Download to read offline
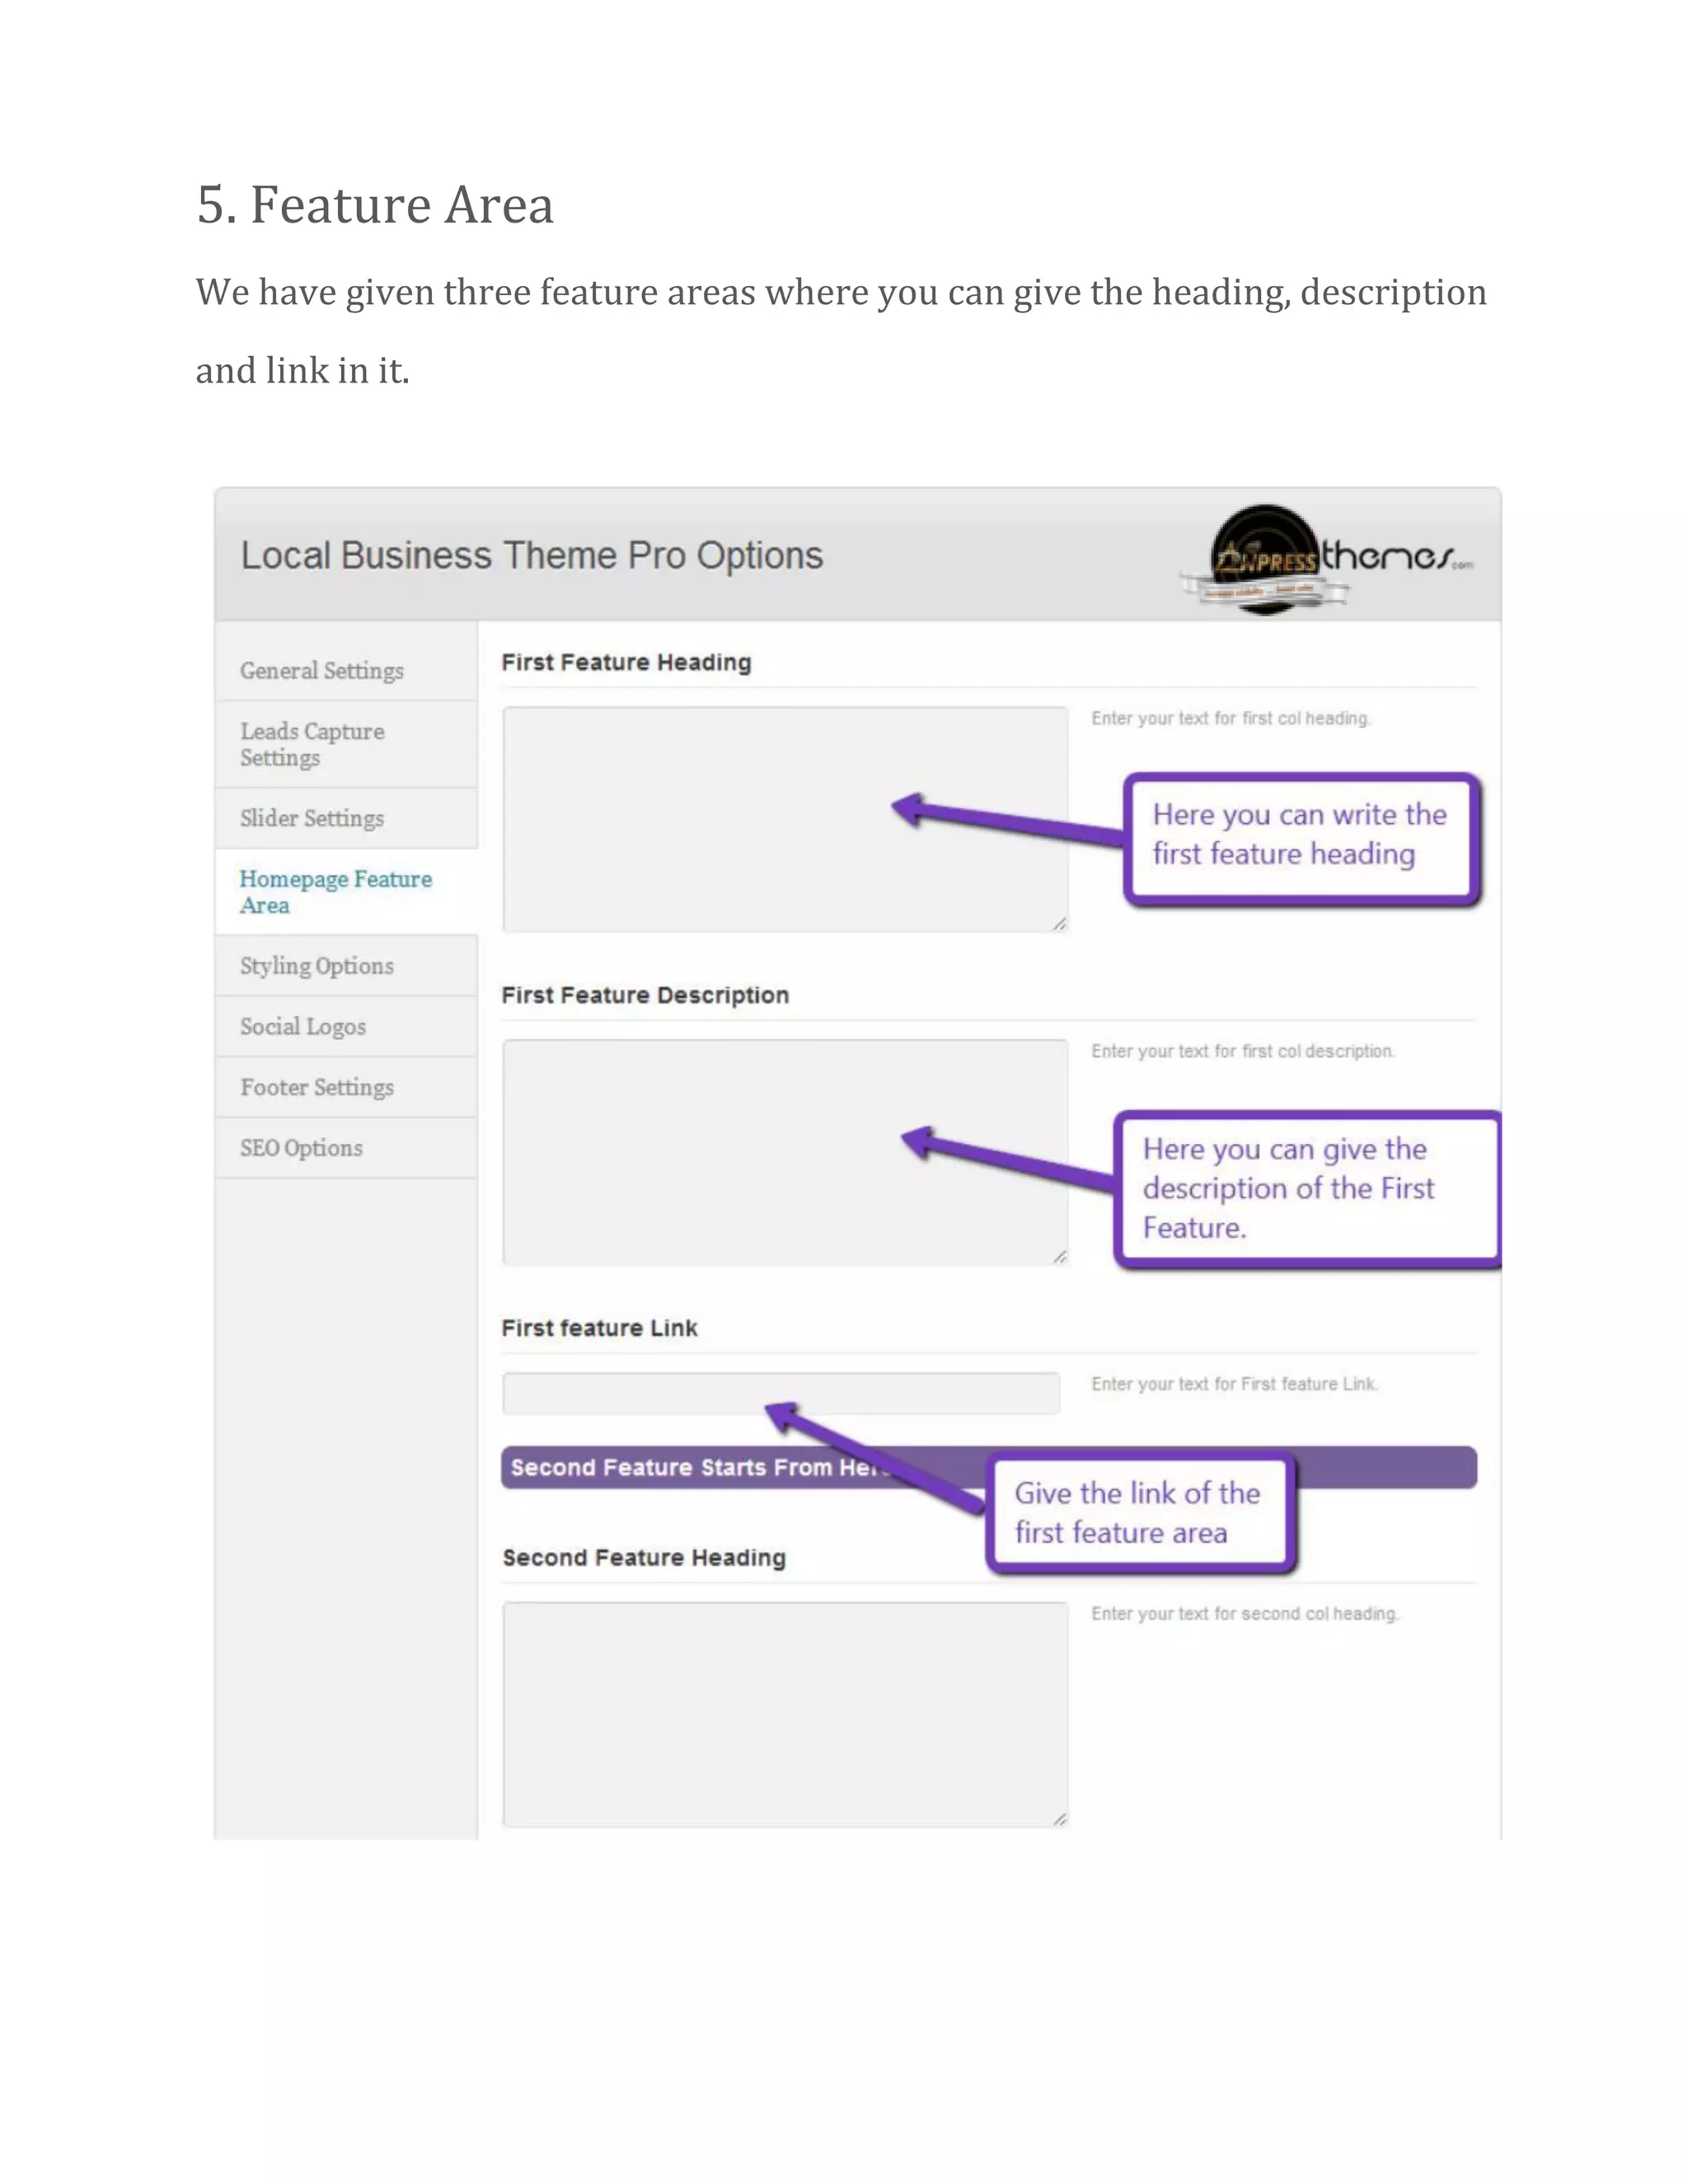
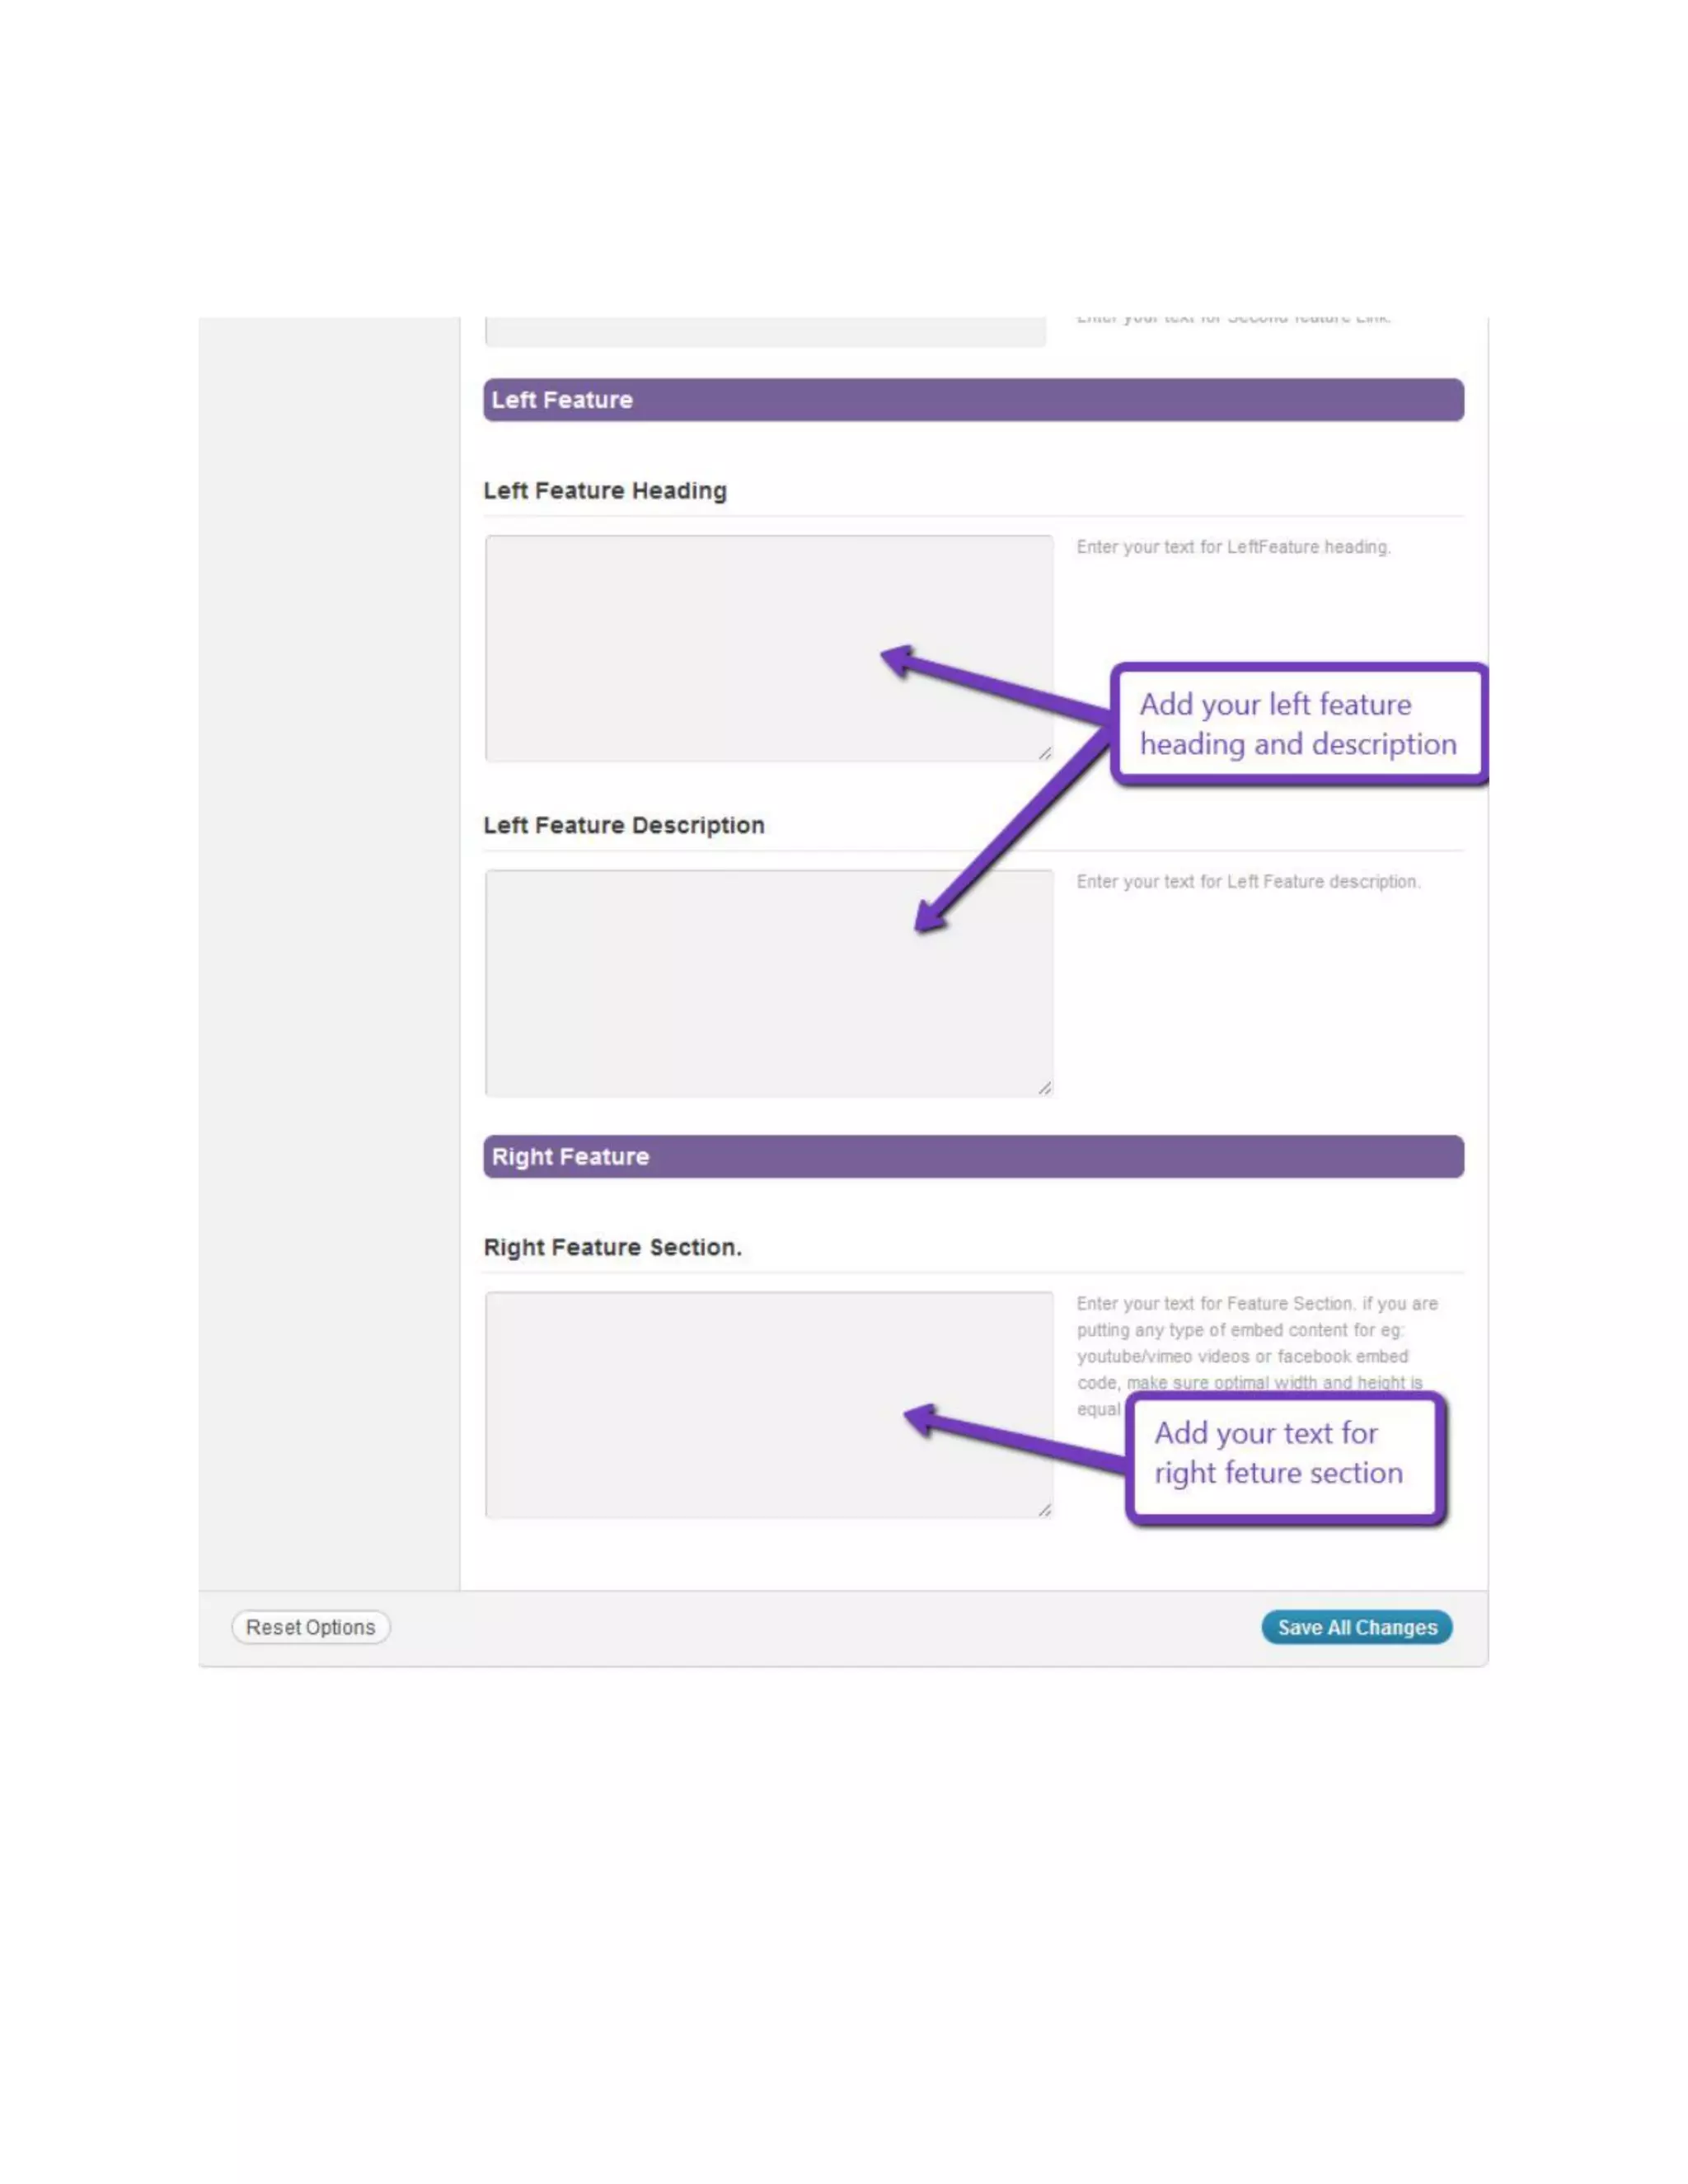
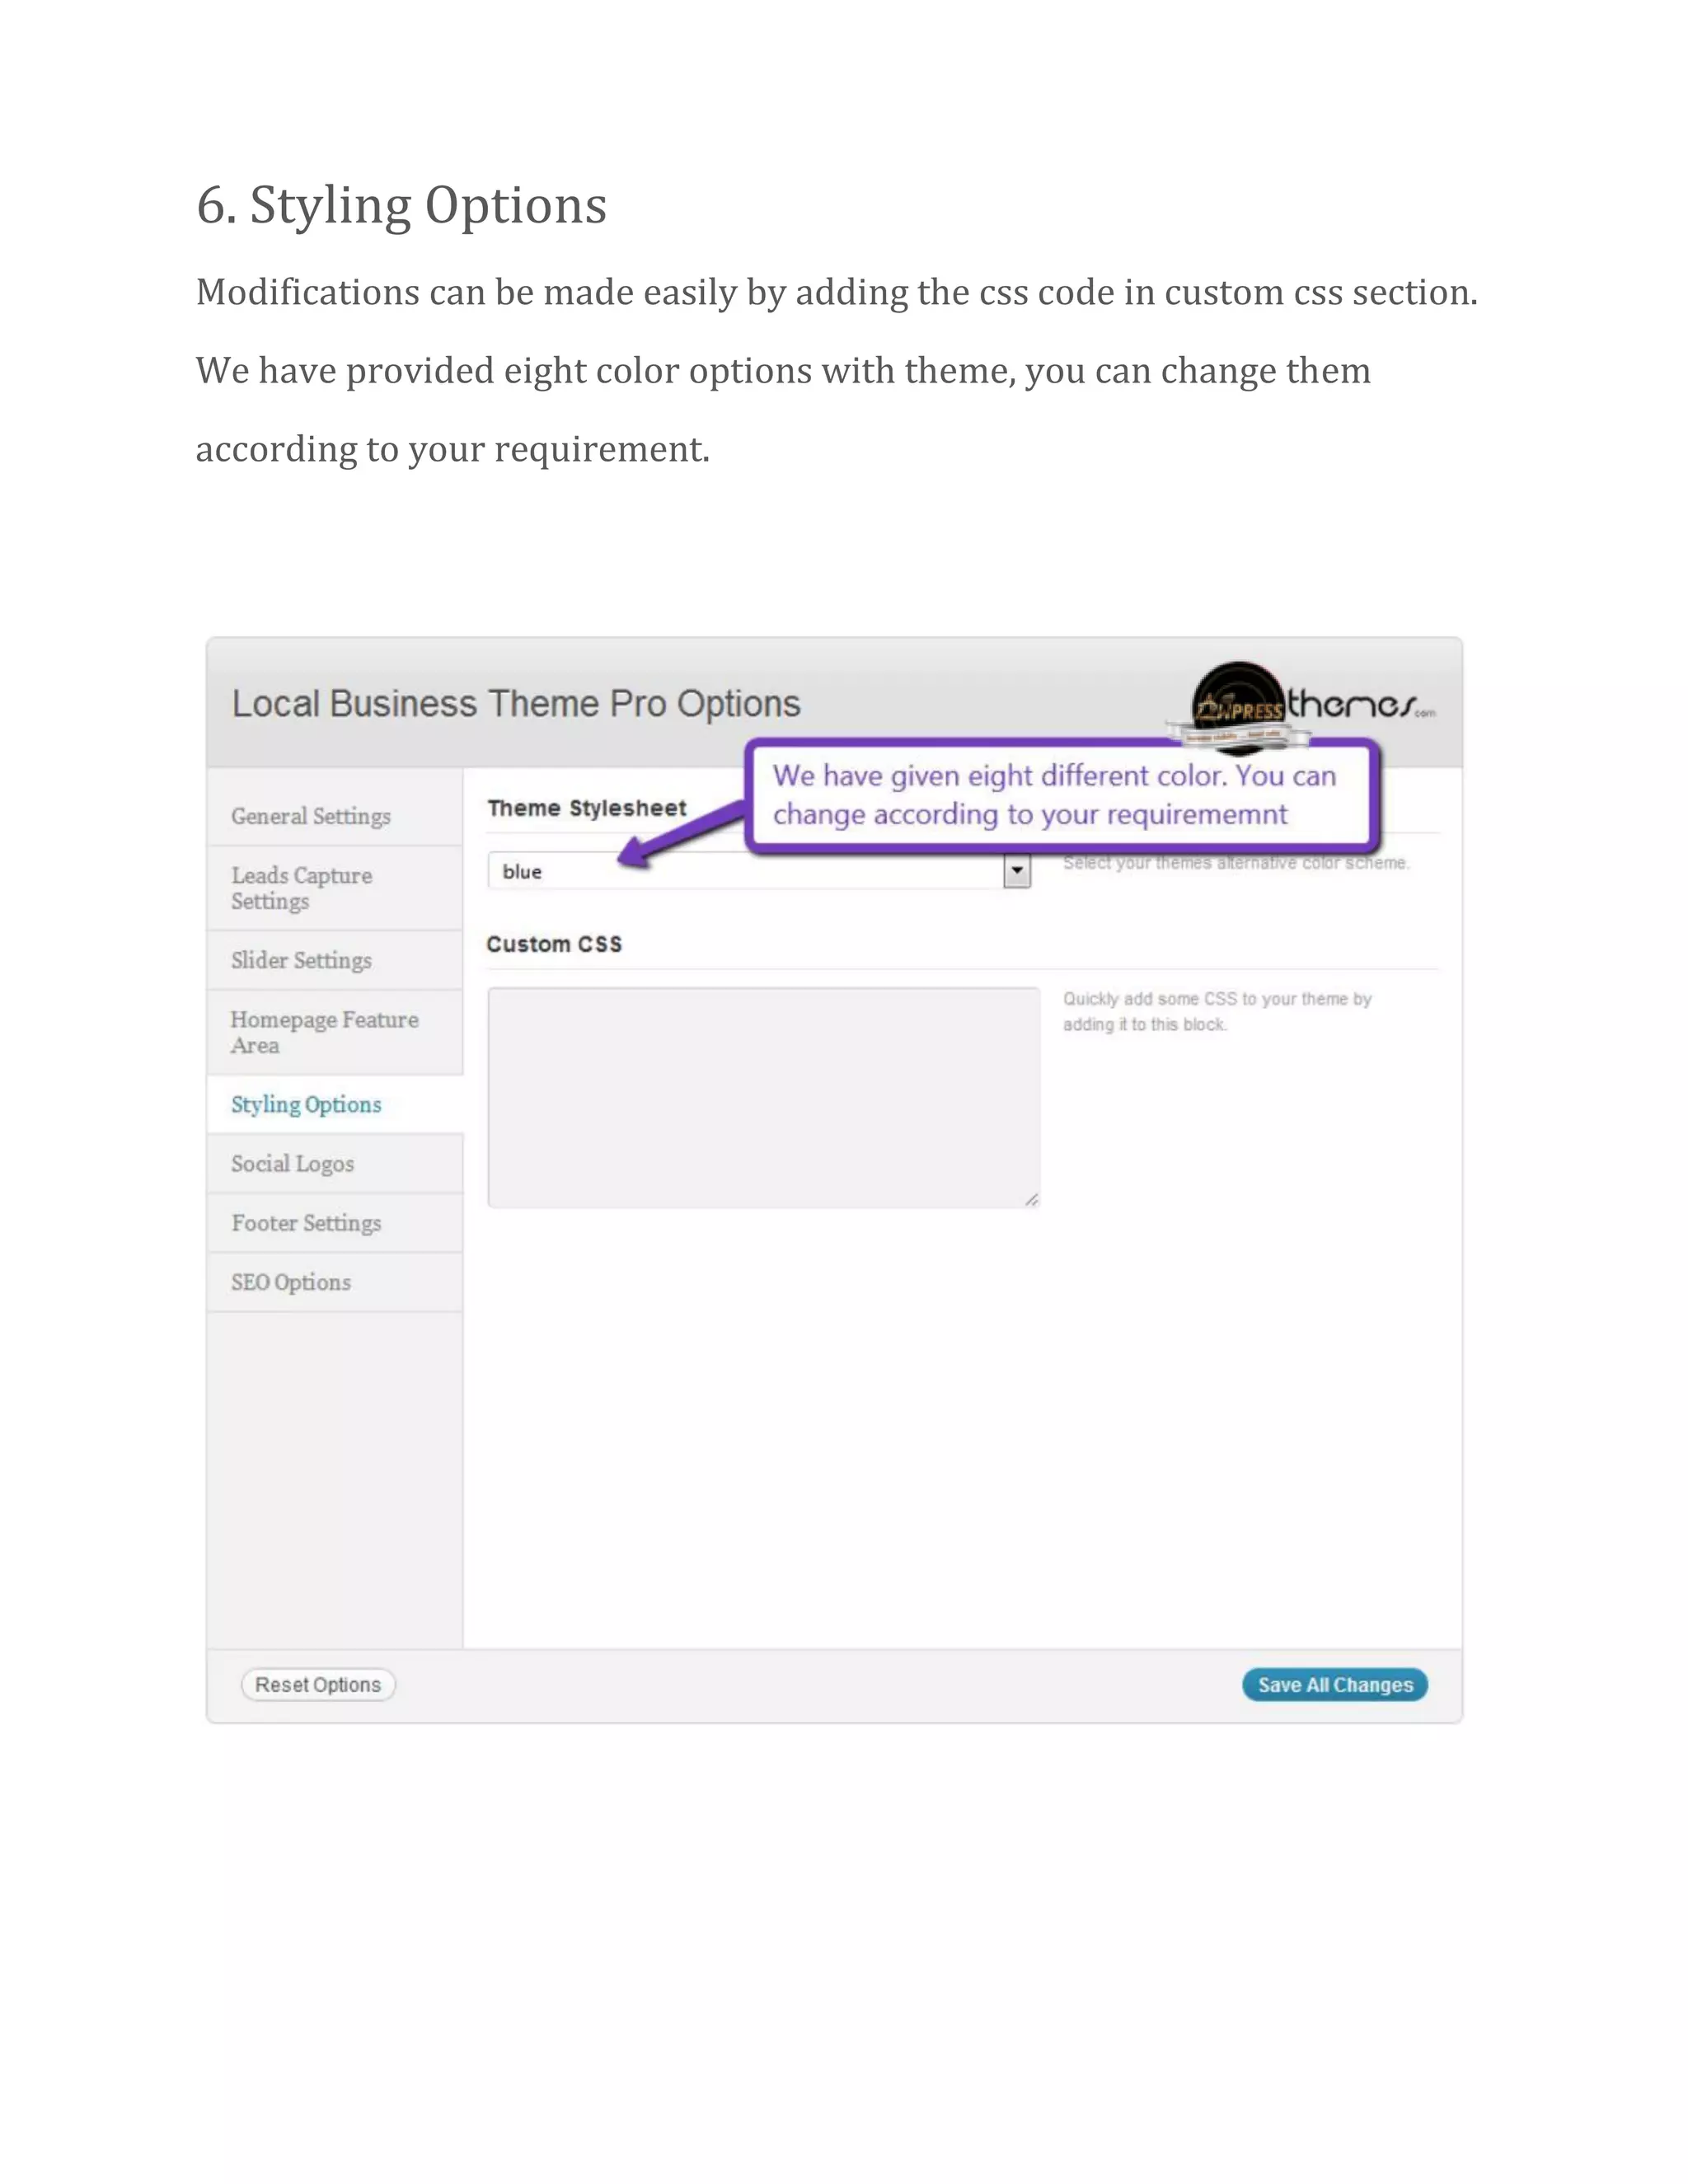
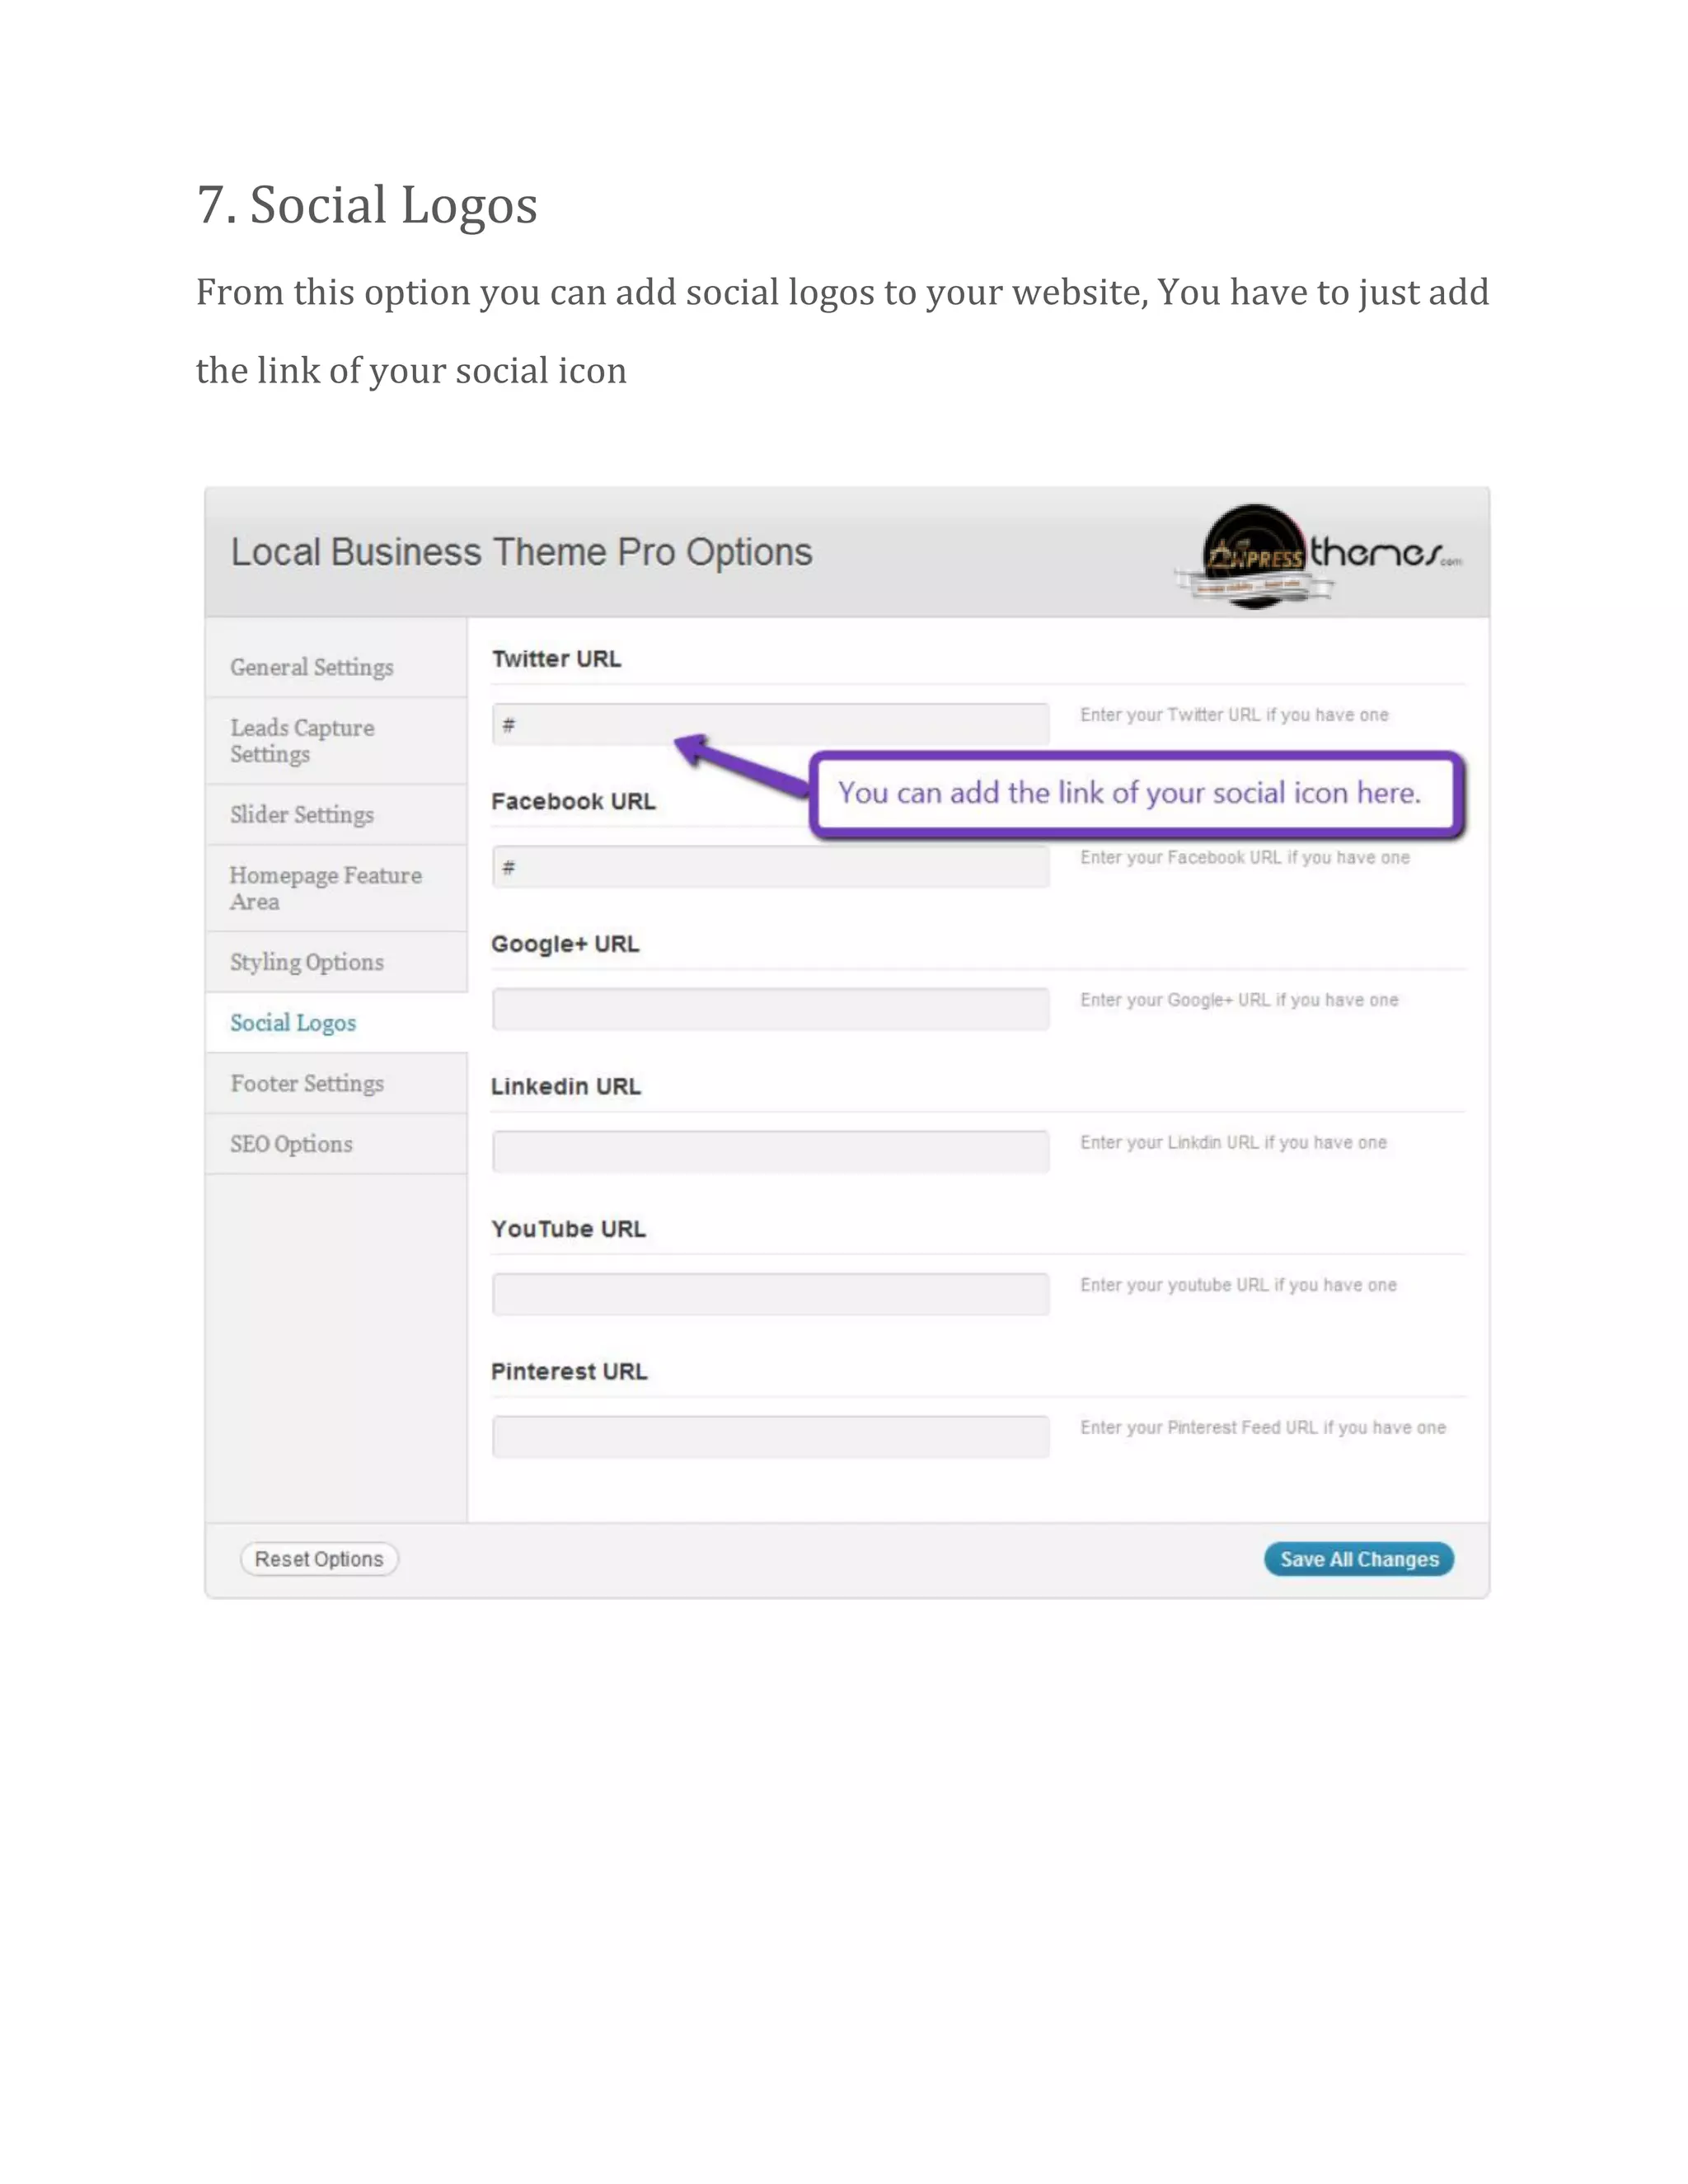
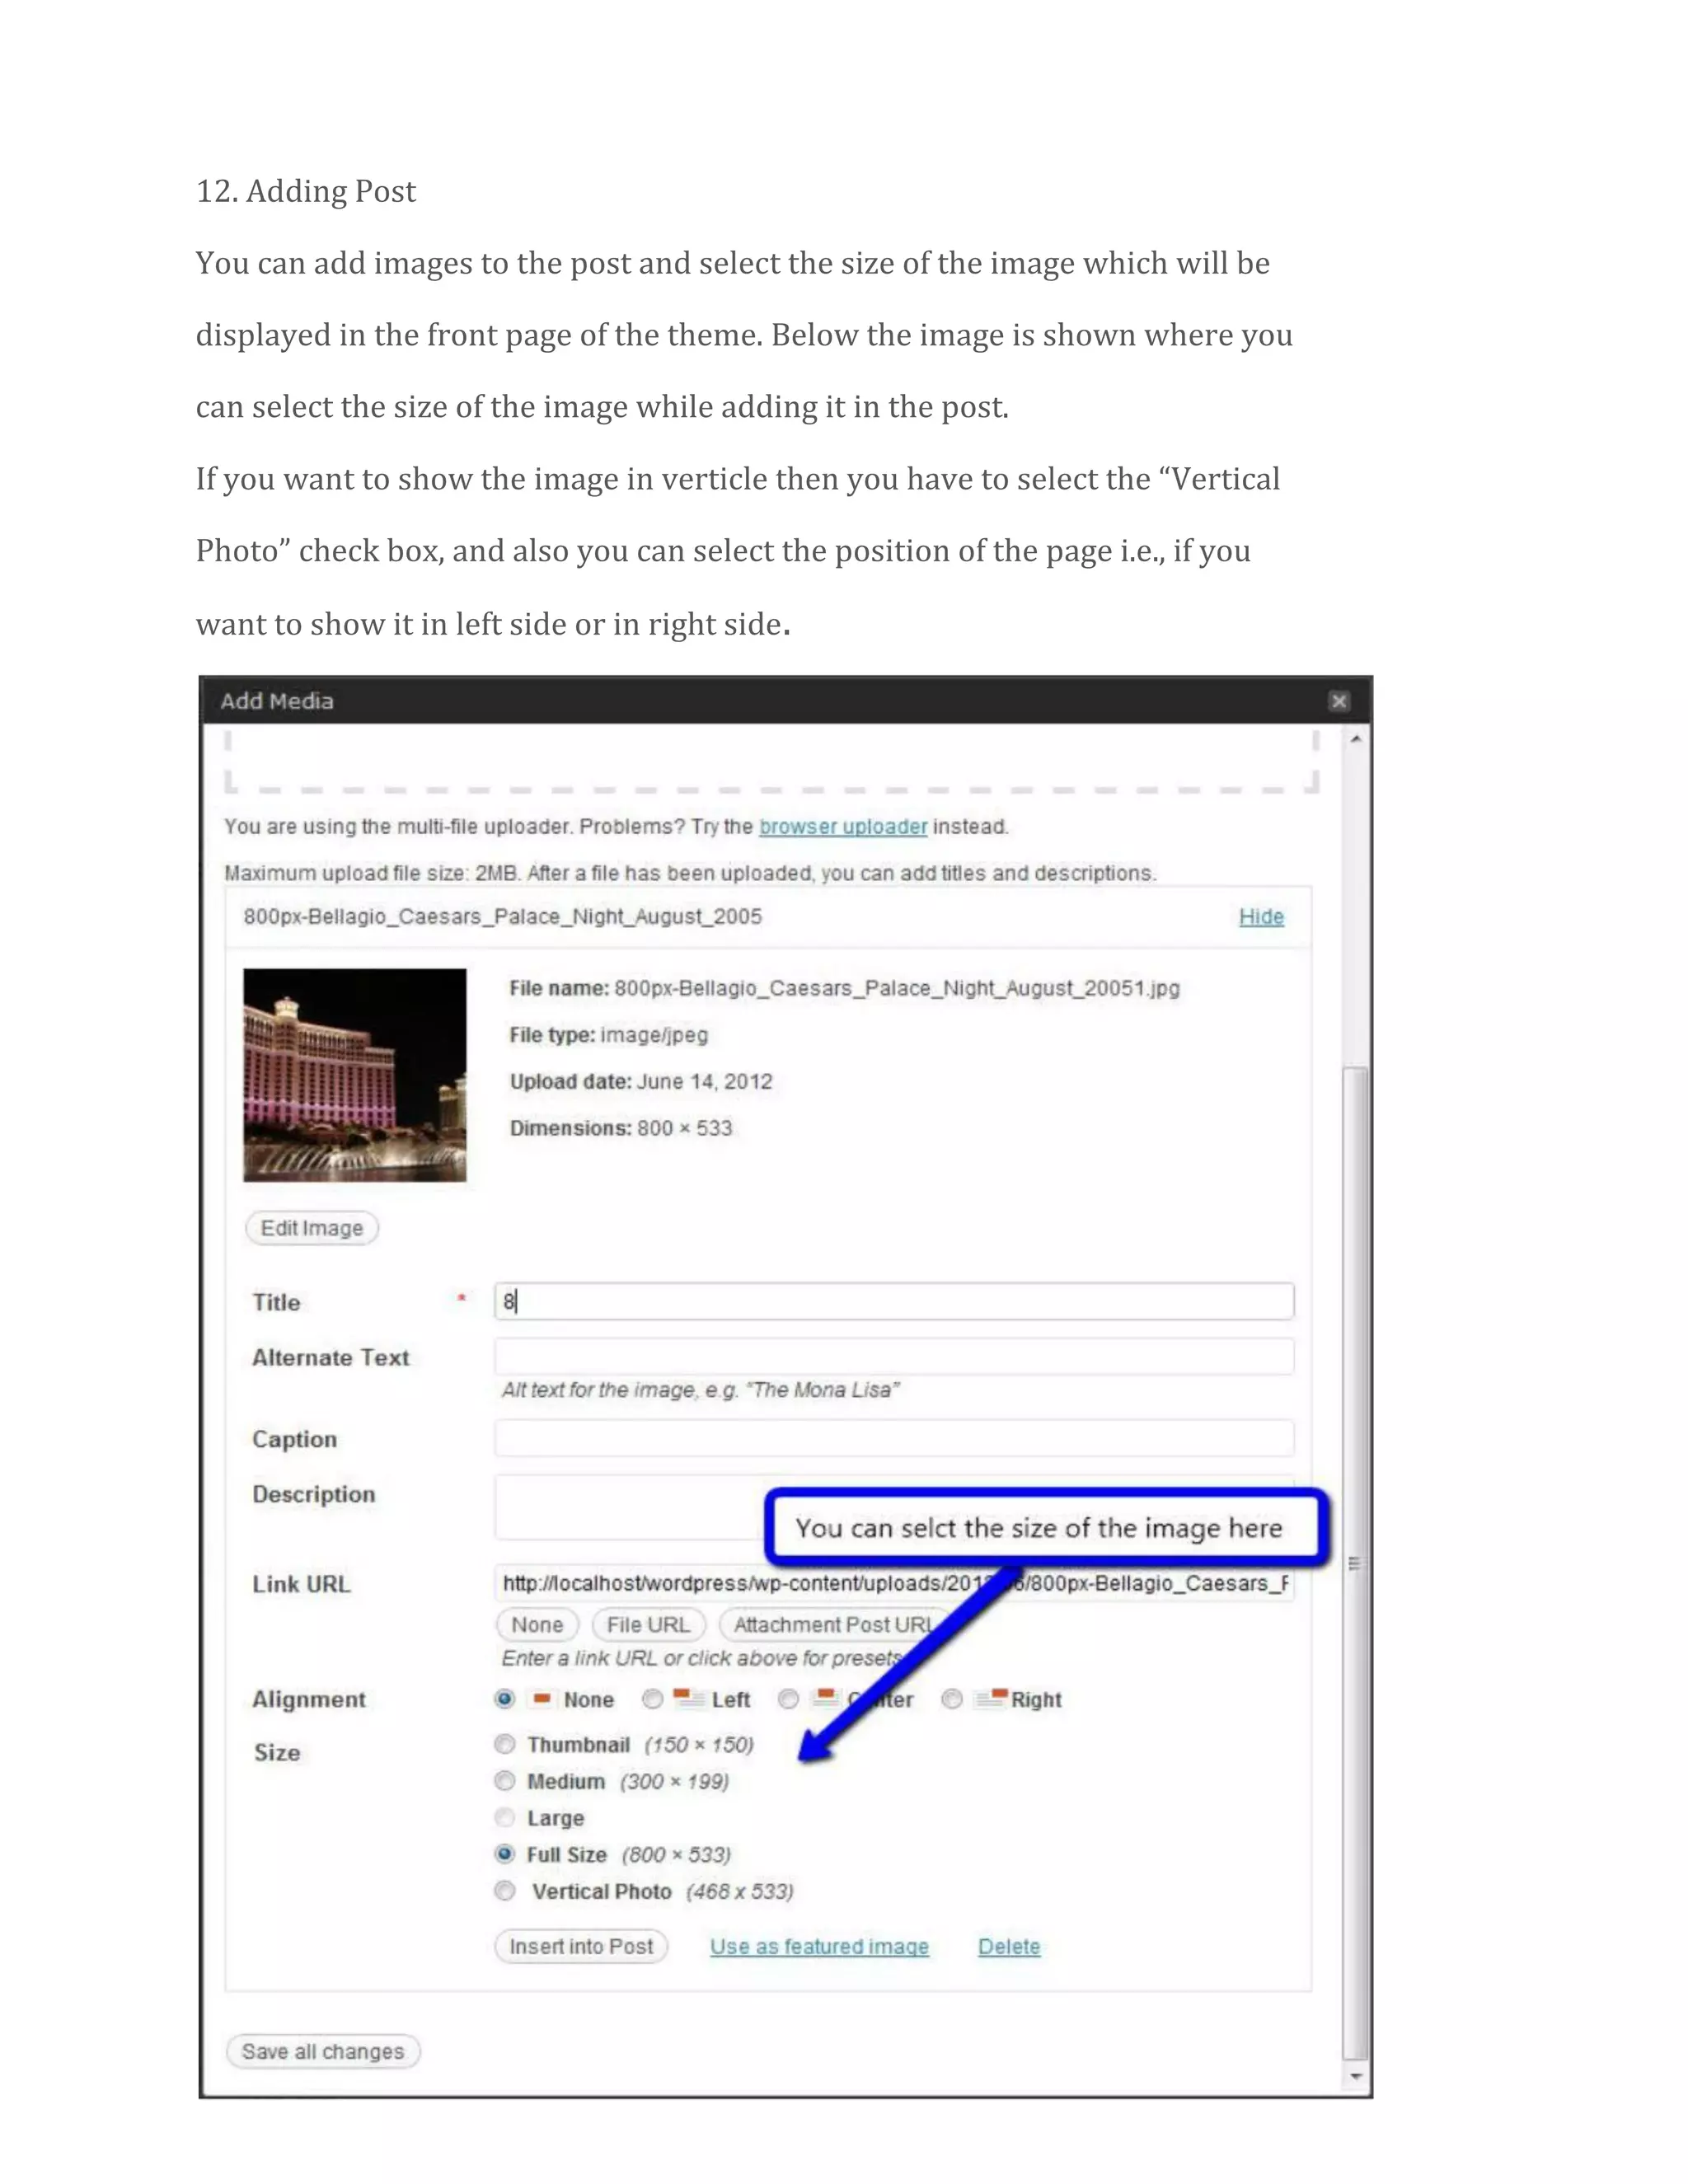
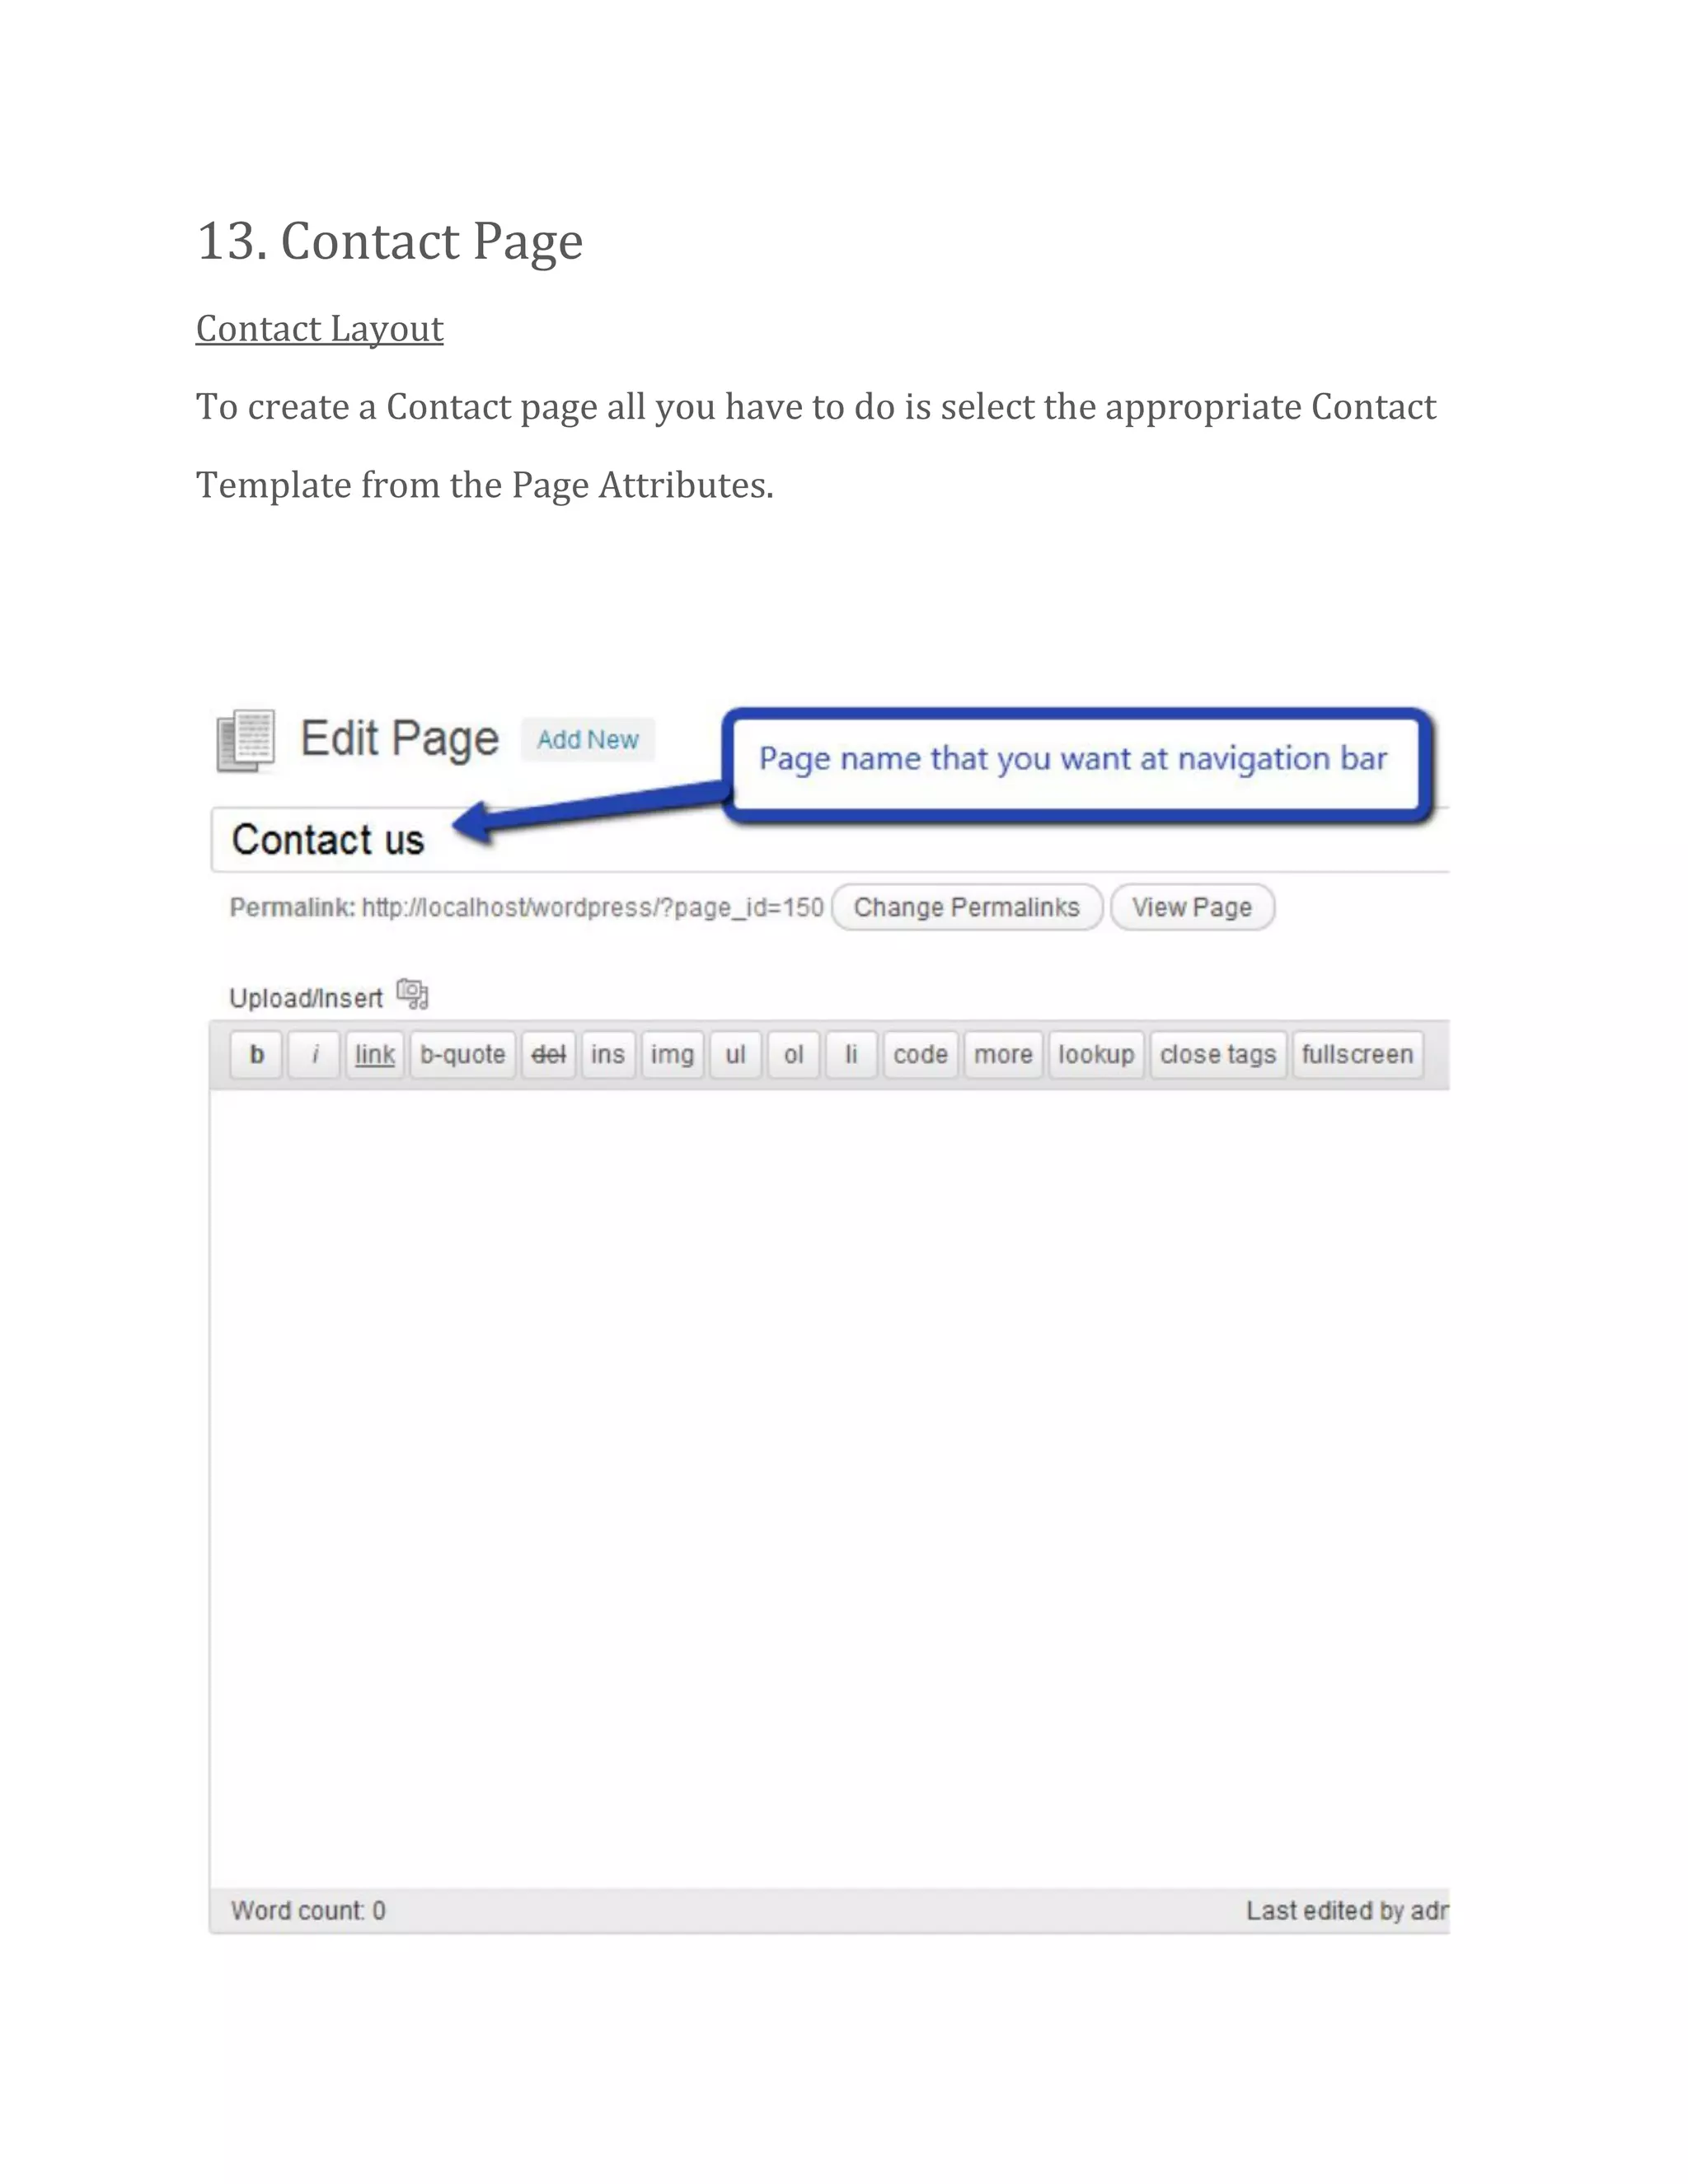
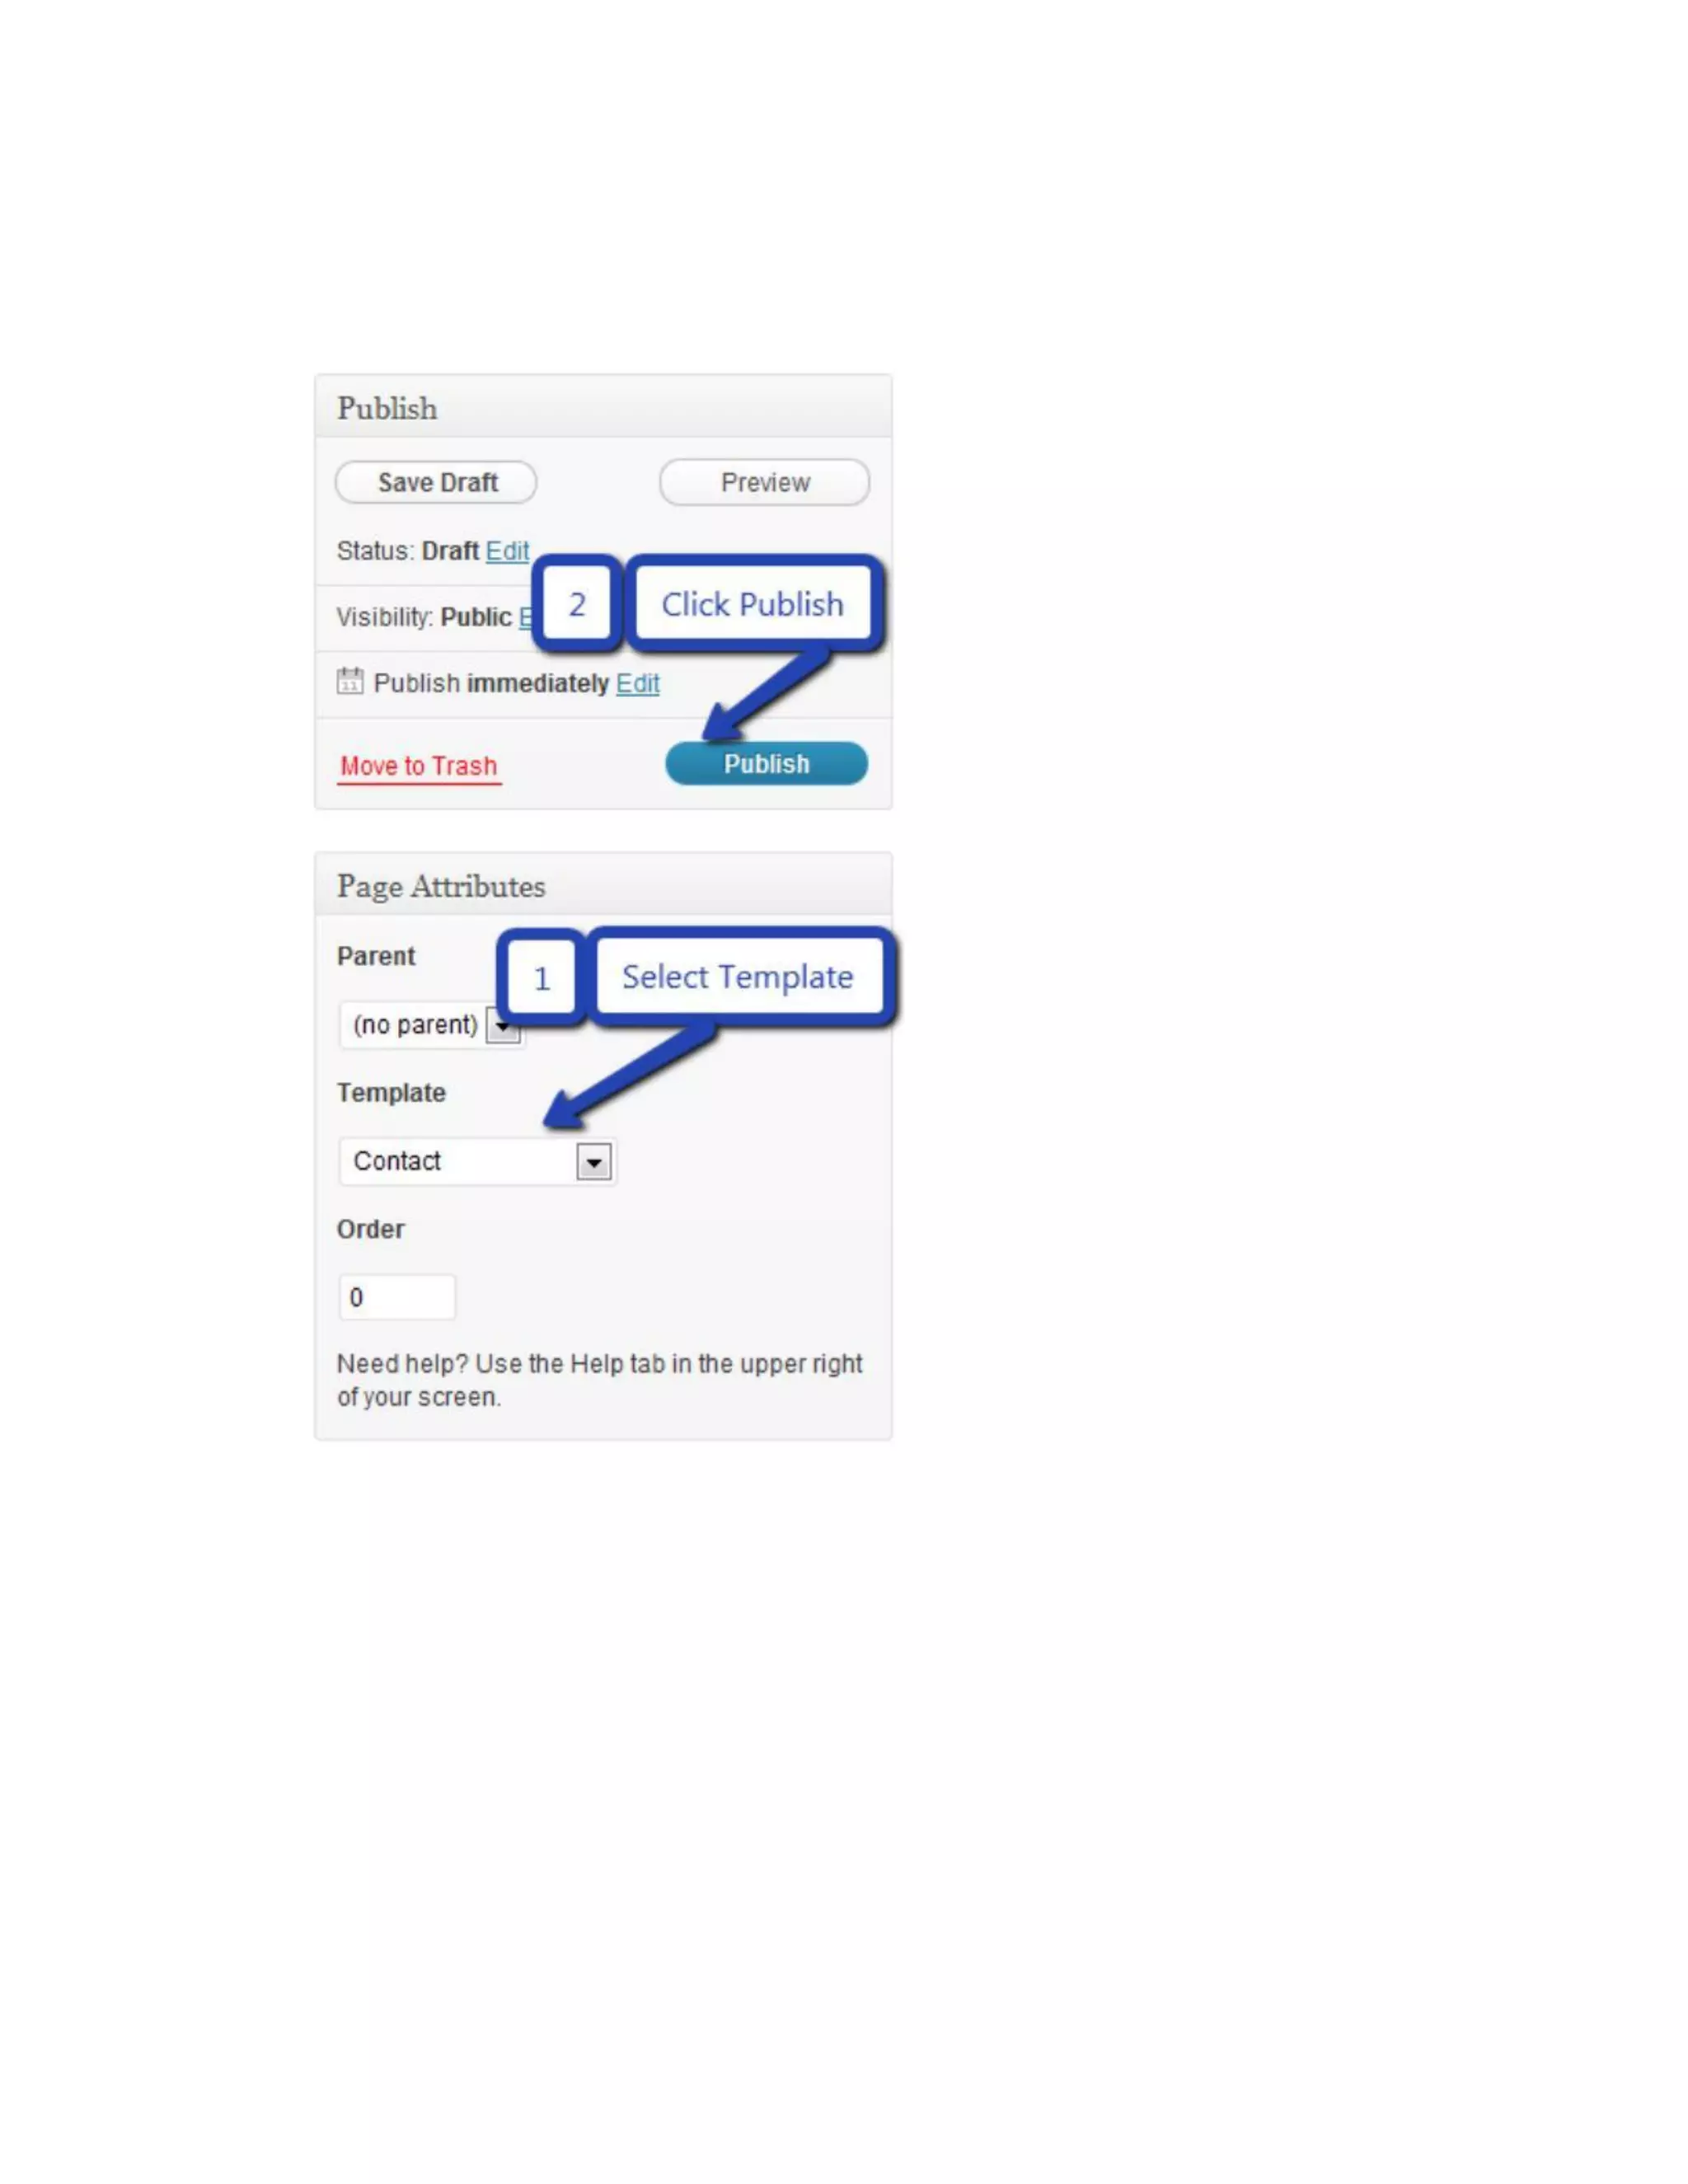
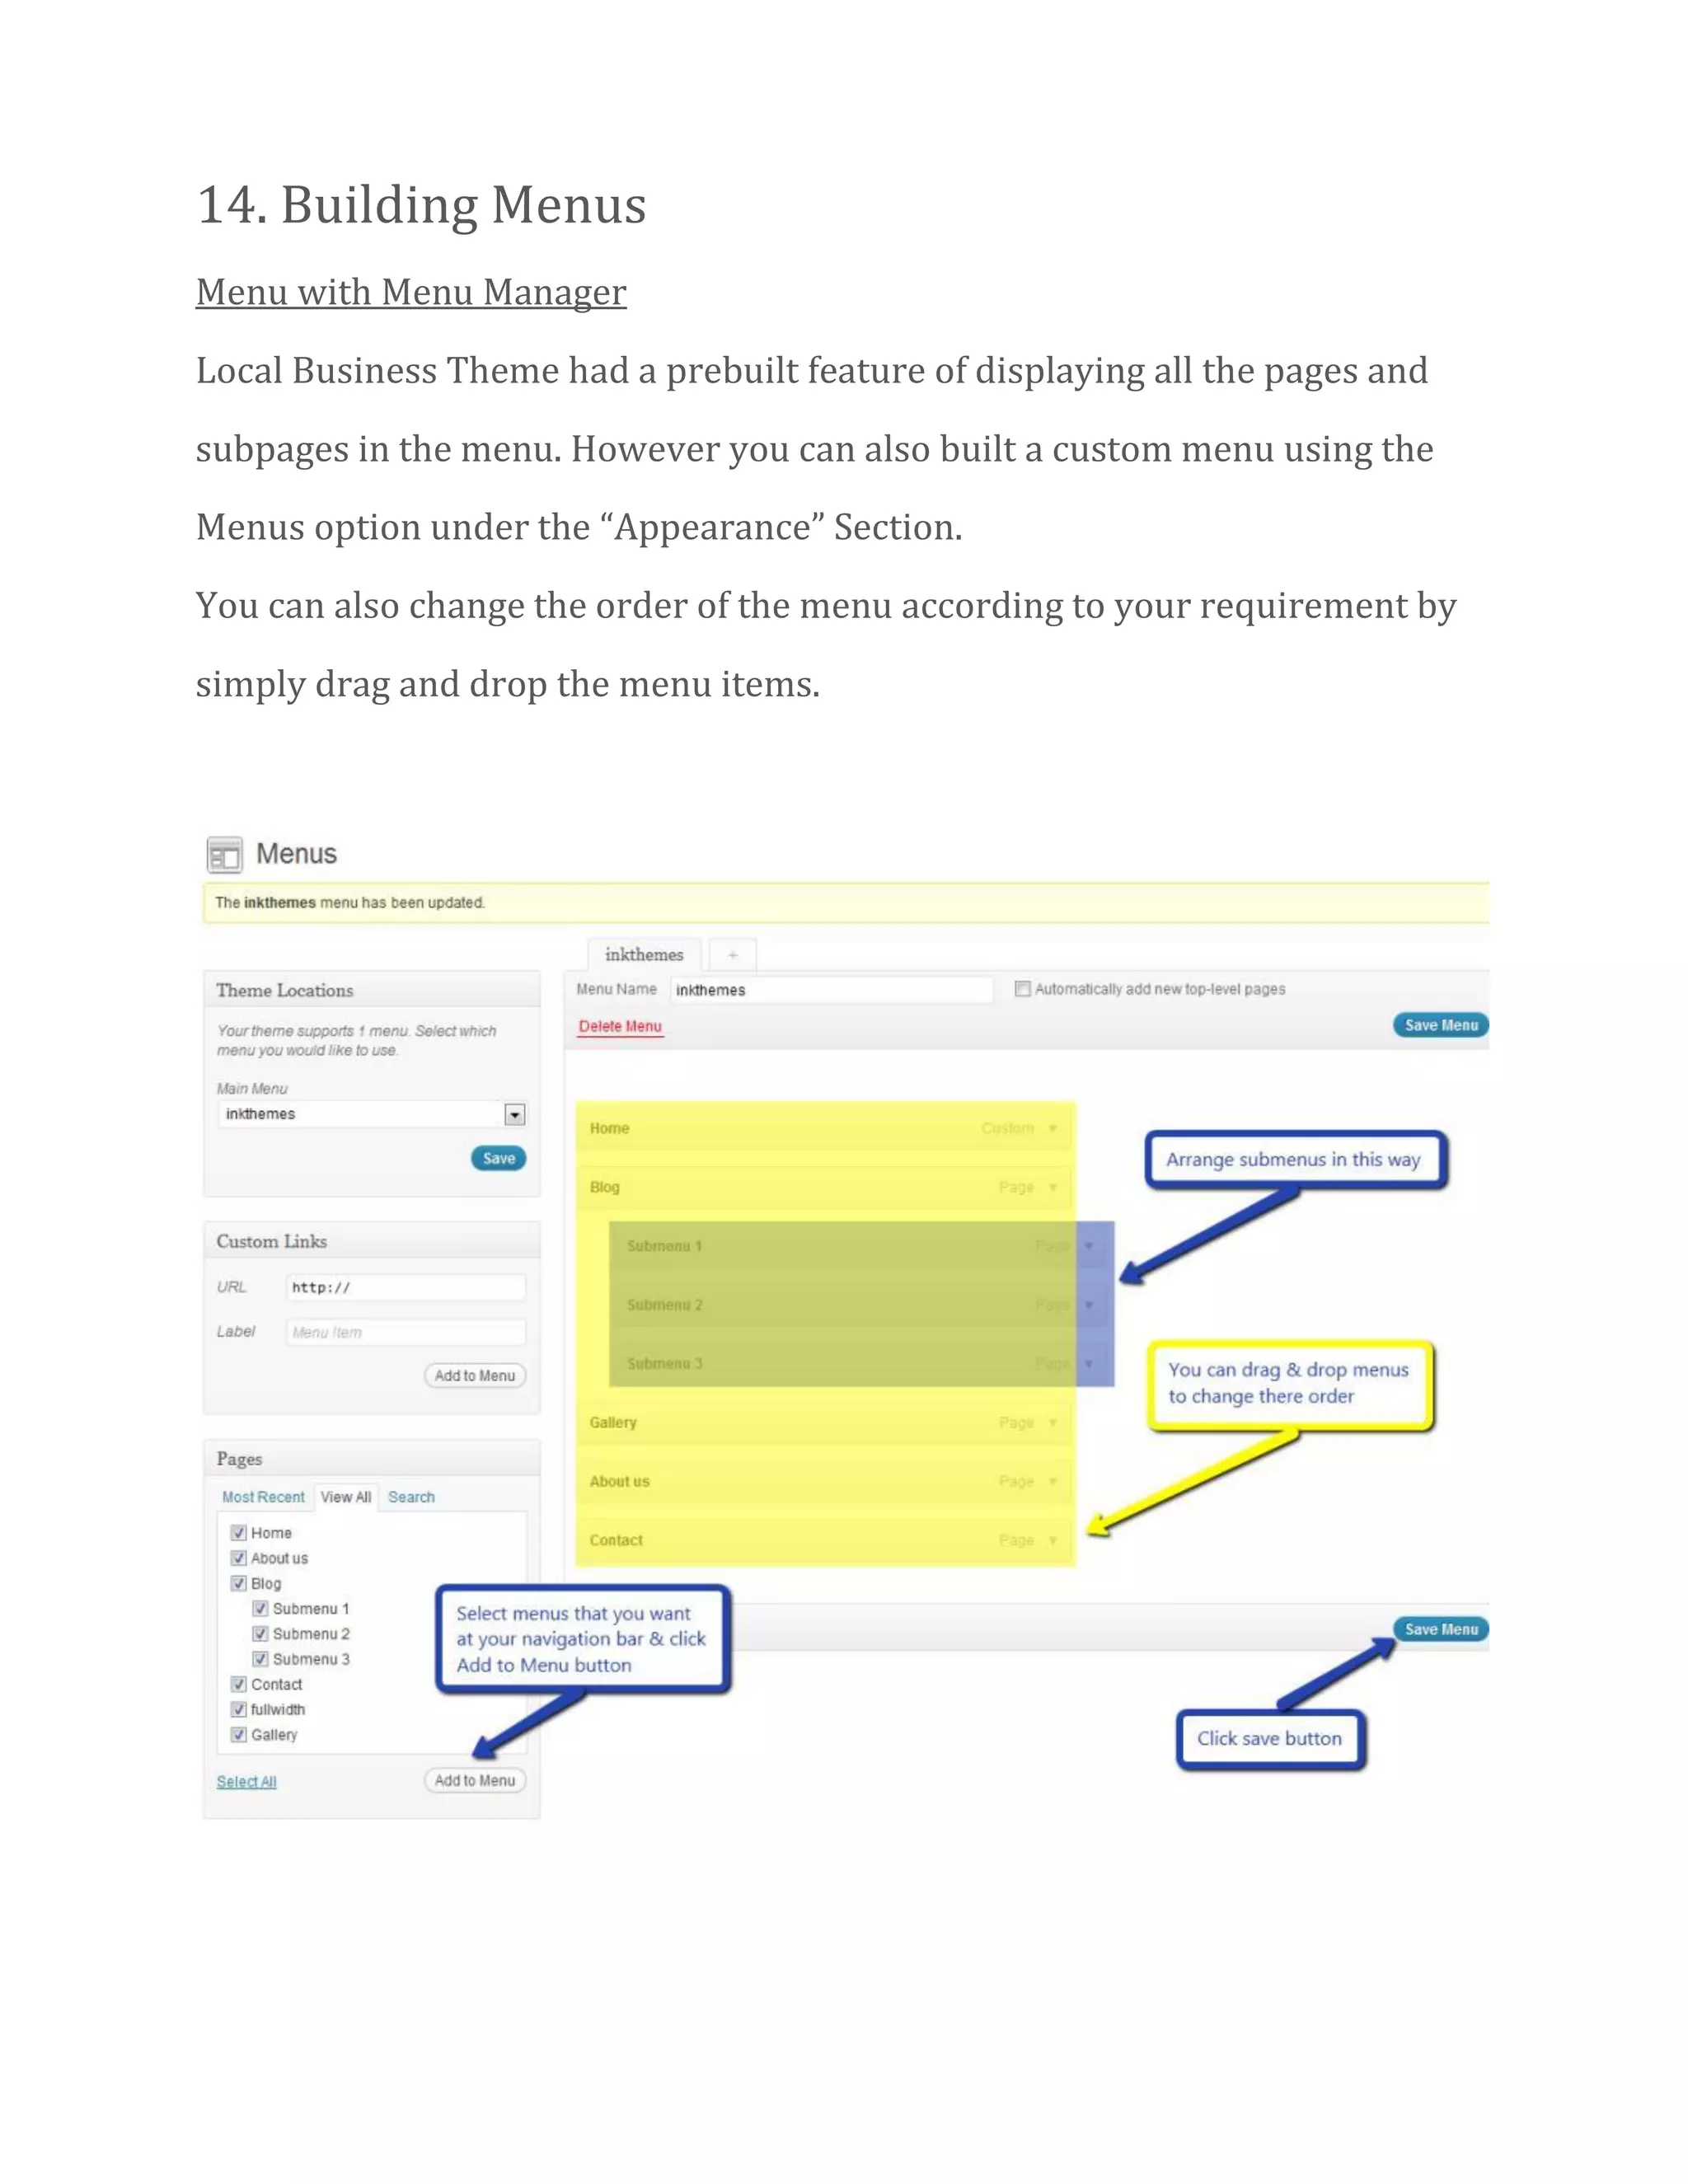


The document provides comprehensive guidelines for customizing a2wpress local business websites, covering steps to create pages, configure settings, and add features such as sliders, galleries, and contact forms. It details the options available for styling, menus, and widgets, ensuring users can tailor their websites effectively. Additionally, resources for video demos and professional assistance are mentioned for further support.


