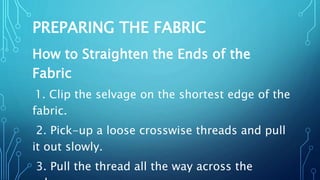
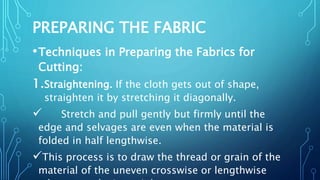
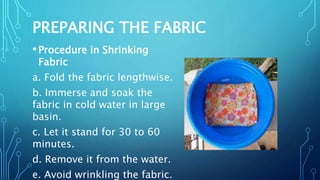
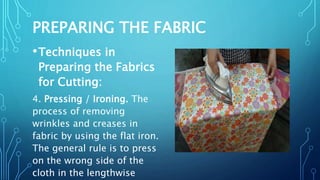
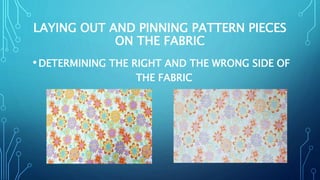
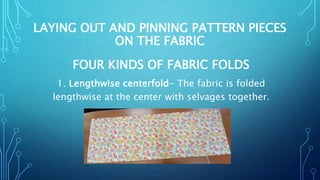
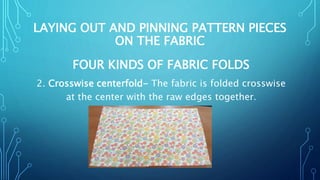
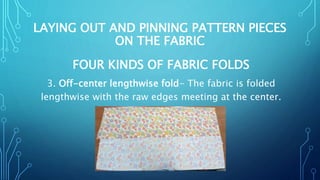
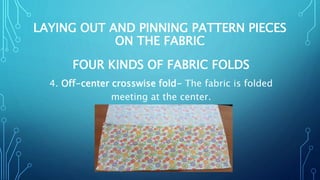
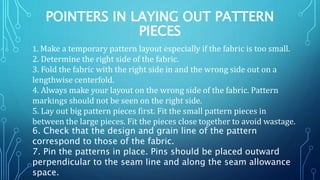
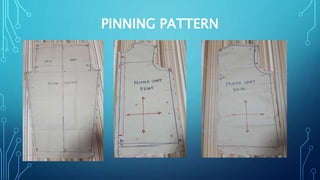
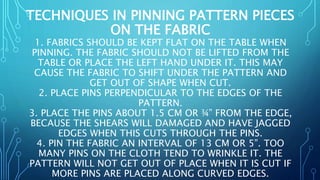
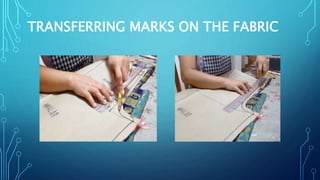
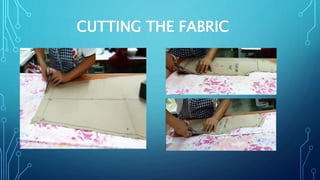
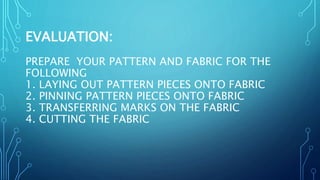
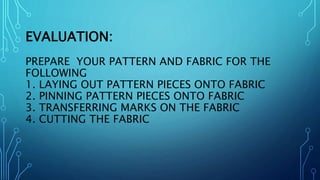
2. OBJECTIVES:
•AT THE END OF THE LESSON THE LEARNERS
SHOULD BE ABLE TO:
1. Prepare the tools and materials for cutting.
2. Lay-out and pin patterns on fabric.
3. Cut the fabric for sleeping garment
3. PRE TEST
MULTIPLE CHOICE: Choose the best answer for
each of the following items. Write the letter of
your answer in your notebook.
1. An arrangement of pattern pieces on fabric
is called
a. marking c. layout
b. b. Tracing d. drafting
4. 2. A pattern which is the basis of all types of pattern.
a. Block pattern c. Final pattern
b. Construction pattern d. none of these
3. Luis will transfer pattern marks to the fabric, what
marking tool will he use?
a. pencil c. Carbon paper
b. Tracing wheel d. Pencil chalk
4. A dressmaker’s guide in cutting fabric pieces in
accordance with the garment design.
•a. Picture c. Pattern
•b. Illustration d. None of these
5. 5. WHICH PATTERN CONSIST OF SEAM ALLOWANCE AND
PATTERN SYMBOLS?
A. BLOCK PATTERN C. CONSTRUCTION PATTERN
B. FINAL PATTERN D. NONE OF THESE
6. IN LAYING PATTERNS ON THE CLOTH THEY MUST BE
FASTENED WITH__________ .
A. DRESSMAKER PINS C. SAFETY PINS
B. HAND NEEDLES D. MACHINE NEEDLES
7. THE FABRIC IS FOLDED LENGTHWISE AT THE CENTER WITH
SELVAGES TOGETHER.
A. CROSSWISE FOLD C. LENGTHWISE FOLD
B. OFF-CENTER LENGTHWISE FOLD D. OFF-CENTER
6. 8. IT HELPS TO REMOVE EXCESSIVE WRINKLES AND
CREASES.
A. STRAIGHTENING THE FABRIC C.
HANGING
B. PRESSING D.
SOAKING
9. LAYOUT THE PIECES OF PATTERN ON THE OF THE
FABRIC.
A. WRONG SIDE C. BOTH
SIDES
B. RIGHT SIDE D. BIAS
SIDE
10. Patterns are laid out on the fabric to determine if the cloth is
enough for all pattern pieces.
a. Cutting the fabric c. Pinning the pattern
b. Pattern layout d. Laying out the pattern
7. PREPARING THE FABRIC
•Techniques in Preparing the Fabrics for
Cutting:
1.Straightening. If the cloth gets out of shape,
straighten it by stretching it diagonally.
Stretch and pull gently but firmly until the
edge and selvages are even when the material is
folded in half lengthwise.
This process is to draw the thread or grain of the
material of the uneven crosswise or lengthwise
8.
9. PREPARING THE FABRIC
How to Straighten the Ends of the
Fabric
1. Clip the selvage on the shortest edge of the
fabric.
2. Pick-up a loose crosswise threads and pull
it out slowly.
3. Pull the thread all the way across the
11. PREPARING THE FABRIC
•Techniques in Preparing the Fabrics for
Cutting:
1.Straightening. If the cloth gets out of shape,
straighten it by stretching it diagonally.
Stretch and pull gently but firmly until the
edge and selvages are even when the material is
folded in half lengthwise.
This process is to draw the thread or grain of the
material of the uneven crosswise or lengthwise
12. PREPARING THE FABRIC
•Techniques in Preparing the Fabrics for
Cutting:
2. Shrinking / Soaking. The fabric by
laundering and drying. Pre-shrunk washable
fabric to remove any sizing and to prevent
shrinkage later.
13. PREPARING THE FABRIC
•Procedure in Shrinking
Fabric
a. Fold the fabric lengthwise.
b. Immerse and soak the
fabric in cold water in large
basin.
c. Let it stand for 30 to 60
minutes.
d. Remove it from the water.
e. Avoid wrinkling the fabric.
14. PREPARING THE FABRIC
•Techniques in
Preparing the Fabrics
for Cutting:
• 3. Hanging and Drying.
After soaking the fabric,
unfold it and hang it on a
clothesline to dry. Do not
wring the material so as to
prevent wrinkles.
15. PREPARING THE FABRIC
•Techniques in
Preparing the Fabrics
for Cutting:
4. Pressing / Ironing. The
process of removing
wrinkles and creases in
fabric by using the flat iron.
The general rule is to press
on the wrong side of the
cloth in the lengthwise
16. LAYING OUT AND PINNING PATTERN PIECES
ON THE FABRIC
•DETERMINING THE RIGHT AND THE WRONG SIDE OF
THE FABRIC
17. LAYING OUT AND PINNING PATTERN PIECES
ON THE FABRIC
FOUR KINDS OF FABRIC FOLDS
1. Lengthwise centerfold- The fabric is folded
lengthwise at the center with selvages together.
18. LAYING OUT AND PINNING PATTERN PIECES
ON THE FABRIC
FOUR KINDS OF FABRIC FOLDS
2. Crosswise centerfold- The fabric is folded crosswise
at the center with the raw edges together.
19. LAYING OUT AND PINNING PATTERN PIECES
ON THE FABRIC
FOUR KINDS OF FABRIC FOLDS
3. Off-center lengthwise fold- The fabric is folded
lengthwise with the raw edges meeting at the center.
20. LAYING OUT AND PINNING PATTERN PIECES
ON THE FABRIC
FOUR KINDS OF FABRIC FOLDS
4. Off-center crosswise fold- The fabric is folded
meeting at the center.
21. LAYING OUT AND PINNING PATTERN PIECES
ON THE FABRIC
FOUR KINDS OF FABRIC FOLDS
4. Off-center crosswise fold- The fabric is folded
meeting at the center.
22. LAYING OUT AND PINNING PATTERN PIECES
ON THE FABRIC
FOUR KINDS OF FABRIC FOLDS
4. Off-center crosswise fold- The fabric is folded
meeting at the center.
23. POINTERS IN LAYING OUT PATTERN
PIECES
1. Make a temporary pattern layout especially if the fabric is too small.
2. Determine the right side of the fabric.
3. Fold the fabric with the right side in and the wrong side out on a
lengthwise centerfold.
4. Always make your layout on the wrong side of the fabric. Pattern
markings should not be seen on the right side.
5. Lay out big pattern pieces first. Fit the small pattern pieces in
between the large pieces. Fit the pieces close together to avoid wastage.
6. Check that the design and grain line of the pattern
correspond to those of the fabric.
7. Pin the patterns in place. Pins should be placed outward
perpendicular to the seam line and along the seam allowance
space.
26. TECHNIQUES IN PINNING PATTERN PIECES
ON THE FABRIC
1. FABRICS SHOULD BE KEPT FLAT ON THE TABLE WHEN
PINNING. THE FABRIC SHOULD NOT BE LIFTED FROM THE
TABLE OR PLACE THE LEFT HAND UNDER IT. THIS MAY
CAUSE THE FABRIC TO SHIFT UNDER THE PATTERN AND
GET OUT OF SHAPE WHEN CUT.
2. PLACE PINS PERPENDICULAR TO THE EDGES OF THE
PATTERN.
3. PLACE THE PINS ABOUT 1.5 CM OR ¾” FROM THE EDGE,
BECAUSE THE SHEARS WILL DAMAGED AND HAVE JAGGED
EDGES WHEN THIS CUTS THROUGH THE PINS.
4. PIN THE FABRIC AN INTERVAL OF 13 CM OR 5”. TOO
MANY PINS ON THE CLOTH TEND TO WRINKLE IT. THE
PATTERN WILL NOT GET OUT OF PLACE WHEN IT IS CUT IF
MORE PINS ARE PLACED ALONG CURVED EDGES.
27. TECHNIQUES IN PINNING PATTERN PIECES
ON THE FABRIC
1. FABRICS SHOULD BE KEPT FLAT ON THE TABLE WHEN
PINNING. THE FABRIC SHOULD NOT BE LIFTED FROM THE
TABLE OR PLACE THE LEFT HAND UNDER IT. THIS MAY
CAUSE THE FABRIC TO SHIFT UNDER THE PATTERN AND
GET OUT OF SHAPE WHEN CUT.
2. PLACE PINS PERPENDICULAR TO THE EDGES OF THE
PATTERN.
3. PLACE THE PINS ABOUT 1.5 CM OR ¾” FROM THE EDGE,
BECAUSE THE SHEARS WILL DAMAGED AND HAVE JAGGED
EDGES WHEN THIS CUTS THROUGH THE PINS.
4. PIN THE FABRIC AN INTERVAL OF 13 CM OR 5”. TOO
MANY PINS ON THE CLOTH TEND TO WRINKLE IT. THE
PATTERN WILL NOT GET OUT OF PLACE WHEN IT IS CUT IF
MORE PINS ARE PLACED ALONG CURVED EDGES.
29. MARKING TIPS
1. MARKING IS DONE ON THE WRONG SIDE OF THE
FABRIC
2. RUN THE TRACING WHEEL OR TAILOR’S CHALK
STEADILY AND FIRMLY ALONG THE EDGE OF THE
RULER ONLY ONCE.
3. PLACE THE GARMENT AND THE PATTERN PIECE
ON TOP OF THE TRACING PAPER.
4. MARK STRAIGHT LINES USING A RULER, TRACING
WHEEL OR PENCIL.
5. THE TIP OF DARTS SHOULD BE INDICATED WITH
A SHORT LINE.
6. REMOVE THE PATTERN PIECE, PLACE THE PINS
BACK.
31. EVALUATION:
PREPARE YOUR PATTERN AND FABRIC FOR THE
FOLLOWING
1. LAYING OUT PATTERN PIECES ONTO FABRIC
2. PINNING PATTERN PIECES ONTO FABRIC
3. TRANSFERRING MARKS ON THE FABRIC
4. CUTTING THE FABRIC
32. EVALUATION:
PREPARE YOUR PATTERN AND FABRIC FOR THE
FOLLOWING
1. LAYING OUT PATTERN PIECES ONTO FABRIC
2. PINNING PATTERN PIECES ONTO FABRIC
3. TRANSFERRING MARKS ON THE FABRIC
4. CUTTING THE FABRIC
Editor's Notes
The importance of fabric preparation is to preserve the fit of the finished garment after washing.
It is always important to follow the rules in laying out pattern in the fabric to ensure accuracy.
Before making a layout, determine the right side and the wrong side of the fabric.