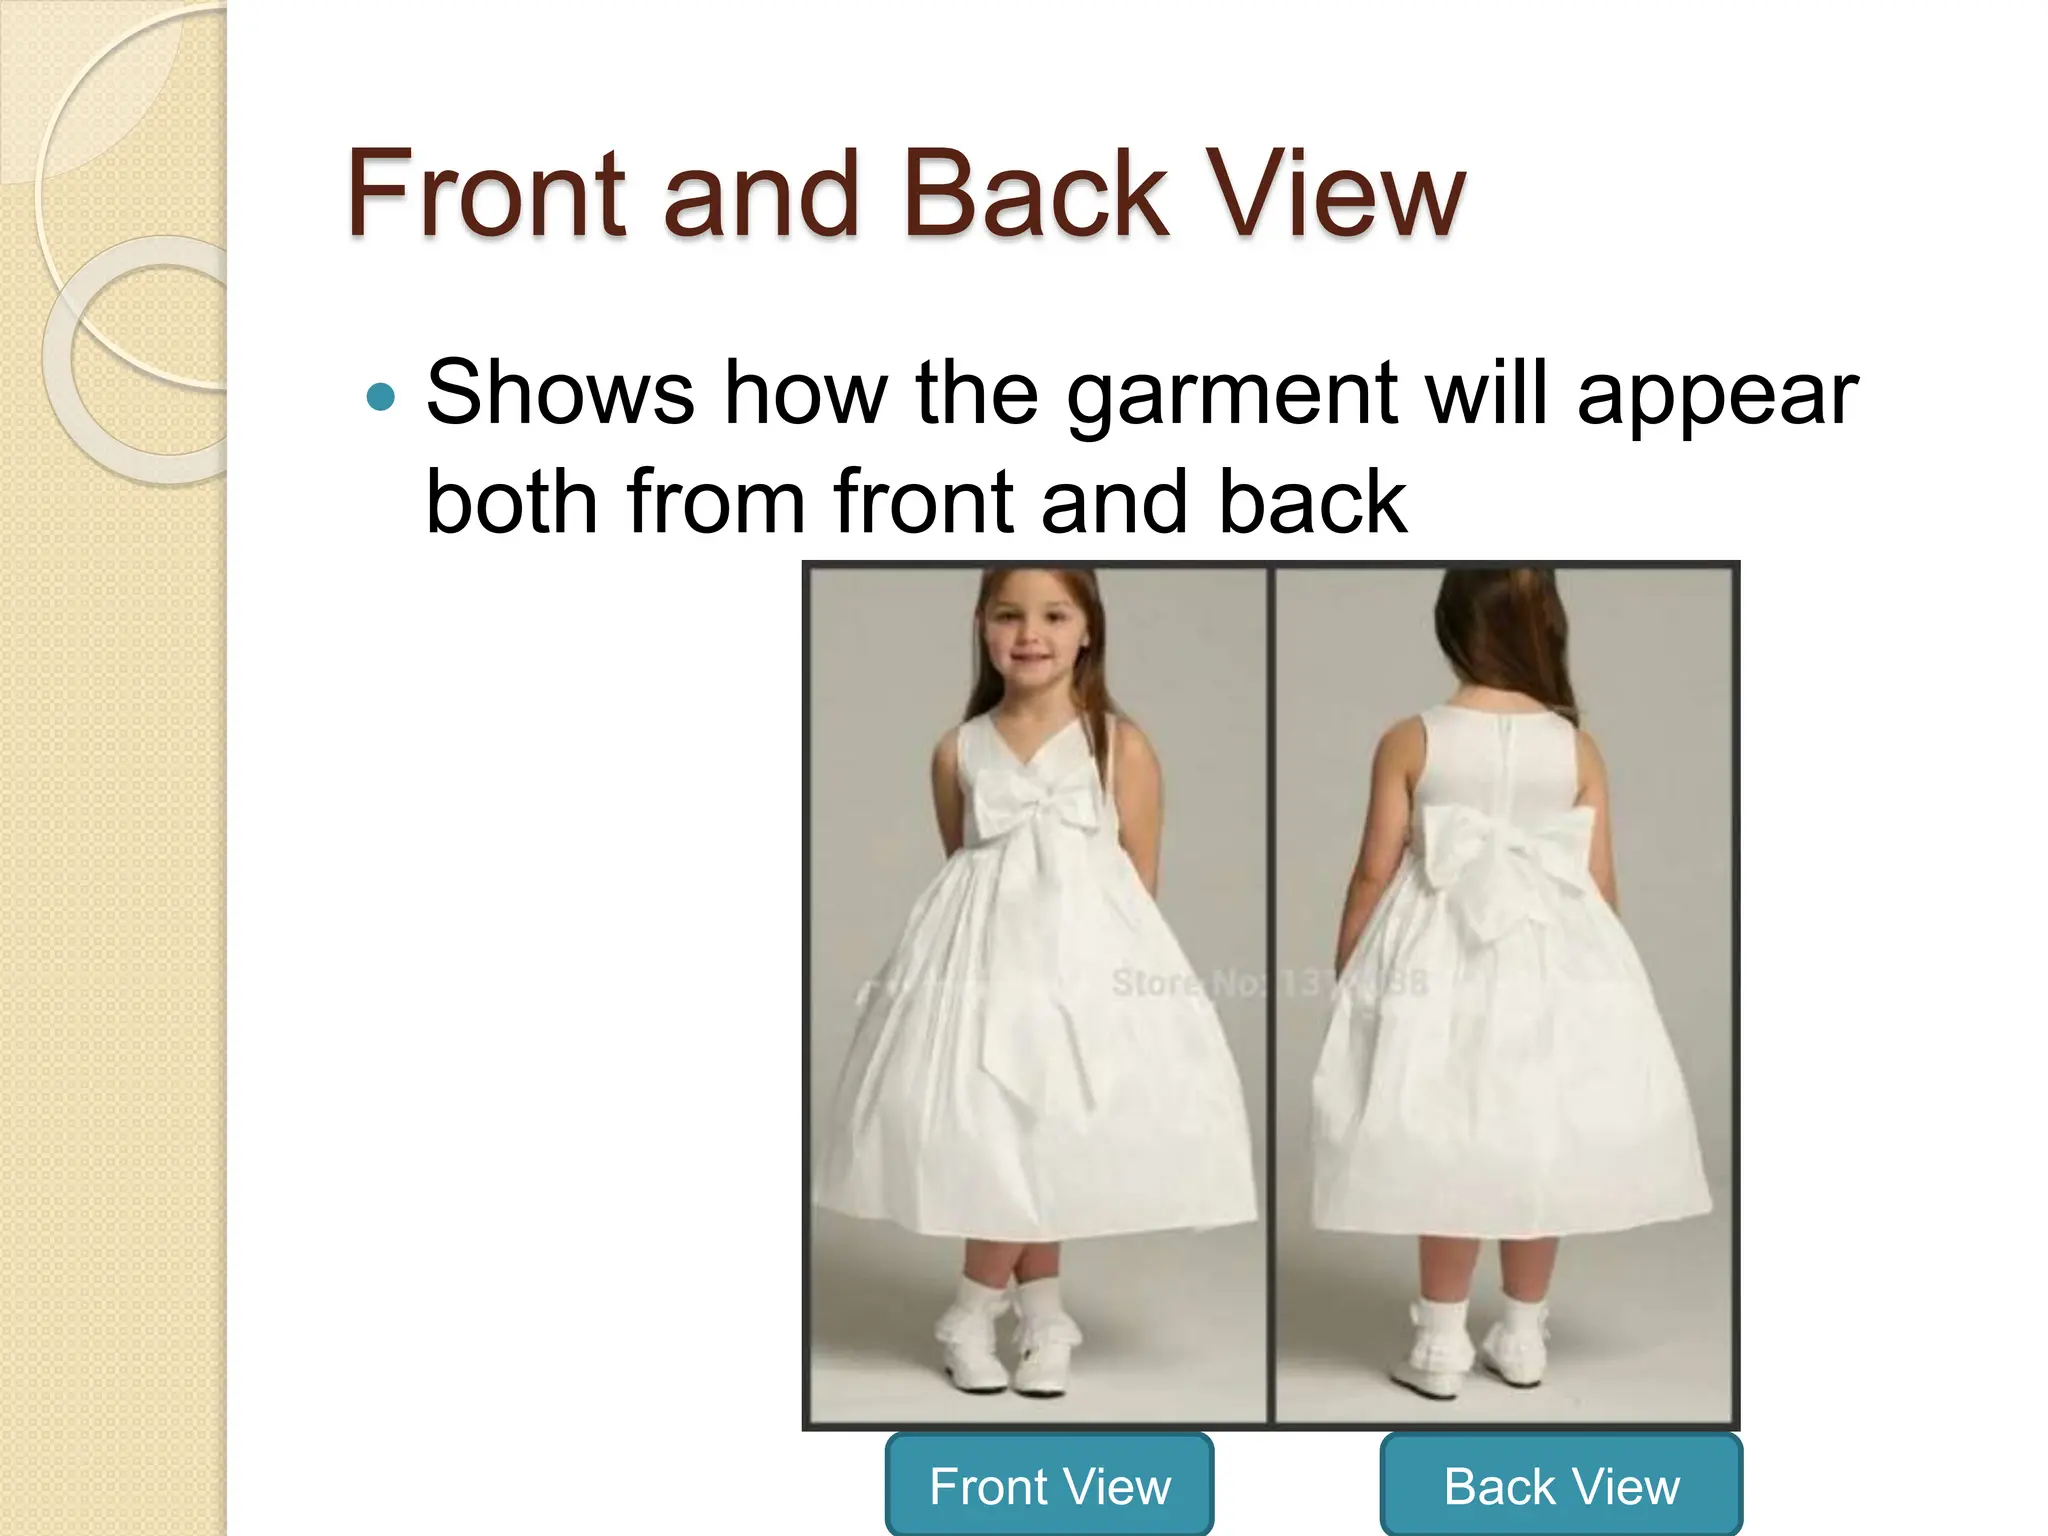
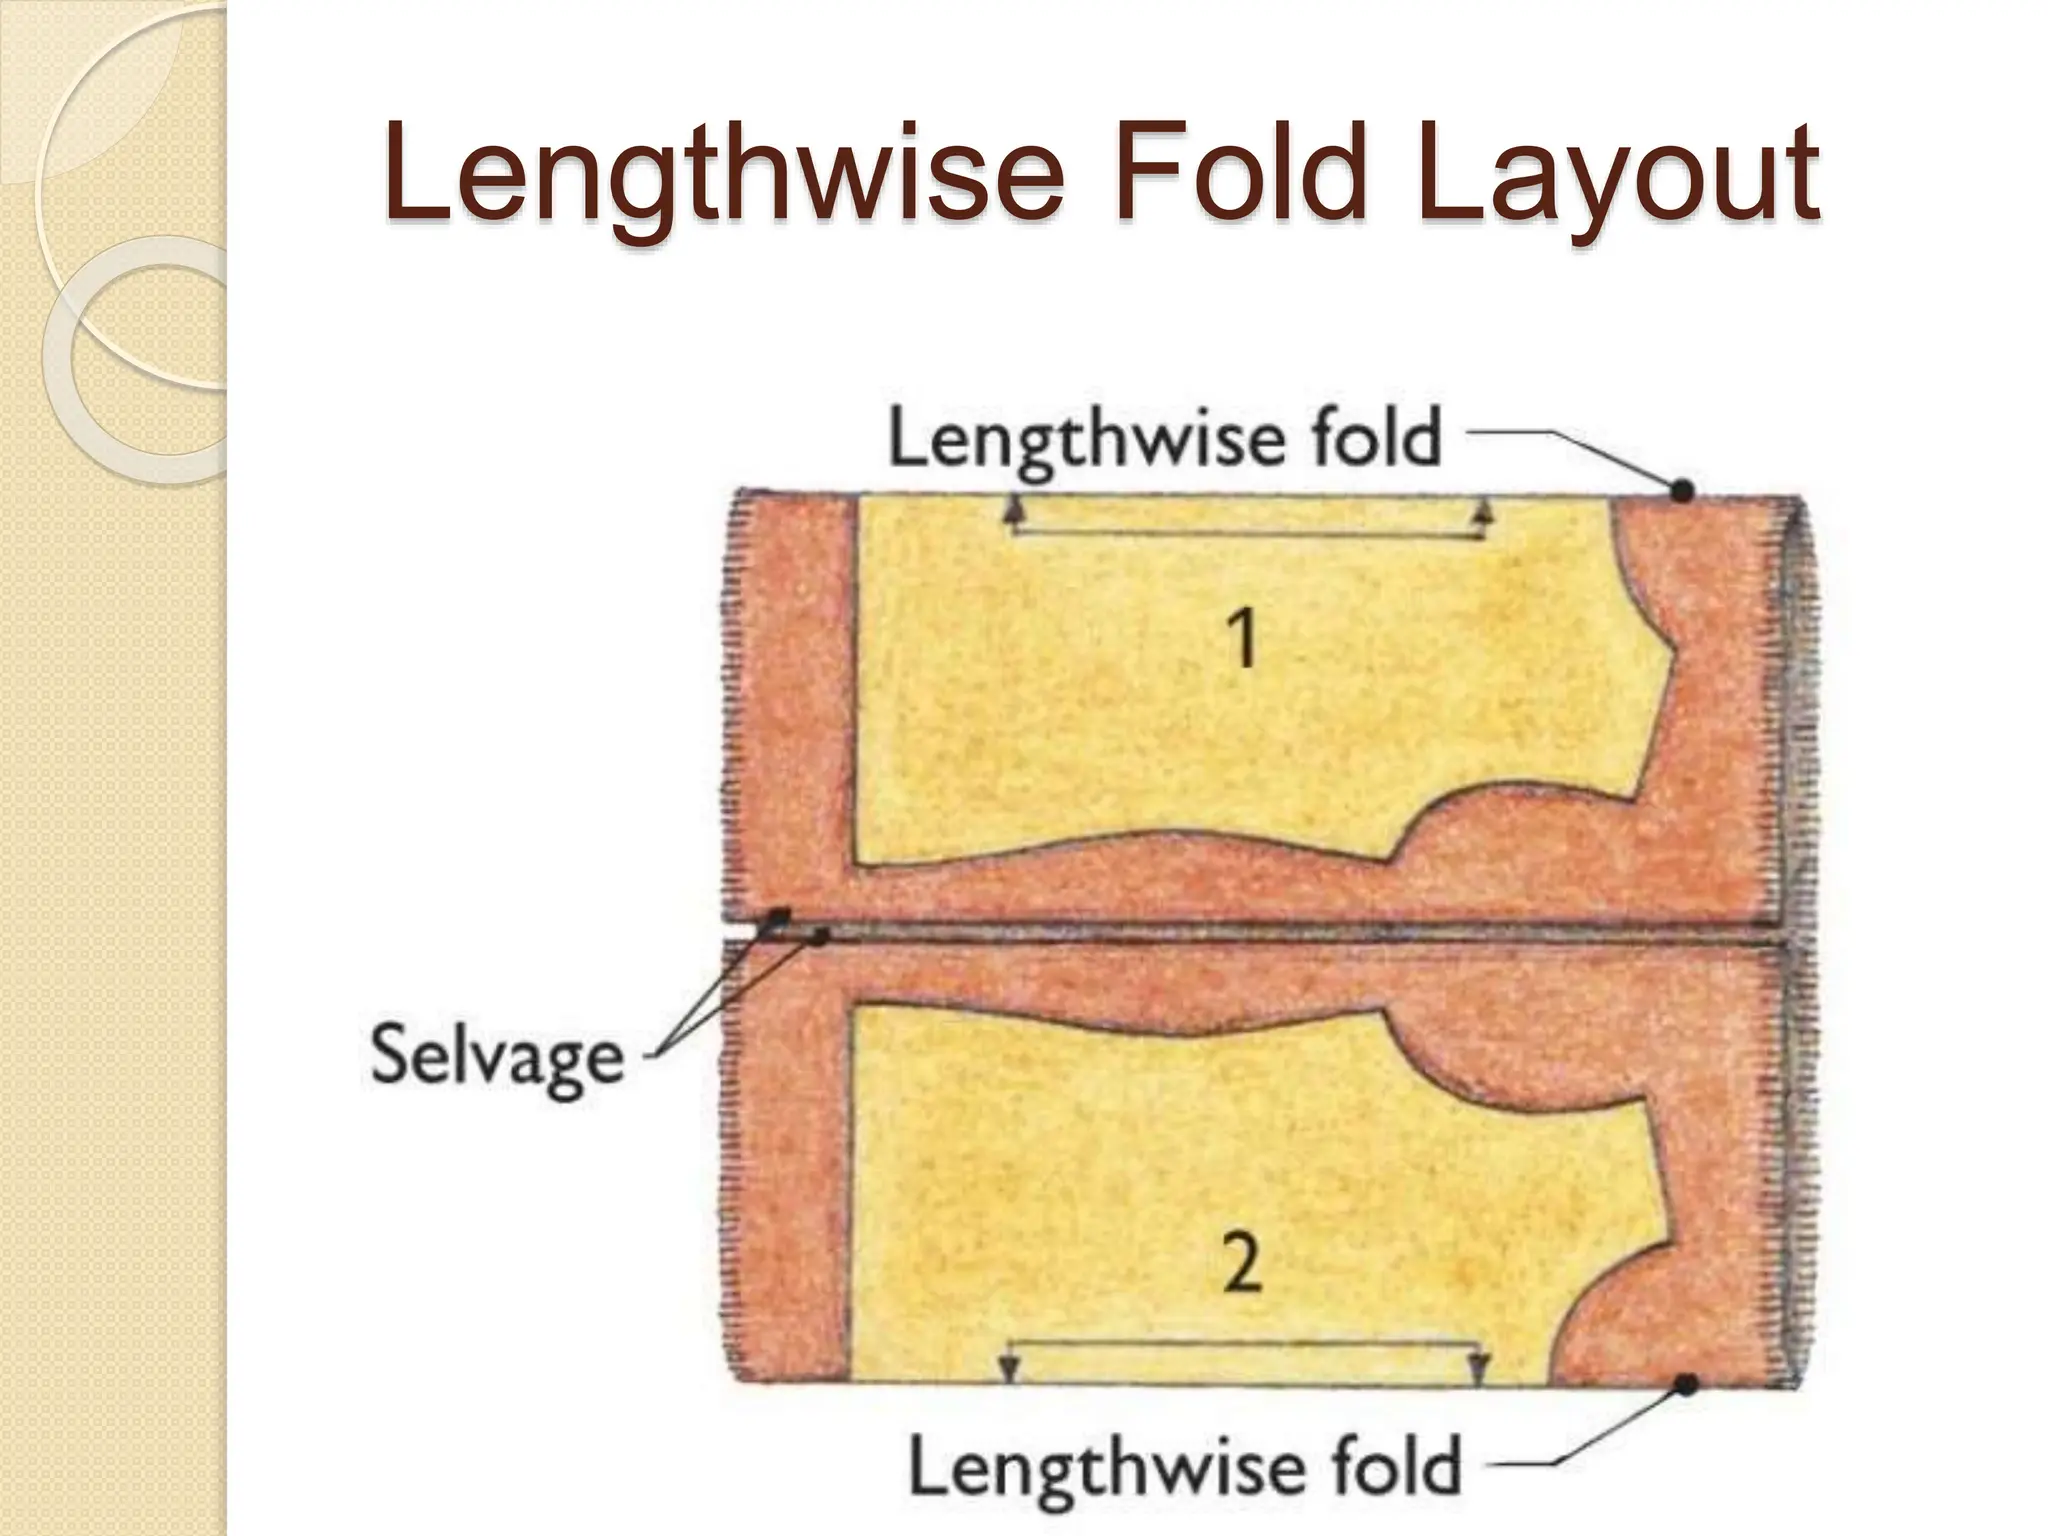
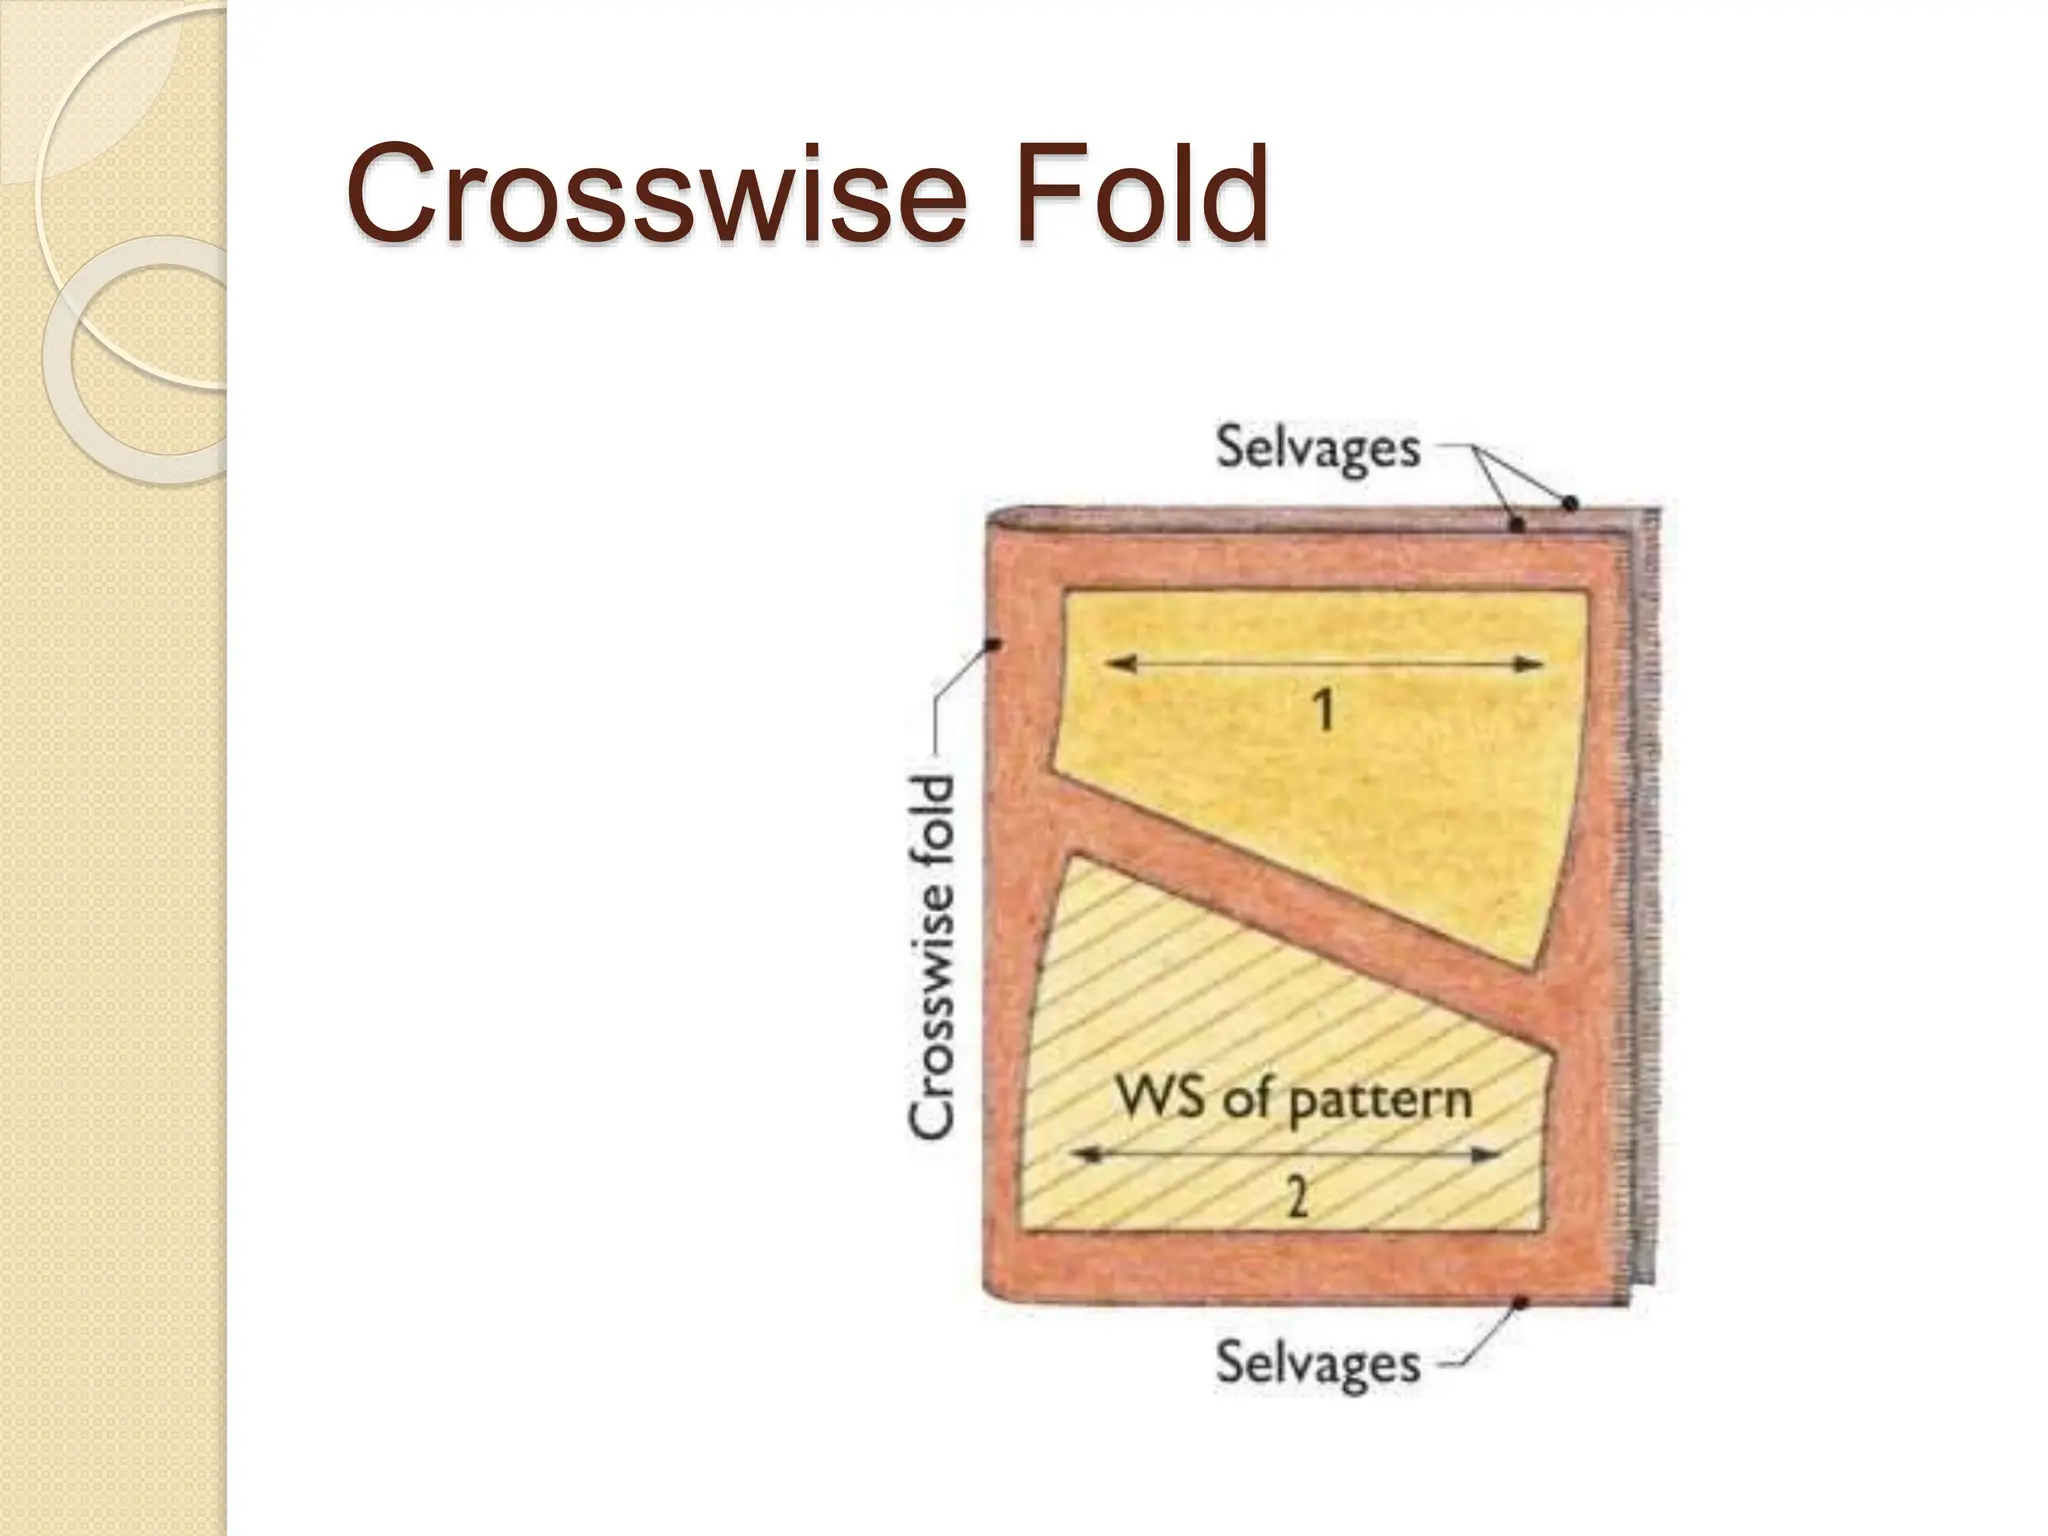
Guidesheet
 Booklet that contains all processes
included in garment construction.
Importance of a Guidesheet
 Shows how work has been organised
 Shows sequence or order of work in
construction
 Helps to estimate amount of time and
skill you will require to complete each
unit
 Used to check if you have included all
materials you need in the construction
of your garment
Contents of a Guidesheet
 Front and back view of the garment
 Pattern Layout
 Unit Construction processes
 Materials required to complete your
garment
Front and Back View
 Shows how the garment will appear
both from front and back
Front View Back View
Parts of a Fabric
Pattern Layout
 Is a figure or sketch that shows how
pattern pieces are going to be laid on the
fabric before cutting
 In garment construction, pattern layout is
done twice
◦ First done to estimate amount of fabric required for
a garment
◦ Second is done in readiness for cutting out
How to determine amount of fabric for
Garment Construction
 Select width of fabric (90 – 200 cm)
 Mark amount on any flat surface such as
table or floor
 Place paper patterns on the marked
surface noting place on fold and other
pattern markings
 Allow space for cutting
How to determine amount of fabric for
Garment Construction
 Work out amount required by measuring the
covered length on the flat surface
 Lengthwise fold layout:
◦ The require amount of fabric is the length along
the selvedge edges
 Crosswise fold layout:
◦ Amount is equal to the length along the selvedge
edge multiply by two
 Record the number of centimetres required
plus 12 cm.
Lengthwise Fold Layout
Crosswise Fold
Unit Construction Processes
 Involves procedure for assembling the
pattern pieces e.g.
 Join bodice front and back on the
shoulder
 Join front and back on side seam
 Attach collar to bodice
 Attach sleeve to bodice
 Join side seams of skirt
 Attach skirt to bodice etc
Material Required
 A piece of fabric (What type)
 Is it polyester, cotton or what?)
 Sewing thread
 Buttons
 Sewing needles
 Interfacing etc
Guidelines for Selecting Fabric
 Fabric should be firm and of medium weight
 Choose fabric that will enable you to identify
grain easily
 Choose fabric with solid colour and small
designs
 Fabric that will enhance and express the
design you have chosen
 Note fiber content and special finish
 Note width of fabric so that you can buy
enough
 Check for powdery dust on fabric as this
indicates sizing (Washing removes the size
Preparation of Fabric for Cutting
 Straightening grain of fabric
 Pre-shrinking
 Identifying faults
 Pressing
Preparation of Fabric for Cutting:
Straightening of the Grain
Check if cut ends are straight
Pull the weft threads so that they
should run from selvedge to
selvedge
 Fold fabric lengthwise so that
selvedges match. If they do not
match, the fabric is off grain
Preparation of Fabric for Cutting:
Straightening of the Grain
 Hold shorter corner and the opposite
corner and pull in the bias direction till
the selvedges match.
 It is important to straighten the grain of
the fabric so as
◦ To cut all pieces on the straight grain of
fabric
◦ The completed garment hangs well on
the body
Preparation of Fabric for Cutting:
Preshrinking
 Soak in lukewarm water for at least 30
minutes
 Drip dry the fabric
 Preshrinking prevents the fabric from
shrinking after first washing
Preparation of Fabric for Cutting:
Identifying Faults
 Identify and mark faults on a fabric using
pins or tailors chalk
 Removing faulty areas enables the
designer to create a garment that is fault
free
Preparation of Fabric for Cutting:
Pressing
Press using a slightly hot iron to
remove creases or folds.
Pressing creates smooth stitching
lines
Guidelines for Laying Out a Pattern
Select appropriate layout on the
guide sheet
Fold fabric according to the layout
Right side of fabric is usually inside
and unless you want to follow some
pattern arrangement
Guidelines for Laying Out a Pattern
 Place paper patterns considering
◦ pattern arrangement
◦ Grain of fabric or place on fold
◦ Number of pieces to be cut
 Pin through both pieces of fabric
◦ Pin diagonally first in the corners
◦ Then pin along the edges.
 The pins should be 6 mm away from the
cutting line
Cutting Out
Support the fabric with the left
hand and cutout with the right
hand
Makes you cut all the pieces you
will need
Transfer pattern markings to the
fabric while the patterns are still
Transferring Pattern Markings
 Choose appropriate marking techniques
so that pattern marks appear on the
fabric e.g.
◦ Chalk or pencil on plain material and
tracing wheel and carbon paper on
printed materials
◦ Tailors tacking can also be used on
both plain and printed materials

Guidesheet.pptx

  • 1.
    Guidesheet  Booklet thatcontains all processes included in garment construction.
  • 2.
    Importance of aGuidesheet  Shows how work has been organised  Shows sequence or order of work in construction  Helps to estimate amount of time and skill you will require to complete each unit  Used to check if you have included all materials you need in the construction of your garment
  • 3.
    Contents of aGuidesheet  Front and back view of the garment  Pattern Layout  Unit Construction processes  Materials required to complete your garment
  • 4.
    Front and BackView  Shows how the garment will appear both from front and back Front View Back View
  • 5.
    Parts of aFabric
  • 6.
    Pattern Layout  Isa figure or sketch that shows how pattern pieces are going to be laid on the fabric before cutting  In garment construction, pattern layout is done twice ◦ First done to estimate amount of fabric required for a garment ◦ Second is done in readiness for cutting out
  • 7.
    How to determineamount of fabric for Garment Construction  Select width of fabric (90 – 200 cm)  Mark amount on any flat surface such as table or floor  Place paper patterns on the marked surface noting place on fold and other pattern markings  Allow space for cutting
  • 8.
    How to determineamount of fabric for Garment Construction  Work out amount required by measuring the covered length on the flat surface  Lengthwise fold layout: ◦ The require amount of fabric is the length along the selvedge edges  Crosswise fold layout: ◦ Amount is equal to the length along the selvedge edge multiply by two  Record the number of centimetres required plus 12 cm.
  • 9.
  • 10.
  • 11.
    Unit Construction Processes Involves procedure for assembling the pattern pieces e.g.  Join bodice front and back on the shoulder  Join front and back on side seam  Attach collar to bodice  Attach sleeve to bodice  Join side seams of skirt  Attach skirt to bodice etc
  • 12.
    Material Required  Apiece of fabric (What type)  Is it polyester, cotton or what?)  Sewing thread  Buttons  Sewing needles  Interfacing etc
  • 13.
    Guidelines for SelectingFabric  Fabric should be firm and of medium weight  Choose fabric that will enable you to identify grain easily  Choose fabric with solid colour and small designs  Fabric that will enhance and express the design you have chosen  Note fiber content and special finish  Note width of fabric so that you can buy enough  Check for powdery dust on fabric as this indicates sizing (Washing removes the size
  • 14.
    Preparation of Fabricfor Cutting  Straightening grain of fabric  Pre-shrinking  Identifying faults  Pressing
  • 15.
    Preparation of Fabricfor Cutting: Straightening of the Grain Check if cut ends are straight Pull the weft threads so that they should run from selvedge to selvedge  Fold fabric lengthwise so that selvedges match. If they do not match, the fabric is off grain
  • 16.
    Preparation of Fabricfor Cutting: Straightening of the Grain  Hold shorter corner and the opposite corner and pull in the bias direction till the selvedges match.  It is important to straighten the grain of the fabric so as ◦ To cut all pieces on the straight grain of fabric ◦ The completed garment hangs well on the body
  • 17.
    Preparation of Fabricfor Cutting: Preshrinking  Soak in lukewarm water for at least 30 minutes  Drip dry the fabric  Preshrinking prevents the fabric from shrinking after first washing
  • 18.
    Preparation of Fabricfor Cutting: Identifying Faults  Identify and mark faults on a fabric using pins or tailors chalk  Removing faulty areas enables the designer to create a garment that is fault free
  • 19.
    Preparation of Fabricfor Cutting: Pressing Press using a slightly hot iron to remove creases or folds. Pressing creates smooth stitching lines
  • 20.
    Guidelines for LayingOut a Pattern Select appropriate layout on the guide sheet Fold fabric according to the layout Right side of fabric is usually inside and unless you want to follow some pattern arrangement
  • 21.
    Guidelines for LayingOut a Pattern  Place paper patterns considering ◦ pattern arrangement ◦ Grain of fabric or place on fold ◦ Number of pieces to be cut  Pin through both pieces of fabric ◦ Pin diagonally first in the corners ◦ Then pin along the edges.  The pins should be 6 mm away from the cutting line
  • 22.
    Cutting Out Support thefabric with the left hand and cutout with the right hand Makes you cut all the pieces you will need Transfer pattern markings to the fabric while the patterns are still
  • 23.
    Transferring Pattern Markings Choose appropriate marking techniques so that pattern marks appear on the fabric e.g. ◦ Chalk or pencil on plain material and tracing wheel and carbon paper on printed materials ◦ Tailors tacking can also be used on both plain and printed materials