The document provides information on instrument processing, including the steps involved in decontamination, cleaning, sterilization, and high-level disinfection. It describes the learning objectives, introduces key terms, and discusses various chemical disinfectants and their appropriate uses. Specific processes and best practices are outlined for decontamination using chlorine solutions, cleaning instruments, sterilization using various methods like steam, dry heat and chemicals, and high-level disinfection through boiling, steaming or chemicals. Factors that impact effectiveness and proper techniques, concentrations, exposure times are emphasized throughout.
Introduction to the instrument processing; emphasizes importance of steps in processing to ensure safety and sterility.
Describes chemical disinfectants, their effectiveness, classifications of patient care items, and specific disinfectant types.
Focuses on formaldehyde and glutaraldehyde specifics, their advantages and operational limitations.
Best practices for preventing contamination of disinfectants and safe storage tips.
Explains decontamination, methods using chlorine solutions, and importance of labeling containers.
Cleaning processes, emphasizing physical removal of organic matters and importance of PPE.
Sterilization methods, particularly steam and dry heat, requirements, and effective practice tips.
Details on chemical sterilization techniques and necessary precautions while handling sterilants.
Methods for monitoring sterilization procedures including biological and mechanical indicators. Storage guidelines for sterilized items to maintain their integrity and shelf-life.
Defines high-level disinfection and outlines various methods including boiling, steaming, and chemical.
Effectiveness ratings of decontamination, cleaning, sterilization, and HLD methods in processing.
2
Learning objectives
At theend of this session, students will be able to:
• Describe the steps of instruments and other
items processing
• list commonly used disinfectants
• Explain how disinfectant solutions are
prepared
• Demonstrate the steps of decontamination
process, cleaning process, sterilization and
HLD process
• Explain how to store sterilized and high level
disinfected instrument and other items
3.
Introduction
• Every item,whether a soiled metal
instruments or pair of surgical gloves,
requires special handling and processing
in order to:
o Minimize the risk of accidental injury
o Provide a high quality end product (i.e., sterile
or HLD instruments and other items).
3
4.
Chemical Disinfectant
• Disinfectantsare chemicals that destroy or inactivate
microorganisms on inanimate objects
• They are not meant to be used on the skin or mucus membranes
4
5.
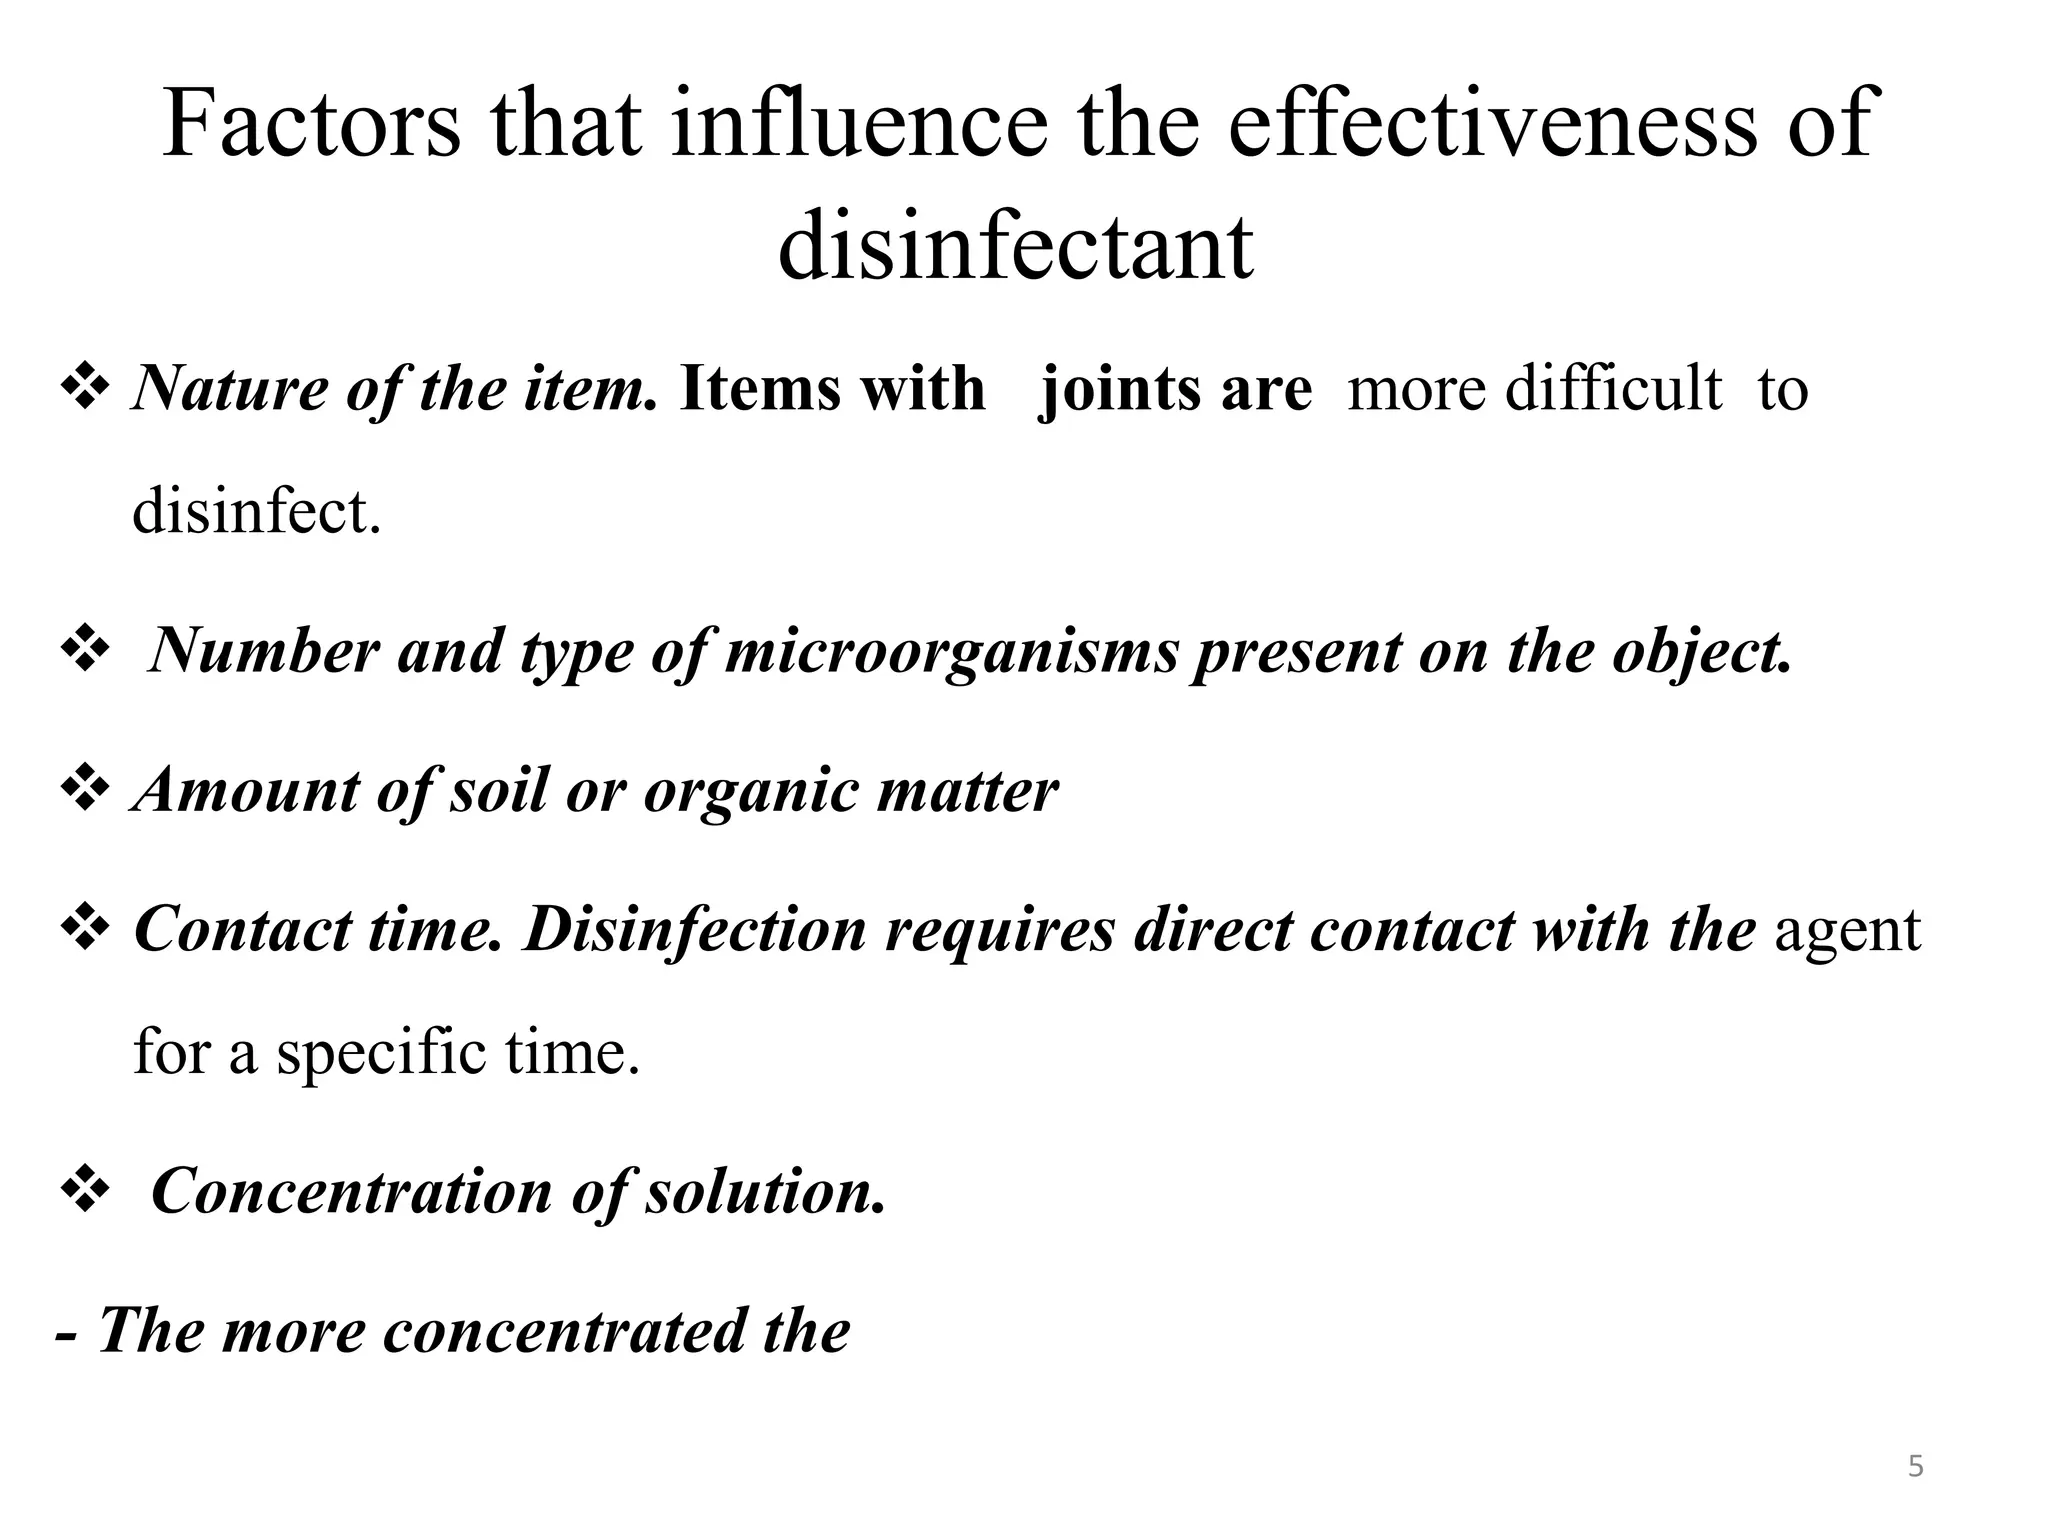
Factors that influencethe effectiveness of
disinfectant
Nature of the item. Items with joints are more difficult to
disinfect.
Number and type of microorganisms present on the object.
Amount of soil or organic matter
Contact time. Disinfection requires direct contact with the agent
for a specific time.
Concentration of solution.
- The more concentrated the
5
6.
Classification of PatientCare Items
Critical items:
- items enter sterile tissue, break the mucosal barrier, or come
into contact with the vascular system
E.g. surgical instruments, catheters, needles, implants etc.
Semi critical items
- which has contact with mucous membranes and require high-
level disinfection , or sterilization.
e.g respiratory therapy equipment high level chemical disinfection
non Critical items
• used only with intact skin.
• Intermediate or low-level disinfection is adequate.
• E.g. blood pressure cuffs, furniture, linens, bedpans, and eating utensils
6
7.
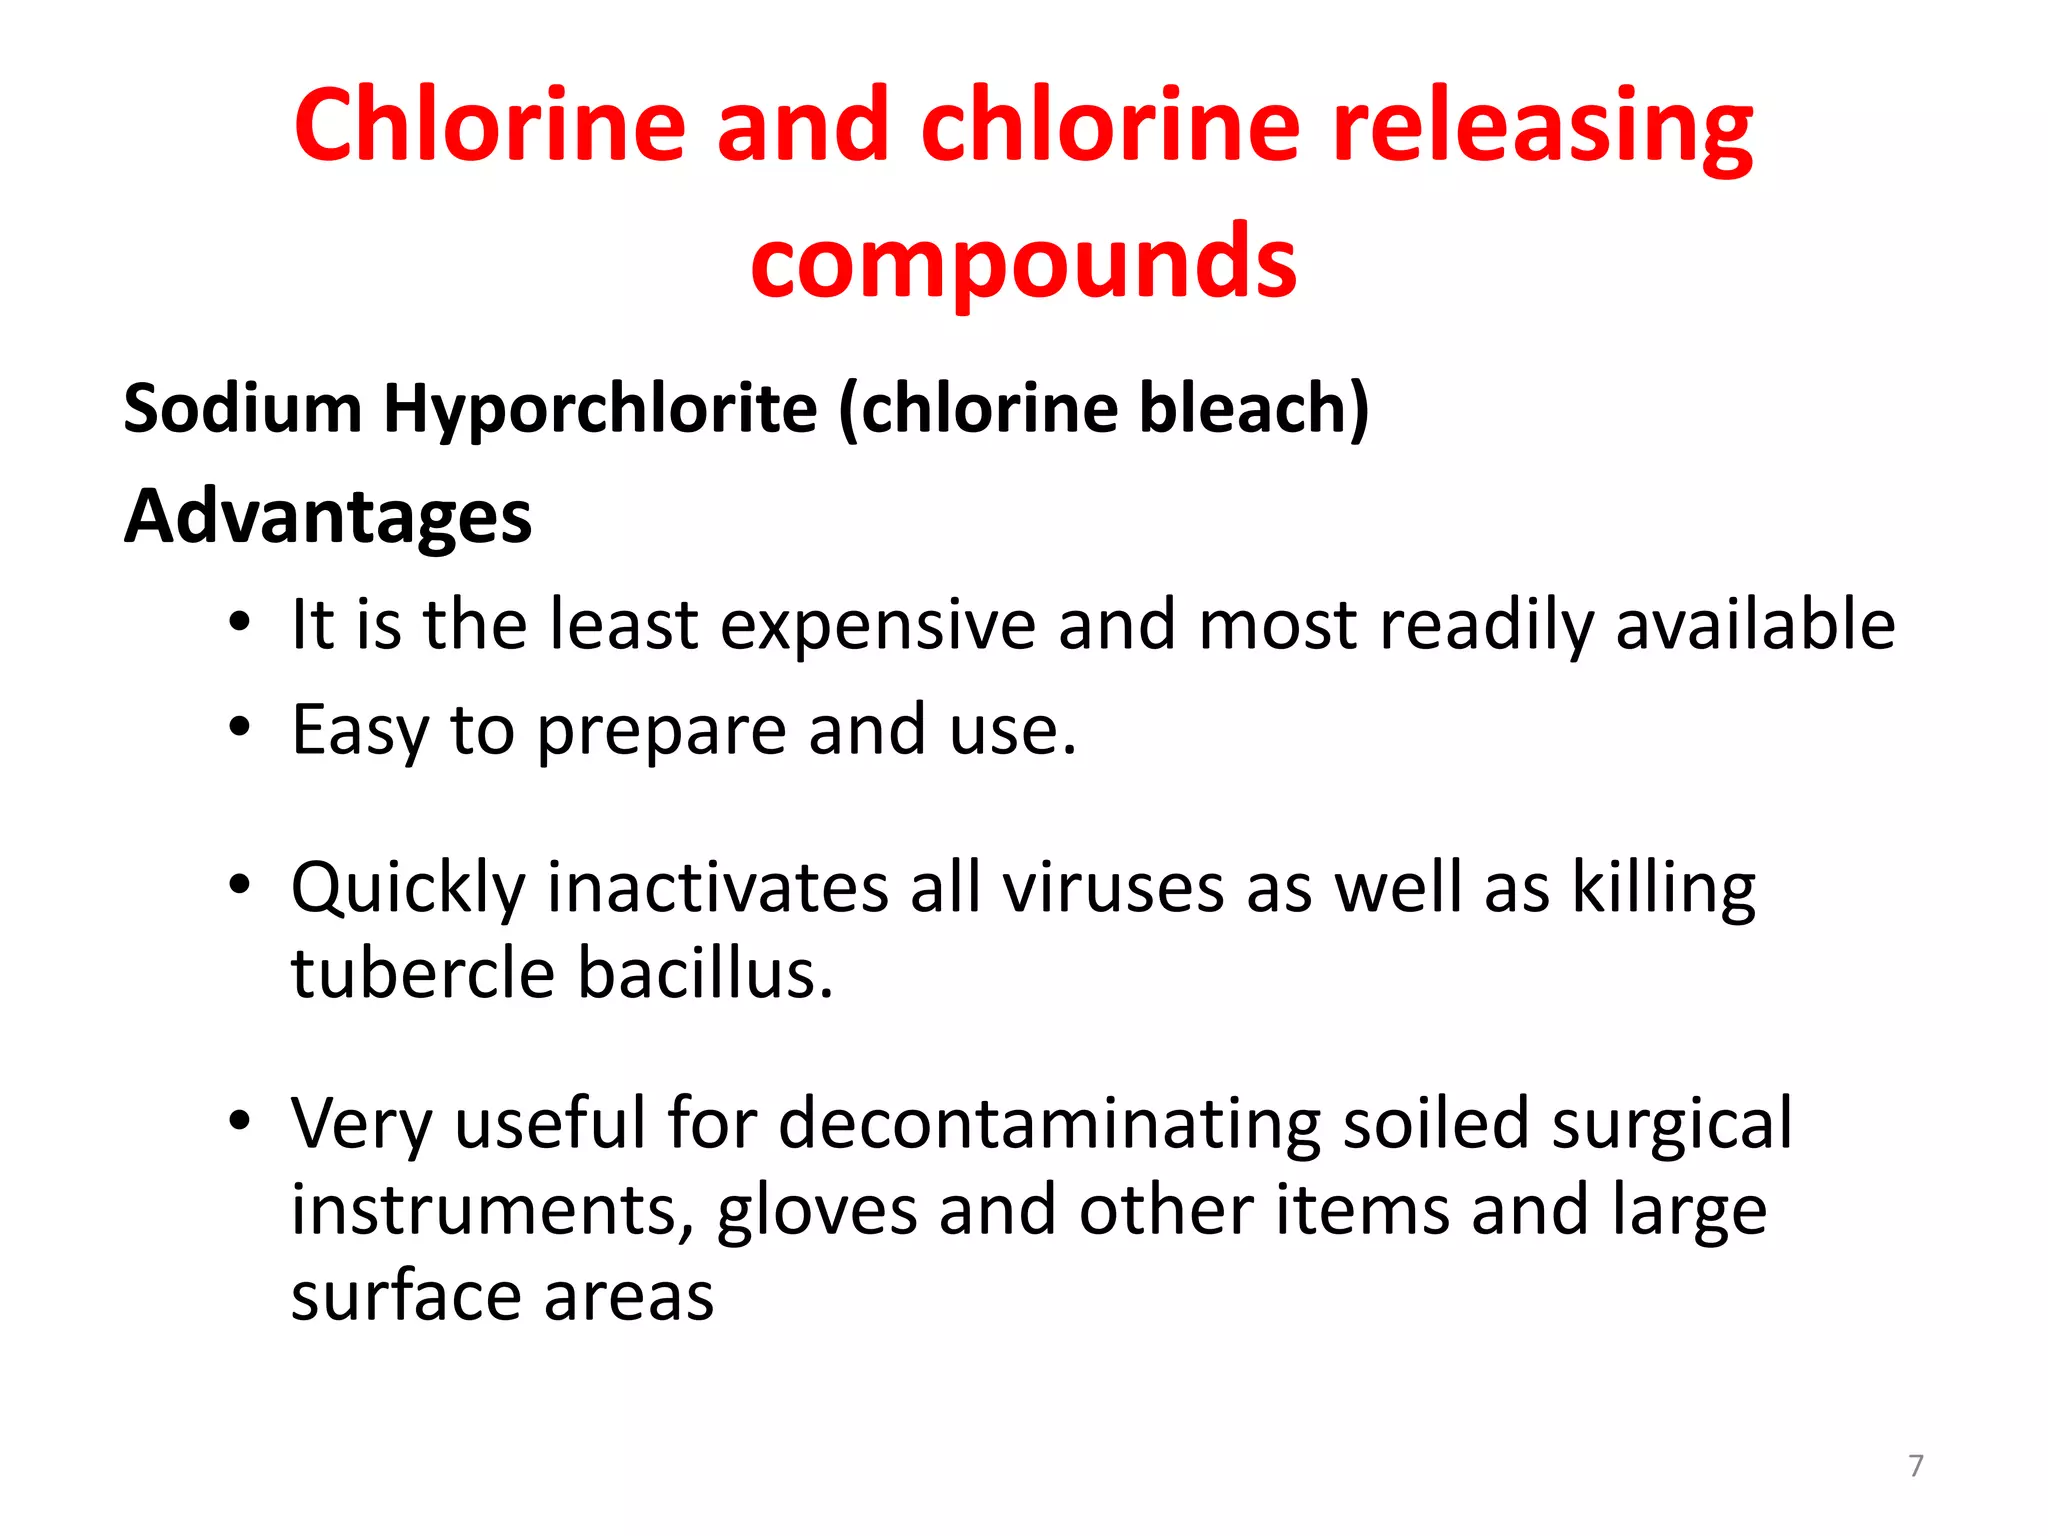
Chlorine and chlorinereleasing
compounds
Sodium Hyporchlorite (chlorine bleach)
Advantages
• It is the least expensive and most readily available
• Easy to prepare and use.
• Quickly inactivates all viruses as well as killing
tubercle bacillus.
• Very useful for decontaminating soiled surgical
instruments, gloves and other items and large
surface areas
7
8.
Chlorine … continued
Limitation
•Inactivated by organic matter.
• Loses potency on standing if left in open container
(replace at least daily).
• May corrode metal instruments with prolonged
exposure (>20 minutes) to concentrations greater
than 0.5%.
8
9.
Chlorine … cont’d
Calciumhypochlorite or chlorinated lime
Available in powder form.
• Calcium hypochlorite contains approximately 70%
available chlorine.
• Chlorinated lime contains approximately 35%
available chlorine.
9
10.
Chlorine …continued
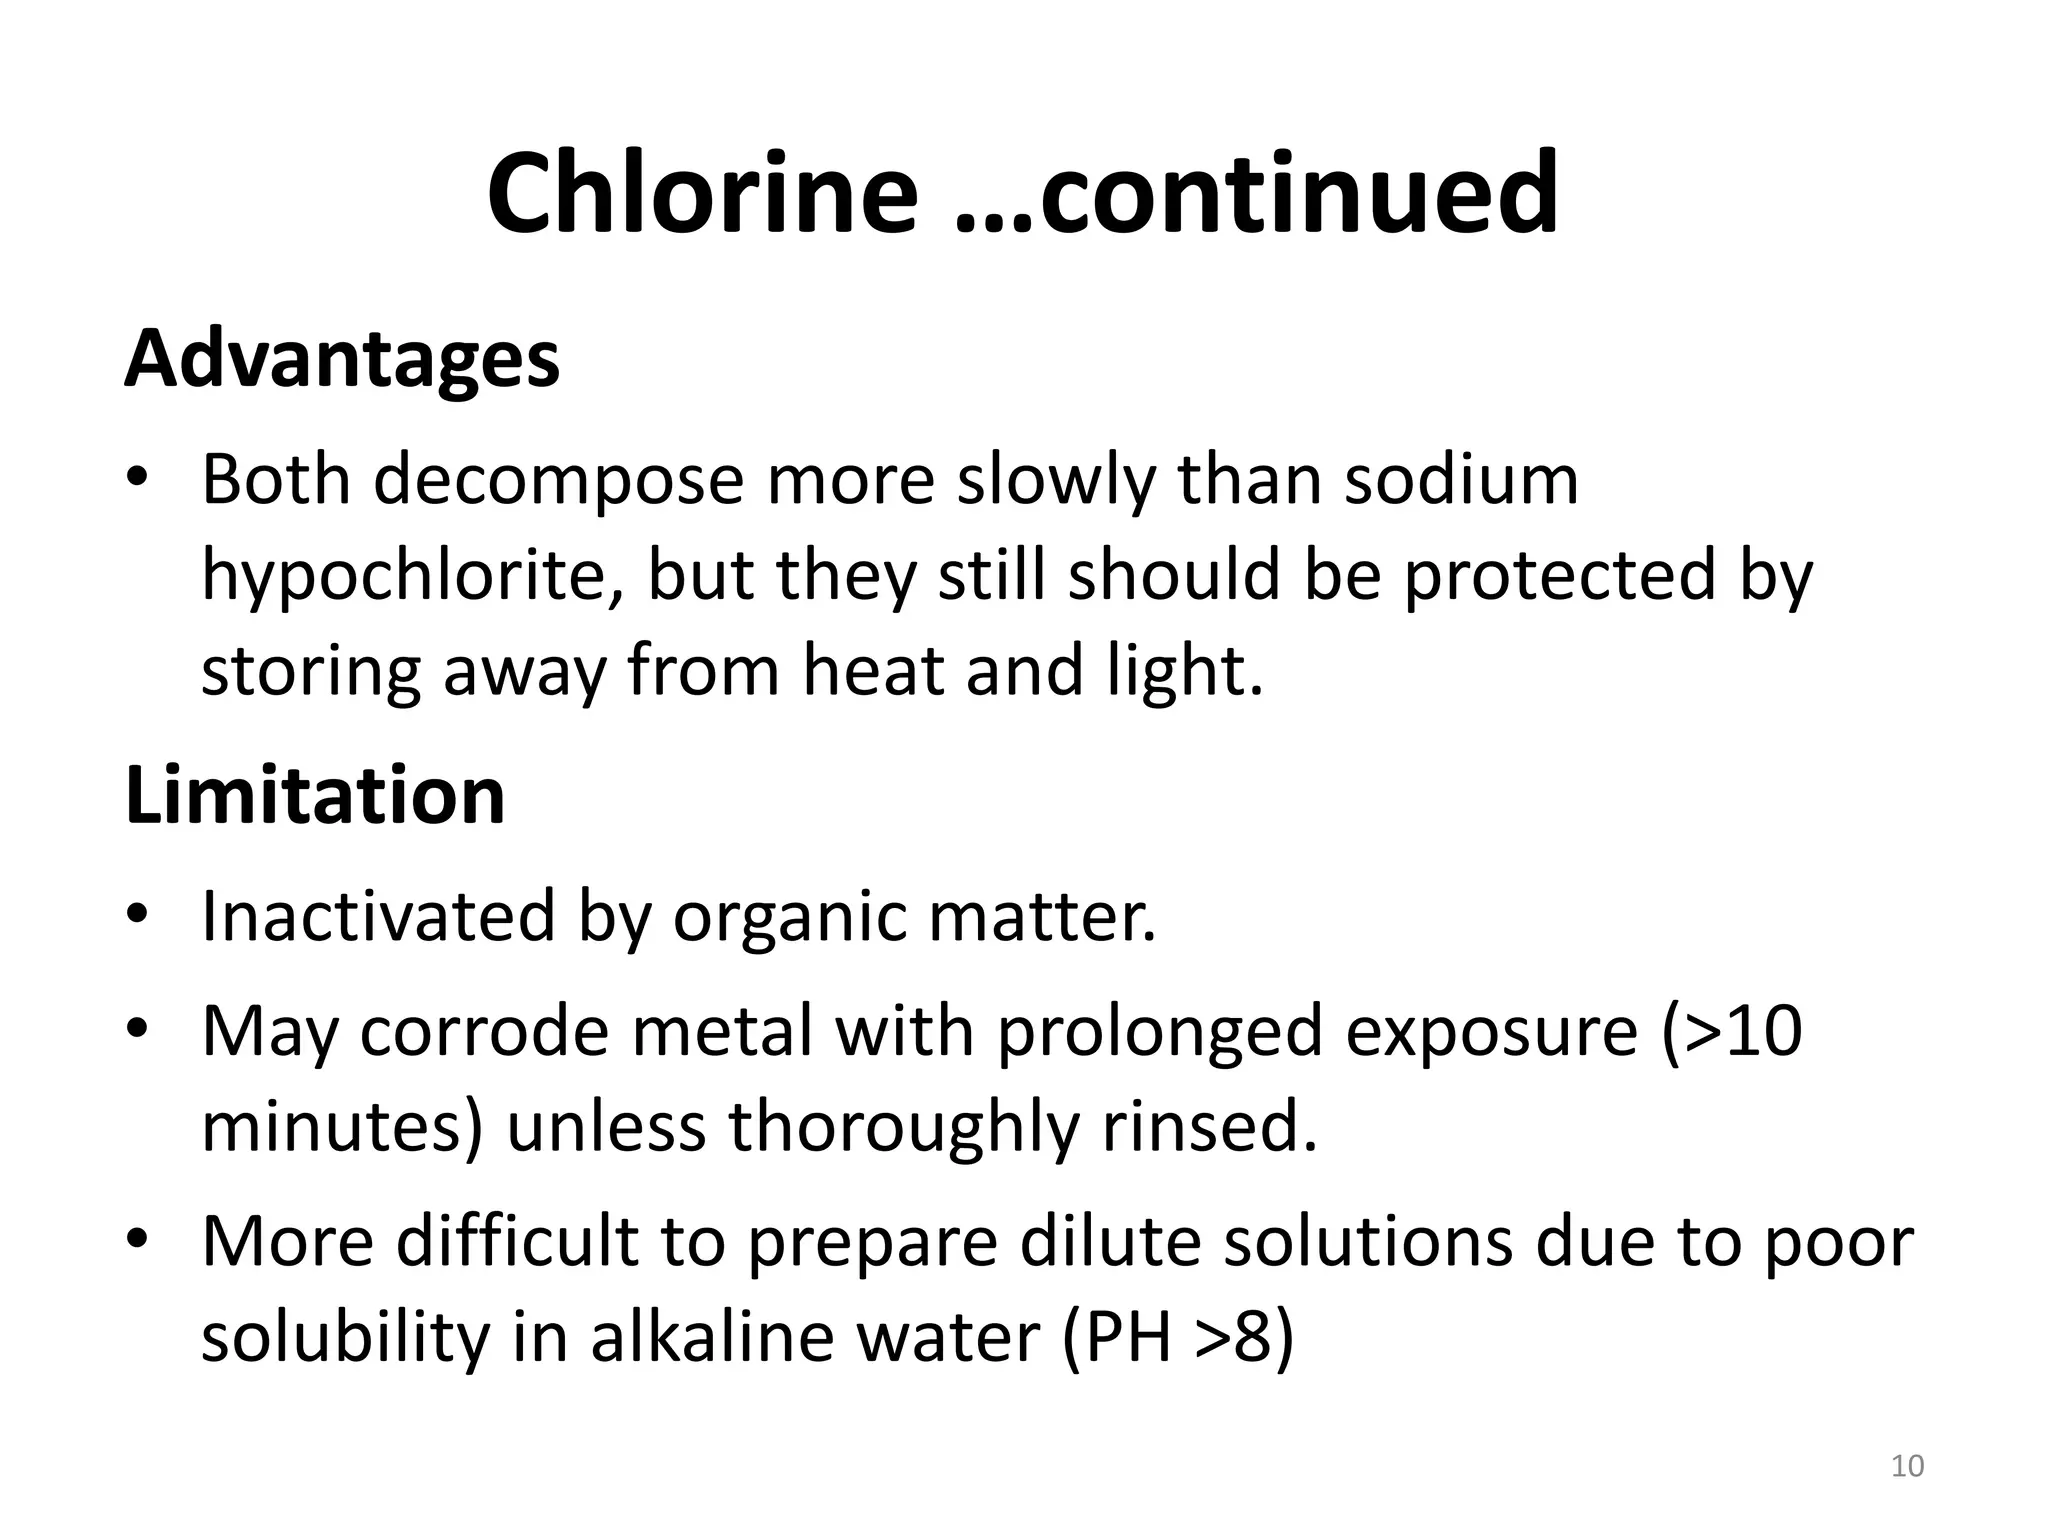
Advantages
• Bothdecompose more slowly than sodium
hypochlorite, but they still should be protected by
storing away from heat and light.
Limitation
• Inactivated by organic matter.
• May corrode metal with prolonged exposure (>10
minutes) unless thoroughly rinsed.
• More difficult to prepare dilute solutions due to poor
solubility in alkaline water (PH >8)
10
11.
Formaldehyde
• It canbe used as a chemical sterilant, as well as a
high-level disinfectant.
• However have the following limitations
o Causes skin irritation.
o Potential carcinogen
o Irritates the skin, eyes and respiratory tract, even at
low concentrations.
o Produces a dangerous gas (bis-chloromethyl-ether)
when mixed with chlorine.
• There fore, should not be used for HLD or
sterilization if other high-level disinfectants are
readily available.
11
12.
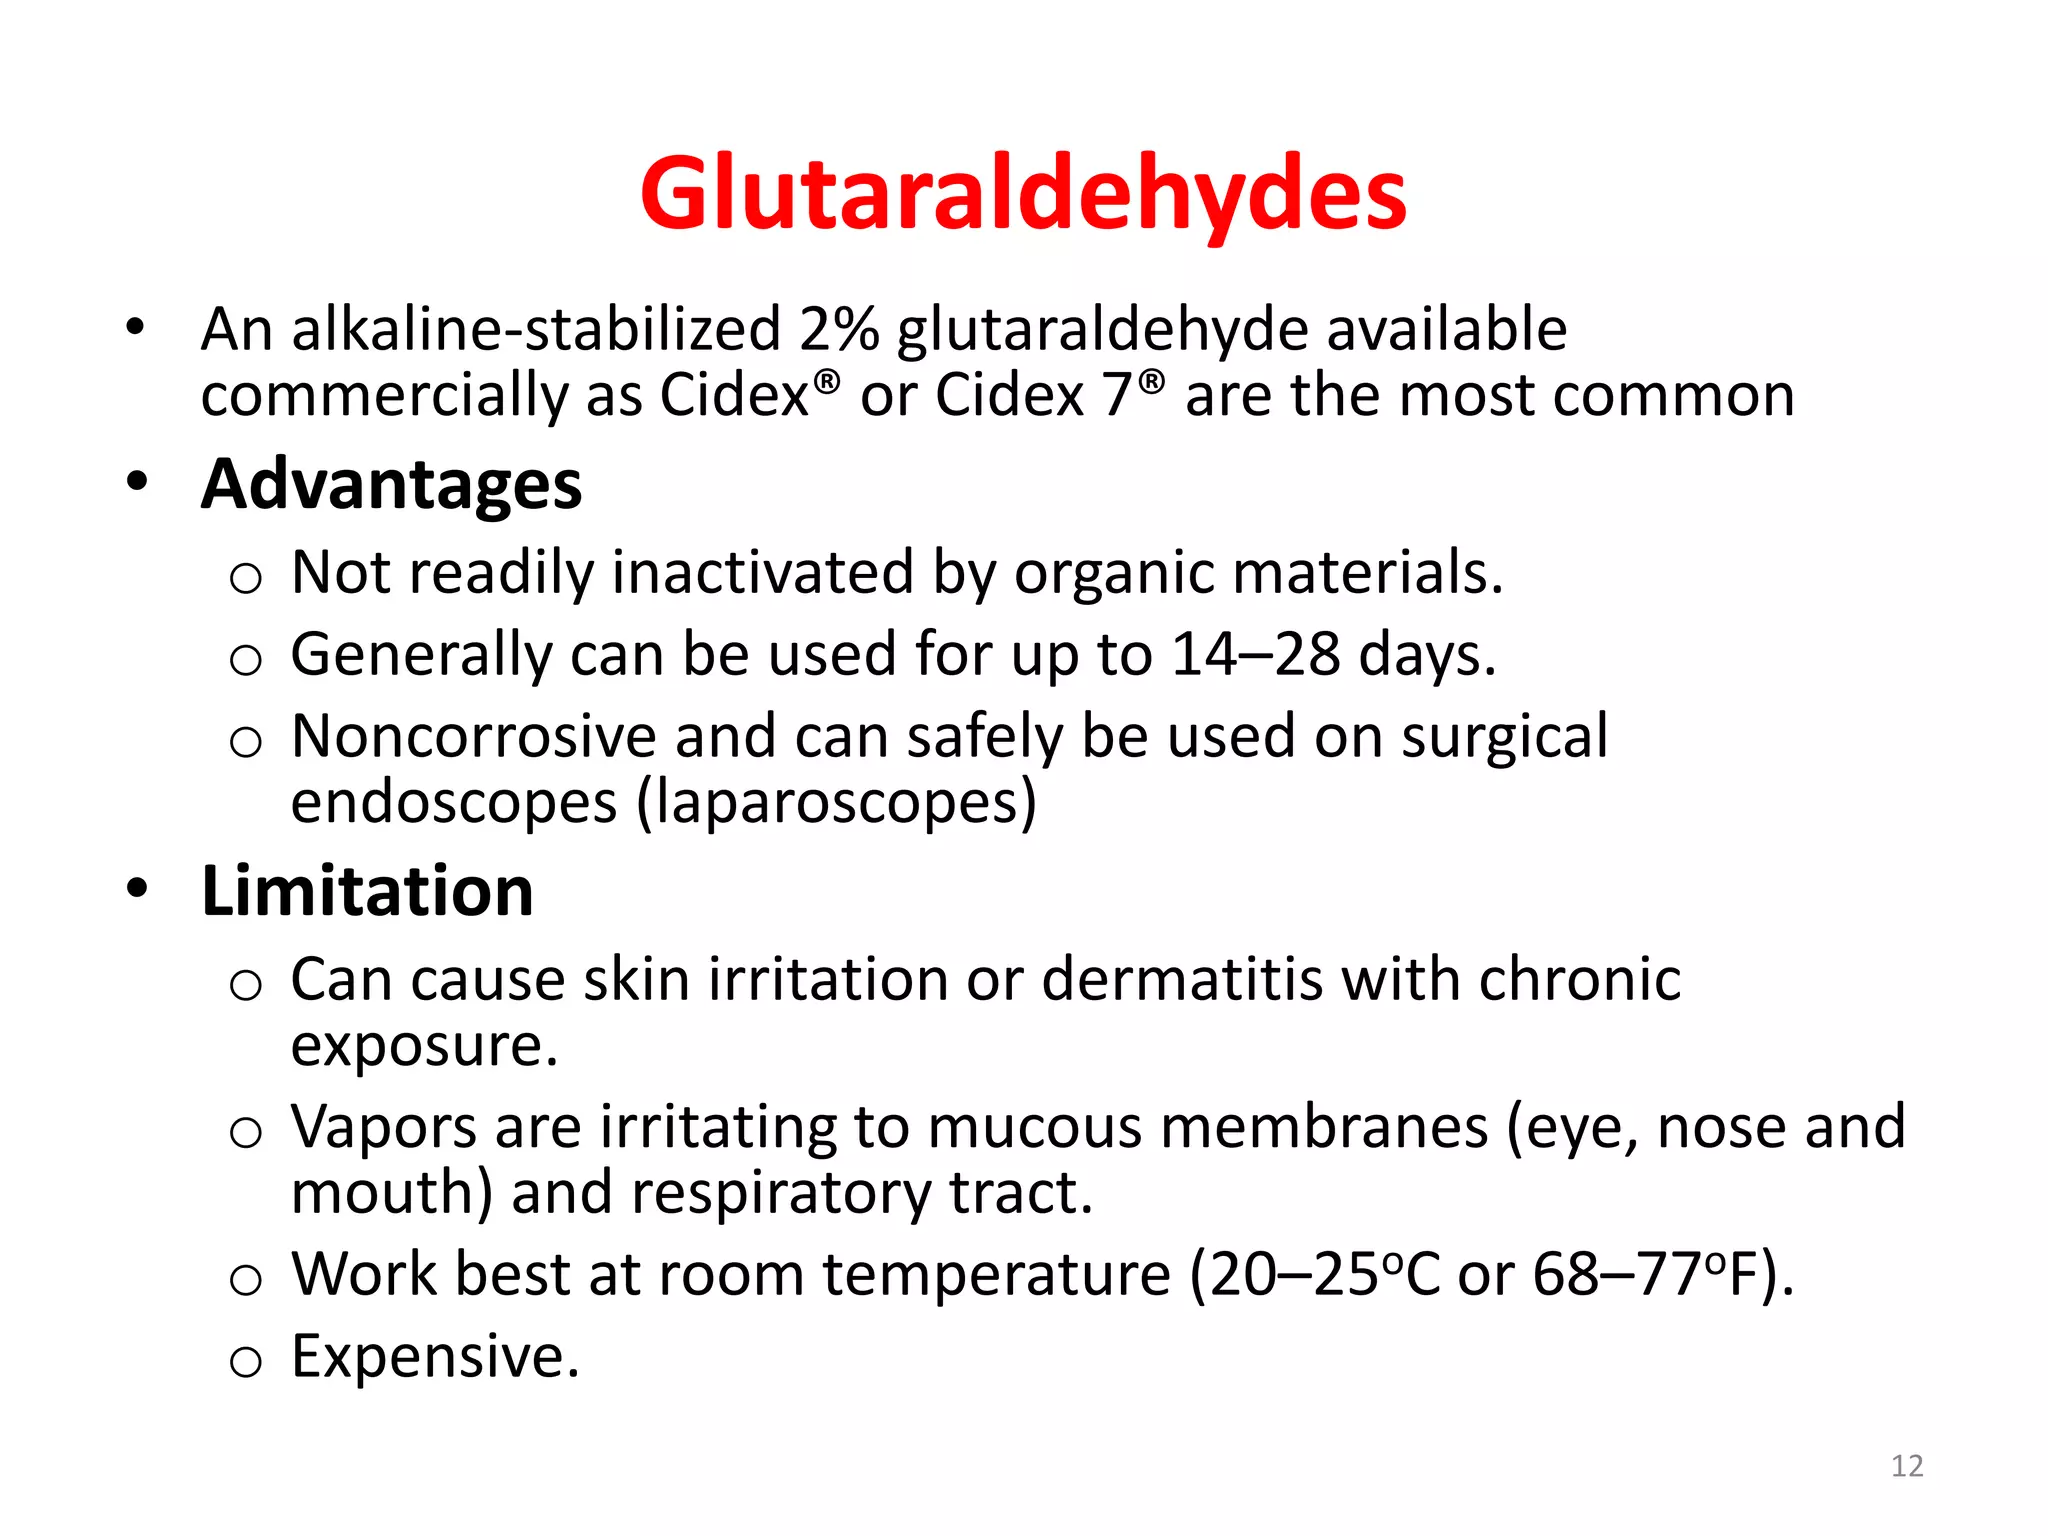
Glutaraldehydes
• An alkaline-stabilized2% glutaraldehyde available
commercially as Cidex® or Cidex 7® are the most common
• Advantages
o Not readily inactivated by organic materials.
o Generally can be used for up to 14–28 days.
o Noncorrosive and can safely be used on surgical
endoscopes (laparoscopes)
• Limitation
o Can cause skin irritation or dermatitis with chronic
exposure.
o Vapors are irritating to mucous membranes (eye, nose and
mouth) and respiratory tract.
o Work best at room temperature (20–25oC or 68–77oF).
o Expensive.
12
13.
Preventing Contamination of
Disinfectants
•Pour solutions into smaller container for use during
service delivery to avoid contaminating the stock
container.
• Label reusable containers with the date each time they
are washed, dried and refilled.
• Always use clean water for decontamination, boiled
water for HLD and sterile water for sterilization to
dilute disinfectants.
13
14.
Preventing contamination of
Disinfectants
•Prepare and use disinfectant in a clean, less
traffic flow and duty area.
• Store disinfectants in a coal, dark area.
• Avoid storing them in direct light or excessive
heat, as this may reduce their strength.
14
15.
15
Household Bleach Safety
•Use mask, goggles, rubber gloves,
waterproof apron and cape
• Mix in well-ventilated and at
room temperature
• Do not use or mix with other
detergents
• Use cold water to mix
What is decontamination?
•Decontamination is the process of making
inanimate objects safer to handled by staff
before cleaning.
o Inactivates HBV and HIV
o Must be done before cleaning
o It is done by soaking the equipment in 0.5%
chlorine solution
17
19
Instructions for PreparingDilute
Chlorine Solutions
To make a 0.5% chlorine solution from 5% bleach,
mix 1 part bleach to 9 parts water.
Dilute
%
e
Concentrat
%
Total parts (TP) (H2O) = - 1
Total parts (TP) (H2O) =
Dilute
.5%
e
Concentrat
5%
- 1 = 9 Total parts (TP) (H2O)
20.
20
Examples Using 5%Bleach for
0.5% Concentration
One part bleach to 9 parts water (use the same container
to measure the bleach and water)
21.
21
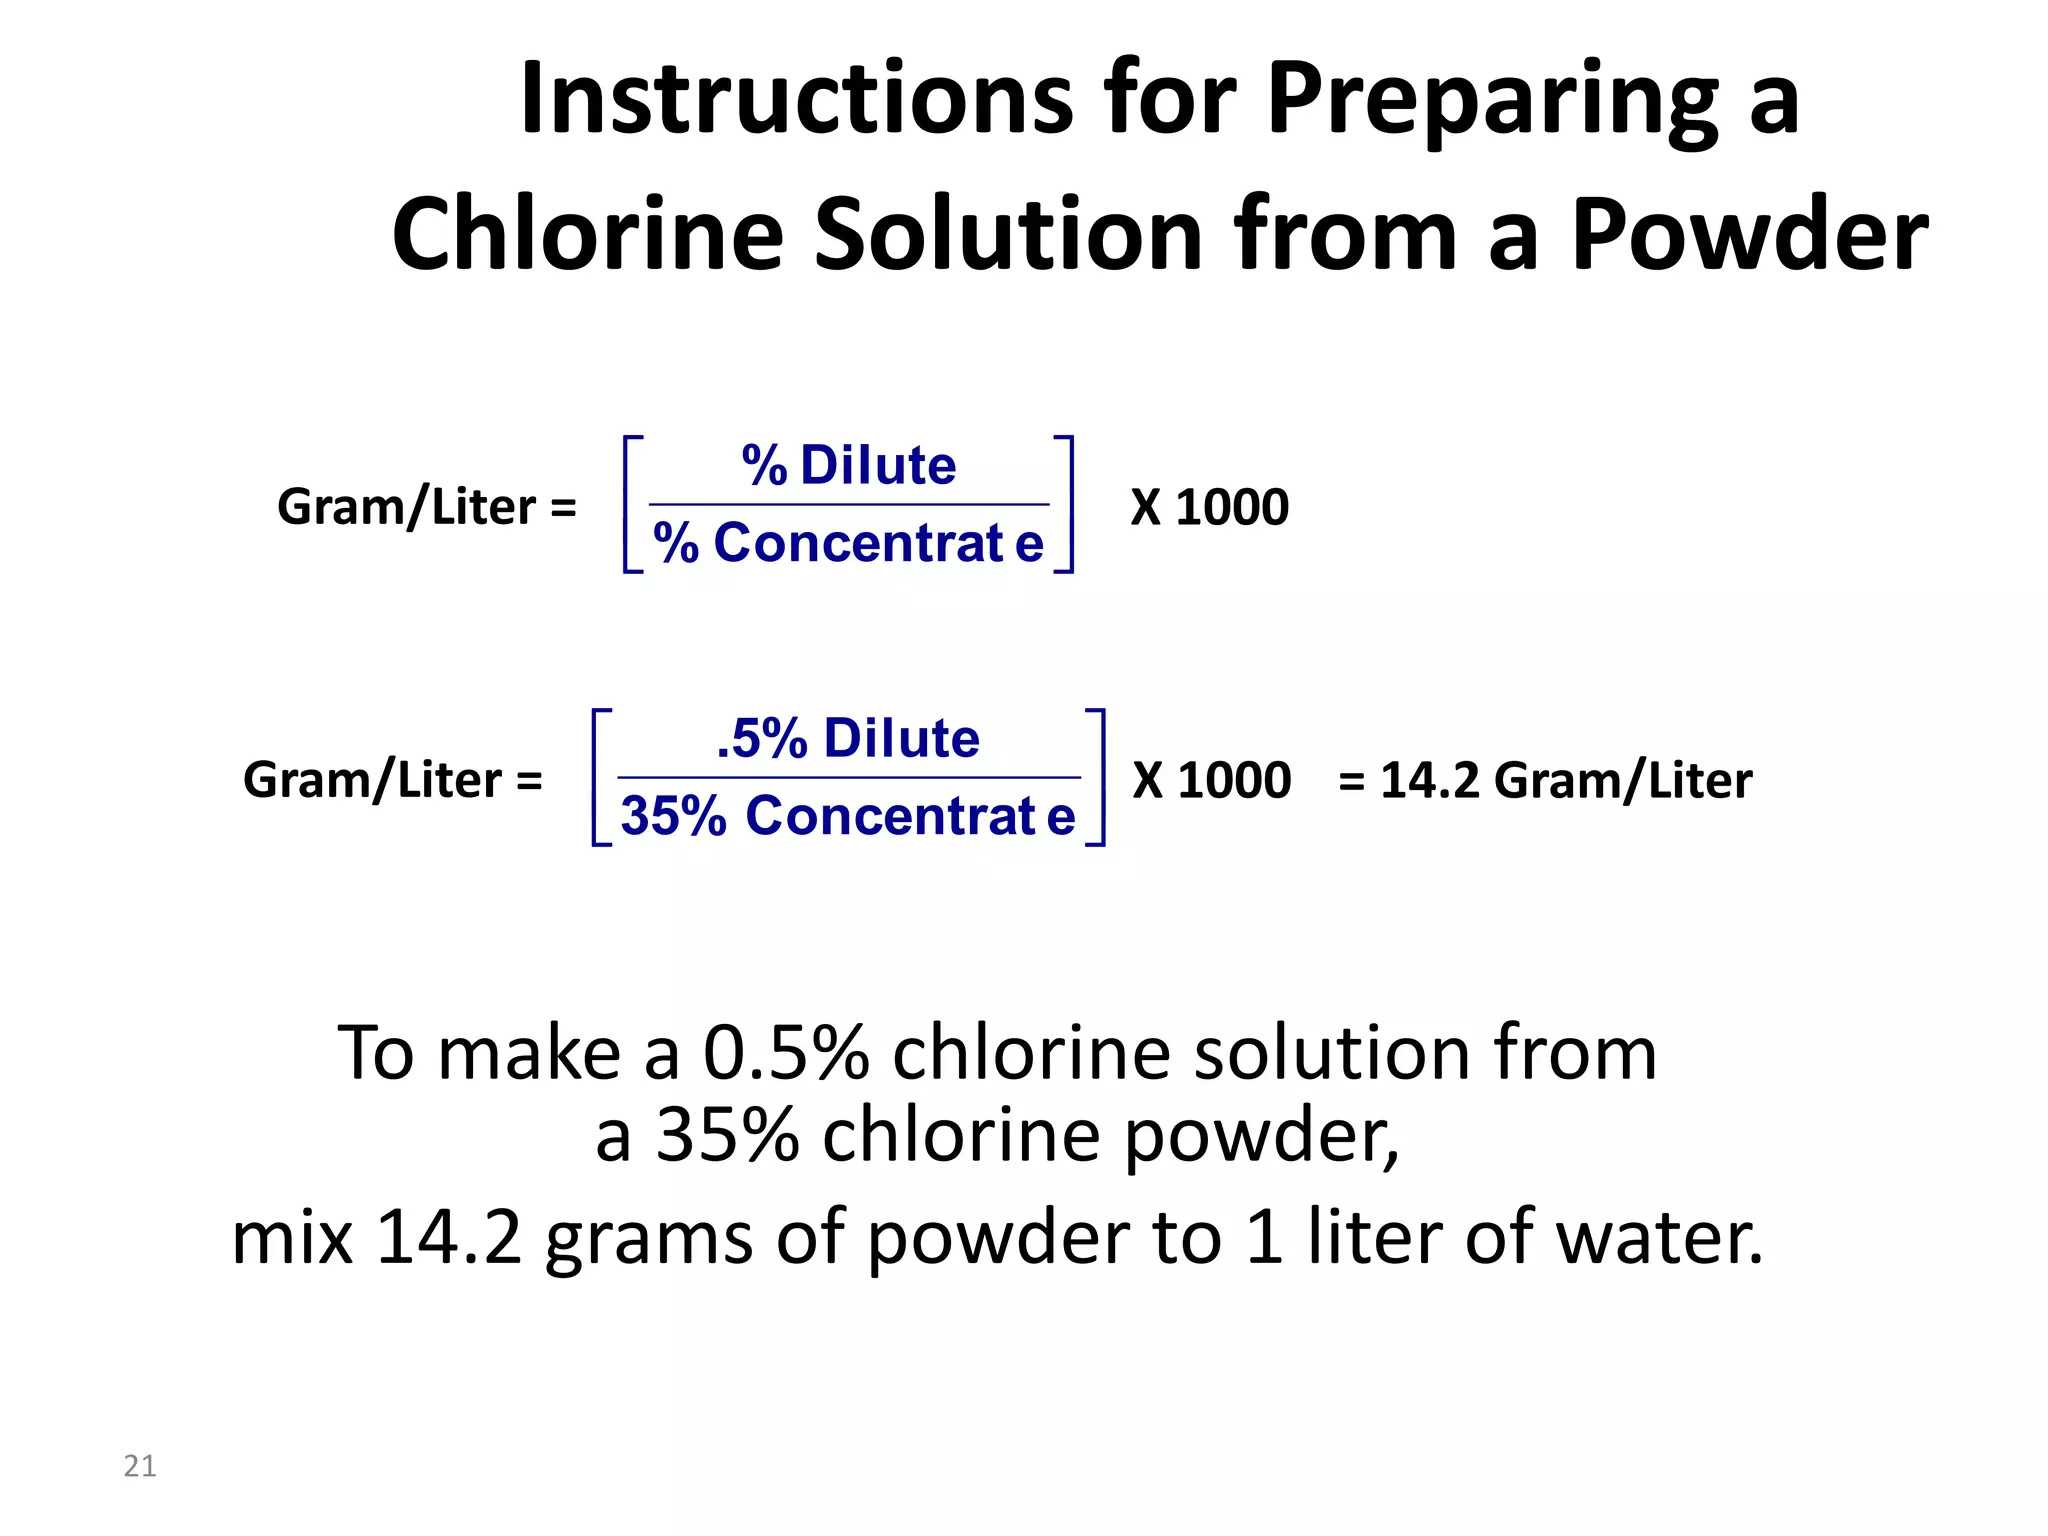
Instructions for Preparinga
Chlorine Solution from a Powder
To make a 0.5% chlorine solution from
a 35% chlorine powder,
mix 14.2 grams of powder to 1 liter of water.
e
Concentrat
%
Dilute
%
Gram/Liter = X 1000
e
Concentrat
35%
Dilute
.5%
Gram/Liter = X 1000 = 14.2 Gram/Liter
22.
22
Decontamination practices
• Placeinstruments and reusable gloves in 0.5% chlorine
solution after use
• Soak for 10 minutes and rinse immediately.
• Do not soak instruments in decontaminating solution for
more than 10 minutes, because it results corrosion
• Use plastic container with cover for decontamination
23.
23
Use three buckets,one filled with 0.5% chlorine
solution, one with soap and water and one
with water
27
Cleaning
• Physically removinginfectious agents and other organic matters
• Doesn’t necessarily destroying infectious agents
• Use liquid soap for effective cleaning
28.
28
Cleaning
Cleaning practices
• UsePPE during cleaning
• Disassemble instruments
• Wash with detergent, water, and a soft
brush.
• Scrub instruments under the water surface
until visibly clean.
• Thoroughly rinse with clean water.
30
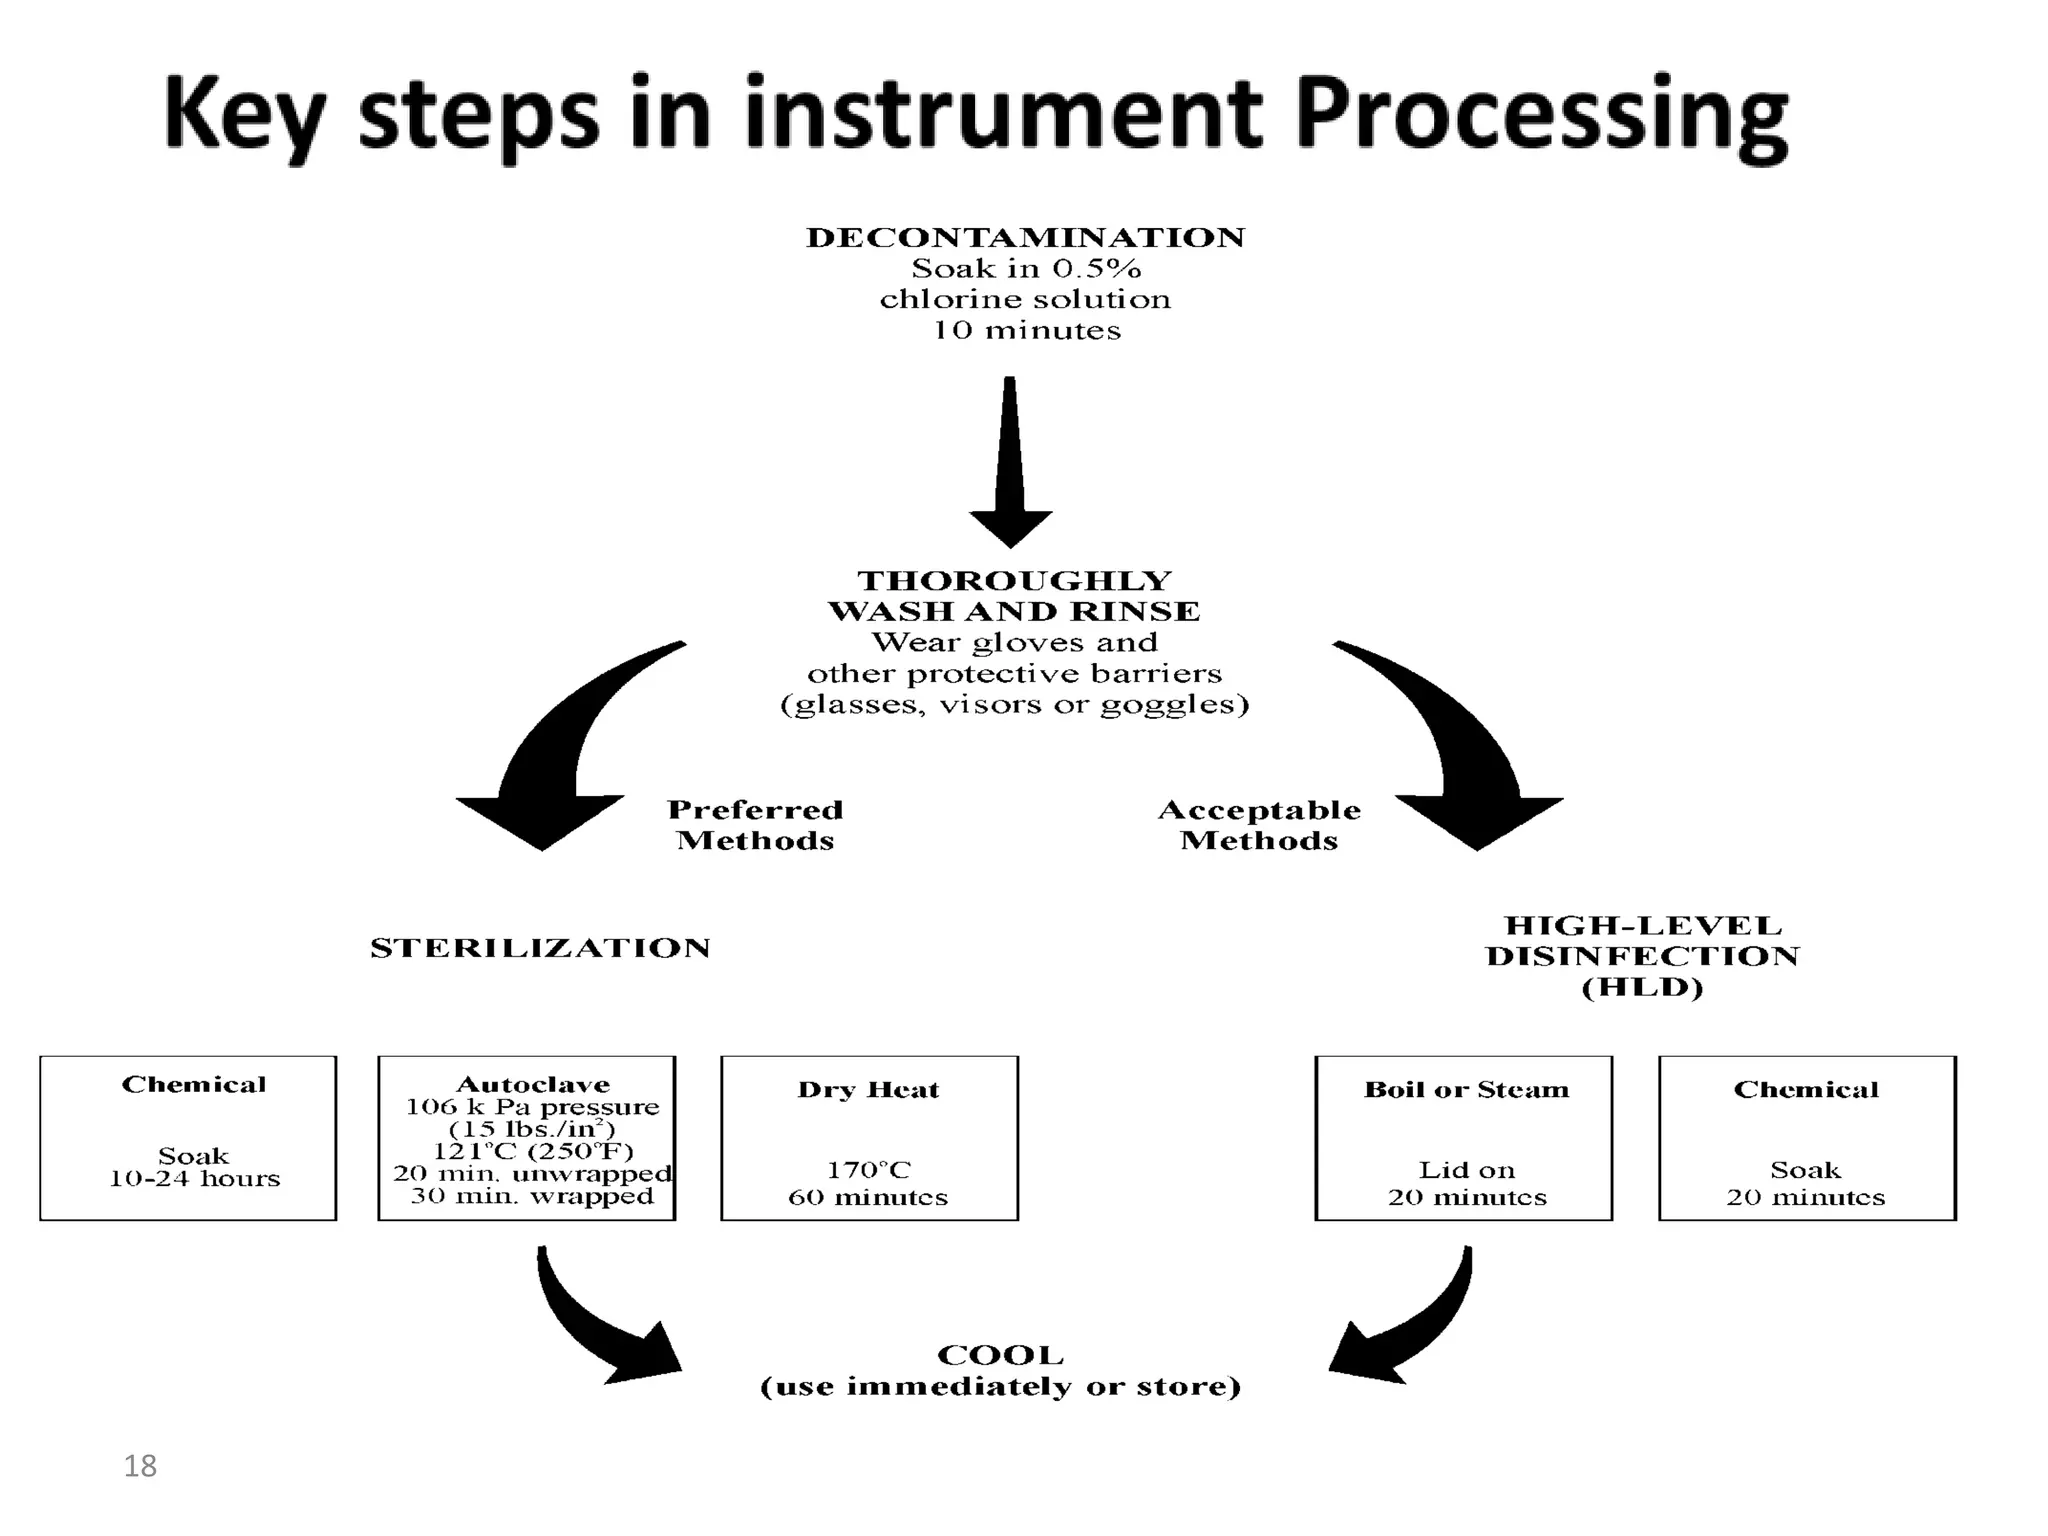
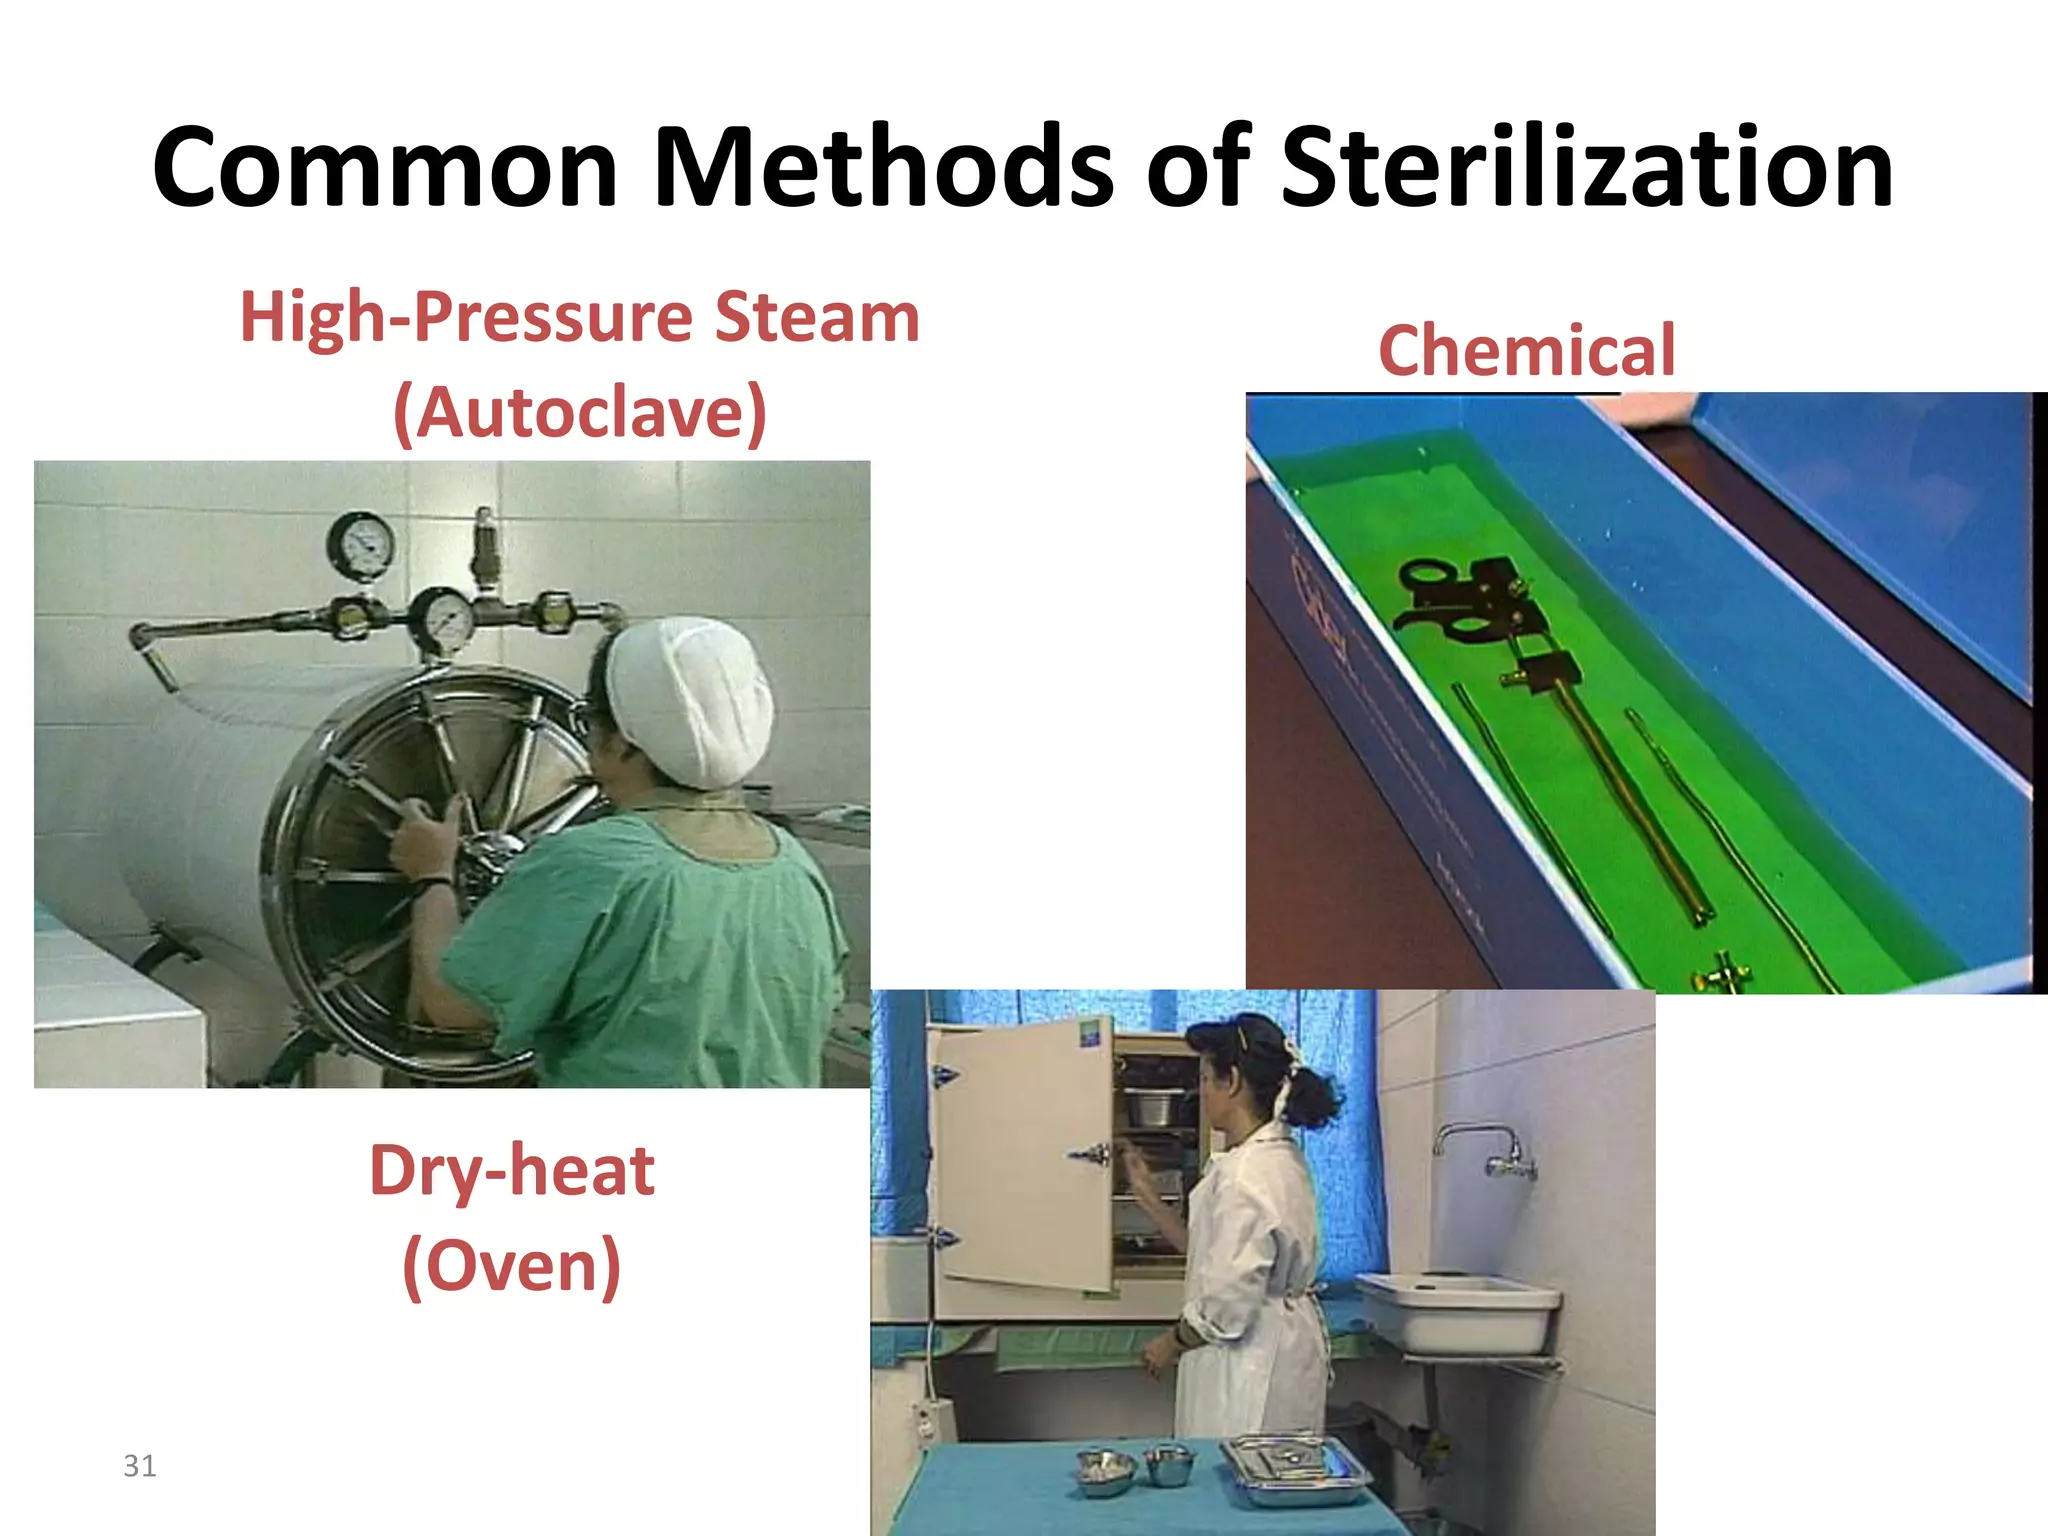
Sterilization
• Destroys allmicroorganisms, including endospores
• Used for instruments and other items that come in
direct contact with the blood stream or tissue under
the skin
31.
31
Common Methods ofSterilization
High-Pressure Steam
(Autoclave)
Chemical
Dry-heat
(Oven)
33
Autoclave … Continued
Thetemperature, pressure and time
combination for steam sterilization is:
• 121°C (250ºF); 106 kPa pressure:
o 20 minutes for unwrapped items
o 30 minutes for wrapped items
• 1320C (2700F), under pressure for 15 minutes for
wrapped items.
• Allow all items to be cooled and dried before
removing.
36
Autoclave…continued
Instructions for operatingsteam sterilizer
• Decontaminate, clean, and dry all instruments and
other items to be sterilized.
• All jointed instruments should be in an open or
unlocked position; when possible, instruments should
be disassembled.
• Instruments should not be held tightly together by
rubber bands. Allow free circulation and penetration of
steam to all surfaces.
• Wrap instruments in double thickness of muslin or
newspaper.
37.
37
Autoclave…continued
Instructions for operatingsteam sterilizer
• Allow instrument packs to dry completely before removal.
• Wrapped instrument packs are considered unacceptable if
there are water droplets or visible moisture on the package
exterior when removed from the autoclave.
• Wrapped items remain sterile as long as the pack remains
clean, dry (including no water stain), and intact.
38.
38
Dry Heat Sterilization(Oven)
Principles:
• Dry heat sterilization is accomplished by thermal (heat)
conduction/ transfer.
• Initially, heat is absorbed by the exterior surface of an item and
then passed to the next layer.
• Microorganisms die as their proteins are slowly destroyed.
• Dry heat sterilization takes longer than steam sterilization
because the steam speeds up the penetration of the heat.
Requirements:
• Adequate temperature
• Correct time
39.
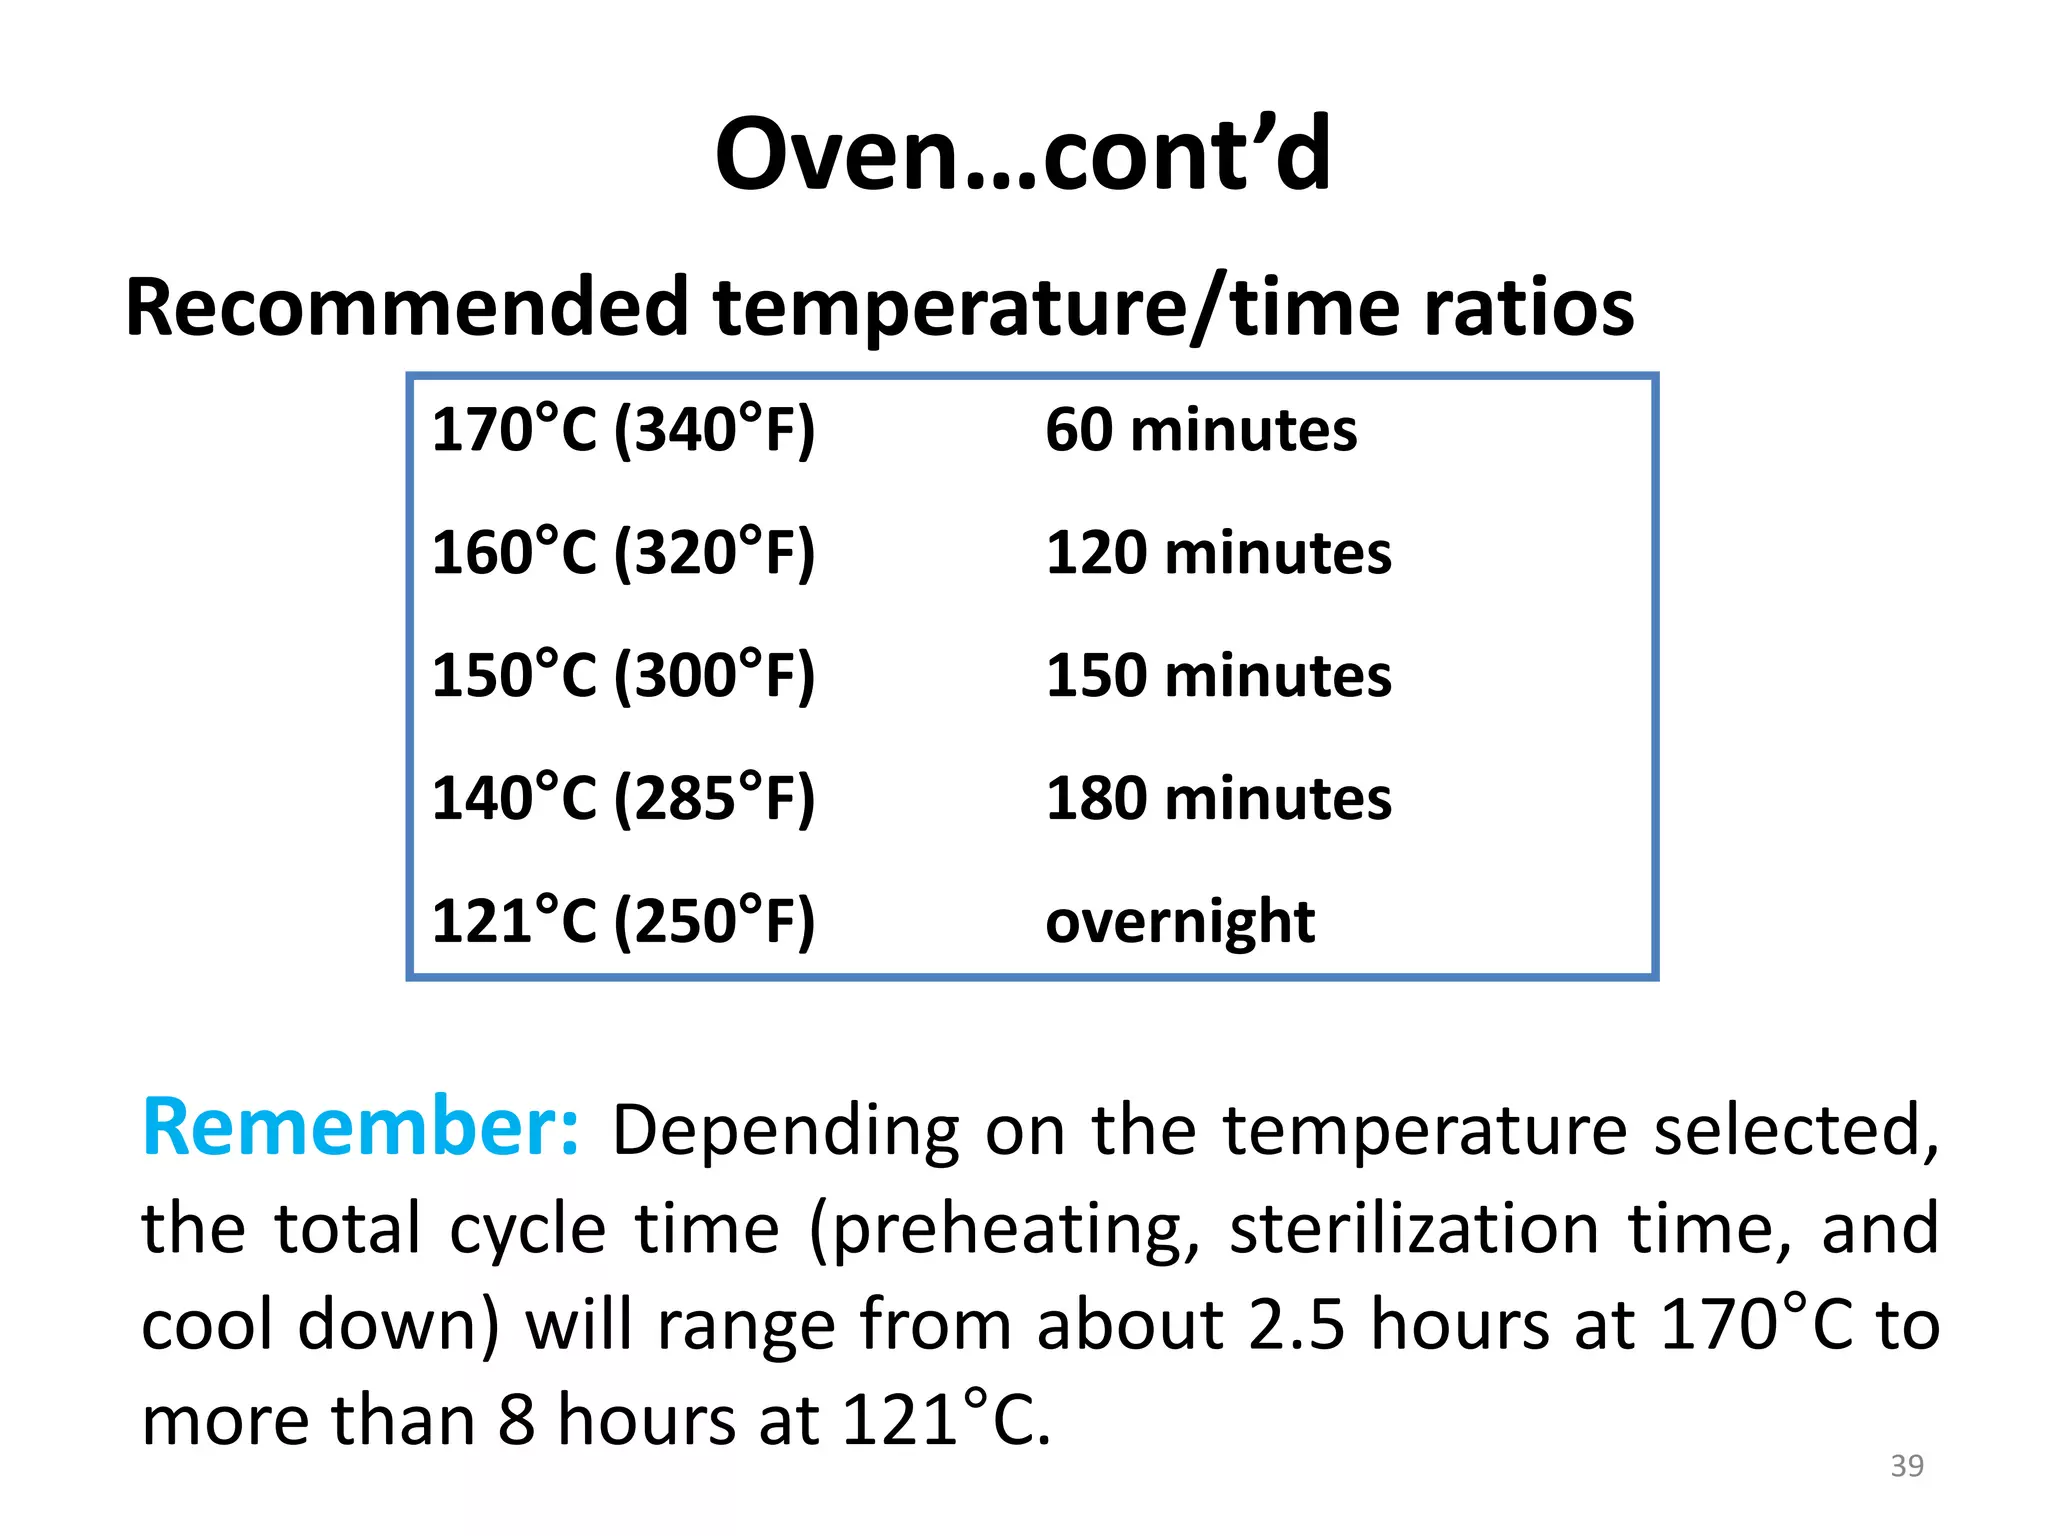
Oven…cont’d
Recommended temperature/time ratios
39
170°C(340°F) 60 minutes
160°C (320°F) 120 minutes
150°C (300°F) 150 minutes
140°C (285°F) 180 minutes
121°C (250°F) overnight
Remember: Depending on the temperature selected,
the total cycle time (preheating, sterilization time, and
cool down) will range from about 2.5 hours at 170°C to
more than 8 hours at 121°C.
40.
40
Oven
Instructions for dryheat oven
• Decontaminate, clean, and dry all instruments and other
items to be sterilized.
• Items can be wrapped in aluminum foil or placed in a
metal container with a tight-fitting lid.
• Wrapping helps prevent recontamination prior to use.
• Begin timing after the desired temperature is reached
• Items should be removed and stored after cooling.
41.
41
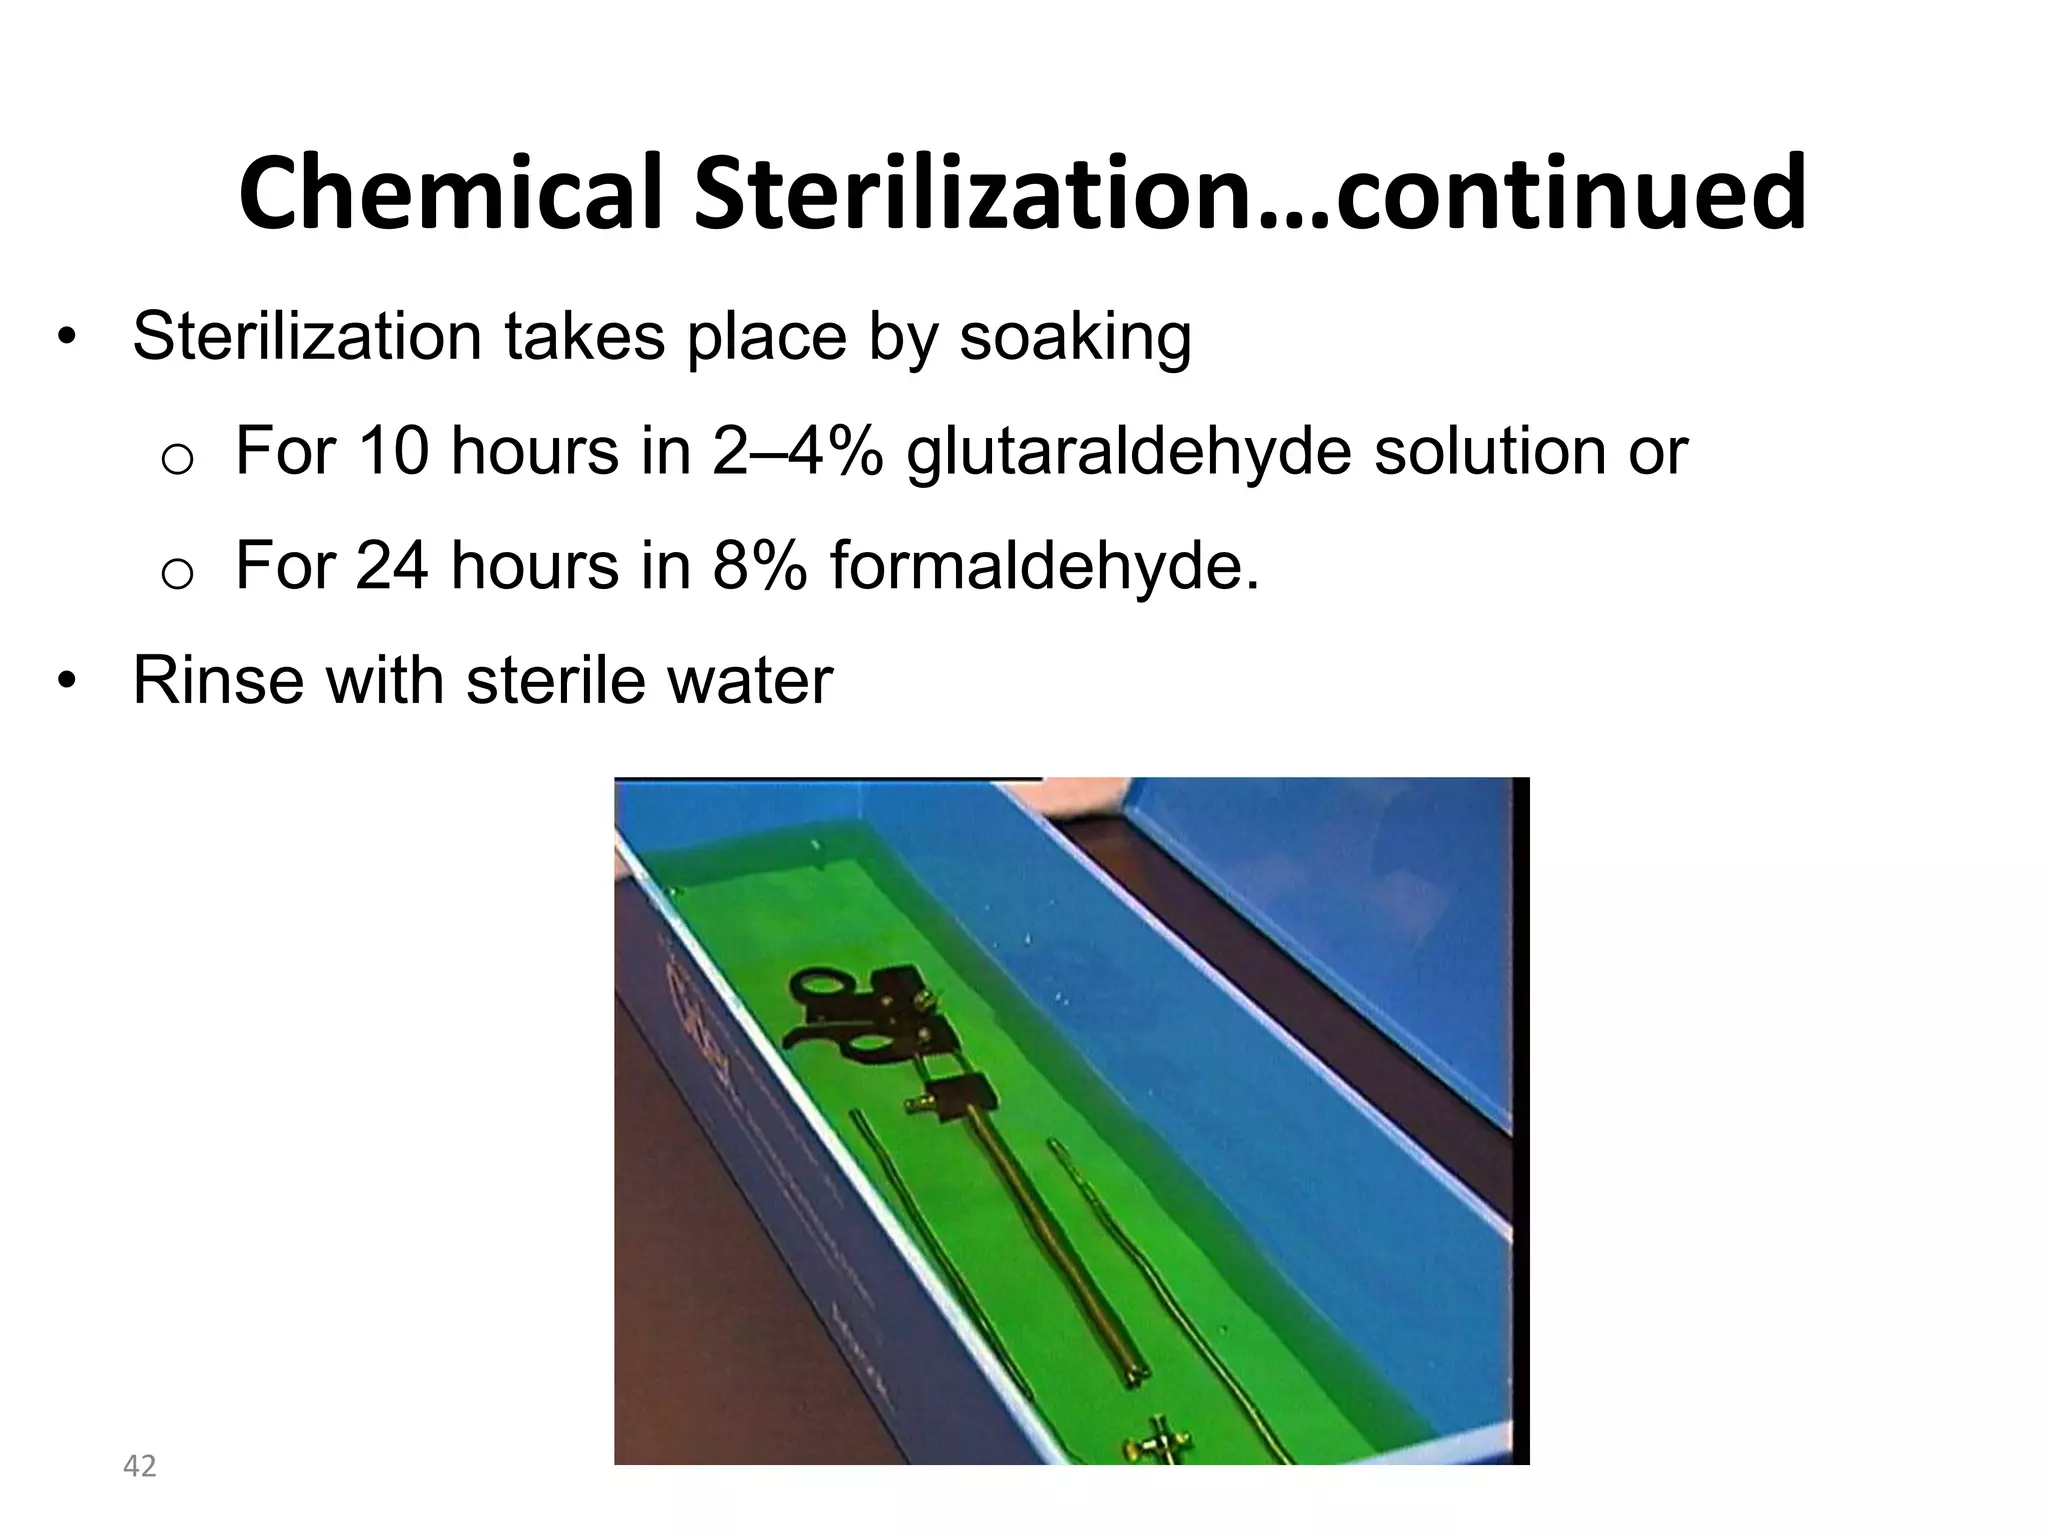
Chemical Sterilization
• Itis an alternative for items that would be damaged if
subjected to steam or dry heat sterilization.
• Glutaraldehyde and formaldehyde are sterilants if used for
the appropriate time.
• Glutaraldehyde and formaldehyde are not readily inactivated
by organic materials.
• When handling these products:
o Wear gloves to avoid skin contact.
o Wear protective eyewear to protect from splashes.
o Limit exposure time.
o Be in a well-ventilated area.
43
Instructions for ChemicalSterilization
• Decontaminate, clean, and dry all instruments and
other items to be sterilized.
• Completely submerge the items in a clean container
filled with the chemical solution and place the lid on
the container.
• Allow items to soak (10 hours in (2-4% conc.)
glutaradehyde or 24 hours in (8% conc.)
formaldehyde).
• Remove objects from the solution with sterile forceps,
rinse all surfaces three times with sterile water, and
air-dry.
• Store objects in a sterile container with a tight-fitting
lid.
44.
44
Monitoring Sterilization Procedures
Sterilizationprocedures can be monitored
routinely using:
• Biological indicators: highly resistant but relatively
harmless (non pathogenic )
eg, Stearothermophilus dies after 2 mins when the Temp.
reaches at 121 °C or 250 °F used to test steam sterilizers.
• Mechanical indicators: visible record of time Temp. &
pressure (Graphs/ Gauges of the sterilizers)
• Chemical indicators: using sensitive tape or glass
containing pellets that melt at certain temp. and duration
45.
45
Storage of aSterile Package
• All sterile items should be stored in an area whereby the packs
or containers will be protected from dirt, moisture and animals.
• As long as the sterile pack remains dry and intact, the shelf life
of the item could stay till 21 days - one moth
• The storage area is best located next to or connected to the
place where sterilization occurs
• It should be in a separated enclosed area with limited access
that is used only to store sterile and patient care supplies.
48
The Shelf-Life System
•The shelf-life of an item after sterilization is event-related.
• The item remains sterile until something causes the package to
become contaminated.
An event can be:
o A tear or worn area in the wrapping
o The package’s becoming wet
o Anything that will enable microorganisms to enter the package
or container
• These events can occur at any time
49.
49
The Shelf-Life ofa sterilized Object
Shelf-life depends on the following factors:
• Quality of the wrapper or container
• Number of times a package is handled before use
• Number of people who handled the package
• Status of package storage of in an open or closed shelves
• Condition of the storage area (humidity, cleanliness)
• Use of plastic dust covers and method of sealing
51
High-Level Disinfection
• Destroysall microorganisms including HBV, HCV, and
HIV; does not reliably kill all bacterial endospores
• Only acceptable alternative when sterilization equipment is
not available
53
HLD…Cont’d
Practices of HLDby Boiling
• Boil instruments for 20 minutes.
• Always boil instruments in a jar with a lid.
• Start timing when the water begins to boil.
• Do not add anything to the jar after timing begins.
• Air-dry before use or storage.
54.
54
HLD… continued
Practices ofHLD by Steaming
• Steam for 20 minutes.
• Be sure there is enough water in the bottom pan for the entire
steam cycle.
• Bring water to a rolling boil.
• Start timing when the steam begins to come out from under the lid,
• Do not add anything to the pan after timing starts.
• Air-dry and store instruments in covered steamer pans.
55.
55
HLD…continued
Practices for ChemicalHigh-Level Disinfection
• For HLD, a 0.1% chlorine solution shall be prepared from
boiled water (stainless steel or plated instruments)
• Cover all items completely with disinfectant,
• Soak for 20 minutes,
• Rinse thoroughly with boiled water three times,
• Air-dry before use and storage,
• Remove items using HLD or sterile forceps/gloves
56.
56
HLD… conteniued
Chemicals forHLD
• 0.1% Chlorine solution
o Safe for stainless and plated instruments
o Concentrated solutions >0.5% can corrode metals
• 8% Formaldehyde
o Vapors are irritating (staff should wear appropriate PPE)
o A potential carcinogen
o Do not mix with chlorine (can produce dangerous gas)
57.
57
HLD… contiued
• Glutaraldehyde2-4%
o Less irritating but still needs to in well ventilated area
• Hydrogen peroxide 6%
o Highly corrosive and should not be used to disinfect copper,
aluminum and zinc
o Loses potency rapidly when exposed to heat and light,
Note
o Chemical disinfectants should be stored in a cool, dark area,
o Never store chemicals in direct sunlight or in excessive heat
58.
58
Table :Effectiveness ofMethods for Processing Instruments
Method Effectiveness
(kill or remove
microorganisms)
End Point
Decontamination Kills HBV and HIV
and most
microorganisms
10-minute soak
Cleaning (water only) Up to 50% Until visibly clean
Cleaning (water and
soap)
Up to 80% Until visibly clean
Sterilization 100% High-pressure steam, dry
heat, or chemical
High-Level
Disinfection
95% (does not
inactivate some
endospores)
Boiling, steaming, or
chemical for 20 minutes