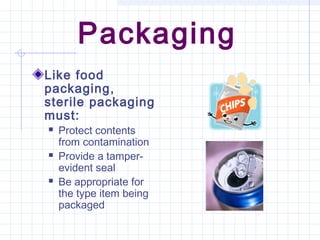
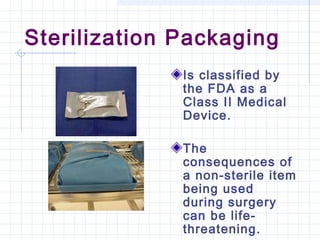
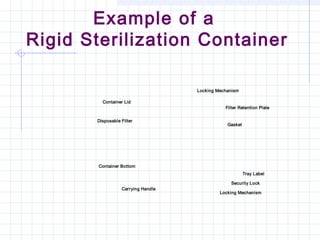
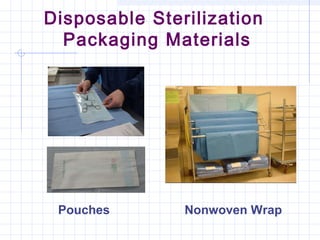
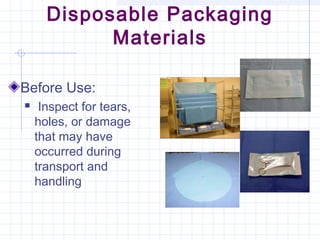
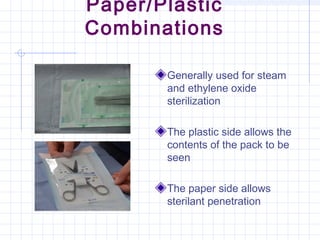
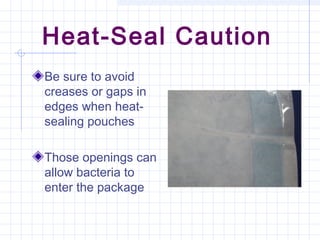
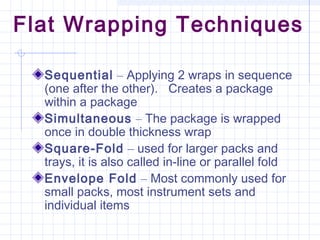
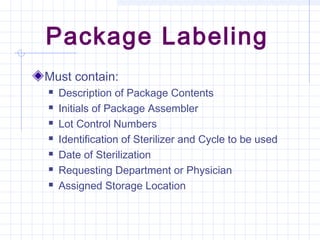
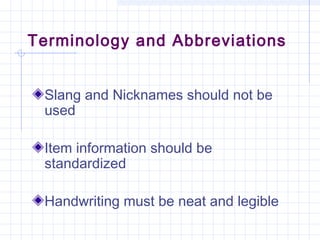
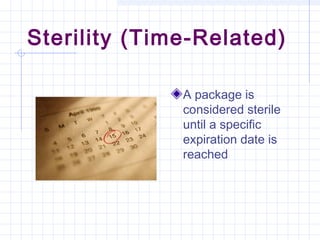
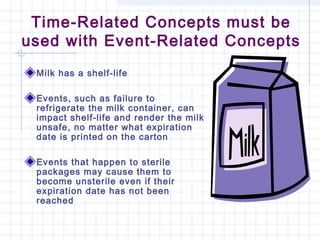
Sterile Packaging
and Storage
Chapter 13
Objectives:
As a result of successfully completing this chapter,
students will be able to:
 Explain the basic objectives of the packaging process, and
review basic selection factors for materials to be used with
specific sterilization methods
 Provide an overview of reusable packaging materials
 Provide an overview of disposable packaging materials
 Discuss basic package closure methods
Objectives:
 Review basic procedures to prepare pack contents for
packaging
 Explain basic packaging procedures for peel pouches
and flat wrapping materials
 Review general packaging concepts:
 Package labeling
 Special concerns
 Sterility maintenance
 Provide basic information about sterile packaging,
storage, and transport
Packaging
Like food
packaging,
sterile packaging
must:
 Protect contents
from contamination
 Provide a tamper-
evident seal
 Be appropriate for
the type item being
packaged
Objectives of the Sterile
Packaging Process
Allow penetration of the sterilant and be
compatible with any other requirements of the
process ( such as drying)
Maintain the sterility of the package contents
until it is opened
Create a package that can be opened
aseptically
Sterilization Packaging
Is classified by
the FDA as a
Class II Medical
Device.
The
consequences of
a non-sterile item
being used
during surgery
can be life-
threatening.
Selecting a Packaging
Material
Different types of packaging are needed for
different types of sterilization
Styles of packaging may vary based on
package contents
Only packaging materials approved as
sterilization packaging by the FDA should be
used for sterilization
Reusable Sterilization
Packaging Materials
Woven Textiles Rigid Sterilization Containers
Woven Textiles
Muslin – Broad
term describing a
wide variety of plain-
weave cotton or
cotton/polyester
fabrics having
approximately 140
threads per square
inch.
Other Woven Textiles
Duck Cloth
Twills
Barrier Cloth
Treated Barrier Fabrics
NOTE: Canvas should not be used as
a sterile packaging material
Textile Packaging
Must be inspected
for holes between
uses using a light
table
Holes must be
patched using heat-
sealed patches
Textile packaging
requires more labor
than disposable
packaging
Textile Packaging
Materials
Should be held at room temperature (640
– 720
F, 180
– 220
C) and
at a relative humidity of 35% - 70% for a minimum of 2 hours
prior to sterilization
Failure to do so may cause superheating of the fabric during
sterilization
Superheating
The condition that arises when steam is at
a temperature which exceeds that of
saturated steam at the same pressure
Rigid Container
Systems
Box-like structures that
consist of an inner basket
(to hold instruments) and
an outer structure that acts
as a bacterial barrier
Rigid containers allow
sterilant penetration
through disposable filters,
ceramic filters, or valves
Rigid Container
Advantages
Provide an excellent
barrier
Easy to use
Eliminate torn
wrappers
Protect instruments
from damage
Disadvantages
Ergonomic concerns due to
container weight
Additional cycle time may be
needed for drying
Plastic containers may need
even more drying time
Additional storage space
required
Additional labor may be required
to clean containers between
uses
Latching mechanisms may
become damaged
Filter retention plates may become
dislodged
Example of a
Rigid Sterilization Container
Container Lid
Disposable Filter
Locking Mechanism
Filter Retention Plate
Gasket
Tray Label
Security Lock
Locking Mechanism
Carrying Handle
Container Bottom
Cleaning of Rigid
Containers
Rigid Containers should be
cleaned between uses
Remove disposable
components
Disassemble
Clean according to
manufacturer’s
recommendations
Rigid Container
Inspection
Inspect all
components
according to
manufacturer’s
guidelines each time
the container is
assembled
Gasket
Disposable Sterilization
Packaging Materials
Pouches Nonwoven Wrap
Disposable Packaging
Materials
Before Use:
 Inspect for tears,
holes, or damage
that may have
occurred during
transport and
handling
Kraft-type Papers
Medical-grade paper
approved for use as
sterilization
packaging
Used for small items
Non-woven Packaging Material
Available in a wide
variety of sizes and
weights
Used for various
items from small
single item packs, to
entire instrument
trays
Paper/Plastic
Combinations
Generally used for steam
and ethylene oxide
sterilization
The plastic side allows the
contents of the pack to be
seen
The paper side allows
sterilant penetration
Spunbond Polyolefin-Plastic
Combinations
Allows visibility of pack contents and
penetration of sterilant
Contains no cellulosic materials and is
therefore compatible with gas plasma
sterilization processes
Methods of Package Closure
Package Closure
Must secure contents
Must be tamper-evident to prevent
resealing the package
Tamper Evident Seals for
Rigid Sterilization
Containers
Self-Seal and Heat-Seal
Closures for Pouches
Heat-Seal Caution
Be sure to avoid
creases or gaps in
edges when heat-
sealing pouches
Those openings can
allow bacteria to
enter the package
Tape Seals on Wrapped
Packs
Preparation of Pack Contents
Before packaging, inspect contents for
cleanliness and function
Apply lubrication or test as required by the
instrument manufacturer
Protect instruments from damage
Assemble a pack that is neat, complete, and
will facilitate the sterilization process
Protectors can protect packaging
from the sharp points of some
instruments
Use devices designed to protect instruments
and hold them in position for sterilization
Reusable holders can help keep
ring-handled instruments open
Basic Packaging
Procedures
Information needed for general
packaging procedures includes:
 Name of device being packaged
 Steps for preparation and assembly of pack
contents
 Sterilization method to be used
 Type and size of packaging to be used
 Correct placement method for items within the
package
 Type and placement requirements for internal
chemical process indicators
Peel Pouches
Used for lightweight items
Label only on the plastic side of the
pouch using an approved felt tip
marker
Package items so the end of the
item to be grasped first is presented
first when the package is opened
Place pouches on edge for
sterilization
Excess Stress on the Sides of Peel-
Pouches will Compromise the Integrity of
the Pouch
Double-Pouching
Use appropriately
sized pouches.
Never fold the inner
pouch
Nest paper to paper
and plastic to plastic
for steam
penetration
Flat Wrapping Techniques
Sequential – Applying 2 wraps in sequence
(one after the other). Creates a package
within a package
Simultaneous – The package is wrapped
once in double thickness wrap
Square-Fold – used for larger packs and
trays, it is also called in-line or parallel fold
Envelope Fold – Most commonly used for
small packs, most instrument sets and
individual items
Flat Wrapping
Diagrams of flat
wrapping methods
and techniques can
be found on pages
256 – 258 of the text
Package Labeling
Must contain:
 Description of Package Contents
 Initials of Package Assembler
 Lot Control Numbers
 Identification of Sterilizer and Cycle to be used
 Date of Sterilization
 Requesting Department or Physician
 Assigned Storage Location
Terminology and Abbreviations
Slang and Nicknames should not be
used
Item information should be
standardized
Handwriting must be neat and legible
Sterility (Time-Related)
A package is
considered sterile
until a specific
expiration date is
reached
Time-Related Sterility
(Expiration Dating)
Uses a calendar theory
Must be used in conjunction with
an event-related philosophy
Relies on Product Rotation
Time-Related Concepts must be
used with Event-Related Concepts
Milk has a shelf-life
Events, such as failure to
refrigerate the milk container, can
impact shelf-life and render the milk
unsafe, no matter what expiration
date is printed on the carton
Events that happen to sterile
packages may cause them to
become unsterile even if their
expiration date has not been
reached
Sterility (Event-
Related)
Items are considered sterile
unless the integrity of the
packaging is compromised or
suspected of being
compromised
Concerns include:
 Moisture Contamination
 Dirt, Dust, and Debris
 Physical Damage
 Breakdown of Packaging Material
due to Wear or Age
“Contents Sterile...
…unless package is
damaged or opened”
Sterile Storage Standards
Temperatures should be 640
-
750
F (180
– 240
C)
Humidity should be 35% - 75%
Items should not be stored
where they may become wet
Air should be as dust-free as
possible
The area should be under
positive air pressure
Work surfaces should be made
of easy to clean materials
Sterile Storage areas should
have restricted traffic
Sterile Storage Standards
Sterile items should
be stored:
 at least 2” away from
exterior walls
 8-10” above the floor
 8-10” from the ceiling
Note: Fire codes may
specify 18” from
sprinkler heads
Organization
Items must be
arranged neatly
to reduce the
number of times
that they are
handled
Organization also
makes locating
items easier
Check ALL Packages
Before Dispensing
Check External
Indicators
Check for Package
Integrity
Check Expiration
Date, if one is
provided on the
package
Package Integrity
Clean
Puncture Free
Dry
Undamaged
Stress-Free
Wear-Free
Product Rotation
FIFO - First In-First Out
Older packages should
be used first.
Product Handling
Clean, Dry Hands
Handle gently
Do not drop,
crush, etc.
Keep Storage
area clean and
organized
Even the most minor
break in protocol...
…can cause great
harm to our patient

Chapter 13 sterile packaging

  • 1.
  • 2.
    Objectives: As a resultof successfully completing this chapter, students will be able to:  Explain the basic objectives of the packaging process, and review basic selection factors for materials to be used with specific sterilization methods  Provide an overview of reusable packaging materials  Provide an overview of disposable packaging materials  Discuss basic package closure methods
  • 3.
    Objectives:  Review basicprocedures to prepare pack contents for packaging  Explain basic packaging procedures for peel pouches and flat wrapping materials  Review general packaging concepts:  Package labeling  Special concerns  Sterility maintenance  Provide basic information about sterile packaging, storage, and transport
  • 4.
    Packaging Like food packaging, sterile packaging must: Protect contents from contamination  Provide a tamper- evident seal  Be appropriate for the type item being packaged
  • 5.
    Objectives of theSterile Packaging Process Allow penetration of the sterilant and be compatible with any other requirements of the process ( such as drying) Maintain the sterility of the package contents until it is opened Create a package that can be opened aseptically
  • 6.
    Sterilization Packaging Is classifiedby the FDA as a Class II Medical Device. The consequences of a non-sterile item being used during surgery can be life- threatening.
  • 7.
    Selecting a Packaging Material Differenttypes of packaging are needed for different types of sterilization Styles of packaging may vary based on package contents Only packaging materials approved as sterilization packaging by the FDA should be used for sterilization
  • 8.
    Reusable Sterilization Packaging Materials WovenTextiles Rigid Sterilization Containers
  • 9.
    Woven Textiles Muslin –Broad term describing a wide variety of plain- weave cotton or cotton/polyester fabrics having approximately 140 threads per square inch.
  • 10.
    Other Woven Textiles DuckCloth Twills Barrier Cloth Treated Barrier Fabrics NOTE: Canvas should not be used as a sterile packaging material
  • 11.
    Textile Packaging Must beinspected for holes between uses using a light table Holes must be patched using heat- sealed patches Textile packaging requires more labor than disposable packaging
  • 12.
    Textile Packaging Materials Should beheld at room temperature (640 – 720 F, 180 – 220 C) and at a relative humidity of 35% - 70% for a minimum of 2 hours prior to sterilization Failure to do so may cause superheating of the fabric during sterilization
  • 13.
    Superheating The condition thatarises when steam is at a temperature which exceeds that of saturated steam at the same pressure
  • 14.
    Rigid Container Systems Box-like structuresthat consist of an inner basket (to hold instruments) and an outer structure that acts as a bacterial barrier Rigid containers allow sterilant penetration through disposable filters, ceramic filters, or valves
  • 15.
    Rigid Container Advantages Provide anexcellent barrier Easy to use Eliminate torn wrappers Protect instruments from damage Disadvantages Ergonomic concerns due to container weight Additional cycle time may be needed for drying Plastic containers may need even more drying time Additional storage space required Additional labor may be required to clean containers between uses Latching mechanisms may become damaged Filter retention plates may become dislodged
  • 16.
    Example of a RigidSterilization Container Container Lid Disposable Filter Locking Mechanism Filter Retention Plate Gasket Tray Label Security Lock Locking Mechanism Carrying Handle Container Bottom
  • 17.
    Cleaning of Rigid Containers RigidContainers should be cleaned between uses Remove disposable components Disassemble Clean according to manufacturer’s recommendations
  • 18.
    Rigid Container Inspection Inspect all components accordingto manufacturer’s guidelines each time the container is assembled Gasket
  • 19.
  • 20.
    Disposable Packaging Materials Before Use: Inspect for tears, holes, or damage that may have occurred during transport and handling
  • 21.
    Kraft-type Papers Medical-grade paper approvedfor use as sterilization packaging Used for small items
  • 22.
    Non-woven Packaging Material Availablein a wide variety of sizes and weights Used for various items from small single item packs, to entire instrument trays
  • 23.
    Paper/Plastic Combinations Generally used forsteam and ethylene oxide sterilization The plastic side allows the contents of the pack to be seen The paper side allows sterilant penetration
  • 24.
    Spunbond Polyolefin-Plastic Combinations Allows visibilityof pack contents and penetration of sterilant Contains no cellulosic materials and is therefore compatible with gas plasma sterilization processes
  • 25.
  • 26.
    Package Closure Must securecontents Must be tamper-evident to prevent resealing the package
  • 27.
    Tamper Evident Sealsfor Rigid Sterilization Containers
  • 28.
  • 29.
    Heat-Seal Caution Be sureto avoid creases or gaps in edges when heat- sealing pouches Those openings can allow bacteria to enter the package
  • 30.
    Tape Seals onWrapped Packs
  • 31.
    Preparation of PackContents Before packaging, inspect contents for cleanliness and function Apply lubrication or test as required by the instrument manufacturer Protect instruments from damage Assemble a pack that is neat, complete, and will facilitate the sterilization process
  • 32.
    Protectors can protectpackaging from the sharp points of some instruments
  • 33.
    Use devices designedto protect instruments and hold them in position for sterilization
  • 34.
    Reusable holders canhelp keep ring-handled instruments open
  • 35.
    Basic Packaging Procedures Information neededfor general packaging procedures includes:  Name of device being packaged  Steps for preparation and assembly of pack contents  Sterilization method to be used  Type and size of packaging to be used  Correct placement method for items within the package  Type and placement requirements for internal chemical process indicators
  • 36.
    Peel Pouches Used forlightweight items Label only on the plastic side of the pouch using an approved felt tip marker Package items so the end of the item to be grasped first is presented first when the package is opened Place pouches on edge for sterilization
  • 37.
    Excess Stress onthe Sides of Peel- Pouches will Compromise the Integrity of the Pouch
  • 38.
    Double-Pouching Use appropriately sized pouches. Neverfold the inner pouch Nest paper to paper and plastic to plastic for steam penetration
  • 39.
    Flat Wrapping Techniques Sequential– Applying 2 wraps in sequence (one after the other). Creates a package within a package Simultaneous – The package is wrapped once in double thickness wrap Square-Fold – used for larger packs and trays, it is also called in-line or parallel fold Envelope Fold – Most commonly used for small packs, most instrument sets and individual items
  • 40.
    Flat Wrapping Diagrams offlat wrapping methods and techniques can be found on pages 256 – 258 of the text
  • 41.
    Package Labeling Must contain: Description of Package Contents  Initials of Package Assembler  Lot Control Numbers  Identification of Sterilizer and Cycle to be used  Date of Sterilization  Requesting Department or Physician  Assigned Storage Location
  • 42.
    Terminology and Abbreviations Slangand Nicknames should not be used Item information should be standardized Handwriting must be neat and legible
  • 43.
    Sterility (Time-Related) A packageis considered sterile until a specific expiration date is reached
  • 44.
    Time-Related Sterility (Expiration Dating) Usesa calendar theory Must be used in conjunction with an event-related philosophy Relies on Product Rotation
  • 45.
    Time-Related Concepts mustbe used with Event-Related Concepts Milk has a shelf-life Events, such as failure to refrigerate the milk container, can impact shelf-life and render the milk unsafe, no matter what expiration date is printed on the carton Events that happen to sterile packages may cause them to become unsterile even if their expiration date has not been reached
  • 46.
    Sterility (Event- Related) Items areconsidered sterile unless the integrity of the packaging is compromised or suspected of being compromised Concerns include:  Moisture Contamination  Dirt, Dust, and Debris  Physical Damage  Breakdown of Packaging Material due to Wear or Age
  • 47.
  • 48.
    Sterile Storage Standards Temperaturesshould be 640 - 750 F (180 – 240 C) Humidity should be 35% - 75% Items should not be stored where they may become wet Air should be as dust-free as possible The area should be under positive air pressure Work surfaces should be made of easy to clean materials Sterile Storage areas should have restricted traffic
  • 49.
    Sterile Storage Standards Sterileitems should be stored:  at least 2” away from exterior walls  8-10” above the floor  8-10” from the ceiling Note: Fire codes may specify 18” from sprinkler heads
  • 50.
    Organization Items must be arrangedneatly to reduce the number of times that they are handled Organization also makes locating items easier
  • 51.
    Check ALL Packages BeforeDispensing Check External Indicators Check for Package Integrity Check Expiration Date, if one is provided on the package
  • 52.
  • 53.
    Product Rotation FIFO -First In-First Out Older packages should be used first.
  • 54.
    Product Handling Clean, DryHands Handle gently Do not drop, crush, etc. Keep Storage area clean and organized
  • 55.
    Even the mostminor break in protocol... …can cause great harm to our patient