Downloaded 2,196 times


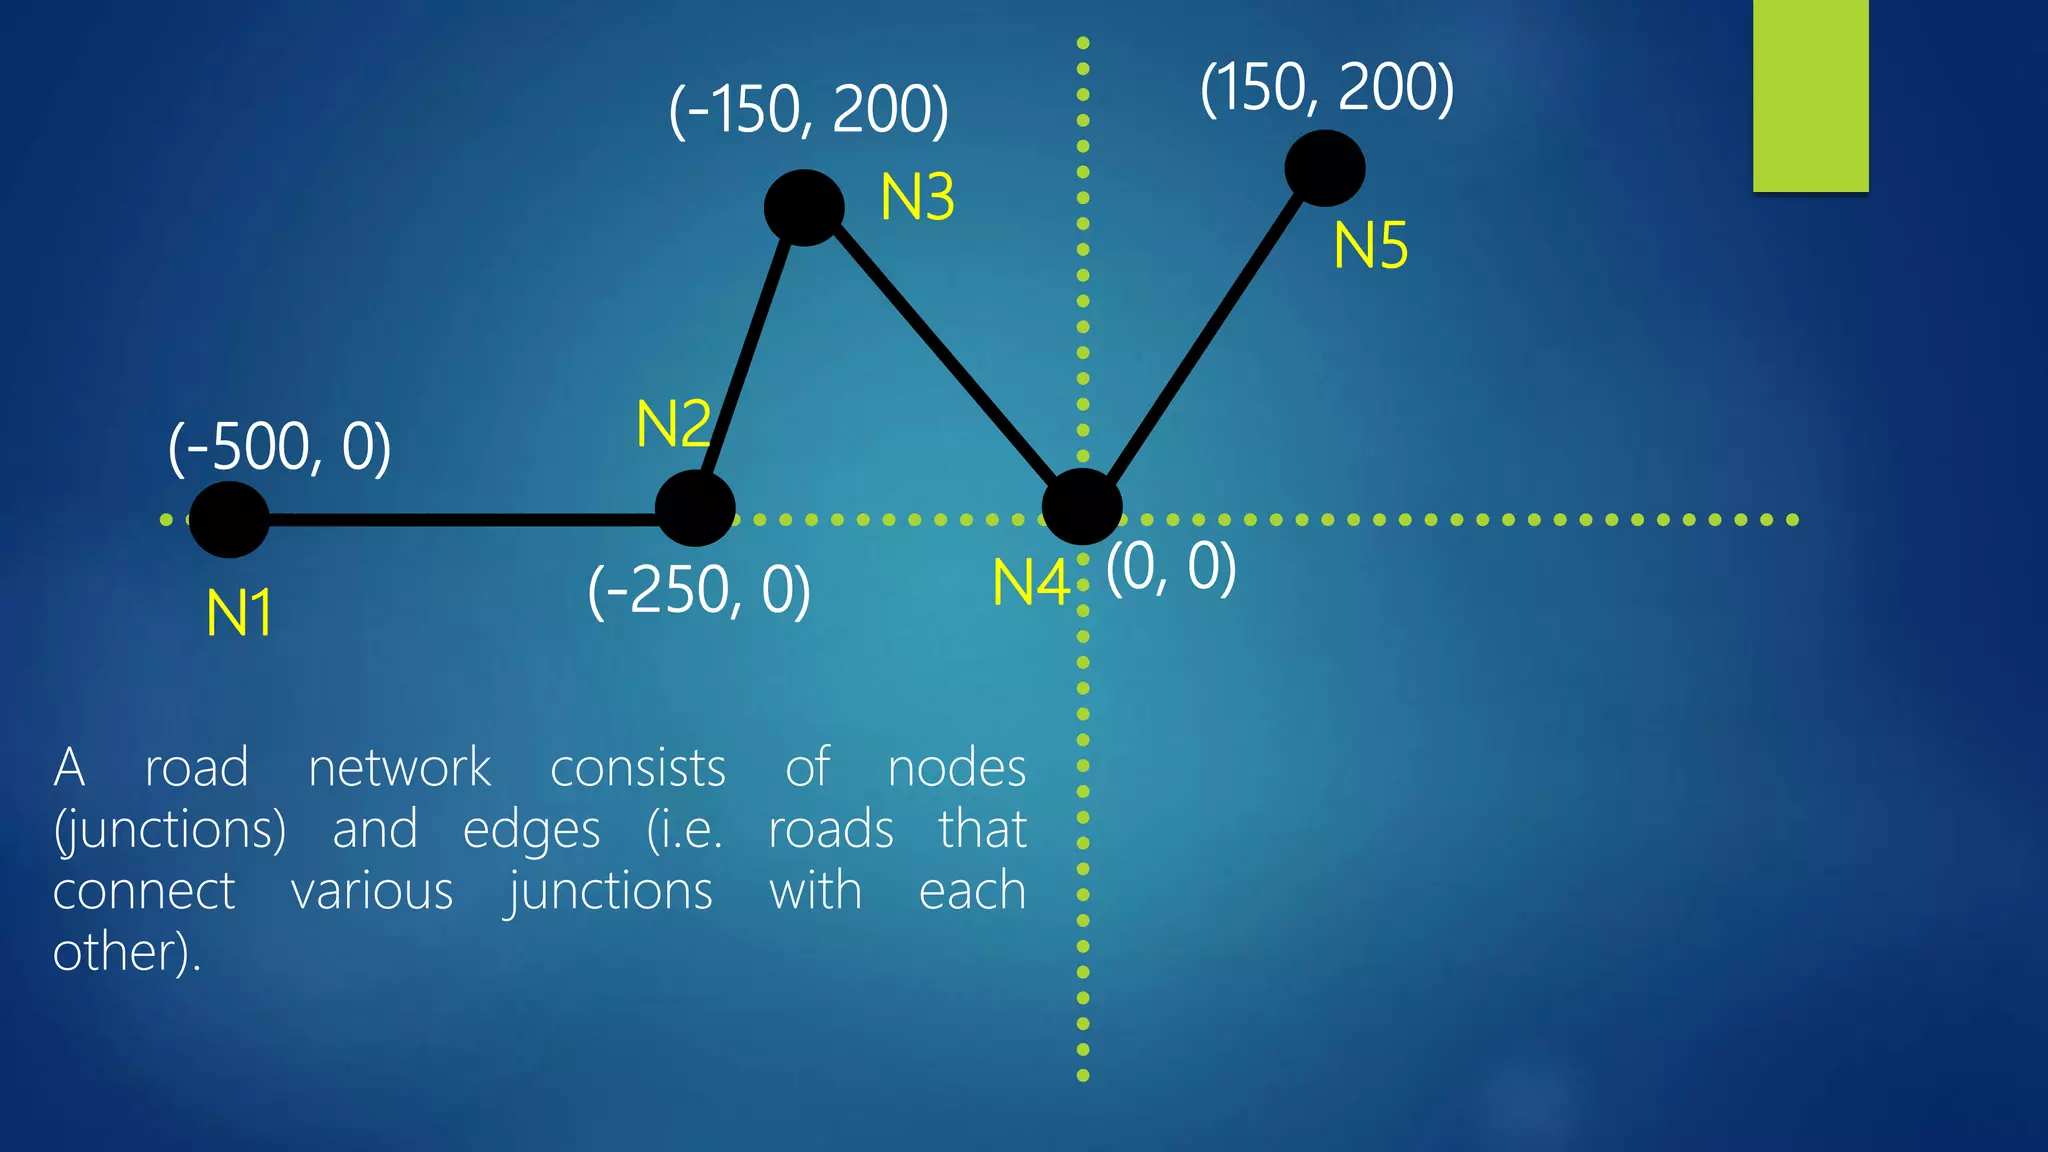

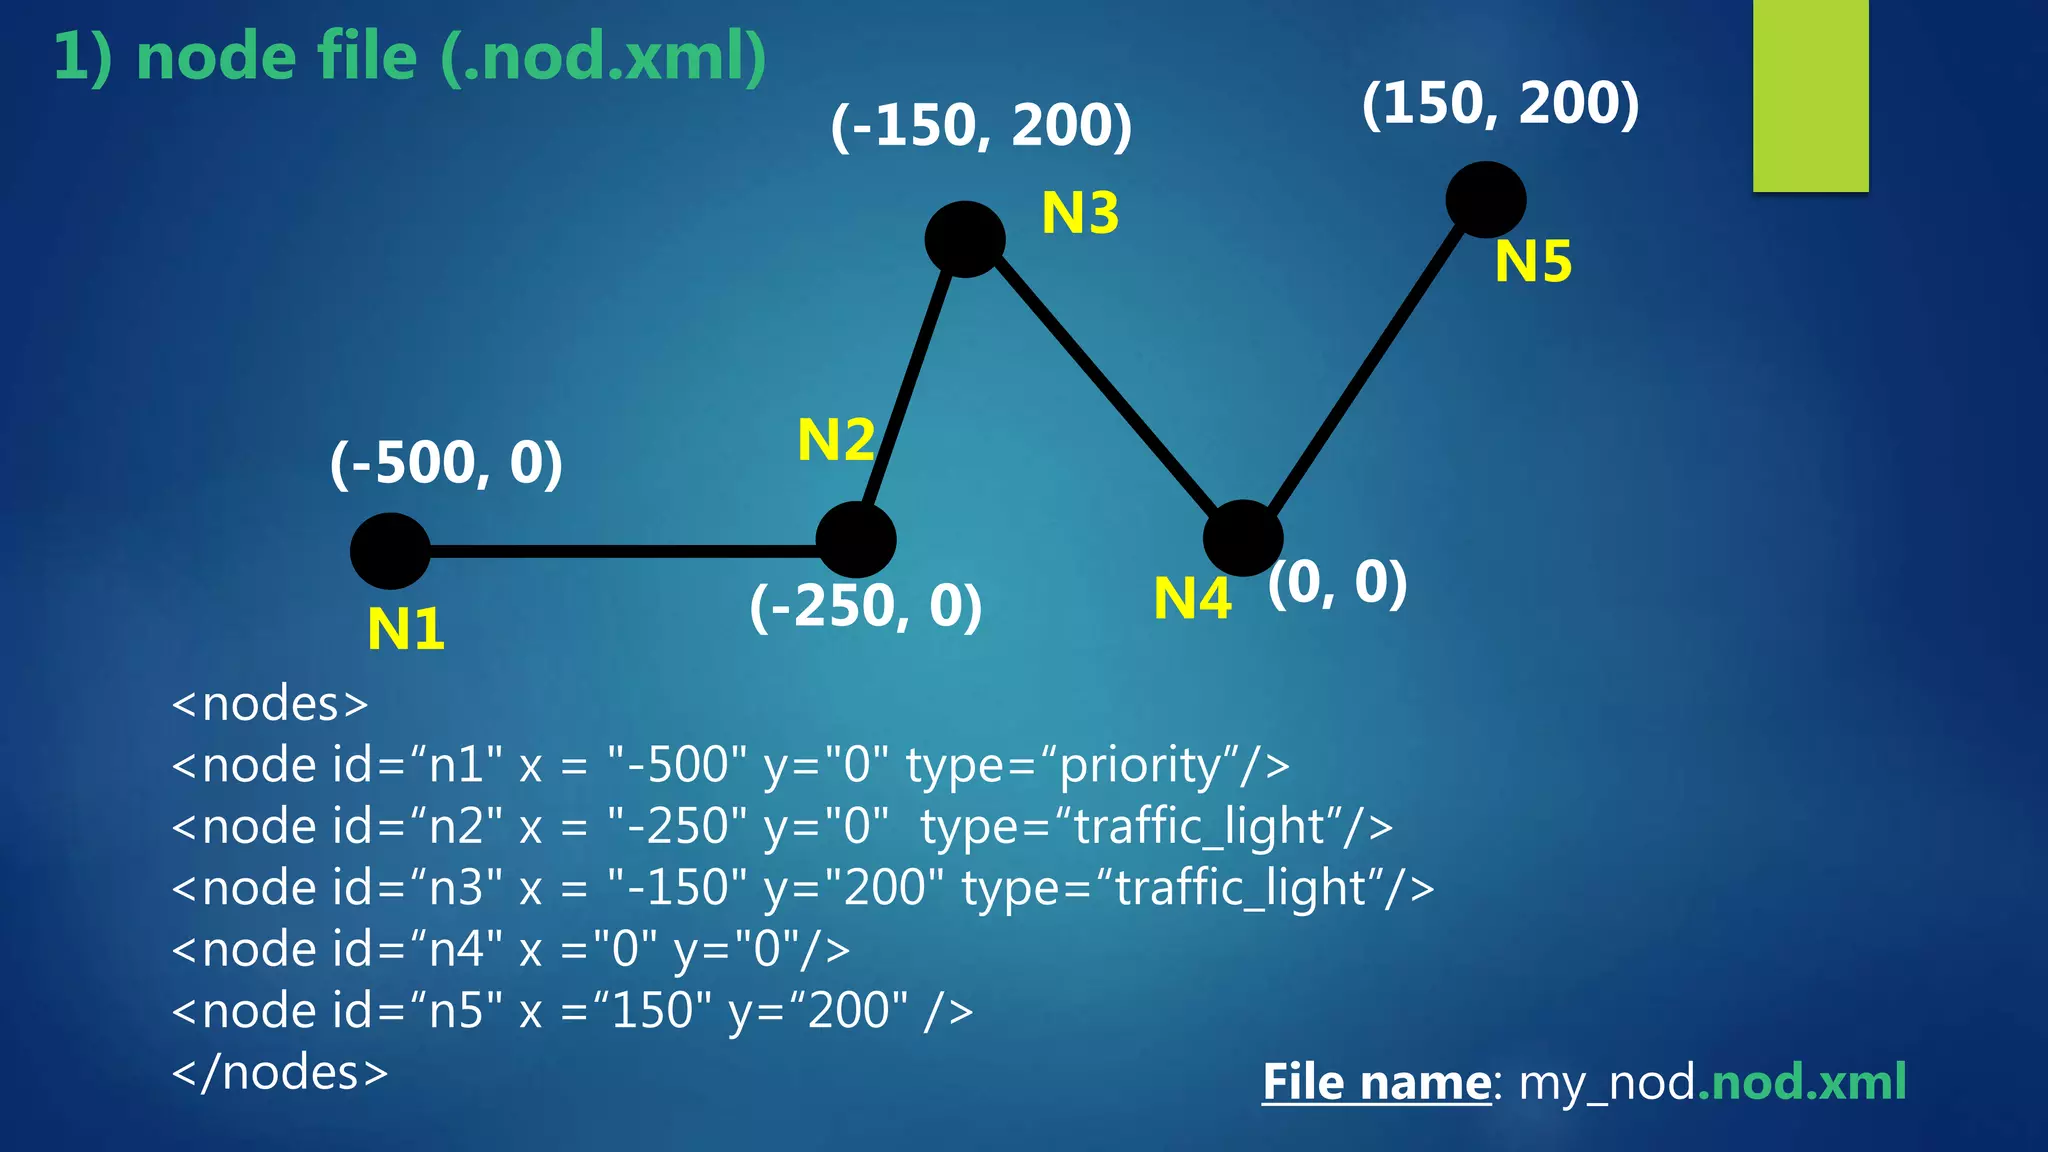
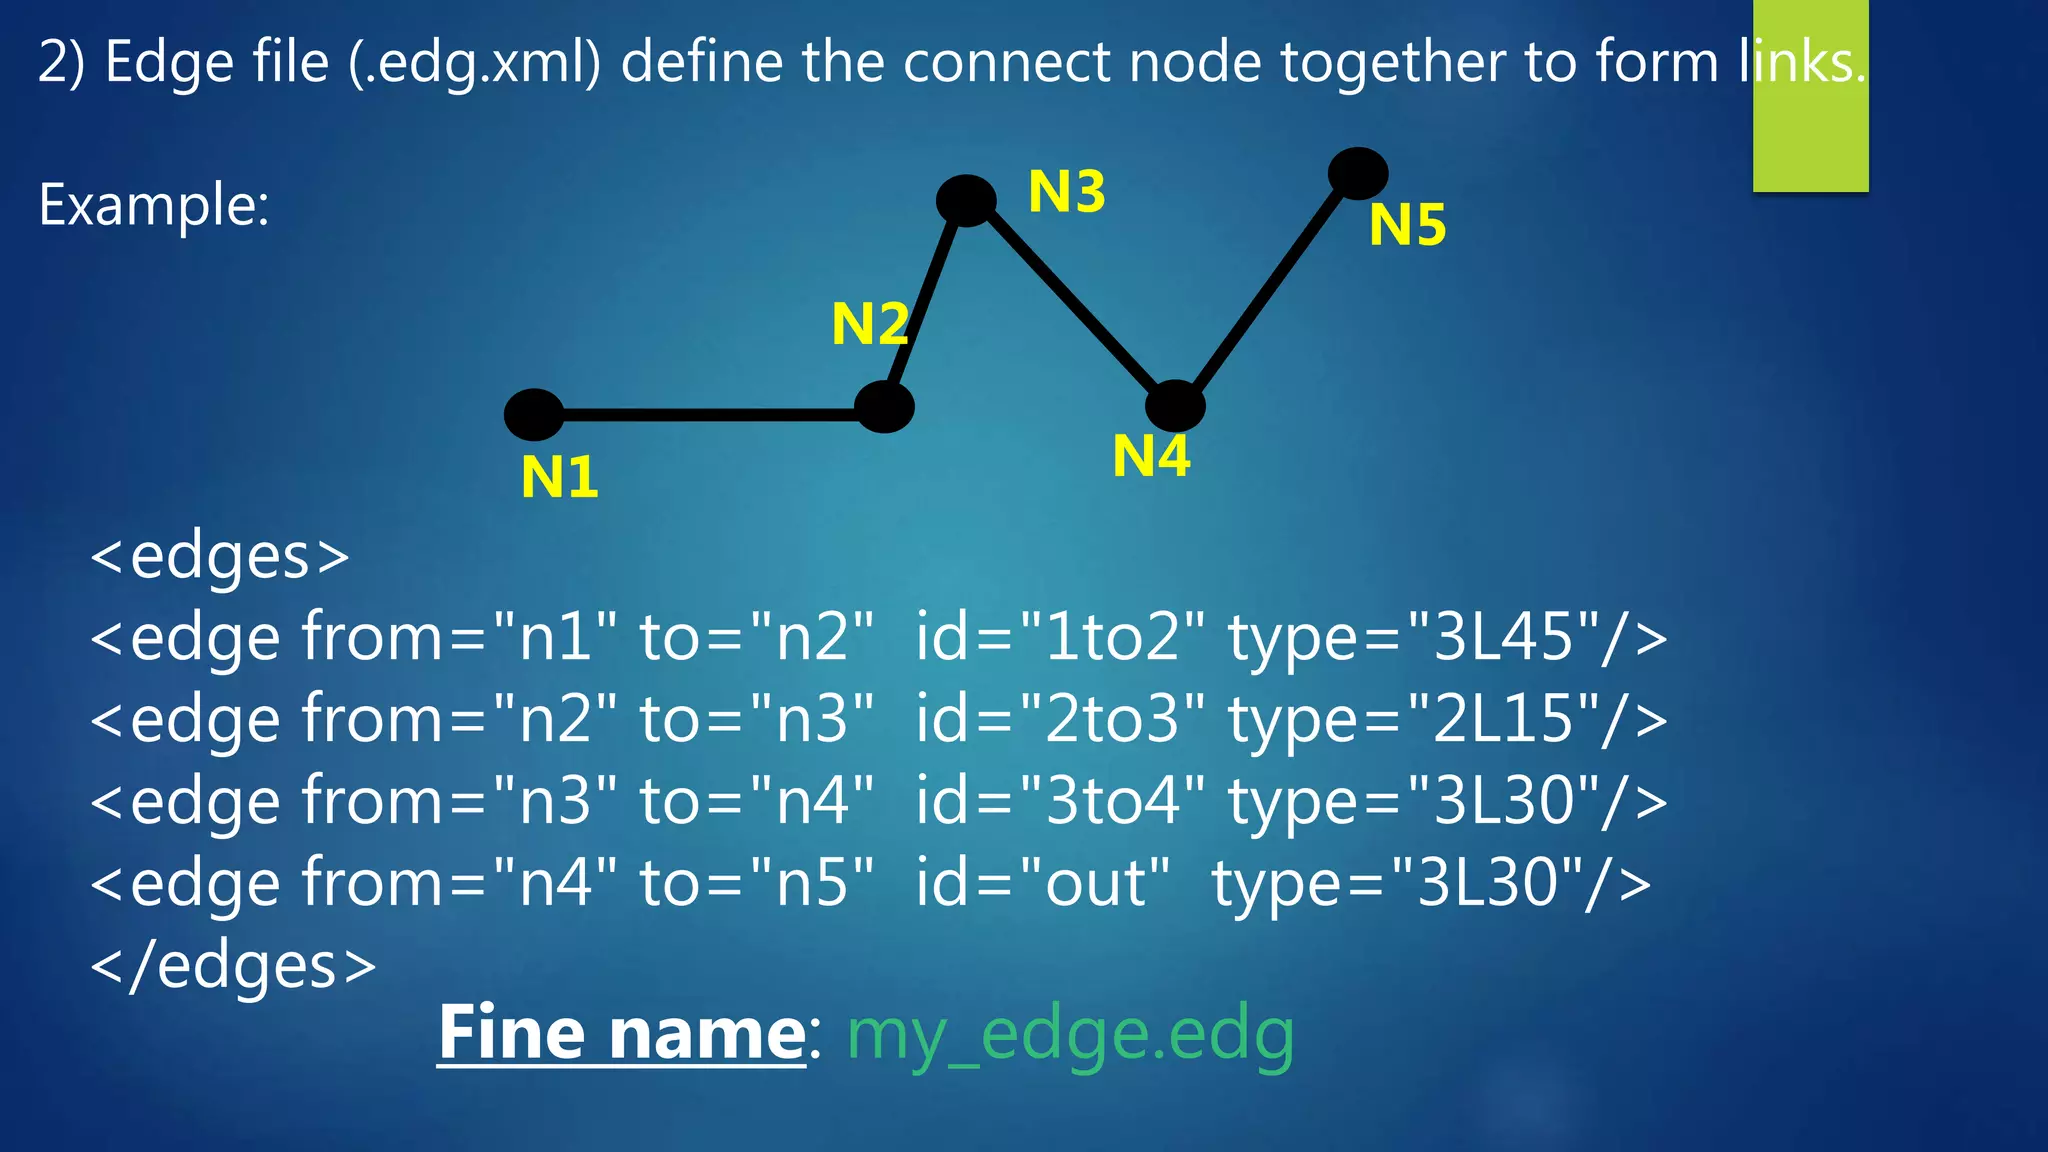
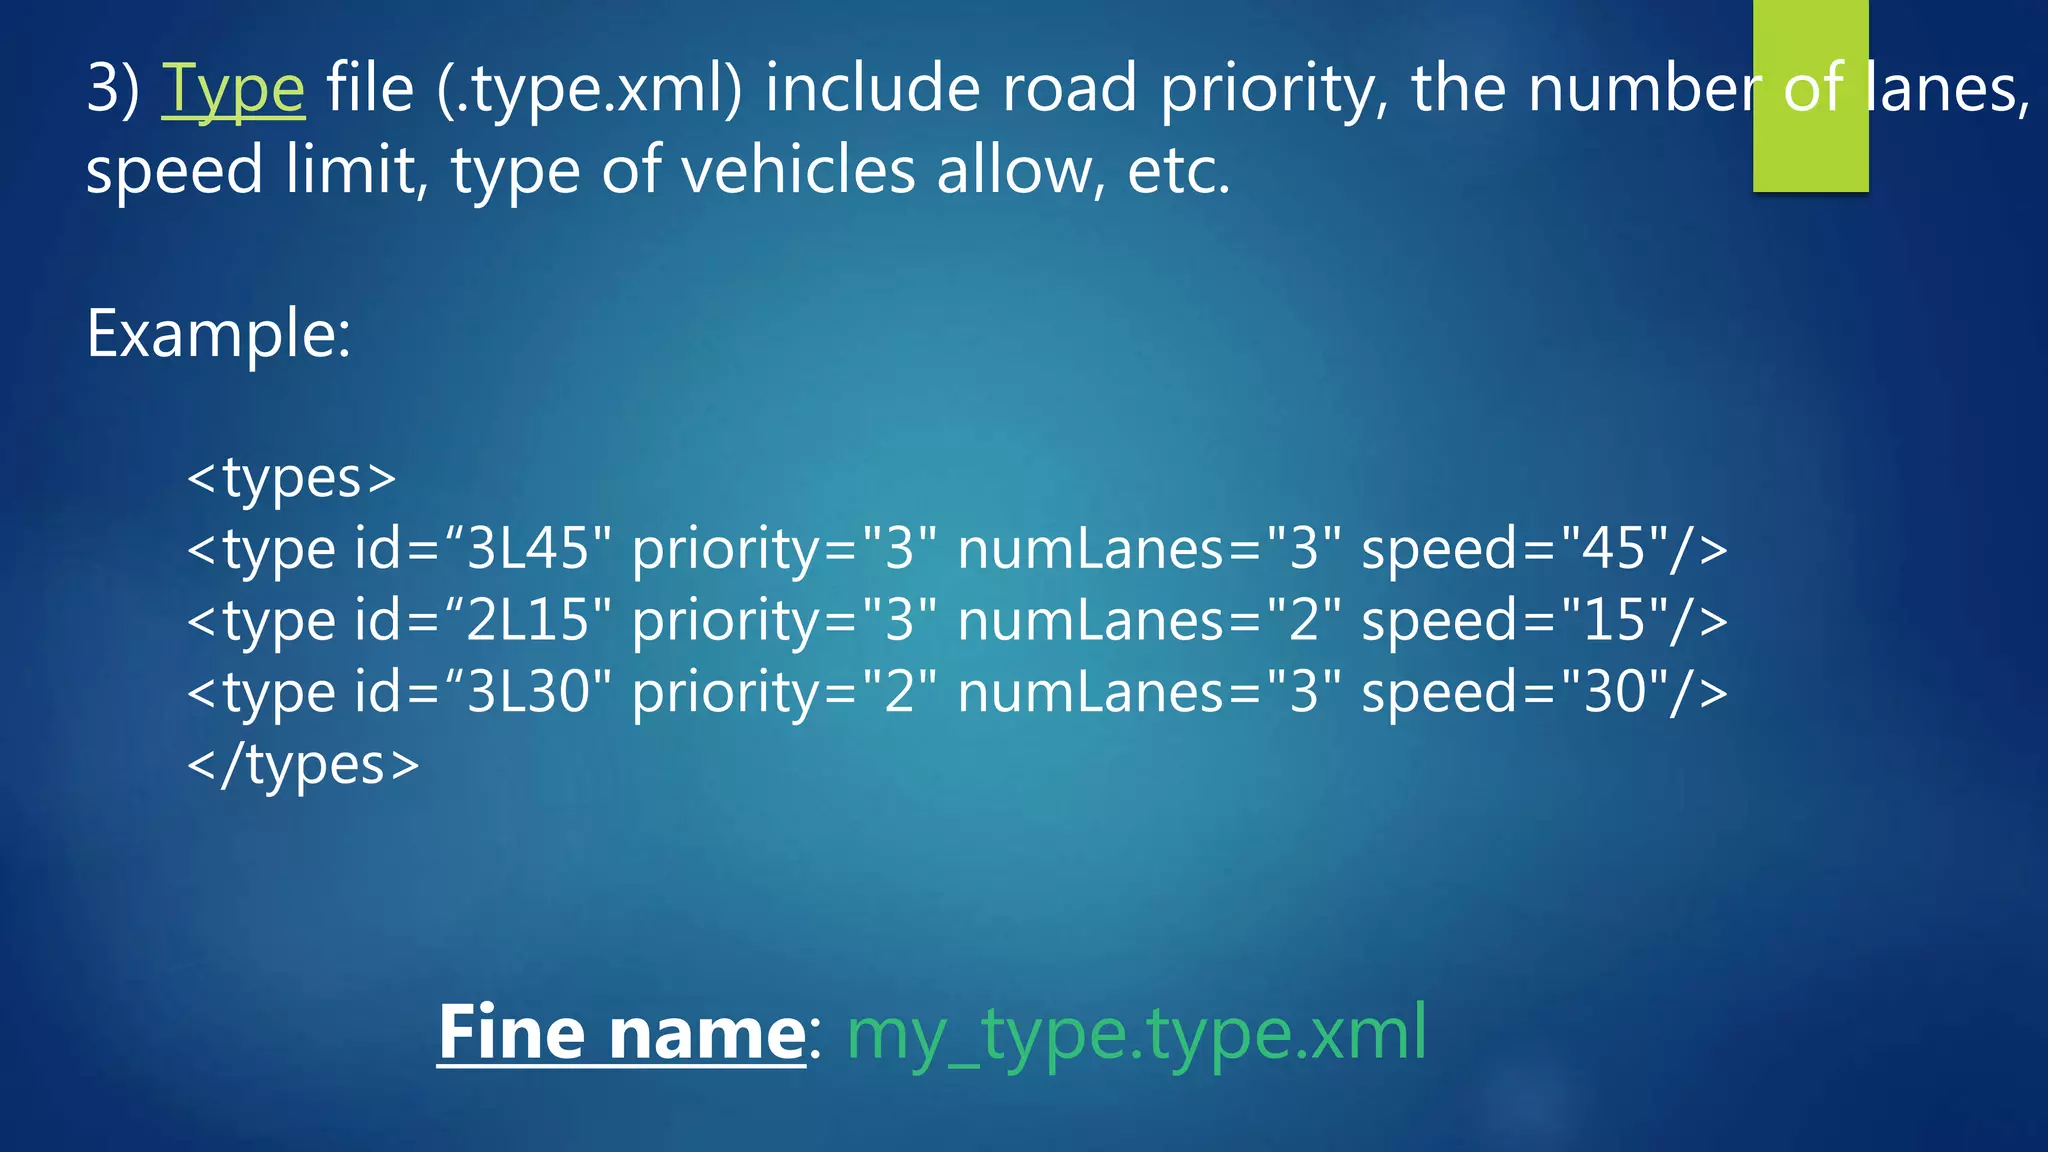


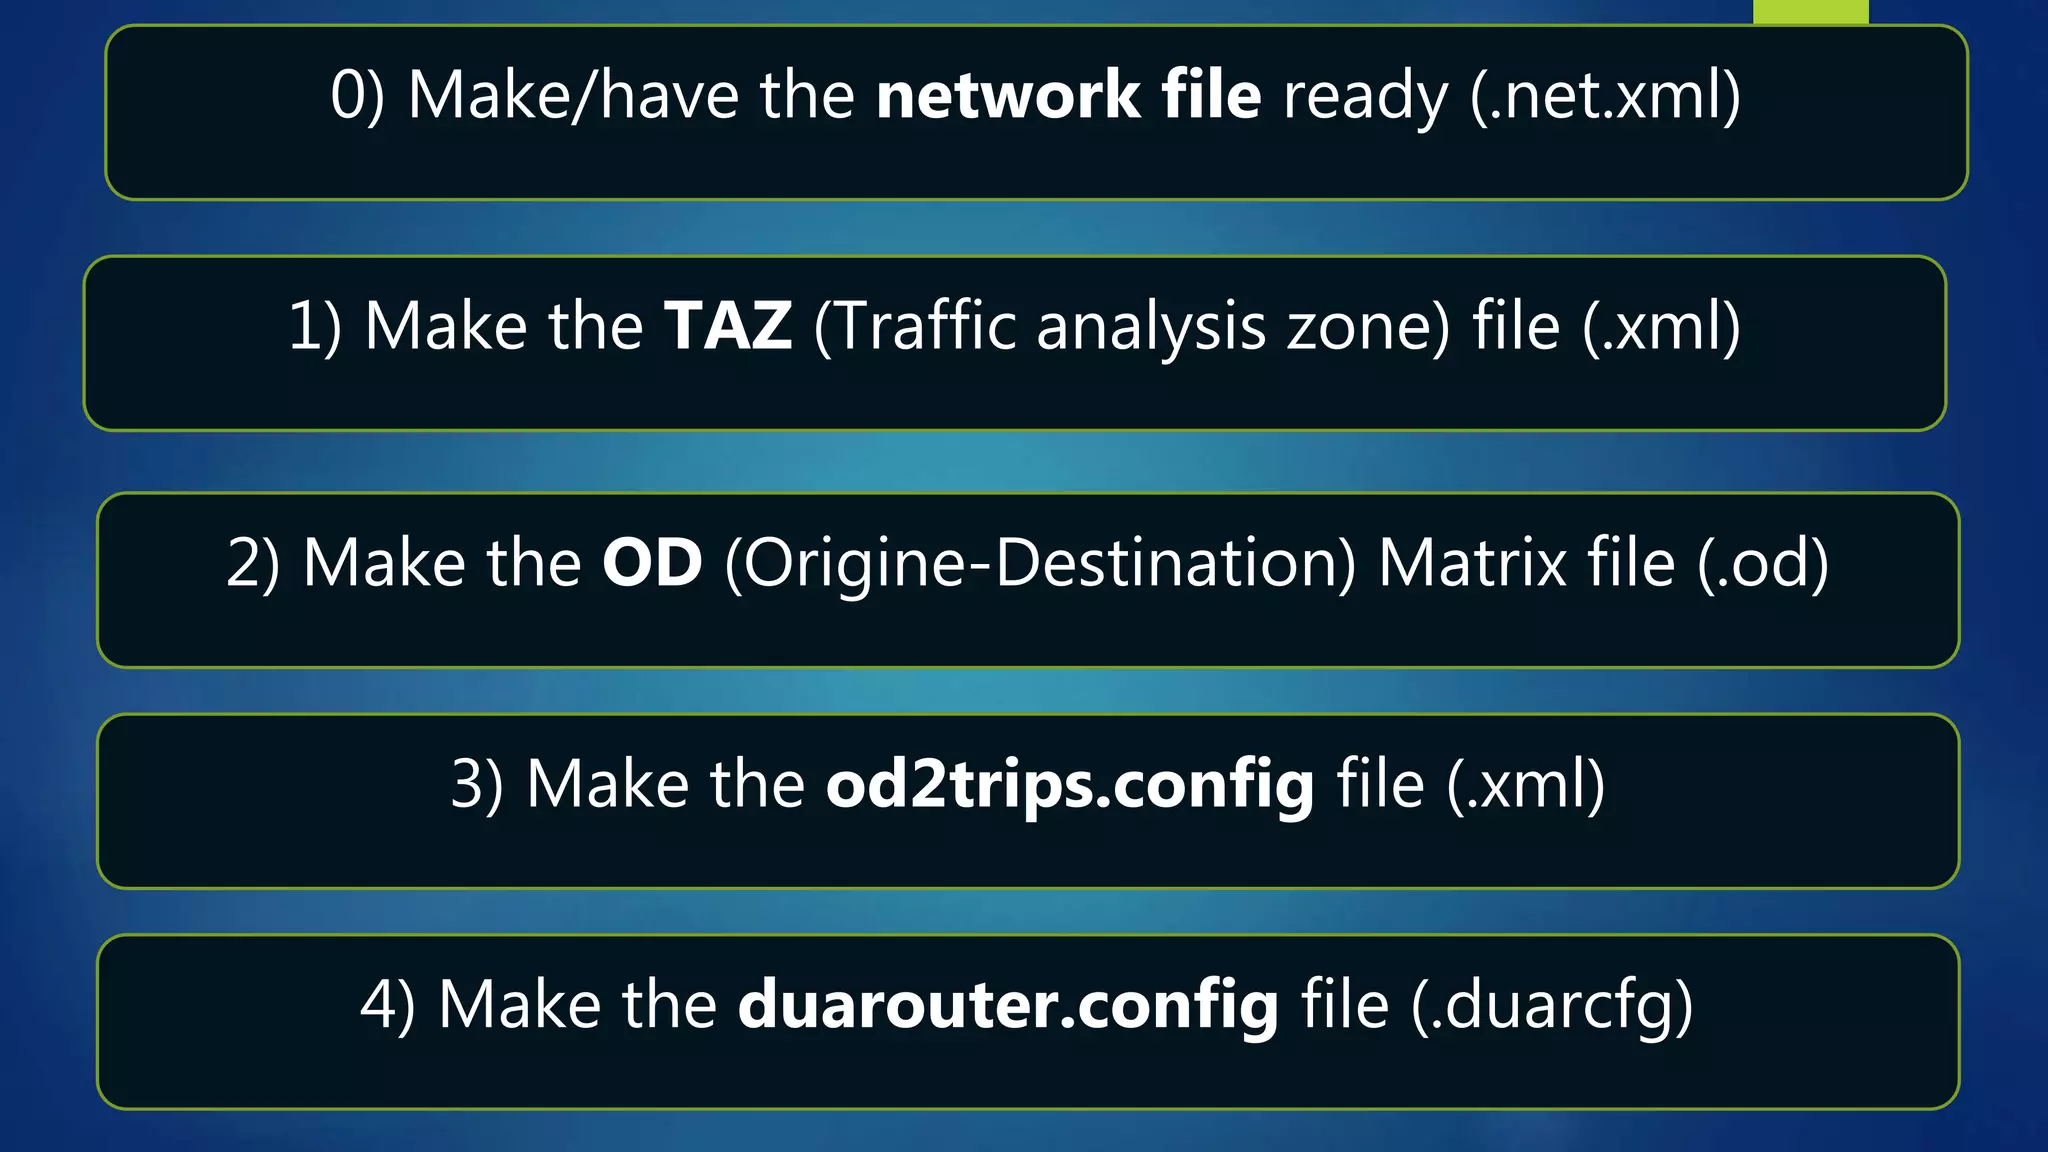
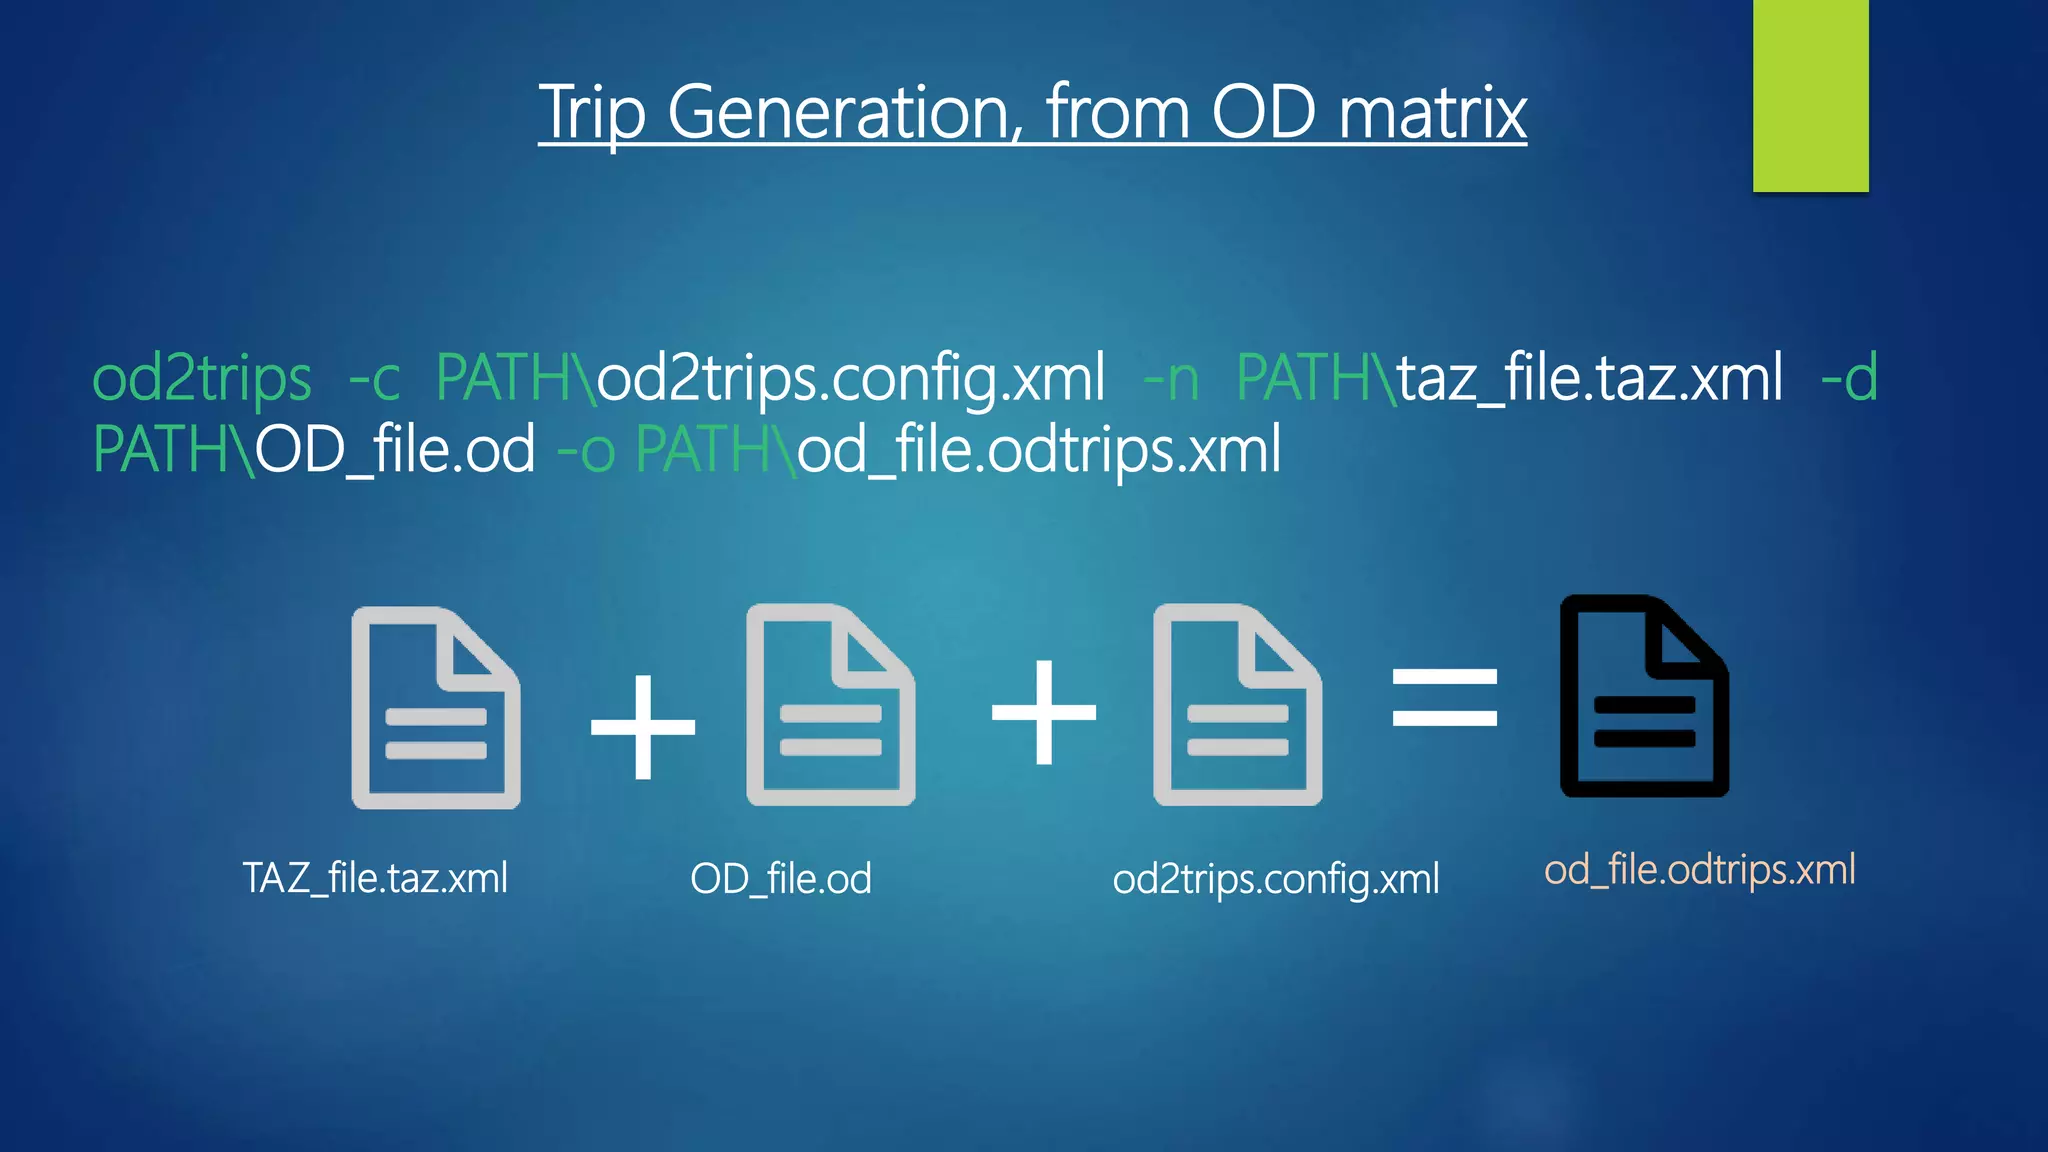
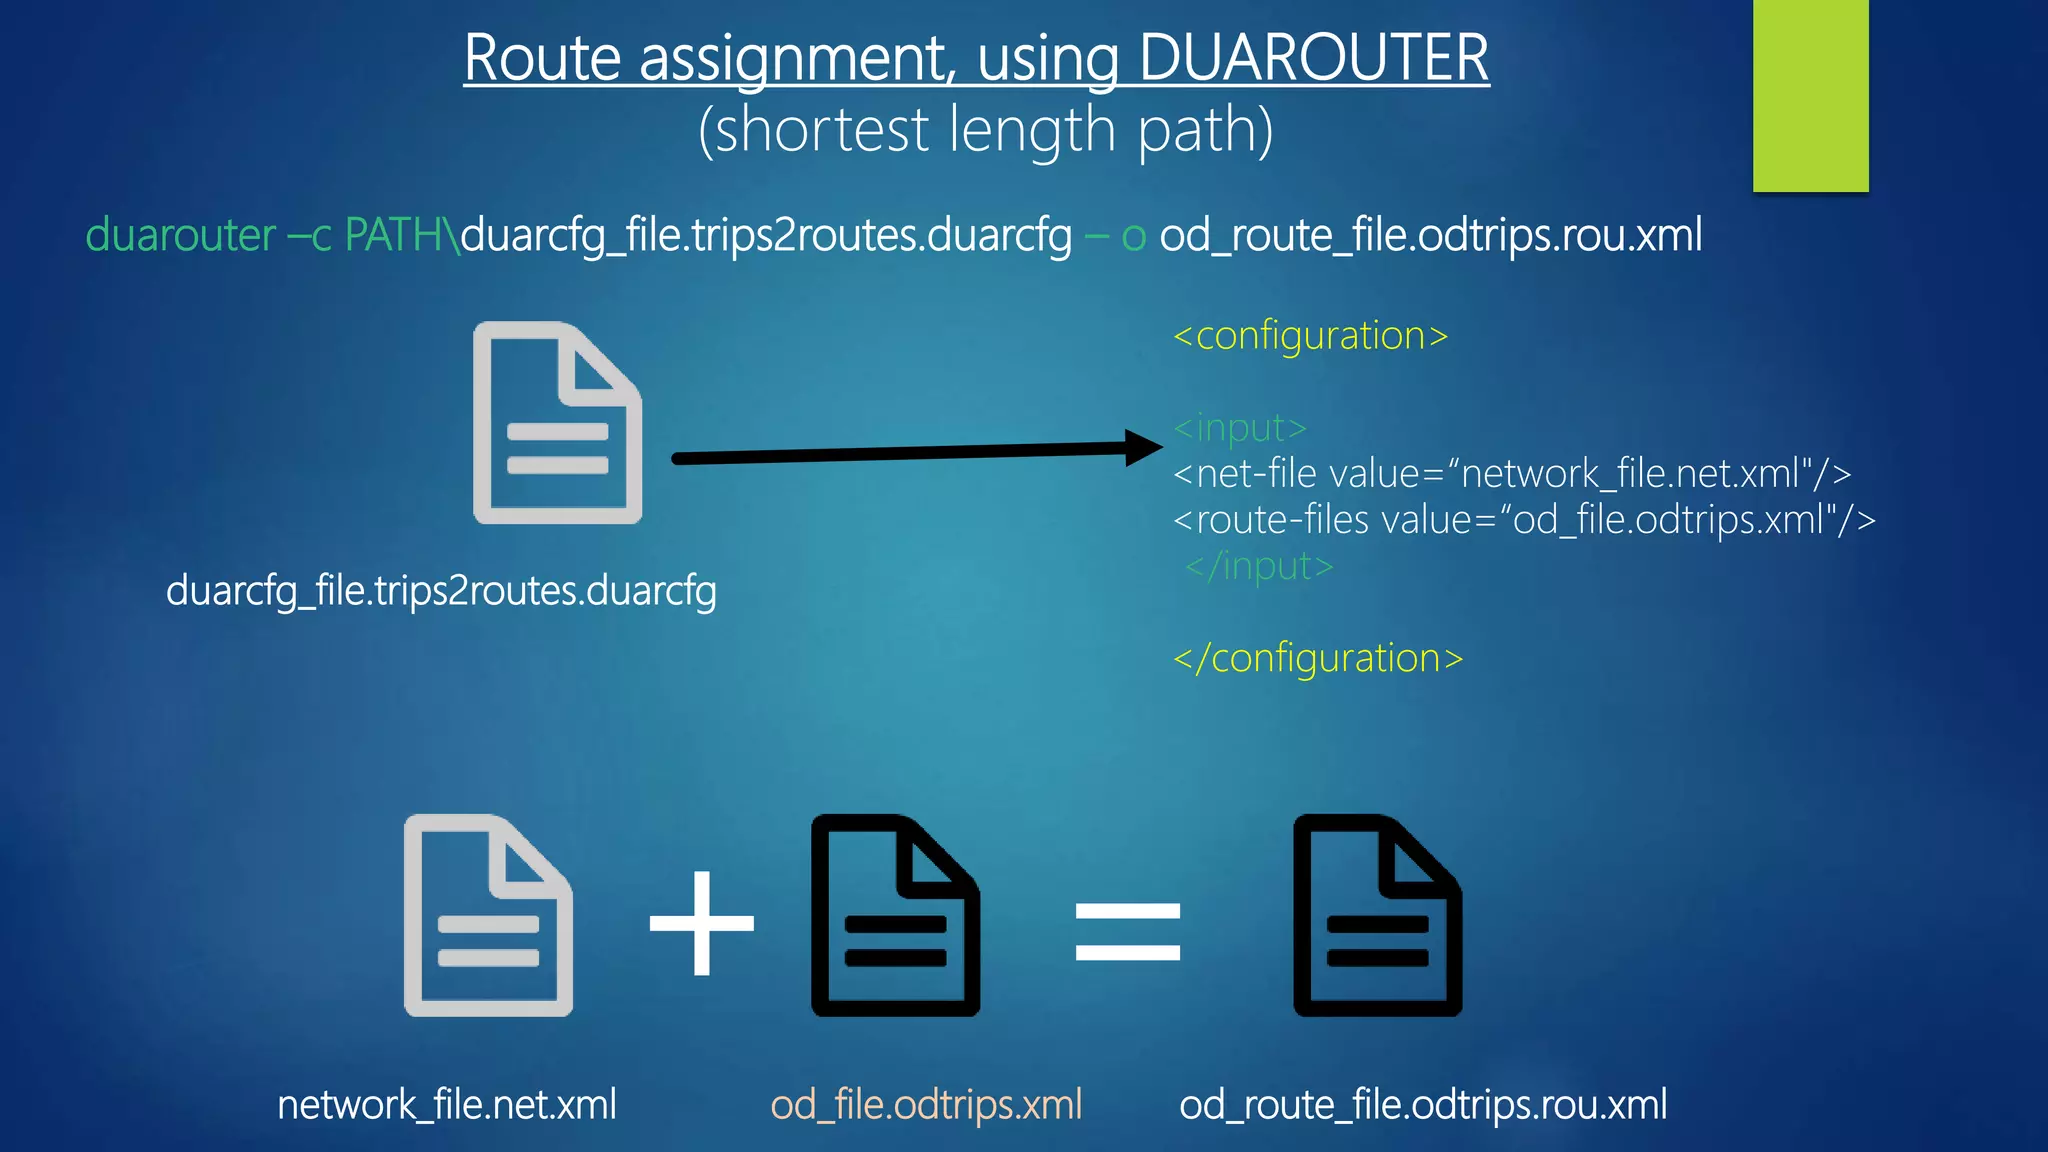
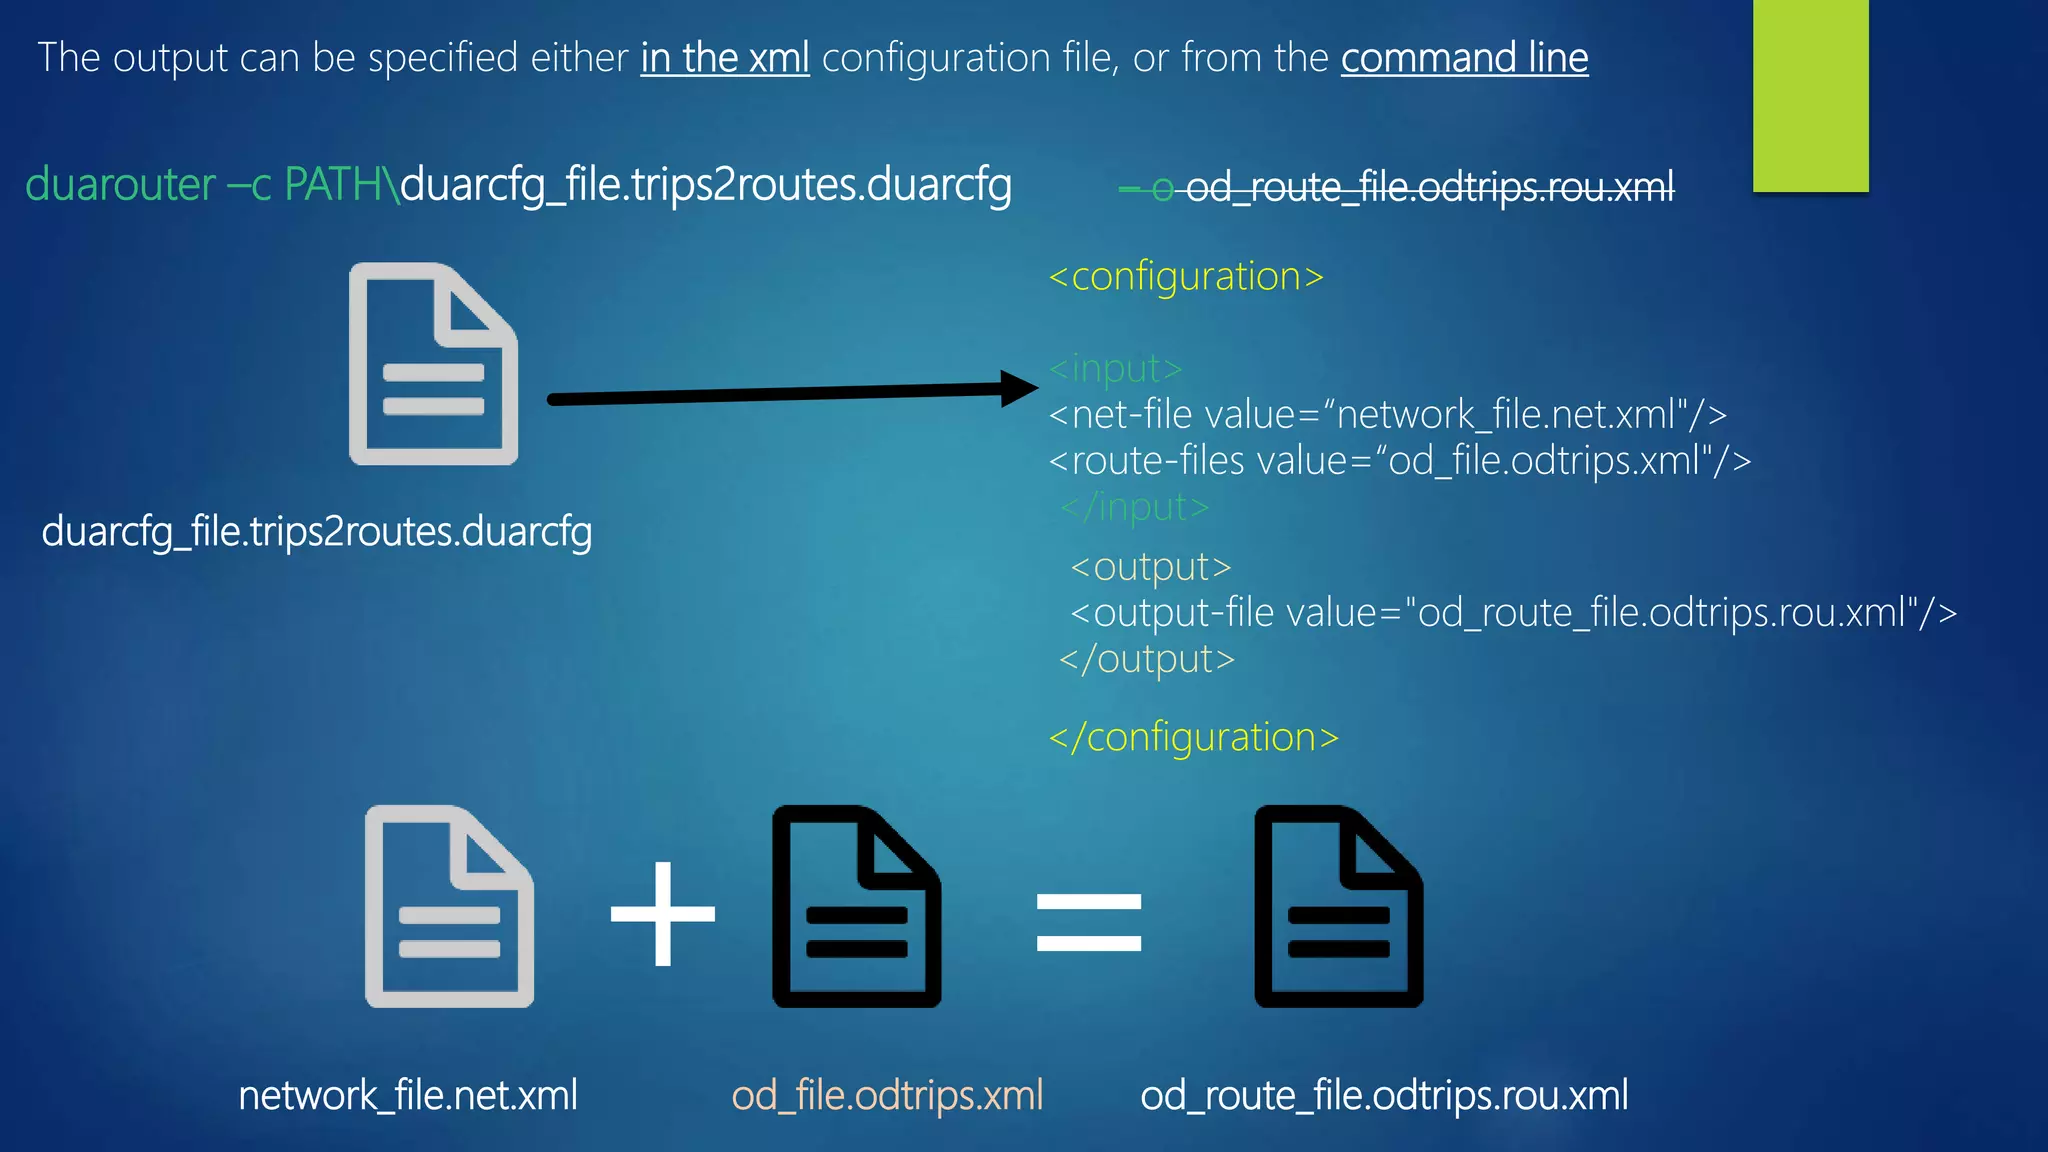
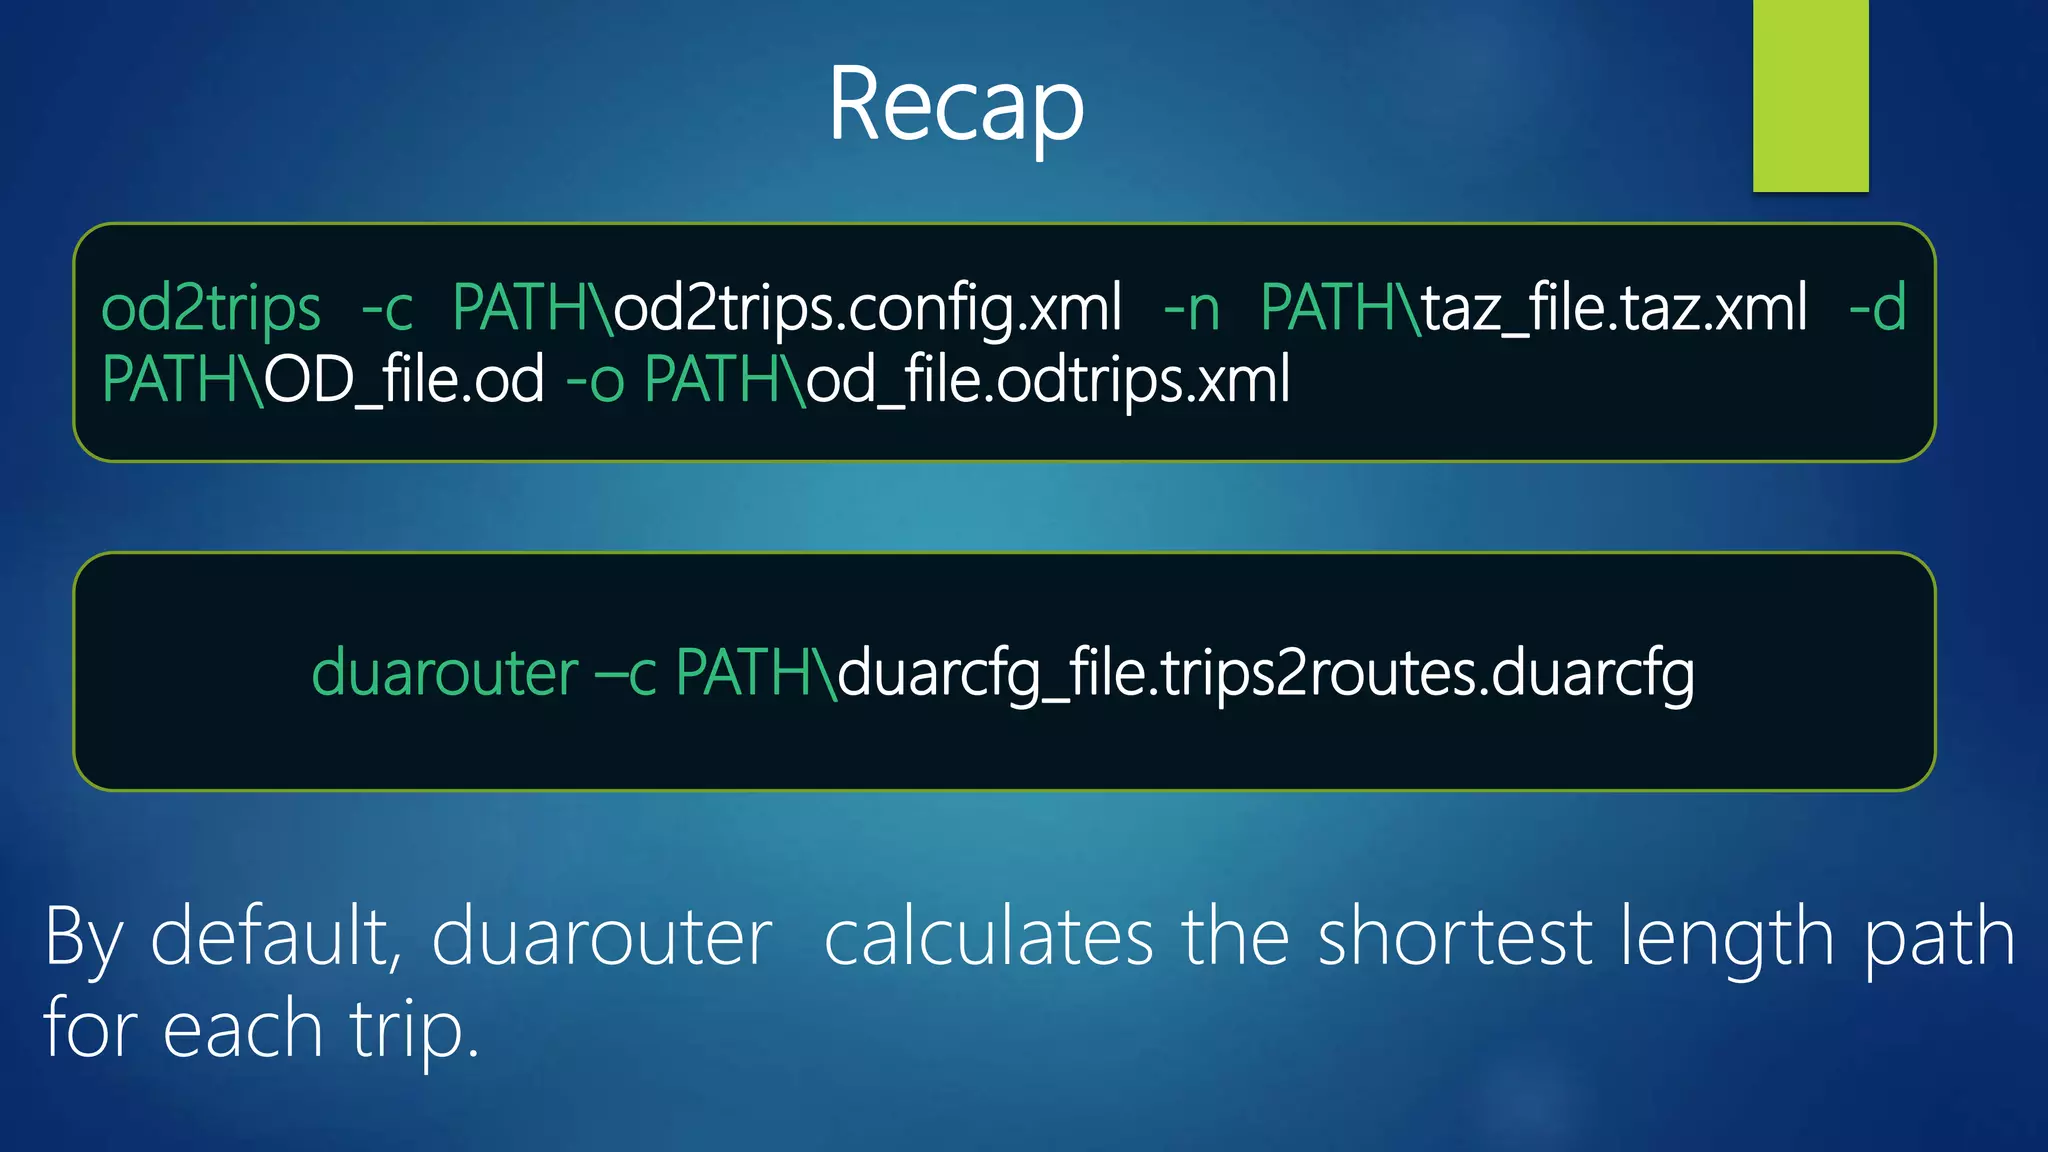
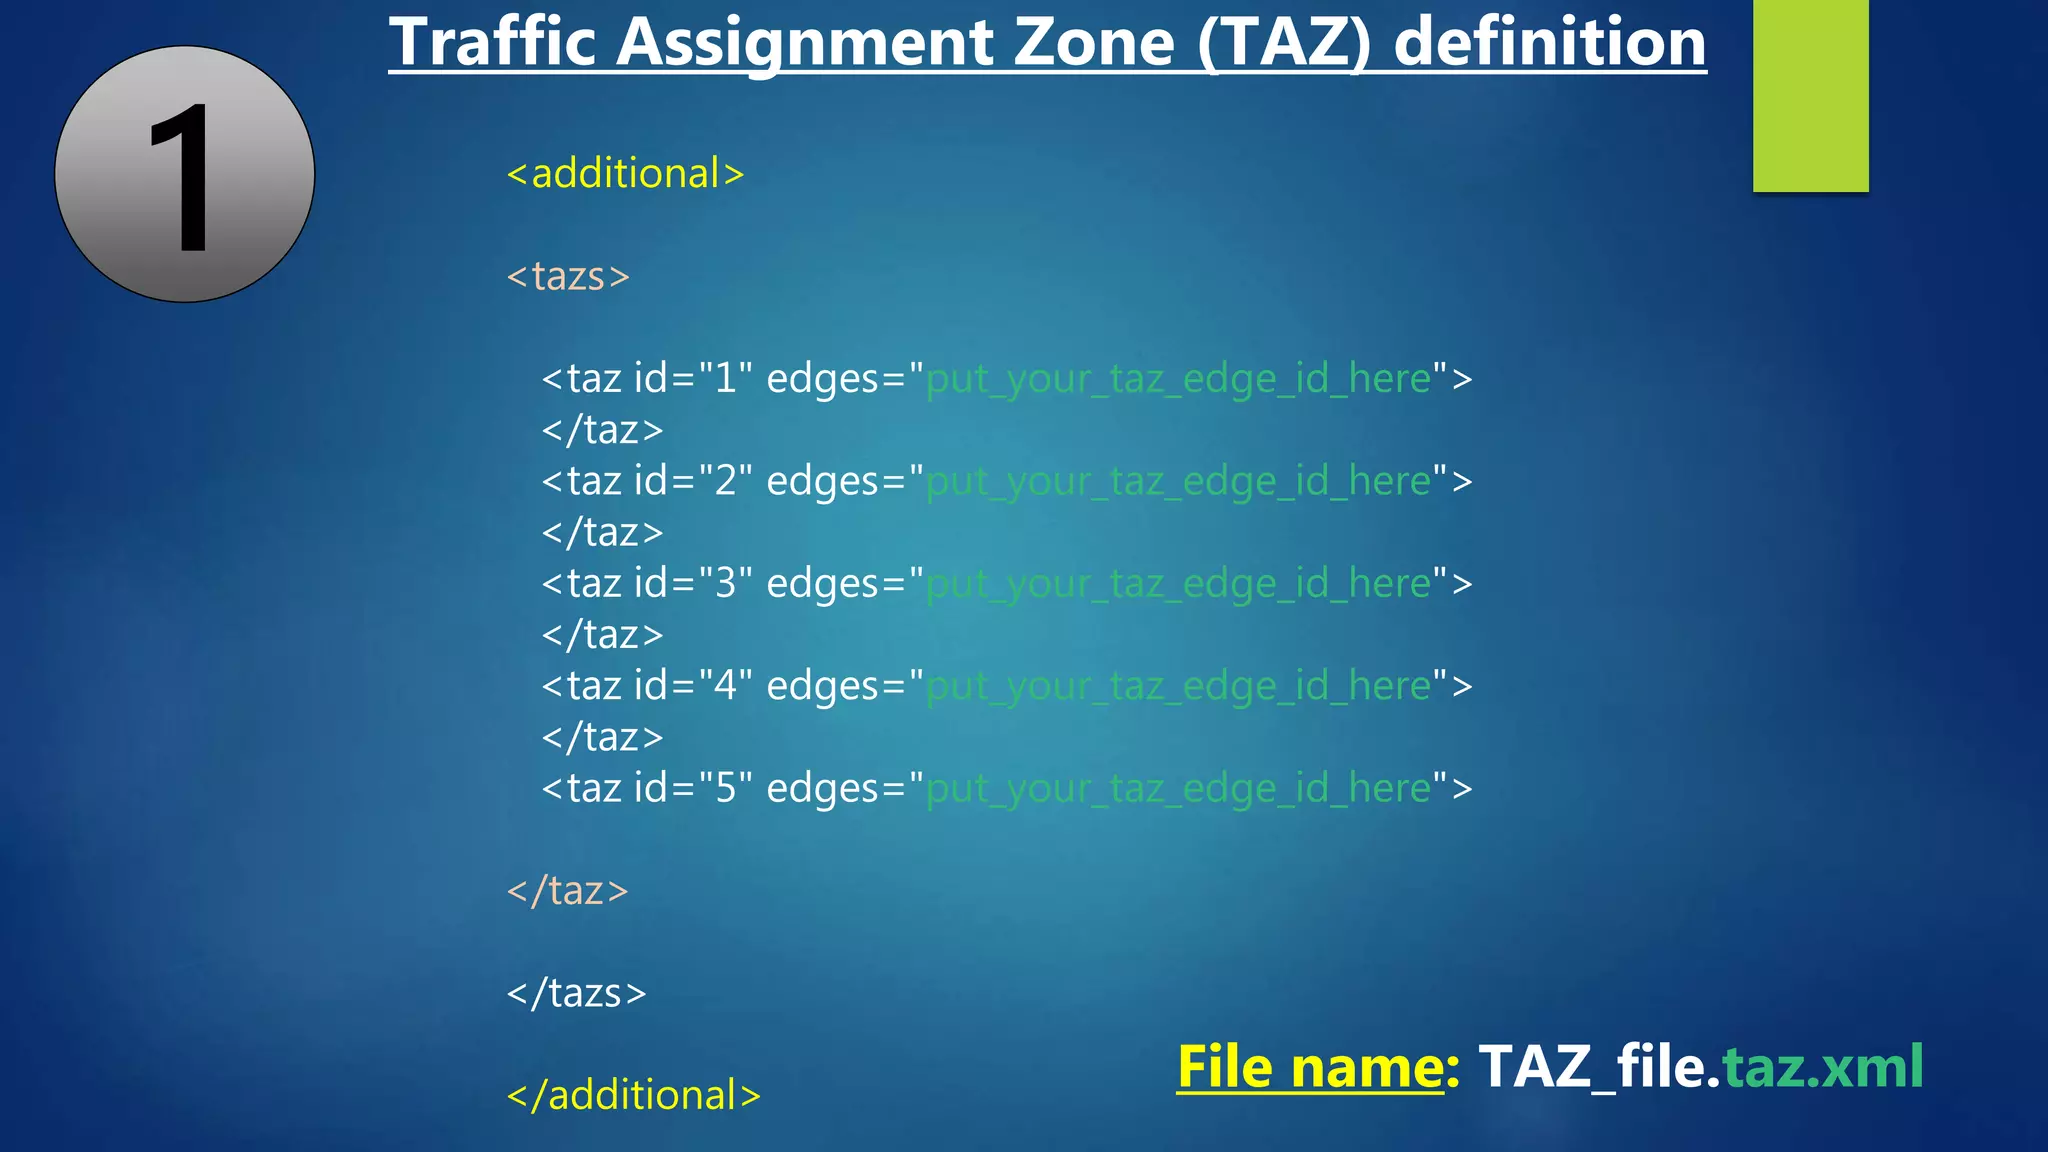
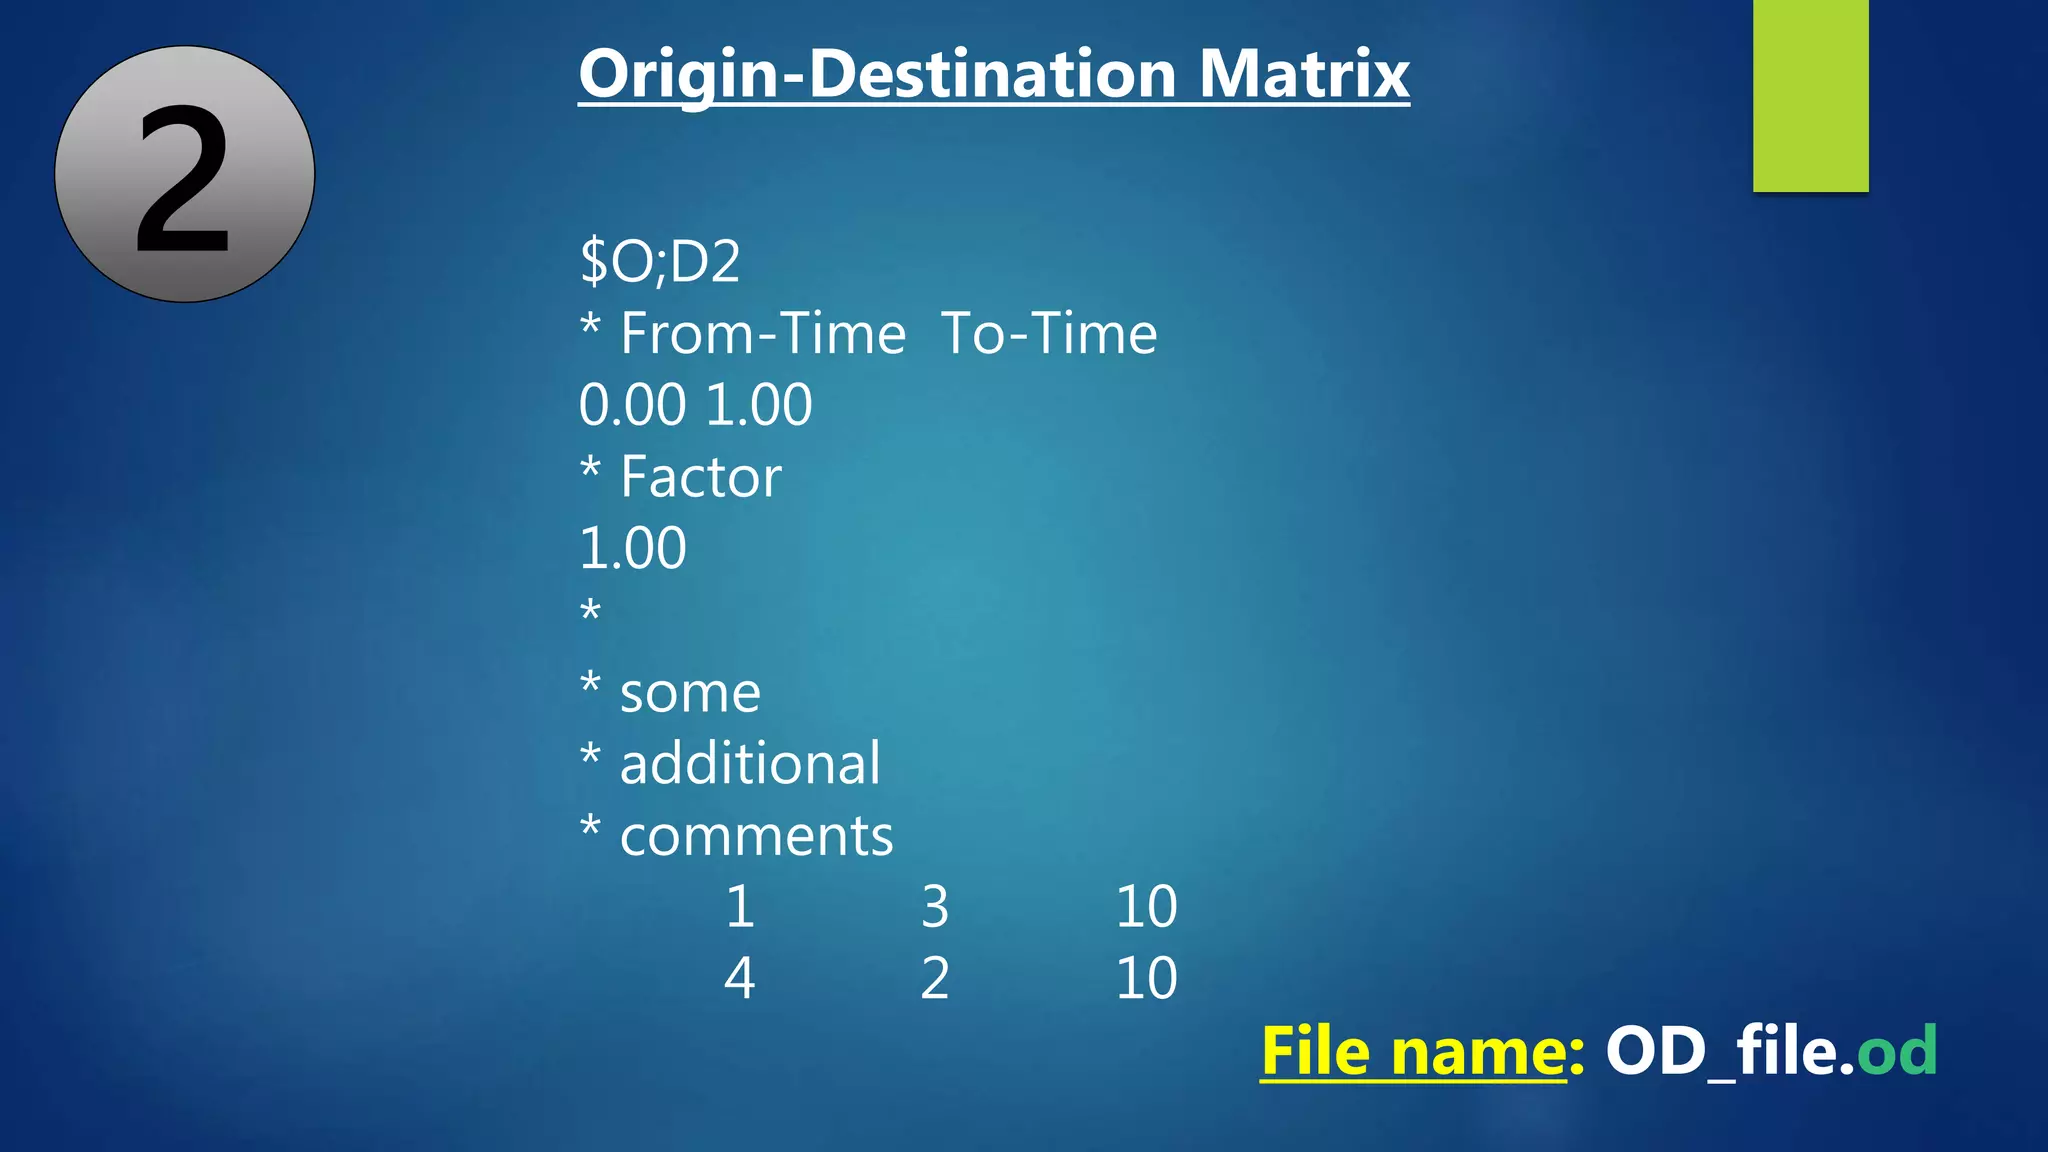
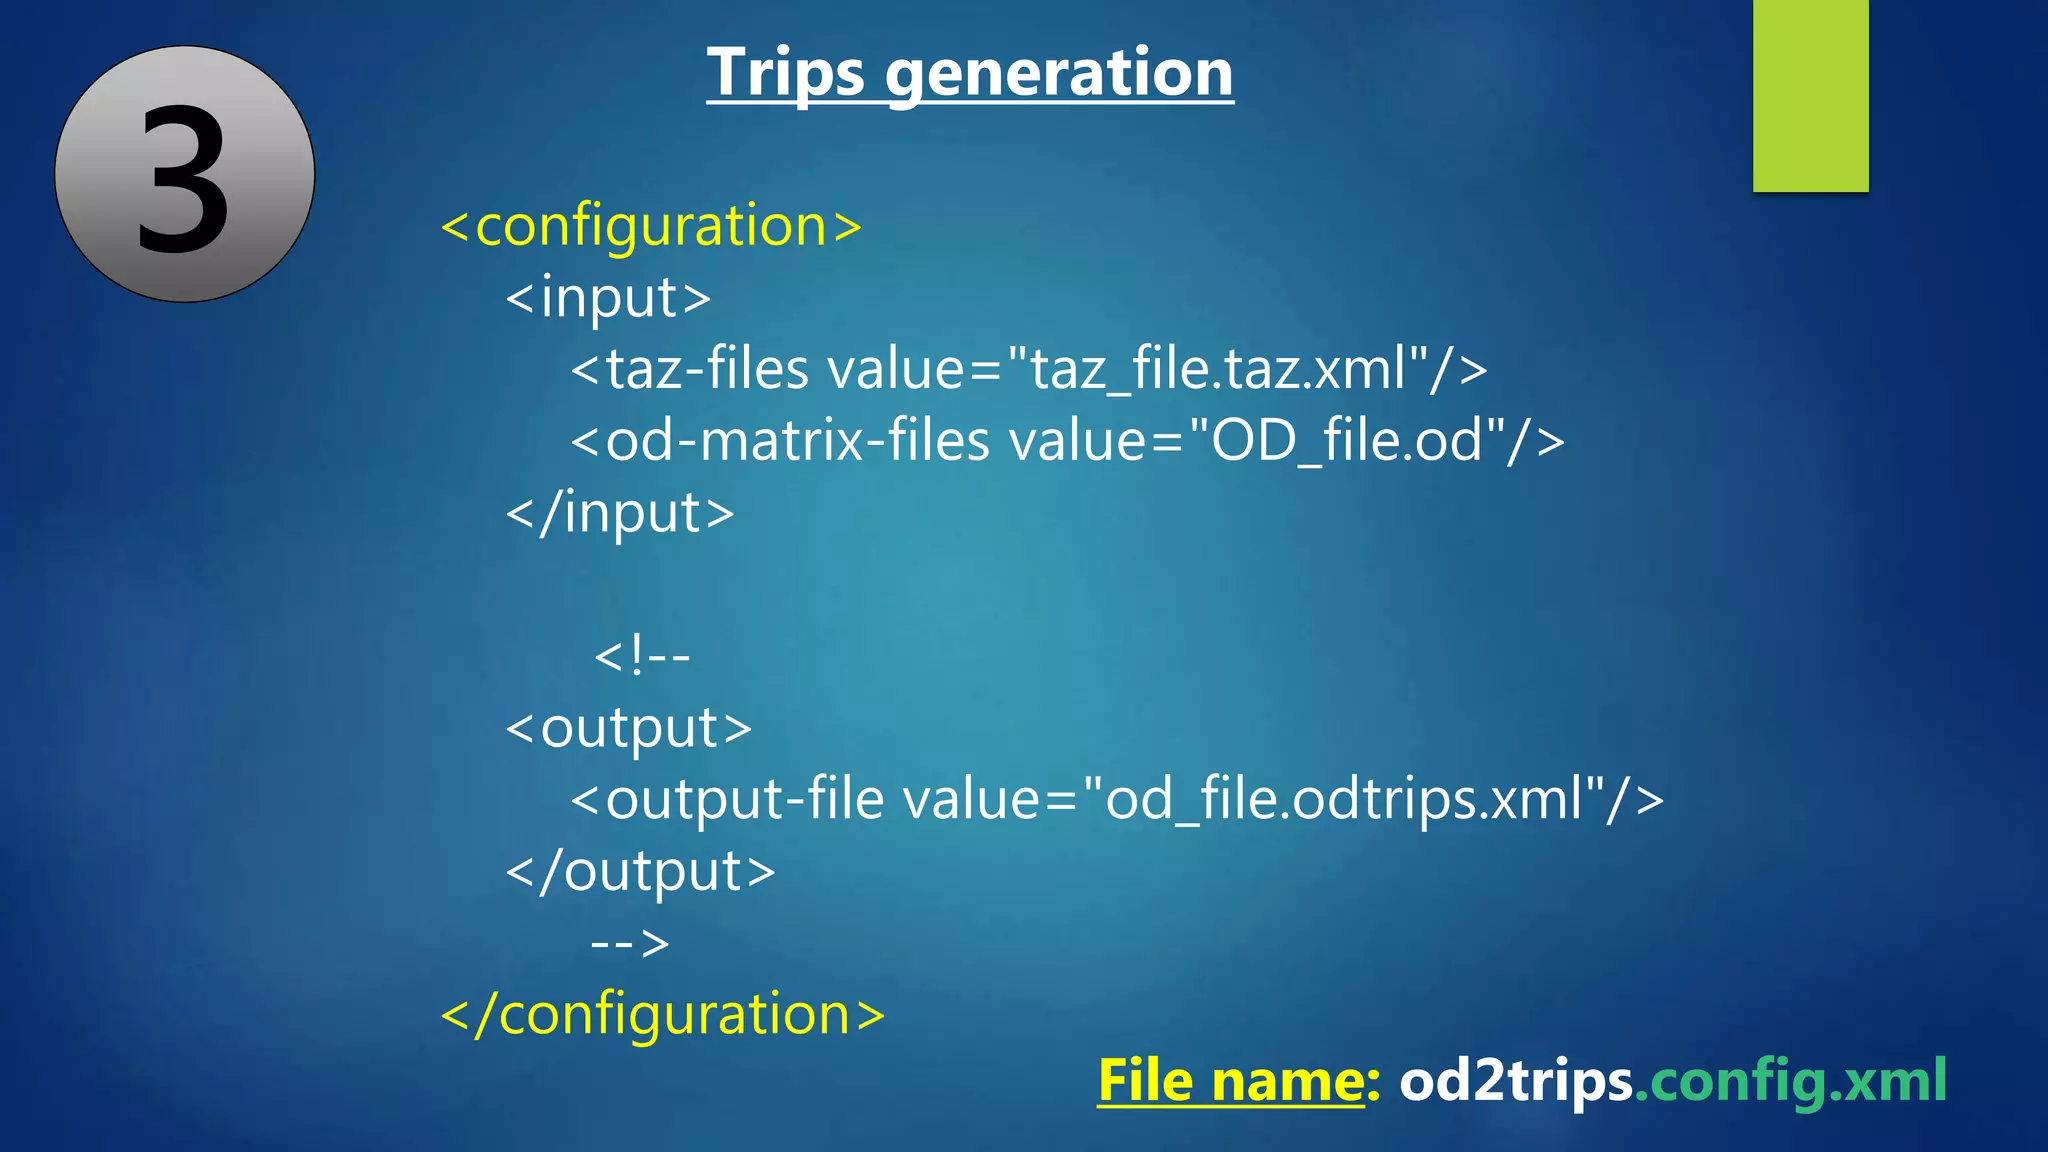
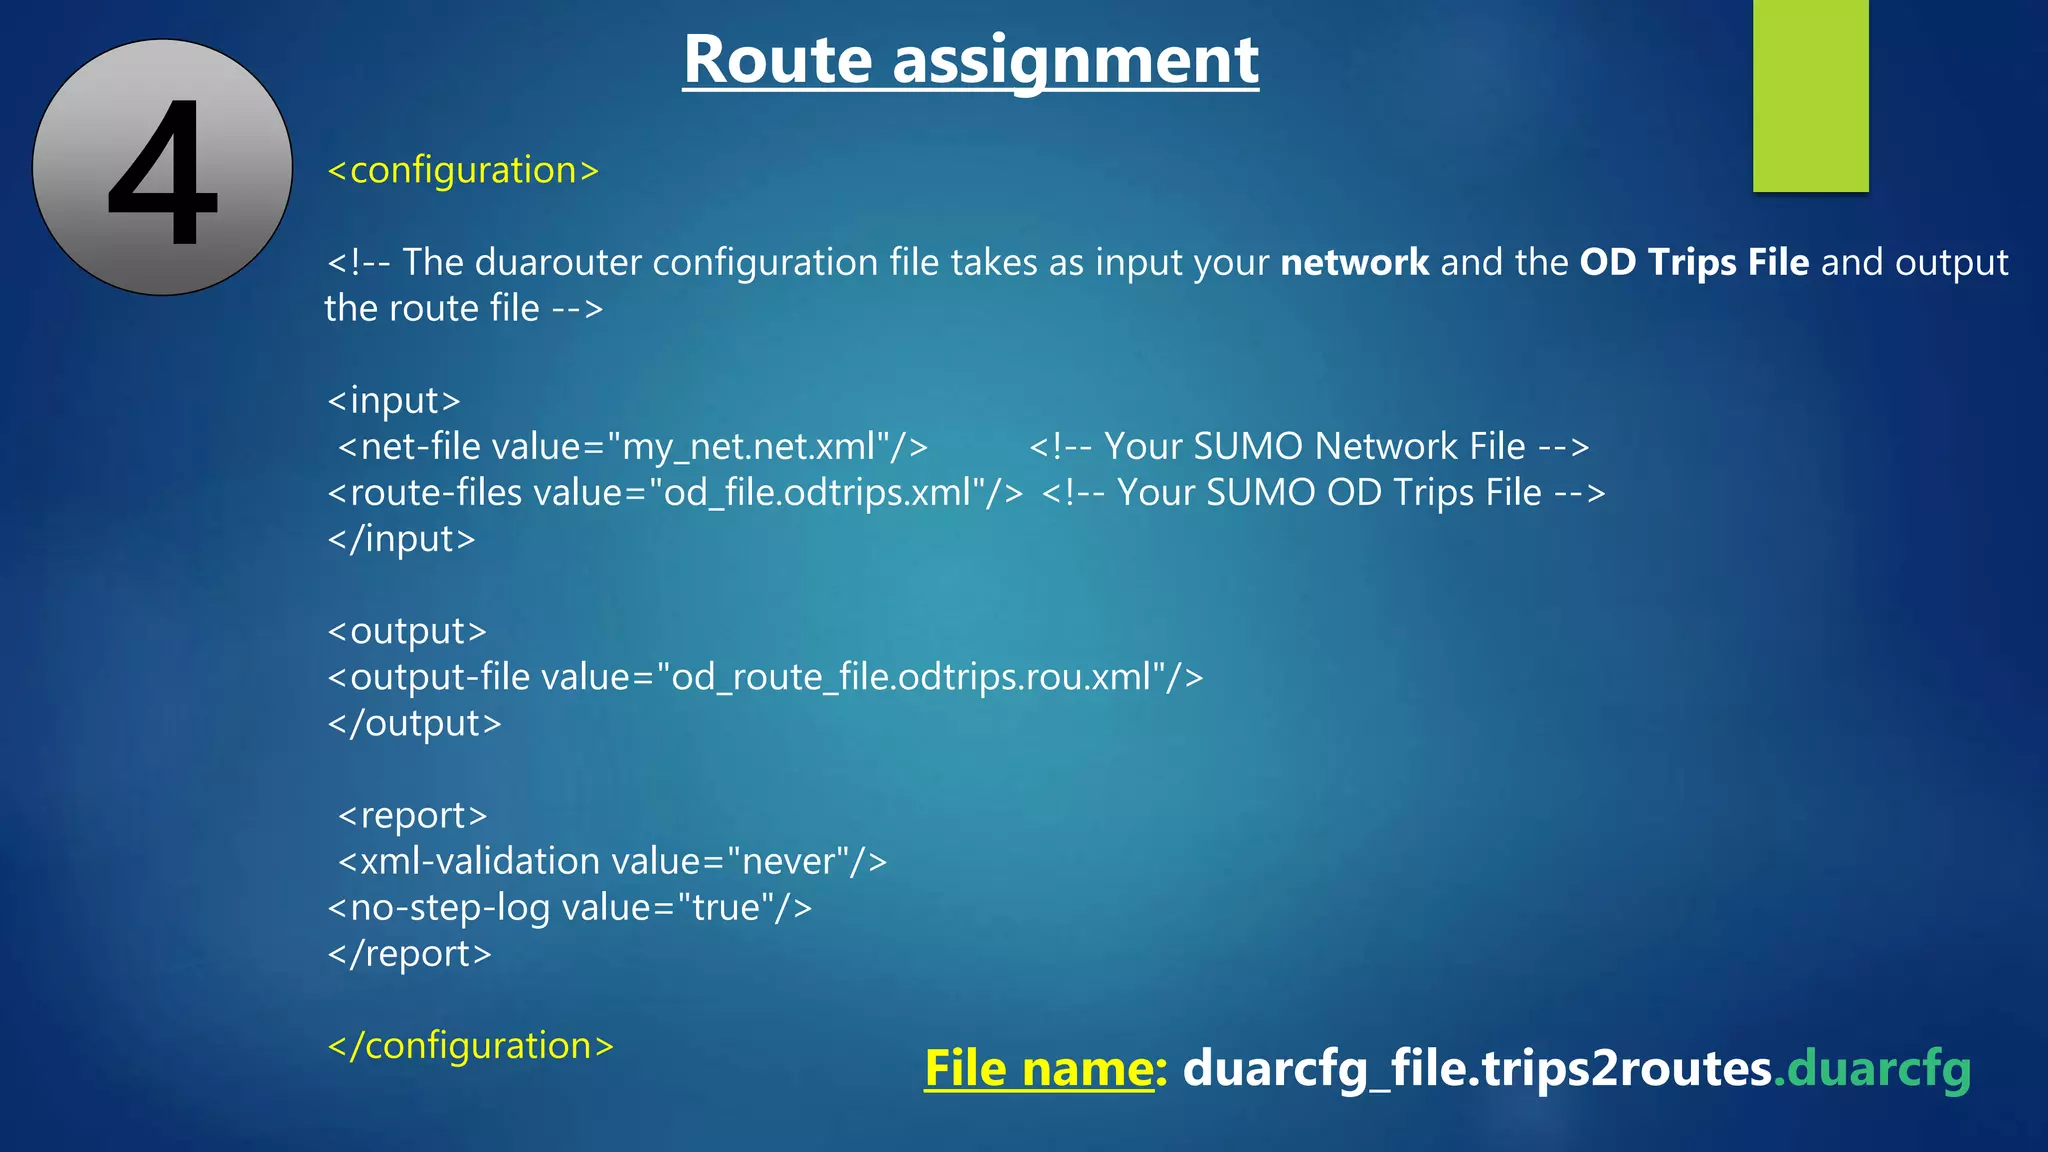
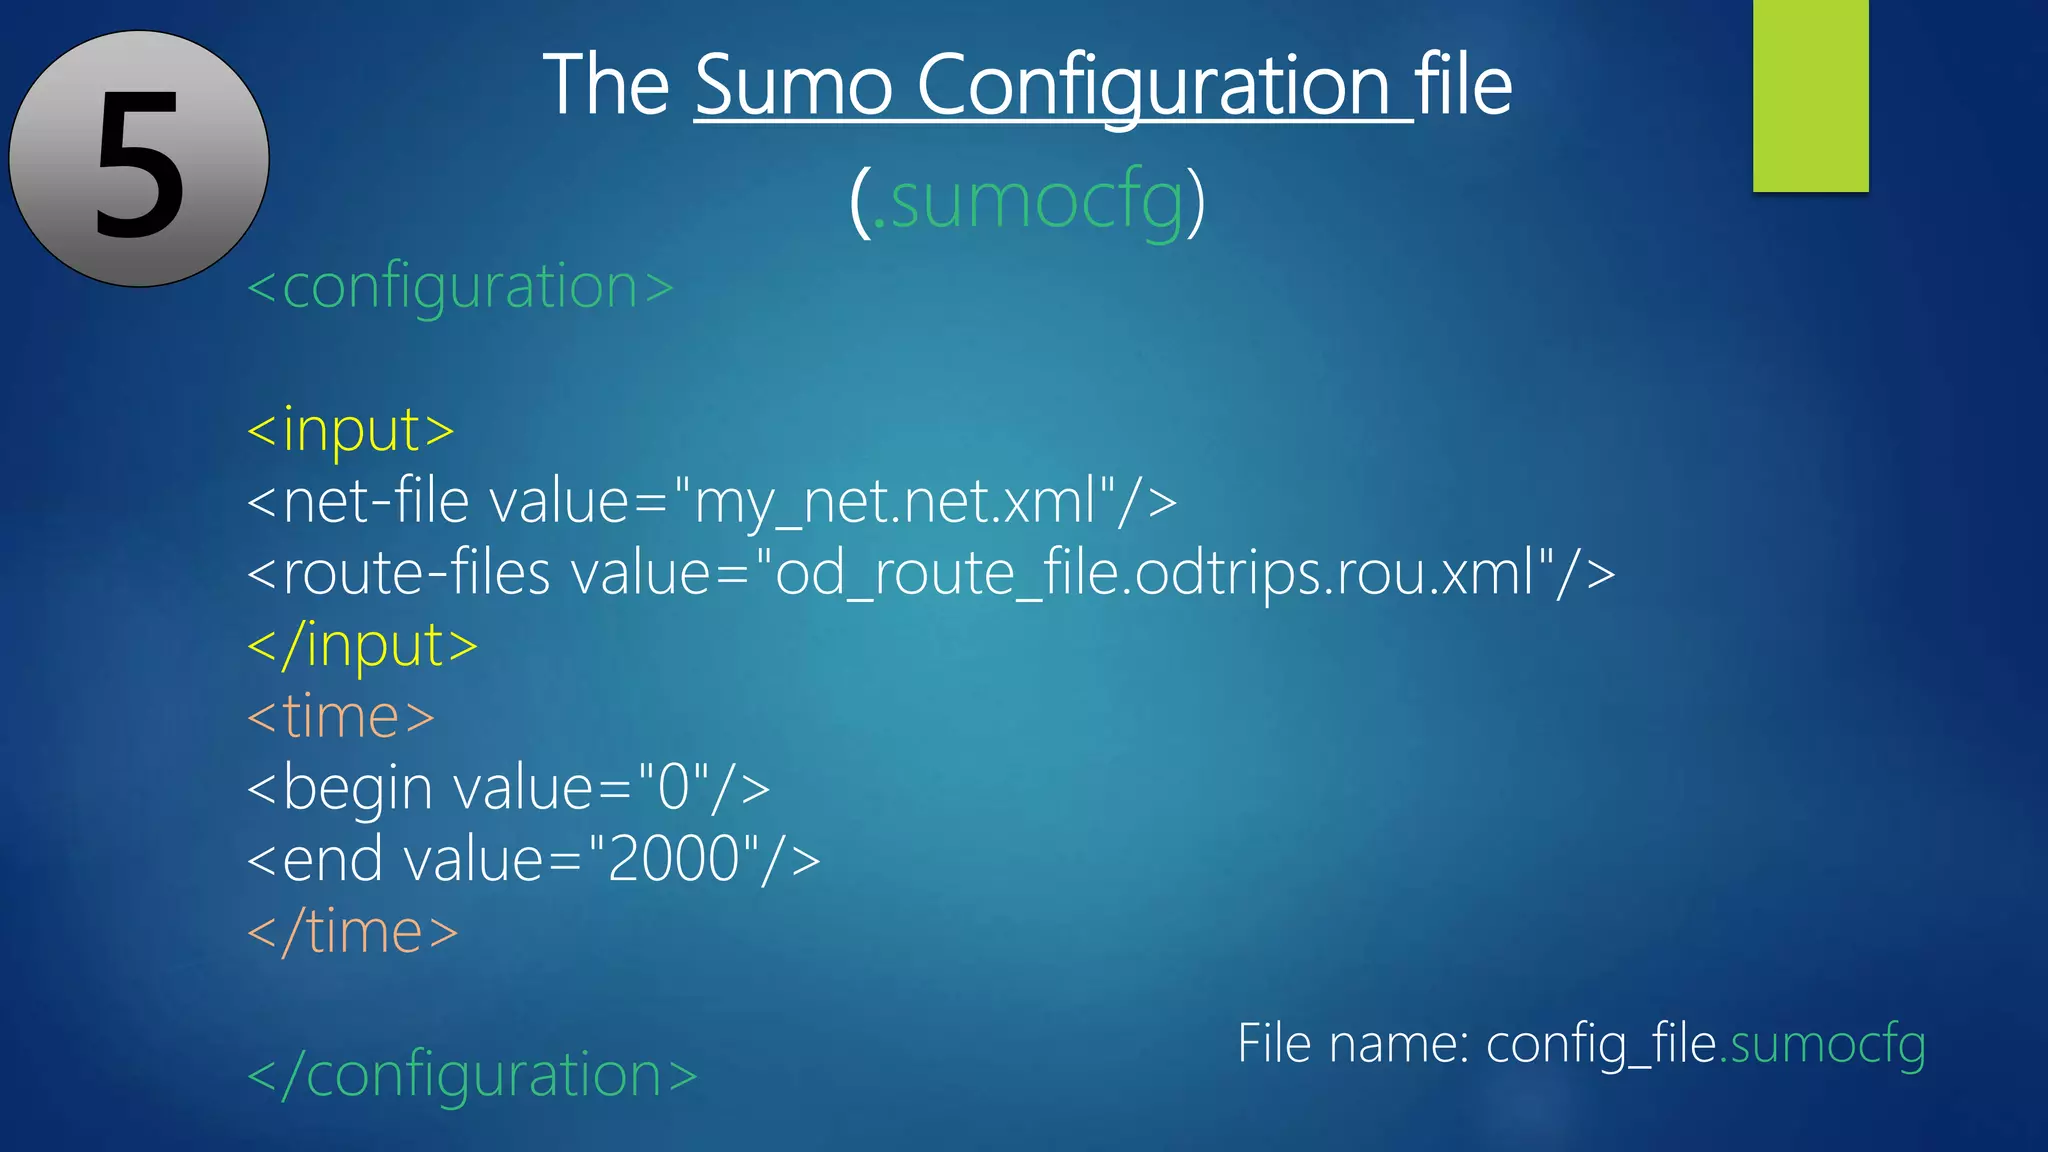


The document describes the process of generating traffic from an origin-destination matrix and simulating it using the traffic simulation package SUMO. It involves: 1. Defining traffic analysis zones (TAZs) and creating a TAZ file. 2. Creating an origin-destination (OD) matrix file specifying the trips between TAZs. 3. Using the od2trips tool to generate individual trip routes from the OD matrix, outputting an OD trips file. 4. Assigning the trips to routes through the network using the duarouter tool, which finds the shortest paths, outputting an OD routes file. 5. Specifying the network, trips and route files in