SlideShare a Scribd company logo
1 of 18
a presentation
software that allows you to
create dynamic slide
presentations. Slideshows
can include animation,
narration, images, videos,
and much more.
Mrs. Imen Tekaya Bouaziz 1
• With PowerPoint on your PC, Mac, or mobile
device, you can:
• Create presentations from scratch or a
template.
• Add text, images, art, and videos.
• Select a professional design with PowerPoint
Designer.
• Add transitions, animations, and cinematic
motion.
• Save to OneDrive, to get to your presentations
from your computer, tablet, or phone.
• Share your work and work with others,
wherever they are.
Mrs. Imen Tekaya Bouaziz 2
Mrs. Imen Tekaya Bouaziz 3
Starting Microsoft
PowerPoint
To start Microsoft PowerPoint:
1.Select the Start menu.
2.Select All Programs.
3.Select Microsoft Office.
4.Select Microsoft PowerPoint 2013.
Opening PowerPoint 2013
When you open PowerPoint
2013 for the first time,
the Start Screen will appear.
From here, you'll be able to
create a new presentation,
choose a template, and access
your recently edited
presentations.
From the Start Screen, locate
and select Blank Presentation.
Mrs. Imen Tekaya Bouaziz 4
2. A new presentation will appear.
Mrs. Imen Tekaya Bouaziz 5
When PowerPoint starts, it opens by default in
Normal view. In Normal view, the application window
includes the following areas:
• Slides tab - A pane in the left pane with thumbnail
previews of your slides. You can click and drag the
thumbnails to rearrange slides.
• Slide pane - Displays the slide that is currently selected in
the Slides tab.
• Notes pane - Displays speaker notes for the slide currently
active in the Slide pane.
In PowerPoint 2007 and 2010, the Notes pane will open by
default in Normal view; however, in PowerPoint 2013 you
must enable it by clicking NOTES in the Status bar.
to a fast start by using PowerPoint themes, that provide ready-
made designs with built-in graphics, borders, fonts,…
Select a theme:
• Themes are ready-made presentation designs
with pre-built colors, fonts, and layouts.
1. Open PowerPoint. Or, if PowerPoint is
already open, select File > New.
2. Select one of the Themes.
3. Select a color variant.
4. Browse through More images if you like.
5. Select Create.
6. Select a placeholder to start typing.
The fonts and colors depend on the theme.
7. On the Home tab, select the New
Slide drop-down to view other layouts in
this theme.
Mrs. Imen Tekaya Bouaziz 6
Select a Template
• A template gives you a slide that's pre-made with a design theme
and content built right in.
1. Open PowerPoint. Or, if PowerPoint is already open,
select File > New.
2. Select Search for online templates and themes and type in a
keyword, and select the magnifying glass.
3. Select a template, and select Create.
Or, double-click the template.
4. Select inside the placeholder text to add or change what you'd
like.
5. Select File > Save As, select where you want to
save it, type a name, and select Save.
Now whenever you need it, you can open and make changes to use it
again.
Mrs. Imen Tekaya Bouaziz 7
Working with the PowerPoint environment
• If you've previously used PowerPoint 2010 or 2007, PowerPoint 2013 will feel familiar. It continues to use
features like the Ribbon and the Quick Access toolbar -where you will find commands to perform common
tasks in PowerPoint—as well as Backstage view.
The Ribbon
• PowerPoint 2013 uses a tabbed Ribbon system instead of traditional menus. The Ribbon contains multiple
tabs, each with several groups of commands. You will use these tabs to perform the most common tasks in
PowerPoint.
Mrs. Imen Tekaya Bouaziz 8
Exploring the Ribbon
Mrs. Imen Tekaya Bouaziz 9
Understanding slides and slide layouts
• When you insert a new slide, it will usually have placeholders.
Placeholders can contain different types of content,
including text and images. Some placeholders have placeholder
text, which you can replace with your own text. Others
have thumbnail icons that allow you to insert pictures, charts, and
videos.
• Slides have different layouts for placeholders, depending on the
type of information you want to include. Whenever you create a
new slide, you'll need to choose a slide layout that fits your
content.
To insert a new slide:
• Whenever you start a new presentation, it will contain one
slide with the Title Slide layout. You can insert as many slides as
you need from a variety of layouts.
1. From the Home tab, click the bottom half of
the New Slide command.
2. Choose the desired slide layout from the menu that appears.
3. The new slide will appear. Click any placeholder and begin
typing to add text. You can also click an icon to add other types
of content, such as a picture or a chart.
Mrs. Imen Tekaya Bouaziz 10
Apply and change a theme
• You created slides for your
presentation, and now you’re
thinking about slide design: the
background design, font styles,
colors, and layouts. Themes provide a
complete slide design for your
presentation.
• Each theme uses its own set of slide
layouts. These layouts control the
way your content is arranged, so the
effect can be dramatic. In the
examples below, you can see that
the placeholders, fonts,
and colors are different.
Mrs. Imen Tekaya Bouaziz 11
To apply a theme:
1- the Design tab on the Ribbon, then locate the Themes group.
Each image represents a theme.
2- Click the More drop-down arrow to see all available themes.
3- Select the desired theme.
Once you've applied a theme, you can also select a variant for that
theme from the Variants group. Variants use different theme
colors while preserving a theme's overall look.
Animating Text and Objects:
• In PowerPoint, you can animate text and objects
such as clip art, shapes, and pictures. Animation—or
movement—on the slide can be used
to draw the audience's attention to specific content
or to make the slide easier to read.
Mrs. Imen Tekaya Bouaziz 12
To apply an animation to an object:
1. Select the object you want to animate.
2. On the Animations tab, click the More drop-down arrow
in the Animation group.
3. A drop-down menu of animation effects will appear.
Select the desired effect,
A drop-down menu of animation effects will appear. Select
the desired effect
4. The effect will apply to the object. The object will have a
small number next to it to show that it has an
animation. In the Slide pane, a star symbol also will
appear next to the slide.
Effect options
• Some effects will have options you can change. For example, with the Fly
In effect you can control which direction the object comes from. These
options can be accessed from the Effect Options command in the
Animation group.
To add multiple animations to an object:
• If you select a new animation from the the menu in the Animation group,
it will replace the object's current animation. However, you'll sometimes
want to place more than one animation on an object, like
an Entrance and an Exit effect. To do this, you'll need to use the Add
Animation command, which will allow you to keep your current
animations while adding new ones.
1. Select an object.
2. Click the Animations tab.
3. In the Advanced Animation group, click the Add Animation command
to view the available animations.
4. Select the desired animation effect.
The Animation Pane
• The Animation Pane allows you to view and manage all of the effects that
are on the current slide. You can modify and reorder effects directly from
the Animation Pane, which is especially useful when you have several
effects.
• To open the Animation Pane:
• From the Animations tab, click the Animation Pane command.
Mrs. Imen Tekaya Bouaziz 13
Applying Transitions
1. Select the desired slide from the Slide
Navigation pane. This is the slide that will
appear after the transition.
2. Click the Transitions tab, then locate the Transition
to This Slide group. By default, None is applied to
each slide.
3. Click the More drop-down arrow to display all
transitions.
4. Click a transition to apply it to the selected slide.
This will automatically preview the transition.
5. You can use the Apply To All command in
the Timing group to apply the same transition to
all slides in your presentation. Keep in mind that
this will modify any other transitions you've
applied.
Mrs. Imen Tekaya Bouaziz 14
To modify the transition effect:
You can quickly customize the look of a transition by changing its direction.
1. Select the slide with the transition you want to modify.
2. Click the Effect Options command, and choose the desired option. These options
will vary depending on the selected transition.
3. The transition will be modified, and a preview of the transition will appear.
 To modify the transition duration:
1. Select the slide with the transition you want to modify.
2. In the Duration field in the Timing group, enter the desired time for the transition.
In this example, we'll increase the time to two seconds—or 02.00—to make the
transition slower.
Mrs. Imen Tekaya Bouaziz 15
 To add sound:
1. Select the slide with the transition you want to modify.
2. Click the Sound drop-down menu in the Timing group.
3. Click a sound to apply it to the selected slide, then preview the transition to hear
the sound.
To remove a transition:
Select the slide with the transition you want to remove.
Choose None from the Transition to This Slide group. The transition will be removed.
** To remove transitions from all slides, apply the None transition to a slide, then
click the Apply to All command.
Hyperlinks and Action Buttons
• Hyperlinks have two basic parts: the address of the webpage,
email address, or other location they are linking to, and
the display text (which can also be a picture or shape).
**To insert a hyperlink:
1. Select the image or text you want to make a hyperlink.
2. Right-click the selected text or image, then click Hyperlink.
Alternatively, you can go to the Insert tab and click
the Hyperlink command.
3. The Insert Hyperlink dialog box will open. You can also get
to this dialog box from the Insert tab by clicking Hyperlink.
4. If you selected text, the words will appear in the Text to
display field at the top. You can change this text if you want.
5. Type the address you want to link to in the Address field.
6. Click OK. The text or image you selected will now be a
hyperlink to the web address.
Mrs. Imen Tekaya Bouaziz 16
Using shapes and pictures as hyperlinks
• Sometimes you might want to to format objects—including shapes,
text boxes, and pictures—as hyperlinks. This is especially helpful if you
want the object to act like a button. To do this, right-click the desired
object and select Hyperlink from the menu that appears. Click the
object during the presentation to open the hyperlink
To insert an action button on one slide:
1. Click the Insert tab.
2. Click the Shapes command in the Illustrations group. A drop-down
menu will appear with the action buttons located at the very
bottom.
3. Select the desired action button.
4. Insert the button onto the slide by clicking the desired location.
The Action Settings dialog box will appear.
5. Select the Mouse Click or Mouse Over tab.
6. Selecting the Mouse Click tab means the action button will
perform its action only when clicked. Selecting the Mouse
Over tab will make the action button perform its action when you
move the mouse over it.
7. In the Action on click section, select Hyperlink to: then click the
drop-down arrow and choose an option from the menu.
8. Check the Play Sound box if you want a sound to play when the
action button is clicked. Select a sound from the drop-down menu,
or select Other sound to use a sound file on your computer.
Mrs. Imen Tekaya Bouaziz 17
Create a video from your PPT presentation
• After you finish creating your presentation in PowerPoint, you can save it as a video to share with others.
• Select File > Export > Create a video.
• Select the quality of the video:
• Presentation Quality - Largest file size and highest quality (1920 x 1080).
• Internet Quality - Medium file size and moderate quality (1280 x 720).
• Low Quality - Smallest file size and lowest quality (852 x 480).
• Decide if you want to:
• Use Recorded Timings and Narrations
• Don't Use Recorded Timings and Narrations
• In the Seconds spent on each slide box, select the default time you want to spend on each slide.
• Select Create Video.
• Enter a file name and then browse to the location you want to save your video.
• In the Save As type box, select if you want to save the video as a MPEG-4 Video or Windows Media Video.
• TIP: The MPEG-4 Video format is recommended for the best compatibility with video players.
• Select Save.
Mrs. Imen Tekaya Bouaziz 18

More Related Content

What's hot

Powerpoint tutorials
Powerpoint tutorials Powerpoint tutorials
Powerpoint tutorials ePowerpoint
 
Introduction to Microsoft PowerPoint 2010 for Microsoft Windows Slides
Introduction to Microsoft PowerPoint 2010 for Microsoft Windows SlidesIntroduction to Microsoft PowerPoint 2010 for Microsoft Windows Slides
Introduction to Microsoft PowerPoint 2010 for Microsoft Windows SlidesSaide OER Africa
 
Microsoft PowerPoint 2007: Create Your First Presentation
Microsoft PowerPoint 2007: Create Your First PresentationMicrosoft PowerPoint 2007: Create Your First Presentation
Microsoft PowerPoint 2007: Create Your First Presentationomoviejohn
 
Microsoft PowerPoint 2013
Microsoft PowerPoint 2013Microsoft PowerPoint 2013
Microsoft PowerPoint 2013Arpee Callejo
 
Making Powerpoint Presentation
Making Powerpoint PresentationMaking Powerpoint Presentation
Making Powerpoint PresentationJe Escober
 
Ms Office Powerpoint Tutorial
Ms Office Powerpoint TutorialMs Office Powerpoint Tutorial
Ms Office Powerpoint TutorialvirtualMaryam
 
PowerPoint basics
PowerPoint basicsPowerPoint basics
PowerPoint basicshope baido
 
New Features In Power Point 2007 Ppt
New Features In Power Point 2007 PptNew Features In Power Point 2007 Ppt
New Features In Power Point 2007 Pptjoelk
 
Triad 2010 power_point_chapter_1
Triad 2010 power_point_chapter_1Triad 2010 power_point_chapter_1
Triad 2010 power_point_chapter_1mindysholder
 
Step By Step Microsoft Power Point 2010
Step By Step Microsoft Power Point 2010Step By Step Microsoft Power Point 2010
Step By Step Microsoft Power Point 2010Baseera Hashmi
 
Microsoft Power Point 2010
Microsoft Power Point 2010Microsoft Power Point 2010
Microsoft Power Point 2010home
 
Learn MS Powerpoint basics
Learn MS Powerpoint basicsLearn MS Powerpoint basics
Learn MS Powerpoint basicsvethics
 
Creating a PowerPoint Presentation
Creating a PowerPoint PresentationCreating a PowerPoint Presentation
Creating a PowerPoint PresentationJide Famuyiwa
 
How to make a Power Point
How to make a Power PointHow to make a Power Point
How to make a Power Pointguest393c4e
 
MS PowerPoint 2010 tutorial 1
MS PowerPoint 2010 tutorial 1MS PowerPoint 2010 tutorial 1
MS PowerPoint 2010 tutorial 1Khalfan Alshuaili
 
Power point 2010 (Reviewing Presentations)
Power point 2010 (Reviewing Presentations) Power point 2010 (Reviewing Presentations)
Power point 2010 (Reviewing Presentations) Christine Joy Pilapil
 

What's hot (20)

Powerpoint tutorials
Powerpoint tutorials Powerpoint tutorials
Powerpoint tutorials
 
My first power point
My first power pointMy first power point
My first power point
 
Introduction to Microsoft PowerPoint 2010 for Microsoft Windows Slides
Introduction to Microsoft PowerPoint 2010 for Microsoft Windows SlidesIntroduction to Microsoft PowerPoint 2010 for Microsoft Windows Slides
Introduction to Microsoft PowerPoint 2010 for Microsoft Windows Slides
 
Microsoft PowerPoint 2007: Create Your First Presentation
Microsoft PowerPoint 2007: Create Your First PresentationMicrosoft PowerPoint 2007: Create Your First Presentation
Microsoft PowerPoint 2007: Create Your First Presentation
 
Microsoft PowerPoint 2013
Microsoft PowerPoint 2013Microsoft PowerPoint 2013
Microsoft PowerPoint 2013
 
Microsoft Powerpoint Basics
Microsoft Powerpoint BasicsMicrosoft Powerpoint Basics
Microsoft Powerpoint Basics
 
Making Powerpoint Presentation
Making Powerpoint PresentationMaking Powerpoint Presentation
Making Powerpoint Presentation
 
Ms powerpoint
Ms powerpointMs powerpoint
Ms powerpoint
 
Ms Office Powerpoint Tutorial
Ms Office Powerpoint TutorialMs Office Powerpoint Tutorial
Ms Office Powerpoint Tutorial
 
PowerPoint basics
PowerPoint basicsPowerPoint basics
PowerPoint basics
 
New Features In Power Point 2007 Ppt
New Features In Power Point 2007 PptNew Features In Power Point 2007 Ppt
New Features In Power Point 2007 Ppt
 
Triad 2010 power_point_chapter_1
Triad 2010 power_point_chapter_1Triad 2010 power_point_chapter_1
Triad 2010 power_point_chapter_1
 
Step By Step Microsoft Power Point 2010
Step By Step Microsoft Power Point 2010Step By Step Microsoft Power Point 2010
Step By Step Microsoft Power Point 2010
 
Microsoft Power Point 2010
Microsoft Power Point 2010Microsoft Power Point 2010
Microsoft Power Point 2010
 
Learn MS Powerpoint basics
Learn MS Powerpoint basicsLearn MS Powerpoint basics
Learn MS Powerpoint basics
 
Creating a PowerPoint Presentation
Creating a PowerPoint PresentationCreating a PowerPoint Presentation
Creating a PowerPoint Presentation
 
How to make a Power Point
How to make a Power PointHow to make a Power Point
How to make a Power Point
 
MS PowerPoint 2010 tutorial 1
MS PowerPoint 2010 tutorial 1MS PowerPoint 2010 tutorial 1
MS PowerPoint 2010 tutorial 1
 
Power point 2010 (Reviewing Presentations)
Power point 2010 (Reviewing Presentations) Power point 2010 (Reviewing Presentations)
Power point 2010 (Reviewing Presentations)
 
MS PowerPoint Training
MS PowerPoint TrainingMS PowerPoint Training
MS PowerPoint Training
 

Similar to Presentation software powerpoint 2013

Introduction to powerpoint
Introduction to powerpointIntroduction to powerpoint
Introduction to powerpointMichael Cortez
 
Essential training on microsoft office power point 2007
Essential training on microsoft office power point 2007Essential training on microsoft office power point 2007
Essential training on microsoft office power point 2007ashok_142
 
How to use power point
How to use power point How to use power point
How to use power point Jehangir Khan
 
Bring your presentations to life with basic knowledge using powerpoint
Bring your presentations to life with basic knowledge using powerpointBring your presentations to life with basic knowledge using powerpoint
Bring your presentations to life with basic knowledge using powerpointKhan Farhana
 
Creating Power Point Presentations | www.sampleassignment.com
Creating Power Point Presentations | www.sampleassignment.comCreating Power Point Presentations | www.sampleassignment.com
Creating Power Point Presentations | www.sampleassignment.comSample Assignment
 
Microsoft PowerPoint Basic features
Microsoft PowerPoint Basic featuresMicrosoft PowerPoint Basic features
Microsoft PowerPoint Basic featuresAkashMeghwar2
 
Pks ms powerpointl unit 3_bcomcs
Pks ms powerpointl unit 3_bcomcsPks ms powerpointl unit 3_bcomcs
Pks ms powerpointl unit 3_bcomcsKALAISELVI P
 
CAB-Unit 3-Lesson-5.pptxgjimt2023.......
CAB-Unit 3-Lesson-5.pptxgjimt2023.......CAB-Unit 3-Lesson-5.pptxgjimt2023.......
CAB-Unit 3-Lesson-5.pptxgjimt2023.......MahakMittal23
 
Power point by Gulshan K Maheshwari(QAU)
Power point by Gulshan  K Maheshwari(QAU)Power point by Gulshan  K Maheshwari(QAU)
Power point by Gulshan K Maheshwari(QAU)GulshanKumar368
 
Introduction to-power point-2016
Introduction to-power point-2016Introduction to-power point-2016
Introduction to-power point-2016Damilola Mosaku
 
Presentationsead 090726004112-phpapp01
Presentationsead 090726004112-phpapp01Presentationsead 090726004112-phpapp01
Presentationsead 090726004112-phpapp01gurpreet kaur
 
1 DIGITAL DOCUMENTATION.pdf
1 DIGITAL DOCUMENTATION.pdf1 DIGITAL DOCUMENTATION.pdf
1 DIGITAL DOCUMENTATION.pdfJNVKGLCS
 
Lesson 2 presentation basics
Lesson 2   presentation basicsLesson 2   presentation basics
Lesson 2 presentation basicsguevarra_2000
 
Lesson 2 presentation basics
Lesson 2   presentation basicsLesson 2   presentation basics
Lesson 2 presentation basicsguevarra_2000
 

Similar to Presentation software powerpoint 2013 (20)

Introduction to powerpoint
Introduction to powerpointIntroduction to powerpoint
Introduction to powerpoint
 
Essential training on microsoft office power point 2007
Essential training on microsoft office power point 2007Essential training on microsoft office power point 2007
Essential training on microsoft office power point 2007
 
How to use power point
How to use power point How to use power point
How to use power point
 
Bring your presentations to life with basic knowledge using powerpoint
Bring your presentations to life with basic knowledge using powerpointBring your presentations to life with basic knowledge using powerpoint
Bring your presentations to life with basic knowledge using powerpoint
 
Creating Power Point Presentations | www.sampleassignment.com
Creating Power Point Presentations | www.sampleassignment.comCreating Power Point Presentations | www.sampleassignment.com
Creating Power Point Presentations | www.sampleassignment.com
 
Microsoft PowerPoint Basic features
Microsoft PowerPoint Basic featuresMicrosoft PowerPoint Basic features
Microsoft PowerPoint Basic features
 
PowerPoint.pdf
PowerPoint.pdfPowerPoint.pdf
PowerPoint.pdf
 
1st try
1st try1st try
1st try
 
PowerPoint 2013
PowerPoint 2013PowerPoint 2013
PowerPoint 2013
 
Pks ms powerpointl unit 3_bcomcs
Pks ms powerpointl unit 3_bcomcsPks ms powerpointl unit 3_bcomcs
Pks ms powerpointl unit 3_bcomcs
 
CAB-Unit 3-Lesson-5.pptxgjimt2023.......
CAB-Unit 3-Lesson-5.pptxgjimt2023.......CAB-Unit 3-Lesson-5.pptxgjimt2023.......
CAB-Unit 3-Lesson-5.pptxgjimt2023.......
 
Power point tutorial
Power point tutorialPower point tutorial
Power point tutorial
 
Power point by Gulshan K Maheshwari(QAU)
Power point by Gulshan  K Maheshwari(QAU)Power point by Gulshan  K Maheshwari(QAU)
Power point by Gulshan K Maheshwari(QAU)
 
Introduction to-power point-2016
Introduction to-power point-2016Introduction to-power point-2016
Introduction to-power point-2016
 
Presentationsead 090726004112-phpapp01
Presentationsead 090726004112-phpapp01Presentationsead 090726004112-phpapp01
Presentationsead 090726004112-phpapp01
 
1 DIGITAL DOCUMENTATION.pdf
1 DIGITAL DOCUMENTATION.pdf1 DIGITAL DOCUMENTATION.pdf
1 DIGITAL DOCUMENTATION.pdf
 
Transitionsandanimations
TransitionsandanimationsTransitionsandanimations
Transitionsandanimations
 
Lesson 2 presentation basics
Lesson 2   presentation basicsLesson 2   presentation basics
Lesson 2 presentation basics
 
Lesson 2 presentation basics
Lesson 2   presentation basicsLesson 2   presentation basics
Lesson 2 presentation basics
 
Presentation1
Presentation1Presentation1
Presentation1
 

More from imen Tekaya Bouaziz

Ikteb termes de-référence-expert-pédagogique
Ikteb termes de-référence-expert-pédagogiqueIkteb termes de-référence-expert-pédagogique
Ikteb termes de-référence-expert-pédagogiqueimen Tekaya Bouaziz
 
Introducing Computer Networks and Loval Area Networks
 Introducing Computer Networks and Loval Area Networks Introducing Computer Networks and Loval Area Networks
Introducing Computer Networks and Loval Area Networksimen Tekaya Bouaziz
 
Internet 8th level imen tek bouaziz 2016
Internet 8th level imen tek bouaziz 2016Internet 8th level imen tek bouaziz 2016
Internet 8th level imen tek bouaziz 2016imen Tekaya Bouaziz
 
Unit1lesson2 lan 9th level: Computer Networks and Local Area Network
Unit1lesson2 lan 9th level: Computer Networks and Local Area NetworkUnit1lesson2 lan 9th level: Computer Networks and Local Area Network
Unit1lesson2 lan 9th level: Computer Networks and Local Area Networkimen Tekaya Bouaziz
 
Conduite de projets par imen tekaya
Conduite de projets par imen tekayaConduite de projets par imen tekaya
Conduite de projets par imen tekayaimen Tekaya Bouaziz
 
Vct pil lf_2014_fr de imen tekaya
Vct pil lf_2014_fr de imen tekayaVct pil lf_2014_fr de imen tekaya
Vct pil lf_2014_fr de imen tekayaimen Tekaya Bouaziz
 
Diagramme effets des energies renouvelables
Diagramme effets des energies renouvelablesDiagramme effets des energies renouvelables
Diagramme effets des energies renouvelablesimen Tekaya Bouaziz
 
Presentation du projet clean sfax du college pilote de sfax
Presentation du projet clean sfax du college pilote de sfaxPresentation du projet clean sfax du college pilote de sfax
Presentation du projet clean sfax du college pilote de sfaximen Tekaya Bouaziz
 

More from imen Tekaya Bouaziz (20)

Other data storage devices v3
Other data storage devices v3Other data storage devices v3
Other data storage devices v3
 
Ikteb termes de-référence-expert-pédagogique
Ikteb termes de-référence-expert-pédagogiqueIkteb termes de-référence-expert-pédagogique
Ikteb termes de-référence-expert-pédagogique
 
Introducing Computer Networks and Loval Area Networks
 Introducing Computer Networks and Loval Area Networks Introducing Computer Networks and Loval Area Networks
Introducing Computer Networks and Loval Area Networks
 
Internet 8th level imen tek bouaziz 2016
Internet 8th level imen tek bouaziz 2016Internet 8th level imen tek bouaziz 2016
Internet 8th level imen tek bouaziz 2016
 
Cyber citizenship imen tekaya
Cyber citizenship imen tekayaCyber citizenship imen tekaya
Cyber citizenship imen tekaya
 
Unit3 :Internet 7th grade 2012
Unit3 :Internet 7th grade  2012Unit3 :Internet 7th grade  2012
Unit3 :Internet 7th grade 2012
 
Unit1lesson2 lan 9th level: Computer Networks and Local Area Network
Unit1lesson2 lan 9th level: Computer Networks and Local Area NetworkUnit1lesson2 lan 9th level: Computer Networks and Local Area Network
Unit1lesson2 lan 9th level: Computer Networks and Local Area Network
 
Conduite de projets par imen tekaya
Conduite de projets par imen tekayaConduite de projets par imen tekaya
Conduite de projets par imen tekaya
 
Magazine clean sfax fr
Magazine clean sfax  frMagazine clean sfax  fr
Magazine clean sfax fr
 
Vct pil lf_2014_fr de imen tekaya
Vct pil lf_2014_fr de imen tekayaVct pil lf_2014_fr de imen tekaya
Vct pil lf_2014_fr de imen tekaya
 
Diagramme effets des energies renouvelables
Diagramme effets des energies renouvelablesDiagramme effets des energies renouvelables
Diagramme effets des energies renouvelables
 
Cancer de la vessie
Cancer de la vessieCancer de la vessie
Cancer de la vessie
 
Polution marine
Polution marine Polution marine
Polution marine
 
Presentation du projet clean sfax du college pilote de sfax
Presentation du projet clean sfax du college pilote de sfaxPresentation du projet clean sfax du college pilote de sfax
Presentation du projet clean sfax du college pilote de sfax
 
Projet photovoltaîque
Projet photovoltaîqueProjet photovoltaîque
Projet photovoltaîque
 
Polution marine
Polution marine Polution marine
Polution marine
 
Oumaima guermaazi 9b7
Oumaima guermaazi 9b7Oumaima guermaazi 9b7
Oumaima guermaazi 9b7
 
Mental health rahma derbel 97
Mental health rahma derbel 97Mental health rahma derbel 97
Mental health rahma derbel 97
 
Les eaux douces français
Les eaux douces  françaisLes eaux douces  français
Les eaux douces français
 
Les dechets domestiques
Les dechets domestiquesLes dechets domestiques
Les dechets domestiques
 

Recently uploaded

HỌC TỐT TIẾNG ANH 11 THEO CHƯƠNG TRÌNH GLOBAL SUCCESS ĐÁP ÁN CHI TIẾT - CẢ NĂ...
HỌC TỐT TIẾNG ANH 11 THEO CHƯƠNG TRÌNH GLOBAL SUCCESS ĐÁP ÁN CHI TIẾT - CẢ NĂ...HỌC TỐT TIẾNG ANH 11 THEO CHƯƠNG TRÌNH GLOBAL SUCCESS ĐÁP ÁN CHI TIẾT - CẢ NĂ...
HỌC TỐT TIẾNG ANH 11 THEO CHƯƠNG TRÌNH GLOBAL SUCCESS ĐÁP ÁN CHI TIẾT - CẢ NĂ...Nguyen Thanh Tu Collection
 
Introduction to ArtificiaI Intelligence in Higher Education
Introduction to ArtificiaI Intelligence in Higher EducationIntroduction to ArtificiaI Intelligence in Higher Education
Introduction to ArtificiaI Intelligence in Higher Educationpboyjonauth
 
Atmosphere science 7 quarter 4 .........
Atmosphere science 7 quarter 4 .........Atmosphere science 7 quarter 4 .........
Atmosphere science 7 quarter 4 .........LeaCamillePacle
 
Proudly South Africa powerpoint Thorisha.pptx
Proudly South Africa powerpoint Thorisha.pptxProudly South Africa powerpoint Thorisha.pptx
Proudly South Africa powerpoint Thorisha.pptxthorishapillay1
 
Full Stack Web Development Course for Beginners
Full Stack Web Development Course  for BeginnersFull Stack Web Development Course  for Beginners
Full Stack Web Development Course for BeginnersSabitha Banu
 
How to do quick user assign in kanban in Odoo 17 ERP
How to do quick user assign in kanban in Odoo 17 ERPHow to do quick user assign in kanban in Odoo 17 ERP
How to do quick user assign in kanban in Odoo 17 ERPCeline George
 
ECONOMIC CONTEXT - PAPER 1 Q3: NEWSPAPERS.pptx
ECONOMIC CONTEXT - PAPER 1 Q3: NEWSPAPERS.pptxECONOMIC CONTEXT - PAPER 1 Q3: NEWSPAPERS.pptx
ECONOMIC CONTEXT - PAPER 1 Q3: NEWSPAPERS.pptxiammrhaywood
 
Gas measurement O2,Co2,& ph) 04/2024.pptx
Gas measurement O2,Co2,& ph) 04/2024.pptxGas measurement O2,Co2,& ph) 04/2024.pptx
Gas measurement O2,Co2,& ph) 04/2024.pptxDr.Ibrahim Hassaan
 
Judging the Relevance and worth of ideas part 2.pptx
Judging the Relevance  and worth of ideas part 2.pptxJudging the Relevance  and worth of ideas part 2.pptx
Judging the Relevance and worth of ideas part 2.pptxSherlyMaeNeri
 
Difference Between Search & Browse Methods in Odoo 17
Difference Between Search & Browse Methods in Odoo 17Difference Between Search & Browse Methods in Odoo 17
Difference Between Search & Browse Methods in Odoo 17Celine George
 
Employee wellbeing at the workplace.pptx
Employee wellbeing at the workplace.pptxEmployee wellbeing at the workplace.pptx
Employee wellbeing at the workplace.pptxNirmalaLoungPoorunde1
 
EPANDING THE CONTENT OF AN OUTLINE using notes.pptx
EPANDING THE CONTENT OF AN OUTLINE using notes.pptxEPANDING THE CONTENT OF AN OUTLINE using notes.pptx
EPANDING THE CONTENT OF AN OUTLINE using notes.pptxRaymartEstabillo3
 
DATA STRUCTURE AND ALGORITHM for beginners
DATA STRUCTURE AND ALGORITHM for beginnersDATA STRUCTURE AND ALGORITHM for beginners
DATA STRUCTURE AND ALGORITHM for beginnersSabitha Banu
 
Framing an Appropriate Research Question 6b9b26d93da94caf993c038d9efcdedb.pdf
Framing an Appropriate Research Question 6b9b26d93da94caf993c038d9efcdedb.pdfFraming an Appropriate Research Question 6b9b26d93da94caf993c038d9efcdedb.pdf
Framing an Appropriate Research Question 6b9b26d93da94caf993c038d9efcdedb.pdfUjwalaBharambe
 
Influencing policy (training slides from Fast Track Impact)
Influencing policy (training slides from Fast Track Impact)Influencing policy (training slides from Fast Track Impact)
Influencing policy (training slides from Fast Track Impact)Mark Reed
 
How to Configure Email Server in Odoo 17
How to Configure Email Server in Odoo 17How to Configure Email Server in Odoo 17
How to Configure Email Server in Odoo 17Celine George
 
Field Attribute Index Feature in Odoo 17
Field Attribute Index Feature in Odoo 17Field Attribute Index Feature in Odoo 17
Field Attribute Index Feature in Odoo 17Celine George
 

Recently uploaded (20)

HỌC TỐT TIẾNG ANH 11 THEO CHƯƠNG TRÌNH GLOBAL SUCCESS ĐÁP ÁN CHI TIẾT - CẢ NĂ...
HỌC TỐT TIẾNG ANH 11 THEO CHƯƠNG TRÌNH GLOBAL SUCCESS ĐÁP ÁN CHI TIẾT - CẢ NĂ...HỌC TỐT TIẾNG ANH 11 THEO CHƯƠNG TRÌNH GLOBAL SUCCESS ĐÁP ÁN CHI TIẾT - CẢ NĂ...
HỌC TỐT TIẾNG ANH 11 THEO CHƯƠNG TRÌNH GLOBAL SUCCESS ĐÁP ÁN CHI TIẾT - CẢ NĂ...
 
Introduction to ArtificiaI Intelligence in Higher Education
Introduction to ArtificiaI Intelligence in Higher EducationIntroduction to ArtificiaI Intelligence in Higher Education
Introduction to ArtificiaI Intelligence in Higher Education
 
Atmosphere science 7 quarter 4 .........
Atmosphere science 7 quarter 4 .........Atmosphere science 7 quarter 4 .........
Atmosphere science 7 quarter 4 .........
 
Proudly South Africa powerpoint Thorisha.pptx
Proudly South Africa powerpoint Thorisha.pptxProudly South Africa powerpoint Thorisha.pptx
Proudly South Africa powerpoint Thorisha.pptx
 
Full Stack Web Development Course for Beginners
Full Stack Web Development Course  for BeginnersFull Stack Web Development Course  for Beginners
Full Stack Web Development Course for Beginners
 
9953330565 Low Rate Call Girls In Rohini Delhi NCR
9953330565 Low Rate Call Girls In Rohini  Delhi NCR9953330565 Low Rate Call Girls In Rohini  Delhi NCR
9953330565 Low Rate Call Girls In Rohini Delhi NCR
 
How to do quick user assign in kanban in Odoo 17 ERP
How to do quick user assign in kanban in Odoo 17 ERPHow to do quick user assign in kanban in Odoo 17 ERP
How to do quick user assign in kanban in Odoo 17 ERP
 
ECONOMIC CONTEXT - PAPER 1 Q3: NEWSPAPERS.pptx
ECONOMIC CONTEXT - PAPER 1 Q3: NEWSPAPERS.pptxECONOMIC CONTEXT - PAPER 1 Q3: NEWSPAPERS.pptx
ECONOMIC CONTEXT - PAPER 1 Q3: NEWSPAPERS.pptx
 
Gas measurement O2,Co2,& ph) 04/2024.pptx
Gas measurement O2,Co2,& ph) 04/2024.pptxGas measurement O2,Co2,& ph) 04/2024.pptx
Gas measurement O2,Co2,& ph) 04/2024.pptx
 
Judging the Relevance and worth of ideas part 2.pptx
Judging the Relevance  and worth of ideas part 2.pptxJudging the Relevance  and worth of ideas part 2.pptx
Judging the Relevance and worth of ideas part 2.pptx
 
Difference Between Search & Browse Methods in Odoo 17
Difference Between Search & Browse Methods in Odoo 17Difference Between Search & Browse Methods in Odoo 17
Difference Between Search & Browse Methods in Odoo 17
 
OS-operating systems- ch04 (Threads) ...
OS-operating systems- ch04 (Threads) ...OS-operating systems- ch04 (Threads) ...
OS-operating systems- ch04 (Threads) ...
 
Employee wellbeing at the workplace.pptx
Employee wellbeing at the workplace.pptxEmployee wellbeing at the workplace.pptx
Employee wellbeing at the workplace.pptx
 
EPANDING THE CONTENT OF AN OUTLINE using notes.pptx
EPANDING THE CONTENT OF AN OUTLINE using notes.pptxEPANDING THE CONTENT OF AN OUTLINE using notes.pptx
EPANDING THE CONTENT OF AN OUTLINE using notes.pptx
 
DATA STRUCTURE AND ALGORITHM for beginners
DATA STRUCTURE AND ALGORITHM for beginnersDATA STRUCTURE AND ALGORITHM for beginners
DATA STRUCTURE AND ALGORITHM for beginners
 
Framing an Appropriate Research Question 6b9b26d93da94caf993c038d9efcdedb.pdf
Framing an Appropriate Research Question 6b9b26d93da94caf993c038d9efcdedb.pdfFraming an Appropriate Research Question 6b9b26d93da94caf993c038d9efcdedb.pdf
Framing an Appropriate Research Question 6b9b26d93da94caf993c038d9efcdedb.pdf
 
Model Call Girl in Tilak Nagar Delhi reach out to us at 🔝9953056974🔝
Model Call Girl in Tilak Nagar Delhi reach out to us at 🔝9953056974🔝Model Call Girl in Tilak Nagar Delhi reach out to us at 🔝9953056974🔝
Model Call Girl in Tilak Nagar Delhi reach out to us at 🔝9953056974🔝
 
Influencing policy (training slides from Fast Track Impact)
Influencing policy (training slides from Fast Track Impact)Influencing policy (training slides from Fast Track Impact)
Influencing policy (training slides from Fast Track Impact)
 
How to Configure Email Server in Odoo 17
How to Configure Email Server in Odoo 17How to Configure Email Server in Odoo 17
How to Configure Email Server in Odoo 17
 
Field Attribute Index Feature in Odoo 17
Field Attribute Index Feature in Odoo 17Field Attribute Index Feature in Odoo 17
Field Attribute Index Feature in Odoo 17
 

Presentation software powerpoint 2013

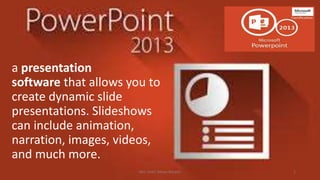
  • 1. a presentation software that allows you to create dynamic slide presentations. Slideshows can include animation, narration, images, videos, and much more. Mrs. Imen Tekaya Bouaziz 1
  • 2. • With PowerPoint on your PC, Mac, or mobile device, you can: • Create presentations from scratch or a template. • Add text, images, art, and videos. • Select a professional design with PowerPoint Designer. • Add transitions, animations, and cinematic motion. • Save to OneDrive, to get to your presentations from your computer, tablet, or phone. • Share your work and work with others, wherever they are. Mrs. Imen Tekaya Bouaziz 2
  • 3. Mrs. Imen Tekaya Bouaziz 3 Starting Microsoft PowerPoint To start Microsoft PowerPoint: 1.Select the Start menu. 2.Select All Programs. 3.Select Microsoft Office. 4.Select Microsoft PowerPoint 2013.
  • 4. Opening PowerPoint 2013 When you open PowerPoint 2013 for the first time, the Start Screen will appear. From here, you'll be able to create a new presentation, choose a template, and access your recently edited presentations. From the Start Screen, locate and select Blank Presentation. Mrs. Imen Tekaya Bouaziz 4
  • 5. 2. A new presentation will appear. Mrs. Imen Tekaya Bouaziz 5 When PowerPoint starts, it opens by default in Normal view. In Normal view, the application window includes the following areas: • Slides tab - A pane in the left pane with thumbnail previews of your slides. You can click and drag the thumbnails to rearrange slides. • Slide pane - Displays the slide that is currently selected in the Slides tab. • Notes pane - Displays speaker notes for the slide currently active in the Slide pane. In PowerPoint 2007 and 2010, the Notes pane will open by default in Normal view; however, in PowerPoint 2013 you must enable it by clicking NOTES in the Status bar.
  • 6. to a fast start by using PowerPoint themes, that provide ready- made designs with built-in graphics, borders, fonts,… Select a theme: • Themes are ready-made presentation designs with pre-built colors, fonts, and layouts. 1. Open PowerPoint. Or, if PowerPoint is already open, select File > New. 2. Select one of the Themes. 3. Select a color variant. 4. Browse through More images if you like. 5. Select Create. 6. Select a placeholder to start typing. The fonts and colors depend on the theme. 7. On the Home tab, select the New Slide drop-down to view other layouts in this theme. Mrs. Imen Tekaya Bouaziz 6 Select a Template • A template gives you a slide that's pre-made with a design theme and content built right in. 1. Open PowerPoint. Or, if PowerPoint is already open, select File > New. 2. Select Search for online templates and themes and type in a keyword, and select the magnifying glass. 3. Select a template, and select Create. Or, double-click the template. 4. Select inside the placeholder text to add or change what you'd like. 5. Select File > Save As, select where you want to save it, type a name, and select Save. Now whenever you need it, you can open and make changes to use it again.
  • 7. Mrs. Imen Tekaya Bouaziz 7
  • 8. Working with the PowerPoint environment • If you've previously used PowerPoint 2010 or 2007, PowerPoint 2013 will feel familiar. It continues to use features like the Ribbon and the Quick Access toolbar -where you will find commands to perform common tasks in PowerPoint—as well as Backstage view. The Ribbon • PowerPoint 2013 uses a tabbed Ribbon system instead of traditional menus. The Ribbon contains multiple tabs, each with several groups of commands. You will use these tabs to perform the most common tasks in PowerPoint. Mrs. Imen Tekaya Bouaziz 8
  • 9. Exploring the Ribbon Mrs. Imen Tekaya Bouaziz 9
  • 10. Understanding slides and slide layouts • When you insert a new slide, it will usually have placeholders. Placeholders can contain different types of content, including text and images. Some placeholders have placeholder text, which you can replace with your own text. Others have thumbnail icons that allow you to insert pictures, charts, and videos. • Slides have different layouts for placeholders, depending on the type of information you want to include. Whenever you create a new slide, you'll need to choose a slide layout that fits your content. To insert a new slide: • Whenever you start a new presentation, it will contain one slide with the Title Slide layout. You can insert as many slides as you need from a variety of layouts. 1. From the Home tab, click the bottom half of the New Slide command. 2. Choose the desired slide layout from the menu that appears. 3. The new slide will appear. Click any placeholder and begin typing to add text. You can also click an icon to add other types of content, such as a picture or a chart. Mrs. Imen Tekaya Bouaziz 10
  • 11. Apply and change a theme • You created slides for your presentation, and now you’re thinking about slide design: the background design, font styles, colors, and layouts. Themes provide a complete slide design for your presentation. • Each theme uses its own set of slide layouts. These layouts control the way your content is arranged, so the effect can be dramatic. In the examples below, you can see that the placeholders, fonts, and colors are different. Mrs. Imen Tekaya Bouaziz 11 To apply a theme: 1- the Design tab on the Ribbon, then locate the Themes group. Each image represents a theme. 2- Click the More drop-down arrow to see all available themes. 3- Select the desired theme. Once you've applied a theme, you can also select a variant for that theme from the Variants group. Variants use different theme colors while preserving a theme's overall look.
  • 12. Animating Text and Objects: • In PowerPoint, you can animate text and objects such as clip art, shapes, and pictures. Animation—or movement—on the slide can be used to draw the audience's attention to specific content or to make the slide easier to read. Mrs. Imen Tekaya Bouaziz 12 To apply an animation to an object: 1. Select the object you want to animate. 2. On the Animations tab, click the More drop-down arrow in the Animation group. 3. A drop-down menu of animation effects will appear. Select the desired effect, A drop-down menu of animation effects will appear. Select the desired effect 4. The effect will apply to the object. The object will have a small number next to it to show that it has an animation. In the Slide pane, a star symbol also will appear next to the slide.
  • 13. Effect options • Some effects will have options you can change. For example, with the Fly In effect you can control which direction the object comes from. These options can be accessed from the Effect Options command in the Animation group. To add multiple animations to an object: • If you select a new animation from the the menu in the Animation group, it will replace the object's current animation. However, you'll sometimes want to place more than one animation on an object, like an Entrance and an Exit effect. To do this, you'll need to use the Add Animation command, which will allow you to keep your current animations while adding new ones. 1. Select an object. 2. Click the Animations tab. 3. In the Advanced Animation group, click the Add Animation command to view the available animations. 4. Select the desired animation effect. The Animation Pane • The Animation Pane allows you to view and manage all of the effects that are on the current slide. You can modify and reorder effects directly from the Animation Pane, which is especially useful when you have several effects. • To open the Animation Pane: • From the Animations tab, click the Animation Pane command. Mrs. Imen Tekaya Bouaziz 13
  • 14. Applying Transitions 1. Select the desired slide from the Slide Navigation pane. This is the slide that will appear after the transition. 2. Click the Transitions tab, then locate the Transition to This Slide group. By default, None is applied to each slide. 3. Click the More drop-down arrow to display all transitions. 4. Click a transition to apply it to the selected slide. This will automatically preview the transition. 5. You can use the Apply To All command in the Timing group to apply the same transition to all slides in your presentation. Keep in mind that this will modify any other transitions you've applied. Mrs. Imen Tekaya Bouaziz 14
  • 15. To modify the transition effect: You can quickly customize the look of a transition by changing its direction. 1. Select the slide with the transition you want to modify. 2. Click the Effect Options command, and choose the desired option. These options will vary depending on the selected transition. 3. The transition will be modified, and a preview of the transition will appear.  To modify the transition duration: 1. Select the slide with the transition you want to modify. 2. In the Duration field in the Timing group, enter the desired time for the transition. In this example, we'll increase the time to two seconds—or 02.00—to make the transition slower. Mrs. Imen Tekaya Bouaziz 15  To add sound: 1. Select the slide with the transition you want to modify. 2. Click the Sound drop-down menu in the Timing group. 3. Click a sound to apply it to the selected slide, then preview the transition to hear the sound. To remove a transition: Select the slide with the transition you want to remove. Choose None from the Transition to This Slide group. The transition will be removed. ** To remove transitions from all slides, apply the None transition to a slide, then click the Apply to All command.
  • 16. Hyperlinks and Action Buttons • Hyperlinks have two basic parts: the address of the webpage, email address, or other location they are linking to, and the display text (which can also be a picture or shape). **To insert a hyperlink: 1. Select the image or text you want to make a hyperlink. 2. Right-click the selected text or image, then click Hyperlink. Alternatively, you can go to the Insert tab and click the Hyperlink command. 3. The Insert Hyperlink dialog box will open. You can also get to this dialog box from the Insert tab by clicking Hyperlink. 4. If you selected text, the words will appear in the Text to display field at the top. You can change this text if you want. 5. Type the address you want to link to in the Address field. 6. Click OK. The text or image you selected will now be a hyperlink to the web address. Mrs. Imen Tekaya Bouaziz 16
  • 17. Using shapes and pictures as hyperlinks • Sometimes you might want to to format objects—including shapes, text boxes, and pictures—as hyperlinks. This is especially helpful if you want the object to act like a button. To do this, right-click the desired object and select Hyperlink from the menu that appears. Click the object during the presentation to open the hyperlink To insert an action button on one slide: 1. Click the Insert tab. 2. Click the Shapes command in the Illustrations group. A drop-down menu will appear with the action buttons located at the very bottom. 3. Select the desired action button. 4. Insert the button onto the slide by clicking the desired location. The Action Settings dialog box will appear. 5. Select the Mouse Click or Mouse Over tab. 6. Selecting the Mouse Click tab means the action button will perform its action only when clicked. Selecting the Mouse Over tab will make the action button perform its action when you move the mouse over it. 7. In the Action on click section, select Hyperlink to: then click the drop-down arrow and choose an option from the menu. 8. Check the Play Sound box if you want a sound to play when the action button is clicked. Select a sound from the drop-down menu, or select Other sound to use a sound file on your computer. Mrs. Imen Tekaya Bouaziz 17
  • 18. Create a video from your PPT presentation • After you finish creating your presentation in PowerPoint, you can save it as a video to share with others. • Select File > Export > Create a video. • Select the quality of the video: • Presentation Quality - Largest file size and highest quality (1920 x 1080). • Internet Quality - Medium file size and moderate quality (1280 x 720). • Low Quality - Smallest file size and lowest quality (852 x 480). • Decide if you want to: • Use Recorded Timings and Narrations • Don't Use Recorded Timings and Narrations • In the Seconds spent on each slide box, select the default time you want to spend on each slide. • Select Create Video. • Enter a file name and then browse to the location you want to save your video. • In the Save As type box, select if you want to save the video as a MPEG-4 Video or Windows Media Video. • TIP: The MPEG-4 Video format is recommended for the best compatibility with video players. • Select Save. Mrs. Imen Tekaya Bouaziz 18