Download to read offline
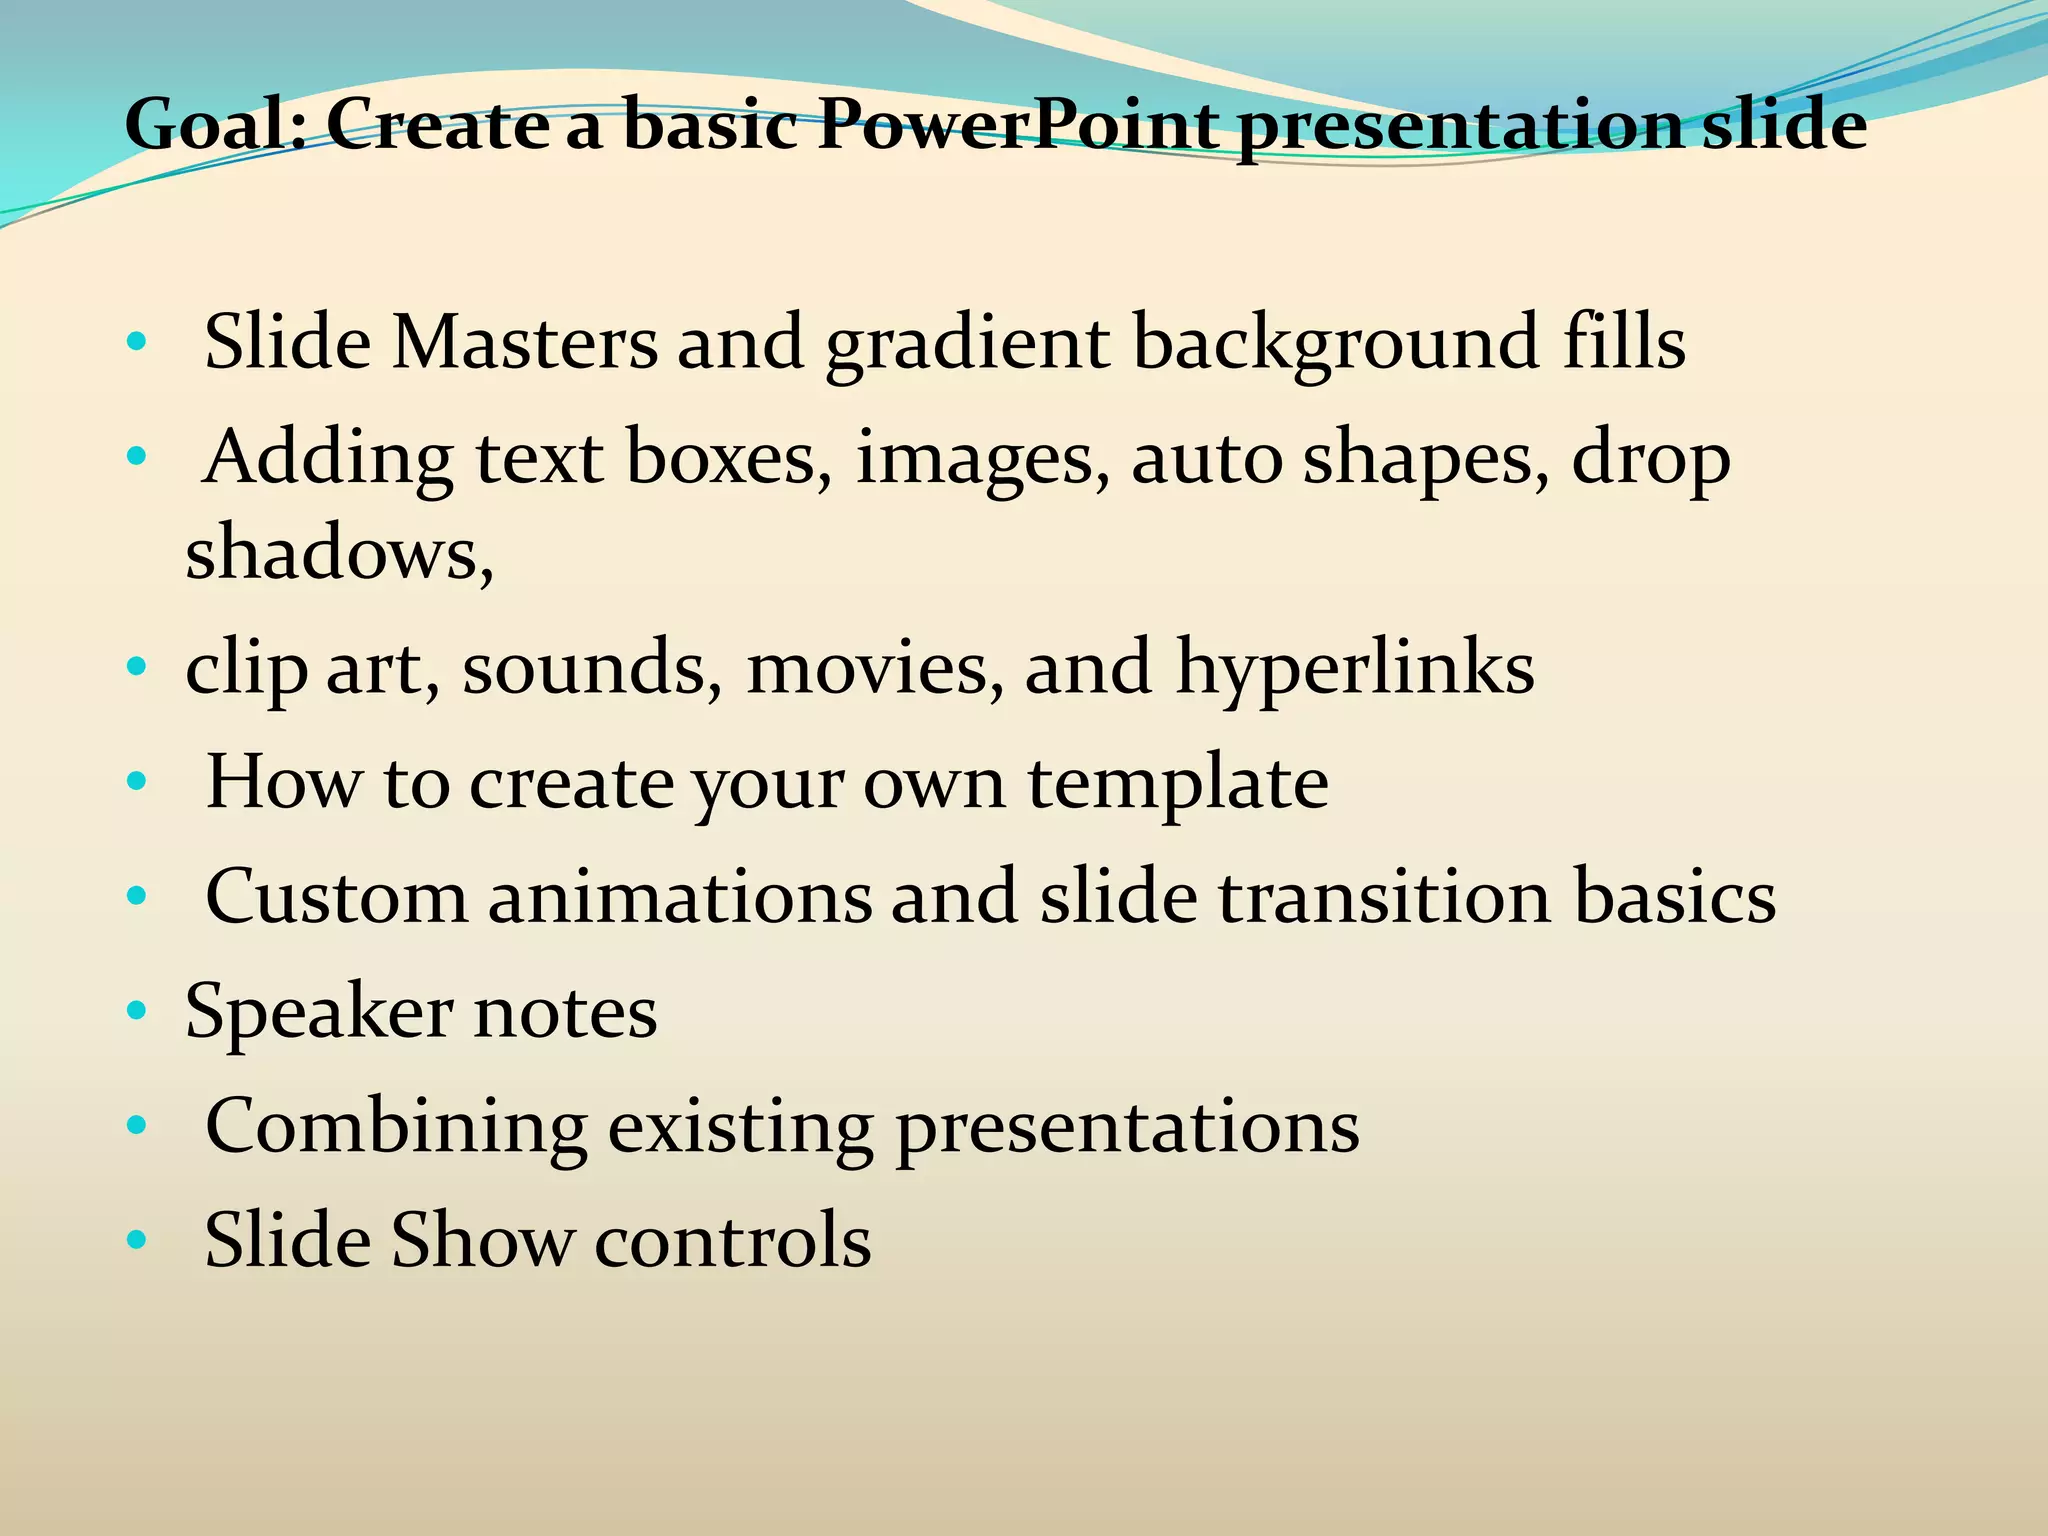
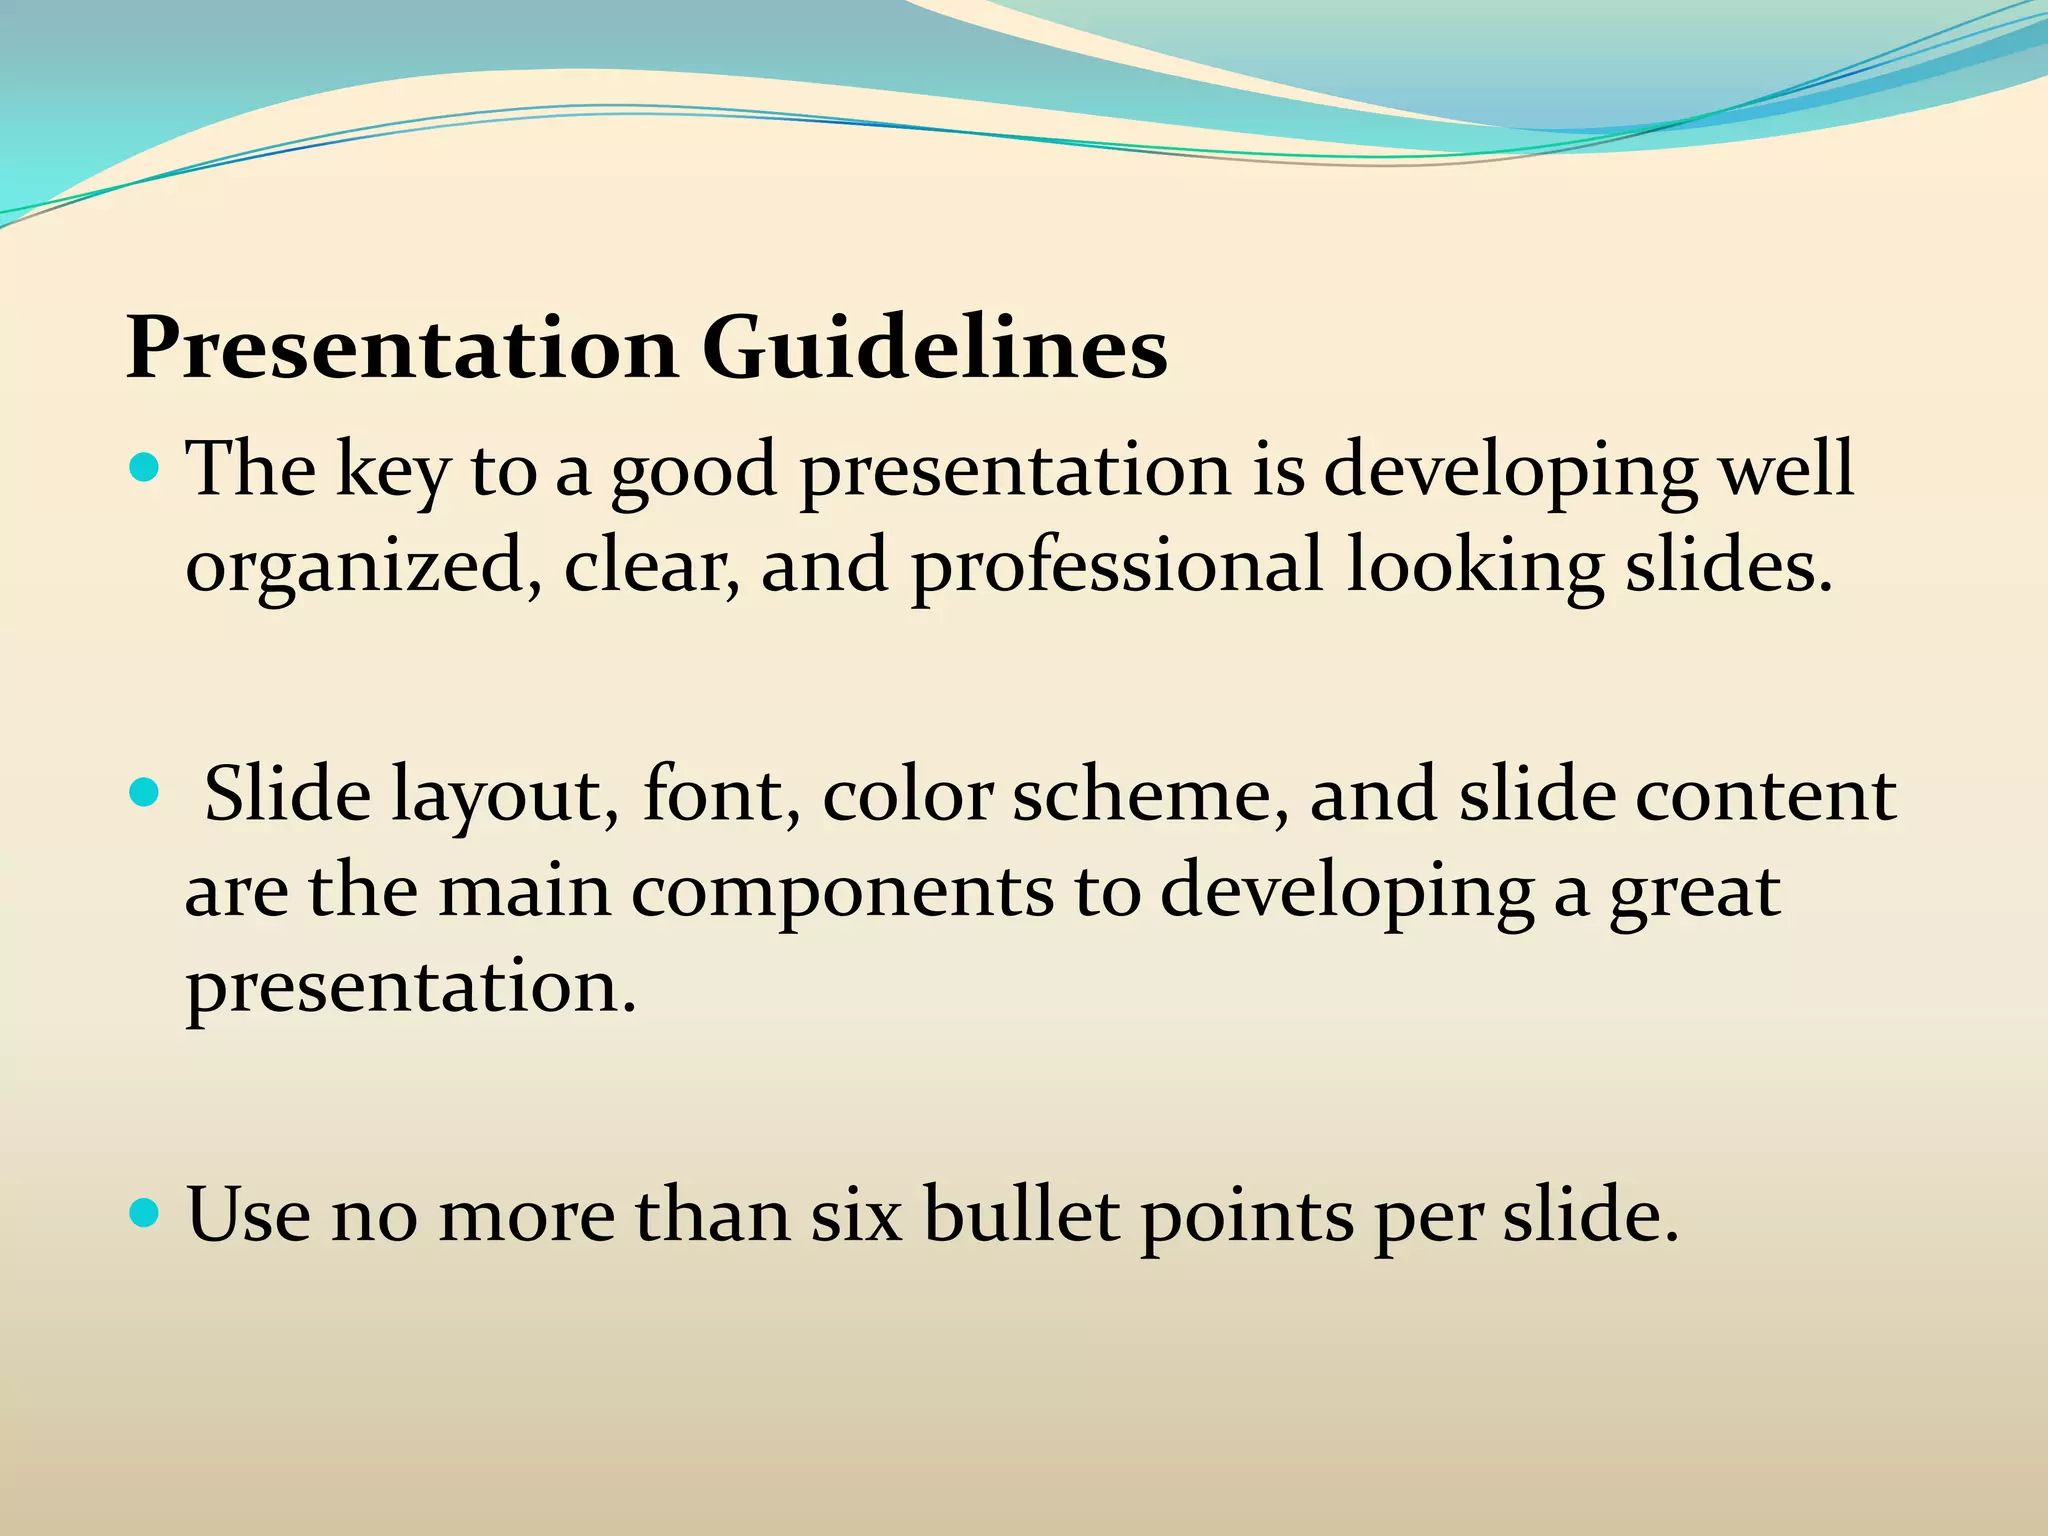
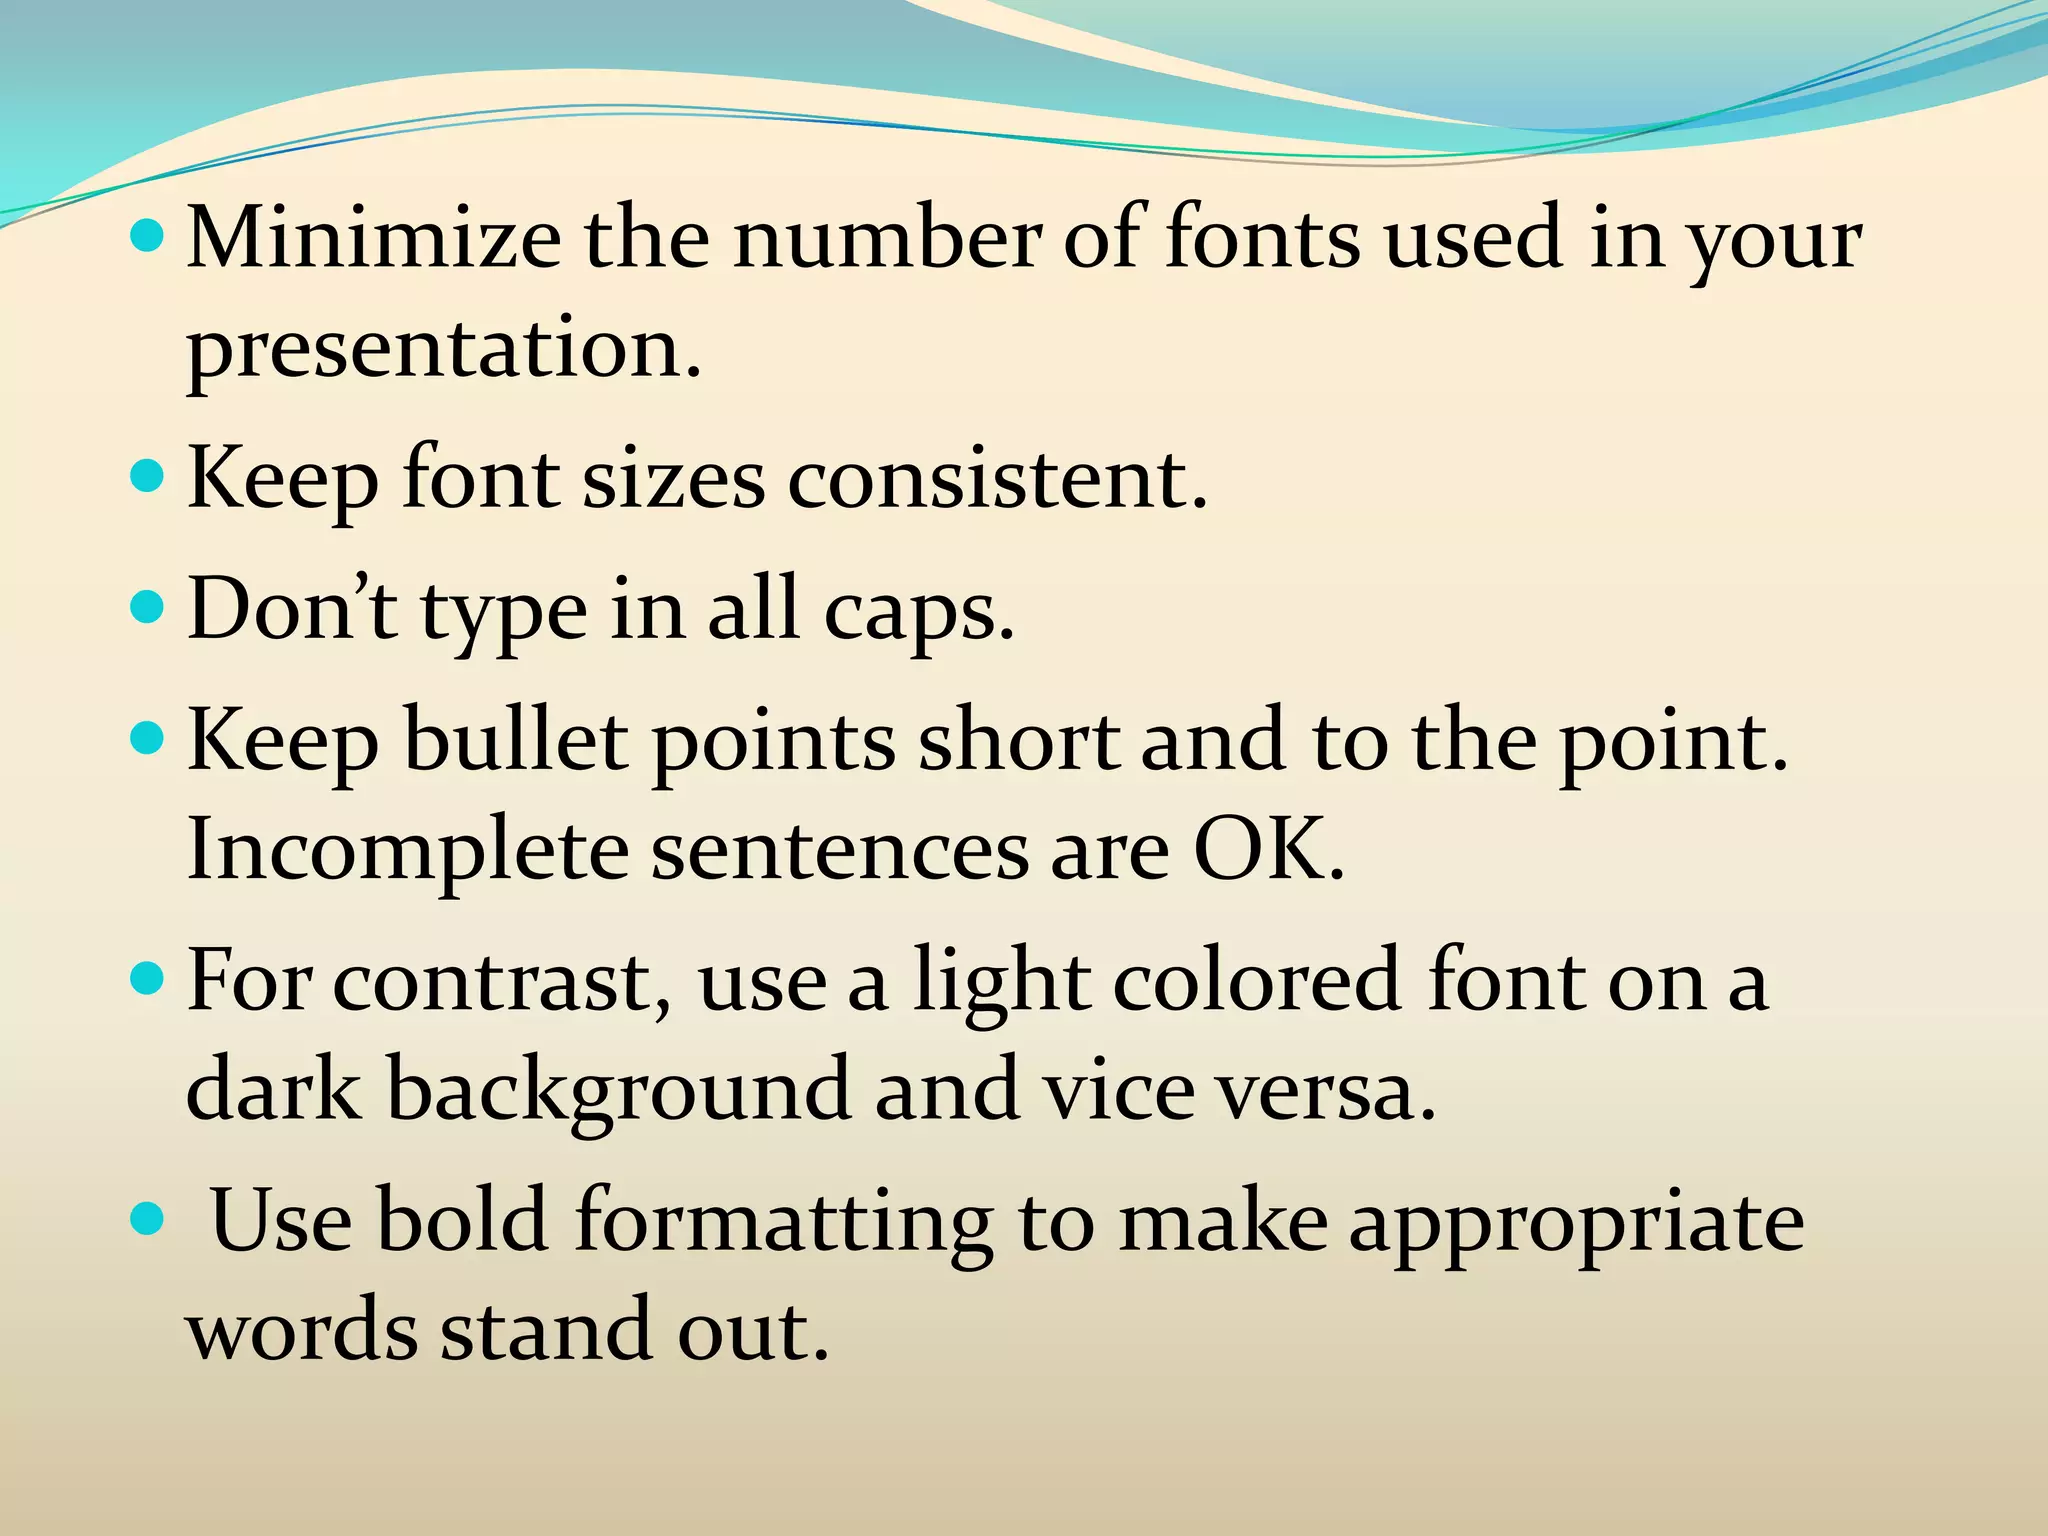
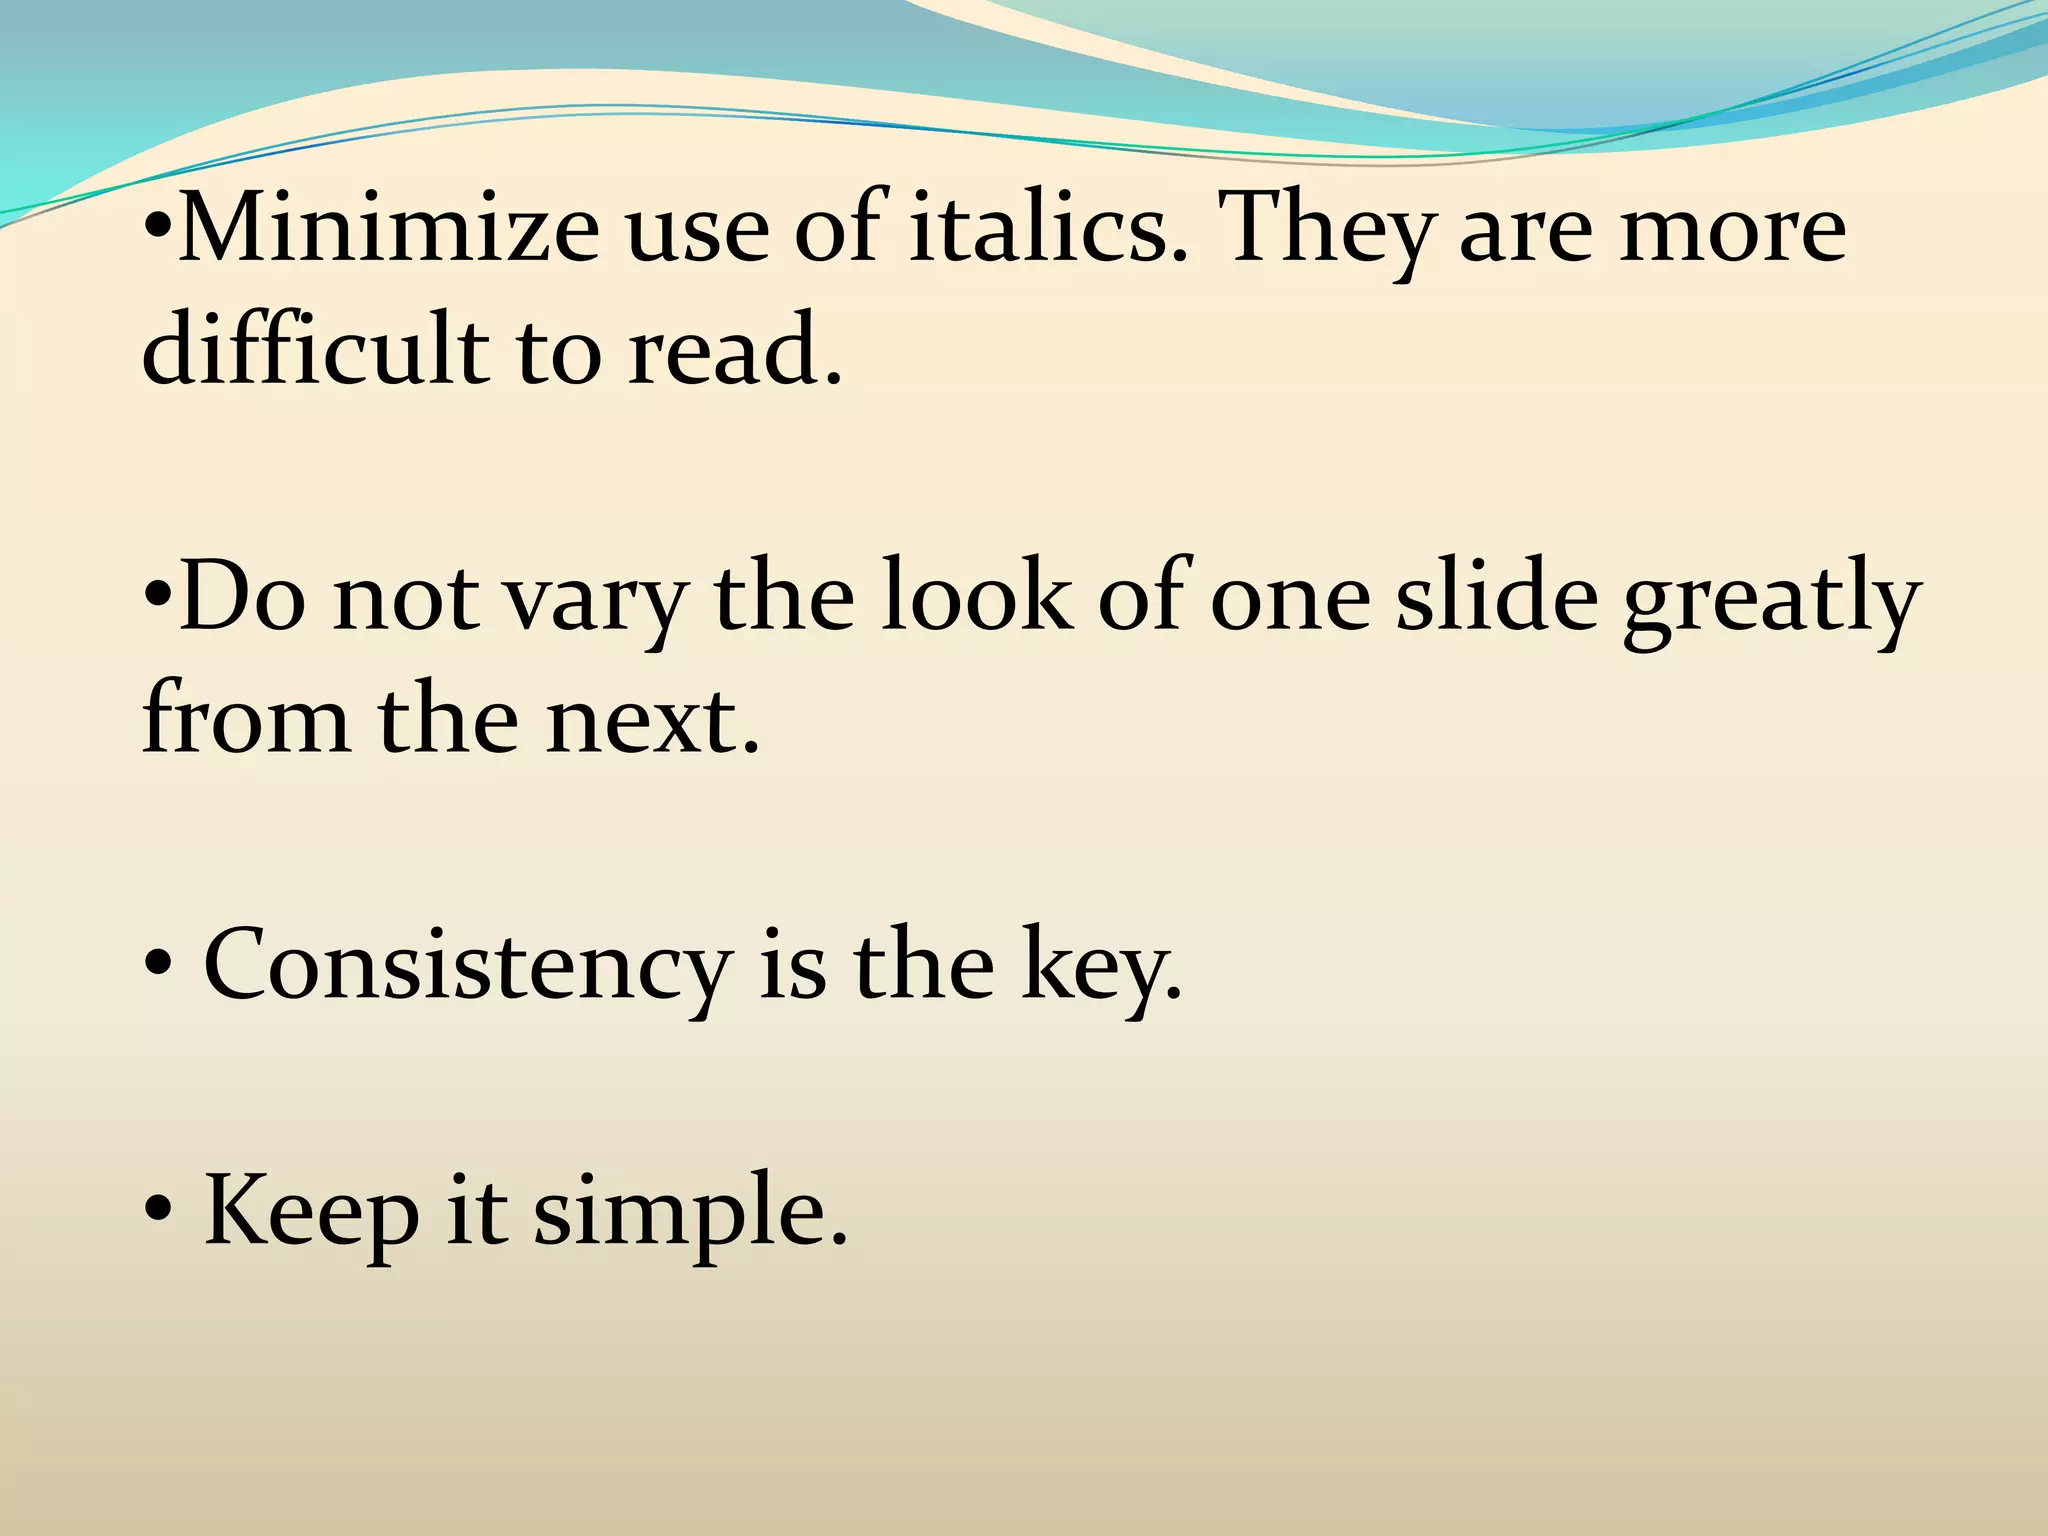
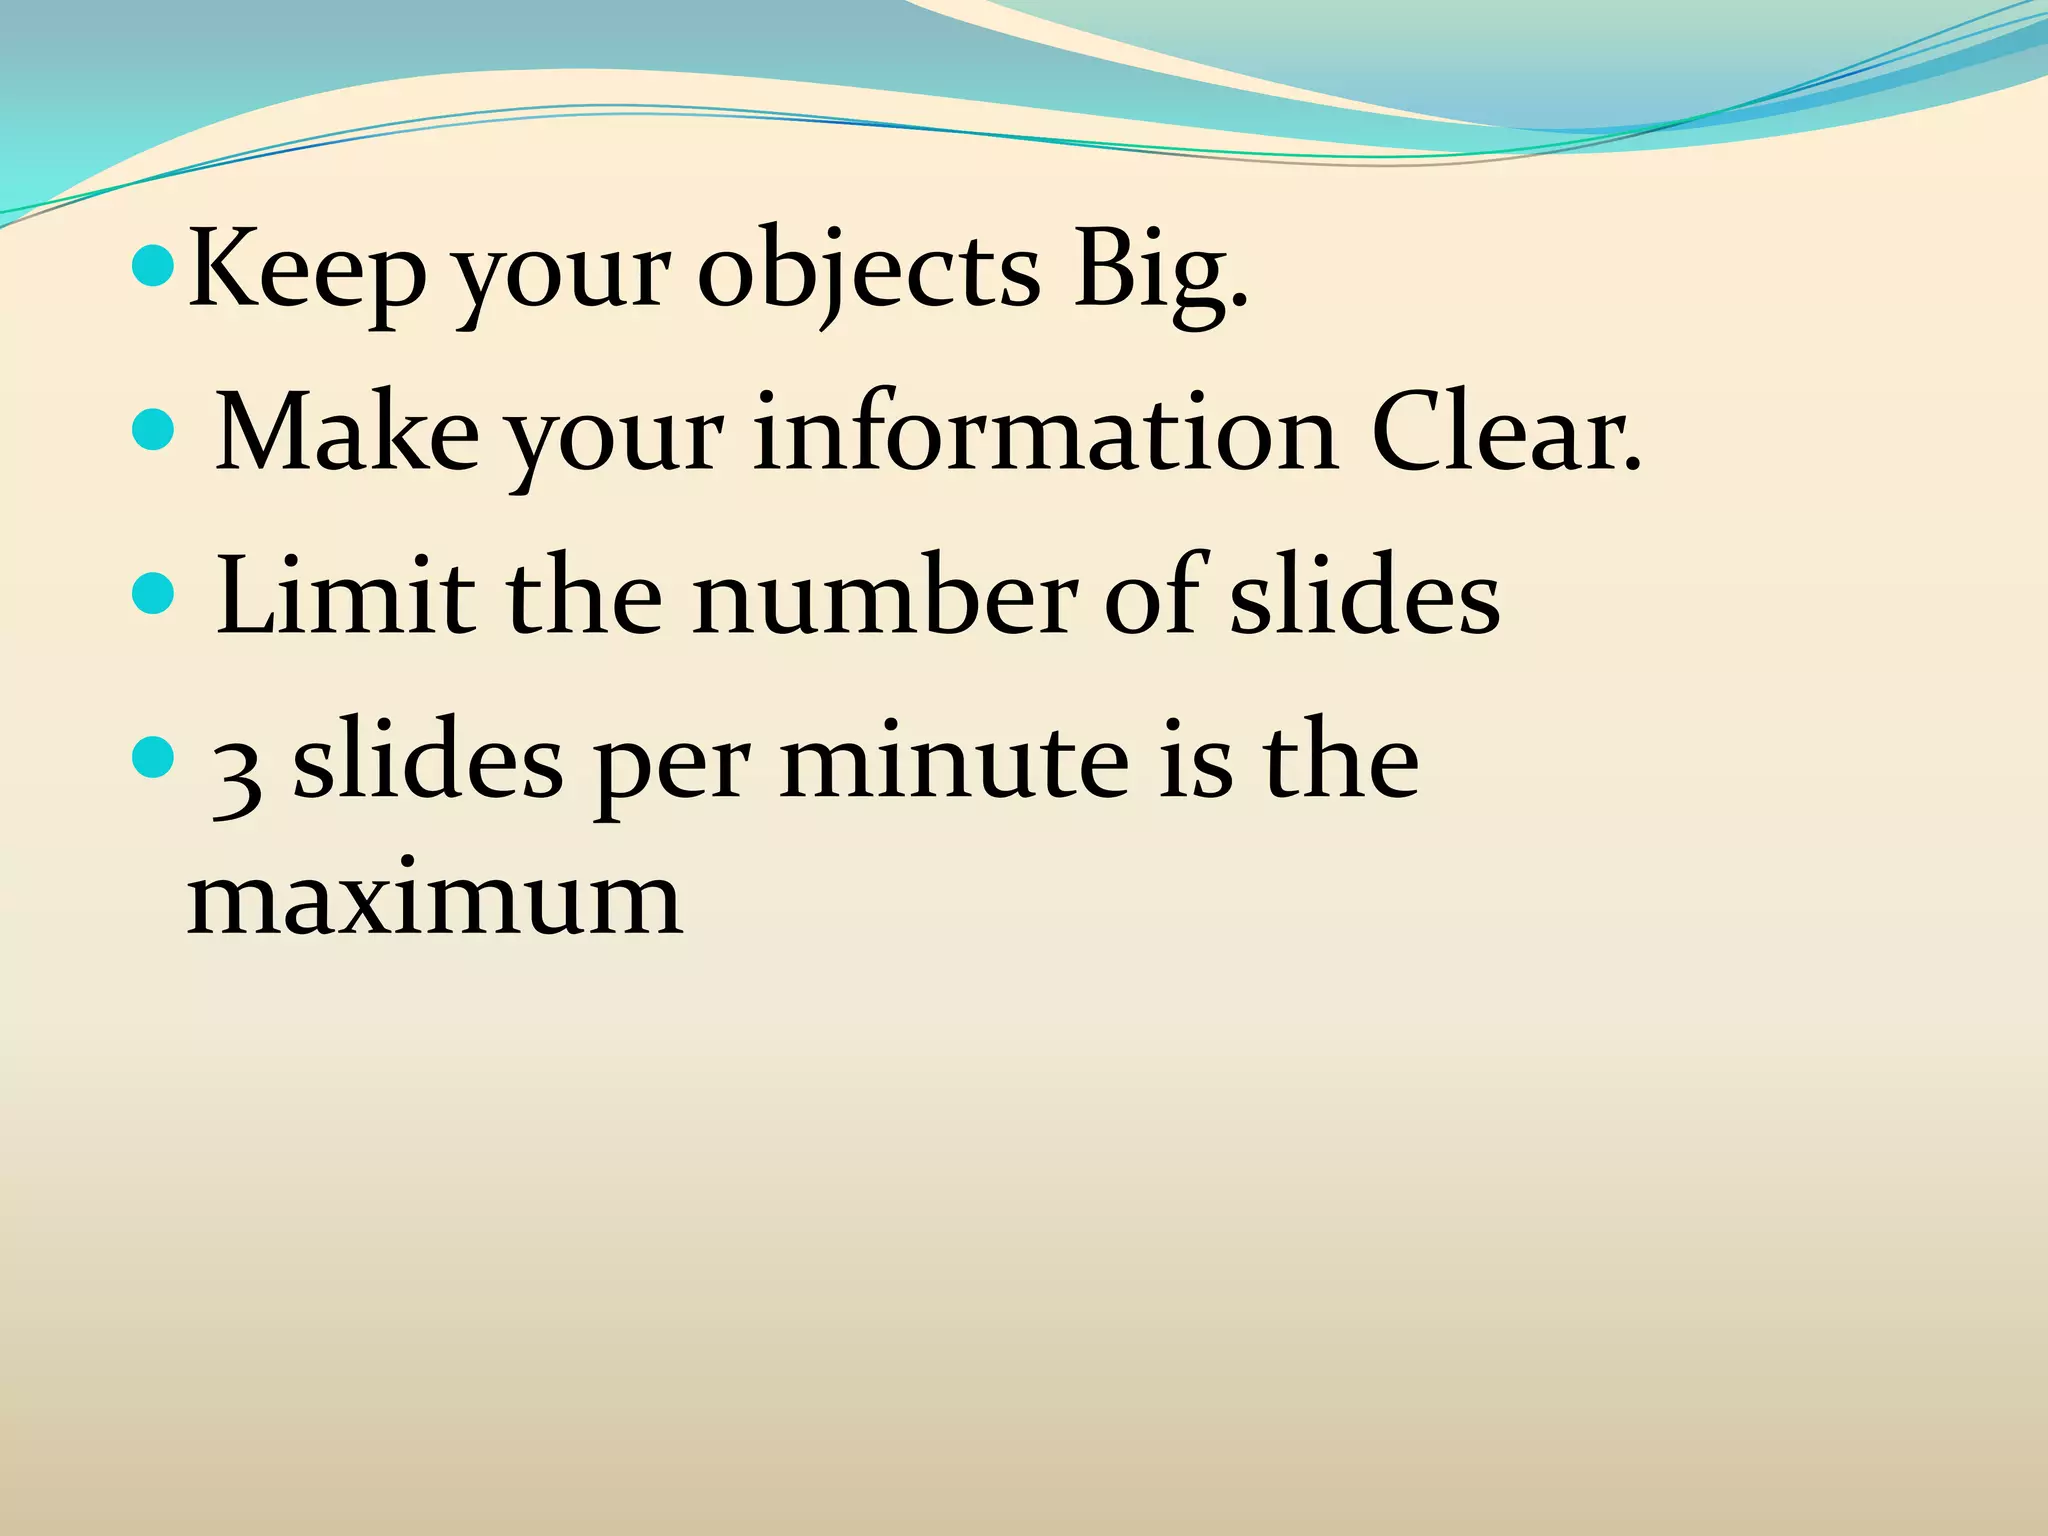
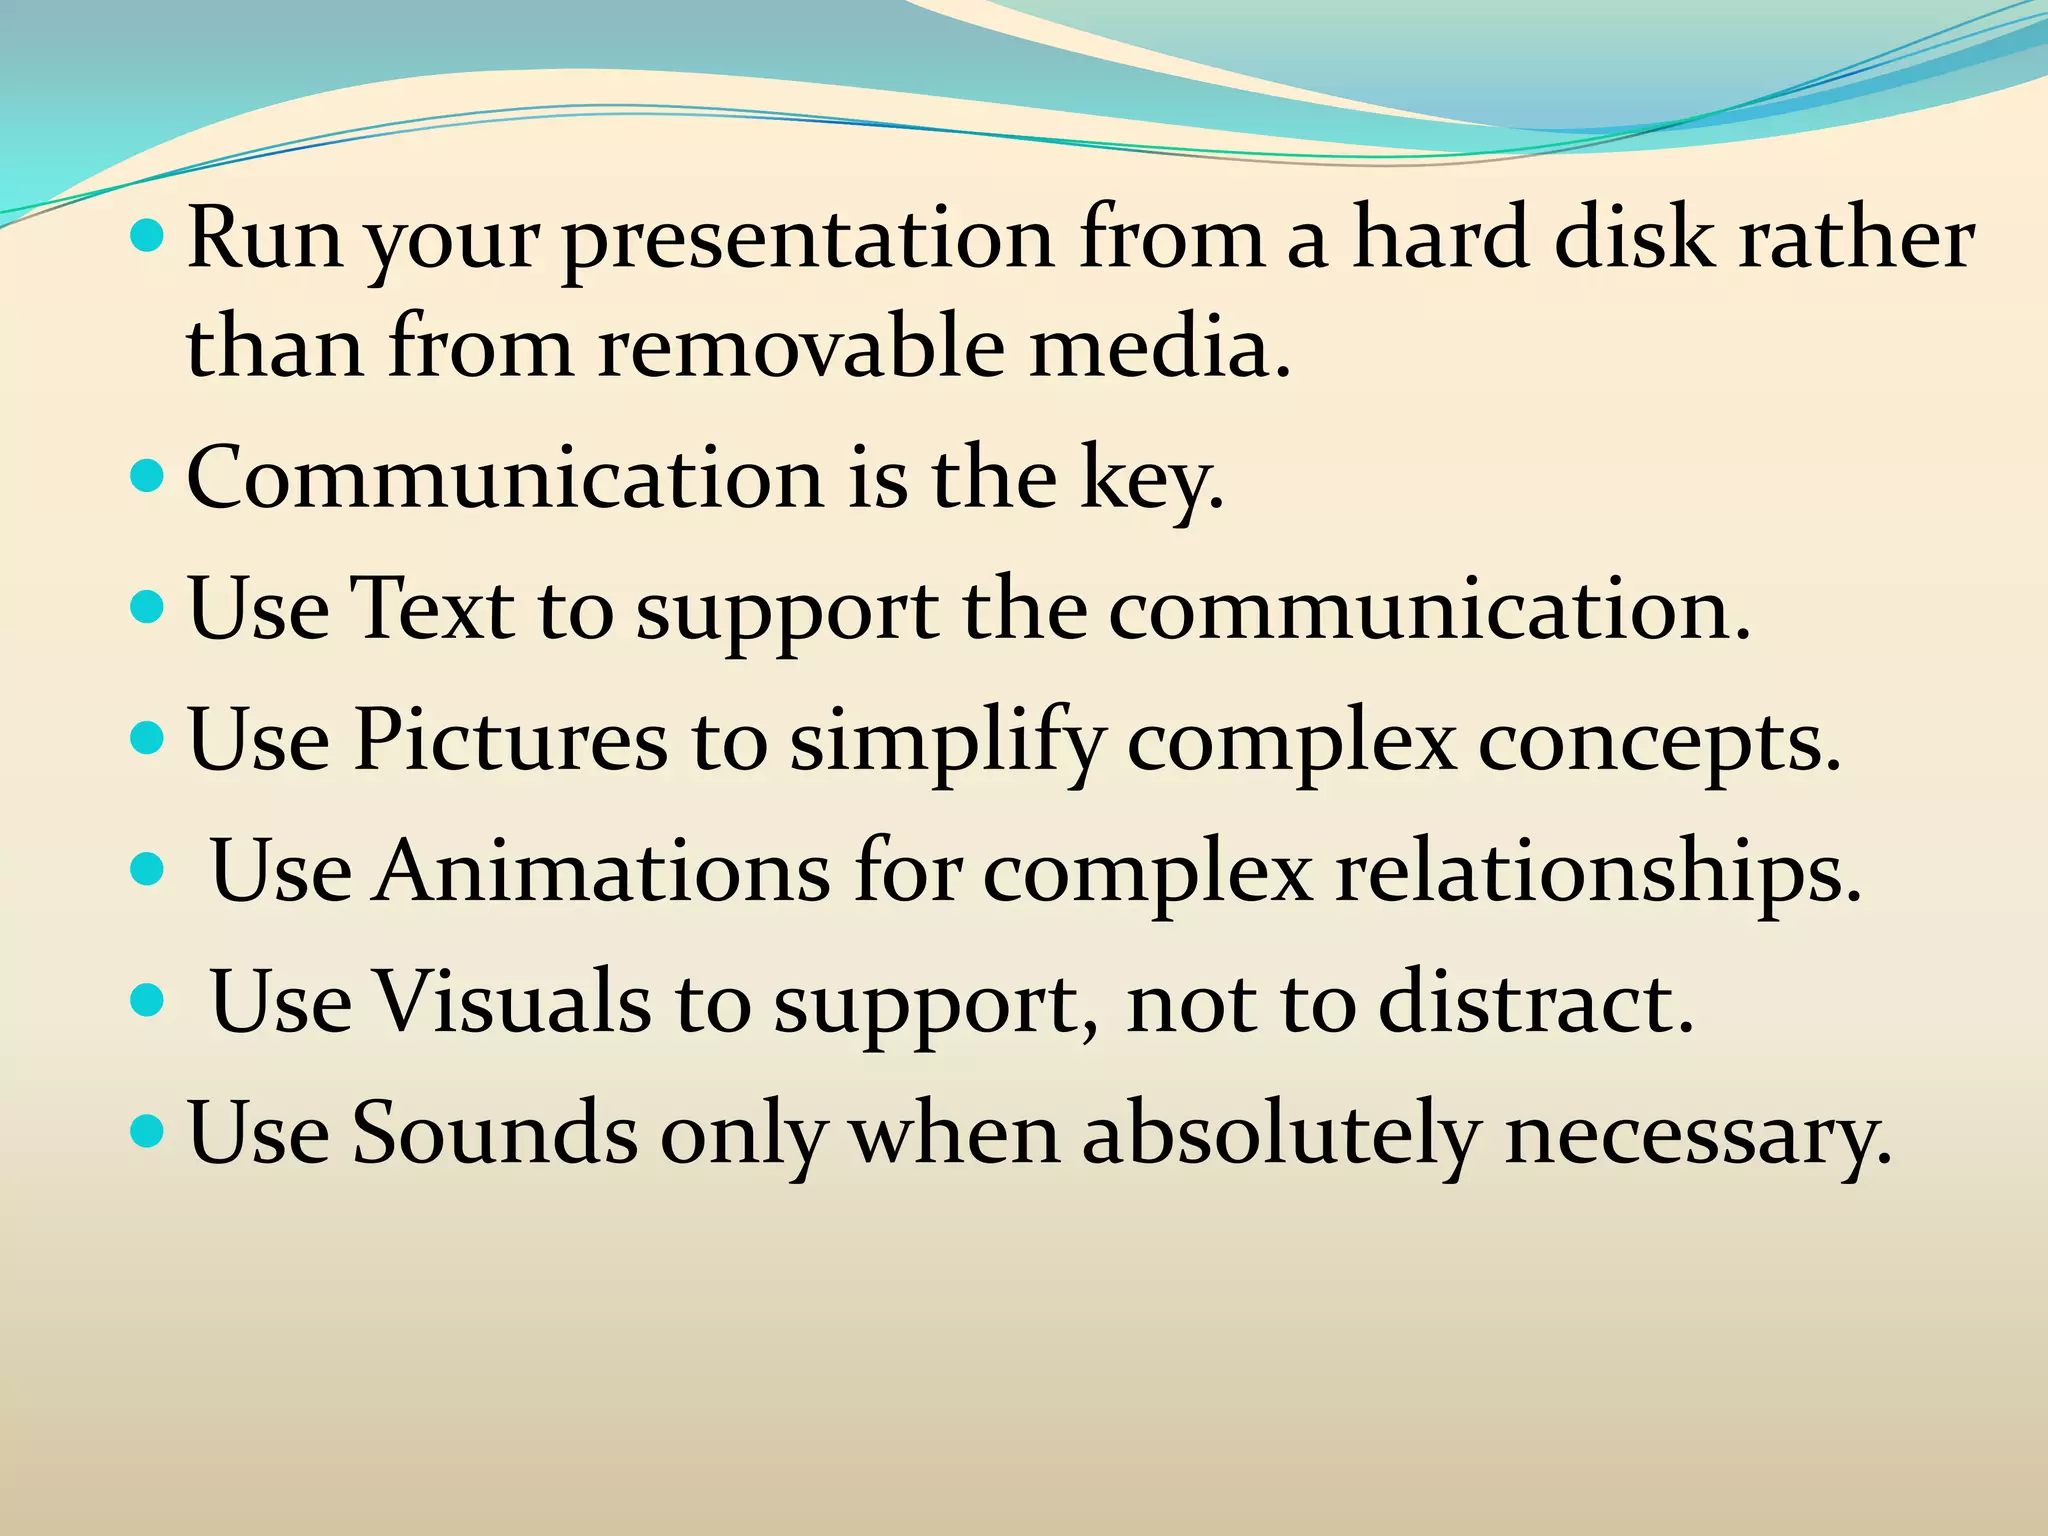
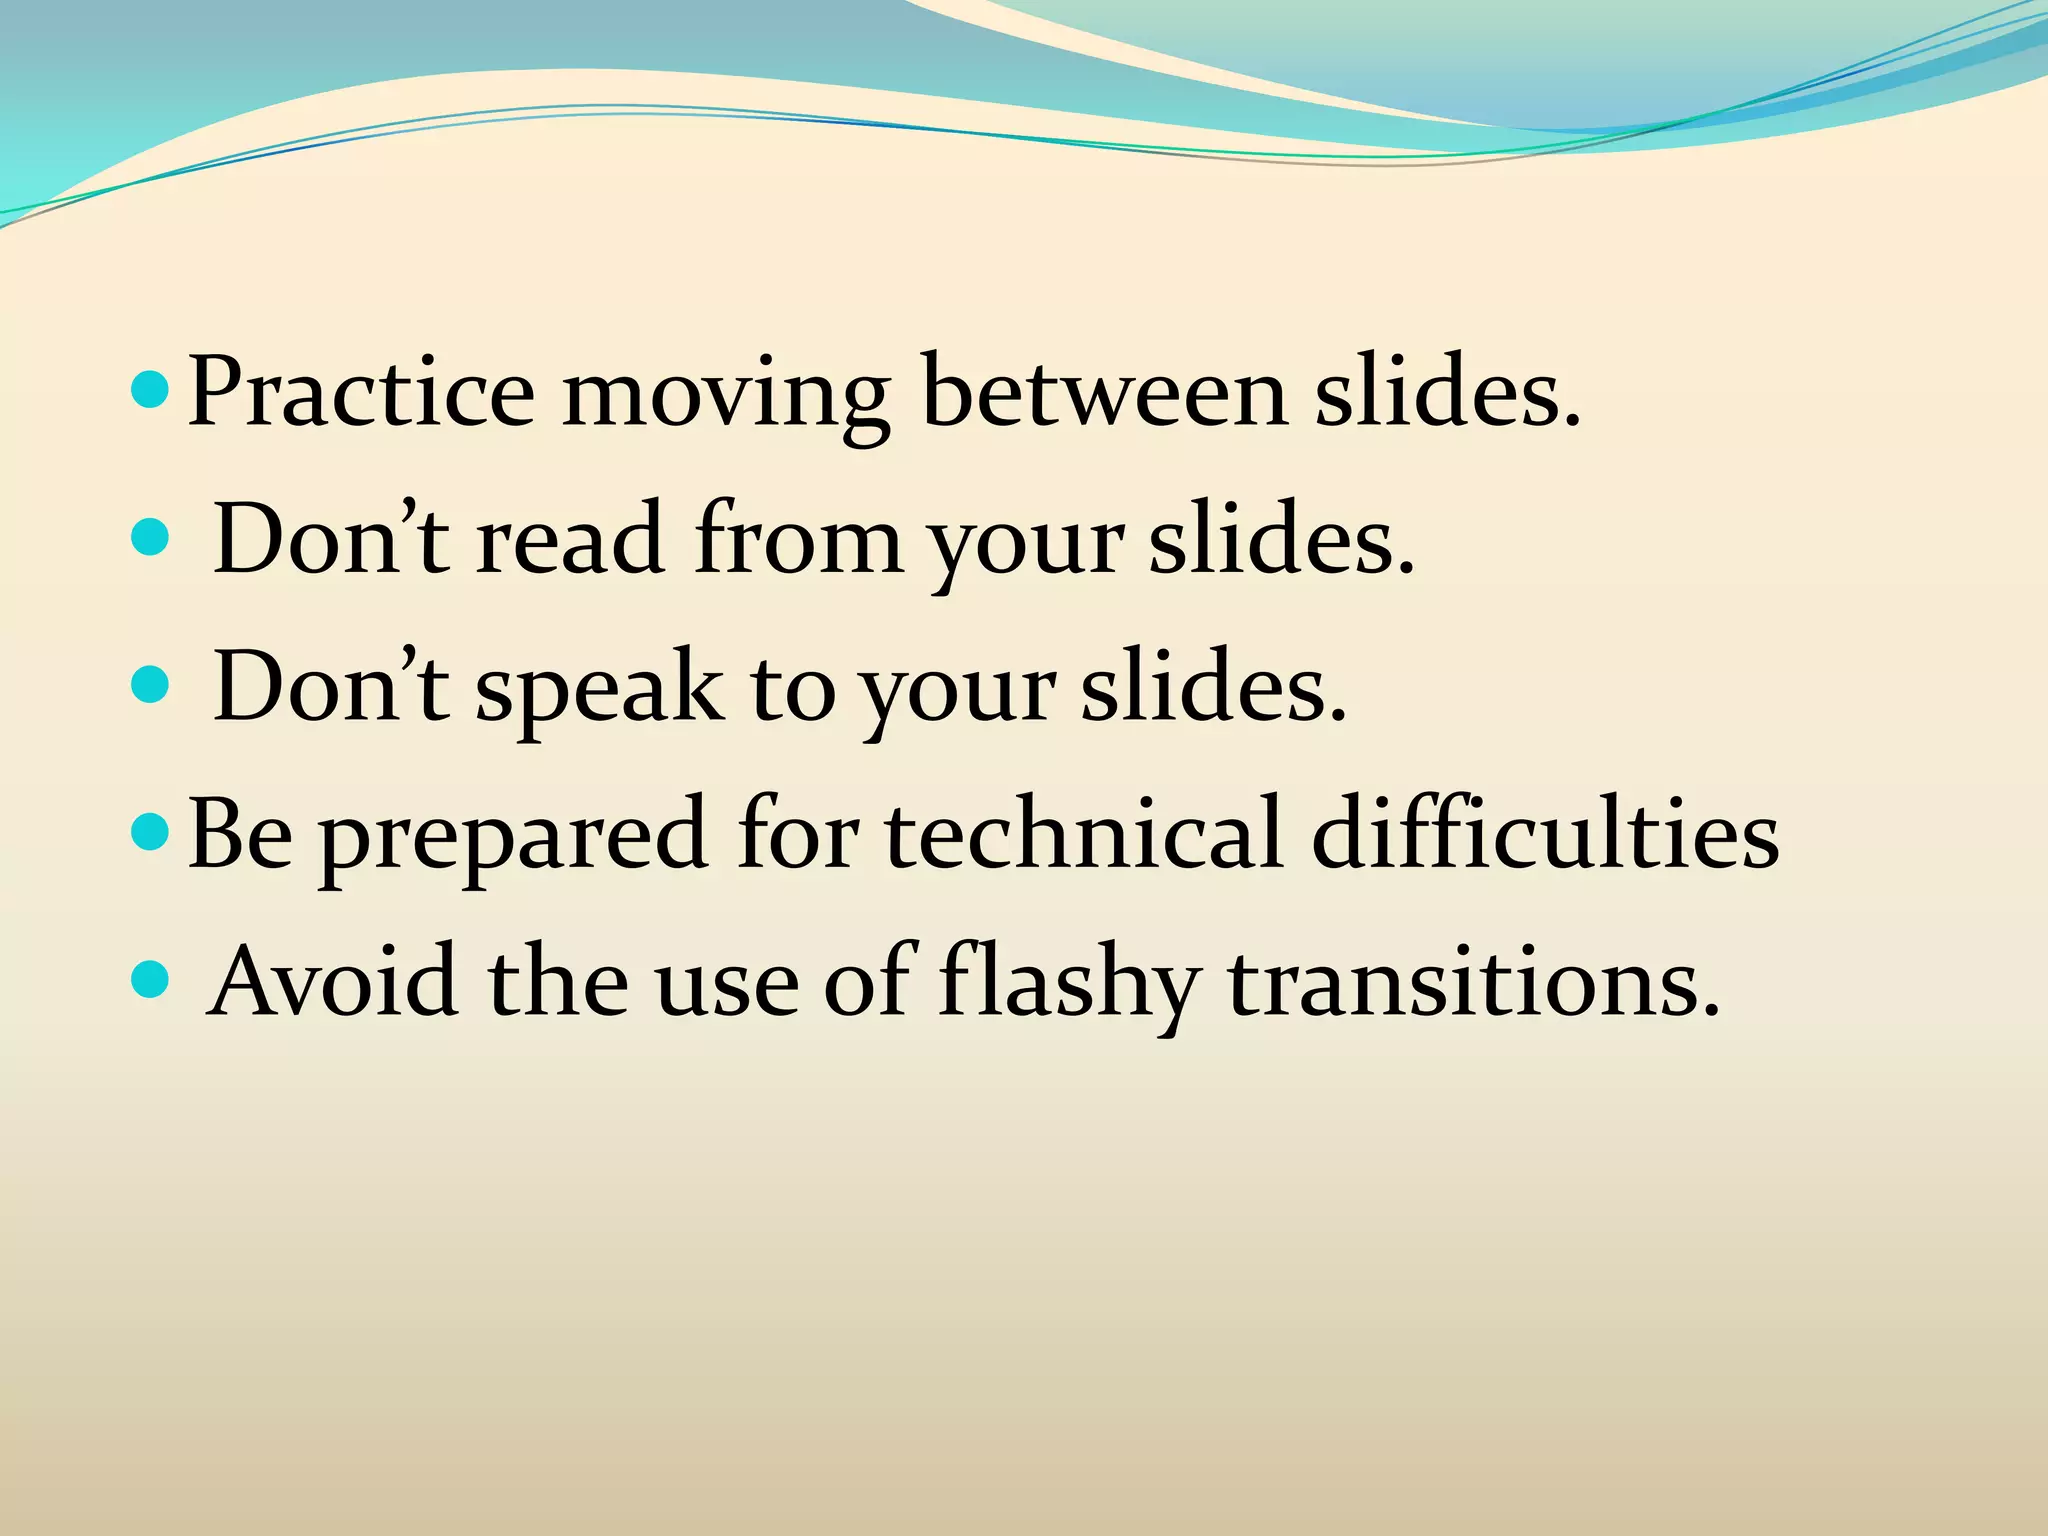
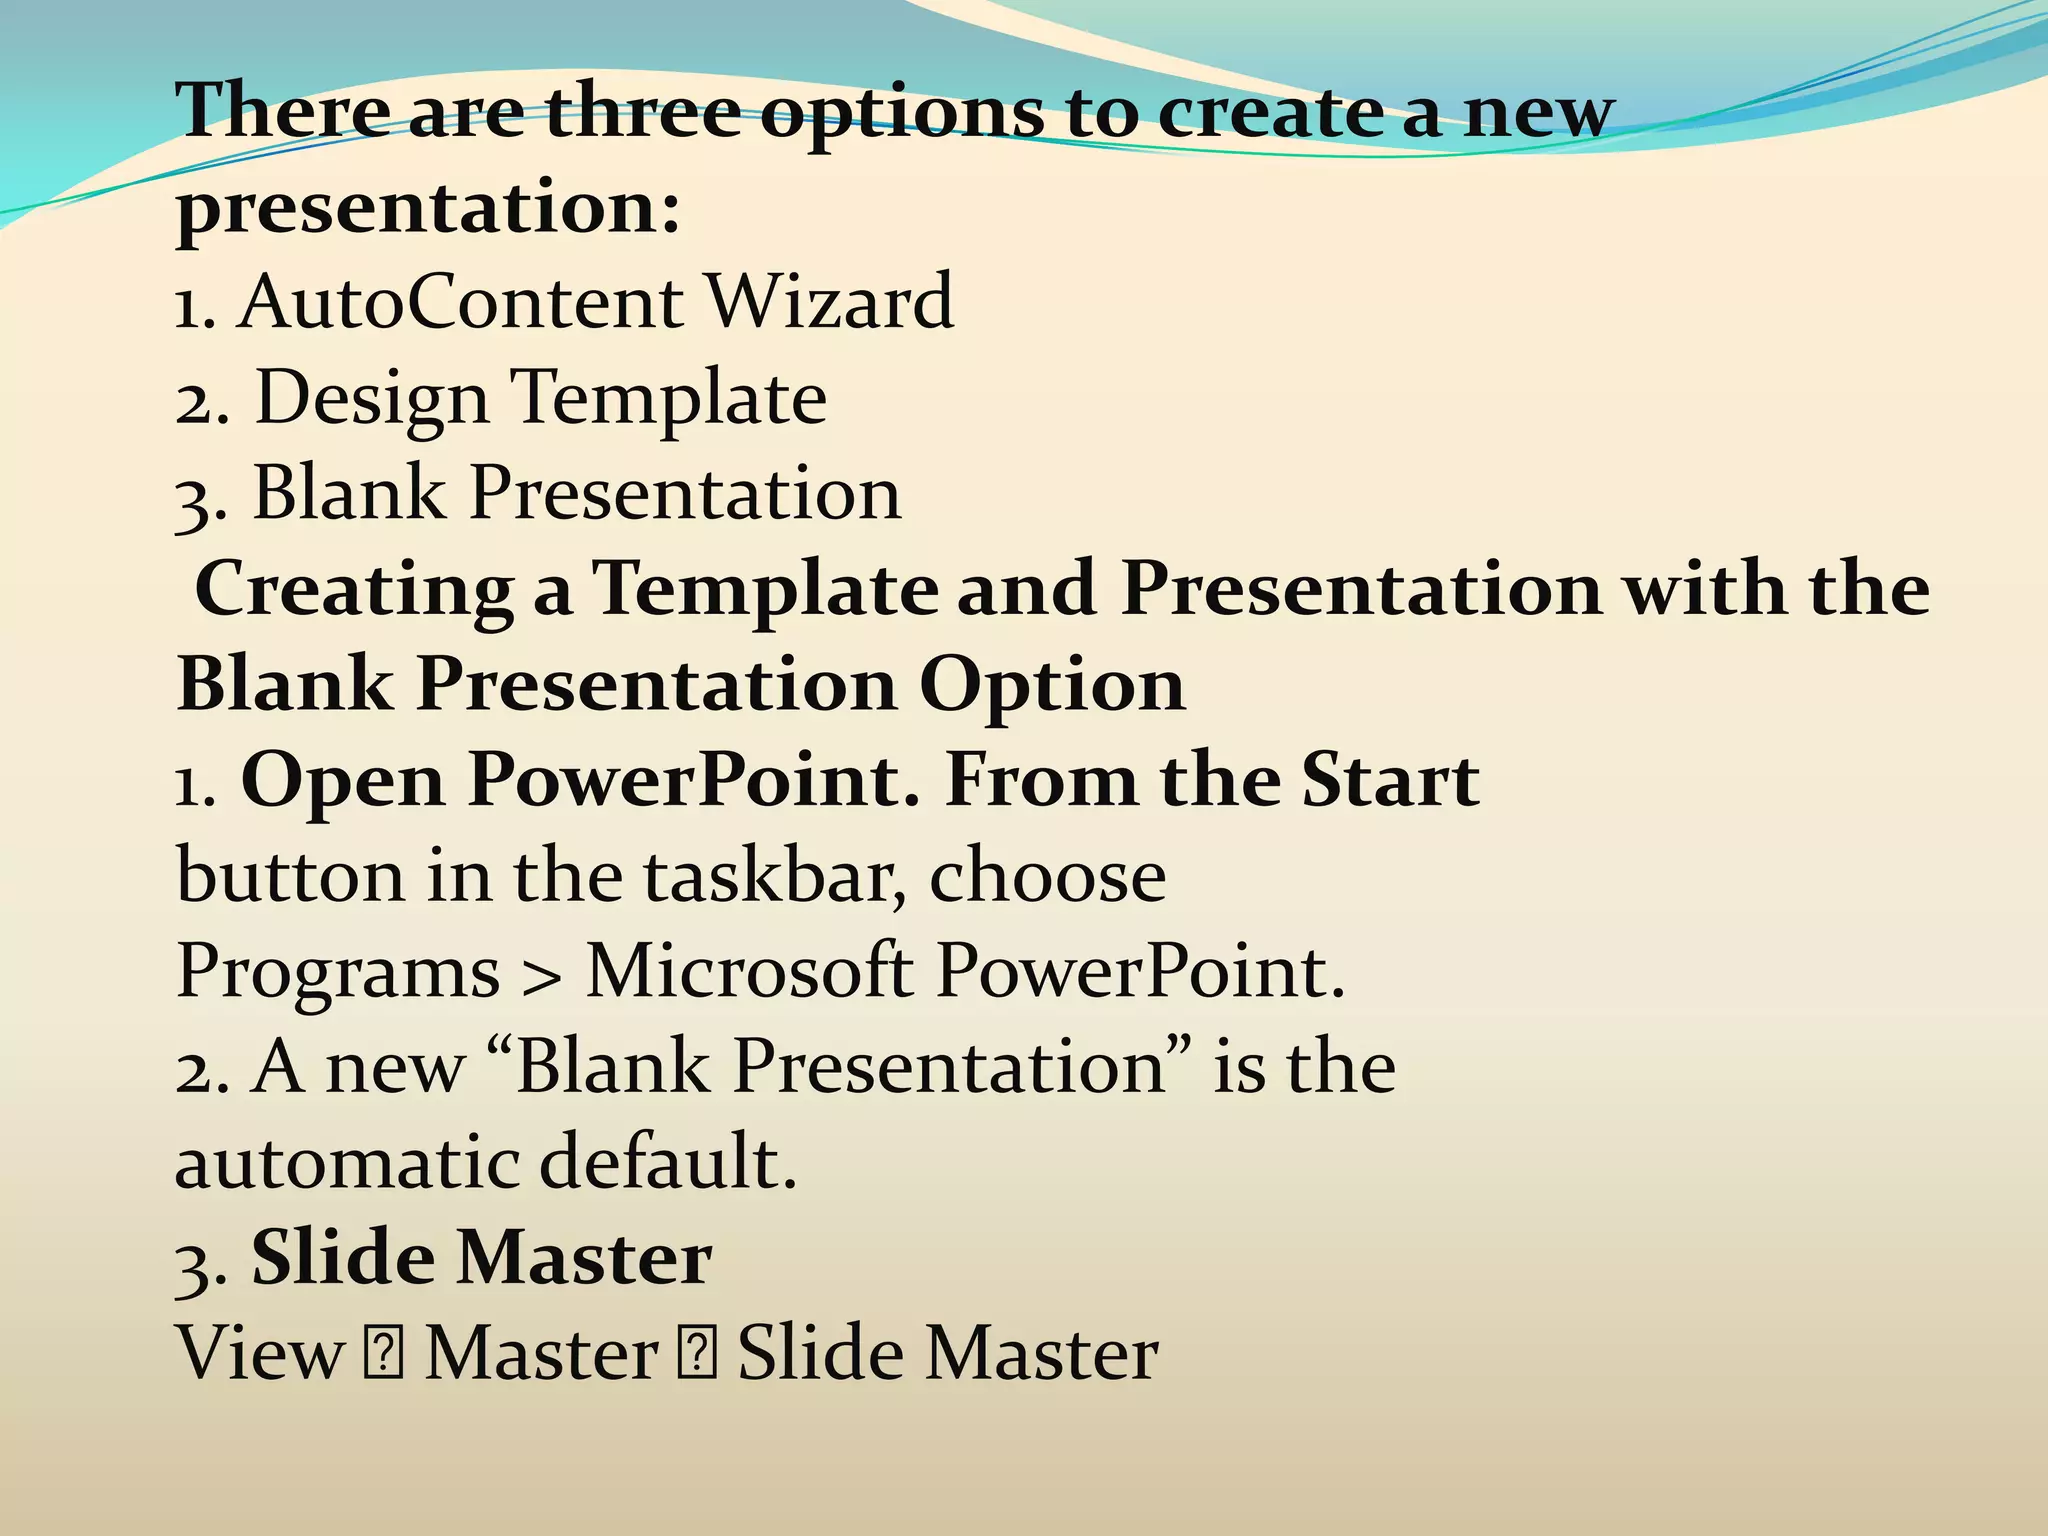
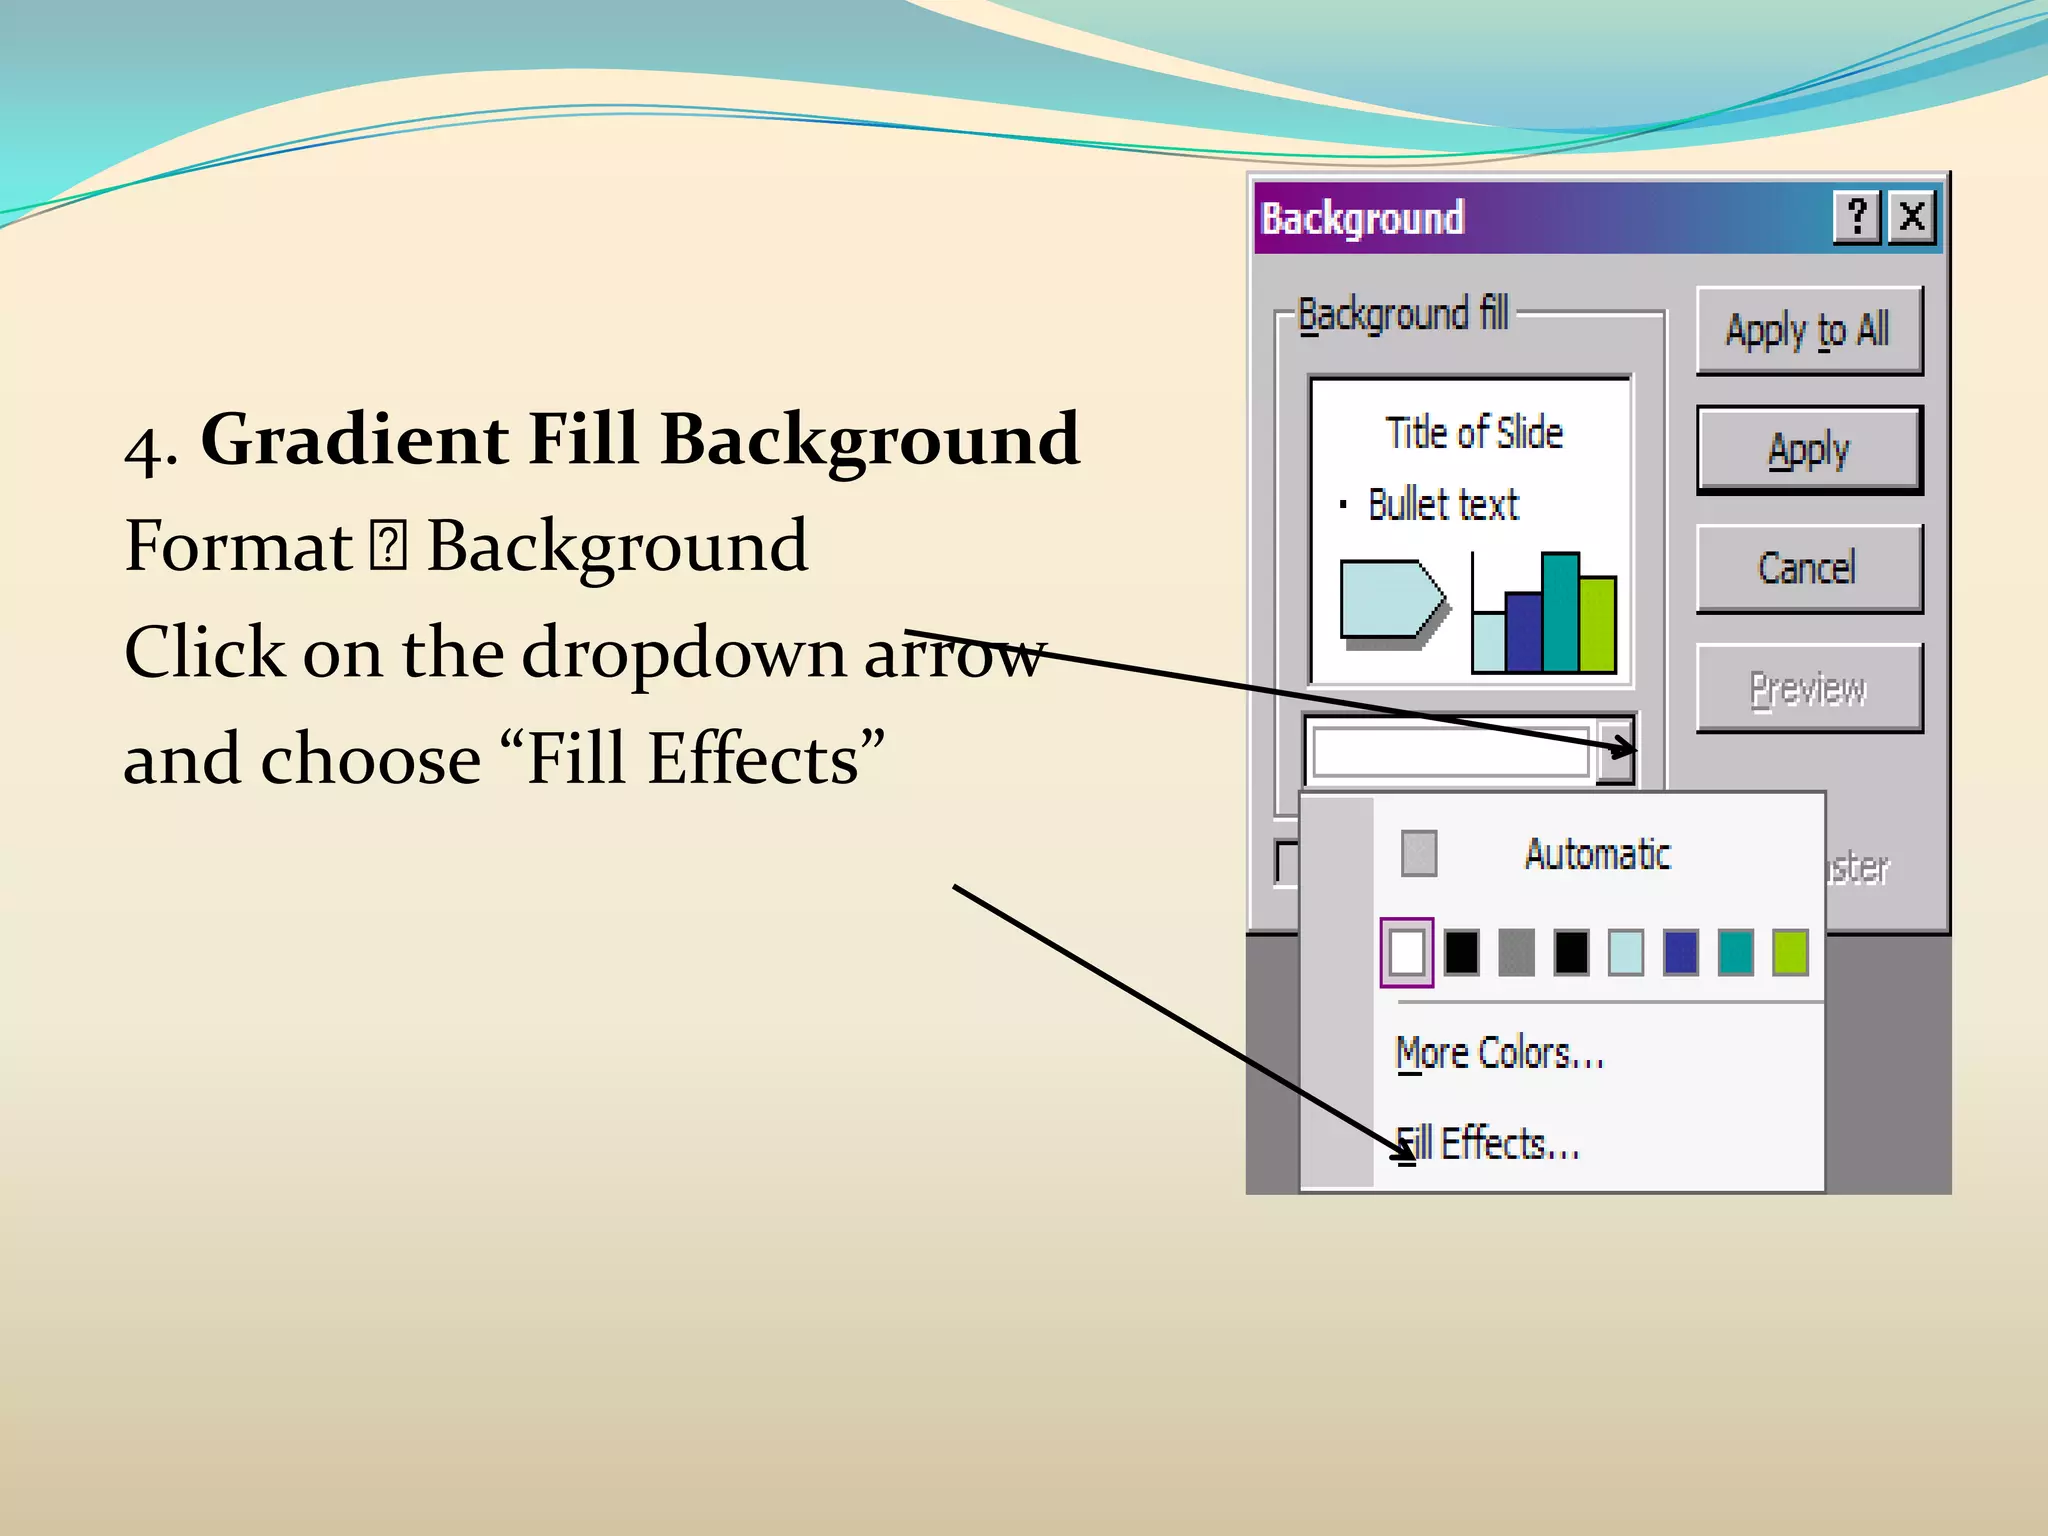
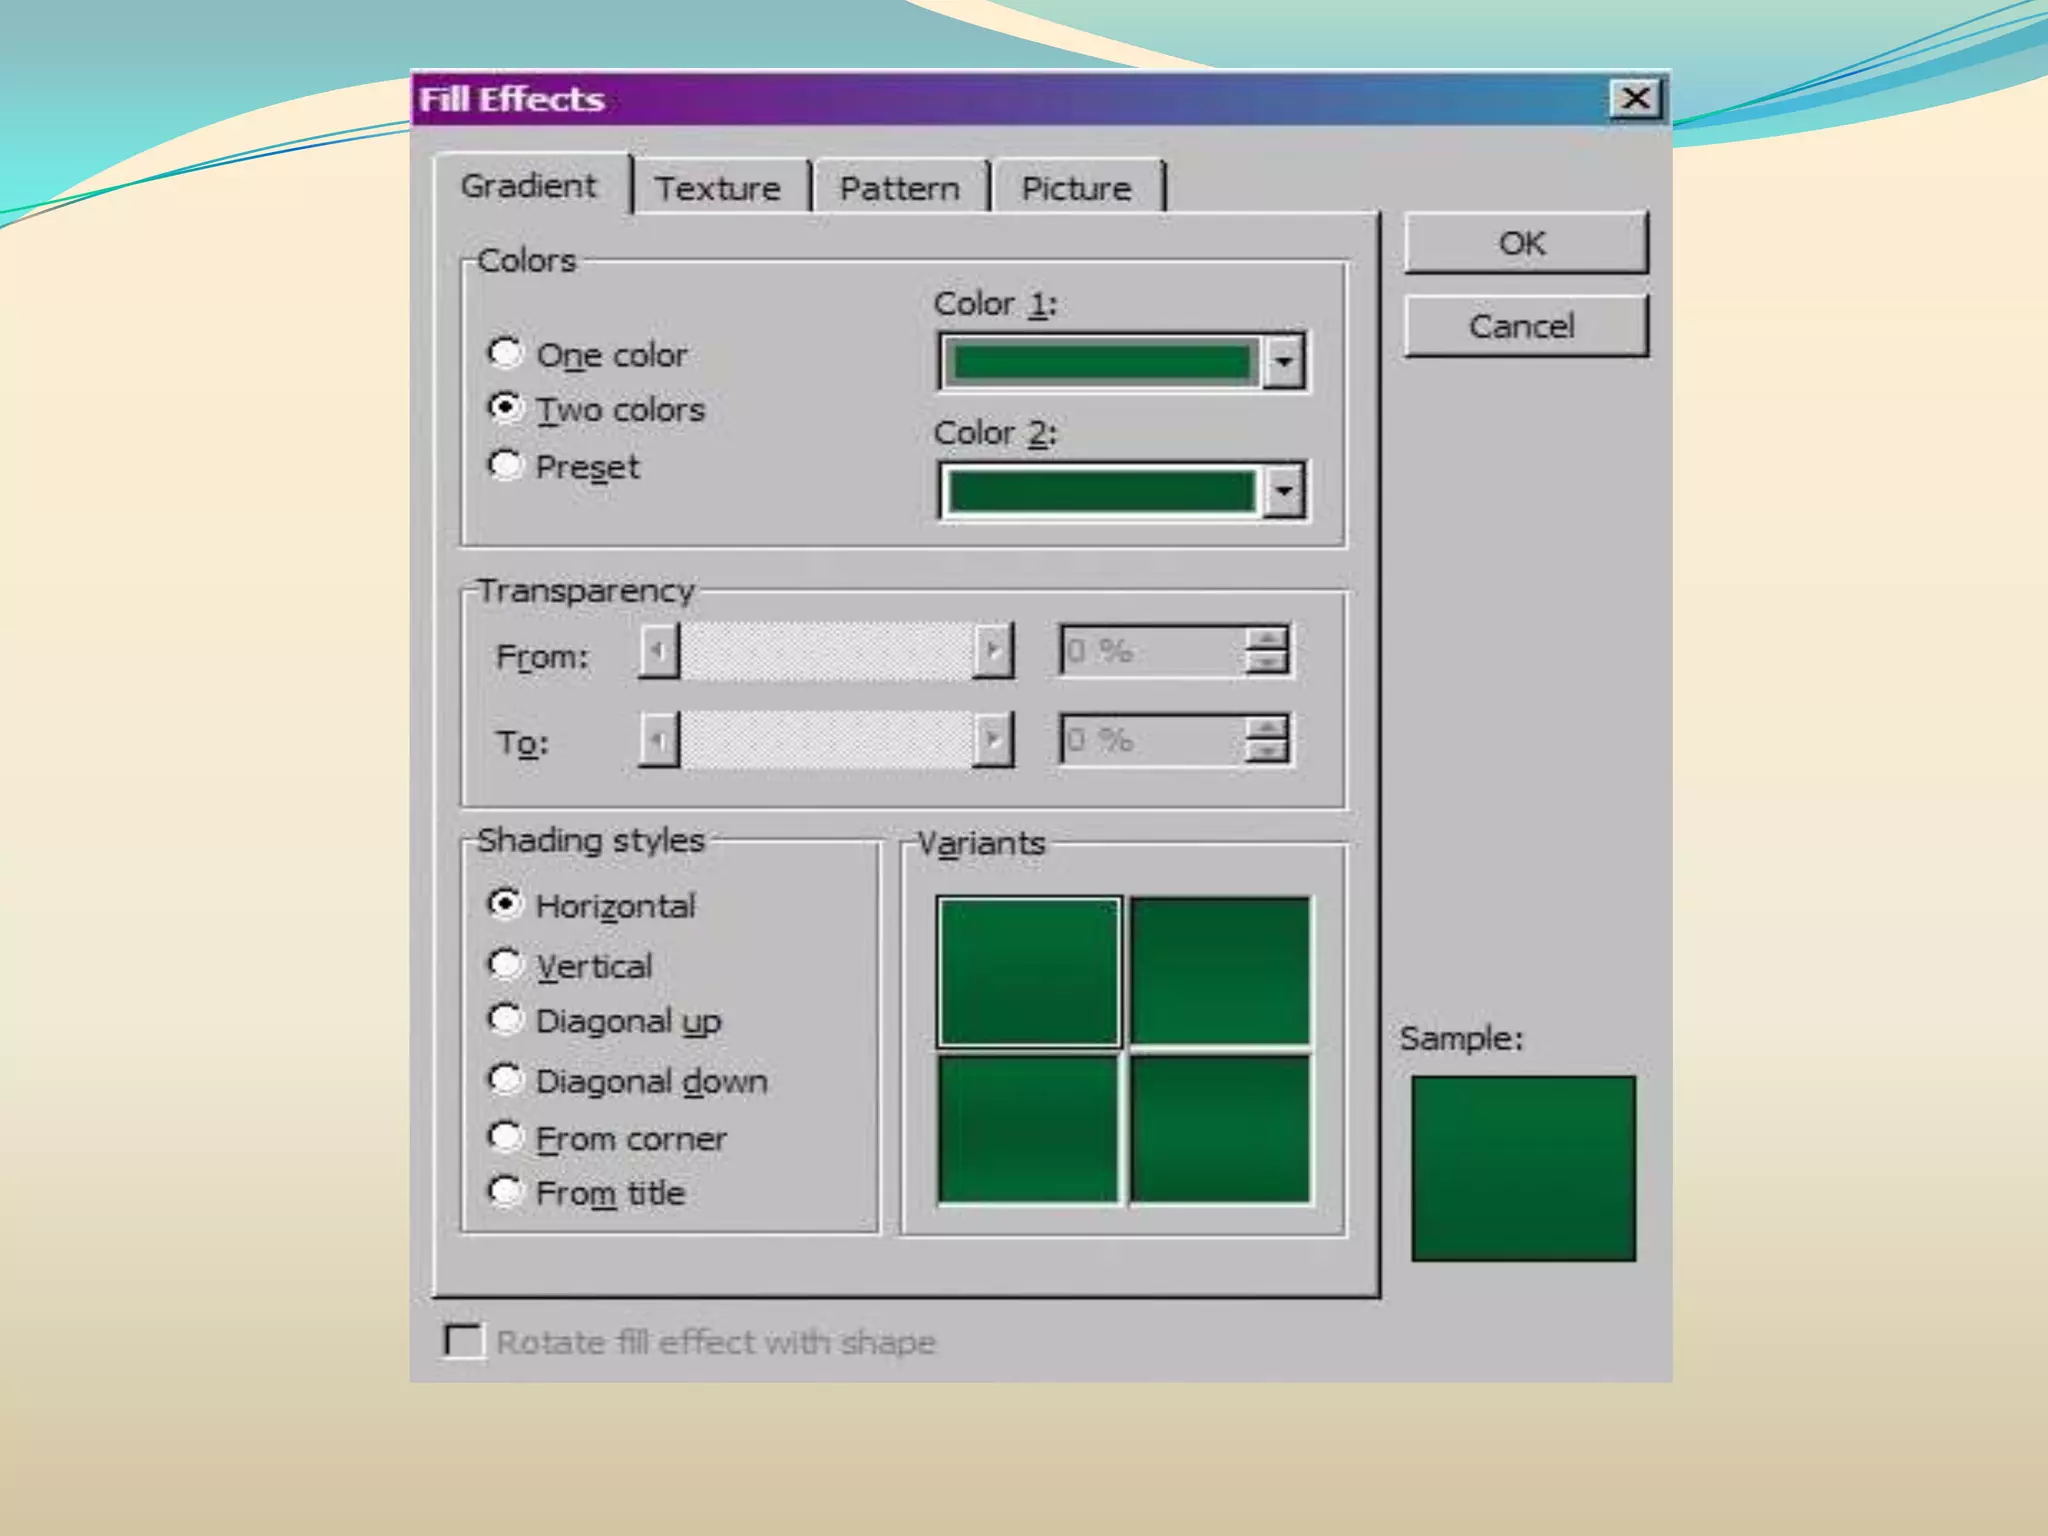
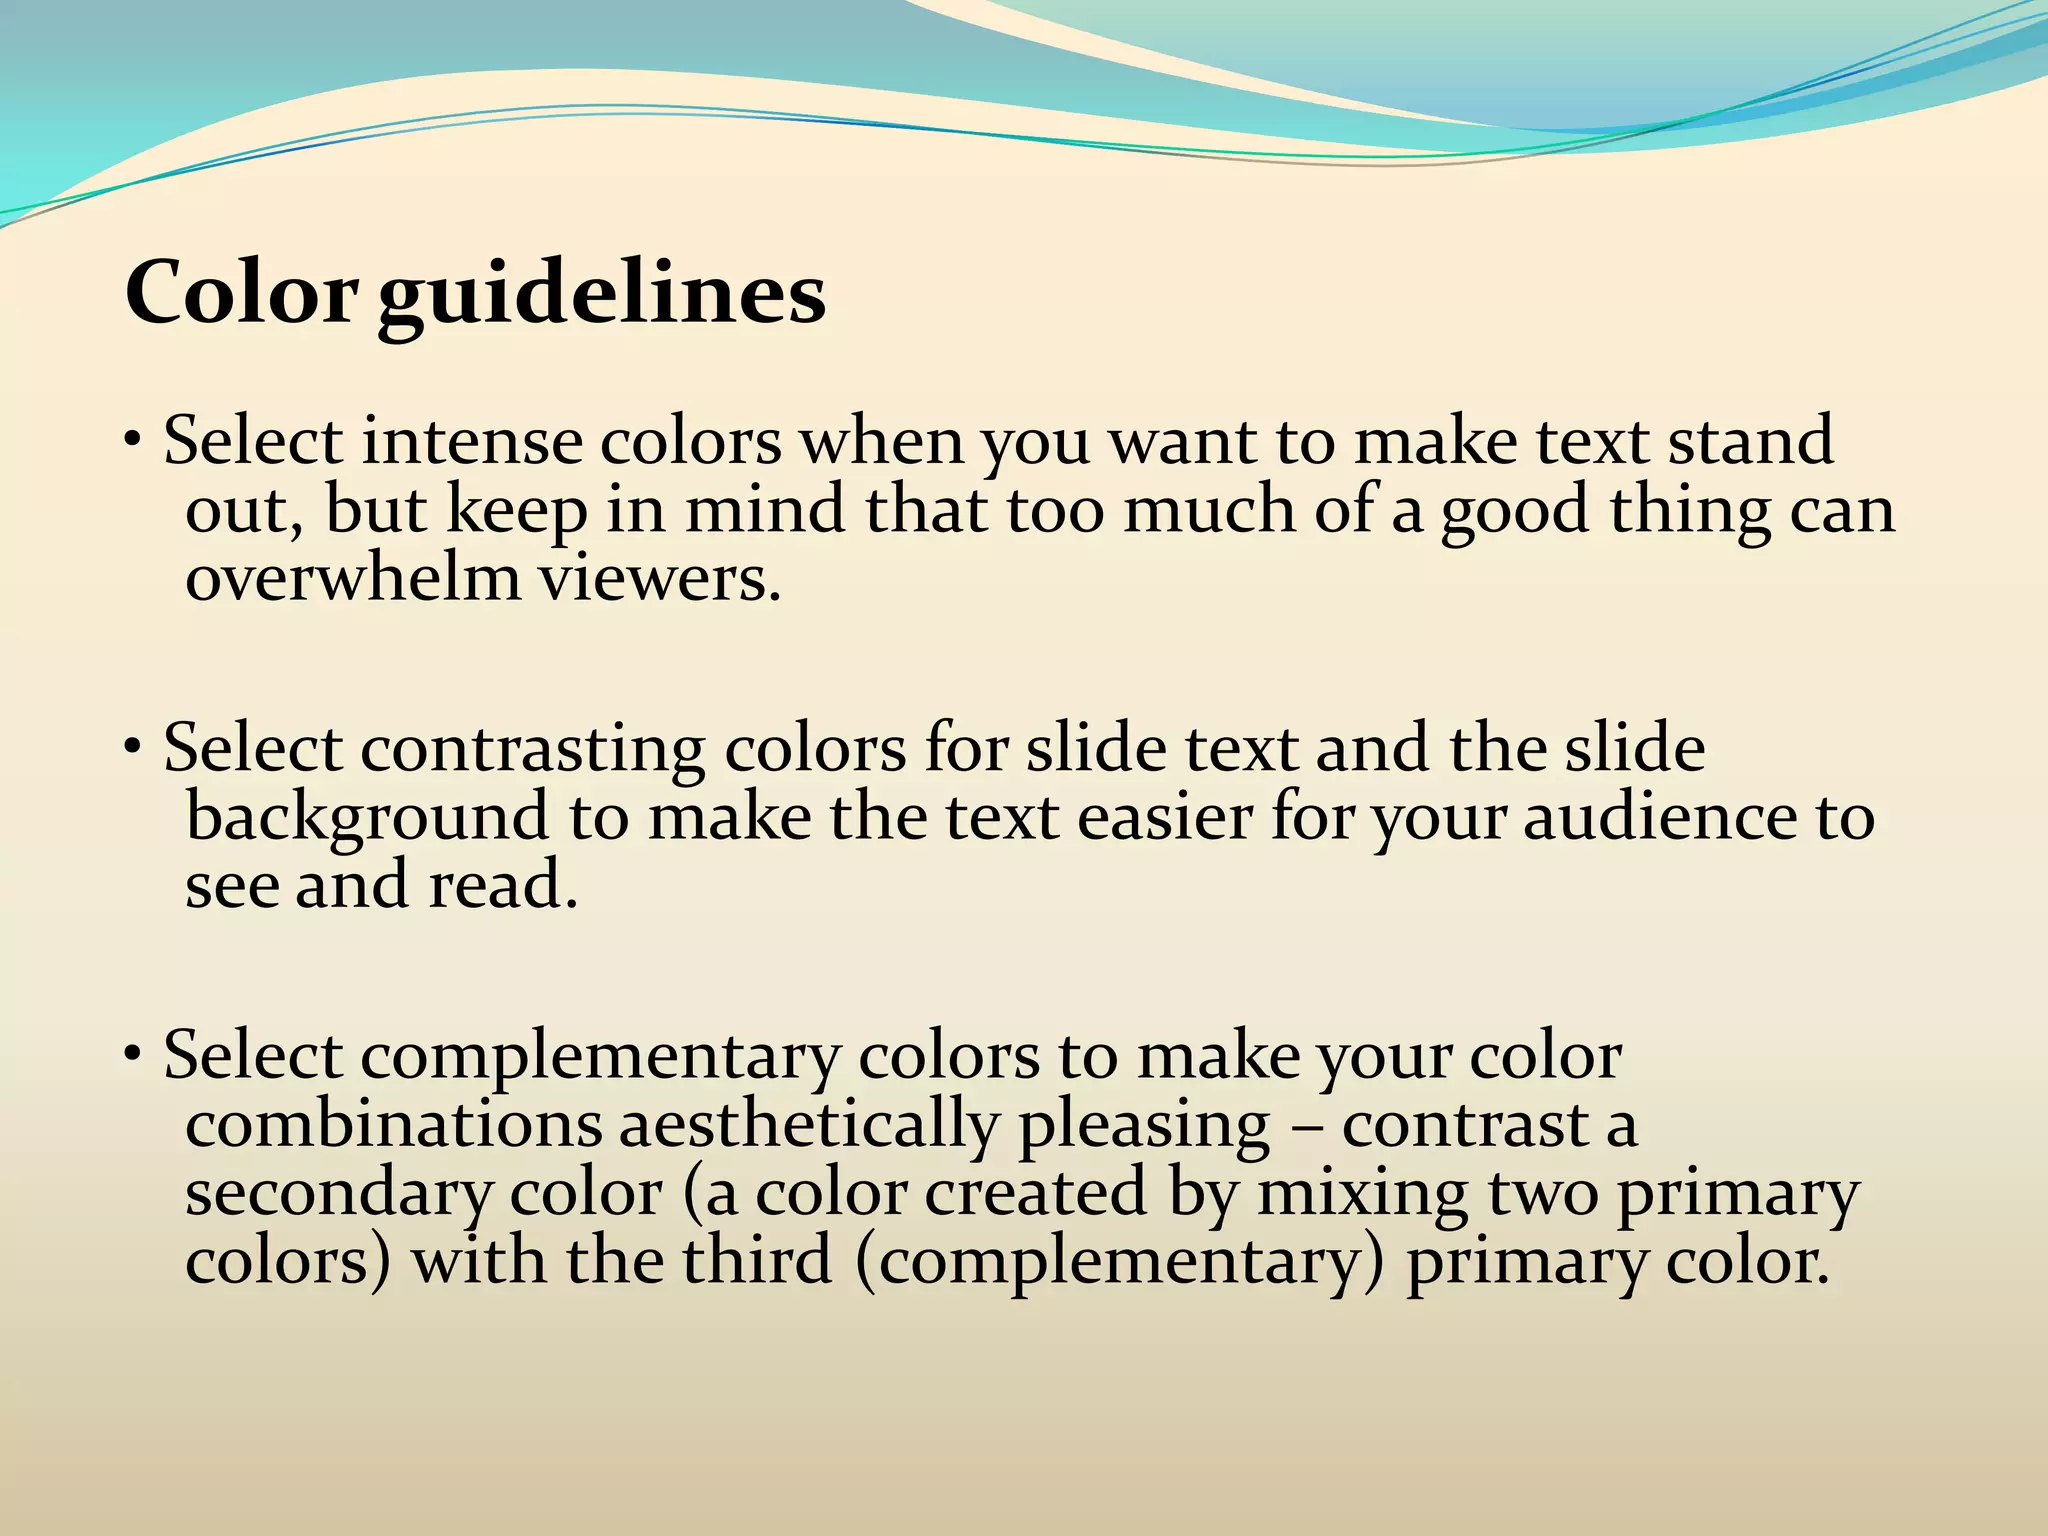

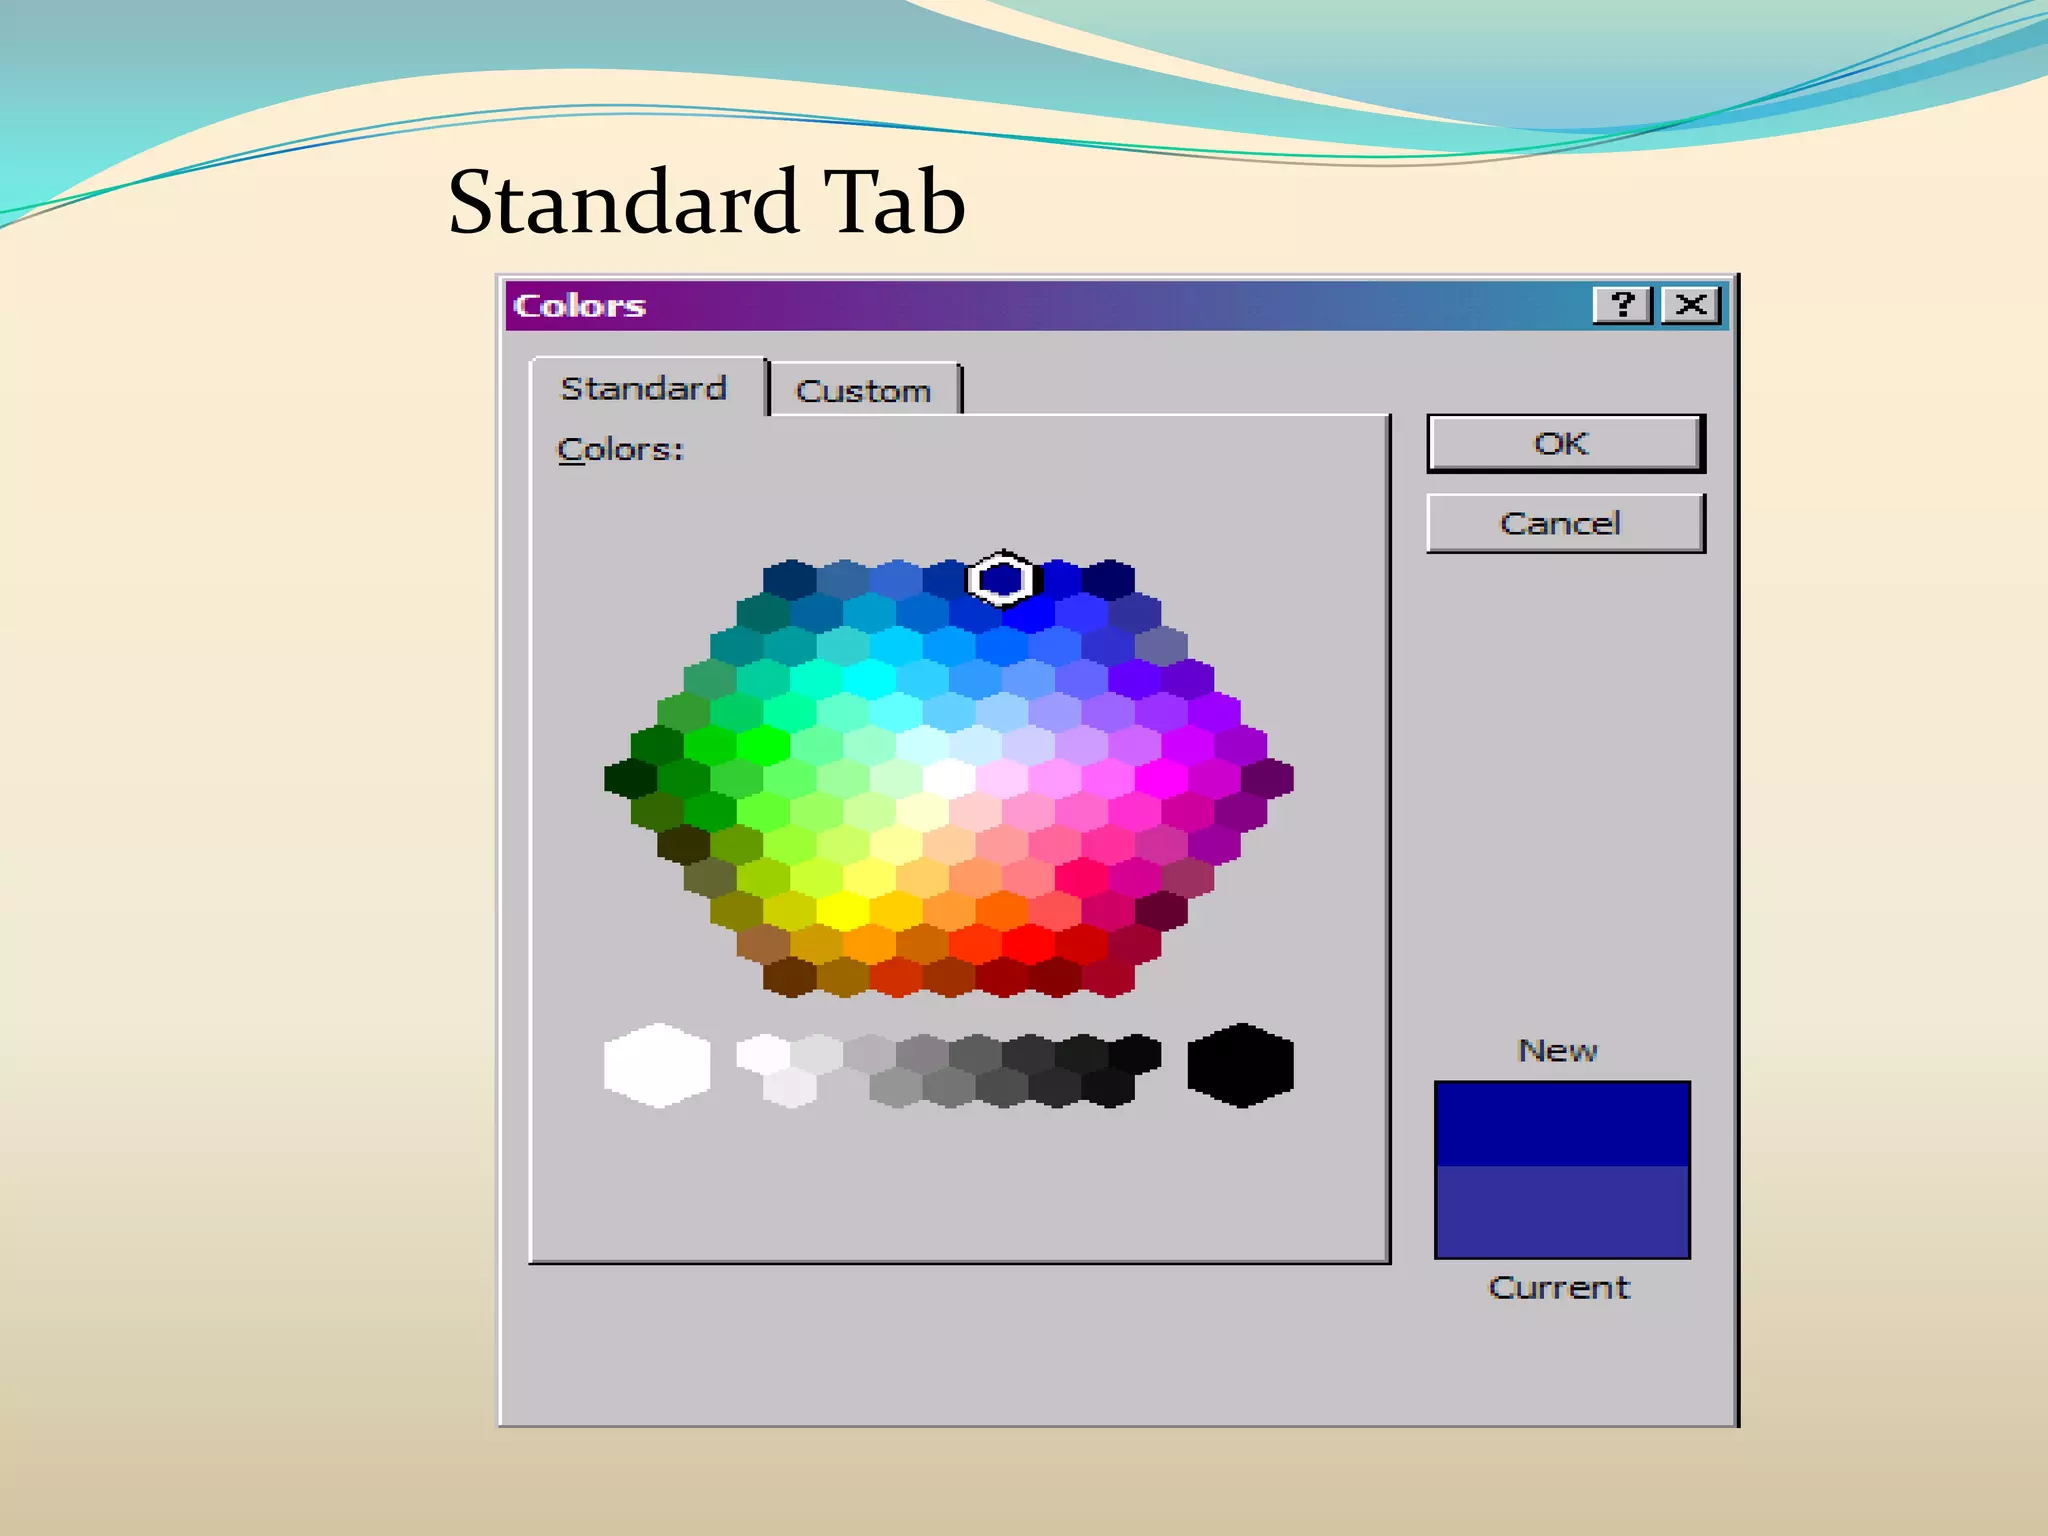
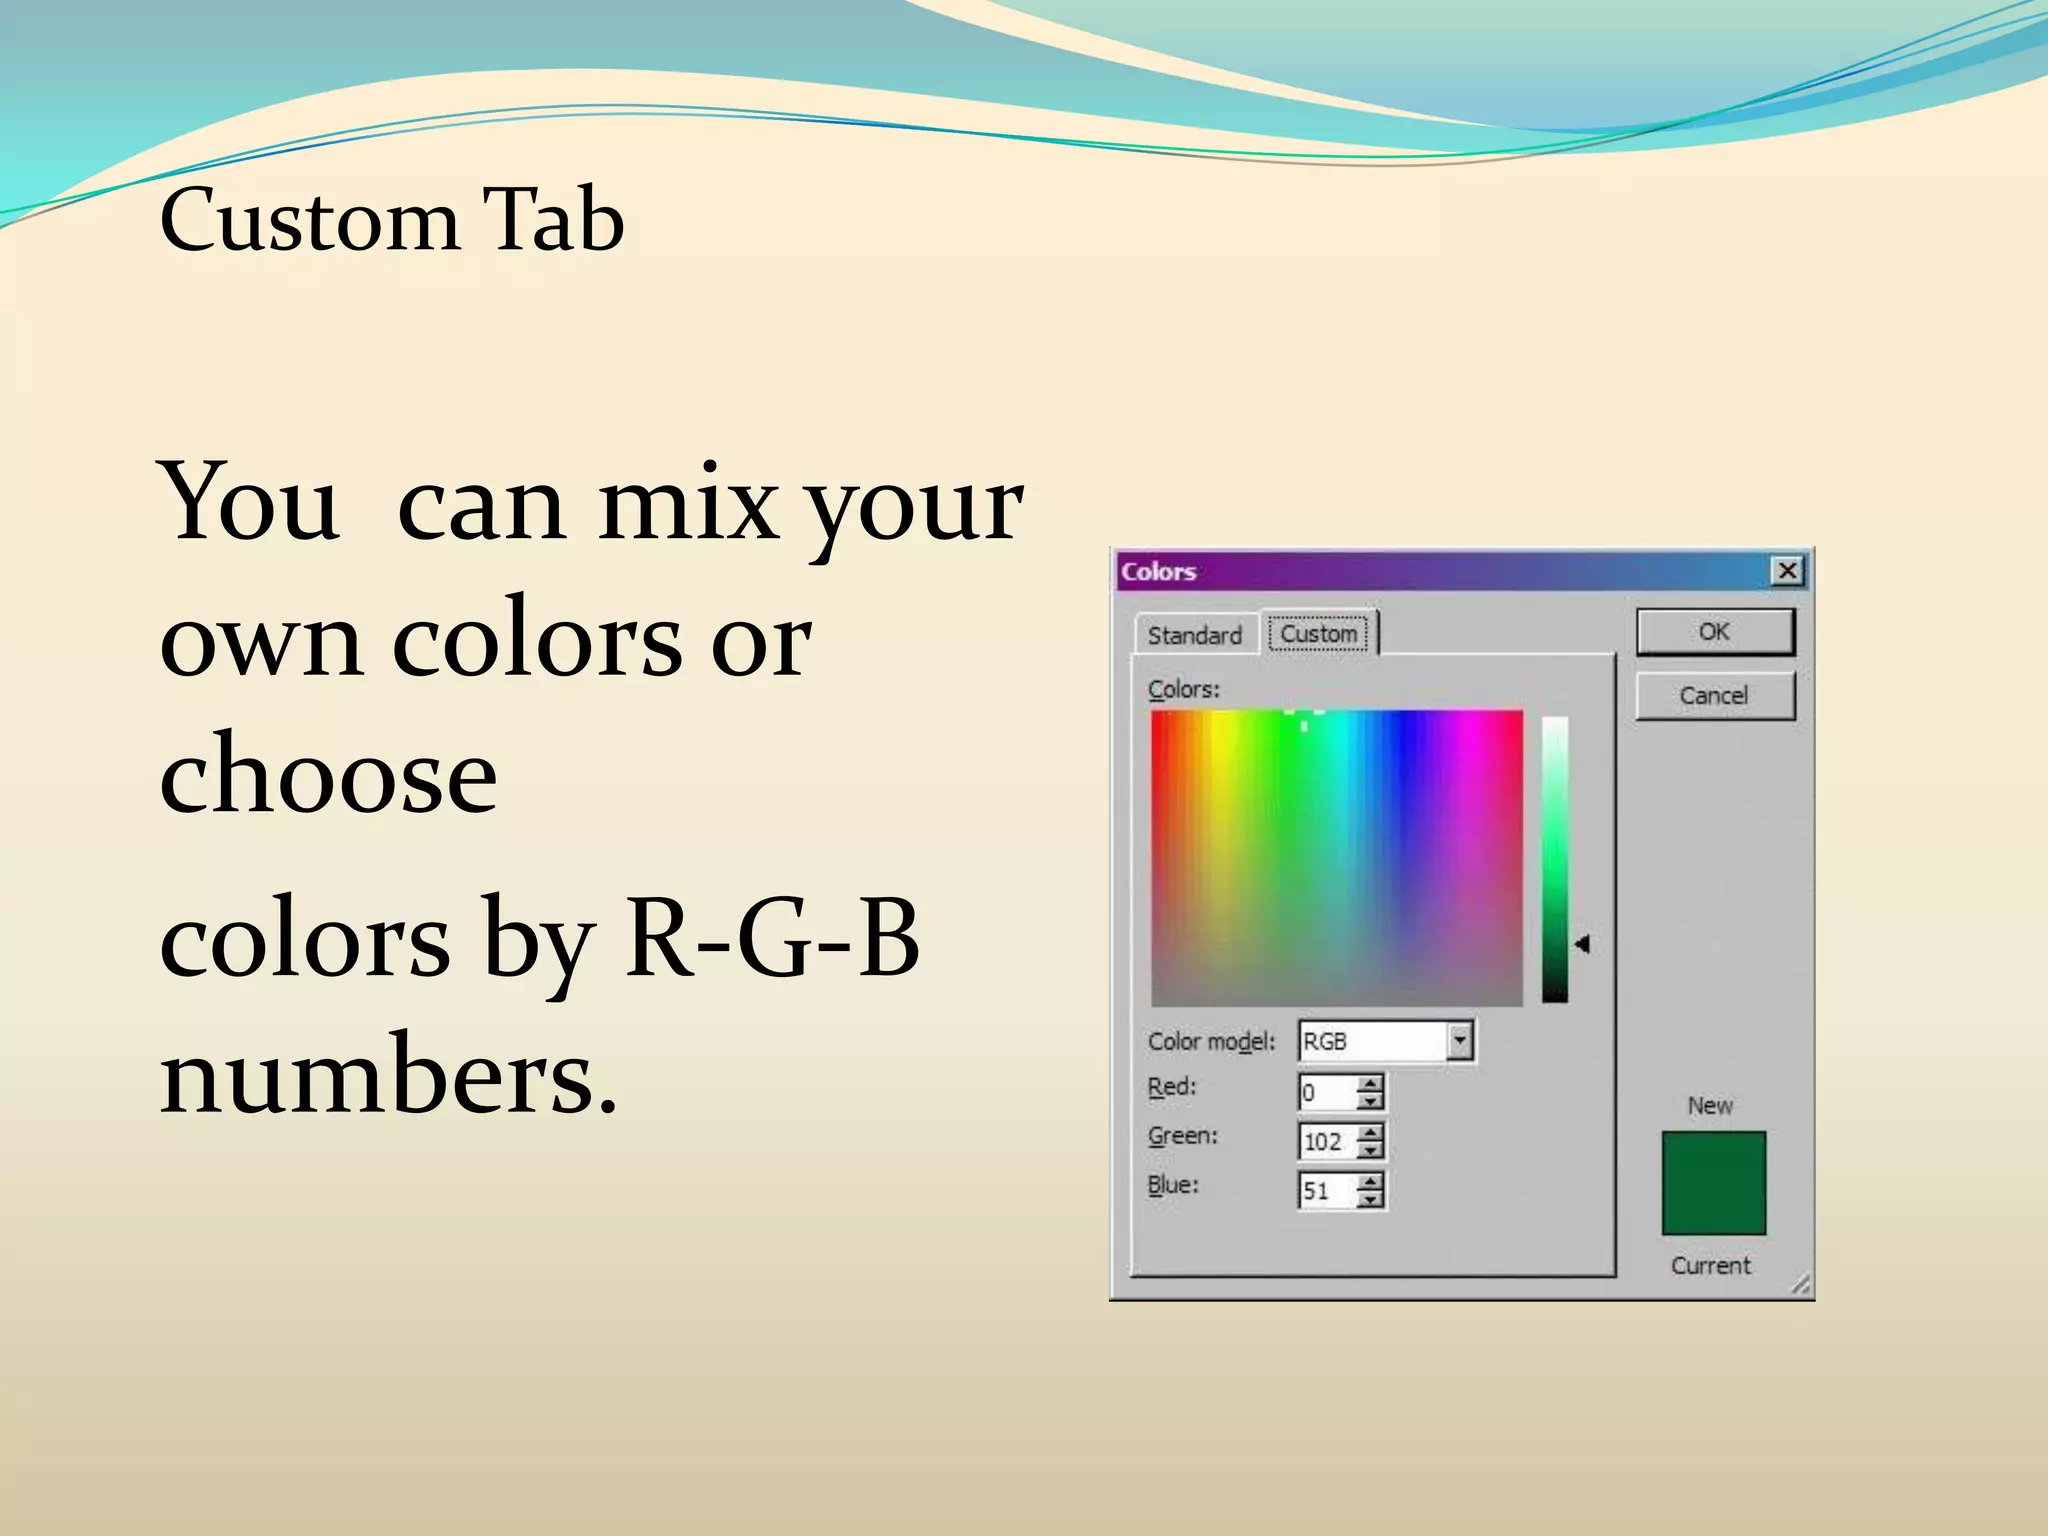
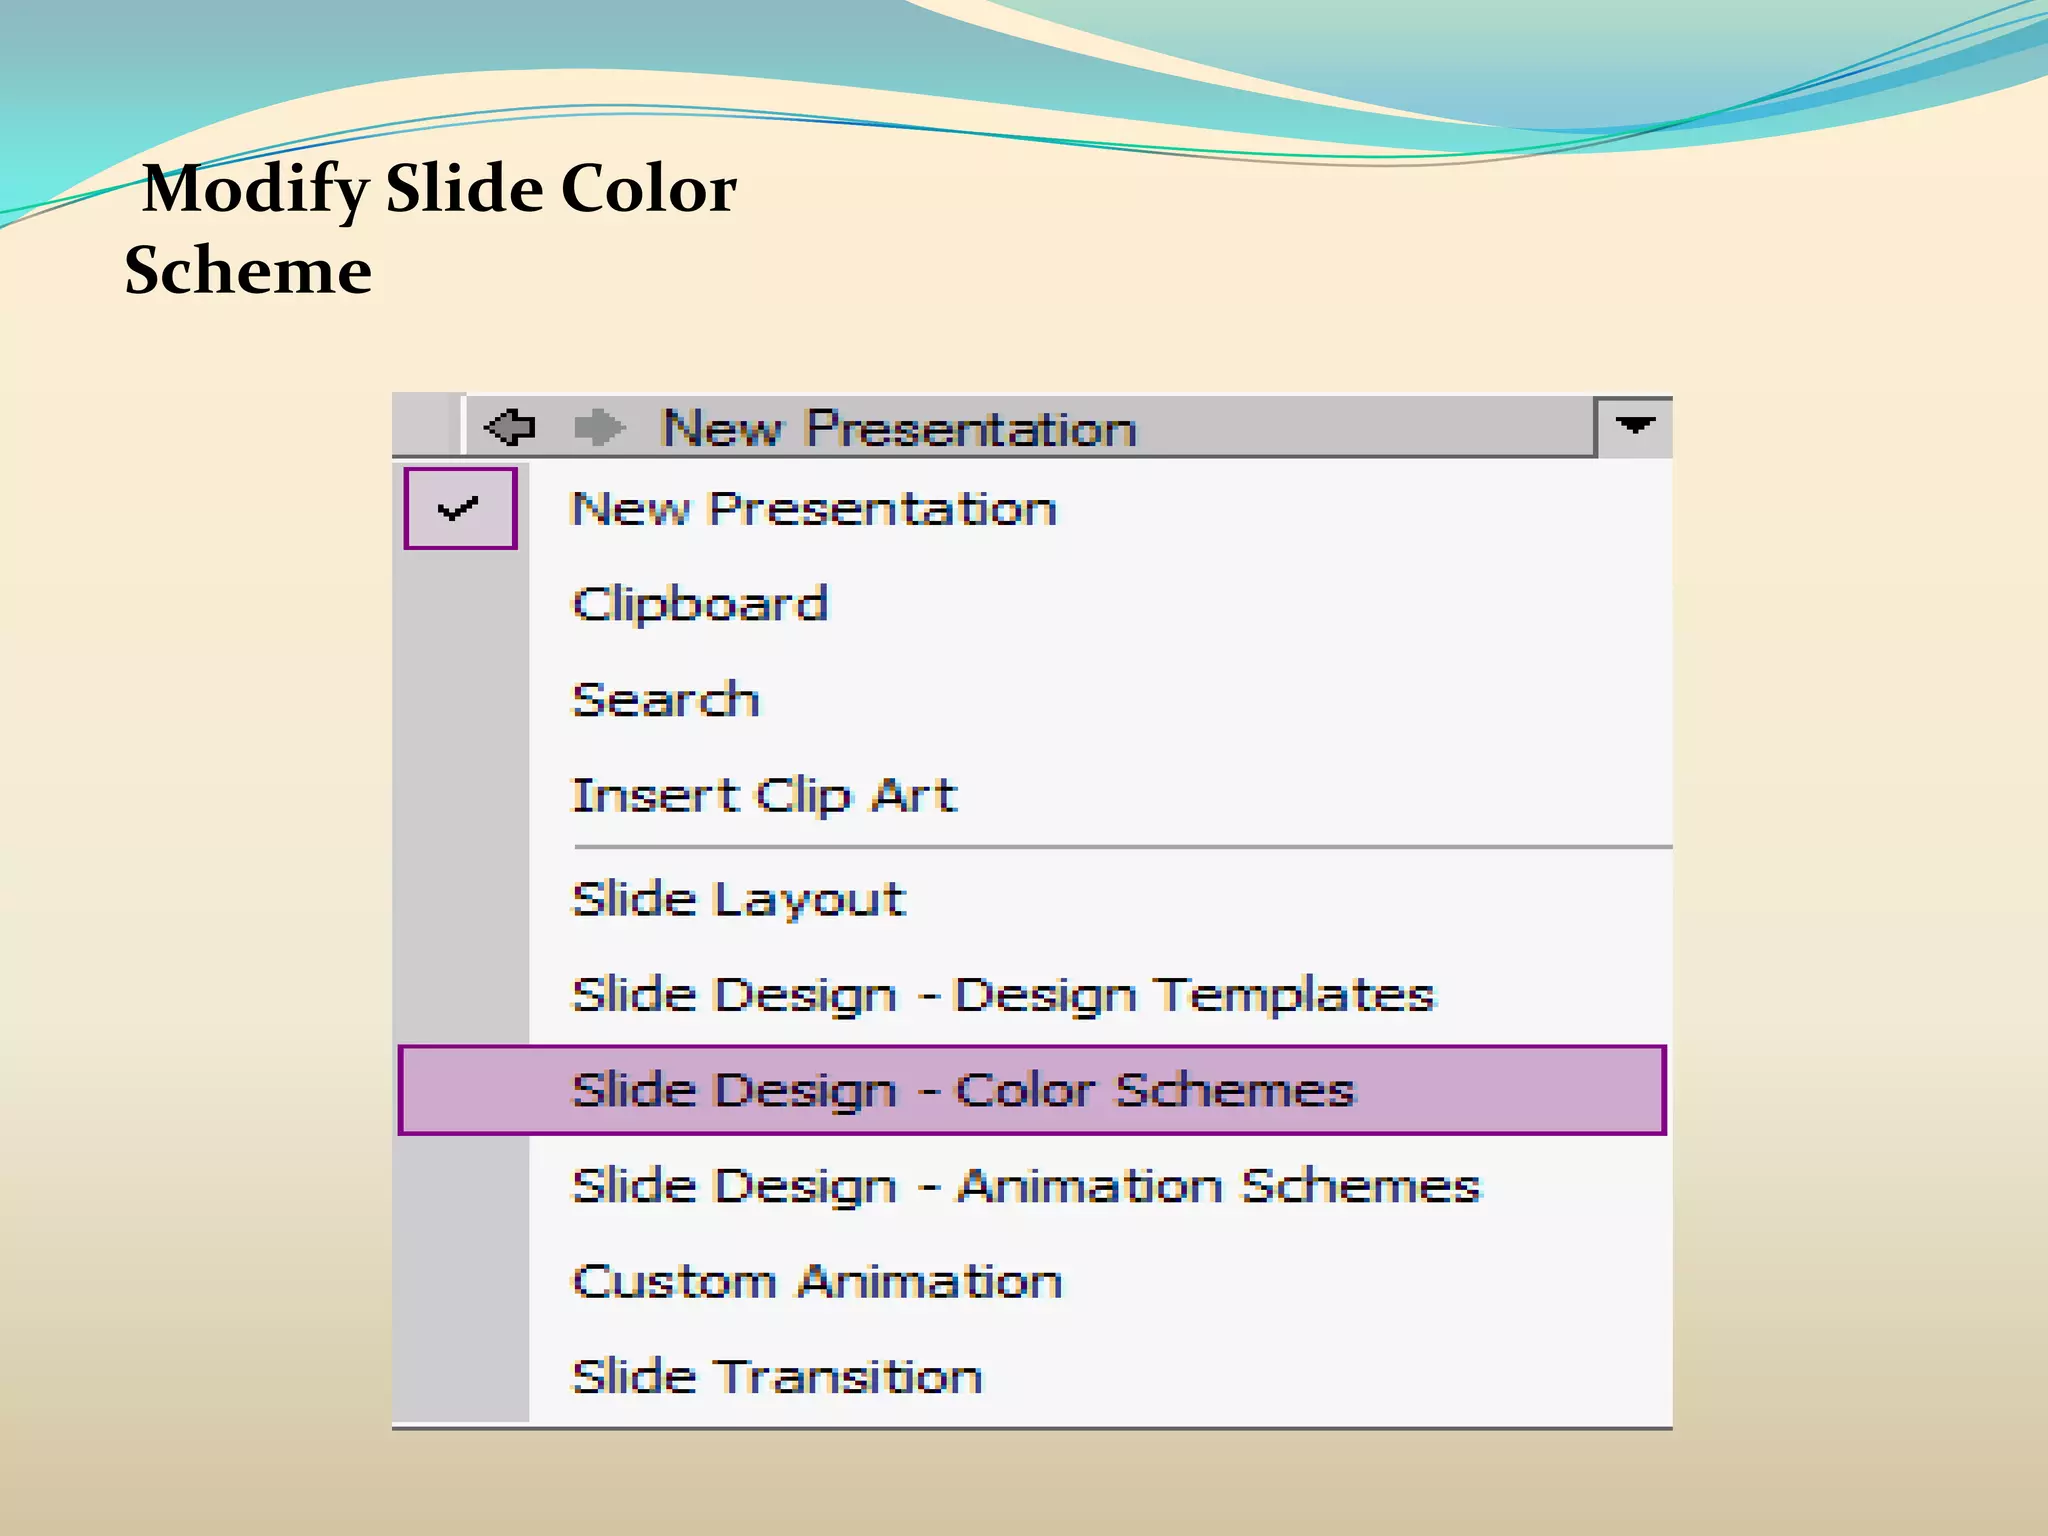
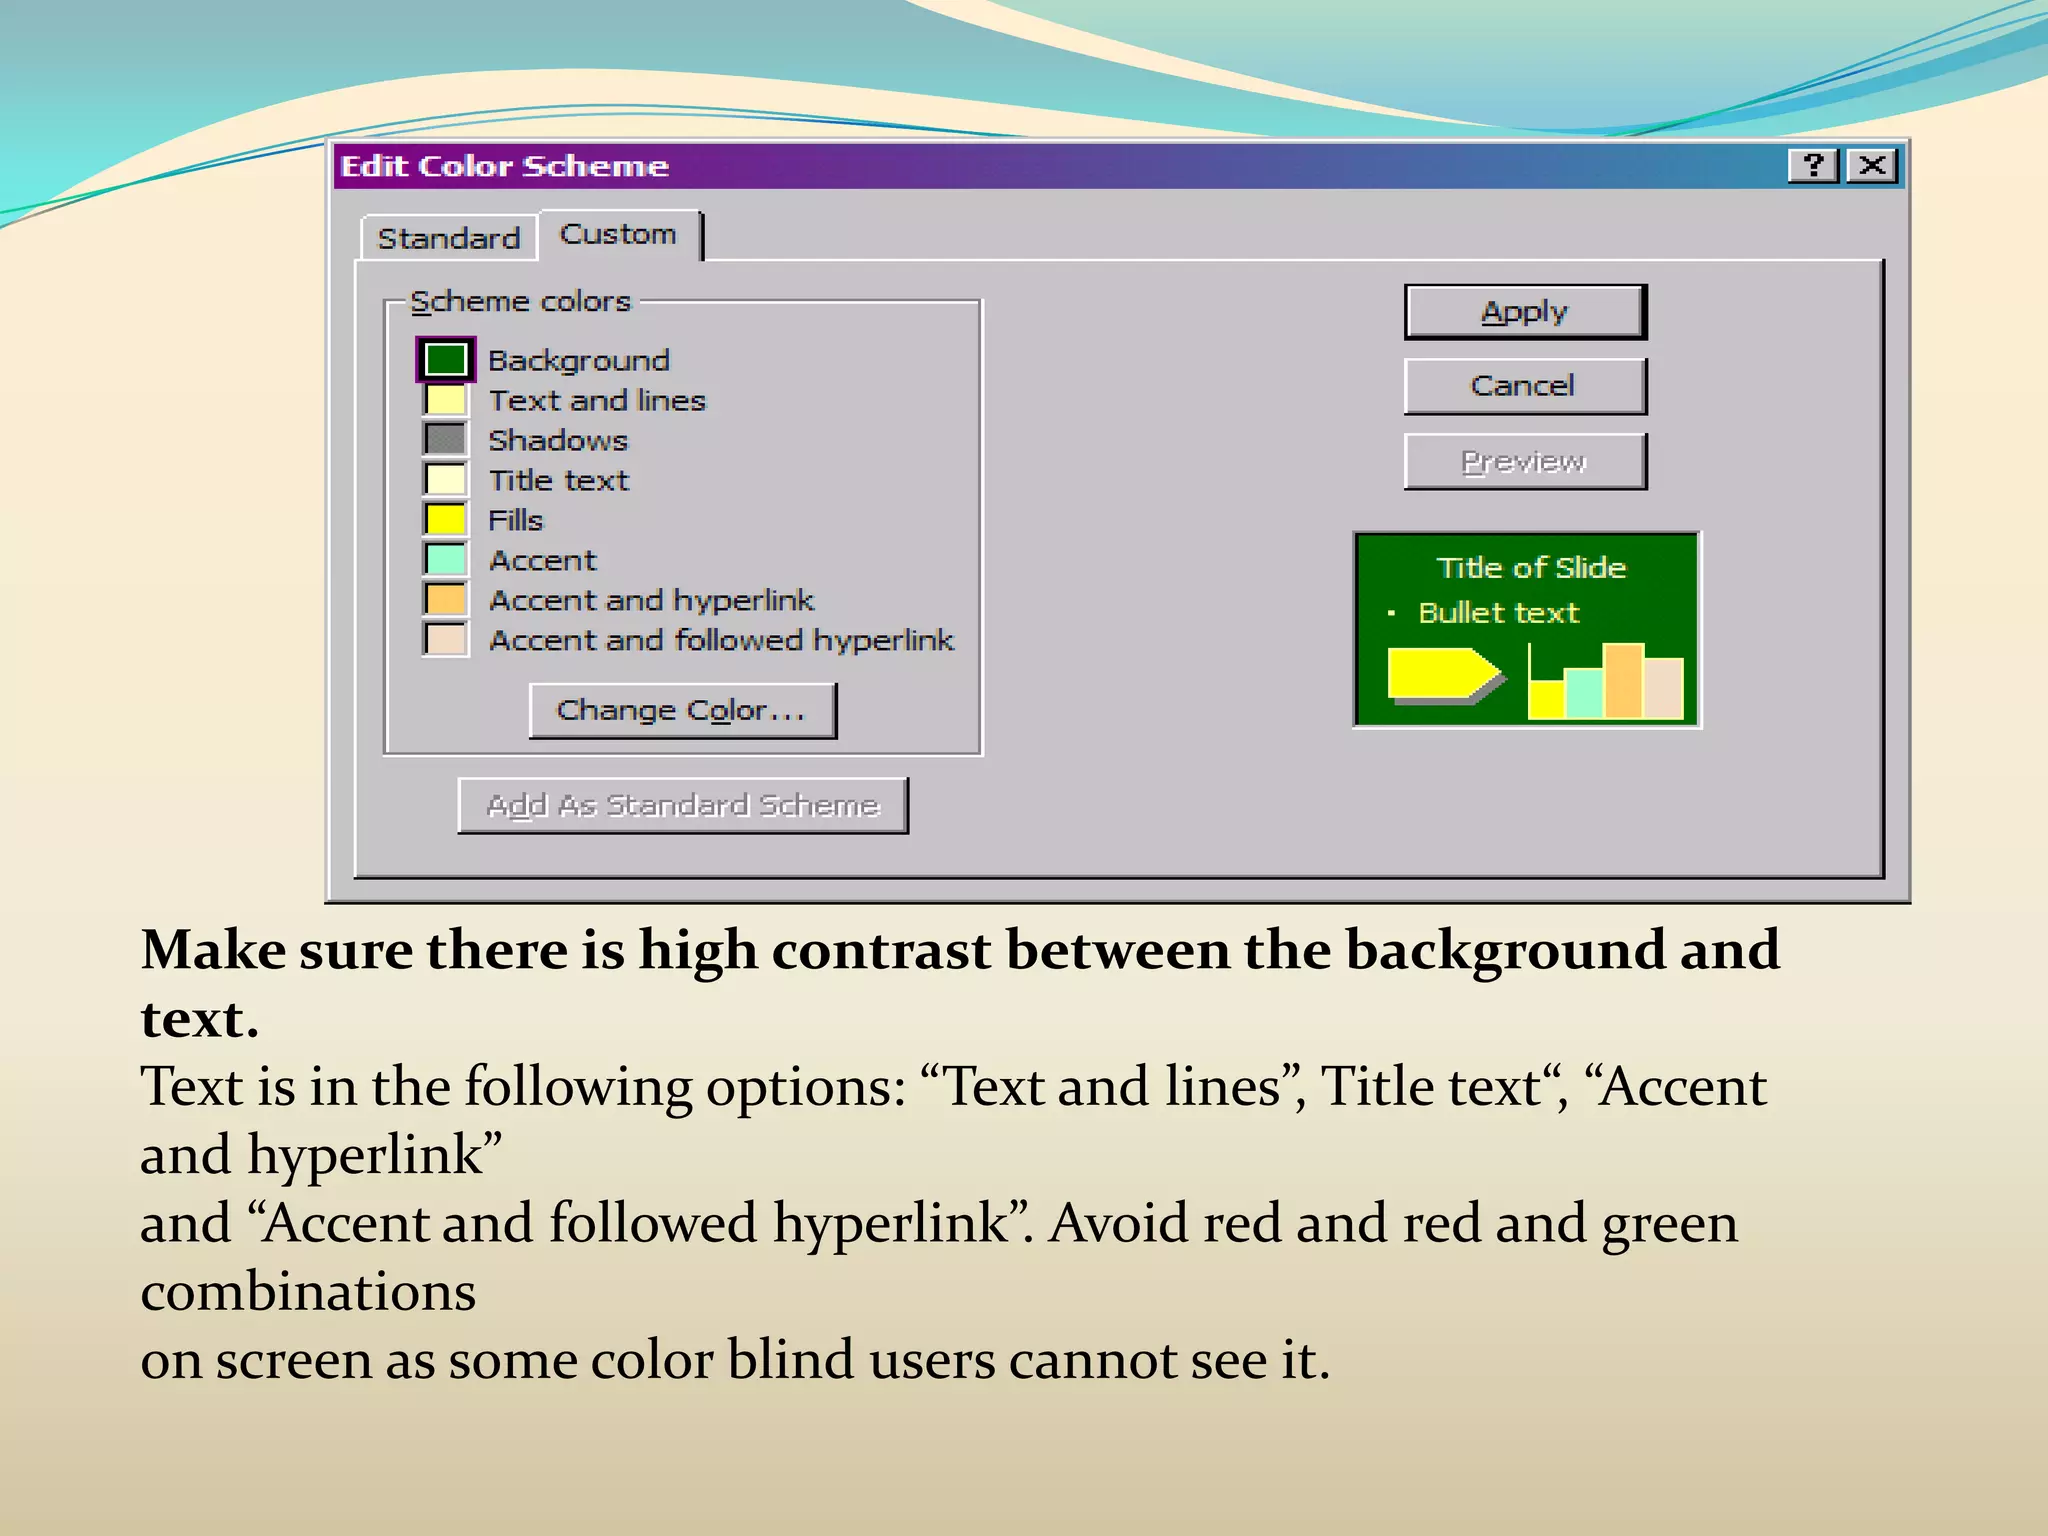
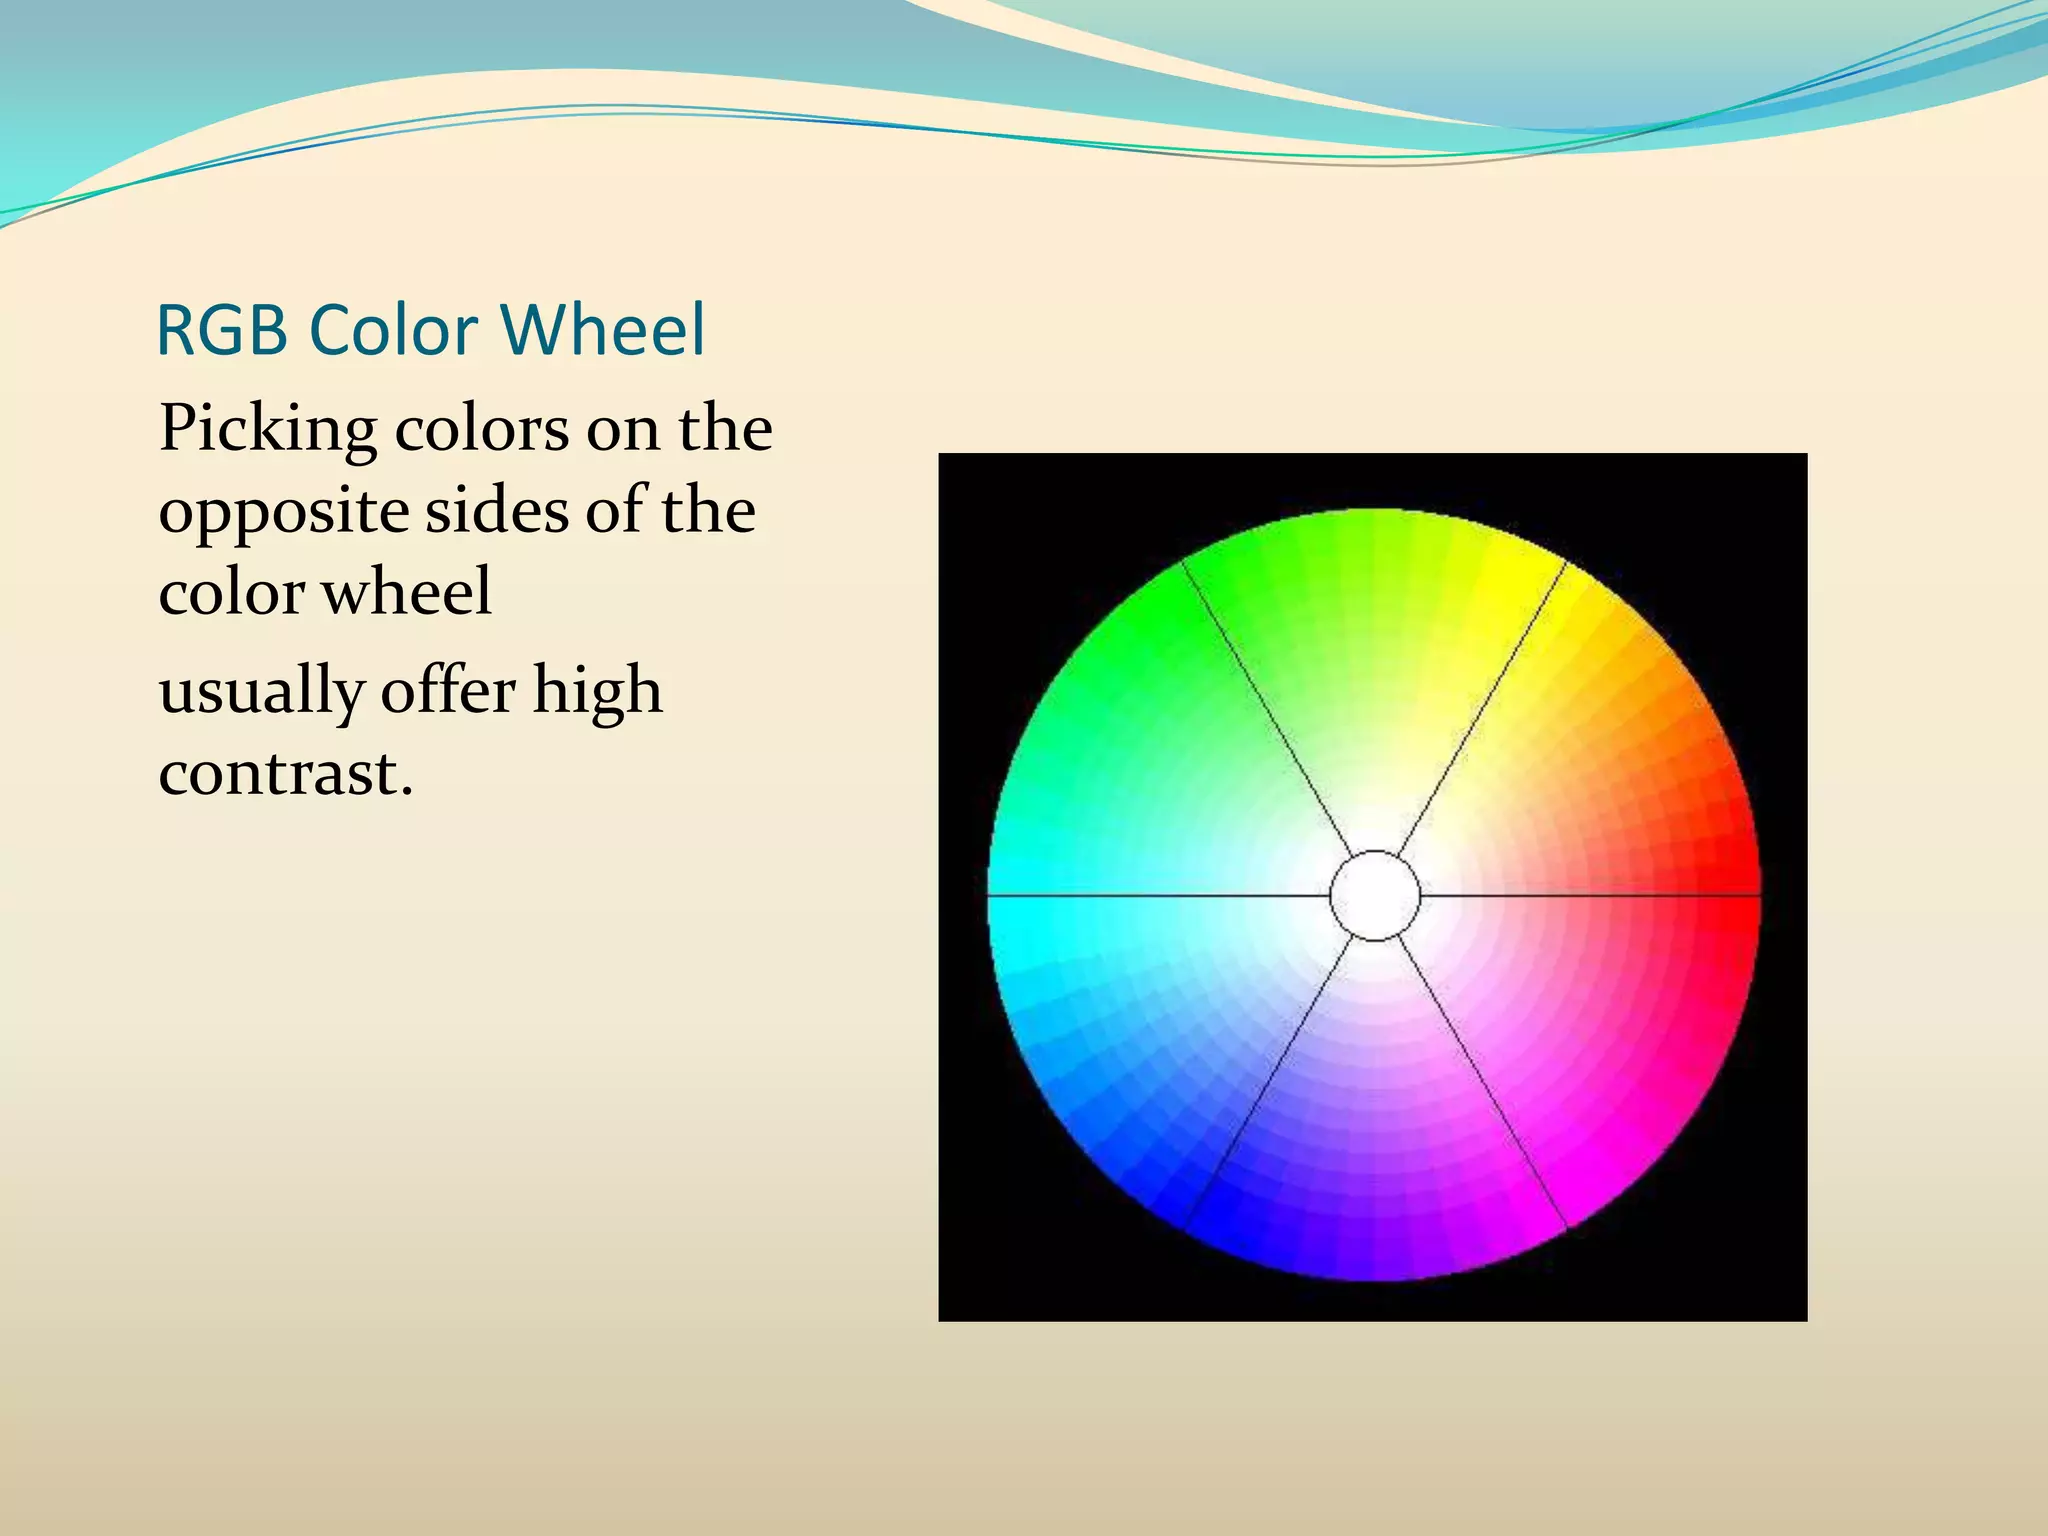

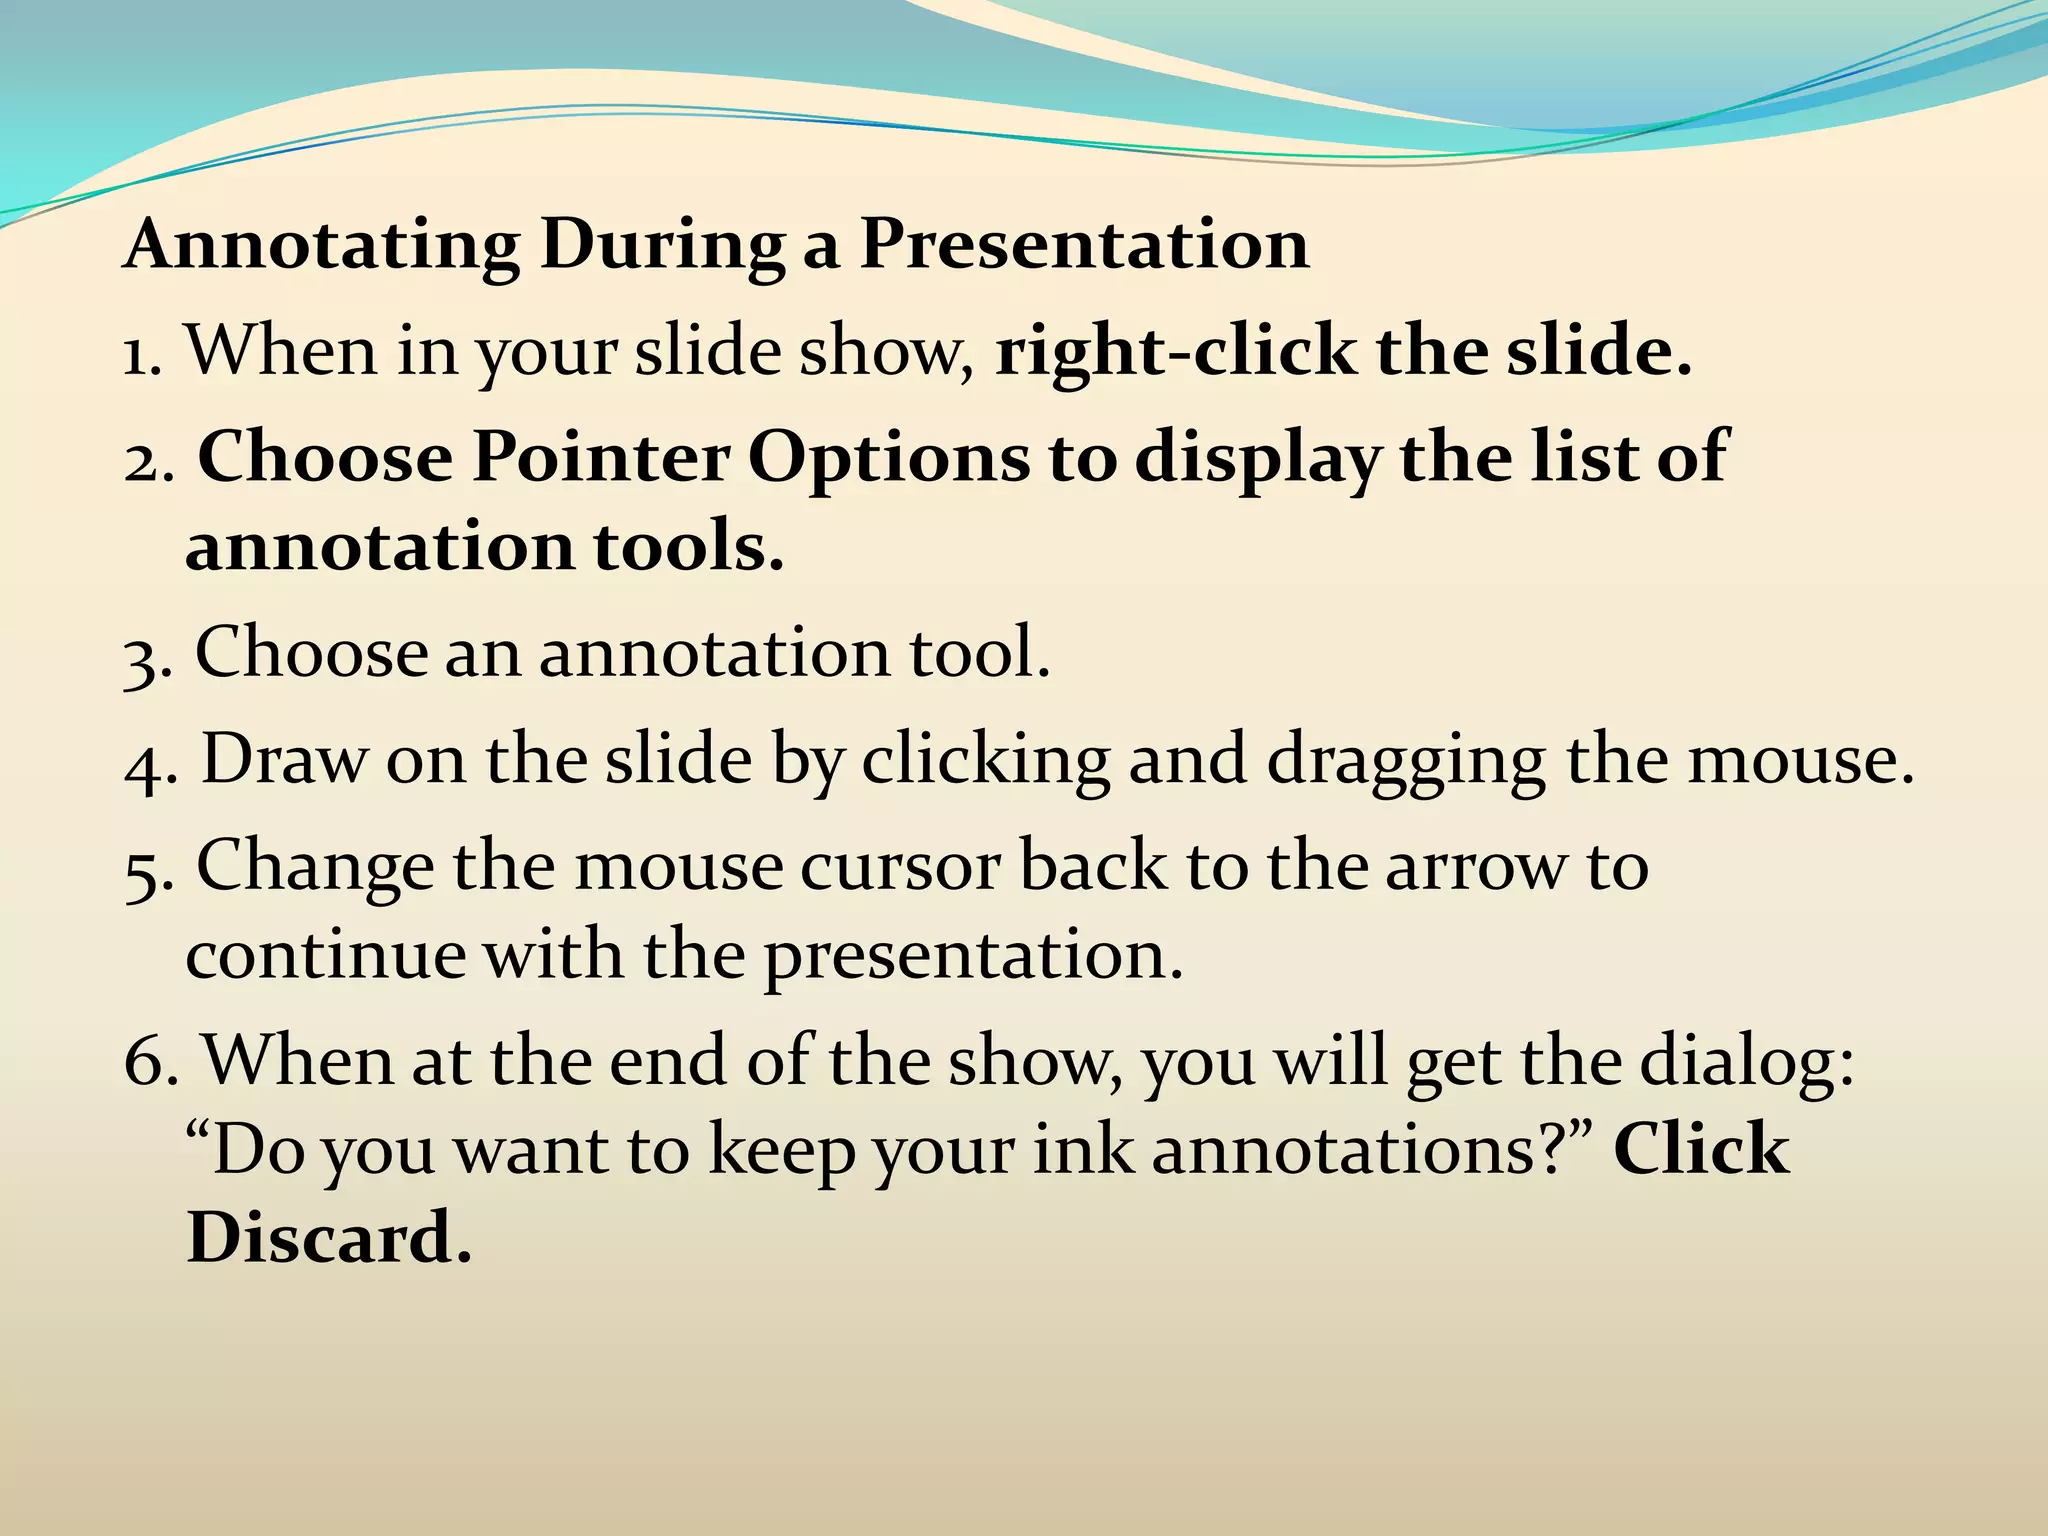

This document provides instructions for creating a basic PowerPoint presentation with one slide. It covers how to add text boxes, images, shapes, transitions, sounds and movies. It also provides guidelines for designing clear and visually appealing slides, including using no more than 6 bullet points per slide, consistent formatting, and high contrast between text and backgrounds. The document concludes by explaining how to add and test hyperlinks, combine existing presentations and deliver a presentation with annotations.