Integrated Science M1 More tools used in Science - Microscope
•Download as PPT, PDF•
2 likes•944 views

More tools used in Science - Microscope

Recommended
More Related Content
What's hot
What's hot (20)
Similar to Integrated Science M1 More tools used in Science - Microscope
Similar to Integrated Science M1 More tools used in Science - Microscope (20)
More from eLearningJa
More from eLearningJa (20)
Recently uploaded
Recently uploaded (20)
Integrated Science M1 More tools used in Science - Microscope
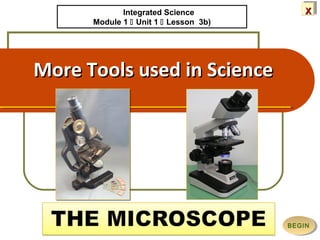
- 1. XXXX More Tools used in ScienceMore Tools used in Science BEGINBEGIN Integrated Science Module 1 Unit 1 Lesson 3b)
- 2. XXXX OVERVIEWOVERVIEW OBJECTIVESOBJECTIVES Size of CellsSize of Cells Parts of a Light Microscope Parts of a Light Microscope REVIEWREVIEW Focussing the Microscope for Viewing Focussing the Microscope for Viewing Taking care of your Microscope Taking care of your Microscope INTRODUCTIONINTRODUCTION OVERVIEWOVERVIEW This slide presentation is for the lesson for: Module 1Unit 1 Lesson 3 Some Tools used in Science In it, you will examine one of the tools that scientists use regularly to observe the internal structure of very small objects such as a cell i.e., the Compound Light Microscope. You will learn about its parts, care and get practice in how to use it correctly to see magnified (enlarged) images of specimens. You can access the topics in the Menu. 2
- 3. XXXX OVERVIEWOVERVIEW OBJECTIVESOBJECTIVES Size of CellsSize of Cells Parts of a Light Microscope Parts of a Light Microscope REVIEWREVIEW Focussing the Microscope for Viewing Focussing the Microscope for Viewing Taking care of your Microscope Taking care of your Microscope INTRODUCTIONINTRODUCTION INTRODUCTIONINTRODUCTION The smallest objects that the unaided human eye can see are about 0.1 mm long. A magnifying glass can help you to see objects somewhat better, but they will still look tiny with no structures seen. For seeing the structure of cells, you must use an instrument that can give a clear, magnified image – i.e., a microscope! Click and watch up to 2.40 to find out a little of the history of microscopes at > http://www.youtube.com/watch?v=ZYNThPzh03c&list=PL 3
- 4. XXXX OVERVIEWOVERVIEW OBJECTIVESOBJECTIVES Size of CellsSize of Cells Parts of a Light Microscope Parts of a Light Microscope REVIEWREVIEW Focussing the Microscope for Viewing Focussing the Microscope for Viewing Taking care of your Microscope Taking care of your Microscope INTRODUCTIONINTRODUCTION OBJECTIVESOBJECTIVES This presentation will enable you to: show an understanding that many structures, e.g. cells, viruses, are too small to be seen with the unaided eye. identify a compound light microscope as an important tool commonly used in science investigations. identify the parts of a compound light microscope and the function of each part. demonstrate the correct use and care of a microscope. work amicably with others. 4
- 5. XXXX OVERVIEWOVERVIEW OBJECTIVESOBJECTIVES Size of CellsSize of Cells Parts of a Light Microscope Parts of a Light Microscope REVIEWREVIEW Focussing the Microscope for Viewing Focussing the Microscope for Viewing Taking care of your Microscope Taking care of your Microscope INTRODUCTIONINTRODUCTION Size of CellsSize of Cells Activity 3.1 – How big is a cell?Activity 3.1 – How big is a cell? When you look at the skin on your hand, can you see cells? 1. Use your pen to mark a dot on your hand. Is a cell bigger than that dot? No?? Is a cell smaller than the dot, then? If so, how many cells do you think are present at that spot? How could you see cells at that spot on your hand? 5 Image Source: http://www.sciencephotogallery.co.uk/image/human-skin-sem_1041169.jpg
- 6. XXXX OVERVIEWOVERVIEW OBJECTIVESOBJECTIVES Size of CellsSize of Cells Parts of a Light Microscope Parts of a Light Microscope REVIEWREVIEW Focussing the Microscope for Viewing Focussing the Microscope for Viewing Taking care of your Microscope Taking care of your Microscope INTRODUCTIONINTRODUCTION Size of Cells -Size of Cells - Activity 3.1 How big is a cell?Activity 3.1 How big is a cell? You know the size of rice grains; do you think a ‘typical’ cell is bigger or smaller than a rice grain? 2. Click on the link for ‘Cell size and scale’ at > http://learn.genetics.utah.edu/content/begin/cells/scale/ 3. Now press the button at the left on the bar below the pictures, then slowly slide it to the right. Watch! Aren’t you surprised at seeing more pictures there? 4. Look for the cell; compare it’s size to the rice grain. How big is one of the cells on your hand? Tell your teacher! What you think! 5. For the answer, look at slide 7. Note the arrows! To see cells, we need a tool called a microscopemicroscope – either a compound light or an electron one. 6
- 7. XXXX OVERVIEWOVERVIEW OBJECTIVESOBJECTIVES Size of CellsSize of Cells Parts of a Light Microscope Parts of a Light Microscope REVIEWREVIEW Focussing the Microscope for Viewing Focussing the Microscope for Viewing Taking care of your Microscope Taking care of your Microscope INTRODUCTIONINTRODUCTION 7 Size of CellsSize of Cells Why we need microscopesWhy we need microscopes!! From > http://micro.magnet.fsu.edu/cells/
- 8. XXXX OVERVIEWOVERVIEW OBJECTIVESOBJECTIVES Size of CellsSize of Cells Parts of a Light Microscope Parts of a Light Microscope REVIEWREVIEW Focussing the Microscope for Viewing Focussing the Microscope for Viewing Taking care of your Microscope Taking care of your Microscope INTRODUCTIONINTRODUCTION Parts of a Light MicroscopeParts of a Light Microscope IntroductionIntroduction 8 Hooke’s surprising observation using his microscope, provided evidence that actually helped us learn about cells and inspired The Cell Theory! Watch up to 2.24 at > http://www.edurite.com/kbase/diagram-of-light-microscope In 1665, a scientist named Robert Hooke made a microscope and, while viewing slices of cork, he noticed that it was made up of many small compartments, which he named ‘cellscells’…. because they reminded him of the rooms (cells) in which monks lived and of prison cells. Click to continue.Click to continue. CellsCells Hooke Microscope
- 9. XXXX OVERVIEWOVERVIEW OBJECTIVESOBJECTIVES Size of CellsSize of Cells Parts of a Light Microscope Parts of a Light Microscope REVIEWREVIEW Focussing the Microscope for Viewing Focussing the Microscope for Viewing Taking care of your Microscope Taking care of your Microscope INTRODUCTIONINTRODUCTION Parts of a Light MicroscopeParts of a Light Microscope A compound microscopeA compound microscope 1. First, watch this video for a description of a light microscope, http://www.youtube.com/watch?v=RKA8_mif6-E 9 Let’s learn about a compound microscope!
- 10. XXXX OVERVIEWOVERVIEW OBJECTIVESOBJECTIVES Size of CellsSize of Cells Parts of a Light Microscope Parts of a Light Microscope REVIEWREVIEW Focussing the Microscope for Viewing Focussing the Microscope for Viewing Taking care of your Microscope Taking care of your Microscope INTRODUCTIONINTRODUCTION Parts of a Light MicroscopeParts of a Light Microscope A compound microscopeA compound microscope All microscopes might not look the same, but they have similar working parts! Make sure you identify all the parts on your microscope. 2.Watch up to 1.10 to see or recall how to get out and carry your microscope > http://stevegallik.org/sites/histologyolm.stevegallik.org/htmlp 3.Now, carefully get out your group’s microscope. Use this next video to find out how to use it > http://www.youtube.com/watch?v=oUsJfttUZ-w 10 IntroductionIntroduction Let’s learn about a compound microscope!
- 11. XXXX OVERVIEWOVERVIEW OBJECTIVESOBJECTIVES Size of CellsSize of Cells Parts of a Light Microscope Parts of a Light Microscope REVIEWREVIEW Focussing the Microscope for Viewing Focussing the Microscope for Viewing Taking care of your Microscope Taking care of your Microscope INTRODUCTIONINTRODUCTION Parts of a Light MicroscopeParts of a Light Microscope Using the MicroscopeUsing the Microscope When using the microscope to view objects: 11 Position your microscope properly on your desk or table. Position your microscope properly on your desk or table. Do NOT swing your micro- scope like a hand bag when carrying it to your table! Do NOT swing your micro- scope like a hand bag when carrying it to your table! Always use a slide (with a cover slip) placed on the stage and held in position by the clips. Look through the eyepiece and select the objective while, at the same time, you focus with the coarse then fine adjustment knobs until you get a sharp, well-lit image. Always use a slide (with a cover slip) placed on the stage and held in position by the clips. Look through the eyepiece and select the objective while, at the same time, you focus with the coarse then fine adjustment knobs until you get a sharp, well-lit image. Image: http://www.inmagine.com/faa055/faa055000258-photo
- 12. XXXX OVERVIEWOVERVIEW OBJECTIVESOBJECTIVES Size of CellsSize of Cells Parts of a Light Microscope Parts of a Light Microscope REVIEWREVIEW Focussing the Microscope for Viewing Focussing the Microscope for Viewing Taking care of your Microscope Taking care of your Microscope INTRODUCTIONINTRODUCTION Focussing the MicroscopeFocussing the Microscope When focusing the microscope to view objects, use first the lowestlowest power then go to high power objective. 12 Click & scroll to the diagram to see how light passes through the objective and eyepiece lenses to enable image formation, at > http://www.cas.miamioh.edu/mbi-ws/microscopes/compoundscope.html http://microscopesunlimited.com/microscope-care/ This is the 4X Low, Low Power. It has a red band. This is the 4X Low, Low Power. It has a red band. The objectives are moved by turning the revolving nosepiece. The 10X Low Power objective has a yellow band. The 10X Low Power objective has a yellow band. 40X or High Power objective has a blue band.
- 13. XXXX OVERVIEWOVERVIEW OBJECTIVESOBJECTIVES Size of CellsSize of Cells Parts of a Light Microscope Parts of a Light Microscope REVIEWREVIEW Focussing the Microscope for Viewing Focussing the Microscope for Viewing Taking care of your Microscope Taking care of your Microscope INTRODUCTIONINTRODUCTION Focussing the MicroscopeFocussing the Microscope 1. Cut out a small letter ‘e’, place it the right way on a slide with a cover slip on top. Try the first ‘Lab Exercises’ > http://www1.broward.edu/~ssimpson/letterE.htm Did you see that the microscope forms an inverted image? 2. Try the second activity with three small pieces of differently coloured threads, to see depth of focus. 3. To find out about magnification, Check > http://www.cas.miamioh.edu/mbi-ws/microscopes/Magnification 4. Compare images at various magnifications at > http://www.cas.miamioh.edu/mbi-w/microscopes/Images.html 13 Image: http://www.inmagine.com/faa055/faa055000258-photo
- 14. XXXX OVERVIEWOVERVIEW OBJECTIVESOBJECTIVES Size of CellsSize of Cells Parts of a Light Microscope Parts of a Light Microscope REVIEWREVIEW Focussing the Microscope for Viewing Focussing the Microscope for Viewing Taking care of your Microscope Taking care of your Microscope INTRODUCTIONINTRODUCTION Focussing the MicroscopeFocussing the Microscope Increasing the magnificationIncreasing the magnification 14 At Left is what Human cheek cells would look like under the X10 objective of a light microscope, then magnified further (Right) using X 40 objective.
- 15. XXXX OVERVIEWOVERVIEW OBJECTIVESOBJECTIVES Size of CellsSize of Cells Parts of a Light Microscope Parts of a Light Microscope REVIEWREVIEW Focussing the Microscope for Viewing Focussing the Microscope for Viewing Taking care of your Microscope Taking care of your Microscope INTRODUCTIONINTRODUCTION Focussing the MicroscopeFocussing the Microscope ResolutionResolution 15 IntroductionIntroduction Increasing magnification decreases the resolution (clearness of image) of the microscope. Look at the images of chloroplasts. This is a photograph of a chloroplast in a plant cell (taken with an electron microscope). Magnification increased with no change in resolution. Resolution is increased with no change in magnification. Note that much more detail of the internal structure of the chloroplast is now shown. http://assets.cambridge.org/97805217/17632/excerpt/9780521717632_excerpt.pdf NOTE
- 16. XXXX OVERVIEWOVERVIEW OBJECTIVESOBJECTIVES Size of CellsSize of Cells Parts of a Light Microscope Parts of a Light Microscope REVIEWREVIEW Focussing the Microscope for Viewing Focussing the Microscope for Viewing Taking care of your Microscope Taking care of your Microscope INTRODUCTIONINTRODUCTION Focussing the MicroscopeFocussing the Microscope Slide PreparationSlide Preparation Watch > http://www.youtube.com/watch?v=bGBgABLEV4g&list=PLE8A77E3 16 Can you just place cells/specimens on the microscope to see them? Can you just place cells/specimens on the microscope to see them? NO!NO! To see any object, a slide is prepared.To see any object, a slide is prepared. Click below and watch how that is done> http://www.youtube.com/watch?v=GHnndVuaync&feature=related (Onion & Human cheek cells)
- 17. XXXX OVERVIEWOVERVIEW OBJECTIVESOBJECTIVES Size of CellsSize of Cells Parts of a Light Microscope Parts of a Light Microscope REVIEWREVIEW Focussing the Microscope for Viewing Focussing the Microscope for Viewing Taking care of your Microscope Taking care of your Microscope INTRODUCTIONINTRODUCTION 17 Focussing the MicroscopeFocussing the Microscope http://www.inmagine.com/dp033/dp1822133-photo http://botit.botany.wisc.edu/botany_130/Plant_cell/Elodea.html Before drawing anything, ALWAYS check a diagram of what you’re supposed to see to make sure you’ve focused on the correct thing and are not just looking at your own eyelashes! Before drawing anything, ALWAYS check a diagram of what you’re supposed to see to make sure you’ve focused on the correct thing and are not just looking at your own eyelashes! http://waynesword.palomar.edu/lmexer1.htm#cheek
- 18. XXXX OVERVIEWOVERVIEW OBJECTIVESOBJECTIVES Size of CellsSize of Cells Parts of a Light Microscope Parts of a Light Microscope REVIEWREVIEW Focussing the Microscope for Viewing Focussing the Microscope for Viewing Taking care of your Microscope Taking care of your Microscope INTRODUCTIONINTRODUCTION Focussing the MicroscopeFocussing the Microscope When going to focus a slide: FIRST … check a diagram/photo, to make sure you know exactly what you should be seeing when the slide is correctly focused. To check slides to focus now, look at these: Gp. 1 & 4 - Look at Computer A = Find ‘Ameoba’ as shown at 0.2 > http://www.youtube.com/watch?v=7pR7TNzJ_pA Gp. 2 & 7 – Look at Computer B = Find two differently shaped cells as shown at ‘Buttercup Guard cells’ > http://www.goscienceseven.com/cells/plantcellphoto.htm Gp. 3 & 6 – Look at Computer C = Find two different cells from ‘Human Blood smear’, shown on slide 3 at > http://www.slideshare.net/TeaNonikashvili/1-human-blood-smear Gp. 5 & 8 – Look at Computer D = Find two central cells stained red from the Root centre, shown on slide 114 at > http://www.sttss.edu.hk/biology/photomicrograph/114.jpg 18Image: http://www.inmagine.com/faa055/faa055000258-photo
- 19. XXXX OVERVIEWOVERVIEW OBJECTIVESOBJECTIVES Size of CellsSize of Cells Parts of a Light Microscope Parts of a Light Microscope REVIEWREVIEW Focussing the Microscope for Viewing Focussing the Microscope for Viewing Taking care of your Microscope Taking care of your Microscope INTRODUCTIONINTRODUCTION Taking care of a MicroscopeTaking care of a Microscope 1. Remove the slide, clean it, and return it to the slide box/shelf. 2. Shut down the microscope by turning off the power to the lamp and unplugging the cord. 3. Unscrew the eyepiece and objectives. Clean each with lens paper/wipes on which you tip a few drops of lens cleaner, starting with the lowest power objective and working to the highest, then cleaning the eyepiece lens. 19 When you’ve finished using a microscope …When you’ve finished using a microscope …
- 20. XXXX OVERVIEWOVERVIEW OBJECTIVESOBJECTIVES Size of CellsSize of Cells Parts of a Light Microscope Parts of a Light Microscope REVIEWREVIEW Focussing the Microscope for Viewing Focussing the Microscope for Viewing Taking care of your Microscope Taking care of your Microscope INTRODUCTIONINTRODUCTION Taking care of a MicroscopeTaking care of a Microscope 4. Once you have cleaned each objective and eyepiece lens, clean each a second time with dry lens paper. 5. Wrap the electric cord neatly (if there is one). 6. Cover the microscope with its dust cover. 7. Then, using both hands, grasp the microscope by its base and arm and gently return it to its cabinet. 20 When you’ve finished using a microscope …When you’ve finished using a microscope …
- 21. XXXX OVERVIEWOVERVIEW OBJECTIVESOBJECTIVES Size of CellsSize of Cells Parts of a Light Microscope Parts of a Light Microscope REVIEWREVIEW Focussing the Microscope for Viewing Focussing the Microscope for Viewing Taking care of your Microscope Taking care of your Microscope INTRODUCTIONINTRODUCTION QUICK REVIEWQUICK REVIEW 21 Most microscopes have the same 'structural' components although at first they might appear to be different! Name the parts & their function. Feedback 1 = Ocular lens or eyepiece - magnifies the image produced by the objective lens. 2 = Objective turret or Revolving nose piece to hold multiple objective lenses; 3 = Objective - Each objective lens forms the primary magnified image of the specimen that comes to focus near the top of the microscope tube just below the eyepiece. 4 = Coarse adjustment focus wheel to move the stage with the specimen for focusing; 5 = Fine adjustment wheel/knob - focusing 6 = Frame 7 = Light source - either a light or a mirror. 8 = Diaphragm controls the diameter of the light beam emerging from the condenser lens; 9 = Stage on which slide/sample is placed. http://simple.wikipedia.org/wiki/Light_microscope CHECK ANSWERSCHECK ANSWERS
- 22. XXXX OVERVIEWOVERVIEW OBJECTIVESOBJECTIVES Size of CellsSize of Cells Parts of a Light Microscope Parts of a Light Microscope REVIEWREVIEW Focussing the Microscope for Viewing Focussing the Microscope for Viewing Taking care of your Microscope Taking care of your Microscope INTRODUCTIONINTRODUCTION REFERENCES/CREDITSREFERENCES/CREDITS http://learn.genetics.utah.edu/content/begin/cells/scale http://www.edurite.com/kbase/diagram-of-light-microscope http://www.youtube.com/watch?v=RKA8_mif6-E http://www.youtube.com/watch?v=oUsJfttUZ-w http://www1.broward.edu/~ssimpson/letterE.htm http://www.youtube.com/watch?v=zXAgbSzEADQ&feature=related http://www.cas.miamioh.edu/mbi-ws/microscopes/Magnification.html http://en.wikipedia.org/wiki/File:Optical_microscope_nikon_alphaphot_%2B.jpg http://micro.magnet.fsu.edu/cells/ http://www.tutorvista.com/biology/microscope-parts-and-functions http://www.inmagine.com/faa055/faa055000258-photo http://www.inmagine.com/dp033/dp1822133-photo http://botit.botany.wisc.edu/botany_130/Plant_cell/Elodea.html http://waynesword.palomar.edu/lmexer1.htm#onion http://waynesword.palomar.edu/lmexer1.htm#cheek http://www.nphsscience.com/lockwood/BioH/HANDOUTS/HANDOUT-BiologicalDrawings.pdf http://www-pvhs.stjohns.k12.fl.us/teachers/lyonss/FOV1-00031ECD/FOV1-0003A5AA/FOV1- 0005AD8A/Guidelines%20for%20Acceptable%20Biological%20Drawings.pdf?Templates=RWD http://www.youtube.com/watch?v=PMIU1fkIPQs&list=PLE8A77E32A39A6BC9 http://www.cas.miamioh.edu/mbi-ws/microscopes/selftest.html http://waynesword.palomar.edu/photsyn1.htm#light http://www.sciencephotogallery.co.uk/image/human-skin-sem_1041169.jpg http://education.denniskunkel.com/catalog/product_info.php?products_id=1123 22 :
Editor's Notes
- Read this before viewing as slide show. Note. If you are using PowerPoint 2007, before you begin, look for the Security Warning below the ribbon, above this slide and click the Options button. In the Security Alert box, click “Enable This Content”. If the Security Warning does not appear, then view the presentation as Slide Show. If you are using PowerPoint 2013, look below the ribbon. If you see a Security Warning, click Enable Content before viewing in Slide Show View. http://chemistry.about.com/od/imagesclipartstructures/ig/Lab-Equipment---Instruments/1930s-Microscope.htm http://en.wikipedia.org/wiki/File:Optical_microscope_nikon_alphaphot_%2B.jpg
- http://web.archive.org/web/20071011070109/http://sps.k12.ar.us/massengale/microscope_lab.htm
- http://microscopesunlimited.com/microscope-care/
- http://www.cas.muohio.edu/mbi-ws/microscopes/activites.html
- http://www.cas.miamioh.edu/mbi-ws/microscopes/activites.html
- http://assets.cambridge.org/97805217/17632/excerpt/9780521717632_excerpt.pdf
- http://simple.wikipedia.org/wiki/File:Optical_microscope_nikon_alphaphot.jpg