SlideShare a Scribd company logo
1 of 21
Advanced Oscilloscope
Features
Lab Experiment
A collection of lab exercises to introduce you to the
advanced features of a digital oscilloscope.
Revision 1.0 Page 1 of 21
Advanced Oscilloscope Features Lab Experiment
Copyright Notice and Reproduction Rights
Ā©2009 Tektronix, Inc.
This document may be reprinted, modified and distributed in whole or in part for the limited purpose of
training users or prospective users of Tektronix oscilloscopes and instrumentation. Any reproduction
must include a copy of this page containing this notice.
Revision 1.0 Page 2 of 21
Advanced Oscilloscope Features Lab Experiment
Table of Contents
LABORATORY EXPERIMENT INTRODUCTION.......................................................................................4
OBJECTIVES................................................................................................................................................................4
EQUIPMENT LIST.........................................................................................................................................................4
INITIAL SETUP........................................................................................................................................... 6
SETTING UP THE LABORATORY EXPERIMENT............................................................................................................6
ACQUISITION MODES...............................................................................................................................7
INTRODUCTION...........................................................................................................................................................7
USING DIFFERENT ACQUISITION MODES....................................................................................................................9
SIGNAL CONDITIONING .........................................................................................................................10
INTRODUCTION.........................................................................................................................................................10
USING COUPLING MODES AND BANDWIDTH LIMIT FILTERS...................................................................................11
WAVEFORM NAVIGATION AND SEARCH.............................................................................................14
INTRODUCTION.........................................................................................................................................................14
FINDING A NARROW PULSE IN A LONG RECORD.....................................................................................................14
WAVEFORM MATH..................................................................................................................................16
INTRODUCTION.........................................................................................................................................................16
USING WAVEFORM MATH........................................................................................................................................16
FAST FOURIER TRANSFORMS..............................................................................................................18
INTRODUCTION.........................................................................................................................................................18
PERFORMING A FAST FOURIER TRANSFORM............................................................................................................18
FINAL EXERCISE.....................................................................................................................................20
Revision 1.0 Page 3 of 21
Laboratory Experiment Introduction
Objectives
In the ā€œIntroduction to Oscilloscopesā€ laboratory experiment module, you learned about the basic
architecture and operation of a digital oscilloscope. This module introduces more advanced acquisition
and analysis techniques, and uses more complex electronic signals to practice these techniques.
Objectives for this module are:
1. Learn how to use the advanced acquisition controls to capture just the signals you want.
2. Learn how to use pan and zoom controls to navigate and search for specific events.
3. Learn how to use waveform math to analyze signals.
4. Learn how to make simple electronic measurements with an oscilloscope.
Equipment List
1. One Tektronix MSO2000 or DPO2000 Series digital oscilloscope.
2. Two Tektronix P2221 1X/10X passive probes.
3. One Host/Device USB Cable.
4. One Tektronix 878-0456-xx demonstration board.
Revision 1.0 Page 4 of 21
Advanced Oscilloscope Features Lab Experiment
Revision 1.0 Page 5 of 21
Advanced Oscilloscope Features Lab Experiment
Revision 1.0 Page 6 of 21
Initial Setup
Setting Up the Laboratory Experiment
1. In the following series of steps you will configure the oscilloscope and the demonstration board that
will be used to achieve the learning objectives for this module.
a. Power up the oscilloscope by pressing the power switch on the lower left corner of the
instrument.
b. Press the front panel Default Setup button to set the oscilloscope to a known state.
c. Connect P2221 1X/10X passive probes to the channel 1 and channel 2 inputs.
d. Make sure the slider switches on both probes are set to 10X.
2. The DPO Demo board (679-6451-XX) has a number of
complex signals. NOISY_SINE will be used in this
exercise.
a. Attach the channel 1 probe ground lead to the GND connector on the demo board.
b. Attach the channel 1 probe tip to the NOISY_SINE signal on the demo board.
c. Plug the USB cable into the USB host port on the front of the MSO/ DPO2000 Series
oscilloscope and the USB device port on the demo board.
d. Verify the demo board green POWER LED is lit.
e. Set the horizontal Scale to 10 ms/div.
f. Press the front panel Trigger Menu button.
g. Press the Mode bottom bezel button and the Normal side bezel button.
h. Press the Menu Off button twice to remove the menus.
i. Using the front panel Trigger Level control, set the trigger level as high as possible while
keeping the oscilloscope triggered.
3. The display should look about like this:
4. The oscilloscope and demo board are now configured for the following lab steps.
Advanced Oscilloscope Features Lab Experiment
Acquisition Modes
Introduction
Although you often want to continuously monitor a signal on your oscilloscope display, there are times
when making measurements or debugging a circuit when you want to freeze the display. Digital
oscilloscopes usually have a front panel control to allow you to start and stop acquisitions.
ā€¢ When the Run/Stop button is pushed, the oscilloscope will continuously acquire waveforms.
Pushing the Run/Stop button again stops the acquisitions.
ā€¢ When the Single button is pushed, the oscilloscope makes a single acquisition and then stops.
The oscilloscope offers several different acquisition modes. An acquisition mode determines how the
displayed waveform is created from the sample points taken by the oscilloscopeā€™s ADC. By default, the
acquisition system is in the Sample mode meaning the oscilloscope displays each sample point taken.
Using Sample mode to look at the NOISY SINE signal for this lab, the display looks about like this:
Figure 1: Example of Sample Mode
Revision 1.0 Page 7 of 21
Advanced Oscilloscope Features Lab Experiment
Averaging provides a way to reduce random noise on the NOISY SINE signal without affecting the
bandwidth of the acquisition. Random noise is reduced by calculating the average value of
corresponding samples in multiple acquisitions.
The display should look about like this, clearly showing the distinct steps on the signal, but notice that
the noise spikes have been removed:
Figure 2: Example of NOISY SINE with averaging
Most oscilloscopes provide another acquisition mode called Peak Detect. Peak Detect captures
high-frequency detail that might otherwise be missed at slow horizontal scale settings. Peak Detect
captures positive and negative signal peaks at the oscilloscopeā€™s maximum sample rate, even when
using a lower sample rate.
The MSO/DPO2000 Series oscilloscopes offer Peak Detect as part of the FilterVuā„¢ low-pass filter
mode. The FilterVuā„¢ mode display of the NOISY SINE signal looks like this:
Figure 3: Example of NOISY SINE with Peak Detect mode (FilterVu)
Notice that the low-pass-filtered signal is shown in the foreground in bright yellow and the stair steps on
the sine wave are even clearer than with averaging. Also notice the darker background signal shows the
peak detected waveform, so you never lose sight of the actual NOISY SINE signal, even when you are
examining the low-pass-filtered display of the signal.
Revision 1.0 Page 8 of 21
Advanced Oscilloscope Features Lab Experiment
Using Different Acquisition Modes
The following steps will explore the use of Sample, Averaging and Peak Detect acquisition
modes.
a. Press the front panel Run/Stop button. Notice that the display stops and that the Stop indicator
appears in the upper left corner of the display.
b. Press the front panel Single button. Notice that a single acquisition is made and then the display
stops again.
c. Press the Run/Stop button again to restart acquisitions.
d. Press the front panel Acquire button.
e. Press the Average bottom bezel button.
f. Press the Average side bezel button until On is selected.
2. Watch the display as subsequent averaging reduces the random noise on the signal.
a. Press Single button. The oscilloscope will acquire as many waveforms as needed (16, in this
case, since it is averaging 16 waveforms) and then stop.
b. When you are done, press Run/Stop.
c. Press the Average side bezel button until Off is selected.
d. Press the front panel FilterVu button.
3. Notice the top readout in the side menu which, by default, indicates the full bandwidth of the
oscilloscope.
a. Using the multipurpose a control, reduce the Noise Filter bandwidth to 6.00 kHz.
b. When you are done, turn the multipurpose a control fully clockwise to restore the full bandwidth
to the display.
Key Points to Remember
1. When the Start/Stop acquisition button is selected, the oscilloscope acquires waveforms until the
Start/Stop acquisition button is pressed again to stop waveform acquisition.
2. When the Single acquisition button is selected, the oscilloscope will capture one waveform (more if
Averaging is selected) and then automatically stop.
3. In the Sample acquisition mode, each sampled point is displayed.
4. Averaging acquisition mode reduces random noise without affecting the bandwidth of the
acquisition.
5. Peak Detect acquisition mode captures high-frequency detail that might otherwise be missed at slow
horizontal scale settings. It captures positive and negative signal peaks at the oscilloscopeā€™s
maximum sample rate, even when using a lower sample rate.
Revision 1.0 Page 9 of 21
Advanced Oscilloscope Features Lab Experiment
Exercise
1. The MSO/DPO2000ā€™s default acquisition mode is:
a. Sample
b. Averaging
c. Peak Detect
d. Noise Filtering
2. The Peak Detect acquisition mode is selected when the ___________________ button is selected.
3. The ________________ acquisition mode provides a way to reduce _________________ without
affecting the bandwidth of the acquisition.
Signal Conditioning
Introduction
Several options are available for conditioning your signal before the oscilloscope samples and displays
it. The following controls are available by pushing the Menu button in the Vertical Controls section of the
oscilloscope.
ā€¢ Coupling controls the way the input signal is routed into the acquisition system. DC coupling is the
default, and enables acquisition of the AC and the DC components of the signal. In cases where you
want to focus on just the AC portion of the waveform, such as ripple or noise on a DC power supply,
AC coupling can be used to remove the DC component. Ground coupling disconnects the input
signal and forces the input to the acquisition system to ground.
ā€¢ Bandwidth Limit controls the bandwidth of the analog input signal, at either the bandwidth of the
oscilloscope or some fixed values (for example, 20 MHz). A lower bandwidth limit decreases the
displayed noise and results in a clearer display. This lowered bandwidth also limits the display of
higher speed details on the selected signal.
ā€¢ Offset allows you to actually remove DC offsets from the input signal, enabling measurements of AC
signals on large DC offsets. Unlike the vertical position control, the Offset control does affect the
acquired waveform data values by actually subtracting out the specified DC level from the input
signal.
Signal conditioning options are also available for triggering. You can choose a trigger coupling mode
which allows the trigger circuit to react to the entire signal, only the low-frequency portion (below 50
kHz), only the high-frequency portion (above 50 kHz), or to be less sensitive to noise on the trigger
signal. Trigger coupling modes are accessible by pushing the Menu button in the Trigger Controls
section of the oscilloscope.
Revision 1.0 Page 10 of 21
Advanced Oscilloscope Features Lab Experiment
Using Coupling Modes and Bandwidth Limit Filters
1. The following steps will explore the use of different coupling modes and bandwidth limit filters. For
this exercise, the PROBE COMP signal on the side of the oscilloscope will be used.
a. Attach the channel 1 probe ground lead to the ground connector on the lower right corner of the
oscilloscope.
b. Attach the channel 1 probe tip to the PROBE COMP signal next to the ground.
c. Press the front panel Autoset button to automatically set up the oscilloscope.
d. Press the front panel Menu Off button once to remove the side menu.
e. Press the yellow channel 1 menu front panel button.
f. Press the Coupling bottom bezel button until AC is selected. Notice how only the AC
component of the waveform is now shown.
g. Press the Coupling bottom bezel button until the ground symbol is selected. Notice that the
waveform is replaced by a flat line at the signal ground level. The input signal has been
disconnected from the oscilloscopeā€™s acquisition system.
h. When you are done, press Coupling again to select DC coupling.
2. In the next few steps, the oscilloscopeā€™s bandwidth limit filters will be used.
a. Press the Bandwidth bottom bezel button.
b. Press the 20MHz side bezel button. Notice the BW icon in the vertical readout section in the
lower left corner of the display. There is no appreciable change in the displayed waveform but
the signal elements above 20 MHz have been filtered out.
c. When you are done, press the Full side bezel button.
Key Points to Remember
1. Coupling controls the way the input signal is routed into the acquisition system. DC coupling enables
the acquisition of the signalā€™s AC and DC components whereas AC coupling removes the DC
component. Ground coupling forces the oscilloscopeā€™s acquisition system to ground.
2. Bandwidth limit mode controls the bandwidth of the analog input signal, at either the bandwidth of
the oscilloscope or some fixed lower bandwidth.
3. Offset mode removes DC offsets from the input signal, enabling measurements of AC signals on
large DC offsets.
4. Trigger coupling modes which allow the trigger circuit to react to the entire signal, only the low-
frequency portion, only the high-frequency portion, or to be less sensitive to noise on the trigger
signal.
Revision 1.0 Page 11 of 21
Advanced Oscilloscope Features Lab Experiment
Exercise
1. This first exercise will examine the effects of DC, AC and Ground signal coupling modes.
a. Attach the channel 1 and channel 2 probe tips to the demo board CNT_CLK signal.
b. Attach the channel 1 and channel 2 probe ground leads to the demo board GND connector.
c. Using what you have learned, configure the oscilloscope for the following display (notice all the
menus are off):
d. Both channel 1 and channel 2 are DC coupled (by default) and are the same. What will happen
to the displayed channel 1 signal (yellow waveform) if AC coupling is selected for channel 1?
Select AC coupling mode for channel 1. What happened?
e. What will happen to the displayed channel 1 signal if ground coupling is selected?
Select ground coupling mode for channel 1. What happened?
Revision 1.0 Page 12 of 21
Advanced Oscilloscope Features Lab Experiment
f. What happened to the displayed channel 2 signal (blue waveform)? Why?
g. Select DC coupling for channel 1 and turn off all menus.
2. This next series of steps will use the setup from the previous exercise and will explore what happens
when a filter is applied to the channel 2 signal but not to the channel 1 signal.
a. Press the channel 2 vertical axis Menu button.
b. Press the Bandwidth Full bottom bezel button to display the Bandwidth Full/20 MHz menu
buttons.
c. Notice the fast rise- and fall-times of the channel 1 and channel 2 signals. Fast transitions
indicate the signal includes high frequency components. What might happen to the rise-time on
the channel 2 signal if a 20 MHz bandwidth filter is applied?
d. Press the 20 MHz side bezel button and describe any changes that take place in the channel 2
signal.
e. Press the Full side bezel button and describe any changes that take place in the channel 2
signal.
Revision 1.0 Page 13 of 21
Advanced Oscilloscope Features Lab Experiment
Waveform Navigation and Search
Introduction
Trying to find one particular event, such as a spike on your signal or a runt pulse, in a long waveform
record can be difficult. For example, a 1 Mpoint record length on the MSO/DPO2000 is equal to over
2000 oscilloscope screens worth of data! To make it easier to find what you are looking for, the
MSO/DPO2000 Series has a special feature called Wave InspectorĀ® that provides tools for quickly
moving through long records and an automated search function.
Finding a Narrow Pulse in a Long Record
1. The following steps will explore the use of waveform navigation and search tools that greatly simplify
finding events of interest.
a. Move the channel 1 probe tip to the FREQ_ANOM (Frequent
Anomalies) signal on the demo board.
b. Press the front panel Default Setup button to set the oscilloscope to a known state.
c. Using the front panel Trigger Level control, set the trigger level to about 1 V.
d. Press the front panel Single button.
e. Press the Menu Off button to remove the menus.
2. It is very difficult to see much signal detail in this display. If we graphically zoom the waveform, the
details become much more visible.
a. Turn the inner Wave InspectorĀ® control and notice how the upper window of the display shows
the context while the lower window shows the zoomed details.
b. Turn the outer, spring-loaded Wave InspectorĀ® control to pan right and left through the
acquired waveform. The harder you turn the control, the faster the panning.
3. Wave InspectorĀ® provides the ability for you to manually mark characteristics of interest on a
waveform. These manual marks are drawn as solid white carets at the top of the display.
a. Press the front panel Mark Set/Clear button to manually mark an event at the center of the
display. Notice the solid white caret that now appears at the top of the display, located at the
center of the zoom window. Mark each of the pulses.
b. To jump back and forth between these marks, press the front panel ā† and ā†’ arrow buttons.
4. Wave InspectorĀ® also provides the ability for you to automatically mark characteristics of interest on
a waveform. These automatic marks are drawn as hollow white carets at the top of the display. This
capability is explored in the following steps.
a. Press the front panel Search button.
b. Press the Search bottom bezel button.
c. Press the Search side bezel button until On is selected.
Revision 1.0 Page 14 of 21
Advanced Oscilloscope Features Lab Experiment
d. Press the Clear All Marks side bezel button. Notice all the solid white carets are removed from
the display.
e. Press the Search Type bottom bezel button.
f. Using the multipurpose a control, select Pulse Width.
g. Press the Set Mark When bottom bezel button.
h. Using the multipurpose b control, set the Pulse Width < to 50 ns.
i. Press the Threshold bottom bezel button.
j. Press the Apply Preset side bezel button to set the search threshold level at 1.4 V.
k. All pulses in the acquisition that meet this pulse width specification will be marked with a hollow
white caret at the top of the display. There will likely be one or two of these narrow pulses in the
acquisition. If not, press the Single button again until one or two appear. Notice the number of
search events in the lower left corner.
l. Navigate to one of the marks using the ā† and ā†’ arrow buttons.
Key Points to Remember
1. The Tektronix Wave InspectorĀ® controls allow you to zoom and pan easily through your waveform
record.
2. With Wave Inspectorā€™s automated search, you can search your entire waveform record for a specific
event. Wave Inspector will mark every occurrence of the event.
Exercise
1. Using what you have learned, configure Wave InspectorĀ® to search for and mark Runt pulses
(pulses with thresholds between 600 mV and 2.2 V) in the FREQ_ANOM signal. To do this, use the
Search Type bottom bezel button, Runt option. How many events were found?
Revision 1.0 Page 15 of 21
Advanced Oscilloscope Features Lab Experiment
Waveform Math
Introduction
Math controls are used to perform point-by-point math operations on displayed waveforms. You can
choose to add two waveforms, subtract one waveform from another, multiply the two waveforms, or
perform a Fast Fourier Transform (FFT) on a waveform.
Waveform math can be very sensitive to slight changes in waveforms. For example:
ā€¢ Waveform addition can be used to easily verify that the positive and negative voltage swings of
a differential pair are equal and opposite.
ā€¢ Waveform subtraction is also very useful for calculating the difference between two voltages to
make non-ground-referenced measurements and to compare waveforms to a reference
waveform (stored in a reference memory).
ā€¢ Waveform multiplication is often used to calculate instantaneous power, which is the voltage
across a device times the current flowing through it.
Using Waveform Math
1. The following series of steps will explore the use of waveform math. For this first lab, the
FREQ_ANOM signal will be used again. This section of the lab continues with the oscilloscope setup
from the previous section.
a. Press the front panel Default Setup button to set the oscilloscope to a known state.
b. Configure the oscilloscope to achieve the following display.
2. The first step is to save a reference waveform which will be used for comparison purposes.
a. Press the Save/Recall Menu button located under the display.
b. Press the Save Waveform bottom bezel button.
c. With the Source set to channel 1 and the Destination set to reference R1 as indicated on the
side bezel, press the OK Save side bezel button to save the reference waveform. Notice that the
white reference waveform appears on the display. Press the Menu Off button to remove the
menus.
d. Using the channel 1 Position control, move the yellow channel 1 waveform up slightly on the
display so you can distinguish between it and the white reference waveform.
3. In the next series of steps, you will define the math waveform to be the difference between the input
signal and the stored reference.
a. Press the red front panel M button to display the math menu.
b. Press the Dual Wfm Math bottom bezel button.
c. Press the Operator side bezel button once to select the ā€“ (subtraction) operator.
d. Using the multipurpose b control, select R1 as the 2nd
Source. Notice the red math difference
waveform appears on the display.
Revision 1.0 Page 16 of 21
Advanced Oscilloscope Features Lab Experiment
e. Press the Menu Off button once to remove the side menu.
f. Using the multipurpose a control, move the red math waveform down on the display so
you can distinguish between it and the other waveforms.
g. Press the Menu Off button once to remove the bottom menu.
h. Press Single a few times and notice how sensitive the math waveform is to small
differences in the waveforms.
Key Points to Remember
1. Waveform math controls perform point-by-point math operations on displayed waveforms.
2. You can choose to add two waveforms, subtract one waveform from another, or multiply the two
waveforms.
3. Waveform math is very sensitive to slight changes in waveforms and can be used to point out small
differences.
Exercise
1. This exercise will use waveform math to analyze the timing relationship between two signals.
a. Attach the channel 1 probe tip to the demo board CNT_CLK signal and attach the probe ground
lead to the demo board Ground connector.
b. Attach the channel 2 probe tip to the demo board CNT_OUT_0 signal and attach the probe
ground lead to the demo board Ground connector.
c. Press the Default Setup button.
d. Using what you have learned, configure the oscilloscope for the following display:
2. Using waveform math, subtract the channel 2 waveform from the channel 1 waveform. Write down
your steps.
3. Are the rising edges of the two signals time-aligned?
Revision 1.0 Page 17 of 21
Advanced Oscilloscope Features Lab Experiment
Fast Fourier Transforms
Introduction
You can use the FFT (Fast Fourier Transform) Math mode to convert a time-domain signal into its
frequency components (spectrum). You can use FFT for the following kinds of analysis: analyzing
harmonics, characterizing noise, testing impulse response, and analyzing vibration.
The MSO/DPO2000 Series FFT is calculated from 5000 points on the display. The resulting FFT
spectrum goes from DC (0 Hz) to one-half the sample rate (displayed as the Nyquist frequency).
The FFT controls include:
ā€¢ Source
o Determines which signal is transformed into the FFT spectrum.
ā€¢ Vertical Units (dBV/div or V/div)
o Determines the vertical scale of the FFT spectrum.
o dBV = 20*log10(V)
ā€¢ Window
o Allows you to tradeoff the frequency resolution and amplitude accuracy that you will see in
the resultant FFT spectrum.
ļ‚§ Rectangular: Best frequency resolution, worst amplitude accuracy. Used with non-
periodic signals such as pulses and transients.
ļ‚§ Hanning: Good frequency resolution, very good amplitude accuracy. Used for
periodic signals.
ļ‚§ Hamming: Very good frequency resolution, good amplitude accuracy. Used for
periodic signals.
ļ‚§ Blackman-Harris: Worst frequency resolution, best amplitude accuracy. Used with
predominantly single-frequency waveforms to look for harmonics.
ā€¢ Horizontal
o Determines the frequency at the center of the screen and the horizontal frequency scale.
ā€¢ Gating Indicators
o Shows which time-domain waveform points are used for the FFT.
Performing a Fast Fourier Transform
1. In the following series of steps, you will set up the oscilloscope to perform a FFT.
a. For this lab, a 1.25 MHz count clock signal will be used. Move the channel 1 probe tip to the
CNT_CLK signal on the demo board.
b. Press the front panel Default Setup button to set the oscilloscope to a known state.
c. Using the front panel Trigger Level control, set the trigger level to about 1 V.
d. Press the red front panel M button to display the math menu.
e. Press the FFT bottom bezel button for a representation of the frequency domain of the clock
signal. If the side menu is displayed, press the Menu Off button once to remove it. Notice the
readout in the upper right corner, indicating that you can control the FFT vertical position and
scale with the multipurpose controls when this menu is displayed.
f. Press the Menu Off button to remove all the menus.
g. Notice the math waveform readout in the lower left corner. In this case, the vertical scale for the
FFT waveform is 20 dB/div (a logarithmic scale) and the horizontal scale is 5 MHz/div. In this
display, the 0 dBV reference point is shown by the red icon on the left side of the display, and
the 0 Hz reference is at the left side of the display.
Revision 1.0 Page 18 of 21
Advanced Oscilloscope Features Lab Experiment
2. To make the FFT display easier to understand, letā€™s spread out the FFT horizontally. You can do this
by changing the horizontal scale for the input waveform.
a. Set the horizontal Scale control to 20 Āµs/div. Notice that the horizontal scale is now 1.25
MHz/div.
b. Press the red front panel M button to display the math menu.
c. Using the multipurpose a control, position the FFT waveform in the lower half of the display.
d. Press the Menu Off button twice to remove the menus.
3. The math waveform can be measured either with the graticule and the FFT horizontal scale
factor (1.25 MHz/div) or with cursors. The following steps will demonstrate the use of cursors.
a. Press the Cursors front panel button.
b. Using the multipurpose a control, position the a cursor on the left-most peak on the FFT. This is
the fundamental frequency, about 1.25 MHz.
c. Using the multipurpose b control, position the b cursor on the third peak from the left. This is the
third harmonic, about 3.75 MHz.
4. As we know from Fourier Analysis theory, an ideal square wave has a spectrum consisting of the
fundamental and odd harmonics. Because this is an imperfect square wave, there are some even
harmonics, but they are much smaller. Remember, the FFT vertical scale is logarithmic!
Key Points to Remember
1. A Fast Fourier Transform (FFT) converts a time domain waveform into its frequency domain
components.
2. The MSO/DPO2000ā€™s FFT function transforms 5000 points of a time domain waveform to the
frequency spectrum.
3. The FFT horizontal scale is in frequency and the vertical scale is in dBV/div or Volts/div.
Exercise
1. In this exercise, you will perform a FFT on a waveform to analyze its spectrum.
a. Attach the channel 1 probe tip to the demo board CNT_OUT_4 signal and attach the probe
ground lead to the demo board Ground connector.
b. Press the Default Setup button.
c. Using what you have learned, configure the oscilloscope for the following display:
d. Set up the oscilloscope to perform a FFT on the waveform. Spread out the FFT horizontally until
you can distinguish the fundamental frequency and harmonics.
e. What is the fundamental frequency of this signal? What is the amplitude of the third and fifth
harmonics?
Revision 1.0 Page 19 of 21
Advanced Oscilloscope Features Lab Experiment
Final Exercise
1. When the Run/Stop acquisition button is selected, the oscilloscope acquires waveforms until:
a. the Run/Stop acquisition button is pressed.
b. memory fills up.
c. the probe tip is removed from the test point.
d. both A and B
2. Which of the following is not a coupling mode?
a. DC
b. AC
c. Ground
d. 1 Mā„¦
3. Waveform math algorithms perform _________________ math operations on displayed waveforms.
a. Pointā€“by-Point
b. Integer
c. Floating Point
d. Recursive
4. Waveform _______________ can be used to determine difference between a reference waveform
(store in reference memory) and an acquired waveform.
a. Subtraction
b. Division
c. Multiplication
d. Addition
5. Waveform _______________ is often used to calculate instantaneous power which is the voltage
across a device times the current flowing through it.
a. Subtraction
b. Division
c. Multiplication
d. Addition
Revision 1.0 Page 20 of 21
Advanced Oscilloscope Features Lab Experiment
6. The Wave Inspector Ā® feature allows users to ________ and __________ specific events out of the
many screens of information the oscilloscope is able to capture and display.
a. find, mark
b. add, subtract
c. add, record
d. generate alarms, generate SNMP traps on
7. The ___________________ converts time domain waveforms into their frequency domain
components.
a. Wave Inspector Ā® feature
b. Fast Fourier Transform (FFT)
c. FilterVuā„¢ mode
d. Reference Waveform mode
8. Using what you have learned, determine the fundamental frequency and amplitudes of the third and
fifth harmonic for the signal on the CNT_OUT_3 pin on the Tektronix demonstration board.
Write down your steps here:
Tektronix products are covered by U.S. and foreign patents, issued and pending. Information in this publication supersedes that in all previously published
material. Specification and price change privileges reserved. TEKTRONIX and TEK are registered trademarks of Tektronix, Inc. All other trade names
referenced are the service marks, trademarks or registered trademarks of their respective companies.
06/09 GB/WWW 3GW-24321-0
Revision 1.0 Page 21 of 21

More Related Content

What's hot

Sytong HT-60 Instruction Manual | Optics Trade
Sytong HT-60 Instruction Manual | Optics TradeSytong HT-60 Instruction Manual | Optics Trade
Sytong HT-60 Instruction Manual | Optics TradeOptics-Trade
Ā 
Instruction Manual | Sytong HT-66 | Optics Trade
Instruction Manual | Sytong HT-66 | Optics TradeInstruction Manual | Sytong HT-66 | Optics Trade
Instruction Manual | Sytong HT-66 | Optics TradeOptics-Trade
Ā 
L32 w831 service_manual
L32 w831 service_manualL32 w831 service_manual
L32 w831 service_manualdiegomonte
Ā 
Amherst Media - Field Production Guide/ Camera Workshop Sony PD 150/ 170
Amherst Media - Field Production Guide/ Camera Workshop Sony PD 150/ 170Amherst Media - Field Production Guide/ Camera Workshop Sony PD 150/ 170
Amherst Media - Field Production Guide/ Camera Workshop Sony PD 150/ 170Amherst Media
Ā 
Instruction Manual ARMASIGHT PRIME Series NV Monocular | Optics Trade
Instruction Manual ARMASIGHT PRIME Series NV Monocular | Optics TradeInstruction Manual ARMASIGHT PRIME Series NV Monocular | Optics Trade
Instruction Manual ARMASIGHT PRIME Series NV Monocular | Optics TradeOptics-Trade
Ā 

What's hot (6)

Sytong HT-60 Instruction Manual | Optics Trade
Sytong HT-60 Instruction Manual | Optics TradeSytong HT-60 Instruction Manual | Optics Trade
Sytong HT-60 Instruction Manual | Optics Trade
Ā 
Instruction Manual | Sytong HT-66 | Optics Trade
Instruction Manual | Sytong HT-66 | Optics TradeInstruction Manual | Sytong HT-66 | Optics Trade
Instruction Manual | Sytong HT-66 | Optics Trade
Ā 
L32 w831 service_manual
L32 w831 service_manualL32 w831 service_manual
L32 w831 service_manual
Ā 
Amherst Media - Field Production Guide/ Camera Workshop Sony PD 150/ 170
Amherst Media - Field Production Guide/ Camera Workshop Sony PD 150/ 170Amherst Media - Field Production Guide/ Camera Workshop Sony PD 150/ 170
Amherst Media - Field Production Guide/ Camera Workshop Sony PD 150/ 170
Ā 
Edu cam360
Edu cam360Edu cam360
Edu cam360
Ā 
Instruction Manual ARMASIGHT PRIME Series NV Monocular | Optics Trade
Instruction Manual ARMASIGHT PRIME Series NV Monocular | Optics TradeInstruction Manual ARMASIGHT PRIME Series NV Monocular | Optics Trade
Instruction Manual ARMASIGHT PRIME Series NV Monocular | Optics Trade
Ā 

Similar to Advanced scopes-lab

Ac lab final_report
Ac lab final_reportAc lab final_report
Ac lab final_reportGeorge Cibi
Ā 
Getting Started with TDS1000B / 2000B Digital Phosphor Oscilloscope Series
Getting Started with TDS1000B / 2000B  Digital Phosphor Oscilloscope SeriesGetting Started with TDS1000B / 2000B  Digital Phosphor Oscilloscope Series
Getting Started with TDS1000B / 2000B Digital Phosphor Oscilloscope SeriesPremier Farnell
Ā 
Devry ecet 105 week 1 i lab introduction to laboratory test equipment new
Devry ecet 105 week 1 i lab introduction to laboratory test equipment newDevry ecet 105 week 1 i lab introduction to laboratory test equipment new
Devry ecet 105 week 1 i lab introduction to laboratory test equipment newBartholomee
Ā 
HĘ°į»›ng dįŗ«n sį»­ dį»„ng mĆ”y đo đį»™ į»“n Testo 815
HĘ°į»›ng dįŗ«n sį»­ dį»„ng mĆ”y đo đį»™ į»“n Testo 815HĘ°į»›ng dįŗ«n sį»­ dį»„ng mĆ”y đo đį»™ į»“n Testo 815
HĘ°į»›ng dįŗ«n sį»­ dį»„ng mĆ”y đo đį»™ į»“n Testo 815Tenmars Viį»‡t Nam
Ā 
Use of an Oscilloscope - maXbox Starter33
Use of an Oscilloscope - maXbox Starter33Use of an Oscilloscope - maXbox Starter33
Use of an Oscilloscope - maXbox Starter33Max Kleiner
Ā 
manual del videograbador de 8 canales de sinrobos.com
manual del videograbador de 8 canales de sinrobos.commanual del videograbador de 8 canales de sinrobos.com
manual del videograbador de 8 canales de sinrobos.comSimon Chaler
Ā 
manual de usuario videograbador 4 canales sinrobos.com
manual de usuario videograbador 4 canales sinrobos.commanual de usuario videograbador 4 canales sinrobos.com
manual de usuario videograbador 4 canales sinrobos.comSimon Chaler
Ā 
gitarpazar.com Ampeg SVT2 PRO 300W Lambalı Bas Gitar Kafa Amfisi kullanim kl...
gitarpazar.com Ampeg SVT2 PRO 300W Lambalı Bas Gitar Kafa Amfisi  kullanim kl...gitarpazar.com Ampeg SVT2 PRO 300W Lambalı Bas Gitar Kafa Amfisi  kullanim kl...
gitarpazar.com Ampeg SVT2 PRO 300W Lambalı Bas Gitar Kafa Amfisi kullanim kl...GitarPazar
Ā 
Instruction Manual | Guide TD210 Thermal Imaging Monocular | Optics Trade
Instruction  Manual | Guide TD210 Thermal Imaging Monocular | Optics TradeInstruction  Manual | Guide TD210 Thermal Imaging Monocular | Optics Trade
Instruction Manual | Guide TD210 Thermal Imaging Monocular | Optics TradeOptics-Trade
Ā 
Plugin hantek8000series
Plugin hantek8000seriesPlugin hantek8000series
Plugin hantek8000seriesSchnarchzappen
Ā 
HĘ°į»›ng dįŗ«n sį»­ dį»„ng mĆ”y đo tį»‘c đį»™ giĆ³, nhiį»‡t đį»™ Extech 407123
HĘ°į»›ng dįŗ«n sį»­ dį»„ng mĆ”y đo tį»‘c đį»™ giĆ³, nhiį»‡t đį»™ Extech 407123HĘ°į»›ng dįŗ«n sį»­ dį»„ng mĆ”y đo tį»‘c đį»™ giĆ³, nhiį»‡t đį»™ Extech 407123
HĘ°į»›ng dįŗ«n sį»­ dį»„ng mĆ”y đo tį»‘c đį»™ giĆ³, nhiį»‡t đį»™ Extech 407123Tenmars Viį»‡t Nam
Ā 
ECET 105 help A Guide to career/Snaptutorial
 ECET 105 help A Guide to career/Snaptutorial ECET 105 help A Guide to career/Snaptutorial
ECET 105 help A Guide to career/Snaptutorialpinck243
Ā 
ECET 105 help A Guide to career/Snaptutorial
ECET 105 help A Guide to career/SnaptutorialECET 105 help A Guide to career/Snaptutorial
ECET 105 help A Guide to career/Snaptutorialpinck199
Ā 
ECET 105 Success Begins /newtonhelp.comĀ 
ECET 105 Success Begins /newtonhelp.comĀ ECET 105 Success Begins /newtonhelp.comĀ 
ECET 105 Success Begins /newtonhelp.comĀ myblue133
Ā 
Arduino frequency counter
Arduino frequency counterArduino frequency counter
Arduino frequency counternasyith_hananur
Ā 

Similar to Advanced scopes-lab (20)

Ac lab final_report
Ac lab final_reportAc lab final_report
Ac lab final_report
Ā 
Getting Started with TDS1000B / 2000B Digital Phosphor Oscilloscope Series
Getting Started with TDS1000B / 2000B  Digital Phosphor Oscilloscope SeriesGetting Started with TDS1000B / 2000B  Digital Phosphor Oscilloscope Series
Getting Started with TDS1000B / 2000B Digital Phosphor Oscilloscope Series
Ā 
How tu use an oscilloscope
How tu use an oscilloscopeHow tu use an oscilloscope
How tu use an oscilloscope
Ā 
Devry ecet 105 week 1 i lab introduction to laboratory test equipment new
Devry ecet 105 week 1 i lab introduction to laboratory test equipment newDevry ecet 105 week 1 i lab introduction to laboratory test equipment new
Devry ecet 105 week 1 i lab introduction to laboratory test equipment new
Ā 
HĘ°į»›ng dįŗ«n sį»­ dį»„ng mĆ”y đo đį»™ į»“n Testo 815
HĘ°į»›ng dįŗ«n sį»­ dį»„ng mĆ”y đo đį»™ į»“n Testo 815HĘ°į»›ng dįŗ«n sį»­ dį»„ng mĆ”y đo đį»™ į»“n Testo 815
HĘ°į»›ng dįŗ«n sį»­ dį»„ng mĆ”y đo đį»™ į»“n Testo 815
Ā 
Use of an Oscilloscope - maXbox Starter33
Use of an Oscilloscope - maXbox Starter33Use of an Oscilloscope - maXbox Starter33
Use of an Oscilloscope - maXbox Starter33
Ā 
manual del videograbador de 8 canales de sinrobos.com
manual del videograbador de 8 canales de sinrobos.commanual del videograbador de 8 canales de sinrobos.com
manual del videograbador de 8 canales de sinrobos.com
Ā 
manual de usuario videograbador 4 canales sinrobos.com
manual de usuario videograbador 4 canales sinrobos.commanual de usuario videograbador 4 canales sinrobos.com
manual de usuario videograbador 4 canales sinrobos.com
Ā 
Av r500 uk
Av r500 ukAv r500 uk
Av r500 uk
Ā 
gitarpazar.com Ampeg SVT2 PRO 300W Lambalı Bas Gitar Kafa Amfisi kullanim kl...
gitarpazar.com Ampeg SVT2 PRO 300W Lambalı Bas Gitar Kafa Amfisi  kullanim kl...gitarpazar.com Ampeg SVT2 PRO 300W Lambalı Bas Gitar Kafa Amfisi  kullanim kl...
gitarpazar.com Ampeg SVT2 PRO 300W Lambalı Bas Gitar Kafa Amfisi kullanim kl...
Ā 
Instruction Manual | Guide TD210 Thermal Imaging Monocular | Optics Trade
Instruction  Manual | Guide TD210 Thermal Imaging Monocular | Optics TradeInstruction  Manual | Guide TD210 Thermal Imaging Monocular | Optics Trade
Instruction Manual | Guide TD210 Thermal Imaging Monocular | Optics Trade
Ā 
Plugin hantek8000series
Plugin hantek8000seriesPlugin hantek8000series
Plugin hantek8000series
Ā 
HĘ°į»›ng dįŗ«n sį»­ dį»„ng mĆ”y đo tį»‘c đį»™ giĆ³, nhiį»‡t đį»™ Extech 407123
HĘ°į»›ng dįŗ«n sį»­ dį»„ng mĆ”y đo tį»‘c đį»™ giĆ³, nhiį»‡t đį»™ Extech 407123HĘ°į»›ng dįŗ«n sį»­ dį»„ng mĆ”y đo tį»‘c đį»™ giĆ³, nhiį»‡t đį»™ Extech 407123
HĘ°į»›ng dįŗ«n sį»­ dį»„ng mĆ”y đo tį»‘c đį»™ giĆ³, nhiį»‡t đį»™ Extech 407123
Ā 
ECET 105 help A Guide to career/Snaptutorial
 ECET 105 help A Guide to career/Snaptutorial ECET 105 help A Guide to career/Snaptutorial
ECET 105 help A Guide to career/Snaptutorial
Ā 
ECET 105 help A Guide to career/Snaptutorial
ECET 105 help A Guide to career/SnaptutorialECET 105 help A Guide to career/Snaptutorial
ECET 105 help A Guide to career/Snaptutorial
Ā 
_SEM-InstructionManual
_SEM-InstructionManual_SEM-InstructionManual
_SEM-InstructionManual
Ā 
ECET 105 Success Begins /newtonhelp.comĀ 
ECET 105 Success Begins /newtonhelp.comĀ ECET 105 Success Begins /newtonhelp.comĀ 
ECET 105 Success Begins /newtonhelp.comĀ 
Ā 
Arduino frequency counter
Arduino frequency counterArduino frequency counter
Arduino frequency counter
Ā 
Vitorsworkshop
VitorsworkshopVitorsworkshop
Vitorsworkshop
Ā 
Jeol 2010 basic_easyusing
Jeol 2010 basic_easyusingJeol 2010 basic_easyusing
Jeol 2010 basic_easyusing
Ā 

More from cyberns_

Keusahawanan Laporan Amali Jualan Oden shalalala
Keusahawanan Laporan Amali Jualan Oden shalalalaKeusahawanan Laporan Amali Jualan Oden shalalala
Keusahawanan Laporan Amali Jualan Oden shalalalacyberns_
Ā 
Kertas kerja Kelab Esporst Dmt 4
Kertas kerja Kelab Esporst Dmt 4Kertas kerja Kelab Esporst Dmt 4
Kertas kerja Kelab Esporst Dmt 4cyberns_
Ā 
Surat rasmi Kelab DMT 4
Surat rasmi Kelab DMT 4Surat rasmi Kelab DMT 4
Surat rasmi Kelab DMT 4cyberns_
Ā 
Minit Mesyuarat Kelab Mobile Technology
Minit Mesyuarat Kelab Mobile TechnologyMinit Mesyuarat Kelab Mobile Technology
Minit Mesyuarat Kelab Mobile Technologycyberns_
Ā 
Implikasi penggunaan telefon bimbit
Implikasi penggunaan telefon bimbitImplikasi penggunaan telefon bimbit
Implikasi penggunaan telefon bimbitcyberns_
Ā 
Sejarah Tingkatan 3 -Kemerdekaan Negara 31 Ogos 1956
Sejarah Tingkatan 3 -Kemerdekaan Negara 31 Ogos 1956Sejarah Tingkatan 3 -Kemerdekaan Negara 31 Ogos 1956
Sejarah Tingkatan 3 -Kemerdekaan Negara 31 Ogos 1956cyberns_
Ā 
Mpu 1181 topic 1 greetings &introductions
Mpu 1181 topic 1 greetings &introductionsMpu 1181 topic 1 greetings &introductions
Mpu 1181 topic 1 greetings &introductionscyberns_
Ā 
Dsm1021sains1 topik3 Gerakanlinear
Dsm1021sains1 topik3 GerakanlinearDsm1021sains1 topik3 Gerakanlinear
Dsm1021sains1 topik3 Gerakanlinearcyberns_
Ā 
Benchmarking
BenchmarkingBenchmarking
Benchmarkingcyberns_
Ā 
Antena proximity sensor
Antena proximity sensorAntena proximity sensor
Antena proximity sensorcyberns_
Ā 
Kelab e sport Kolej Komunit iAmpang
Kelab e sport Kolej Komunit iAmpangKelab e sport Kolej Komunit iAmpang
Kelab e sport Kolej Komunit iAmpangcyberns_
Ā 
Wawasan matlamat konsep
Wawasan matlamat konsepWawasan matlamat konsep
Wawasan matlamat konsepcyberns_
Ā 
Kerja,Kuasa,Tenaga Keupayaan,Tenaga Kinetik Dan Keabadian Tenaga
Kerja,Kuasa,Tenaga Keupayaan,Tenaga Kinetik Dan Keabadian TenagaKerja,Kuasa,Tenaga Keupayaan,Tenaga Kinetik Dan Keabadian Tenaga
Kerja,Kuasa,Tenaga Keupayaan,Tenaga Kinetik Dan Keabadian Tenagacyberns_
Ā 
Dsm1021 sains1 Gerakanlinear
Dsm1021 sains1 GerakanlinearDsm1021 sains1 Gerakanlinear
Dsm1021 sains1 Gerakanlinearcyberns_
Ā 
Proximity sensors
Proximity sensorsProximity sensors
Proximity sensorscyberns_
Ā 
Mobile Device-Architecture
Mobile Device-ArchitectureMobile Device-Architecture
Mobile Device-Architecturecyberns_
Ā 
DSM1021-SAINS-1-TOPIK-2-DAYA-MOMENTUM
DSM1021-SAINS-1-TOPIK-2-DAYA-MOMENTUMDSM1021-SAINS-1-TOPIK-2-DAYA-MOMENTUM
DSM1021-SAINS-1-TOPIK-2-DAYA-MOMENTUMcyberns_
Ā 
DSM1021-SAINS-1-TOPIK-2-DAYA-LERAIAN-DAYA
DSM1021-SAINS-1-TOPIK-2-DAYA-LERAIAN-DAYADSM1021-SAINS-1-TOPIK-2-DAYA-LERAIAN-DAYA
DSM1021-SAINS-1-TOPIK-2-DAYA-LERAIAN-DAYAcyberns_
Ā 
DSM1021-SAINS-1-TOPIK-2-DAYA-KESEIMBANGAN-PANDUAN-DAYA
DSM1021-SAINS-1-TOPIK-2-DAYA-KESEIMBANGAN-PANDUAN-DAYADSM1021-SAINS-1-TOPIK-2-DAYA-KESEIMBANGAN-PANDUAN-DAYA
DSM1021-SAINS-1-TOPIK-2-DAYA-KESEIMBANGAN-PANDUAN-DAYAcyberns_
Ā 
UI AND UX GRAPHIC DESIGN(SOCIAL NETWORKING)
UI AND UX GRAPHIC DESIGN(SOCIAL NETWORKING)UI AND UX GRAPHIC DESIGN(SOCIAL NETWORKING)
UI AND UX GRAPHIC DESIGN(SOCIAL NETWORKING)cyberns_
Ā 

More from cyberns_ (20)

Keusahawanan Laporan Amali Jualan Oden shalalala
Keusahawanan Laporan Amali Jualan Oden shalalalaKeusahawanan Laporan Amali Jualan Oden shalalala
Keusahawanan Laporan Amali Jualan Oden shalalala
Ā 
Kertas kerja Kelab Esporst Dmt 4
Kertas kerja Kelab Esporst Dmt 4Kertas kerja Kelab Esporst Dmt 4
Kertas kerja Kelab Esporst Dmt 4
Ā 
Surat rasmi Kelab DMT 4
Surat rasmi Kelab DMT 4Surat rasmi Kelab DMT 4
Surat rasmi Kelab DMT 4
Ā 
Minit Mesyuarat Kelab Mobile Technology
Minit Mesyuarat Kelab Mobile TechnologyMinit Mesyuarat Kelab Mobile Technology
Minit Mesyuarat Kelab Mobile Technology
Ā 
Implikasi penggunaan telefon bimbit
Implikasi penggunaan telefon bimbitImplikasi penggunaan telefon bimbit
Implikasi penggunaan telefon bimbit
Ā 
Sejarah Tingkatan 3 -Kemerdekaan Negara 31 Ogos 1956
Sejarah Tingkatan 3 -Kemerdekaan Negara 31 Ogos 1956Sejarah Tingkatan 3 -Kemerdekaan Negara 31 Ogos 1956
Sejarah Tingkatan 3 -Kemerdekaan Negara 31 Ogos 1956
Ā 
Mpu 1181 topic 1 greetings &introductions
Mpu 1181 topic 1 greetings &introductionsMpu 1181 topic 1 greetings &introductions
Mpu 1181 topic 1 greetings &introductions
Ā 
Dsm1021sains1 topik3 Gerakanlinear
Dsm1021sains1 topik3 GerakanlinearDsm1021sains1 topik3 Gerakanlinear
Dsm1021sains1 topik3 Gerakanlinear
Ā 
Benchmarking
BenchmarkingBenchmarking
Benchmarking
Ā 
Antena proximity sensor
Antena proximity sensorAntena proximity sensor
Antena proximity sensor
Ā 
Kelab e sport Kolej Komunit iAmpang
Kelab e sport Kolej Komunit iAmpangKelab e sport Kolej Komunit iAmpang
Kelab e sport Kolej Komunit iAmpang
Ā 
Wawasan matlamat konsep
Wawasan matlamat konsepWawasan matlamat konsep
Wawasan matlamat konsep
Ā 
Kerja,Kuasa,Tenaga Keupayaan,Tenaga Kinetik Dan Keabadian Tenaga
Kerja,Kuasa,Tenaga Keupayaan,Tenaga Kinetik Dan Keabadian TenagaKerja,Kuasa,Tenaga Keupayaan,Tenaga Kinetik Dan Keabadian Tenaga
Kerja,Kuasa,Tenaga Keupayaan,Tenaga Kinetik Dan Keabadian Tenaga
Ā 
Dsm1021 sains1 Gerakanlinear
Dsm1021 sains1 GerakanlinearDsm1021 sains1 Gerakanlinear
Dsm1021 sains1 Gerakanlinear
Ā 
Proximity sensors
Proximity sensorsProximity sensors
Proximity sensors
Ā 
Mobile Device-Architecture
Mobile Device-ArchitectureMobile Device-Architecture
Mobile Device-Architecture
Ā 
DSM1021-SAINS-1-TOPIK-2-DAYA-MOMENTUM
DSM1021-SAINS-1-TOPIK-2-DAYA-MOMENTUMDSM1021-SAINS-1-TOPIK-2-DAYA-MOMENTUM
DSM1021-SAINS-1-TOPIK-2-DAYA-MOMENTUM
Ā 
DSM1021-SAINS-1-TOPIK-2-DAYA-LERAIAN-DAYA
DSM1021-SAINS-1-TOPIK-2-DAYA-LERAIAN-DAYADSM1021-SAINS-1-TOPIK-2-DAYA-LERAIAN-DAYA
DSM1021-SAINS-1-TOPIK-2-DAYA-LERAIAN-DAYA
Ā 
DSM1021-SAINS-1-TOPIK-2-DAYA-KESEIMBANGAN-PANDUAN-DAYA
DSM1021-SAINS-1-TOPIK-2-DAYA-KESEIMBANGAN-PANDUAN-DAYADSM1021-SAINS-1-TOPIK-2-DAYA-KESEIMBANGAN-PANDUAN-DAYA
DSM1021-SAINS-1-TOPIK-2-DAYA-KESEIMBANGAN-PANDUAN-DAYA
Ā 
UI AND UX GRAPHIC DESIGN(SOCIAL NETWORKING)
UI AND UX GRAPHIC DESIGN(SOCIAL NETWORKING)UI AND UX GRAPHIC DESIGN(SOCIAL NETWORKING)
UI AND UX GRAPHIC DESIGN(SOCIAL NETWORKING)
Ā 

Recently uploaded

CELL CYCLE Division Science 8 quarter IV.pptx
CELL CYCLE Division Science 8 quarter IV.pptxCELL CYCLE Division Science 8 quarter IV.pptx
CELL CYCLE Division Science 8 quarter IV.pptxJiesonDelaCerna
Ā 
Organic Name Reactions for the students and aspirants of Chemistry12th.pptx
Organic Name Reactions  for the students and aspirants of Chemistry12th.pptxOrganic Name Reactions  for the students and aspirants of Chemistry12th.pptx
Organic Name Reactions for the students and aspirants of Chemistry12th.pptxVS Mahajan Coaching Centre
Ā 
How to Configure Email Server in Odoo 17
How to Configure Email Server in Odoo 17How to Configure Email Server in Odoo 17
How to Configure Email Server in Odoo 17Celine George
Ā 
Solving Puzzles Benefits Everyone (English).pptx
Solving Puzzles Benefits Everyone (English).pptxSolving Puzzles Benefits Everyone (English).pptx
Solving Puzzles Benefits Everyone (English).pptxOH TEIK BIN
Ā 
Enzyme, Pharmaceutical Aids, Miscellaneous Last Part of Chapter no 5th.pdf
Enzyme, Pharmaceutical Aids, Miscellaneous Last Part of Chapter no 5th.pdfEnzyme, Pharmaceutical Aids, Miscellaneous Last Part of Chapter no 5th.pdf
Enzyme, Pharmaceutical Aids, Miscellaneous Last Part of Chapter no 5th.pdfSumit Tiwari
Ā 
DATA STRUCTURE AND ALGORITHM for beginners
DATA STRUCTURE AND ALGORITHM for beginnersDATA STRUCTURE AND ALGORITHM for beginners
DATA STRUCTURE AND ALGORITHM for beginnersSabitha Banu
Ā 
Introduction to AI in Higher Education_draft.pptx
Introduction to AI in Higher Education_draft.pptxIntroduction to AI in Higher Education_draft.pptx
Introduction to AI in Higher Education_draft.pptxpboyjonauth
Ā 
Alper Gobel In Media Res Media Component
Alper Gobel In Media Res Media ComponentAlper Gobel In Media Res Media Component
Alper Gobel In Media Res Media ComponentInMediaRes1
Ā 
ECONOMIC CONTEXT - PAPER 1 Q3: NEWSPAPERS.pptx
ECONOMIC CONTEXT - PAPER 1 Q3: NEWSPAPERS.pptxECONOMIC CONTEXT - PAPER 1 Q3: NEWSPAPERS.pptx
ECONOMIC CONTEXT - PAPER 1 Q3: NEWSPAPERS.pptxiammrhaywood
Ā 
Meghan Sutherland In Media Res Media Component
Meghan Sutherland In Media Res Media ComponentMeghan Sutherland In Media Res Media Component
Meghan Sutherland In Media Res Media ComponentInMediaRes1
Ā 
Pharmacognosy Flower 3. Compositae 2023.pdf
Pharmacognosy Flower 3. Compositae 2023.pdfPharmacognosy Flower 3. Compositae 2023.pdf
Pharmacognosy Flower 3. Compositae 2023.pdfMahmoud M. Sallam
Ā 
Hierarchy of management that covers different levels of management
Hierarchy of management that covers different levels of managementHierarchy of management that covers different levels of management
Hierarchy of management that covers different levels of managementmkooblal
Ā 
Roles & Responsibilities in Pharmacovigilance
Roles & Responsibilities in PharmacovigilanceRoles & Responsibilities in Pharmacovigilance
Roles & Responsibilities in PharmacovigilanceSamikshaHamane
Ā 
Blooming Together_ Growing a Community Garden Worksheet.docx
Blooming Together_ Growing a Community Garden Worksheet.docxBlooming Together_ Growing a Community Garden Worksheet.docx
Blooming Together_ Growing a Community Garden Worksheet.docxUnboundStockton
Ā 
ESSENTIAL of (CS/IT/IS) class 06 (database)
ESSENTIAL of (CS/IT/IS) class 06 (database)ESSENTIAL of (CS/IT/IS) class 06 (database)
ESSENTIAL of (CS/IT/IS) class 06 (database)Dr. Mazin Mohamed alkathiri
Ā 
MARGINALIZATION (Different learners in Marginalized Group
MARGINALIZATION (Different learners in Marginalized GroupMARGINALIZATION (Different learners in Marginalized Group
MARGINALIZATION (Different learners in Marginalized GroupJonathanParaisoCruz
Ā 
Presiding Officer Training module 2024 lok sabha elections
Presiding Officer Training module 2024 lok sabha electionsPresiding Officer Training module 2024 lok sabha elections
Presiding Officer Training module 2024 lok sabha electionsanshu789521
Ā 
Computed Fields and api Depends in the Odoo 17
Computed Fields and api Depends in the Odoo 17Computed Fields and api Depends in the Odoo 17
Computed Fields and api Depends in the Odoo 17Celine George
Ā 

Recently uploaded (20)

CELL CYCLE Division Science 8 quarter IV.pptx
CELL CYCLE Division Science 8 quarter IV.pptxCELL CYCLE Division Science 8 quarter IV.pptx
CELL CYCLE Division Science 8 quarter IV.pptx
Ā 
Organic Name Reactions for the students and aspirants of Chemistry12th.pptx
Organic Name Reactions  for the students and aspirants of Chemistry12th.pptxOrganic Name Reactions  for the students and aspirants of Chemistry12th.pptx
Organic Name Reactions for the students and aspirants of Chemistry12th.pptx
Ā 
How to Configure Email Server in Odoo 17
How to Configure Email Server in Odoo 17How to Configure Email Server in Odoo 17
How to Configure Email Server in Odoo 17
Ā 
Solving Puzzles Benefits Everyone (English).pptx
Solving Puzzles Benefits Everyone (English).pptxSolving Puzzles Benefits Everyone (English).pptx
Solving Puzzles Benefits Everyone (English).pptx
Ā 
Enzyme, Pharmaceutical Aids, Miscellaneous Last Part of Chapter no 5th.pdf
Enzyme, Pharmaceutical Aids, Miscellaneous Last Part of Chapter no 5th.pdfEnzyme, Pharmaceutical Aids, Miscellaneous Last Part of Chapter no 5th.pdf
Enzyme, Pharmaceutical Aids, Miscellaneous Last Part of Chapter no 5th.pdf
Ā 
DATA STRUCTURE AND ALGORITHM for beginners
DATA STRUCTURE AND ALGORITHM for beginnersDATA STRUCTURE AND ALGORITHM for beginners
DATA STRUCTURE AND ALGORITHM for beginners
Ā 
Introduction to AI in Higher Education_draft.pptx
Introduction to AI in Higher Education_draft.pptxIntroduction to AI in Higher Education_draft.pptx
Introduction to AI in Higher Education_draft.pptx
Ā 
Alper Gobel In Media Res Media Component
Alper Gobel In Media Res Media ComponentAlper Gobel In Media Res Media Component
Alper Gobel In Media Res Media Component
Ā 
ECONOMIC CONTEXT - PAPER 1 Q3: NEWSPAPERS.pptx
ECONOMIC CONTEXT - PAPER 1 Q3: NEWSPAPERS.pptxECONOMIC CONTEXT - PAPER 1 Q3: NEWSPAPERS.pptx
ECONOMIC CONTEXT - PAPER 1 Q3: NEWSPAPERS.pptx
Ā 
Meghan Sutherland In Media Res Media Component
Meghan Sutherland In Media Res Media ComponentMeghan Sutherland In Media Res Media Component
Meghan Sutherland In Media Res Media Component
Ā 
Pharmacognosy Flower 3. Compositae 2023.pdf
Pharmacognosy Flower 3. Compositae 2023.pdfPharmacognosy Flower 3. Compositae 2023.pdf
Pharmacognosy Flower 3. Compositae 2023.pdf
Ā 
Hierarchy of management that covers different levels of management
Hierarchy of management that covers different levels of managementHierarchy of management that covers different levels of management
Hierarchy of management that covers different levels of management
Ā 
Roles & Responsibilities in Pharmacovigilance
Roles & Responsibilities in PharmacovigilanceRoles & Responsibilities in Pharmacovigilance
Roles & Responsibilities in Pharmacovigilance
Ā 
Blooming Together_ Growing a Community Garden Worksheet.docx
Blooming Together_ Growing a Community Garden Worksheet.docxBlooming Together_ Growing a Community Garden Worksheet.docx
Blooming Together_ Growing a Community Garden Worksheet.docx
Ā 
ESSENTIAL of (CS/IT/IS) class 06 (database)
ESSENTIAL of (CS/IT/IS) class 06 (database)ESSENTIAL of (CS/IT/IS) class 06 (database)
ESSENTIAL of (CS/IT/IS) class 06 (database)
Ā 
MARGINALIZATION (Different learners in Marginalized Group
MARGINALIZATION (Different learners in Marginalized GroupMARGINALIZATION (Different learners in Marginalized Group
MARGINALIZATION (Different learners in Marginalized Group
Ā 
Presiding Officer Training module 2024 lok sabha elections
Presiding Officer Training module 2024 lok sabha electionsPresiding Officer Training module 2024 lok sabha elections
Presiding Officer Training module 2024 lok sabha elections
Ā 
Model Call Girl in Tilak Nagar Delhi reach out to us at šŸ”9953056974šŸ”
Model Call Girl in Tilak Nagar Delhi reach out to us at šŸ”9953056974šŸ”Model Call Girl in Tilak Nagar Delhi reach out to us at šŸ”9953056974šŸ”
Model Call Girl in Tilak Nagar Delhi reach out to us at šŸ”9953056974šŸ”
Ā 
Computed Fields and api Depends in the Odoo 17
Computed Fields and api Depends in the Odoo 17Computed Fields and api Depends in the Odoo 17
Computed Fields and api Depends in the Odoo 17
Ā 
9953330565 Low Rate Call Girls In Rohini Delhi NCR
9953330565 Low Rate Call Girls In Rohini  Delhi NCR9953330565 Low Rate Call Girls In Rohini  Delhi NCR
9953330565 Low Rate Call Girls In Rohini Delhi NCR
Ā 

Advanced scopes-lab

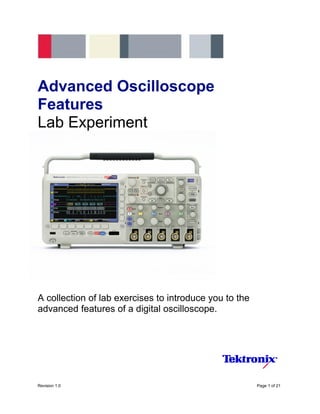
  • 1. Advanced Oscilloscope Features Lab Experiment A collection of lab exercises to introduce you to the advanced features of a digital oscilloscope. Revision 1.0 Page 1 of 21
  • 2. Advanced Oscilloscope Features Lab Experiment Copyright Notice and Reproduction Rights Ā©2009 Tektronix, Inc. This document may be reprinted, modified and distributed in whole or in part for the limited purpose of training users or prospective users of Tektronix oscilloscopes and instrumentation. Any reproduction must include a copy of this page containing this notice. Revision 1.0 Page 2 of 21
  • 3. Advanced Oscilloscope Features Lab Experiment Table of Contents LABORATORY EXPERIMENT INTRODUCTION.......................................................................................4 OBJECTIVES................................................................................................................................................................4 EQUIPMENT LIST.........................................................................................................................................................4 INITIAL SETUP........................................................................................................................................... 6 SETTING UP THE LABORATORY EXPERIMENT............................................................................................................6 ACQUISITION MODES...............................................................................................................................7 INTRODUCTION...........................................................................................................................................................7 USING DIFFERENT ACQUISITION MODES....................................................................................................................9 SIGNAL CONDITIONING .........................................................................................................................10 INTRODUCTION.........................................................................................................................................................10 USING COUPLING MODES AND BANDWIDTH LIMIT FILTERS...................................................................................11 WAVEFORM NAVIGATION AND SEARCH.............................................................................................14 INTRODUCTION.........................................................................................................................................................14 FINDING A NARROW PULSE IN A LONG RECORD.....................................................................................................14 WAVEFORM MATH..................................................................................................................................16 INTRODUCTION.........................................................................................................................................................16 USING WAVEFORM MATH........................................................................................................................................16 FAST FOURIER TRANSFORMS..............................................................................................................18 INTRODUCTION.........................................................................................................................................................18 PERFORMING A FAST FOURIER TRANSFORM............................................................................................................18 FINAL EXERCISE.....................................................................................................................................20 Revision 1.0 Page 3 of 21
  • 4. Laboratory Experiment Introduction Objectives In the ā€œIntroduction to Oscilloscopesā€ laboratory experiment module, you learned about the basic architecture and operation of a digital oscilloscope. This module introduces more advanced acquisition and analysis techniques, and uses more complex electronic signals to practice these techniques. Objectives for this module are: 1. Learn how to use the advanced acquisition controls to capture just the signals you want. 2. Learn how to use pan and zoom controls to navigate and search for specific events. 3. Learn how to use waveform math to analyze signals. 4. Learn how to make simple electronic measurements with an oscilloscope. Equipment List 1. One Tektronix MSO2000 or DPO2000 Series digital oscilloscope. 2. Two Tektronix P2221 1X/10X passive probes. 3. One Host/Device USB Cable. 4. One Tektronix 878-0456-xx demonstration board. Revision 1.0 Page 4 of 21
  • 5. Advanced Oscilloscope Features Lab Experiment Revision 1.0 Page 5 of 21
  • 6. Advanced Oscilloscope Features Lab Experiment Revision 1.0 Page 6 of 21 Initial Setup Setting Up the Laboratory Experiment 1. In the following series of steps you will configure the oscilloscope and the demonstration board that will be used to achieve the learning objectives for this module. a. Power up the oscilloscope by pressing the power switch on the lower left corner of the instrument. b. Press the front panel Default Setup button to set the oscilloscope to a known state. c. Connect P2221 1X/10X passive probes to the channel 1 and channel 2 inputs. d. Make sure the slider switches on both probes are set to 10X. 2. The DPO Demo board (679-6451-XX) has a number of complex signals. NOISY_SINE will be used in this exercise. a. Attach the channel 1 probe ground lead to the GND connector on the demo board. b. Attach the channel 1 probe tip to the NOISY_SINE signal on the demo board. c. Plug the USB cable into the USB host port on the front of the MSO/ DPO2000 Series oscilloscope and the USB device port on the demo board. d. Verify the demo board green POWER LED is lit. e. Set the horizontal Scale to 10 ms/div. f. Press the front panel Trigger Menu button. g. Press the Mode bottom bezel button and the Normal side bezel button. h. Press the Menu Off button twice to remove the menus. i. Using the front panel Trigger Level control, set the trigger level as high as possible while keeping the oscilloscope triggered. 3. The display should look about like this: 4. The oscilloscope and demo board are now configured for the following lab steps.
  • 7. Advanced Oscilloscope Features Lab Experiment Acquisition Modes Introduction Although you often want to continuously monitor a signal on your oscilloscope display, there are times when making measurements or debugging a circuit when you want to freeze the display. Digital oscilloscopes usually have a front panel control to allow you to start and stop acquisitions. ā€¢ When the Run/Stop button is pushed, the oscilloscope will continuously acquire waveforms. Pushing the Run/Stop button again stops the acquisitions. ā€¢ When the Single button is pushed, the oscilloscope makes a single acquisition and then stops. The oscilloscope offers several different acquisition modes. An acquisition mode determines how the displayed waveform is created from the sample points taken by the oscilloscopeā€™s ADC. By default, the acquisition system is in the Sample mode meaning the oscilloscope displays each sample point taken. Using Sample mode to look at the NOISY SINE signal for this lab, the display looks about like this: Figure 1: Example of Sample Mode Revision 1.0 Page 7 of 21
  • 8. Advanced Oscilloscope Features Lab Experiment Averaging provides a way to reduce random noise on the NOISY SINE signal without affecting the bandwidth of the acquisition. Random noise is reduced by calculating the average value of corresponding samples in multiple acquisitions. The display should look about like this, clearly showing the distinct steps on the signal, but notice that the noise spikes have been removed: Figure 2: Example of NOISY SINE with averaging Most oscilloscopes provide another acquisition mode called Peak Detect. Peak Detect captures high-frequency detail that might otherwise be missed at slow horizontal scale settings. Peak Detect captures positive and negative signal peaks at the oscilloscopeā€™s maximum sample rate, even when using a lower sample rate. The MSO/DPO2000 Series oscilloscopes offer Peak Detect as part of the FilterVuā„¢ low-pass filter mode. The FilterVuā„¢ mode display of the NOISY SINE signal looks like this: Figure 3: Example of NOISY SINE with Peak Detect mode (FilterVu) Notice that the low-pass-filtered signal is shown in the foreground in bright yellow and the stair steps on the sine wave are even clearer than with averaging. Also notice the darker background signal shows the peak detected waveform, so you never lose sight of the actual NOISY SINE signal, even when you are examining the low-pass-filtered display of the signal. Revision 1.0 Page 8 of 21
  • 9. Advanced Oscilloscope Features Lab Experiment Using Different Acquisition Modes The following steps will explore the use of Sample, Averaging and Peak Detect acquisition modes. a. Press the front panel Run/Stop button. Notice that the display stops and that the Stop indicator appears in the upper left corner of the display. b. Press the front panel Single button. Notice that a single acquisition is made and then the display stops again. c. Press the Run/Stop button again to restart acquisitions. d. Press the front panel Acquire button. e. Press the Average bottom bezel button. f. Press the Average side bezel button until On is selected. 2. Watch the display as subsequent averaging reduces the random noise on the signal. a. Press Single button. The oscilloscope will acquire as many waveforms as needed (16, in this case, since it is averaging 16 waveforms) and then stop. b. When you are done, press Run/Stop. c. Press the Average side bezel button until Off is selected. d. Press the front panel FilterVu button. 3. Notice the top readout in the side menu which, by default, indicates the full bandwidth of the oscilloscope. a. Using the multipurpose a control, reduce the Noise Filter bandwidth to 6.00 kHz. b. When you are done, turn the multipurpose a control fully clockwise to restore the full bandwidth to the display. Key Points to Remember 1. When the Start/Stop acquisition button is selected, the oscilloscope acquires waveforms until the Start/Stop acquisition button is pressed again to stop waveform acquisition. 2. When the Single acquisition button is selected, the oscilloscope will capture one waveform (more if Averaging is selected) and then automatically stop. 3. In the Sample acquisition mode, each sampled point is displayed. 4. Averaging acquisition mode reduces random noise without affecting the bandwidth of the acquisition. 5. Peak Detect acquisition mode captures high-frequency detail that might otherwise be missed at slow horizontal scale settings. It captures positive and negative signal peaks at the oscilloscopeā€™s maximum sample rate, even when using a lower sample rate. Revision 1.0 Page 9 of 21
  • 10. Advanced Oscilloscope Features Lab Experiment Exercise 1. The MSO/DPO2000ā€™s default acquisition mode is: a. Sample b. Averaging c. Peak Detect d. Noise Filtering 2. The Peak Detect acquisition mode is selected when the ___________________ button is selected. 3. The ________________ acquisition mode provides a way to reduce _________________ without affecting the bandwidth of the acquisition. Signal Conditioning Introduction Several options are available for conditioning your signal before the oscilloscope samples and displays it. The following controls are available by pushing the Menu button in the Vertical Controls section of the oscilloscope. ā€¢ Coupling controls the way the input signal is routed into the acquisition system. DC coupling is the default, and enables acquisition of the AC and the DC components of the signal. In cases where you want to focus on just the AC portion of the waveform, such as ripple or noise on a DC power supply, AC coupling can be used to remove the DC component. Ground coupling disconnects the input signal and forces the input to the acquisition system to ground. ā€¢ Bandwidth Limit controls the bandwidth of the analog input signal, at either the bandwidth of the oscilloscope or some fixed values (for example, 20 MHz). A lower bandwidth limit decreases the displayed noise and results in a clearer display. This lowered bandwidth also limits the display of higher speed details on the selected signal. ā€¢ Offset allows you to actually remove DC offsets from the input signal, enabling measurements of AC signals on large DC offsets. Unlike the vertical position control, the Offset control does affect the acquired waveform data values by actually subtracting out the specified DC level from the input signal. Signal conditioning options are also available for triggering. You can choose a trigger coupling mode which allows the trigger circuit to react to the entire signal, only the low-frequency portion (below 50 kHz), only the high-frequency portion (above 50 kHz), or to be less sensitive to noise on the trigger signal. Trigger coupling modes are accessible by pushing the Menu button in the Trigger Controls section of the oscilloscope. Revision 1.0 Page 10 of 21
  • 11. Advanced Oscilloscope Features Lab Experiment Using Coupling Modes and Bandwidth Limit Filters 1. The following steps will explore the use of different coupling modes and bandwidth limit filters. For this exercise, the PROBE COMP signal on the side of the oscilloscope will be used. a. Attach the channel 1 probe ground lead to the ground connector on the lower right corner of the oscilloscope. b. Attach the channel 1 probe tip to the PROBE COMP signal next to the ground. c. Press the front panel Autoset button to automatically set up the oscilloscope. d. Press the front panel Menu Off button once to remove the side menu. e. Press the yellow channel 1 menu front panel button. f. Press the Coupling bottom bezel button until AC is selected. Notice how only the AC component of the waveform is now shown. g. Press the Coupling bottom bezel button until the ground symbol is selected. Notice that the waveform is replaced by a flat line at the signal ground level. The input signal has been disconnected from the oscilloscopeā€™s acquisition system. h. When you are done, press Coupling again to select DC coupling. 2. In the next few steps, the oscilloscopeā€™s bandwidth limit filters will be used. a. Press the Bandwidth bottom bezel button. b. Press the 20MHz side bezel button. Notice the BW icon in the vertical readout section in the lower left corner of the display. There is no appreciable change in the displayed waveform but the signal elements above 20 MHz have been filtered out. c. When you are done, press the Full side bezel button. Key Points to Remember 1. Coupling controls the way the input signal is routed into the acquisition system. DC coupling enables the acquisition of the signalā€™s AC and DC components whereas AC coupling removes the DC component. Ground coupling forces the oscilloscopeā€™s acquisition system to ground. 2. Bandwidth limit mode controls the bandwidth of the analog input signal, at either the bandwidth of the oscilloscope or some fixed lower bandwidth. 3. Offset mode removes DC offsets from the input signal, enabling measurements of AC signals on large DC offsets. 4. Trigger coupling modes which allow the trigger circuit to react to the entire signal, only the low- frequency portion, only the high-frequency portion, or to be less sensitive to noise on the trigger signal. Revision 1.0 Page 11 of 21
  • 12. Advanced Oscilloscope Features Lab Experiment Exercise 1. This first exercise will examine the effects of DC, AC and Ground signal coupling modes. a. Attach the channel 1 and channel 2 probe tips to the demo board CNT_CLK signal. b. Attach the channel 1 and channel 2 probe ground leads to the demo board GND connector. c. Using what you have learned, configure the oscilloscope for the following display (notice all the menus are off): d. Both channel 1 and channel 2 are DC coupled (by default) and are the same. What will happen to the displayed channel 1 signal (yellow waveform) if AC coupling is selected for channel 1? Select AC coupling mode for channel 1. What happened? e. What will happen to the displayed channel 1 signal if ground coupling is selected? Select ground coupling mode for channel 1. What happened? Revision 1.0 Page 12 of 21
  • 13. Advanced Oscilloscope Features Lab Experiment f. What happened to the displayed channel 2 signal (blue waveform)? Why? g. Select DC coupling for channel 1 and turn off all menus. 2. This next series of steps will use the setup from the previous exercise and will explore what happens when a filter is applied to the channel 2 signal but not to the channel 1 signal. a. Press the channel 2 vertical axis Menu button. b. Press the Bandwidth Full bottom bezel button to display the Bandwidth Full/20 MHz menu buttons. c. Notice the fast rise- and fall-times of the channel 1 and channel 2 signals. Fast transitions indicate the signal includes high frequency components. What might happen to the rise-time on the channel 2 signal if a 20 MHz bandwidth filter is applied? d. Press the 20 MHz side bezel button and describe any changes that take place in the channel 2 signal. e. Press the Full side bezel button and describe any changes that take place in the channel 2 signal. Revision 1.0 Page 13 of 21
  • 14. Advanced Oscilloscope Features Lab Experiment Waveform Navigation and Search Introduction Trying to find one particular event, such as a spike on your signal or a runt pulse, in a long waveform record can be difficult. For example, a 1 Mpoint record length on the MSO/DPO2000 is equal to over 2000 oscilloscope screens worth of data! To make it easier to find what you are looking for, the MSO/DPO2000 Series has a special feature called Wave InspectorĀ® that provides tools for quickly moving through long records and an automated search function. Finding a Narrow Pulse in a Long Record 1. The following steps will explore the use of waveform navigation and search tools that greatly simplify finding events of interest. a. Move the channel 1 probe tip to the FREQ_ANOM (Frequent Anomalies) signal on the demo board. b. Press the front panel Default Setup button to set the oscilloscope to a known state. c. Using the front panel Trigger Level control, set the trigger level to about 1 V. d. Press the front panel Single button. e. Press the Menu Off button to remove the menus. 2. It is very difficult to see much signal detail in this display. If we graphically zoom the waveform, the details become much more visible. a. Turn the inner Wave InspectorĀ® control and notice how the upper window of the display shows the context while the lower window shows the zoomed details. b. Turn the outer, spring-loaded Wave InspectorĀ® control to pan right and left through the acquired waveform. The harder you turn the control, the faster the panning. 3. Wave InspectorĀ® provides the ability for you to manually mark characteristics of interest on a waveform. These manual marks are drawn as solid white carets at the top of the display. a. Press the front panel Mark Set/Clear button to manually mark an event at the center of the display. Notice the solid white caret that now appears at the top of the display, located at the center of the zoom window. Mark each of the pulses. b. To jump back and forth between these marks, press the front panel ā† and ā†’ arrow buttons. 4. Wave InspectorĀ® also provides the ability for you to automatically mark characteristics of interest on a waveform. These automatic marks are drawn as hollow white carets at the top of the display. This capability is explored in the following steps. a. Press the front panel Search button. b. Press the Search bottom bezel button. c. Press the Search side bezel button until On is selected. Revision 1.0 Page 14 of 21
  • 15. Advanced Oscilloscope Features Lab Experiment d. Press the Clear All Marks side bezel button. Notice all the solid white carets are removed from the display. e. Press the Search Type bottom bezel button. f. Using the multipurpose a control, select Pulse Width. g. Press the Set Mark When bottom bezel button. h. Using the multipurpose b control, set the Pulse Width < to 50 ns. i. Press the Threshold bottom bezel button. j. Press the Apply Preset side bezel button to set the search threshold level at 1.4 V. k. All pulses in the acquisition that meet this pulse width specification will be marked with a hollow white caret at the top of the display. There will likely be one or two of these narrow pulses in the acquisition. If not, press the Single button again until one or two appear. Notice the number of search events in the lower left corner. l. Navigate to one of the marks using the ā† and ā†’ arrow buttons. Key Points to Remember 1. The Tektronix Wave InspectorĀ® controls allow you to zoom and pan easily through your waveform record. 2. With Wave Inspectorā€™s automated search, you can search your entire waveform record for a specific event. Wave Inspector will mark every occurrence of the event. Exercise 1. Using what you have learned, configure Wave InspectorĀ® to search for and mark Runt pulses (pulses with thresholds between 600 mV and 2.2 V) in the FREQ_ANOM signal. To do this, use the Search Type bottom bezel button, Runt option. How many events were found? Revision 1.0 Page 15 of 21
  • 16. Advanced Oscilloscope Features Lab Experiment Waveform Math Introduction Math controls are used to perform point-by-point math operations on displayed waveforms. You can choose to add two waveforms, subtract one waveform from another, multiply the two waveforms, or perform a Fast Fourier Transform (FFT) on a waveform. Waveform math can be very sensitive to slight changes in waveforms. For example: ā€¢ Waveform addition can be used to easily verify that the positive and negative voltage swings of a differential pair are equal and opposite. ā€¢ Waveform subtraction is also very useful for calculating the difference between two voltages to make non-ground-referenced measurements and to compare waveforms to a reference waveform (stored in a reference memory). ā€¢ Waveform multiplication is often used to calculate instantaneous power, which is the voltage across a device times the current flowing through it. Using Waveform Math 1. The following series of steps will explore the use of waveform math. For this first lab, the FREQ_ANOM signal will be used again. This section of the lab continues with the oscilloscope setup from the previous section. a. Press the front panel Default Setup button to set the oscilloscope to a known state. b. Configure the oscilloscope to achieve the following display. 2. The first step is to save a reference waveform which will be used for comparison purposes. a. Press the Save/Recall Menu button located under the display. b. Press the Save Waveform bottom bezel button. c. With the Source set to channel 1 and the Destination set to reference R1 as indicated on the side bezel, press the OK Save side bezel button to save the reference waveform. Notice that the white reference waveform appears on the display. Press the Menu Off button to remove the menus. d. Using the channel 1 Position control, move the yellow channel 1 waveform up slightly on the display so you can distinguish between it and the white reference waveform. 3. In the next series of steps, you will define the math waveform to be the difference between the input signal and the stored reference. a. Press the red front panel M button to display the math menu. b. Press the Dual Wfm Math bottom bezel button. c. Press the Operator side bezel button once to select the ā€“ (subtraction) operator. d. Using the multipurpose b control, select R1 as the 2nd Source. Notice the red math difference waveform appears on the display. Revision 1.0 Page 16 of 21
  • 17. Advanced Oscilloscope Features Lab Experiment e. Press the Menu Off button once to remove the side menu. f. Using the multipurpose a control, move the red math waveform down on the display so you can distinguish between it and the other waveforms. g. Press the Menu Off button once to remove the bottom menu. h. Press Single a few times and notice how sensitive the math waveform is to small differences in the waveforms. Key Points to Remember 1. Waveform math controls perform point-by-point math operations on displayed waveforms. 2. You can choose to add two waveforms, subtract one waveform from another, or multiply the two waveforms. 3. Waveform math is very sensitive to slight changes in waveforms and can be used to point out small differences. Exercise 1. This exercise will use waveform math to analyze the timing relationship between two signals. a. Attach the channel 1 probe tip to the demo board CNT_CLK signal and attach the probe ground lead to the demo board Ground connector. b. Attach the channel 2 probe tip to the demo board CNT_OUT_0 signal and attach the probe ground lead to the demo board Ground connector. c. Press the Default Setup button. d. Using what you have learned, configure the oscilloscope for the following display: 2. Using waveform math, subtract the channel 2 waveform from the channel 1 waveform. Write down your steps. 3. Are the rising edges of the two signals time-aligned? Revision 1.0 Page 17 of 21
  • 18. Advanced Oscilloscope Features Lab Experiment Fast Fourier Transforms Introduction You can use the FFT (Fast Fourier Transform) Math mode to convert a time-domain signal into its frequency components (spectrum). You can use FFT for the following kinds of analysis: analyzing harmonics, characterizing noise, testing impulse response, and analyzing vibration. The MSO/DPO2000 Series FFT is calculated from 5000 points on the display. The resulting FFT spectrum goes from DC (0 Hz) to one-half the sample rate (displayed as the Nyquist frequency). The FFT controls include: ā€¢ Source o Determines which signal is transformed into the FFT spectrum. ā€¢ Vertical Units (dBV/div or V/div) o Determines the vertical scale of the FFT spectrum. o dBV = 20*log10(V) ā€¢ Window o Allows you to tradeoff the frequency resolution and amplitude accuracy that you will see in the resultant FFT spectrum. ļ‚§ Rectangular: Best frequency resolution, worst amplitude accuracy. Used with non- periodic signals such as pulses and transients. ļ‚§ Hanning: Good frequency resolution, very good amplitude accuracy. Used for periodic signals. ļ‚§ Hamming: Very good frequency resolution, good amplitude accuracy. Used for periodic signals. ļ‚§ Blackman-Harris: Worst frequency resolution, best amplitude accuracy. Used with predominantly single-frequency waveforms to look for harmonics. ā€¢ Horizontal o Determines the frequency at the center of the screen and the horizontal frequency scale. ā€¢ Gating Indicators o Shows which time-domain waveform points are used for the FFT. Performing a Fast Fourier Transform 1. In the following series of steps, you will set up the oscilloscope to perform a FFT. a. For this lab, a 1.25 MHz count clock signal will be used. Move the channel 1 probe tip to the CNT_CLK signal on the demo board. b. Press the front panel Default Setup button to set the oscilloscope to a known state. c. Using the front panel Trigger Level control, set the trigger level to about 1 V. d. Press the red front panel M button to display the math menu. e. Press the FFT bottom bezel button for a representation of the frequency domain of the clock signal. If the side menu is displayed, press the Menu Off button once to remove it. Notice the readout in the upper right corner, indicating that you can control the FFT vertical position and scale with the multipurpose controls when this menu is displayed. f. Press the Menu Off button to remove all the menus. g. Notice the math waveform readout in the lower left corner. In this case, the vertical scale for the FFT waveform is 20 dB/div (a logarithmic scale) and the horizontal scale is 5 MHz/div. In this display, the 0 dBV reference point is shown by the red icon on the left side of the display, and the 0 Hz reference is at the left side of the display. Revision 1.0 Page 18 of 21
  • 19. Advanced Oscilloscope Features Lab Experiment 2. To make the FFT display easier to understand, letā€™s spread out the FFT horizontally. You can do this by changing the horizontal scale for the input waveform. a. Set the horizontal Scale control to 20 Āµs/div. Notice that the horizontal scale is now 1.25 MHz/div. b. Press the red front panel M button to display the math menu. c. Using the multipurpose a control, position the FFT waveform in the lower half of the display. d. Press the Menu Off button twice to remove the menus. 3. The math waveform can be measured either with the graticule and the FFT horizontal scale factor (1.25 MHz/div) or with cursors. The following steps will demonstrate the use of cursors. a. Press the Cursors front panel button. b. Using the multipurpose a control, position the a cursor on the left-most peak on the FFT. This is the fundamental frequency, about 1.25 MHz. c. Using the multipurpose b control, position the b cursor on the third peak from the left. This is the third harmonic, about 3.75 MHz. 4. As we know from Fourier Analysis theory, an ideal square wave has a spectrum consisting of the fundamental and odd harmonics. Because this is an imperfect square wave, there are some even harmonics, but they are much smaller. Remember, the FFT vertical scale is logarithmic! Key Points to Remember 1. A Fast Fourier Transform (FFT) converts a time domain waveform into its frequency domain components. 2. The MSO/DPO2000ā€™s FFT function transforms 5000 points of a time domain waveform to the frequency spectrum. 3. The FFT horizontal scale is in frequency and the vertical scale is in dBV/div or Volts/div. Exercise 1. In this exercise, you will perform a FFT on a waveform to analyze its spectrum. a. Attach the channel 1 probe tip to the demo board CNT_OUT_4 signal and attach the probe ground lead to the demo board Ground connector. b. Press the Default Setup button. c. Using what you have learned, configure the oscilloscope for the following display: d. Set up the oscilloscope to perform a FFT on the waveform. Spread out the FFT horizontally until you can distinguish the fundamental frequency and harmonics. e. What is the fundamental frequency of this signal? What is the amplitude of the third and fifth harmonics? Revision 1.0 Page 19 of 21
  • 20. Advanced Oscilloscope Features Lab Experiment Final Exercise 1. When the Run/Stop acquisition button is selected, the oscilloscope acquires waveforms until: a. the Run/Stop acquisition button is pressed. b. memory fills up. c. the probe tip is removed from the test point. d. both A and B 2. Which of the following is not a coupling mode? a. DC b. AC c. Ground d. 1 Mā„¦ 3. Waveform math algorithms perform _________________ math operations on displayed waveforms. a. Pointā€“by-Point b. Integer c. Floating Point d. Recursive 4. Waveform _______________ can be used to determine difference between a reference waveform (store in reference memory) and an acquired waveform. a. Subtraction b. Division c. Multiplication d. Addition 5. Waveform _______________ is often used to calculate instantaneous power which is the voltage across a device times the current flowing through it. a. Subtraction b. Division c. Multiplication d. Addition Revision 1.0 Page 20 of 21
  • 21. Advanced Oscilloscope Features Lab Experiment 6. The Wave Inspector Ā® feature allows users to ________ and __________ specific events out of the many screens of information the oscilloscope is able to capture and display. a. find, mark b. add, subtract c. add, record d. generate alarms, generate SNMP traps on 7. The ___________________ converts time domain waveforms into their frequency domain components. a. Wave Inspector Ā® feature b. Fast Fourier Transform (FFT) c. FilterVuā„¢ mode d. Reference Waveform mode 8. Using what you have learned, determine the fundamental frequency and amplitudes of the third and fifth harmonic for the signal on the CNT_OUT_3 pin on the Tektronix demonstration board. Write down your steps here: Tektronix products are covered by U.S. and foreign patents, issued and pending. Information in this publication supersedes that in all previously published material. Specification and price change privileges reserved. TEKTRONIX and TEK are registered trademarks of Tektronix, Inc. All other trade names referenced are the service marks, trademarks or registered trademarks of their respective companies. 06/09 GB/WWW 3GW-24321-0 Revision 1.0 Page 21 of 21