
Recommended
More Related Content
What's hot
What's hot (20)
Similar to Shoring
Similar to Shoring (20)
More from VijayanandVimnandu
Recently uploaded
Recently uploaded (20)
Shoring
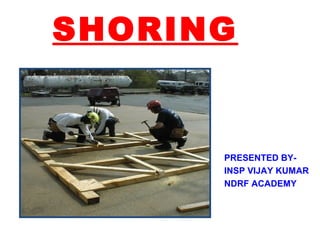
- 1. SHORING PRESENTED BY- INSP VIJAY KUMAR NDRF ACADEMY
- 2. OOBBJEJECTCTIVIVEESS Upon completion of this lesson you will be able to know about......... Shoring and its components. Factors that determine the design and method of shoring. Procedures for window/door shore and a vertical- shore. Positions and functions of the members of a shoring team.
- 3. SHORING The temporary support of damaged, collapsed, or partially collapsed structure that is unstable, required for conducting search and rescue operations at reduced risk to the victims and the rescue team.
- 4. Shoring follows a “Double-Funnel Principle”, means that a shore collects a load, channels it and redistributes it safely to another surface or structure that can support it. L o a d C o l l e c t o r L o a d D i s t r i b u t o r L o a d S u p p o r t
- 5. SHORE COMPONENTS D a m a g e d f l o o r P o s t W e d g e s G u s s e t p l a t e C l e a t S o l e P l a t e H e a d e r G u s s e t S h i m s D i a g o n a l b r a c e s M i d - p o i n t b r a c e
- 6. COMPONENTS OF SHORE • Sole plate: provides a foundation for the shoring system by supporting the weight being transferred from above and distributes it over a wider area. • Header beam: collects the weight from above and spreads it throughout the shoring system. HEADER BEAM SOLE PLATE
- 7. • Post: Supports the weight collected by the header and transfers it to the sole plate where it is distributed. • Diagonal bracing: Locks the entire shoring system together as one unit, supporting against possible eccentric loads. It is the last component to be installed. P O S T P O S T P O S T P O S T
- 8. • Gusset plate: A small piece of 13 mm or 18 mm plywood nailed to the top and bottom of posts to aid in placement of the header and secure the posts to the header and sole plate. • Wedges/shims: Two wooden inclined planes married together and placed under the bottom of the posts. These provide compression for the shoring system. The shim is a single wedge used to fill in gaps above the shoring system.
- 9. • Cleat: A 5cmx10cm wooden piece nailed to the post and header or sole plate to secure the shoring. or A small pieces of wood used to secure other parts of a shoring system.
- 10. Types of Shoring • Vertical Shoring • Window/Door Shoring Other Types of Shoring • T-Spot Shoring • Raker Shoring • Laced Post Shoring • Horizontal Shoring • Improvised Bamboo shoring
- 11. A variety of factors will determine what method of shoring is required in a particular situation. Weight of construction materials Weight of the structural elements to be supported The normal load capacity of the existing undamaged structure Condition of the structure to be supported DETERMINING FACTOR
- 12. Condition of the foundation and floor/surface angle to determine stability of shoring Availability of shoring material Lateral and vertical instability O v e r h a n g D i s t a n c e b e t w e e n p o s t s H e i g h t L o a d
- 13. Vertical Shore Specifications with 10 x 10 cm POST, HEADER and SOLE PLATE Maximum Height Maximum Distance Between Posts Maximum Overhang Load-bearing Capacity per Post 2.5 m (8’0”) 1.25 (4’0”) 60 cm (2’0”) 3,600 kg (8,000 lbs.) 3.0 m (10’0”) 1.50 (5’0”) 80 cm (2’6”) 2,270 kg (5,000 lbs.) 3.7 m (12’0”) 1.80 (6’0”) 90 cm (3’0”) 1,600 kg (3,500 lbs.)
- 14. Steps of vertical shore 1-Determine where to erect the vertical shore. 2-Measure and cut sole plate and header. 3-Measure and cut the posts to the proper height. 4-Attach cleats or gusset plates to the header and posts, on opposite ends and opposing sides.
- 15. 5-Install the posts and the header on top of the sole plate to support the damaged structural element 6-Install a set of wedges under the bottom of each post 7-Attach cleats or gusset plates on opposite ends and opposing sides of the sole plate and posts and nail in place 8-Attach the diagonal braces to each side of the vertical shore
- 16. Steps for window and door Shore 1-Determine where to erect the window/Door shore. 2-Measure and cut the sole plate 3-Measure and cut the header 4-Measure and cut the posts to the proper height 5-Install the sole plate with a set of wedges 6-Install the header with a set of wedges 7-Install the posts and wedges
- 17. 8-Attach the cleats and/or gusset plate 9-Confine the wedges 10-Install diagonal braces(when applicable)
- 18. Several additional types of shores can be used in collapsed structures, though they will not be taught in this course. Some examples include: • T-Spot Shore: The main purpose of the T-shore is to initially stabilise damaged floors, ceilings or roofs, so that the more substantial shoring can be constructed at less risk. This shore is quickly placed and only temporary, also used during quick extrication of a victim. Other Types of Shoring
- 19. “T”- spot shore
- 20. Raker ShoreRaker Shore A triangular system of shoring used to support leaning or unstable walls or columns. Rakers must always be installed in series; at least two must be erected in any given situation.
- 22. Raker Shore
- 23. Laced Post Shore A high-capacity, four-post system that is used to support sagging(Hanging down) floors and ceilings, or other overhead hazards. It can be used as a “SAFE HEAVEN”.
- 24. Laced Post Shore
- 25. Horizontal Shore Used to stabilise a damaged wall against another undamaged wall in hallways, corridors or between buildings. .
- 26. Horizontal Shore
- 27. Bamboo Shore
- 28. Air Shore
- 29. Shoring Team Composition Assembly GroupCutting Group
- 31. Cutting Group Cuttin g Office r Feeder Cutter Tools/Equipment Runner Layout
- 32. Members and Functions of Shoring team If sufficient manpower were available, a shoring team could be organised using two separate 6 person squads, one squad as an‑ assembly team and another as a cutting team. However, a single squad may be required to perform both sets of duties.
- 33. Assembly Group • Shoring Officer (Rescue Squad Officer): is incharge of the operation. Also works with structural specialists (if available) to determine where to place shores. If a Safety cannot be designated, the Shoring Officer will also take on this role. • Measurer: measures all shoring components and relays the information to the layout person of the cutting team.
- 34. . Two Shorers: these work together assembling and erecting shores in place. . Safety: responsible for overall safety of the assembly team. . Runner: Ensures tools, equipment and shoring materials are moved from the shoring operation primary access point to the shoring site and assists in the erection of shores as needed.
- 35. Cutting Group • Cutting Group Officer (Rescue Squad Officer): In charge of selecting the cutting site. The site should be close to the shoring operation. The Cutting Team Officer doubles as the Safety. • Layout: Sets up the cutting station and records measurements. Performs all measuring and layout of angles.
- 36. Feeder Moves and feeds measured and marked shoring material from the Layout to the Cutter and helps secure it during cutting. Runner Fulfill the requirements related to shoring from shoring station to shoring site.
- 37. Cutter: Cuts the measured materials. Tools and equipment person: Directs where materials and equipment are to be placed and moved, and is responsible for keeping track of all tools. This person is assigned to both the Cutting Group and the Assembly Group.
- 38. NAIL SPECIFICATIONS • For CSSR, common nails of two sizes will be used. • All plywood(gusset plates) must be nailed using 8d common nails only. • All dimensional wood must be nailed by using 16d • D= diameter of nail , l= length , x= no. of nail • D=l/x • D= 6.5/8=8.2mm
- 41. Have we met our objectives?
- 42. Define Shoring
- 43. - Tell the Cutting group members? - Tell the components of shoring? - Tell the Assembly group members?
- 44. Closing
- 46. Thank you