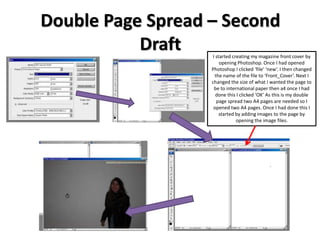
1. Double Page Spread – Second
Draft I started creating my magazine front cover by
opening Photoshop. Once I had opened
Photoshop I clicked ‘file’ ‘new’. I then changed
the name of the file to ‘Front_Cover’. Next I
changed the size of what I wanted the page to
be to international paper then a4 once I had
done this I clicked ‘OK’ As this is my double
page spread two A4 pages are needed so I
opened two A4 pages. Once I had done this I
started by adding images to the page by
opening the image files.
2. Using the eraser tool changing the eraser to an eraser which had a faded edge to it. I wanted to use this type of eraser
as then the images would be able to fade in more to the page and the image wouldn’t look as solid against the page. I
opened up all the images I wanted erasing all of the background around the model. As the background of the images is
white/grey as the two A4 pages are white they faded in quite well together. I was then happy with the images by just
having the model of the image as the main subject. By just having the model it made the model stand out more and
attracted the reader straight to the model and not the background.
3. As the model was looking to the left hand
side of her I didn’t want all the images in this
direction so I decided to rotate the image in
order so it looked as if the model was looking
at herself. I did this by rotating the image by
80 degrees.
I was then happy with the images and the way they were
displayed on the page so I decided to add the headline going
across the two double pages. Using the same font I had used
previously on the front cover and table of contents page of my
magazine. I then adjusted the size of the font as the headline
needs to be the biggest font on the double page spread pages.
By duplicating
the layer the
two sets of
font were the
same as they
are all part of
the headline
making the
headline look
like it was all
one font in a
straight line.
4. I then added a
quote from the
artist as when
doing research of
double page
spreads in
magazines they
often had a quote
from the artist that
was featured in the
article in order to
make the reader
interested and
read the article
further. As the
headline is in black
font, I made the
quote in red to
make it stand out
to the reader.
I decided to add an effect to the images
so I did this by going to image, artists
and a new window opened. I then
experimented the different effects
available and I decided to go with the
black and white effect. I then applied
this effect to both the images used on
my double page spread.
5. I then added all the text to the two
pages about the article making the
quote line stand out again in red. By
putting the quotes in red it made that
particular text stand out to the reader
so the reader would be able to read
the quotes in both locations straight
away.
As there was a white space in the top right hand corner of my double page spread I decided to add a blue shape in the corner stating a
competition in where they could meet the model that the article is featured on. By putting it in a bright blue shape it makes the
competition stand out against the other texts and more appealing towards the reader as they would be attracted straight away to the
bright blue shape. I then added text to the shape stating they could meet the artist Lydjia.
6. Double Page Spread – Final Draft
I started creating my magazine front cover by opening Photoshop. Once I had opened
Photoshop I clicked ‘file’ ‘new’. I then changed the name of the file to ‘Front_Cover’. Next I
changed the size of what I wanted the page to be to international paper then a4 once I had
done this I clicked ‘OK’ As this is my double page spread two A4 pages are needed so I
opened two A4 pages.
7. I then open the file where my images are saved choosing the pictures I want for my double page spread. The image then opened up in a new
window so I dragged it onto the left hand side of the open page. As well as this I dragged it to the right hand side of the page as I wanted one
picture covering those pages as the background. As the image came up larger than I wanted using CTRL T I was then able to adjust the image
size to the size that I wanted.
8. I then adjusted the size of the images on both of the left and the right side of the page making it look like one image together. By only using
one image for my double page spread it makes it look more effective as it shows the reader straight away who the article is based on by them
just looking directly as the main image.
Once I was happy with this I then added the headline of the double page spread using the same font I used previously for my front cover and
contents page. As I overlaid the fonts to make it look like a 3D effect I did the same for the headline as well.
9. I then added the rest of the text to the left hand side of the page of the headline of the article. As there is two models featured in the main
image I made the model wearing red the main feature but her best friend the model lying down the Harley Davidson bike.
I didn’t want to use the original image so I decided to change the effects by going to image, artistic, coloured pencil. This then made the
image go lighter than its original image. By having a lighter image I then able to add text overlaying the image and the reader will be able to
read the text clearly. I then changed the brightness and sharpness of the image making the whole image look darker, I did this so that I was
able to add text on top as well as making the background of the image darker making the models stand out more in contrast to the
background and Harley Davidson motorbike.
10. As my magazine is called Spotlight Sunday I decided to add lens flare on the bottom right hand corner of the page to make it look like a
spotlight. I did this by going to image, lens flare and choosing the type of lens flare I wanted. I then decided to make the lens flare more
brighter than it originally was so I did this by clicking on curves and changing the brightness. The lens flare then looked like a spotlight and as
my magazine is called Spotlight Sunday this related to the magazine.
11. As I was then happy with the image I decided to add the article text to the image of the interview between the artist and the interviewee.
The white text being the artist that is being interviewed and red text being the questions asked by the interviewee. By having the two texts in
different colours it helps the reader identify the two different people.