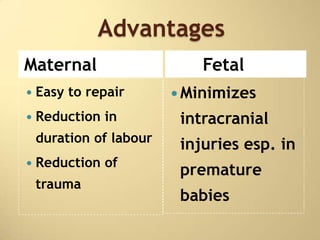
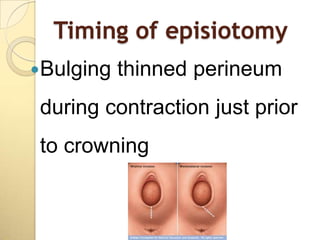
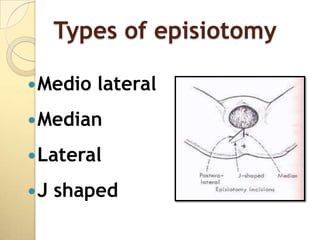
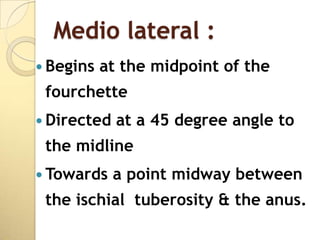
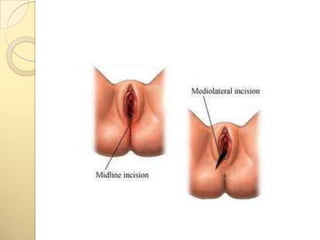
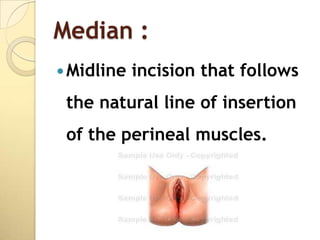
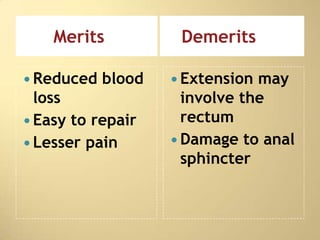
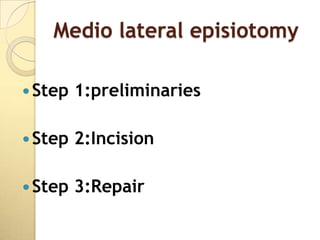
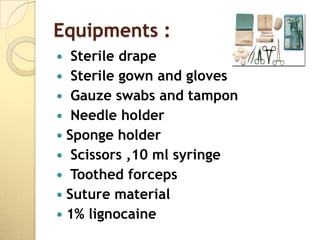
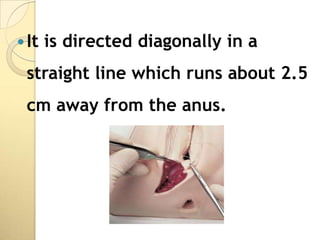
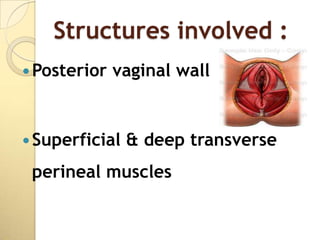
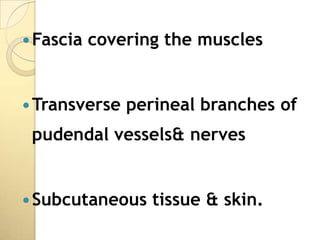
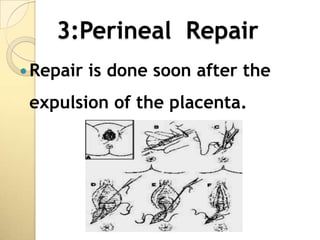
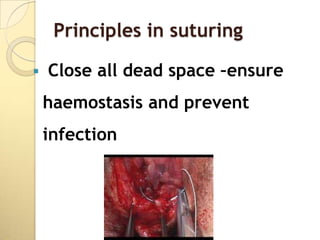
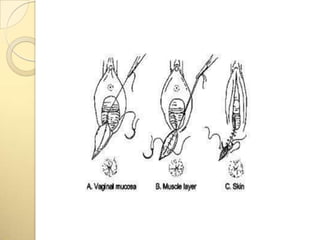
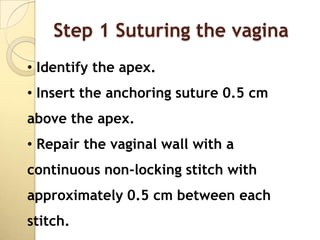
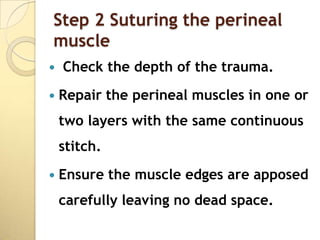
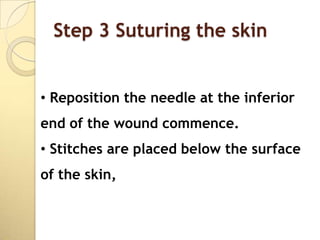
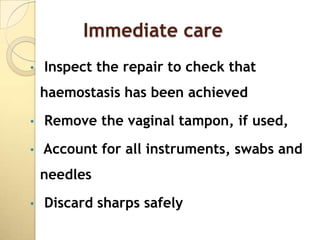
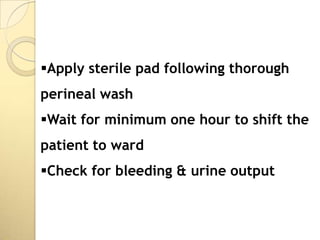
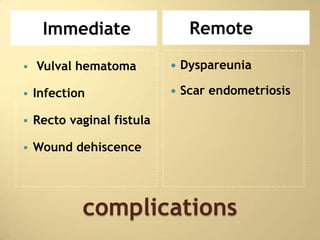
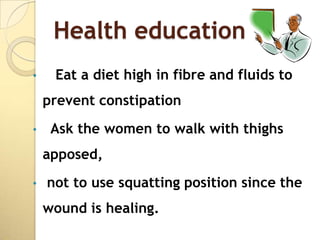
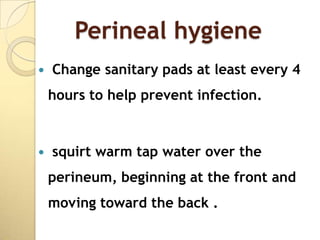
Episiotomy and its
repair…


      Lt Kalaivani R
Episiotomy
 Definition
 Purpose
 Indications
 Advantages
 Types
 Perineal repair
 Perineal Care
 Complication
Definition
 A surgically   planned incision on
 the perineum and the posterior
 vaginal wall during the second
 stage of labour is called
 episiotomy.
Purpose
 To   enlarge the vaginal introitus
   To facilitate easy & safe delivery
   To minimize rupture of the perineal
    muscles & facia.
 To   reduce stress on fetal head.
Indications
 In   rigid perineum
   Anticipating perineal tear:
 Big   baby
 Face   to pubis delivery
 Breech   delivery
 Shoulder     dystocia
Common indication
Threatened   perineal injury
Rigid   perineum
Forceps   delivery
Advantages
Maternal                     Fetal
   Easy to repair        Minimizes
   Reduction in          intracranial
    duration of labour
                          injuries esp. in
   Reduction of
                          premature
    trauma
                          babies
Timing of episiotomy
Bulging   thinned perineum
during contraction just prior
to crowning
Types of episiotomy

 Medio   lateral
 Median

 Lateral

J   shaped
Medio lateral :
 Begins   at the midpoint of the
 fourchette
 Directed   at a 45 degree angle to
 the midline
 Towards    a point midway between
 the ischial tuberosity & the anus.
MERITS            DEMERITS
                   MEDIAN
 Safety   from     Apposition  of
  rectal             tissue not so
  involvement        good
 Incision can      Discomfort is
  be extend.         more.
                    Wound
                     disruption is
                     more
Median :
 Midline   incision that follows
 the natural line of insertion
 of the perineal muscles.
Merits           Demerits

 Reduced   blood    Extension may
  loss                involve the
 Easy to repair      rectum
 Lesser pain        Damage to anal
                      sphincter
Medio lateral episiotomy

 Step   1:preliminaries

 Step   2:Incision

 Step   3:Repair
Equipments :
  Sterile drape
 Sterile gown and gloves
 Gauze swabs and tampon
 Needle holder
 Sponge holder
 Scissors ,10 ml syringe
 Toothed forceps
 Suture material
 1% lignocaine
1 :Preliminaries:

  The   perineum is thoroughly
  swabbed with antiseptic lotion,
  Draped     properly,
  Incision   line- Infiltrated with 10 ml
  of 1% lignocaine solution.
2:Making Episiotomy
•   Two fingers are placed in the
    vagina between the presenting
    part & posterior vaginal wall.
 The   incision is made by straight
 or curved blunt pointed sharp
 scissors


 The   open blades are positioned.
 Incision   should be made at the
 height of an contraction.


 Cut   should be made starting from
 the centre of the forchette
 extendening laterally either to the
 left or right.
 It   is directed diagonally in a
 straight line which runs about 2.5
 cm away from the anus.
 If   delivery of the head does not
 follow immediately, apply pressure
 to the episiotomy site.


 Control   delivery of the head to
 avoid extension of the episiotomy.
Structures involved :
 Posterior   vaginal wall


 Superficial   & deep transverse
 perineal muscles
 Fascia   covering the muscles


 Transverse   perineal branches of
 pudendal vessels& nerves


 Subcutaneous    tissue & skin.
3:Perineal Repair
 Repair   is done soon after the
 expulsion of the placenta.
Purpose of Repair

To control bleeding
 To prevent infection
 To assist wound healing by
primary intention.
The most common suture type

 polyglactin 910 suture:
  Coated Vicryl, Vicryl RAPIDE (> 70%)
 polyglycolic acid:
   Safil, Safil Quick, Dexon II (12%)
 Traditional sutures :
   catgut, chromic catgut) (10%).
Preliminaries :
 The   patient is placed in
 lithotomy position


A   good light source from behind
 is needed to find the apex first.
 The   perineum &the wound area
 is cleaned with antiseptics


 Blood   clots are removed from the
 vagina & the wound area
 The   patient is drapped properly
 &repair should be done under
 strict aseptic precaution


A   vaginal pack is inserted & is
 placed high up.
Principles in suturing

   Close all dead space –ensure
    haemostasis and prevent
    infection
Cotton balls must not be used.


 Handle tissue gently using non
toothed forceps.


Ensure good anatomical restoration
and alignment to facilitate healing.
• Use minimal amount of suture
material, and do not over tighten suture
this may impede healing.


• Following the repair a rectal examination
should be performed to ensure no suture
material has been inserted through the
rectal mucosa.
Layers of perineal repair

 Vaginal   mucosa & submucosal
 tissue.
 Perineal   muscles
 Skin   & subcutaneous tissue
Step 1 Suturing the vagina
• Identify the apex.
• Insert the anchoring suture 0.5 cm
above the apex.
• Repair the vaginal wall with a
continuous non-locking stitch with
approximately 0.5 cm between each
stitch.
Step 2 Suturing the perineal
muscle
   Check the depth of the trauma.
   Repair the perineal muscles in one or
    two layers with the same continuous
    stitch.
   Ensure the muscle edges are apposed
    carefully leaving no dead space.
   On completion of the muscle
    layer, the skin edges should align
   so that they can be brought together
    without tension.
Step 3 Suturing the skin


• Reposition the needle at the inferior
end of the wound commence.
• Stitches are placed below the surface
of the skin,
•   The point of the needle should be
    repositioned between each side,

•   So that it faces the skin edge being
    sutured.

•   Continue taking bites of tissue from each
    side until the superior wound edge is
    reached.
Immediate care
•   Inspect the repair to check that
    haemostasis has been achieved
•   Remove the vaginal tampon, if used,
•   Account for all instruments, swabs and
    needles
•   Discard sharps safely
Apply sterile pad following thorough
perineal wash
Wait for minimum one hour to shift the
patient to ward
Check for bleeding & urine output
Immediate                   Remote

   Vulval hematoma            Dyspareunia

   Infection                  Scar endometriosis

   Recto vaginal fistula

   Wound dehiscence


            complications
Health education
•    Eat a diet high in fibre and fluids to
    prevent constipation
•    Ask the women to walk with thighs
    apposed,
•   not to use squatting position since the
    wound is healing.
Perineal hygiene
   Change sanitary pads at least every 4
    hours to help prevent infection.


   squirt warm tap water over the
    perineum, beginning at the front and
    moving toward the back .
•   Sit in a tub of warm water


•   Always wash hands thoroughly before
    and after going to the bathroom.


•   Always keep the wound clean & dry after
    each urination & defecation.
kegal’s exercise
•    Squeeze the perineal muscles as if
    you were trying to stop the flow of
    urine.
•   Hold for 5 to 10 seconds and then
    relax. Do this exercise 10 times a day
    to regain muscle strength.
Presentation episiotomy

Presentation episiotomy

  • 1.
  • 2.
    Episiotomy  Definition  Purpose Indications  Advantages  Types  Perineal repair  Perineal Care  Complication
  • 3.
    Definition  A surgically planned incision on the perineum and the posterior vaginal wall during the second stage of labour is called episiotomy.
  • 4.
    Purpose  To enlarge the vaginal introitus  To facilitate easy & safe delivery  To minimize rupture of the perineal muscles & facia.  To reduce stress on fetal head.
  • 5.
    Indications  In rigid perineum
  • 6.
    Anticipating perineal tear:  Big baby  Face to pubis delivery  Breech delivery  Shoulder dystocia
  • 7.
    Common indication Threatened perineal injury Rigid perineum Forceps delivery
  • 8.
    Advantages Maternal Fetal  Easy to repair  Minimizes  Reduction in intracranial duration of labour injuries esp. in  Reduction of premature trauma babies
  • 9.
    Timing of episiotomy Bulging thinned perineum during contraction just prior to crowning
  • 10.
    Types of episiotomy Medio lateral  Median  Lateral J shaped
  • 11.
    Medio lateral : Begins at the midpoint of the fourchette  Directed at a 45 degree angle to the midline  Towards a point midway between the ischial tuberosity & the anus.
  • 13.
    MERITS DEMERITS MEDIAN  Safety from  Apposition of rectal tissue not so involvement good  Incision can  Discomfort is be extend. more.  Wound disruption is more
  • 14.
    Median :  Midline incision that follows the natural line of insertion of the perineal muscles.
  • 15.
    Merits Demerits  Reduced blood  Extension may loss involve the  Easy to repair rectum  Lesser pain  Damage to anal sphincter
  • 16.
    Medio lateral episiotomy Step 1:preliminaries  Step 2:Incision  Step 3:Repair
  • 17.
    Equipments :  Sterile drape  Sterile gown and gloves  Gauze swabs and tampon  Needle holder  Sponge holder  Scissors ,10 ml syringe  Toothed forceps  Suture material  1% lignocaine
  • 18.
    1 :Preliminaries: The perineum is thoroughly swabbed with antiseptic lotion,  Draped properly,  Incision line- Infiltrated with 10 ml of 1% lignocaine solution.
  • 19.
    2:Making Episiotomy • Two fingers are placed in the vagina between the presenting part & posterior vaginal wall.
  • 20.
     The incision is made by straight or curved blunt pointed sharp scissors  The open blades are positioned.
  • 21.
     Incision should be made at the height of an contraction.  Cut should be made starting from the centre of the forchette extendening laterally either to the left or right.
  • 22.
     It is directed diagonally in a straight line which runs about 2.5 cm away from the anus.
  • 23.
     If delivery of the head does not follow immediately, apply pressure to the episiotomy site.  Control delivery of the head to avoid extension of the episiotomy.
  • 24.
    Structures involved : Posterior vaginal wall  Superficial & deep transverse perineal muscles
  • 25.
     Fascia covering the muscles  Transverse perineal branches of pudendal vessels& nerves  Subcutaneous tissue & skin.
  • 26.
    3:Perineal Repair  Repair is done soon after the expulsion of the placenta.
  • 27.
    Purpose of Repair Tocontrol bleeding  To prevent infection  To assist wound healing by primary intention.
  • 28.
    The most commonsuture type  polyglactin 910 suture: Coated Vicryl, Vicryl RAPIDE (> 70%)  polyglycolic acid: Safil, Safil Quick, Dexon II (12%)  Traditional sutures : catgut, chromic catgut) (10%).
  • 29.
    Preliminaries :  The patient is placed in lithotomy position A good light source from behind is needed to find the apex first.
  • 30.
     The perineum &the wound area is cleaned with antiseptics  Blood clots are removed from the vagina & the wound area
  • 31.
     The patient is drapped properly &repair should be done under strict aseptic precaution A vaginal pack is inserted & is placed high up.
  • 32.
    Principles in suturing  Close all dead space –ensure haemostasis and prevent infection
  • 33.
    Cotton balls mustnot be used.  Handle tissue gently using non toothed forceps. Ensure good anatomical restoration and alignment to facilitate healing.
  • 34.
    • Use minimalamount of suture material, and do not over tighten suture this may impede healing. • Following the repair a rectal examination should be performed to ensure no suture material has been inserted through the rectal mucosa.
  • 35.
    Layers of perinealrepair  Vaginal mucosa & submucosal tissue.  Perineal muscles  Skin & subcutaneous tissue
  • 37.
    Step 1 Suturingthe vagina • Identify the apex. • Insert the anchoring suture 0.5 cm above the apex. • Repair the vaginal wall with a continuous non-locking stitch with approximately 0.5 cm between each stitch.
  • 38.
    Step 2 Suturingthe perineal muscle  Check the depth of the trauma.  Repair the perineal muscles in one or two layers with the same continuous stitch.  Ensure the muscle edges are apposed carefully leaving no dead space.
  • 39.
    On completion of the muscle layer, the skin edges should align  so that they can be brought together without tension.
  • 40.
    Step 3 Suturingthe skin • Reposition the needle at the inferior end of the wound commence. • Stitches are placed below the surface of the skin,
  • 41.
    The point of the needle should be repositioned between each side, • So that it faces the skin edge being sutured. • Continue taking bites of tissue from each side until the superior wound edge is reached.
  • 42.
    Immediate care • Inspect the repair to check that haemostasis has been achieved • Remove the vaginal tampon, if used, • Account for all instruments, swabs and needles • Discard sharps safely
  • 43.
    Apply sterile padfollowing thorough perineal wash Wait for minimum one hour to shift the patient to ward Check for bleeding & urine output
  • 44.
    Immediate Remote  Vulval hematoma  Dyspareunia  Infection  Scar endometriosis  Recto vaginal fistula  Wound dehiscence complications
  • 45.
    Health education • Eat a diet high in fibre and fluids to prevent constipation • Ask the women to walk with thighs apposed, • not to use squatting position since the wound is healing.
  • 46.
    Perineal hygiene  Change sanitary pads at least every 4 hours to help prevent infection.  squirt warm tap water over the perineum, beginning at the front and moving toward the back .
  • 47.
    Sit in a tub of warm water • Always wash hands thoroughly before and after going to the bathroom. • Always keep the wound clean & dry after each urination & defecation.
  • 48.
    kegal’s exercise • Squeeze the perineal muscles as if you were trying to stop the flow of urine. • Hold for 5 to 10 seconds and then relax. Do this exercise 10 times a day to regain muscle strength.