

Recommended
More Related Content
What's hot
What's hot (20)
Similar to Glass blocks
Similar to Glass blocks (20)
More from sonali parashar
More from sonali parashar (20)
Recently uploaded
Recently uploaded (20)
Glass blocks
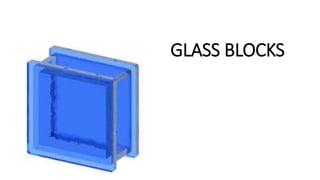
- 1. GLASS BLOCKS
- 2. Glass brick, also known as glass block, is an architectural element made from glass. Glass bricks provide visual obscuration while admitting light. The glass block was originally developed in the early 1900s to provide natural light in manufacturing plants. WHY WE USE GLASS BLOCKS Glass Blocks are a versatile building material you can use for windows, stairwells, shower screens, paving, interior and exterior walls - the opportunities are endless. Glass blocks provide you with a unique design alternative with many practical advantages. Light Clear glass blocks allows up to 79% of natural light to pass through Insulation Along with added light comes better control of heat and noise. Glass blocks can reduce noise by up to 45 db Security Provides the strength without the harsh look of metal screens Versatility In pre-fabricated panels, Many colours, styles and application are available. Simplicity They are easy to install. Energy Conservation Glass is a bad conductor of heat.. A good double layered glass acts as a good insulator, and thus can help in the conservation of Energy and reducing your power bills. Lower heat-loss is achieved by multiple glazing layers, gases and the use of low-e coatings.
- 3. SIZES Inch sizes (actual dimensions, in inches) •5¾ × 5¾ × 3 7⁄8 •7½ × 7½ × 3¼ or 4 •7¾ × 7¾ × 3 7⁄8 •9½ × 9½ × 3 1⁄8 •11¾ × 11¾ × 3 7⁄8 or 4 inches Metric sizes (nominal dimensions, in millimeters) •160 × 160 × 30 •190 × 190 × 80 or 100 •240 × 115 × 80 •40 × 240 × 80 Decorative (in inches) •7¾ × 5¾ × 3 1⁄8 or 3 7⁄8 •4½ × 4½ × 3 1/8 •4½ × 9½ × 3 1/8 Solid glass block •7 5⁄8 inches by 7 5⁄8 inches by 3 inches. Glass pavers such as those inserted in sidewalks, are •5¾ inches by 5¾ inches by 1 inch •7 5/8 inches by 7 5/8 inches by 1½ inches.
- 4. CONSTRUCTION METHOD Glass wall blocks are fixed together to form complete walls by several methods – the most common method of construction is to bed the blocks together in a Portland cement-based mortar with reinforcing rods of steel placed within the mortar as recommended by the project architect or block manufacturer. Other methods of construction include several proprietary systems whereby the mortar is replaced by timber or PVC extrusions. 1-Choose the right glass block for your project. Blocks with large faces will let in more light, and thin blocks are better for windows. You can use different sizes, colors and textures to create the look you want. INSTALLATION OF GLASS BLOCK
- 5. 2-Draw a diagram of the installation-Plan your project to use whole blocks. Glass blocks can't be cut. •Allow a space of 1/4 to 3/8 inch (0.6 to 1 cm) between blocks and between the blocks and the wall, jamb or window frame. You must include the spaces for your drawing to be accurate. •You may discover that no arrangement of glass blocks will completely fill the area of the installation. Plan to add finished wood or other material to the arrangement. 3-Mix the glass mortar according to the directions. The amount of mortar you will need depends not only on the size of the project, but on the size of the blocks. Mix the mortar in batches that can be used in about an hour so the mortar won't start to set before you get a chance to use it.
- 6. 4-Put down a bed of mortar and place the first row of blocks.Place the first block. Then, trowel enough mortar onto 1 side of the next block so that when you set it beside the first block, the mortar fills the space between and sticks the blocks together. Add mortar to only 1 side of each subsequent block in the row. •The spaces between the end blocks and the wall, jamb or window frame will be filled with an expansion strip, not mortar. The expansion strip will allow the blocks to expand and contract with changes in temperature. 5-Place the appropriate spacers between the blocks. Tap the blocks snugly against the spacers with a rubber mallet. Spacers ensure that the spaces between blocks are uniform and that the weight of the upper rows don't force mortar to squeeze out of the lower rows.Use "T" spacers around the perimeter. Press the first spacers into the mortar as the first row of blocks is installed. For the sides, screw or nail "T" spacers to the adjoining wall or window frame. •Place "X" spacers between blocks. They will ensure even spacing between blocks on the same row and between rows. •Put the spacers between blocks halfway between the back and front so they don't interfere with tooling the joints later. Leave them in place and mortar over them.
- 7. 6-Install anchors and reinforcing rods every 2 feet (30 cm) to provide strength and stability to your glass block installation.Lay a thin bed of mortar and press the reinforcing rod into it. •Connect the rod to the anchors. The anchors extend from the wall or window frame at least 1 inch (2 to 3 cm). 7-Tool the joints. Before the mortar sets, use a mason's jointer along all the spaces between the blocks to make the mortar joint smooth and concave.Except for very small glass block installations, you will need to regularly stop and tool the joints. Don't wait until you're done laying the blocks.
- 8. 8-Clean any stray mortar off the faces of the blocks with a damp cloth. The dust that forms on the blocks as the mortar dries can be wiped away with a soft cloth later. 9-Seal the perimeter and joints when the mortar is completely set. Use regular caulk between the blocks and the wall or frame and clear silicon sealant between blocks.
- 9. USES OF GLASS BLOCKS home-gym-with-glass-block bathroom-with-glass-block Curved-shower-space-with-glass-block Eclectic-bathroom-with-glass-block-detail Exterior-glass-blocks-on-a-home Glass-block-detail-in-a-modern-shower
- 10. Glass-block-in-a-living-room Glass-block-in-an-outdoor-space Glass-block-on-the-ground home-with-glass-block-windows home-with-glass-block-windows Townhome-with-glass-block-floor