
Recommended
Recommended
More Related Content
Similar to GNSS Observation Using U-BLOX (5)
Similar to GNSS Observation Using U-BLOX (5) (20)
More from NopphawanTamkuan
More from NopphawanTamkuan (20)
Recently uploaded
Recently uploaded (20)
GNSS Observation Using U-BLOX (5)
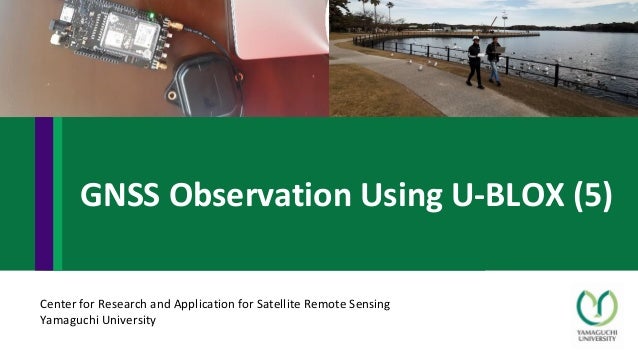
- 1. Center for Research and Application for Satellite Remote Sensing Yamaguchi University GNSS Observation Using U-BLOX (5)
- 2. Software requirements: 1. Demo5 b33a (download from http://rtkexplorer.com/downloads/rtklib-code/) 2. U-center (https://www.u-blox.com/en/product/u-center) Hardware requirements: 1. U-blox Zed f9P dual frequency receivers with antenna (2 sets for rover and base) 2. Laptop (2 units for rover and base) This tutorial is extracted from: https://rtklibexplorer.wordpress.com/2019/08/24/dual-frequency-ppk- solutions-with-rtklib-and-the-u-blox-f9p/ GNSS OBSERVATION USING U-BLOX ZED F9P DUAL FREQUENCY RECEIVER
- 3. Antenna USB cable Connect the antenna to the Zed RF Connector and the board to a Windows PC with the USB cable. Make sure that the antenna is placed in an open area to receive GNSS signal CONFIGURING THE RECEIVER
- 4. CONFIGURING THE RECEIVER •Verify the port where the receiver is connected in the Device Manager. Use this (may vary depending on your PC) •Start the “u-center” app and connect to the receiver: Receiver > Connection > Com “#”. Set the baud rate to 460800. (Usually, baud rate won’t matter if it is a USB connection but 460800 is recommended by u-blox for C099 F9P). The green connection indicator flashing at the bottom of the screen
- 5. CONFIGURING THE RECEIVER •From the “View” tab, open the “Configuration View”. Click on “RATE” and set “Measurement Period” to the desired time between observation samples (e.g. 200 ms for a 5Hz sample rate or 1000 ms for a 1 Hz sample rate), then click on “Send”.
- 6. 1. From View tab open the “Generation 9 Configure View, select “GNSS Configuration”, enable GPS L1C/A and L2C, Glonass L1 and L2, Galileo E1 and E5b, BediDou B1 and B2, and QZSS L1C/A. Select “RAM” and “Flash” under “Layer Selection”, then click on “Send Configuration”. 2. From the “Messages” window, right click on “NMEA” and then click on “Disable Child Messages” to disable all the NMEA messages. (None of these are needed for an RTK solution but if you want any of the messages for other reasons you can then individually enable the ones you need). 3. From the “Messages” window, double click on “UBX” then “RXM”. Right click and enable “RAWX” to enable raw observation messages and “SFRBX” to enable navigation messages. CONFIGURING THE RECEIVER
- 7. 1. If you want to display the 3D accuracy in the Data View window expand NAV in the “Messages” window, then right click on PVT to enable message. (You can choose the Docking Windows to display in the View>Docking Windows) 1. If an antenna is connected to the receiver and is not completely blocked, verify that you see RAWX and SFRBX messages appear in the “Packet” window. 2. From the “Configure” window, select “CFG”, then “Save current configuration” then “Send” to save these settings to the flash on-board the F9P module. 3. Repeat this procedure for the base receiver except set the “Measurement Period” under “RATE” to “1000 ms” for a 1 Hz sample rate. CONFIGURING THE RECEIVER
- 8. Collecting the data in u-center 1. To start collecting data select Player>Record. Save the file in your folder. File format: Port#_YYMMDD_hhmmss.ubx Note: time is in UTC not local time Click to “Yes” to the dialog box. Alternatively, you can click on the “red button” icon to start recording.
- 9. •To view the data collected, go to View > Chart View. Change the Y Value by clicking on the Value button next to the Y button. In the “Select a Property” window type “lat” in the blank space below, then select “Lat” in the entries and click OK. Click the X button then click the X value. Select “Lon” then click OK. To stop observation, click the “Eject file” button. Collecting the data in u-center
- 10. Collecting the data in RTKLIB using strsvr •Open the demo5_b33 folder and launch the strsvr.exe. •Set the input stream to “Serial”, click on the input “Opt” button and set the port and baud rate.
- 11. Collecting the data in RTKLIB using strsvr •Set the output stream to file and click on the output “Opt” to set the file name. You may add “_%Y%m%d%h%M” to the end of the file name which will append the year, month, day, hour and minute of the data to the file name. Give the file name a “.ubx” extension to let RTKLIB know that it is u-blox binary data. •Click “Start” to start collecting data.
- 12. Collecting data in u-center 1. Connect the u-blox receiver and set the baud rate to 460800. 2. Go to Receiver>NTRIP Client. The window below will open. Input the IP address of the base station. (Displayed IP address is just an example. Get the IP address from the administrator of the base station) Input the Port (from base station administrator). Username and Password will be supplied by client/user or provided by the base station administrator. Click update source table and select NTRIP mount point from the dropdown list or input the mount point as provided by the administrator. 3. Click OK.
- 13. Collecting data in u-center Check the Data View. Make sure that a fixed solution is achieve before stopping. •Displayed coordinates is the corrected observation.
- 14. Field observation Measure height of GNSS device Start device and survey
- 15. Convert u-blox format to OBS and NAV formats GNSS processing
- 17. Select Satellite Systems: GPS, GLO, GALL, QZS, BDS Select observation types: C, L, D, S, Frequencies: L1, L2/E5b
- 19. 1) Static positioning 2) Kinematic positioning GPS post-processing
- 28. 1) Static positioning 2) Kinematic positioning GPS post-processing