Bracket Exercise (Inventor)
•
0 likes•462 views

If you purchase the course from www.solidprofessor.com, you can access all the training videos and tutorials.

Recommended
More Related Content
What's hot
What's hot (18)
Similar to Bracket Exercise (Inventor)
Similar to Bracket Exercise (Inventor) (20)
Recently uploaded
Recently uploaded (20)
Bracket Exercise (Inventor)
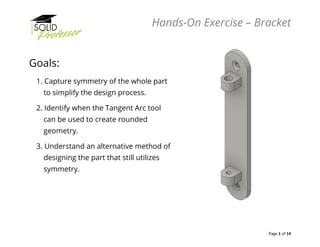
- 1. Hands-On Exercise – Bracket Page 1 of 14 Goals: 1. Capture symmetry of the whole part to simplify the design process. 2. Identify when the Tangent Arc tool can be used to create rounded geometry. 3. Understand an alternative method of designing the part that still utilizes symmetry.
- 2. Hands-On Exercise – Bracket Page 2 of 14 Instructions: 1. Begin a new part file using the Standard (in).ipt template and start a new sketch on the XY Plane. 2. Sketch and dimension the profile shown below. (Hint: Note the location of the origin).
- 3. Hands-On Exercise – Bracket Page 3 of 14 Instructions: (continued) 3. Extrude the sketch to a Blind Depth of 0.25 inches.
- 4. Hands-On Exercise – Bracket Page 4 of 14 Instructions: (continued) 4. Use the Hole command to create a cut on the face of the extrude just created. a. Make sure the hole is countersunk with the dimensions shown here, and make sure the termination is Through All. b. Change the Placement from Linear to Concentric and select the face for the cut. c. With the Concentric Reference icon selected, select the arc to center the hole.
- 5. Hands-On Exercise – Bracket Page 5 of 14 Instructions: (continued) 5. Sketch a rectangle on the front face with the dimensions shown below. a. Use a centerline to center the rectangle on the width of the part.
- 6. Hands-On Exercise – Bracket Page 6 of 14 Instructions: (continued) 6. Extrude the sketch to a depth of 0.5 inches.
- 7. Hands-On Exercise – Bracket Page 7 of 14 Instructions: (continued) 7. Start a sketch on the top face of the tombstone to create the rounded portion of the tombstone shape. 8. Use a tangent arc to create the rounded shape.
- 8. Hands-On Exercise – Bracket Page 8 of 14 Instructions: (continued) 9. Create the extrude using the “To” end condition and select the bottom edge of the block.
- 9. Hands-On Exercise – Bracket Page 9 of 14 Instructions: (continued) 10. Use the Hole command to create a hold on the top face of the tombstone. a. The hole is counterbored with a larger diameter of 0.44 inches, the depth set to 0.25 inches, and the through diameter set to 0.27 inches.
- 10. Hands-On Exercise – Bracket Page 10 of 14 Instructions: (continued) 10. (continued) b. Change the Placement to Concentric and select the face for the cut. c. With the Concentric Reference icon pressed, select the arc to center the hole. Make sure to use the “To” end condition and select the bottom edge of the tombstone.
- 11. Hands-On Exercise – Bracket Page 11 of 14 Instructions: (continued) 11. Use the Mirror Feature to create the rest of the model. a. Select the Mirror Solid icon, and use the bottom face of the body as the mirror reference.
- 12. Hands-On Exercise – Bracket Page 12 of 14 Self-Check: 1. Design Intent: Let’s check to make sure the design intent of mirroring the part about an axis was achieved. Expand the Solid Bodies folder in the Browser, then right click on the body in the and select Properties. Click the Update button. Is the Y-component of the center of mass 0.000 inches? • If so, Good job! • If not, double check the placement of the origin of the first sketch.
- 13. Hands-On Exercise – Bracket Page 13 of 14 Additional Practice As with most designs, there are multiple approaches that can be taken to create this part. If you needed only some of the features to be mirrored across the body, the first approach may not be the best method. For additional practice, try making this part with only one instance of the countersunk hole by incorporating symmetry from the very beginning, starting with the extrude shown.
- 14. Hands-On Exercise – Bracket Page 14 of 14 Additional Practice: (continued) • Create the countersunk hole, the tombstone, and the counter bored hole. • Mirror the tombstone and the counter bored hole across the body using the XZ Plane as a reference and check your model with the image shown below.