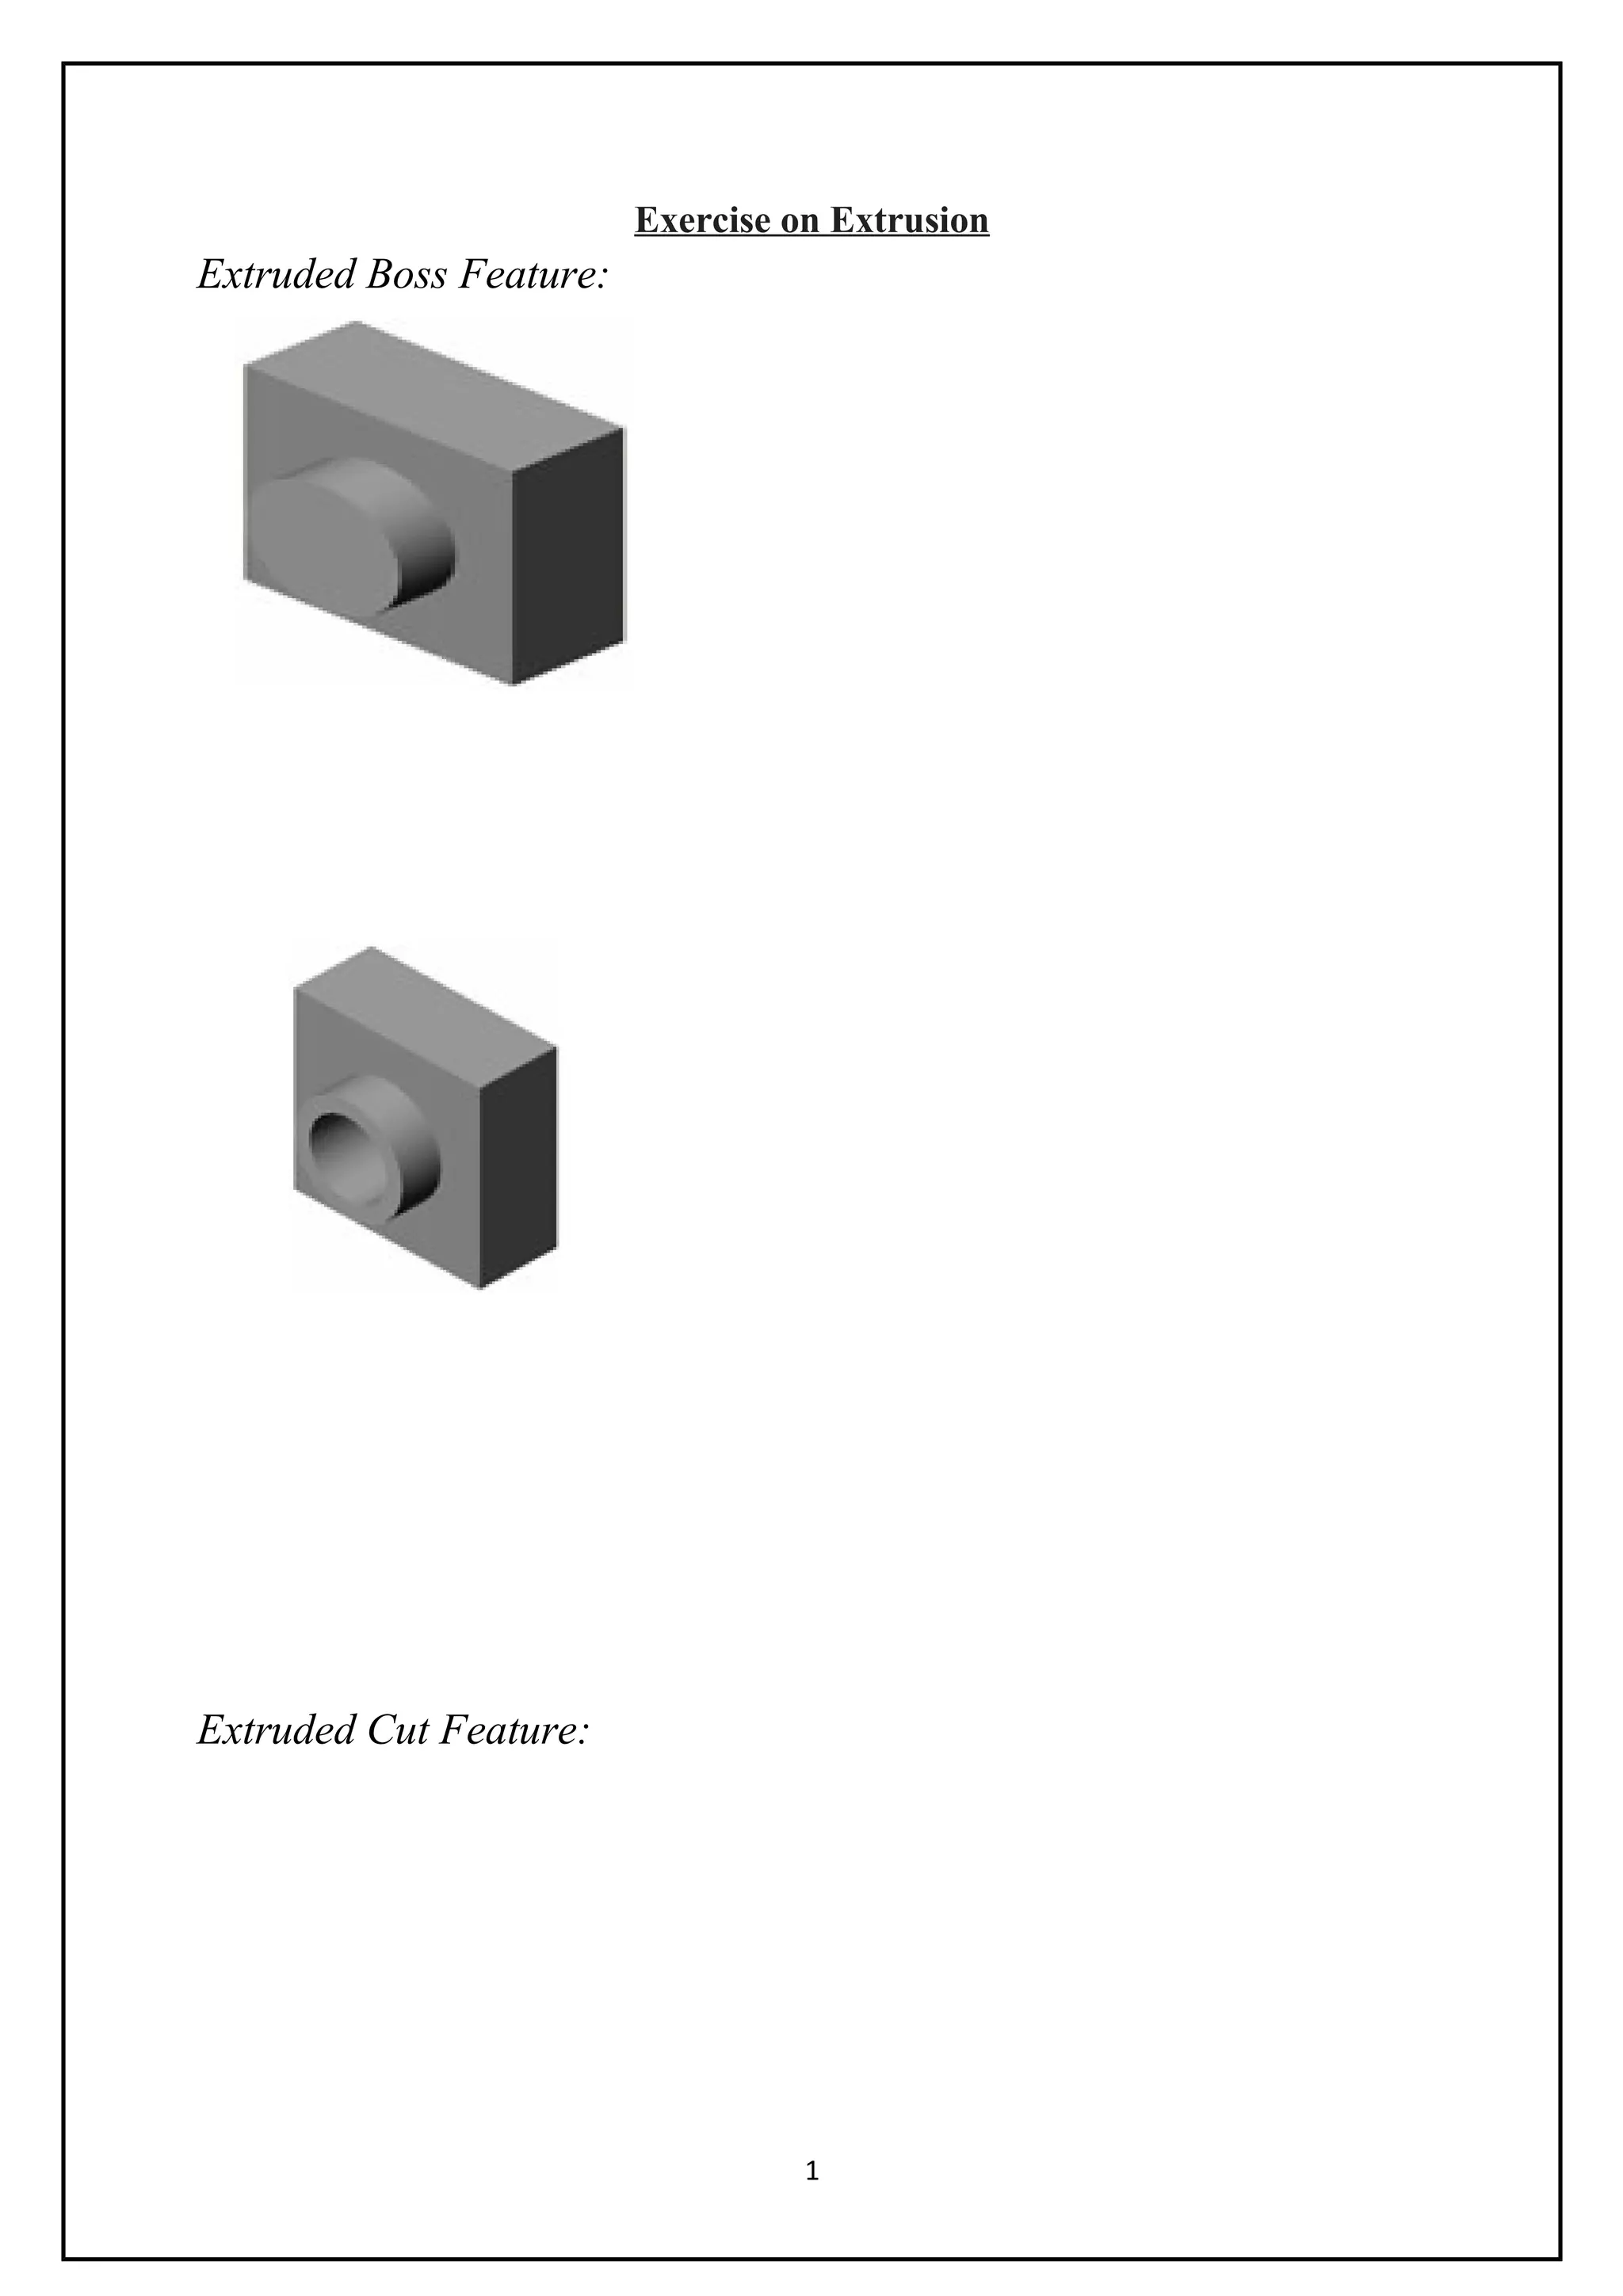
2. Fillet Feature:
Ex No: 1a Introduction of 3D Modelling software
Exercise on Extrusion
AIM:
To model the given object using the Extrusion feature as per the
dimensions given.
TOOLS:
Personal Computer, Solid Modeling Software (Creo Parametric)
Description of Extrusion Feature:
Base Feature:
The first feature that is created
The foundation of the part
2
3. The base feature geometry for the box is an extrusion
The extrusion is named Extrude1
To Create an Extruded Base Feature
1. Select a sketch plane.
2. Extrude the sketch perpendicular to sketch plane.
Extruded Boss Feature:
It Adds material to the part and requires a sketch.
Extruded Cut Feature:
It Removes material from the part and also it requires a sketch.
Fillet Feature:
Rounds the edges or faces of a part to a specified radius.
Procedure:
1. Select a sketch plane.(Front, top or Side)
2. Sketch a 2D profile of the model.
3. Dimension the model using Smart Dimension icon.
4. Check the sketch is fully defined.
5. Extrude the sketch perpendicular to sketch plane.
6. Use extruded cut feature to cut the solid as given in the drawing.
Result:
Thus the given model is extruded.
Exercises on Revolve
3
5. Ex No: 1b Exercises on Revolve
AIM:
To model the given object using the Revolve feature as per the dimensions
given.
TOOLS:
Personal Computer, Solid Modelling Software (Creo Parametric)
Description of Revolve Feature:
Command Manager: Features > Revolved Boss/Base
5
6. Menu: Insert > Boss/Base > Revolve
Toolbar: Features > Revolved Boss/Base.
Using this tool, the sketch is revolved about the revolution axis. The
revolution axis could be an axis, an entity of the sketch, or an edge of another
feature to create the revolved feature. Note that whether you use a centerline or
an edge to revolve the sketch, the sketch should be drawn on one side of the
centerline or the edge.
Procedure:
1. Select a sketch plane.(Front, top or Side)
2. Sketch a 2D profile of the model.
3. Dimension the model using Smart Dimension icon.
4. Check the sketch is fully defined.
5. Revolve the sketch.
Result:
Thus the given model is drawn using revolve feature.
6
8. Ex No: 1c Exercises on RIB
AIM:
To model the given object and construct rib portion in it.
TOOLS:
Personal Computer, Solid Modelling Software (Creo Parametric)
Description of RIB Feature:
Command Manager: Features > Rib
8
9. Menu: Insert > Features > Rib
Toolbar: Features > Rib
Ribs are defined as the thin walled structures that are used to increase the
strength of the entire structure of the component, so that it does not fail under an
increased load. In Creo parametric, the ribs are created using an open sketch as
well as a closed sketch. To create a rib feature, invoke The Rib property manager
and select the plane on which you need to draw the sketch for creating the rib
feature. Draw the sketch and exit the sketching environment. Specify the rib
parameters in the rib property manager and view the detailed preview using the
detailed preview button. The rib tool is revoked by choosing the rib button from
the features.
Procedure:
1. Select a sketch plane.(Front, top or Side)
2. Sketch a 2D profile of the model.
3. Dimension the model using Smart Dimension icon
4. Check the sketch is fully defined
5. Extrude the sketch.
6. Using Rib Feature complete the model.
Result:
Thus the given model is drawn and completed using rib feature.
Exercises on Shell
9
11. Ex No: 1d Exercises on Shell
AIM:
To model the given object and remove the material using shell option.
TOOLS:
Personal Computer, Solid Modelling Software (Creo Parametric)
Description of SHELL Feature:
Removes material from the selected face.
Creates a hollow block from a solid block.
Very useful for thin-walled, plastic parts.
You are required to specify a wall thickness when using the shell
feature.
Procedure:
1. Select a sketch plane.(Front, top or Side)
2. Sketch a 2D profile of the model.
3. Dimension the model using Smart Dimension icon.
4. Check the sketch is fully defined.
5. Extrude the sketch.
6. Select the face in which you are going to draw the cut profile.
7. Make that plane to normal to you.
11
12. 8. Sketch the cut profile & dimension it.
9. Use Extruded cut feature remove the portion.
10. Select the Shell feature.
11. Select the face in which material to be removed using shell.
12. Specify the shell thickness.
Result:
Thus the given model is drawn and completed using shell feature.
12
14. Ex No: 2 Exercises on Assembly of Flange Coupling
AIM:
To model and assemble the flange coupling as per the dimensions given
and also convert the 3D model into different vies with Bill of materials.
TOOLS:
Personal Computer, Solid Modelling Software (Creo Parametric)
Description about Flange Coupling:
A flange coupling is the simplest type of rigid coupling most extensively
used in the general power transmission application. It consist of two C.I or steel
bosses projected flange plates at on of their ends. The flange plates are drilled
with a number of equidistant bolt holes on their flat faces with their centers lying
on a imaginary circle called “pitch Circle”. Each of the flange bosses is securely
keyed to the end of each shaft using a tapered key driven from inside. While
assembling generally two flanges are set such that the keys fitted in them are out
of alignment to each other, then the flanges are bolted together by a number of
bolts and nuts. Power is transmitted from one shaft to other through the bolts.
These bolts are in close running fit in the holes which are drilled and placed in
the flanges in order that the load is taken smoothly with out any impact which
would take place if the bolts are fitted loose in the holes. Correct alignment of
the two shafts is assured irrespective of the bolts, by allowing the end of the
shaft to another a small distances in bosses bore of the other flange.
Procedure:
1. Model different parts of a flange coupling using Extrude, Revolve etc.,
features.
2. Select the assembly in Creo Parametric main menu.
3. Using Insert component icon of property manager, insert base
component
& next components to be assemble.
4. Assemble the parts using various features in assembly mode.
5. Continue the inserting the component & mating until the entire
14
16. component are assembled.
6. Save the assembly.
7. From the main menu of creo parametric select the drawing option.
8. Select the drawing sheet format size as – A4
Landscape.
9. Using the model view manager browse the document
to be open.
10. Click the view orientation from the model view
manager & place the
drawing view in the proper place in the sheet as shown
above.
11. Using the placed view as parent view project the
other or needed views
12. Move cursor to any one view and right click the
mouse button.
13. Select the Table – BOM.
14. Place the BOM in the proper place in the drawing
sheet.
15. Save the drawing sheet.
16
17. Result:
Thus the given flange coupling is modeled, assembled &
different views are taken.
17
19. Ex No: 3 Exercises on Assembly of
Plummer Block
AIM:
To model and assemble the Plummer block as per the
dimensions given and also convert the 3D model into different
vies with Bill of materials.
TOOLS:
Personal Computer, Solid Modelling Software (Creo
Parametric)
Description about Plummer Block:
A pillow block, also known as a Plummer block or
bearing housing, is a pedestal used to provide support for a
rotating shaft with the help of compatible bearings & various
accessories. Housing material for a pillow block is typically
made of cast iron or cast steel. Pillow blocks are usually
referred to the housings which have a bearing fitted into them
and thus the user need not purchase the bearings separately.
Pillow blocks are usually mounted in cleaner environments
and generally are meant for lesser loads of general industry.
These differ from "plummer blocks" which are bearing
housings supplied without any bearings and are usually meant
for higher load ratings and corrosive industrial environments.
However the terms pillow block and plummer block are used
interchangeably in certain parts of the world.
Procedure:
1. Model different parts of a Plummer Block using
Extrude, Revolve etc., features.
2. Select the assembly in Creo Parametric main menu.
3. Using Insert component icon of property manager,
insert base component
& next components to be assemble.
19
20. 4. Assemble the parts using various features in assembly
mode.
5. Continue the inserting the component & mating until
the entire component are assembled.
6. Save the assembly.
7. From the main menu of creo parametric select the
drawing option.
8. Select the drawing sheet format size as – A4
Landscape.
20
22. 9. Using the model view manager browse the document
to be Open.
10. Click the view orientation from the model view
manager & place the
drawing view in the proper place in the sheet as shown
above.
11. Using the placed view as parent view project the
other or needed views
12. Move cursor to any one view and right click the
mouse button.
13. Select the Table – BOM.
14. Place the BOM in the proper place in the drawing
sheet.
15. Save the drawing sheet.
22
23. Result:
Thus the given Plummer block is modeled; assembled &
different views are taken.
23
24. Ex No: 4 Exercises on Assembly of Screw
Jack
AIM:
To model and assemble the Screw jack as per the
dimensions given and also convert the3D model into different
vies with Bill of materials.
TOOLS:
Personal Computer,
Solid Modelling Software
(Creo Parametric)
Description about Screw
jack:
A Screw Jack, manually
operated is a contrivance to
lift heavy object over a small
height with a distinct
Mechanical Advantages. It
also serves as a supporting
aid in the raised position. A
screw Jack is actuated by a
square threaded screw
worked by applying a
moderate effort at the end of
a Tommy bar inserted into
the hole of the head of the screw. The body of the screw jack
has an enlarged circular base which provides a large bearing
area. A gun metal nut is tight fitted into the body at the top. A
screw spindle is screwed through the nut. A load bearing cup is
mounted at the top of the screw spindle and secured to it by a
washer and a CSK screw. When the screw spindle is rotated,
the load bearing cup moves only up or down along with the
screw spindle but will not rotate with it. The Tommy bar is
inserted into the hole in the head of the screw spindle only
24
25. during working and will be detached when not in use.
Procedure:
1. Model different parts of a Screw Jack using Extrude,
Revolve etc., features.
2. Select the assembly in Creo Parametric main menu.
3. Using Insert component icon of property manager,
insert base component
& next components to be assemble.
4. Assemble the parts using various features in assembly
mode.
5. Continue the inserting the component & mating until
the entire component are assembled.
6. Save the assembly.
7. From the main menu of creo parametric select the
drawing option.
8. Drawing icon in main menu of Creo parametric
9. Select the drawing sheet format size as – A4
Landscape.
25
27. 10. Using the model view manager browse the
document to be open.
11. Click the view orientation from the model view
manager & place the drawing view in the proper place
in the sheet.
12. Using the placed view as parent view project the
other or needed views.
13. Move cursor to any one view and right click the
mouse button.
14. Select the Table – BOM.
15. Place the BOM in the proper place in the drawing
sheet.
16. Save the drawing sheet.
Result:
Thus the given Screw Jack is modeled; assembled &
27
30. Ex No: 5 Exercises on Assembly of Lathe
Tail Stock
AIM:
To model and assemble the lathe tailstock as per the
dimensions given and also convert the 3D model into different
vies with Bill of materials.
TOOLS:
Personal Computer, Solid Modelling Software (Creo
parametric)
Description about Lathe Tailstock:
A tailstock, also known as a foot stock, is a device often
used as part of an engineering lathe, wood-turning lathe, or
used in conjunction with a rotary table on a milling machine. It
is usually used to apply support to the longitudinal rotary axis
of a work piece being machined. A lathe center is mounted in
the tailstock, and inserted against the sides of a hole in the
center of the work piece. A tailstock is particularly useful
when the work piece is relatively long and slender. Failing to
use a tailstock can cause "chatter," where the work piece bends
excessively while being cut.It is also used on a lathe to hold
drilling or reaming tools for machining a hole in the work
piece. Unlike drilling with a drill press or a milling machine,
the tool is stationary while the work piece rotates. Holes can
only be cut along the axis that the work piece is set to spin.
Procedure:
1. Model different parts of a Lathe Tailstock using
Extrude, revolve etc., features
2. Select the assembly in creo parametric main menu.
3. Using Insert component icon of property manager,
insert base component & next components to be
assemble.
30
31. 4. Assemble the parts using various features in
assembly mode.
5. Continue the inserting the component & mating until
the entire
component are assembled.
6. Save the assembly.
7. From the main menu of creo parametric select the
drawing option.
8. Drawing icon in main menu of Creo parametric
9. Select the drawing sheet format size as – A4
Landscape.
31
32. 10. Using the model view manager browse the
document to be open.
11. Click the view orientation from the model view
manager & place
the drawing view in the proper place in the sheet.
12. Using the placed view as parent view project the
other or needed views.
13. Move cursor to any one view and right click the
mouse button.
14. Select the Table – BOM.
15. Place the BOM in the proper place in the drawing
sheet.
16. Save the drawing sheet.
32
33. Result:
Thus the given Lathe Tailstock is modeled; assembled &
different views are taken.
33
35. Ex No: 6 Exercises on Assembly of
Universal Joint
AIM:
To model and assemble the Universal Joint as per the
dimensions given and also convert the3D model into different
vies with Bill of materials.
TOOLS:
Personal Computer, Solid Modelling Software (Creo
Parametric)
Description about Universal Joint:
A universal joint, (universal coupling, U-joint, Cardan
joint, Hardy-Spicer joint, or Hooke's joint) is a joint or
coupling in a rigid rod that allows the rod to 'bend' in any
direction, and is commonly used in shafts that transmit rotary
motion. It consists of a pair of hinges located close together,
oriented at 90° to each other, connected by a cross shaft.
Procedure:
1. Model different parts of a Universal Joint using
Extrude, Revolve etc., features.
2. Select the assembly in Creo Parametric main menu.
3. Using Insert component icon of property manager,
insert base component & next components to be
assemble.
4. 4. Assemble the parts using various features in
assembly mode.
5. Continue the inserting the component & mating until
the entire
component are assembled.
6. Save the assembly.
7. From the main menu of creo parametric select the
drawing option.
8. Drawing icon in main menu of Creo parametric
35
36. 9. Select the drawing sheet format size as – A4
Landscape.
10. Using the model view manager browse the
document to be
open.
11. Click the view orientation from the model view
manager &
place the drawing view in the proper place in the sheet.
12. Using the placed view as parent view project the
other or
needed views.
13. Move cursor to any one view and right click the
mouse button.
36
38. 14. Select the Table – BOM.
15. Place the BOM in the proper place in the drawing
sheet.
16.Save the drawing sheet.
Result:
Thus the given Universal Joint is modeled; assembled &
different views are taken
38
40. Ex No: 7 Exercises on Assembly of Machine
Vice
AIM:
To model and assemble the Machine Vice as per the
dimensions given and also convert the 3D model into different
vies with Bill of materials.
TOOLS:
Personal Computer, Solid Modelling Software (Creo
Parametric)
Description about Machine Vice:
A vice is a mechanical apparatus used to secure an
object to allow work to be performed on it. Vices have two
parallel jaws, one fixed and the other movable, threaded in and
out by a screw and lever. Woodworking vices are attached to a
workbench, typically flush with its work surface. Their jaws
are made of wood or metal, the latter usually faced with wood,
called cheeks, to avoid marring the work. The movable jaw
may include a retractable dog to hold work against a bench
dog.
"Quick-release" vices employ a split nut that allows the screw
to engage or disengage with a half-turn of the handle. When
disengaged the movable jaw may be moved in or out
throughout its entire range of motion, vastly speeding up the
process of adjustment.
Procedure:
1. Model different parts of a Machine Vice using
Extrude, Revolve etc., features.
2. Select the assembly in Creo Parametric main menu.
3. Using Insert component icon of property manager,
insert base component & next components to be
assemble.
4. Assemble the parts using various features in
40
41. assembly mode.
5. Continue the inserting the component & mating until
the entire
component are assembled.
6. Save the assembly.
7. From the main menu of creo parametric select the
drawing option.
8. Drawing icon in main menu of Creo parametric
9. Select the drawing sheet format size as – A4
Landscape.
10. Using the model view manager browse the
document to be open.
41
43. 11. Click the view orientation from the model view
manager &
place the drawing view in the proper place in the sheet.
12. Using the placed view as parent view project the
other or needed
views.
13. Move cursor to any one view and right click the
mouse button.
14. Select the Table – BOM.
15. Place the BOM in the proper place in the drawing
sheet.
16. Save the drawing sheet.
Result:
Thus the given Machine Vice is modeled, assembled &
43
45. Ex No: 8 Exercises
on Assembly of Stuffing
box
AIM:
To model and assemble
the Stuffing box as per the
dimensions given and also
convert the3D model into
different vies with Bill of
materials.
TOOLS:
Personal Computer,
Solid Modelling Software
(Creo Parametric)
Description about Stuffing box:
A stuffing box is an assembly which is used to house a
gland seal. It is used to prevent leakage of fluid, such as water
or steam, between sliding or turning parts of machine
elements. A gland is a general type of stuffing box, used to seal
a rotating or reciprocating shaft against a fluid. The most
common example is in the head of a tap (faucet) where the
gland is usually packed with string which has been soaked in
tallow or similar grease. The gland nut allows the packing
material to be compressed to form a watertight seal and
prevent water leaking up the shaft when the tap is turned on.
The gland at the rotating shaft of a centrifugal pump may be
packed in a similar way and graphite grease used to
accommodate continuous operation. The linear seal around the
piston rod of a double acting steam piston is also known as a
gland, particularly in marine applications. Likewise the shaft of
45
46. a hand pump or wind pump is sealed with a gland where the
shaft exits the borehole.
Procedure:
1. Model different parts of a Stuffing box using
Extrude, Revolve etc., features.
2. Select the assembly in Creo Parametric main menu.
3. Using Insert component icon of property manager,
insert base component & next components to be
assemble.
4. Assemble the parts using various features in
assembly mode.
5. Continue the inserting the component & mating until
the entire component are assembled.
6. Save the assembly.
7. From the main menu of creo parametric select the
drawing option.
8. Drawing icon in main menu of Creo parametric
46
48. 9. Select the drawing sheet format size as – A4
Landscape.
10. Using the model view manager browse the
document to be open.
11. Click the view orientation from the model view
manager & place
the drawing view in the proper place in the sheet.
12. Using the placed view as parent view project the
other or
needed views.
13. Move cursor to any one view and right click the
mouse button.
14. Select the Table – BOM.
15. Place the BOM in the proper place in the drawing
sheet.
16. Save the drawing sheet.
48
49. Result:
Thus the given Stuffing box is modeled; assembled &
different views are taken.
49
50. Ex No: 9 Exercises on Assembly of
Crosshead
AIM:
To model and assemble the Crosshead as per the
dimensions given and also convert the3D model into different
vies with Bill of materials.
TOOLS:
Personal Computer, Solid Modelling Software (Creo
Parametric)
Description about Crosshead:
A crosshead is a mechanism used in long reciprocating
engines and reciprocating compressors to eliminate sideways
pressure on the piston. Also the crosshead enables the
connecting rod to freely move outside the cylinder. Because of
the very small bore to stroke ratio on such engines, the
connecting rod would hit the cylinder walls and block the
engine from rotating if the piston was attached direct to the
connecting rod like on trunk engines. Hence the position where
the crosshead is placed, is equal to the engine stroke.
Procedure:
1. Model different parts of a Crosshead using Extrude,
Revolve etc., features.
2. Select the assembly in Creo Parametric main menu.
3. Using Insert component icon of property manager,
insert base
component & next components to be assemble.
4. Assemble the parts using various features in
assembly mode.
5. Continue the inserting the component & mating until
the entire
component are assembled.
6. Save the assembly.
7. From the main menu of creo parametric select the
50
51. drawing option.
8. Drawing icon in main menu of Creo parametric
9. Select the drawing sheet format size as – A4
Landscape.
10. Using the model view manager browse the
document to be open.
11. Click the view orientation from the model view
manager & place the drawing view in the proper place
in the sheet.
12. Using the placed view as parent view project the
other or
needed views.
13. Move cursor to any one view and right click the
mouse button.
51
52. 14. Select the Table – BOM.
15. Place the BOM in the proper place in the drawing
sheet.
16. Save the drawing sheet.
Result:
Thus the given Crosshead is modeled; assembled &
different views are taken.
52
54. Ex No: 10 Exercises on Assembly of Safety
Valves
AIM:
To model and assemble the Safety Valves as per the
dimensions given and also convert the3D model into different
vies with Bill of materials.
TOOLS:
Personal Computer, Solid Modelling Software (Creo
Parametric)
Description about Safety Valves:
A safety valve is a valve which has the function of
increasing the safety of a thermal-hydraulics plant. An
example of safety valve could be a pressure safety valve
(PSV), i.e. a pressure relief valve (PRV) which automatically
releases a substance from a boiler, pressure vessel, or other
system, when the pressure or temperature exceeds preset
limits. Also pilot-operated relief valves could have the function
of safety valves. Safety valves were first used on steam boilers
during the Industrial Revolution. Early boilers operating
without them were prone to accidental explosion.
Procedure:
1. Model different parts of a Safety Valves using
Extrude, Revolve etc., features.
2. Select the assembly in Creo Parametric main menu.
3. Using Insert component icon of property manager,
insert base component & next components to be
assemble.
4. Assemble the parts using various features in
assembly mode.
5. Continue the inserting the component & mating until
the entire component are assembled.
6. Save the assembly.
7. From the main menu of creo parametric select the
54
55. drawing option.
8. Drawing icon in main menu of Creo parametric
9. Select the drawing sheet format size as – A4
Landscape.
10. Using the model view manager browse the
document to be open.
11. Click the view orientation from the model view
manager & place the drawing view in the proper place
in the sheet.
12. Using the placed view as parent view project the
other or needed views.
55
57. 13. Move cursor to any one view and right click the
mouse button.
14. Select the Table – BOM.
15. Place the BOM in the proper place in the drawing
sheet.
16. Save the drawing sheet.
Result:
Thus the given Safety Valves is modeled, assembled &
different views are taken.
57
59. Ex No: 11 Exercises on Assembly of Non-
return valves
AIM:
To model and assemble the Non-return valves as per the
dimensions given and also convert the3D model into different
vies with Bill of materials.
TOOLS:
Personal Computer, Solid Modelling Software (Creo
Parametric)
Description about Non-return valves:
A check valve, clack valve, non-return valve or one-way
valve is a valve that normally allows fluid (liquid or gas) to
flow through it in only one direction. Check valves are two-
port valves, meaning they have two openings in the body, one
for fluid to enter and the other for fluid to leave. There are
various types of check valves used in a wide variety of
applications. Check valves are often part of common
household items. Although they are available in a wide range
of sizes and costs, check valves generally are very small,
simple, or inexpensive. Check valves work automatically and
most are not controlled by a person or any external control;
accordingly, most do not have any valve handle or stem. The
bodies (external shells) of most check valves are made of
plastic or metal.
Procedure:
1. Model different parts of Non-return valves using
Extrude, Revolve etc., features.
2. Select the assembly in Creo Parametric main menu.
3. Using Insert component icon of property manager,
insert base component
& next components to be assemble.
4. Assemble the parts using various features in
59
60. assembly mode.
5. Continue the inserting the component & mating until
the entire component are assembled.
6. Save the assembly.
7. From the main menu of creo parametric select the
drawing option.
8. Drawing icon in main menu of Creo parametric
9. Select the drawing sheet format size as – A4
Landscape.
10. Using the model view manager browse the
document to be open.
60
62. 11. Click the view orientation from the model view
manager & place the drawing view in the proper place
in the sheet.
12. Using the placed view as parent view project the
other or needed views.
13. Move cursor to any one view and right click the
mouse button.
14. Select the Table – BOM.
15. Place the BOM in the proper place in the drawing
sheet.
16. Save the drawing sheet.
Result:
Thus the given Non-return valve is modeled, assembled
62
64. Ex No: 12 Exercises on Assembly of
Connecting rod
AIM:
To model and assemble the Connecting rod as per the
dimensions given and also convert the3D model into different
vies with Bill of materials.
TOOLS:
Personal Computer, Solid Modelling Software (Creo
Parametric)
Description about Connecting rod:
A connecting rod is an engine component that transfers
motion from the piston to the crankshaft and functions as a
lever arm. Connecting rods are commonly made from cast
aluminum alloy and are designed to withstand dynamic
stresses from combustion and piston movement. The small end
of the connecting rod connects to the piston with a piston pin.
The piston pin, or wrist pin, provides a pivot point between the
piston and connecting rod. Spring clips, or piston pin locks, are
used to hold the piston pin in place. The big end of the
connecting rod connects to the crankpin journal to provide a
pivot point on the crankshaft. Connecting rods are produces as
one piece or two-piece components. A rod cap is the
removable section of a two-piece connecting rod that provides
a bearing surface for the crankpin journal. The rod cap is
attached to the connecting rod with two cap screws for
installation and removal from the crankshaft.
Procedure:
1. Model different parts of a Connecting rod using
Extrude, Revolve etc., features.
2. Select the assembly in Creo Parametric main menu.
3. Using Insert component icon of property manager,
insert base component & next components to be
64
65. assemble.
4. Assemble the parts using various features in
assembly mode.
5. Continue the inserting the component & mating until
the entire component are assembled.
6. Save the assembly.
7. From the main menu of Creo parametric select the
drawing option.
8. Drawing icon in main menu of Creo parametric
65
67. 9. Select the drawing sheet format size as – A4
Landscape.
10. Using the model view manager browse the
document to be open.
11. Click the view orientation from the model view
manager &
place the drawing view in the proper place in the sheet.
12. Using the placed view as parent view project the
other or needed views.
13. Move cursor to any one view and right click the
mouse button.
14. Select the Table – BOM.
15. Place the BOM in the proper place in the drawing
sheet.
16. Save the drawing sheet.
67
68. Result:
Thus the given Connecting rod is modeled; assembled &
different views are taken.
68
70. Ex No: 13 Exercises on Assembly of
Piston
AIM:
To model and assemble the Piston as per the dimensions
given and also convert the3D model into different vies with
Bill of materials.
TOOLS:
Personal Computer, Solid Modelling Software (Creo
Parametric)
Description about Piston:
A piston is a component of reciprocating engines,
reciprocating pumps, gas compressors and pneumatic
cylinders, among other similar mechanisms. It is the moving
component that is contained by a cylinder and is made gas-
tight by piston rings. In an engine, its purpose is to transfer
force from expanding gas in the cylinder to the crankshaft via a
piston rod and/or connecting rod. In a pump, the function is
reversed and force is transferred from the crankshaft to the
piston for the purpose of compressing or ejecting the fluid in
the cylinder. In some engines, the piston also acts as a valve by
covering and uncovering ports in the cylinder wall.
Procedure:
1. Model different parts of a Piston using Extrude,
Revolve etc., features.
2. Select the assembly in Creo Parametric main menu.
3. Using Insert component icon of property manager,
insert base component & next components to be
assemble.
4. Assemble using MATE Feature.
5. Continue the inserting the component & mating until
the entire component are assembled.
6. Save the assembly.
70
71. 7. From the main menu of creo parametric select the
drawing option.
8. Drawing icon in main menu of Creo parametric
9. Select the drawing sheet format size as – A4
Landscape.
10. Using the model view manager browse the
document to be open.
11. Click the view orientation from the model view
manager & place the
drawing view in the proper place in the sheet.
12. Using the placed view as parent view project the
other or needed
71
73. views.
13. Move cursor to any one view and right click the
mouse button. 14.Select the Table – BOM.
15. Place the BOM in the proper place in the drawing
sheet.
16. Save the drawing sheet.
Result:
Thus the given Piston is modeled; assembled & different
views are taken.
73
74. Ex No: 14
Exercises
on Assembly
of
Crankshaft
AIM:
To model
and assemble
the Crankshaft as per the dimensions given and also convert
the3D model into different vies with Bill of materials.
TOOLS:
Personal Computer, Solid Modelling Software (Creo
Parametric)
Description about Crankshaft:
A crankshaft—related to crank—is a mechanical part
able to perform a conversion between reciprocating motion
and rotational motion. In a reciprocating engine, it translates
reciprocating motion of the piston into rotational motion;
whereas in a reciprocating compressor, it converts the
rotational motion into reciprocating motion. In order to do the
75. conversion between two motions, the crankshaft has "crank
throws" or "crankpins", additional bearing surfaces whose axis
is offset from that of the crank, to which the "big ends" of the
connecting rods from each cylinder attach. It is typically
connected to a flywheel to reduce the pulsation characteristic
of the four-stroke cycle, and sometimes a torsional or
vibrational damper at the opposite end, to reduce the torsional
vibrations often caused along the length of the crankshaft by
the cylinders farthest from the output end acting on the
torsional elasticity of the metal.
Procedure:
1. Model different parts of a Crankshaft using Extrude,
Revolve etc., features.
2. Select the assembly in Creo Parametric main menu.
3. Using Insert component icon of property manager,
insert base
component
& next components to be assemble.
4. Assemble using MATE Feature.
5. Continue the inserting the component & mating until
the entire
component are assembled.
6. Save the assembly.
7. From the main menu of creo parametric select the
drawing option.
8. Drawing icon in main menu of Creo parametric
9. Select the drawing sheet format size as – A4
Landscape.
10. Using the model view manager browse the
document to be open.
11. Click the view orientation from the model view
manager & place
the drawing view in the proper place in the sheet.
12. Using the placed view as parent view project the
other or needed
views.
76. 13. Move cursor to any one view and right click the
mouse button.
14. Select the Table – BOM.
15. Place the BOM in the proper place in the drawing
sheet.
16. Save the drawing sheet.
Result:
Thus the given Crankshaft is modeled; assembled &
different views are taken.
B) COMPUTER AIDED MANUFACTURING
(CAM)
Ex No: 1 Manual Part Programming in CNC
Lathe
77. CNC Part Programming
Axis of motion
In generally, all motions have 6 degrees of freedom. In other
words, motion can be resolved into 6 axes, namely, 3 linear
axes (X, Y and Z axis) and 3 rotational axes (A, B, and C
axis).
Fig. Axis of Motion
Dimension Systems
Incremental System
This type of control always uses as a reference to the
preceding point in a sequence of points. The disadvantage of
this system is that if an error occurs, it will be accumulated.
78. Incremental System
Absolute System
In an absolute system all references are made to the origin of
the coordinate system. All commands of motion are defined
by the absolute coordinate referred to the origin.
Absolute System
Definition of Programming
NC programming is where all the machining data are
compiled and where the data are translated into a language
which can be understood by the control system of the machine
tool. The machining data is as follows:
a. Machining sequence classification of process, tool
start up point, cutting depth, tool path etc.
79. b. Cutting conditions spindle speed, feed rate,
coolant, etc.
c. Selection of cutting tools.
Programme Structure
Structure of CNC Part
Programme
A CNC programme consists of blocks, words and addresses.
Block: A command given to the control unit is called a block.
Word: A block is composed of one or more words. A word is
composed of an identification letter and a series of numerals,
e.g. the command for a feed rate of 200mm/min is F200.
Address: The identification letter at the beginning of each
word is called address. The meaning of the address is in
accordance with EIA (Electronic Industries Association)
standard RS-274-D. The most common 'addresses' are listed
below:
Function Address
Sequence number N
80. Preparatory function G
Co-ordinate word X, Y, Z
Parameters for Circular Interpolation I, J, K
Feed function F
Spindle function S
Tool function T
Miscellaneous
function M
An example of a programme is as
follows:
N20 G01 X20.5 F200 S1000 M03
N21 G02 X30.0 Y40.0 I20.5 J32.0
Explanation of Words
Sequence Number (N Address)
A sequence number is used to identify the block. It is always
placed at the beginning of the block and can be regarded as the
name of the block. The sequence numbers need not be
consecutive. The execution sequence of the programme is
according to the actual sequence of the block and not the
sequence of the number. In fact some CNC systems do not
require sequence numbers.
Preparatory Function (G Address)
A preparatory function determines how the tool is to move to
the programmed target. The most common G addresses are
listed below:
G00 Rapid traverse
G01 Linear interpolation with feed rate
G02 Circular interpolation (clockwise)
G03 Circular interpolation (counter clockwise)
G2/G3 Helical interpolation
G04 Dwell time in milliseconds
81. G05 Spline definition
G06 Spline interpolation
G07 Tangential circular interpolation / Helix interpolation /
Polygon interpolation / Feedrate interpolation
G08 Ramping function at block transition / Look ahead
"off"
G09 No ramping function at block transition / Look ahead
"on"
G10 Stop dynamic block pre processing
G11 Stop interpolation during block pre processing
G12 Circular interpolation (cw) with radius
G13 Circular interpolation (ccw) with radius
G14 Polar coordinate programming, absolute
G15 Polar coordinate programming, relative
G16 Definition of the pole point of the polar coordinate
system
G17 Selection of the X, Y plane
G18 Selection of the Z, X plane
G19 Selection of the Y, Z plane
G20 Selection of a freely definable plane
G21 Parallel axes "on"
G22 Parallel axes "off"
G24 Safe zone programming; lower limit values
G25 Safe zone programming; upper limit values
G26 Safe zone programming "off"
G27 Safe zone programming "on"
G33 Thread cutting with constant pitch
G34 Thread cutting with dynamic pitch
G35 Oscillation configuration
G38 Mirror imaging "on"
G39 Mirror imaging "off"
G40 Path compensations "off"
G41 Path compensation left of the work piece contour
G42 Path compensation right of the work piece contour
G43 Path compensation left of the work piece contour with
altered approach
G44 Path compensation right of the work piece contour
82. with altered approach
G50 Scaling
G51 Part rotation; programming in degrees
G52 Part rotation; programming in radians
G53 Zero offset off
G54 Zero offset #1
G55 Zero offset #2
G56 Zero offset #3
G57 Zero offset #4
G58 Zero offset #5
G59 Zero offset #6
G63 Feed / spindle override not active
G66 Feed / spindle override active
G70 Inch format active
G71 Metric format active
G72 Interpolation with precision stop "off"
G73 Interpolation with precision stop "on"
G74 Move to home position
G75 Curvature function activation
G76 Curvature acceleration limit
G78 Normalcy function "on" (rotational axis orientation)
G79 Normalcy function "off"
G80 - G89 for milling applications:
G80 Canned cycle "off"
G81 Drilling to final depth canned cycle
G82 Spot facing with dwell time canned cycle
G83 Deep hole drilling canned cycle
G84 Tapping or Thread cutting with balanced chuck canned
cycle
G85 Reaming canned cycle
G86 Boring canned cycle
G87 Reaming with measuring stop canned cycle
G88 Boring with spindle stop canned cycle
G89 Boring with intermediate stop canned cycle
G81 - G88 for cylindrical grinding applications:
G81 Reciprocation without plunge
G82 Incremental face grinding
83. G83 Incremental plunge grinding
G84 Multi-pass face grinding
G85 Multi-pass diameter grinding
G86 Shoulder grinding
G87 Shoulder grinding with face plunge
G88 Shoulder grinding with diameter plunge
G90 Absolute programming
G91 Incremental programming
G92 Position preset
G93 Constant tool circumference velocity "on" (grinding
wheel)
G94 Feed in mm / min (or inch / min)
G95 Feed per revolution (mm / rev or inch / rev)
G96 Constant cutting speed "on"
G97 Constant cutting speed "off"
G98 Positioning axis signal to PLC
G99 Axis offset
G100 Polar transformation "off"
G101 Polar transformation "on"
G102 Cylinder barrel transformation "on"; Cartesian
coordinate system
G103 Cylinder barrel transformation "on," with real-time-
radius compensation
G104 Cylinder barrel transformation with center line
migration (CLM) and
G105 Polar transformation "on" with polar axis selections
G106 Cylinder barrel transformation "on" polar-/cylinder-
coordinates
G107 Cylinder barrel transformation "on" polar-/cylinder-
coordinates with
G108 Cylinder barrel transformation polar-/cylinder-
coordinates with CLM
G109 Axis transformation programming of the tool depth
G110 Power control axis selection/channel 1
G111 Power control pre-selection V1, F1, T1/channel 1
G112 Power control pre-selection V2, F2, T2/channel 1
G113 Power control pre-selection V3, F3, T3/channel 1
84. G114 Power control pre-selection T4/channel 1
G115 Power control pre-selection T5/channel 1
G116 Power control pre-selection T6/pulsing output
G117 Power control pre-selection T7/pulsing output
G120 Axis transformation; orientation changing of the linear
interpolation rotary axis
G121 Axis transformation; orientation change in a plane
G125 Electronic gear box; plain teeth
G126 Electronic gear box; helical gearing, axial
G127 Electronic gear box; helical gearing, tangential
G128 Electronic gear box; helical gearing, diagonal
G130 Axis transformation; programming of the type of the
orientation change
G131 Axis transformation; programming of the type of the
orientation change
G132 Axis transformation; programming of the type of the
orientation change
G133 Zero lag thread cutting "on"
G134 Zero lag thread cutting "off"
G140 Axis transformation; orientation designation work
piece fixed coordinates
G141 Axis transformation; orientation designation active
coordinates
G160 ART activation
G161 ART learning function for velocity factors "on"
G162 ART learning function deactivation
G163 ART learning function for acceleration factors
G164 ART learning function for acceleration changing
G165 Command filter "on"
G166 Command filter "off"
G170 Digital measuring signals; block transfer with hard
stop
G171 Digital measuring signals; block transfer without hard
stop
G172 Digital measuring signals; block transfer with smooth
stop
G175 SERCOS-identification number "write"
85. G176 SERCOS-identification number "read"
G180 Axis transformation "off"
G181 Axis transformation "on" with not rotated coordinate
system
G182 Axis transformation "on" with rotated / displaced
coordinate system
G183 Axis transformation; definition of the coordinate
system
G184 Axis transformation; programming tool dimensions
G186 Look ahead; corner acceleration; circle tolerance
G188 Activation of the positioning axes
G190 Diameter programming deactivation
G191 Diameter programming "on" and display of the contact
point
G192 Diameter programming; only display contact point
diameter
G193 Diameter programming; only display contact point
actual axes center point
G200 Corner smoothing "off"
G201 Corner smoothing "on" with defined radius
G202 Corner smoothing "on" with defined corner tolerance
G203 Corner smoothing with defined radius up to maximum
tolerance
G210 Power control axis selection/Channel 2
G211 Power control pre-selection V1, F1, T1/Channel 2
G212 Power control pre-selection V2, F2, T2/Channel 2
G213 Power control pre-selection V3, F3, T3/Channel 2
G214 Power control pre-selection T4/Channel 2
G215 Power control pre-selection T5/Channel 2
G216 Power control pre-selection T6/pulsing output/Channel
2
G217 Power control pre-selection T7/pulsing output/Channel
2
G220 Angled wheel transformation "off"
G221 Angled wheel transformation "on"
G222 Angled wheel transformation "on" but angled wheel
moves before others
86. G223 Angled wheel transformation "on" but angled wheel
moves after others
G265 Distance regulation – axis selection
G270 Turning finishing cycle
G271 Stock removal in turning
G272 Stock removal in facing
G274 Peck finishing cycle
G275 Outer diameter / internal diameter turning cycle
G276 Multiple pass threading cycle
G310 Power control axes selection /channel 3
G311 Power control pre-selection V1, F1, T1/channel 3
G312 Power control pre-selection V2, F2, T2/channel 3
G313 Power control pre-selection V3, F3, T3/channel 3
G314 Power control pre-selection T4/channel 3
G315 Power control pre-selection T5/channel 3
G316 Power control pre-selection T6/pulsing output/Channel
3
G317 Power control pre-selection T7/pulsing output/Channel
3
Co-ordinate Word (X/Y/Z Address)
A co-ordinate word specifies the target point of the tool
movement (absolute dimension system) or the distance to be
moved (incremental dimension). The word is composed of the
address of the axis to be moved and the value and direction of
the movement.
Example: X100 Y-200: represents the movement to (100,
200). Whether the dimensions are absolute or incremental will
have to be defined previously (using G90 or G91).
Parameter for Circular Interpolation (I/J/K Address)
These parameters specify the distance measured from the start
point of the arc to the centre. Numerals following I, J and K
are the X, Y and Z components of the distance respectively.
87. Spindle Function (S Address)
The spindle speed is commanded under an S address and is
always in revolution per minute. It can be calculated by the
following formula:
Spindle Speed =
)(
1000min)/(
mmDiameterCutter
mSpeedCuttingSurface
×
−
π
The following table gives the surface cutting speeds for some
common materials:
Cutting tool
Material
Work piece material
Al alloy Brass Cast Iron Mild Steel
HSS 120 75 18 30
Carbide 500 180 120 200
Example: S2000 represents a spindle speed of 2000rpm
Feed Function (F Address)
The feed is programmed under an F address except for rapid
traverse. The unit may be in mm per minute (in the case of
milling machine) or in mm per revolution (in the case of
turning machine). The unit of the feed rate has to be defined
at the beginning of the programme.
The following table gives the chip load per tooth of milling
cutters cutting some common materials:
Milling Cutter
Material
Chip load per tooth (mm/rev)
Al alloy Brass
Cast
Iron Mild Steel
HSS 0.28 0.18 0.20 0.13
Sintered Carbide 0.25 0.15 0.25 0.25
Example: F200 represents a feed rate of 200mm/min
88. Tool Function (T Address)
The selection of tool is commanded under a T address.
Example: T02 represents tool number 2
M codes simple definition
M00 Unconditional stop
M01 Conditional stop
M02 End of program
M03 Spindle clockwise
M04 Spindle counter clockwise
M05 Spindle stop
M06 Tool change (see Note below)
M19 Spindle orientation
M20 Start oscillation (configured by G35)
M21 End oscillation
M30 End of program
M40 Automatic spindle gear range selection
M41 Spindle gear transmission step 1
M42 Spindle gear transmission step 2
M43 Spindle gear transmission step 3
M44 Spindle gear transmission step 4
M45 Spindle gear transmission step 5
M46 Spindle gear transmission step 6
M70 Spline definition, beginning and end curve 0
M71 Spline definition, beginning tangential, end curve 0
M72 Spline definition, beginning curve 0, end tangential
M73 Spline definition, beginning and end tangential
M80 Delete rest of distance using probe function, from axis
measuring input
M81 Drive On application block (resynchronize axis
position via PLC signal during the block)
M101-M108 Turn off fast output byte bit 1 (to 8)
M109 Turn off all (8) bits in the fast output byte
M111-M118 Turn on fast output byte bit 1 (to 8)
89. M121-M128 Pulsate (on/off) fast output byte bit 1 (to 8)
M140 Distance regulation “on” (configured by G265)
M141 Distance regulation “off”
M150 Delete rest of distance using probe function, for a
probe input (one of 16, M151-M168)
M151-M158 Digital input byte 1 bit 1 (to bit 8) is the active
probe input
M159 PLC cannot define the bit mask for the probe inputs
M160 PLC can define the bit mask for the probe inputs (up
to 16)
M161-M168 Digital input byte 2 bit 1 (to bit 8) is the active
probe input
M170 Continue the block processing look ahead of the part
program (cancel the M171)
M171 Stop the block processing look ahead of the probe
input part program segment (like a G10)
M200 Activate the hand wheel operation in the automatic
mode (to introduce an offset in the program)
M201-M208 Select the axis (by number from 1 to 8) for the
hand wheel operation
M209 Activate the hand wheel operation in the automatic
mode, with PLC control of the axis selection
M210 Deactivate the hand wheel input while in the
automatic mode
M211 Deactivate this hand wheel feature and also remove
the hand wheel offset (if any)
M213 Spindle 2 clockwise
M214 Spindle 2 counter clockwise
M215 Spindle 2 stop
M280 Switchable spindle/rotary axis, rotary axis on, first
combination
M281 Switchable spindle/rotary axis, rotary axis on, second
combination
M290 Switchable spindle/rotary axis, spindle enabled, first
combination
M291 Switchable spindle/rotary axis, spindle enabled,
second combination
90. Steps for CNC Programming and Machining
The following is the procedures to be followed in CNC
programming and machining. The most important point is to
verify the programme by test run it on the machine before the
actual machining in order to ensure that the programme is free
of mistakes.
a. Study the part drawing carefully.
b. Unless the drawing dimensions are CNC adapted, select
a suitable programme zero point on the work piece. The
tool will be adjusted to this zero point during the machine
set up.
c. Determine the machining operations and their sequence.
d. Determine the method of work clamping (vice, rotary
table, fixtures etc).
e. Select cutting tools and determine spindle speeds and
feeds.
f. Write programme (translate machining steps into
programme blocks). If many solutions are possible, try the
simplest solution first. It is usually longer, but better to
proceed in this way.
g. Prepare tool chart or diagram, measure tool geometry
(lengths, radii) and note.
h. Clamp work piece and set up machine.
i. Enter compensation value if necessary.
j. Check and test programme. It is a good practice to dry
run the programme (i) without the work piece, (ii) without
the cutting tools, or (iii) by raising the tool to a safe height.
If necessary, correct and edit programme and check
again. Start machining.
G-codes in Part Programming
Absolute and Incremental Dimensioning (G90/G91)
G90 and G91 are used to control the dimensioning system that
will be used in the data input. In G90 mode, the dimensions
91. will be recognized as absolute while in G91 will be
incremental.
Rapid Positioning (G00)
This is to command the cutter to move from the existing point
to the target point at the fastest speed of the machine.
Programme Format
G00
X
Y
Z
Linear Interpolation (G01)
This is to command the cutter to move from the existing point
to the target point along a straight line at the speed designated
by the F address.
Programme Format
G01
X
Y
Z
F
92. Circular Interpolation (G02/G03)
This is to command the cutter to move from the existing point
to the target point along a circular arc in clockwise direction
(G02) or counter clockwise direction (G03). In this case,
beside the target point, the radius or the centre of the arc is
also required. Most of the CNC systems nowadays still
require the data of the arc centre rather than the radius. The
parameters of the centre of the circular arc is designated by
the I, J and K addresses. I is the distance along the X axis, J
along the Y, and K along the Z. This parameter is defined as
the vector (magnitude and direction) from the starting point to
the centre of the arc.
Programme Format
(Clockwise Direction)
G02
X
Y
I(XC - XS)
J(YC - YS)
Where
XC and YC is the coordinate of the centre, and
XS and YS is the coordinate of the start point of the
arc.
93. Circular Interpolation – Clockwise
Programme Format
(Counter clockwise Direction)
G03
X
Y
I
J
Circular Interpolation - Counter clockwise
94. Cutter Compensation (G40/G41/G42)
In CNC machining, if the cutter axis is moving along the
programmed path, the dimension of the work piece obtained
will be incorrect since the diameter of the cutter has not be
taken into account. Modern CNC systems are capable of
doing this type of calculation which is known as cutter
compensation. What the system requires are the programmed
path, the cutter diameter and the position of the cutter with
reference to the contour. Normally, the cutter diameter is not
included in the programme. It has to be input to the CNC
system in the tool setting process.
Comparison of Tool Path with and without Cutter
Compensation
If the cutter is on the left of the contour, G41 is used. If the
cutter is on the right of the contour, G42 will be used. G40 is
to cancel the compensation calculation.
96. Programme Functions
N01 G90 Absolute Dimensioning
N02 G00 X-30 Y-30 Z100 Rapid move to (X-30, Y-30, Z100)
N03 T01 Using Tool Number 1
N04 G00 Z5 S1000 M03 Rapid move to Z5; start spindle clockwise at
1000rpm
N05 G01 Z-10 F100 Feed to Z-10 at 100mm/min
N06 G41 G01 X0 Y15 F200 Call up compensation, cutter on the left feed to
(X0, Y15) at 200mm/min
N07 G01 Y66.564 From N07 to N15 is the contour cutting
N08 G02 X16.111 Y86.183, I20 J0
N09 G02 X93.889 Y86.183
I38.889 J-196.183
N10 G02 X110 Y66.564
I-3.889 J-19.619
N11 G01 Y26.247
N12 G02 X98.882 Y11.758
I-15 J0
N13 G01 X55 Y0
N14 G01 X15
N15 G02 X0 Y15
I0 J15
N16 G40 X-30 Y-30, Cancel of compensation; feed to (X-30, Y-30)
N17 G00 Z100 M30, Rapid move to Z100; programme end
Other Functions
97. Modern CNC systems have some specially designed functions
to simplify the manual programming. However, since most of
these functions are system oriented, it is not intended to
discuss them here in detail. The following paragraphs give a
brief description of commonly used functions in modern CNC
systems. The user should refer to the programming manuals
of the machine for the detail programming and operation.
Mirror Image
This is the function that converts the programmed path to its
mirror image, which is identical in dimensions but
geometrically opposite about one or two axes.
Programme Repetition and Looping
In actual machining, it is not always possible to machine to
the final dimension in one go. This function enables the
looping of a portion of the programme so that the portion can
be executed repeatedly.
Pocketing Cycle
Pocketing is a common process in machining. This is to
excavate the material within a boundary normally in zigzag
path and layer by layer. In a pocketing cycle, the pattern of
cutting is pre-determined. The user is required to input
parameters including the length, width and depth of the
pocket, tool path spacing, and layer depth. The CNC system
will then automatically work out the tool path.
Drilling, Boring, Reaming and Tapping Cycle
This is similar to pocketing cycle. In this function, the drilling
pattern is pre-determined by the CNC system. What the user
has to do is to input the required parameters such as the total
depth of the hole, the down feed depth, the relief height and
the dwell time at the bottom of the hole.
98. Ex. No: 1a MULTIPLE TURNING
OPERATION
AIM:
To write, simulate and execute a CNC program for
the job of given dimensions as shown in the figure
using semi production lathe.
PROCEDURE:
-Initially draw the rough diagram with required
dimensions. ( 30x90mm)ɸ
-Write a CNC program with preparatory and
miscellaneous codes
-Provide proper tolerances to protect the tool
-Select appropriate tool
-Enter the program using software
-Simulation of tool path
-Do manual setting
-Enable work piece reference and carry out
machining
102. ALL DIMENSIONS ARE IN mm
Ex. No: 1b DRILLING AND BORING
AIM:
To write, simulate and execute a CNC program for
the job of given dimensions as shown in the figure using
semi production lathe.
PROCEDURE:
-Initially draw the rough diagram with required
dimensions ( 30x90mm)ɸ
-Write a CNC program with preparatory and
miscellaneous codes
-Provide proper tolerances to protect the tool
-Select appropriate tool
-Enter the program using software
-Simulation of tool path
-Do manual setting
-Enable work piece reference and carry out
machining
PROGRAM
103. RESULT:
Verify the tool path generation and actual
dimensions obtained.
TAPER TURNING
ALL DIMENSIONS ARE IN mm
104. Ex.No:1c TAPER TURNING
AIM:
To write, simulate and execute a CNC program
for the job of given dimensions as shown in the figure
using semi production lathe.
PROCEDURE:
-Initially draw the rough diagram with required
dimensions ( 30x90mm)ɸ
-Write a CNC program with preparatory and
miscellaneous codes
-Provide proper tolerances to protect the tool
-Select appropriate tool
-Enter the program using software
-Simulation of tool path
-Do manual setting
-Enable work piece reference and carry out
machining
PROGRAM
105. RESULT:
Verify the tool path generation and actual
dimensions obtained.
THREAD CUTTING OPERATION
106. ALL DIMENSIONS ARE IN mm
Ex. No: 1d THREAD CUTTING
AIM:
To write, simulate and execute a CNC program for
the job of given dimensions as shown in the figure using
semi production lathe.
PROCEDURE:
-Initially draw the rough diagram with required
dimensions ( 30x90mm)ɸ
-Write a CNC program with preparatory and
miscellaneous codes
-Provide proper tolerances to protect the tool
-Select appropriate tool
-Enter the program using software
-Simulation of tool path
-Do manual setting
-Enable work piece reference and carry out
machining
PROGRAM
107. RESULT:
Verify the tool path generation and actual
dimensions obtained
Ex.No: 2 MANUAL PART PROGRAMMING IN CNC
MILLING
Directives
[BILLET - Define Billet Size
[EDGE MOVE - Offset from the program zero to the
lower left corner of the billet
[TOOL DEF - Define diameter and length of a tool
[STEP - Step by step execution of program
[NO STEP - Cancel step by step execution of
[SHOW - Show the operation being
simulated
[NO SHOW - Stop the operation being simulated
[TUTORIAL - To display user interactive message at
the bottom
[CLEAR - It will clear the interactive message
display
General Notations
X X Coordinate value
108. Y Y
Coordinate
value
Z Z
Coordinate
value
T Tool Number
F Feed rate
S Spindle speed
R Radius of arc
Functions
Function Operation
G00 Positioning (Rapid traverse)
G01 Linear interpolation (Cutting feed)
G02 Circular interpolation /Helical CW
G03 Circular interpolation/Helical CCW
G04 Dwell Exact stop
G20 Imperial units (inches)
G21 Metric units (mm)
G28 Return to reference point
G40 Tool radius compensation cancel
G41 Left hand radius compensation
G42 Right hand radius compensation
G49 Tool length compensation cancel
G90 Absolute command
G91 Incremental command
G92 Set datum
G94 Feed per minute
G95 Feed per rotation
G170-G171 Circular Pocketing
G172-G173 Rectangular Pocketing
M Functions
Function Operation
M00 Program Stop
M02 Program End
M03 Spindle Forward
M04 Spindle Reverse
M05 Spindle Stop
109. M06 Tool Change
M70 X Mirror on
M71 Y Mirror on
M80 X Mirror Off
M81 Y Mirror Off
M98 Subprogram Call
M99 Subprogram Exit
LINEAR, CIRCULAR INTERPOLATION (MILLING)
110. ALL DIMENSIONS ARE IN mm
Ex.No: 2a LINEAR, CIRCULAR INTERPOLATION
(MILLING)
AIM
To write, simulate and execute a CNC milling program
for the job of given dimensions as shown in the figure using
semi production milling machine.
PROCEDURE
-Identify the required coordinates of the profile based
on profile origin.
-Provide proper tolerances to protect the tool
-Select appropriate tool, speed, feed rate for the
operations
-Write the NC program using appropriate Preparatory
and miscellaneous codes.
-Enter the program
-Analyze the program
-Ensure the program should be free from errors using
check syntax and dry run
-Simulate the program
-Do manual setting carefully
-Carry out machining
PROGRAM
111. RESULT
The dimensions of machined part are verified
with drawing.
MIRRORING OPERATION IN CNC MILLING
112. ALL DIMENSIONS ARE IN mm
Ex. No: 2b MIRRORING
AIM
To write, simulate and execute a CNC milling program
for the job of given dimensions as shown in the figure using
semi production milling machine.
PROCEDURE
-Identify the required coordinates of the profile based
on profile origin.
-Provide proper tolerances to protect the tool
113. -Select appropriate tool, speed, feed rate for the
operations
-Write the NC program using appropriate Preparatory
and miscellaneous codes.
-Enter the program
-Analyze the program
-Ensure the program should be free from errors using
check syntax and dry run
-Simulate the program
-Do manual setting carefully
-Carry out machining
PROGRAM
RESULT
The dimensions of machined part are verified
with drawing.
115. To write, simulate and execute a CNC milling program
for the job of given dimensions as shown in the figure using
semi production milling machine.
PROCEDURE
-Identify the required coordinates of the profile based
on profile origin.
-Provide proper tolerances to protect the tool
-Select appropriate tool, speed, feed rate for the
operations
-Write the NC program using appropriate Preparatory
and miscellaneous codes.
-Enter the program
-Analyze the program
-Ensure the program should be free from errors using
check syntax and dry run
-Simulate the program
-Do manual setting carefully
-Carry out machining
PROGRAM
RESULT
The dimensions of machined part are verified
with drawing.
117. Ex.No: 2d DRILLING
AIM
To write, simulate and execute a CNC milling program
for the job of given dimensions as shown in the figure using
semi production milling machine.
PROCEDURE
-Identify the required coordinates of the profile based
on profile origin.
-Provide proper tolerances to protect the tool
-Select appropriate tool, speed, feed rate for the
operations
-Write the NC program using appropriate Preparatory
and miscellaneous codes.
-Enter the program
-Analyze the program
-Ensure the program should be free from errors using
check syntax and dry run
-Simulate the program
-Do manual setting carefully
-Carry out machining
PROGRAM
RESULT
118. The dimensions of machined part are verified
with drawing.
Ex.No: 3a Computer Aided Part
Programming
(CL Data and Post process generation using
CAM packages)
Edge CAM
Computer aided part programming computer is used to
generate the part program to machine the component.
Edgecam is a market leading computer aided manufacturing
(CAM) software system for NC part programming. With
unparalleled ease of use and sophisticated tool path
generation, it's the CAM system that will need for milling,
turning and mill-turn machining.
CAM Program to Edgecam Workflow
NEW PRODUCT DEVELOPMENT (NPD) IN CNC
MACHINING:
1. STUDY OF DRAWING
2. PROCESS PLANNING
119. 3. FIXTURE DESIGN
4. TOOL SELECTION
5. SEQUENCE OF OPERATIONS
6. NC CODE GENERATION
7. CNC MACHINING
8. INSPECTION
9. DELIVERY
Advanced CADCAM Software Solutions for the
Manufacturing Industry:
With Edgecam Solid Machinist, the integrity of design is
maintained because the solid model is imported without
translation. Edgecam Solid Machinist uses automatic feature
recognition to interrogate the model geometry and quickly
identify machinable features.
STEPS INVOLVED IN GENERATION OF NC PART
PROGRAMMING:
Exercise: Face Milling Operation in CNC Milling Operation
120. Step 1: Create 2D Design in Edgecam
Select Radius arc in the Design toolbar in Setup tab.
121. Step 2: Enter Radius value (50) and Position value (0,0,0).
Step 3: Enter Radius value (15) and Position value ( 0,0,0).
Step 4: Double click the circle and divide the circle into 3.
Step 5: Enter Radius value (5) and click on three end points.
Step 6: Select Line dialog box in Geometry.
122. Step 7: Enable Tangent to Tangent
Step 8: Select the two circles for single tangent line. Repeat
this for other five places.
Step 9: Select the Trim Both option in the Edit Toolbar.
Step 10: Select the required portion of the smaller circle and
the tangent line. Repeat this step for rest of the circles.
Step 11: Select the Radius Arc in the Design Toolbar.
Step 12: Enter the Radius value (60) and pick the Origin as
Centre.
Face Milling Operation in Edgecam
Step 1: Select the Face Milling in Mill Operation Menu bar in
Machining tab.
Various parameters in the General tab of Face Milling
Operation.
123. Step 2: Select tool and its various parameters from the
appropriate menu. Provide cutting parameters like feed, speed
and depth of cut in the menu. Generate the tool path for Face
milling operation.
124. Step 3: Click Simulate Machining icon.
Click the Start button to start the simulation. Record the
Simulation using the option Capture frame to an AVI
animation as shown.
Final Step: NC Code Generation
125. Click the Generate Code Icon to generate the NC codes for the
operations.
In the Generate CNC Code Window give a Name and Browse
for the file where the NC file has to saved. Click OK to view
the NC Codes. view the NC codes in the Editor Window.
126. Ex.No: 3b Computer Aided Part Programming
Application of CAPP in Machining and Turning Centre
AIM
To generate, simulate and execute a CNC program for the
job of given dimensions as shown in the figure using Edge
Cam Software.
PROCEDURE
- Create 2D Design in Edgecam in Design tool bar
with appropriate dimensions as mentioned in the
diagram.
- Create Stock in Edgecam module. Select proper tool
and fixture in Design tool bar
- Incase of milling operation, select create milling
sequence from the menu bar
- Hide the machine display icon once select the
machine.
- Select the profiling in operation menu bar
- Select the mill type (upmilling or down milling)
- Select the tool tap. Give feed rate, depth of cut,
position of the tool in the machine.
- Select the simulate machining option to start the
simulation.
- Select the generate code to generate the NC code.
PROGRAM
127.
128. Computer Aided Part Programming
Generate NC part programming
ALL DIMENSIONS ARE IN mm
128
129. RESULT
The NC part programming is generated and coded into
the CNC milling machine. The dimension of machined part is
129
130. verified with drawing.
VIVA-VOCE QUESTIONS
1. What is flange coupling?
2. What is use of protected type flange coupling?
3. List out some of the modeling software currently available?
4. What is universal coupling?
5. What are the parts of universal coupling?
6. What is coupling?
7. What are the types of couplings?
8. What is knuckle joint?
9. What are the applications of knuckle joint?
10. What is a screw jack?
11. What are the applications of CAD?
12. Define absolute co-ordinates?
13. Define polar co ordinates.
14. Define angular dimension?
15. Define aligned dimension?
16. Define MIRROR?
17. What are the advantages of CAD?
18. What is the default position of the UCS icon
19. How can you create a cylinder by drawing a rectangular
shape
20. Which information does the MASSPROP shortcut provide
21. Where did the dimension text is generally placed
22. Which dimension tool will place the length of an angled
line.
23. Which tolerance identify the maximum and minimum
sizes of a feature
24. A typical set of mechanical working drawings includes
25. The text used on a typical detail sheet should be ________.
26. Which primary unit of measurement is used for
engineering drawings and design in the mechanical industries
27. What are the two main types of projection
28. What is the application of Screw jack?
29. What are the constraints available for assembly?
30. What is the use of shell command?
130
131. 31. What is the use of RIB command?
32. What is the extension Creo Parametric file?
33.What are the difference between CAD and CAM?
34. How to use Revolve command in SOLIDWORKS?
35. What are the important modeling operation?
36. Explain about G codes?
37. Mention few important G codes?
38. What is the use M codes?
39. Write about some important M codes?
40. What is the use of box facing cycle?
41. State the Geometric characteristics symbols
42. Symbols for indicating surface text element of a screw
thread?
43. Basic profiles of forms of screw thread?
44. State the Types of threads.
45. State the Bolts & Nuts.
46. State the Chamfering & Fillet
47. What are the empirical proportions of Hexagon & screw
head
48. State the Types of Bolts.
49. State the Types of nuts.
50. State the Tolerances, fit, limits.
131