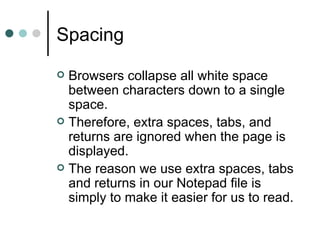
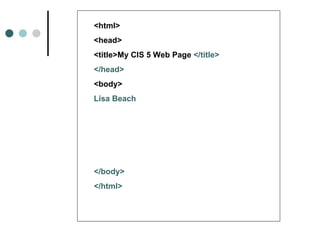
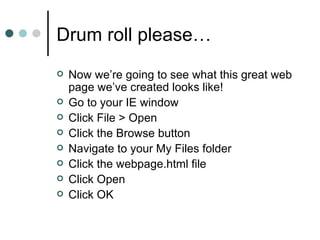
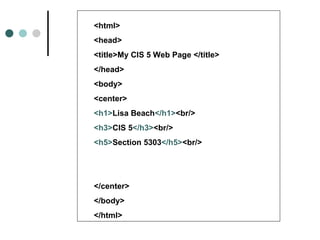
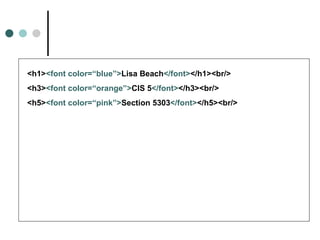
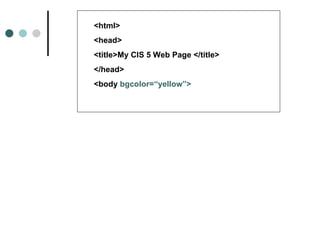
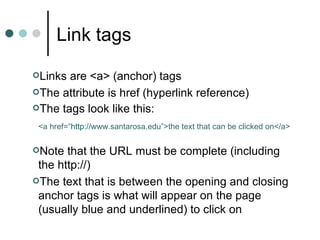
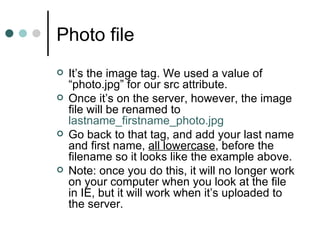
Web page
Assignment
CIS 5 Online
By following these steps exactly you will be
able to create a simple web page that will
satisfy the requirements for CIS 5 online.

You CANNOT use a web page generator
program (Dreamweaver, GoLive, etc.) to
complete this assignment. I will know if you
do! No points will be given to such a
submission.

Do NOT copy and paste from this PowerPoint
file.

If you have any questions, be sure to post
them to the class message board.
Leave this window open while you’re
working, then open and re-size other
windows as directed.

I recommend you close all other
windows before you begin.

When I need you to type something, you
will see it displayed in teal.
Photo requirement
   To complete this assignment, you will need a
    digital photo of yourself.
   You can use a digital camera or scan a printed
    photo you have (the labs have scanners and the
    assistants can help you with this.)
   Name the file “photo.jpg” and save it in your My
    Files folder (this is important!)
   Please make sure the file size of your photo is
    less than 500 KB. If you’re not sure how to make
    your file smaller, either post the question to the
    message board or ask a lab assistant on campus
    to help you.
   Your classmates will see this photo, so choose a
    good one!
First, open Notepad

 Click Start
 Point to All Programs

 Point to Accessories

 Click on Notepad
Open Internet Explorer

 Even if you usually use a different
  browser, it will be helpful for the sake
  of simplicity if you use this browser.
 Once you open an IE window, you
  should have three windows open:
     PowerPoint
     Notepad
     IE
Go to Notepad

   As we switch between windows, use
    the tabs in your taskbar (bottom of
    your screen) to go from one program
    to another.
Add the four basic HTML tags

             “Tags” are the codes that are used to create web
              pages.
             Tags always go between “brackets” like this: <html>
             When we put these tags (along with plain text) in a
              file, the browser then interprets them to give us
              colors, sizes, lines, etc. and shows them to us as
              web pages.
             Use the next screen as your example, and type the
              tags exactly as you see them in your Notepad file.
             Remember, HTML is a precise language and will
              not tolerate spelling or punctuation errors!


   Note: because XHTML prefers it, all tags should be entered in lowercase.
<html>
<head>
<title>
<body>
Why…
   <html> tells the browser that what follows is written in
    the HTML language
   <head> is the signal that what appears in this area is
    information for the browser and search engines, not to
    be displayed.
   <title> is the area that contains the name of the web
    page. This name will appear in the title bar of the
    window when the page is opened, in the “Favorites” or
    “Bookmarks” list if the page is book-marked, and in the
    title area of a “hit” in a search engine list.
   <body> is the area to put anything that you actually
    want to have displayed on the web page.
Save the file

 File > Save
 Name the file webpage.html (no
  spaces)
 You MUST add the .html extension,
  as indicated, to your filename
 Save the file in you’re My Files folder
Add a title

 After the <title> tag, type
  My CIS 5 Web Page
 Save the file
Closing tags
   Nearly every HTML command has both an
    opening and closing tag. There are a few
    exceptions, but for the most part, each time
    we “open” a tag, we will need to “close” it.
    We do this by adding a similar tag that
    begins with a / . For example, the tag to
    close the <html> command is </html>.
   Opening and closing tags surround the
    characters that they apply to.
   Use the next page to close the tags we
    have opened so far.
<html>
<head>
<title>My CIS 5 Web Page </title>
</head>
<body>


</body>
</html>
Nesting tags
   Notice that tags are “nested” and not
    “crossed”. Therefore:

    <b><i>These tags are crossed</b></i>

    is wrong and

    <b><i>These tags are nested</i></b>

    is correct.
Spacing
 Browsers collapse all white space
  between characters down to a single
  space.
 Therefore, extra spaces, tabs, and
  returns are ignored when the page is
  displayed.
 The reason we use extra spaces, tabs
  and returns in our Notepad file is
  simply to make it easier for us to read.
Add your name

 Use the following screen to put your
  name in the body of the web page
 Make sure it’s your name, and not
  mine!
 Save the file
<html>
<head>
<title>My CIS 5 Web Page </title>
</head>
<body>
Lisa Beach


</body>
</html>
Drum roll please…
   Now we’re going to see what this great web
    page we’ve created looks like!
   Go to your IE window
   Click File > Open
   Click the Browse button
   Navigate to your My Files folder
   Click the webpage.html file
   Click Open
   Click OK
Are we impressed?

 I know, it’s pretty boring so far, but
  isn’t it cool that you’ve created a web
  page from scratch?
 Now we’ll make it more exciting…
Centering plus
 Add a tag that will center your text.
 Before your name, add a <center>
  tag.
 After your name add
  CIS 5
  Section ????
  (replace the ?s with your section #)
 Before the closing body tag, close the
  center tag.
<html>
<head>
<title>My CIS 5 Web Page </title>
</head>
<body>
<center>
Lisa Beach
CIS 5
Section 5303


</center>
</body>
</html>
Seeing the changes
   Each time you want to see how your
    changes to your html file affect the way the
    page looks in the browser, you need to do
    two things:
       Save the Notepad file (File > Save)
       Refresh the IE screen
        (you can either choose Refresh from the
        View menu, or click the Refresh button on
        the toolbar)
   Do this now!
Not what you expected?
   Maybe you expected the text to be on 3 lines, like
    it is in our Notepad file.
   Remember what I said about spaces (see slide
    #16)
   If we want to have the text on 3 lines (and we do!)
    we’ll need to use either break or paragraph tags
   The break tag <br/> is one of those exceptions to
    the closing tag rule. It is what is called “self
    closing,” so the / is included in the opening tag.
   Use the following screen to add line breaks to our
    text.
<html>
<head>
<title>My CIS 5 Web Page </title>
</head>
<body>
<center>
Lisa Beach<br/>
CIS 5<br/>
Section 5303<br/>


</center>
</body>
</html>
Save and refresh

 Check out the difference in your IE
  window. Look better now?
 Feel free to add more break tags
  anywhere you want to make things
  look better.
 Now let’s make the page a little
  snazzier by using heading tags.
Headings
   Heading tags are used to make text more or less
    “important” in a document.
   Visually, heading tags make text larger, bolder,
    etc.
   There are six levels of headings: <h1> to <h6> ,
    with <h1> being the most “important” or largest.
   You will need to use three different heading tags
    for your text. You can choose which ones you like
    best, just make sure they are not all the same.
   Be sure to close your heading tags!
<html>
<head>
<title>My CIS 5 Web Page </title>
</head>
<body>
<center>
<h1>Lisa Beach</h1><br/>
<h3>CIS 5</h3><br/>
<h5>Section 5303</h5><br/>


</center>
</body>
</html>
Save and refresh

 If you’d like to make things easier, you
  can re-size your Notepad and IE
  windows so that they are open side by
  side.
 Now when you make a change, Save
  in Notepad, then click the refresh
  button in IE – no need to use the
  taskbar to switch between windows.
Color
   Now for the fun stuff… adding color!
   Not every color in the rainbow can be displayed on a web
    page.
    Colors can be named either with words (“orange”) or
    with 6-digit codes called hexidecimal codes.
   Color is added to text by adding a <font> tag
   The word “color” then becomes an “attribute” to the font
    tag
   The name of the color becomes a “value” of the attribute.
   Values are always enclosed with quotes.
   It ends up looking like this:
                <font color=“blue”>

     Tag                           value
    name    attribute
Add color to our text
   Use the next screen to add font tags with
    color attributes to our three lines of text.
   Remember to both open and close the color
    tags.
   The three lines should end up being three
    different colors.
   Remember to “nest” your tags correctly.
   NOTE: As the sample file gets larger and
    more complex, I will show you only the part
    that we are currently working on.
<h1><font color=“blue”>Lisa Beach</font></h1><br/>
<h3><font color=“orange”>CIS 5</font></h3><br/>
<h5><font color=“pink”>Section 5303</font></h5><br/>
Save and refresh
 Like the colors?
 Be sure to experiment with different
  names.
 Want a complete list of names?
 http://www.w3schools.com/html/html_colorn
 You might be surprised by how many
  there are!
Background color

 We’ll add an attribute to the <body>
  tag that will change the background
  color of our page.
 It will look like this:
  <body bgcolor=“yellow”>
<html>
<head>
<title>My CIS 5 Web Page </title>
</head>
<body bgcolor=“yellow”>
Clashing colors
 Now that you’ve added a background
  color, you may want to rethink your
  text colors (or vice versa). Play with
  different combinations until you find
  one you like.
 Remember to be nice to your readers.
  Red text on a black background, for
  instance, may look cool, but it’s hard
  on the eyes!
Adding your picture
   For this next part, you will need a digital
    picture of yourself (read slide #4 again if
    you missed it.)
   The file must be named photo.jpg, and it
    must be saved in the My Files folder (or
    wherever you have saved your Notepad
    file.)
   We will use an image tag to “point” to the
    photo, with an “src” attribute to tell the
    browser what it’s called and where to find it.
   Use a few breaks <br/> to set it off from the
    text.
<h1><font color=“blue”>Lisa Beach</font></h1><br/>
<h3><font color=“orange”>CIS 5</font></h3><br/>
<h5><font color=“pink”>Section 5303</font></h5><br/>
<br/>
<img src=“photo.jpg” /> <br/>
<br/>
Save and refresh
   Did it work? If not, check to make sure that
    the file is actually called photo.jpg and is
    saved in the same folder that your Notepad
    file is saved in.
   Photo too big or too small? You can add a
    width attribute to the img tag to change the
    size on the page. Just note that in the real
    world, a web page designer would change
    the actual dimensions of the image using
    photo editing software, rather than changing
    the size here.
<h1><font color=“blue”>Lisa Beach</font></h1><br/>
<h3><font color=“orange”>CIS 5</font></h3><br/>
<h5><font color=“pink”>Section 5303</font></h5><br/>
<br/>
<img src=“photo.jpg” width=“100” /> <br/>
<br/>
Image tag notes
   The img tag is self-closing, so you’ll need
    the / at the end and no closing tag.
   The location of the image here is “relative”
    meaning if you don’t tell the browser
    otherwise, it will look only in the same folder
    the html file is located in. If you needed to,
    you could add the complete path for the
    filename so it would look elsewhere.
   The width value is in pixels (remember
    those?) So a value of 100 is 100 pixels. You
    may want to play with this value until the
    image size is what you want.
Horizontal rule
   The next element we’ll add to our page is
    called a horizontal rule. That’s just a fancy
    way of saying a straight line across the page.
   The tag is <hr/> (self-closing)
   The attributes we will use are width, size,
    noshade and color.
      The width value can be either in pixels (i.e.
       “200”) or in percentage of the actual page
       width (i.e. “75%).
      The size (height) value is in pixels.
      The noshade attribute removes the shadow.
      All values must be in “ ” s!
<h1><font color=“blue”>Lisa Beach</font></h1><br/>
<h3><font color=“orange”>CIS 5</font></h3><br/>
<h5><font color=“pink”>Section 5303</font></h5><br/>
<br/>
<img src=“photo.jpg” width=“100” /> <br/>
<br/>
<hr width=“75%” size=“15” noshade=“noshade” color=“turquoise” />
<br/>
Links
   The last two elements we’ll add are hyperlinks.
   Hyperlinks are the things you click on that take you
    somewhere else.
   There are 4 types of links:
      Internal: takes you to somewhere within the website
      External: takes you to somewhere else on the web
      Jump: takes you to a different place on the same
       page
      Email: opens your email software and adds an
       address to the To: line
   We’ll add an external and an email link
Link tags
Links are <a> (anchor) tags
The attribute is href (hyperlink reference)
The tags look like this:

 <a href=“http://www.santarosa.edu”>the text that can be clicked on</a>

Note  that the URL must be complete (including
 the http://)
The text that is between the opening and closing
 anchor tags is what will appear on the page
 (usually blue and underlined) to click on
Your external link

 Link us to one of your favorite
  websites
 Use the text to tell us why it is a
  favorite
<img src=“photo.jpg” width=“100” /> <br/>
<br/>
<hr width=“75%” size=“15” noshade=“noshade” color=“turquoise” />
<br/>
<a href=“http://www.snopes.com/”> I always check this site when I get
one of those emails from a well-meaning friend telling me I should be in
a panic about something. When it turns out not to be true (most of the
time!) I send back the link to this site. </a>
<br/>


In this case, the whole paragraph of text is the link.
Alternatively…
<img src=“photo.jpg” width=“100” /> <br/>
<br/>
<hr width=“75%” size=“15” noshade=“noshade” color=“turquoise” />
<br/>
I always check <a href=“http://www.snopes.com/”> this site </a> when I
get one of those emails from a well-meaning friend telling me I should
be in a panic about something. When it turns out to not be true (most of
the time) I send back the link to this site.
<br/>


In this case, just the words “this site” are the link.
Save and refresh

 Try the link in IE.
 Didn’t work? This is a long tag. Go
  back and check that you haven’t
  misspelled anything, left out quotes,
  added or left out any punctuation, etc.
Email link
   The format for an email link is similar to an
    external link.
    <a href=“mailto:youremailaddress@isp.net”>Email me!</a>

   In this case, your actual email address goes in
    the quotes.
   Use whatever text you prefer between the
    anchor tags
   This link will NOT work on campus computers,
    because they are not set up for individual email
    software.
<br/>
I always check <a href=“http://www.snopes.com/”> this site </a> when I
get one of those emails from a well-meaning friend telling me I should
be in a panic about something. When it turns out to not be true (most of
the time) I send back the link to this site.
<br/><br/>
<a href=“mailto:beachtch@pacbell.net”> Email me! </a>
</center>
</body>
</html>
Un-center

   Move the closing center tag so that
    the two hyperlinks are no longer
    centered
Tweaking

   Go back and change any colors,
    sizes, spacing, etc. until you’re
    pleased with the look of your page.
Extra credit
   For 5 extra credit points, use the link from
    the color section to find the hexidecimal (6-
    digit) codes for your colors and replace your
    color names with these.
   Be sure you put the # in front of the 6-digit
    code to identify it as a hexidecimal color
    code (i.e. color=“#999CCC”)
Last look

   Take a last look at the page in IE and
    make sure everything looks good and
    is working correctly.
Before we upload

 We will need to change one thing
  before we upload the file to the CATE
  server.
 When you upload files, the server
  automatically adds your
  lastname_firstname to the beginning
  of the filename.
 Any idea what this will mess up???
Photo file
   It’s the image tag. We used a value of
    “photo.jpg” for our src attribute.
   Once it’s on the server, however, the image
    file will be renamed to
    lastname_firstname_photo.jpg
   Go back to that tag, and add your last name
    and first name, all lowercase, before the
    filename so it looks like the example above.
   Note: once you do this, it will no longer work
    on your computer when you look at the file
    in IE, but it will work when it’s uploaded to
    the server.
Case note
   Once it’s on the server, all filenames will be
    case sensitive.
   Therefore, if your image file is called
    photo.JPG, or Photo.jpg
    you must make sure that you call it that in
    the img tag. You must match exactly the
    case of the filename in the tag.
   Even though IE may have ignored a case
    difference, the server will not!
<h1><font color=“blue”>Lisa Beach</font></h1><br/>
<h3><font color=“orange”>CIS 5</font></h3><br/>
<h5><font color=“pink”>Section 5303</font></h5><br/>
<br/>
<img src=“beach_lisa_photo.jpg” width=“100” /> <br/>
<br/>
<hr width=“75%” size=“15” noshade=“noshade” color=“turquoise” />
<br/>
Upload your files

 Use the link on the schedule to upload
  both your html and jpg files.
 Use the same link to view the web
  pages created by the other students.
 Post a message to the message
  board if you have any difficulties or
  questions about this assignment.
You’re Done!

Web pageassignment

  • 1.
  • 2.
    By following thesesteps exactly you will be able to create a simple web page that will satisfy the requirements for CIS 5 online. You CANNOT use a web page generator program (Dreamweaver, GoLive, etc.) to complete this assignment. I will know if you do! No points will be given to such a submission. Do NOT copy and paste from this PowerPoint file. If you have any questions, be sure to post them to the class message board.
  • 3.
    Leave this windowopen while you’re working, then open and re-size other windows as directed. I recommend you close all other windows before you begin. When I need you to type something, you will see it displayed in teal.
  • 4.
    Photo requirement  To complete this assignment, you will need a digital photo of yourself.  You can use a digital camera or scan a printed photo you have (the labs have scanners and the assistants can help you with this.)  Name the file “photo.jpg” and save it in your My Files folder (this is important!)  Please make sure the file size of your photo is less than 500 KB. If you’re not sure how to make your file smaller, either post the question to the message board or ask a lab assistant on campus to help you.  Your classmates will see this photo, so choose a good one!
  • 5.
    First, open Notepad Click Start  Point to All Programs  Point to Accessories  Click on Notepad
  • 6.
    Open Internet Explorer Even if you usually use a different browser, it will be helpful for the sake of simplicity if you use this browser.  Once you open an IE window, you should have three windows open:  PowerPoint  Notepad  IE
  • 7.
    Go to Notepad  As we switch between windows, use the tabs in your taskbar (bottom of your screen) to go from one program to another.
  • 8.
    Add the fourbasic HTML tags  “Tags” are the codes that are used to create web pages.  Tags always go between “brackets” like this: <html>  When we put these tags (along with plain text) in a file, the browser then interprets them to give us colors, sizes, lines, etc. and shows them to us as web pages.  Use the next screen as your example, and type the tags exactly as you see them in your Notepad file.  Remember, HTML is a precise language and will not tolerate spelling or punctuation errors!  Note: because XHTML prefers it, all tags should be entered in lowercase.
  • 9.
  • 10.
    Why…  <html> tells the browser that what follows is written in the HTML language  <head> is the signal that what appears in this area is information for the browser and search engines, not to be displayed.  <title> is the area that contains the name of the web page. This name will appear in the title bar of the window when the page is opened, in the “Favorites” or “Bookmarks” list if the page is book-marked, and in the title area of a “hit” in a search engine list.  <body> is the area to put anything that you actually want to have displayed on the web page.
  • 11.
    Save the file File > Save  Name the file webpage.html (no spaces)  You MUST add the .html extension, as indicated, to your filename  Save the file in you’re My Files folder
  • 12.
    Add a title After the <title> tag, type My CIS 5 Web Page  Save the file
  • 13.
    Closing tags  Nearly every HTML command has both an opening and closing tag. There are a few exceptions, but for the most part, each time we “open” a tag, we will need to “close” it. We do this by adding a similar tag that begins with a / . For example, the tag to close the <html> command is </html>.  Opening and closing tags surround the characters that they apply to.  Use the next page to close the tags we have opened so far.
  • 14.
    <html> <head> <title>My CIS 5Web Page </title> </head> <body> </body> </html>
  • 15.
    Nesting tags  Notice that tags are “nested” and not “crossed”. Therefore: <b><i>These tags are crossed</b></i> is wrong and <b><i>These tags are nested</i></b> is correct.
  • 16.
    Spacing  Browsers collapseall white space between characters down to a single space.  Therefore, extra spaces, tabs, and returns are ignored when the page is displayed.  The reason we use extra spaces, tabs and returns in our Notepad file is simply to make it easier for us to read.
  • 17.
    Add your name Use the following screen to put your name in the body of the web page  Make sure it’s your name, and not mine!  Save the file
  • 18.
    <html> <head> <title>My CIS 5Web Page </title> </head> <body> Lisa Beach </body> </html>
  • 19.
    Drum roll please…  Now we’re going to see what this great web page we’ve created looks like!  Go to your IE window  Click File > Open  Click the Browse button  Navigate to your My Files folder  Click the webpage.html file  Click Open  Click OK
  • 20.
    Are we impressed? I know, it’s pretty boring so far, but isn’t it cool that you’ve created a web page from scratch?  Now we’ll make it more exciting…
  • 21.
    Centering plus  Adda tag that will center your text.  Before your name, add a <center> tag.  After your name add CIS 5 Section ???? (replace the ?s with your section #)  Before the closing body tag, close the center tag.
  • 22.
    <html> <head> <title>My CIS 5Web Page </title> </head> <body> <center> Lisa Beach CIS 5 Section 5303 </center> </body> </html>
  • 23.
    Seeing the changes  Each time you want to see how your changes to your html file affect the way the page looks in the browser, you need to do two things:  Save the Notepad file (File > Save)  Refresh the IE screen (you can either choose Refresh from the View menu, or click the Refresh button on the toolbar)  Do this now!
  • 24.
    Not what youexpected?  Maybe you expected the text to be on 3 lines, like it is in our Notepad file.  Remember what I said about spaces (see slide #16)  If we want to have the text on 3 lines (and we do!) we’ll need to use either break or paragraph tags  The break tag <br/> is one of those exceptions to the closing tag rule. It is what is called “self closing,” so the / is included in the opening tag.  Use the following screen to add line breaks to our text.
  • 25.
    <html> <head> <title>My CIS 5Web Page </title> </head> <body> <center> Lisa Beach<br/> CIS 5<br/> Section 5303<br/> </center> </body> </html>
  • 26.
    Save and refresh Check out the difference in your IE window. Look better now?  Feel free to add more break tags anywhere you want to make things look better.  Now let’s make the page a little snazzier by using heading tags.
  • 27.
    Headings  Heading tags are used to make text more or less “important” in a document.  Visually, heading tags make text larger, bolder, etc.  There are six levels of headings: <h1> to <h6> , with <h1> being the most “important” or largest.  You will need to use three different heading tags for your text. You can choose which ones you like best, just make sure they are not all the same.  Be sure to close your heading tags!
  • 28.
    <html> <head> <title>My CIS 5Web Page </title> </head> <body> <center> <h1>Lisa Beach</h1><br/> <h3>CIS 5</h3><br/> <h5>Section 5303</h5><br/> </center> </body> </html>
  • 29.
    Save and refresh If you’d like to make things easier, you can re-size your Notepad and IE windows so that they are open side by side.  Now when you make a change, Save in Notepad, then click the refresh button in IE – no need to use the taskbar to switch between windows.
  • 30.
    Color  Now for the fun stuff… adding color!  Not every color in the rainbow can be displayed on a web page.  Colors can be named either with words (“orange”) or with 6-digit codes called hexidecimal codes.  Color is added to text by adding a <font> tag  The word “color” then becomes an “attribute” to the font tag  The name of the color becomes a “value” of the attribute.  Values are always enclosed with quotes.  It ends up looking like this: <font color=“blue”> Tag value name attribute
  • 31.
    Add color toour text  Use the next screen to add font tags with color attributes to our three lines of text.  Remember to both open and close the color tags.  The three lines should end up being three different colors.  Remember to “nest” your tags correctly.  NOTE: As the sample file gets larger and more complex, I will show you only the part that we are currently working on.
  • 32.
    <h1><font color=“blue”>Lisa Beach</font></h1><br/> <h3><fontcolor=“orange”>CIS 5</font></h3><br/> <h5><font color=“pink”>Section 5303</font></h5><br/>
  • 33.
    Save and refresh Like the colors?  Be sure to experiment with different names.  Want a complete list of names?  http://www.w3schools.com/html/html_colorn  You might be surprised by how many there are!
  • 34.
    Background color  We’lladd an attribute to the <body> tag that will change the background color of our page.  It will look like this: <body bgcolor=“yellow”>
  • 35.
    <html> <head> <title>My CIS 5Web Page </title> </head> <body bgcolor=“yellow”>
  • 36.
    Clashing colors  Nowthat you’ve added a background color, you may want to rethink your text colors (or vice versa). Play with different combinations until you find one you like.  Remember to be nice to your readers. Red text on a black background, for instance, may look cool, but it’s hard on the eyes!
  • 37.
    Adding your picture  For this next part, you will need a digital picture of yourself (read slide #4 again if you missed it.)  The file must be named photo.jpg, and it must be saved in the My Files folder (or wherever you have saved your Notepad file.)  We will use an image tag to “point” to the photo, with an “src” attribute to tell the browser what it’s called and where to find it.  Use a few breaks <br/> to set it off from the text.
  • 38.
    <h1><font color=“blue”>Lisa Beach</font></h1><br/> <h3><fontcolor=“orange”>CIS 5</font></h3><br/> <h5><font color=“pink”>Section 5303</font></h5><br/> <br/> <img src=“photo.jpg” /> <br/> <br/>
  • 39.
    Save and refresh  Did it work? If not, check to make sure that the file is actually called photo.jpg and is saved in the same folder that your Notepad file is saved in.  Photo too big or too small? You can add a width attribute to the img tag to change the size on the page. Just note that in the real world, a web page designer would change the actual dimensions of the image using photo editing software, rather than changing the size here.
  • 40.
    <h1><font color=“blue”>Lisa Beach</font></h1><br/> <h3><fontcolor=“orange”>CIS 5</font></h3><br/> <h5><font color=“pink”>Section 5303</font></h5><br/> <br/> <img src=“photo.jpg” width=“100” /> <br/> <br/>
  • 41.
    Image tag notes  The img tag is self-closing, so you’ll need the / at the end and no closing tag.  The location of the image here is “relative” meaning if you don’t tell the browser otherwise, it will look only in the same folder the html file is located in. If you needed to, you could add the complete path for the filename so it would look elsewhere.  The width value is in pixels (remember those?) So a value of 100 is 100 pixels. You may want to play with this value until the image size is what you want.
  • 42.
    Horizontal rule  The next element we’ll add to our page is called a horizontal rule. That’s just a fancy way of saying a straight line across the page.  The tag is <hr/> (self-closing)  The attributes we will use are width, size, noshade and color.  The width value can be either in pixels (i.e. “200”) or in percentage of the actual page width (i.e. “75%).  The size (height) value is in pixels.  The noshade attribute removes the shadow.  All values must be in “ ” s!
  • 43.
    <h1><font color=“blue”>Lisa Beach</font></h1><br/> <h3><fontcolor=“orange”>CIS 5</font></h3><br/> <h5><font color=“pink”>Section 5303</font></h5><br/> <br/> <img src=“photo.jpg” width=“100” /> <br/> <br/> <hr width=“75%” size=“15” noshade=“noshade” color=“turquoise” /> <br/>
  • 44.
    Links  The last two elements we’ll add are hyperlinks.  Hyperlinks are the things you click on that take you somewhere else.  There are 4 types of links:  Internal: takes you to somewhere within the website  External: takes you to somewhere else on the web  Jump: takes you to a different place on the same page  Email: opens your email software and adds an address to the To: line  We’ll add an external and an email link
  • 45.
    Link tags Links are<a> (anchor) tags The attribute is href (hyperlink reference) The tags look like this: <a href=“http://www.santarosa.edu”>the text that can be clicked on</a> Note that the URL must be complete (including the http://) The text that is between the opening and closing anchor tags is what will appear on the page (usually blue and underlined) to click on
  • 46.
    Your external link Link us to one of your favorite websites  Use the text to tell us why it is a favorite
  • 47.
    <img src=“photo.jpg” width=“100”/> <br/> <br/> <hr width=“75%” size=“15” noshade=“noshade” color=“turquoise” /> <br/> <a href=“http://www.snopes.com/”> I always check this site when I get one of those emails from a well-meaning friend telling me I should be in a panic about something. When it turns out not to be true (most of the time!) I send back the link to this site. </a> <br/> In this case, the whole paragraph of text is the link.
  • 48.
    Alternatively… <img src=“photo.jpg” width=“100”/> <br/> <br/> <hr width=“75%” size=“15” noshade=“noshade” color=“turquoise” /> <br/> I always check <a href=“http://www.snopes.com/”> this site </a> when I get one of those emails from a well-meaning friend telling me I should be in a panic about something. When it turns out to not be true (most of the time) I send back the link to this site. <br/> In this case, just the words “this site” are the link.
  • 49.
    Save and refresh Try the link in IE.  Didn’t work? This is a long tag. Go back and check that you haven’t misspelled anything, left out quotes, added or left out any punctuation, etc.
  • 50.
    Email link  The format for an email link is similar to an external link. <a href=“mailto:youremailaddress@isp.net”>Email me!</a>  In this case, your actual email address goes in the quotes.  Use whatever text you prefer between the anchor tags  This link will NOT work on campus computers, because they are not set up for individual email software.
  • 51.
    <br/> I always check<a href=“http://www.snopes.com/”> this site </a> when I get one of those emails from a well-meaning friend telling me I should be in a panic about something. When it turns out to not be true (most of the time) I send back the link to this site. <br/><br/> <a href=“mailto:beachtch@pacbell.net”> Email me! </a> </center> </body> </html>
  • 52.
    Un-center  Move the closing center tag so that the two hyperlinks are no longer centered
  • 53.
    Tweaking  Go back and change any colors, sizes, spacing, etc. until you’re pleased with the look of your page.
  • 54.
    Extra credit  For 5 extra credit points, use the link from the color section to find the hexidecimal (6- digit) codes for your colors and replace your color names with these.  Be sure you put the # in front of the 6-digit code to identify it as a hexidecimal color code (i.e. color=“#999CCC”)
  • 55.
    Last look  Take a last look at the page in IE and make sure everything looks good and is working correctly.
  • 56.
    Before we upload We will need to change one thing before we upload the file to the CATE server.  When you upload files, the server automatically adds your lastname_firstname to the beginning of the filename.  Any idea what this will mess up???
  • 57.
    Photo file  It’s the image tag. We used a value of “photo.jpg” for our src attribute.  Once it’s on the server, however, the image file will be renamed to lastname_firstname_photo.jpg  Go back to that tag, and add your last name and first name, all lowercase, before the filename so it looks like the example above.  Note: once you do this, it will no longer work on your computer when you look at the file in IE, but it will work when it’s uploaded to the server.
  • 58.
    Case note  Once it’s on the server, all filenames will be case sensitive.  Therefore, if your image file is called photo.JPG, or Photo.jpg you must make sure that you call it that in the img tag. You must match exactly the case of the filename in the tag.  Even though IE may have ignored a case difference, the server will not!
  • 59.
    <h1><font color=“blue”>Lisa Beach</font></h1><br/> <h3><fontcolor=“orange”>CIS 5</font></h3><br/> <h5><font color=“pink”>Section 5303</font></h5><br/> <br/> <img src=“beach_lisa_photo.jpg” width=“100” /> <br/> <br/> <hr width=“75%” size=“15” noshade=“noshade” color=“turquoise” /> <br/>
  • 60.
    Upload your files Use the link on the schedule to upload both your html and jpg files.  Use the same link to view the web pages created by the other students.  Post a message to the message board if you have any difficulties or questions about this assignment.
  • 61.