Download to read offline
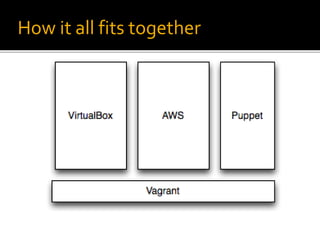


The document discusses virtualization for developers, focusing on creating encapsulated development environments using tools like Vagrant, VirtualBox, and Puppet. It outlines the benefits of virtualization, such as maintaining a clean host machine and facilitating easier onboarding. Additionally, it covers the steps needed to get started with these tools and provides essential commands and deployment options, including using Vagrant with AWS.


![Vagrant + Docker provider [+Puppet]](https://cdn.slidesharecdn.com/ss_thumbnails/npoggivagrant-docker-140725100147-phpapp02-thumbnail.jpg?width=640&height=640&fit=bounds)