The document discusses the process of importing video clips into Adobe Premiere Pro and editing them. It describes:
1) Importing video clips from the file menu into the empty cache area of Premiere Pro.
2) Dragging clips from the cache into the timeline at the bottom of the screen to begin editing.
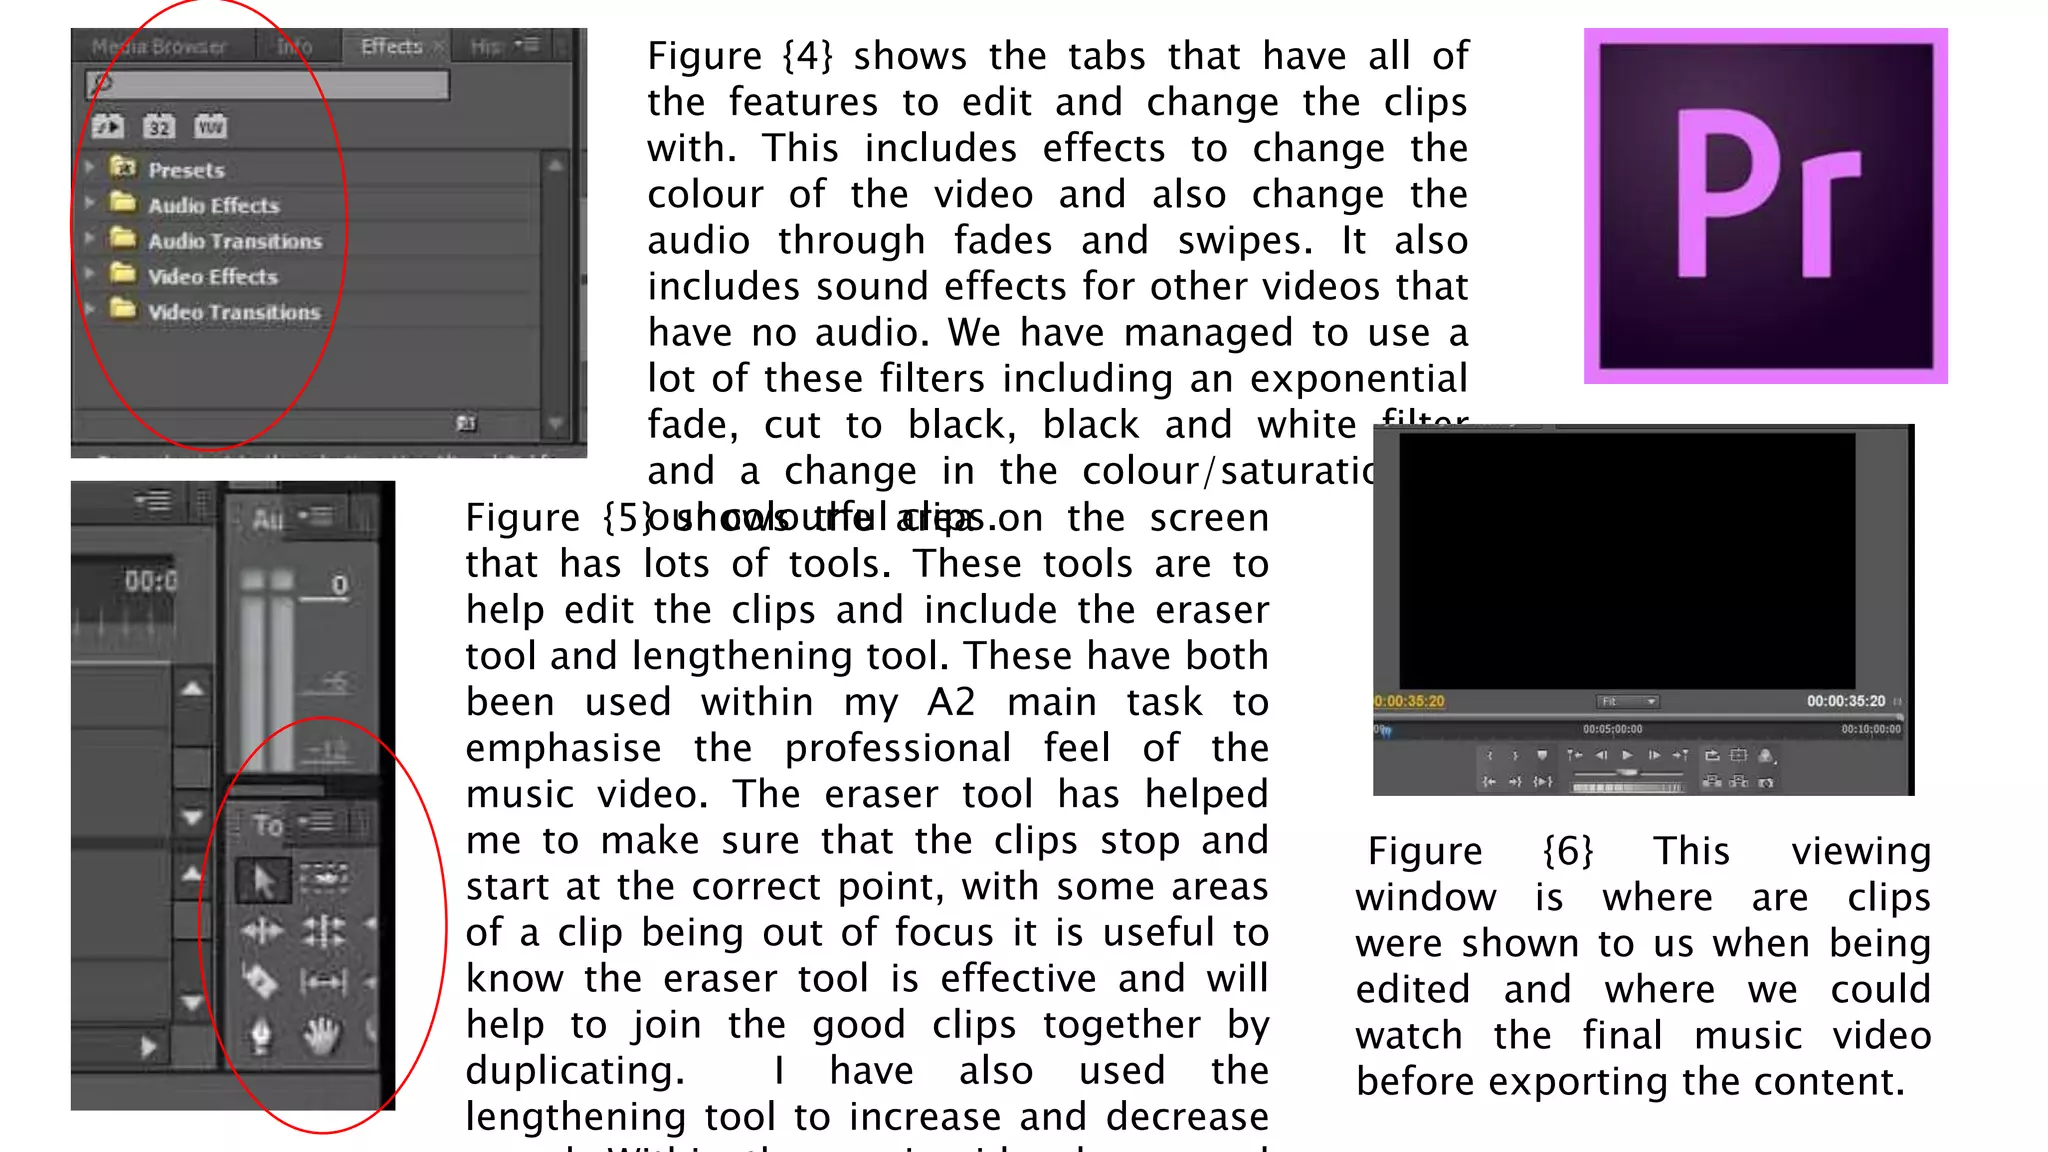
3) Using tools in Premiere Pro like effects, filters, and trimming tools to edit clips and add professional touches to a music video project.
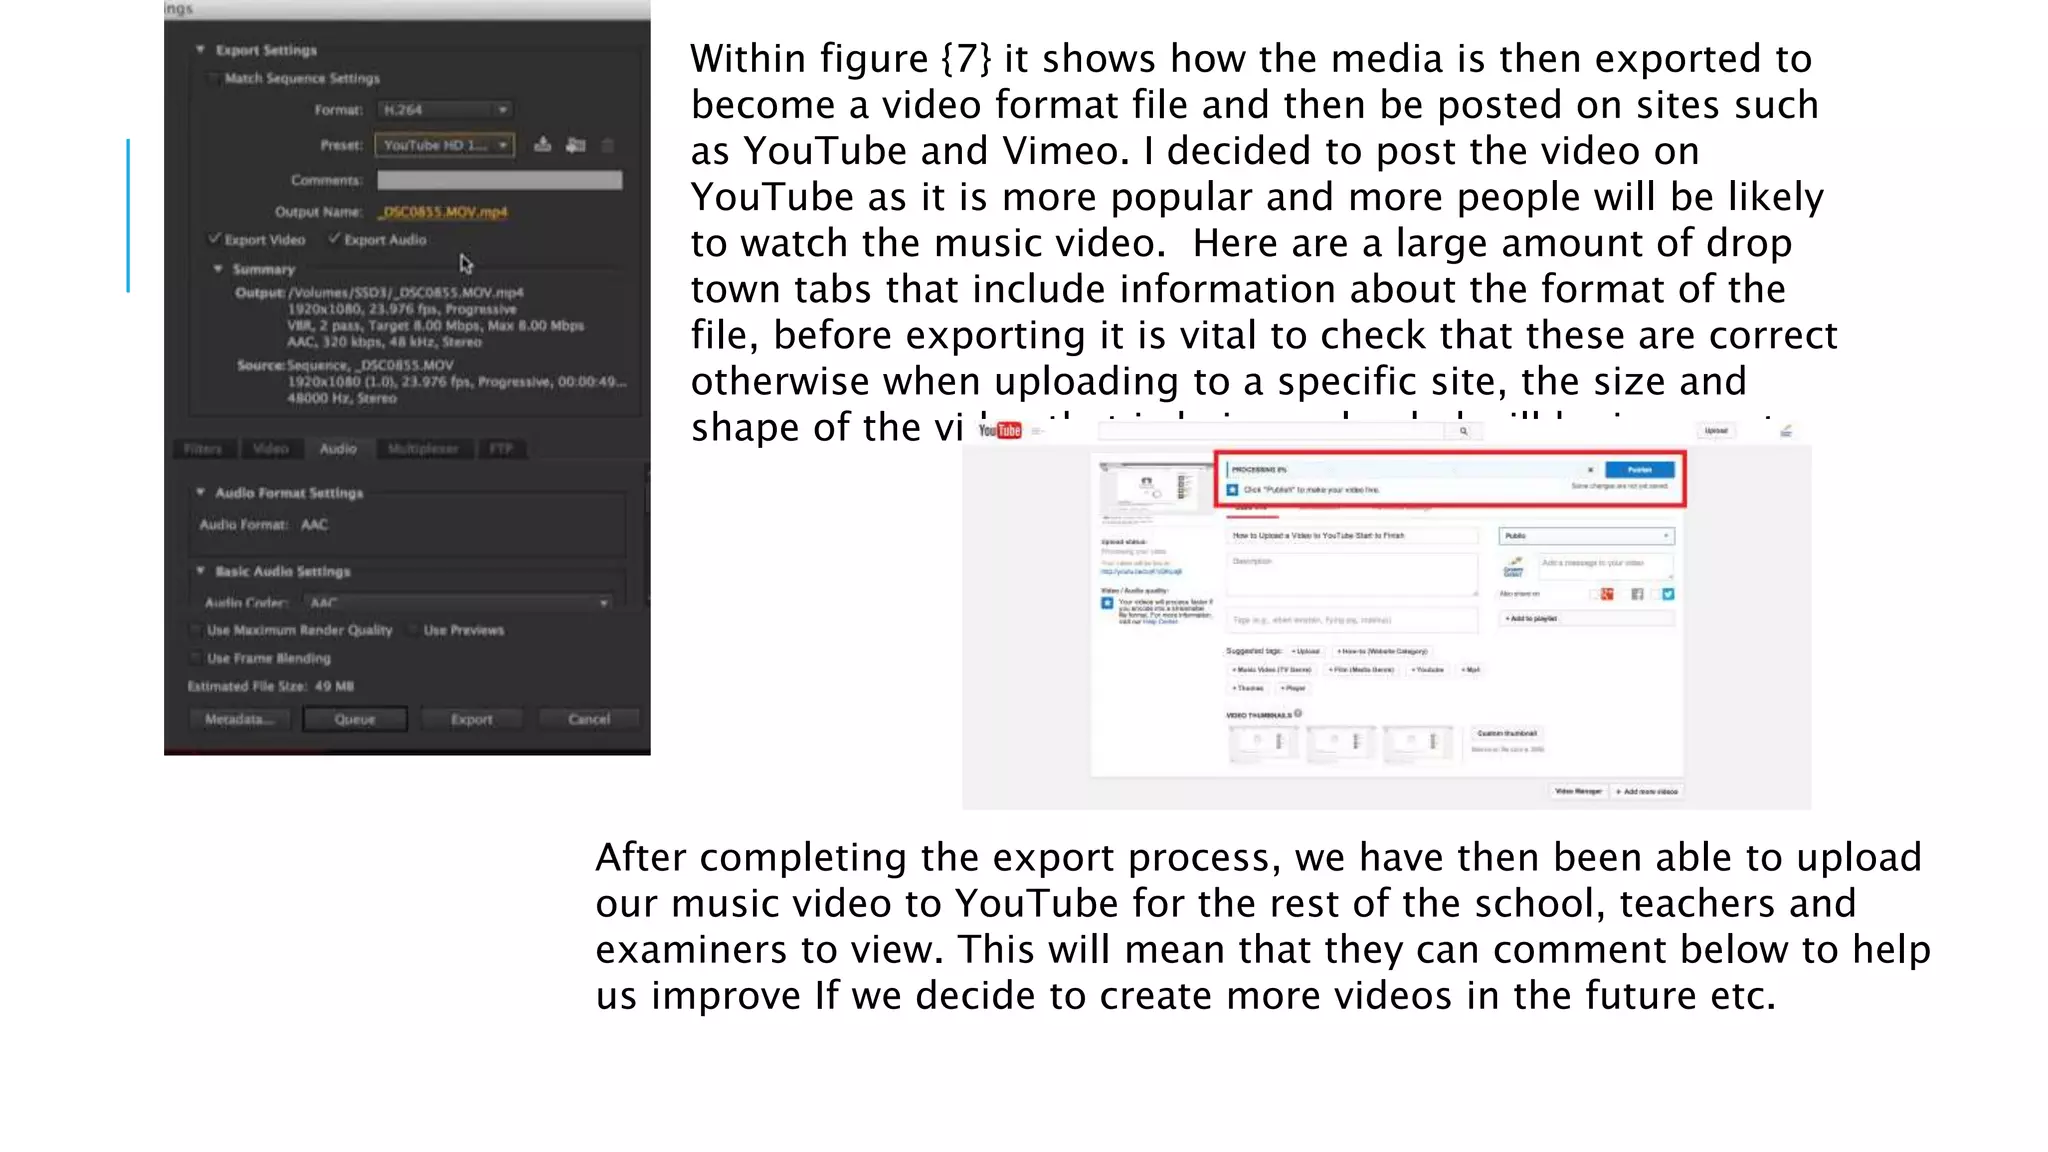
4) Exporting the finished video project in the correct format to upload and share on sites like YouTube.


![Reading Techniques [Autosaved].pptxReading Techniques [Autosaved].pptx](https://cdn.slidesharecdn.com/ss_thumbnails/readingtechniquesautosaved-251211193055-b8821f9d-thumbnail.jpg?width=640&height=640&fit=bounds)
