Download to read offline
![IBM Corporation ©2015
Formula language provides syntax and @functions for evaluating
constants and variables, and for performing simple logic.
@MailSend
@MailSend( sendTo ; copyTo ; blindCopyTo ; subject ; message )
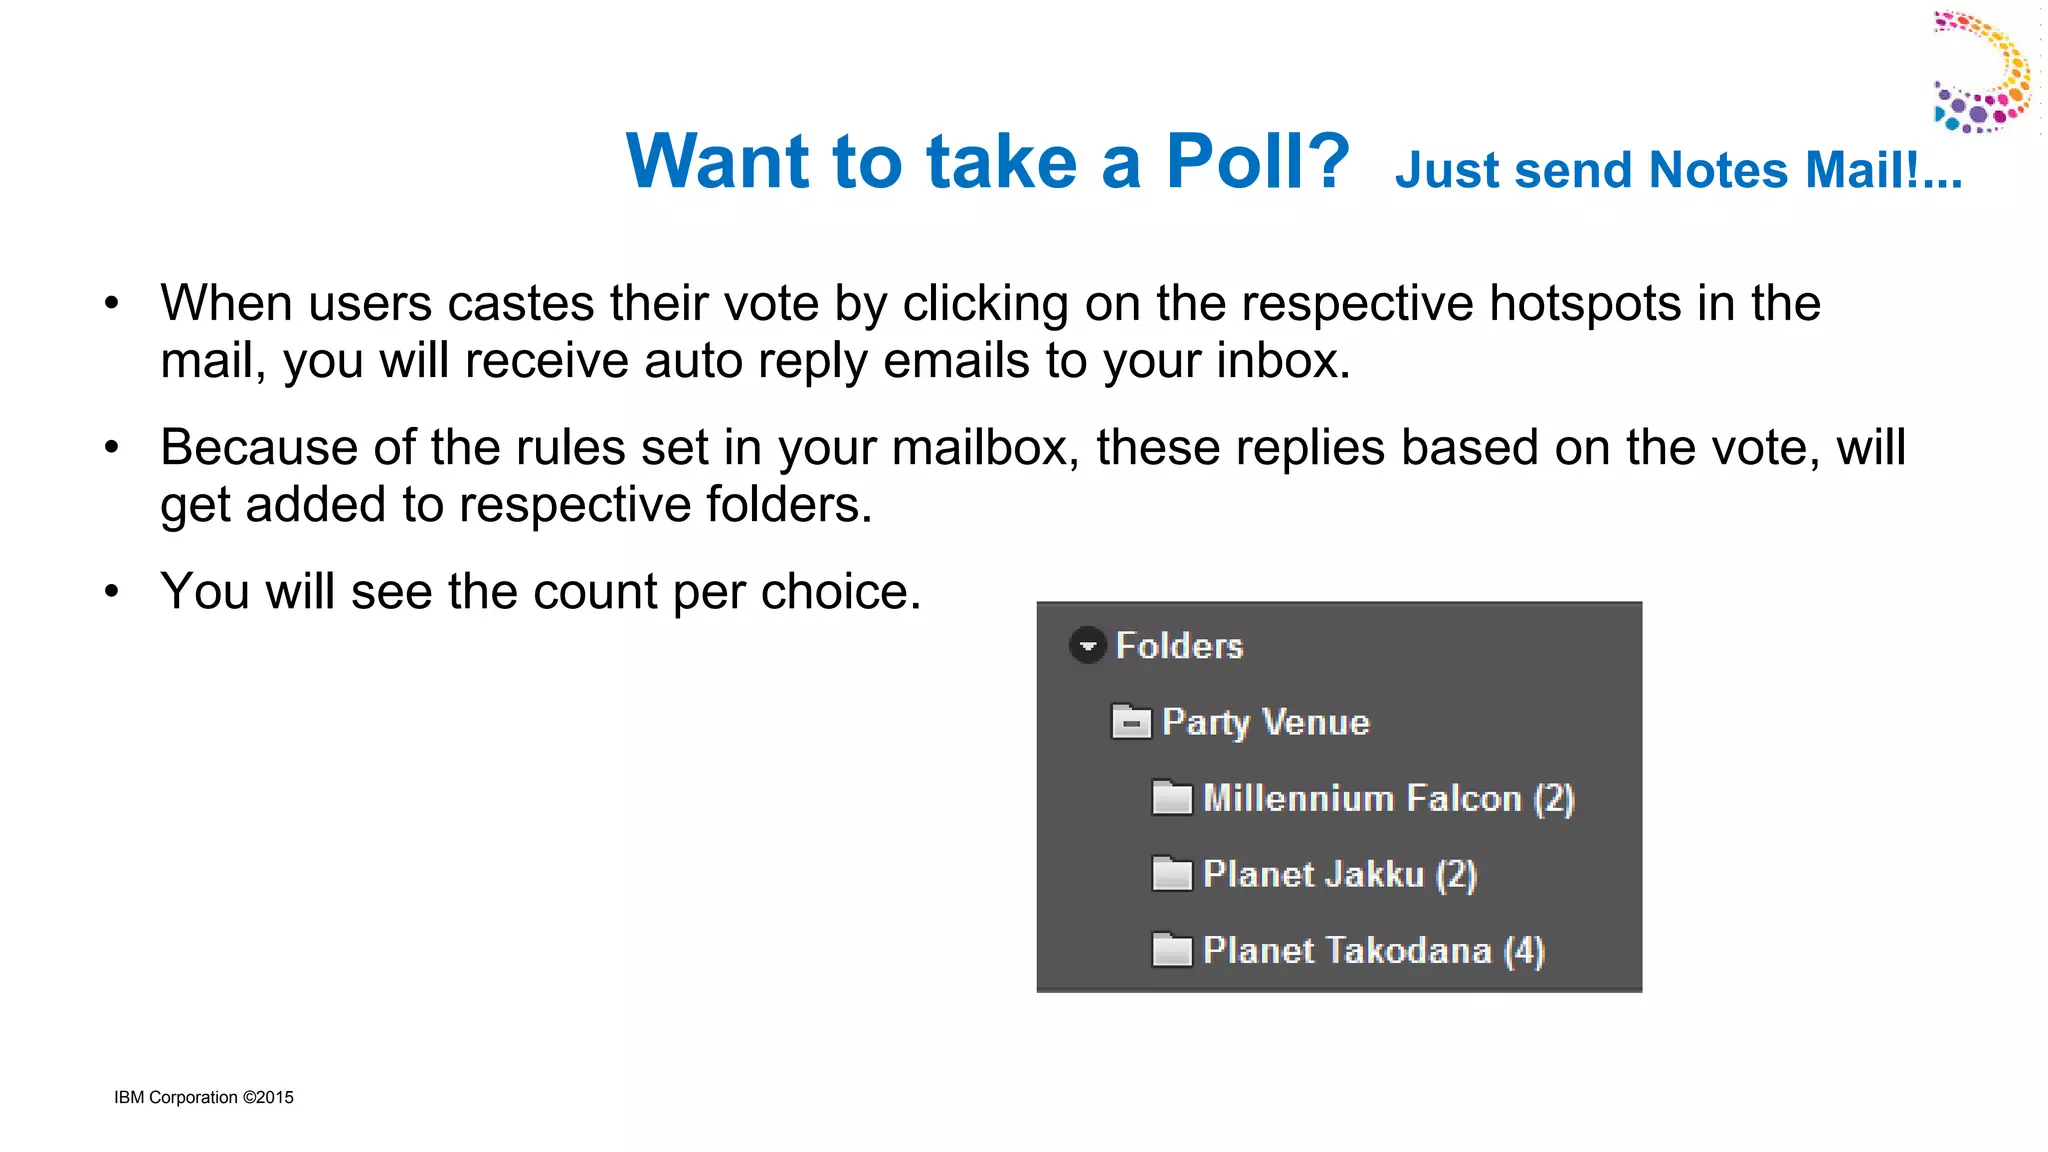
@MailSend composes a new mail memo based on the information you supply in the
arguments list, and sends it to the recipients listed in the sendTo, copyTo, and
blindcopyTo arguments
@Prompt
@Prompt( [OK] ; title ; prompt)
Displays a dialog box to the user. @Prompt is useful for prompting a user for
confirmation after user hits the hotspot while casting vote.
Formula Language
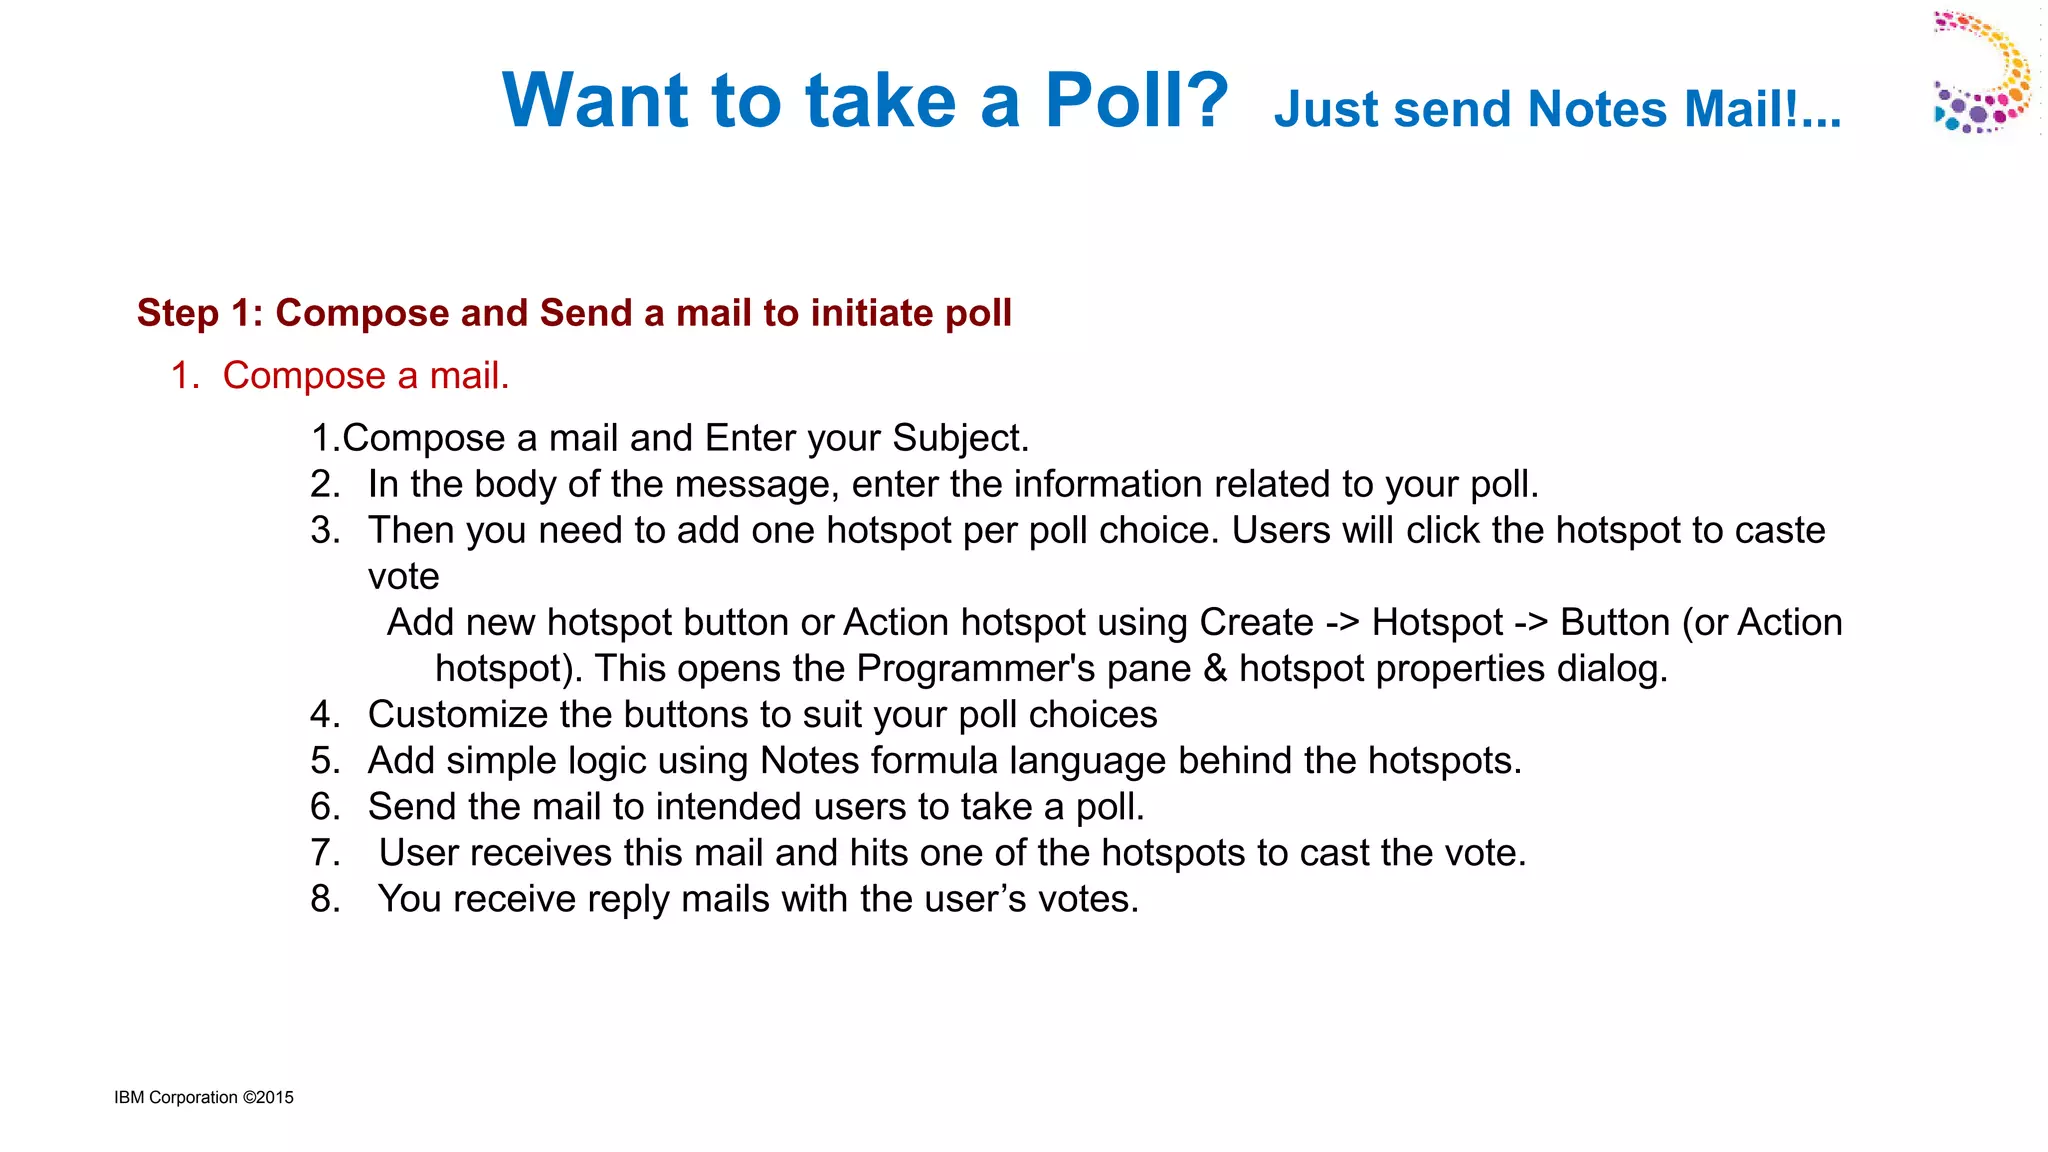
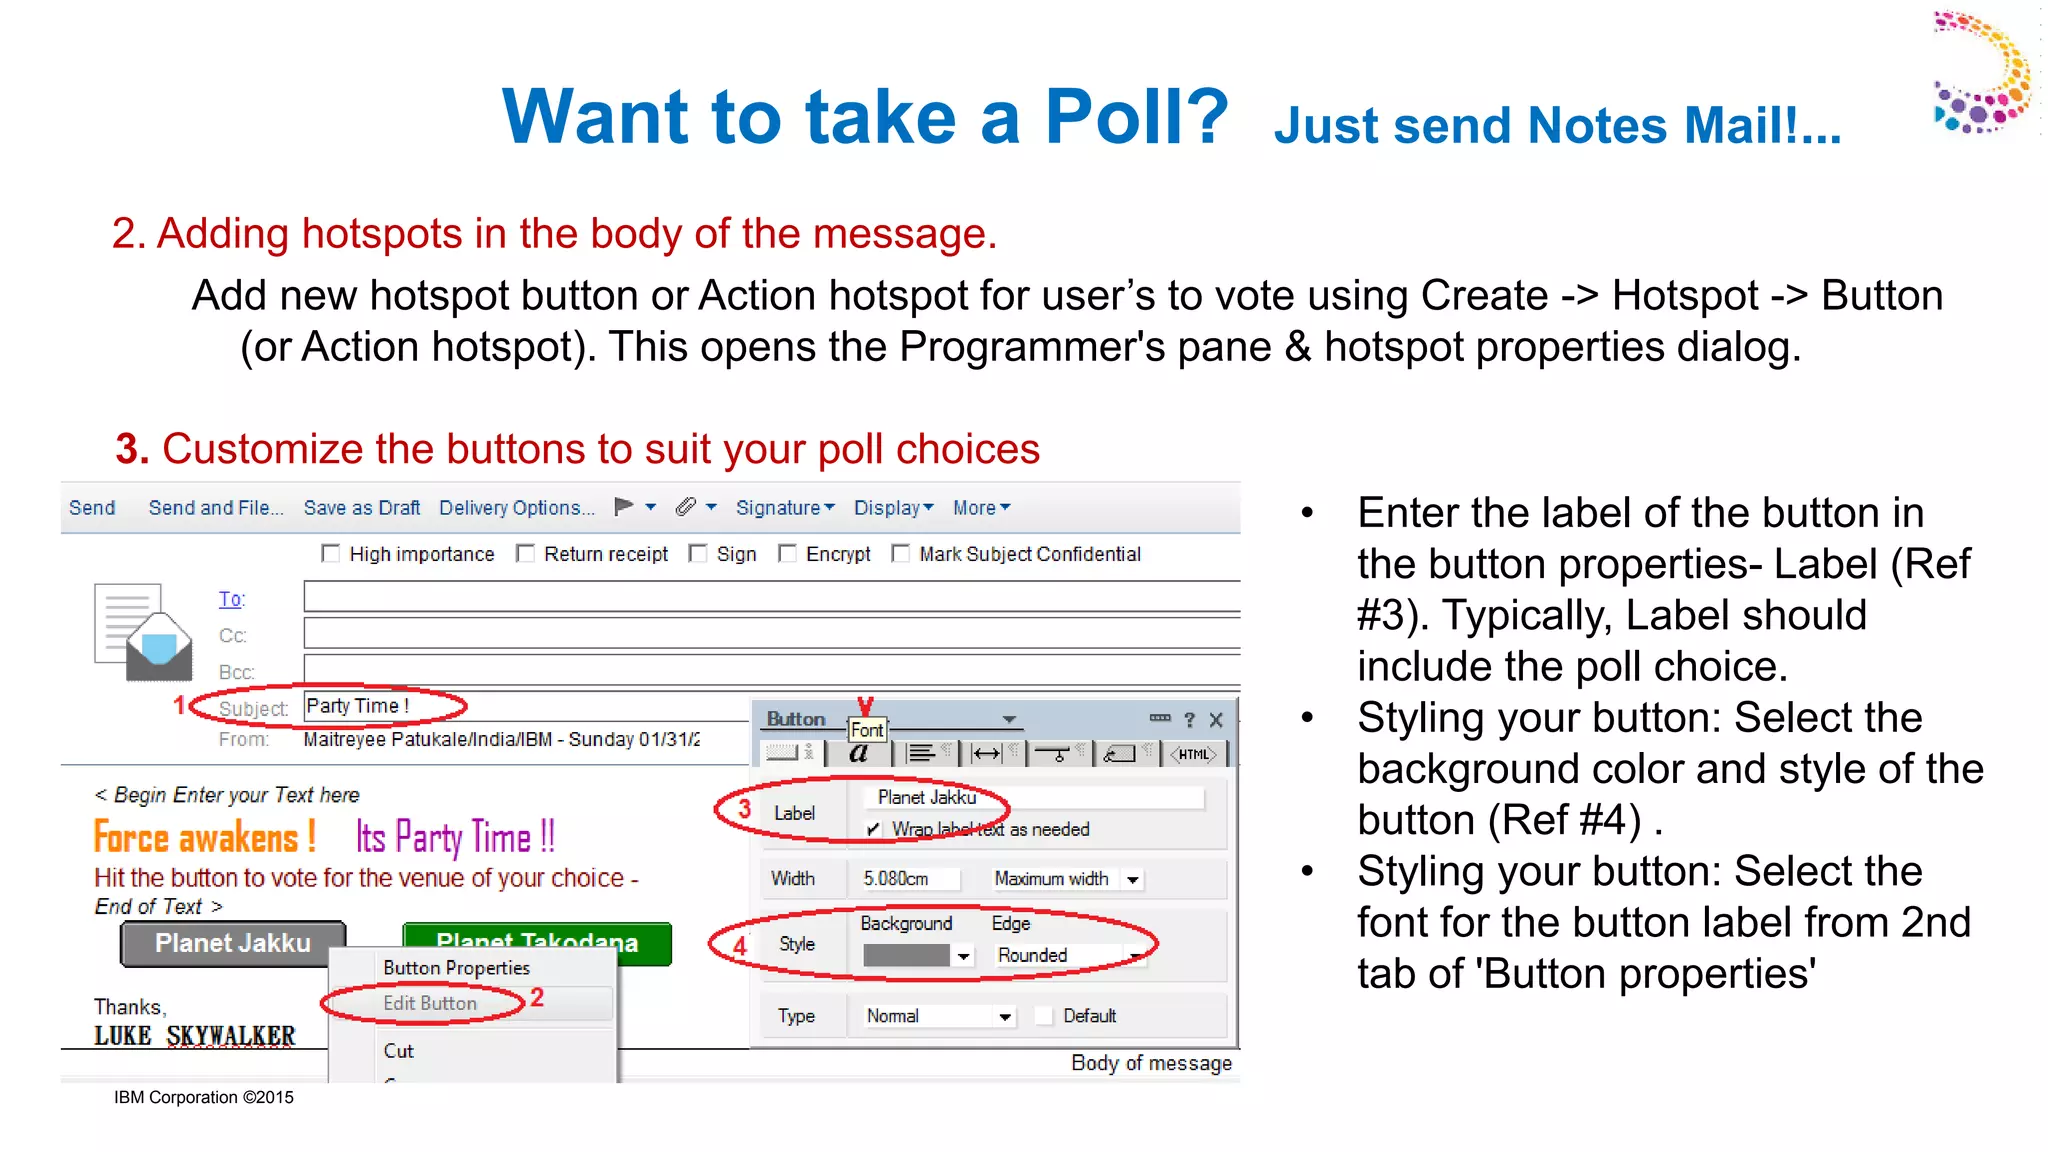
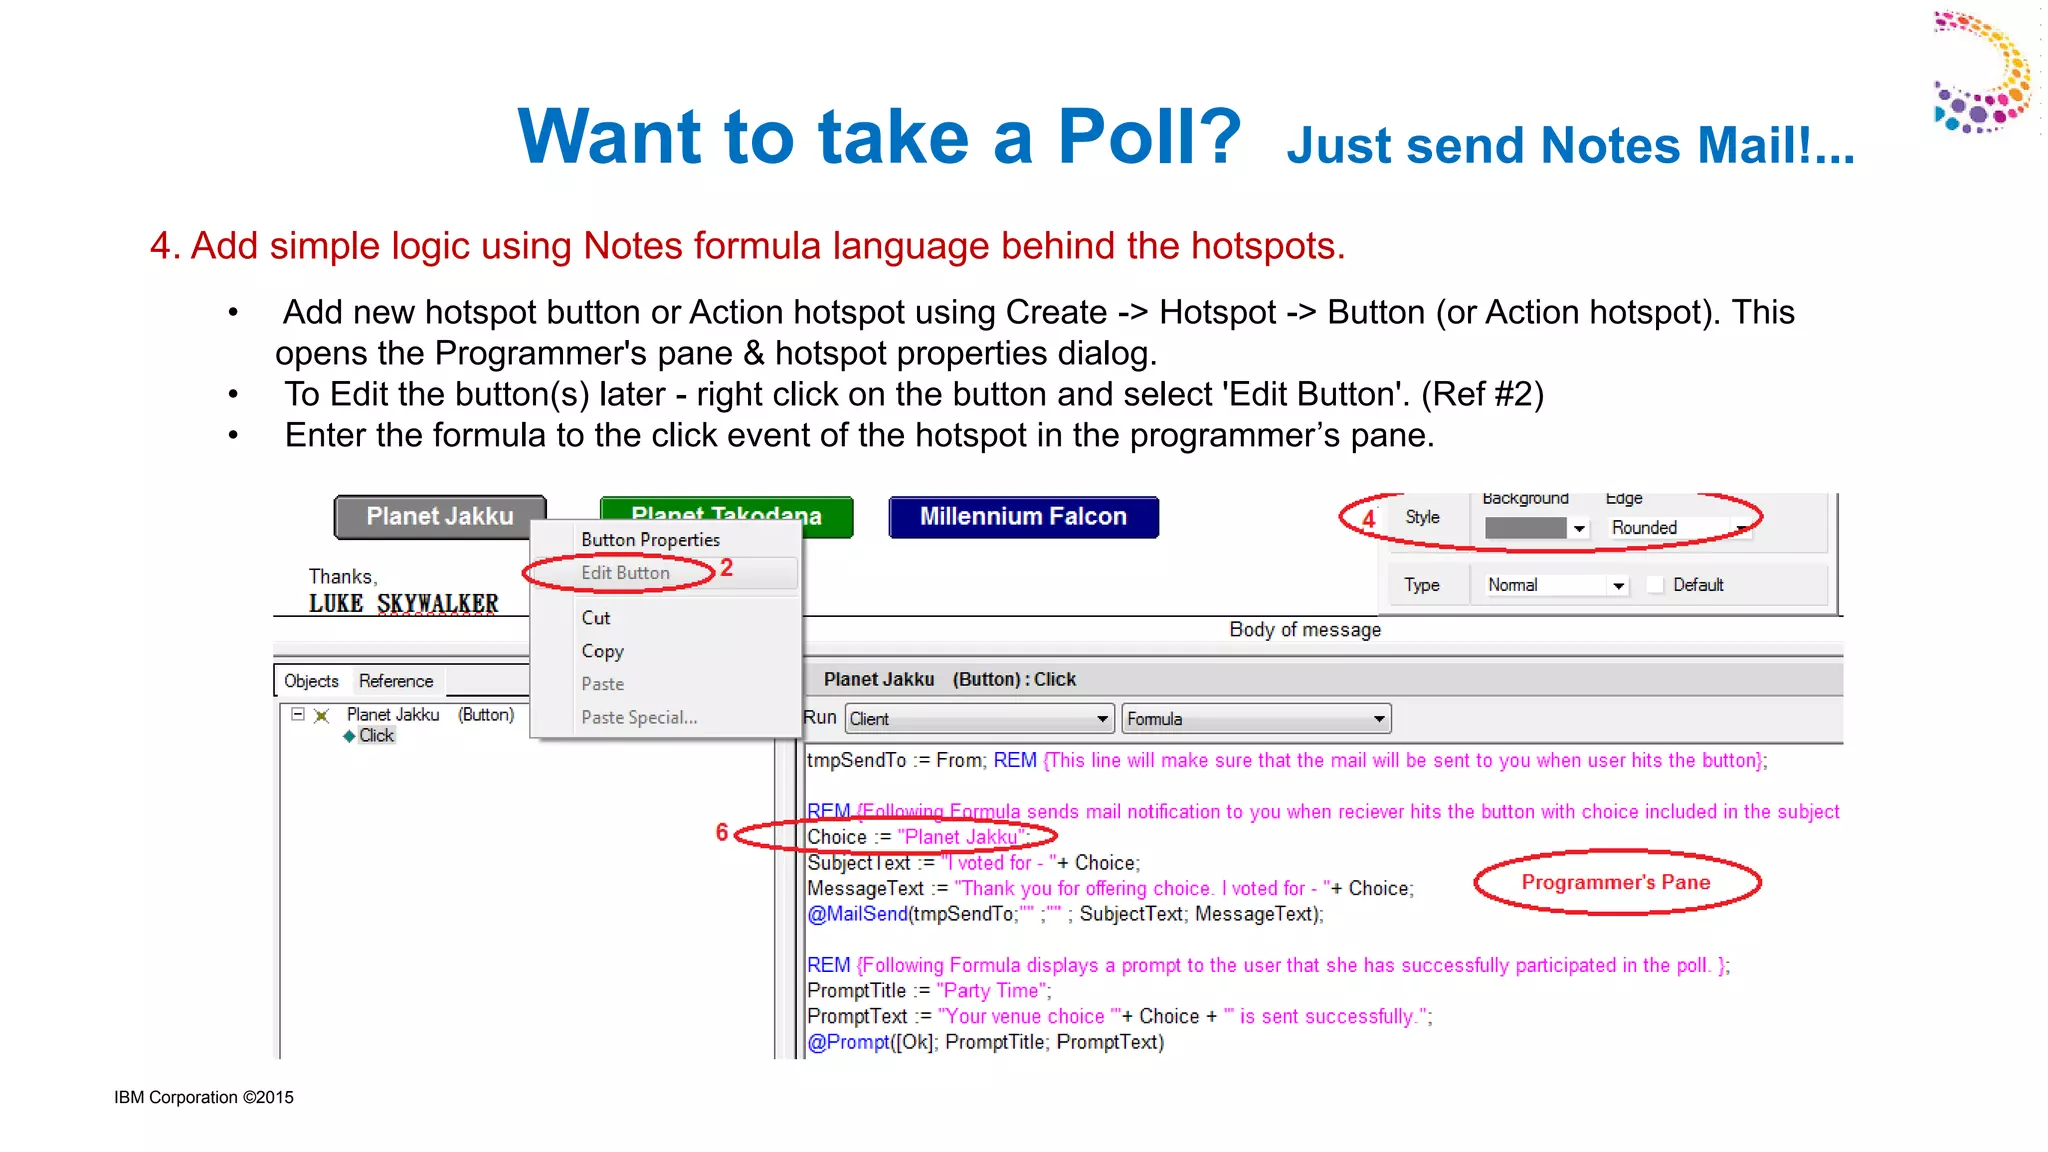
4: Add simple logic using Notes formula language behind the hotspots.](https://image.slidesharecdn.com/jumpsessiontipsandtricksforibmnotesmail-170518054343/75/Tip-and-tricks-for-IBM-Notes-Mail-JUMP-Session-10-2048.jpg)
![IBM Corporation ©2015
tmpSendTo := From;
REM {Above line will make sure that the mail will be sent to you when user hits the button};
REM {Following Formula sends mail notification to you when receiver hits the button with choice
included in the subject of the mail. };
Choice := "Planet Jakku";
SubjectText := "I voted for - "+ Choice;
MessageText := "Thank you for offering choice. I voted for - "+ Choice;
@MailSend(tmpSendTo;"" ;"" ; SubjectText; MessageText);
REM {Following Formula displays a prompt to the user that she has successfully participated in the
poll. };
PromptTitle := "Party Time";
PromptText := "Your venue choice '"+ Choice + "' is sent successfully.";
@Prompt([Ok]; PromptTitle; PromptText)
Want to take a Poll? Just send Notes Mail!...](https://image.slidesharecdn.com/jumpsessiontipsandtricksforibmnotesmail-170518054343/75/Tip-and-tricks-for-IBM-Notes-Mail-JUMP-Session-12-2048.jpg)


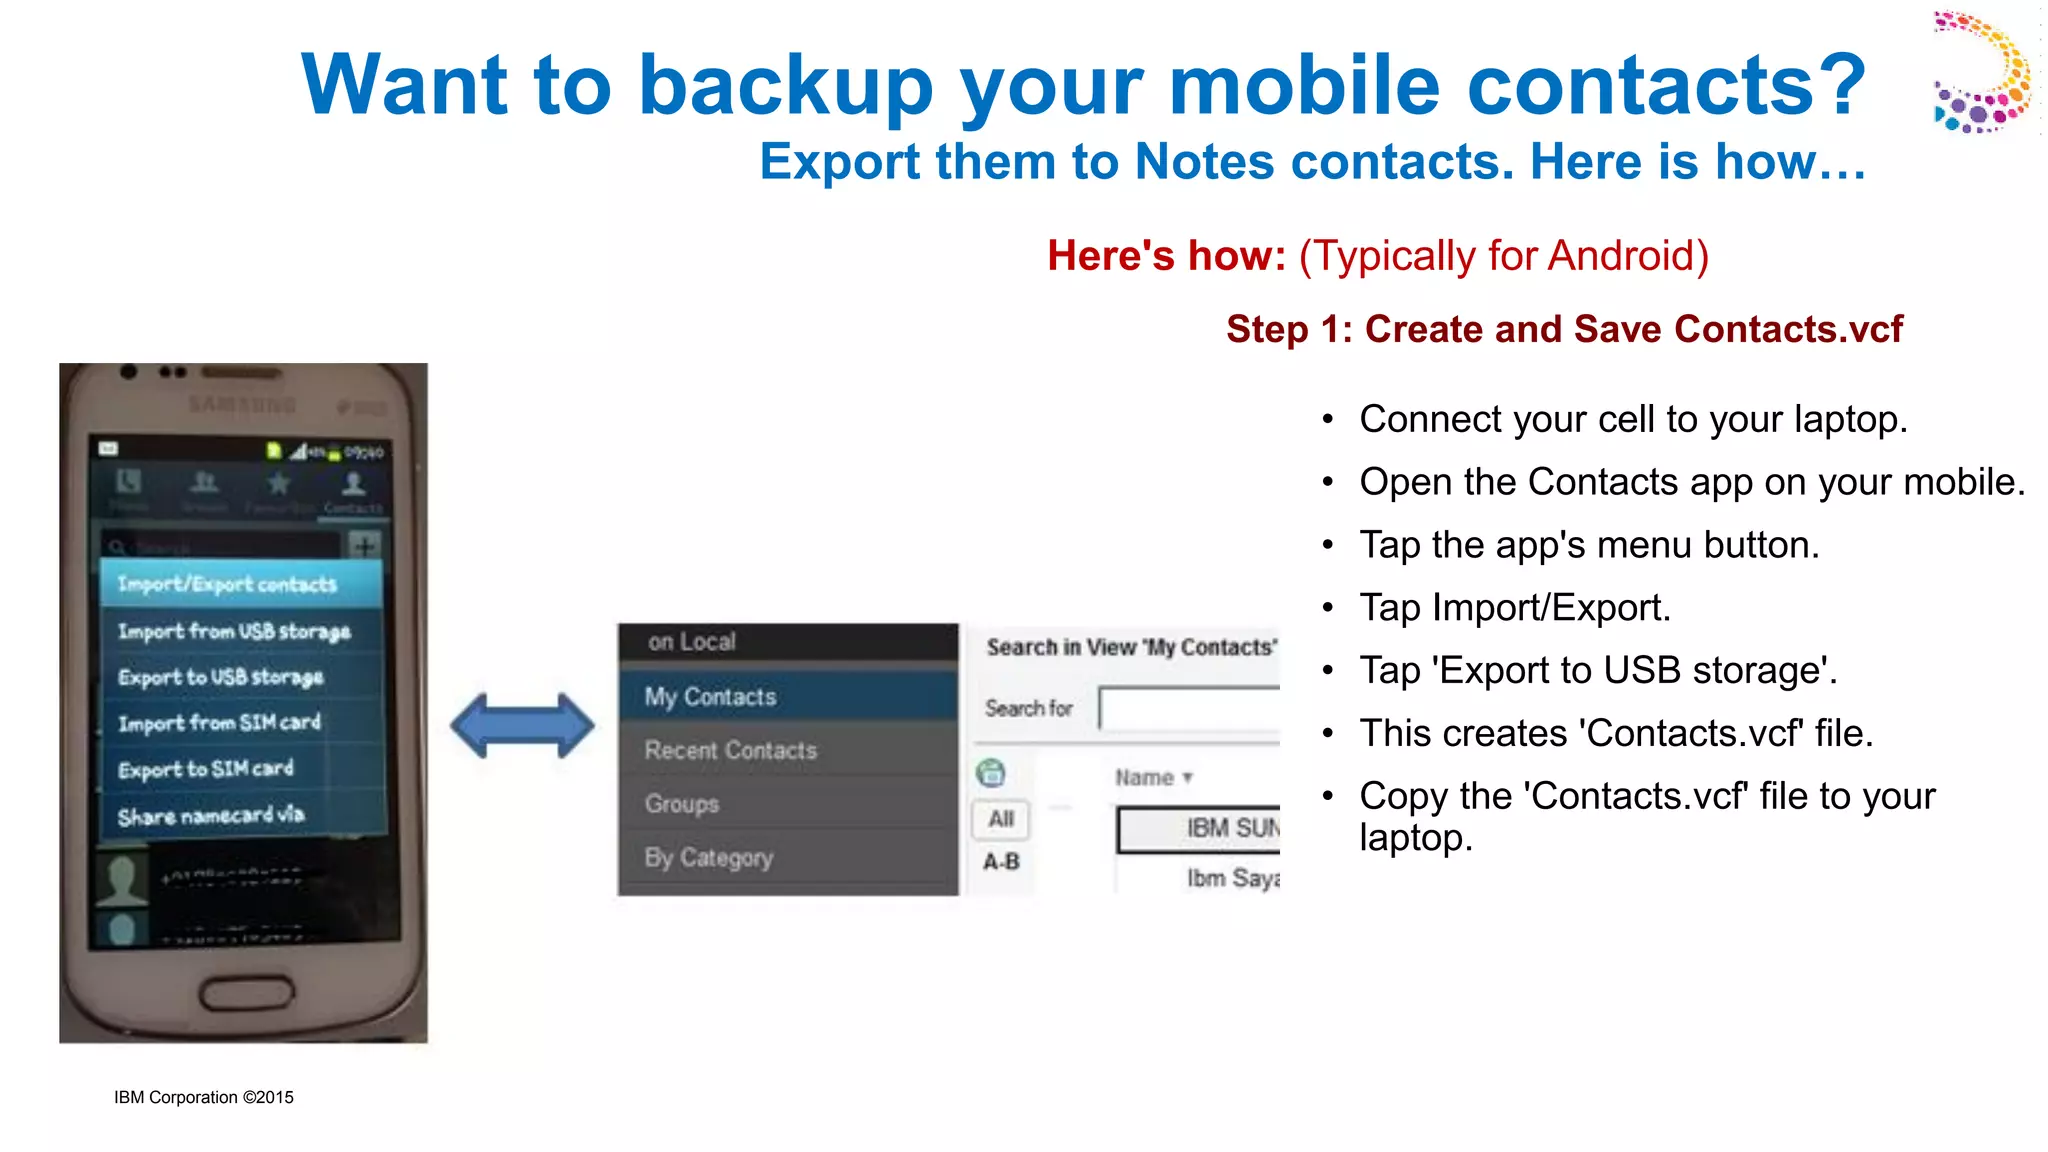
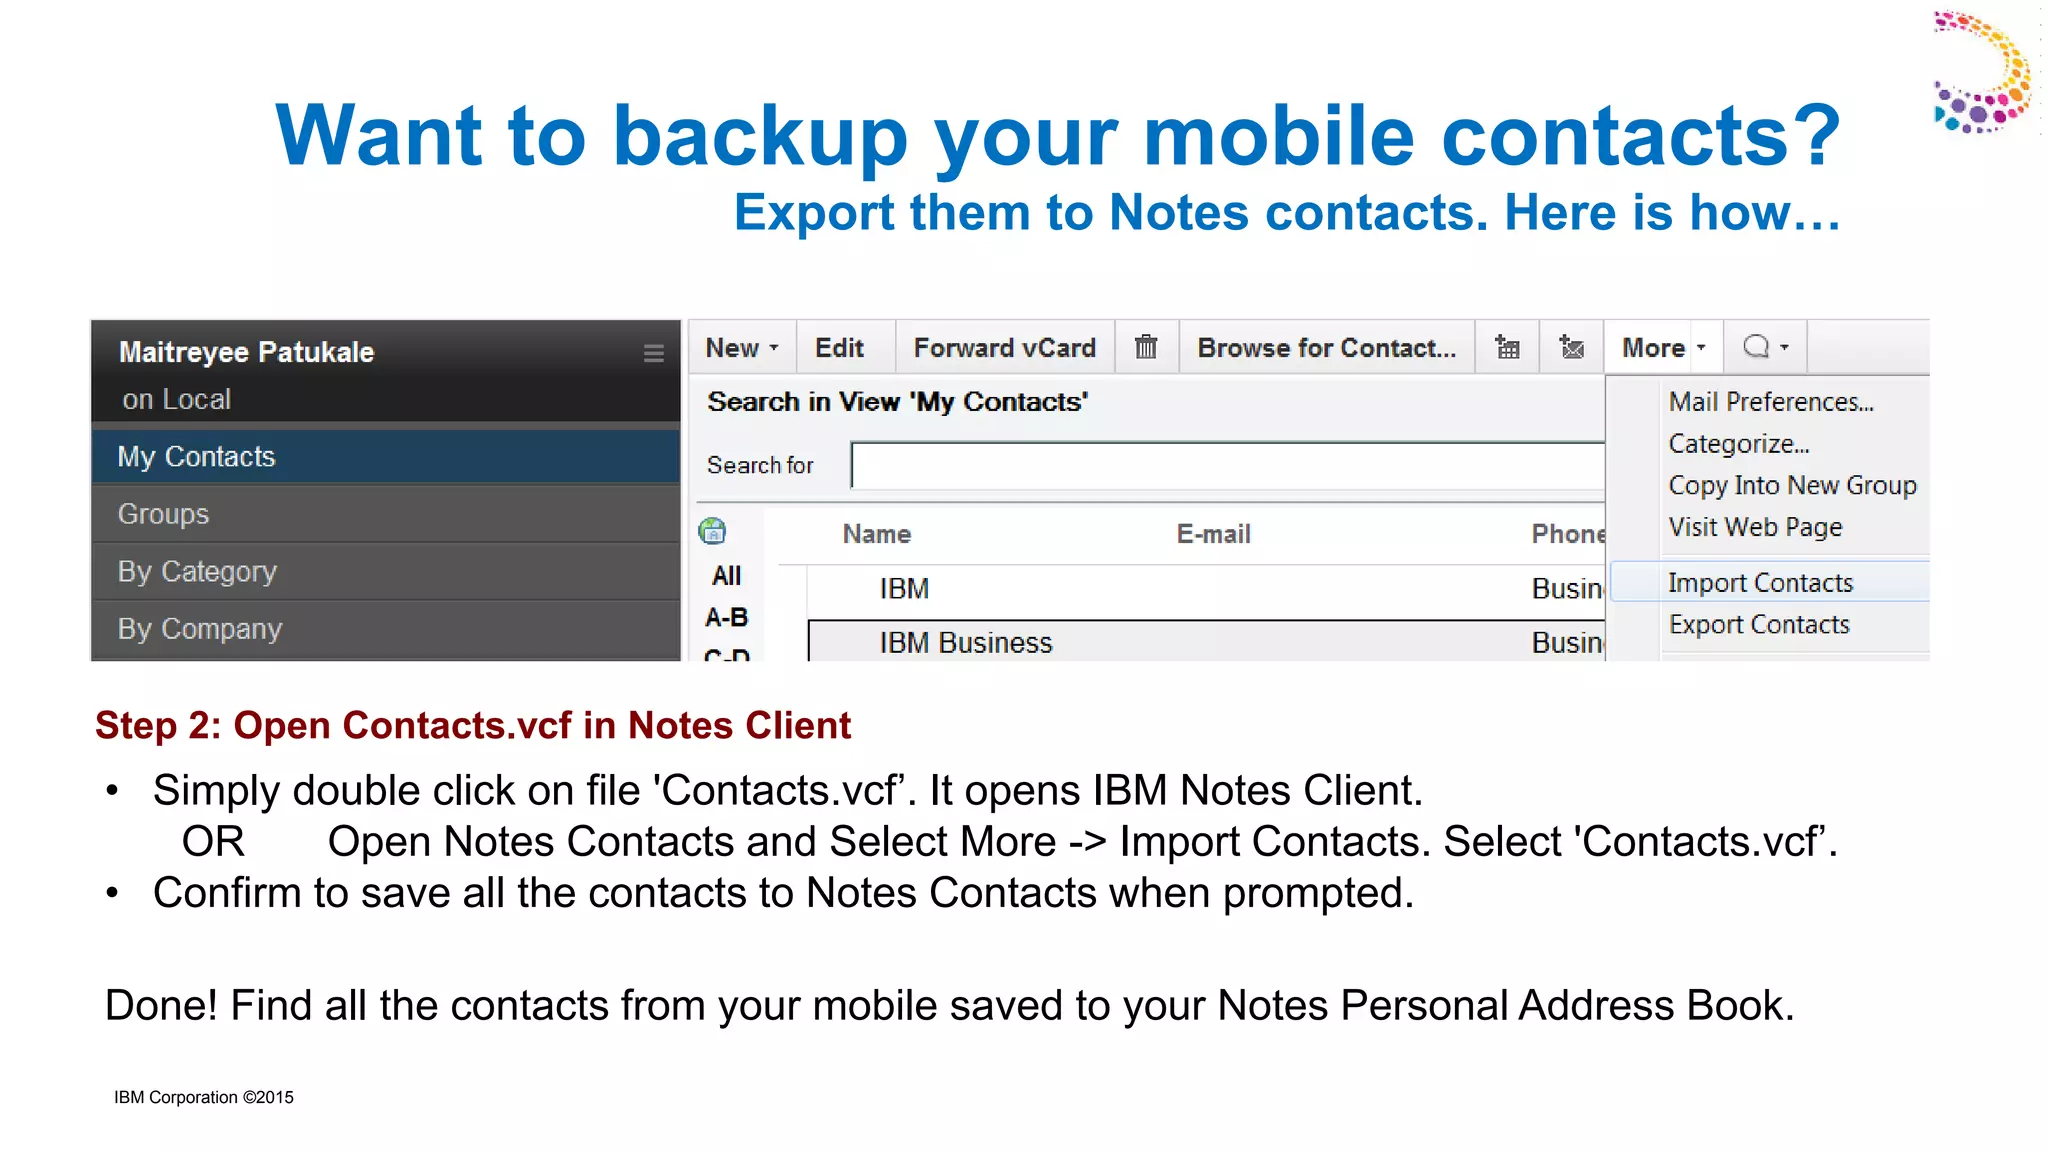
This document provides tips and tricks for using IBM Notes Mail more effectively. It discusses how to backup mobile contacts by exporting them to Notes contacts, how to take a poll by sending a Notes mail with clickable buttons, and how to add news blinks to a signature using an animated table. The document gives step-by-step instructions for implementing these features and includes references to additional IBM documentation resources.


![What's new in lotus notes 8[1].5, 8.5.1, and 8.5](https://cdn.slidesharecdn.com/ss_thumbnails/whatsnewinlotusnotes81-130905095006--thumbnail.jpg?width=640&height=640&fit=bounds)


![Vibe Coding vs. Spec-Driven Development [Free Meetup]](https://cdn.slidesharecdn.com/ss_thumbnails/vibecodingvsspecdrivendevelopment-251209105622-43f455e7-thumbnail.jpg?width=640&height=640&fit=bounds)


