This document provides an overview of basic features in Microsoft Word 2013, including how to create and edit documents, format text and pages, insert symbols, and set indents and tabs. It discusses the Word interface and tools like the ribbon, ruler, and views. It describes how to change font features, size, color and effects. It also covers adjusting page layout options like orientation, margins and size. Finally, it reviews formatting line and paragraph spacing, as well as using tabs. The goal is to familiarize users with Word's core functionality for document creation and editing.
Introduction to MS Word 2013, user interface familiarity, document creation/editing, text formatting.
Details about Word 2013 interface, including the Start Screen, Quick Access Toolbar, Ruler, Backstage view, Document views, and the Ribbon functions.
Instructions for creating new documents in Word 2013, either blank or from templates.
Guide for formatting text, including font changes, sizes, colors, alignment, and inserting symbols. Instructions on indenting text structures and managing tab stops for organized document layouts.Processes for creating bulleted, numbered, and multilevel lists to organize content effectively.
Exercise prompt for users to apply learned formatting skills in creating a comprehensive Word document.
Practical 01-(Basic Features)
Creatingand editing documents with Microsoft Word
Objectives
Get familiar with MS Word 2013 user interface.
Understand and be able to create and edit documents in MS Word 2013.
Understand text formatting and page layout in MS Word 2013.
Tools
MS Word (Version: 2013, 2010 or 2007)
Keywords: Word processing, User interface, Formatting, Layout. Duration: 03 hours
1 Introduction
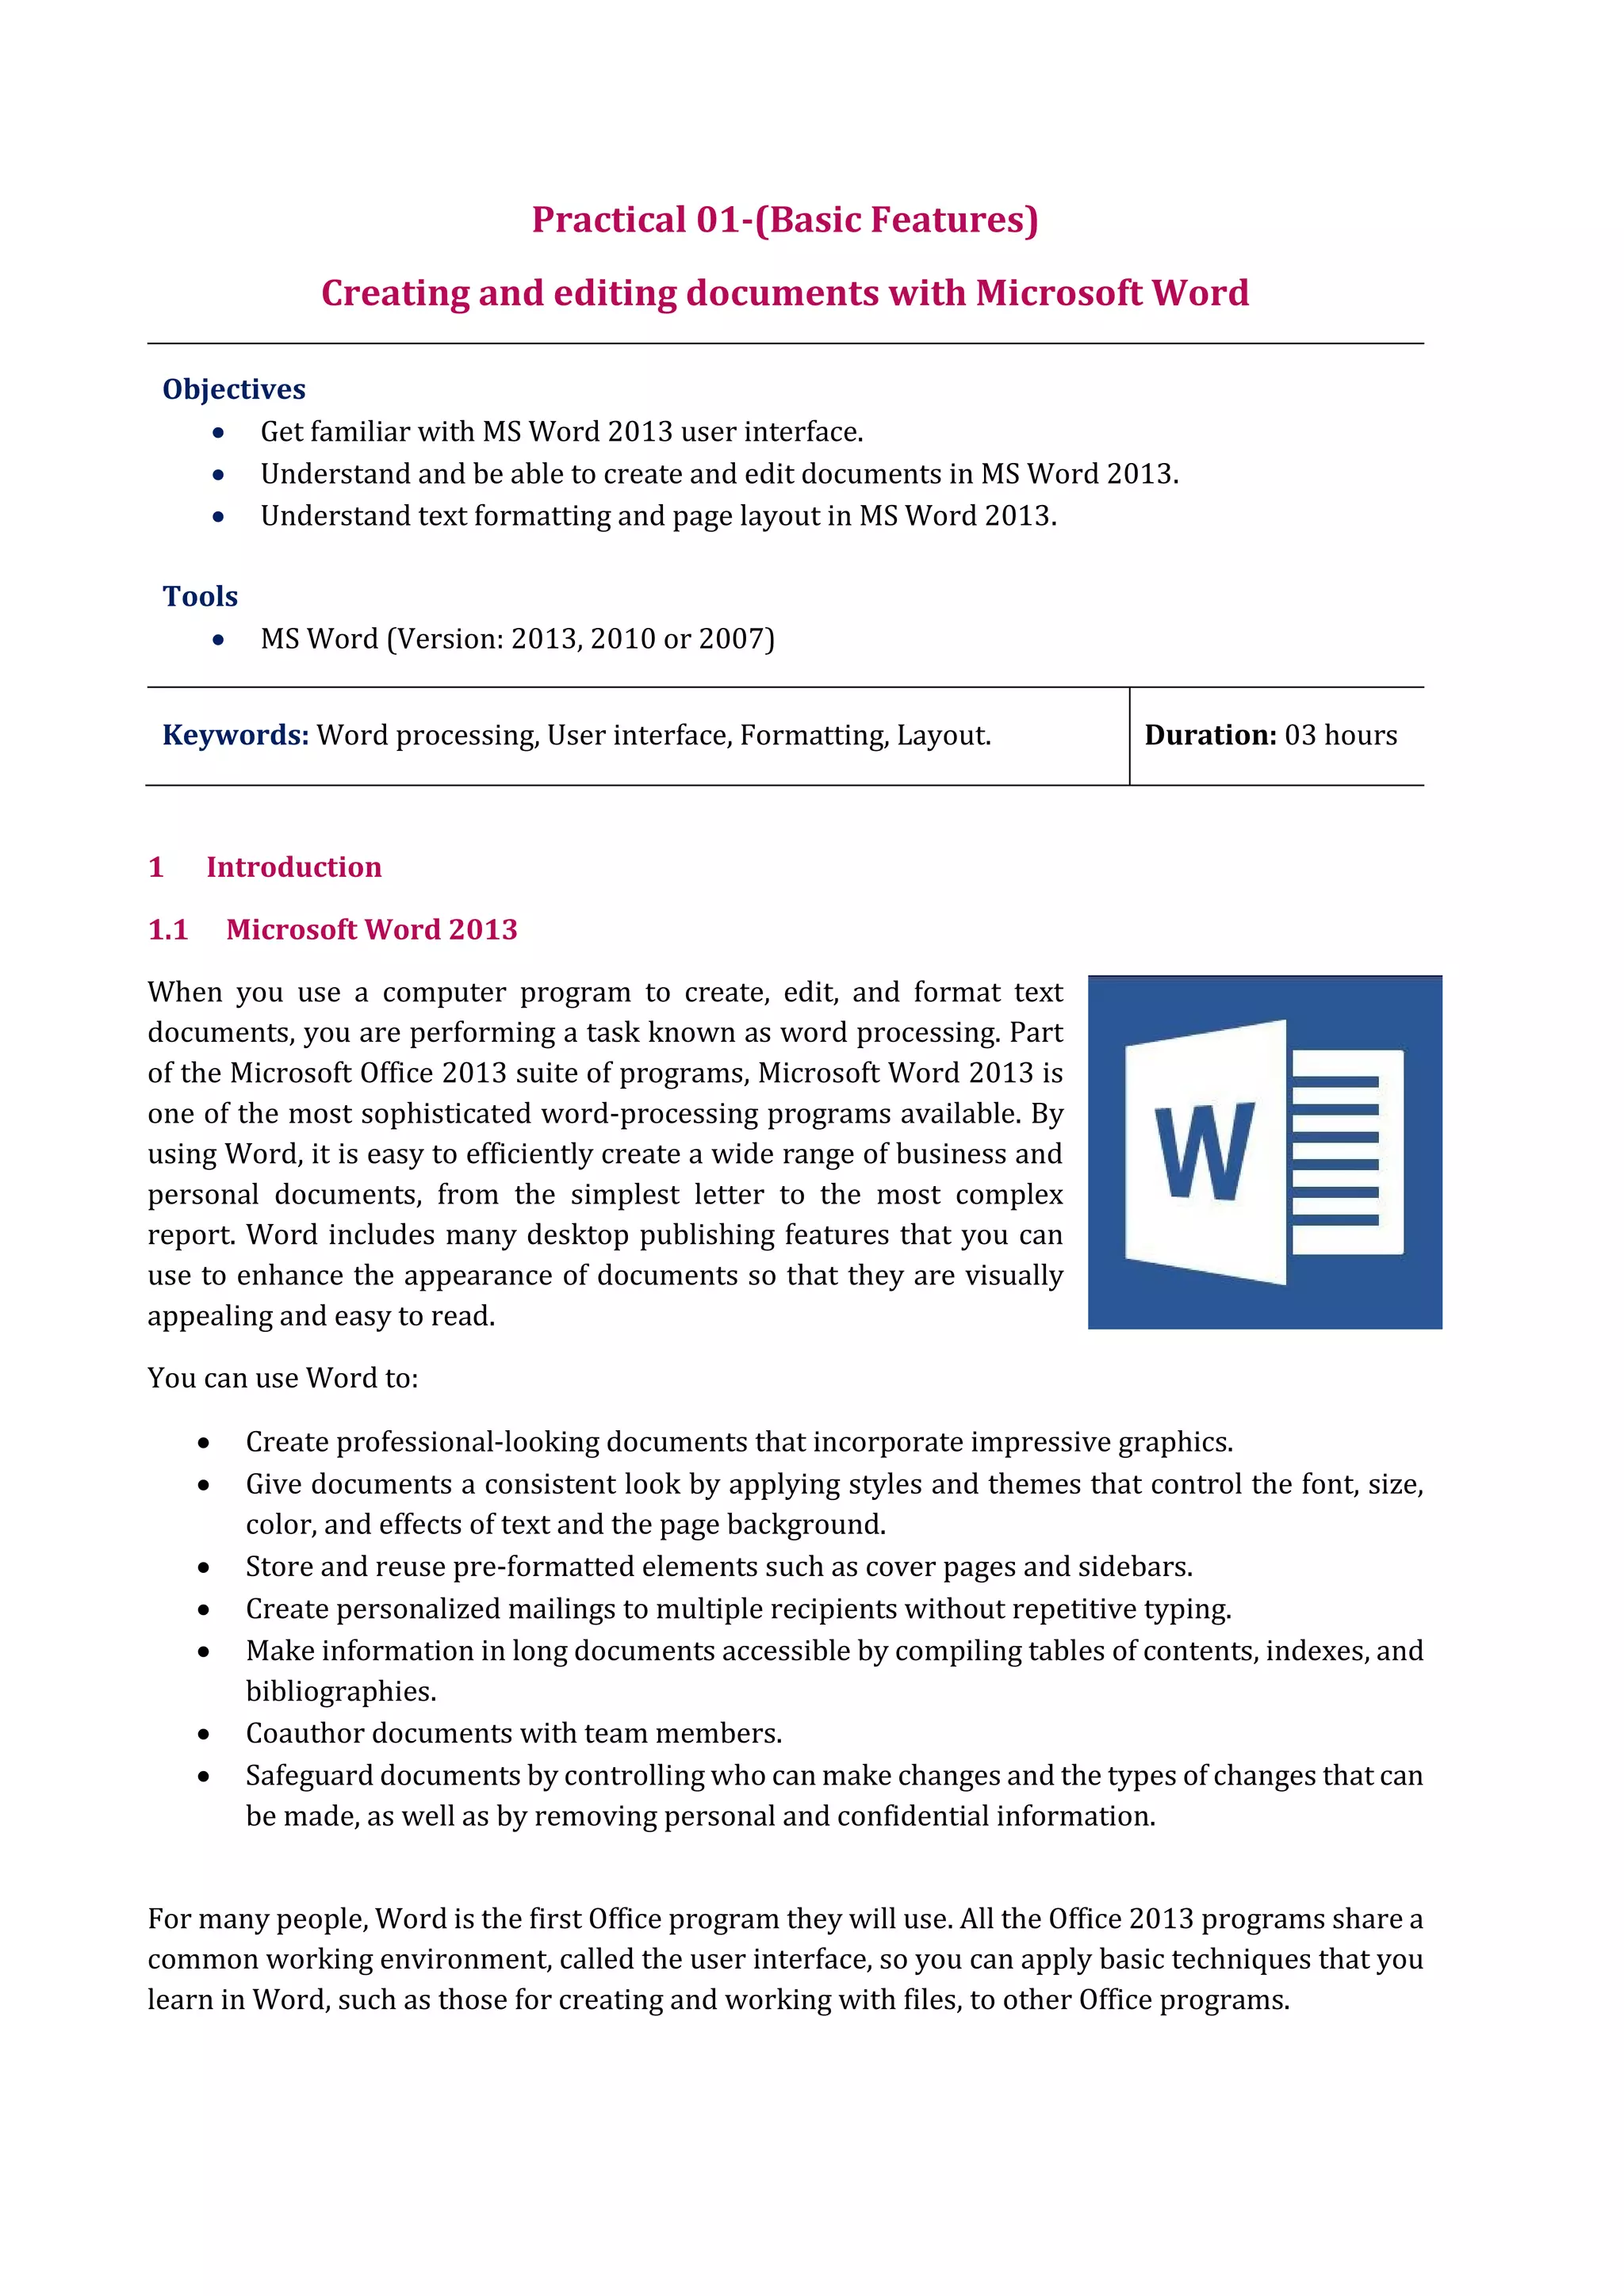
1.1 Microsoft Word 2013
When you use a computer program to create, edit, and format text
documents, you are performing a task known as word processing. Part
of the Microsoft Office 2013 suite of programs, Microsoft Word 2013 is
one of the most sophisticated word-processing programs available. By
using Word, it is easy to efficiently create a wide range of business and
personal documents, from the simplest letter to the most complex
report. Word includes many desktop publishing features that you can
use to enhance the appearance of documents so that they are visually
appealing and easy to read.
You can use Word to:
Create professional-looking documents that incorporate impressive graphics.
Give documents a consistent look by applying styles and themes that control the font, size,
color, and effects of text and the page background.
Store and reuse pre-formatted elements such as cover pages and sidebars.
Create personalized mailings to multiple recipients without repetitive typing.
Make information in long documents accessible by compiling tables of contents, indexes, and
bibliographies.
Coauthor documents with team members.
Safeguard documents by controlling who can make changes and the types of changes that can
be made, as well as by removing personal and confidential information.
For many people, Word is the first Office program they will use. All the Office 2013 programs share a
common working environment, called the user interface, so you can apply basic techniques that you
learn in Word, such as those for creating and working with files, to other Office programs.
2.
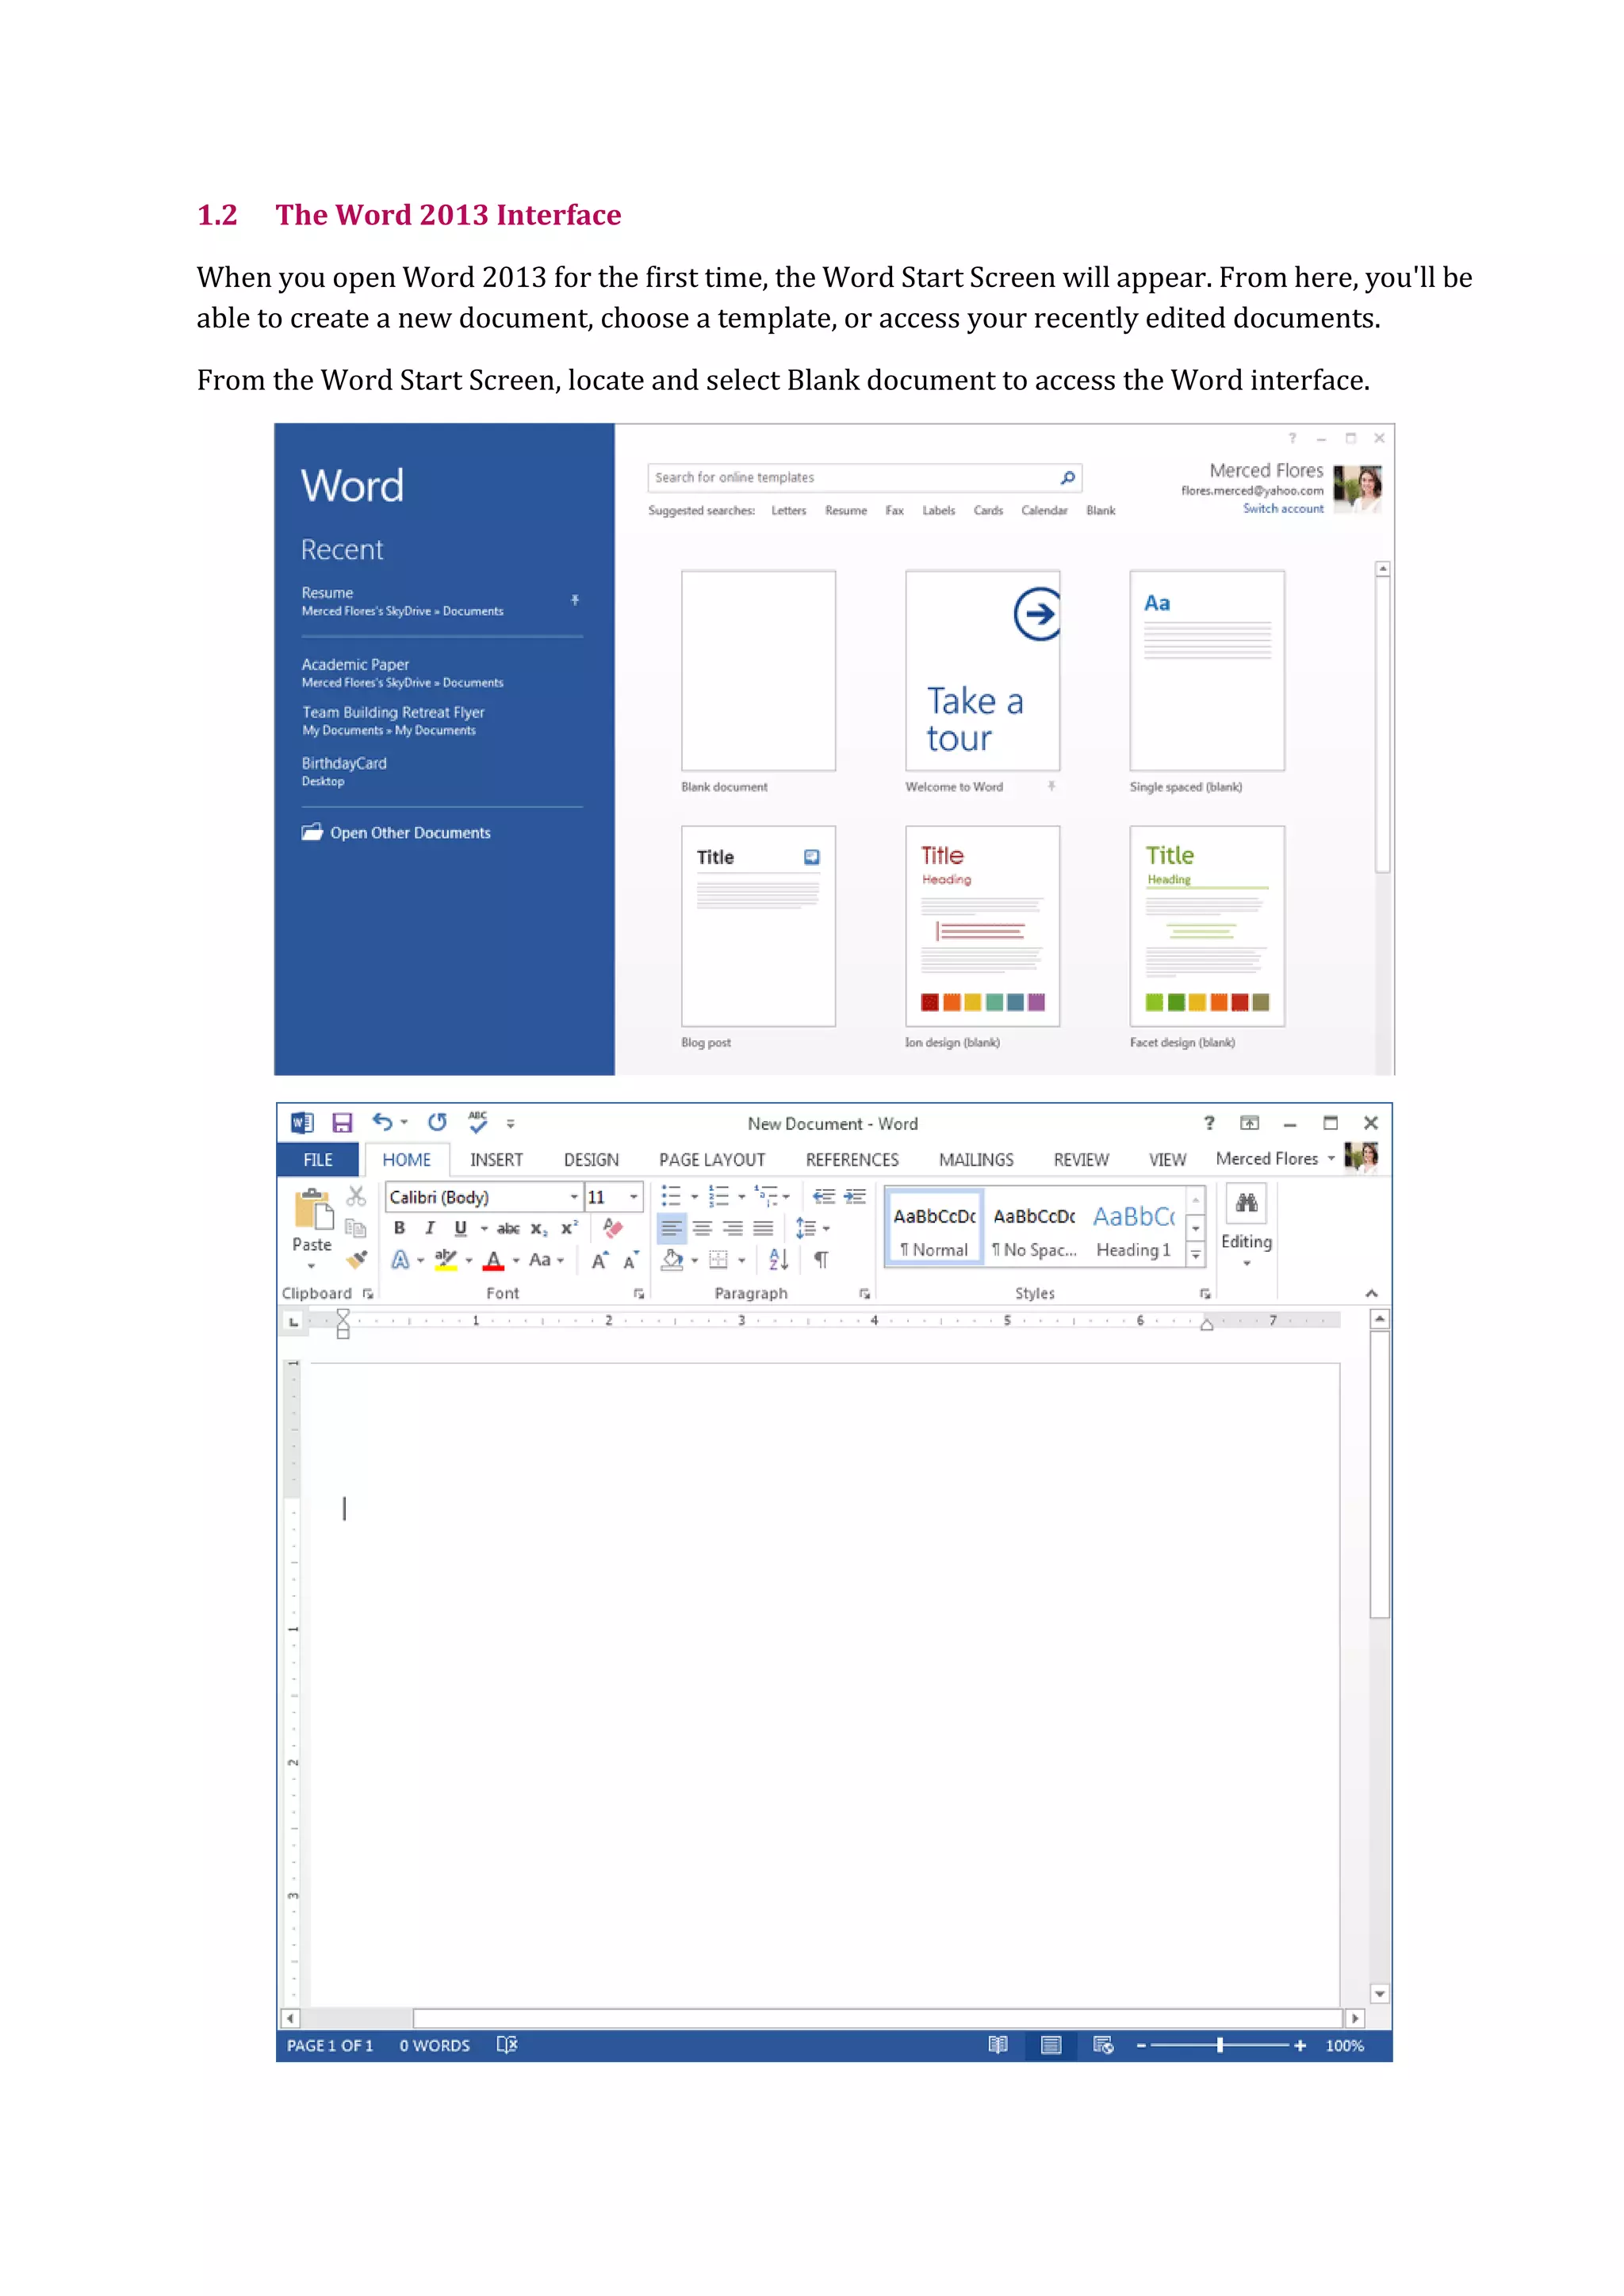
1.2 The Word2013 Interface
When you open Word 2013 for the first time, the Word Start Screen will appear. From here, you'll be
able to create a new document, choose a template, or access your recently edited documents.
From the Word Start Screen, locate and select Blank document to access the Word interface.
3.
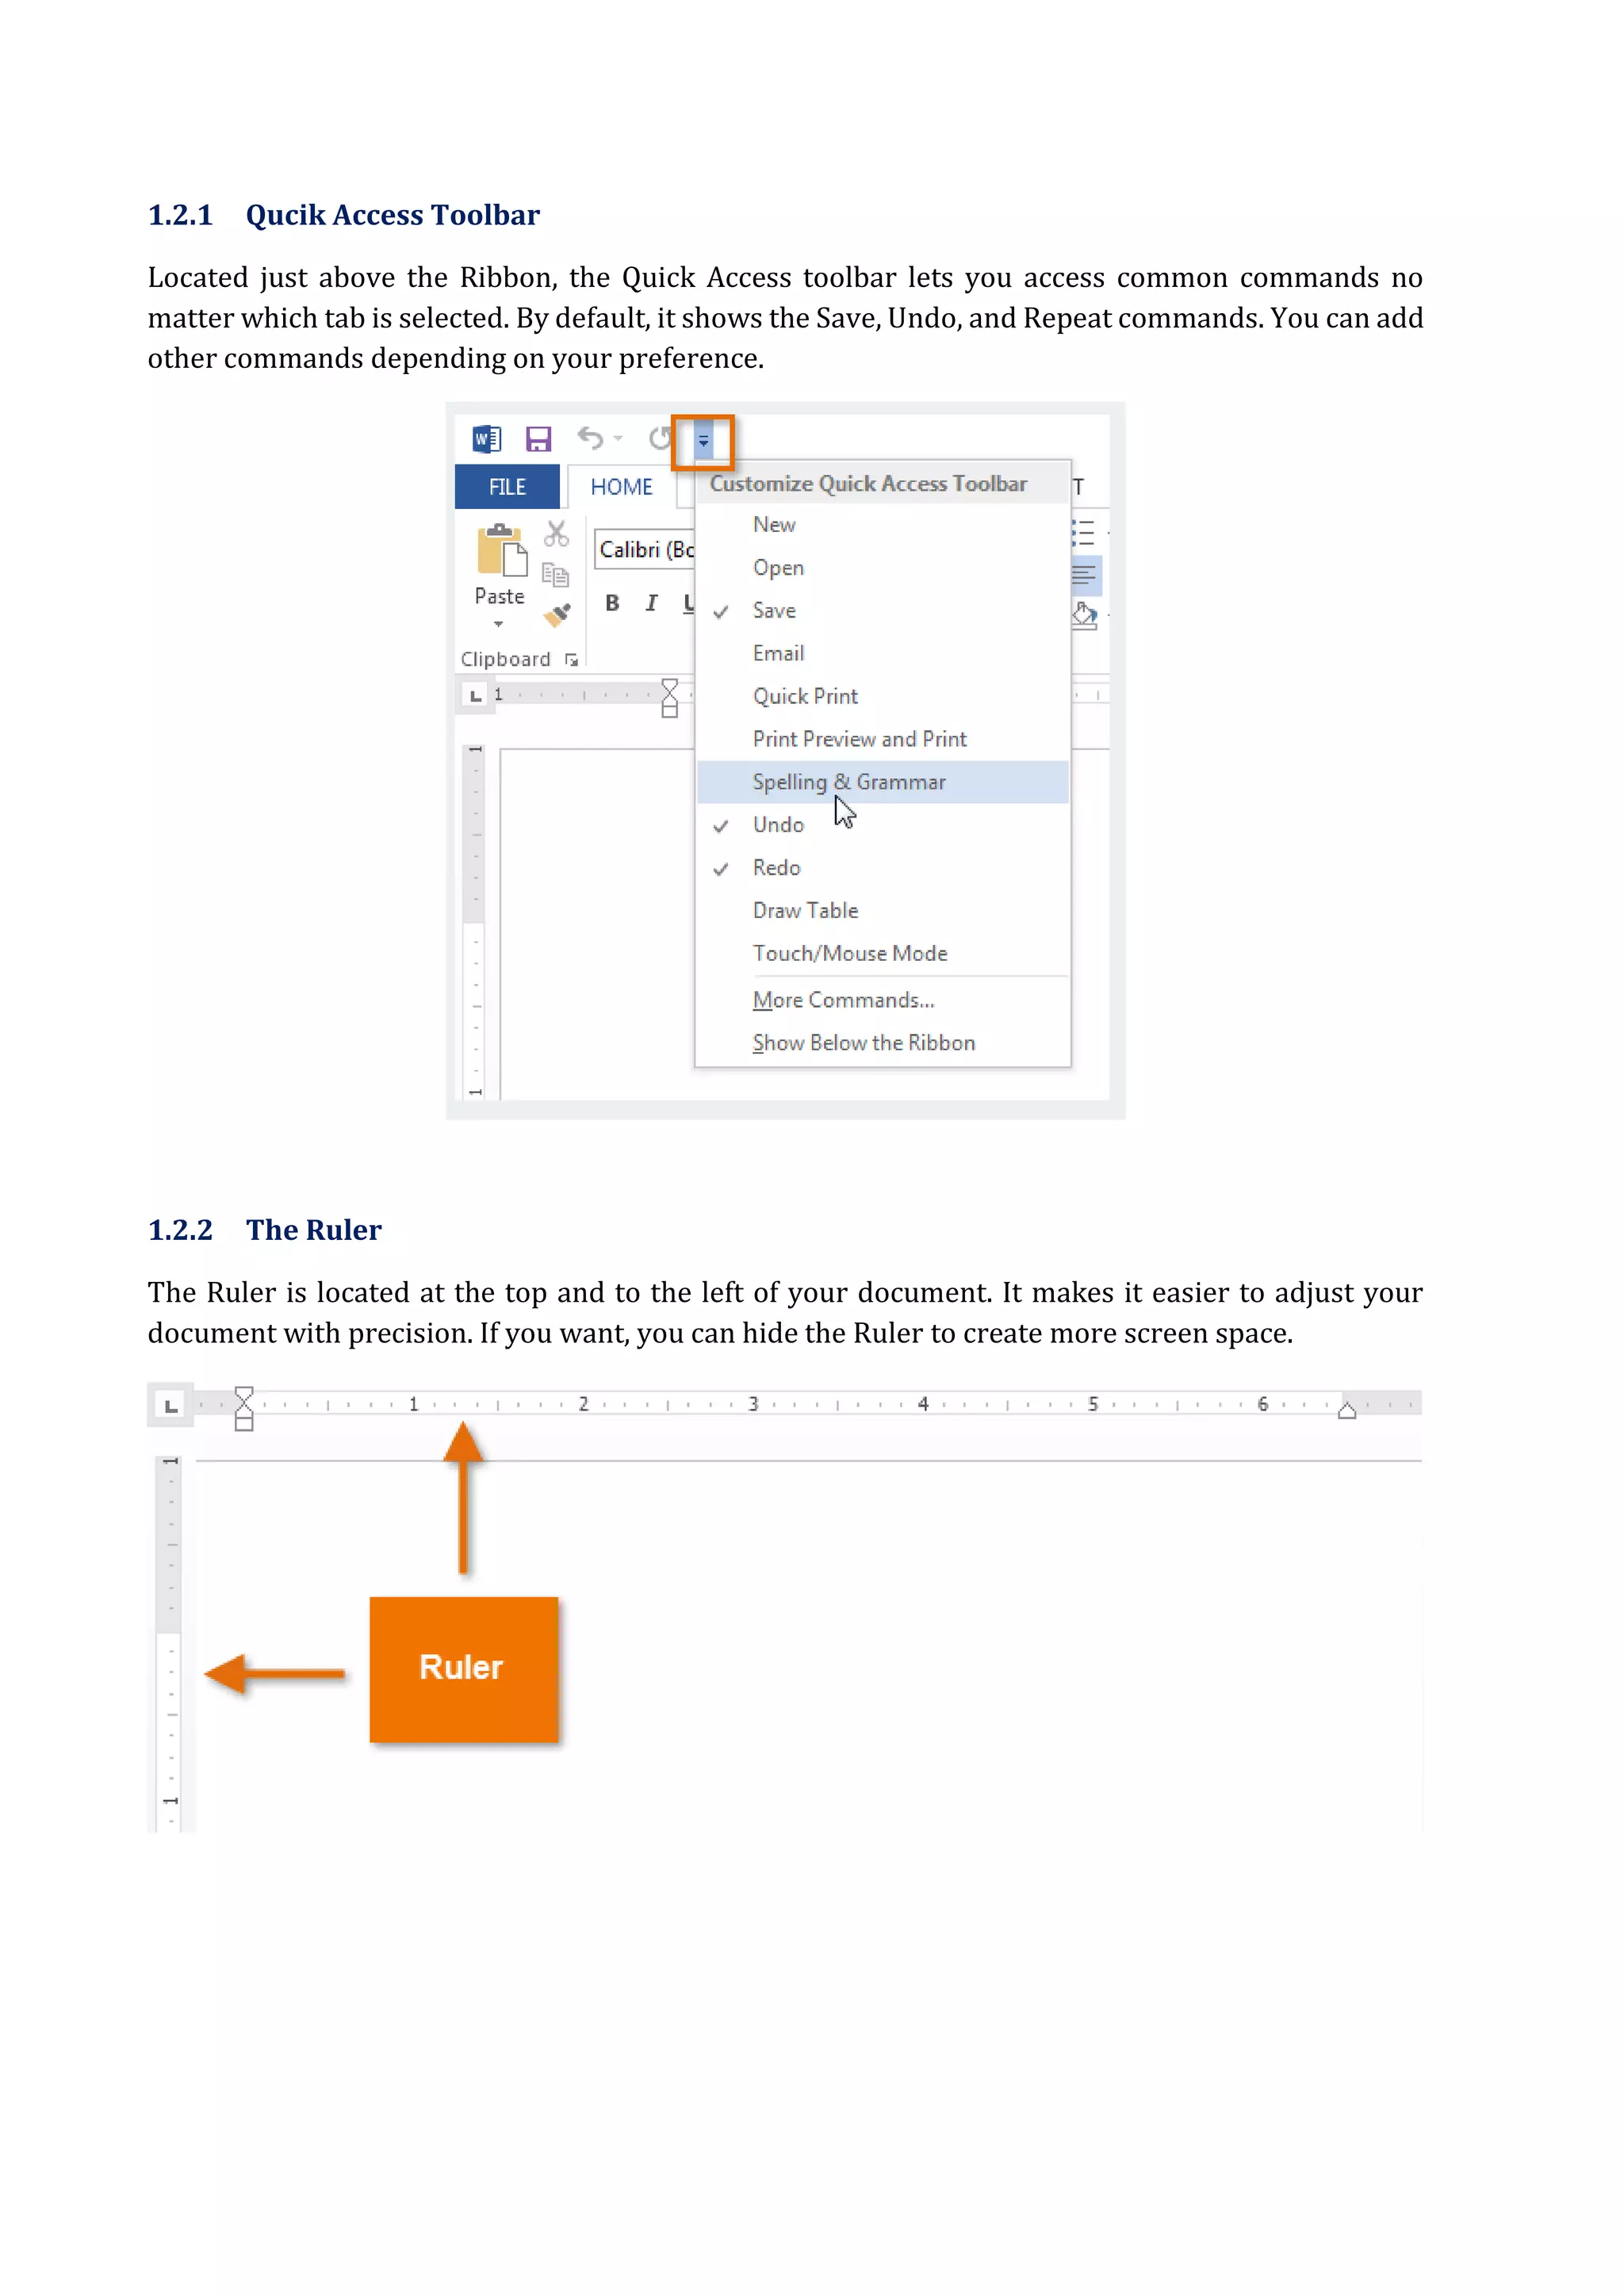
1.2.1 Qucik AccessToolbar
Located just above the Ribbon, the Quick Access toolbar lets you access common commands no
matter which tab is selected. By default, it shows the Save, Undo, and Repeat commands. You can add
other commands depending on your preference.
1.2.2 The Ruler
The Ruler is located at the top and to the left of your document. It makes it easier to adjust your
document with precision. If you want, you can hide the Ruler to create more screen space.
4.
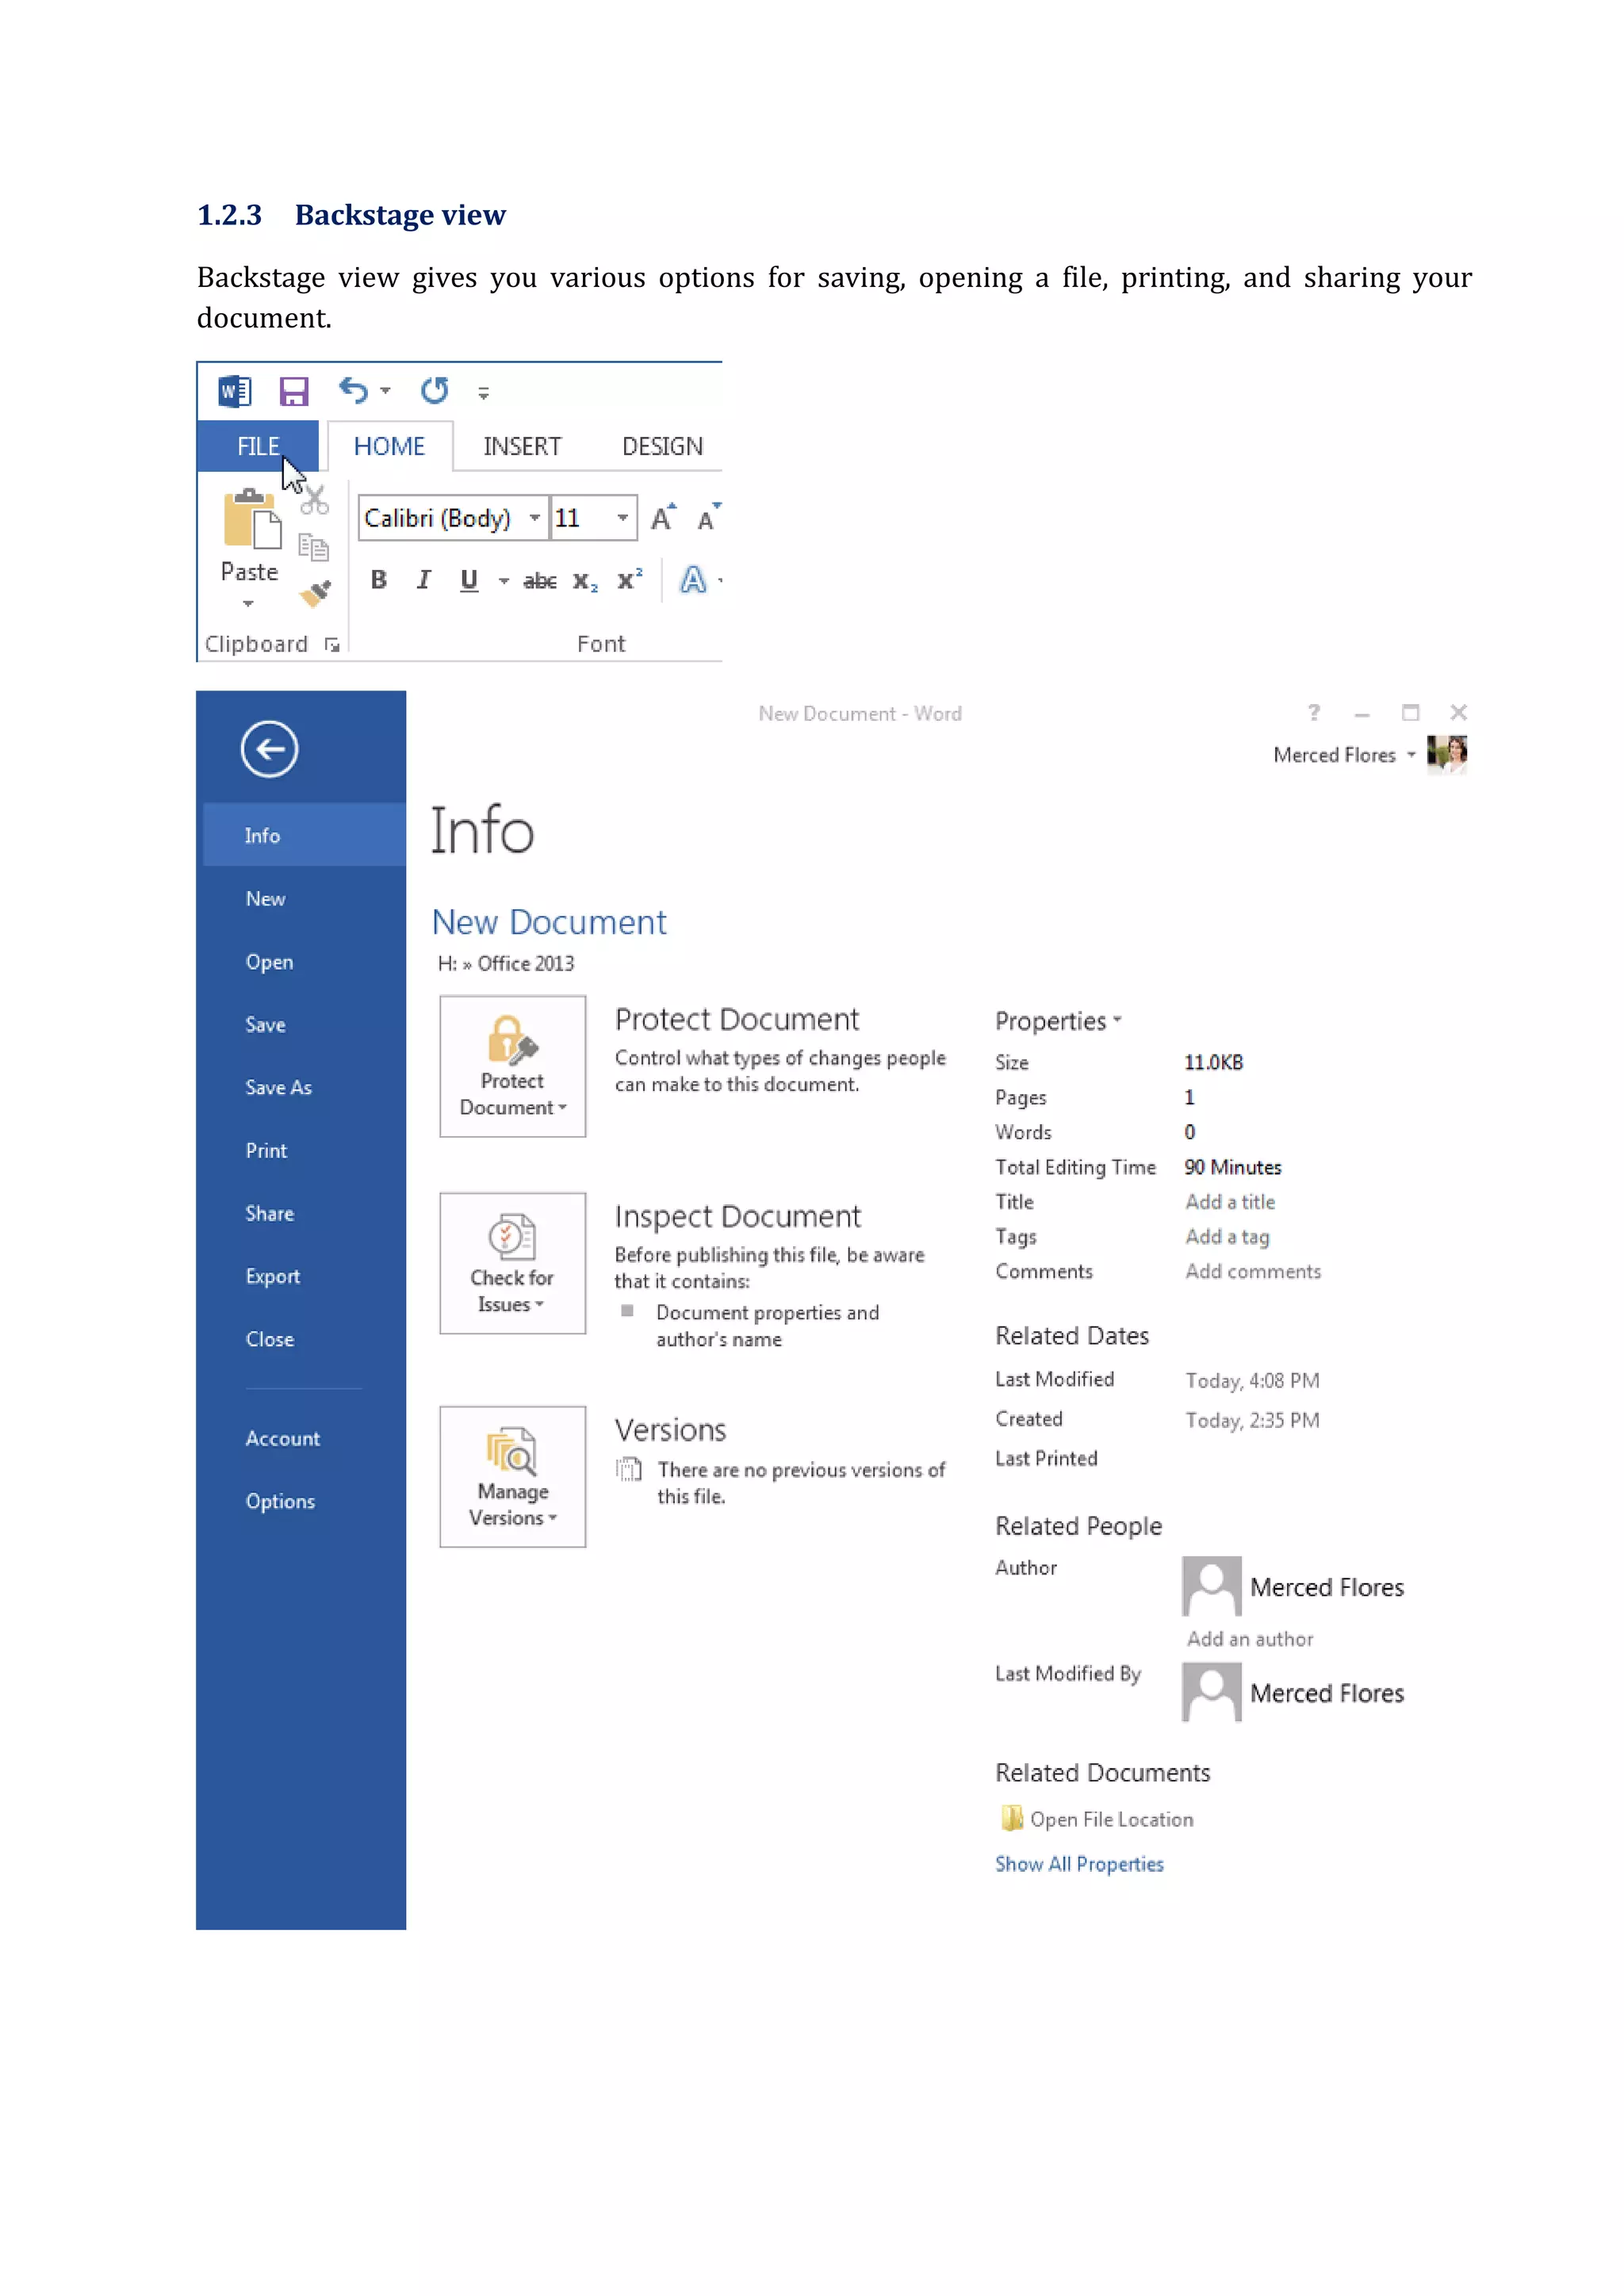
1.2.3 Backstage view
Backstageview gives you various options for saving, opening a file, printing, and sharing your
document.
5.
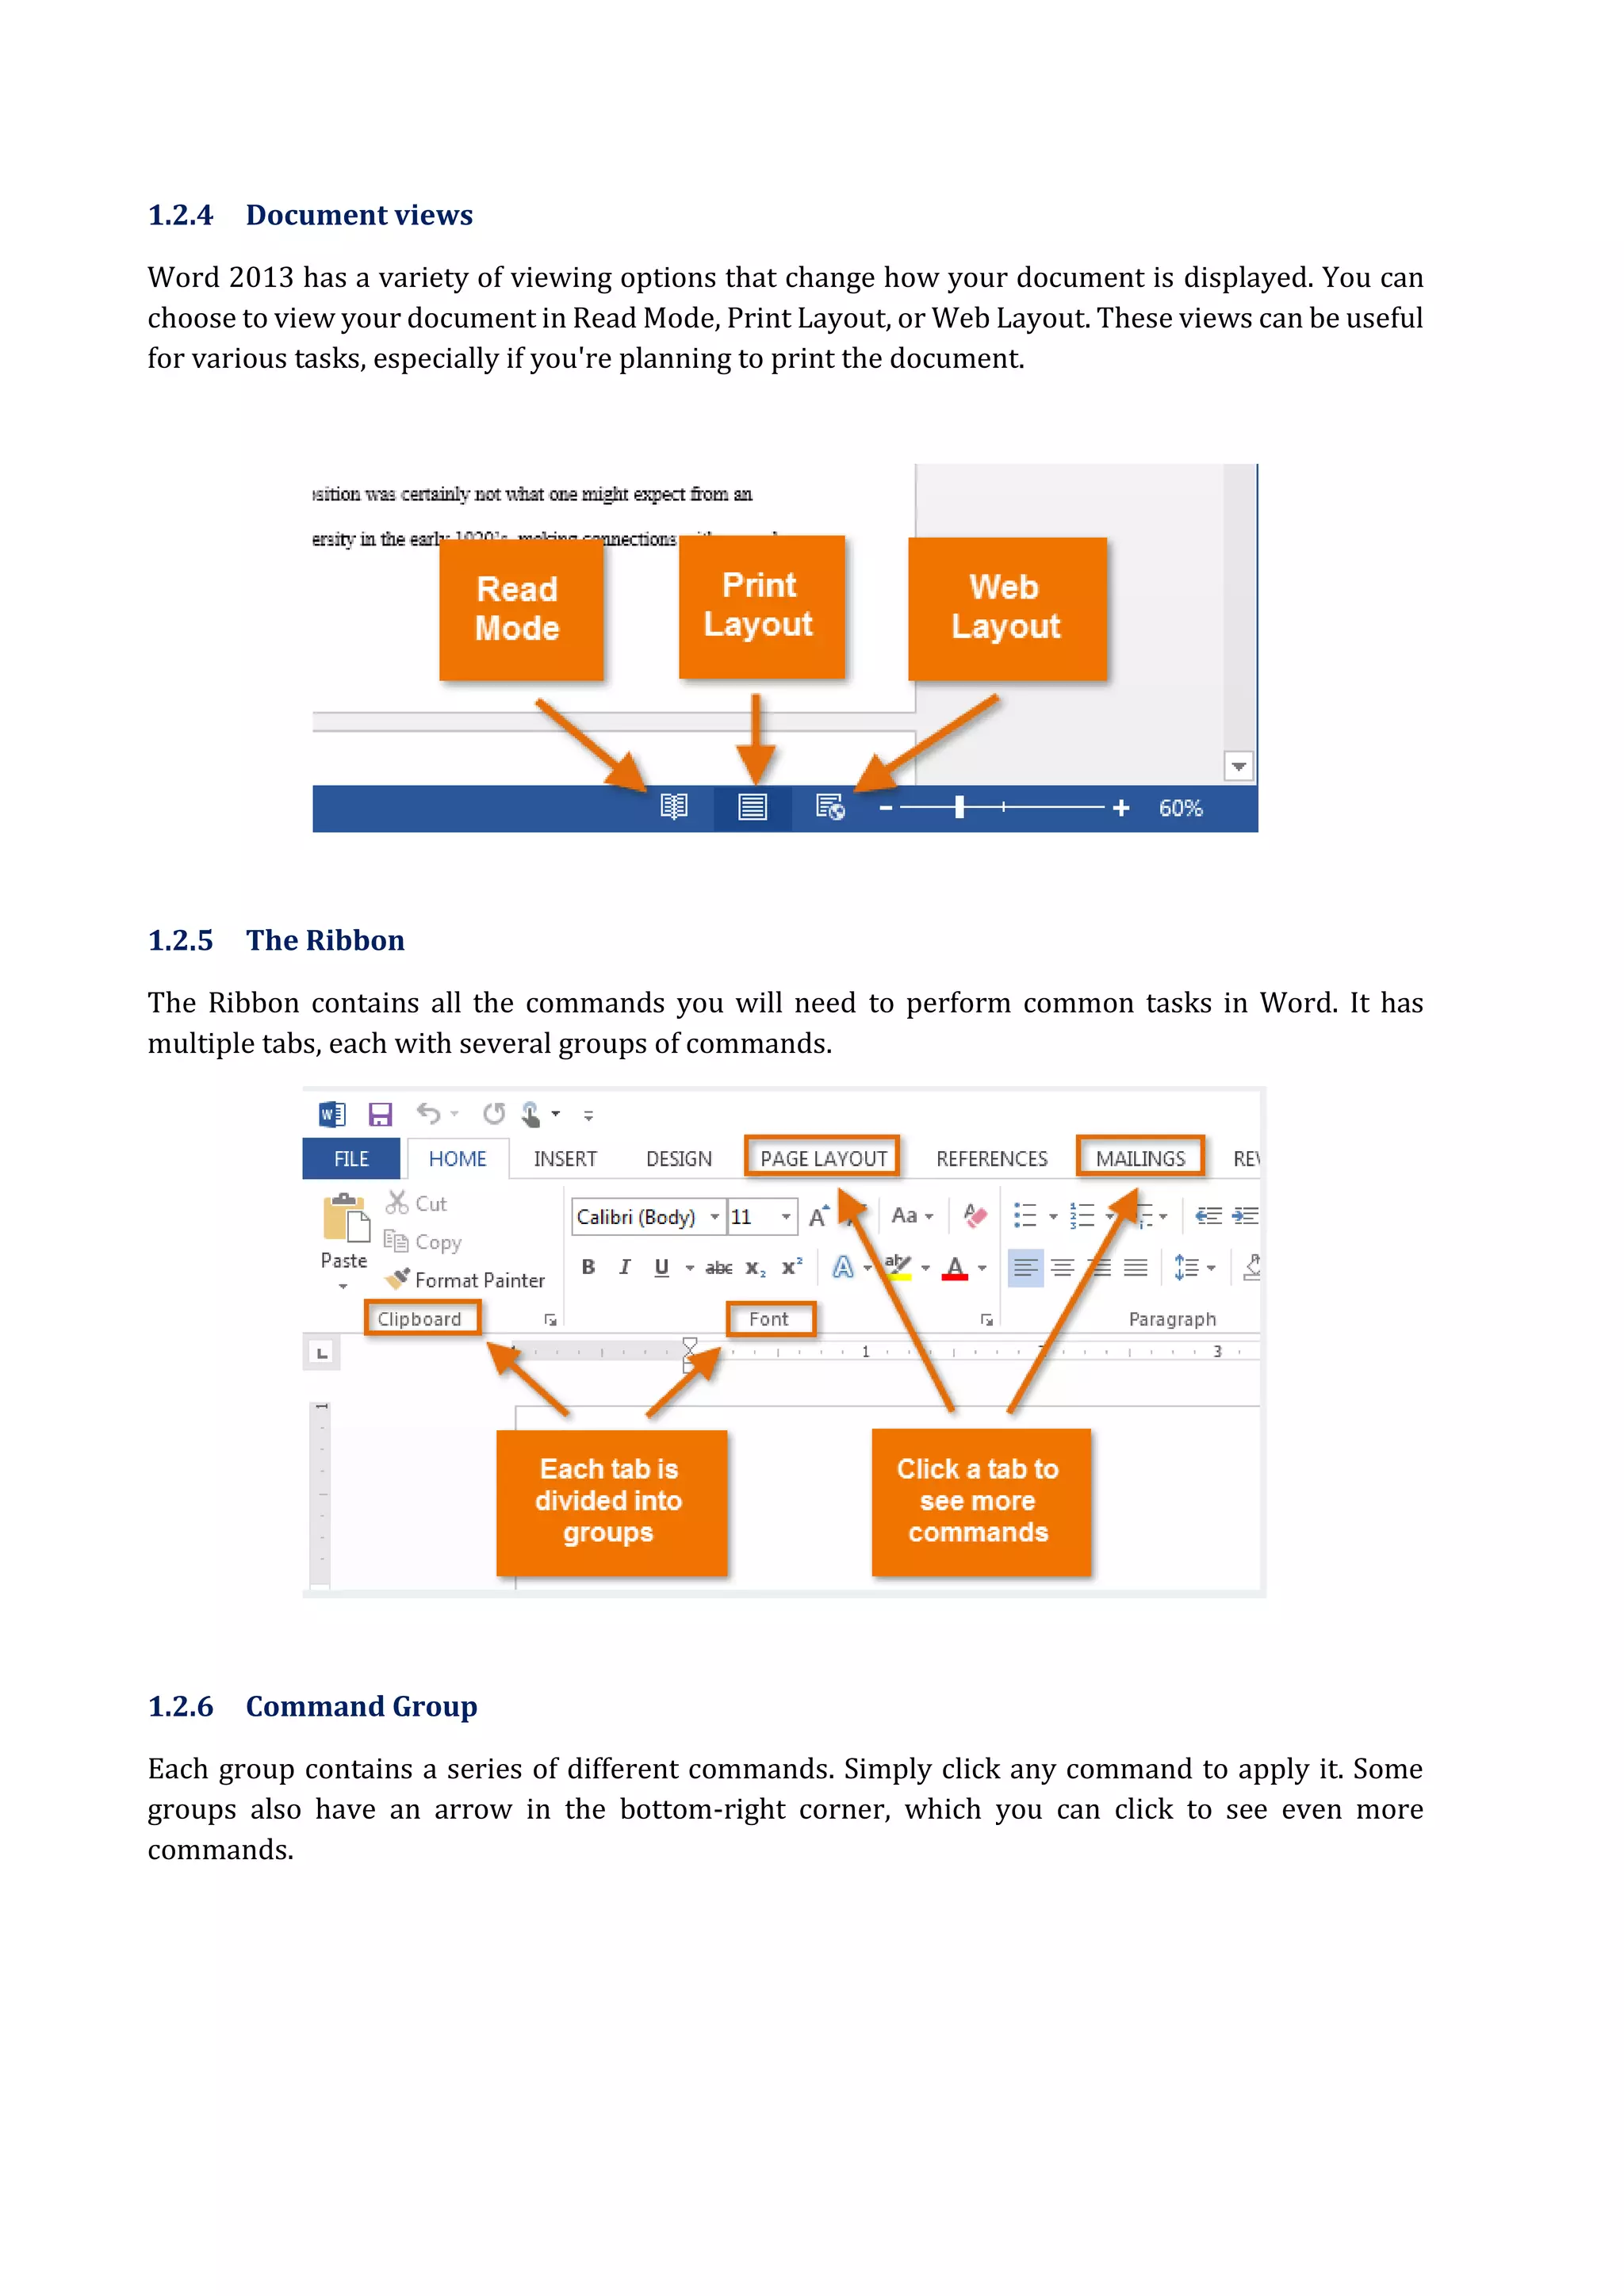
1.2.4 Document views
Word2013 has a variety of viewing options that change how your document is displayed. You can
choose to view your document in Read Mode, Print Layout, or Web Layout. These views can be useful
for various tasks, especially if you're planning to print the document.
1.2.5 The Ribbon
The Ribbon contains all the commands you will need to perform common tasks in Word. It has
multiple tabs, each with several groups of commands.
1.2.6 Command Group
Each group contains a series of different commands. Simply click any command to apply it. Some
groups also have an arrow in the bottom-right corner, which you can click to see even more
commands.
6.
1.2.7 Page NumberIndicator
The page number indicator helps you keep track of the number of pages that your document contains.
Click the page number indicator to open the document navigation pane. There, you can search your
document by headings or scroll quickly through its pages.
7.
1.3 Working withthe Word environment
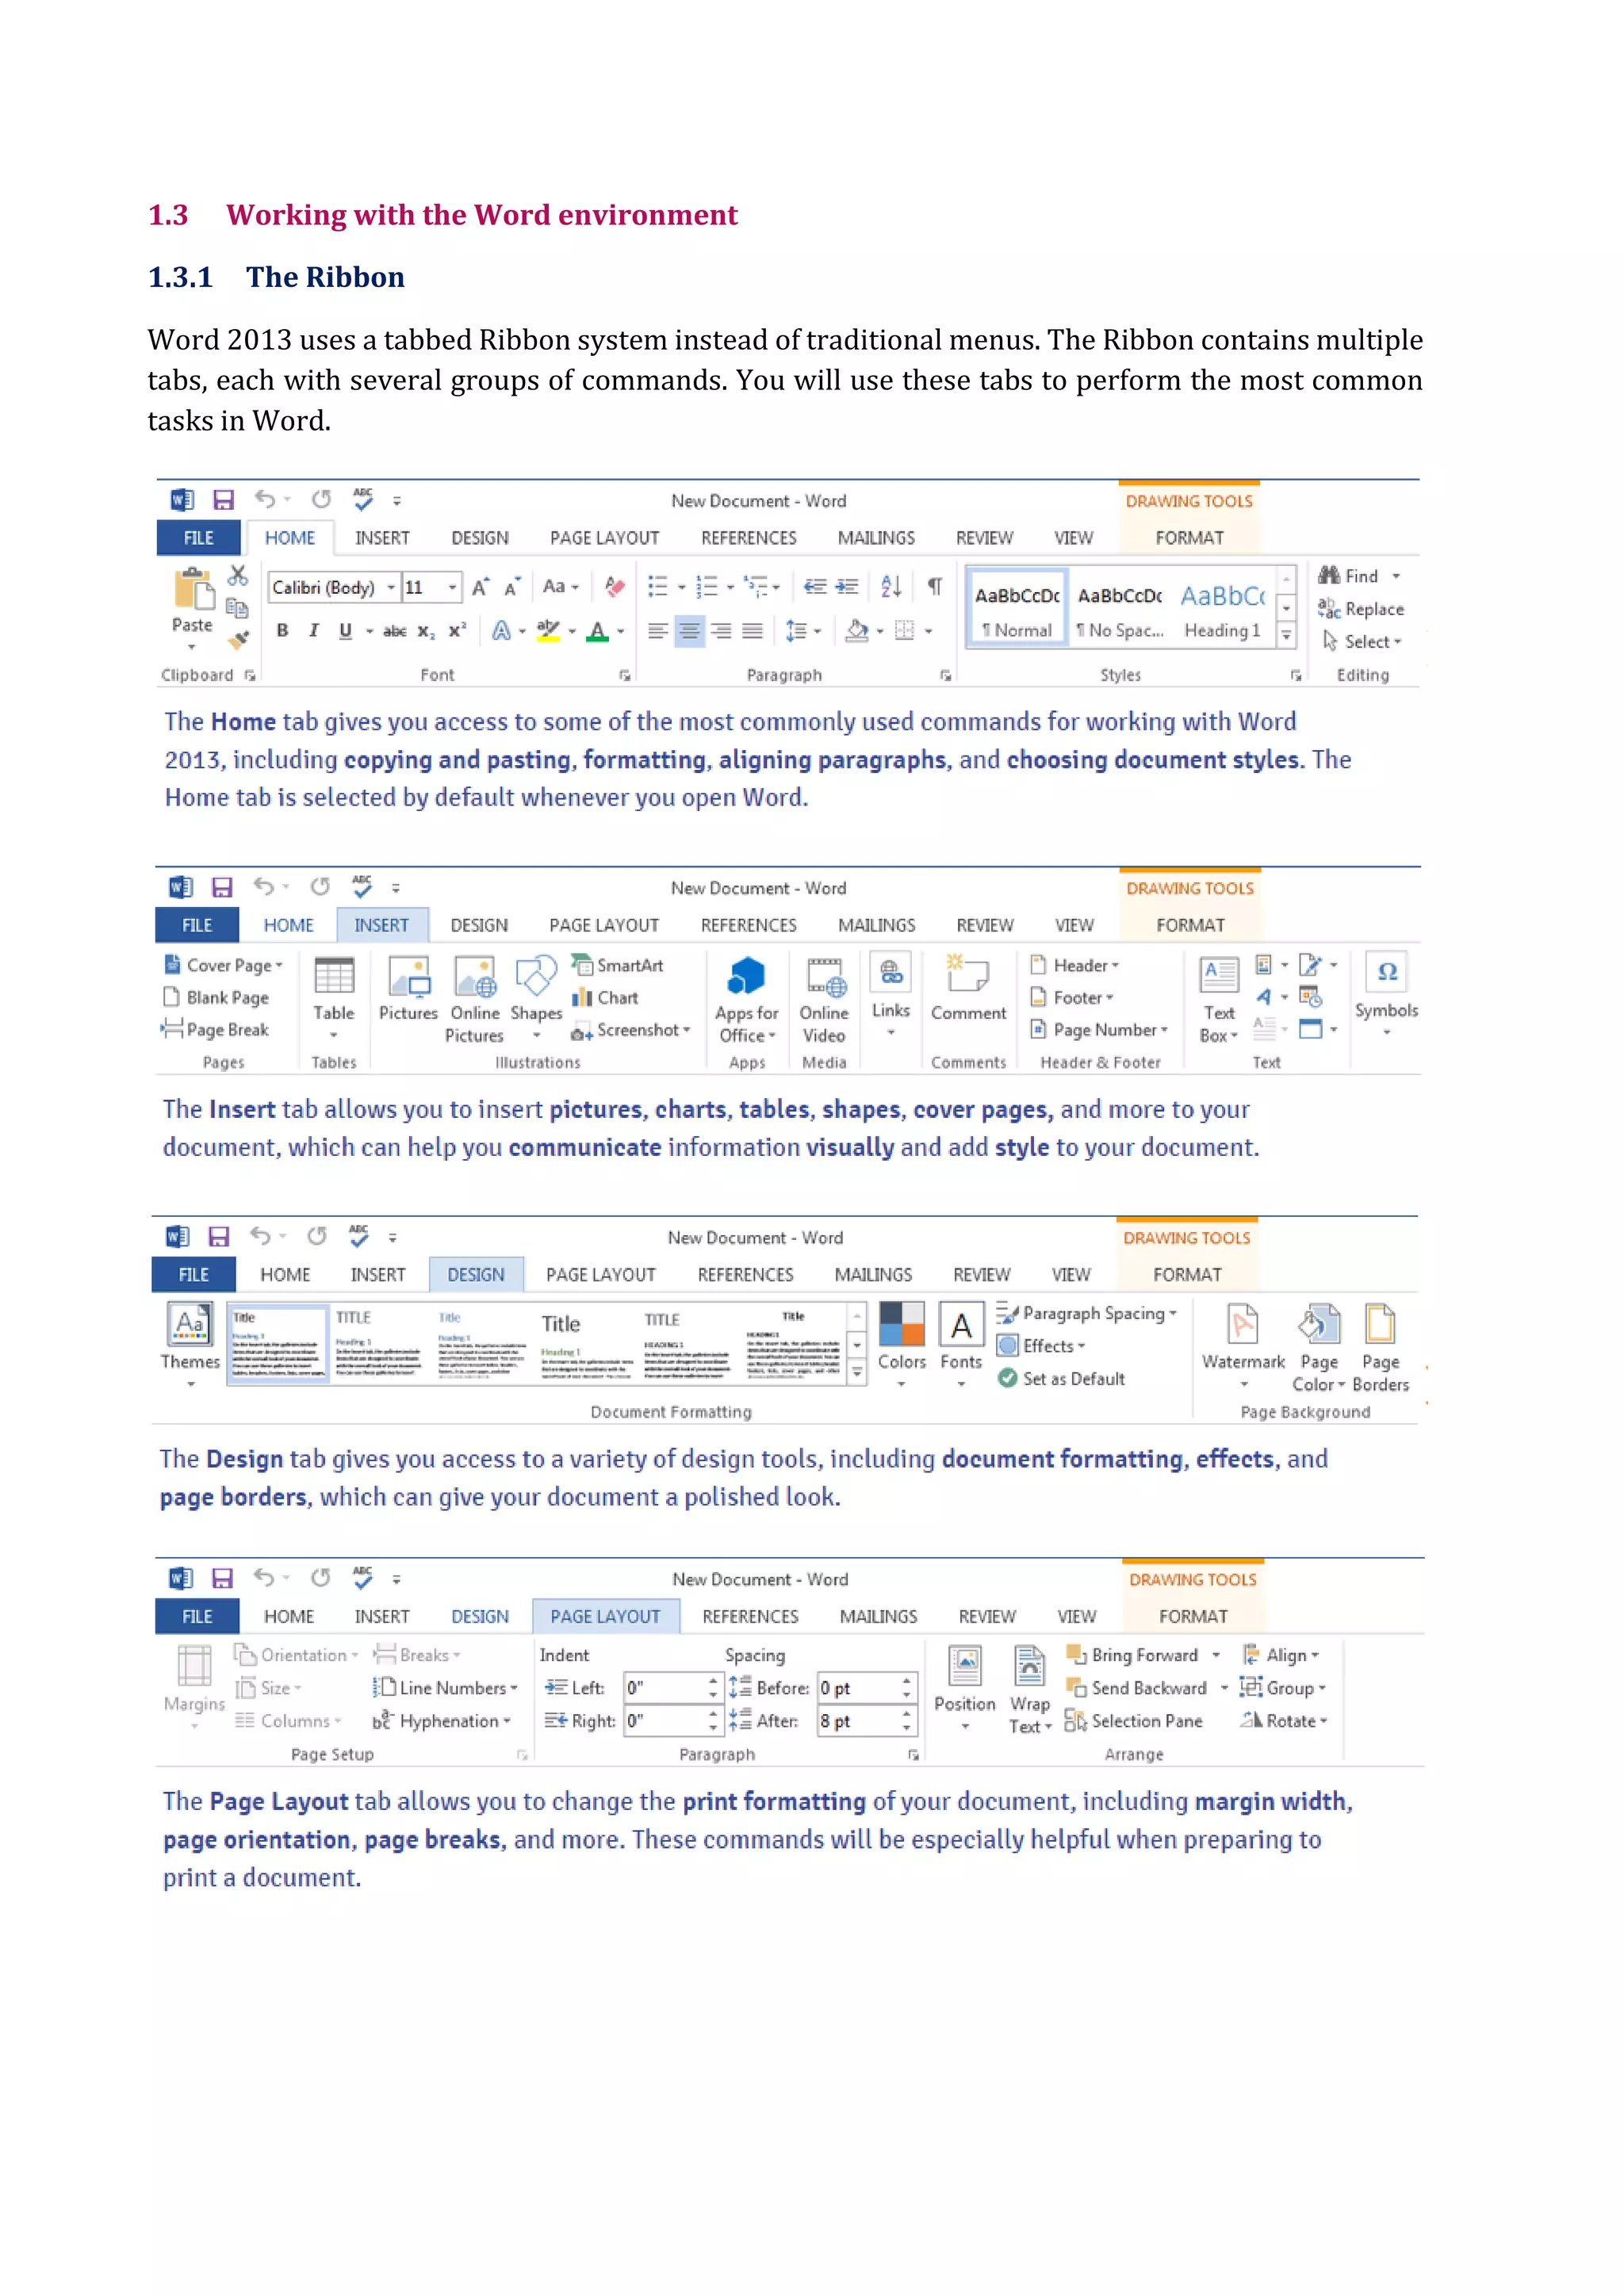
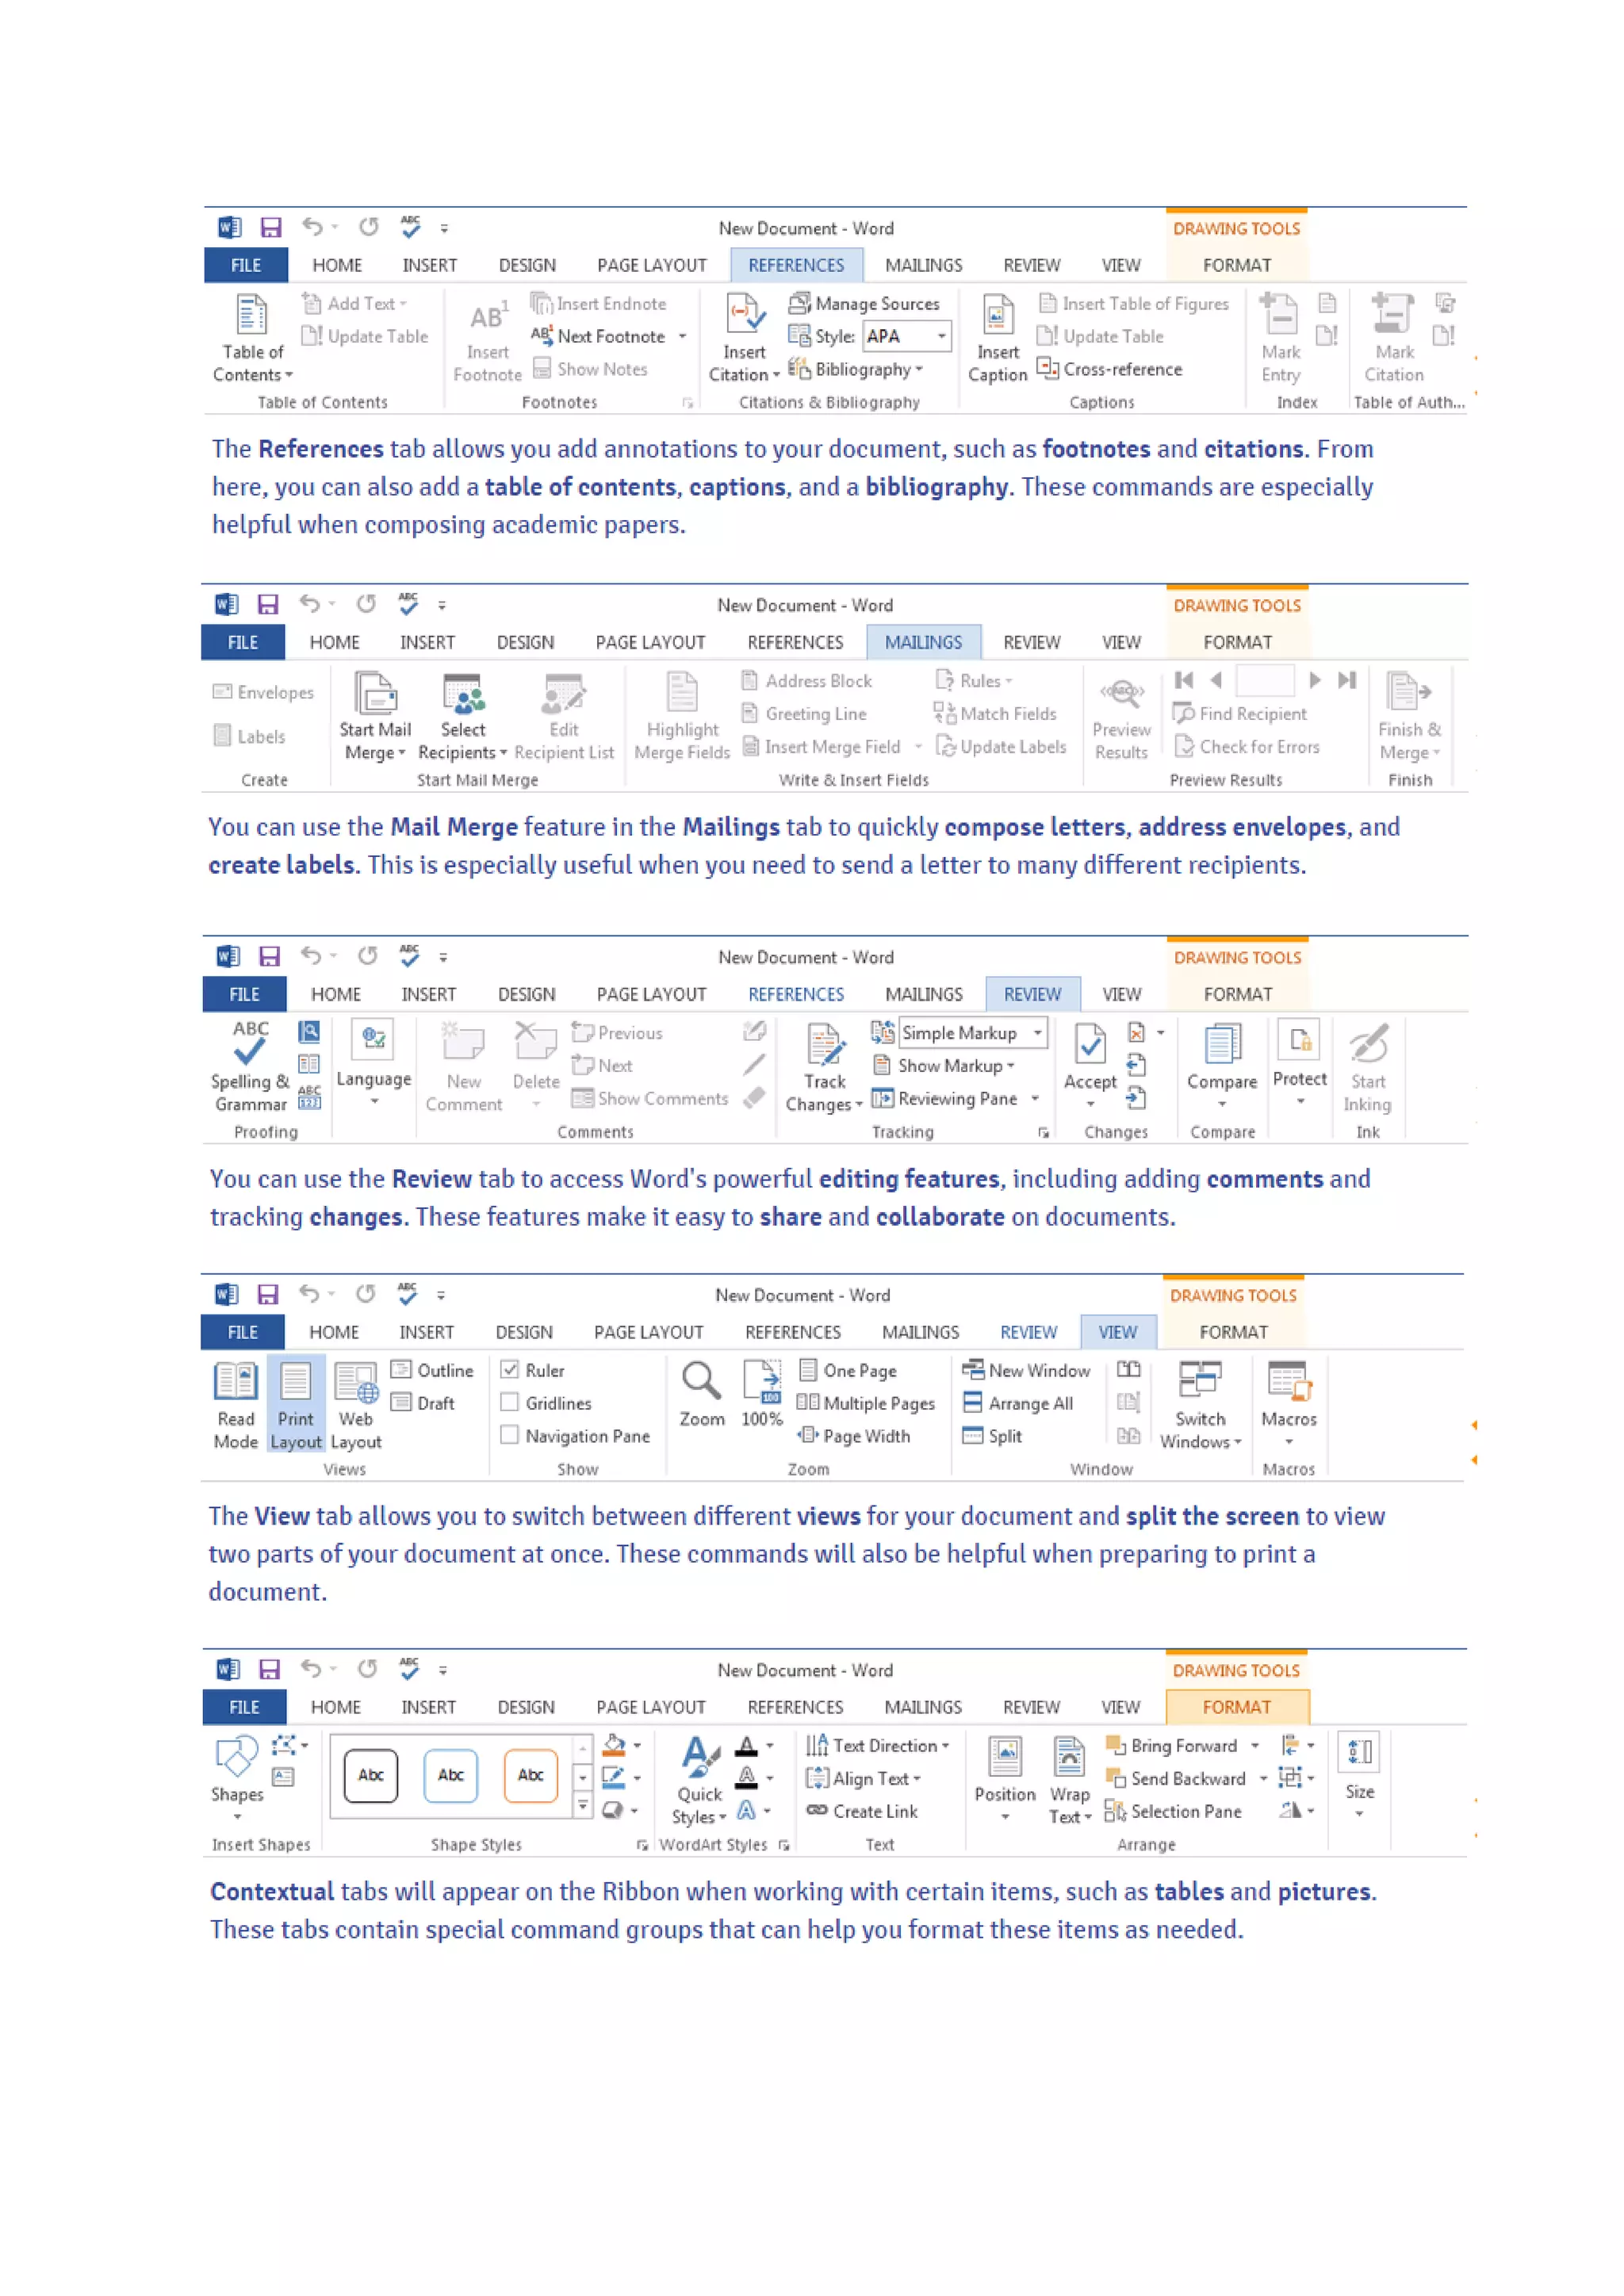
1.3.1 The Ribbon
Word 2013 uses a tabbed Ribbon system instead of traditional menus. The Ribbon contains multiple
tabs, each with several groups of commands. You will use these tabs to perform the most common
tasks in Word.
9.
1.4 Creating documentsin Word 2013
Word files are called documents. Whenever you start a new project in Word, you'll need to create a
new document, which can either be blank or from a template. You'll also need to know how to open
an existing document.
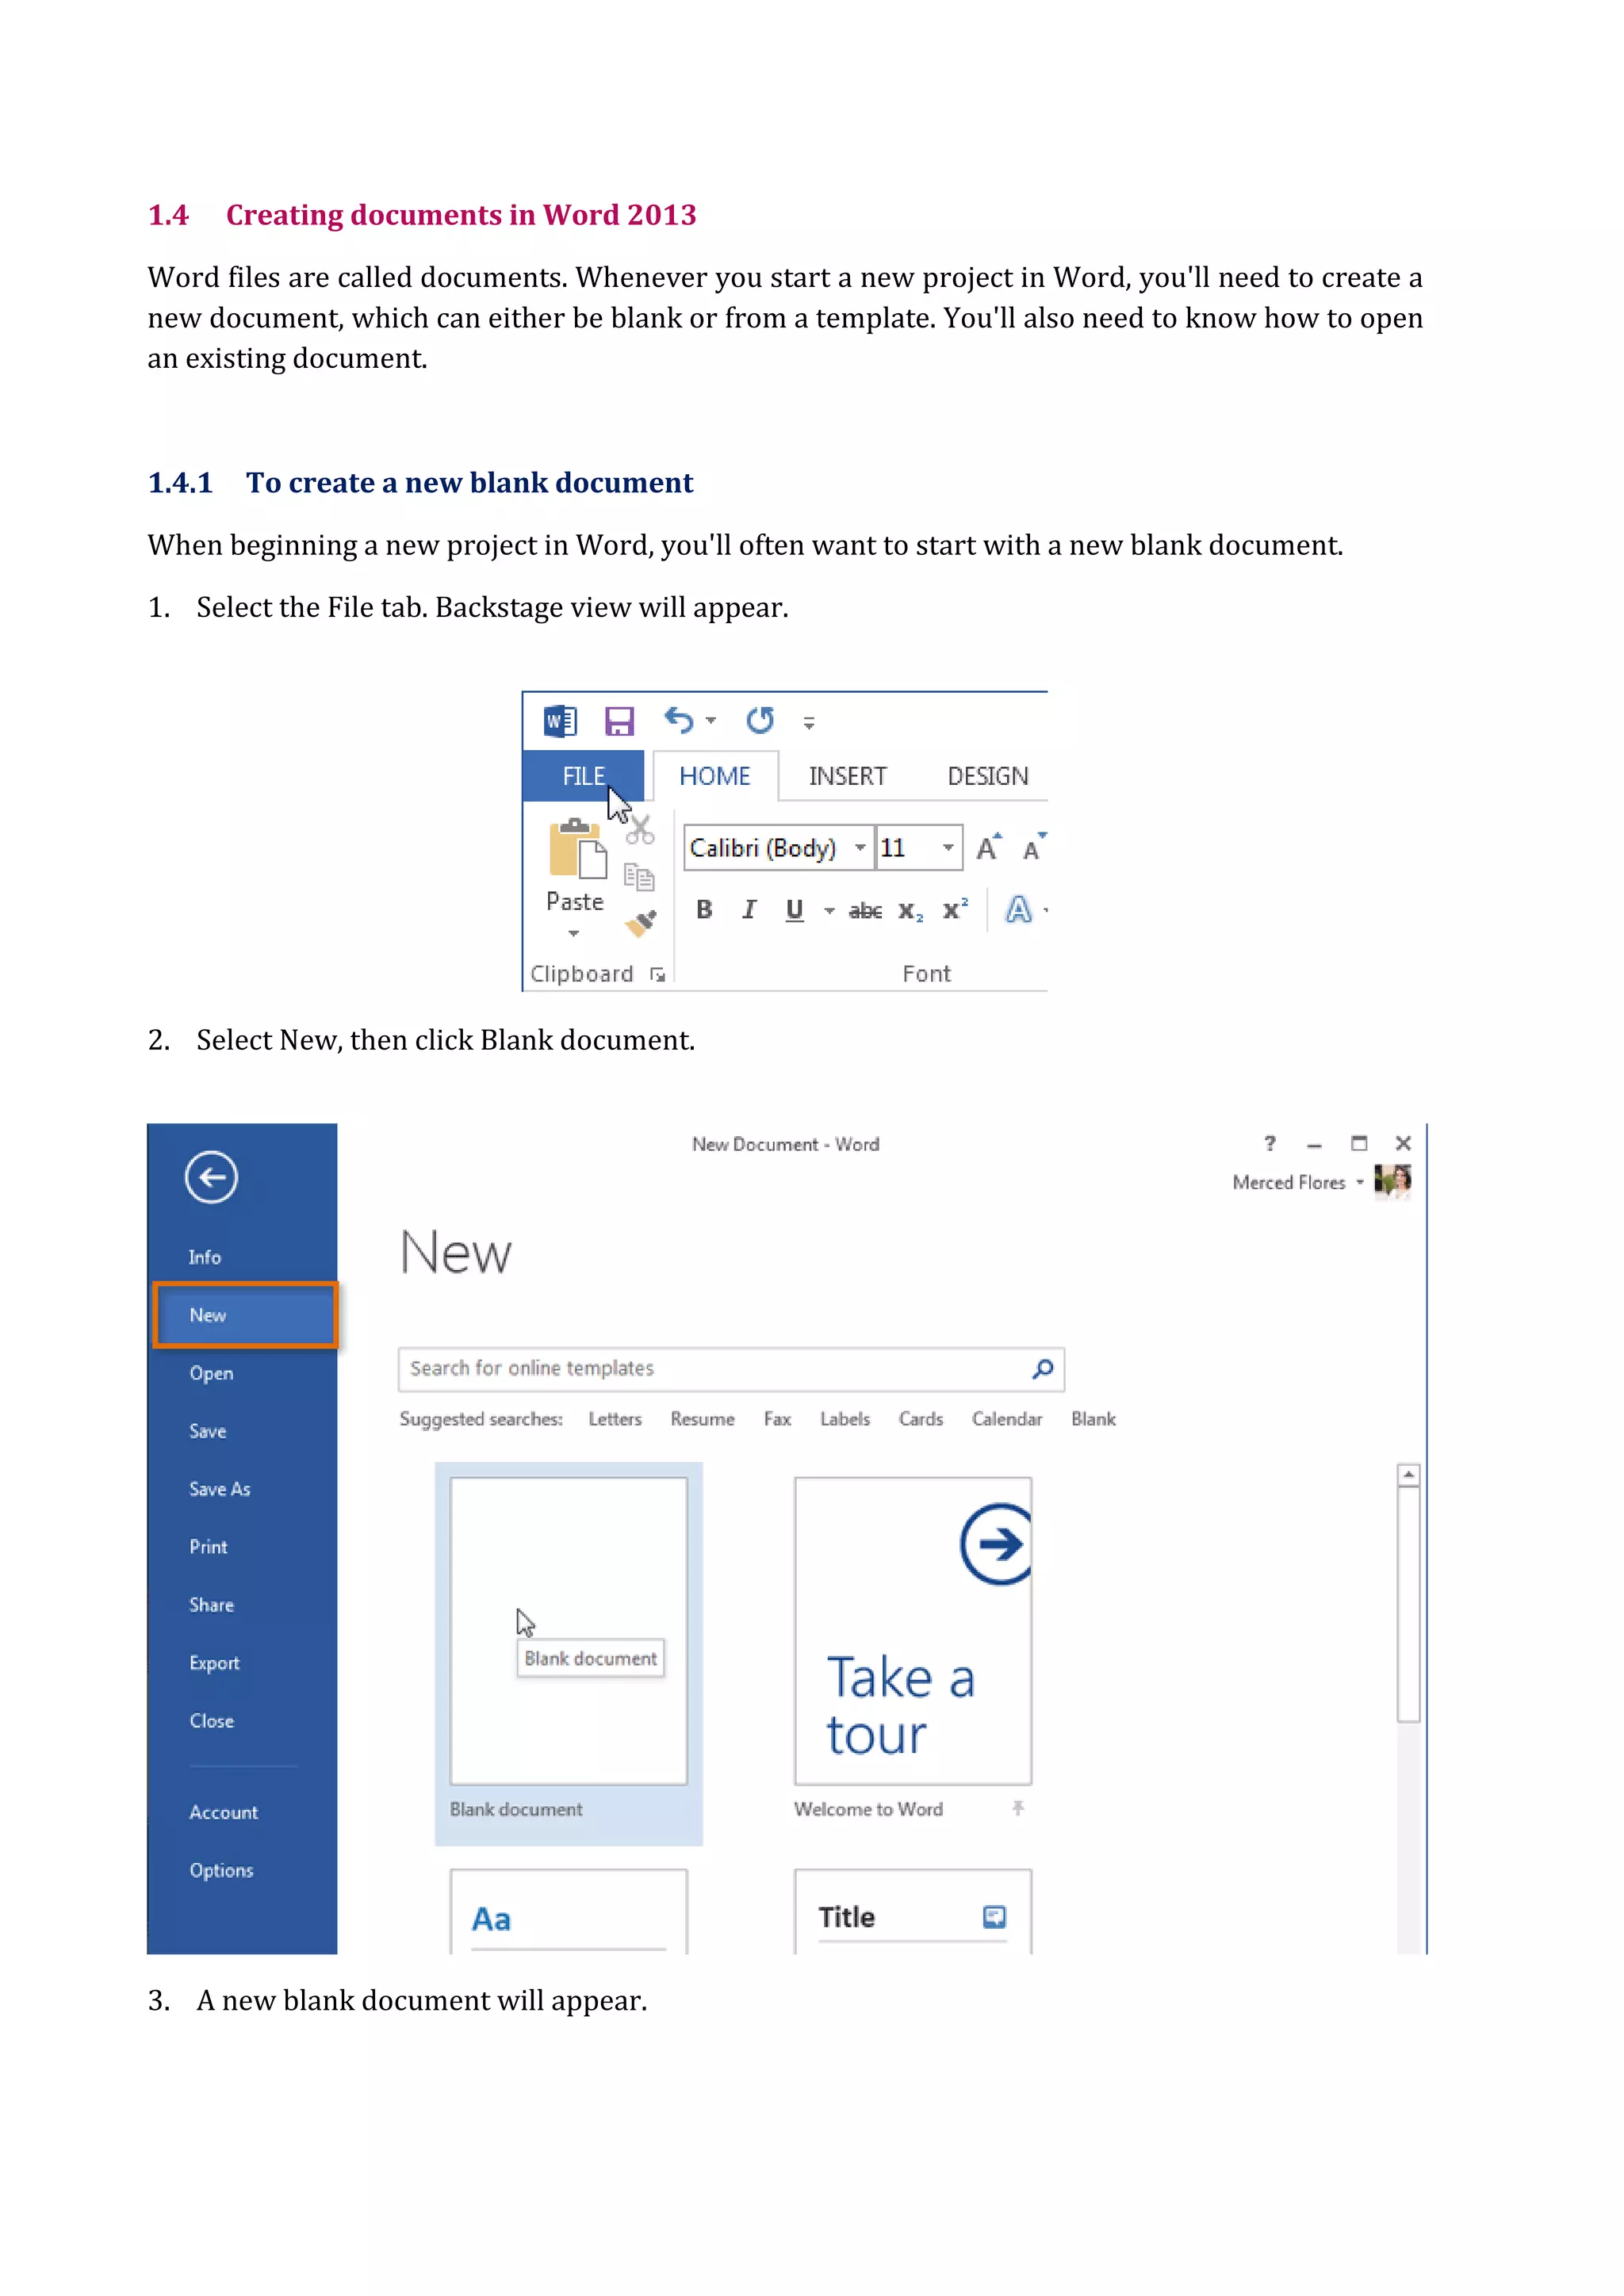
1.4.1 To create a new blank document
When beginning a new project in Word, you'll often want to start with a new blank document.
1. Select the File tab. Backstage view will appear.
2. Select New, then click Blank document.
3. A new blank document will appear.
10.
1.5 Formatting Text
Formattedtext can draw the reader's attention to specific parts of a document and emphasize
important information. In Word, you have many options for adjusting the font of your text, including
size, color, and inserting special symbols. You can also adjust the alignment of the text to change how
it is displayed on the page.
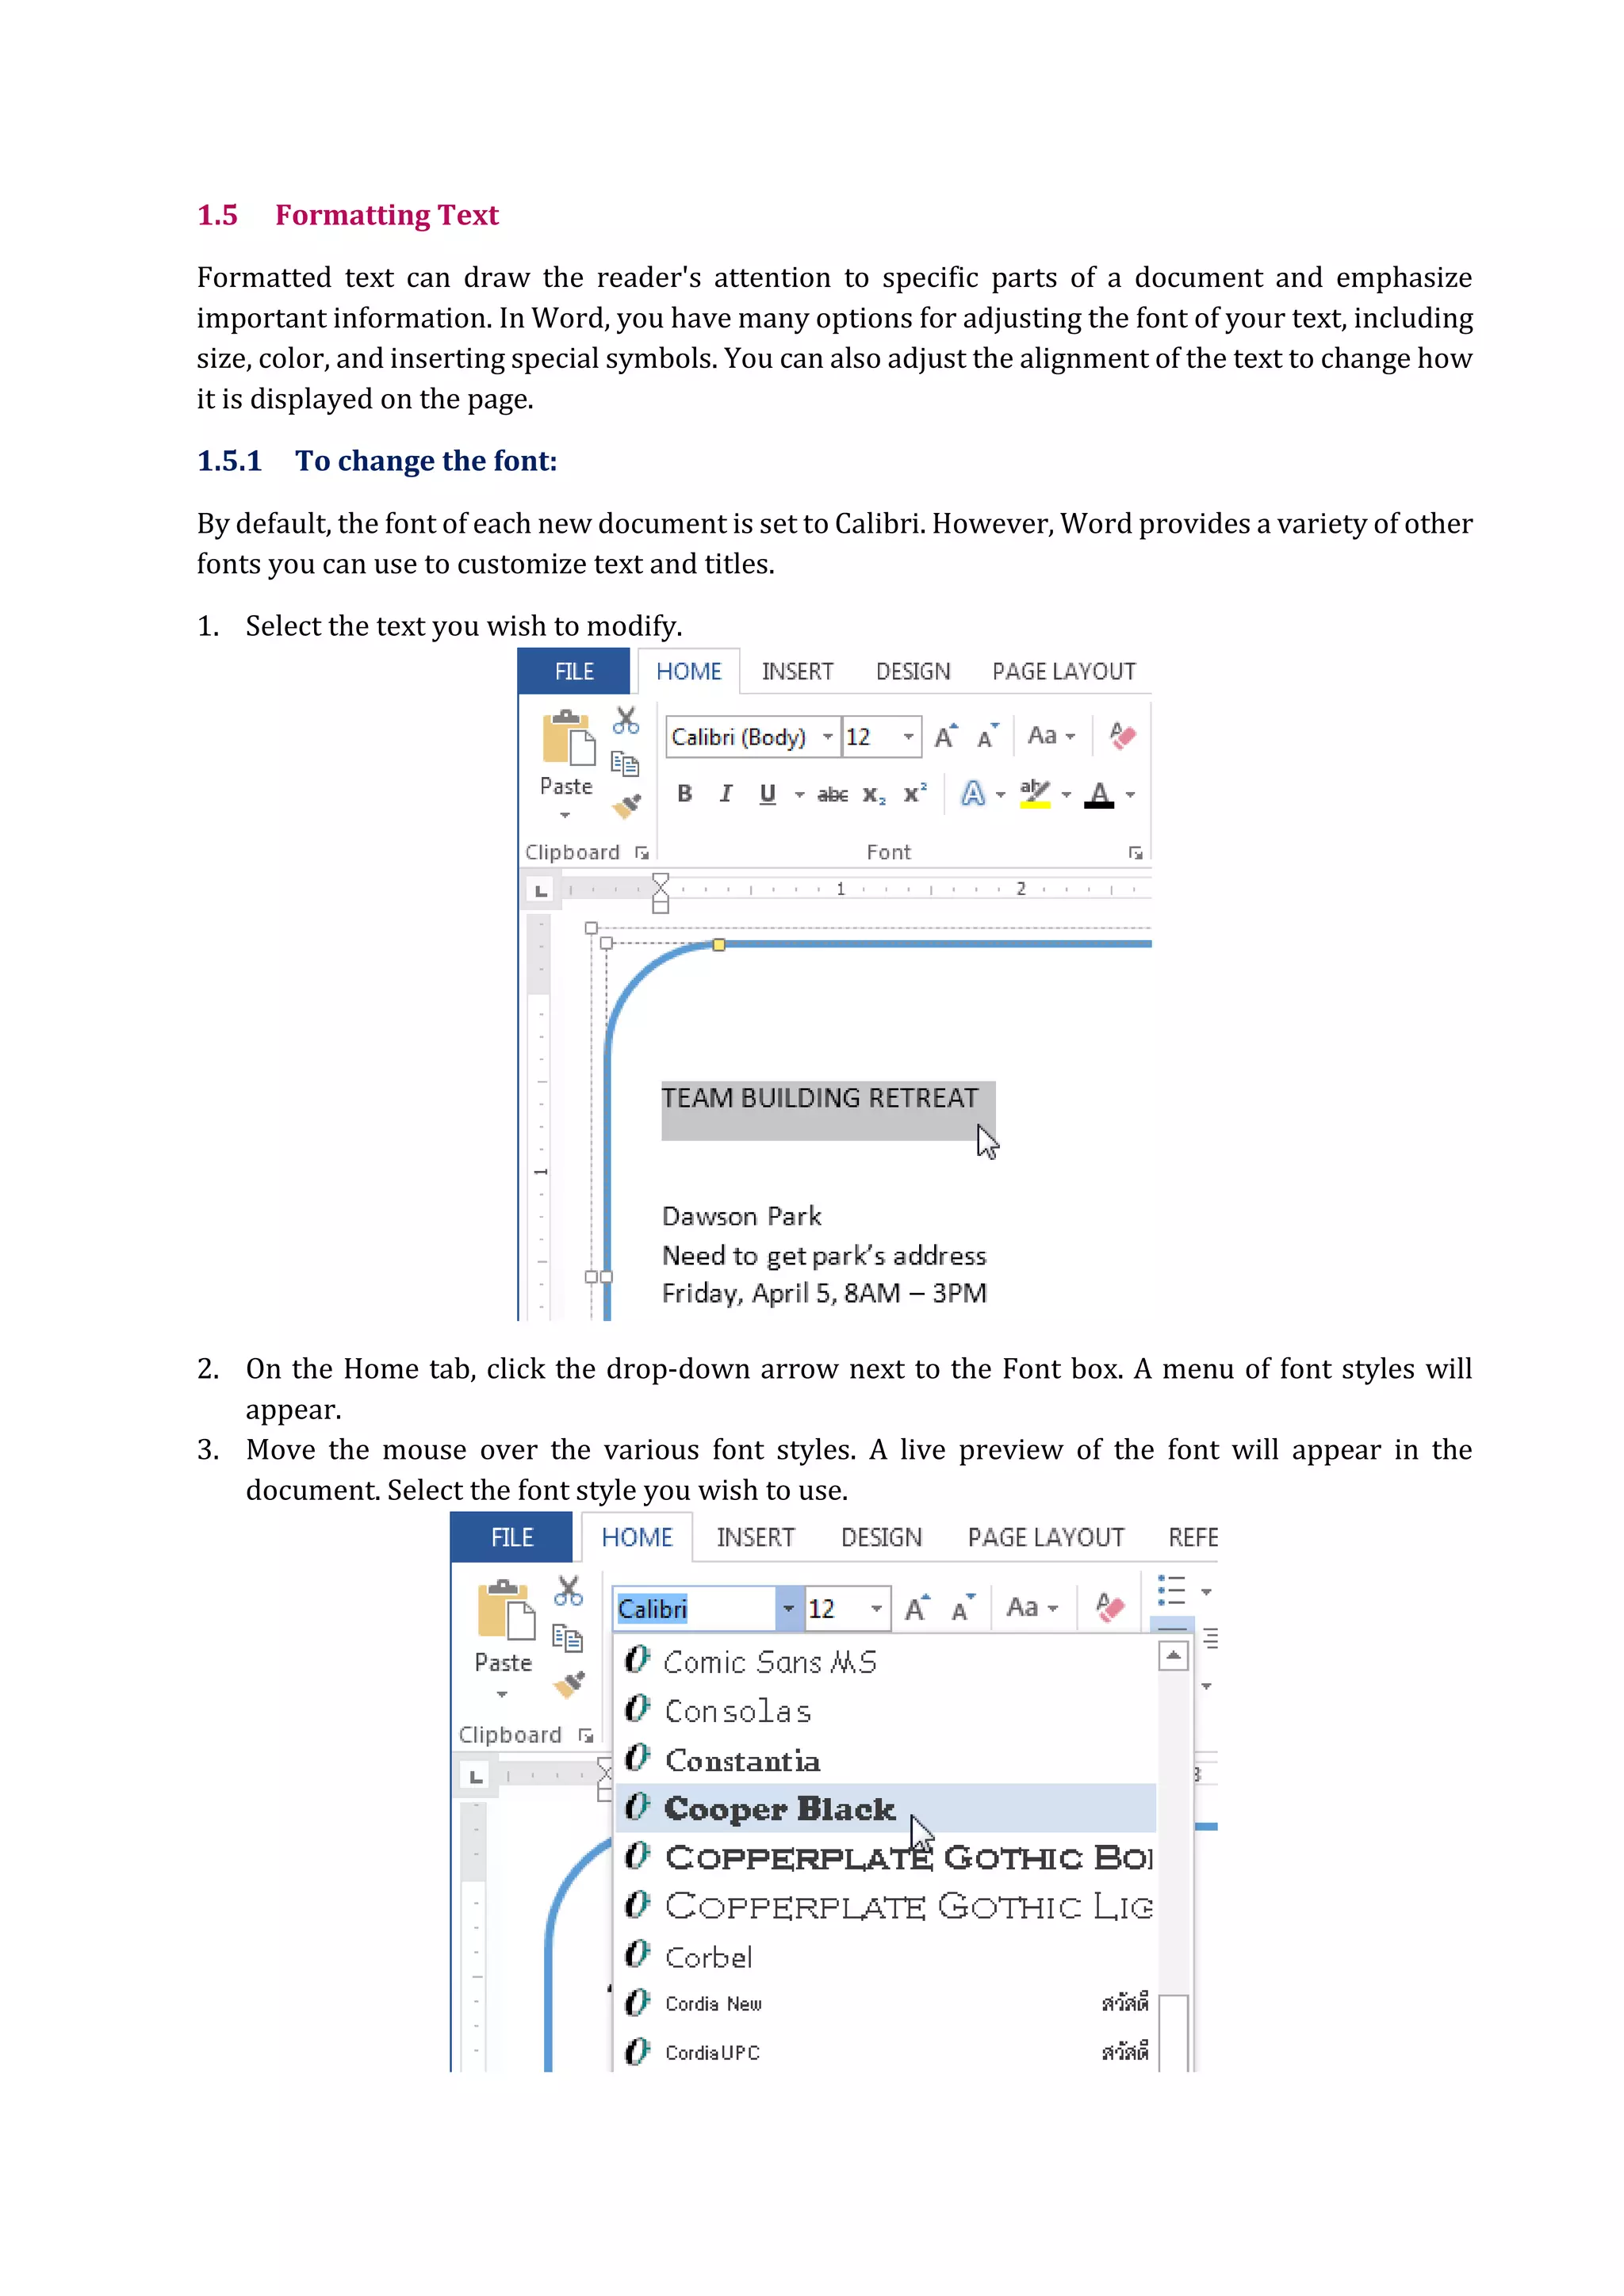
1.5.1 To change the font:
By default, the font of each new document is set to Calibri. However, Word provides a variety of other
fonts you can use to customize text and titles.
1. Select the text you wish to modify.
2. On the Home tab, click the drop-down arrow next to the Font box. A menu of font styles will
appear.
3. Move the mouse over the various font styles. A live preview of the font will appear in the
document. Select the font style you wish to use.
11.
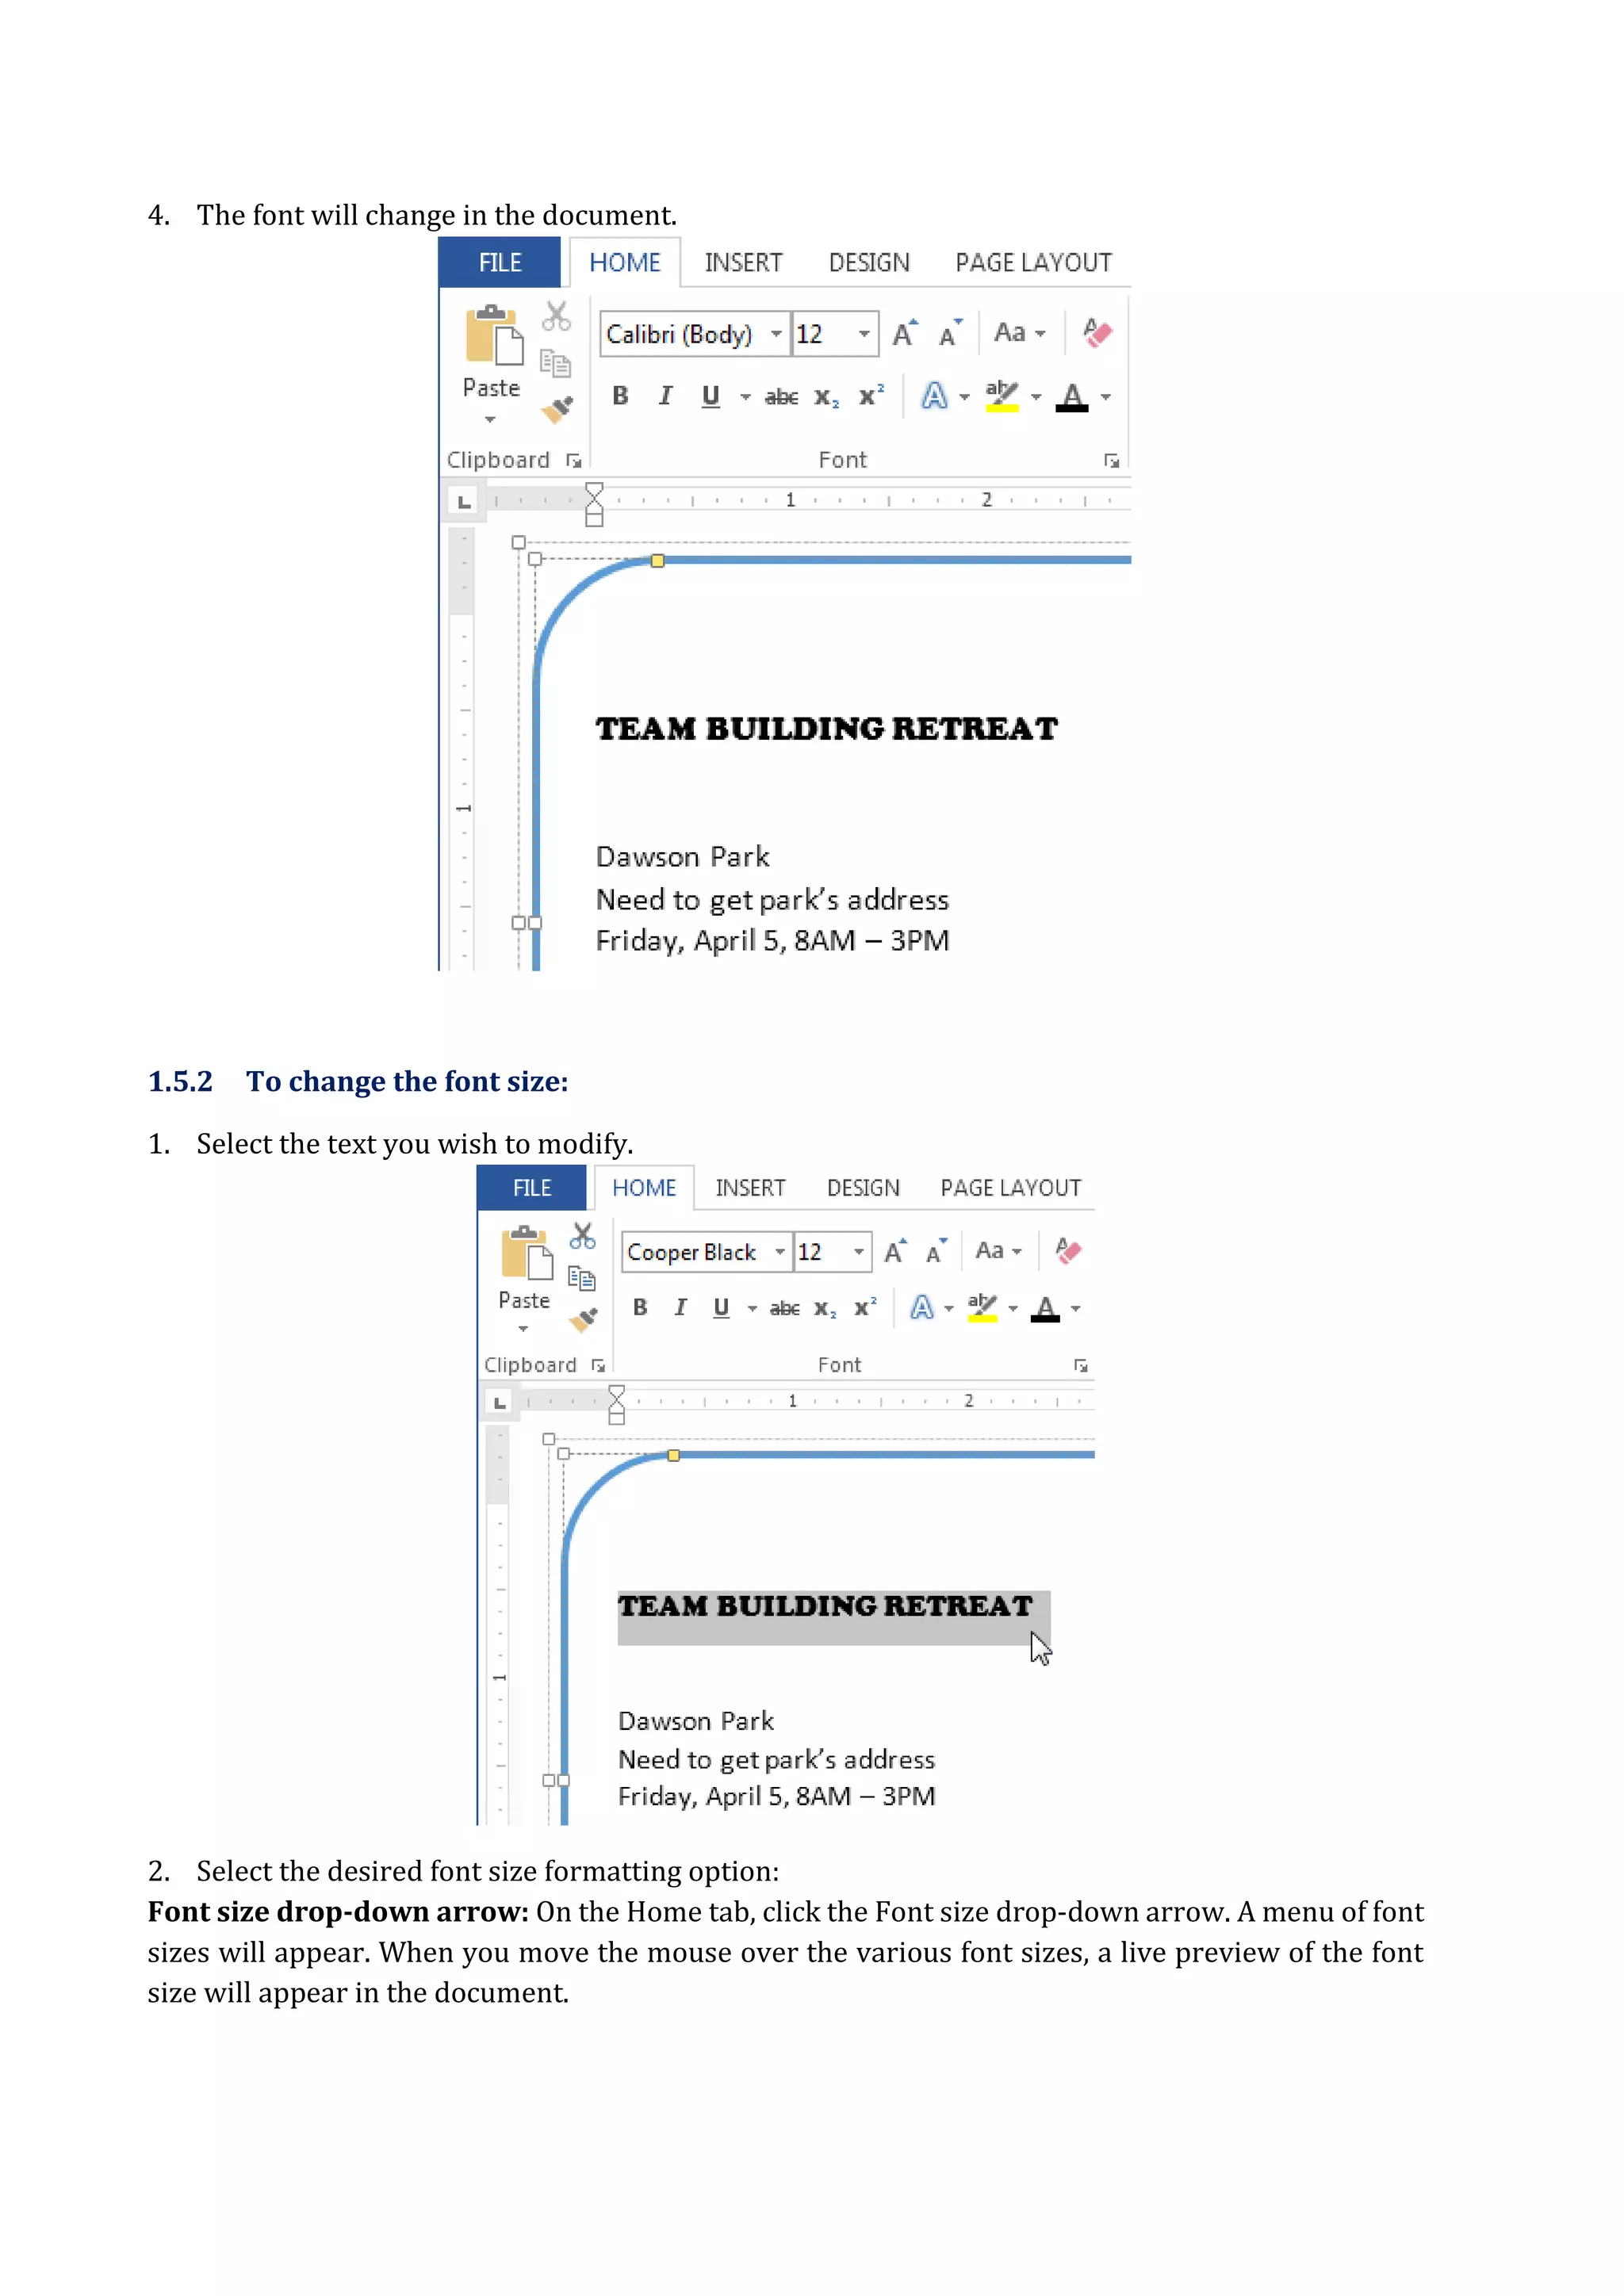
4. The fontwill change in the document.
1.5.2 To change the font size:
1. Select the text you wish to modify.
2. Select the desired font size formatting option:
Font size drop-down arrow: On the Home tab, click the Font size drop-down arrow. A menu of font
sizes will appear. When you move the mouse over the various font sizes, a live preview of the font
size will appear in the document.
12.
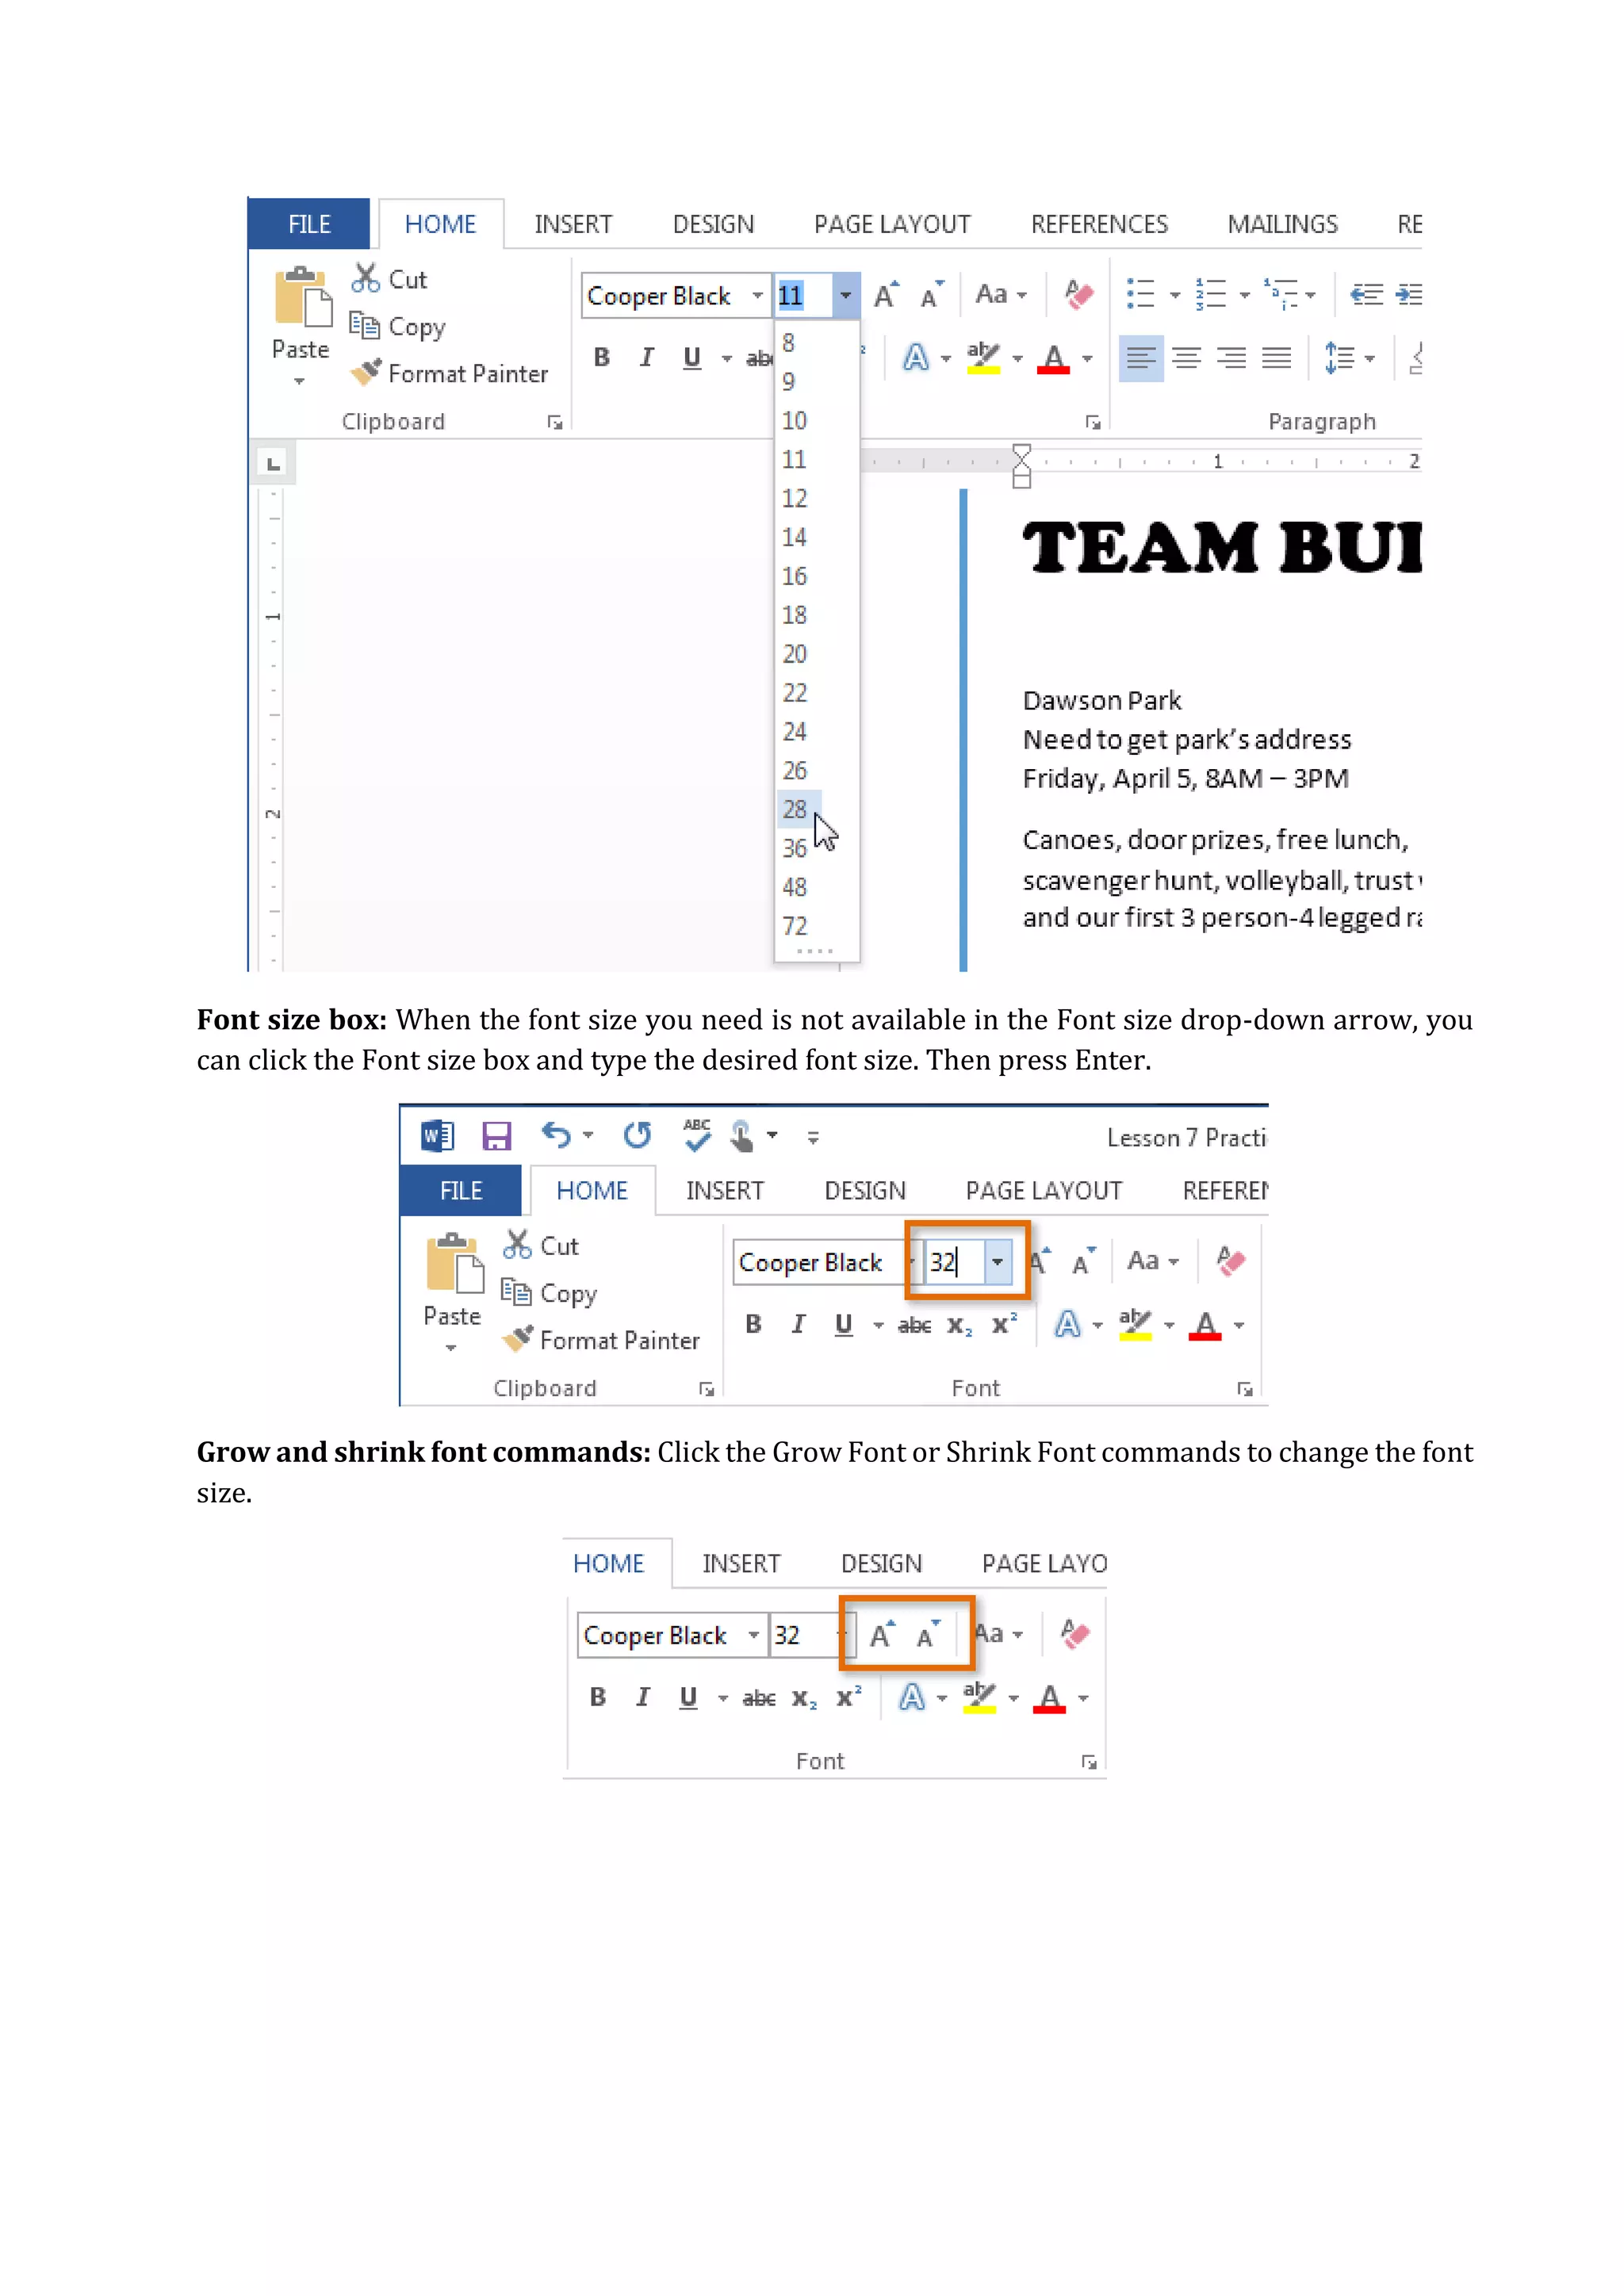
Font size box:When the font size you need is not available in the Font size drop-down arrow, you
can click the Font size box and type the desired font size. Then press Enter.
Grow and shrink font commands: Click the Grow Font or Shrink Font commands to change the font
size.
13.
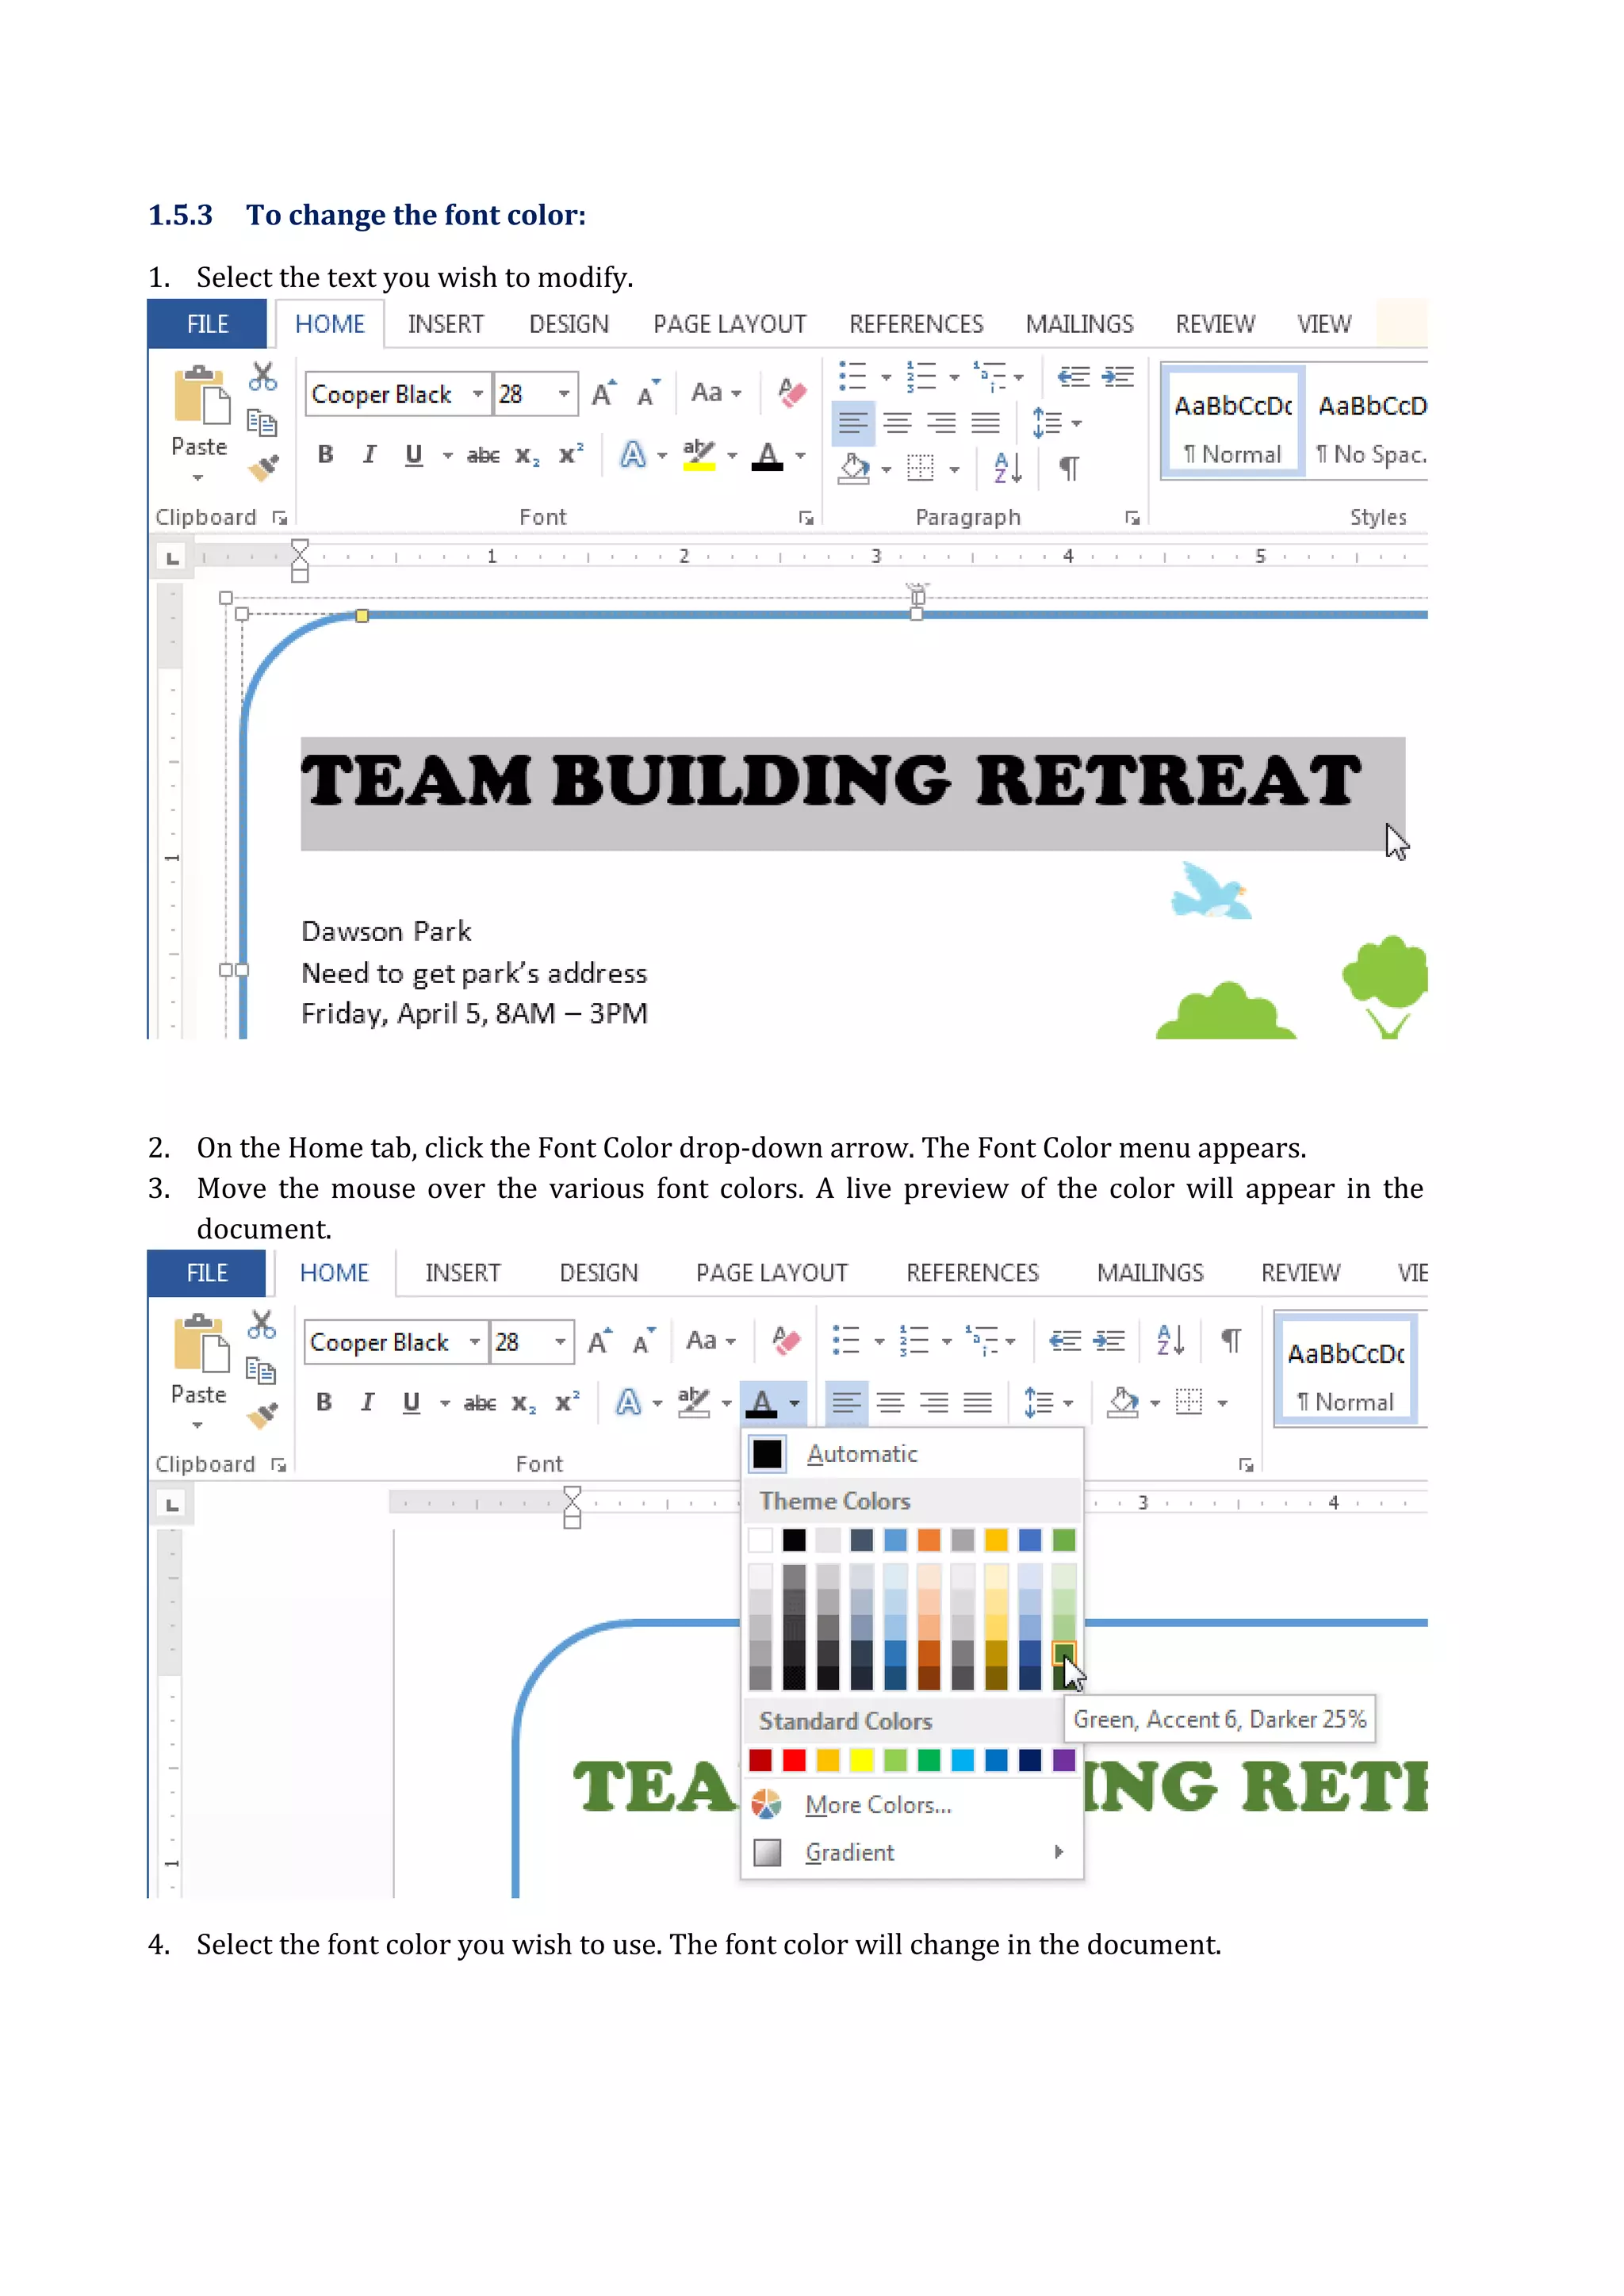
1.5.3 To changethe font color:
1. Select the text you wish to modify.
2. On the Home tab, click the Font Color drop-down arrow. The Font Color menu appears.
3. Move the mouse over the various font colors. A live preview of the color will appear in the
document.
4. Select the font color you wish to use. The font color will change in the document.
14.
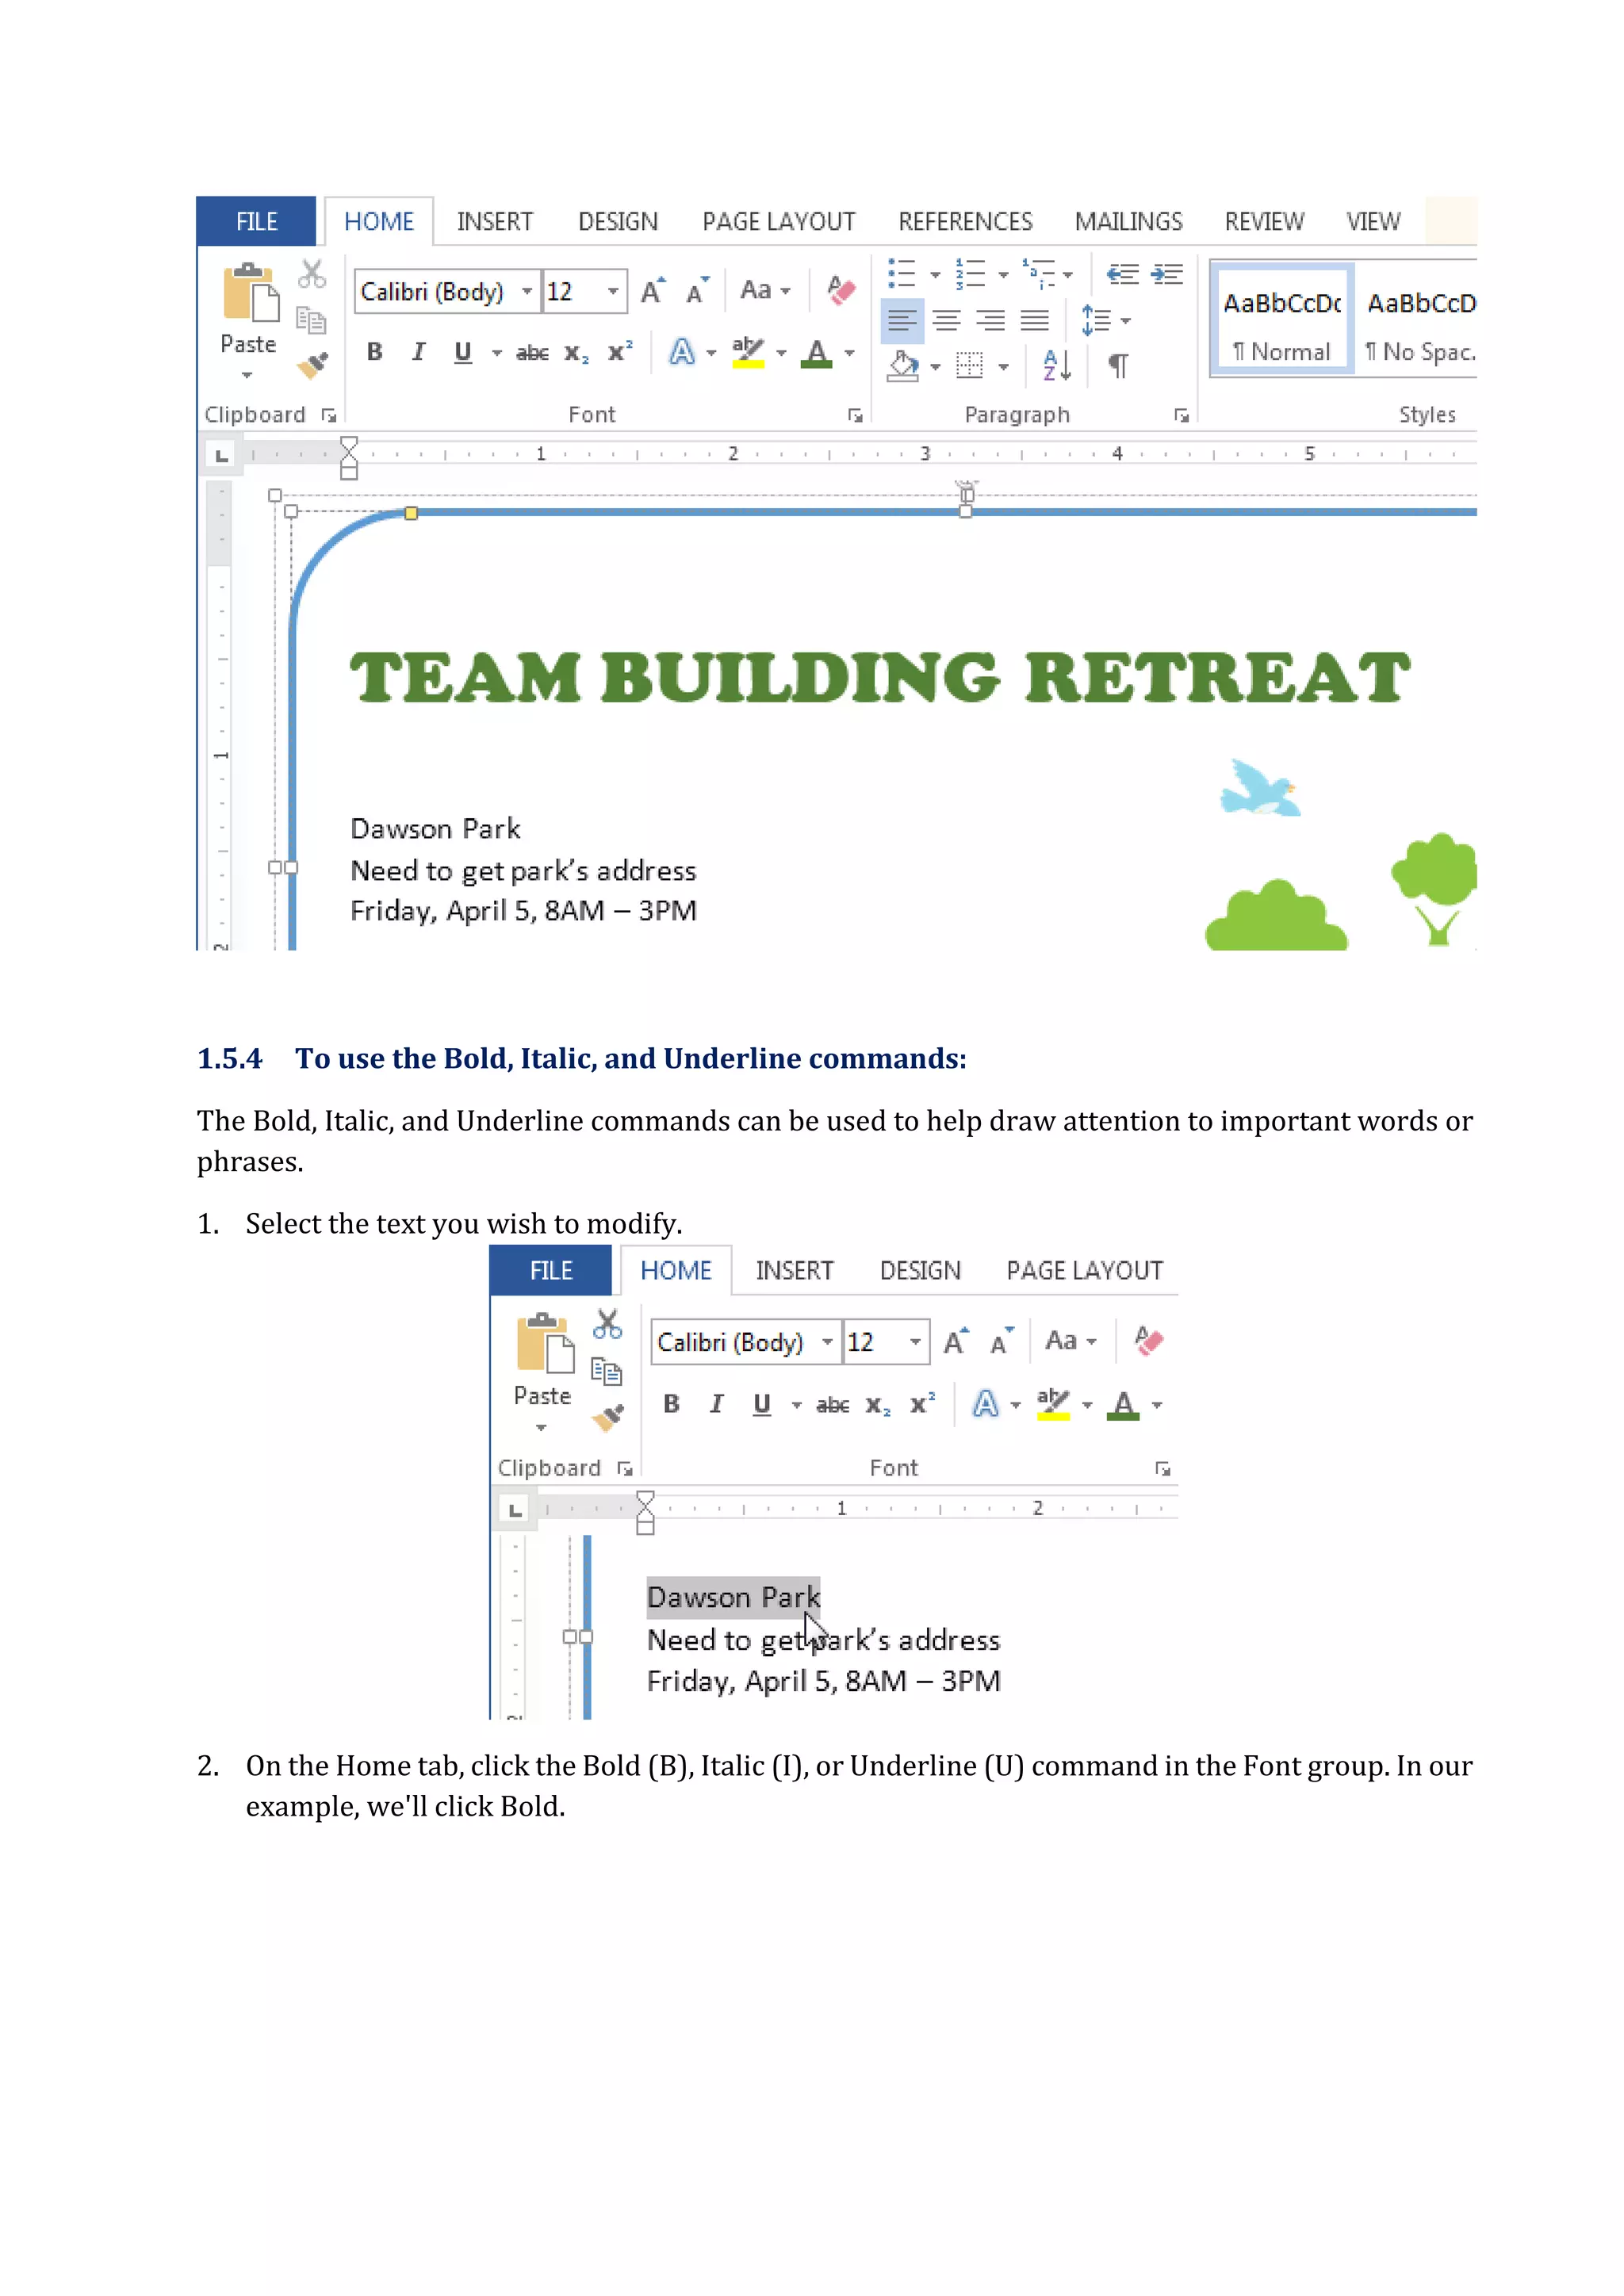
1.5.4 To usethe Bold, Italic, and Underline commands:
The Bold, Italic, and Underline commands can be used to help draw attention to important words or
phrases.
1. Select the text you wish to modify.
2. On the Home tab, click the Bold (B), Italic (I), or Underline (U) command in the Font group. In our
example, we'll click Bold.
15.
3. The selectedtext will be modified in the document.
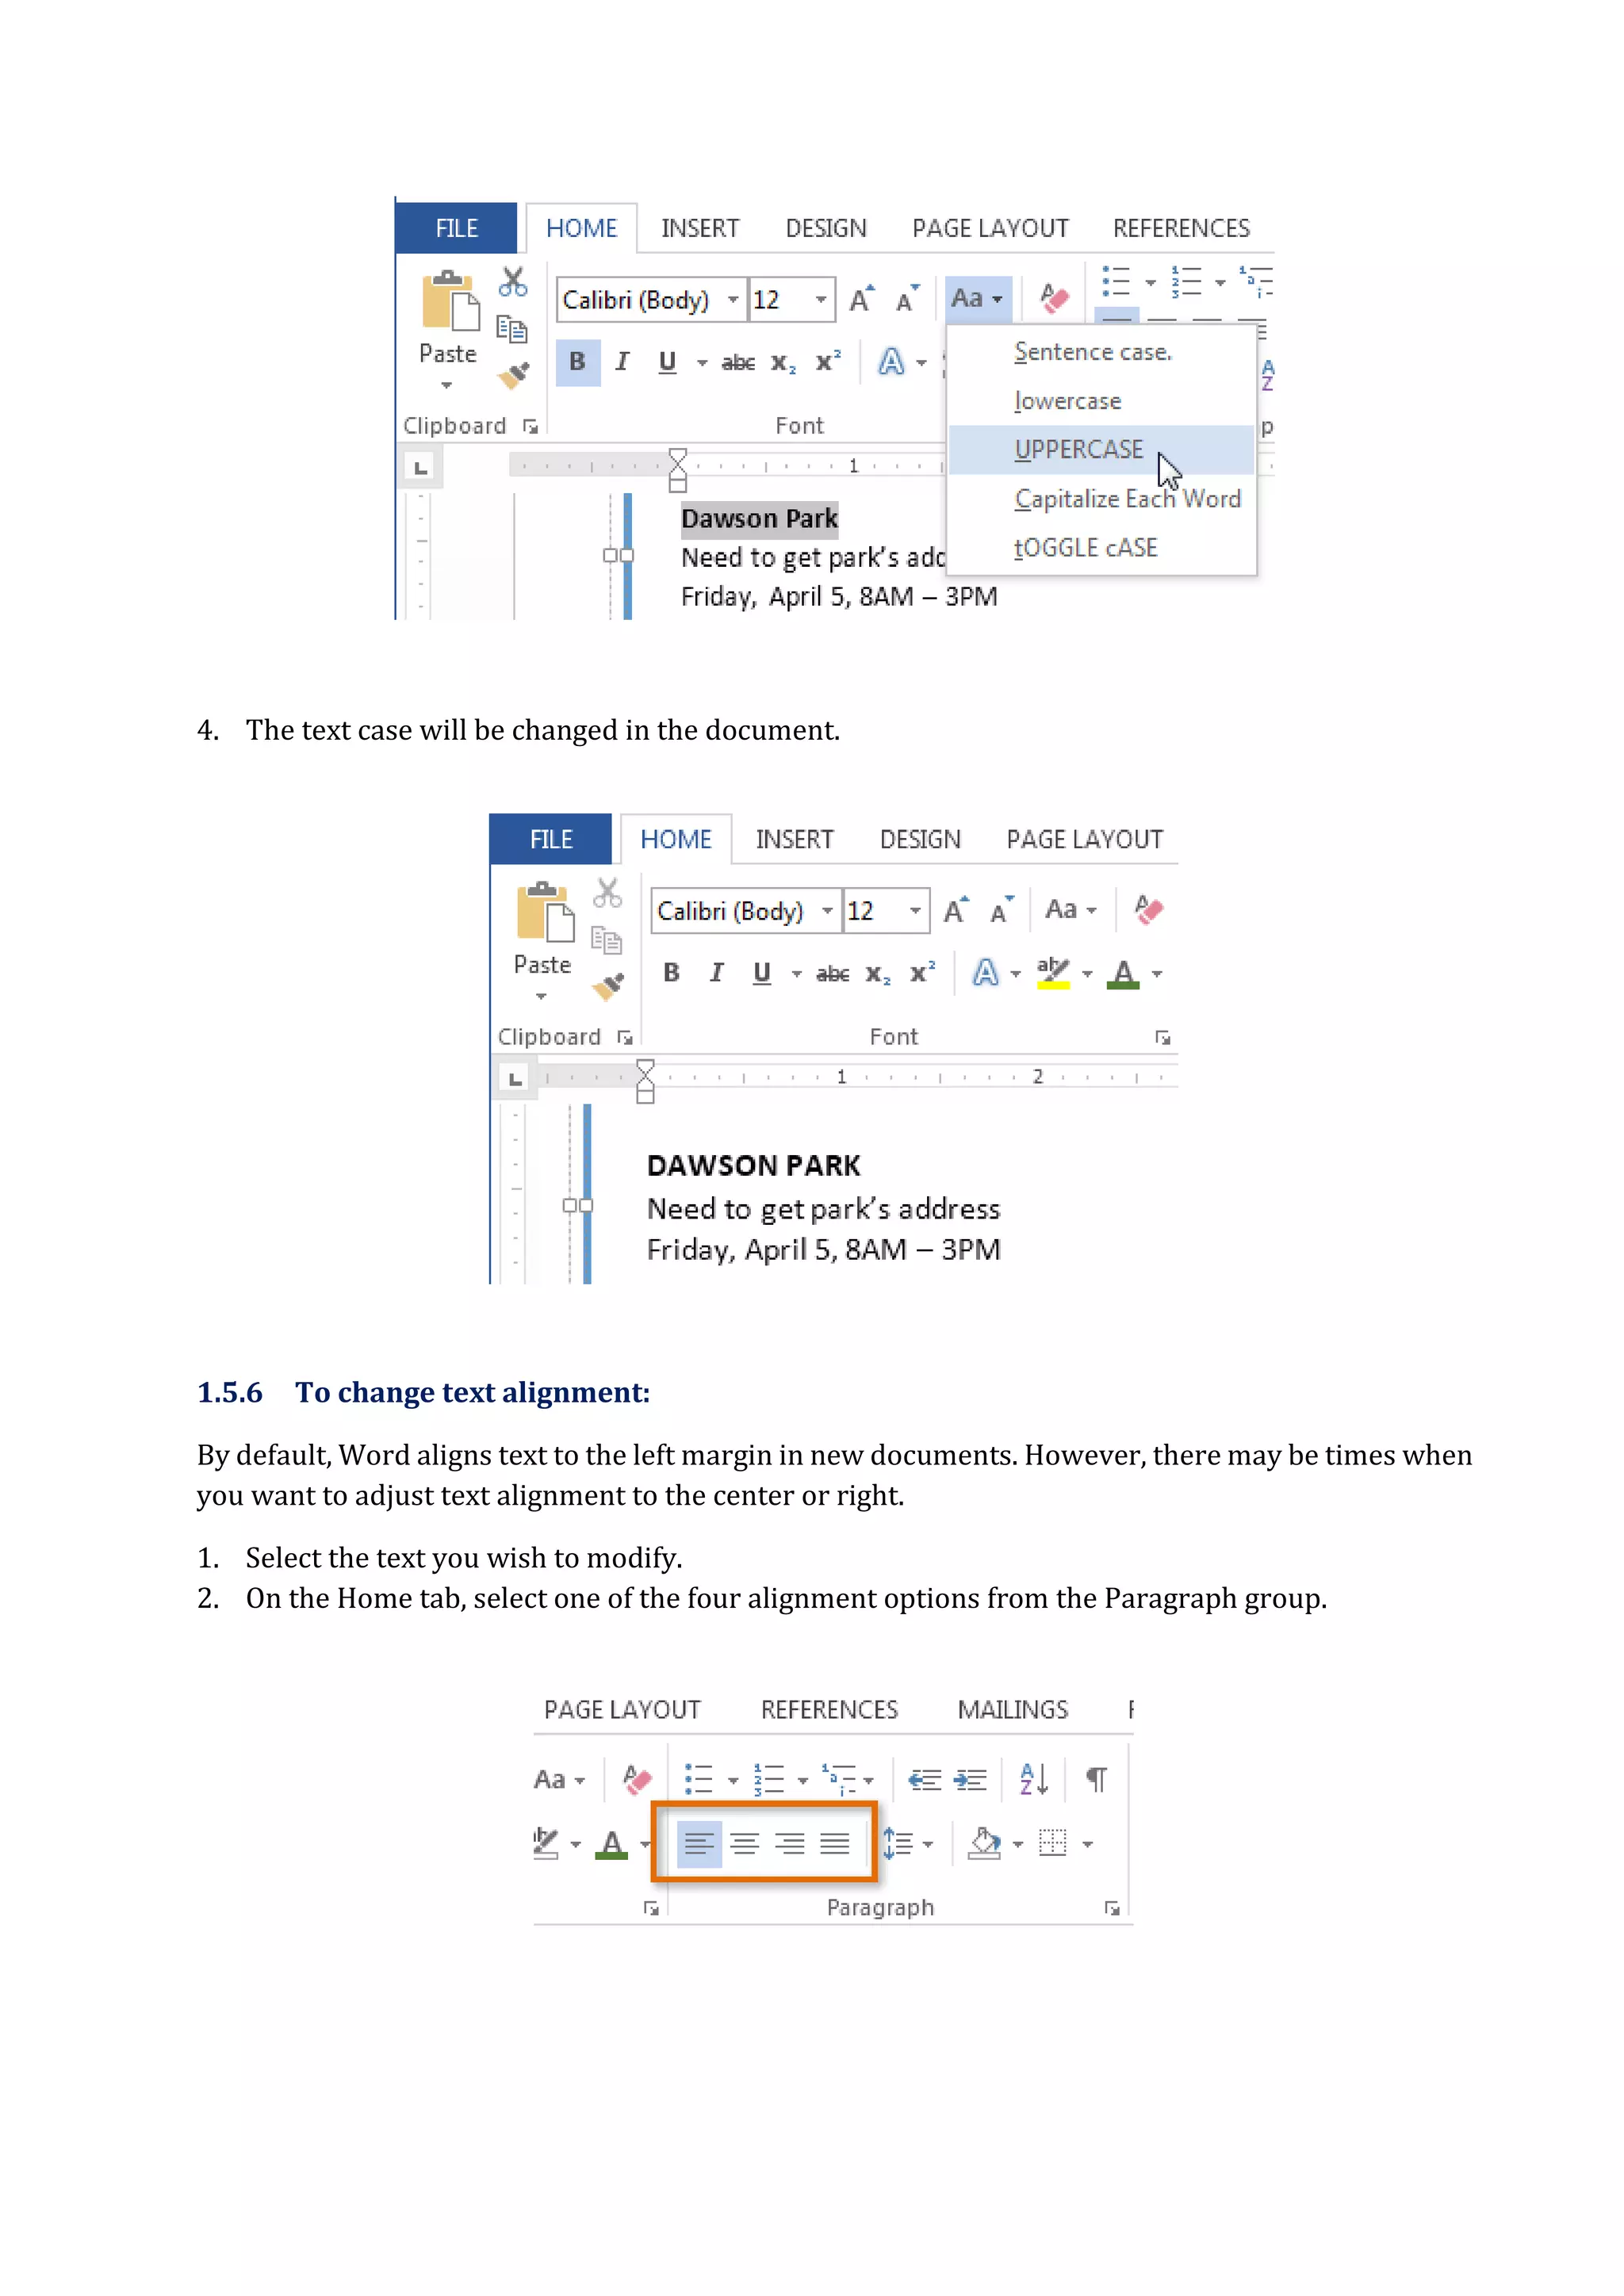
1.5.5 To change the text case:
When you need to quickly change text case, you can use the Change Case command instead of deleting
and retyping text.
1. Select the text you wish to modify.
2. On the Home tab, click the Change Case command in the Font group.
3. A drop-down menu will appear. Select the desired case option from the menu.
16.
4. The textcase will be changed in the document.
1.5.6 To change text alignment:
By default, Word aligns text to the left margin in new documents. However, there may be times when
you want to adjust text alignment to the center or right.
1. Select the text you wish to modify.
2. On the Home tab, select one of the four alignment options from the Paragraph group.
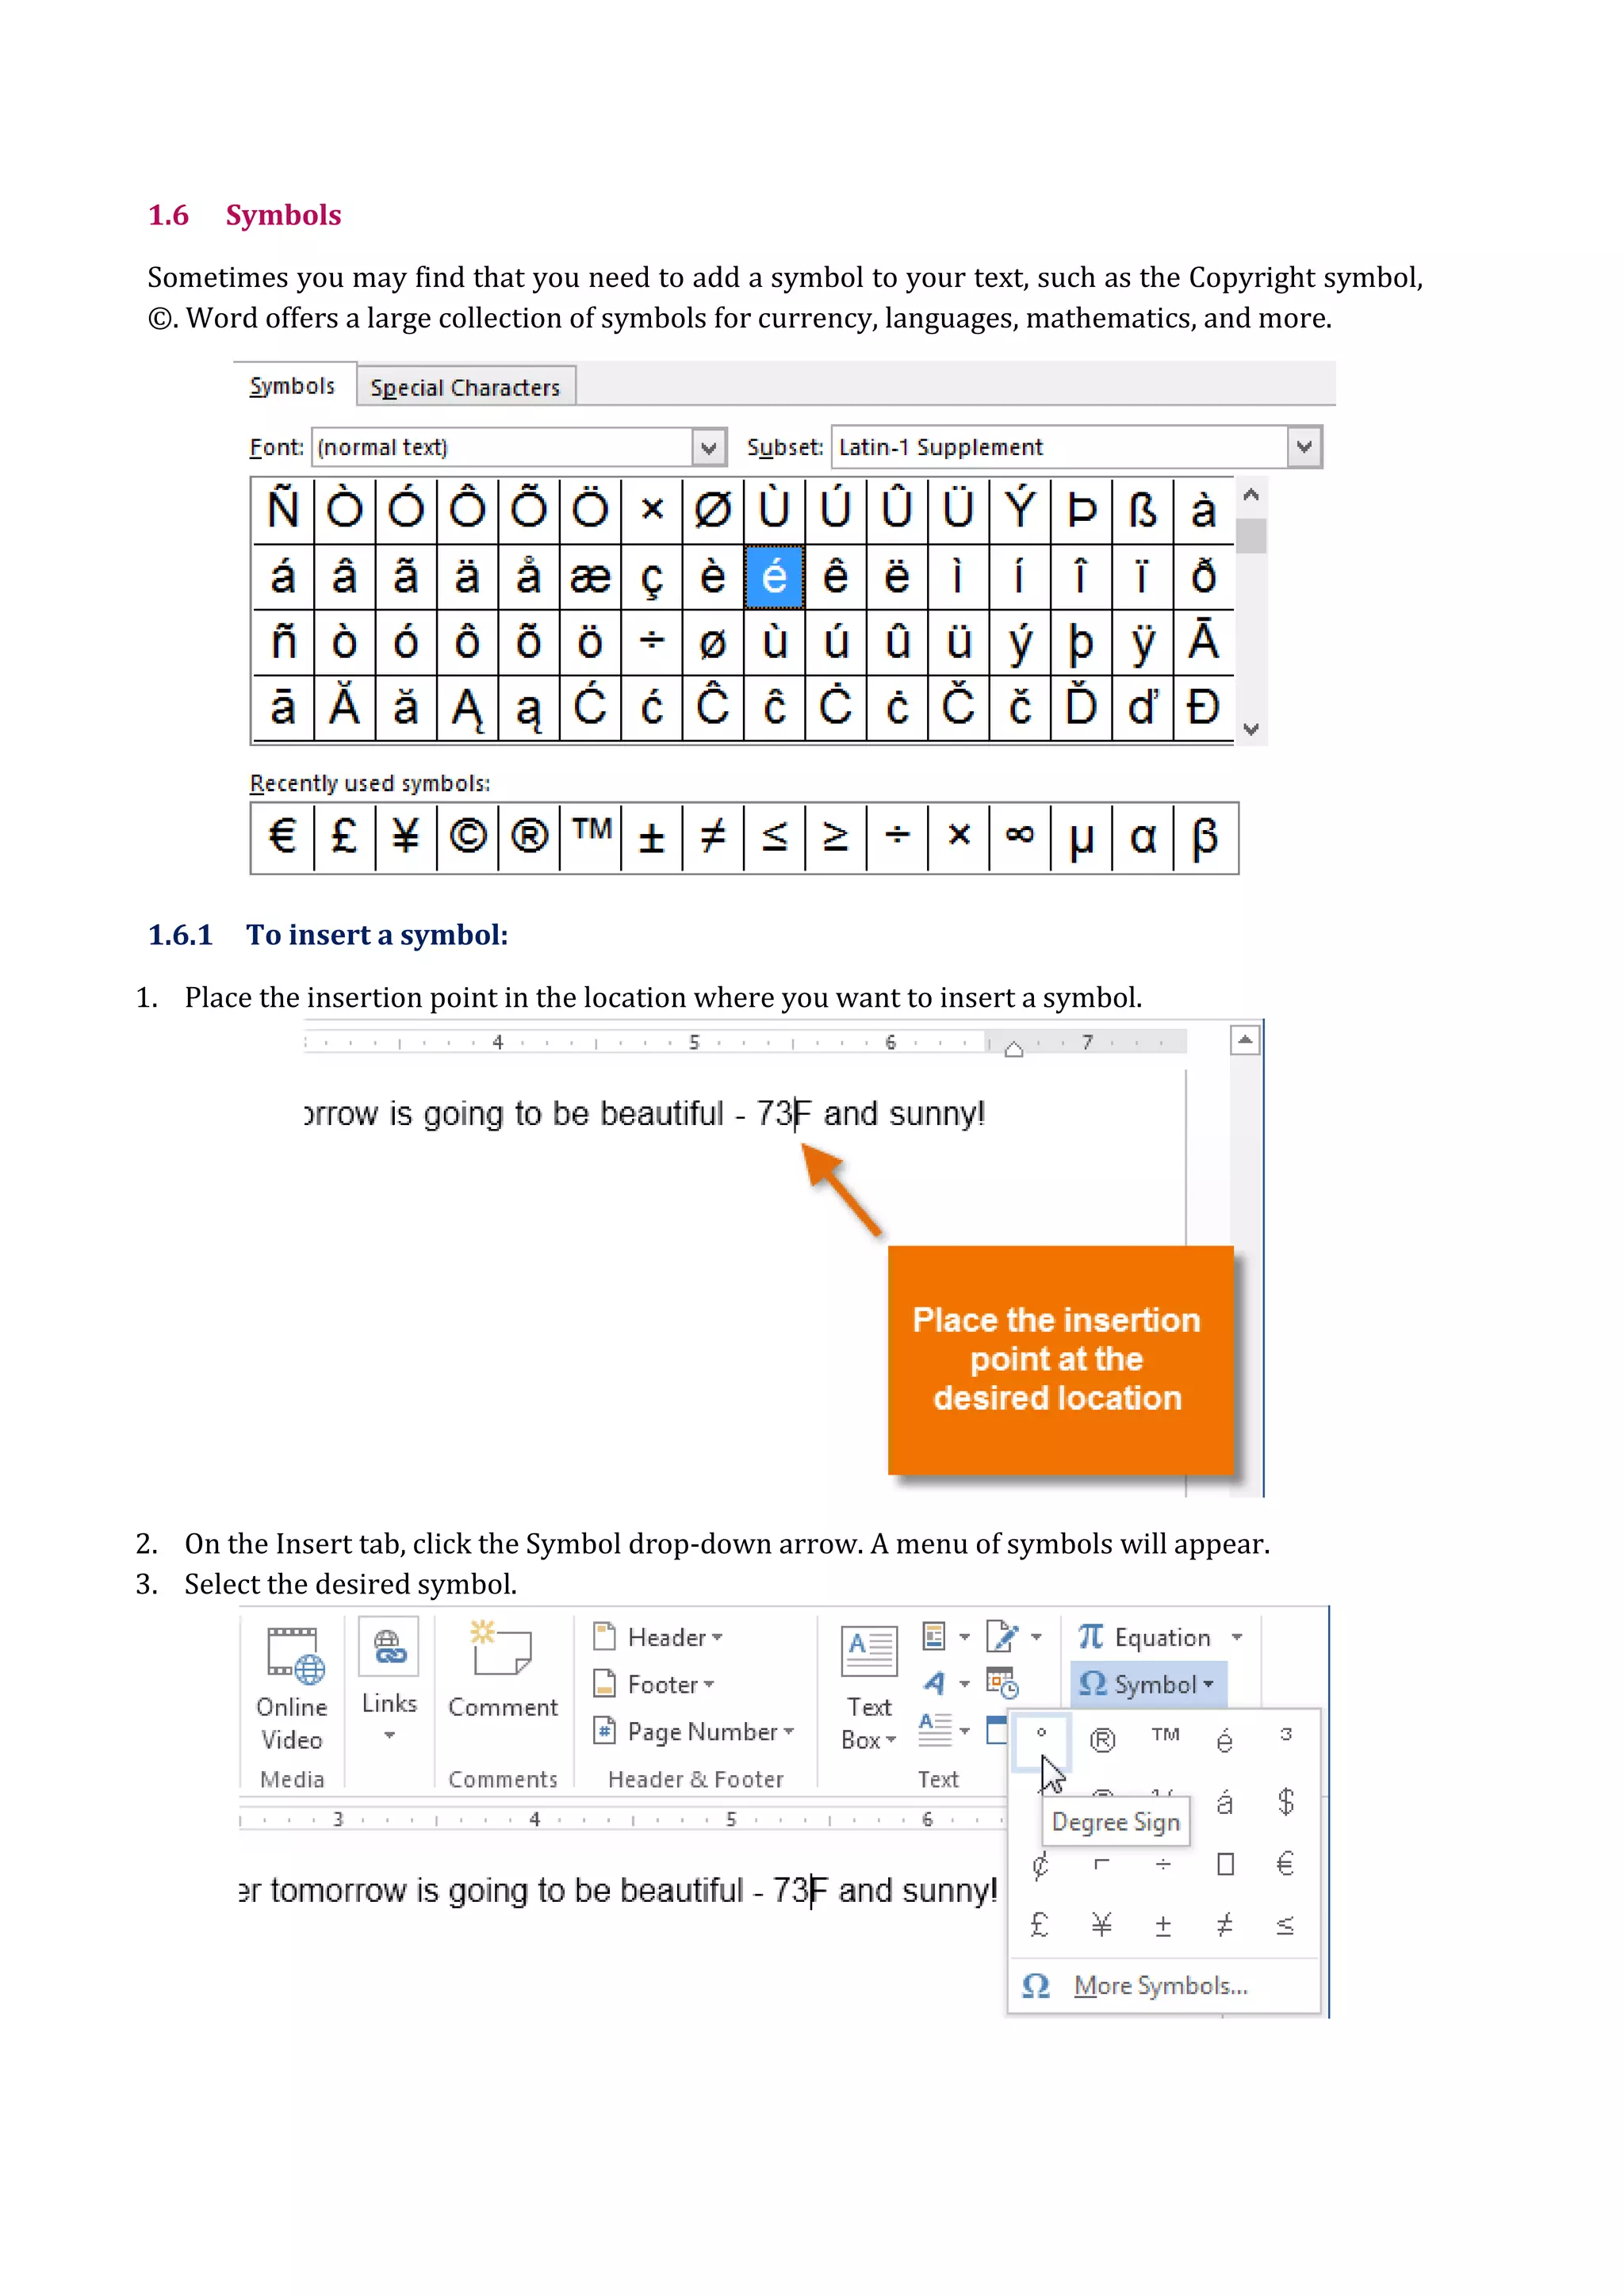
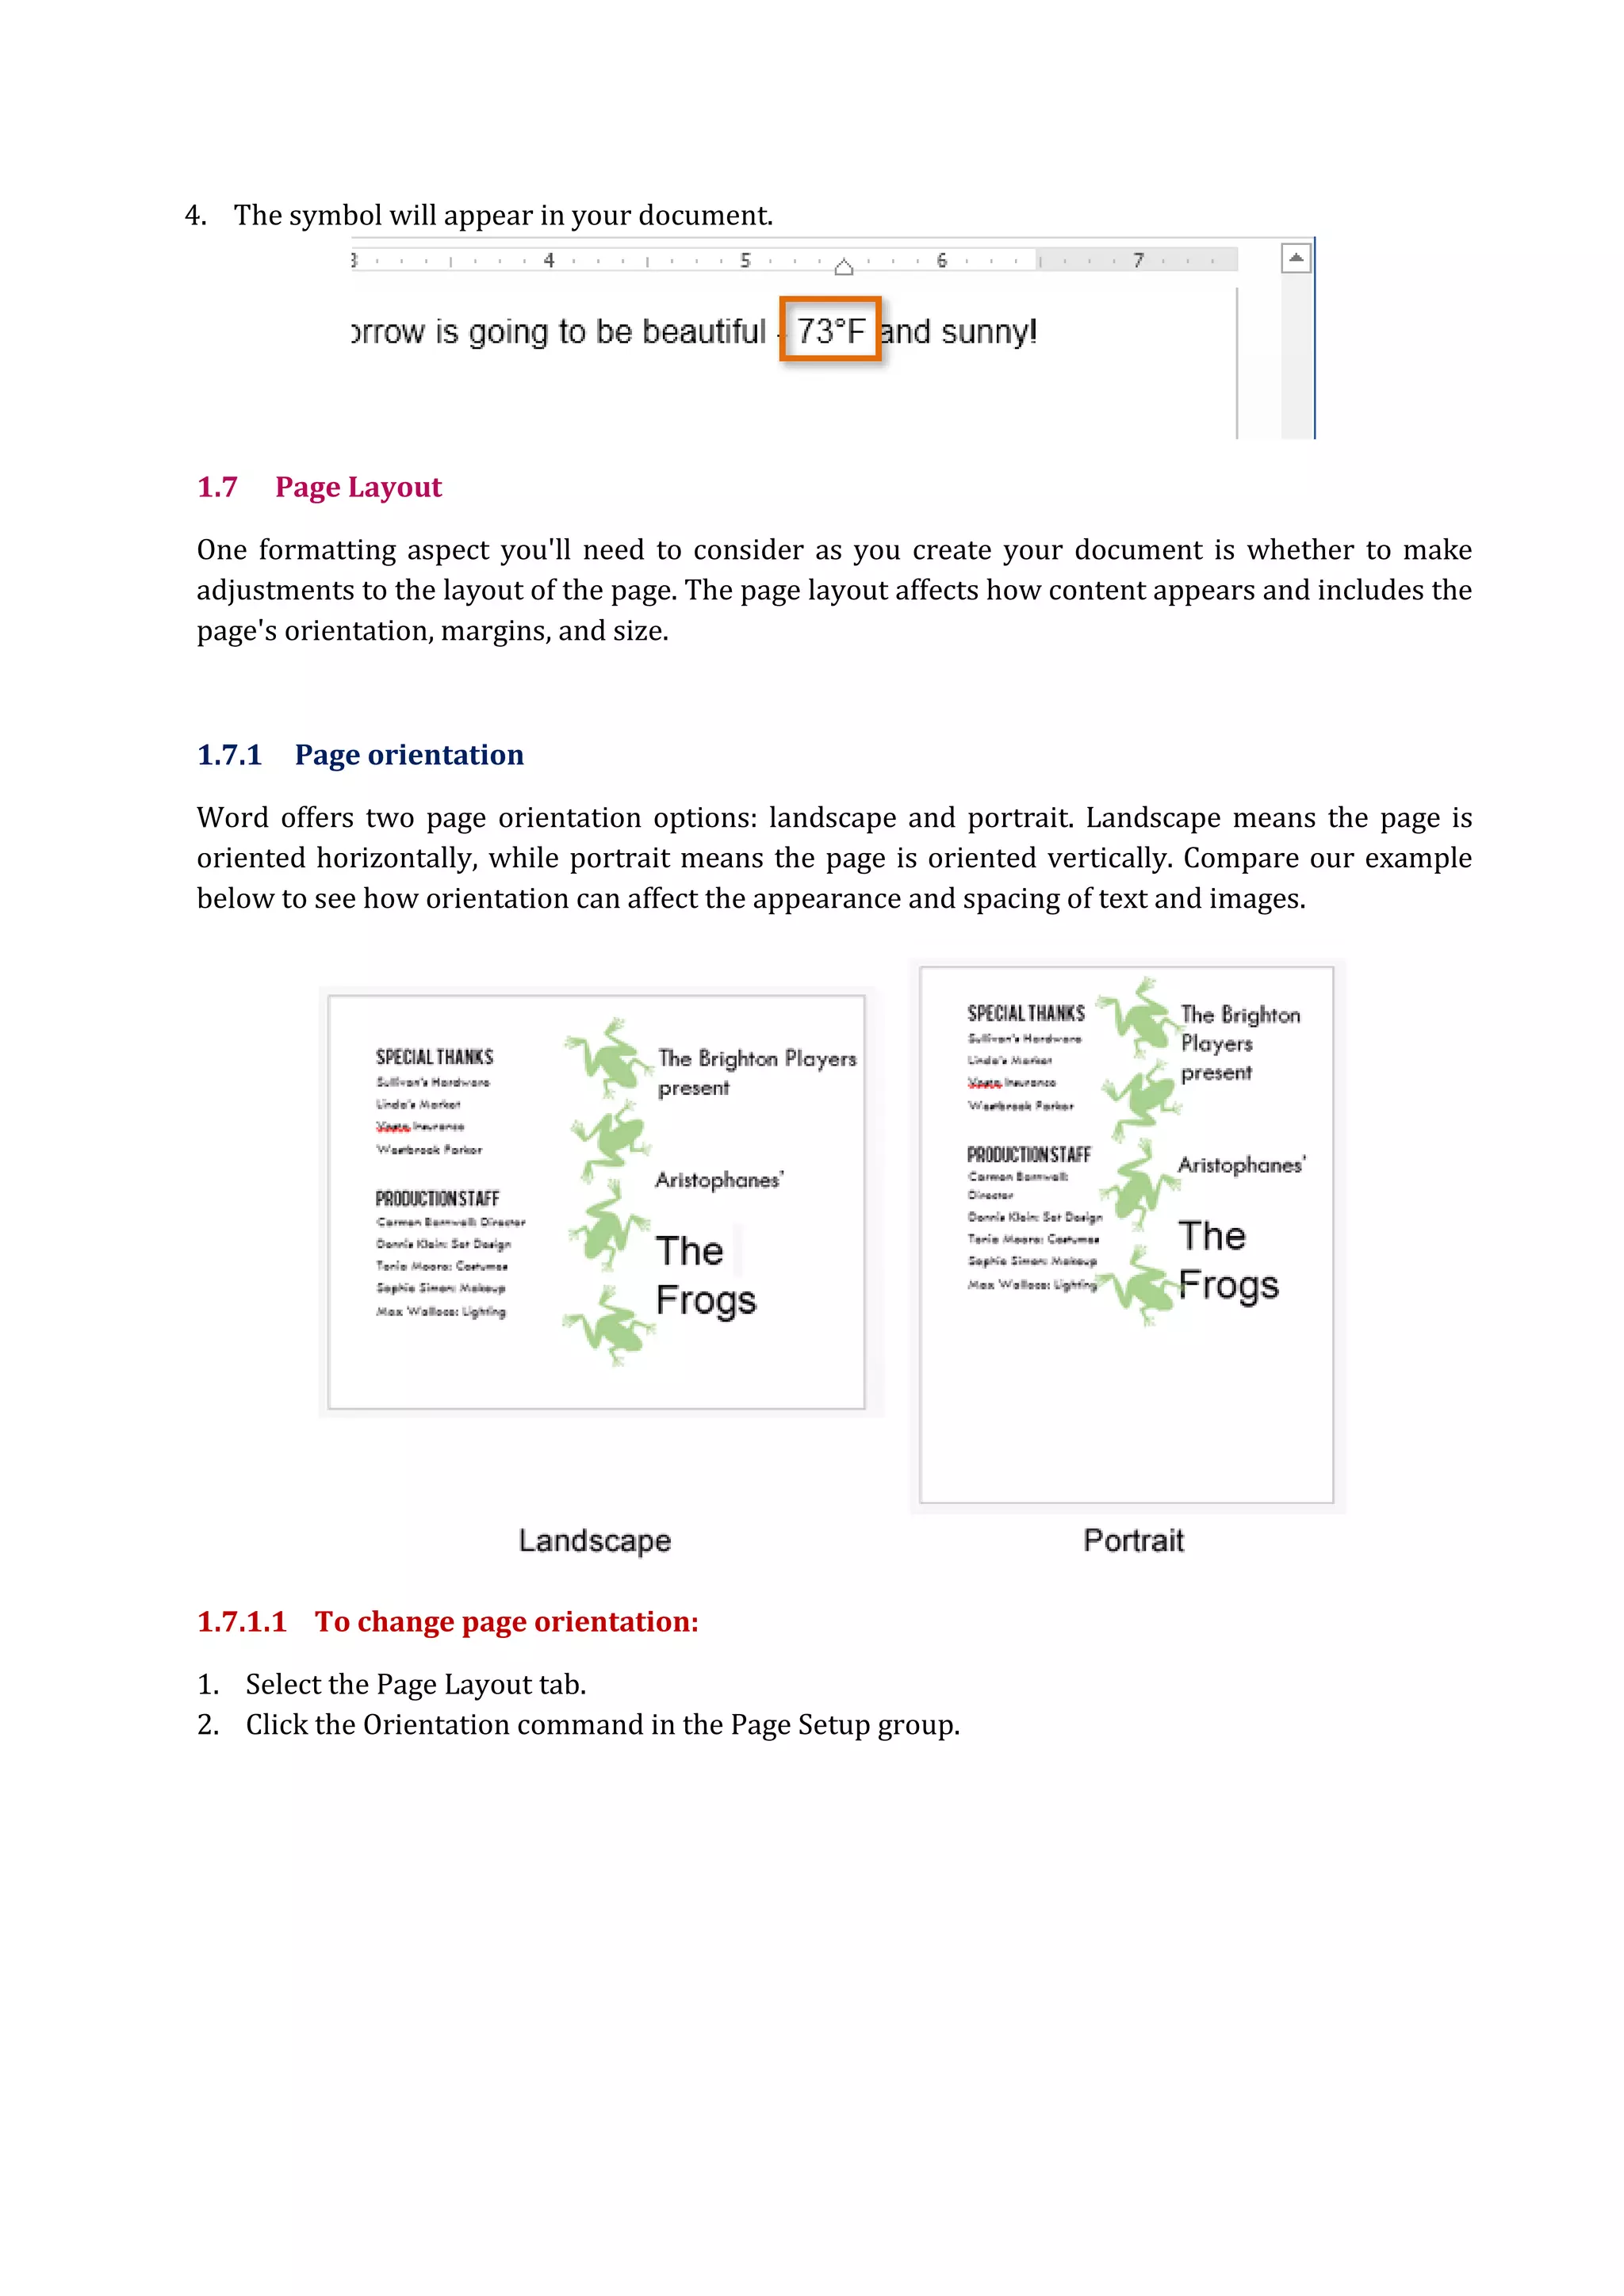
4. The symbolwill appear in your document.
1.7 Page Layout
One formatting aspect you'll need to consider as you create your document is whether to make
adjustments to the layout of the page. The page layout affects how content appears and includes the
page's orientation, margins, and size.
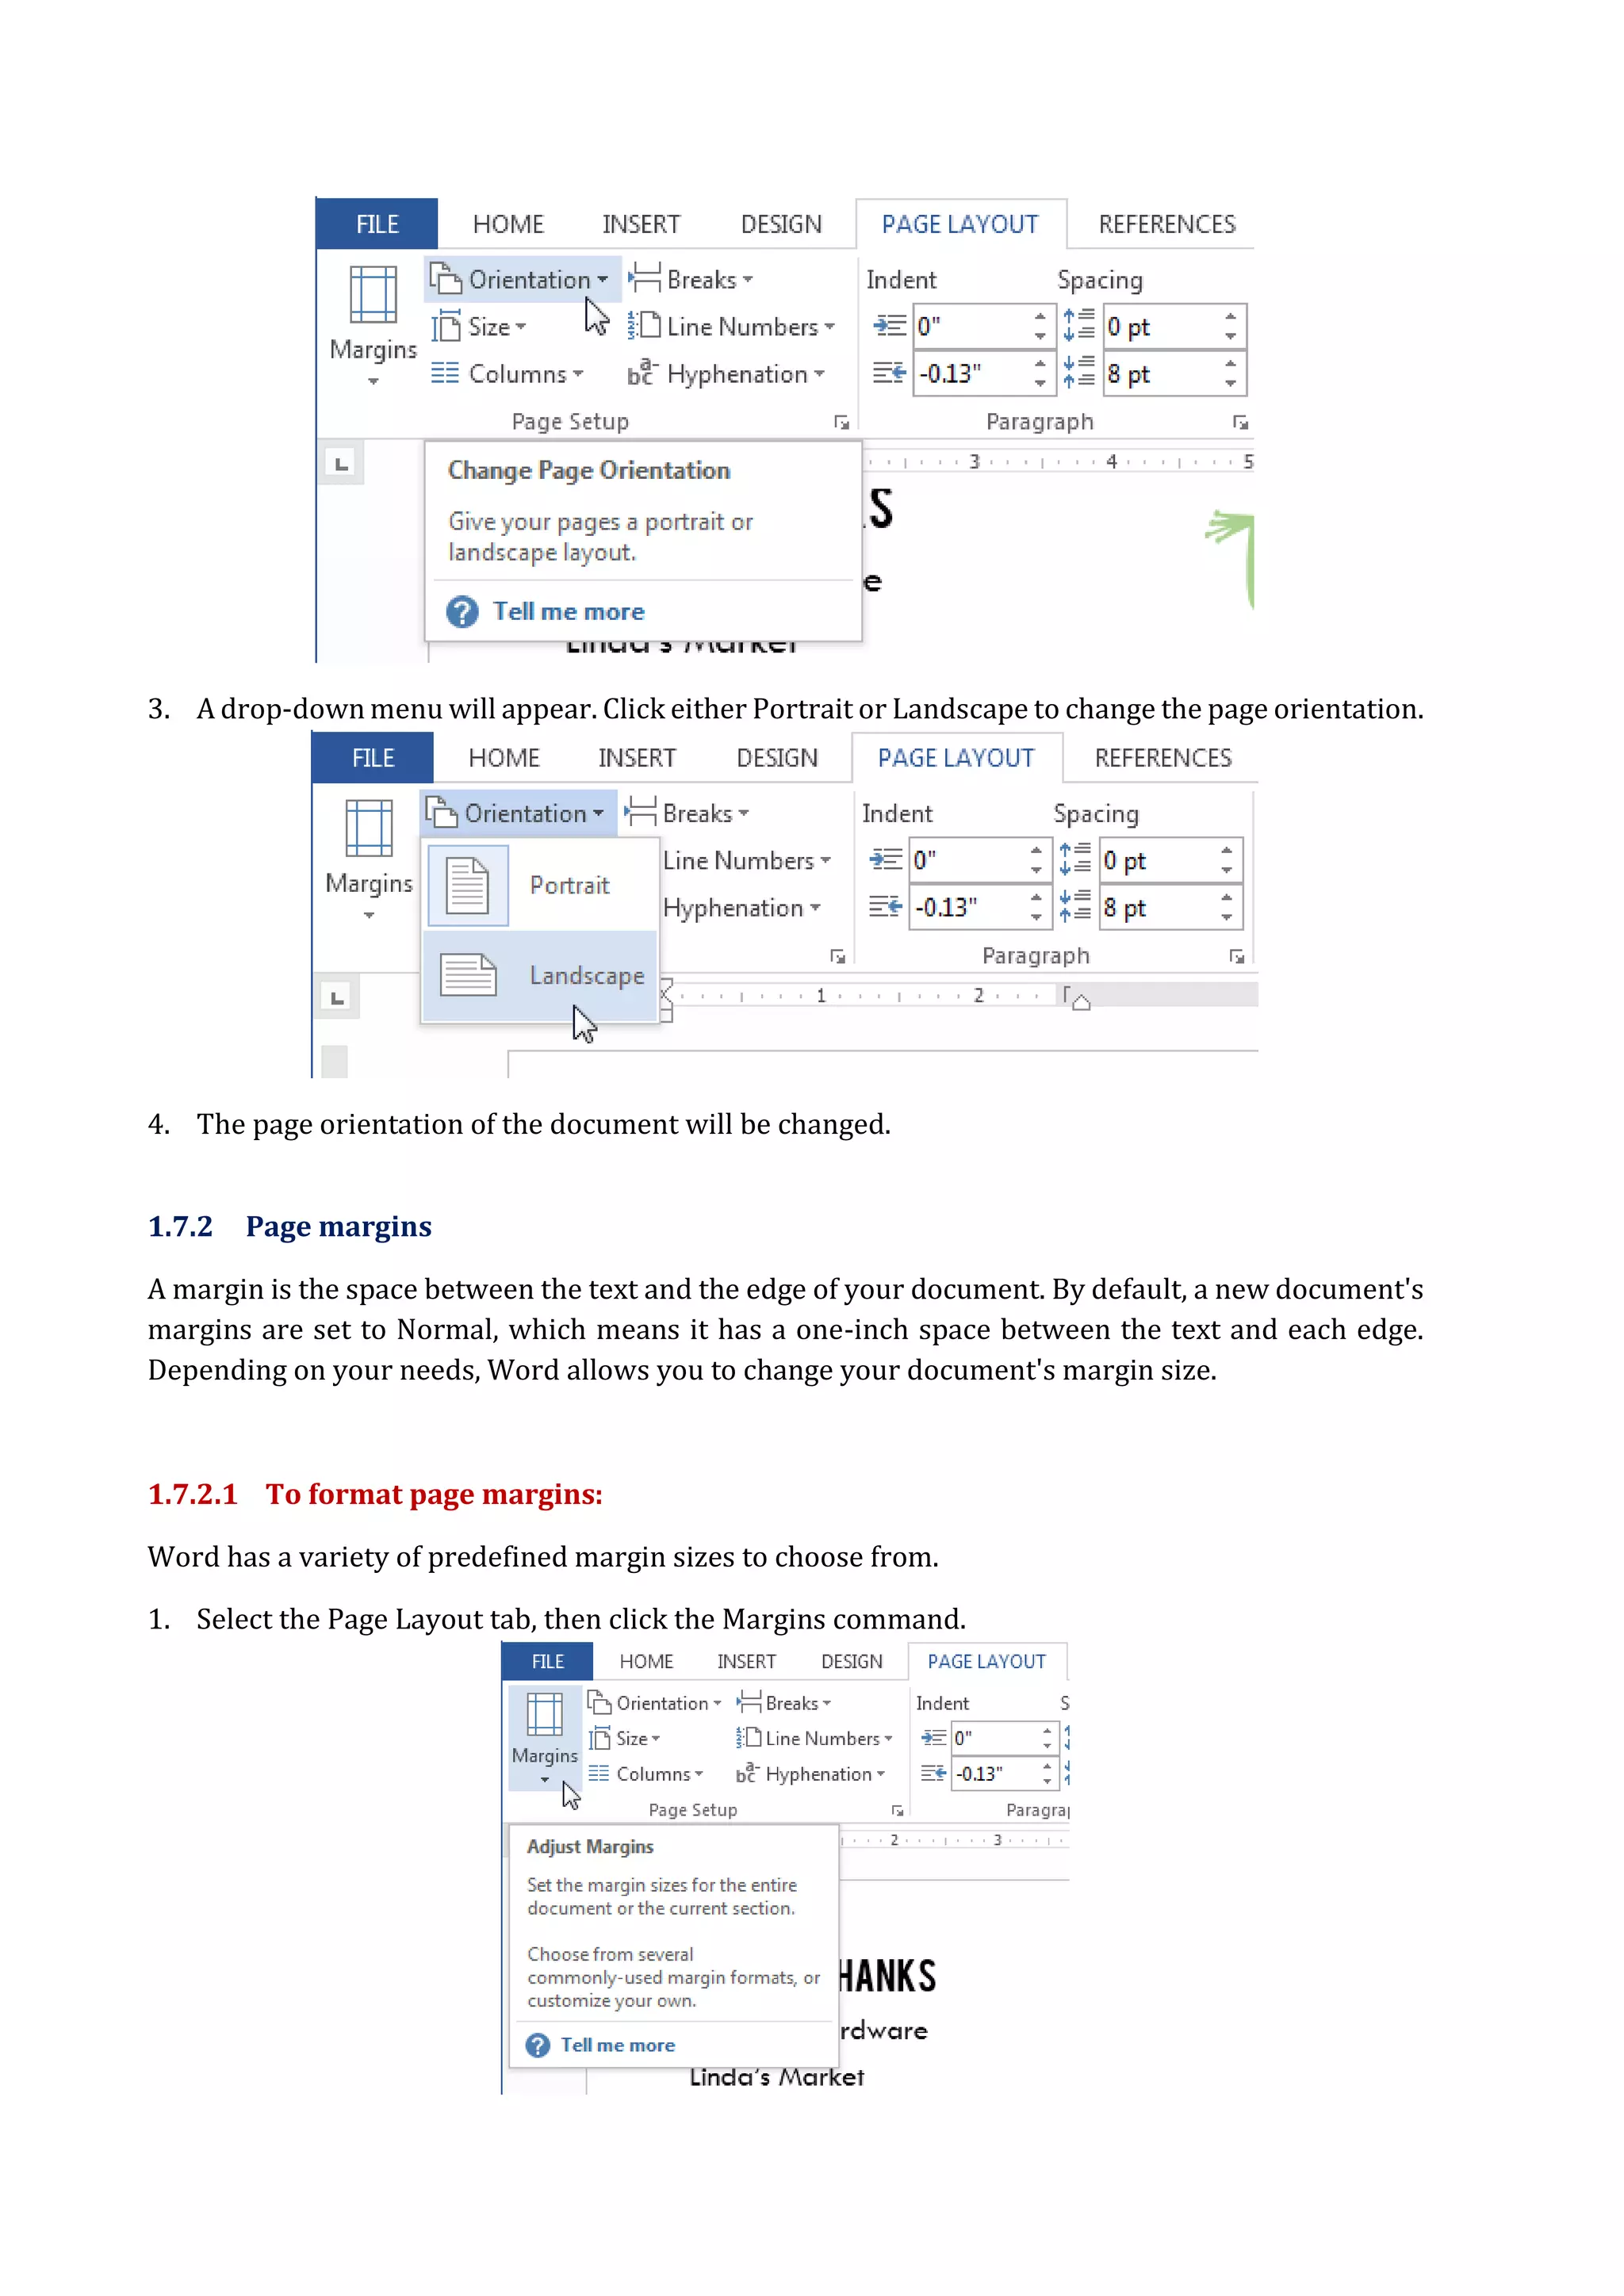
1.7.1 Page orientation
Word offers two page orientation options: landscape and portrait. Landscape means the page is
oriented horizontally, while portrait means the page is oriented vertically. Compare our example
below to see how orientation can affect the appearance and spacing of text and images.
1.7.1.1 To change page orientation:
1. Select the Page Layout tab.
2. Click the Orientation command in the Page Setup group.
19.
3. A drop-downmenu will appear. Click either Portrait or Landscape to change the page orientation.
4. The page orientation of the document will be changed.
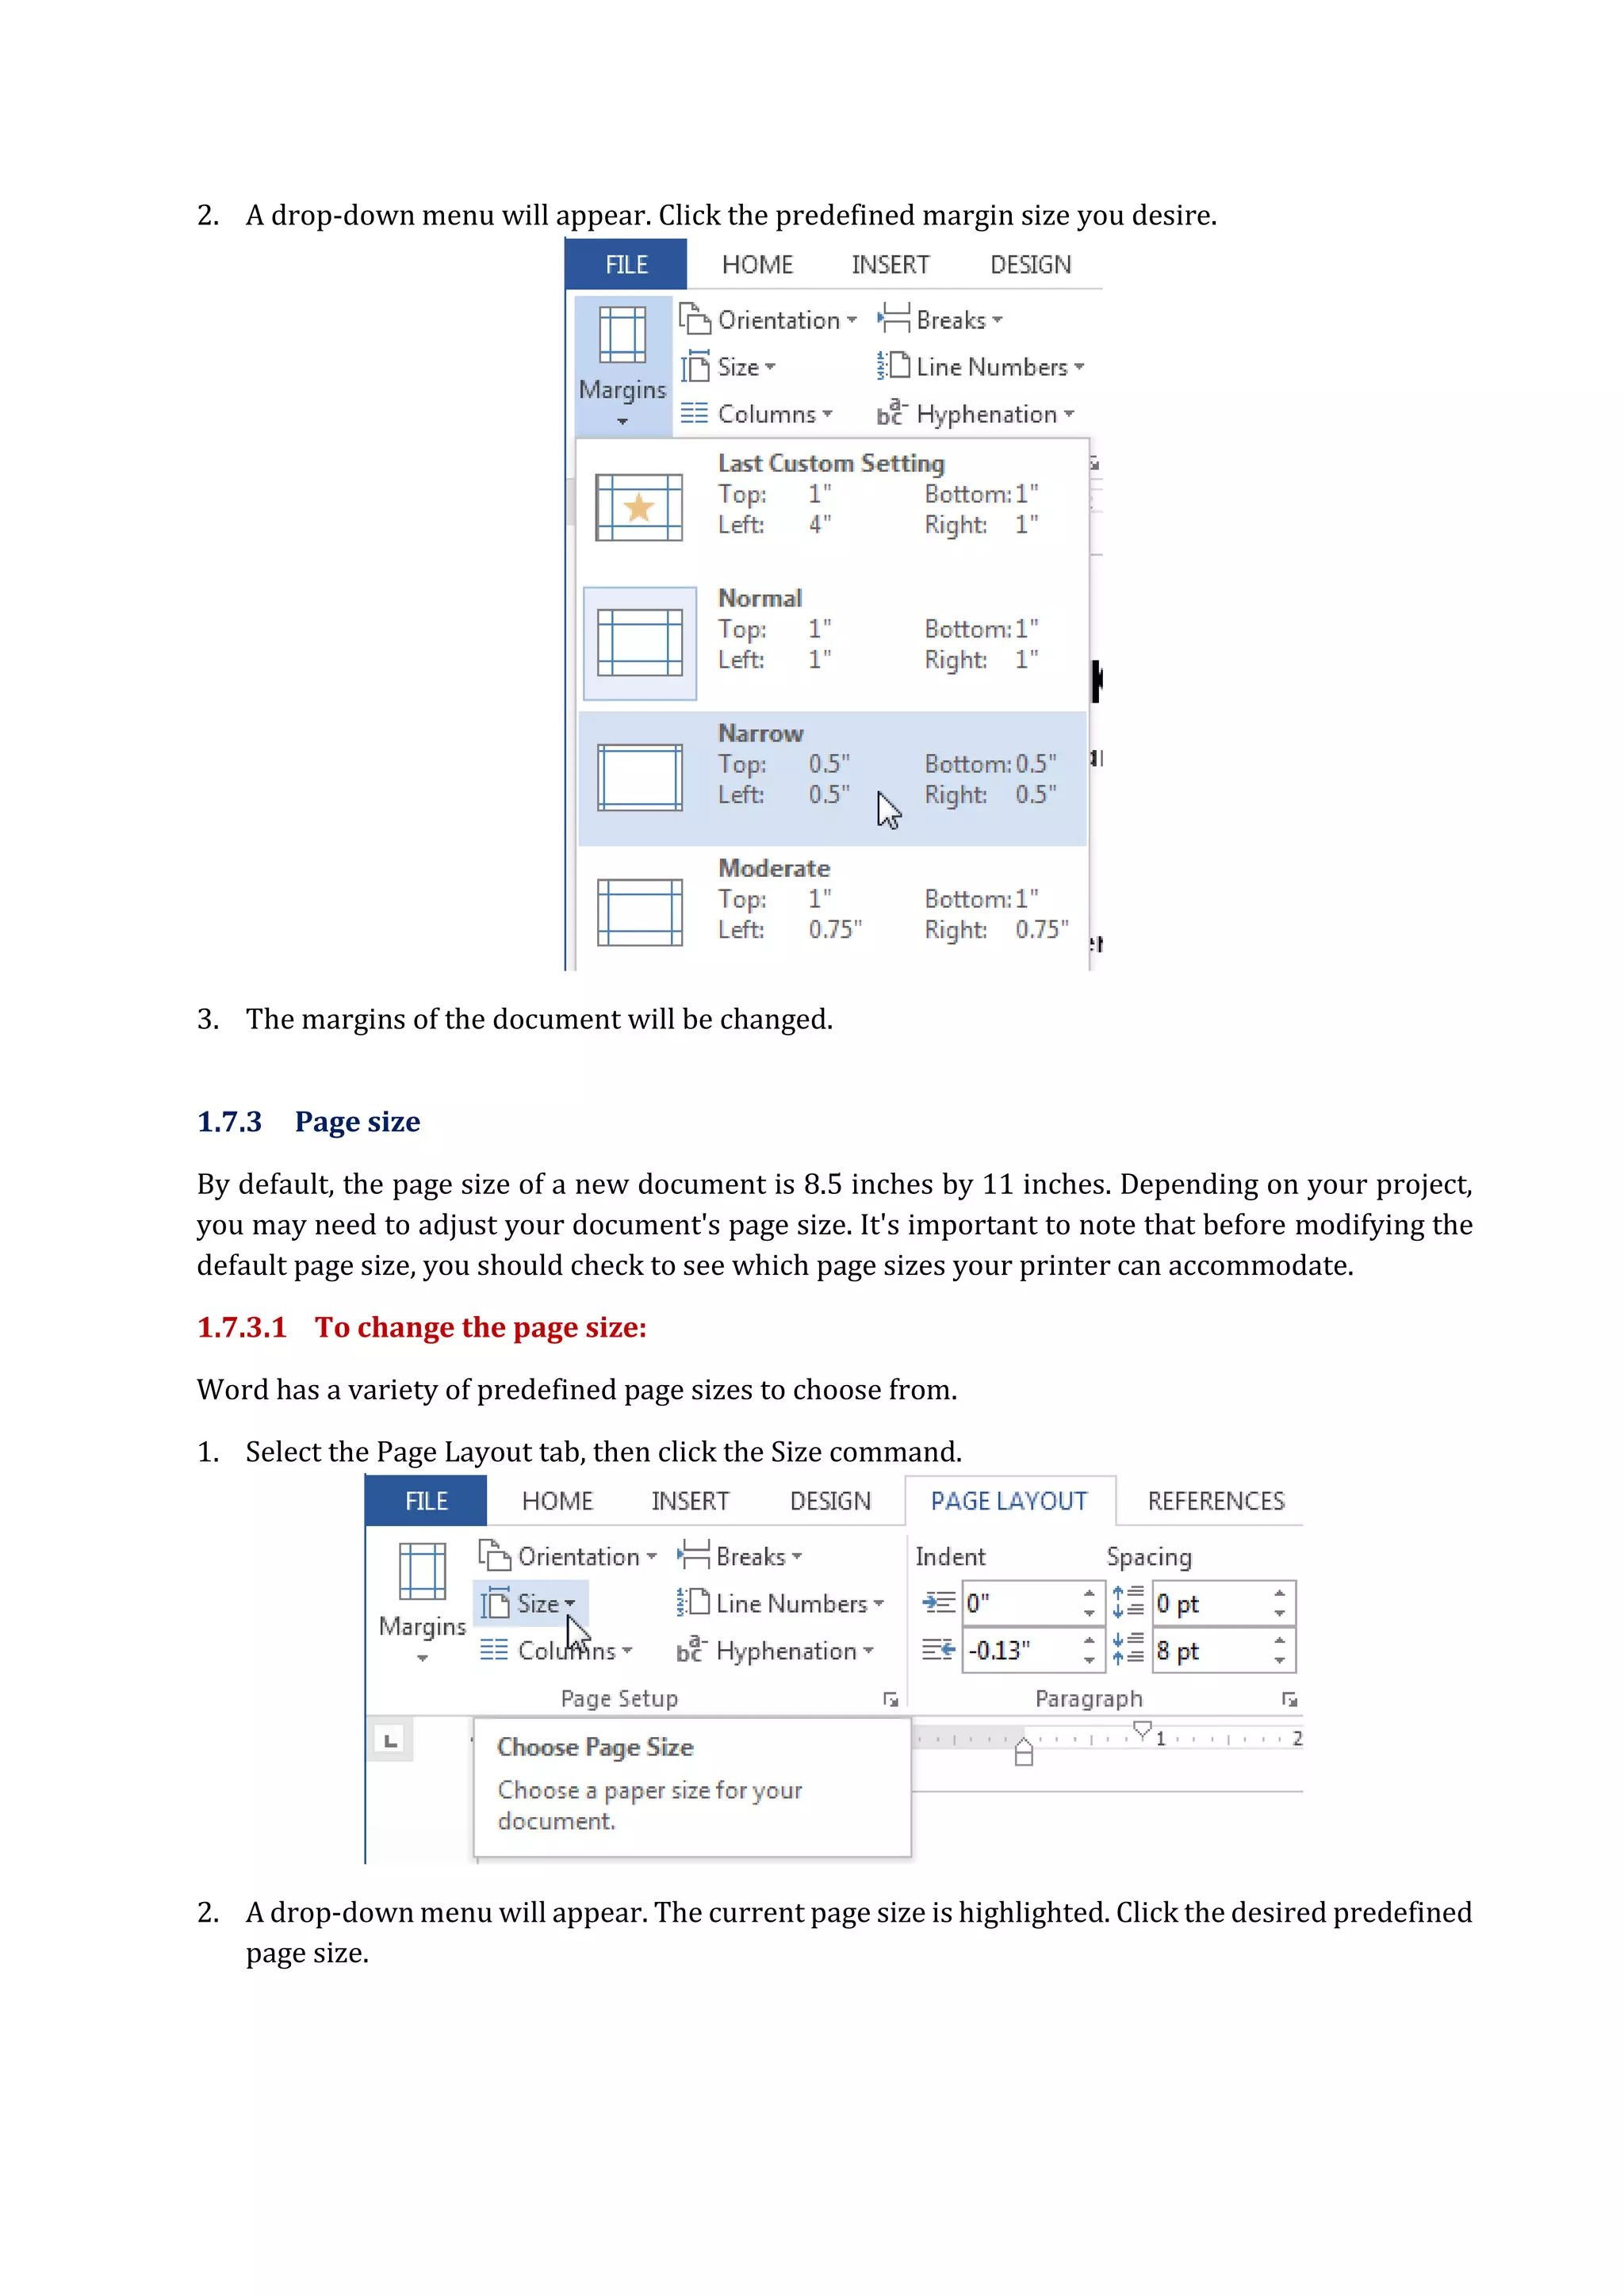
1.7.2 Page margins
A margin is the space between the text and the edge of your document. By default, a new document's
margins are set to Normal, which means it has a one-inch space between the text and each edge.
Depending on your needs, Word allows you to change your document's margin size.
1.7.2.1 To format page margins:
Word has a variety of predefined margin sizes to choose from.
1. Select the Page Layout tab, then click the Margins command.
20.
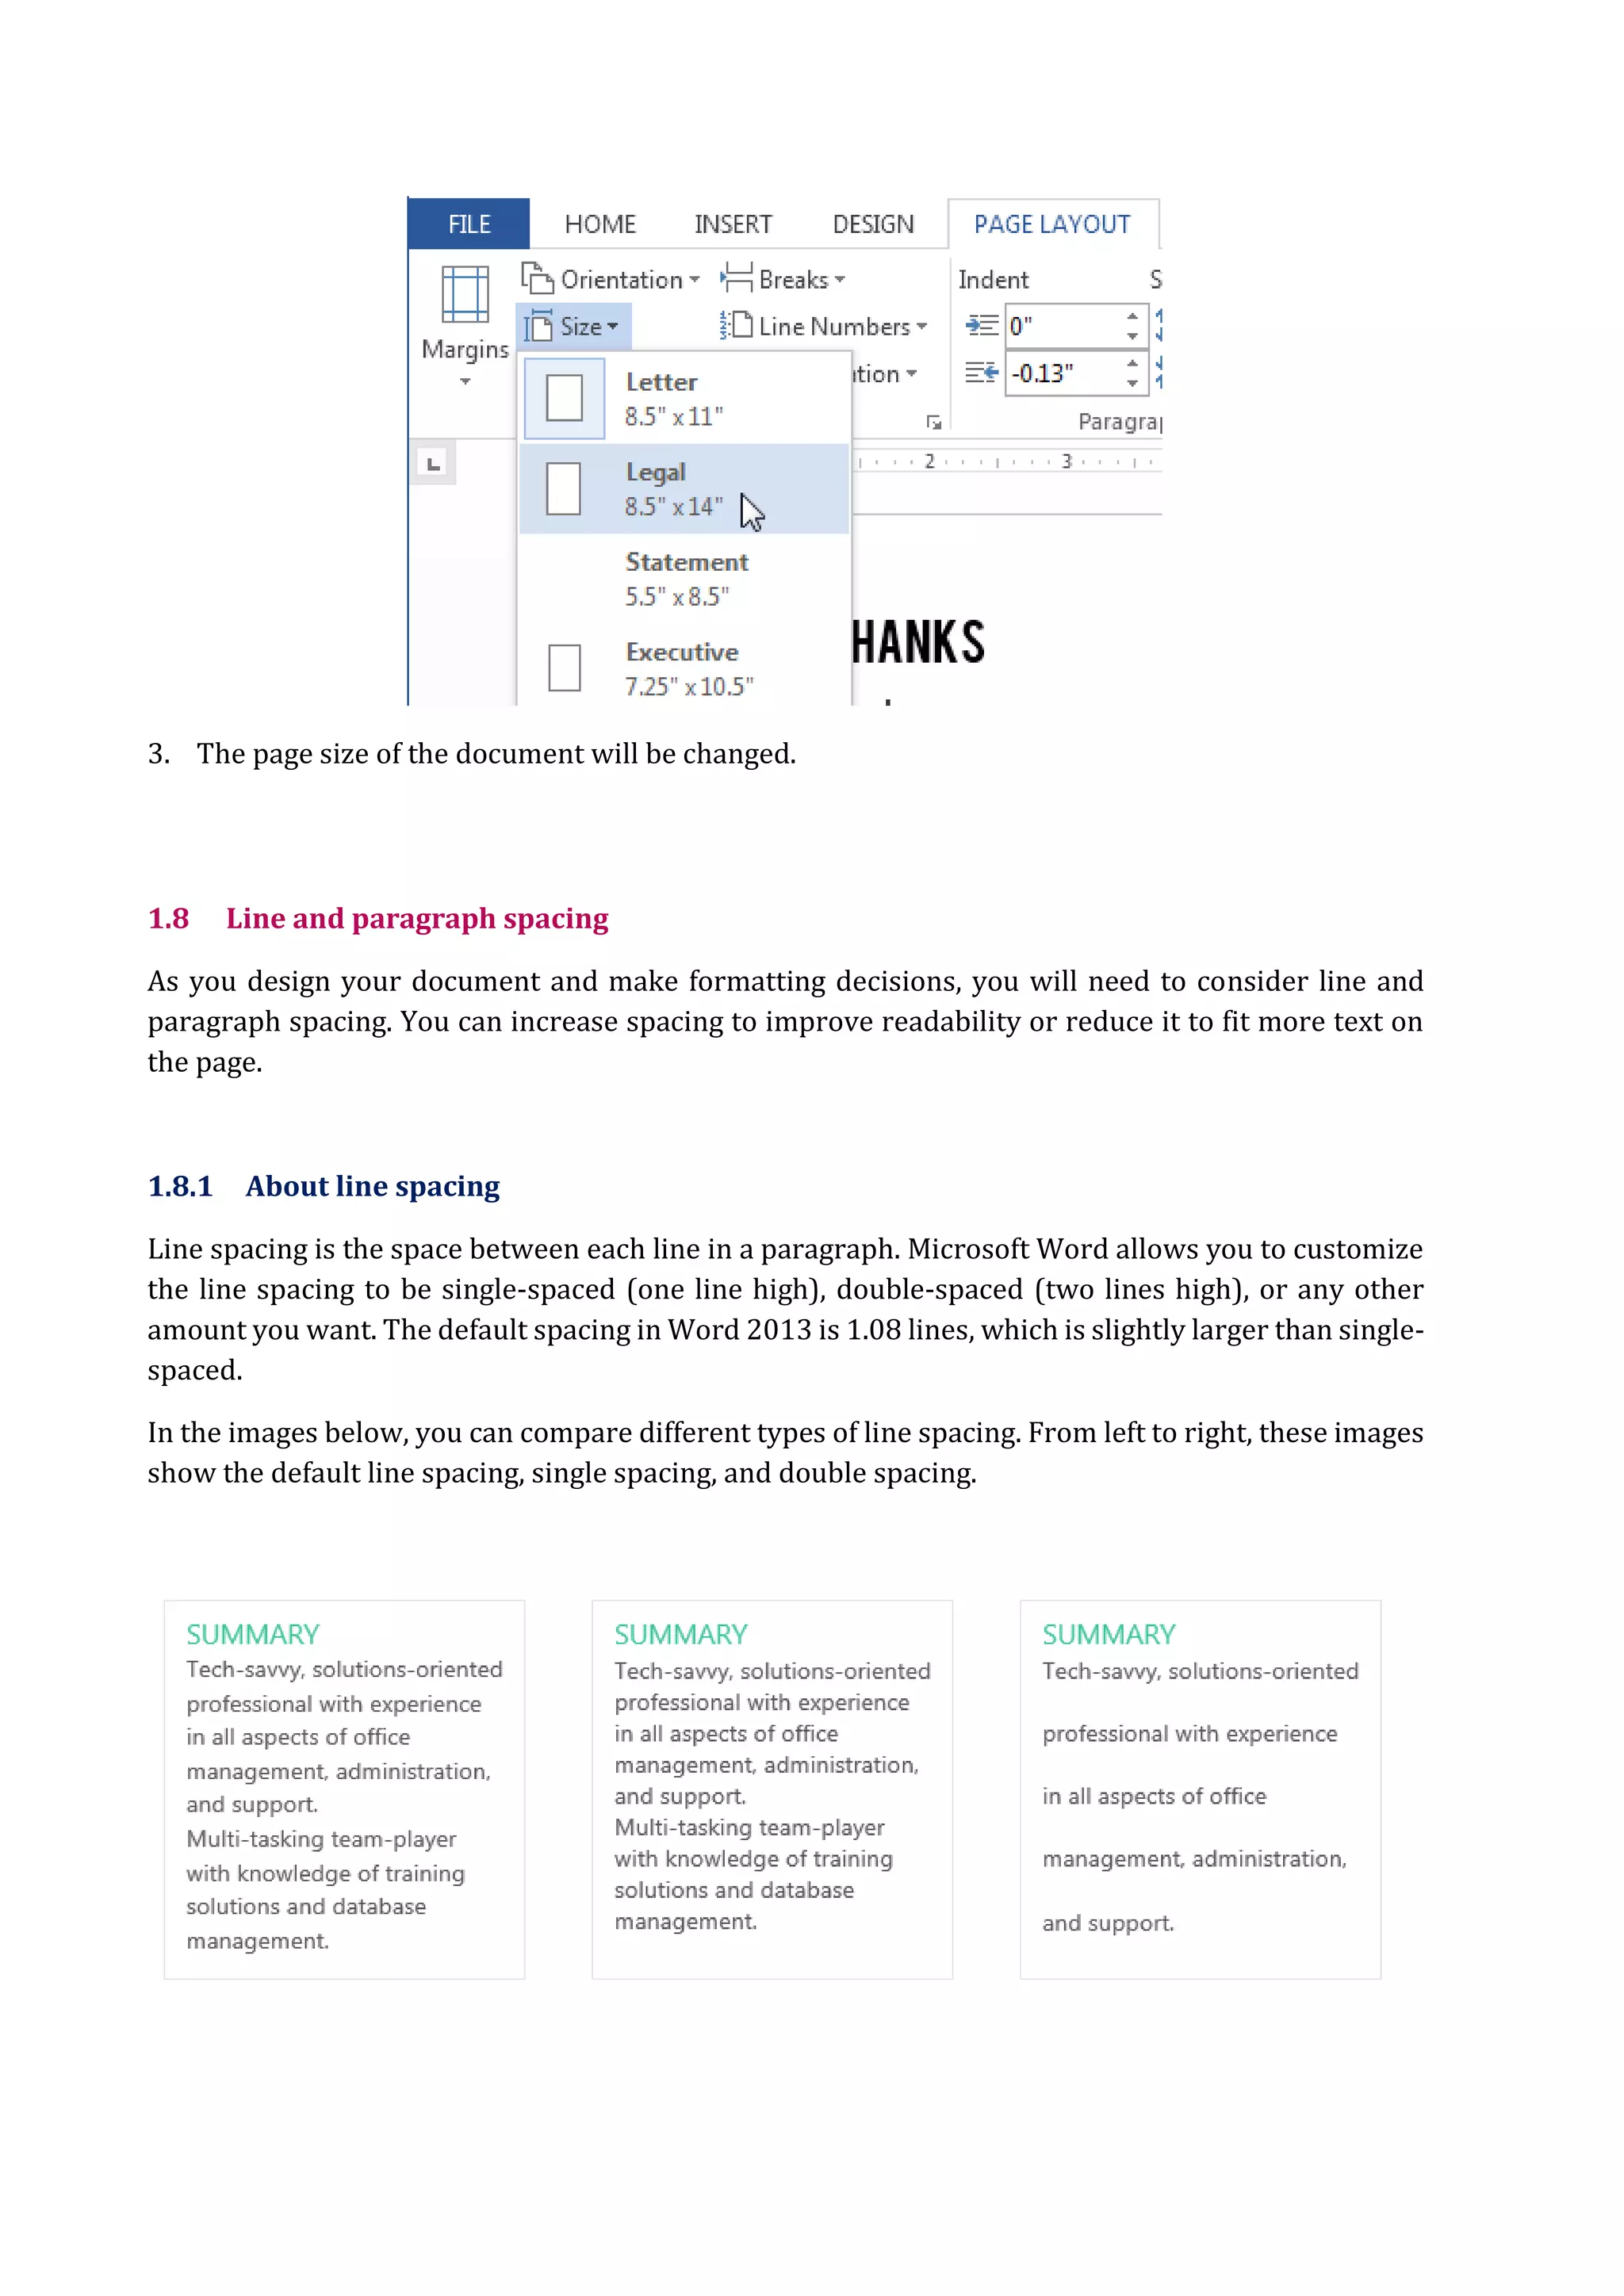
2. A drop-downmenu will appear. Click the predefined margin size you desire.
3. The margins of the document will be changed.
1.7.3 Page size
By default, the page size of a new document is 8.5 inches by 11 inches. Depending on your project,
you may need to adjust your document's page size. It's important to note that before modifying the
default page size, you should check to see which page sizes your printer can accommodate.
1.7.3.1 To change the page size:
Word has a variety of predefined page sizes to choose from.
1. Select the Page Layout tab, then click the Size command.
2. A drop-down menu will appear. The current page size is highlighted. Click the desired predefined
page size.
21.
3. The pagesize of the document will be changed.
1.8 Line and paragraph spacing
As you design your document and make formatting decisions, you will need to consider line and
paragraph spacing. You can increase spacing to improve readability or reduce it to fit more text on
the page.
1.8.1 About line spacing
Line spacing is the space between each line in a paragraph. Microsoft Word allows you to customize
the line spacing to be single-spaced (one line high), double-spaced (two lines high), or any other
amount you want. The default spacing in Word 2013 is 1.08 lines, which is slightly larger than single-
spaced.
In the images below, you can compare different types of line spacing. From left to right, these images
show the default line spacing, single spacing, and double spacing.
22.
1.8.1.1 To formatline spacing:
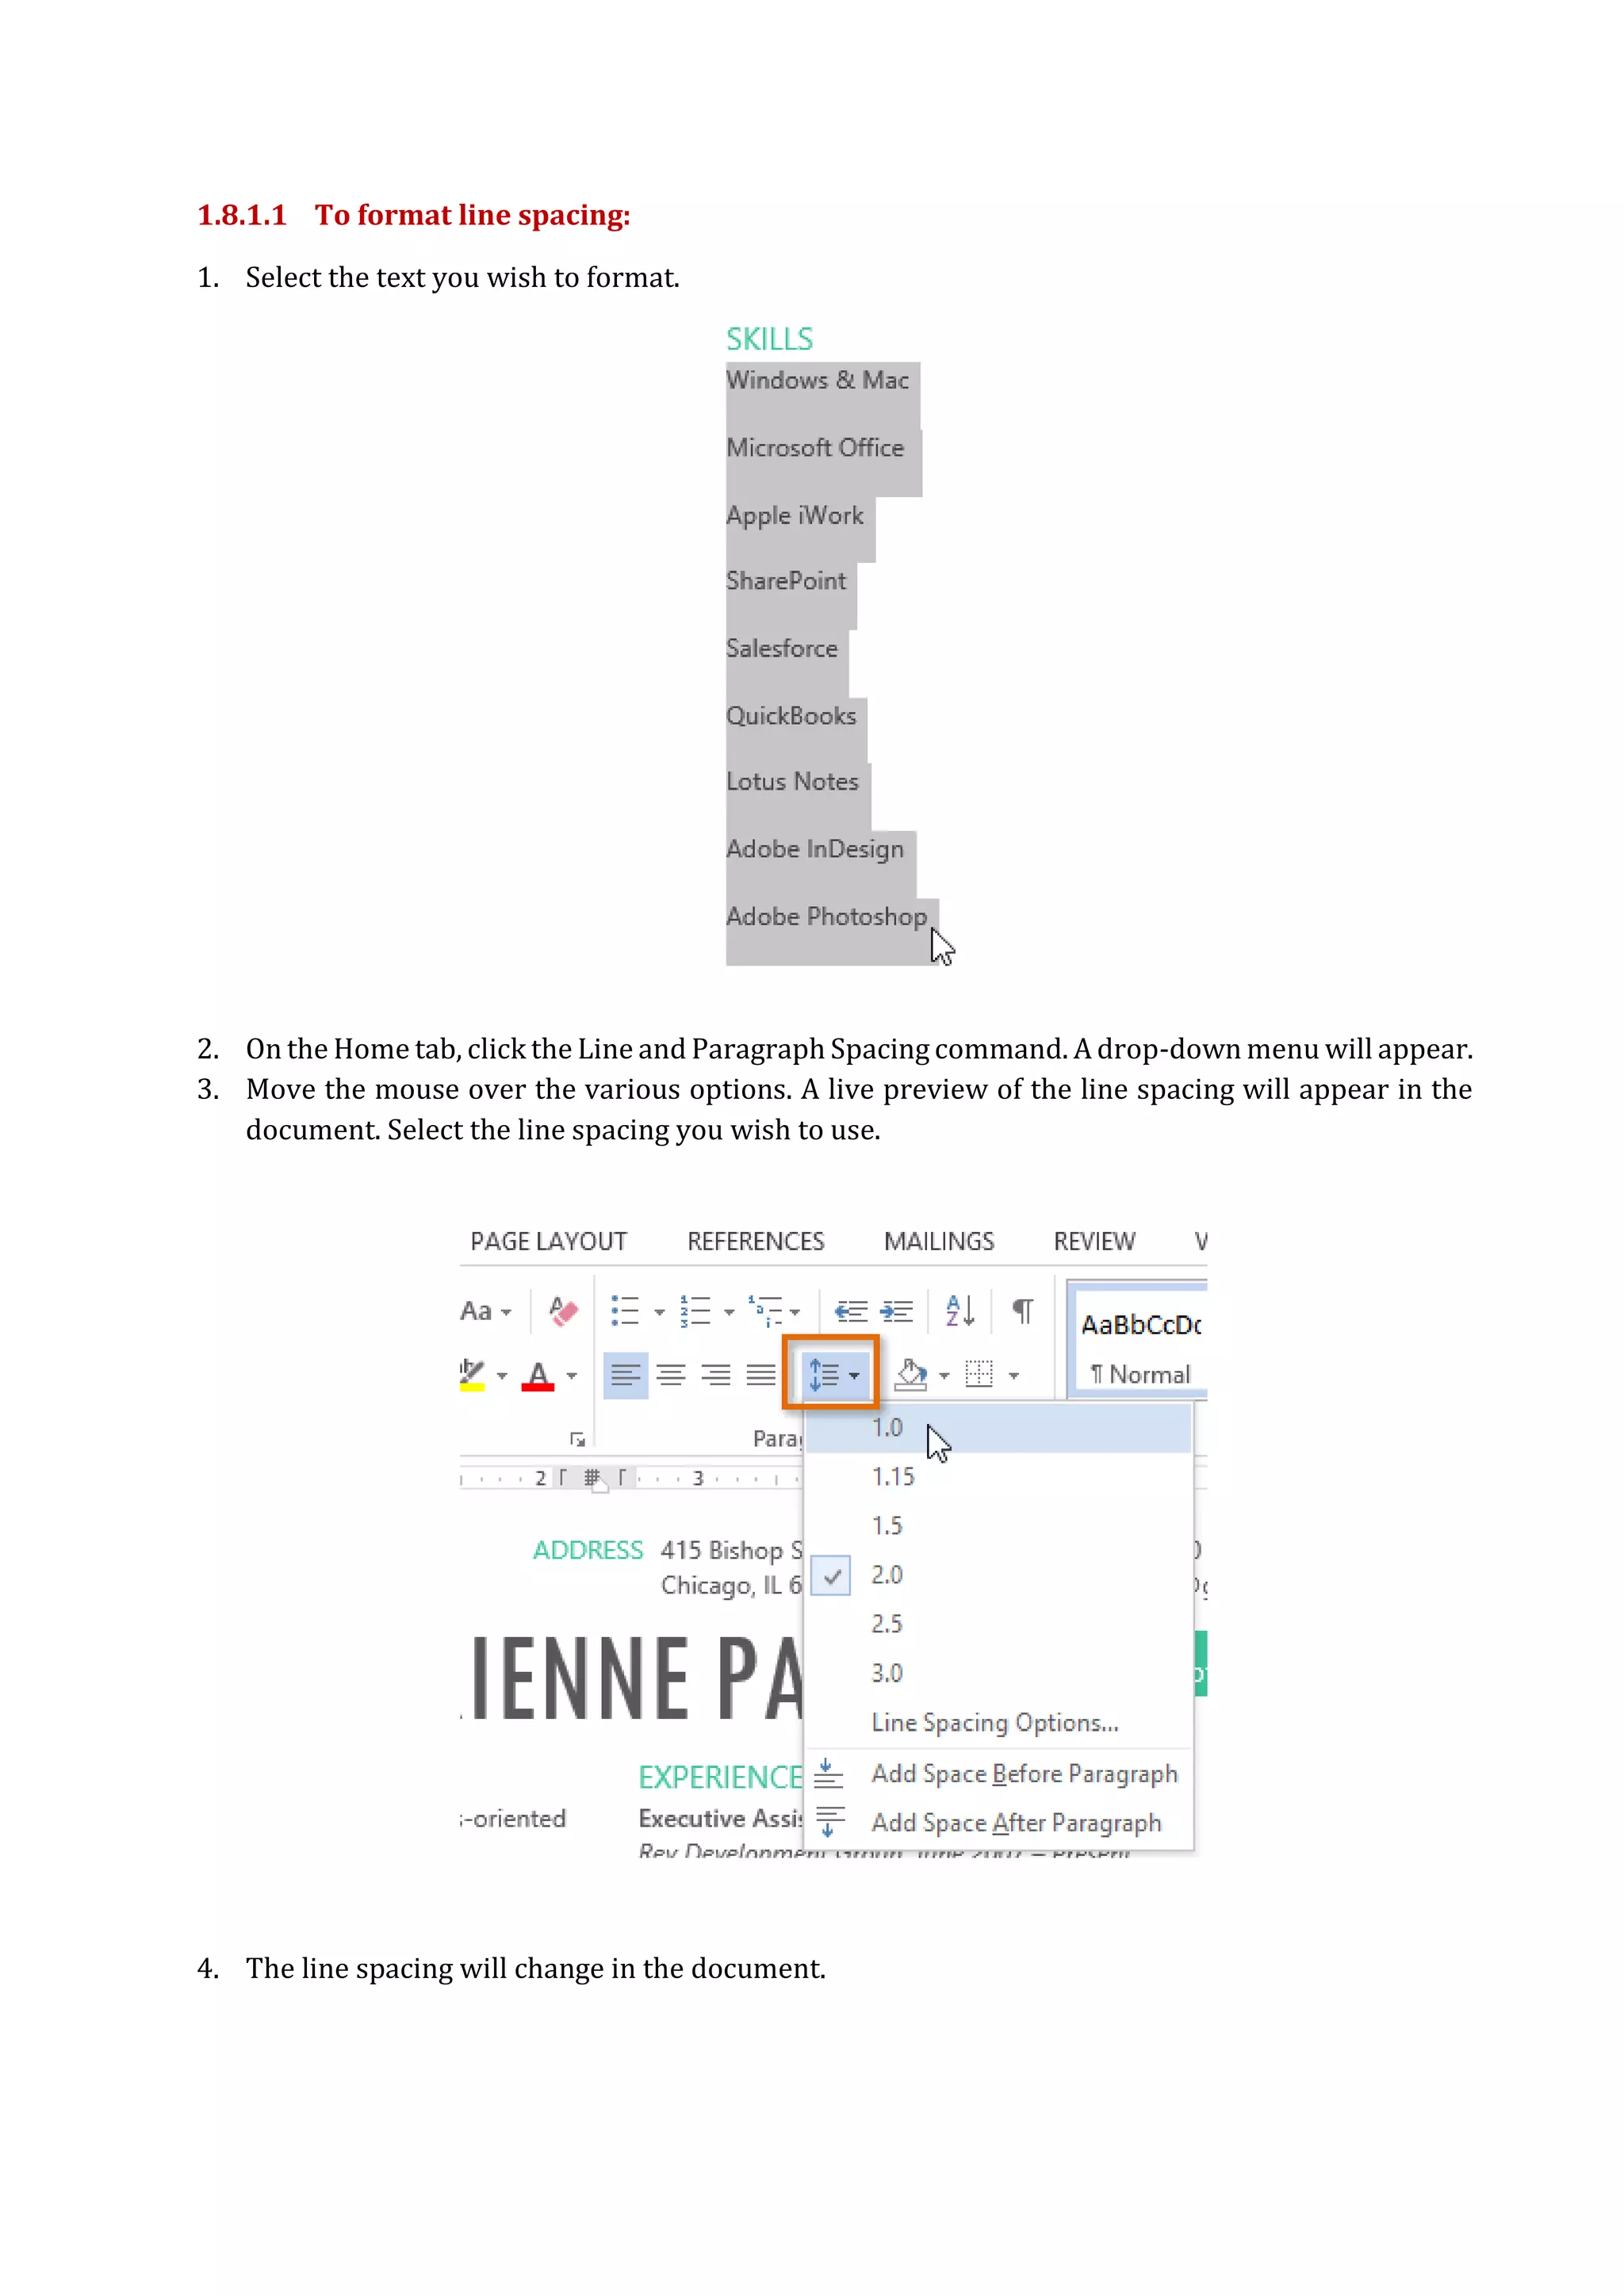
1. Select the text you wish to format.
2. On the Home tab, click the Line and Paragraph Spacing command. A drop-down menu will appear.
3. Move the mouse over the various options. A live preview of the line spacing will appear in the
document. Select the line spacing you wish to use.
4. The line spacing will change in the document.
23.
1.8.2 Paragraph spacing
Bydefault, when you press the Enter key Word 2013 moves the insertion point down a little farther
than one line on the page. This automatically creates space between paragraphs. Just as you can
format spacing between lines in your document, you can adjust spacing before and after paragraphs.
This is useful for separating paragraphs, headings, and subheadings.
1.8.2.1 To format paragraph spacing:
In our example, we'll increase the space before a paragraph to separate it from a heading. This will
make our document easier to read.
1. Select the paragraph or paragraphs you wish to format.
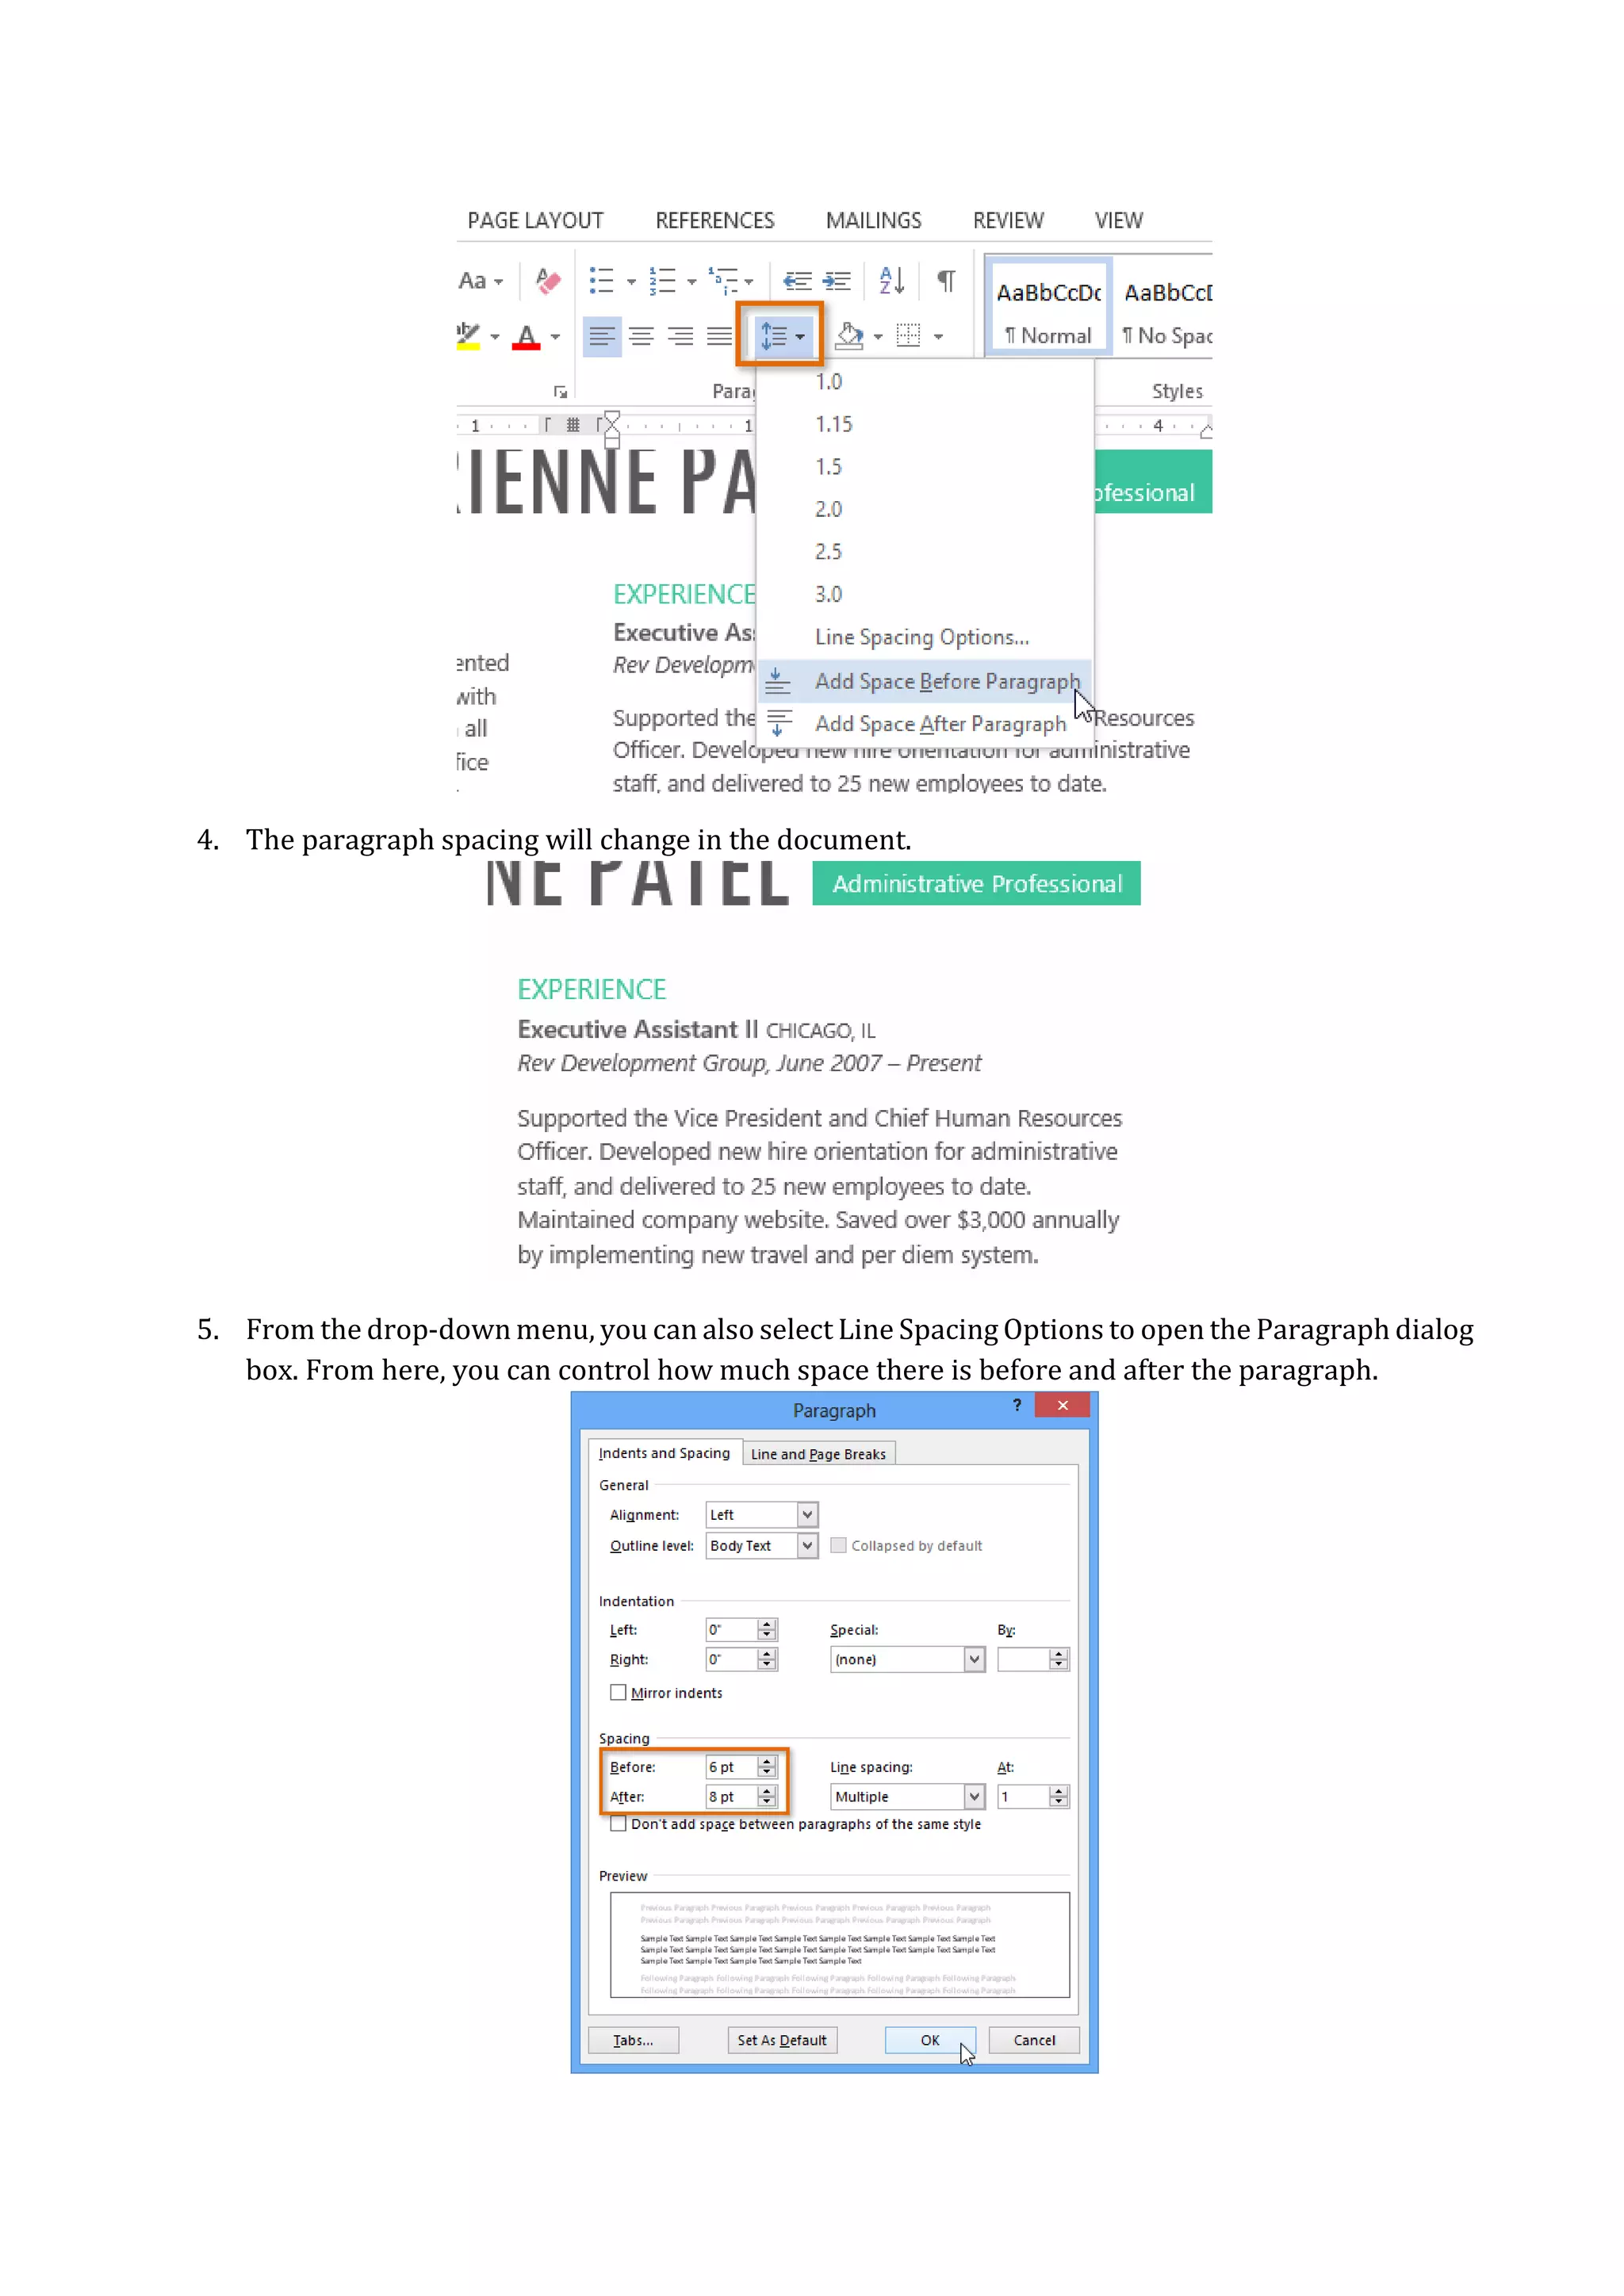
2. On the Home tab, click the Line and Paragraph Spacing command. Hover the mouse over Add
Space Before Paragraph or Remove Space After Paragraph from the drop-down menu. A live
preview of the paragraph spacing will appear in the document.
3. Select the paragraph spacing you wish to use. In our example, we'll select Add Space Before
Paragraph.
24.
4. The paragraphspacing will change in the document.
5. From the drop-down menu, you can also select Line Spacing Options to open the Paragraph dialog
box. From here, you can control how much space there is before and after the paragraph.
25.
1.9 Indents andTabs
Indenting text adds structure to your document by allowing you to separate information. Whether
you'd like to move a single line or an entire paragraph, you can use the tab selector and the horizontal
ruler to set tabs and indents.
1.9.1 Indenting text
In many types of documents, you may wish to indent only the first line of each paragraph. This helps
to visually separate paragraphs from one another. It's also possible to indent every line except for
the first line, which is known as a hanging indent.
1.9.2 To indent using the Tab key:
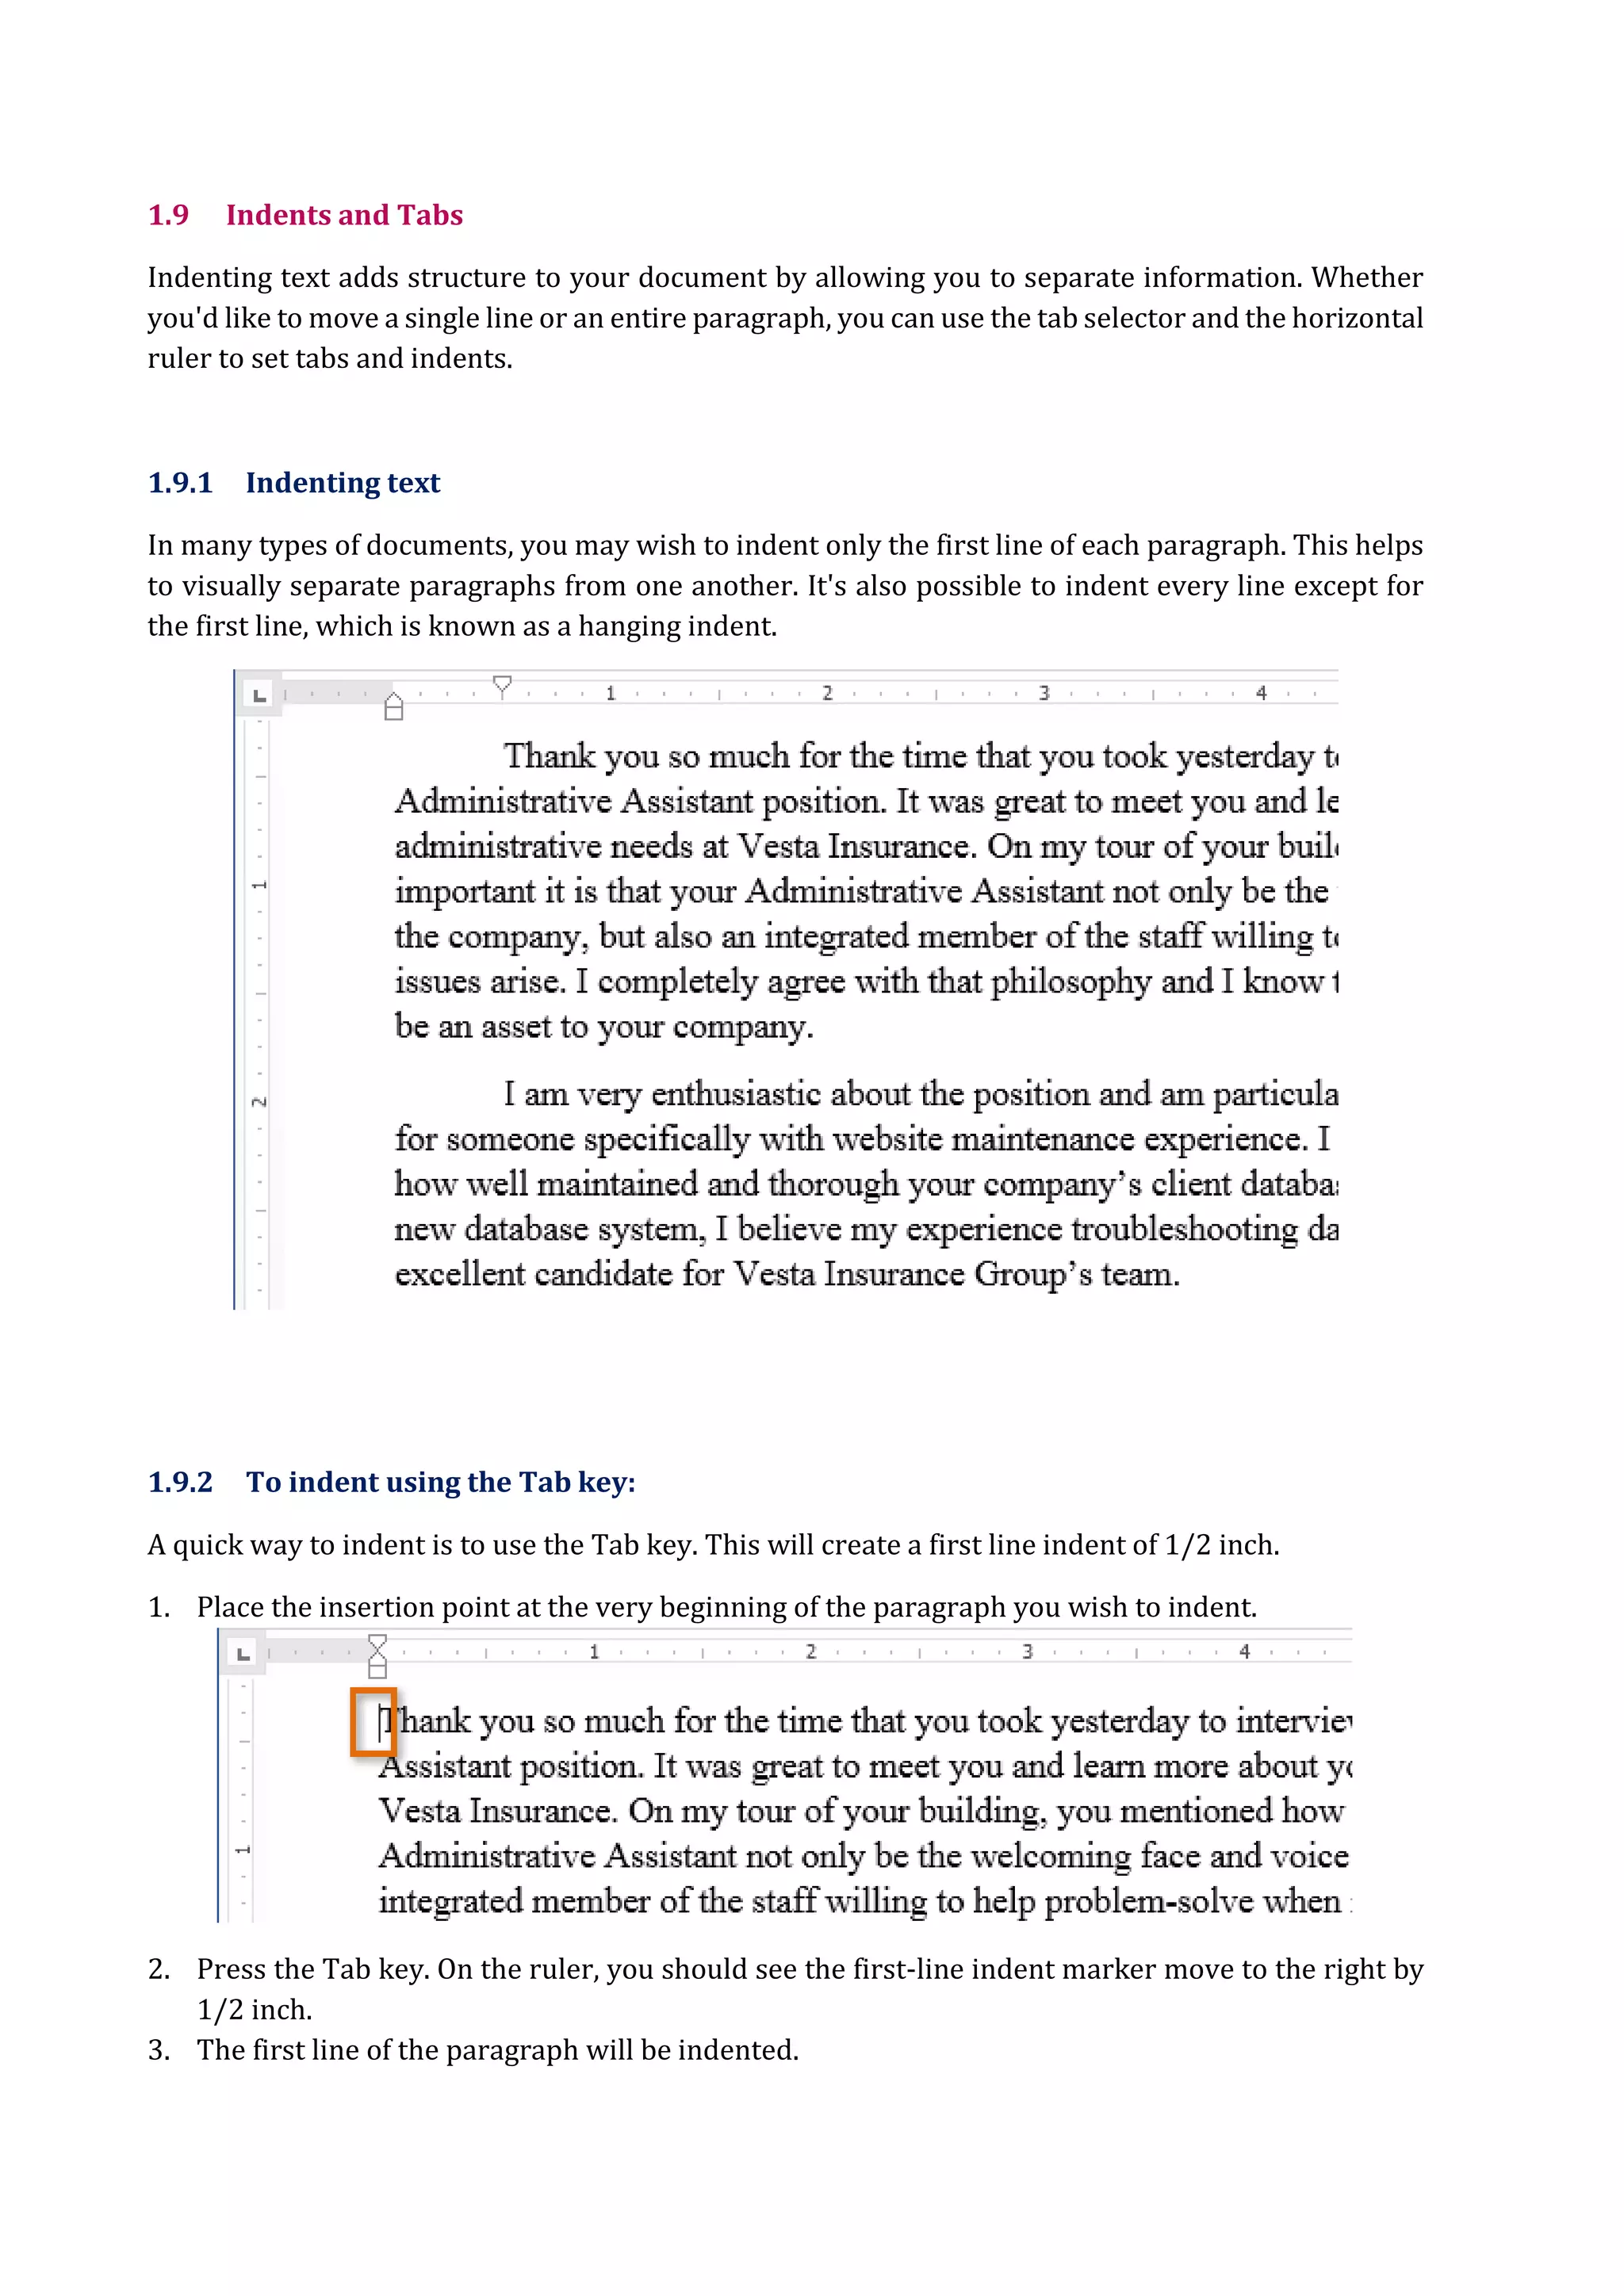
A quick way to indent is to use the Tab key. This will create a first line indent of 1/2 inch.
1. Place the insertion point at the very beginning of the paragraph you wish to indent.
2. Press the Tab key. On the ruler, you should see the first-line indent marker move to the right by
1/2 inch.
3. The first line of the paragraph will be indented.
26.
1.9.3 Indent markers
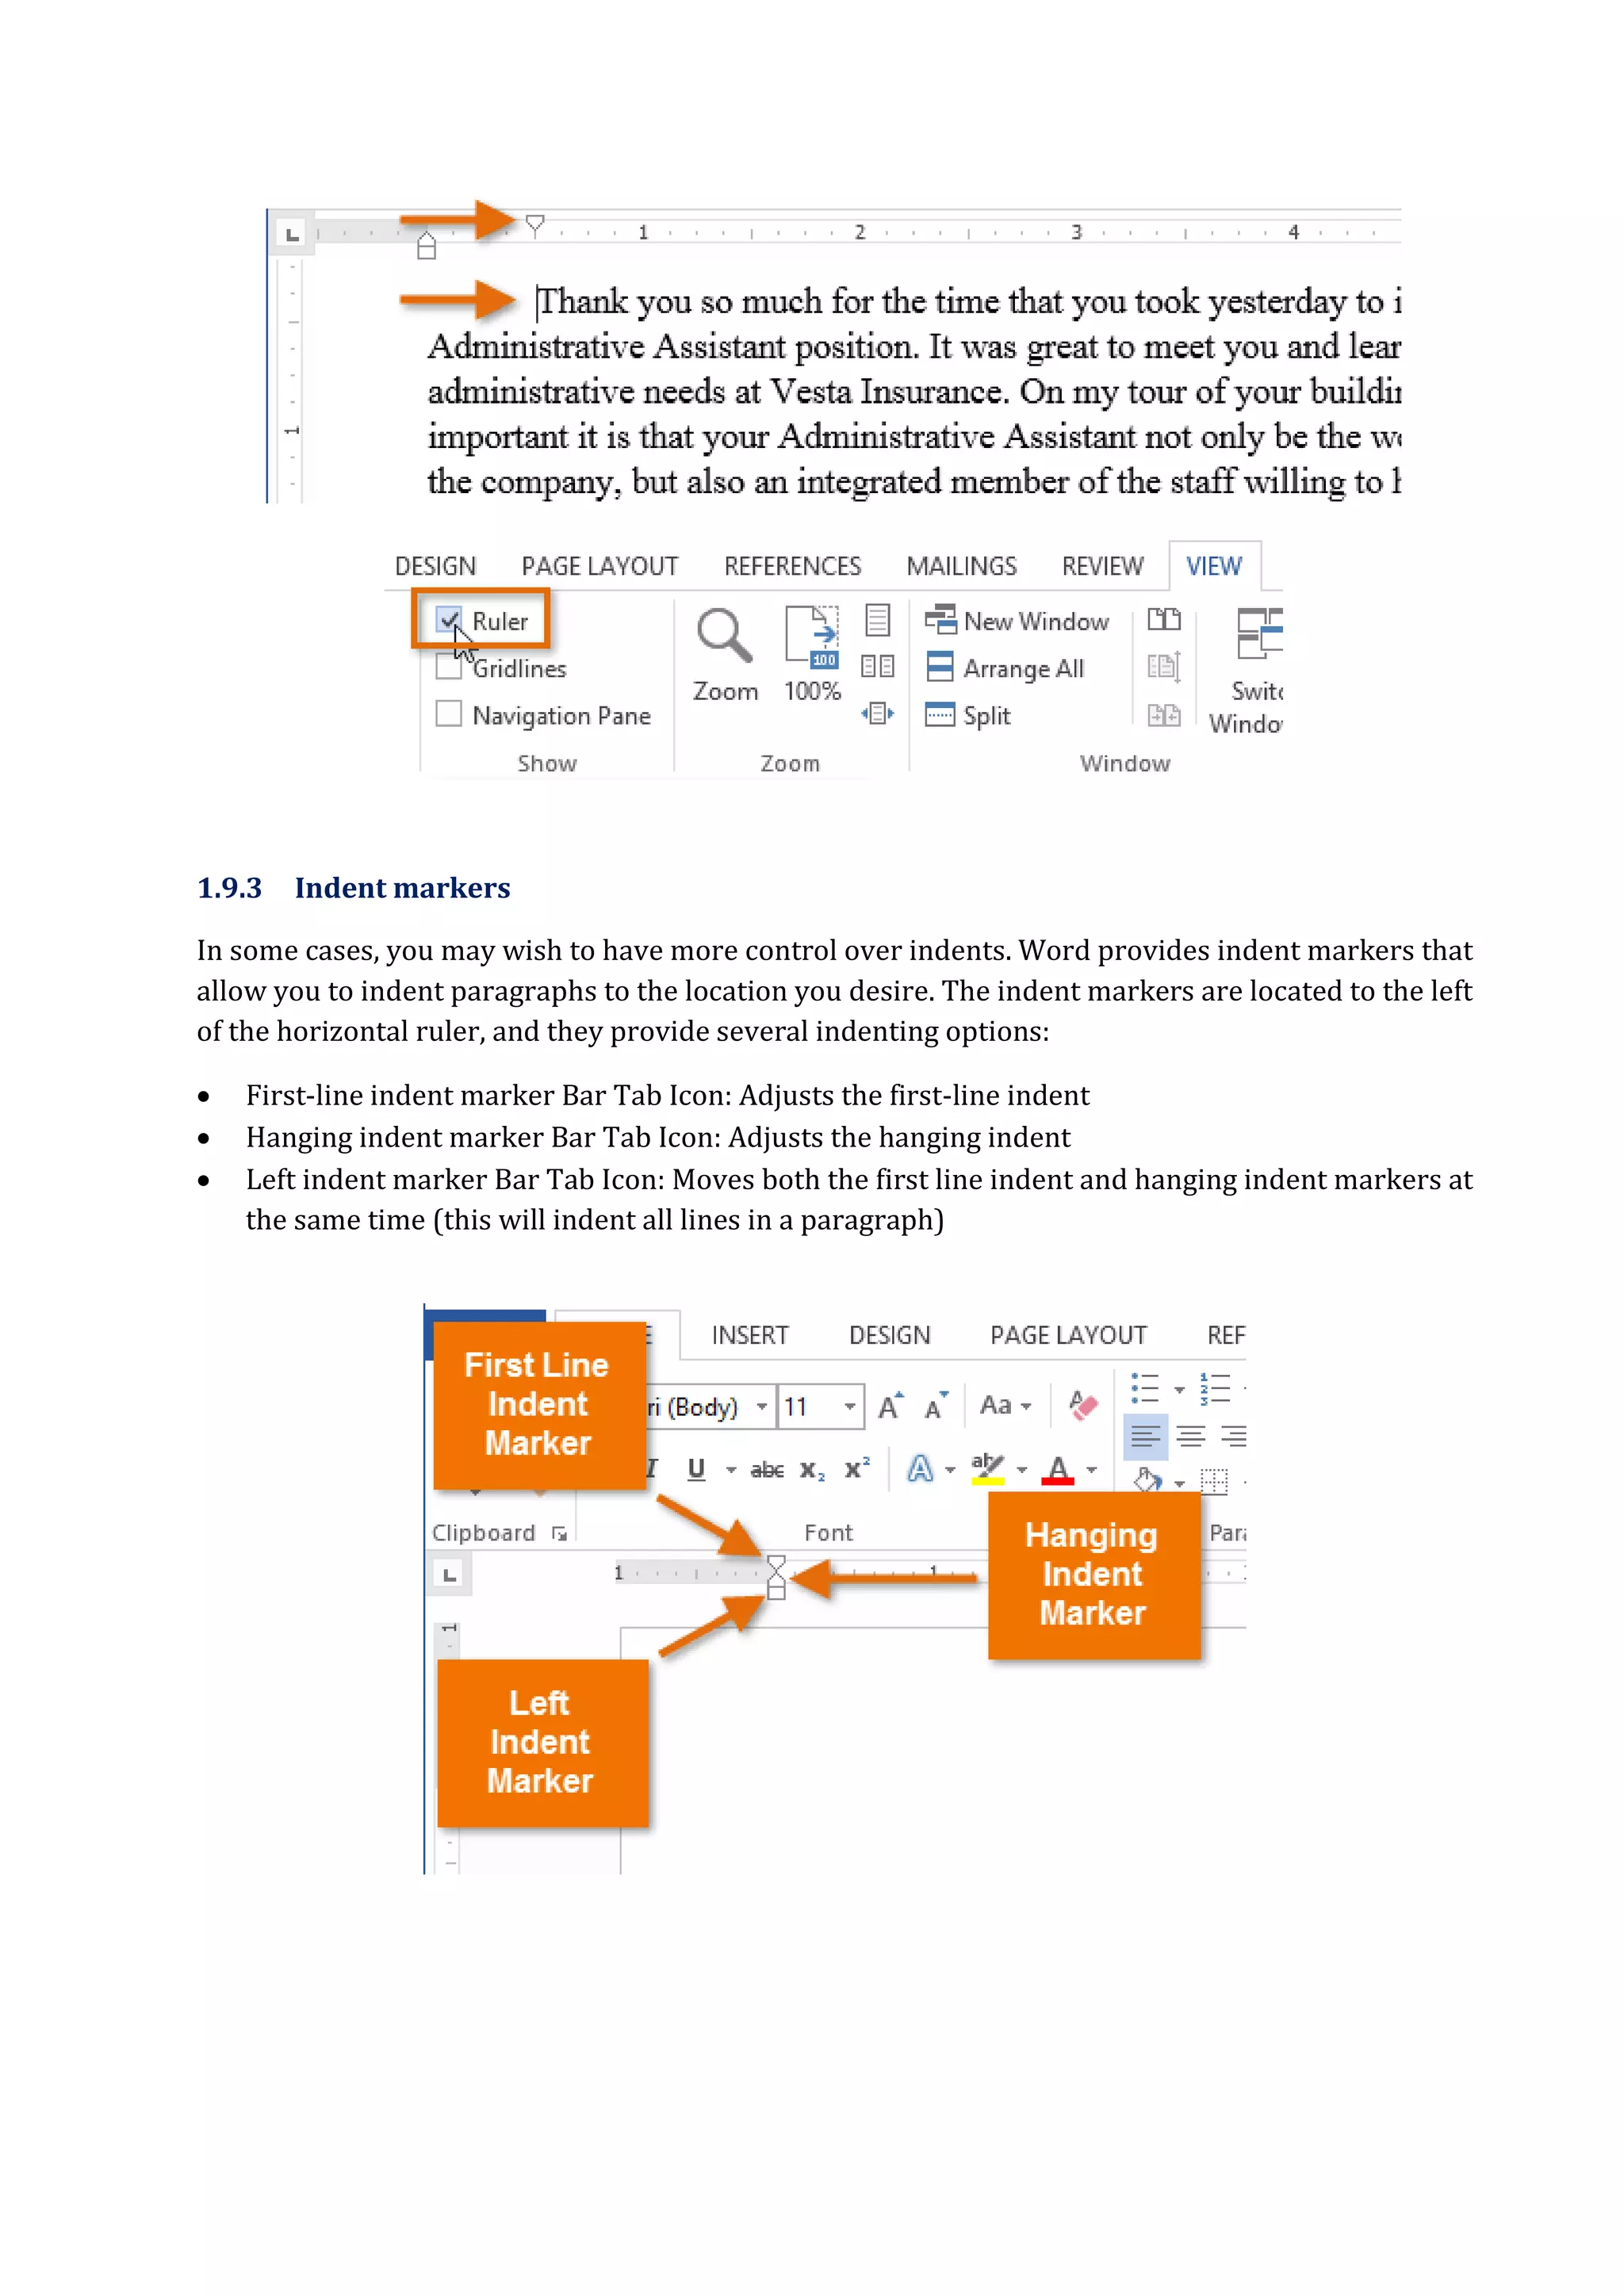
Insome cases, you may wish to have more control over indents. Word provides indent markers that
allow you to indent paragraphs to the location you desire. The indent markers are located to the left
of the horizontal ruler, and they provide several indenting options:
First-line indent marker Bar Tab Icon: Adjusts the first-line indent
Hanging indent marker Bar Tab Icon: Adjusts the hanging indent
Left indent marker Bar Tab Icon: Moves both the first line indent and hanging indent markers at
the same time (this will indent all lines in a paragraph)
27.
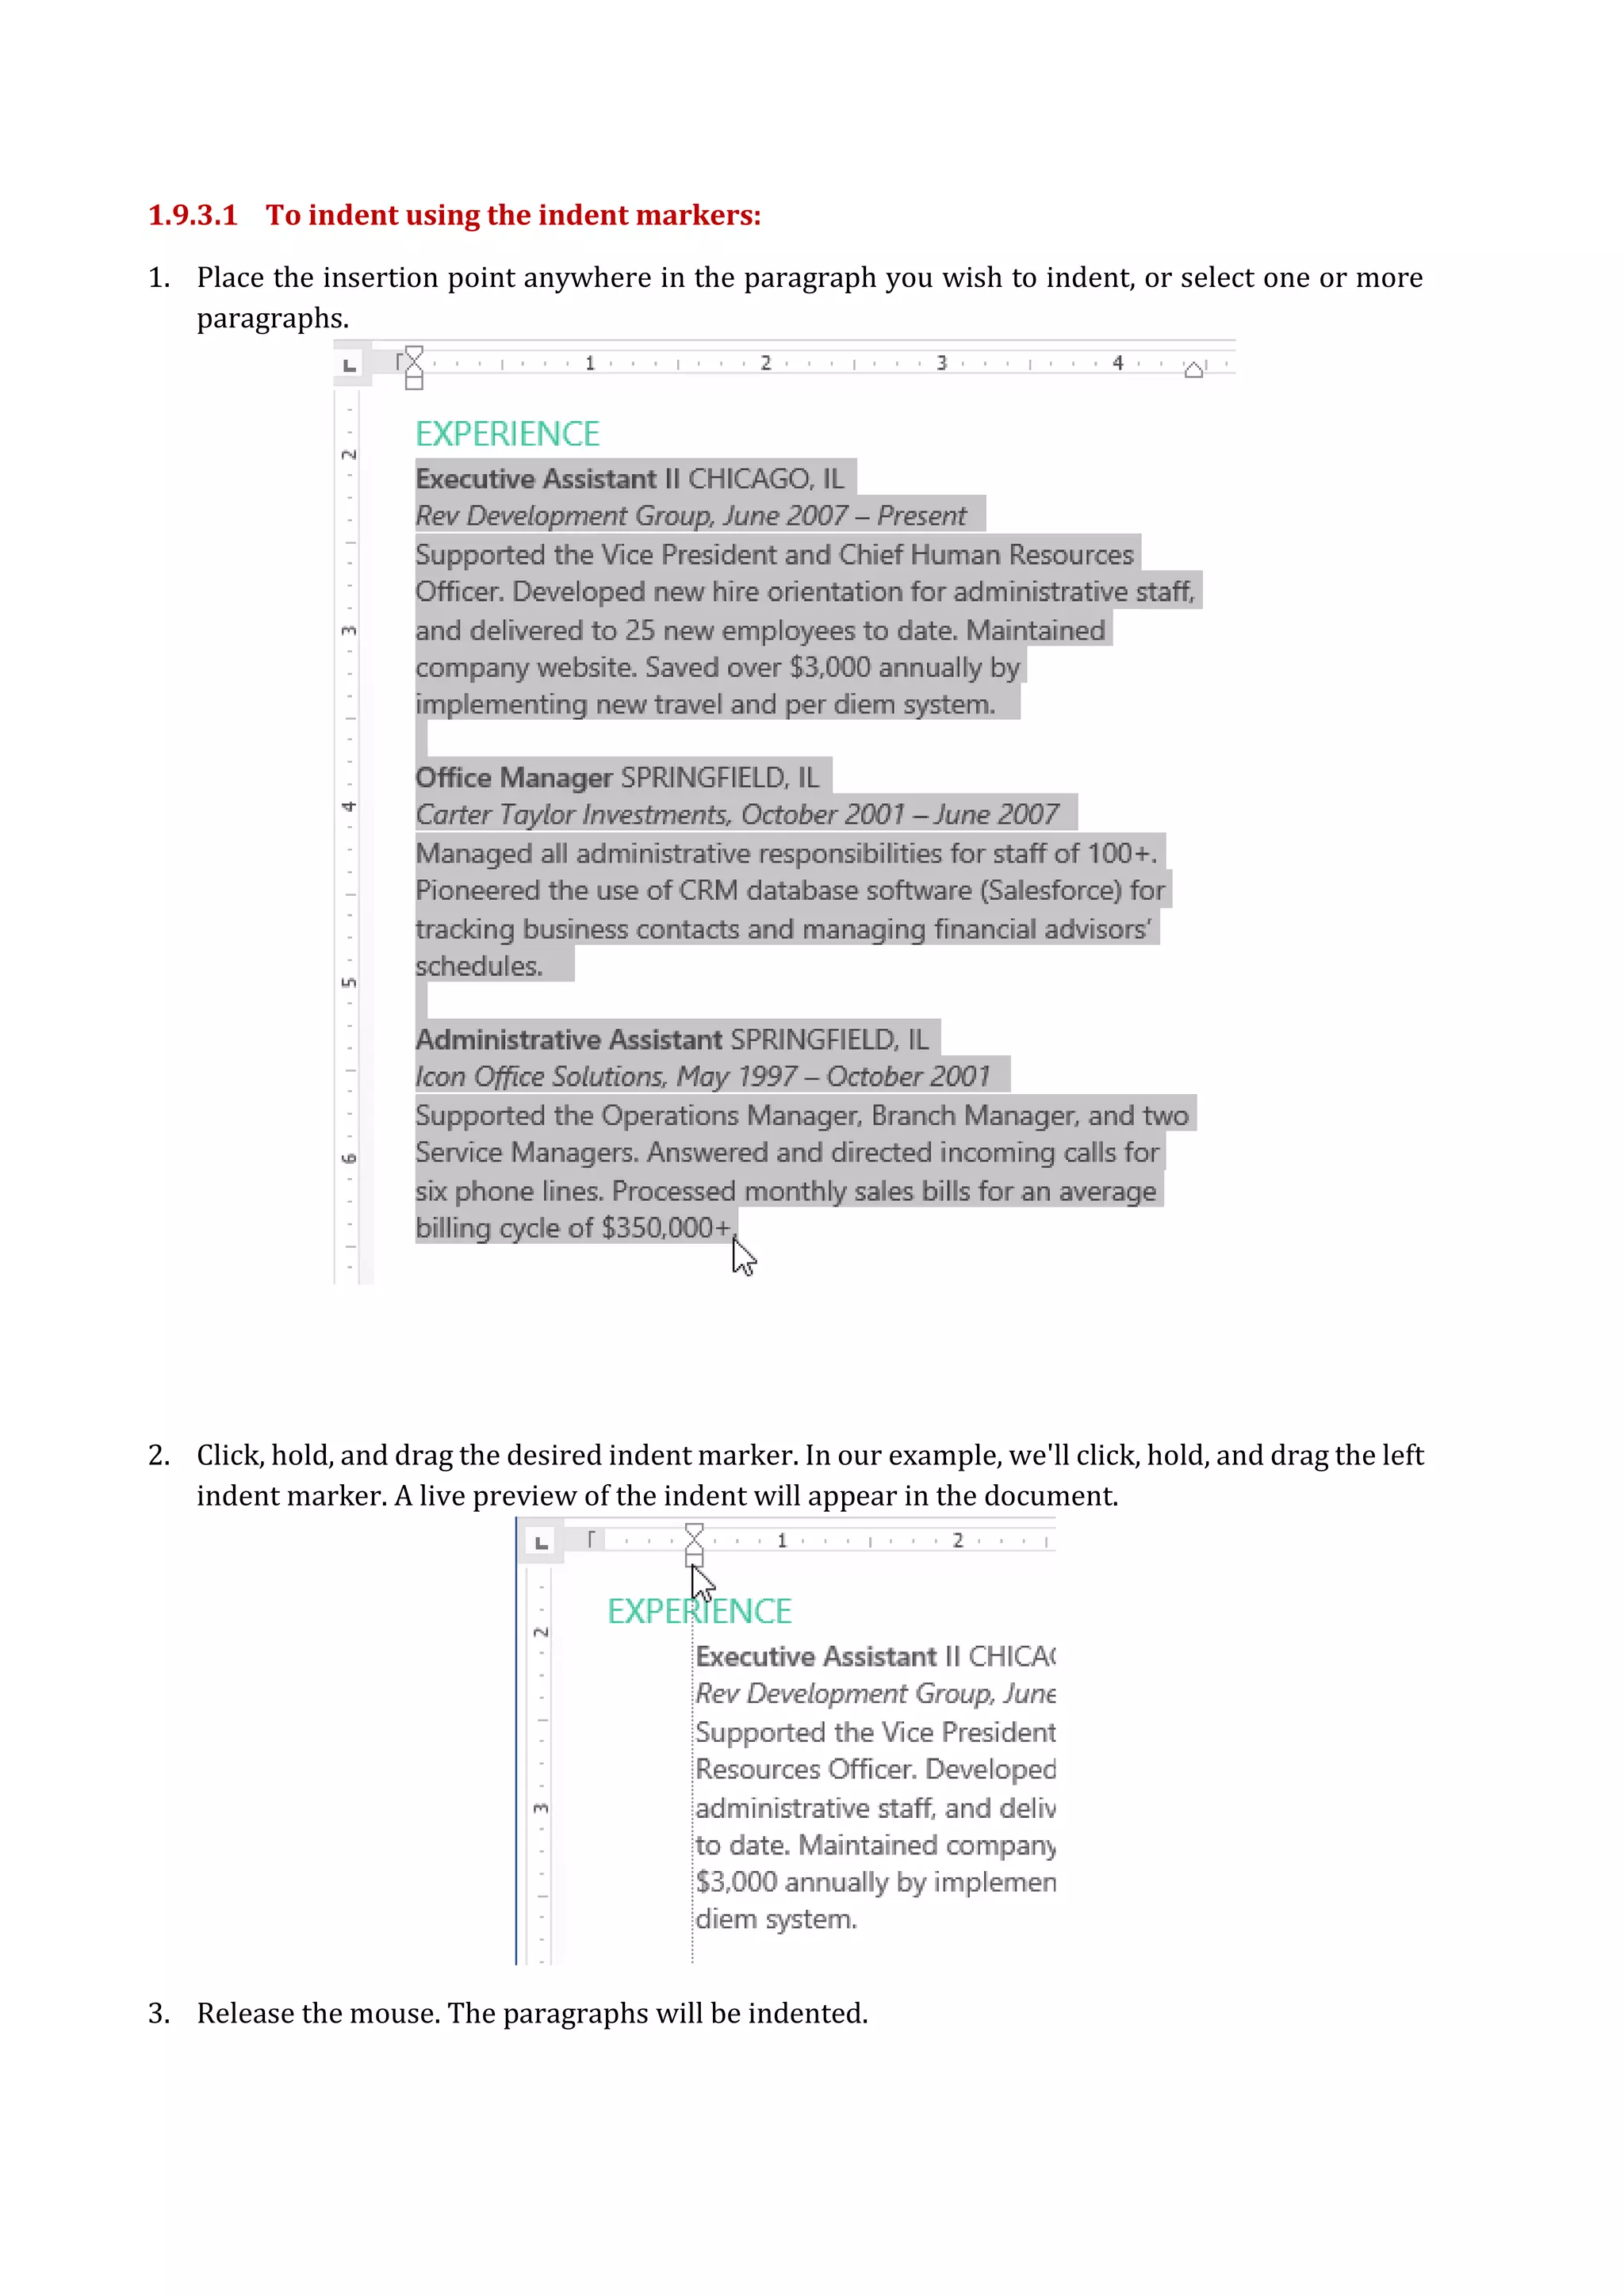
1.9.3.1 To indentusing the indent markers:
1. Place the insertion point anywhere in the paragraph you wish to indent, or select one or more
paragraphs.
2. Click, hold, and drag the desired indent marker. In our example, we'll click, hold, and drag the left
indent marker. A live preview of the indent will appear in the document.
3. Release the mouse. The paragraphs will be indented.
28.
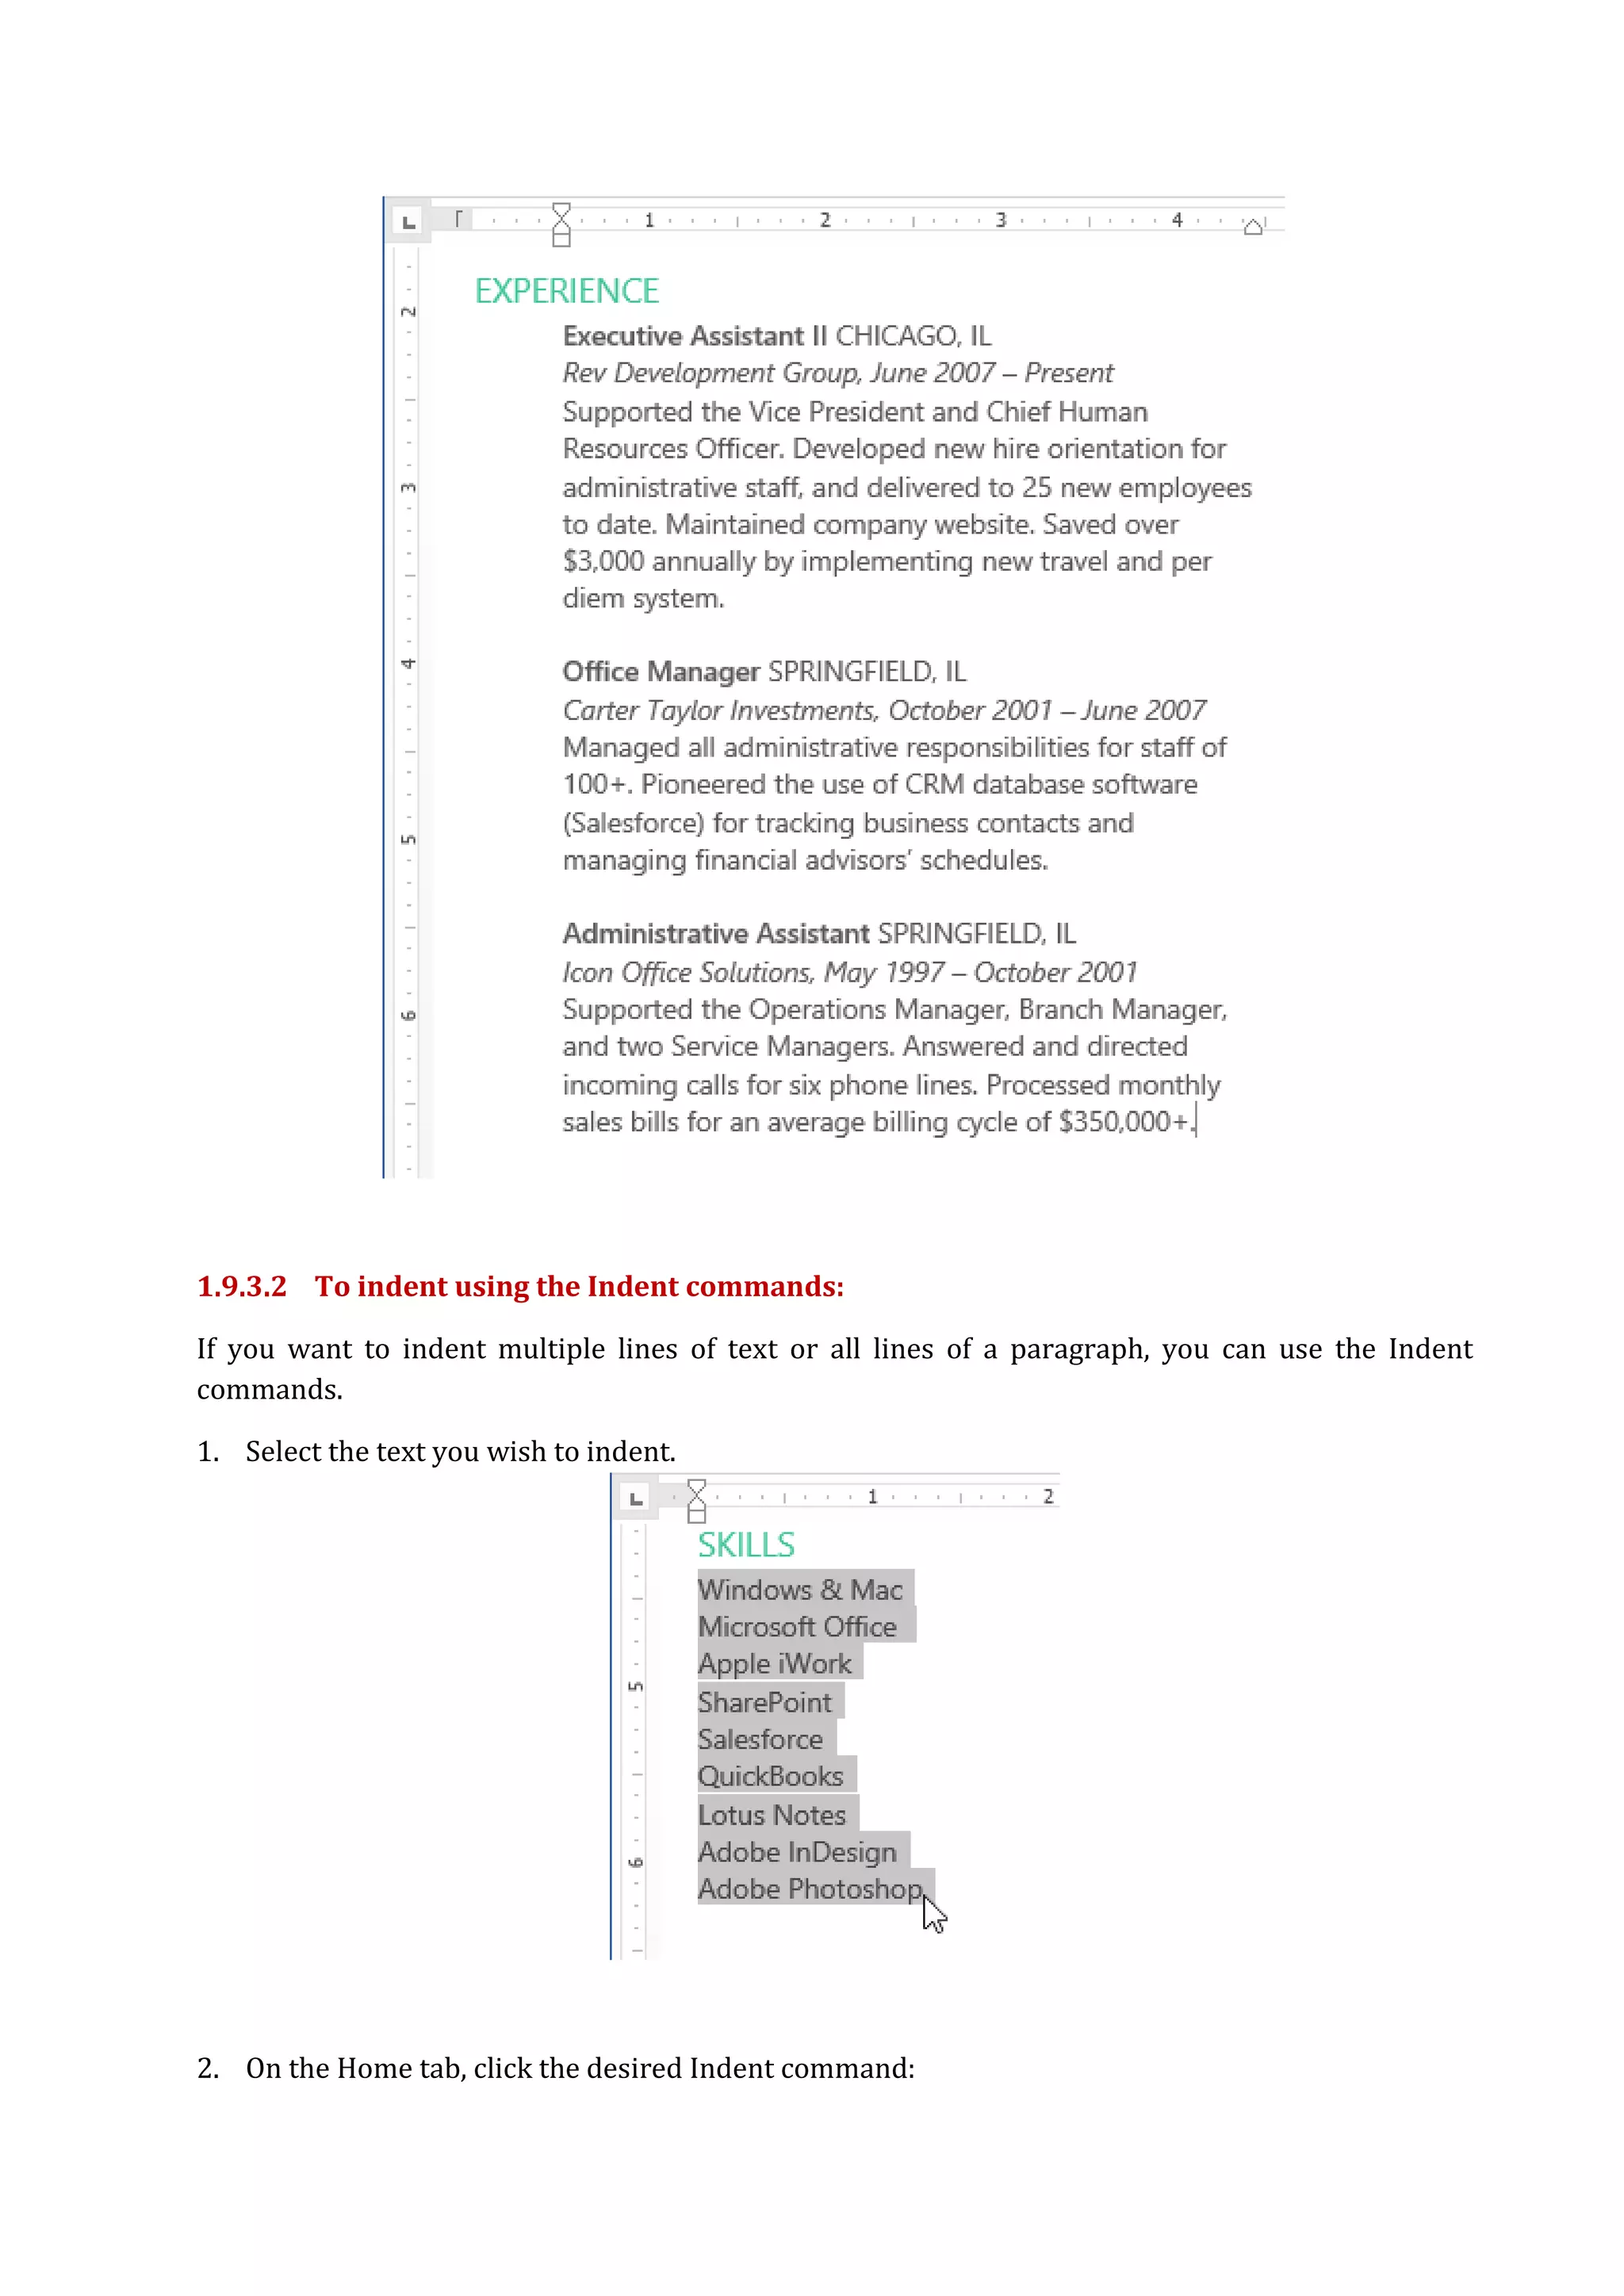
1.9.3.2 To indentusing the Indent commands:
If you want to indent multiple lines of text or all lines of a paragraph, you can use the Indent
commands.
1. Select the text you wish to indent.
2. On the Home tab, click the desired Indent command:
29.
Increase Indent:Increases the indent by increments of 1/2 inch. In our example, we'll
increase the indent.
Decrease Indent: Decreases the indent by increments of 1/2 inch.
3. The text will indent.
1.10 Tabs
Using Tabs gives you more control over the placement of text. By default, every time you press the
Tab key, the insertion point will move 1/2 inch to the right. Adding tab stops to the ruler allows you
to change the size of the tabs, and Word even allows you to apply more than one tab stop to a single
line. For example, on a resume you could Left Align the beginning of a line and Right Align the end of
the line by adding a Right Tab.
30.
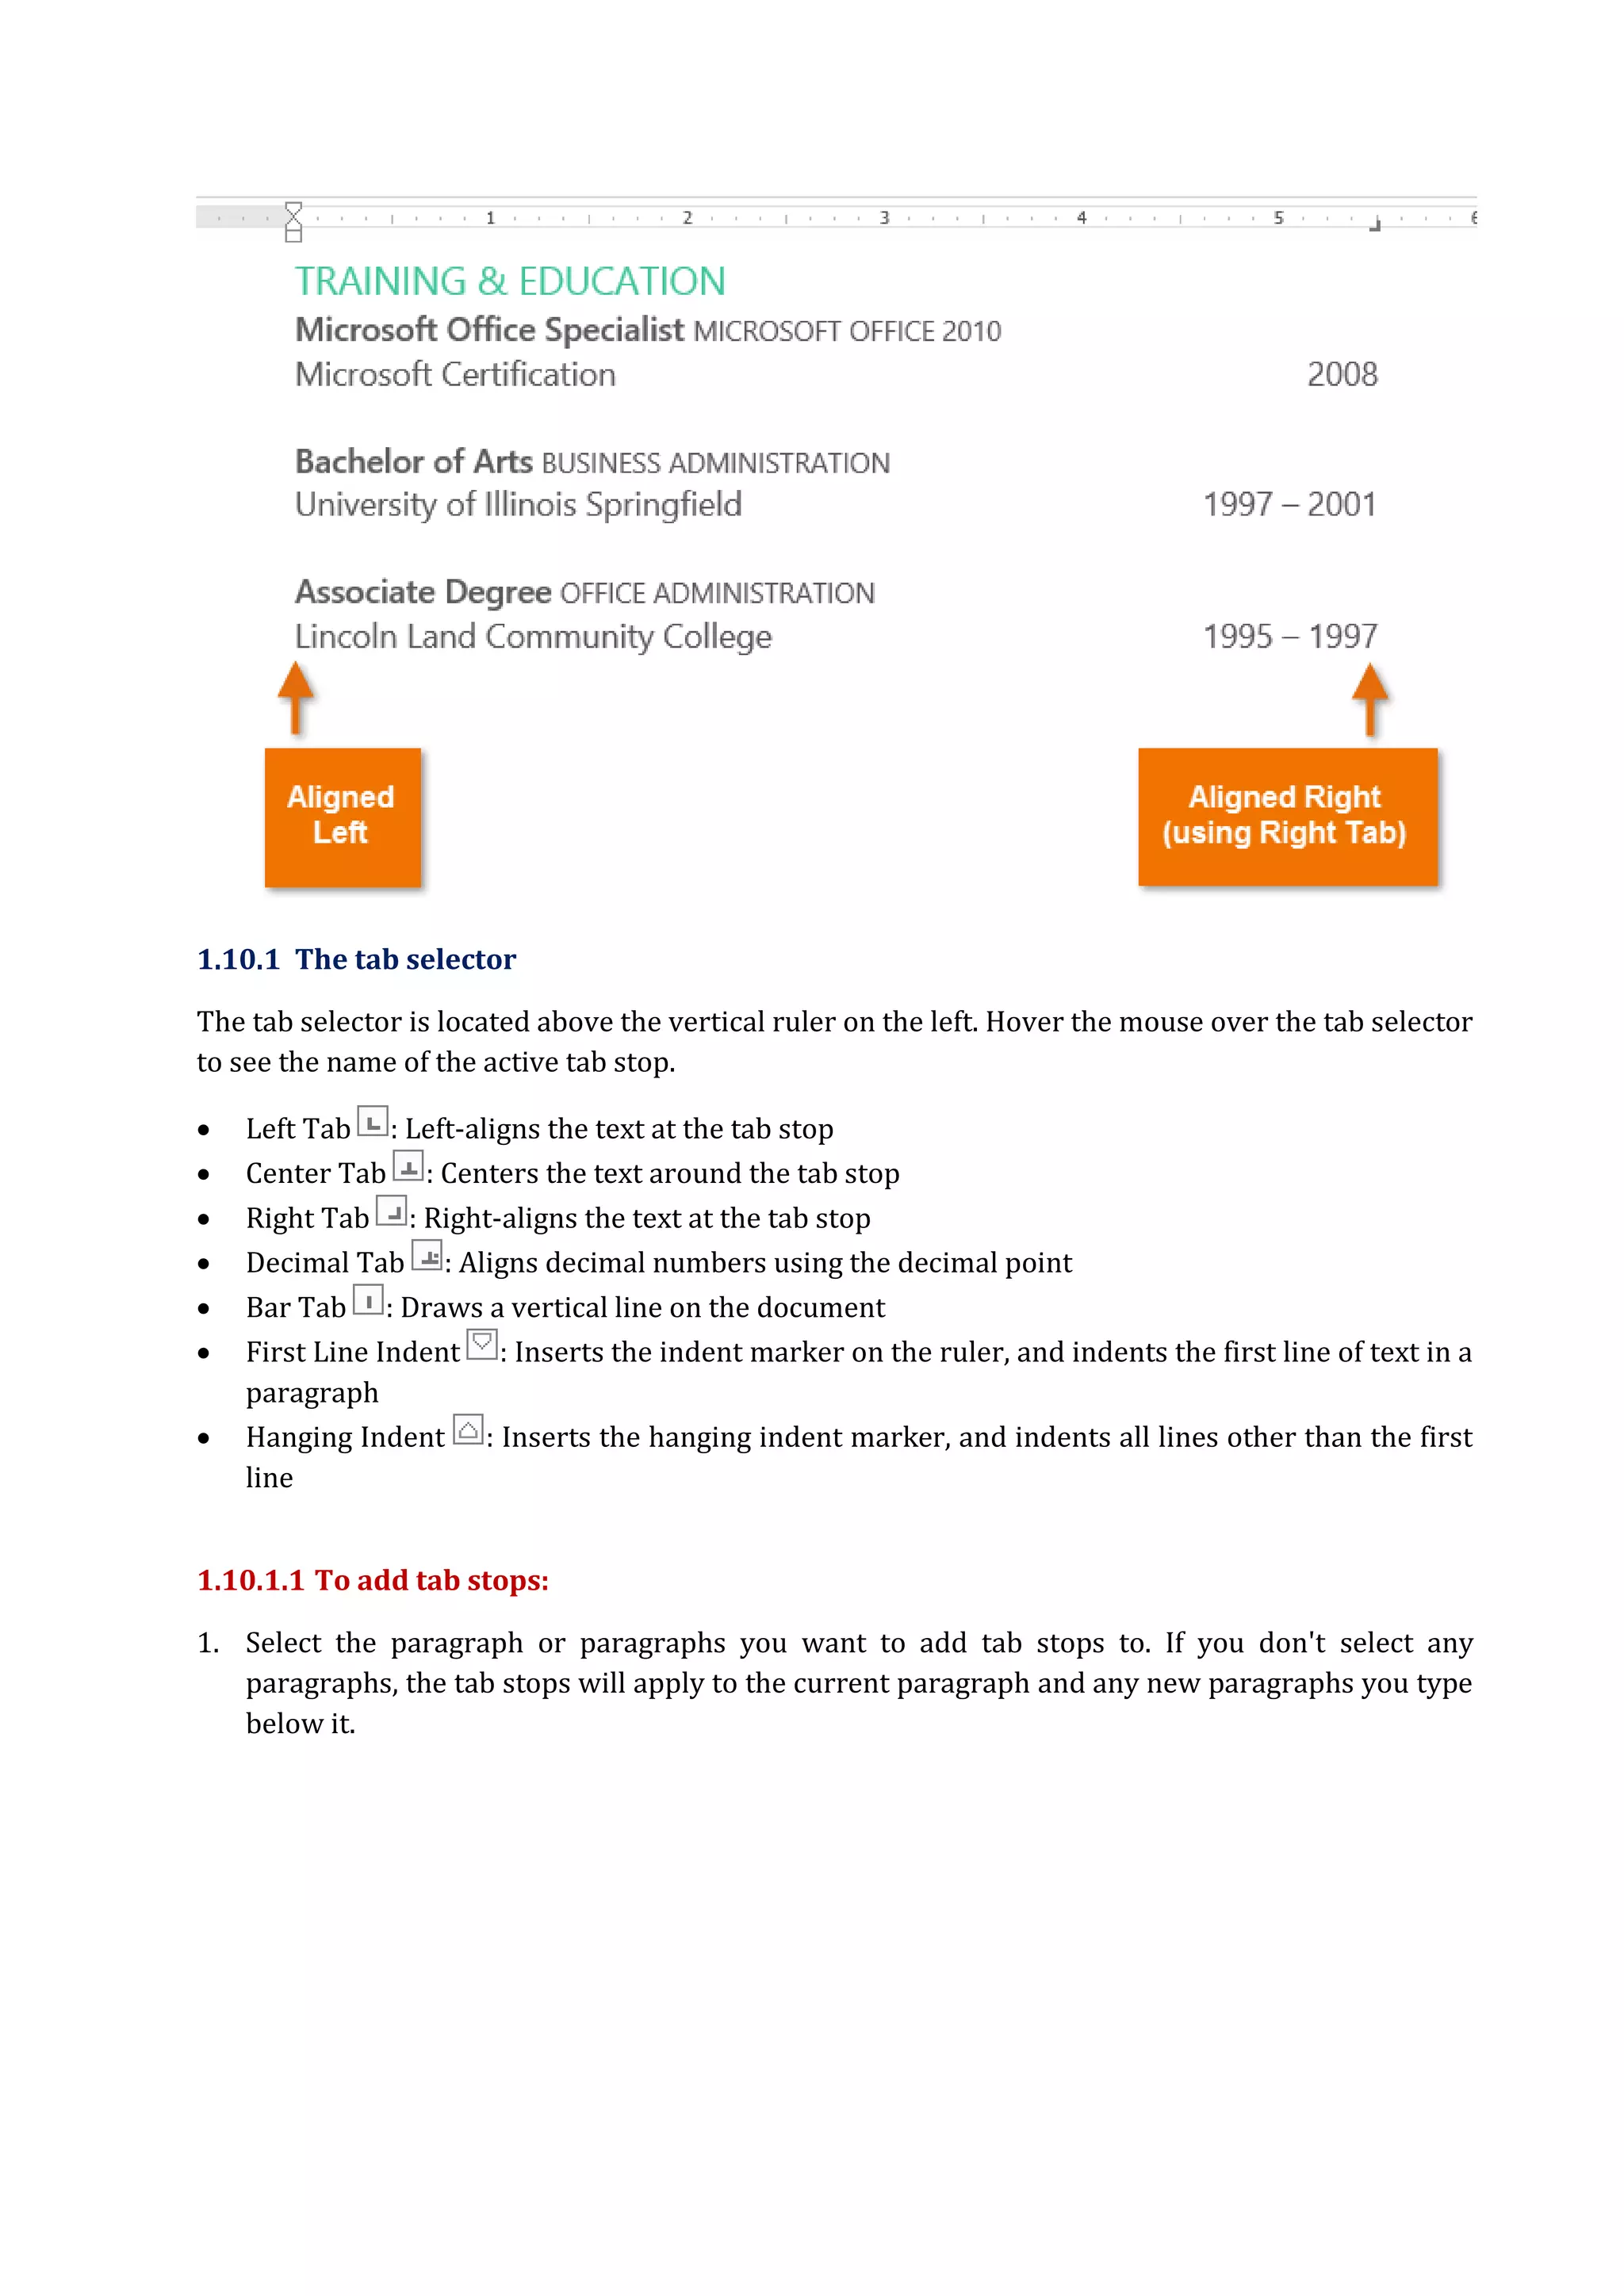
1.10.1 The tabselector
The tab selector is located above the vertical ruler on the left. Hover the mouse over the tab selector
to see the name of the active tab stop.
Left Tab : Left-aligns the text at the tab stop
Center Tab : Centers the text around the tab stop
Right Tab : Right-aligns the text at the tab stop
Decimal Tab : Aligns decimal numbers using the decimal point
Bar Tab : Draws a vertical line on the document
First Line Indent : Inserts the indent marker on the ruler, and indents the first line of text in a
paragraph
Hanging Indent : Inserts the hanging indent marker, and indents all lines other than the first
line
1.10.1.1 To add tab stops:
1. Select the paragraph or paragraphs you want to add tab stops to. If you don't select any
paragraphs, the tab stops will apply to the current paragraph and any new paragraphs you type
below it.
31.
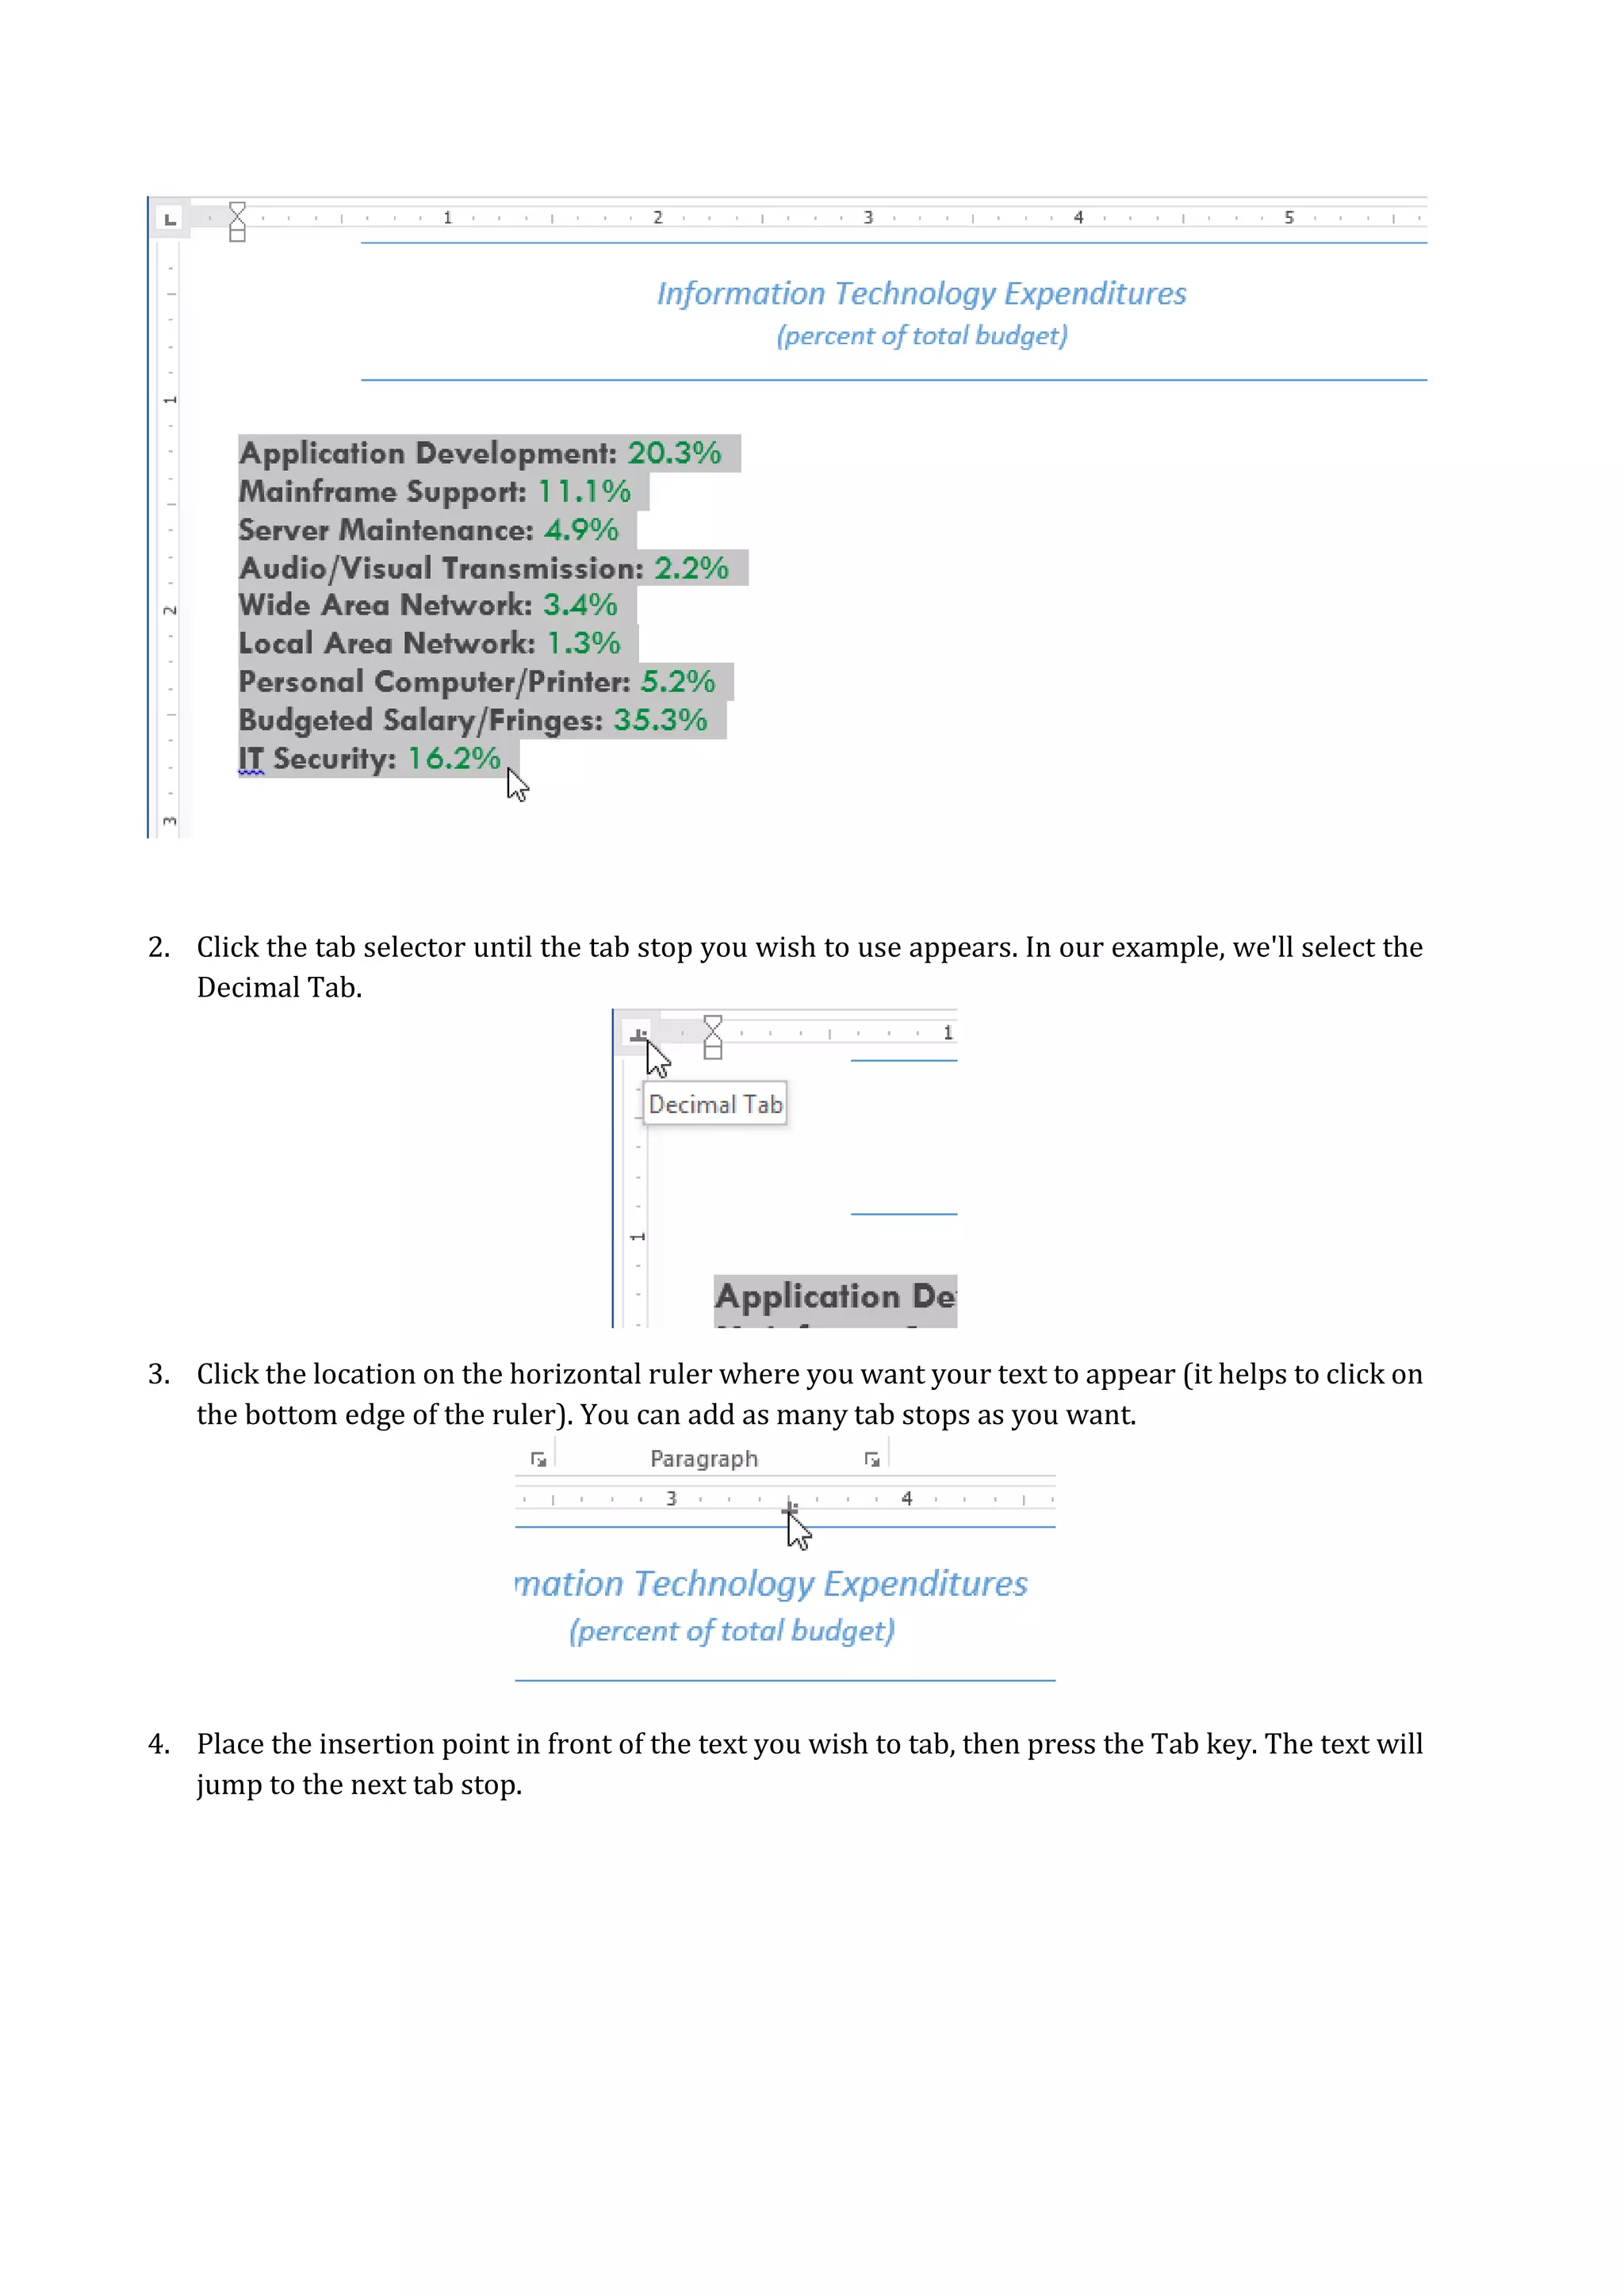
2. Click thetab selector until the tab stop you wish to use appears. In our example, we'll select the
Decimal Tab.
3. Click the location on the horizontal ruler where you want your text to appear (it helps to click on
the bottom edge of the ruler). You can add as many tab stops as you want.
4. Place the insertion point in front of the text you wish to tab, then press the Tab key. The text will
jump to the next tab stop.
32.
1.11 Lists
Bulleted andnumbered lists can be used in your documents to outline, arrange, and emphasize text.
In this lesson, you will learn how to modify existing bullets, insert new bulleted and numbered lists,
select symbols as bullets, and format multilevel lists.
1.11.1 To create a bulleted list:
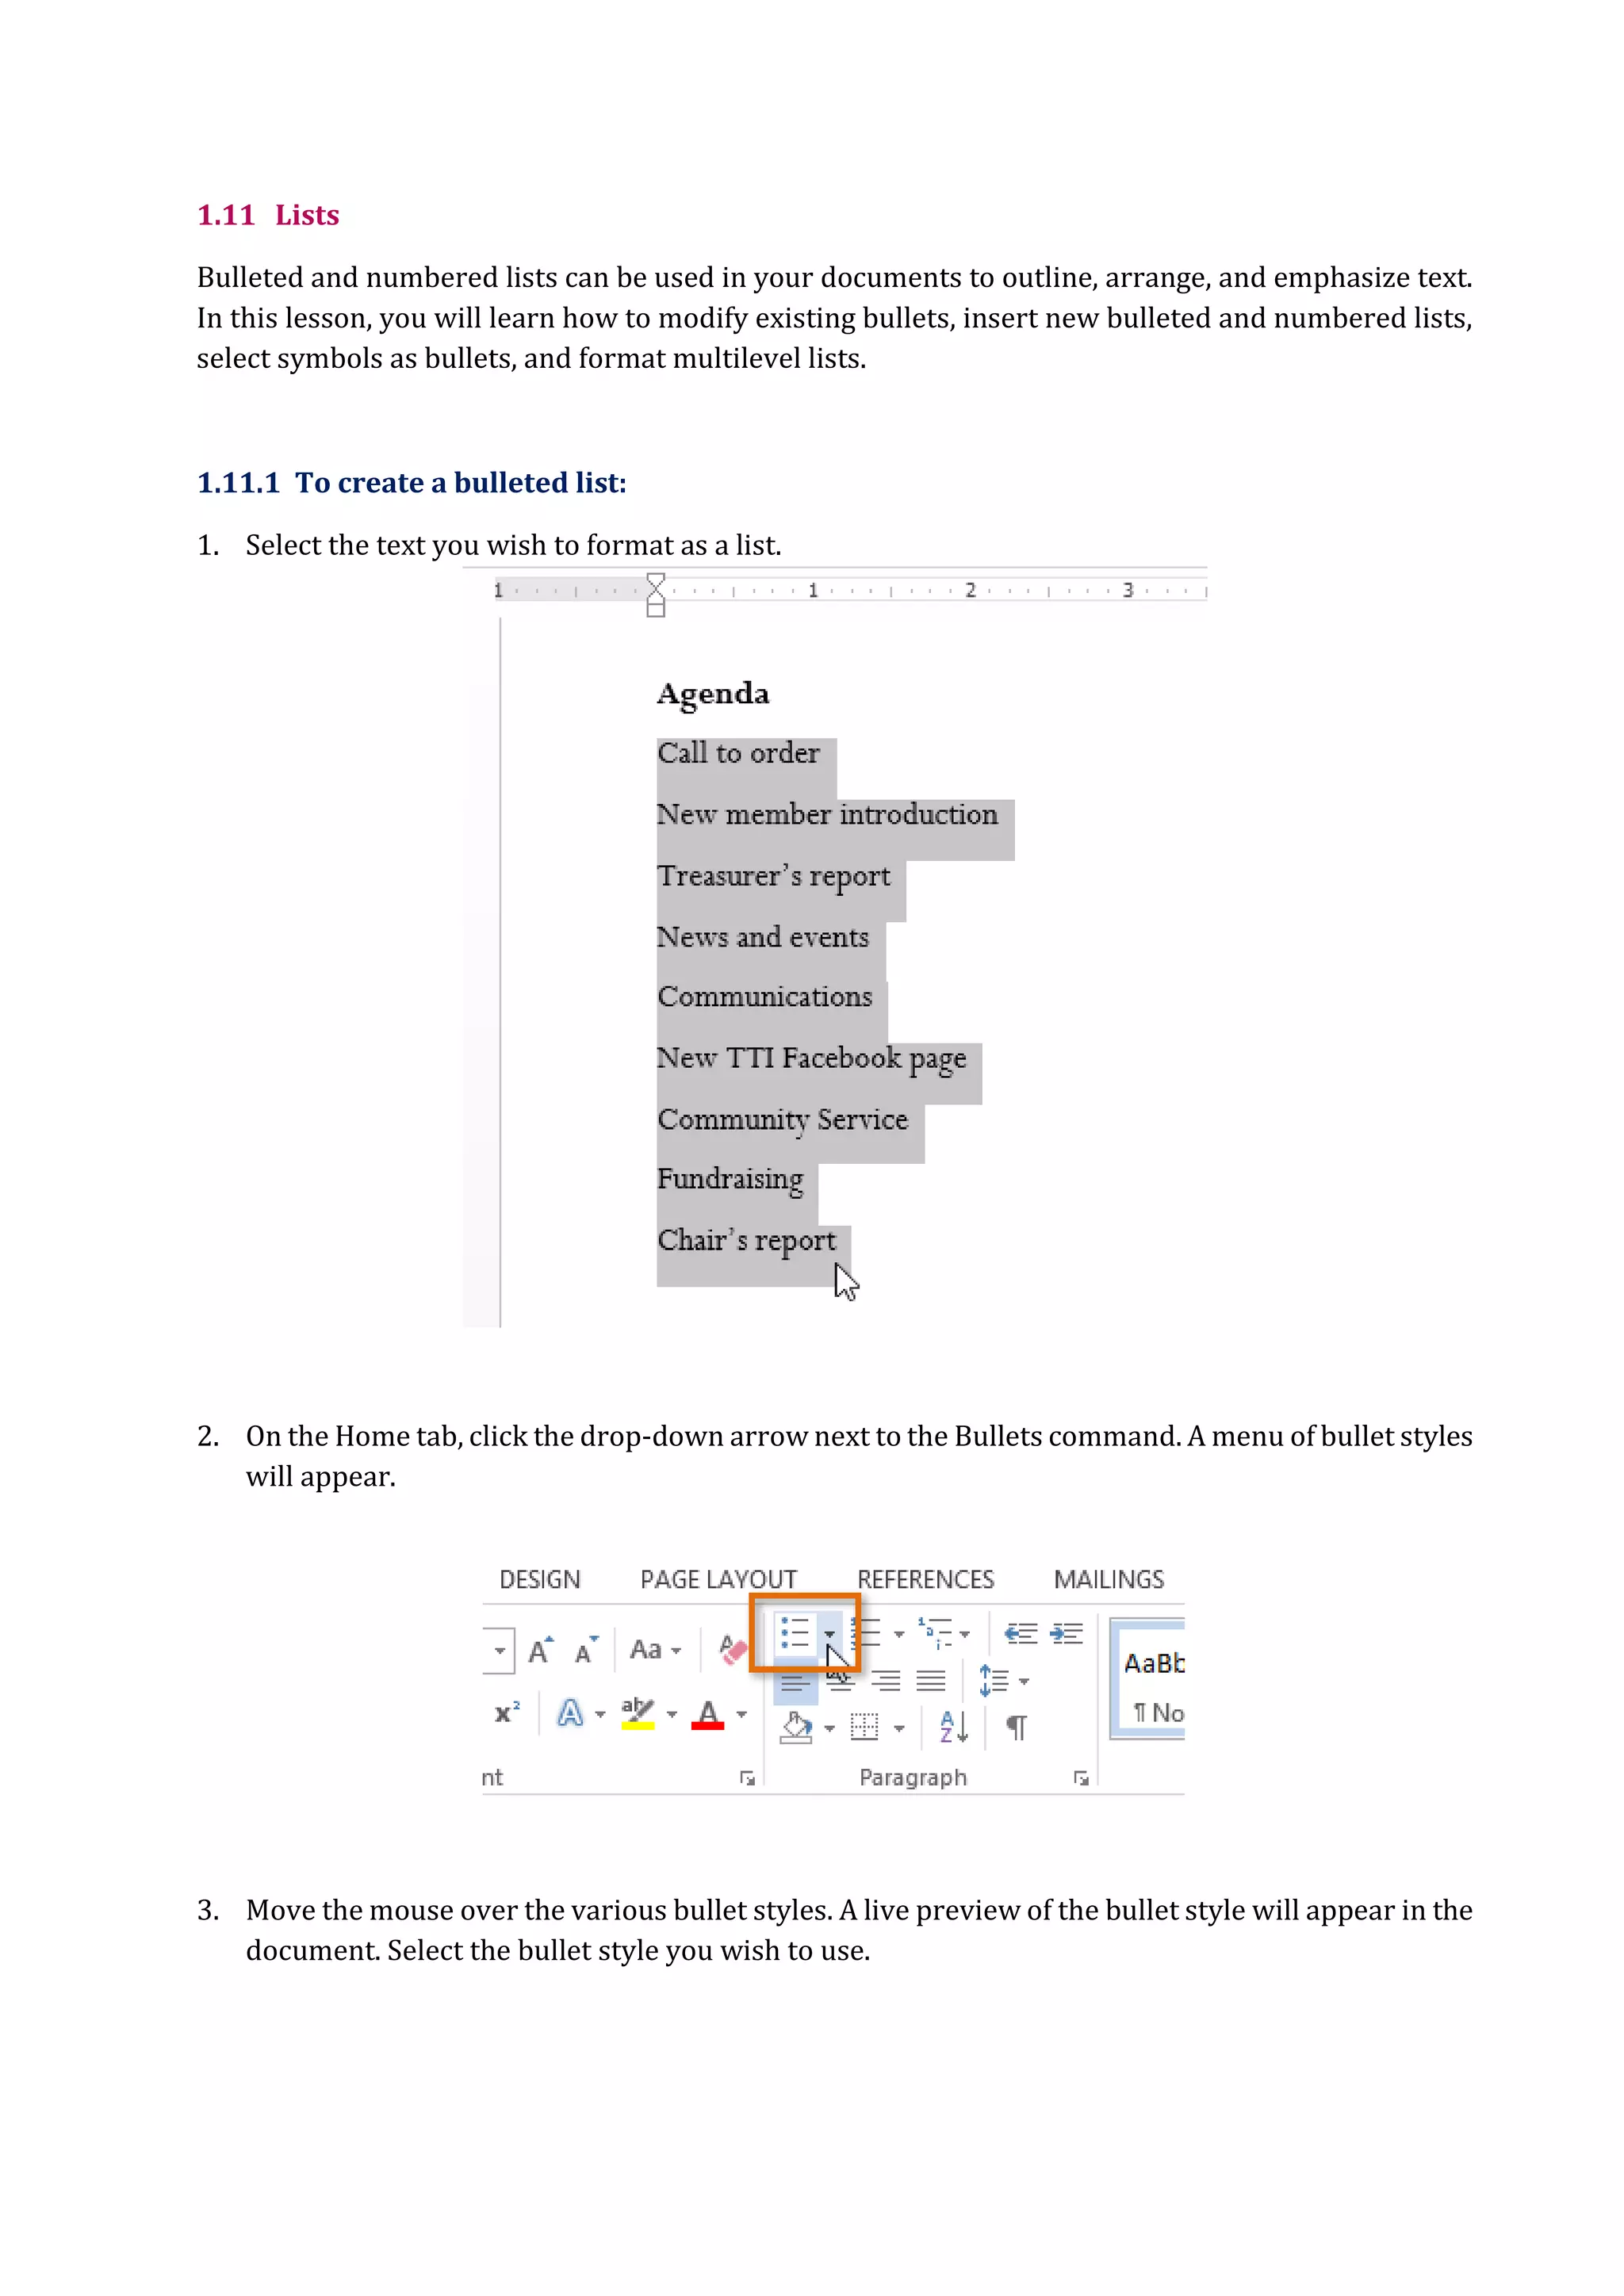
1. Select the text you wish to format as a list.
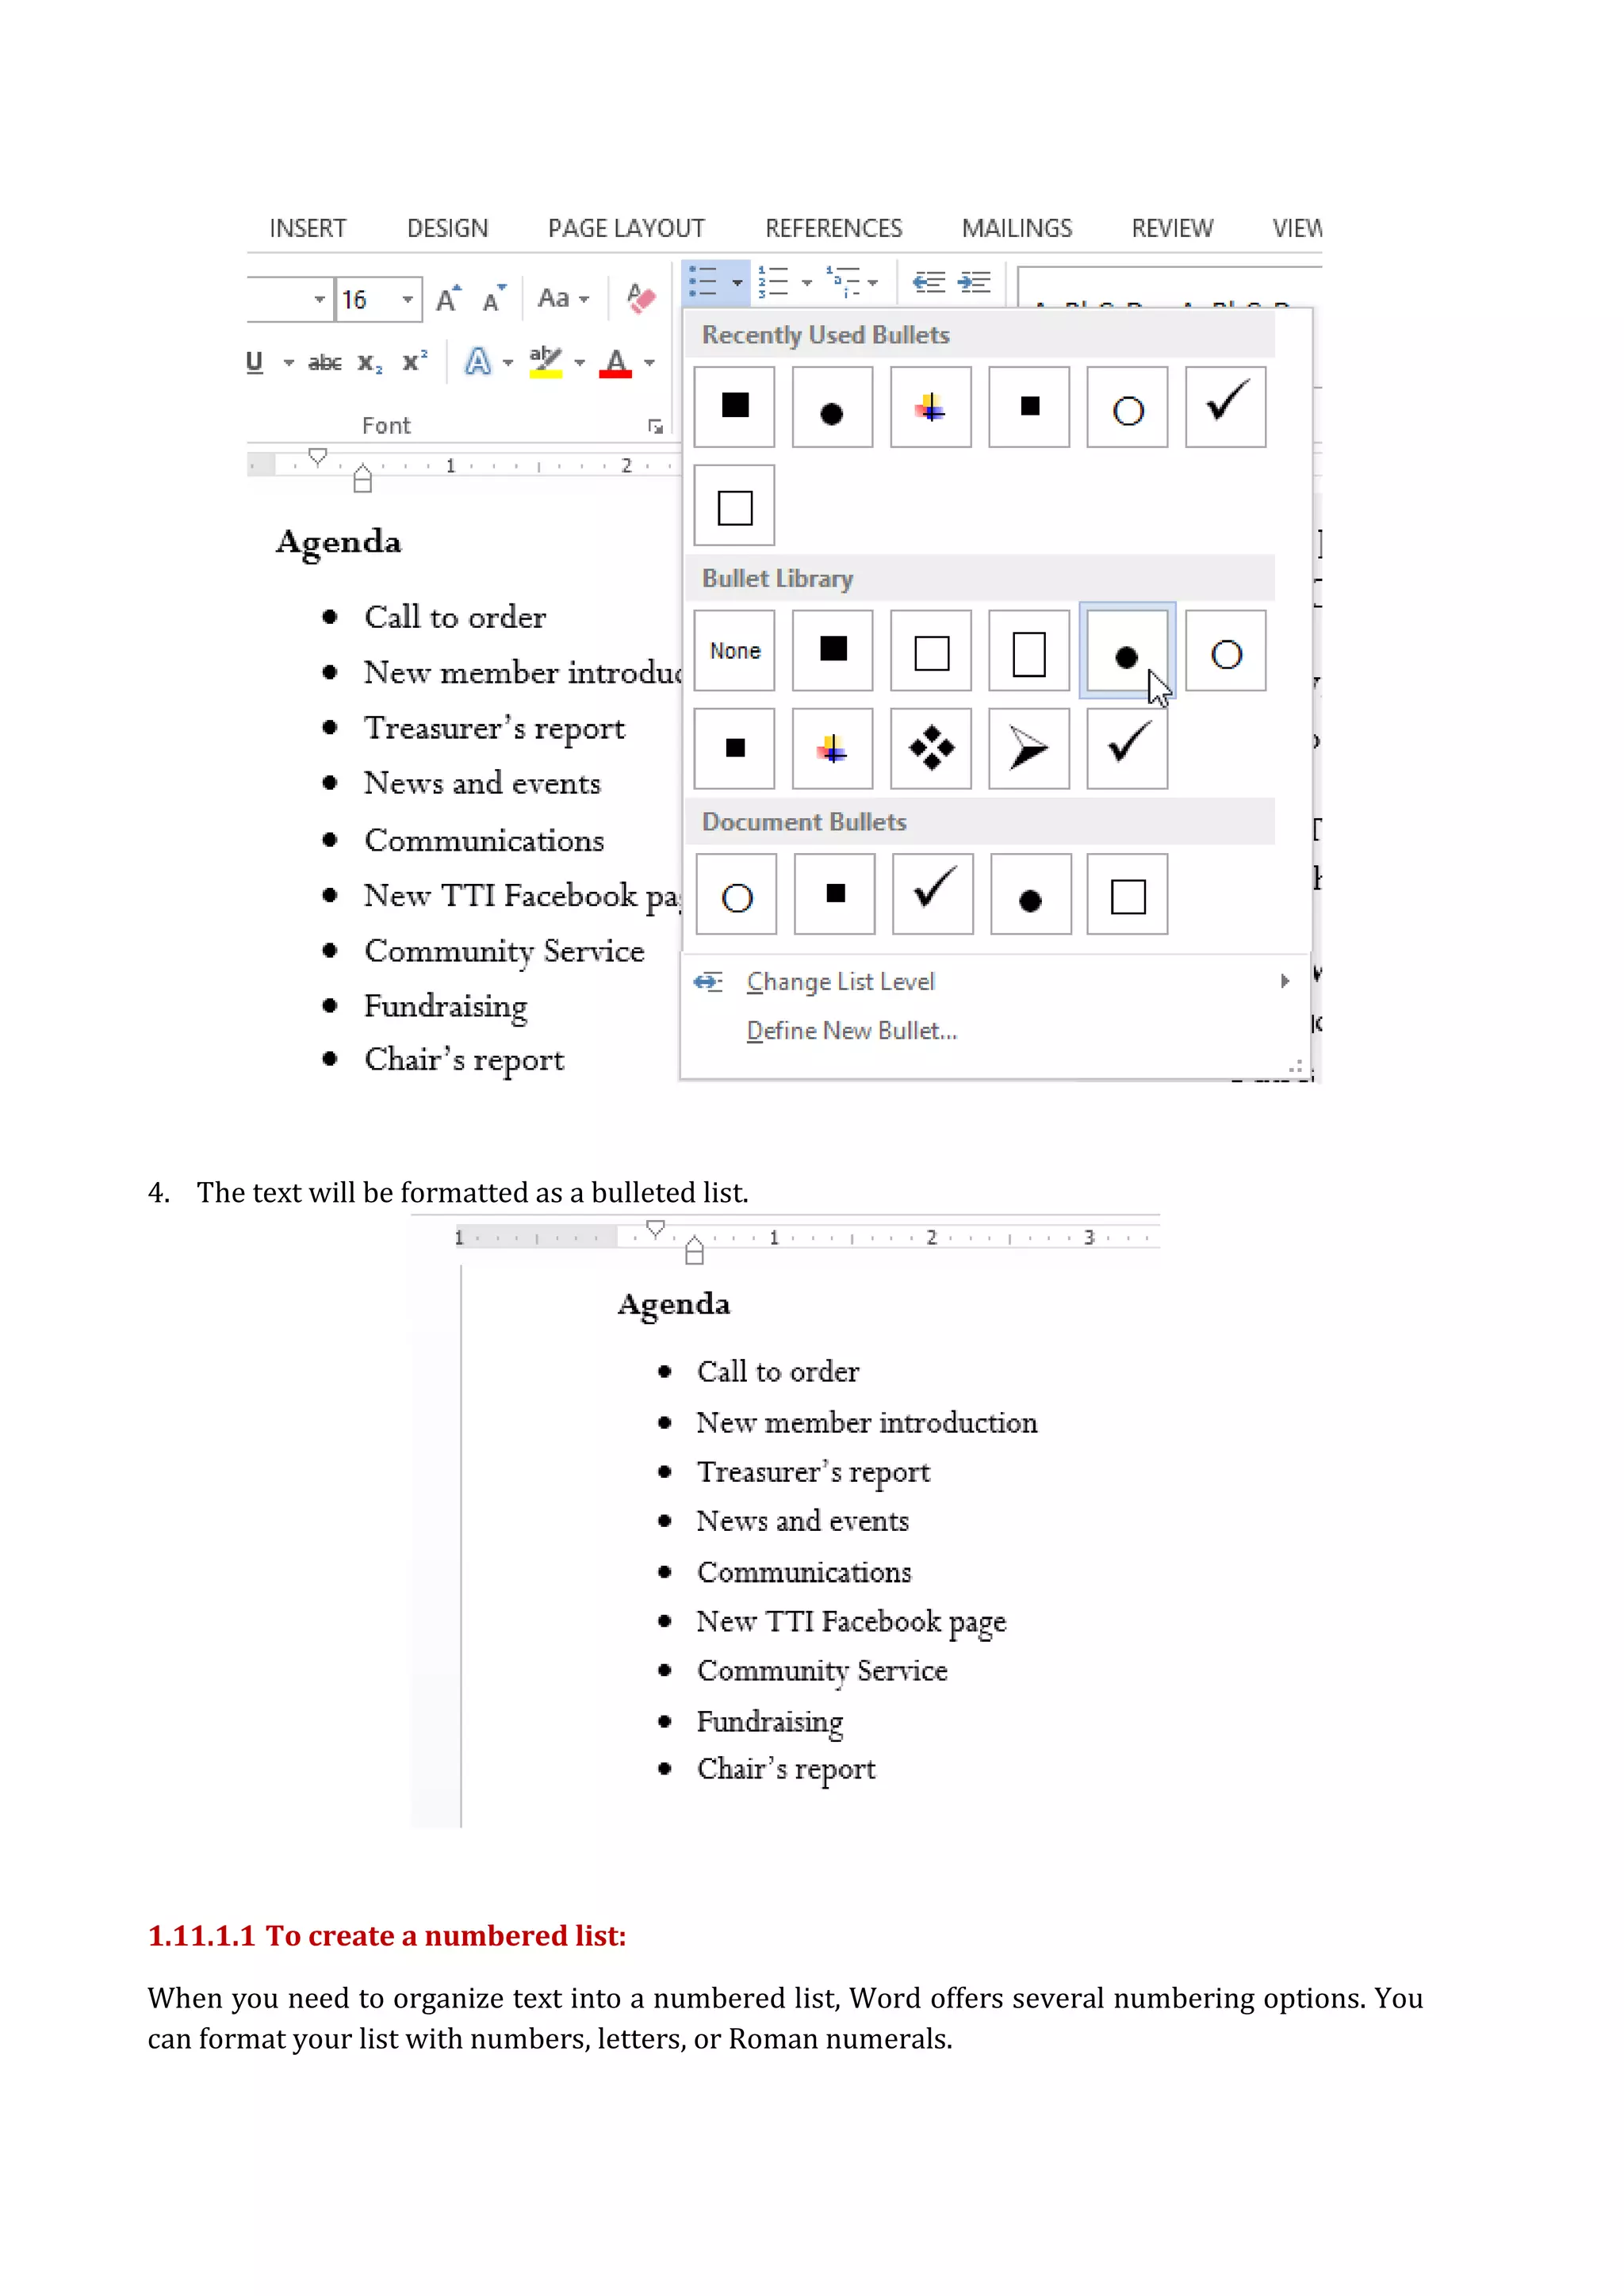
2. On the Home tab, click the drop-down arrow next to the Bullets command. A menu of bullet styles
will appear.
3. Move the mouse over the various bullet styles. A live preview of the bullet style will appear in the
document. Select the bullet style you wish to use.
33.
4. The textwill be formatted as a bulleted list.
1.11.1.1 To create a numbered list:
When you need to organize text into a numbered list, Word offers several numbering options. You
can format your list with numbers, letters, or Roman numerals.
34.
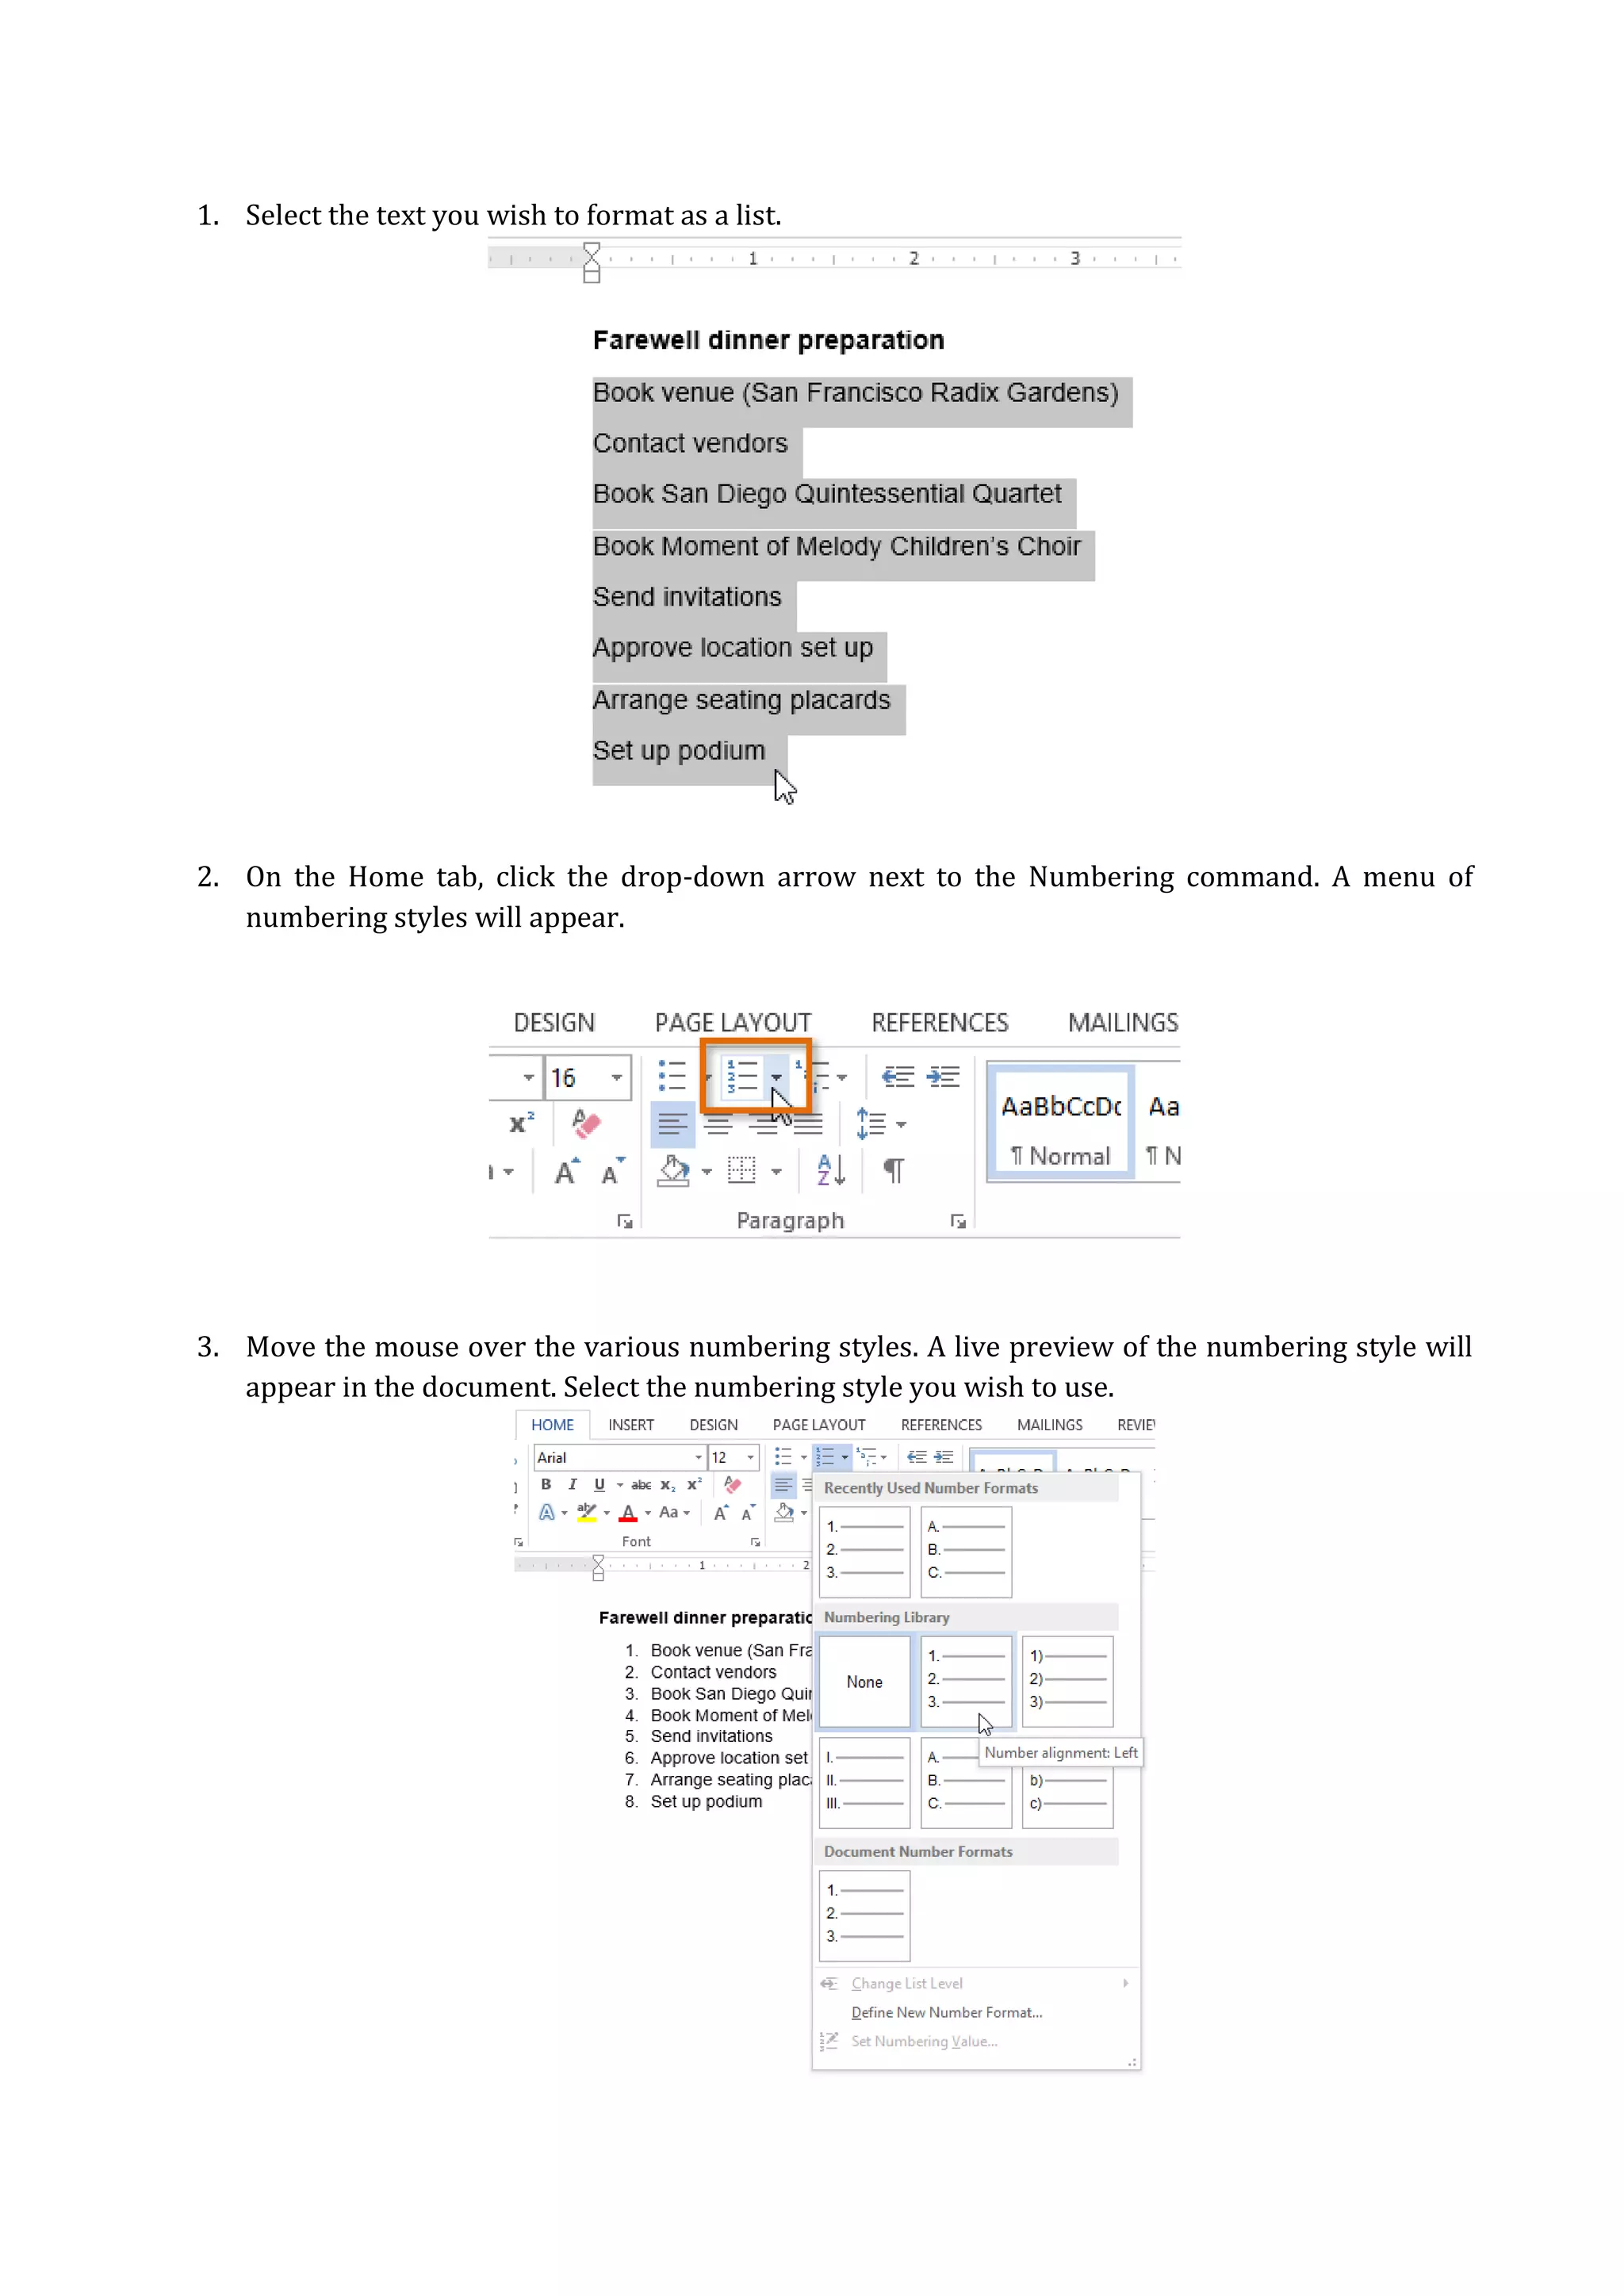
1. Select thetext you wish to format as a list.
2. On the Home tab, click the drop-down arrow next to the Numbering command. A menu of
numbering styles will appear.
3. Move the mouse over the various numbering styles. A live preview of the numbering style will
appear in the document. Select the numbering style you wish to use.
35.
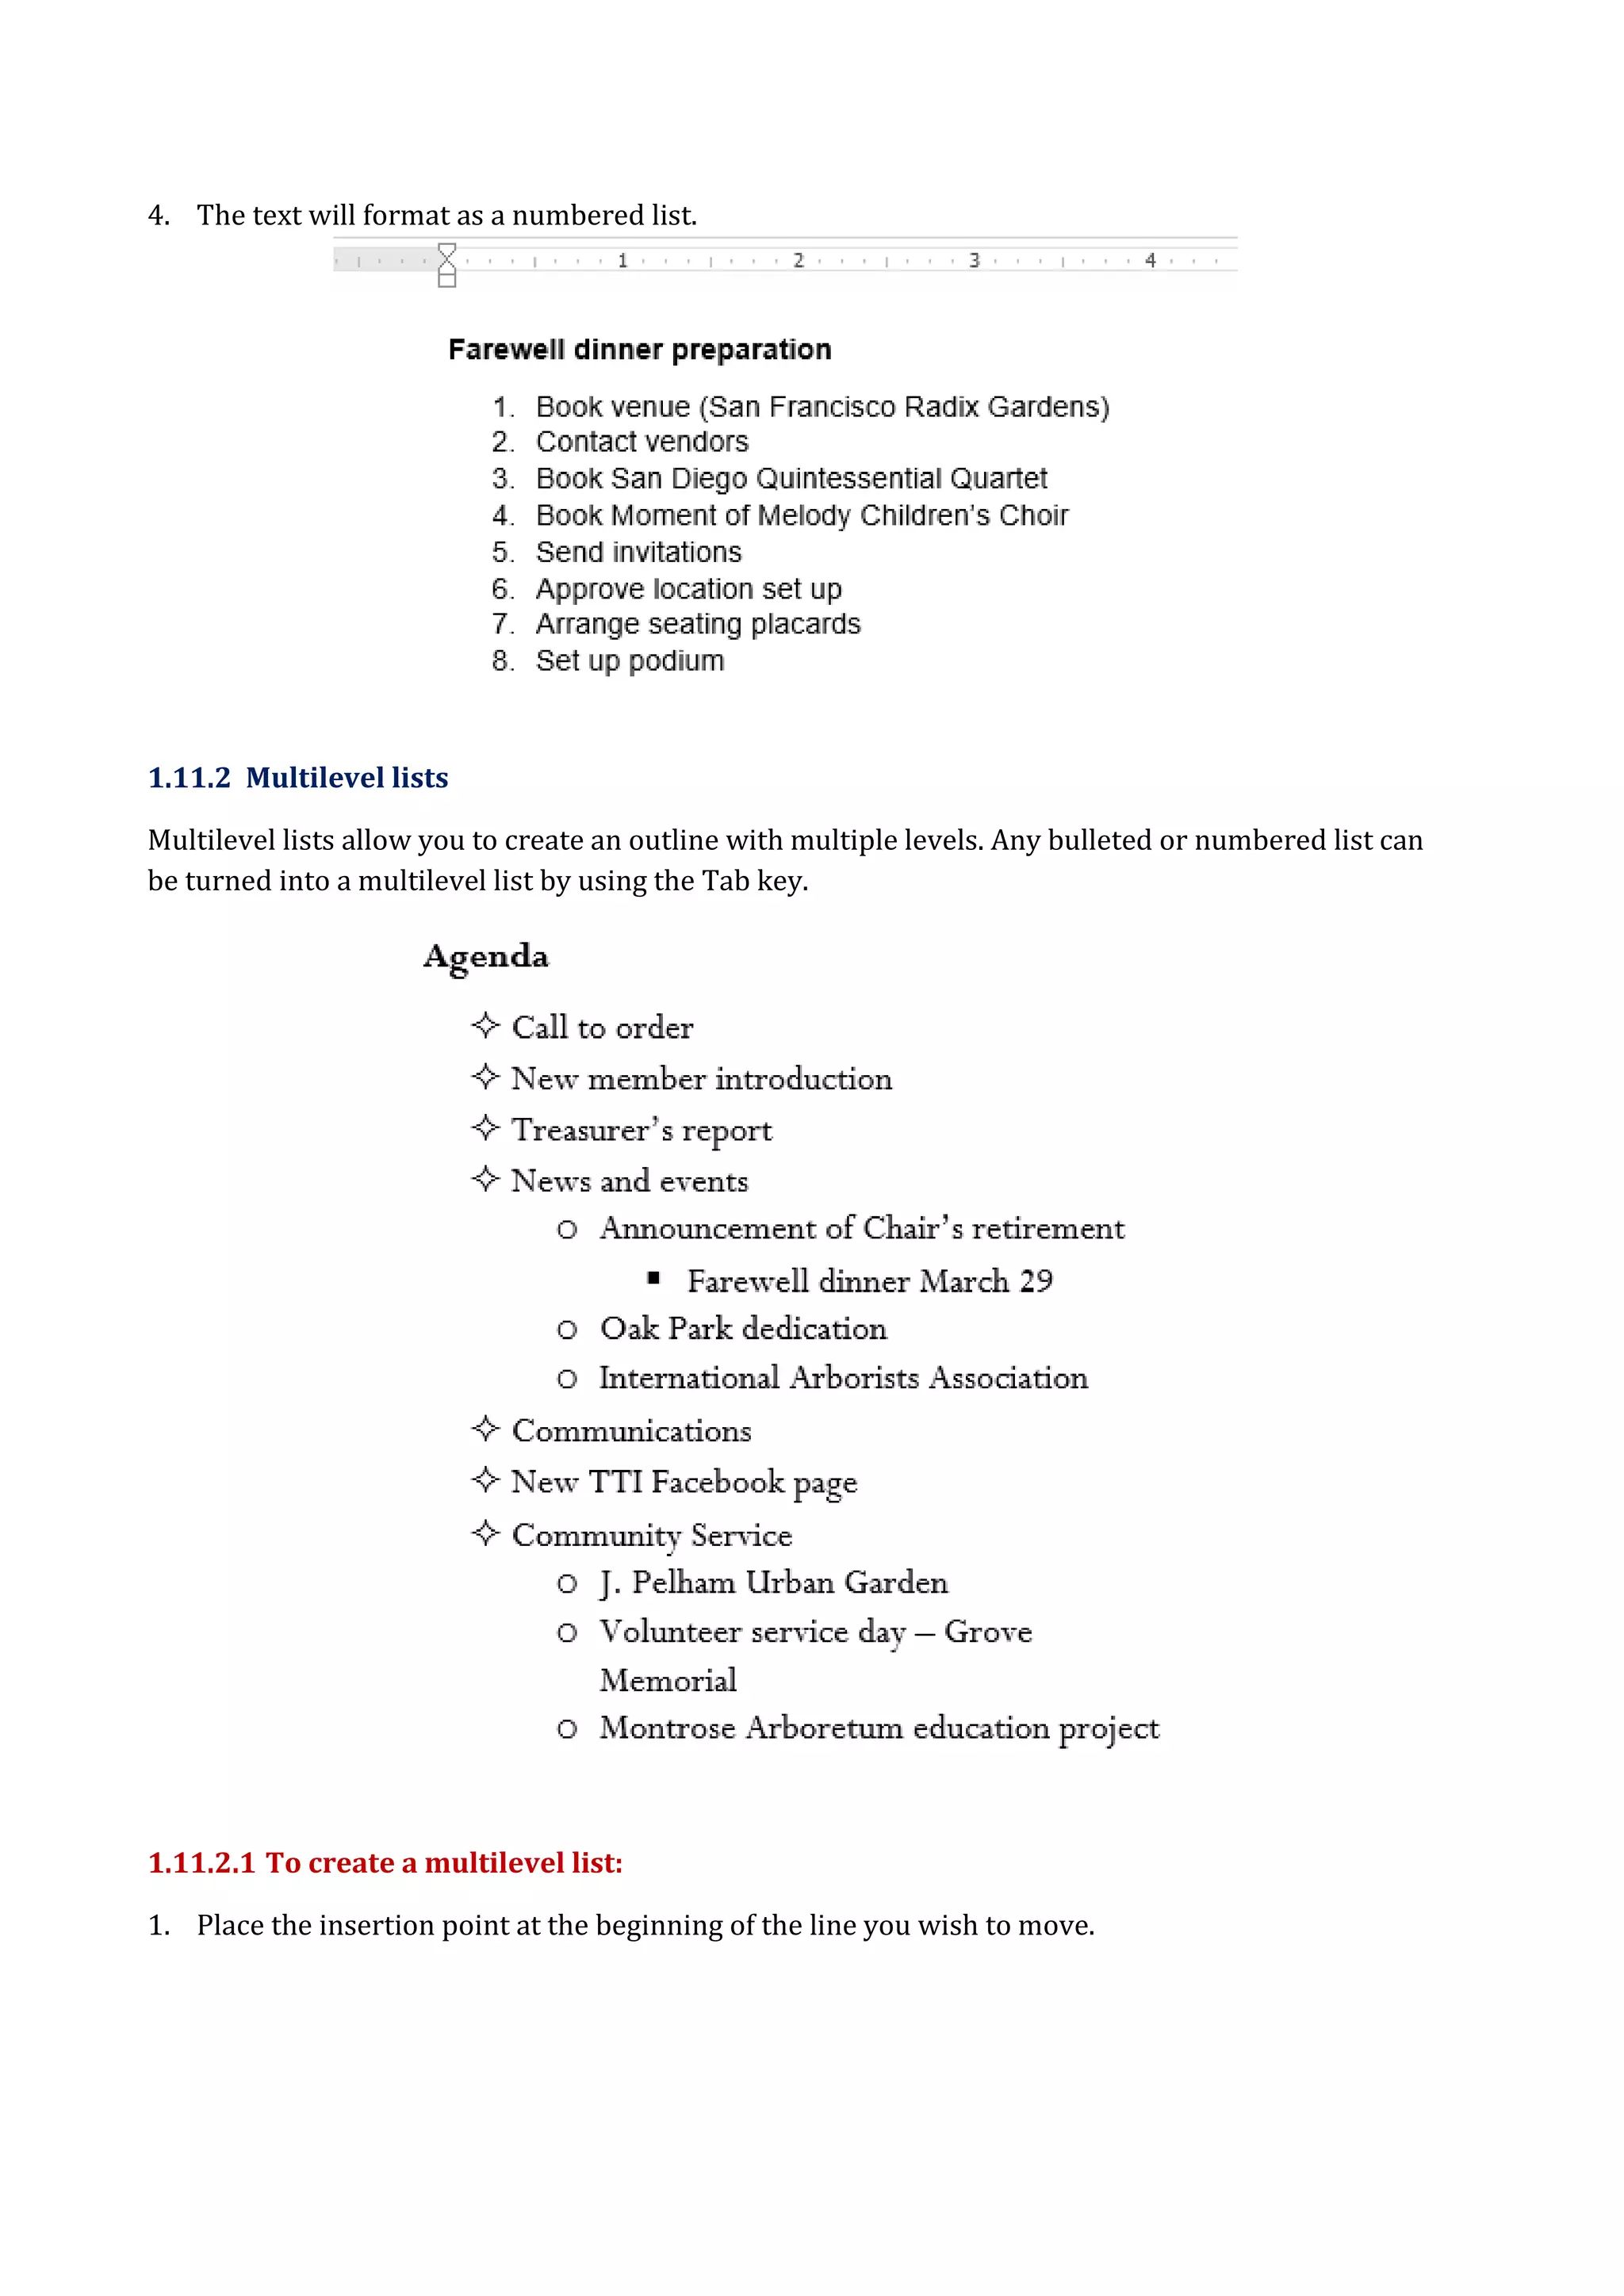
4. The textwill format as a numbered list.
1.11.2 Multilevel lists
Multilevel lists allow you to create an outline with multiple levels. Any bulleted or numbered list can
be turned into a multilevel list by using the Tab key.
1.11.2.1 To create a multilevel list:
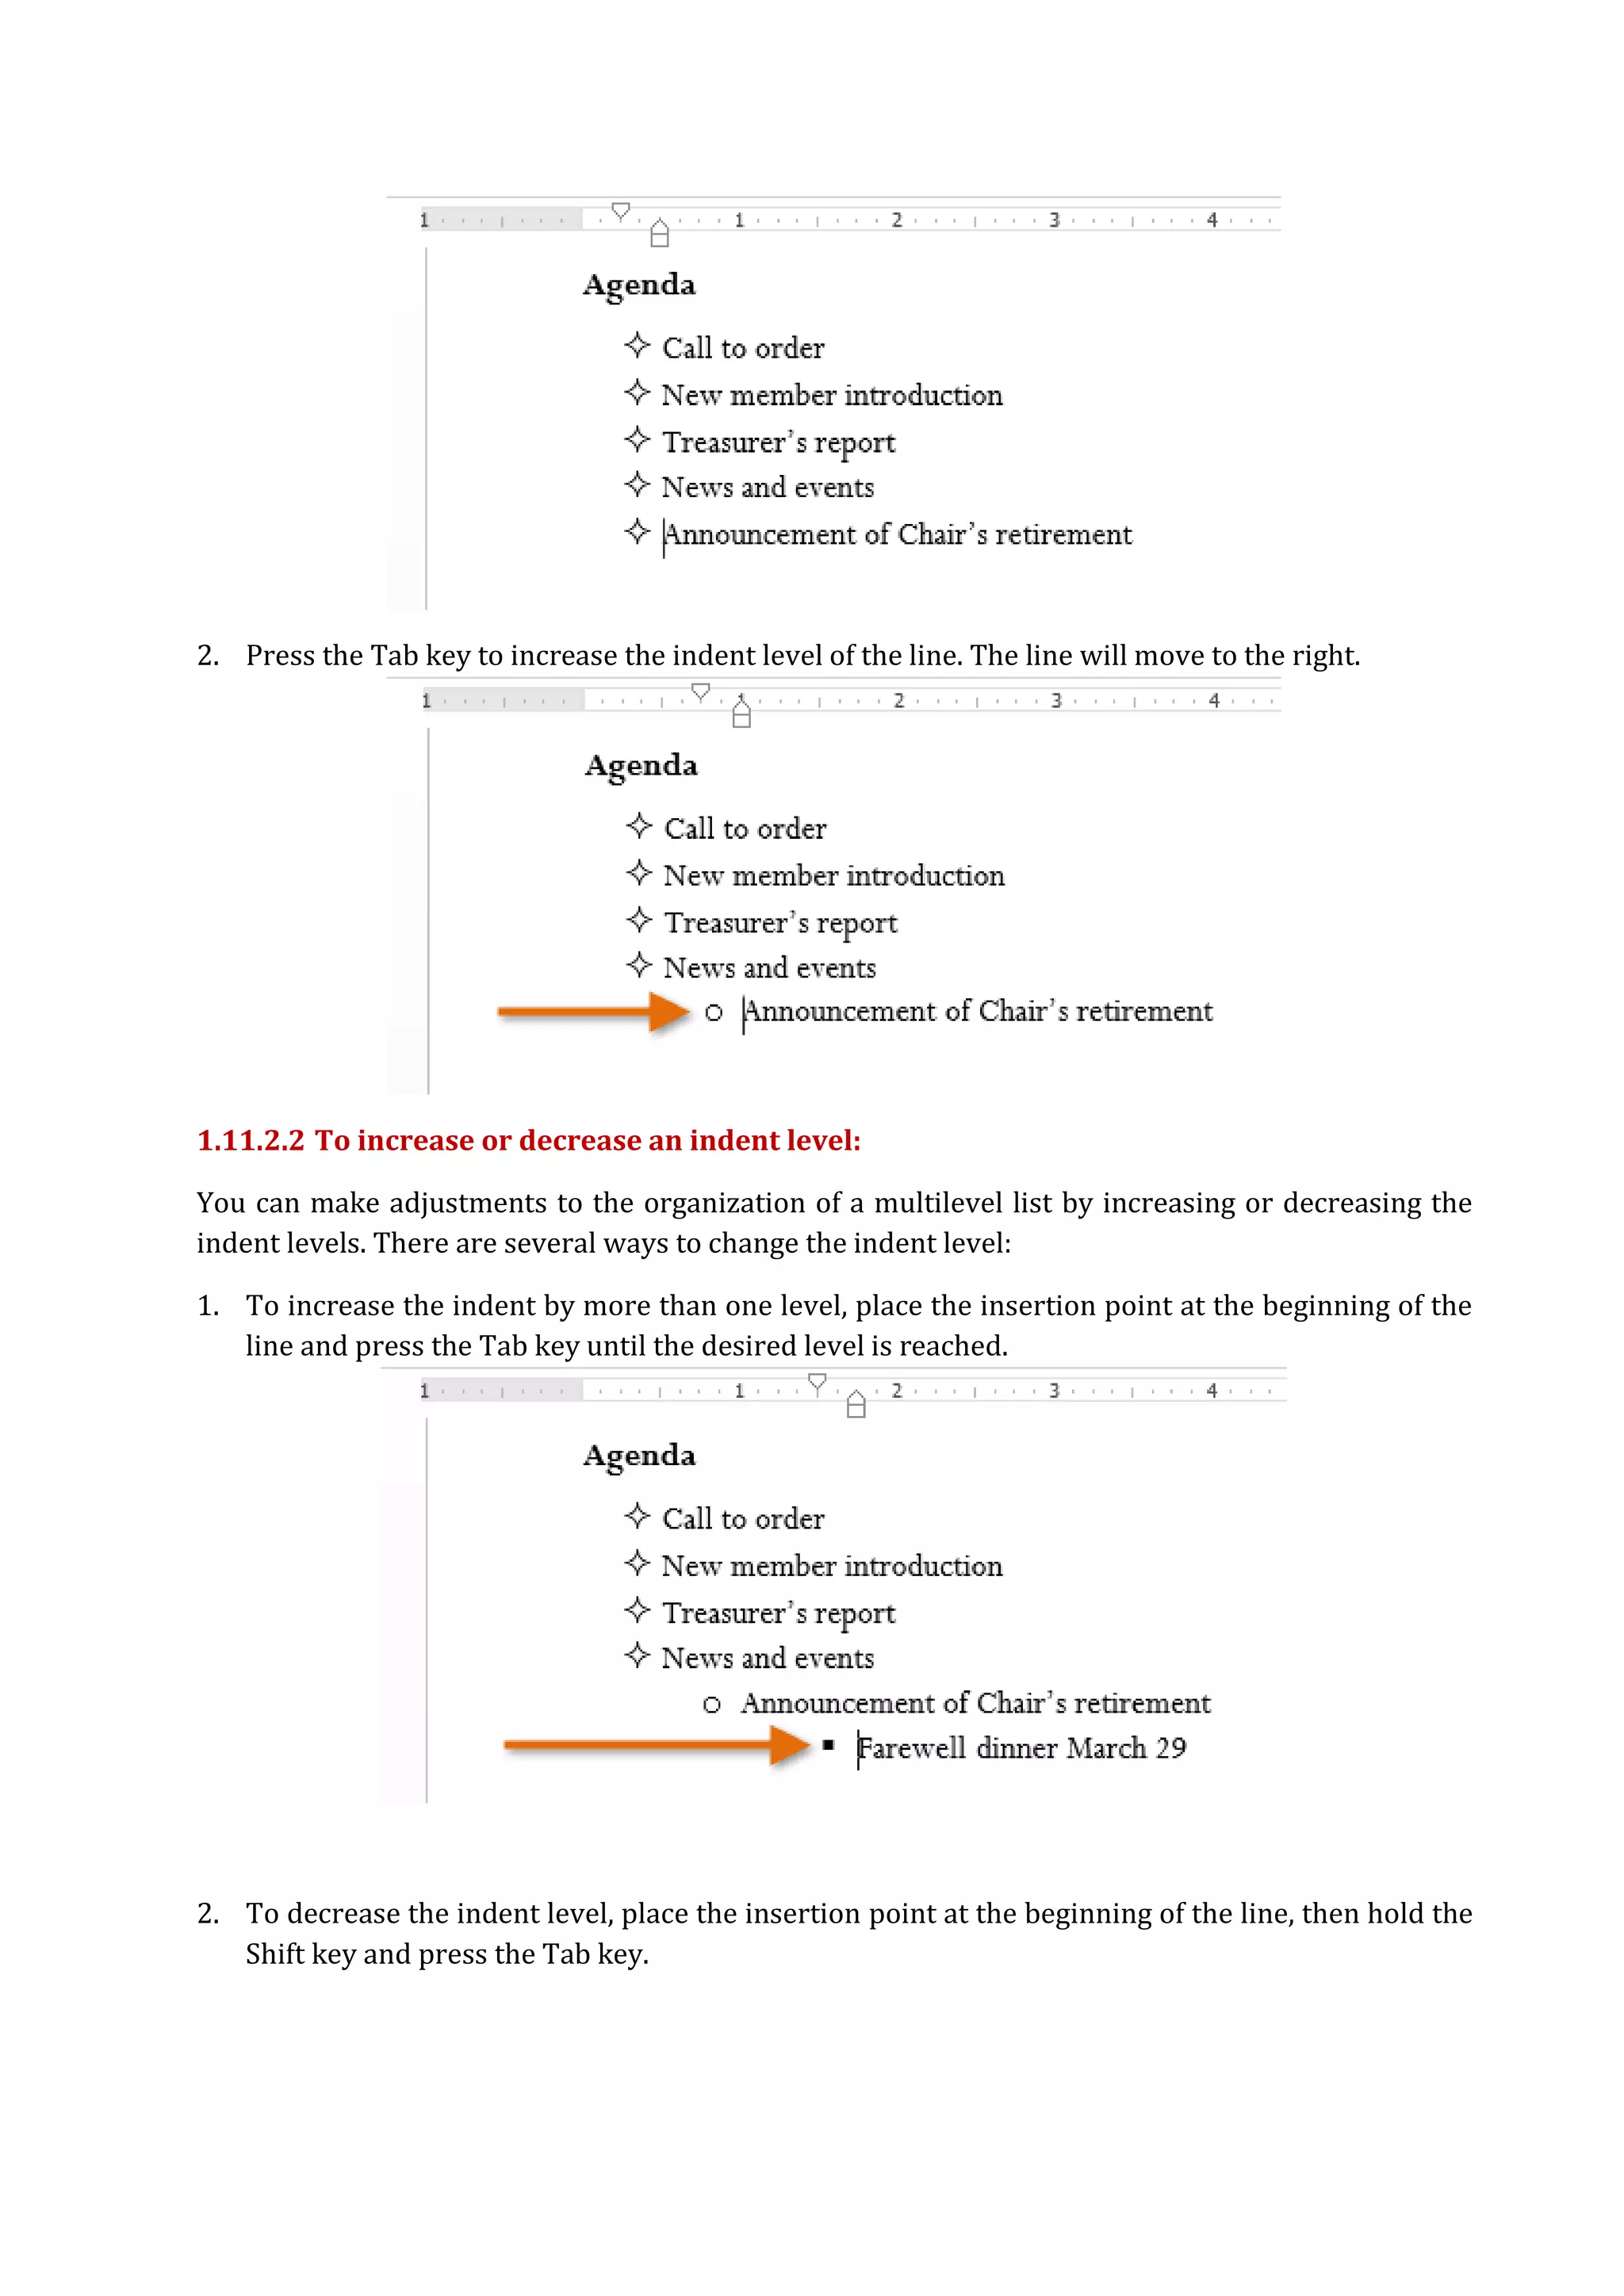
1. Place the insertion point at the beginning of the line you wish to move.
36.
2. Press theTab key to increase the indent level of the line. The line will move to the right.
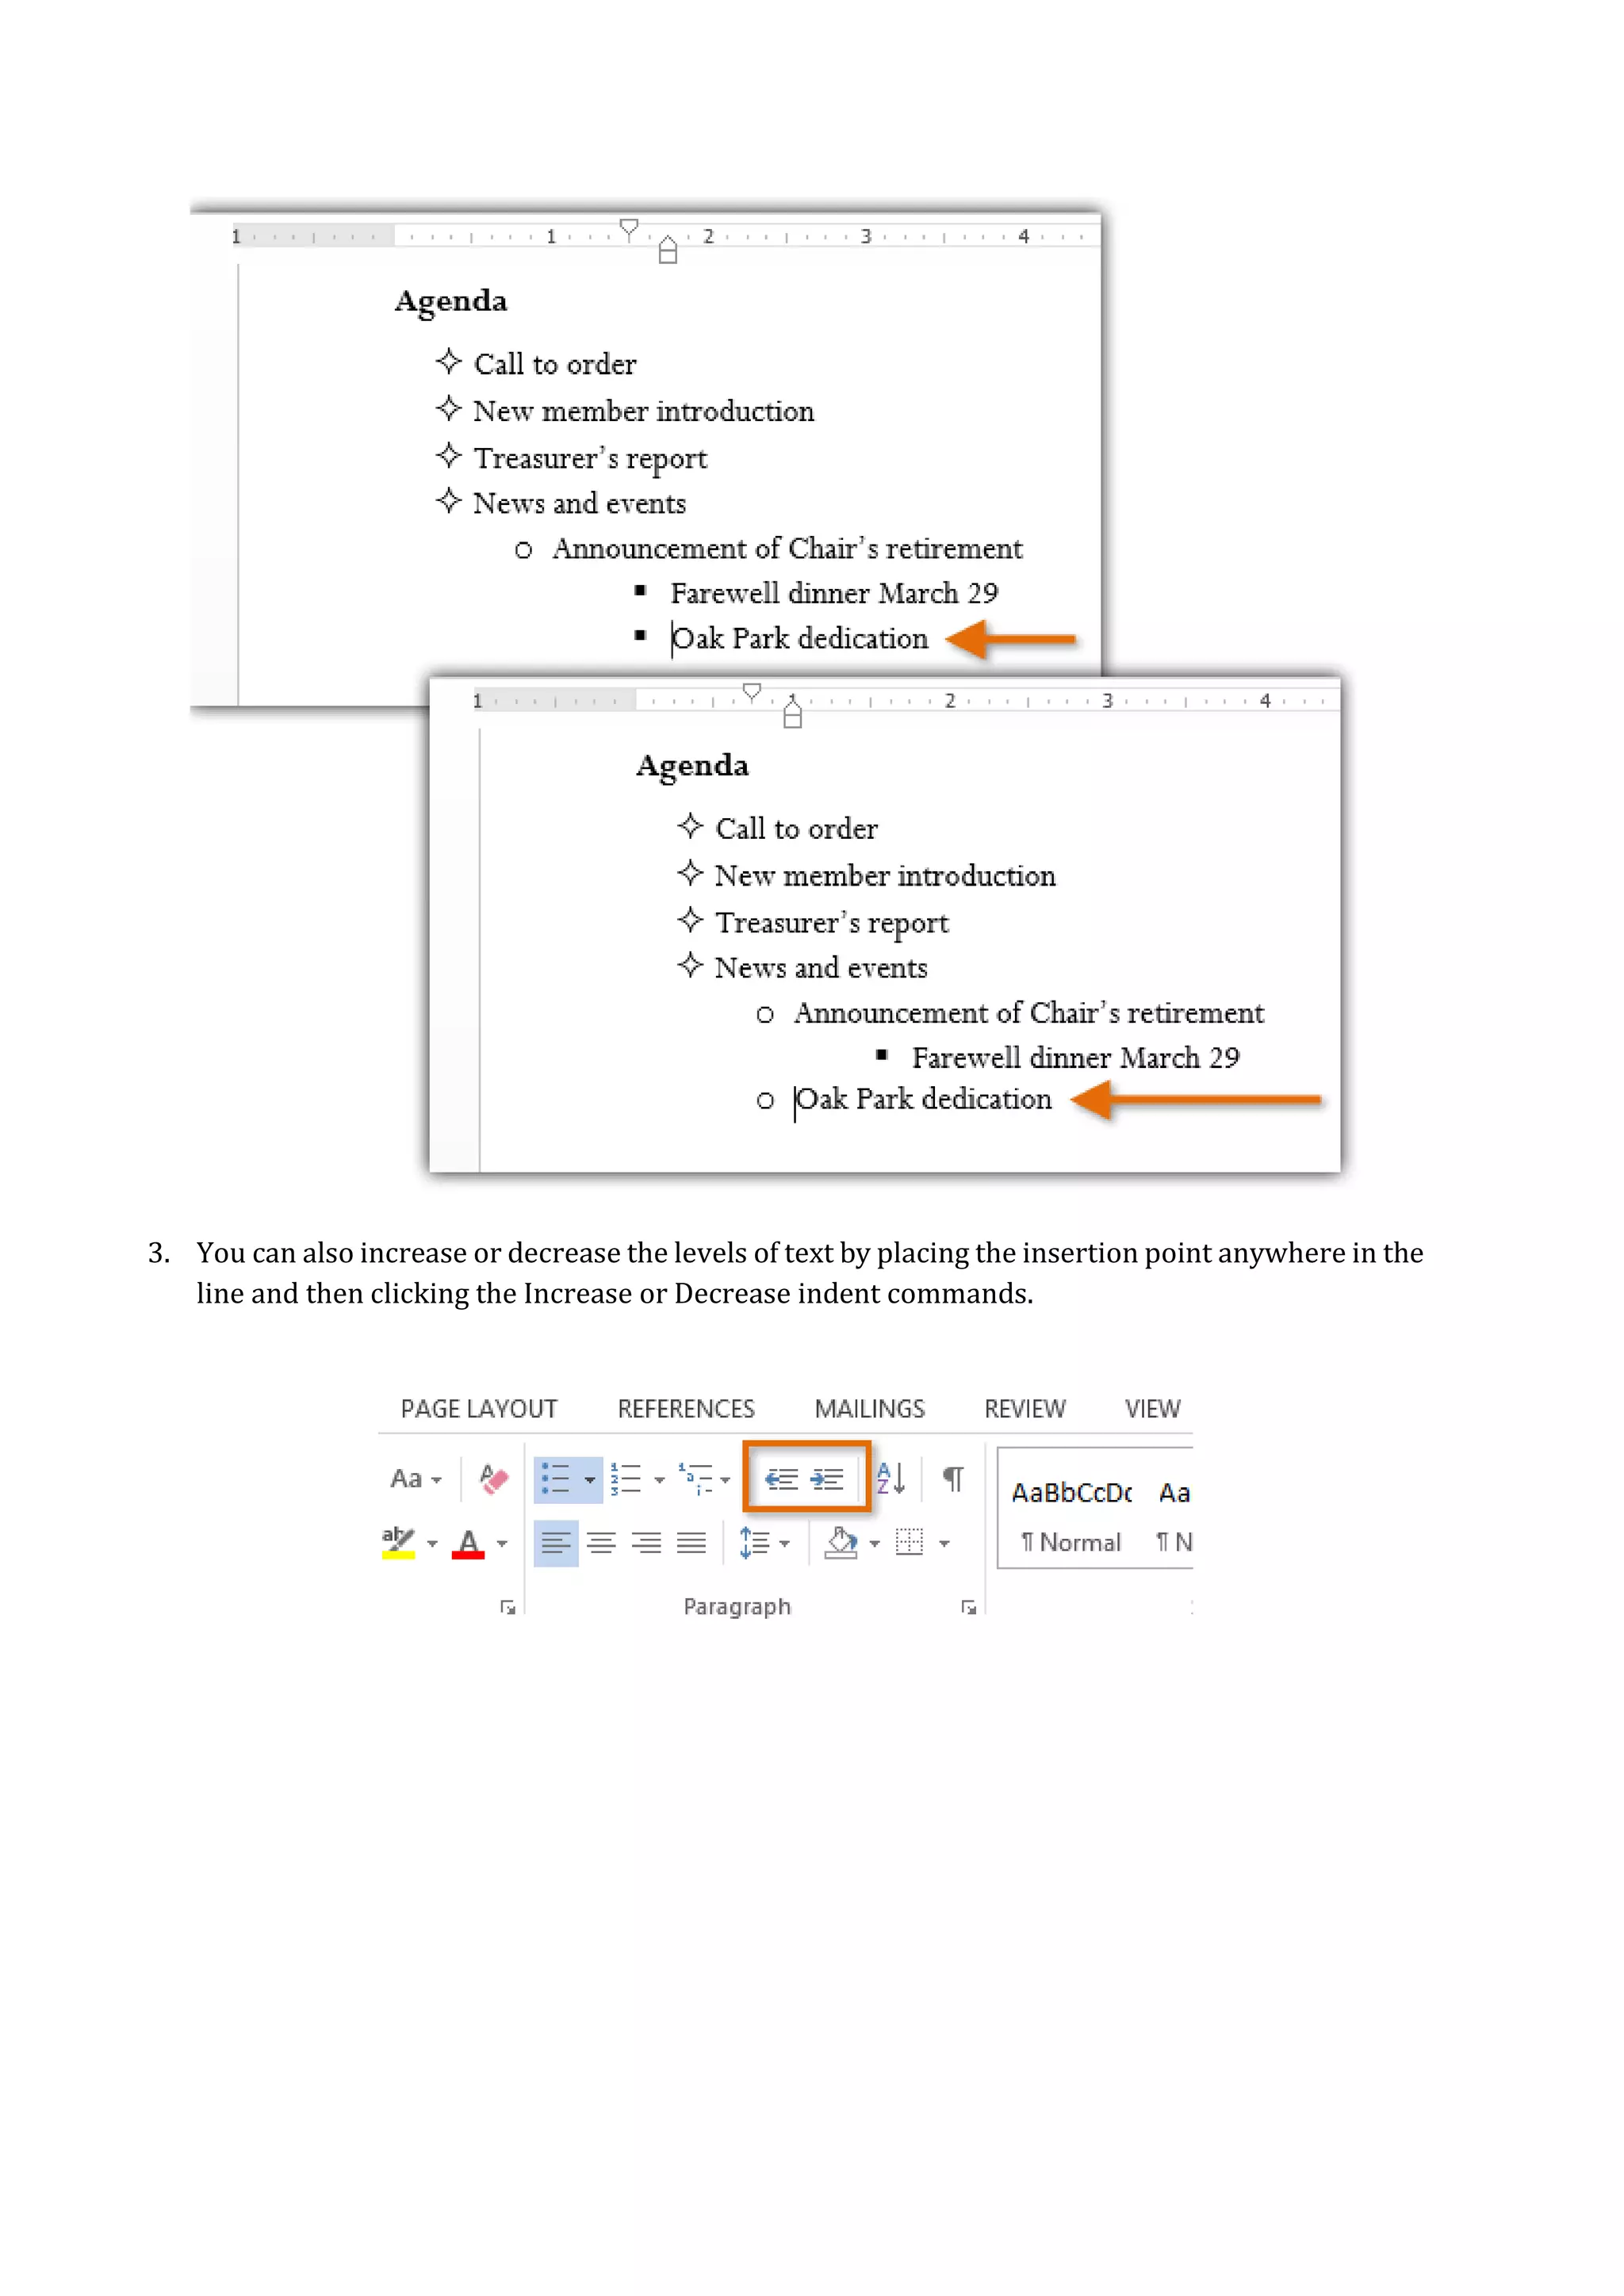
1.11.2.2 To increase or decrease an indent level:
You can make adjustments to the organization of a multilevel list by increasing or decreasing the
indent levels. There are several ways to change the indent level:
1. To increase the indent by more than one level, place the insertion point at the beginning of the
line and press the Tab key until the desired level is reached.
2. To decrease the indent level, place the insertion point at the beginning of the line, then hold the
Shift key and press the Tab key.
37.
3. You canalso increase or decrease the levels of text by placing the insertion point anywhere in the
line and then clicking the Increase or Decrease indent commands.
38.
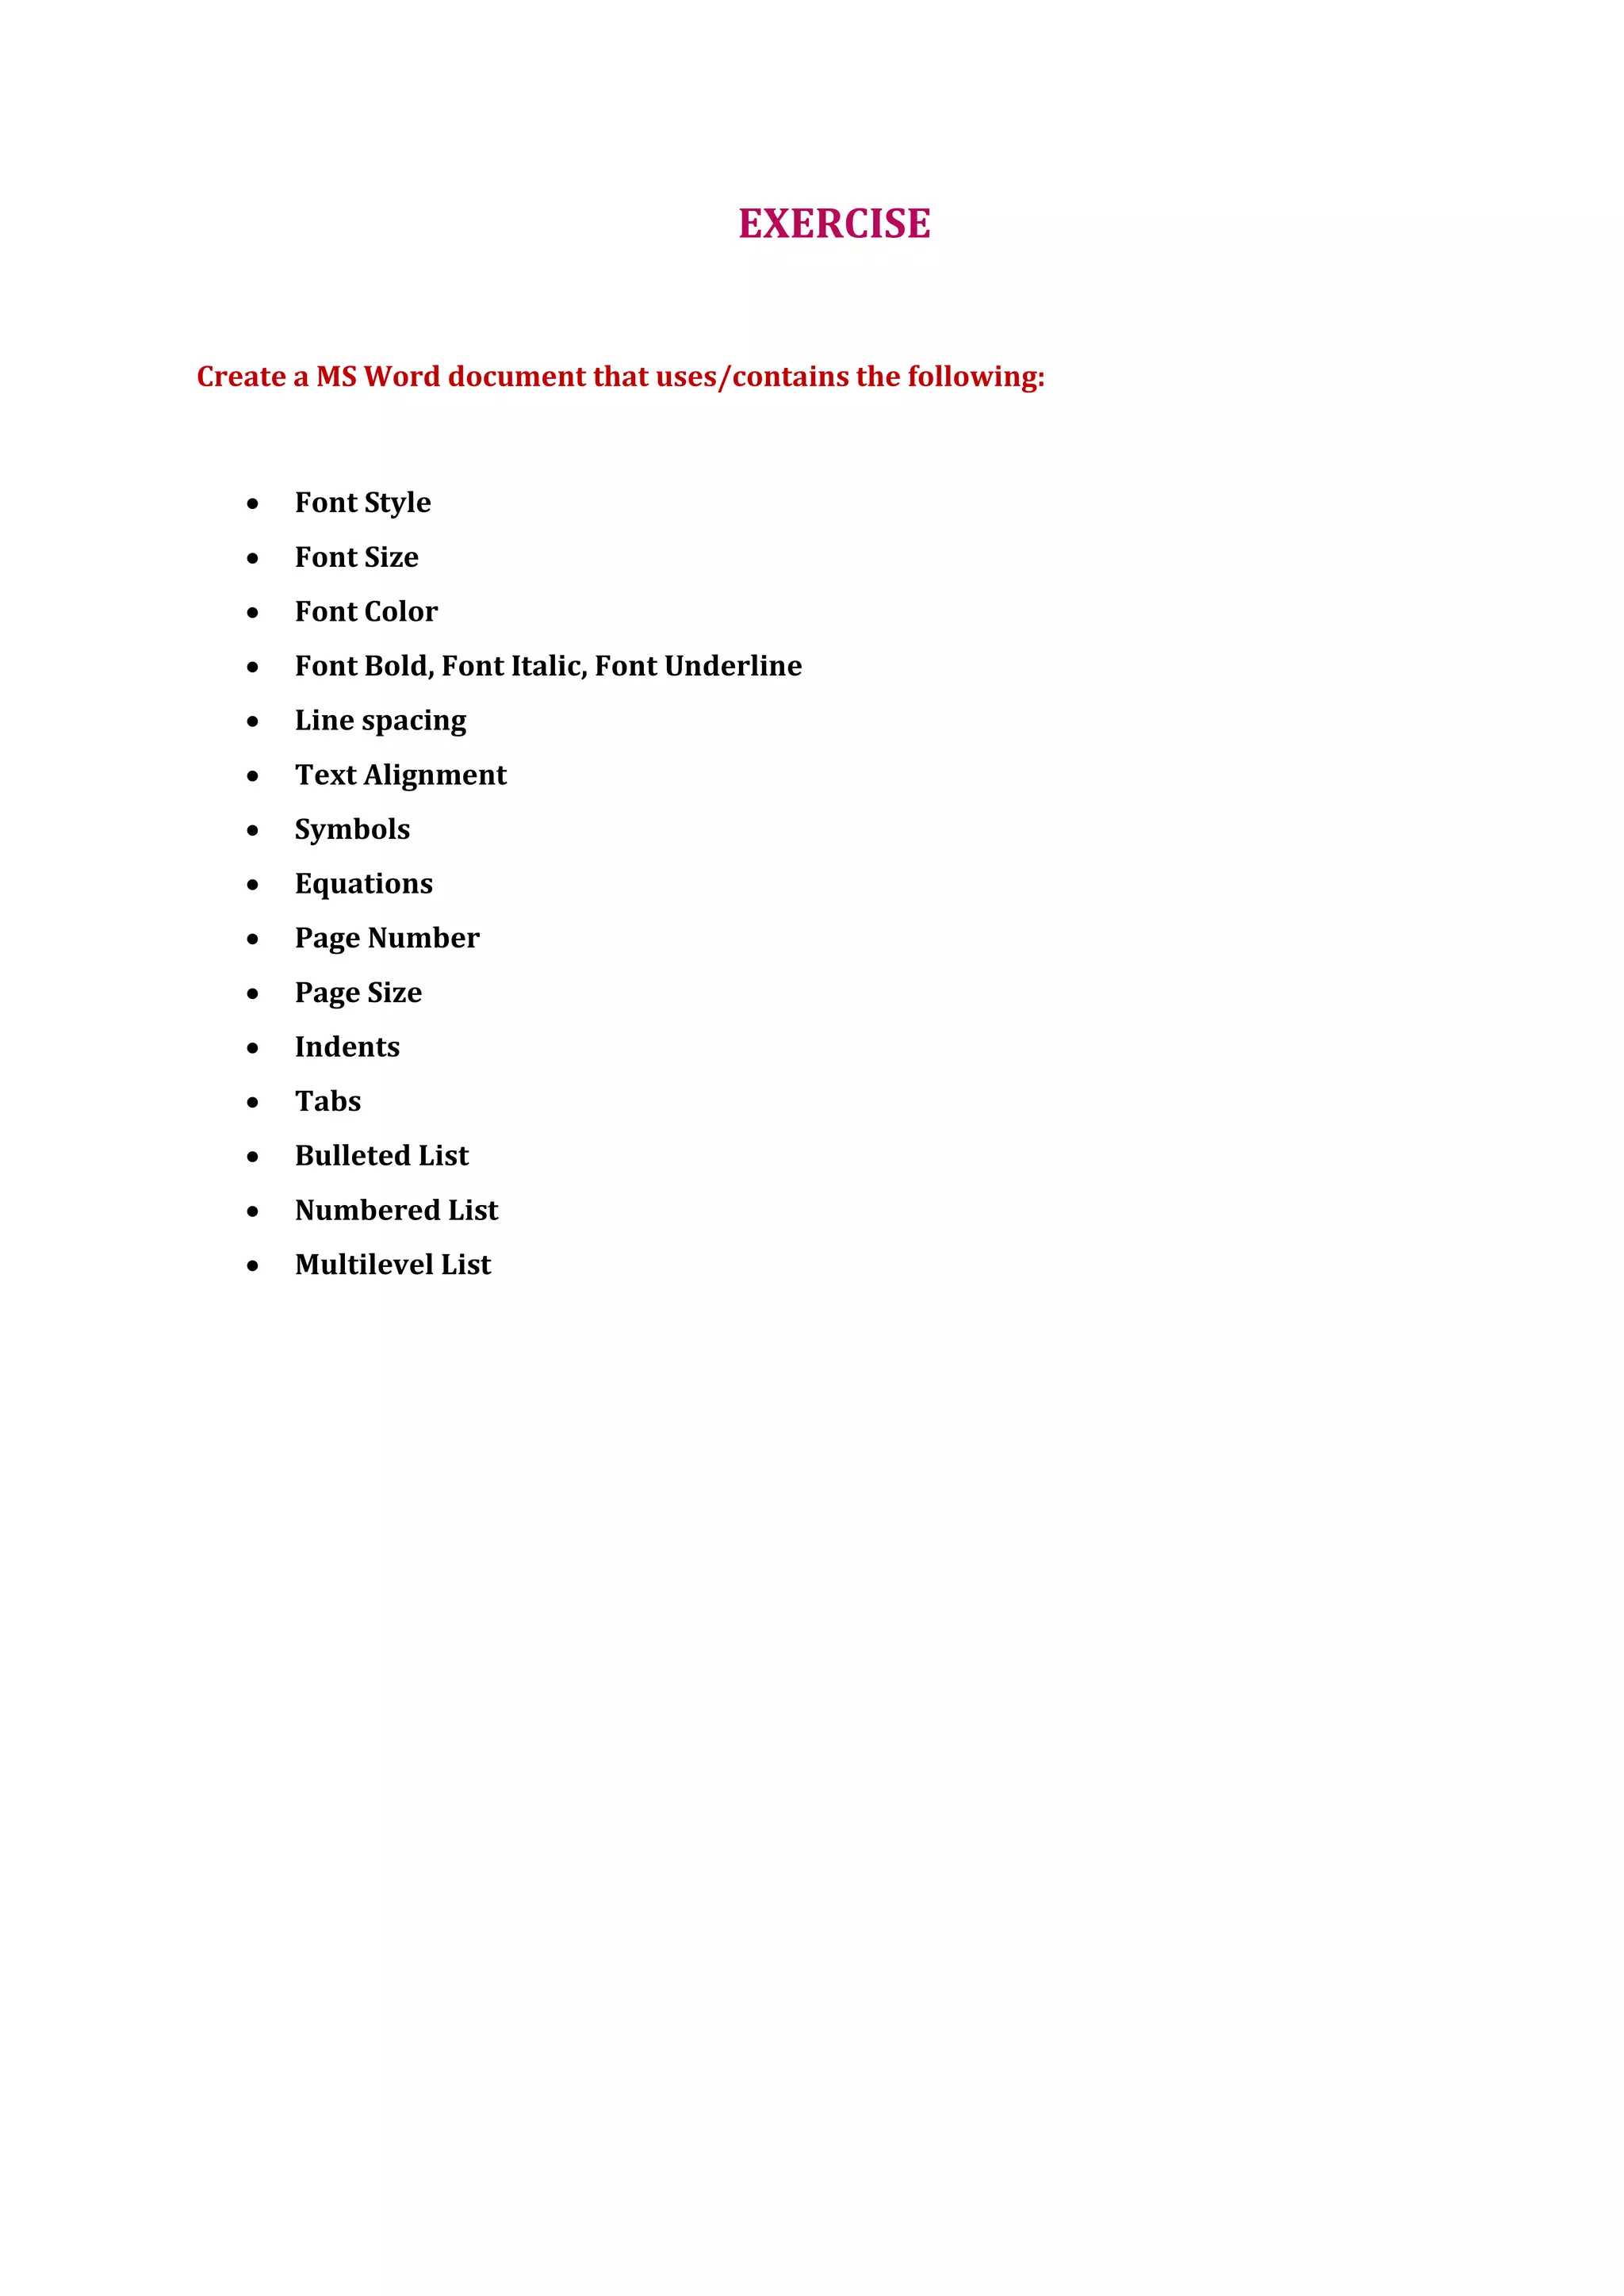
EXERCISE
Create a MSWord document that uses/contains the following:
Font Style
Font Size
Font Color
Font Bold, Font Italic, Font Underline
Line spacing
Text Alignment
Symbols
Equations
Page Number
Page Size
Indents
Tabs
Bulleted List
Numbered List
Multilevel List