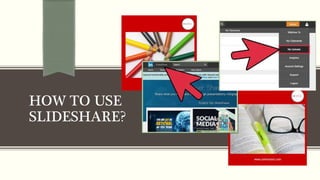
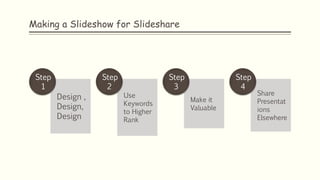
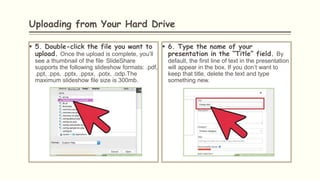
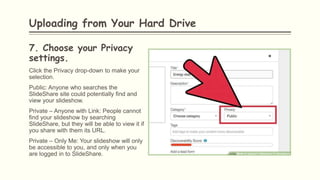
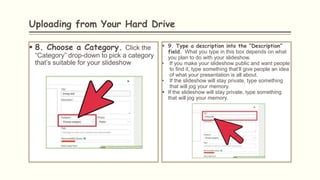
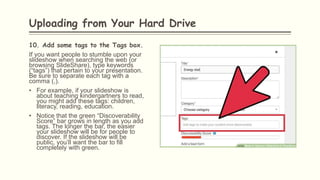
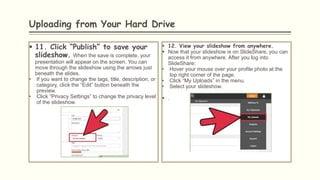
SlideShare is an online platform for sharing presentations. The document discusses how to use SlideShare by uploading presentations, designing them effectively, using keywords to increase discoverability, and sharing presentations on other platforms like LinkedIn to drive more traffic. Uploading a presentation involves selecting the file from your computer or cloud storage, adding a title, description, tags, and publishing it on SlideShare. Well-designed presentations with valuable content and optimized keywords will perform better on SlideShare.


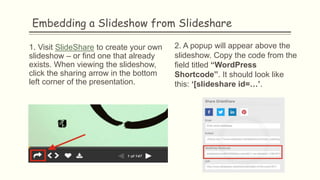
![Embedding a Slideshow from Slideshare
3. Paste the code into
a post or page on your blog
and publish it. The
slideshow will look similar
to the one below.
Customizing
You can also change the width and height of your
slideshow by adding these parameters &w=650&h=500 to
the end of the shortcode.
Example: If you use this shortcode your slideshow will be
displayed at 650px wide and 500px high.
[slideshare id=8874930&doc=sotw2011-as-delivered-
110816213106-phpapp01&w=650&h=500]](https://image.slidesharecdn.com/slideshare-170917153847/85/Slideshare-24-320.jpg)