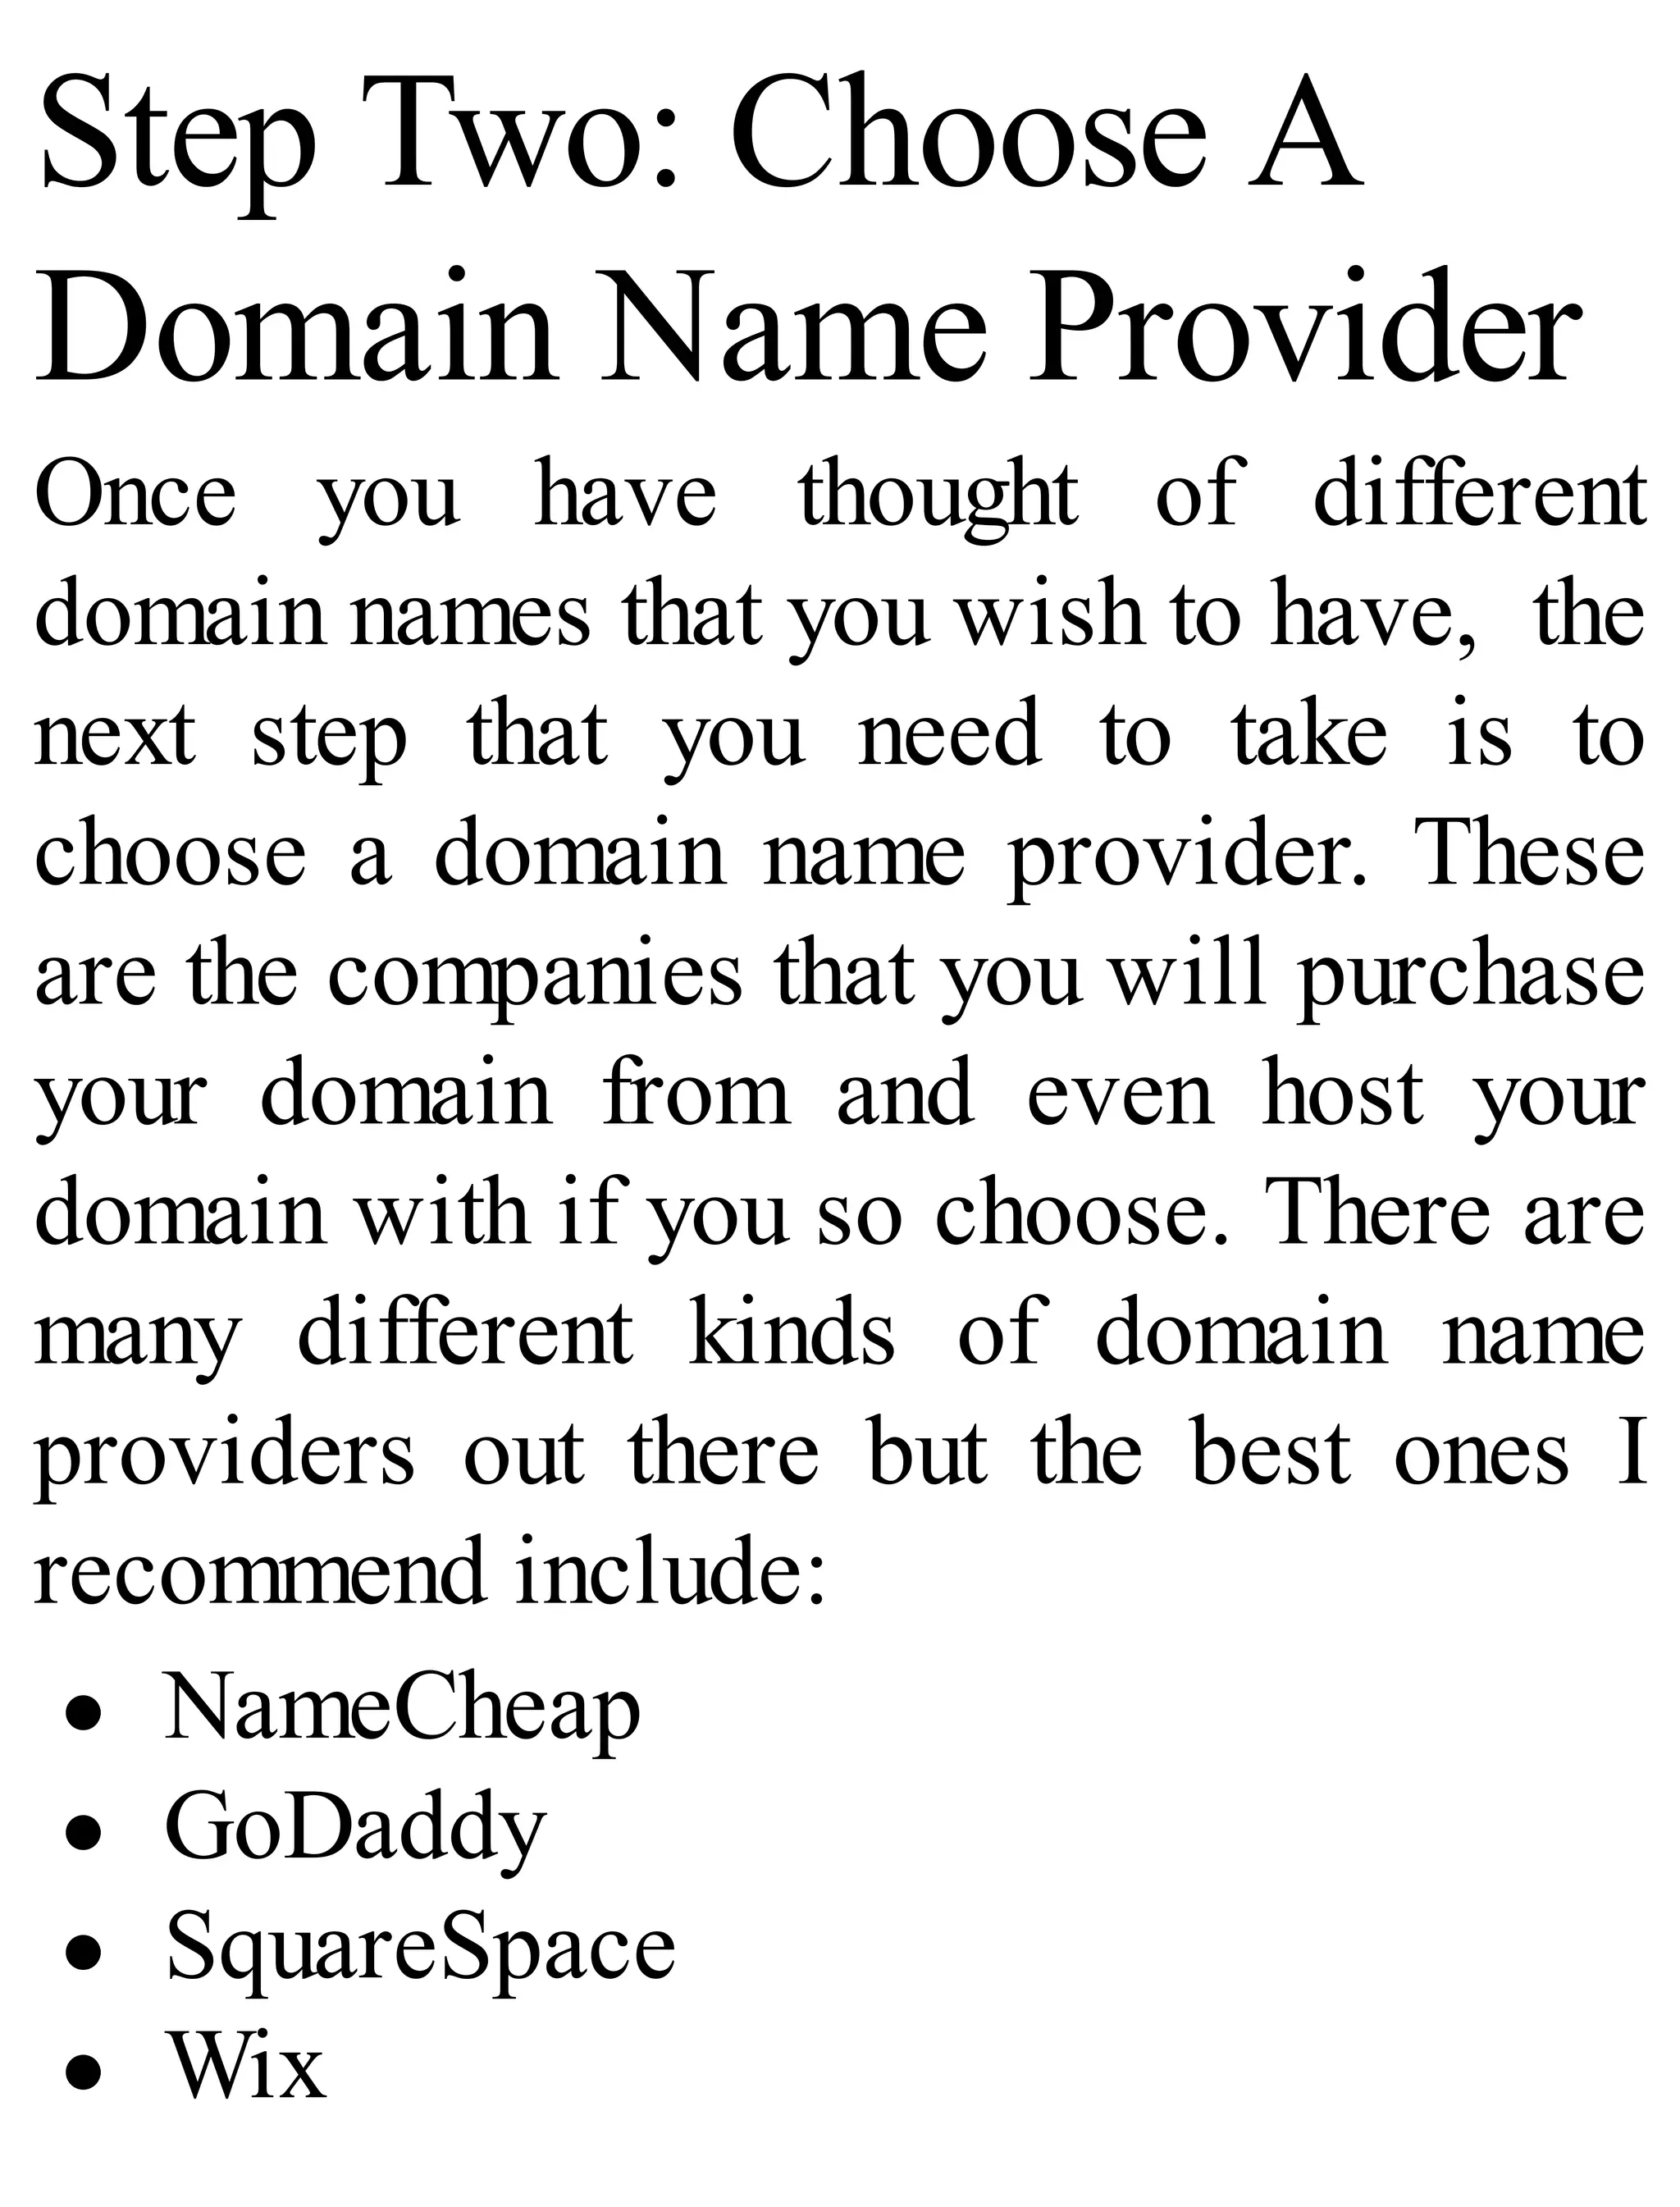
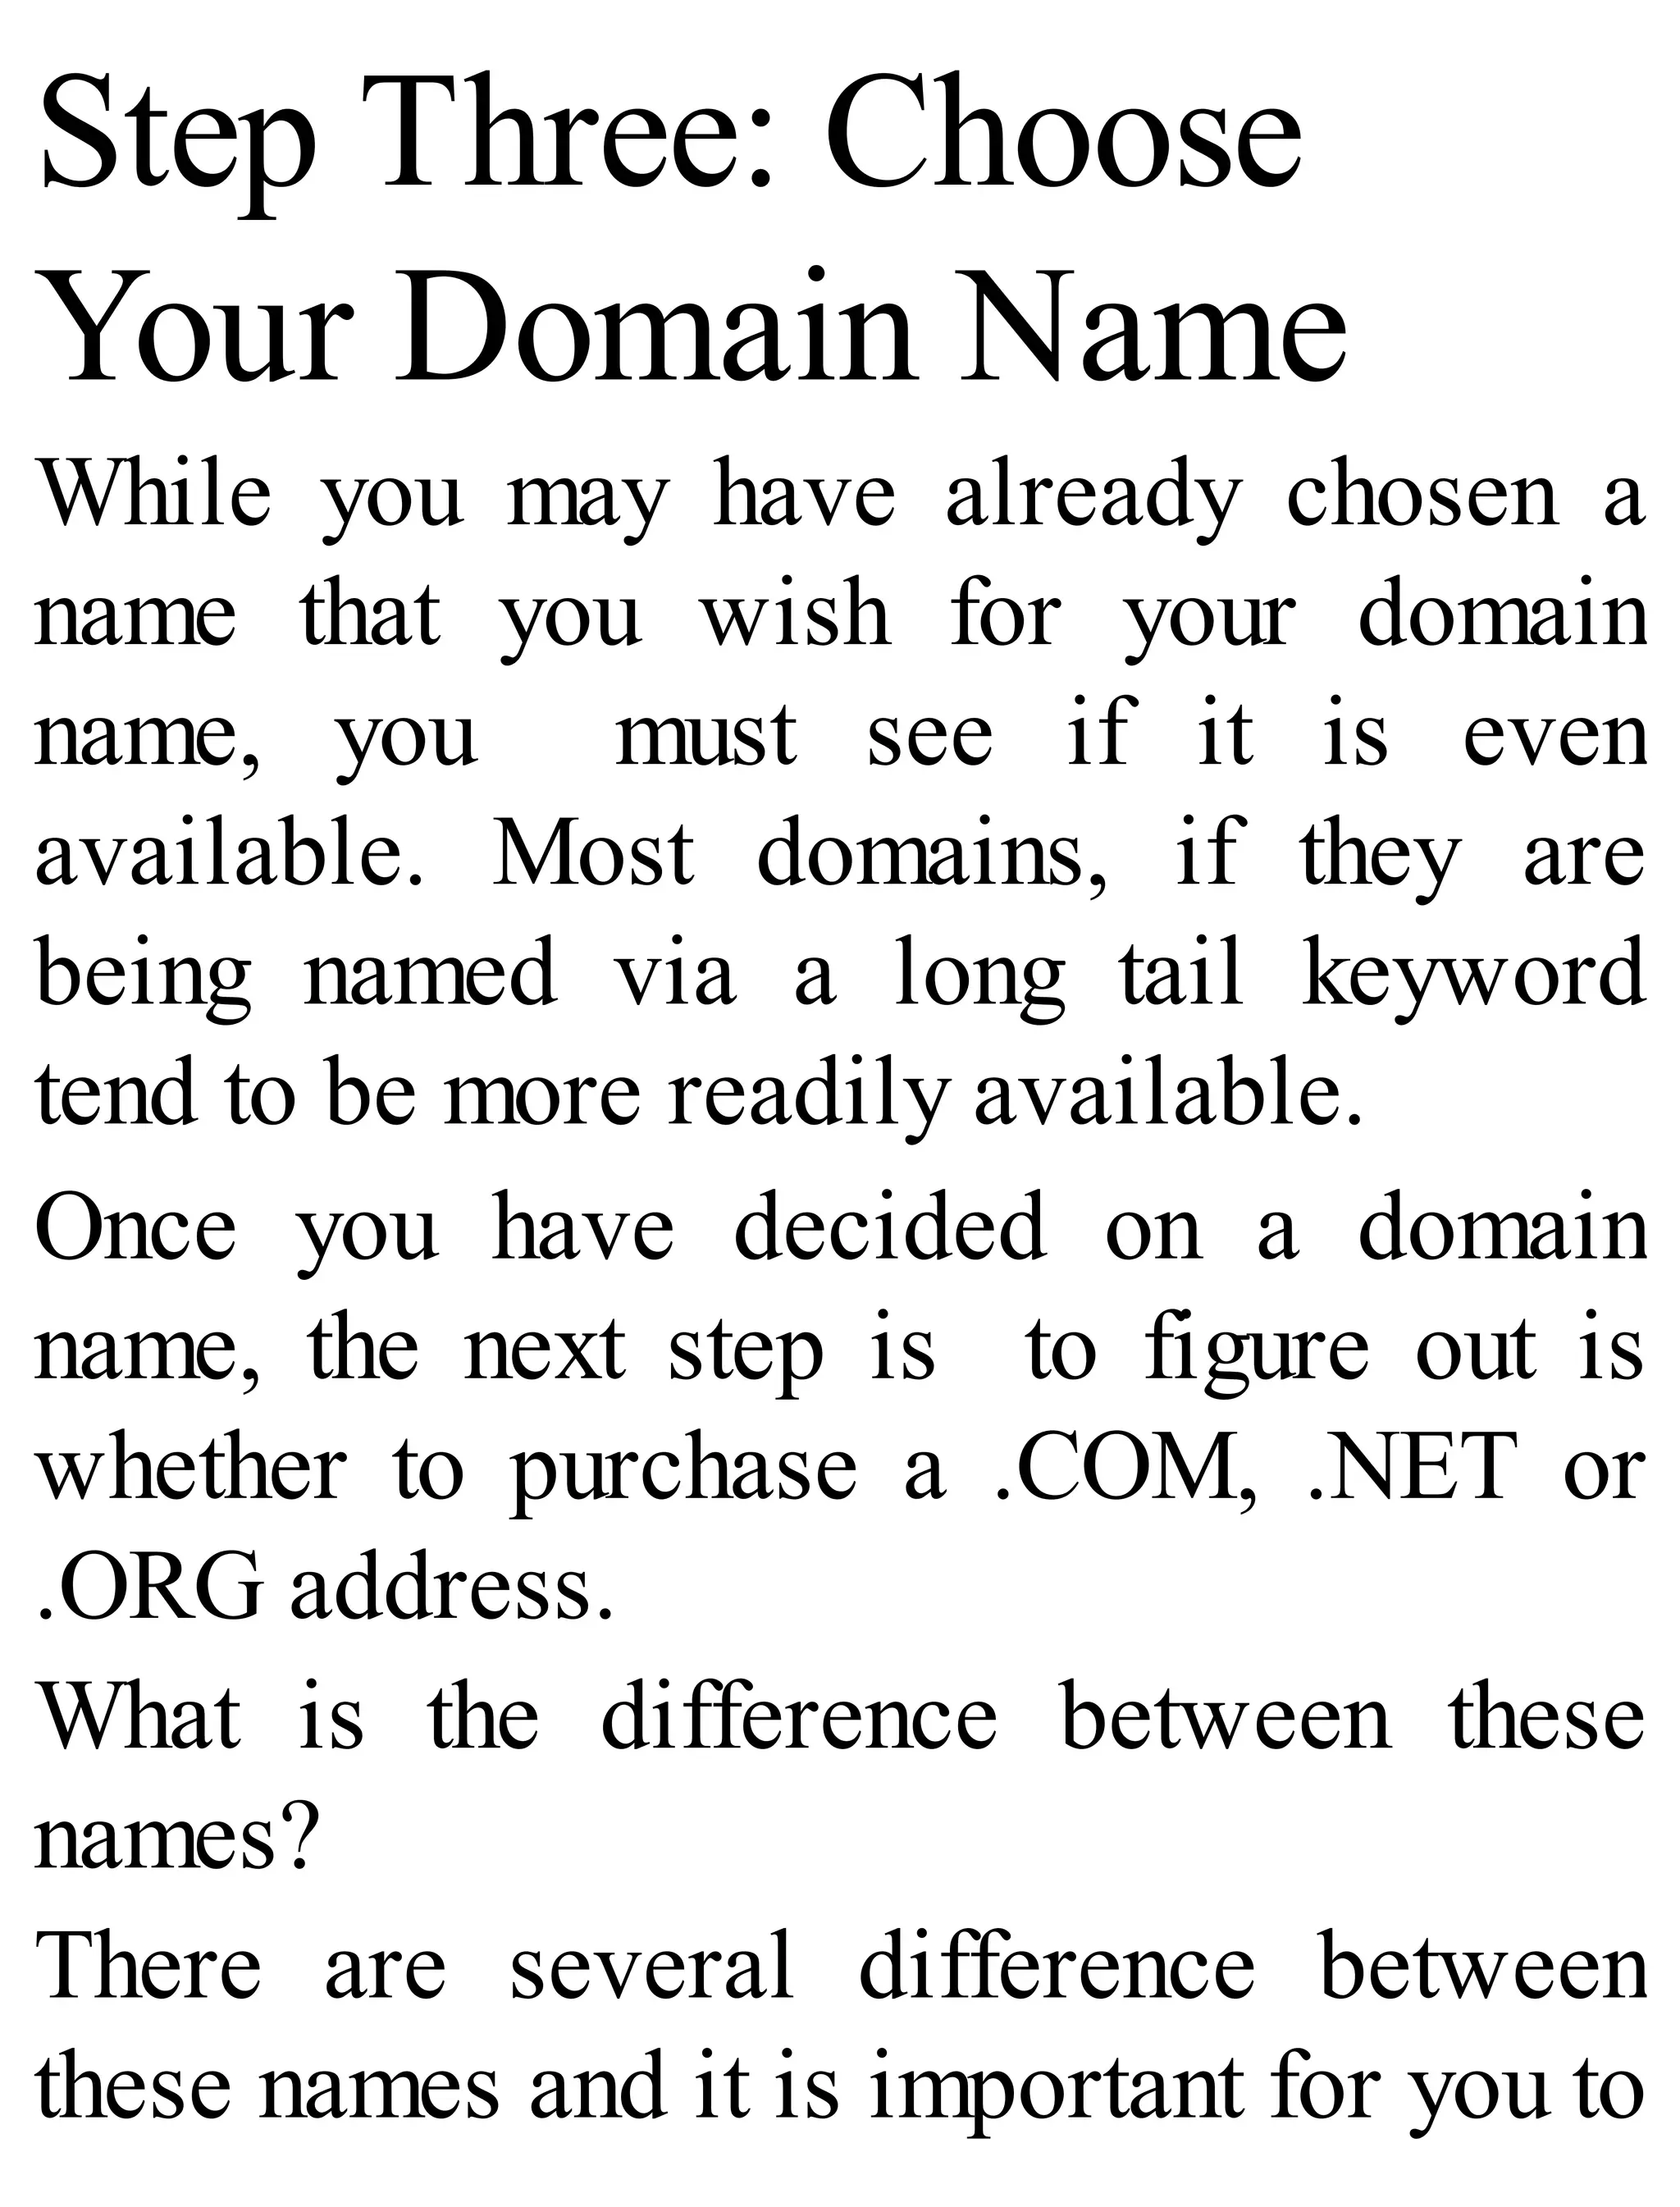
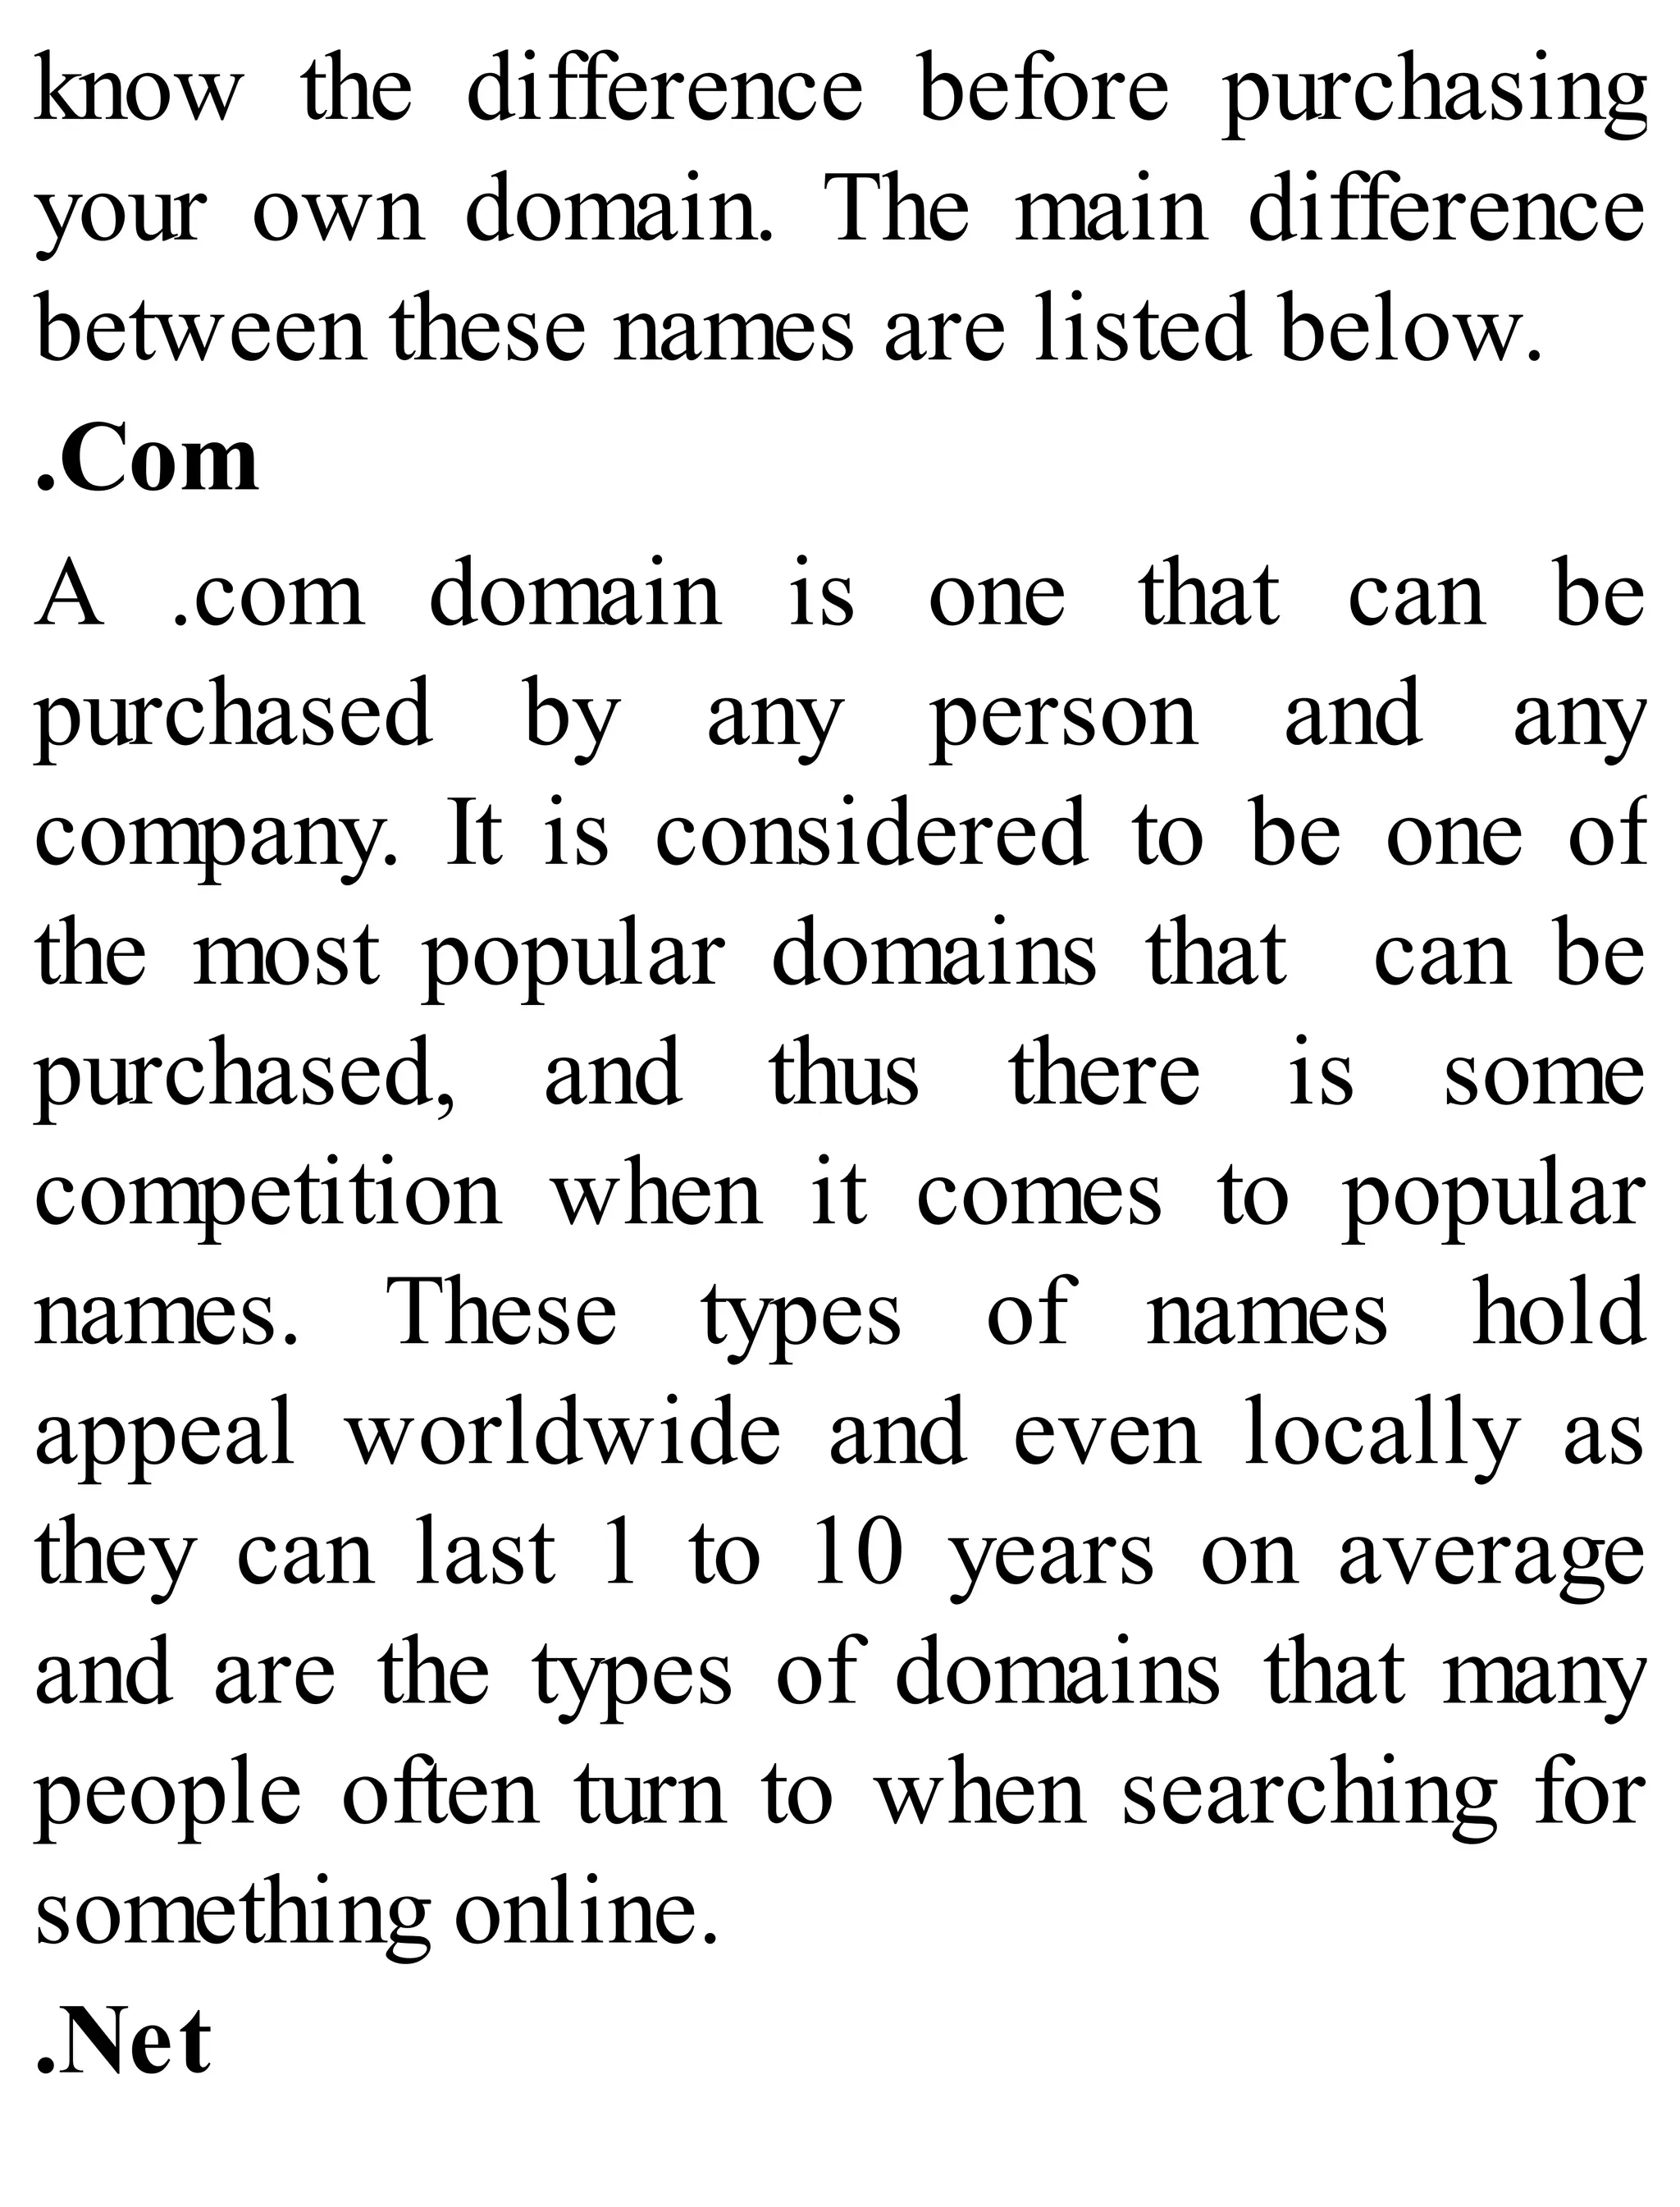
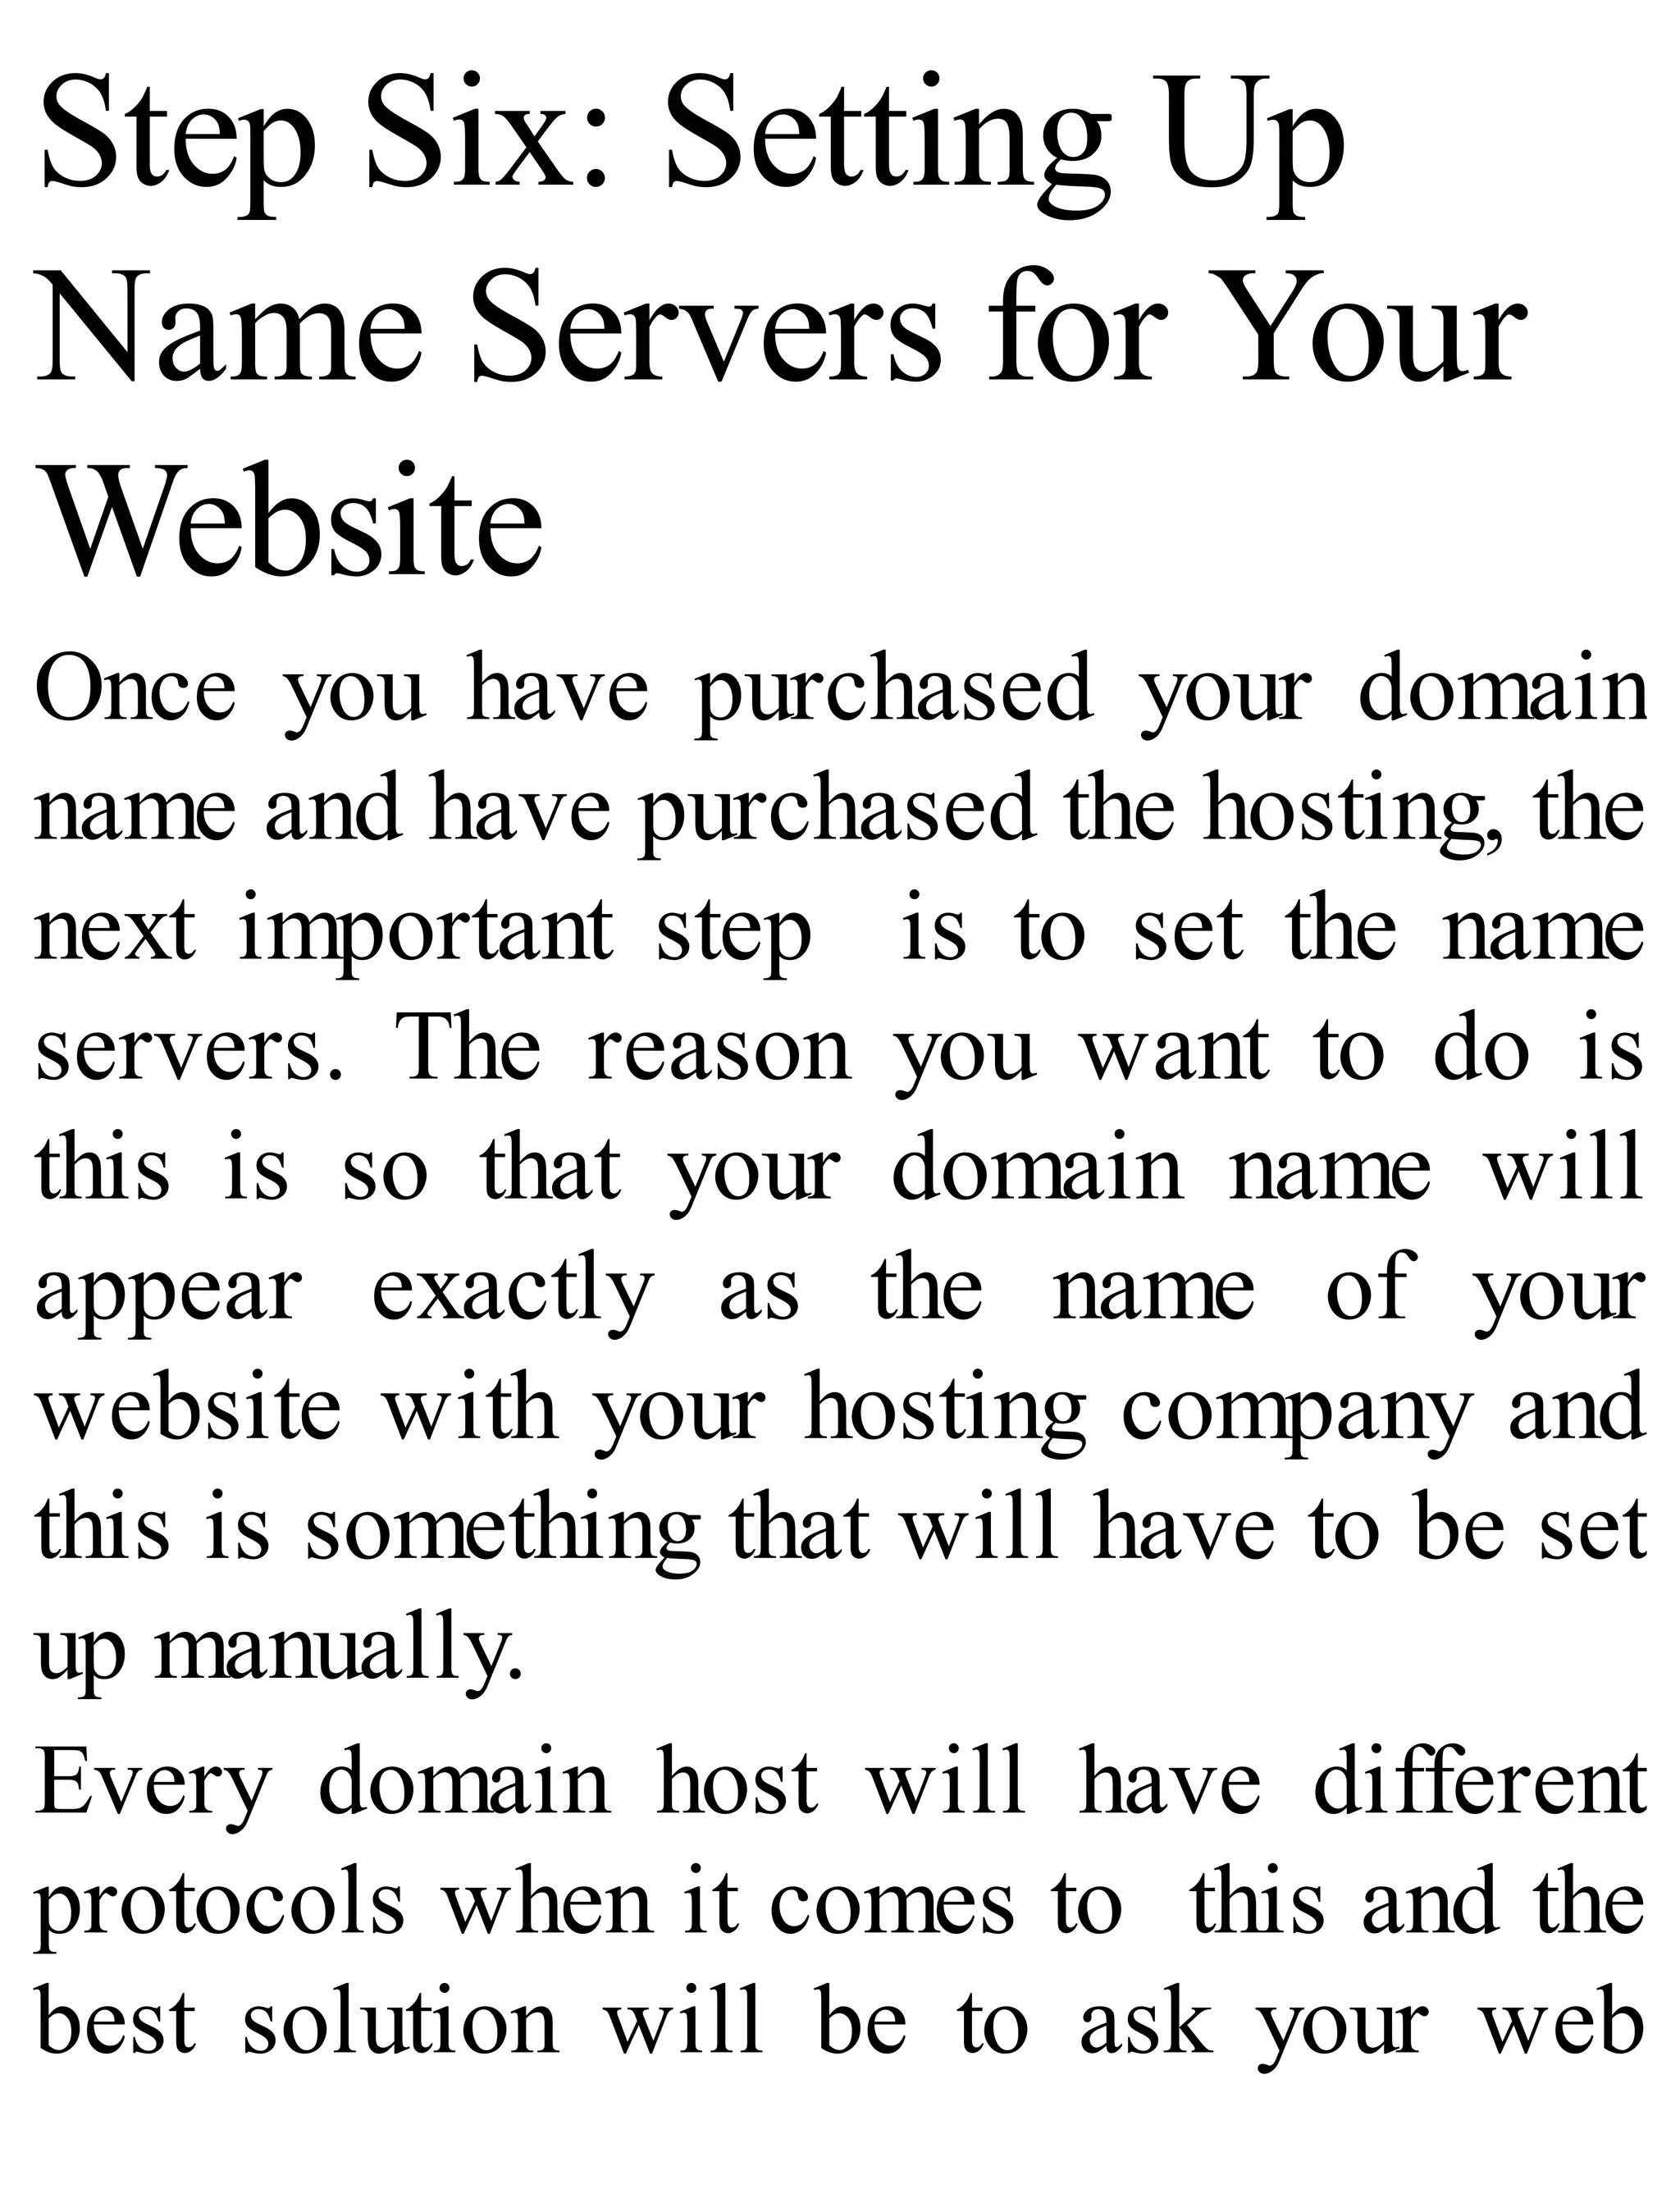
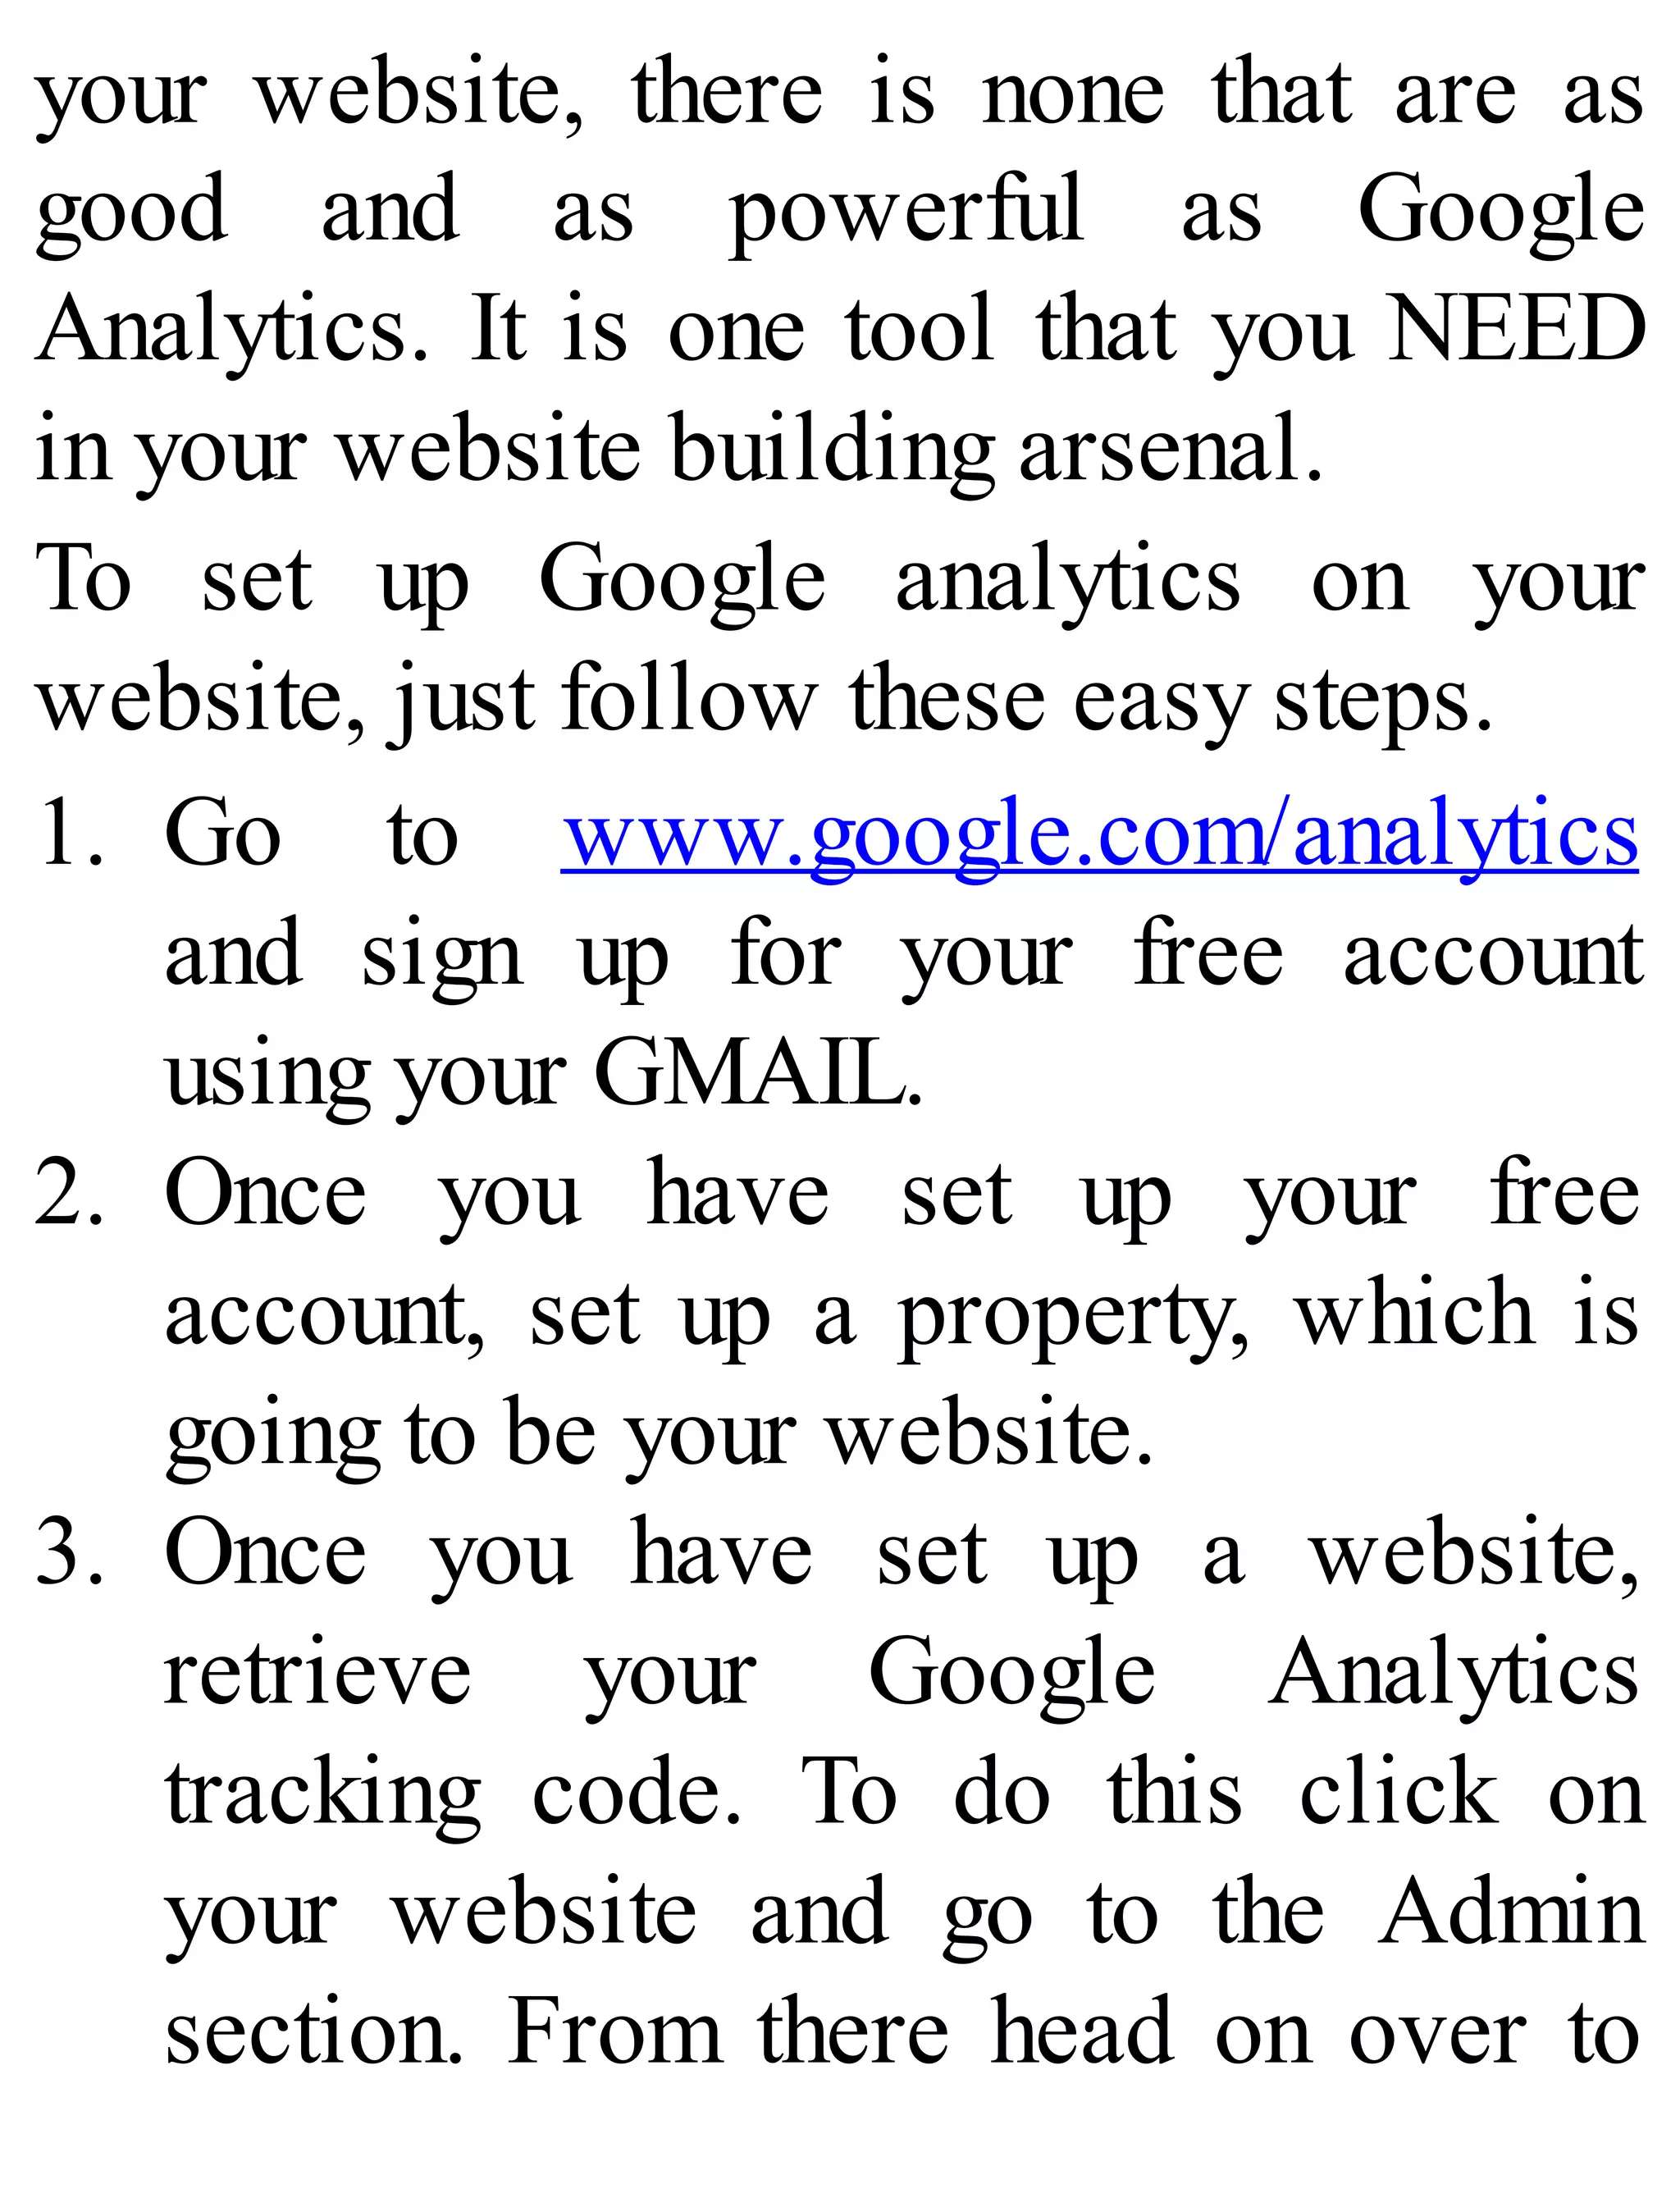
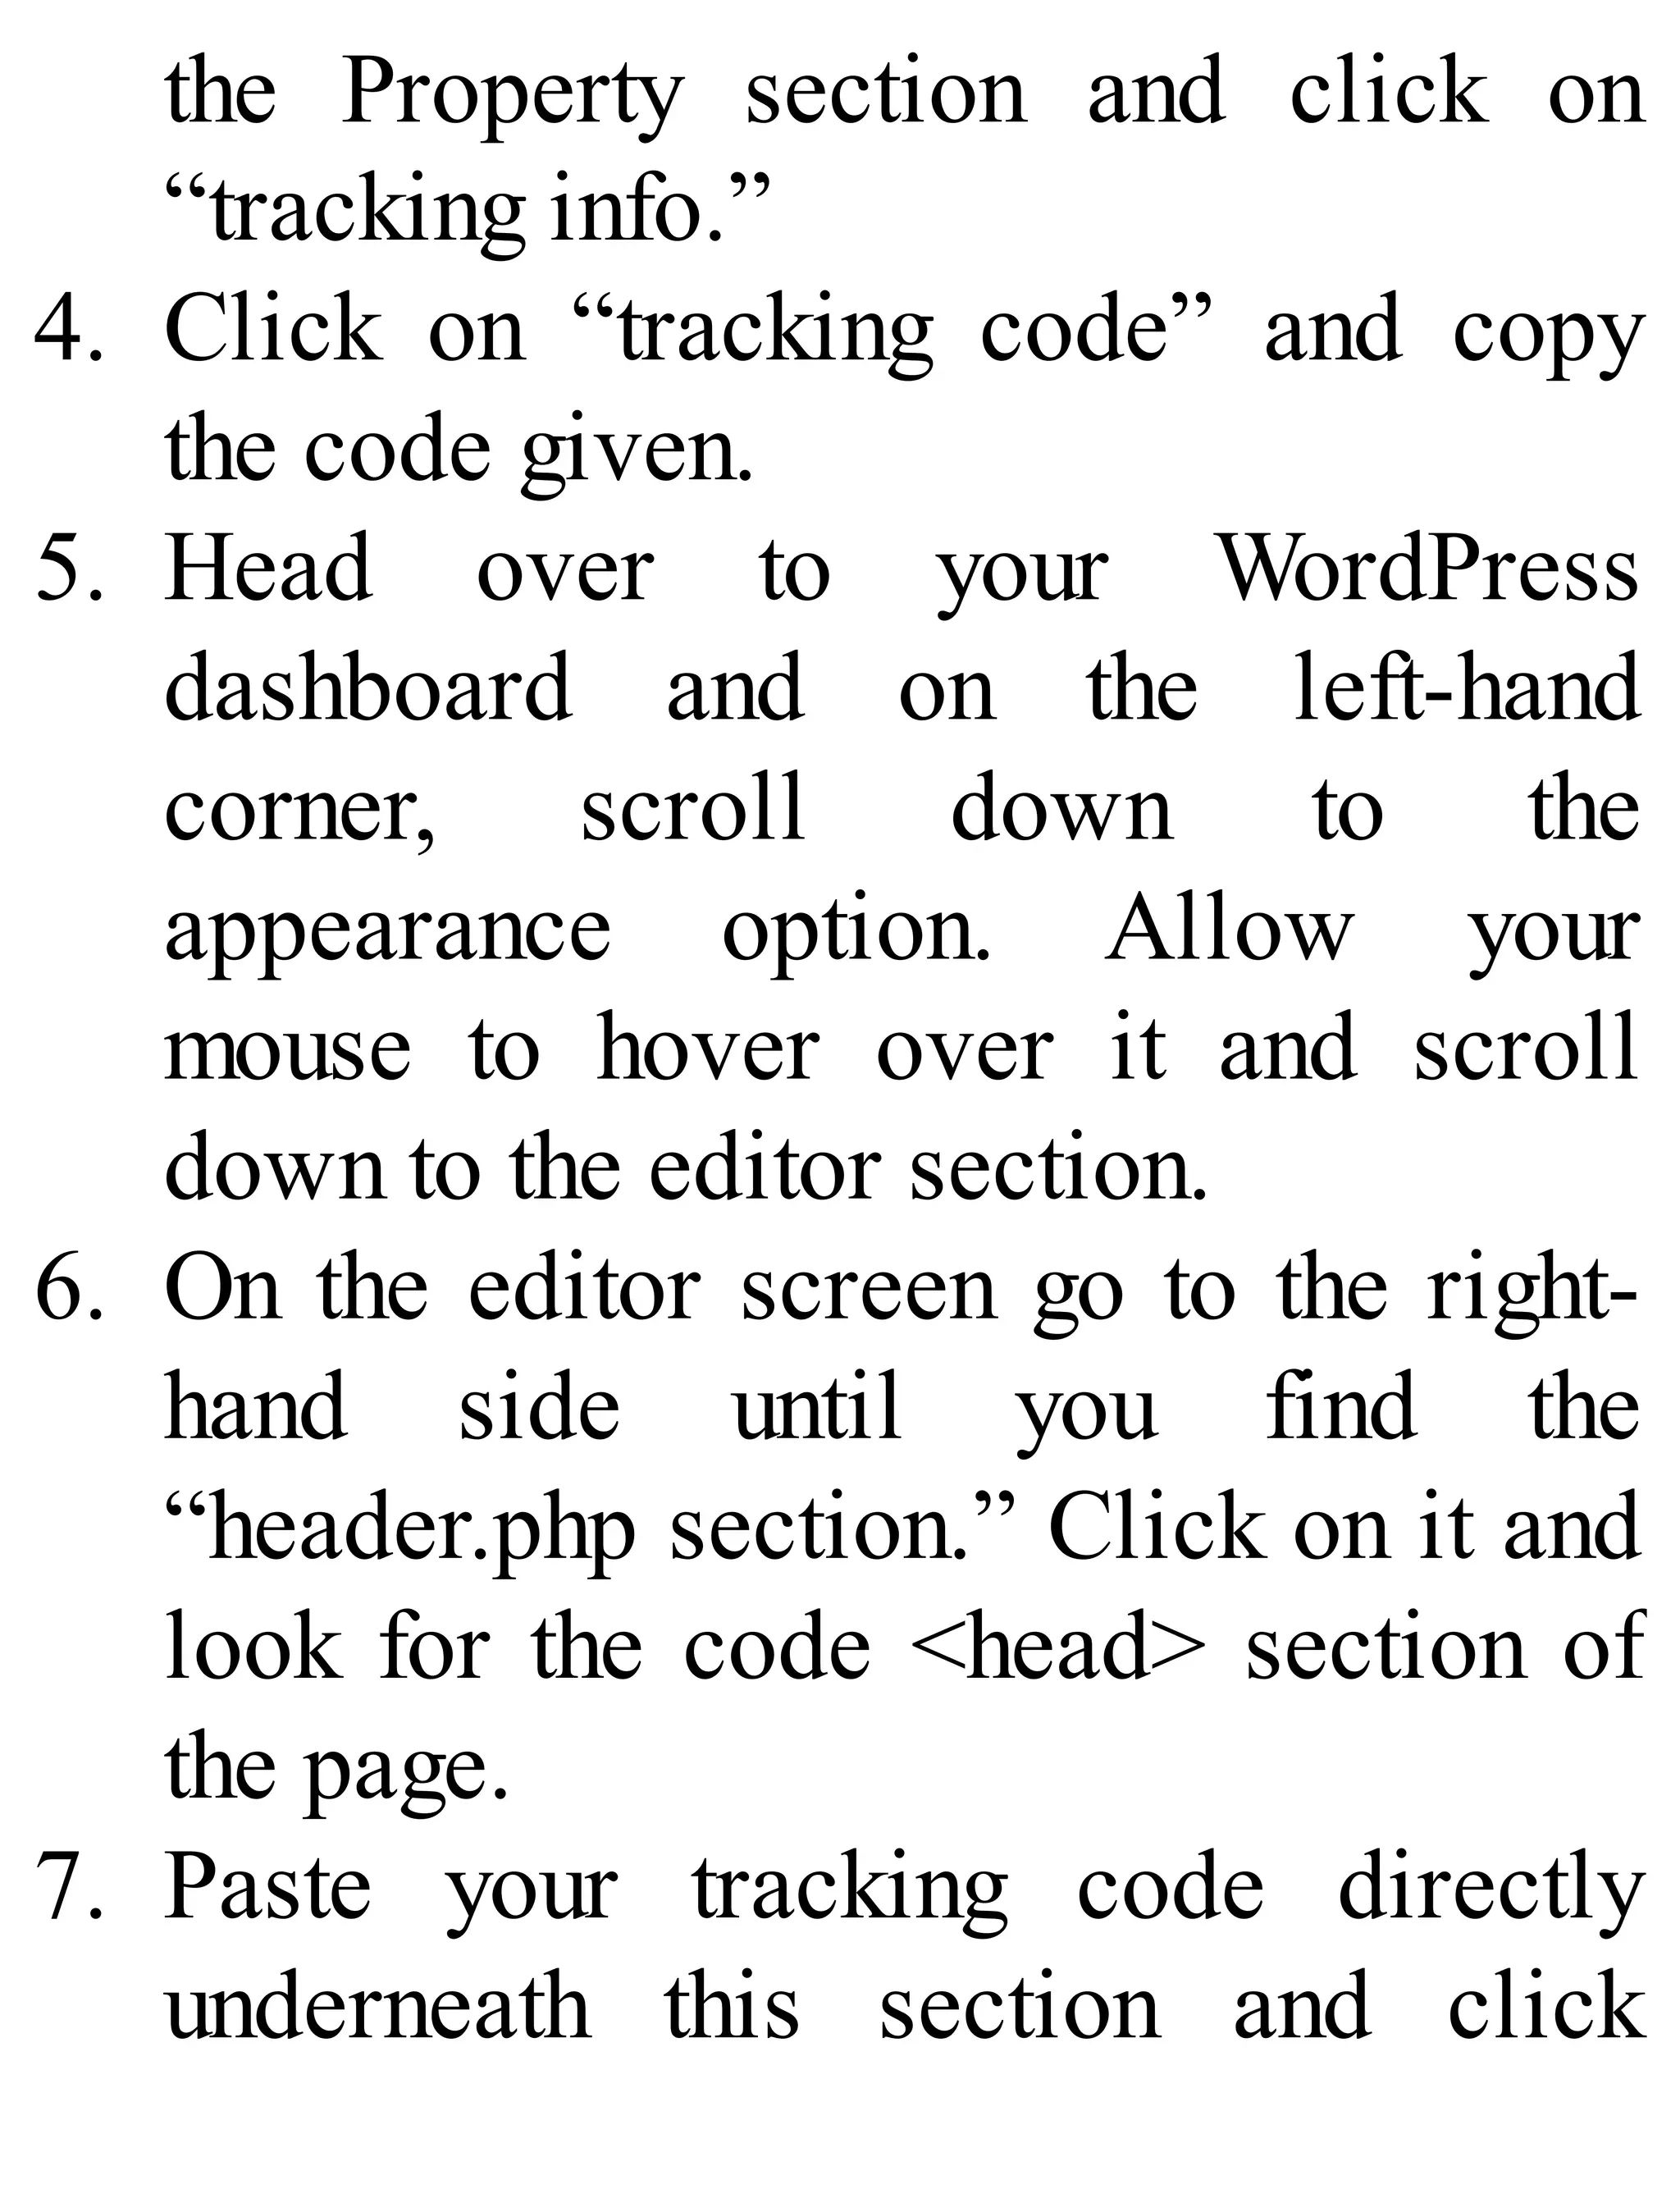
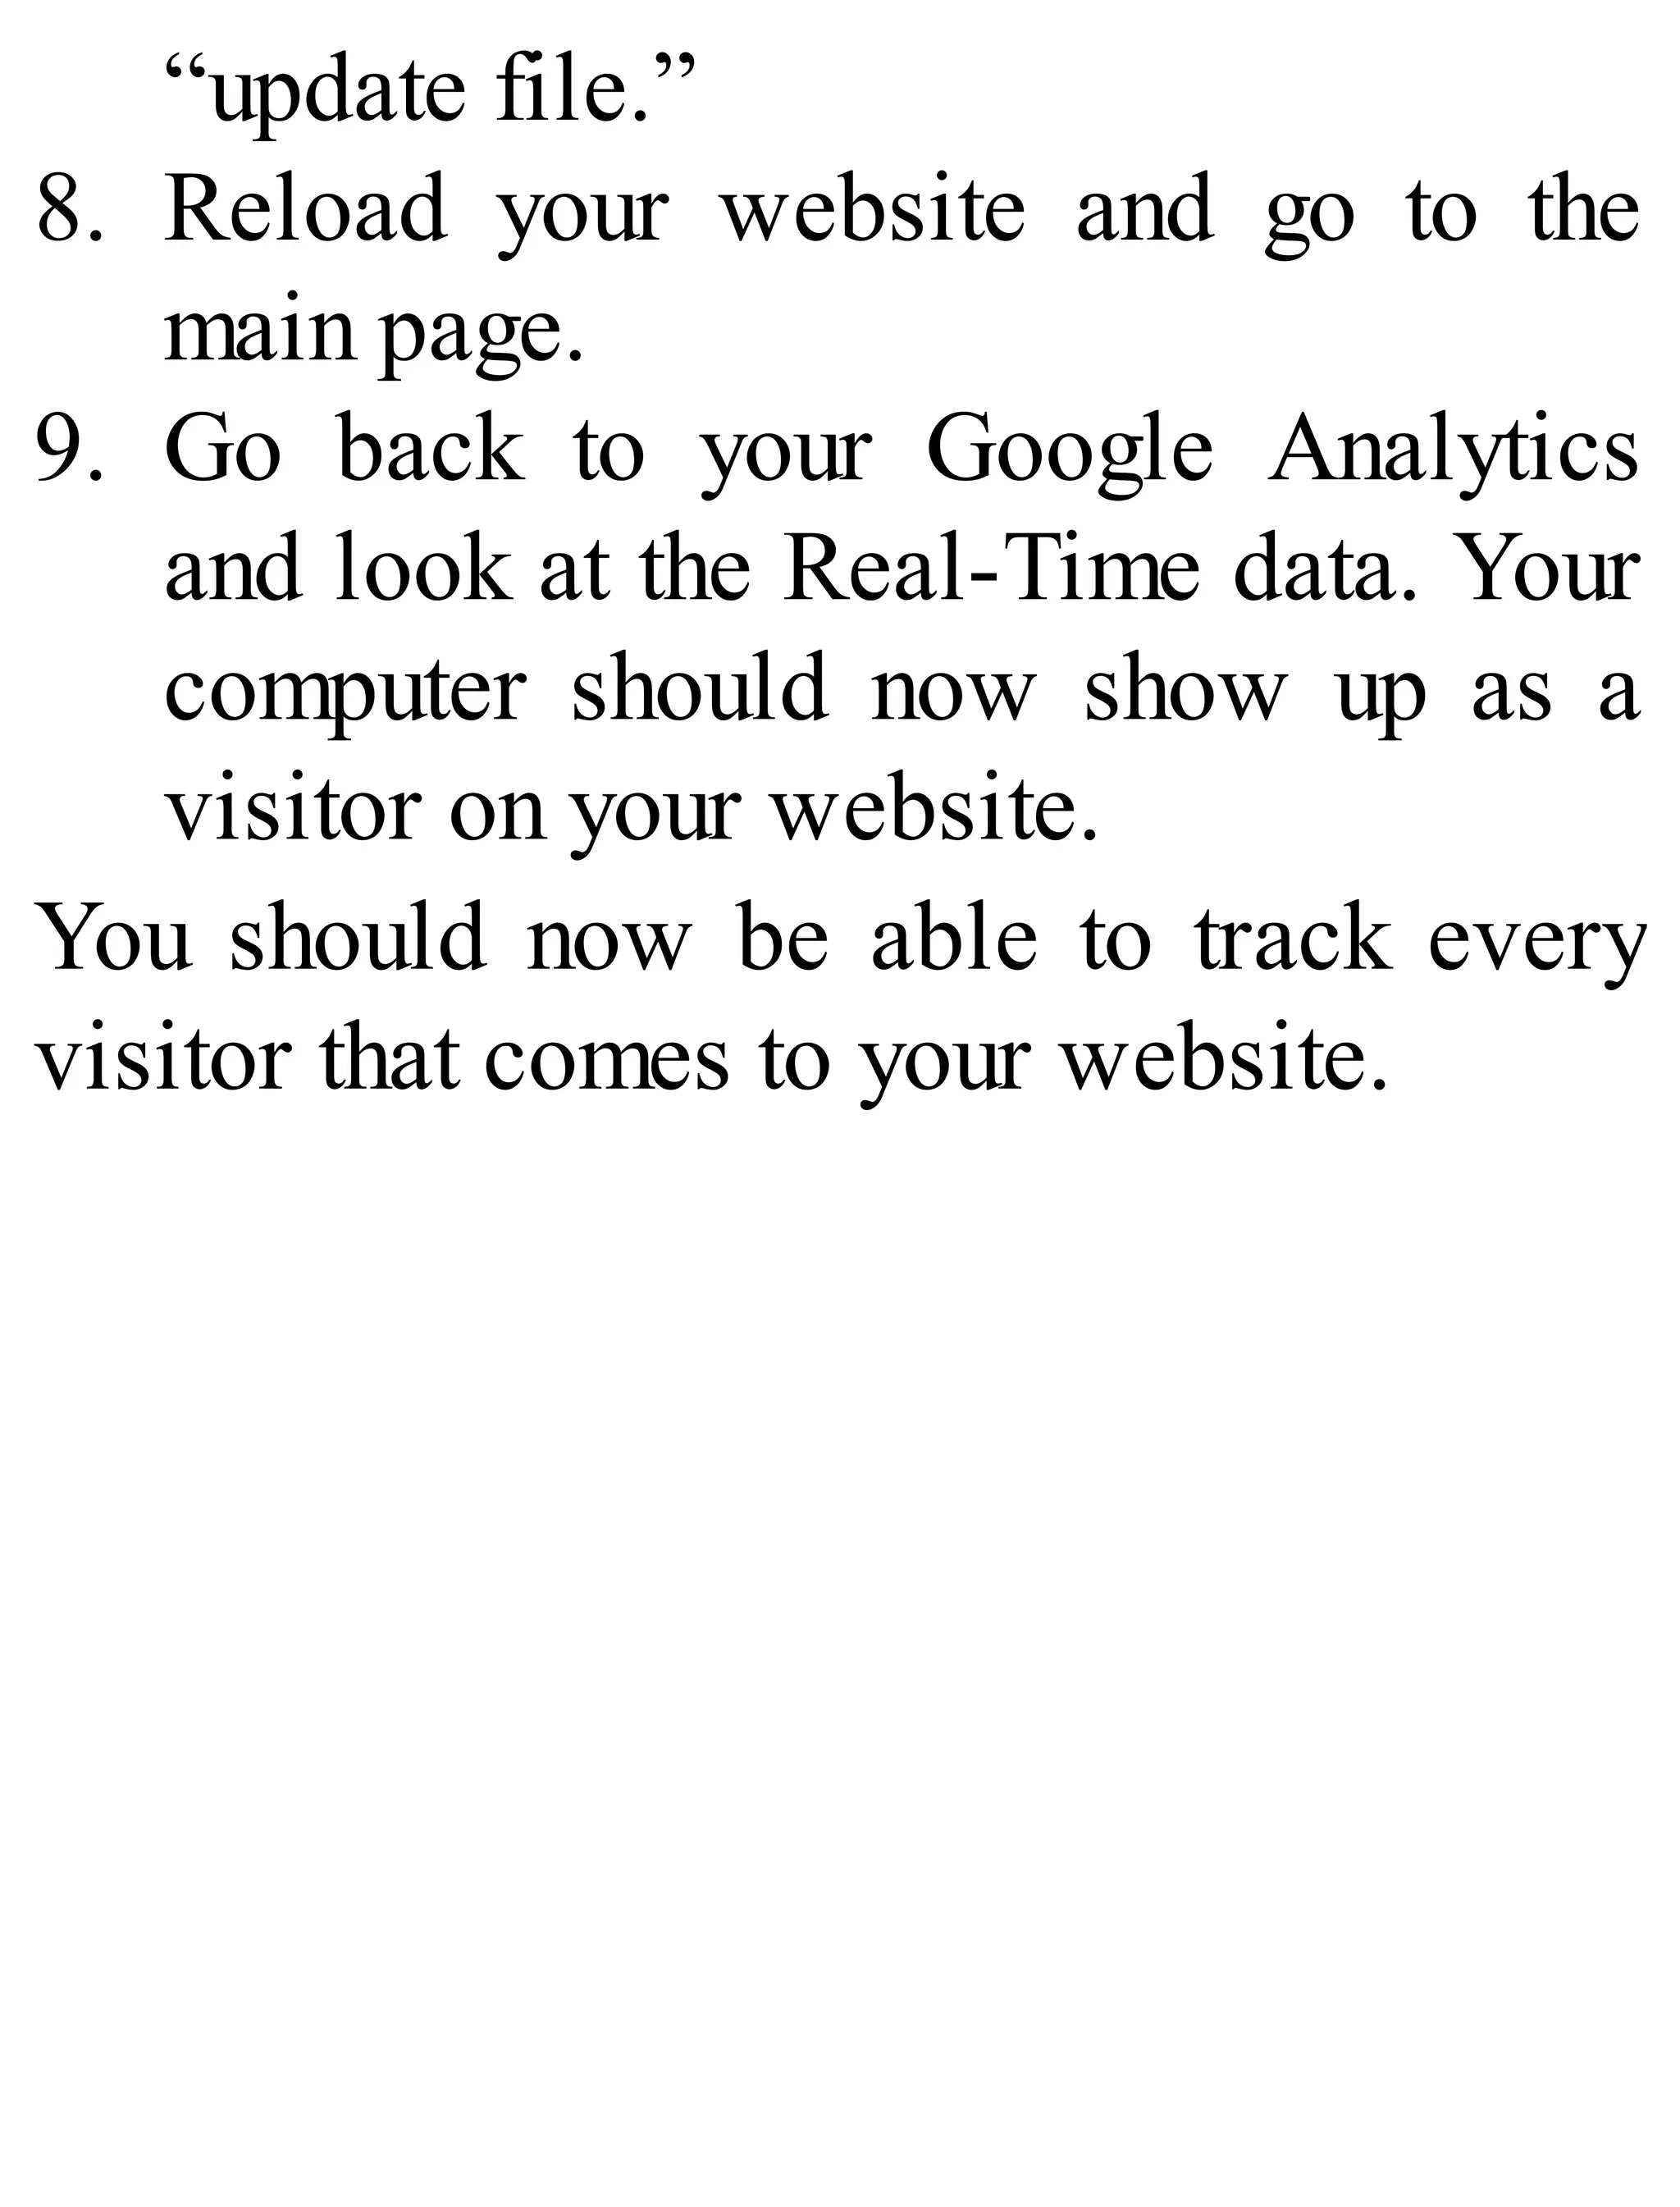
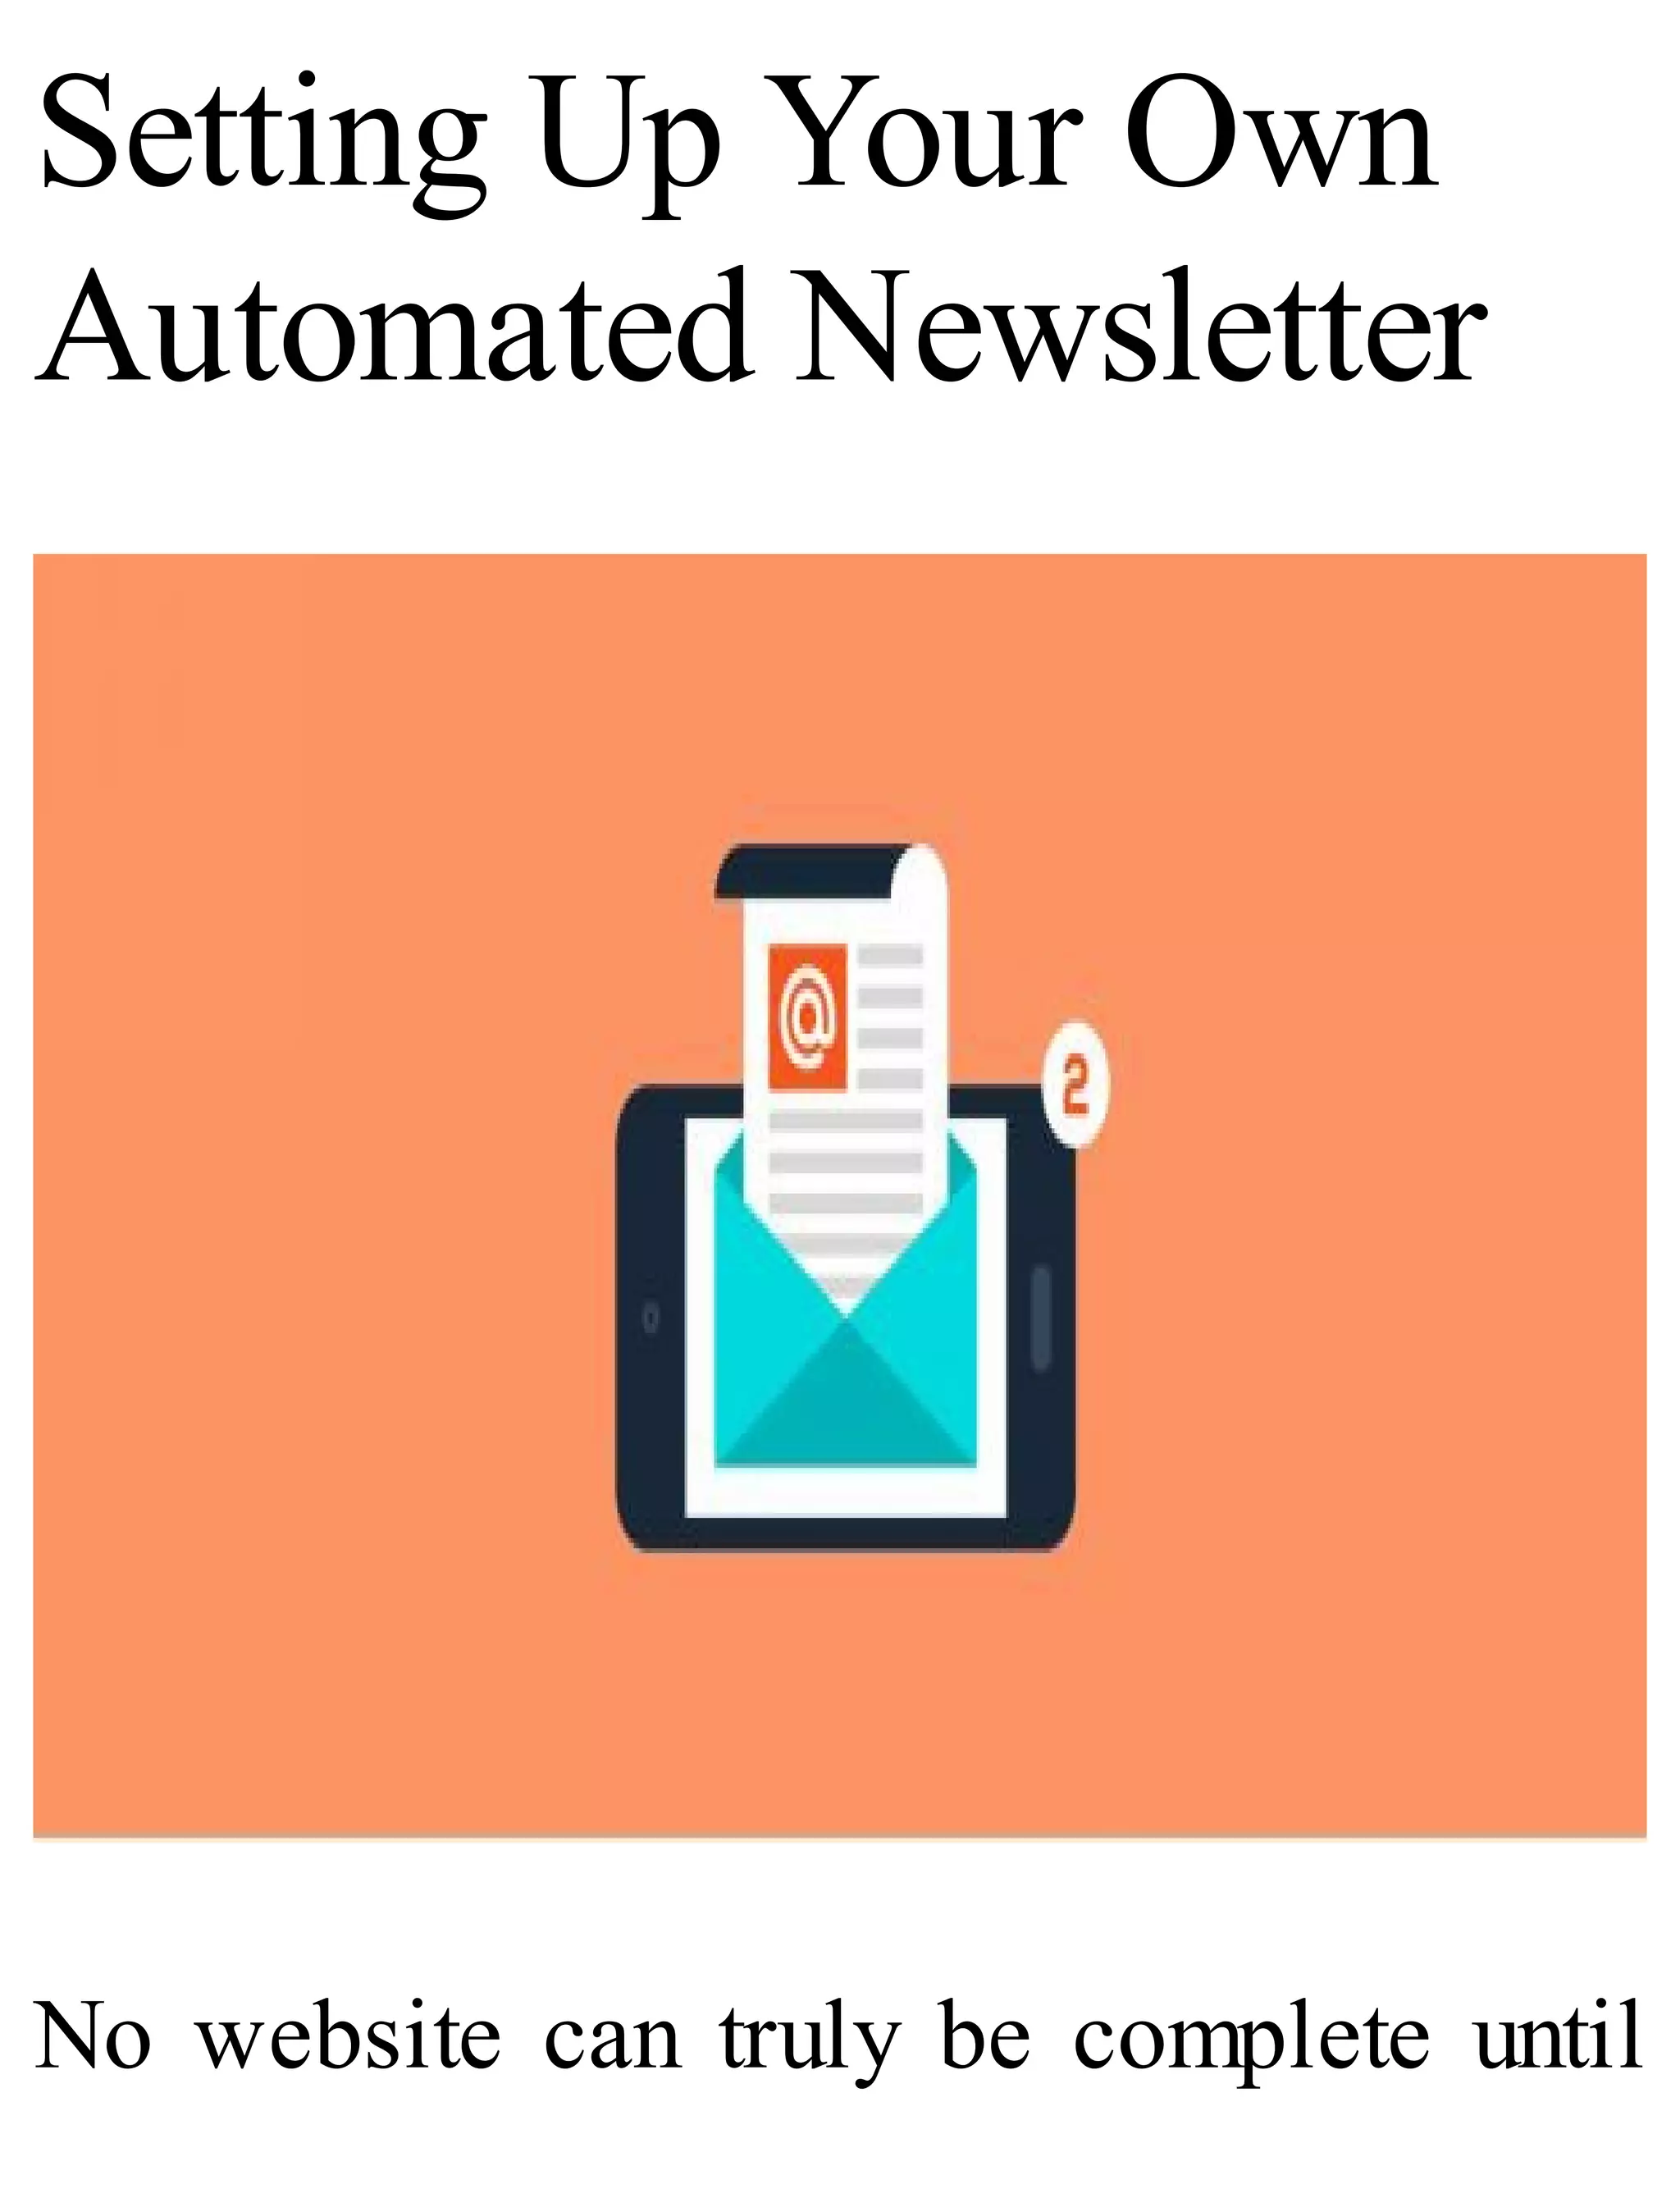
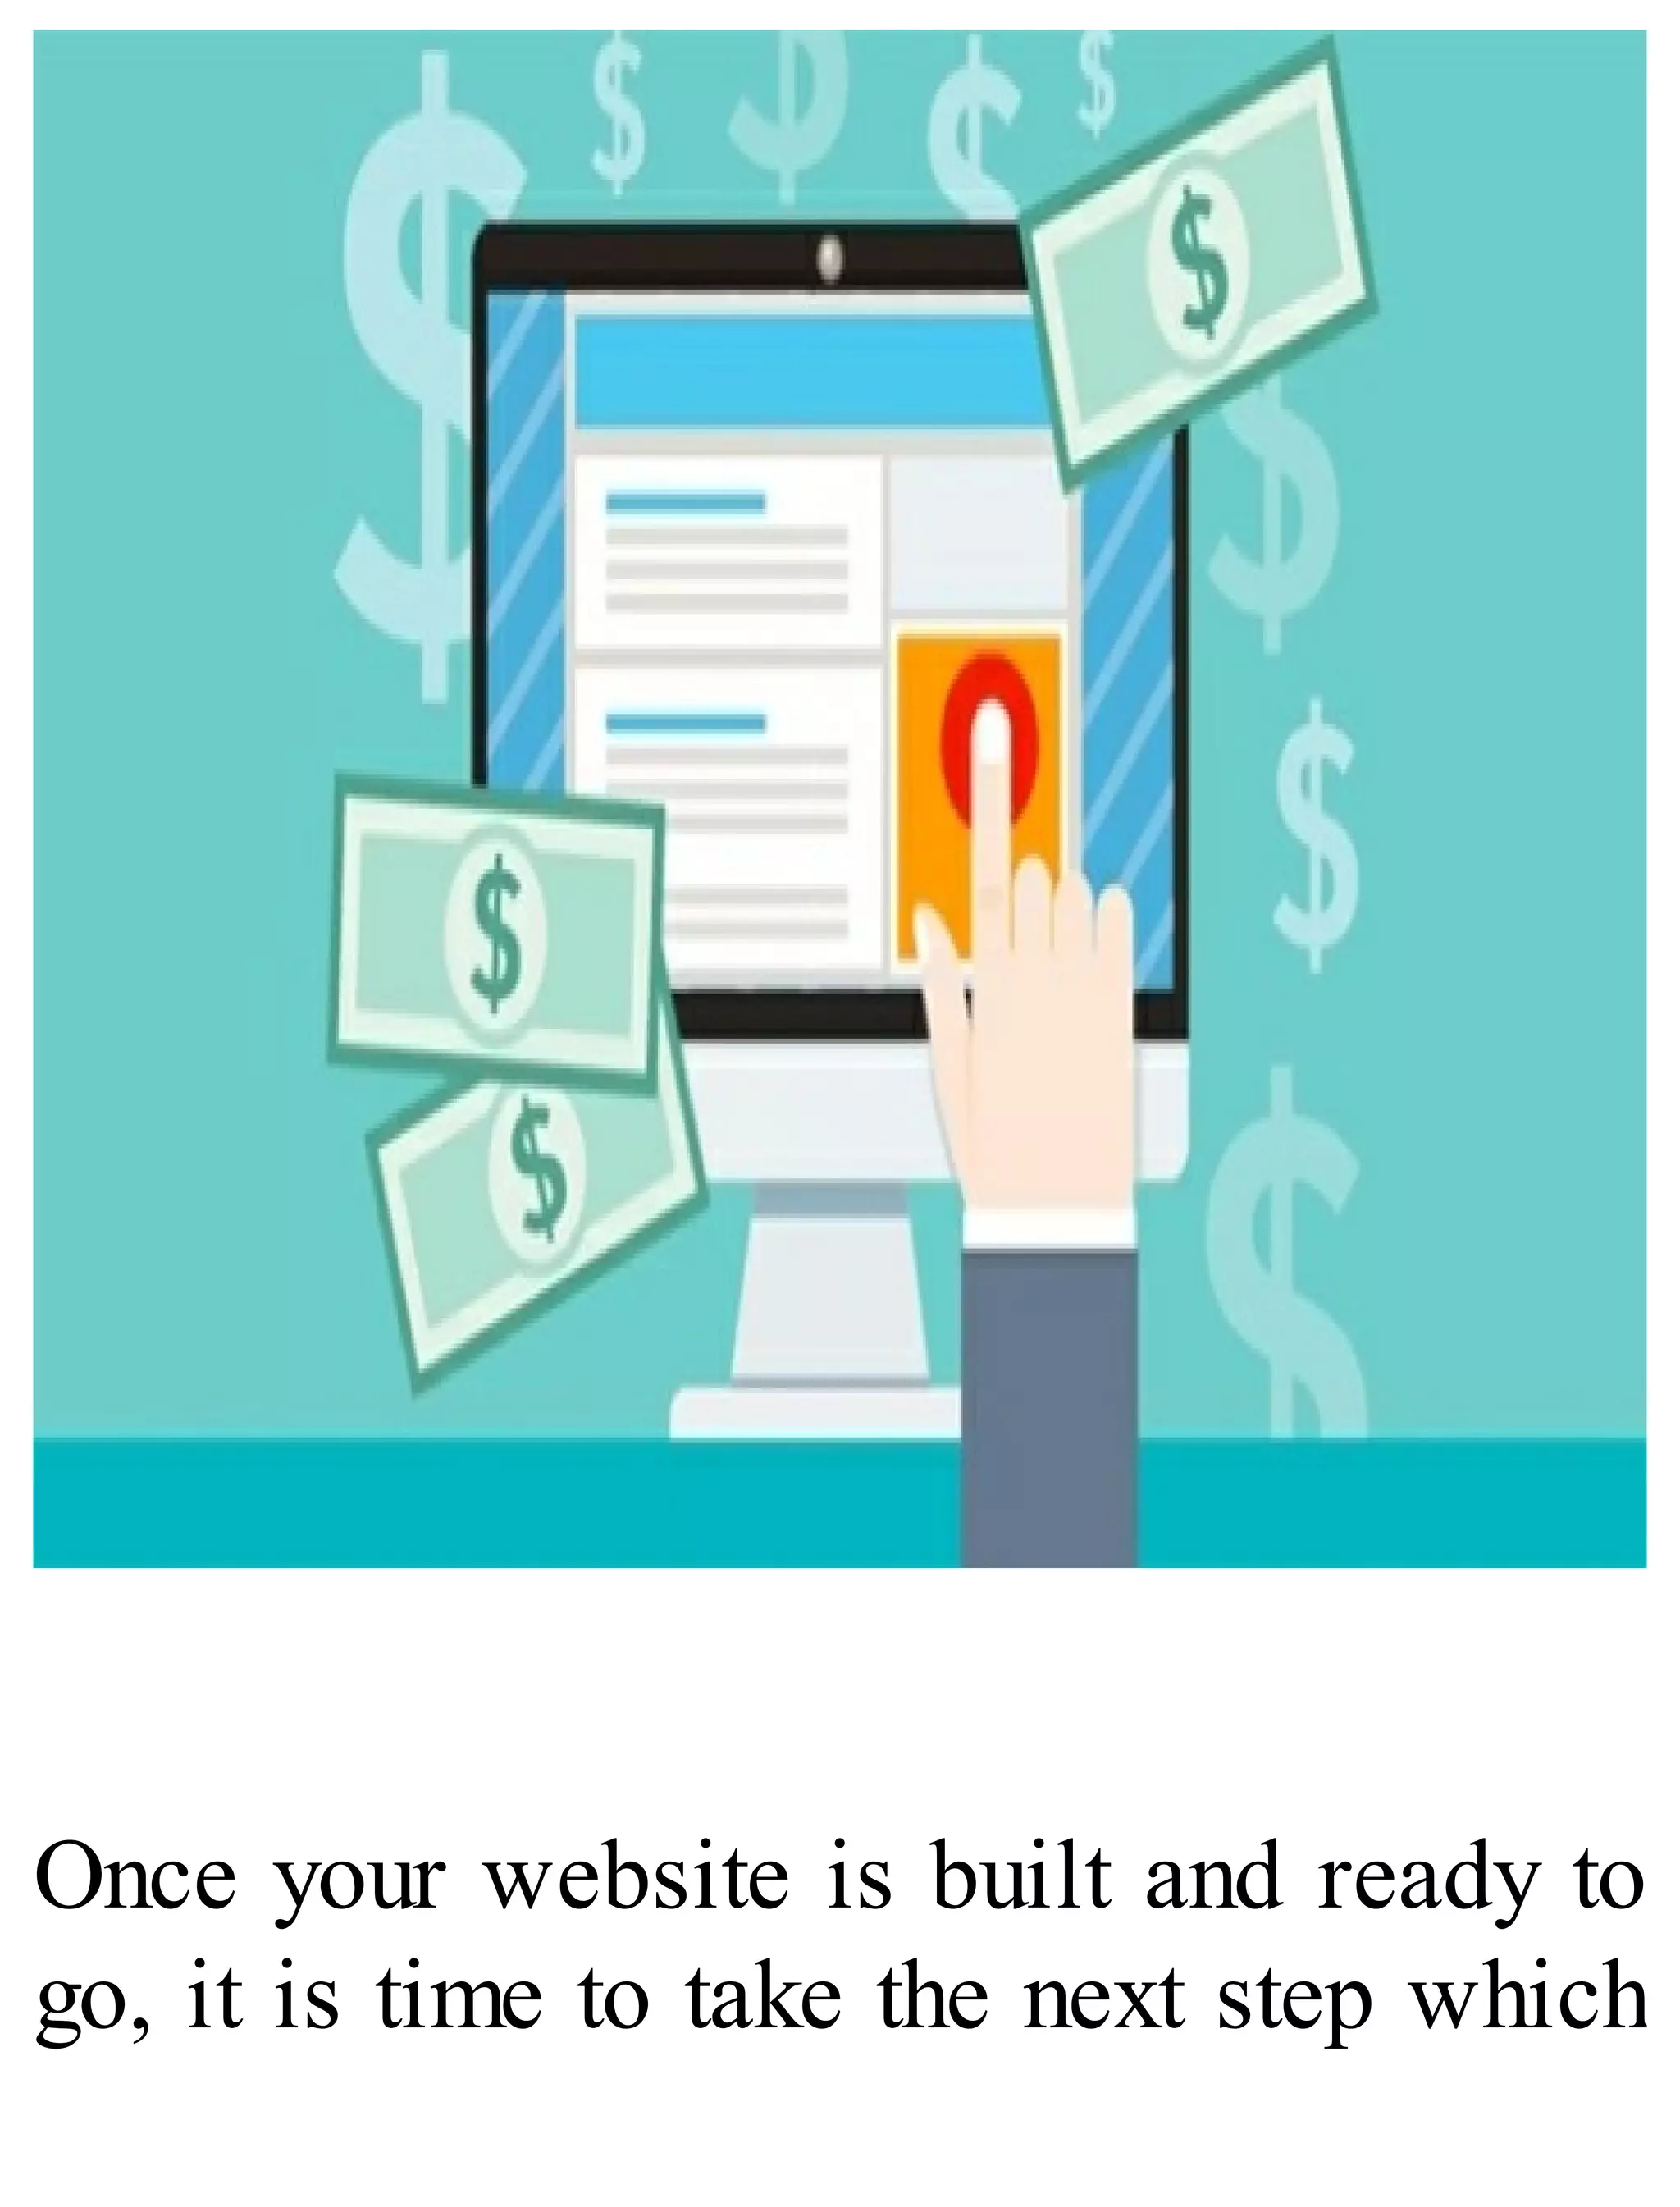
How to Make a
Website for
Beginners
Learn How to Make Your
Own Website from Scratch
with WordPress!
 
By
Jackson Smith
Copyright 2017 Jackson Smith
Kindle Edition
License Notes
No part of this Book can be reproduced
in any form or by any means including
print, electronic, scanning or
photocopying unless prior permission is
granted by the author.
All ideas, suggestions and guidelines
mentioned here are written for
informative purposes. While the author
has taken every possible step to ensure
accuracy, all readers are advised to
follow information at their own risk. The
author cannot be held responsible for
personal and/or commercial damages in
case of misinterpreting and
misunderstanding any part of this Book
Table of Contents
Introduction
Planning Your Website
Determine the Theme of Your Website
Content
Deciding on a Name for Your Website
Getting Inspired from Other Websites
Buying Domains and Hosting Them
Properly
Step One: Choose the Perfect Domain
Name
Step Two: Choose A Domain Name
Provider
Step Three: Choose Your Domain
Name
Step Four: Register Your Domain with
The Domain Provider You Have
Chosen
Step Five: Choose A Hosting Service
Step Six: Setting Up Name Servers for
Your Website
Installing WordPress
1. Clear the Cache on Your Web
Browser
2. Wait It Out
Configuring Your WordPress Setting and
an Introduction to Search Engine
Optimization
Website Themes and Installing
WordPress Plugins
Choosing Your Personal WordPress
Theme
Adding Plugins to Your Website
Installing Google Analytics on Your Site
and Setting Up an Automated Newsletter
Installing Google Analytics
Setting Up Your Own Automated
Newsletter
The Ten Most Common Ways to
Monetize Your Website
1. Affiliate Marketing
2. PayPerClick Advertising
3. Sell Ad Space on Your Website
4. Sell Your Own Digital Products
5. Accepting Donations from Your
Website Visitors
6. Accept Sponsored Articles and Posts
7. Generate “Leads” For Other
Companies
8. Build Up an Email List
9. Setting Up Your Own eCommerce
Website
10. Flipping Websites
Top Five Ways to Gain Traffic to Your
Website
Create Great Content
Create a Podcast
Video Marketing
Document Sharing
What to Do
Where to Submit Documents
Utilize Infographics
Conclusion
Author's Afterthoughts
Introduction
The ability to make your own website is
one of the most important fundamental
skills that is needed in today’s high tech
modern world. As time passes, this skill
becomes even more important as today’s
technology grows. These days it seems
that every person and every company has
a website!
Luckily, in today’s age few skills are
needed to build your own website fr0m
scratch. Back in the 1990’s, in order to
build a website, it was necessary to not
only build it manually, but to also learn
coding as well in order to get your
website to do what you want it to do.
Learning how to program websites can
be very frustrating and can take years to
learn.
In today’s world, we live in the era of
WordPress making it unnecessary to
know how to build a website manually.
It is no longer necessary to spend years
learning coding or programming.
WordPress is a website building system
that is extremely easy to use and can
even enable the user to build sites using
his own domain name.
Over 15% of all websites currently
online today are made with WordPress.
With your own WordPress website, you
can easily build any type of website
based upon what you want it to do and
how you want it to look. This type of
website doesn’t require much work and
it can be built in just a matter of minutes.
This book will show you how to build
your own website based upon your
needs and without countless hours of
coding required. You will learn how to
build your own WordPress website from
scratch in an easy to follow, step-by-step
fashion, and even learn of different ways
to monetize your website.
So, let’s get started!
Planning Your
Website
Before you can even begin thinking of
building your website, you need to plan
what you want it to look like.
Understand that building your own
website is going to be a journey within
itself and the more it is planned and laid
out, the better it will come out once it is
finished. Building your own website is
going to take some preparation on your
part and in this section, you will learn
how to plan out your site so you don’t
waste precious time in the process.
Determine the Theme of
Your Website Content
The first question that you should ask
yourself before jumping in to build your
website is what kind of content do you
plan to publish on your site? Are you
going to create a blog? Are you creating
a company website for your business?
Are you going to write about the things
that interest you the most?
Once you have a basic concept in your
mind, grab a pen and a piece of paper.
Sit down and write out what your
content is going to be about. I highly
recommend coming up with content
ideas that you are passionate about and
that you have the most knowledge in.
Once you have written down your ideas,
go back over them and choose the topic
on which you can write the most
information. This is the core content that
you will want to utilize when it comes
to building your website.
Deciding on a Name for
Your Website
Now that you have started to get
your creative juices flowing, the next
thing to do is decide on a name for your
website. The best way to do this is to
use a pen and paper and write down as
many names that interest you as possible.
However, when creating these names,
make sure to come up with names that
are easy to remember, short, and of
course, unique.
I highly recommend staying away from
website names that aren’t generic and
that aren’t obvious.
Some great website names include:
Epinions
Teva
Petfoodio
DamnDelicious
Getting Inspired from
Other Websites
There are a number of different online
websites and blogs that can be looked at
online to get inspiration to build your
own website. You may already know of
your favorite websites off of the top of
your head.
When looking at these other blogs and
website, make sure to carefully
examine the design of the website and
especially how the content is structured.
Take note of what is most appealing
about these sites. Keep this in mind
when building your own site so you can
have a website that you are proud of and
that your own visitors will like as
well. 
Buying Domains and
Hosting Them
Properly
Before you can even begin to think about
building your website, the first thing that
you are going to have to worry about is
purchasing a domain name and hosting
the domain name. In this section I will
walk you through this process step-by-
step so we can start the building blocks
of website development.
Step One: Choose the
Perfect Domain Name
The first thing that you are going to have
to do is choose a provider and purchase
your domain name from them. This is
going to help to establish your presence
online and also give the basic
framework of your future site. Every
website ever built has started here and
yours will be no different.
Now, what you will first have to do is
decide on an actual name for your
domain. This name is going to reflect
your niche for your site and be used for
future branding purposes. This is going
to be your unique address where
potential customers will be able to find
you and your products.
While you are thinking of these special
domain names, make sure that you write
each idea that you have down.
There are many reasons you will want
to purchase your own unique domain
name. Some of these reasons include:
1. The ability to keep this domain name
regardless of any changes in the
company you host your domain with.
Since visitors can visit your site
using the direct URL, they will never
know the difference if you change
hosting companies.
2. Having your own domain name will
give your business credibility.
Without your own domain name, it is
harder for visitors to take your
business seriously or for them to
even see it as a professional
business. This can, in the end, help to
attract important people to your
website such as sponsors and
business contacts.
3. Having your own domain name that
matches your business is similar to
having your own phone number: it
makes it easier to remember. The
easier it is to find your site online,
the more traffic you will
have directed to it.
Step Two: Choose A
Domain Name Provider
Once you have thought of different
domain names that you wish to have, the
next step that you need to take is to
choose a domain name provider. These
are the companies that you will purchase
your domain from and even host your
domain with if you so choose. There are
many different kinds of domain name
providers out there but the best ones I
recommend include:
NameCheap
GoDaddy
SquareSpace
Wix
Each of these domain name providers
make it easy to purchase your very own
domain for just a few dollars a year.
Typically, your own domain will range
in price but most domains are offered for
less than $10 a year if that particular
name is available.
Step Three: Choose
Your Domain Name
While you may have already chosen a
name that you wish for your domain
name, you must see if it is even
available. Most domains, if they are
being named via a long tail keyword
tend to be more readily available.
Once you have decided on a domain
name, the next step is to figure out is
whether to purchase a .COM, .NET or
.ORG address.
What is the difference between these
names?
There are several difference between
these names and it is important for you to
know the difference before purchasing
your own domain. The main difference
between these names are listed below.
.Com
A .com domain is one that can be
purchased by any person and any
company. It is considered to be one of
the most popular domains that can be
purchased, and thus there is some
competition when it comes to popular
names. These types of names hold
appeal worldwide and even locally as
they can last 1 to 10 years on average
and are the types of domains that many
people often turn to when searching for
something online.
.Net
A .net domain is another domain that can
be purchased by any person and any
company that wishes to own one. A .net
domain is often purchased when a
person wishes to conduct networking
through it, but in truth, it can be used for
any purpose. It is a domain name that is
appealing to both small business owners
and corporations. However, it does have
its limitations such as the fact that spaces
and special characters cannot be used
when coming up with the domain name.
.Org
While this type of domain name can be
purchased by any person who wish to
buy it, it is more likely to be purchased
by large organizations, though it is open
for purchase by anybody. Specifically,
most non-profit organizations tend to
purchase these domains. Moreover, this
type of domain can be registered
privately, giving it more of an appeal to
those who want to keep the details of
their domain anonymous.
Step Four: Register Your
Domain with The
Domain Provider You
Have Chosen
Once you have chosen the particular
domain you want and have checked to
see if that name is available, the next
step is to register your domain with the
domain provider you have chosen. This
is easy enough to do as all you have to
do is pay the allotted fee for the domain.
Most domain name providers charge no
more than $11 a year for the domain.
Step Five: Choose A
Hosting Service
The next thing that you are going to
want to do is choose a hosting
service to host your domain on. Now,
this is going to be an important step
for you to take as it will have an
effect on what you are going to be
able to do with your website.
To choose the right hosting service, it
is ultimately going to depend on
what you are looking to do with your
website. There are a few things that
you are going to have to consider
when it comes to choosing the right
hosting service.
Choose whether your website will
host advertisements or if you are
looking to offer an ad-free
experience to your users.
What kind of uploading space you
want to have on your site. This is
extremely important especially if you
are going to build a website to hold a
lot of videos or photos as this will
determine the price of your hosting.
How reliable your hosting is for your
website needs. The one thing that you
should always look for when it
comes to hosting is reliability in
running your site. Make sure the
hosting company offers a way to
recover lost data and never has any
gaps in availability.
Look at speed of access. Make sure
that your website speed isn’t too
slow as you can possibly deter
people from visiting your website at
all. You want to make sure that you
go with a hosting company that offers
a few speed packages to boost the
speed of your website.
The allotted bandwidth that is
provided. Keep in mind that most
hosting companies often have a limit
on the amount of traffic that you can
receive to your website on any given
day. So, if your own website exceeds
those limits, your site will go down
temporarily. While you obviously
may not want this to happen, you can
choose hosting companies that off
more bandwidth limits.
Choose a hosting company that is
compatible with WordPress. This is
essential since that is the kind of site
you are going to learn how to build in
this book. You want to make sure that
you choose a hosting company that
not only offers the option to build
your website via WordPress, but
also offers support for it as well.
The last thing to consider about a
hosting company is obviously price.
There are many hosting companies
out there that will have different
price packages available to go along
with your website needs. Each price
package is going to have its own
limitations on available bandwidth,
total space, and file size. So
ultimately you will need to determine
your own website needs before
determining what you are willing to
pay to host your website.
Step Six: Setting Up
Name Servers for Your
Website
Once you have purchased your domain
name and have purchased the hosting, the
next important step is to set the name
servers. The reason you want to do is
this is so that your domain name will
appear exactly as the name of your
website with your hosting company and
this is something that will have to be set
up manually.
Every domain host will have different
protocols when it comes to this and the
best solution will be to ask your web
host directly. However, these are the
basic steps.
1. Go to your account.
2. Click on manage domains.
3. Click on the name of the domain that
you have recently purchased.
4. Transfer the DNS setting to the Web
Host.
5. Choose custom DNS settings if that is
an option for you.
6. Type in the URL of the location 0f
your web host. Click save and you
are set.
The moment this is done your traffic will
go directly to your website the when
people type the domain name into the
address bar in their search engine.
With your domain name purchased and
the hosting set up, there isn’t much left
for you to do but begin building your
own website!
Installing WordPress
So, before we actually begin to install
WordPress, we need to understand what
WordPress even is. WordPress is an
online open source website building tool
that is probably considered to be the
easiest and perhaps most powerful
content management system for blogs
and websites that exists today.
The next step in the website building
process is to install WordPress on your
domain. You need to understand that
when I say install WordPress, it does not
mean that you need to install it on your
PC as many website hosting companies
will invite you to do. The good news is
that once you install WordPress on your
domain, you never have to worry about
doing it again.
There are multiple ways that you can
download WordPress onto your domain,
but perhaps the easiest and most
effective way is to do so from the
dashboard of your web host. There
should be an area that you can click to
manage your domains. In this area, you
should be able to access settings such as
upgrading your hosting package, opening
up support tickets, and adding add-ons to
your domain. This is the area that you
are going to run your business from so
make sure that you familiarize yourself
with it as much as possible.
The area that you will want to access is
your cPanel. Once there, scroll down
until you find a button that reads,
“WordPress” and under that you will
need to click the Install option. Once you
are at the install window you will need
to configure a few options as follows:
Choose the Protocol: on this option
make sure that you select the http://
option
Choose the Domain: pick the
domain name that you want to install
WordPress.
Site Name: pick the name of your
future website. Don’t worry, you can
always change this later on.
Site Description: this is going to be
the tagline of your site. For this
section I highly recommend using one
keyword to target.
Admin Username: Pick a username
that visitors to your site will get to
know you by. Don’t just choose
admin.
Admin Password: this is going to be
the password that you use to access
your website. Make sure to pick a
password that will be hard for others
to figure out.
Admin Email: pick an email address
that can receive alerts for your
website. Any email will suffice.
Auto Upgrade: check this option so
you don’t have to manually install
WordPress updates on your website.
Finally press Install and now your
website will have access to WordPress.
To double check that you have done it
correctly, type your domain into your
web browser. What you should see upon
typing in your domain is a plain website
without any information listed upon it
except for a post title that reads, “Hello
World.”
If by chance you aren’t seeing this
default installation, there are a few
things you can try before you have to
reach out to support.
1. Clear the Cache on
Your Web Browser
There are many different ways that you
can do this but of course it will
ultimately depend on what web browser
you are using. If you are unsure of how
to do this for your particular web
browser, I highly suggest looking up
instructions on Google and following
them precisely. This is something that
will only take you a few minutes to do.
Once your cache is clear I highly
recommend that you reload your
browser to see if the default WordPress
installation appears.
2. Wait It Out
Sometimes it just takes some time for the
default browser to appear when you
look up your domain. It can take up to 24
hours to appear, but it can take even
longer than that. I suggest waiting at least
a day if you need to for your WordPress
installation to appear.
If none of these solutions have worked
for you, then I suggest contacting your
hosting support or even going as far as
contacting WordPress support if need
be.
Configuring Your
WordPress Setting
and an Introduction to
Search Engine
Optimization
Once you have installed WordPress onto
your website and have successful logged
in to the admin dashboard, the next thing
that you will want to do is configure a
few settings within your dashboard and
begin to get your feet wet in the world of
Search Engine Optimization. Be jumping
into the setting section of your
dashboard, make sure that you are
working with the latest version of
WordPress that is currently available.
Not only will using the most updated
version of WordPress help to keep your
website secure, but it will also ensure
that your site is running as smoothly as
possible.
Now, it is time to update some of the
settings. To do this, go to the left-hand
sidebar of your dashboard and look for
the “Settings” option. From there you
will want to click on the subsection that
you wish to modify. In this section, you
will find the most important setting so
make sure that you familiarize yourself
with this section.
Here is a list of different settings
subcategories that you are going to want
to update as soon as possible.
1. General Settings
In this section, you will be able to
modify a few crucial components of your
website such as the website title, the
tagline (if using) and the email that you
want website notifications sent to. This
section should be filled in when you
initially install WordPress, but you can
update it as you see fit.
2. Reading Settings
This is the section that you will have to
decide what to display on the homepage
of your site. Here you can choose
between showing blog posts or a static
homepage. You can even choose to have
your latest blog posts show up.
3. Discussion Settings
In this section, you will be able to
configure the options for people to
comment on your blog posts. If you are
running a blog that will encourage a
discussion by your visitors, you can
allow people to comment on your posts,
and you will be able to configure
whether or not you want these comments
to appear on your website right away or
whether you want the option of
approving them before they appear.
If you have a business website set up
and don’t want users to leave any
comments, you can turn this option off as
well. If the option is set to “off”, then
visitors to your site won’t have the
option to leave a comment on any of
your posts.
4. Permalinks Settings
If you are not sure what a permalink is, it
is simple the URL that is designated to a
blog post or blog page. So, in other
words, when configuring these settings,
you want to decide what the URL of
each blog post or page is going to be?
This is an important setting to configure
for SEO or Search Engine Optimization
Purposes.
Website Themes and
Installing WordPress
Plugins
The next step in building your
WordPress website is setting up your
own custom website theme and installing
a few essential plugins that are needed
for your website to run smoothly.
WordPress itself makes it incredibly
easy to switch up the look of your site by
utilizing themes that are incredibly easy
to install.
Choosing Your Personal
WordPress Theme
When it comes to themes, there are
literally thousands of free themes that
are available for download online and
best of all many of these themes can be
accessed directly from your WordPress
dashboard. To add a new theme to your
website, just go to the left-hand sidebar
and scroll down until you see the option
“Appearance.” Once there hold your
mouse over the option and click on the
option “Themes.”
Once you are in the Themes section, go
to the top section of the page and click
“Install Themes.” Once there head to the
search section and here you will find the
various free themes that you can use to
personalize your website. You can even
customize your search by checking the
various options available to find
specific colors and features that are
offered with different themes.
If you have found a particular theme that
you like, click on the Theme preview
itself. Once there, click the “Install”
option and it will automatically install
for you. Once your new theme has been
updated, refresh your web browser
before heading to the main page of your
site. There you should be able to see the
new theme. If you are satisfied with it,
go back to your dashboard and begin
customizing it to your liking.
Adding Plugins to Your
Website
Once you have a theme set up, the next
thing to do is begin to add plugins to
your website. Plugins are one feature
exclusive to WordPress and that help to
give you the ability to do pretty much
whatever you want with your site,
without having to write any coding or
hire a professional programmer to do it
for you.
Plugins are pieces of software that are
developed to be installed on your
website to accomplish a certain task.
Think of plugins as a sort of app to
enable your website to do various things
such as coming up with a price
comparison chart, setting up a contact
form, setting up a review post,
subscribing to your social media
profiles, adding in a forum, setting up an
e-commerce store etc.
To install a plugin on your website, you
will need to head to the left-hand section
of your WordPress dashboard. Once
there, scroll down to the “Plugins”
option. Click on it and once you are on
the plugins screen you should see a list
of plugins that are currently installed on
your website. To add new plugins head
to the top of your plugins page and click,
“Add New” option. In the search
section, search for the specific features
that you are looking for in a plugin. Once
you have found a plugin that meets the
needs of your website, just click on the
install option and it will install
automatically onto your site. As soon
as the plugin is installed, click the
Activate option for it to begin running.
However, once your plugin is installed,
your work is still not completed. From
here you will need to configure your
plugin via the plugin options menu so
that it will do exactly what you want it to
do. To do this just head back to the
Plugins section listed on the left-hand
side of your WordPress dashboard and
find the plugin you have recently
installed. Click on the “Settings” option
and configure it as you wish.
There are a few plugins that I highly
recommend you install on your website
the moment you install WordPress.
These plugins will not only help to
ensure that your website runs smoothly,
but also give it a professional feel to
those who visit your website.
1. CometCache
This is the perfect plugin to download if
you want to increase your website speed
naturally. It is incredibly easy and
simple to use and just as effective. It is
so easy that you can download it in just
under 2 minutes. Since website visitors
expect your website to load as quickly
as possible, this is the perfect plugin to
use to do just that.
2. Simple Author Box
This plugin attaches a responsive author
box at the bottom of your pages and
posts. This author box also allows you
to attach social media icons to your
posts which allows your visitors to
share your posts to their friends with
ease.
3. SI Captcha Anti-Spam
This plugin allows you to add a secure
image CAPTCHA which can help
prevent spam from appearing in the
comments section from humans and bots
alike. It can also be used for websites
that contain lost password options,
registration, WooCommerce websites
and login forms.
4. Contact Form 7
If you wish for your website visitors to
have the option to contact you directly,
then this is the perfect plugin for you to
download. This form allows visitors to
fill in their information allowing you to
personally contact them. Not only does
this help to give your website a more
professional look, but it also gives the
ability to keep your personal email
anonymous.
5. All-In-One SEO Pack
This is the perfect plugin if you plan on
using SEO practices to rank your
website. It allows you to fully configure
your website titles and gives you full
control of on page search engine
optimization on all of your posts and
pages.
6. Google XML Sitemaps
What many website owners just starting
out don’t realize is that in order for your
website to be ranked within the search
engines, you need to generate a sitemap
for it. This can be complicated if you do
not know how to do it from scratch, but
with the help of this plugin, you can have
a sitemap generated for your site
automatically. This plugin will help
search engines find your website and
update them within the search engine as
soon as you update it.
7. Exclude Pages from Navigation
This plugin gives you the option to
exclude pages from your main menu bar
on the current page you are editing. Upon
installation, this plugin will include a
checkbox that you can check off or on
within the page or the post you are
editing.
8. Tweet, Like, Google +1 and Share
If you wish to include social media
share links within your posts and pages,
then this is the perfect plugin to install
on your site. This will add not only
simple social media icons to your posts
and page, but it will also include
attractive and professional designs to
make your posts more shareable.
Every one of these plugins included in
this list are free for download. You can
do everything you need to do with these
simple plugins. Additionally, they all
have premium downloads available if
necessary.
Installing Google
Analytics on Your
Site and Setting Up
an Automated
Newsletter
In this section, I will explain a few
advanced things that you will want to do
with your site to get it up and ready for
business when it launches. In this
section, I will explain the importance of
setting up tracking and an email list to
those who visit your website.
Installing Google
Analytics
Installing Google Analytics onto your
site is incredibly important for any
person who wants to build a website. It
allows you to see firsthand important
data regarding your visitors. You will be
able to know where your visitors came
from, what pages are the most popular
upon your website, what keywords your
visitors typed in the search engine to
find your website, and what referral
websites your website is currently
linked to.
While there are plenty of tracking
programs out there that you can use for
your website, there is none that are as
good and as powerful as Google
Analytics. It is one tool that you NEED
in your website building arsenal.
To set up Google analytics on your
website, just follow these easy steps.
1. Go to www.google.com/analytics
and sign up for your free account
using your GMAIL.
2. Once you have set up your free
account, set up a property, which is
going to be your website.
3. Once you have set up a website,
retrieve your Google Analytics
tracking code. To do this click on
your website and go to the Admin
section. From there head on over to
the Property section and click on
“tracking info.”
4. Click on “tracking code” and copy
the code given.
5. Head over to your WordPress
dashboard and on the left-hand
corner, scroll down to the
appearance option. Allow your
mouse to hover over it and scroll
down to the editor section.
6. On the editor screen go to the right-
hand side until you find the
“header.php section.” Click on it and
look for the code <head> section of
the page.
7. Paste your tracking code directly
underneath this section and click
“update file.”
8. Reload your website and go to the
main page.
9. Go back to your Google Analytics
and look at the Real-Time data. Your
computer should now show up as a
visitor on your website.
You should now be able to track every
visitor that comes to your website.
Setting Up Your Own
Automated Newsletter
No website can truly be complete until
you set up your own personal newsletter
for subscribers. Every viable business in
the world needs to have an email list in
order to be successful and yours will be
no different. This is going to be the main
way that you will be able to make money
with your site and is the one thing that
will set you apart from your competition.
There are many advantages to setting up
your own email marketing list such as:
Your mailing list can be used even if
something happens to your website.
It is a much more personal way for
you to communicate with the visitors
on your website.
It can help you build trust with your
website visitors.
It is the easiest way to promote
affiliate products or your own
products for sale in order to make
money.
In order to set up your own email
marketing list, find a company that offers
that service. The best programs that I
recommend include Mail Chimp or
Aweber. Once you have your own
account set up with either of these
companies (each offers a free trial
before paying monthly for the service),
you can begin crafting professional
looking newsletters to your subscribers.
Here are a few tips to making the most
out of your email newsletters:
1. Set up your email list as soon as you
set up your website. The sooner your
email list is set up, the sooner you
can begin collecting email addresses.
2. Offer a freebie for your audience as
soon as they sign up. I highly
recommend offering something that
won’t take you too much time to put
together such as an eBook or a free
training series.
3. Always ask your subscribers to
“white list” your email address so it
isn’t blocked by spam filters within
their email service.
4. Make sure that the sign-up form for
your newsletter is easily seen on
your website. You want to make sure
that visitors signing up to your list a
top priority.
5. Make sure that you update your
subscribers on new content on your
site every week by sending out
broadcasts. This will help your
visitors to stay up-to-date with all of
your content.
6. While it is true that your email
campaign is a platform for you to
utilize in order to sell and promote
various products in order to make
money, you don’t want to promote
products in every newsletter that you
send out. Sell to your visitors
sparingly and instead focus on
delivering high quality and useful
content to them instead.
The Ten Most
Common Ways to
Monetize Your
Website
Once your website is built and ready to
go, it is time to take the next step which
is to officially monetize it. There are
many different ways to monetize your
site and no one way is the right way.
Making money with your own website
isn’t easy, but the following are ten
different ways that will make this easier
for you.
1. Affiliate Marketing
Affiliate marketing is perhaps one of the
most popular, if not fastest way, to make
money with your own website. The best
way to utilize affiliate marketing is to
find products to promote that are within
your specific niche. Once you have
chosen these products, you can just
endorse it within the content of your
website, within your email newsletters,
and to visitors of your website. If
people like the product that much, they
will click on the affiliate link you are
promoting and purchase the product. In
turn you will gain a commission from
these sales.
You need to keep in mind that the
commission for these products will
range depending on what they are and
sales price. Most products have a
commission of 30% or can even be as
much as 90%. While it may not seem
like a lot of money at first, if you gain 20
sales in a day, that amount can add up
quickly.
2. PayPerClick
Advertising
Another great way to monetize your
website is to utilize pay-per-click
advertising. The most popular platform
for this kind of advertising is Google
Adsense. Google Adsense is a platform
run by Google that allows website
owners and publishers to utilize
Google’s massive advertising network
to run ads on your own site and earn
money in the process.
One of the many reasons Adsense is so
popular is how simple it is to use. The
moment you sign up for an account with
Adsense, you can get a special code for
each ad you want and you can easily
embed it into a post on your website.
The ads that are then displayed on your
website are relevant to your niche and
will show ads that your visitors are
going to be interested in.
The way that this type of monetization
works is that you are paid every time a
person clicks on these ads. While you
are not paid a great deal of money for
these ads, if you have plenty of traffic,
you can easily make a couple thousand
dollars every month.
3. Sell Ad Space on
Your Website
Instead of turning to Google Adsense to
monetize your site, another option is to
offer ad space directly on your website.
The only way this method of monetizing
your website is viable is if you get
plenty of traffic to your website on a
daily basis. The best part about this
method is that you can charge whatever
you want for this space, whether it is a
monthly price or a one-time price.
Typically, you will want to charge those
interested per one thousand impressions
their ad gets on their website. So, for
example, let’s say you are charging
someone $5 per 100,000 visits a month,
that cost will equate to $500 a month just
for you. If you get even more traffic than
that you can earn as much as $5,000 a
month!
4. Sell Your Own
Digital Products
It is true that for you to make the most
money with your own website, you will
need to offer products that you have
created directly. The main reason for
this is that there is no middle man
involved between you and potential
customers. That means there is no other
person taking a cut of the money that you
earn.
This is a very straightforward approach
because as soon as you sell any of your
products, you can earn money on them
immediately. However, as simple as that
may sound, it is a bit more complicated
than that.
5. Creating your own digital products
and then publishing them will require a
ton of time on your part. There are also
a number of additional “hidden costs” to
making these products such as time
involved and monetary costs in hiring
others to help you put these products
together. Other things that you need to
consider as well are how you are going
to collect payment, how are you going to
ship products out if they are physical
products and figuring out taxes as well.
5. Accepting Donations
from Your Website
Visitors
This is a great option for people who
don’t have a large number of people
visiting their website but have a strong
community of visitors that they are
engaged with. If you have this type of
community aspect with your own site,
simply ask your readers to help you keep
your site going and contribute.
What you need to keep in mind is that
this kind of monetization isn’t going to
put you on the road to great wealth. What
it can do is help you to cover some of
the short-term expenses that it takes to
maintain your website and will help to
support your website in every way such
as helping to cover costs of creating
products, covering the cost of research
and even helping to cover the cost of
hosting your website every month.
6. Accept Sponsored
Articles and Posts
Another common way to make money
with your website sometimes means
increasing the amount of people visiting
your website on a monthly basis. Once
you have built a steady stream of traffic
to your website, there are going to be
websites that will contact you to feature
your site. These sites will feature your
content on their own company website,
especially if it is relevant to their own
niche.
Not only is this a great way to promote
your website, but it is a great to build
your monthly visitors in the process.
7. Generate “Leads” For
Other Companies
Online businesses, and most businesses
for that matter, thrive financially when
they have new leads coming to their
website every day. With that in mind, it
is no secret that many of these
businesses are always on the lookout for
ways to help grow their customer base.
This is a great way for you to become
the middle-man and introduce both those
interested in a niche and a company that
is offering what the customer needs
without much work on your part.
This type of monetization works
similarly to affiliate marketing, but in
your case, you don’t have to worry about
promoting one product in order to gain a
commission. Your customers are more
interested in finding more information
that you can give them at this point.
8. Build Up an Email
List
Without an email list, most websites will
fail to make money. There is a saying
online which is, “the money is in the
list” and it is one saying that you want to
live by especially when building your
website. An email list is usually
comprised of subscribers who read your
blog posts loyally and the main goal of
this list is going to be to convert these
strangers into passionate subscribers
who want to stay up-to-date with your
latest content.
The thing that you need to understand is
that building up an email list is a long-
term strategy to making money with your
website. Even though it takes some time
to build up, it is one of the best long-
term money making methods that you can
utilize today.
When building your email list, you want
to make sure to create a relationship
with your followers by offering helpful
information that will help them in
whatever they are coming to you for.
Never spam your followers with offers
that they don’t want. Doing this will
abuse the trust you have with your
readers and sabotage your long-term
business goals.
9. Setting Up Your Own
eCommerce Website
Remember, when building your own
website, you don’t just have to make it
about content alone. A website can be
whatever you want it to be and another
great way to monetize your website is to
turn it into an eCommerce site. This
website will be built in such a way that
you can center it on selling tools and
products in your own online store.
One thing to realize about this method is
that there are literally thousands of other
eCommerce websites out there, meaning
that competition is going to be tough.
Make sure that you find your own unique
niche and come up with your own unique
marketing strategy to make it work.
10. Flipping Websites
Another great way to monetize your
website is to flip it for a much larger
profit down the line. The way this
method of monetization works is
creating a site, building it up and then
selling it for a larger profit than you first
put into it.
Don’t get me wrong. This is a great
profit opportunity, especially if you have
a website that is currently getting traffic
and making money. It makes it more
appealing and more buyers are willing
to purchase it especially if they don’t
have to do too much work in order to
make money. However, I am more for
building something that is your own and
that will help you make money in the
long run. Still, this is a great method to
utilize if you want to make a quick
return.
Top Five Ways to
Gain Traffic to Your
Website
Once you have your website, the next
thing you are going to have to worry
about is driving traffic to it. Without
traffic, you will not make a dime with
your website nor will you be able to
promote whatever it is that are trying to
promote. You could have the best
product in the world, but without traffic
it will never be seen. In this section, you
will learn my personal top ways to gain
money to your website as easily as
possible.
Create Great Content
Perhaps the best way to start driving
traffic to your own website is to create
the best content possible. However, you
cannot just create ordinary content. You
need to make sure that you create content
that is as high quality as possible.
To start creating content, first come up
with your own ideas for your own
content. There are many ways to do this
but the ways that I recommend the most
include:
1. Reddit
Reddit is a great place to come with
ideas for your own content. You can find
a variety of subreddits that are related to
your niche so you can see exactly what
is a popular topic being discussed in
your niche right now. This is also
another great way to get visitors to visit
your website.
2. Google News
One of the most important tools that you
can utilize when coming up with your
own unique content is to utilize the news
to your advantage. The best tool for you
to use is Google news and search for a
keyword that is relevant to your niche.
With the help of Google news, you will
see what topics within your niche are
being discussed most not only by the
press, but also by popular websites
within your niche as well.
3. Buzzsumo
Buzzsumo is a website where you can
see what type of content within your
niche is being shared the most on
popular social media platforms. To use
this tool just search a specific keyword
and get some ideas of the type of content
you should write.
4. Google’s Top 10 Results
While this is not a strategy that is
considered to be new, it is nonetheless
effective. To utilize this method, Google
keywords related to your niche or the
desired topic that you wish to write
about. Take a close look at the top ten
sites and what their content contains to
give you an idea of what to write for
your own content.
5. Q and A Websites
Another great way to come up with ideas
for your topic is to utilize Q and A
websites to your advantage. You can see
in real time what questions people are
asking and what kind of solutions they
want. Once you see these questions for
yourself you can then draft your own
content that will answer these questions
for them.
Create a Podcast
Not everybody has time to stop and read
a new article on your website. This is
when creating your own podcast can
come in handy. A podcast is a way to
broadcast content on the Internet. It has
been shown that 20% of all people who
go online, listen to podcasts as they
search the web.
This is a great way to take advantage of
this 20% to bring traffic to your own
website. Just turn your articles into
audio versions and upload them onto the
most popular podcast distribution
websites.
In order to make your own podcast, you
are going to need a few things:
A basic computer
A good quality microphone
An audio program such as audacity
A topic related to your niche
The ability to format your audio and
content so that it is easy for viewers
to listen to
An editing software to edit your
podcast
Your website
Subscription buttons to place on your
website
Video Marketing
Another great way to drive traffic to
your website is to utilize the hottest
trend in marketing today which is video
marketing. It has been shown that people
tend to remember about 15-20% of what
they hear, but 30-40% of what they see
and hear. With the help of videos, you
can drive a great amount of traffic back
to your website with ease.
There are many different ways that you
can make videos today, but the most
popular methods include:
1. Actually Getting in Front of The
Camera
One way to create videos to bring traffic
to your website includes getting right in
front of the camera and explaining a few
key points from the article you wish to
talk about. When using this method,
make sure that you create a script that
you can use to read to keep your video
as organized as possible. Once you have
created your video, just upload it to a
video sharing platform and promote the
video on your own website.
2. Use Microsoft PowerPoint
Another thing that you can do is to create
a video by using a PowerPoint
presentation that you have prepared in
advance.
3. Record Your Computer Screen to
Make a Compelling Video
Another great way is to inform people
about your article by using a screen
capture software. Whether you want to
record a presentation, create a tutorial
using a special kind of software, or
want to do a thoroughly reviewed video,
then this is the perfect method for you to
utilize. There are different kinds of
screen recording software that you can
use, but the main programs that I
recommend using are:
Camtasia
OBS
TinyTake
Screenr
Ezvid
Regardless of how you make your
videos make sure that you follow these
tips:
Make Sure to Keep Your Videos Short
and To the Point-as a rule of thumb you
want to keep your videos below the 5
minute mark. Any longer and viewers
are most likely to end the video before
it’s actually finished.
Never Ignore Audio Quality-one of the
most important parts of your video is
audio quality. If your audio is bad, many
viewers will shut the video off so they
don’t have to hear it. That is why you
want to use a high quality microphone.
Even if you are creating a video of your
computer screen, make sure to add some
nice background music that goes with the
feeling of your video.
Make Sure to Create a Strong Call to
Action-an important part of your video
is to give your viewers something to do
towards the end of your video. This is
called your call to action and you want
to make sure that you include a call to
action at the end of every video such as
asking for your viewers to subscribe,
visit a website, or to leave a comment.
Upload to Various Video Websites-
While it is true that YouTube is known
for having the most traffic out of any
video site online today, that does not
mean that you should just upload to that
platform alone. Upload to various other
video platforms such as YouNow,
Vimeo, Metacafe, and Daily Motion.
Document Sharing
This is one way to gain traffic that many
web users don’t utilize on their own
websites. Document sharing is creating
an electronic file such as a word or .pdf
file to share useful information across
different websites. Document sharing is
a way to help increase brand awareness
in the niche of your choice which can
help increase the visibility of your own
website when searched in a search
engine. Thus it can help bring in lots of
traffic to your site as well as increase
the keywords your site ranks for in the
search engines.
There are plenty of document sharing
sites online today. However, the most
popular sharing sites gets up to 5 million
visits every single day and that number
is continuing to grow at least by 20%
each year. These sites are quickly
becoming the go-to site to obtain more
information regarding a specific
problem requires a solution.
With just a little bit of work and effort
on your part, you can generate a massive
amount of traffic back to your site for
many years to come.
What to Do
In order to utilize document sharing sites
to your advantage, there are a few things
that you are going to have to do. What
you will have to do includes:
1. Find an article on your website that is
a minimum of 700 words.
2. Copy only HALF of this article into a
Microsoft word document.
3. At the end of your article within your
word document, paste a link that links
back to the main article on your website.
4. Include a sentence at the end of your
article that says, “To continue reading
the rest of this article, click here.”
5. Save your article in word as a .pdf
file so that it can be easily shared on
these document sharing websites.
Where to Submit
Documents
As I have stated previously, there are
thousands of different document sharing
websites out there. However the best
websites with the most amount of traffic
include:
Srcibd
Docstoc
Google Docs
Calameo
Issuu
Slide Share
If you are going to include the full article
instead of just half as I recommended,
make sure that you include a strong call
to action in the middle and end of your
article for the best results. I also
recommend including various pictures
that will link back to your website or to
a sales pages as well.
Utilize Infographics
Back in the early days of online
marketing, infographics were highly
popular and to this day they still remain
a highly popular way to generate traffic
to your website. Infographics are a
perfect tool to use if you want to transfer
content quickly and make it visually
interesting to those who see it. They are
a great way for you to share complex
information in an easily understandable
format that is user friendly.
So, how do you create an infographic?
This is what you will want to do:
1. Think of a Layout
The first thing that you are going to have
to do is come up with a basic layout for
your infographic so you know exactly
what you want it to include. This is
something that you can do on a simple
sheet of paper or within a word
document.
2. Create It for Free
The next thing that you will want to do is
create your infographic. If you don’t
want to waste any money on it, then you
can always make it for free. Best of all
you don’t need to be a graphic designer
in order to do it. There are various
online tools that you can use to create an
infographic such as:
Canva
Picktochart
Venngage
Easel.ly
The main problem with many of these
free tools is that many of these programs
offer the same templates and layouts to
every person, so the chances of you
having a similar infographic to someone
else is actually quite high.
3. Hire A Designer to Create on For
You
This is an option for those who have a
bit of money to invest in their website. If
you don’t have any graphic design
expertise, then hiring an experienced
designer who has created infographics
before is the best option. You can find
people who provide this type of service
on various websites such as:
Fiverr
Dribble
Upwork
When hiring someone to create your
infographic, make sure that you check
out samples of their work beforehand
and have a sketch ready to make the job
easier for them.
Conclusion
As you can see from the help of this
book, creating your own WordPress
website from scratch (without any
coding necessary) is incredibly easier
than you may have been led to believe.
While your own WordPress website may
not be quite as versatile as websites that
are made from scratch with coding and
programming manipulation, it is easier
to make these sites, it can be up and
running in just a matter of minutes, and it
is extremely convenient for people with
no coding or programming experience.
I hope that by the end of this book you
have learned a thing or two about
building your own WordPress website
from scratch. I hope that you have seen
how easy it is to do for yourself and feel
encouraged to building your own
website. I also hope that you have
learned a few other things that you
weren’t expecting such as how to
monetize your site and how to drive
traffic to your website.
Now it is time for you get out there and
start building your own website from
scratch. Don’t forget to check out the
WordPress official website for constant
updates and answers to any question that
you may have.
Good luck!
Author's
Afterthoughts
Thanks ever so much to each of my
cherished readers for investing the
time to read this book!
I know you could have picked from
many other books but you chose this
one. So a big thanks for downloading
this book and reading all the way to the
end.
If you enjoyed this book or received
value from it, I'd like to ask you for a
favor. Please take a few minutes to post
an honest and heartfelt review on
Amazon.com. Your support does make
a difference and helps to benefit other
people.
Thanks!

How.to.make.a.website.for.beginners

  • 2.
    How to Makea Website for Beginners Learn How to Make Your Own Website from Scratch with WordPress!   By
  • 3.
    Jackson Smith Copyright 2017Jackson Smith Kindle Edition
  • 4.
    License Notes No partof this Book can be reproduced in any form or by any means including print, electronic, scanning or photocopying unless prior permission is granted by the author. All ideas, suggestions and guidelines mentioned here are written for informative purposes. While the author has taken every possible step to ensure accuracy, all readers are advised to follow information at their own risk. The author cannot be held responsible for
  • 5.
    personal and/or commercialdamages in case of misinterpreting and misunderstanding any part of this Book
  • 6.
    Table of Contents Introduction PlanningYour Website Determine the Theme of Your Website Content Deciding on a Name for Your Website Getting Inspired from Other Websites Buying Domains and Hosting Them Properly Step One: Choose the Perfect Domain Name Step Two: Choose A Domain Name
  • 7.
    Provider Step Three: ChooseYour Domain Name Step Four: Register Your Domain with The Domain Provider You Have Chosen Step Five: Choose A Hosting Service Step Six: Setting Up Name Servers for Your Website Installing WordPress 1. Clear the Cache on Your Web Browser 2. Wait It Out Configuring Your WordPress Setting and
  • 8.
    an Introduction toSearch Engine Optimization Website Themes and Installing WordPress Plugins Choosing Your Personal WordPress Theme Adding Plugins to Your Website Installing Google Analytics on Your Site and Setting Up an Automated Newsletter Installing Google Analytics Setting Up Your Own Automated Newsletter The Ten Most Common Ways to Monetize Your Website
  • 9.
    1. Affiliate Marketing 2.PayPerClick Advertising 3. Sell Ad Space on Your Website 4. Sell Your Own Digital Products 5. Accepting Donations from Your Website Visitors 6. Accept Sponsored Articles and Posts 7. Generate “Leads” For Other Companies 8. Build Up an Email List 9. Setting Up Your Own eCommerce Website 10. Flipping Websites Top Five Ways to Gain Traffic to Your
  • 10.
    Website Create Great Content Createa Podcast Video Marketing Document Sharing What to Do Where to Submit Documents Utilize Infographics Conclusion Author's Afterthoughts
  • 11.
  • 13.
    The ability tomake your own website is one of the most important fundamental skills that is needed in today’s high tech modern world. As time passes, this skill becomes even more important as today’s technology grows. These days it seems that every person and every company has a website! Luckily, in today’s age few skills are needed to build your own website fr0m scratch. Back in the 1990’s, in order to build a website, it was necessary to not only build it manually, but to also learn coding as well in order to get your website to do what you want it to do. Learning how to program websites can be very frustrating and can take years to
  • 14.
    learn. In today’s world,we live in the era of WordPress making it unnecessary to know how to build a website manually. It is no longer necessary to spend years learning coding or programming. WordPress is a website building system that is extremely easy to use and can even enable the user to build sites using his own domain name. Over 15% of all websites currently online today are made with WordPress. With your own WordPress website, you can easily build any type of website based upon what you want it to do and how you want it to look. This type of website doesn’t require much work and
  • 15.
    it can bebuilt in just a matter of minutes. This book will show you how to build your own website based upon your needs and without countless hours of coding required. You will learn how to build your own WordPress website from scratch in an easy to follow, step-by-step fashion, and even learn of different ways to monetize your website. So, let’s get started!
  • 16.
  • 18.
    Before you caneven begin thinking of building your website, you need to plan what you want it to look like. Understand that building your own website is going to be a journey within itself and the more it is planned and laid out, the better it will come out once it is finished. Building your own website is going to take some preparation on your part and in this section, you will learn how to plan out your site so you don’t waste precious time in the process.
  • 19.
    Determine the Themeof Your Website Content The first question that you should ask yourself before jumping in to build your website is what kind of content do you plan to publish on your site? Are you going to create a blog? Are you creating a company website for your business? Are you going to write about the things that interest you the most? Once you have a basic concept in your mind, grab a pen and a piece of paper. Sit down and write out what your content is going to be about. I highly recommend coming up with content ideas that you are passionate about and
  • 20.
    that you havethe most knowledge in. Once you have written down your ideas, go back over them and choose the topic on which you can write the most information. This is the core content that you will want to utilize when it comes to building your website.
  • 21.
    Deciding on aName for Your Website Now that you have started to get your creative juices flowing, the next thing to do is decide on a name for your website. The best way to do this is to use a pen and paper and write down as many names that interest you as possible. However, when creating these names, make sure to come up with names that are easy to remember, short, and of course, unique. I highly recommend staying away from website names that aren’t generic and that aren’t obvious. Some great website names include:
  • 22.
  • 23.
    Getting Inspired from OtherWebsites There are a number of different online websites and blogs that can be looked at online to get inspiration to build your own website. You may already know of your favorite websites off of the top of your head. When looking at these other blogs and website, make sure to carefully examine the design of the website and especially how the content is structured. Take note of what is most appealing about these sites. Keep this in mind when building your own site so you can have a website that you are proud of and
  • 24.
    that your ownvisitors will like as well. 
  • 25.
  • 27.
    Before you caneven begin to think about building your website, the first thing that you are going to have to worry about is purchasing a domain name and hosting the domain name. In this section I will walk you through this process step-by- step so we can start the building blocks of website development.
  • 28.
    Step One: Choosethe Perfect Domain Name The first thing that you are going to have to do is choose a provider and purchase your domain name from them. This is going to help to establish your presence online and also give the basic framework of your future site. Every website ever built has started here and yours will be no different. Now, what you will first have to do is decide on an actual name for your domain. This name is going to reflect your niche for your site and be used for future branding purposes. This is going to be your unique address where
  • 29.
    potential customers willbe able to find you and your products. While you are thinking of these special domain names, make sure that you write each idea that you have down. There are many reasons you will want to purchase your own unique domain name. Some of these reasons include: 1. The ability to keep this domain name regardless of any changes in the company you host your domain with. Since visitors can visit your site using the direct URL, they will never know the difference if you change hosting companies. 2. Having your own domain name will give your business credibility.
  • 30.
    Without your owndomain name, it is harder for visitors to take your business seriously or for them to even see it as a professional business. This can, in the end, help to attract important people to your website such as sponsors and business contacts. 3. Having your own domain name that matches your business is similar to having your own phone number: it makes it easier to remember. The easier it is to find your site online, the more traffic you will have directed to it.
  • 31.
    Step Two: ChooseA Domain Name Provider Once you have thought of different domain names that you wish to have, the next step that you need to take is to choose a domain name provider. These are the companies that you will purchase your domain from and even host your domain with if you so choose. There are many different kinds of domain name providers out there but the best ones I recommend include: NameCheap GoDaddy SquareSpace Wix
  • 32.
    Each of thesedomain name providers make it easy to purchase your very own domain for just a few dollars a year. Typically, your own domain will range in price but most domains are offered for less than $10 a year if that particular name is available.
  • 33.
    Step Three: Choose YourDomain Name While you may have already chosen a name that you wish for your domain name, you must see if it is even available. Most domains, if they are being named via a long tail keyword tend to be more readily available. Once you have decided on a domain name, the next step is to figure out is whether to purchase a .COM, .NET or .ORG address. What is the difference between these names? There are several difference between these names and it is important for you to
  • 34.
    know the differencebefore purchasing your own domain. The main difference between these names are listed below. .Com A .com domain is one that can be purchased by any person and any company. It is considered to be one of the most popular domains that can be purchased, and thus there is some competition when it comes to popular names. These types of names hold appeal worldwide and even locally as they can last 1 to 10 years on average and are the types of domains that many people often turn to when searching for something online. .Net
  • 35.
    A .net domainis another domain that can be purchased by any person and any company that wishes to own one. A .net domain is often purchased when a person wishes to conduct networking through it, but in truth, it can be used for any purpose. It is a domain name that is appealing to both small business owners and corporations. However, it does have its limitations such as the fact that spaces and special characters cannot be used when coming up with the domain name. .Org While this type of domain name can be purchased by any person who wish to buy it, it is more likely to be purchased by large organizations, though it is open
  • 36.
    for purchase byanybody. Specifically, most non-profit organizations tend to purchase these domains. Moreover, this type of domain can be registered privately, giving it more of an appeal to those who want to keep the details of their domain anonymous.
  • 37.
    Step Four: RegisterYour Domain with The Domain Provider You Have Chosen Once you have chosen the particular domain you want and have checked to see if that name is available, the next step is to register your domain with the domain provider you have chosen. This is easy enough to do as all you have to do is pay the allotted fee for the domain. Most domain name providers charge no more than $11 a year for the domain.
  • 38.
    Step Five: ChooseA Hosting Service The next thing that you are going to want to do is choose a hosting service to host your domain on. Now, this is going to be an important step for you to take as it will have an effect on what you are going to be able to do with your website. To choose the right hosting service, it is ultimately going to depend on what you are looking to do with your website. There are a few things that you are going to have to consider when it comes to choosing the right hosting service.
  • 39.
    Choose whether yourwebsite will host advertisements or if you are looking to offer an ad-free experience to your users. What kind of uploading space you want to have on your site. This is extremely important especially if you are going to build a website to hold a lot of videos or photos as this will determine the price of your hosting. How reliable your hosting is for your website needs. The one thing that you should always look for when it comes to hosting is reliability in running your site. Make sure the hosting company offers a way to recover lost data and never has any
  • 40.
    gaps in availability. Lookat speed of access. Make sure that your website speed isn’t too slow as you can possibly deter people from visiting your website at all. You want to make sure that you go with a hosting company that offers a few speed packages to boost the speed of your website. The allotted bandwidth that is provided. Keep in mind that most hosting companies often have a limit on the amount of traffic that you can receive to your website on any given day. So, if your own website exceeds those limits, your site will go down temporarily. While you obviously
  • 41.
    may not wantthis to happen, you can choose hosting companies that off more bandwidth limits. Choose a hosting company that is compatible with WordPress. This is essential since that is the kind of site you are going to learn how to build in this book. You want to make sure that you choose a hosting company that not only offers the option to build your website via WordPress, but also offers support for it as well. The last thing to consider about a hosting company is obviously price. There are many hosting companies out there that will have different price packages available to go along
  • 42.
    with your websiteneeds. Each price package is going to have its own limitations on available bandwidth, total space, and file size. So ultimately you will need to determine your own website needs before determining what you are willing to pay to host your website.
  • 43.
    Step Six: SettingUp Name Servers for Your Website Once you have purchased your domain name and have purchased the hosting, the next important step is to set the name servers. The reason you want to do is this is so that your domain name will appear exactly as the name of your website with your hosting company and this is something that will have to be set up manually. Every domain host will have different protocols when it comes to this and the best solution will be to ask your web
  • 44.
    host directly. However,these are the basic steps. 1. Go to your account. 2. Click on manage domains. 3. Click on the name of the domain that you have recently purchased. 4. Transfer the DNS setting to the Web Host. 5. Choose custom DNS settings if that is an option for you. 6. Type in the URL of the location 0f your web host. Click save and you are set. The moment this is done your traffic will go directly to your website the when people type the domain name into the
  • 45.
    address bar intheir search engine. With your domain name purchased and the hosting set up, there isn’t much left for you to do but begin building your own website!
  • 46.
  • 48.
    So, before weactually begin to install WordPress, we need to understand what WordPress even is. WordPress is an online open source website building tool that is probably considered to be the easiest and perhaps most powerful content management system for blogs and websites that exists today. The next step in the website building process is to install WordPress on your domain. You need to understand that when I say install WordPress, it does not mean that you need to install it on your PC as many website hosting companies will invite you to do. The good news is that once you install WordPress on your
  • 49.
    domain, you neverhave to worry about doing it again. There are multiple ways that you can download WordPress onto your domain, but perhaps the easiest and most effective way is to do so from the dashboard of your web host. There should be an area that you can click to manage your domains. In this area, you should be able to access settings such as upgrading your hosting package, opening up support tickets, and adding add-ons to your domain. This is the area that you are going to run your business from so make sure that you familiarize yourself with it as much as possible. The area that you will want to access is
  • 50.
    your cPanel. Oncethere, scroll down until you find a button that reads, “WordPress” and under that you will need to click the Install option. Once you are at the install window you will need to configure a few options as follows: Choose the Protocol: on this option make sure that you select the http:// option Choose the Domain: pick the domain name that you want to install WordPress. Site Name: pick the name of your future website. Don’t worry, you can always change this later on. Site Description: this is going to be the tagline of your site. For this
  • 51.
    section I highlyrecommend using one keyword to target. Admin Username: Pick a username that visitors to your site will get to know you by. Don’t just choose admin. Admin Password: this is going to be the password that you use to access your website. Make sure to pick a password that will be hard for others to figure out. Admin Email: pick an email address that can receive alerts for your website. Any email will suffice. Auto Upgrade: check this option so you don’t have to manually install WordPress updates on your website.
  • 52.
    Finally press Installand now your website will have access to WordPress. To double check that you have done it correctly, type your domain into your web browser. What you should see upon typing in your domain is a plain website without any information listed upon it except for a post title that reads, “Hello World.” If by chance you aren’t seeing this default installation, there are a few things you can try before you have to reach out to support.
  • 53.
    1. Clear theCache on Your Web Browser There are many different ways that you can do this but of course it will ultimately depend on what web browser you are using. If you are unsure of how to do this for your particular web browser, I highly suggest looking up instructions on Google and following them precisely. This is something that will only take you a few minutes to do. Once your cache is clear I highly recommend that you reload your browser to see if the default WordPress
  • 54.
  • 55.
    2. Wait ItOut Sometimes it just takes some time for the default browser to appear when you look up your domain. It can take up to 24 hours to appear, but it can take even longer than that. I suggest waiting at least a day if you need to for your WordPress installation to appear. If none of these solutions have worked for you, then I suggest contacting your hosting support or even going as far as contacting WordPress support if need be.
  • 56.
    Configuring Your WordPress Setting andan Introduction to Search Engine Optimization
  • 57.
    Once you haveinstalled WordPress onto your website and have successful logged in to the admin dashboard, the next thing
  • 58.
    that you willwant to do is configure a few settings within your dashboard and begin to get your feet wet in the world of Search Engine Optimization. Be jumping into the setting section of your dashboard, make sure that you are working with the latest version of WordPress that is currently available. Not only will using the most updated version of WordPress help to keep your website secure, but it will also ensure that your site is running as smoothly as possible. Now, it is time to update some of the settings. To do this, go to the left-hand sidebar of your dashboard and look for the “Settings” option. From there you
  • 59.
    will want toclick on the subsection that you wish to modify. In this section, you will find the most important setting so make sure that you familiarize yourself with this section. Here is a list of different settings subcategories that you are going to want to update as soon as possible. 1. General Settings In this section, you will be able to modify a few crucial components of your website such as the website title, the tagline (if using) and the email that you want website notifications sent to. This section should be filled in when you initially install WordPress, but you can
  • 60.
    update it asyou see fit. 2. Reading Settings This is the section that you will have to decide what to display on the homepage of your site. Here you can choose between showing blog posts or a static homepage. You can even choose to have your latest blog posts show up. 3. Discussion Settings In this section, you will be able to configure the options for people to comment on your blog posts. If you are running a blog that will encourage a discussion by your visitors, you can allow people to comment on your posts,
  • 61.
    and you willbe able to configure whether or not you want these comments to appear on your website right away or whether you want the option of approving them before they appear. If you have a business website set up and don’t want users to leave any comments, you can turn this option off as well. If the option is set to “off”, then visitors to your site won’t have the option to leave a comment on any of your posts. 4. Permalinks Settings If you are not sure what a permalink is, it is simple the URL that is designated to a blog post or blog page. So, in other
  • 62.
    words, when configuringthese settings, you want to decide what the URL of each blog post or page is going to be? This is an important setting to configure for SEO or Search Engine Optimization Purposes.
  • 63.
  • 64.
    The next stepin building your WordPress website is setting up your own custom website theme and installing a few essential plugins that are needed for your website to run smoothly.
  • 65.
    WordPress itself makesit incredibly easy to switch up the look of your site by utilizing themes that are incredibly easy to install.
  • 66.
    Choosing Your Personal WordPressTheme When it comes to themes, there are literally thousands of free themes that are available for download online and best of all many of these themes can be accessed directly from your WordPress dashboard. To add a new theme to your website, just go to the left-hand sidebar and scroll down until you see the option “Appearance.” Once there hold your mouse over the option and click on the option “Themes.” Once you are in the Themes section, go to the top section of the page and click “Install Themes.” Once there head to the
  • 67.
    search section andhere you will find the various free themes that you can use to personalize your website. You can even customize your search by checking the various options available to find specific colors and features that are offered with different themes. If you have found a particular theme that you like, click on the Theme preview itself. Once there, click the “Install” option and it will automatically install for you. Once your new theme has been updated, refresh your web browser before heading to the main page of your site. There you should be able to see the new theme. If you are satisfied with it, go back to your dashboard and begin
  • 68.
    customizing it toyour liking.
  • 69.
    Adding Plugins toYour Website Once you have a theme set up, the next thing to do is begin to add plugins to
  • 70.
    your website. Pluginsare one feature exclusive to WordPress and that help to give you the ability to do pretty much whatever you want with your site, without having to write any coding or hire a professional programmer to do it for you. Plugins are pieces of software that are developed to be installed on your website to accomplish a certain task. Think of plugins as a sort of app to enable your website to do various things such as coming up with a price comparison chart, setting up a contact form, setting up a review post, subscribing to your social media profiles, adding in a forum, setting up an
  • 71.
    e-commerce store etc. Toinstall a plugin on your website, you will need to head to the left-hand section of your WordPress dashboard. Once there, scroll down to the “Plugins” option. Click on it and once you are on the plugins screen you should see a list of plugins that are currently installed on your website. To add new plugins head to the top of your plugins page and click, “Add New” option. In the search section, search for the specific features that you are looking for in a plugin. Once you have found a plugin that meets the needs of your website, just click on the install option and it will install automatically onto your site. As soon
  • 72.
    as the pluginis installed, click the Activate option for it to begin running. However, once your plugin is installed, your work is still not completed. From here you will need to configure your plugin via the plugin options menu so that it will do exactly what you want it to do. To do this just head back to the Plugins section listed on the left-hand side of your WordPress dashboard and find the plugin you have recently installed. Click on the “Settings” option and configure it as you wish. There are a few plugins that I highly recommend you install on your website the moment you install WordPress. These plugins will not only help to
  • 73.
    ensure that yourwebsite runs smoothly, but also give it a professional feel to those who visit your website. 1. CometCache This is the perfect plugin to download if you want to increase your website speed naturally. It is incredibly easy and simple to use and just as effective. It is so easy that you can download it in just under 2 minutes. Since website visitors expect your website to load as quickly as possible, this is the perfect plugin to use to do just that. 2. Simple Author Box This plugin attaches a responsive author
  • 74.
    box at thebottom of your pages and posts. This author box also allows you to attach social media icons to your posts which allows your visitors to share your posts to their friends with ease. 3. SI Captcha Anti-Spam This plugin allows you to add a secure image CAPTCHA which can help prevent spam from appearing in the comments section from humans and bots alike. It can also be used for websites that contain lost password options, registration, WooCommerce websites and login forms.
  • 75.
    4. Contact Form7 If you wish for your website visitors to have the option to contact you directly, then this is the perfect plugin for you to download. This form allows visitors to fill in their information allowing you to personally contact them. Not only does this help to give your website a more professional look, but it also gives the ability to keep your personal email anonymous. 5. All-In-One SEO Pack This is the perfect plugin if you plan on using SEO practices to rank your website. It allows you to fully configure your website titles and gives you full
  • 76.
    control of onpage search engine optimization on all of your posts and pages. 6. Google XML Sitemaps What many website owners just starting out don’t realize is that in order for your website to be ranked within the search engines, you need to generate a sitemap for it. This can be complicated if you do not know how to do it from scratch, but with the help of this plugin, you can have a sitemap generated for your site automatically. This plugin will help search engines find your website and update them within the search engine as soon as you update it.
  • 77.
    7. Exclude Pagesfrom Navigation This plugin gives you the option to exclude pages from your main menu bar on the current page you are editing. Upon installation, this plugin will include a checkbox that you can check off or on within the page or the post you are editing. 8. Tweet, Like, Google +1 and Share If you wish to include social media share links within your posts and pages, then this is the perfect plugin to install on your site. This will add not only simple social media icons to your posts and page, but it will also include
  • 78.
    attractive and professionaldesigns to make your posts more shareable. Every one of these plugins included in this list are free for download. You can do everything you need to do with these simple plugins. Additionally, they all have premium downloads available if necessary.
  • 79.
    Installing Google Analytics onYour Site and Setting Up an Automated Newsletter
  • 80.
    In this section,I will explain a few advanced things that you will want to do with your site to get it up and ready for business when it launches. In this
  • 81.
    section, I willexplain the importance of setting up tracking and an email list to those who visit your website.
  • 82.
    Installing Google Analytics Installing GoogleAnalytics onto your site is incredibly important for any person who wants to build a website. It allows you to see firsthand important data regarding your visitors. You will be able to know where your visitors came from, what pages are the most popular upon your website, what keywords your visitors typed in the search engine to find your website, and what referral websites your website is currently linked to. While there are plenty of tracking programs out there that you can use for
  • 83.
    your website, thereis none that are as good and as powerful as Google Analytics. It is one tool that you NEED in your website building arsenal. To set up Google analytics on your website, just follow these easy steps. 1. Go to www.google.com/analytics and sign up for your free account using your GMAIL. 2. Once you have set up your free account, set up a property, which is going to be your website. 3. Once you have set up a website, retrieve your Google Analytics tracking code. To do this click on your website and go to the Admin section. From there head on over to
  • 84.
    the Property sectionand click on “tracking info.” 4. Click on “tracking code” and copy the code given. 5. Head over to your WordPress dashboard and on the left-hand corner, scroll down to the appearance option. Allow your mouse to hover over it and scroll down to the editor section. 6. On the editor screen go to the right- hand side until you find the “header.php section.” Click on it and look for the code <head> section of the page. 7. Paste your tracking code directly underneath this section and click
  • 85.
    “update file.” 8. Reloadyour website and go to the main page. 9. Go back to your Google Analytics and look at the Real-Time data. Your computer should now show up as a visitor on your website. You should now be able to track every visitor that comes to your website.
  • 86.
    Setting Up YourOwn Automated Newsletter No website can truly be complete until
  • 87.
    you set upyour own personal newsletter for subscribers. Every viable business in the world needs to have an email list in order to be successful and yours will be no different. This is going to be the main way that you will be able to make money with your site and is the one thing that will set you apart from your competition. There are many advantages to setting up your own email marketing list such as: Your mailing list can be used even if something happens to your website. It is a much more personal way for you to communicate with the visitors on your website. It can help you build trust with your website visitors.
  • 88.
    It is theeasiest way to promote affiliate products or your own products for sale in order to make money. In order to set up your own email marketing list, find a company that offers that service. The best programs that I recommend include Mail Chimp or Aweber. Once you have your own account set up with either of these companies (each offers a free trial before paying monthly for the service), you can begin crafting professional looking newsletters to your subscribers. Here are a few tips to making the most out of your email newsletters: 1. Set up your email list as soon as you
  • 89.
    set up yourwebsite. The sooner your email list is set up, the sooner you can begin collecting email addresses. 2. Offer a freebie for your audience as soon as they sign up. I highly recommend offering something that won’t take you too much time to put together such as an eBook or a free training series. 3. Always ask your subscribers to “white list” your email address so it isn’t blocked by spam filters within their email service. 4. Make sure that the sign-up form for your newsletter is easily seen on your website. You want to make sure that visitors signing up to your list a
  • 90.
    top priority. 5. Makesure that you update your subscribers on new content on your site every week by sending out broadcasts. This will help your visitors to stay up-to-date with all of your content. 6. While it is true that your email campaign is a platform for you to utilize in order to sell and promote various products in order to make money, you don’t want to promote products in every newsletter that you send out. Sell to your visitors sparingly and instead focus on delivering high quality and useful content to them instead.
  • 91.
    The Ten Most CommonWays to Monetize Your Website
  • 92.
    Once your websiteis built and ready to go, it is time to take the next step which
  • 93.
    is to officiallymonetize it. There are many different ways to monetize your site and no one way is the right way. Making money with your own website isn’t easy, but the following are ten different ways that will make this easier for you.
  • 94.
    1. Affiliate Marketing Affiliatemarketing is perhaps one of the most popular, if not fastest way, to make money with your own website. The best way to utilize affiliate marketing is to find products to promote that are within your specific niche. Once you have chosen these products, you can just endorse it within the content of your website, within your email newsletters, and to visitors of your website. If people like the product that much, they will click on the affiliate link you are promoting and purchase the product. In turn you will gain a commission from these sales. You need to keep in mind that the
  • 95.
    commission for theseproducts will range depending on what they are and sales price. Most products have a commission of 30% or can even be as much as 90%. While it may not seem like a lot of money at first, if you gain 20 sales in a day, that amount can add up quickly.
  • 96.
    2. PayPerClick Advertising Another greatway to monetize your website is to utilize pay-per-click advertising. The most popular platform for this kind of advertising is Google Adsense. Google Adsense is a platform run by Google that allows website owners and publishers to utilize Google’s massive advertising network to run ads on your own site and earn money in the process. One of the many reasons Adsense is so popular is how simple it is to use. The moment you sign up for an account with Adsense, you can get a special code for
  • 97.
    each ad youwant and you can easily embed it into a post on your website. The ads that are then displayed on your website are relevant to your niche and will show ads that your visitors are going to be interested in. The way that this type of monetization works is that you are paid every time a person clicks on these ads. While you are not paid a great deal of money for these ads, if you have plenty of traffic, you can easily make a couple thousand dollars every month.
  • 98.
    3. Sell AdSpace on Your Website Instead of turning to Google Adsense to monetize your site, another option is to offer ad space directly on your website. The only way this method of monetizing your website is viable is if you get plenty of traffic to your website on a daily basis. The best part about this method is that you can charge whatever you want for this space, whether it is a monthly price or a one-time price. Typically, you will want to charge those interested per one thousand impressions their ad gets on their website. So, for example, let’s say you are charging
  • 99.
    someone $5 per100,000 visits a month, that cost will equate to $500 a month just for you. If you get even more traffic than that you can earn as much as $5,000 a month!
  • 100.
    4. Sell YourOwn Digital Products It is true that for you to make the most money with your own website, you will need to offer products that you have created directly. The main reason for this is that there is no middle man involved between you and potential customers. That means there is no other person taking a cut of the money that you earn. This is a very straightforward approach because as soon as you sell any of your products, you can earn money on them immediately. However, as simple as that may sound, it is a bit more complicated
  • 101.
    than that. 5. Creatingyour own digital products and then publishing them will require a ton of time on your part. There are also a number of additional “hidden costs” to making these products such as time involved and monetary costs in hiring others to help you put these products together. Other things that you need to consider as well are how you are going to collect payment, how are you going to ship products out if they are physical products and figuring out taxes as well.
  • 102.
    5. Accepting Donations fromYour Website Visitors This is a great option for people who don’t have a large number of people visiting their website but have a strong community of visitors that they are engaged with. If you have this type of community aspect with your own site, simply ask your readers to help you keep your site going and contribute. What you need to keep in mind is that this kind of monetization isn’t going to put you on the road to great wealth. What it can do is help you to cover some of
  • 103.
    the short-term expensesthat it takes to maintain your website and will help to support your website in every way such as helping to cover costs of creating products, covering the cost of research and even helping to cover the cost of hosting your website every month.
  • 104.
    6. Accept Sponsored Articlesand Posts Another common way to make money with your website sometimes means increasing the amount of people visiting your website on a monthly basis. Once you have built a steady stream of traffic to your website, there are going to be websites that will contact you to feature your site. These sites will feature your content on their own company website, especially if it is relevant to their own niche. Not only is this a great way to promote your website, but it is a great to build your monthly visitors in the process.
  • 105.
    7. Generate “Leads”For Other Companies Online businesses, and most businesses for that matter, thrive financially when they have new leads coming to their website every day. With that in mind, it is no secret that many of these businesses are always on the lookout for ways to help grow their customer base. This is a great way for you to become the middle-man and introduce both those interested in a niche and a company that is offering what the customer needs without much work on your part. This type of monetization works similarly to affiliate marketing, but in
  • 106.
    your case, youdon’t have to worry about promoting one product in order to gain a commission. Your customers are more interested in finding more information that you can give them at this point.
  • 107.
    8. Build Upan Email List Without an email list, most websites will fail to make money. There is a saying online which is, “the money is in the list” and it is one saying that you want to live by especially when building your website. An email list is usually comprised of subscribers who read your blog posts loyally and the main goal of this list is going to be to convert these strangers into passionate subscribers who want to stay up-to-date with your latest content. The thing that you need to understand is that building up an email list is a long-
  • 108.
    term strategy tomaking money with your website. Even though it takes some time to build up, it is one of the best long- term money making methods that you can utilize today. When building your email list, you want to make sure to create a relationship with your followers by offering helpful information that will help them in whatever they are coming to you for. Never spam your followers with offers that they don’t want. Doing this will abuse the trust you have with your readers and sabotage your long-term business goals.
  • 109.
    9. Setting UpYour Own eCommerce Website Remember, when building your own website, you don’t just have to make it about content alone. A website can be whatever you want it to be and another great way to monetize your website is to turn it into an eCommerce site. This website will be built in such a way that you can center it on selling tools and products in your own online store. One thing to realize about this method is that there are literally thousands of other eCommerce websites out there, meaning that competition is going to be tough. Make sure that you find your own unique
  • 110.
    niche and comeup with your own unique marketing strategy to make it work.
  • 111.
    10. Flipping Websites Anothergreat way to monetize your website is to flip it for a much larger profit down the line. The way this method of monetization works is creating a site, building it up and then selling it for a larger profit than you first put into it. Don’t get me wrong. This is a great profit opportunity, especially if you have a website that is currently getting traffic and making money. It makes it more appealing and more buyers are willing to purchase it especially if they don’t have to do too much work in order to make money. However, I am more for building something that is your own and
  • 112.
    that will helpyou make money in the long run. Still, this is a great method to utilize if you want to make a quick return.
  • 113.
    Top Five Waysto Gain Traffic to Your Website
  • 115.
    Once you haveyour website, the next thing you are going to have to worry about is driving traffic to it. Without traffic, you will not make a dime with your website nor will you be able to promote whatever it is that are trying to promote. You could have the best product in the world, but without traffic it will never be seen. In this section, you will learn my personal top ways to gain money to your website as easily as possible.
  • 116.
    Create Great Content Perhapsthe best way to start driving traffic to your own website is to create the best content possible. However, you cannot just create ordinary content. You need to make sure that you create content that is as high quality as possible. To start creating content, first come up with your own ideas for your own content. There are many ways to do this but the ways that I recommend the most include: 1. Reddit Reddit is a great place to come with ideas for your own content. You can find
  • 117.
    a variety ofsubreddits that are related to your niche so you can see exactly what is a popular topic being discussed in your niche right now. This is also another great way to get visitors to visit your website. 2. Google News One of the most important tools that you can utilize when coming up with your own unique content is to utilize the news to your advantage. The best tool for you to use is Google news and search for a keyword that is relevant to your niche. With the help of Google news, you will see what topics within your niche are being discussed most not only by the
  • 118.
    press, but alsoby popular websites within your niche as well. 3. Buzzsumo Buzzsumo is a website where you can see what type of content within your niche is being shared the most on popular social media platforms. To use this tool just search a specific keyword and get some ideas of the type of content you should write. 4. Google’s Top 10 Results While this is not a strategy that is considered to be new, it is nonetheless effective. To utilize this method, Google keywords related to your niche or the
  • 119.
    desired topic thatyou wish to write about. Take a close look at the top ten sites and what their content contains to give you an idea of what to write for your own content. 5. Q and A Websites Another great way to come up with ideas for your topic is to utilize Q and A websites to your advantage. You can see in real time what questions people are asking and what kind of solutions they want. Once you see these questions for yourself you can then draft your own content that will answer these questions for them.
  • 120.
    Create a Podcast Noteverybody has time to stop and read a new article on your website. This is when creating your own podcast can come in handy. A podcast is a way to broadcast content on the Internet. It has been shown that 20% of all people who go online, listen to podcasts as they search the web. This is a great way to take advantage of this 20% to bring traffic to your own website. Just turn your articles into audio versions and upload them onto the most popular podcast distribution websites. In order to make your own podcast, you
  • 121.
    are going toneed a few things: A basic computer A good quality microphone An audio program such as audacity A topic related to your niche The ability to format your audio and content so that it is easy for viewers to listen to An editing software to edit your podcast Your website Subscription buttons to place on your website
  • 122.
  • 123.
    Another great wayto drive traffic to your website is to utilize the hottest trend in marketing today which is video marketing. It has been shown that people tend to remember about 15-20% of what they hear, but 30-40% of what they see and hear. With the help of videos, you can drive a great amount of traffic back to your website with ease. There are many different ways that you can make videos today, but the most popular methods include: 1. Actually Getting in Front of The Camera One way to create videos to bring traffic to your website includes getting right in
  • 124.
    front of thecamera and explaining a few key points from the article you wish to talk about. When using this method, make sure that you create a script that you can use to read to keep your video as organized as possible. Once you have created your video, just upload it to a video sharing platform and promote the video on your own website. 2. Use Microsoft PowerPoint Another thing that you can do is to create a video by using a PowerPoint presentation that you have prepared in advance. 3. Record Your Computer Screen to
  • 125.
    Make a CompellingVideo Another great way is to inform people about your article by using a screen capture software. Whether you want to record a presentation, create a tutorial using a special kind of software, or want to do a thoroughly reviewed video, then this is the perfect method for you to utilize. There are different kinds of screen recording software that you can use, but the main programs that I recommend using are: Camtasia OBS TinyTake Screenr Ezvid
  • 126.
    Regardless of howyou make your videos make sure that you follow these tips: Make Sure to Keep Your Videos Short and To the Point-as a rule of thumb you want to keep your videos below the 5 minute mark. Any longer and viewers are most likely to end the video before it’s actually finished. Never Ignore Audio Quality-one of the most important parts of your video is audio quality. If your audio is bad, many viewers will shut the video off so they don’t have to hear it. That is why you want to use a high quality microphone. Even if you are creating a video of your computer screen, make sure to add some
  • 127.
    nice background musicthat goes with the feeling of your video. Make Sure to Create a Strong Call to Action-an important part of your video is to give your viewers something to do towards the end of your video. This is called your call to action and you want to make sure that you include a call to action at the end of every video such as asking for your viewers to subscribe, visit a website, or to leave a comment. Upload to Various Video Websites- While it is true that YouTube is known for having the most traffic out of any video site online today, that does not mean that you should just upload to that platform alone. Upload to various other
  • 128.
    video platforms suchas YouNow, Vimeo, Metacafe, and Daily Motion.
  • 129.
  • 130.
    This is oneway to gain traffic that many web users don’t utilize on their own websites. Document sharing is creating an electronic file such as a word or .pdf file to share useful information across different websites. Document sharing is a way to help increase brand awareness in the niche of your choice which can help increase the visibility of your own website when searched in a search engine. Thus it can help bring in lots of traffic to your site as well as increase the keywords your site ranks for in the search engines. There are plenty of document sharing
  • 131.
    sites online today.However, the most popular sharing sites gets up to 5 million visits every single day and that number is continuing to grow at least by 20% each year. These sites are quickly becoming the go-to site to obtain more information regarding a specific problem requires a solution. With just a little bit of work and effort on your part, you can generate a massive amount of traffic back to your site for many years to come.
  • 132.
    What to Do Inorder to utilize document sharing sites to your advantage, there are a few things that you are going to have to do. What you will have to do includes: 1. Find an article on your website that is a minimum of 700 words. 2. Copy only HALF of this article into a Microsoft word document. 3. At the end of your article within your word document, paste a link that links back to the main article on your website. 4. Include a sentence at the end of your article that says, “To continue reading the rest of this article, click here.” 5. Save your article in word as a .pdf
  • 133.
    file so thatit can be easily shared on these document sharing websites.
  • 134.
    Where to Submit Documents AsI have stated previously, there are thousands of different document sharing websites out there. However the best websites with the most amount of traffic include: Srcibd Docstoc Google Docs Calameo Issuu Slide Share If you are going to include the full article instead of just half as I recommended, make sure that you include a strong call
  • 135.
    to action inthe middle and end of your article for the best results. I also recommend including various pictures that will link back to your website or to a sales pages as well.
  • 136.
  • 138.
    Back in theearly days of online marketing, infographics were highly popular and to this day they still remain a highly popular way to generate traffic to your website. Infographics are a perfect tool to use if you want to transfer content quickly and make it visually interesting to those who see it. They are a great way for you to share complex information in an easily understandable format that is user friendly. So, how do you create an infographic? This is what you will want to do: 1. Think of a Layout The first thing that you are going to have
  • 139.
    to do iscome up with a basic layout for your infographic so you know exactly what you want it to include. This is something that you can do on a simple sheet of paper or within a word document. 2. Create It for Free The next thing that you will want to do is create your infographic. If you don’t want to waste any money on it, then you can always make it for free. Best of all you don’t need to be a graphic designer in order to do it. There are various online tools that you can use to create an infographic such as:
  • 140.
    Canva Picktochart Venngage Easel.ly The main problemwith many of these free tools is that many of these programs offer the same templates and layouts to every person, so the chances of you having a similar infographic to someone else is actually quite high. 3. Hire A Designer to Create on For You This is an option for those who have a bit of money to invest in their website. If you don’t have any graphic design expertise, then hiring an experienced
  • 141.
    designer who hascreated infographics before is the best option. You can find people who provide this type of service on various websites such as: Fiverr Dribble Upwork When hiring someone to create your infographic, make sure that you check out samples of their work beforehand and have a sketch ready to make the job easier for them.
  • 142.
    Conclusion As you cansee from the help of this book, creating your own WordPress website from scratch (without any coding necessary) is incredibly easier than you may have been led to believe. While your own WordPress website may not be quite as versatile as websites that are made from scratch with coding and programming manipulation, it is easier to make these sites, it can be up and running in just a matter of minutes, and it is extremely convenient for people with no coding or programming experience. I hope that by the end of this book you
  • 143.
    have learned athing or two about building your own WordPress website from scratch. I hope that you have seen how easy it is to do for yourself and feel encouraged to building your own website. I also hope that you have learned a few other things that you weren’t expecting such as how to monetize your site and how to drive traffic to your website. Now it is time for you get out there and start building your own website from scratch. Don’t forget to check out the WordPress official website for constant updates and answers to any question that you may have. Good luck!
  • 144.
  • 145.
    Thanks ever somuch to each of my cherished readers for investing the time to read this book!
  • 146.
    I know youcould have picked from many other books but you chose this one. So a big thanks for downloading this book and reading all the way to the end. If you enjoyed this book or received value from it, I'd like to ask you for a favor. Please take a few minutes to post an honest and heartfelt review on Amazon.com. Your support does make a difference and helps to benefit other people. Thanks!