Downloaded 78 times
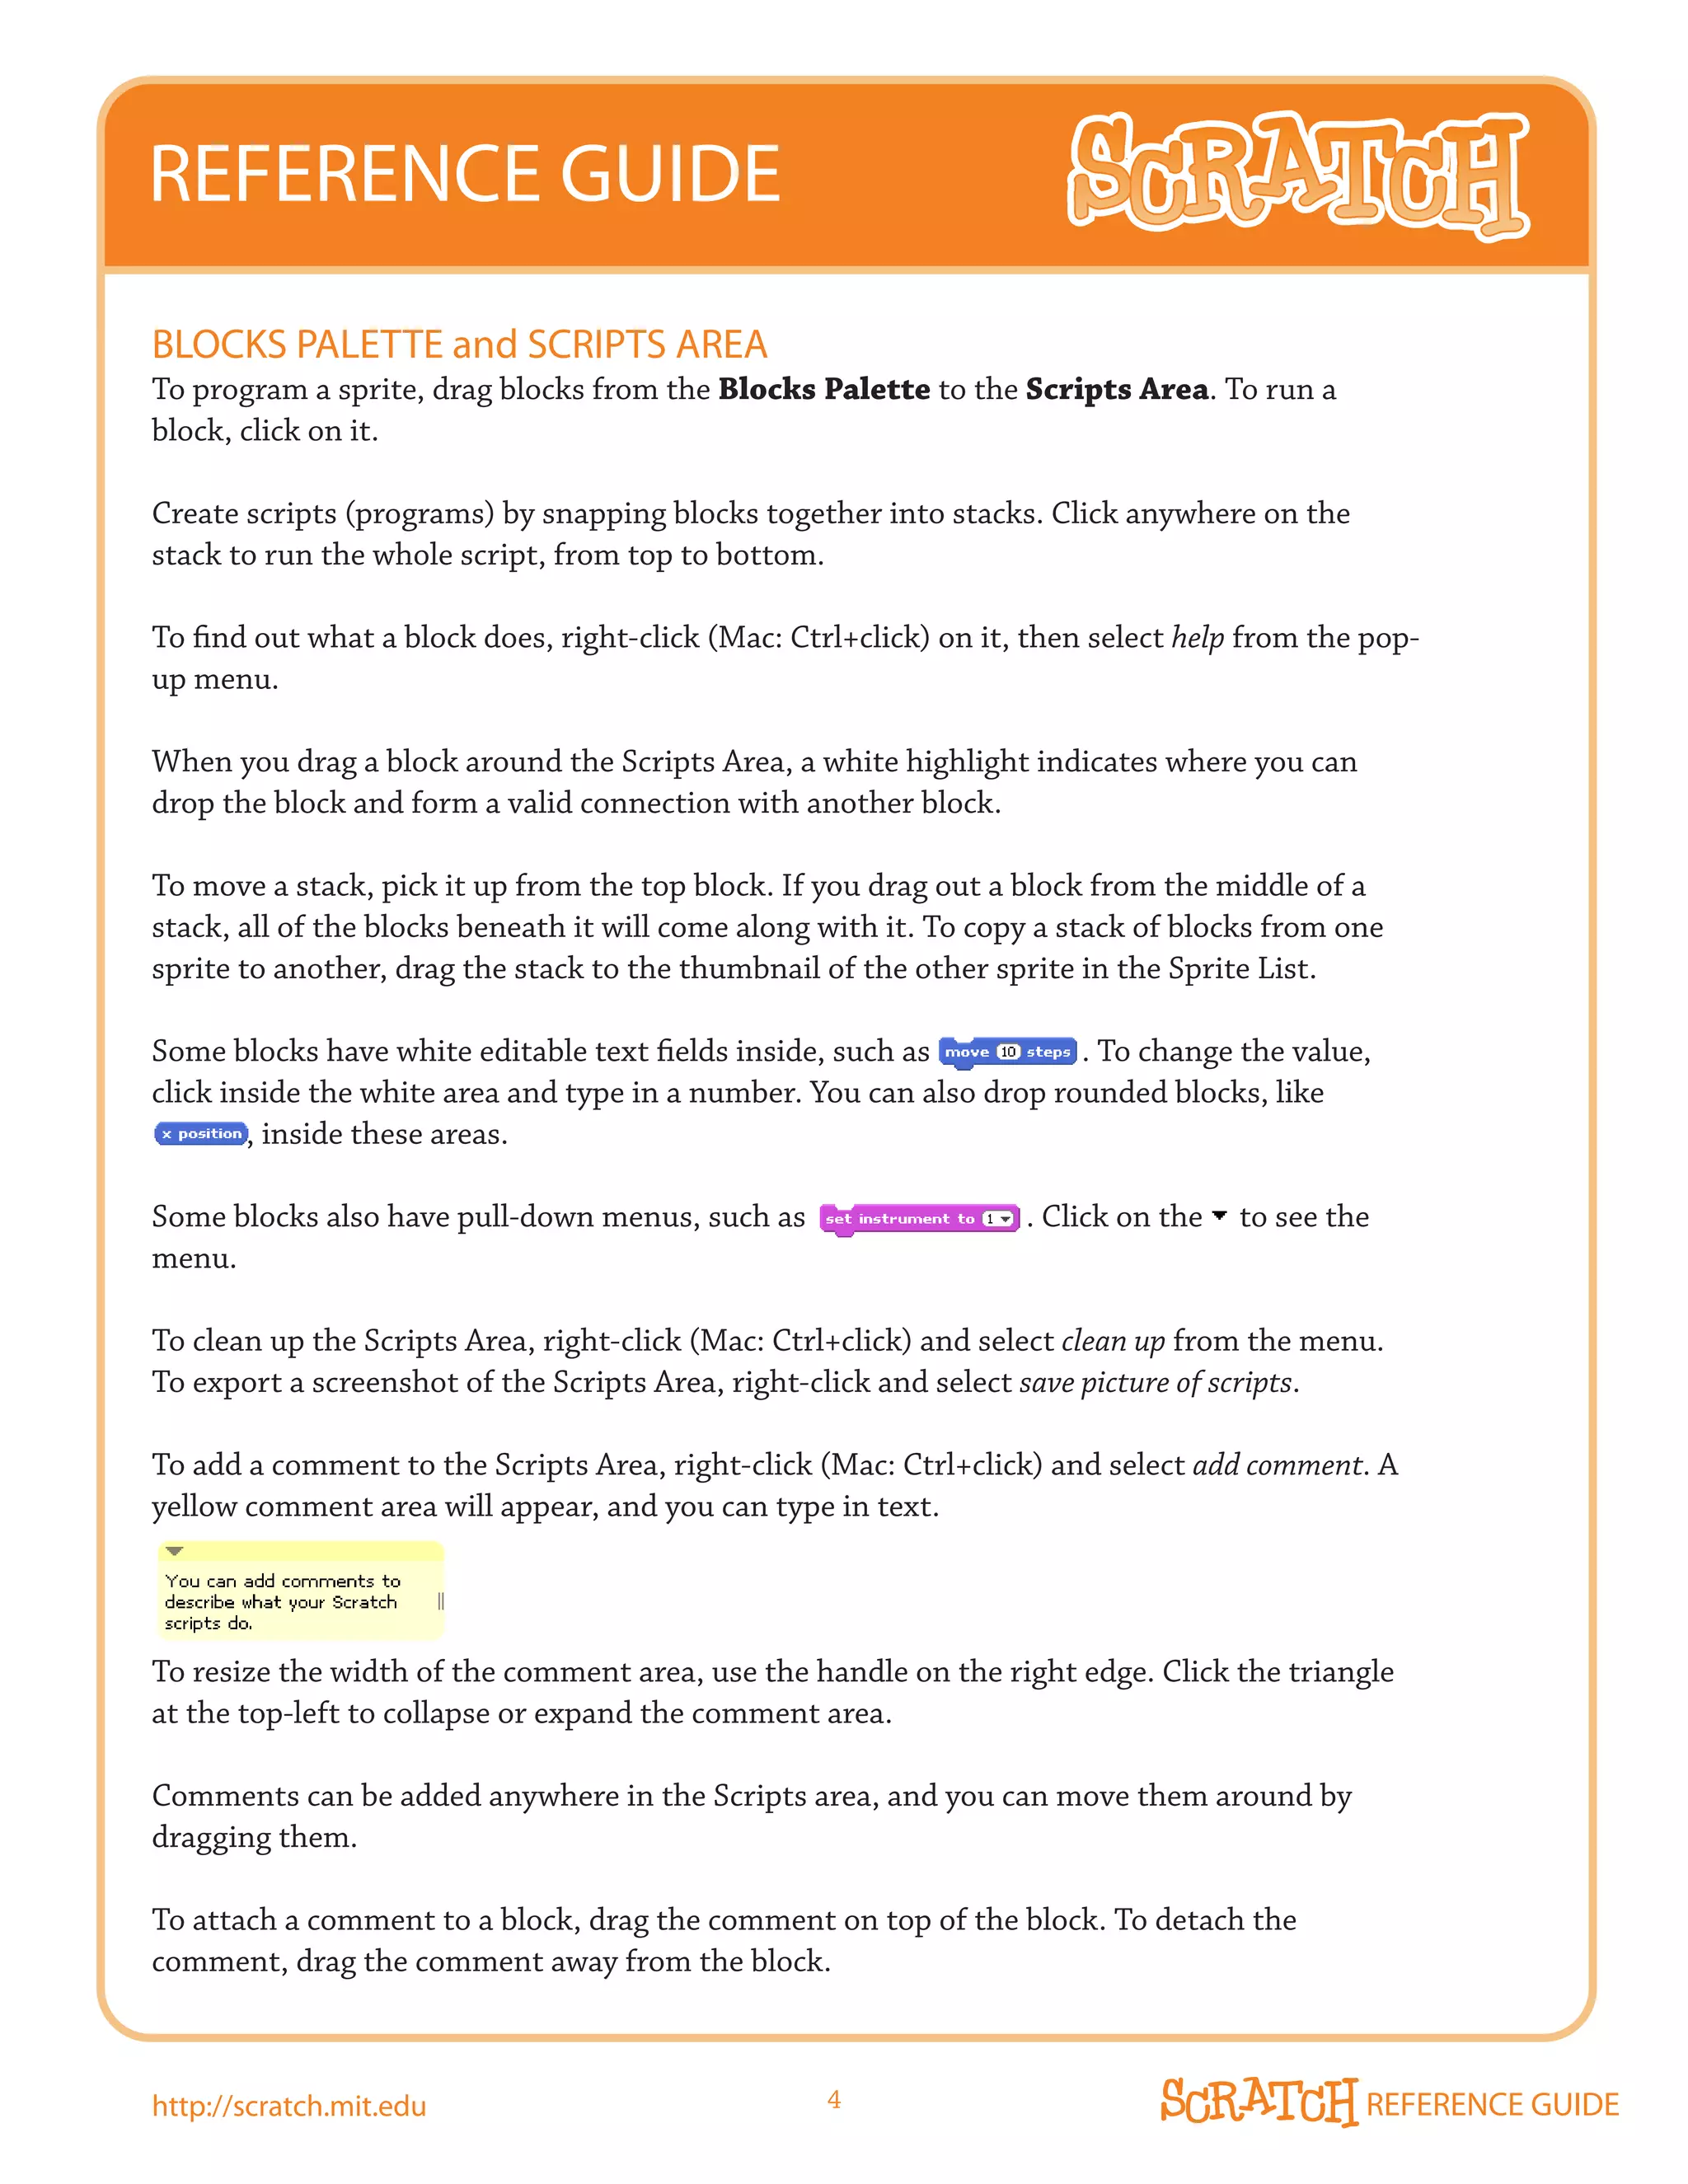
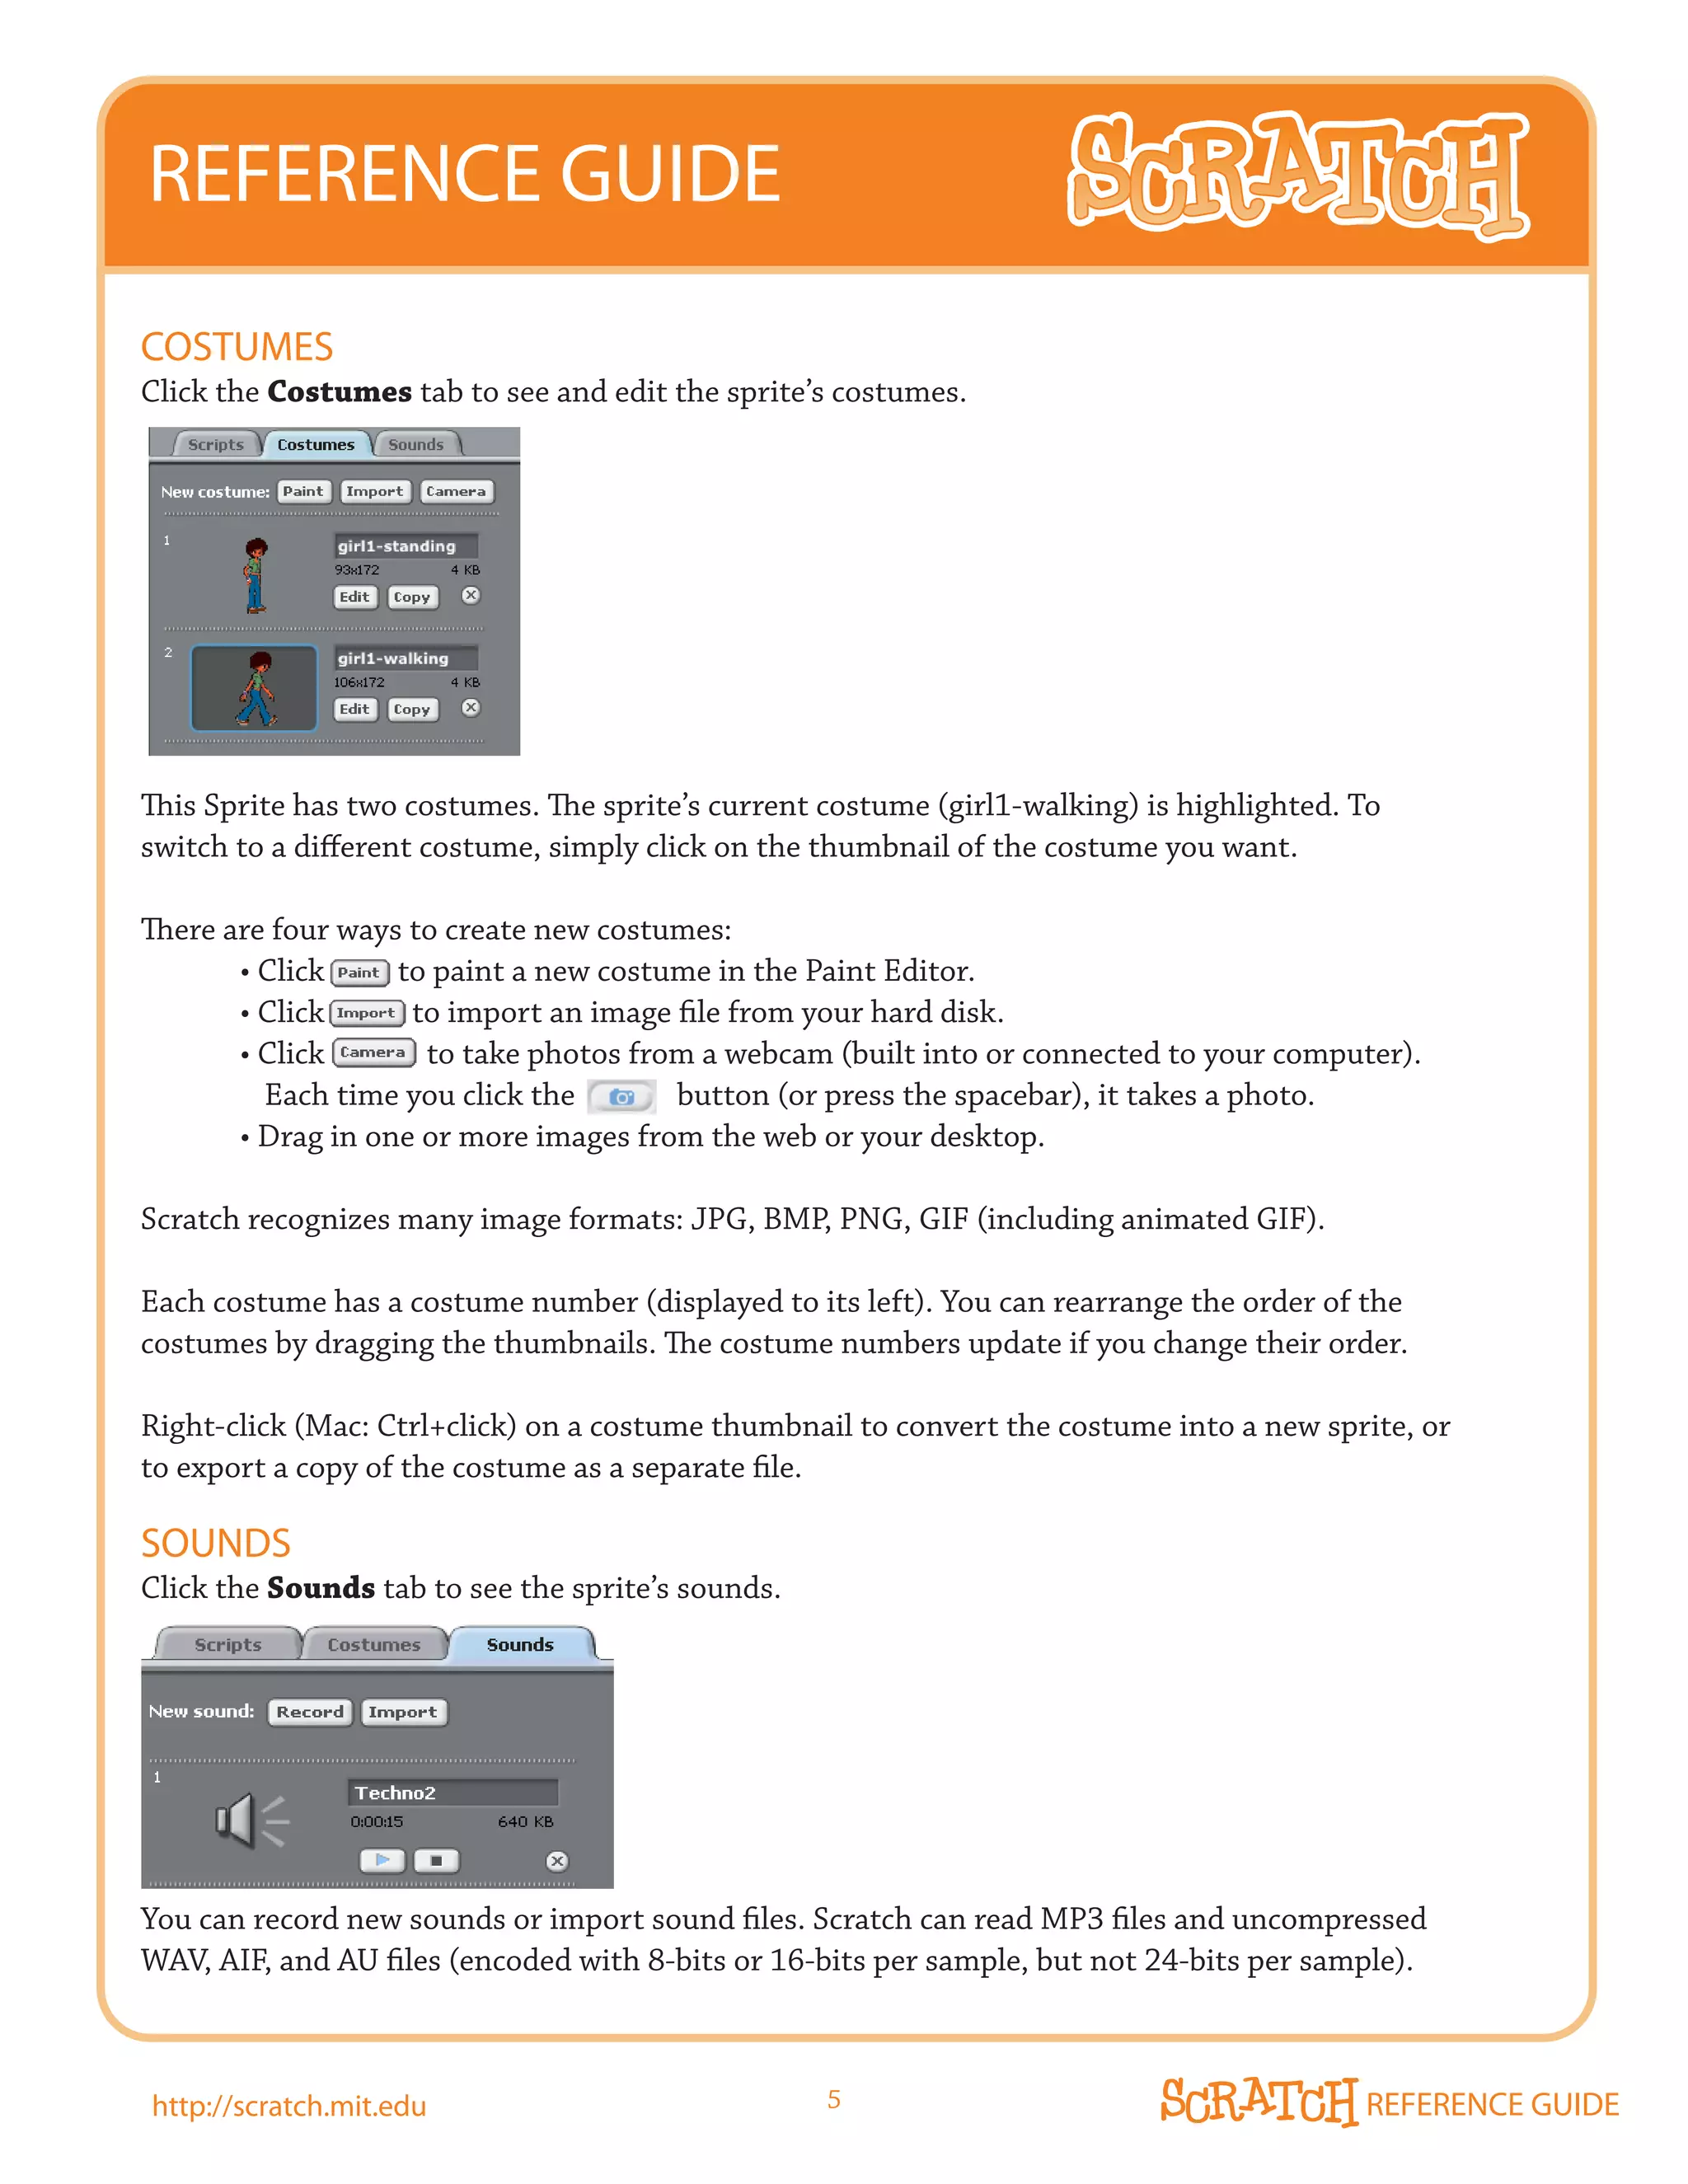
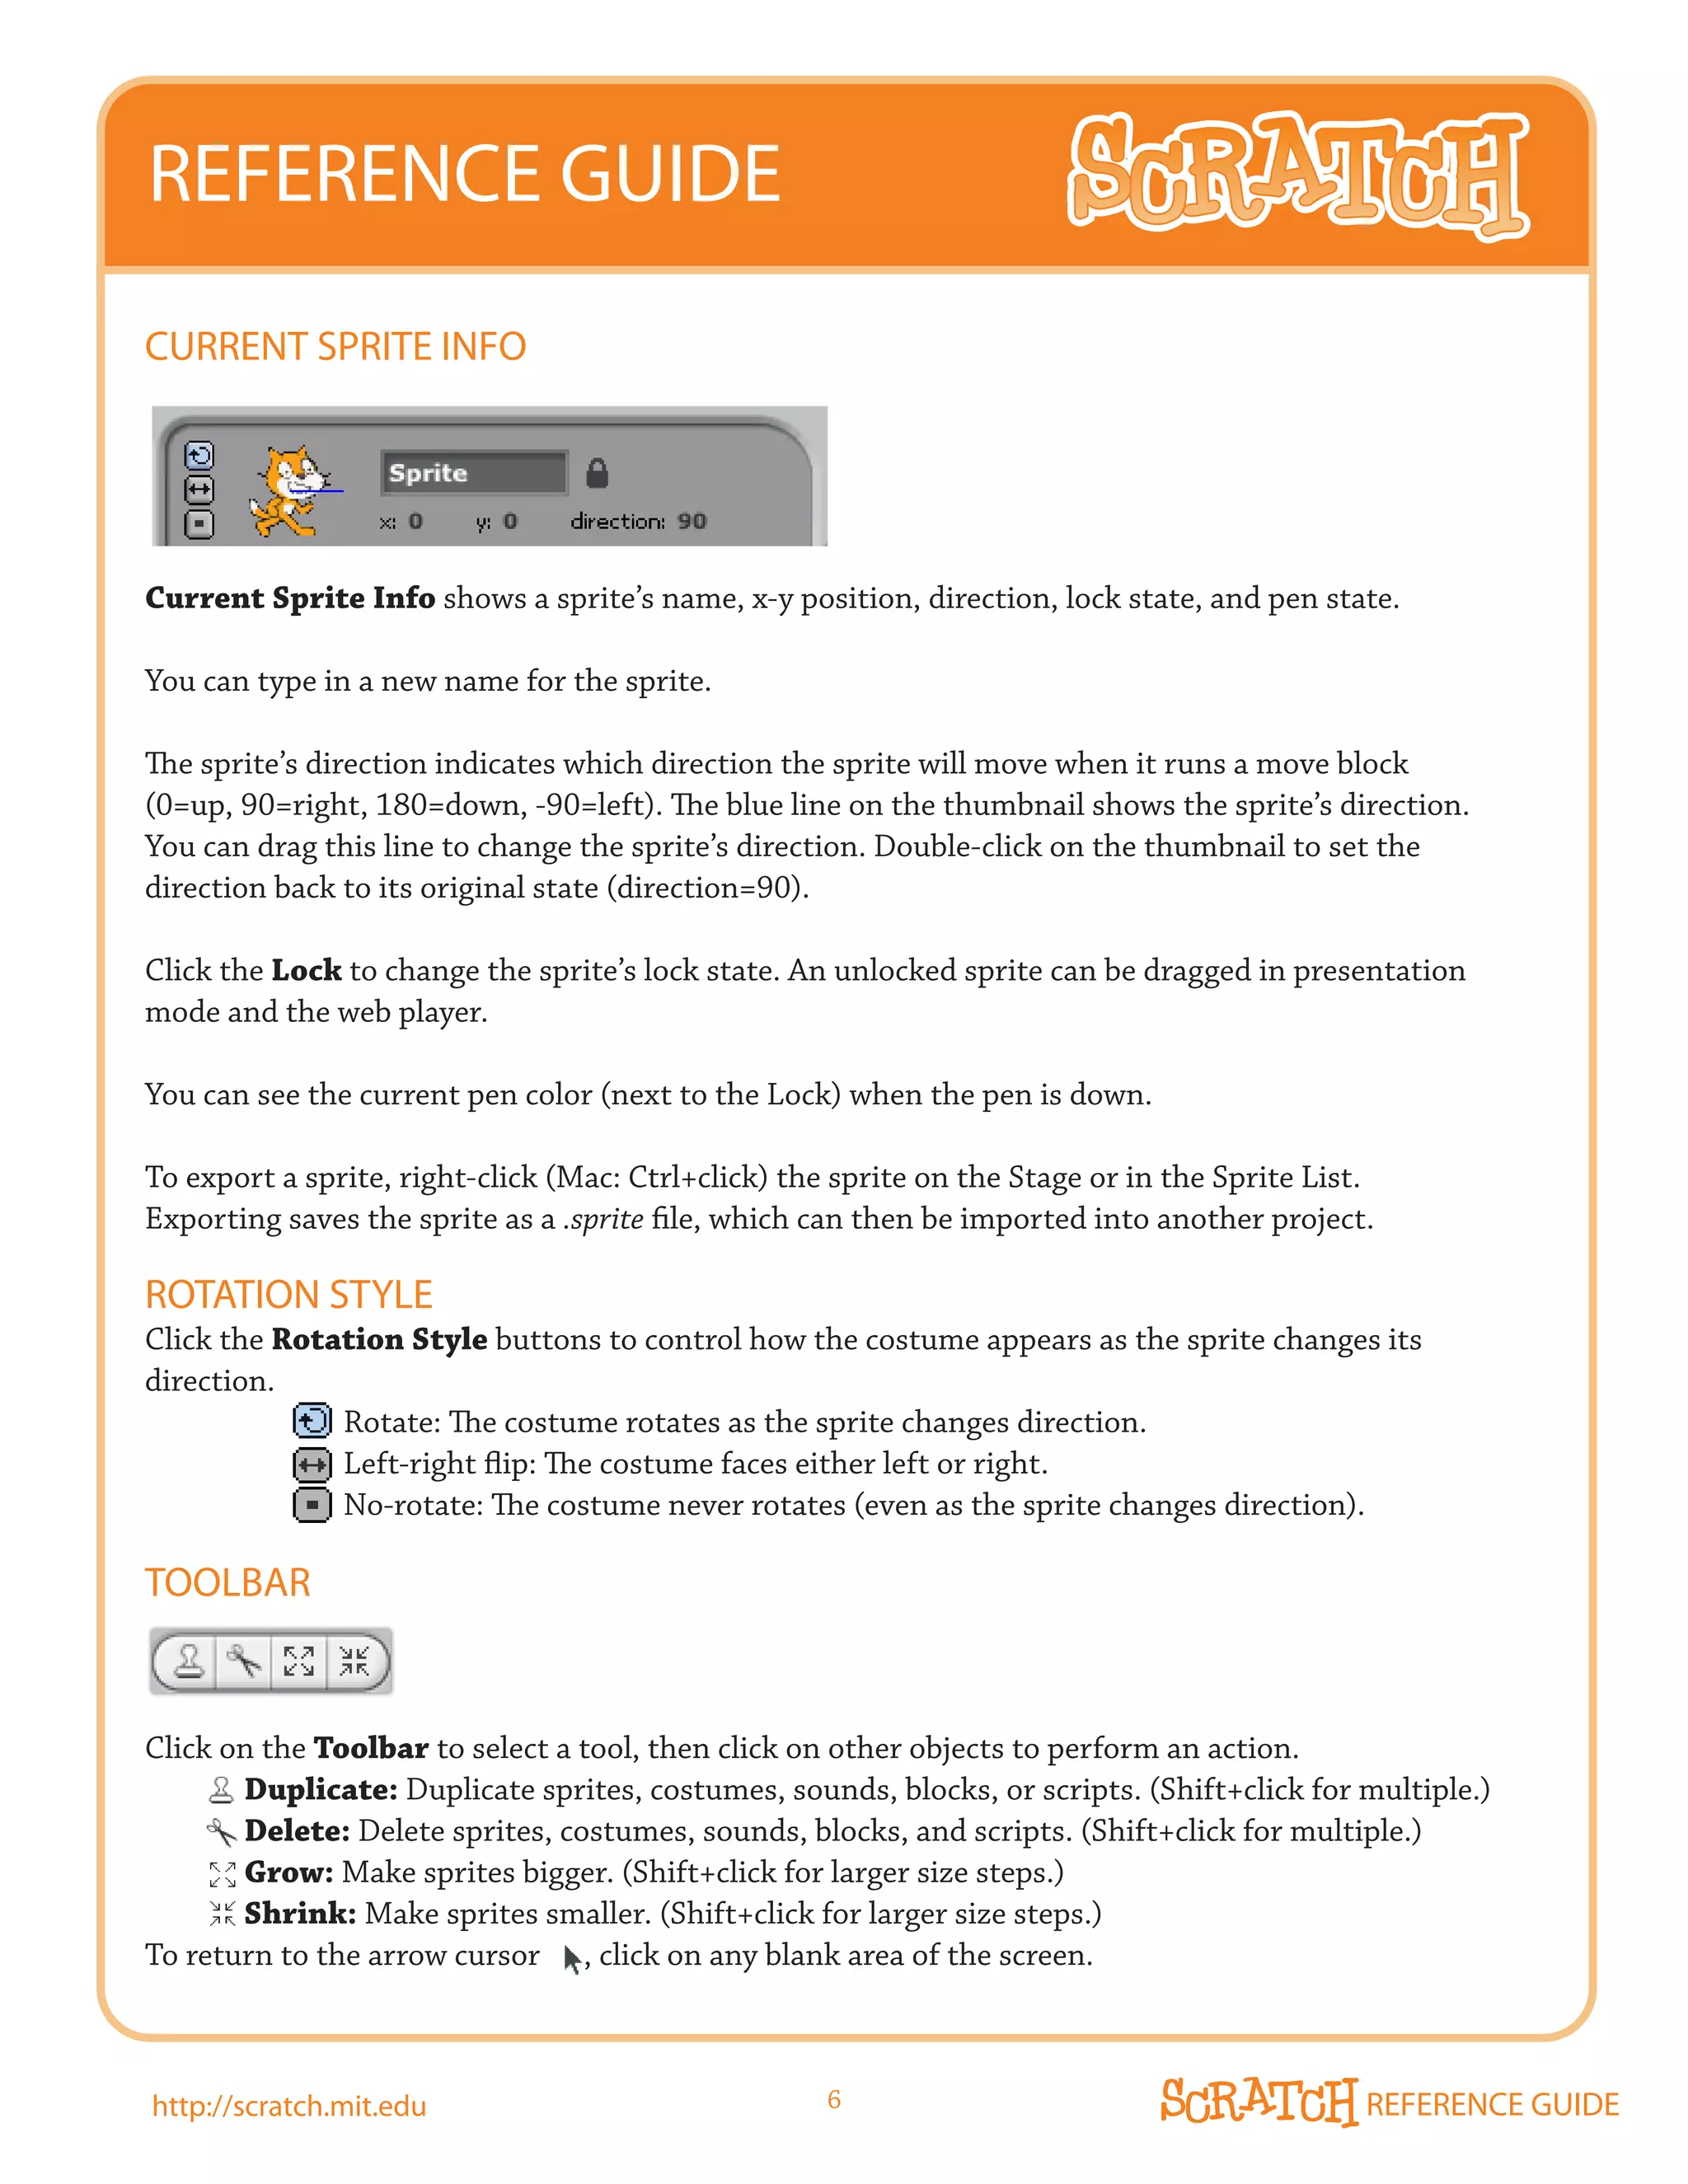
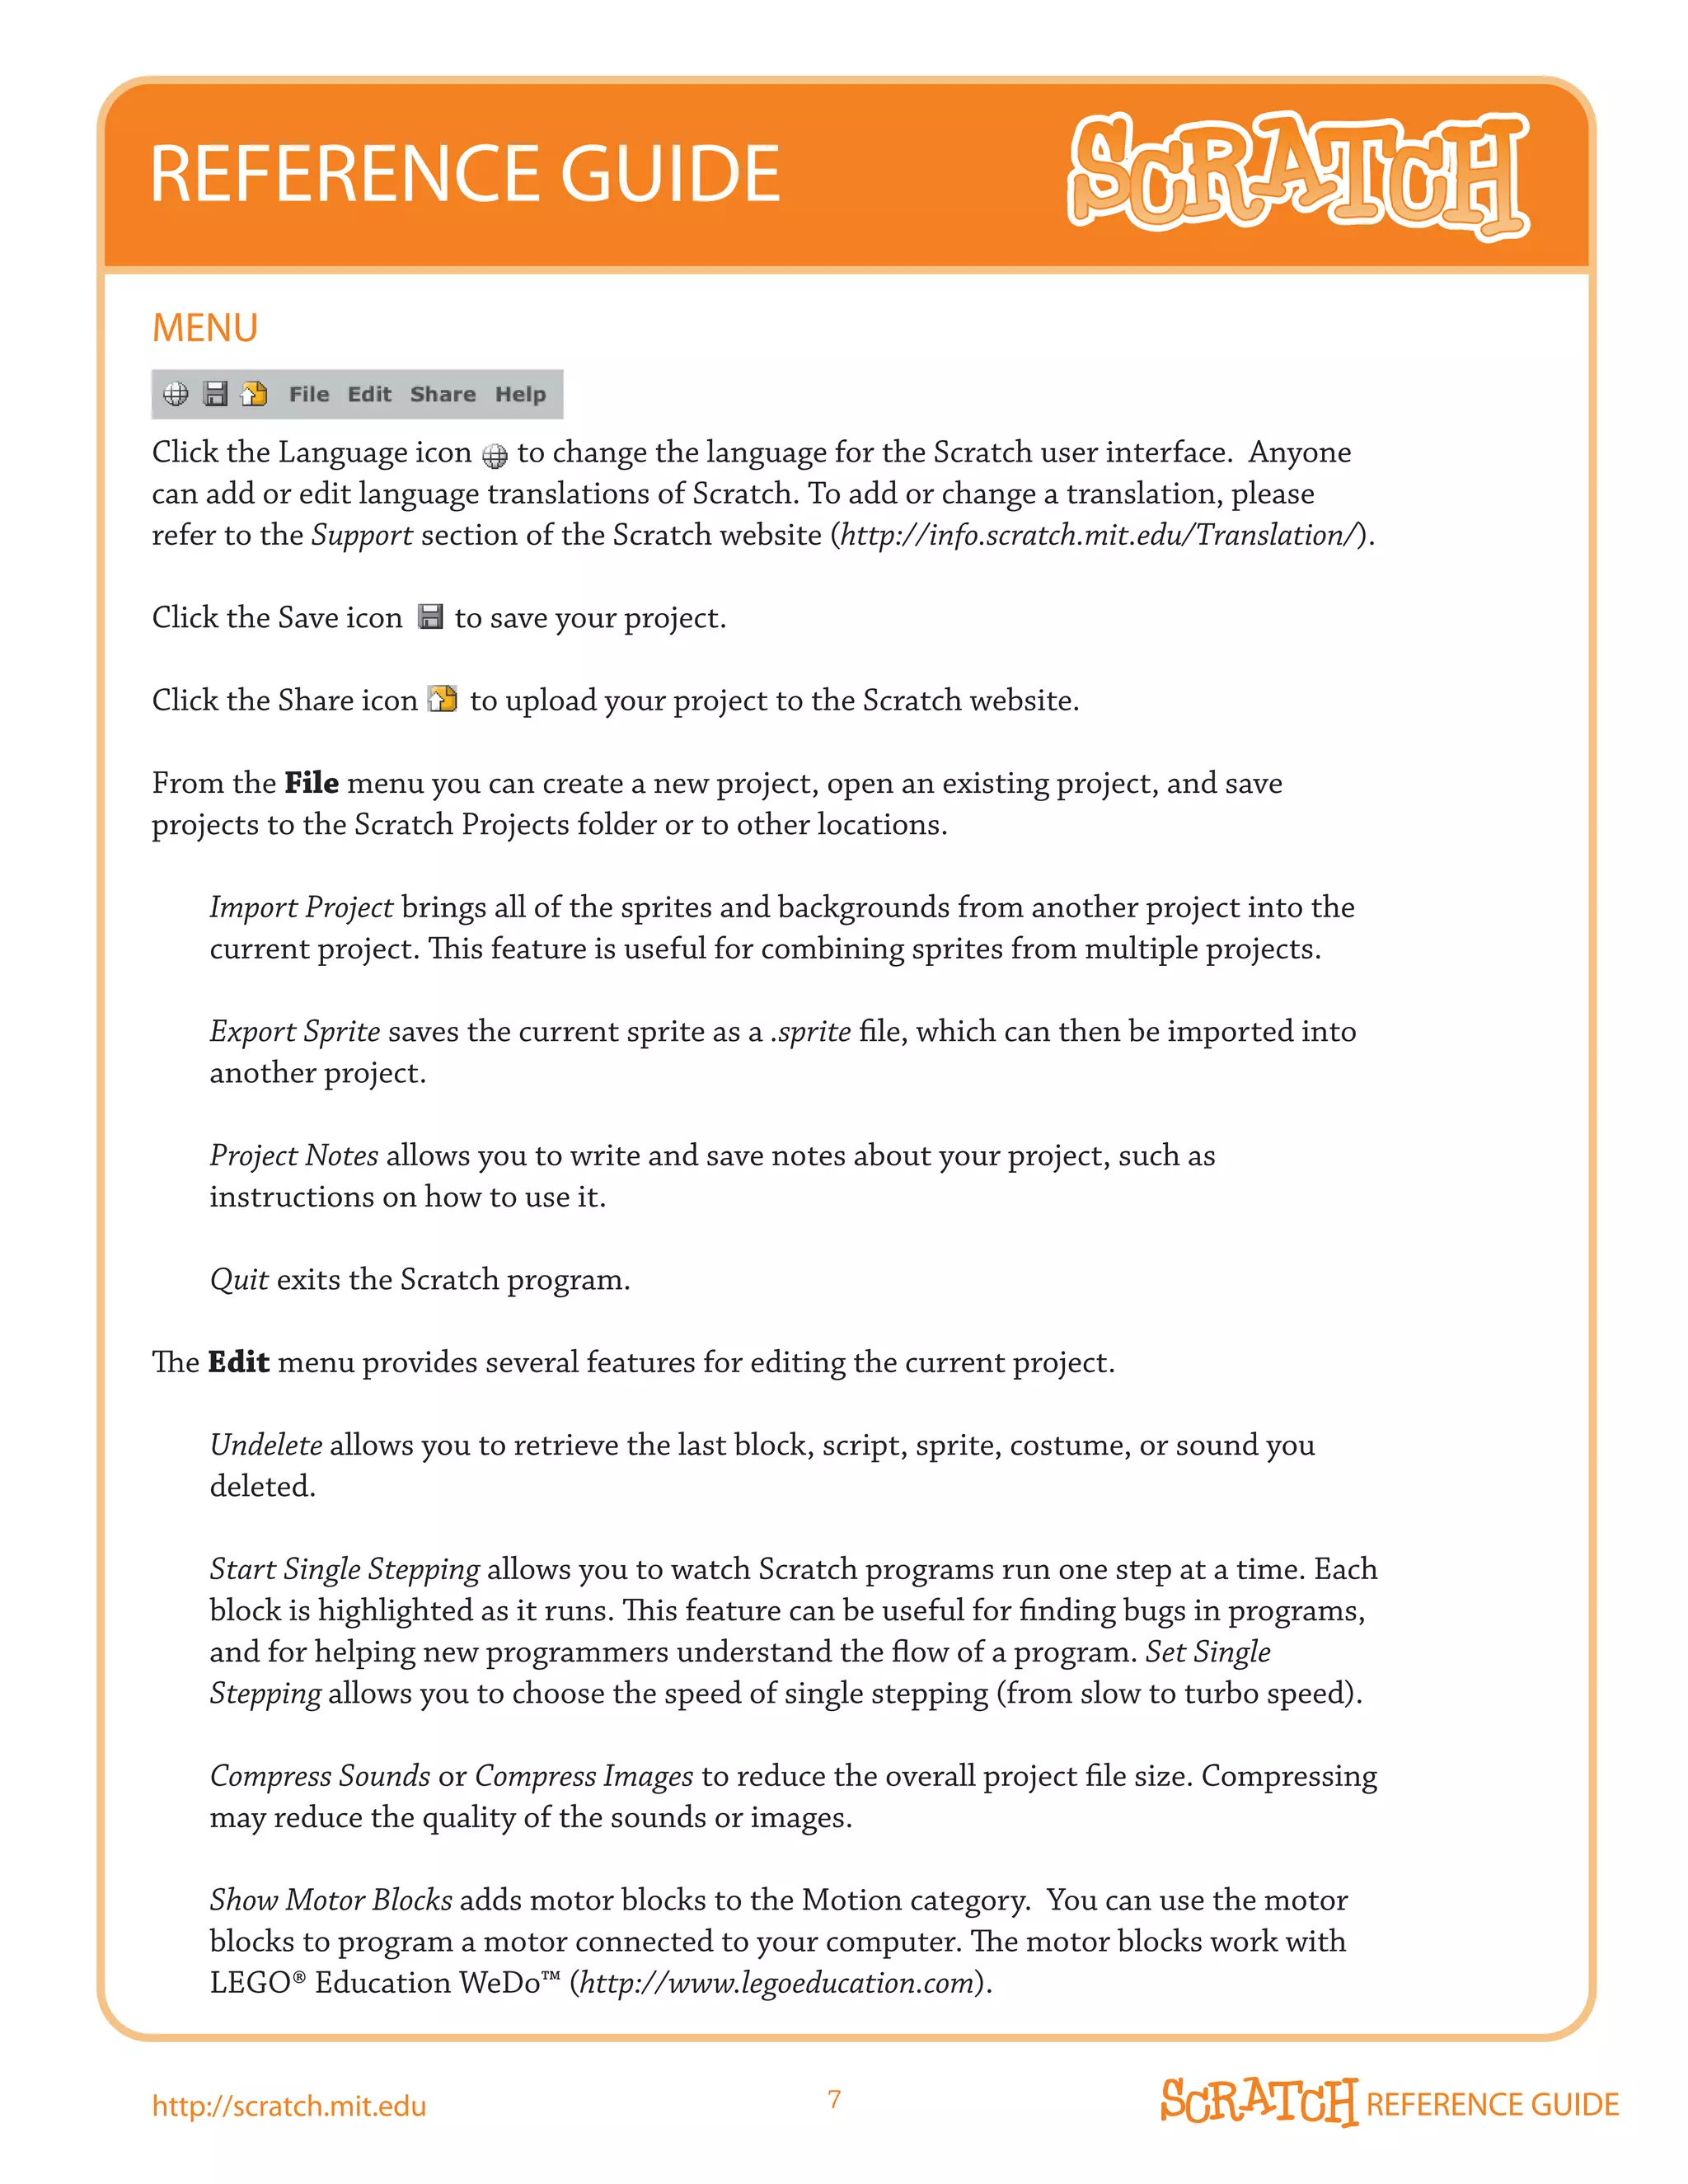
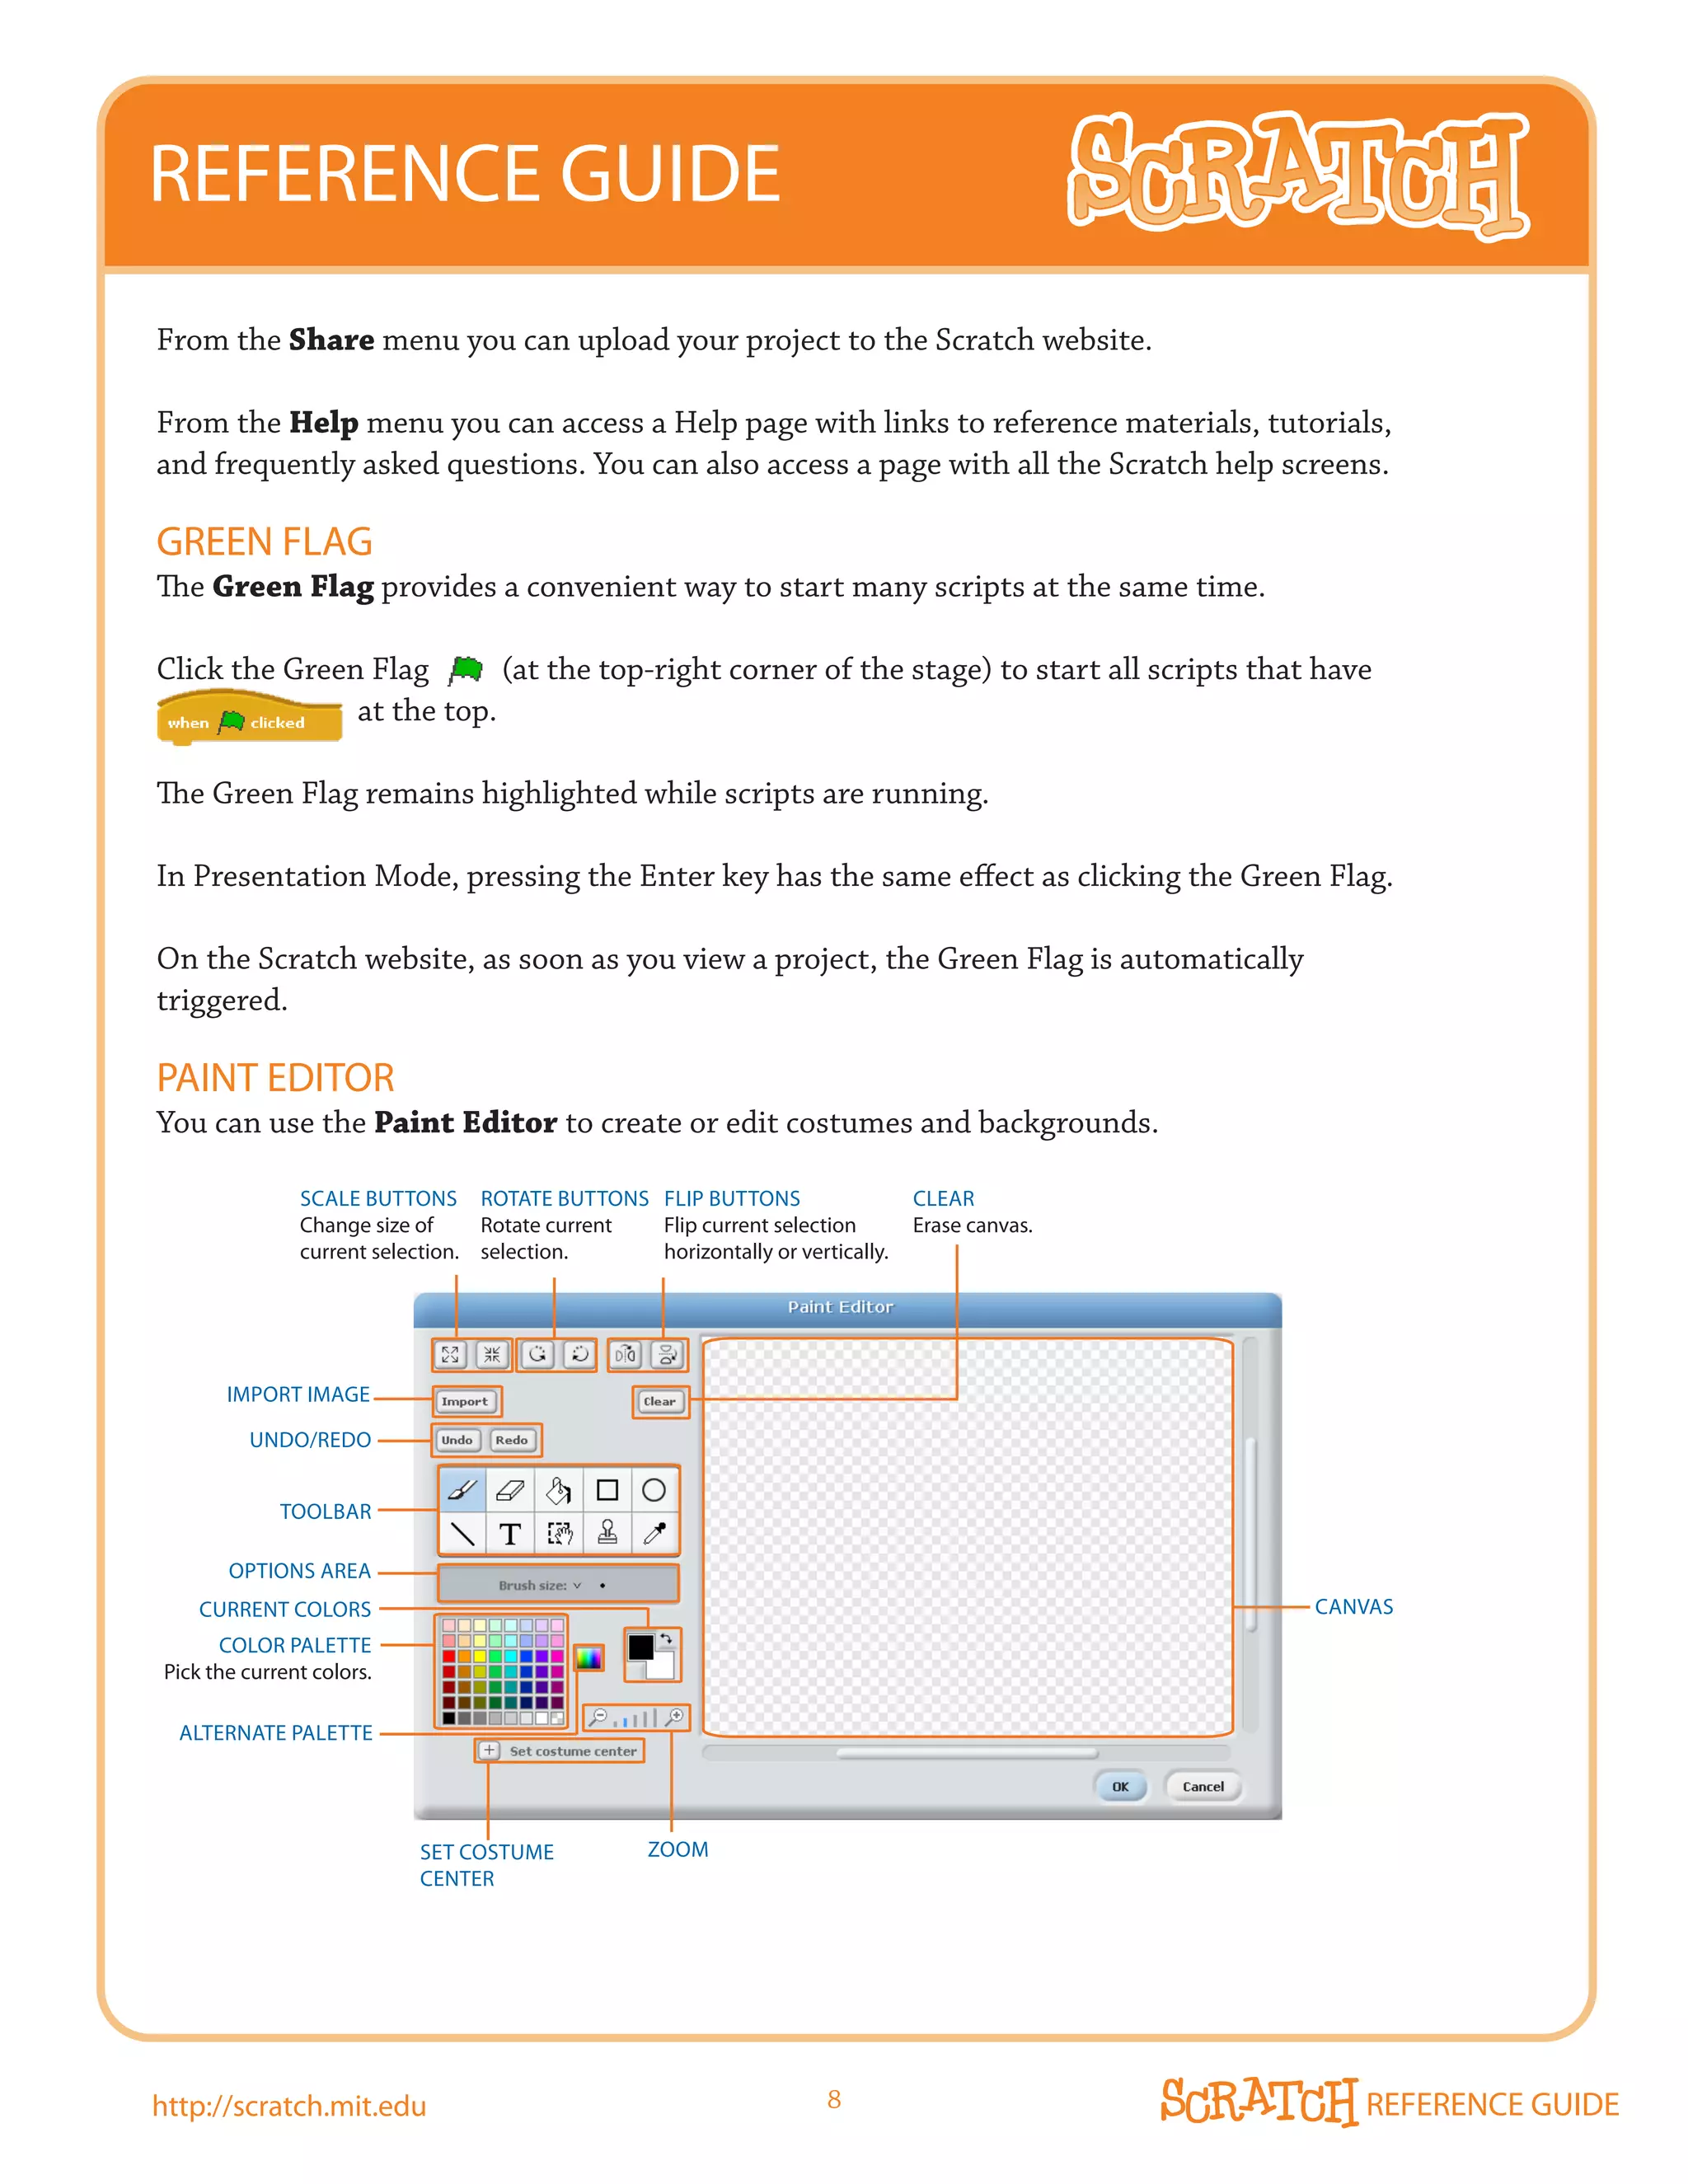


![REFERENCE GUIDE
4. APPENDIX
SySTEm REQUIREmENTS FOR SCRATCH VERSION 1.4
Computer OS:
Windows XP, Windows 2000, Windows Vista
Mac OS X 10.4 or later
Display: 800x480 or larger, thousands or millions of colors (16-bit color or greater).
Disk: At least 120 megabytes of free space to install Scratch
Note: Scratch comes with a large media library and a collection of Sample projects. If you have
very limited disk space, you can delete the Media and Projects folders from the Scratch folder.
Memory: Most computers have enough memory to run Scratch. Older computers may run
Scratch slowly.
Sound: To take advantage of sound ouput and input, you need speakers (or headphones) and a
microphone. Many laptops have speakers and microphones built in.
CHANGING DEFAULT SETTINGS
Default Sprite
The default sprite for new projects is the Scratch cat. To use a different sprite as the default,
export the sprite, rename the exported file as default.sprite, and place it in the Costumes folder.
To replace only the default costume, place an image file called default.jpg (or .png or .bmp or .gif)
in the Costumes folder.
Disabling Sharing to Website
In some cases, you may not want users to upload their Scratch projects online at all. Adding the
following line to the file Scratch.ini will hide the “Share” menu and button:
Share=0
Default Language
Scratch starts using the language specified by the “locale” of the computer, but this can be
overridden. In the Scratch.ini file, add the line:
Language = [ISO-639-2 code]
Note that this setting will be changed whenever the user changes the language setting (if the
Scratch.ini file is writeable) so that Scratch will start up in the language that was last in use.
http://scratch.mit.edu 22 REFERENCE GUIDE](https://image.slidesharecdn.com/scratchreferenceguide14-110919094830-phpapp02/75/Scratch-referenceguide14-22-2048.jpg)
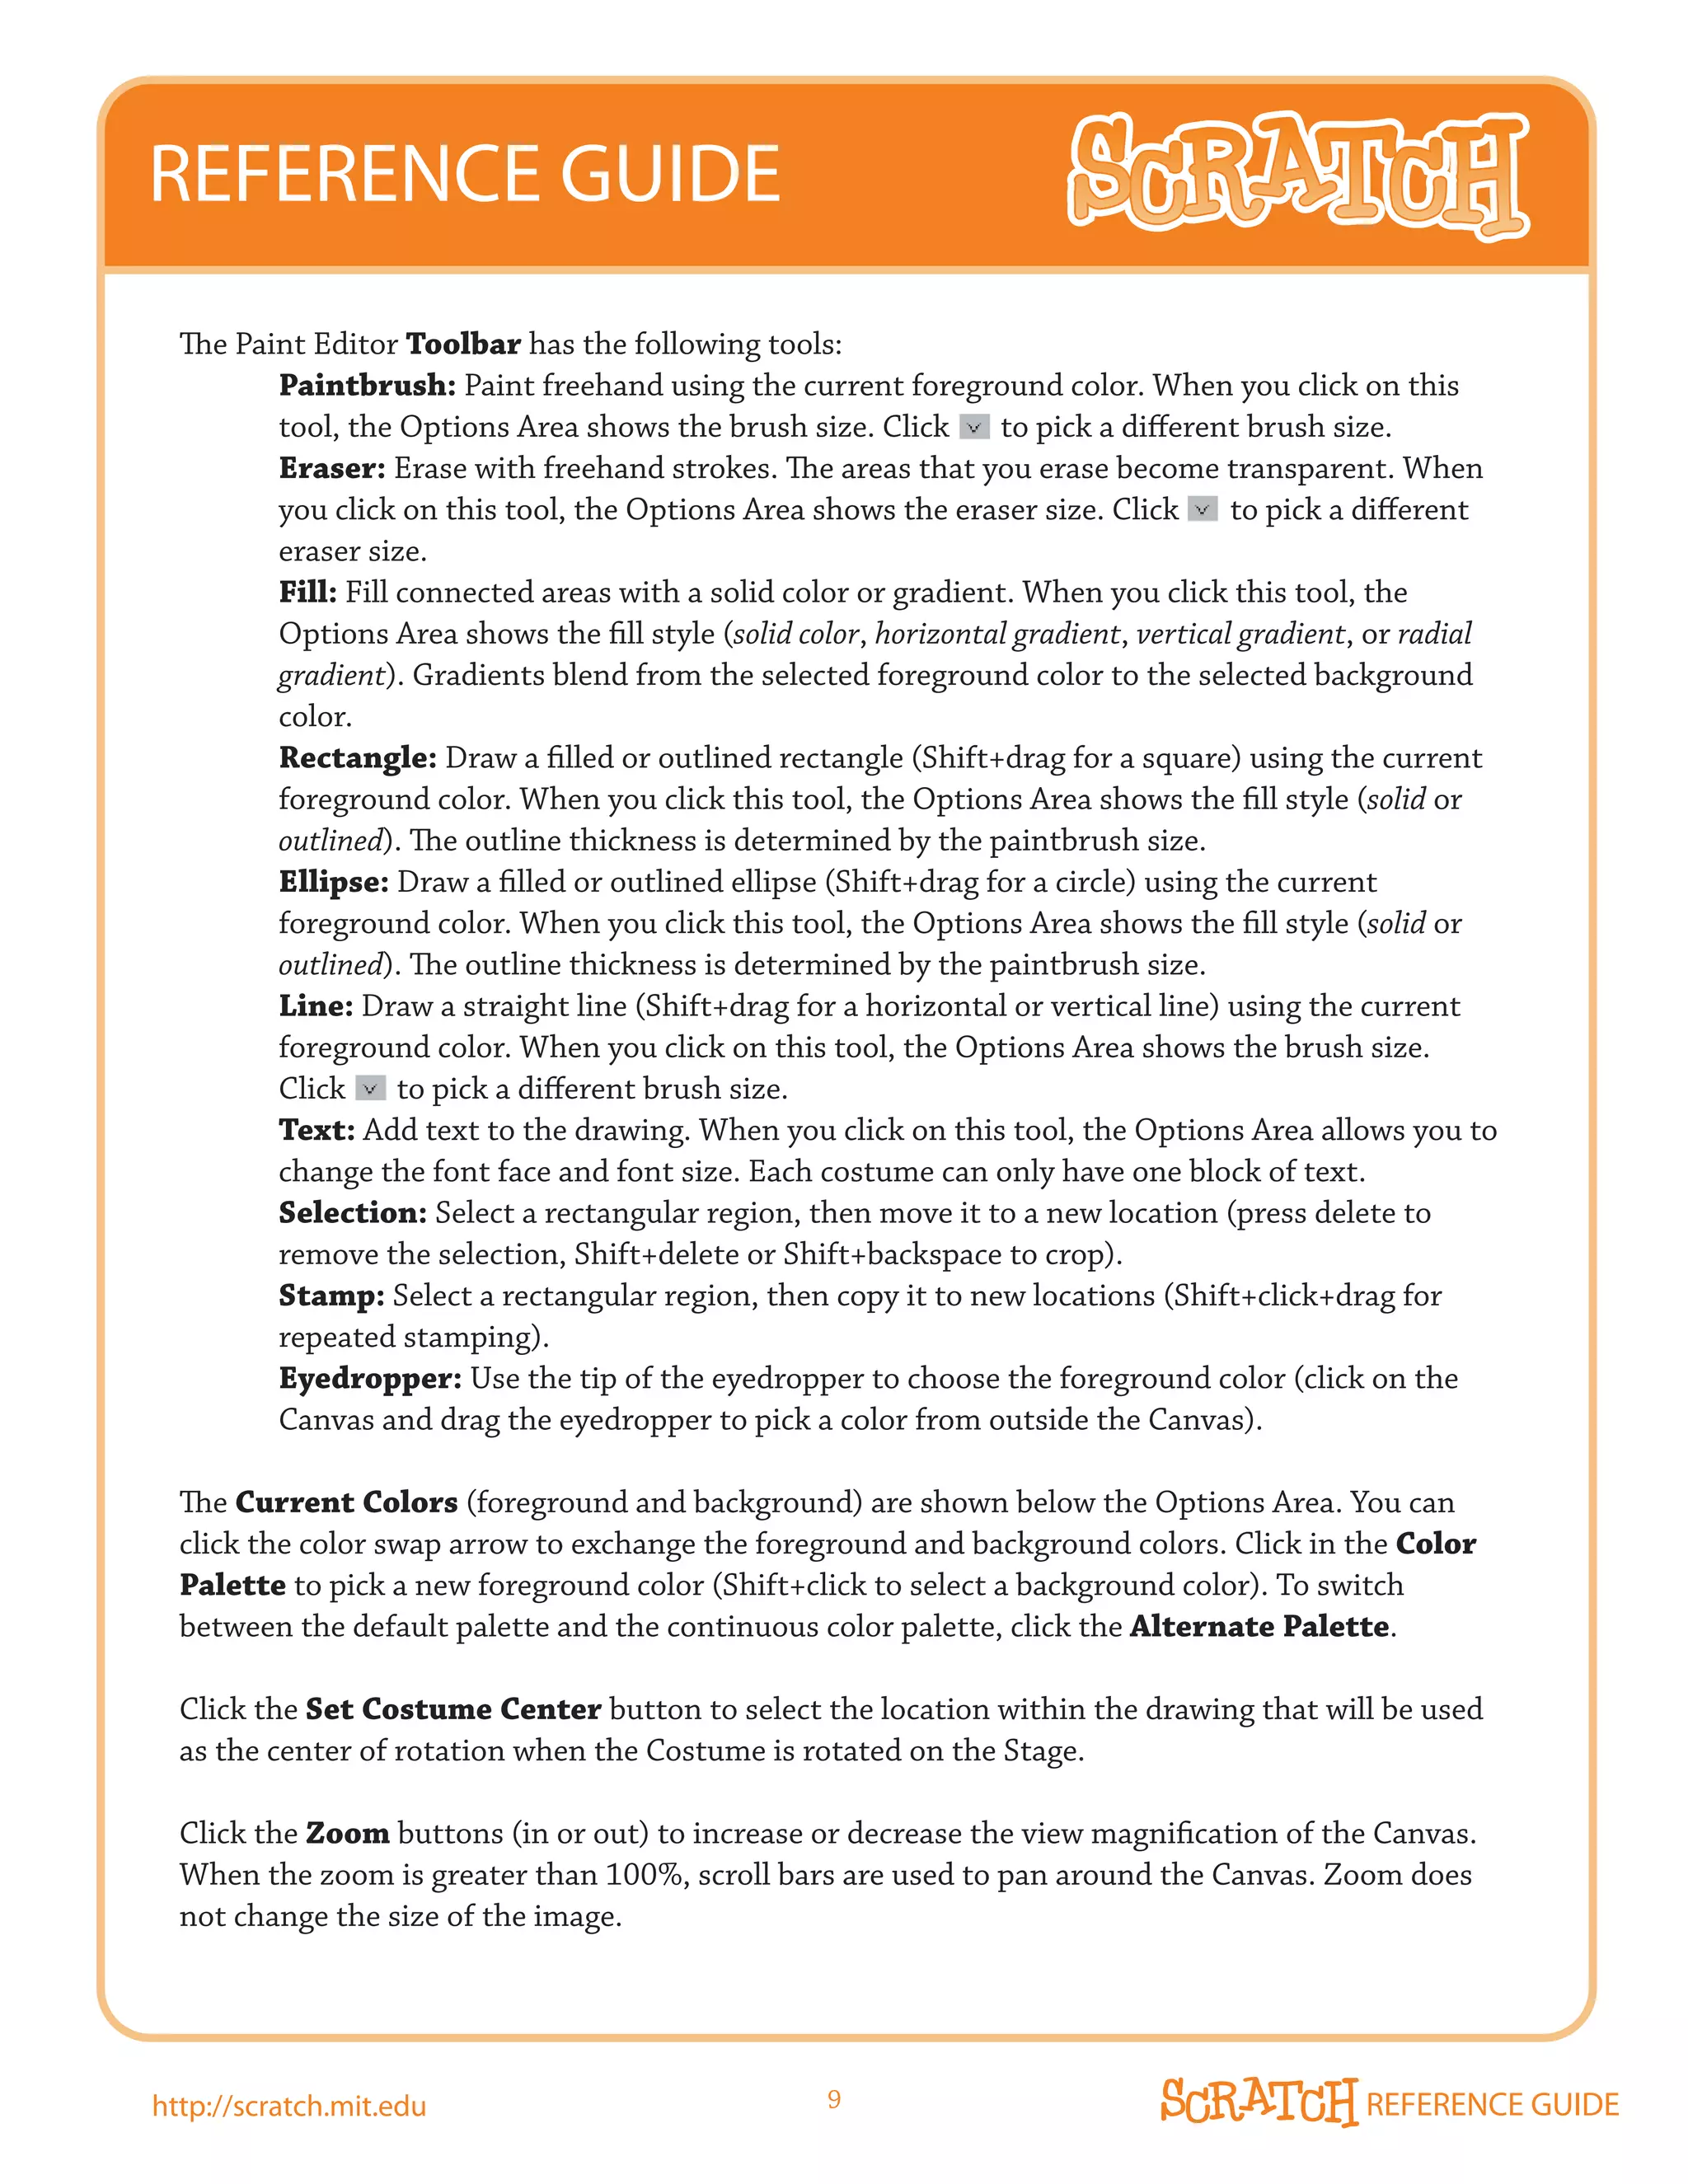
![REFERENCE GUIDE
Default Project Notes
By default, the Project Notes in a Scratch project are blank. If you want to provide questions
or instructions whenever users first edit a project’s notes, you can create a default Project
Notes file. Simply make a text file with your default notes, save it with UTF8 encoding, name it
defaultNotes.txt, and put it into the Scratch folder.
If the user does not edit the default notes, then nothing is saved in the Project Notes. The user
has to change at least one character for the notes to be saved in the project.
NETWORk AND DRIVE SETTINGS
Customizing the Default Home Folder
By default, Scratch assumes the user’s home folder is on the local C: drive. However, in
networked settings, users’ folders are often kept on a networked drive. Adding this line to the
Scratch.ini file:
Home=J:MySchoolStudentsGrade5*
will tell Scratch that user folders are kept in the folder J:MySchoolStudentsGrade5. Note
that the asterisk is replaced by the name of the user who is logged in. You may omit the asterisk
if you want all users to share the same folder for their Scratch projects.
Visible Drives
In network Windows settings, it is sometimes useful to limit which drives are visible to the
user. This can by done by adding a line such as:
VisibleDrives=J:,M:
to the Scratch.ini file.Lettered drive names must end in a colon, and the drive names must be
separated by commas. If visible drives are set, users will not be able to see any other drives
(including USB drives), and they won’t be able to navigate up the file hierarchy to parts of the
disk outside of the Scratch folder and their home folder.
Proxy Servers
Proxy server settings can be specified in the Scratch.ini file using the following entries:
ProxyServer=[server name or IP address]
ProxyPort=[port number]
FURTHER INFORmATION
For more information and updates on network installation and customization, please see:
http://info.scratch.mit.edu/Network_Installation
http://scratch.mit.edu 23 REFERENCE GUIDE](https://image.slidesharecdn.com/scratchreferenceguide14-110919094830-phpapp02/75/Scratch-referenceguide14-23-2048.jpg)

Scratch is a programming language that allows users to create interactive stories, games, and animations. A Scratch project contains sprites that can be programmed using block scripts to move and interact. Sprites have costumes that define their appearance and can be switched. The reference guide provides an overview of the Scratch interface and basic programming concepts.