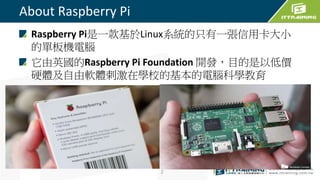
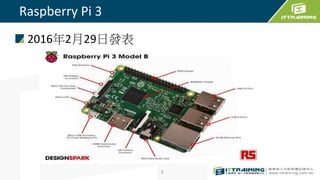
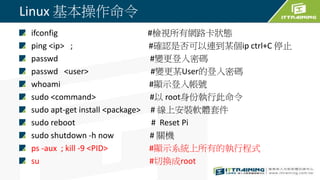
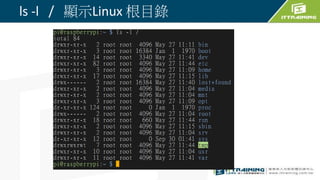
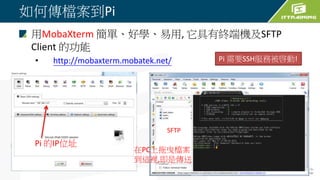
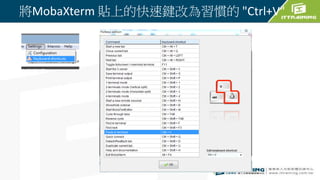
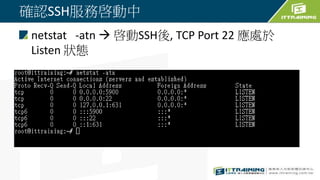
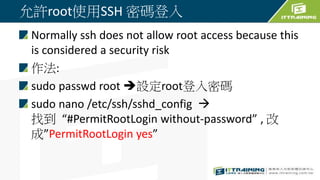
Raspberry Pi 3 是一款基於 Linux 系統的單板電腦,旨在促進學校的電腦科學教育。文檔提供了 Raspberry Pi 3 的硬體規格、基本操作命令和軟體安裝步驟,並介紹了如何使用 UART 進行連接及 Wi-Fi 設定。還包含了如何傳輸檔案至 Raspberry Pi 及自動執行程式的相關指導。
Pi 校時
Synchronize andset computers’ date and time by
querying a Network Time Protocol (NTP) server
sudo apt-get install ntpdate
sudo ntpdate ntp.ubuntu.com


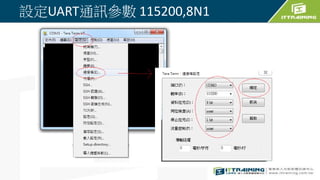
![打開 TeraTerm 軟體會看到連接埠的端口有
COMx(如下畫面)。 選擇連接埠端口 : COM3:
Prolific USB-to-Serial Comm Port 並按下 [確定]。](https://image.slidesharecdn.com/rosraspberrypibasic-181208052833/85/Raspberry-pi-12-320.jpg)

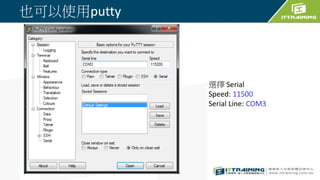
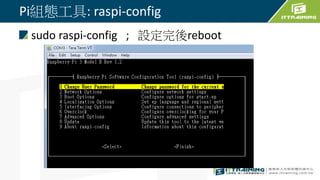
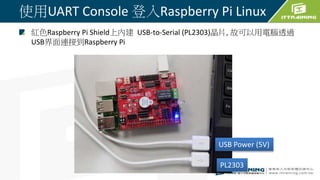
![開啓Pi的SSH功能
sudo raspi-config 進入[Interfacing
options] 將SSH 開啓
22](https://image.slidesharecdn.com/rosraspberrypibasic-181208052833/85/Raspberry-pi-22-320.jpg)
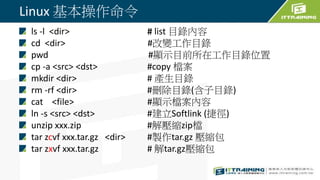
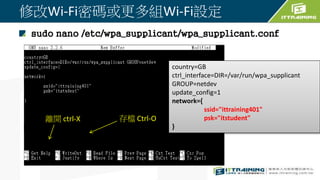
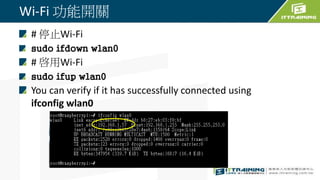
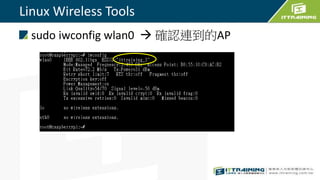
![設定Pi 3 Wi-Fi
# Site Survey (AP Scan)
sudo iwlist wlan0 scan
#連接AP
sudo raspi-config 進入[Network Options]Wi-Fi](https://image.slidesharecdn.com/rosraspberrypibasic-181208052833/85/Raspberry-pi-25-320.jpg)


![[AKIBA.AWS] EC2の基礎 - パフォーマンスを100%引き出すオプション設定 -](https://cdn.slidesharecdn.com/ss_thumbnails/akibaaws01-170901004726-thumbnail.jpg?width=640&height=640&fit=bounds)
![[嵌入式系統] MCS-51 實驗 - 使用 IAR (3)](https://cdn.slidesharecdn.com/ss_thumbnails/mcs51iarpart3-150613071723-lva1-app6892-thumbnail.jpg?width=640&height=640&fit=bounds)


![[1]投影片 futurewad樹莓派研習會 141120](https://cdn.slidesharecdn.com/ss_thumbnails/1futurewad141120-141219161346-conversion-gate02-thumbnail.jpg?width=640&height=640&fit=bounds)
![[2]futurewad樹莓派研習會 141127](https://cdn.slidesharecdn.com/ss_thumbnails/2futurewad141127-141219161835-conversion-gate02-thumbnail.jpg?width=640&height=640&fit=bounds)


![[3]投影片 futurewad樹莓派研習會 141204](https://cdn.slidesharecdn.com/ss_thumbnails/3futurewad141204-141219162020-conversion-gate01-thumbnail.jpg?width=640&height=640&fit=bounds)


