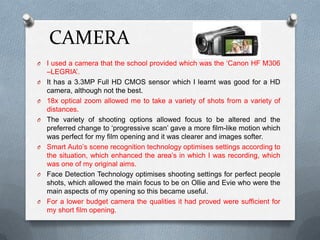
The document discusses what the author has learned about various technologies through constructing their media product. They discuss learning skills with editing software like Adobe Premiere Pro and effects software like After Effects. They also discuss using a Canon camera, SD cards for storage, finding non-copyrighted music online, and using green screens. The author had to learn how to complete many technical tasks they were unfamiliar with at the start of the process.
The Technologies I used during the construction stages of my Media courseworkhharris25
Here is a power point explaining the technologies I used during the construction stages of my a-level media coursework. I have explained how and why I have used them.
The Technologies I used during the construction stages of my Media courseworkhharris25
Here is a power point explaining the technologies I used during the construction stages of my a-level media coursework. I have explained how and why I have used them.
I chose to answer Question 6 using a Microsoft PowerPoint, and talked about what I have learnt about different technologies from the process of constructing my product.
2024.06.01 Introducing a competency framework for languag learning materials ...Sandy Millin
http://sandymillin.wordpress.com/iateflwebinar2024
Published classroom materials form the basis of syllabuses, drive teacher professional development, and have a potentially huge influence on learners, teachers and education systems. All teachers also create their own materials, whether a few sentences on a blackboard, a highly-structured fully-realised online course, or anything in between. Despite this, the knowledge and skills needed to create effective language learning materials are rarely part of teacher training, and are mostly learnt by trial and error.
Knowledge and skills frameworks, generally called competency frameworks, for ELT teachers, trainers and managers have existed for a few years now. However, until I created one for my MA dissertation, there wasn’t one drawing together what we need to know and do to be able to effectively produce language learning materials.
This webinar will introduce you to my framework, highlighting the key competencies I identified from my research. It will also show how anybody involved in language teaching (any language, not just English!), teacher training, managing schools or developing language learning materials can benefit from using the framework.
Ethnobotany and Ethnopharmacology:
Ethnobotany in herbal drug evaluation,
Impact of Ethnobotany in traditional medicine,
New development in herbals,
Bio-prospecting tools for drug discovery,
Role of Ethnopharmacology in drug evaluation,
Reverse Pharmacology.
The Roman Empire A Historical Colossus.pdfkaushalkr1407
The Roman Empire, a vast and enduring power, stands as one of history's most remarkable civilizations, leaving an indelible imprint on the world. It emerged from the Roman Republic, transitioning into an imperial powerhouse under the leadership of Augustus Caesar in 27 BCE. This transformation marked the beginning of an era defined by unprecedented territorial expansion, architectural marvels, and profound cultural influence.
The empire's roots lie in the city of Rome, founded, according to legend, by Romulus in 753 BCE. Over centuries, Rome evolved from a small settlement to a formidable republic, characterized by a complex political system with elected officials and checks on power. However, internal strife, class conflicts, and military ambitions paved the way for the end of the Republic. Julius Caesar’s dictatorship and subsequent assassination in 44 BCE created a power vacuum, leading to a civil war. Octavian, later Augustus, emerged victorious, heralding the Roman Empire’s birth.
Under Augustus, the empire experienced the Pax Romana, a 200-year period of relative peace and stability. Augustus reformed the military, established efficient administrative systems, and initiated grand construction projects. The empire's borders expanded, encompassing territories from Britain to Egypt and from Spain to the Euphrates. Roman legions, renowned for their discipline and engineering prowess, secured and maintained these vast territories, building roads, fortifications, and cities that facilitated control and integration.
The Roman Empire’s society was hierarchical, with a rigid class system. At the top were the patricians, wealthy elites who held significant political power. Below them were the plebeians, free citizens with limited political influence, and the vast numbers of slaves who formed the backbone of the economy. The family unit was central, governed by the paterfamilias, the male head who held absolute authority.
Culturally, the Romans were eclectic, absorbing and adapting elements from the civilizations they encountered, particularly the Greeks. Roman art, literature, and philosophy reflected this synthesis, creating a rich cultural tapestry. Latin, the Roman language, became the lingua franca of the Western world, influencing numerous modern languages.
Roman architecture and engineering achievements were monumental. They perfected the arch, vault, and dome, constructing enduring structures like the Colosseum, Pantheon, and aqueducts. These engineering marvels not only showcased Roman ingenuity but also served practical purposes, from public entertainment to water supply.
The Indian economy is classified into different sectors to simplify the analysis and understanding of economic activities. For Class 10, it's essential to grasp the sectors of the Indian economy, understand their characteristics, and recognize their importance. This guide will provide detailed notes on the Sectors of the Indian Economy Class 10, using specific long-tail keywords to enhance comprehension.
For more information, visit-www.vavaclasses.com
Welcome to TechSoup New Member Orientation and Q&A (May 2024).pdfTechSoup
In this webinar you will learn how your organization can access TechSoup's wide variety of product discount and donation programs. From hardware to software, we'll give you a tour of the tools available to help your nonprofit with productivity, collaboration, financial management, donor tracking, security, and more.
Operation “Blue Star” is the only event in the history of Independent India where the state went into war with its own people. Even after about 40 years it is not clear if it was culmination of states anger over people of the region, a political game of power or start of dictatorial chapter in the democratic setup.
The people of Punjab felt alienated from main stream due to denial of their just demands during a long democratic struggle since independence. As it happen all over the word, it led to militant struggle with great loss of lives of military, police and civilian personnel. Killing of Indira Gandhi and massacre of innocent Sikhs in Delhi and other India cities was also associated with this movement.
1. Q6) What have you learnt
about technologies from the
process of constructing this
product?
2. Before starting…
O I knew minimal aspects to the technologies of
which I was using at the beginning of this
process as I had never worked with the
editing software or the camera’s provided.
O I could understand the basic functions of the
camera I was provided with, and as a result of
my shot list I only needed to use them in a
minimalistic way through the shooting
process. Instead focussed my time on
developing my skillset in the software and
effects I could use in different programmes.
3. MY BLOG!
O I had never even thought I would be able
to tackle having my own blog and when I
found out that I would have to manage my
own the task daunted me. My experience
of the blogging World prior to this task
was only of celebrities such as Tanya Burr
on www.tanyaburr.co.uk who shows her
audience her beauty and fashion tips and
Perez Hilton on perezhilton.com.
O Taking advise from such blogs, I took note
that I would have to appeal to my target
audience so I played with page layouts
and designs and settled for a blue
background and chose writing which
looked like a typewriter, which I thought
was relevant.
emilyweal.blogspot.co.u
k
4. O I realised that you could ‘share’ your blog
posts with others on the blogspot.com
community which is convenient for the industry
as increasingly media and technology is the
way to get noticed and an excellent to share
work. It is evolving as the industry is as it
constantly get changed when it is relevant to
do so to capture it’s target audience.
O I started basic by just posting short writing
posts onto my blog as this was easy because I
knew what I was writing about and I just had to
adapt my writing to suit my blog’s style.
5. O I soon after realised I could insert pictures to
show case my work and relevant topics to
support my writing. I used print screens of
work I have done on Prezi and I took print
screens of films which were relevant to my
subject topics.
O I then found that I could link my youtube
channel to my blogspot page and I could
easily add my video’s onto my blog. This
made it much easier to show my audience
what I was talking about by supplying a video
a side to my text. I inserted movie clips,
adverts and my own filming footage I had
done through this process.
6.
7.
8. CAMERA
O I used a camera that the school provided which was the ‘Canon HF M306
–LEGRIA’.
O It has a 3.3MP Full HD CMOS sensor which I learnt was good for a HD
camera, although not the best.
O 18x optical zoom allowed me to take a variety of shots from a variety of
distances.
O The variety of shooting options allowed focus to be altered and the
preferred change to ‘progressive scan’ gave a more film-like motion which
was perfect for my film opening and it was clearer and images softer.
O Smart Auto’s scene recognition technology optimises settings according to
the situation, which enhanced the area’s in which I was recording, which
was one of my original aims.
O Face Detection Technology optimises shooting settings for perfect people
shots, which allowed the main focus to be on Ollie and Evie who were the
main aspects of my opening so this became useful.
O For a lower budget camera the qualities it had proved were sufficient for
my short film opening.
9. SD CARD
O I decided to use an additional SD card with the
camera because I felt that using the external
memory may not allow me store as much
footage as I had (eventually over 100 files!)
O Using the SD card instead of the camera for
storage meant that the convenience of having
my files to hand was much easier, as I would
just have to have the card to access all my
footage instead of having the camera as well.
O I learnt about the ‘Class’ of an SD and how fast
it works as to how high the card was. I in fact
only had a low class of 4 on my SD card but it
worked fine for what I needed it for. Although
thinking onwards, if I was to make my film into
a full length film, I would benefit to using a
larger sized class to speed the process up,
although on a budget a class 4 suited me just
fine for the price!
10. EDITING SOFTWARE
O Post production I worked with Adobe Premier Pro to
edit my footage together, which was a software
system I had never used before starting my media
course at AS.
O In previous tasks such as my Preliminary Task I got
to grasps with the basic tools on Premier Pro and
then later on with a guest teacher, I was able to
branch my knowledge on some of the effects and
how to layer and add music and other sounds onto
the reel.
O Editing is what I had the most fun, as I experimented
with many different visual forms on screen to
achieve my ideal look.
O Layering 2 video clips on top of each other took a lot
of time and effort to get them spot on.
11. O With some of the city location shots with Ollie I
used the colour corrector to add a lighter image
to some of the shots which turned out darker
due to weather issues.
O Adapting the brightness and contrast I realised I
could achieve a much better picture, although I
didn’t adapt it too much to create an un-natural
picture as I wanted the footage to look true to
the setting and minimal budget in which I was
working with
12. KEY FRAMES
O Having developed skills on using key frames, I decided to
experiment with these to achieve a cleaner and more
professional looking film opening.
O I had to practise and adjust these a lot as I discovered fairly
early on that it is very easy to position the key frames in the
wrong place achieving an undesired look.
O I used the key frames for my actor credits which were scrolling
in from behind the footage throughout my opening. I made
them go from left to right, and would seem to scroll of the
screen.
O At first I tried to experiment by trying to make it look as if my
characters were hiding and then revealing the titles, but then
with 2 pieces of footage at screen at once and by not using all
of the screen I decided that this looked messy. Instead, I then
placed all the actor credits in the background black where there
wasn’t footage rolling.
13.
14. Adding the title into the
chalkboard
O I wanted to work further with software to
add special features into my film which
others hadn’t included. I came up with the
idea of adding my title into a pan shot of
Ollie and I achieved a really professional
look.
15. O I did this by using motion tracking to stabilise
the text on After Effects.
O With a lot of trial and error I was able to
achieve a stable title image on the chalkboard.
O In After Effects I also made the chalkboard
clear before adding the text. I did this by
scaling a solid back colour layer on top on the
chalkboard, making sure I kept the outside
frame and made the colour to match the
original colour by selecting the ‘eyedropper’
colour tool to achieve a clean finish with no
obvious outline edges.
16. IDENT
O I wanted to have fun making my ident by
using new software in which I hadn’t really
experimented with before.
O For this I used Adobe After Effects.
O I used a green screen which I hadn’t used
previously and used my camera to record
myself making a dove symbol with my hands.
O I then edited this further on After Effects and
changed the position of the hands by
adjusting the key frames.
17. DOWNLOADING MY NON-DIAGETIC
MUSIC
O Finding legal un-copyrighted music proved a very difficult
task. I searched on many different sites to find what I was
looking for and filed through cover artists which I could use.
I found so many original songs which fitted perfectly with my
film opening with the upbeat vibe I was looking for although
the only problem was… downloading them was illegal!
O Finally, after weeks of searching I tracked down a small
group on youtube.com covering the song ‘You Make My
Dreams Come True’ by Hall and Oats. It was exactly what I
was looking for.
18.
19. O The next step was to convert it to a mp3 file
which would be compatible with my computer
and Premier Pro.
O I found a site on the internet which allowed
me to do this and I downloaded it from a
youtube video to an mp3 file. I have never
done this process before so I had to go
through many different sites to make sure that
I was doing it the right way and that I wasn’t
breaching any codes by doing what I was
doing.