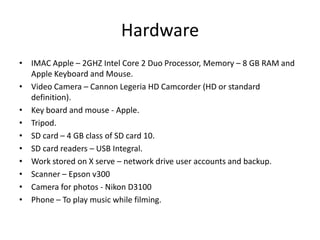
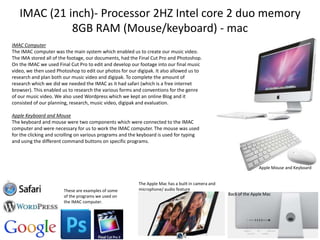
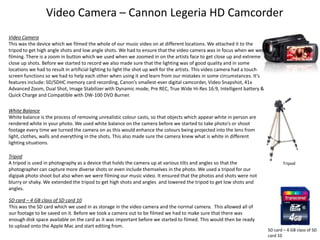
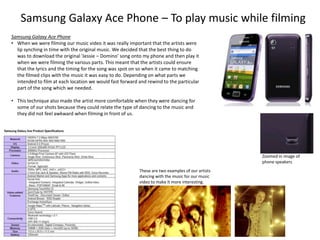
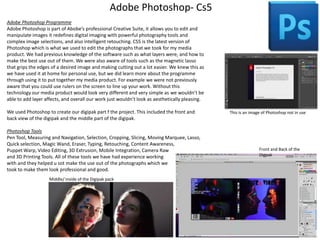
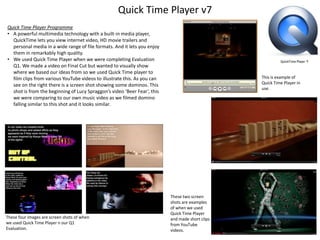
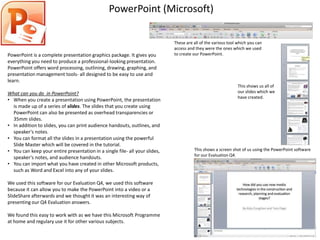
How did you use new media
technologies in the construction and
research, planning and evaluation
stages?
By Katy Coughlan and Tara Page
Hardware
• IMAC Apple – 2GHZ Intel Core 2 Duo Processor, Memory – 8 GB RAM and
Apple Keyboard and Mouse.
• Video Camera – Cannon Legeria HD Camcorder (HD or standard
definition).
• Key board and mouse - Apple.
• Tripod.
• SD card – 4 GB class of SD card 10.
• SD card readers – USB Integral.
• Work stored on X serve – network drive user accounts and backup.
• Scanner – Epson v300
• Camera for photos - Nikon D3100
• Phone – To play music while filming.
IMAC (21 inch)- Processor 2HZ Intel core 2 duo memory
8GB RAM (Mouse/keyboard) - mac
IMAC Computer
The IMAC computer was the main system which enabled us to create our music video.
The IMA stored all of the footage, our documents, had the Final Cut Pro and Photoshop.
On the IMAC we used Final Cut Pro to edit and develop our footage into our final music
video, we then used Photoshop to edit our photos for our digipak. It also allowed us to
research and plan both our music video and digipak. To complete the amount of
research which we did we needed the IMAC as it had safari (which is a free internet
browser). This enabled us to research the various forms and conventions for the genre
of our music video. We also used Wordpress which we kept an online Blog and it
consisted of our planning, research, music video, digipak and evaluation.
Apple Keyboard and Mouse
The keyboard and mouse were two components which were connected to the IMAC
computer and were necessary for us to work the IMAC computer. The mouse was used
for the clicking and scrolling on various programs and the keyboard is used for typing
and using the different command buttons on specific programs.

Apple Mouse and Keyboard

These are examples of some
of the programs we used on
the IMAC computer.

The Apple Mac has a built in camera and
microphone/ audio feature
Back of the Apple Mac
Video Camera – Cannon Legeria HD Camcorder
Video Camera
This was the device which we filmed the whole of our music video on at different locations. We attached it to the
tripod to get high angle shots and low angle shots. We had to ensure that the video camera was in focus when we were
filming. There is a zoom in button which we used when we zoomed in on the artists face to get close up and extreme
close up shots. Before we started to record we also made sure that the lighting was of good quality and in some
locations we had to result in artificial lighting to light the shot up well for the artists. This video camera had a touch
screen functions so we had to help each other when using it and learn from our mistakes in some circumstances. It’s
features include: SD/SDHC memory card recording, Canon’s smallest-ever digital camcorder, Video Snapshot, 41x
Advanced Zoom, Dual Shot, Image Stabilizer with Dynamic mode, Pre REC, True Wide Hi-Res 16:9, Intelligent battery &
Quick Charge and Compatible with DW-100 DVD Burner.
White Balance
White balance is the process of removing unrealistic colour casts, so that objects which appear white in person are
rendered white in your photo. We used white balance on the camera before we started to take photo’s or shoot
footage every time we turned the camera on as this would enhance the colours being projected into the lens from
light, clothes, walls and everything in the shots. This also made sure the camera knew what is white in different
lighting situations.
Tripod
A tripod is used in photography as a device that holds the camera up at various tilts and angles so that the
photographer can capture more diverse shots or even include themselves in the photo. We used a tripod for our
digipak photo shoot but also when we were filming our music video. It ensured that the photos and shots were not
blurry or shaky. We extended the tripod to get high shots and angles and lowered the tripod to get low shots and
angles.
SD card – 4 GB class of SD card 10
This was the SD card which we used in as storage in the video camera and the normal camera. This allowed all of
our footage to be saved on it. Before we took a camera out to be filmed we had to make sure that there was
enough disk space available on the card as it was important before we started to filmed. This would then be ready
to upload onto the Apple Mac and start editing from.

Tripod

SD card – 4 GB class of SD
card 10
Scanner – Epson v300
What is a scanner ?
•
A scanner is a device that reads (scans) a image and it converts it into digital
information. Then the scanners software converts this digital code into a image. lets
you scan something and enlarge it on to your computer . We used a scanner when we
did our planning drawing’s and we scanned them on to the computer and put them
on our blog.
The Epson v300
•
This particular scanner lets you can scan photos, film and 3D objects with high clarity.
It has a 4800 dpi optical resolution it can scan up to 6 negative frames or 4 slides at
one time. It has a Built-in film adaptor for 35mm positive and negative film and slide
scanning. The Epson Easy Photo Fix allows you to restore photos. The Epson’s
ReadyScan LED helps the scanner have a low power usage.
The main use of this scanner was to scan in our storyboards and other paper resources
onto our blog to show development and written work which we
have produced.

These are examples of the work which we
scanned onto our IMAC desktop to use on our
blog.
Camera for photos - Nikon D3100
Camera
As we worked in a pair we were both able to use this camera and help each other with how to function all
of the settings and to get the best shots which we could. This camera has many features which allowed us
to capture the best possible photographs. As the same as the video camera we had to start with white
balancing the camera, then manually focusing so that the shots were in focus and not pixelated. We did
not use this to film the music video we just used it to take photographs for our digipak.
All photos were stored on a SD card which we later inserted and uploaded on to an Apple Mac. We used
this camera to capture all the photos for our coursework. When using this camera we had to think about
composition, lighting and focus to ensure our photos and video footage was the best we could product.
Tripod
The tripod was also a device which we used when we were doing our photoshoot. This ensured that the
shots were still and that there was no blurry or out of focus shots. We were able to adjust the length of
the legs in order to get the height of the shot correctly.

Flash Light
We used the flash light and connected it to a timer on the camera. This meant that when we took a
picture the light also flashed to get a really professional looking photo. We experimented with this piece of
technology to try different and unique shots which could work well for our digipak.

These are two examples
of each of our artists
when we used the
camera with the flash
light

Tripod

Flash Light
Camera photos – UV light
What is a uv black light?
•
It is a lamp which emits a long wave of ultraviolet light , the lamp has a dark
purple filter material either on the bulb or a separate glass filter , which blocks
most visible light and allows through the UV. Because of this the lamp has a dim
purple glow when operating. Black lights are used for decorative and artistic
lighting effects when we used neon (fluorescent) paint on our artist faces and but
the up black light next to it the paints glow.
• We used this component when we were filming the neon footage for our music
video. Also we decided for our digipak to use the neon set up for our artists
because it was unique and fits in well with the ‘pop’ genre which we have chosen.
This light we purchased from ebay for £10, we were intending to buy a larger one s
that it was easier to use but we were on cheap budget so could not afford a larger
light.

These are the UV paints
which we purchased
online and used on our
artists.

Festival make
up inspired us.
The images below show
the photos from our
photoshoot which we
did for our digipak. We
used the UV black light
at various positions to
get the best shot which
looked unique and made
our artists look
interesting.
SD Card Readers – USB Integral
How do they work?
• A card reader is a data input device that reads data from a SD card. They are
electronic devices that read plastic memory cards embed with a computer chip.
They have USB interface that allows them to access the data from the card.
Integral card reader
• We used this card reader to transfer the photos and videos off the cameras that we
used it quickly upload them onto the computer and back them up. All you have to
do is slot the card into the card reader and plug it into the USB port.
• This then allowed us to save the work which we had on the SD Card reader and save
it on our desktop in various folders. For example we uploaded our photographs for
our digipak photoshoot and placed them in a folder named ‘photography’

This screen shop shows
the files which have
been imported from the
SD Card reader.

SD Integral Card Reader
Samsung Galaxy Ace Phone – To play music while filming
Samsung Galaxy Ace Phone
• When we were filming our music video it was really important that the artists were
lip synching in time with the original music. We decided that the best thing to do
was to download the original ‘Jessie – Domino’ song onto my phone and then play it
when we were filming the various parts. This meant that the artists could ensure
that the lyrics and the timing for the song was spot on so when it came to matching
the filmed clips with the music it was easy to do. Depending on what parts we
intended to film at each location we would fast forward and rewind to the particular
part of the song which we needed.
• This technique also made the artist more comfortable when they were dancing for
some of our shots because they could relate the type of dancing to the music and
they did not feel awkward when filming in front of us.

Zoomed in image of
phone speakers
These are two examples of our artists
dancing with the music for our music
video to make it more interesting.
Software
•
•
•
•
•
•
•

Final Cut Pro X v.10.0.9- Apple
File converter – Free video converter v.2.30 Leawo
Adobe Photoshop- Cs5
Quick time player v7
PowerPoint (Microsoft)
OSX v.10.6.8 – Apple Operating system
Online software -YouTube , Word Press (blogging) , Google Slide share ,
Prezie ,FB , Twitter , Safari- Web browser, Da Font.
Final Cut Pro X v.10.0.9- Apple
Final Cut Software
Final cut is a professional video editing suit, and is top of the range and very expensive
to get hold of, this is because of the vast range of freedom that it gives you in editing
video and audio. The programme allows the importation of video clips and has the
options for them to be mastered and edited in order to achieve a music video. We
used final cut for my project music video to put a whole edit together. Final cut was a
programme of easy usage and allowed me to pick and create may effects. By using
final cut we were able to blade clips and place clips where we wanted them. Also the
speed and reverse videos and choose the pace of the edits. We also did various effects
and transitions, fonts, colours, title options and spilt screens.
Our view of Final Cut Pro
Our video has a lot of fast editing and effects, and it was important that we edited our
visuals well and matched shots and angles together in time with the music in order to
create a good quality music video. We did this using final cut programme. Our video is
all performance based so it allowed us to play around with the different effects and
transitions in Final Cut because we didn’t have to play it safe as our video does not
have a story or hidden meaning. The effects completely transformed our footage to
make it go from amateur into a good standard of professional quality. It also allowed
us to create similar but different visuals to what Jessie J uses in her own music videos.
We found it hard at first to adjust to the new programme that we were not familiar
with. But as we were working in a pair we were able tot each ach other different
aspects of the programme and help each other along the way. After using it the first
few times and adjusting to the layout of where everything was we seemed to find it
easy to work with.
Final Cut Effects Bar
This part of final cut we found particularly useful as it allowed us to adapt the different
effects which we placed on various shots. This included transparency, amount, hue,
saturation etc.. This helped us to create the cool ad unique effects in our video.

This is a screen shot us using Final Cut Pro to create our
music video.
This is the
Final Cut
effects bar.
Final Cut Pro X v.10.0.9- Apple

Transitions: Choose from more than 90
professionally designed transitions and add
them to your project with drag-and-drop
ease. We used these in our video.

Video Effects: There are a wide range of effect
to to experiment with including glows, blurs,
lighting, drop shadows, and more. Just select a
shot, then choose an effect; skimming the effect
thumbnail lets you preview before applying it.

Magnetic Timeline: The Magnetic Timeline
eliminates the so you’ll never be slowed down by
clip collisions or out-of-sync problems as you’re
working The Magnetic Timeline automatically
tracks clip relationships as you rearrange, trim, or
add clips, letting you easily make changes in even
the most complex sequences.

Titles: Final Cut Pro includes professionally
designed animated templates, with intuitive
onscreen controls that make it easy to create
titles that leap off the screen. These are what
we used to create our on screen lyrics.

Skimming: The most responsive way ever to
view vast amounts of media, skimming in the
Filmstrip view lets you fly through and select
the best takes. Skim to any point in your
timeline, then press the Space bar to play the
video instantly.

Clip Connections: It is easier to position B-roll,
titles, music, and sound effects, with direct
links to reference clips in the timeline. When
you move a clip in the timeline, you can
choose to have its Connected Clips move with
it or keep them locked in place. This ensures it
is more precise.
Adobe Photoshop- Cs5
Adobe Photoshop Programme
Adobe Photoshop is part of Abobe’s professional Creative Suite, it allows you to edit and
manipulate images it redefines digital imaging with powerful photography tools and
complex image selections, and also intelligent retouching. CS5 is the latest version of
Photoshop which is what we used to edit the photographs that we took for my media
product. We had previous knowledge of the software such as what layers were, and how to
make the best use out of them. We were also aware of tools such as the magnetic lasso
that grips the edges of a desired image and making cutting out a lot easier. We knew this as
we have used it at home for personal use, but we did learn more about the programme
through using it to put together my media product. For example we were not previously
aware that you could use rulers on the screen to line up your work. Without this
technology our media product would look very different and very simple as we wouldn’t be
able to add layer affects, and overall our work just wouldn’t look as aesthetically pleasing.
We used Photoshop to create our digipak part f the project. This included the front and
back view of the digipak and the middle part of the digipak.
Photoshop Tools
Pen Tool, Measuring and Navigation, Selection, Cropping, Slicing, Moving Marquee, Lasso,
Quick selection, Magic Wand, Eraser, Typing, Retouching, Content Awareness,
Puppet Warp, Video Editing, 3D Extrusion, Mobile Integration, Camera Raw
and 3D Printing Tools. All of these tools we have had experience working
with and they helped u sot make the use out of the photographs which we
took to make them look professional and good.
Middle/ inside of the Digipak pack

This is an image of Photoshop not in use

Front and Back of the
Digpak
Quick Time Player v7
Quick Time Player Programme
• A powerful multimedia technology with a built-in media player,
QuickTime lets you view internet video, HD movie trailers and
personal media in a wide range of file formats. And it lets you enjoy
them in remarkably high quality.
• We used Quick Time Player when we were completing Evaluation
Q1. We made a video on Final Cut but wanted to visually show
where we based our ideas from so we used Quick Time player to
film clips from various YouTube videos to illustrate this. As you can
see on the right there is a screen shot showing some dominos. This
shot is from the beginning of Lucy Spraggon’s video ‘Beer Fear’, this
we were comparing to our own music video as we filmed domino
falling similar to this shot and it looks similar.

These four images are screen shots of when
we used Quick Time Player n our Q1
Evaluation.

This is example of
Quick Time Player in
use.

These two screen
shots are examples
of when we used
Quick Time Player
and made short clips
from YouTube
videos.
PowerPoint (Microsoft)

PowerPoint is a complete presentation graphics package. It gives you
everything you need to produce a professional-looking presentation.
PowerPoint offers word processing, outlining, drawing, graphing, and
presentation management tools- all designed to be easy to use and
learn.
What can you do in PowerPoint?
• When you create a presentation using PowerPoint, the presentation
is made up of a series of slides. The slides that you create using
PowerPoint can also be presented as overhead transparencies or
35mm slides.
• In addition to slides, you can print audience handouts, outlines, and
speaker's notes.
• You can format all the slides in a presentation using the powerful
Slide Master which will be covered in the tutorial.
• You can keep your entire presentation in a single file- all your slides,
speaker's notes, and audience handouts.
• You can import what you have created in other Microsoft products,
such as Word and Excel into any of your slides.
We used this software for our Evaluation Q4, we used this software
because it can allow you to make the PowerPoint into a video or a
SlideShare afterwards and we thought it was an interesting way of
presenting our Q4 Evaluation answers.
We found this easy to work with as we have this Microsoft Programme
at home and regulary use it for other various subjects.

These are all of the various tool which you can
access and they were the ones which we used
to create our PowerPoint.

This shows us all of
our slides which we
have created.

This shows a screen shot of us using the PowerPoint software
for our Evaluation Q4.
OSX v.10.6.8 – Apple Operating system
Click on the apple
logo, which can be
found in the top
left hand corner
of the desktop.

Osx v. 10.6.8
Osx v. 10.6.8 is the apple operating system that we used on the
apple ac computer. It is designed to run exclusively on Mac
computers. It took over from Mac OS9 that was released in 1999.
In OSX , the X is the roman numeral for 10 and is a big part of the
brands identity. OSX is the second most active client operating
system used worldwide.
This screen will
appear and it will
tell you about the
software. You can
then click ‘more
info’.
Online software -YouTube , Word Press (blogging) ,
Google Slide Share , Prezi ,Facebook , Twitter , SafariWeb browser, Da Font and 1001 Fonts
Broadband Provider
The schools broadband provider is swgfl this is what is needed for an
internet connection. Without this aspects of my media product would
be limited as we wouldn’t be able to work online with web software
such as WordPress.
Wordpress
Wordpress is an online internet software that allows anyone to create
their own personal blog. It can be private or public depending on your
personal choice, ours was private with our teachers linked so that they
could comment on our work and suggest any changes that need to be
made. It helped us to create our media product by giving us space to
write and plan our magazine as well as to show the progress of our
work from the very beginning right to the end of our final media
products.
Safari
Safari is the world’s fastest internet browser created by Apple, it is the
internet browser that we used while creating out media product. It
allowed us to browse the internet without the distraction of ads which
would normally distract us from online research. Through using Safari
we were able to access programmes such as YouTube, Word Press
(blogging), Google Slide Share, Prezi, Facebook, Twitter, Web Browser
and Da Font.

Wireless Internet
Provider
Online software -YouTube , Word Press (blogging) ,
Google Slide Share , Prezi ,Facebook , Twitter , SafariWeb browser, Da Font and 1001 Fonts
YouTube
YouTube, owned by Google, is a video-sharing website on which users
can upload, share, comment on and view videos. YouTube is the
largest video sharing site in the world and YouTube search is the
second-largest search engine in the world. We used this to upload our
media videos on our private account and also to research Jessie J (the
artists who’s song we covered) existing music videos.
Slide Share
SlideShare is the world's largest community for sharing presentations.
We used this for our Q4 evaluation question because we produced our
work on PowerPoint and then uploaded onto slideshare to make it
interesting for the audience to watch.
Prezi
Prezi is a software company, producing cloud-based presentation
software and story telling tool for presenting ideas on a virtual canvas.
This was another presentation method which we used for our
presentation question.
Facebook and Twitter
These are both social networking sites and we used these to help us
gain audience feedback from our video as we were able to friends,
family and members of the public to watch the video and message us
their opinions and feedback,
Da Font and 1001 Fonts
These are both websites where you can download fonts for free. We
downloaded then into Photoshop and Final Cut and used then in our
music video and digipak.

Q4 presentation 4

  • 1.
    How did youuse new media technologies in the construction and research, planning and evaluation stages? By Katy Coughlan and Tara Page
  • 2.
    Hardware • IMAC Apple– 2GHZ Intel Core 2 Duo Processor, Memory – 8 GB RAM and Apple Keyboard and Mouse. • Video Camera – Cannon Legeria HD Camcorder (HD or standard definition). • Key board and mouse - Apple. • Tripod. • SD card – 4 GB class of SD card 10. • SD card readers – USB Integral. • Work stored on X serve – network drive user accounts and backup. • Scanner – Epson v300 • Camera for photos - Nikon D3100 • Phone – To play music while filming.
  • 3.
    IMAC (21 inch)-Processor 2HZ Intel core 2 duo memory 8GB RAM (Mouse/keyboard) - mac IMAC Computer The IMAC computer was the main system which enabled us to create our music video. The IMA stored all of the footage, our documents, had the Final Cut Pro and Photoshop. On the IMAC we used Final Cut Pro to edit and develop our footage into our final music video, we then used Photoshop to edit our photos for our digipak. It also allowed us to research and plan both our music video and digipak. To complete the amount of research which we did we needed the IMAC as it had safari (which is a free internet browser). This enabled us to research the various forms and conventions for the genre of our music video. We also used Wordpress which we kept an online Blog and it consisted of our planning, research, music video, digipak and evaluation. Apple Keyboard and Mouse The keyboard and mouse were two components which were connected to the IMAC computer and were necessary for us to work the IMAC computer. The mouse was used for the clicking and scrolling on various programs and the keyboard is used for typing and using the different command buttons on specific programs. Apple Mouse and Keyboard These are examples of some of the programs we used on the IMAC computer. The Apple Mac has a built in camera and microphone/ audio feature Back of the Apple Mac
  • 4.
    Video Camera –Cannon Legeria HD Camcorder Video Camera This was the device which we filmed the whole of our music video on at different locations. We attached it to the tripod to get high angle shots and low angle shots. We had to ensure that the video camera was in focus when we were filming. There is a zoom in button which we used when we zoomed in on the artists face to get close up and extreme close up shots. Before we started to record we also made sure that the lighting was of good quality and in some locations we had to result in artificial lighting to light the shot up well for the artists. This video camera had a touch screen functions so we had to help each other when using it and learn from our mistakes in some circumstances. It’s features include: SD/SDHC memory card recording, Canon’s smallest-ever digital camcorder, Video Snapshot, 41x Advanced Zoom, Dual Shot, Image Stabilizer with Dynamic mode, Pre REC, True Wide Hi-Res 16:9, Intelligent battery & Quick Charge and Compatible with DW-100 DVD Burner. White Balance White balance is the process of removing unrealistic colour casts, so that objects which appear white in person are rendered white in your photo. We used white balance on the camera before we started to take photo’s or shoot footage every time we turned the camera on as this would enhance the colours being projected into the lens from light, clothes, walls and everything in the shots. This also made sure the camera knew what is white in different lighting situations. Tripod A tripod is used in photography as a device that holds the camera up at various tilts and angles so that the photographer can capture more diverse shots or even include themselves in the photo. We used a tripod for our digipak photo shoot but also when we were filming our music video. It ensured that the photos and shots were not blurry or shaky. We extended the tripod to get high shots and angles and lowered the tripod to get low shots and angles. SD card – 4 GB class of SD card 10 This was the SD card which we used in as storage in the video camera and the normal camera. This allowed all of our footage to be saved on it. Before we took a camera out to be filmed we had to make sure that there was enough disk space available on the card as it was important before we started to filmed. This would then be ready to upload onto the Apple Mac and start editing from. Tripod SD card – 4 GB class of SD card 10
  • 5.
    Scanner – Epsonv300 What is a scanner ? • A scanner is a device that reads (scans) a image and it converts it into digital information. Then the scanners software converts this digital code into a image. lets you scan something and enlarge it on to your computer . We used a scanner when we did our planning drawing’s and we scanned them on to the computer and put them on our blog. The Epson v300 • This particular scanner lets you can scan photos, film and 3D objects with high clarity. It has a 4800 dpi optical resolution it can scan up to 6 negative frames or 4 slides at one time. It has a Built-in film adaptor for 35mm positive and negative film and slide scanning. The Epson Easy Photo Fix allows you to restore photos. The Epson’s ReadyScan LED helps the scanner have a low power usage. The main use of this scanner was to scan in our storyboards and other paper resources onto our blog to show development and written work which we have produced. These are examples of the work which we scanned onto our IMAC desktop to use on our blog.
  • 6.
    Camera for photos- Nikon D3100 Camera As we worked in a pair we were both able to use this camera and help each other with how to function all of the settings and to get the best shots which we could. This camera has many features which allowed us to capture the best possible photographs. As the same as the video camera we had to start with white balancing the camera, then manually focusing so that the shots were in focus and not pixelated. We did not use this to film the music video we just used it to take photographs for our digipak. All photos were stored on a SD card which we later inserted and uploaded on to an Apple Mac. We used this camera to capture all the photos for our coursework. When using this camera we had to think about composition, lighting and focus to ensure our photos and video footage was the best we could product. Tripod The tripod was also a device which we used when we were doing our photoshoot. This ensured that the shots were still and that there was no blurry or out of focus shots. We were able to adjust the length of the legs in order to get the height of the shot correctly. Flash Light We used the flash light and connected it to a timer on the camera. This meant that when we took a picture the light also flashed to get a really professional looking photo. We experimented with this piece of technology to try different and unique shots which could work well for our digipak. These are two examples of each of our artists when we used the camera with the flash light Tripod Flash Light
  • 7.
    Camera photos –UV light What is a uv black light? • It is a lamp which emits a long wave of ultraviolet light , the lamp has a dark purple filter material either on the bulb or a separate glass filter , which blocks most visible light and allows through the UV. Because of this the lamp has a dim purple glow when operating. Black lights are used for decorative and artistic lighting effects when we used neon (fluorescent) paint on our artist faces and but the up black light next to it the paints glow. • We used this component when we were filming the neon footage for our music video. Also we decided for our digipak to use the neon set up for our artists because it was unique and fits in well with the ‘pop’ genre which we have chosen. This light we purchased from ebay for £10, we were intending to buy a larger one s that it was easier to use but we were on cheap budget so could not afford a larger light. These are the UV paints which we purchased online and used on our artists. Festival make up inspired us. The images below show the photos from our photoshoot which we did for our digipak. We used the UV black light at various positions to get the best shot which looked unique and made our artists look interesting.
  • 8.
    SD Card Readers– USB Integral How do they work? • A card reader is a data input device that reads data from a SD card. They are electronic devices that read plastic memory cards embed with a computer chip. They have USB interface that allows them to access the data from the card. Integral card reader • We used this card reader to transfer the photos and videos off the cameras that we used it quickly upload them onto the computer and back them up. All you have to do is slot the card into the card reader and plug it into the USB port. • This then allowed us to save the work which we had on the SD Card reader and save it on our desktop in various folders. For example we uploaded our photographs for our digipak photoshoot and placed them in a folder named ‘photography’ This screen shop shows the files which have been imported from the SD Card reader. SD Integral Card Reader
  • 9.
    Samsung Galaxy AcePhone – To play music while filming Samsung Galaxy Ace Phone • When we were filming our music video it was really important that the artists were lip synching in time with the original music. We decided that the best thing to do was to download the original ‘Jessie – Domino’ song onto my phone and then play it when we were filming the various parts. This meant that the artists could ensure that the lyrics and the timing for the song was spot on so when it came to matching the filmed clips with the music it was easy to do. Depending on what parts we intended to film at each location we would fast forward and rewind to the particular part of the song which we needed. • This technique also made the artist more comfortable when they were dancing for some of our shots because they could relate the type of dancing to the music and they did not feel awkward when filming in front of us. Zoomed in image of phone speakers These are two examples of our artists dancing with the music for our music video to make it more interesting.
  • 10.
    Software • • • • • • • Final Cut ProX v.10.0.9- Apple File converter – Free video converter v.2.30 Leawo Adobe Photoshop- Cs5 Quick time player v7 PowerPoint (Microsoft) OSX v.10.6.8 – Apple Operating system Online software -YouTube , Word Press (blogging) , Google Slide share , Prezie ,FB , Twitter , Safari- Web browser, Da Font.
  • 11.
    Final Cut ProX v.10.0.9- Apple Final Cut Software Final cut is a professional video editing suit, and is top of the range and very expensive to get hold of, this is because of the vast range of freedom that it gives you in editing video and audio. The programme allows the importation of video clips and has the options for them to be mastered and edited in order to achieve a music video. We used final cut for my project music video to put a whole edit together. Final cut was a programme of easy usage and allowed me to pick and create may effects. By using final cut we were able to blade clips and place clips where we wanted them. Also the speed and reverse videos and choose the pace of the edits. We also did various effects and transitions, fonts, colours, title options and spilt screens. Our view of Final Cut Pro Our video has a lot of fast editing and effects, and it was important that we edited our visuals well and matched shots and angles together in time with the music in order to create a good quality music video. We did this using final cut programme. Our video is all performance based so it allowed us to play around with the different effects and transitions in Final Cut because we didn’t have to play it safe as our video does not have a story or hidden meaning. The effects completely transformed our footage to make it go from amateur into a good standard of professional quality. It also allowed us to create similar but different visuals to what Jessie J uses in her own music videos. We found it hard at first to adjust to the new programme that we were not familiar with. But as we were working in a pair we were able tot each ach other different aspects of the programme and help each other along the way. After using it the first few times and adjusting to the layout of where everything was we seemed to find it easy to work with. Final Cut Effects Bar This part of final cut we found particularly useful as it allowed us to adapt the different effects which we placed on various shots. This included transparency, amount, hue, saturation etc.. This helped us to create the cool ad unique effects in our video. This is a screen shot us using Final Cut Pro to create our music video. This is the Final Cut effects bar.
  • 12.
    Final Cut ProX v.10.0.9- Apple Transitions: Choose from more than 90 professionally designed transitions and add them to your project with drag-and-drop ease. We used these in our video. Video Effects: There are a wide range of effect to to experiment with including glows, blurs, lighting, drop shadows, and more. Just select a shot, then choose an effect; skimming the effect thumbnail lets you preview before applying it. Magnetic Timeline: The Magnetic Timeline eliminates the so you’ll never be slowed down by clip collisions or out-of-sync problems as you’re working The Magnetic Timeline automatically tracks clip relationships as you rearrange, trim, or add clips, letting you easily make changes in even the most complex sequences. Titles: Final Cut Pro includes professionally designed animated templates, with intuitive onscreen controls that make it easy to create titles that leap off the screen. These are what we used to create our on screen lyrics. Skimming: The most responsive way ever to view vast amounts of media, skimming in the Filmstrip view lets you fly through and select the best takes. Skim to any point in your timeline, then press the Space bar to play the video instantly. Clip Connections: It is easier to position B-roll, titles, music, and sound effects, with direct links to reference clips in the timeline. When you move a clip in the timeline, you can choose to have its Connected Clips move with it or keep them locked in place. This ensures it is more precise.
  • 13.
    Adobe Photoshop- Cs5 AdobePhotoshop Programme Adobe Photoshop is part of Abobe’s professional Creative Suite, it allows you to edit and manipulate images it redefines digital imaging with powerful photography tools and complex image selections, and also intelligent retouching. CS5 is the latest version of Photoshop which is what we used to edit the photographs that we took for my media product. We had previous knowledge of the software such as what layers were, and how to make the best use out of them. We were also aware of tools such as the magnetic lasso that grips the edges of a desired image and making cutting out a lot easier. We knew this as we have used it at home for personal use, but we did learn more about the programme through using it to put together my media product. For example we were not previously aware that you could use rulers on the screen to line up your work. Without this technology our media product would look very different and very simple as we wouldn’t be able to add layer affects, and overall our work just wouldn’t look as aesthetically pleasing. We used Photoshop to create our digipak part f the project. This included the front and back view of the digipak and the middle part of the digipak. Photoshop Tools Pen Tool, Measuring and Navigation, Selection, Cropping, Slicing, Moving Marquee, Lasso, Quick selection, Magic Wand, Eraser, Typing, Retouching, Content Awareness, Puppet Warp, Video Editing, 3D Extrusion, Mobile Integration, Camera Raw and 3D Printing Tools. All of these tools we have had experience working with and they helped u sot make the use out of the photographs which we took to make them look professional and good. Middle/ inside of the Digipak pack This is an image of Photoshop not in use Front and Back of the Digpak
  • 14.
    Quick Time Playerv7 Quick Time Player Programme • A powerful multimedia technology with a built-in media player, QuickTime lets you view internet video, HD movie trailers and personal media in a wide range of file formats. And it lets you enjoy them in remarkably high quality. • We used Quick Time Player when we were completing Evaluation Q1. We made a video on Final Cut but wanted to visually show where we based our ideas from so we used Quick Time player to film clips from various YouTube videos to illustrate this. As you can see on the right there is a screen shot showing some dominos. This shot is from the beginning of Lucy Spraggon’s video ‘Beer Fear’, this we were comparing to our own music video as we filmed domino falling similar to this shot and it looks similar. These four images are screen shots of when we used Quick Time Player n our Q1 Evaluation. This is example of Quick Time Player in use. These two screen shots are examples of when we used Quick Time Player and made short clips from YouTube videos.
  • 15.
    PowerPoint (Microsoft) PowerPoint isa complete presentation graphics package. It gives you everything you need to produce a professional-looking presentation. PowerPoint offers word processing, outlining, drawing, graphing, and presentation management tools- all designed to be easy to use and learn. What can you do in PowerPoint? • When you create a presentation using PowerPoint, the presentation is made up of a series of slides. The slides that you create using PowerPoint can also be presented as overhead transparencies or 35mm slides. • In addition to slides, you can print audience handouts, outlines, and speaker's notes. • You can format all the slides in a presentation using the powerful Slide Master which will be covered in the tutorial. • You can keep your entire presentation in a single file- all your slides, speaker's notes, and audience handouts. • You can import what you have created in other Microsoft products, such as Word and Excel into any of your slides. We used this software for our Evaluation Q4, we used this software because it can allow you to make the PowerPoint into a video or a SlideShare afterwards and we thought it was an interesting way of presenting our Q4 Evaluation answers. We found this easy to work with as we have this Microsoft Programme at home and regulary use it for other various subjects. These are all of the various tool which you can access and they were the ones which we used to create our PowerPoint. This shows us all of our slides which we have created. This shows a screen shot of us using the PowerPoint software for our Evaluation Q4.
  • 16.
    OSX v.10.6.8 –Apple Operating system Click on the apple logo, which can be found in the top left hand corner of the desktop. Osx v. 10.6.8 Osx v. 10.6.8 is the apple operating system that we used on the apple ac computer. It is designed to run exclusively on Mac computers. It took over from Mac OS9 that was released in 1999. In OSX , the X is the roman numeral for 10 and is a big part of the brands identity. OSX is the second most active client operating system used worldwide. This screen will appear and it will tell you about the software. You can then click ‘more info’.
  • 17.
    Online software -YouTube, Word Press (blogging) , Google Slide Share , Prezi ,Facebook , Twitter , SafariWeb browser, Da Font and 1001 Fonts Broadband Provider The schools broadband provider is swgfl this is what is needed for an internet connection. Without this aspects of my media product would be limited as we wouldn’t be able to work online with web software such as WordPress. Wordpress Wordpress is an online internet software that allows anyone to create their own personal blog. It can be private or public depending on your personal choice, ours was private with our teachers linked so that they could comment on our work and suggest any changes that need to be made. It helped us to create our media product by giving us space to write and plan our magazine as well as to show the progress of our work from the very beginning right to the end of our final media products. Safari Safari is the world’s fastest internet browser created by Apple, it is the internet browser that we used while creating out media product. It allowed us to browse the internet without the distraction of ads which would normally distract us from online research. Through using Safari we were able to access programmes such as YouTube, Word Press (blogging), Google Slide Share, Prezi, Facebook, Twitter, Web Browser and Da Font. Wireless Internet Provider
  • 18.
    Online software -YouTube, Word Press (blogging) , Google Slide Share , Prezi ,Facebook , Twitter , SafariWeb browser, Da Font and 1001 Fonts YouTube YouTube, owned by Google, is a video-sharing website on which users can upload, share, comment on and view videos. YouTube is the largest video sharing site in the world and YouTube search is the second-largest search engine in the world. We used this to upload our media videos on our private account and also to research Jessie J (the artists who’s song we covered) existing music videos. Slide Share SlideShare is the world's largest community for sharing presentations. We used this for our Q4 evaluation question because we produced our work on PowerPoint and then uploaded onto slideshare to make it interesting for the audience to watch. Prezi Prezi is a software company, producing cloud-based presentation software and story telling tool for presenting ideas on a virtual canvas. This was another presentation method which we used for our presentation question. Facebook and Twitter These are both social networking sites and we used these to help us gain audience feedback from our video as we were able to friends, family and members of the public to watch the video and message us their opinions and feedback, Da Font and 1001 Fonts These are both websites where you can download fonts for free. We downloaded then into Photoshop and Final Cut and used then in our music video and digipak.