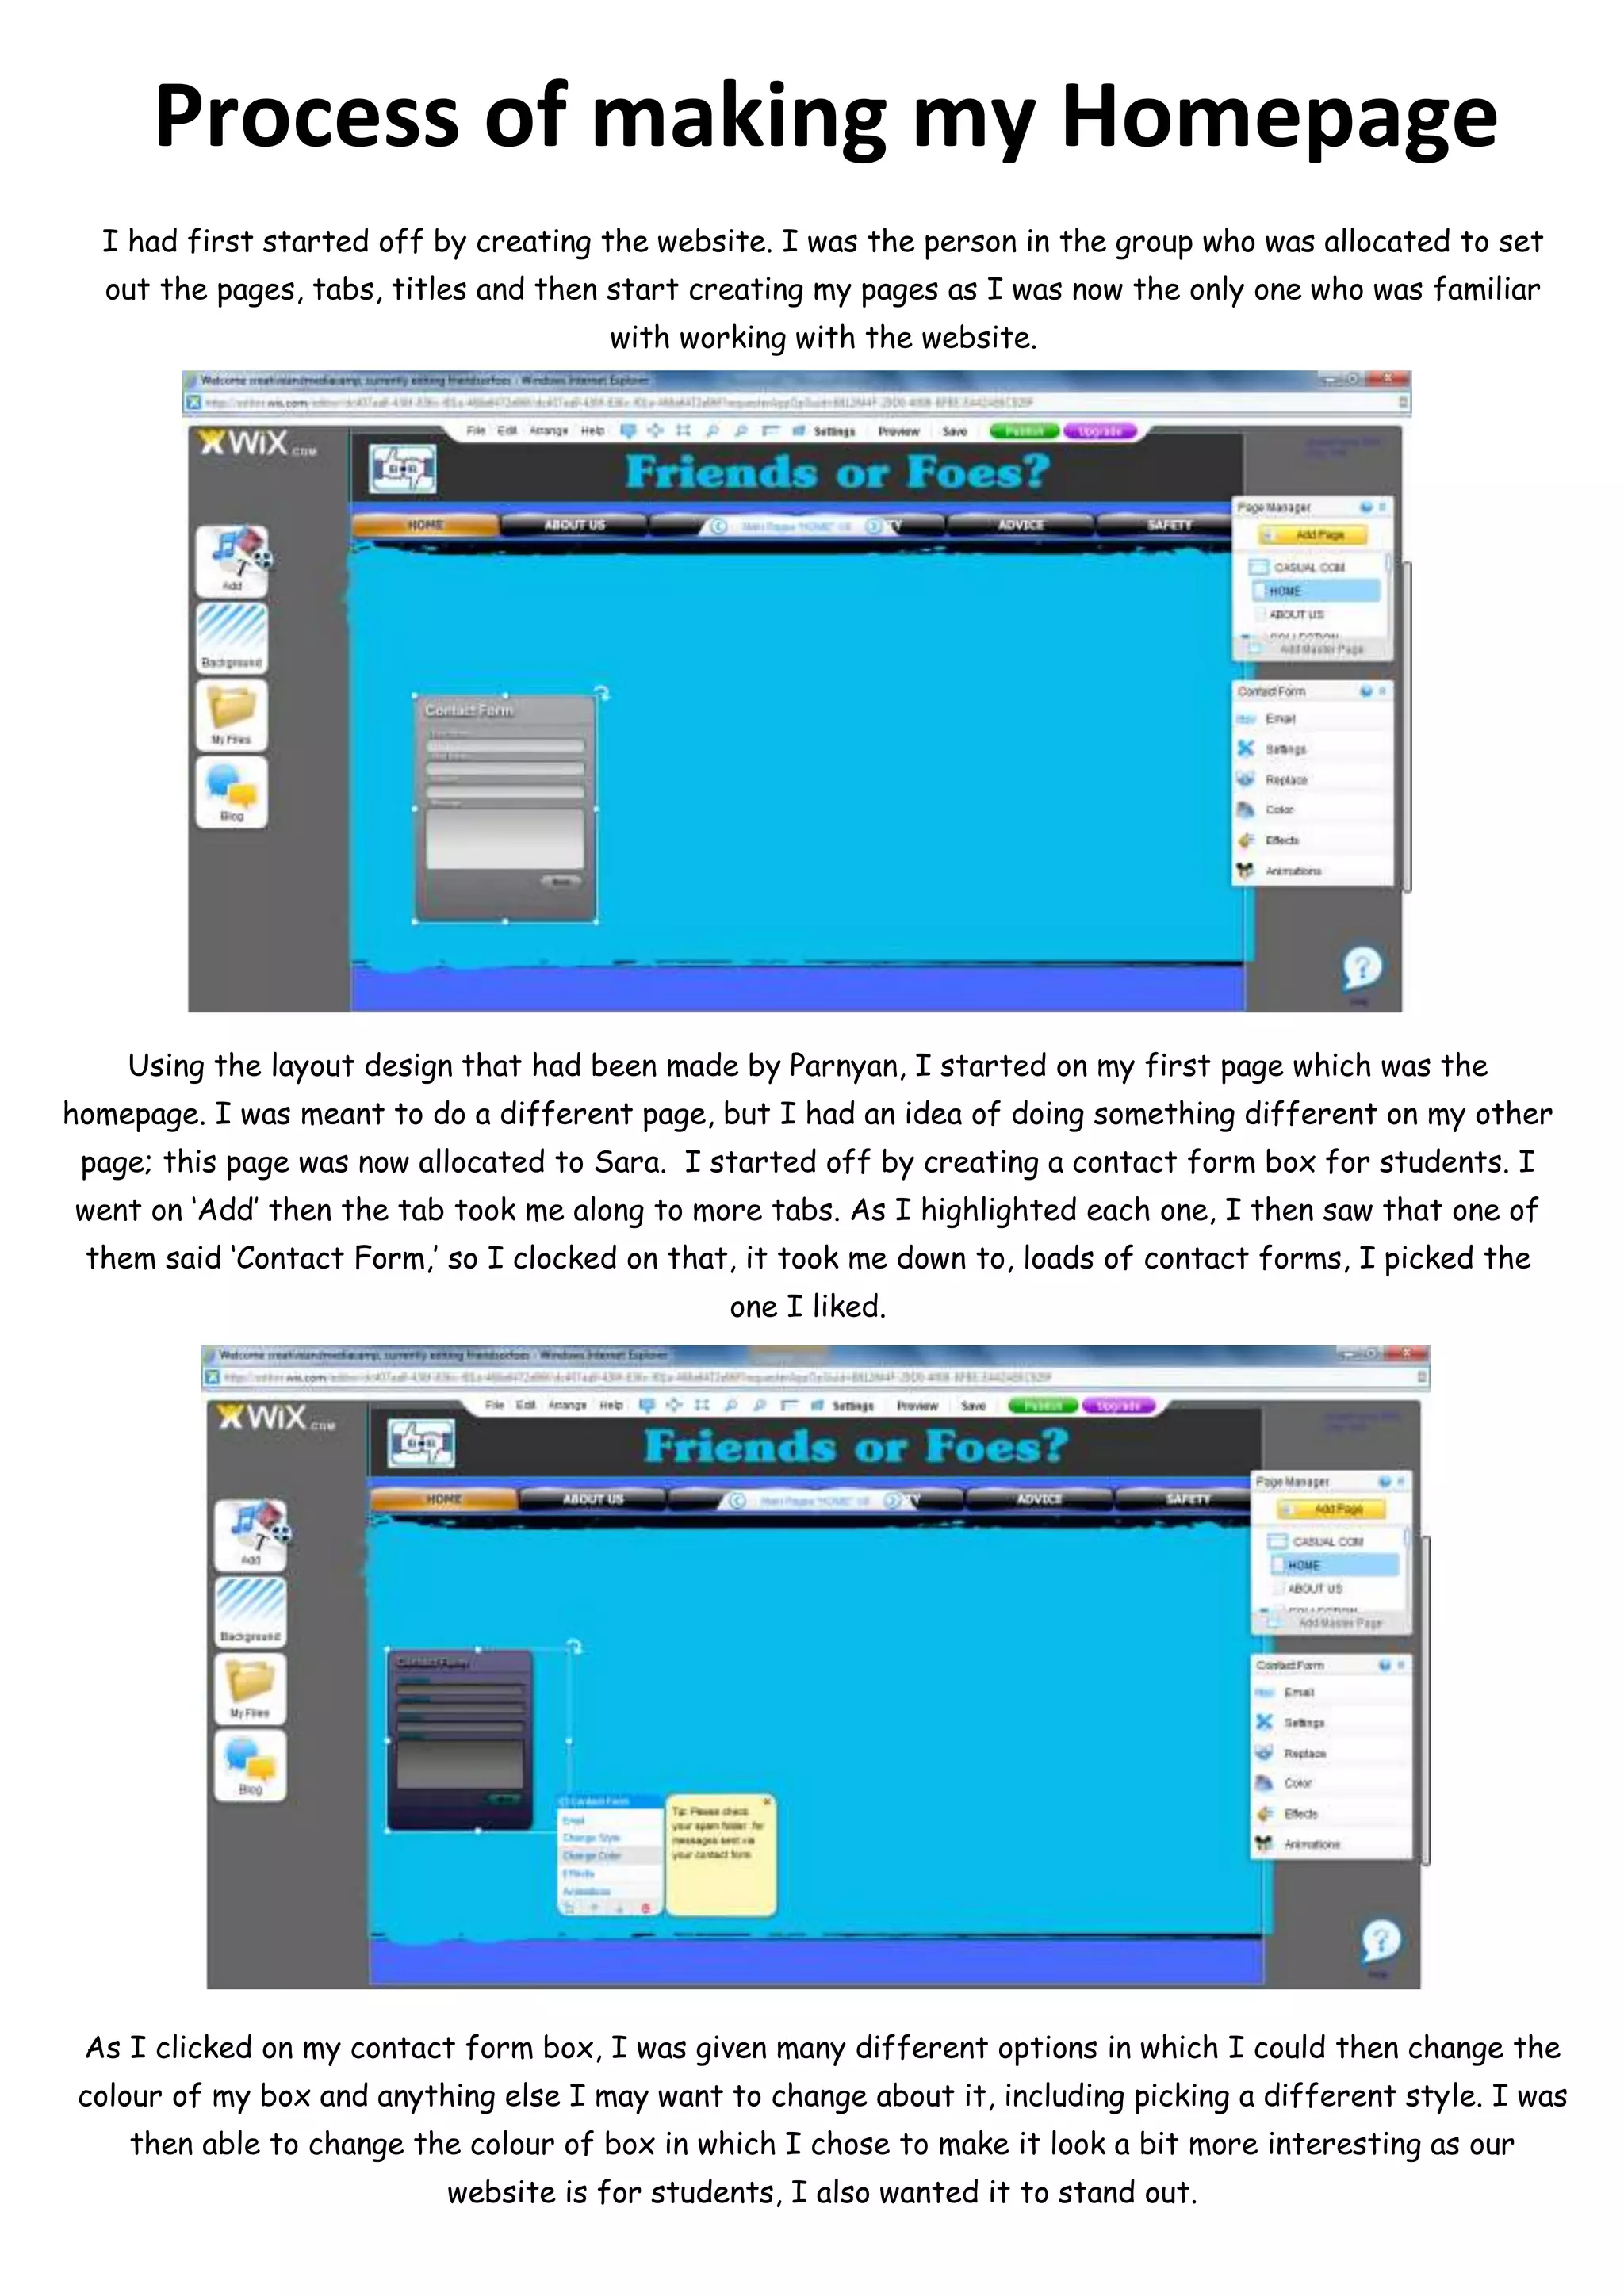
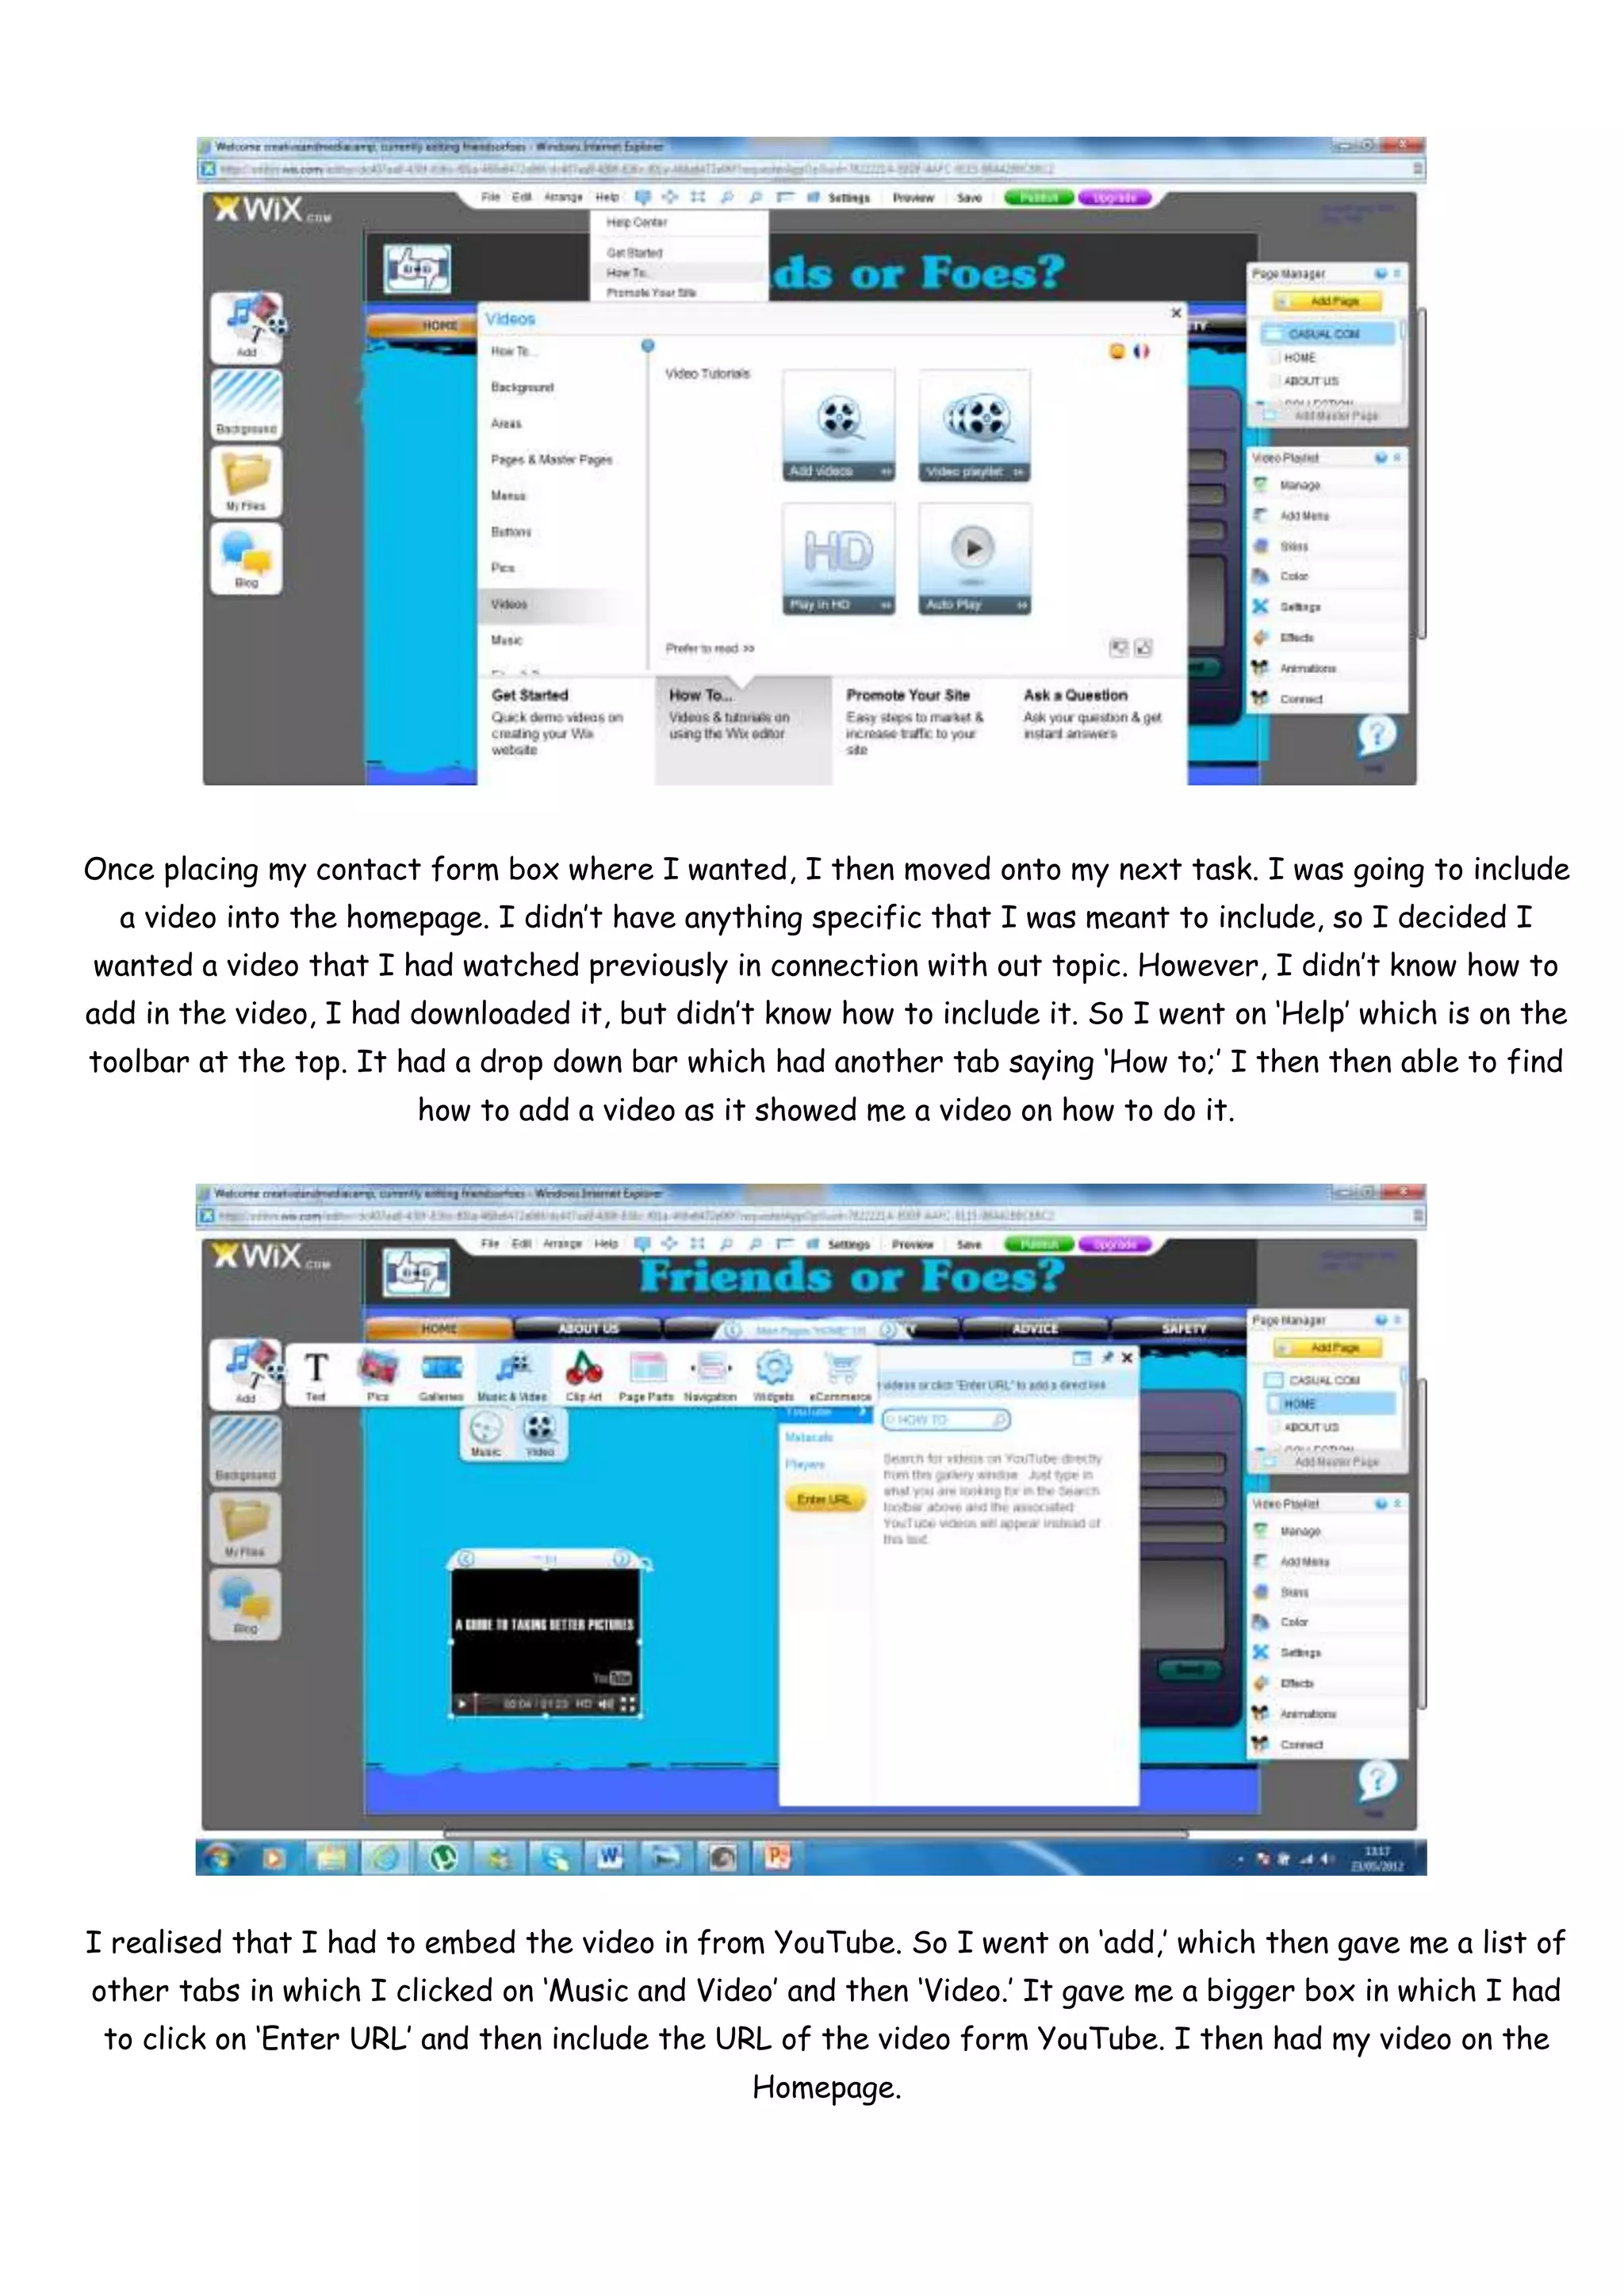
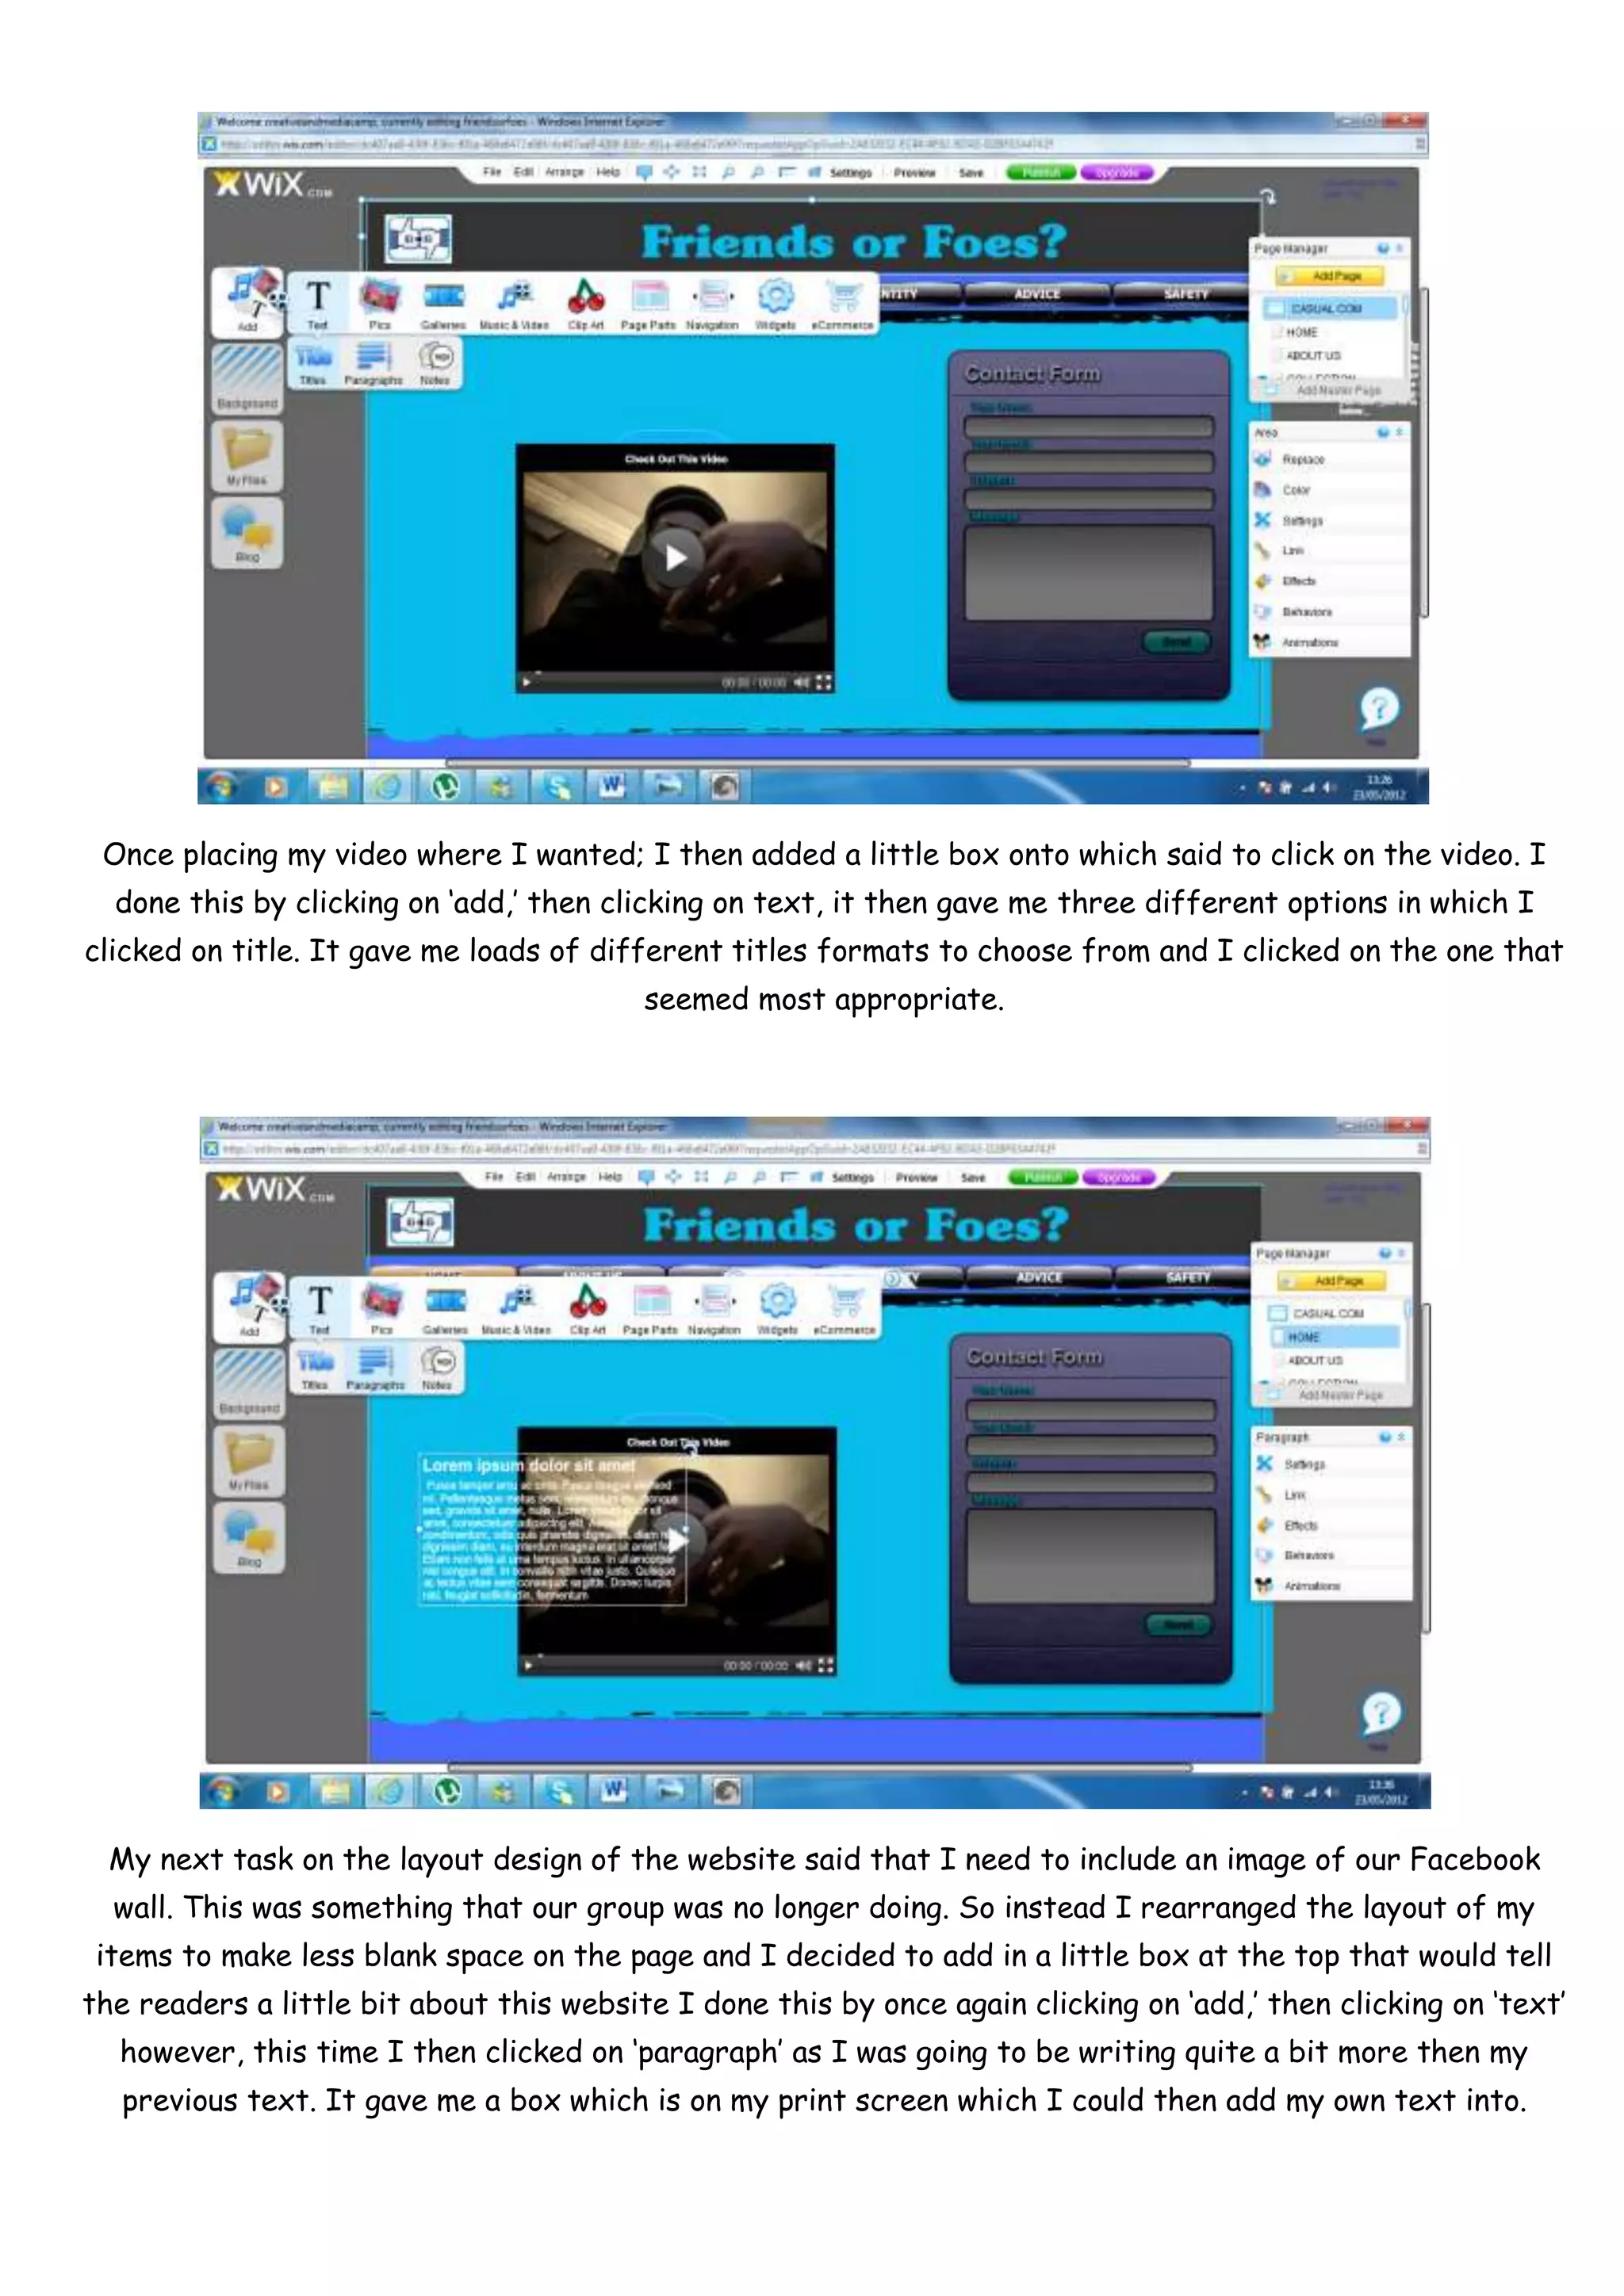
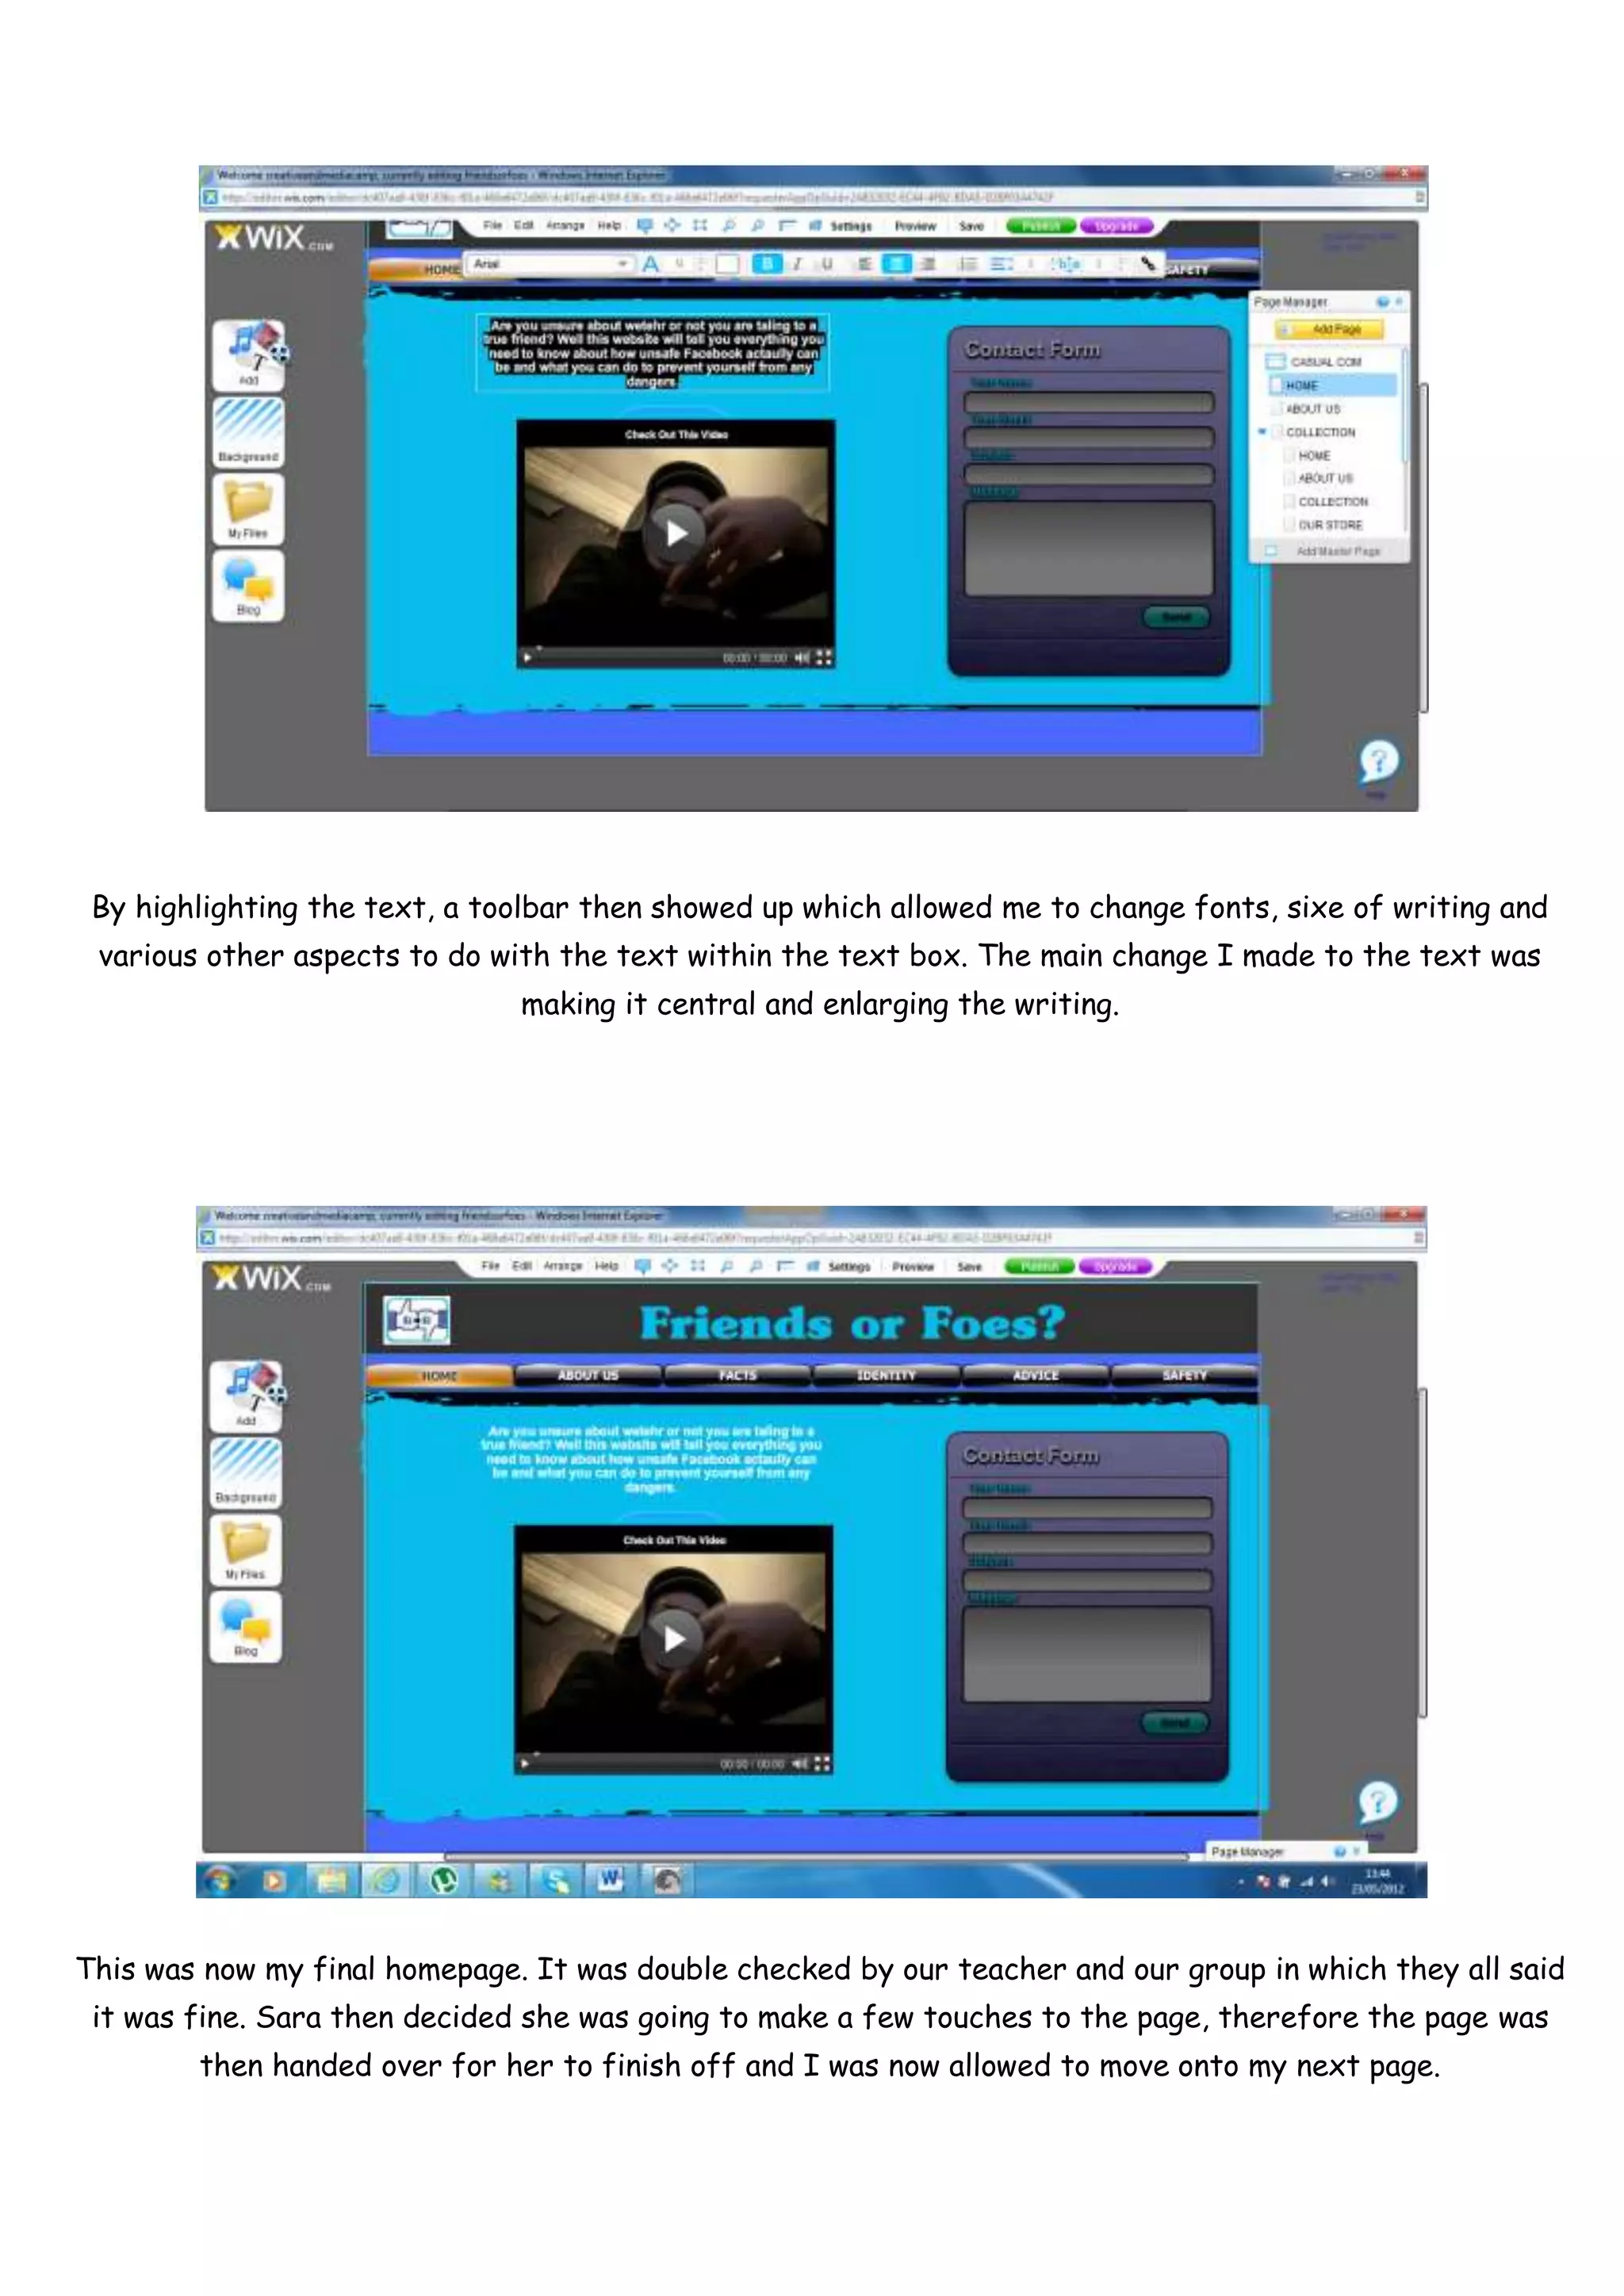
Process of making my Homepage
  I had first started off by creating the website. I was the person in the group who was allocated to set
  out the pages, tabs, titles and then start creating my pages as I was now the only one who was familiar
                                       with working with the website.


    Using the layout design that had been made by Parnyan, I started on my first page which was the
homepage. I was meant to do a different page, but I had an idea of doing something different on my other
 page; this page was now allocated to Sara. I started off by creating a contact form box for students. I
went on ‘Add’ then the tab took me along to more tabs. As I highlighted each one, I then saw that one of
 them said ‘Contact Form,’ so I clocked on that, it took me down to, loads of contact forms, I picked the
                                                one I liked.


 As I clicked on my contact form box, I was given many different options in which I could then change the
 colour of my box and anything else I may want to change about it, including picking a different style. I was
    then able to change the colour of box in which I chose to make it look a bit more interesting as our
                           website is for students, I also wanted it to stand out.
Once placing my contact form box where I wanted, I then moved onto my next task. I was going to include
  a video into the homepage. I didn’t have anything specific that I was meant to include, so I decided I
wanted a video that I had watched previously in connection with out topic. However, I didn’t know how to
add in the video, I had downloaded it, but didn’t know how to include it. So I went on ‘Help’ which is on the
toolbar at the top. It had a drop down bar which had another tab saying ‘How to;’ I then then able to find
                        how to add a video as it showed me a video on how to do it.


I realised that I had to embed the video in from YouTube. So I went on ‘add,’ which then gave me a list of
other tabs in which I clicked on ‘Music and Video’ and then ‘Video.’ It gave me a bigger box in which I had
 to click on ‘Enter URL’ and then include the URL of the video form YouTube. I then had my video on the
                                                 Homepage.
Once placing my video where I wanted; I then added a little box onto which said to click on the video. I
  done this by clicking on ‘add,’ then clicking on text, it then gave me three different options in which I
clicked on title. It gave me loads of different titles formats to choose from and I clicked on the one that
                                          seemed most appropriate.


  My next task on the layout design of the website said that I need to include an image of our Facebook
  wall. This was something that our group was no longer doing. So instead I rearranged the layout of my
 items to make less blank space on the page and I decided to add in a little box at the top that would tell
the readers a little bit about this website I done this by once again clicking on ‘add,’ then clicking on ‘text’
  however, this time I then clicked on ‘paragraph’ as I was going to be writing quite a bit more then my
   previous text. It gave me a box which is on my print screen which I could then add my own text into.
By highlighting the text, a toolbar then showed up which allowed me to change fonts, sixe of writing and
 various other aspects to do with the text within the text box. The main change I made to the text was
                               making it central and enlarging the writing.


This was now my final homepage. It was double checked by our teacher and our group in which they all said
 it was fine. Sara then decided she was going to make a few touches to the page, therefore the page was
        then handed over for her to finish off and I was now allowed to move onto my next page.

Process of my Homepage

  • 1.
    Process of makingmy Homepage I had first started off by creating the website. I was the person in the group who was allocated to set out the pages, tabs, titles and then start creating my pages as I was now the only one who was familiar with working with the website. Using the layout design that had been made by Parnyan, I started on my first page which was the homepage. I was meant to do a different page, but I had an idea of doing something different on my other page; this page was now allocated to Sara. I started off by creating a contact form box for students. I went on ‘Add’ then the tab took me along to more tabs. As I highlighted each one, I then saw that one of them said ‘Contact Form,’ so I clocked on that, it took me down to, loads of contact forms, I picked the one I liked. As I clicked on my contact form box, I was given many different options in which I could then change the colour of my box and anything else I may want to change about it, including picking a different style. I was then able to change the colour of box in which I chose to make it look a bit more interesting as our website is for students, I also wanted it to stand out.
  • 2.
    Once placing mycontact form box where I wanted, I then moved onto my next task. I was going to include a video into the homepage. I didn’t have anything specific that I was meant to include, so I decided I wanted a video that I had watched previously in connection with out topic. However, I didn’t know how to add in the video, I had downloaded it, but didn’t know how to include it. So I went on ‘Help’ which is on the toolbar at the top. It had a drop down bar which had another tab saying ‘How to;’ I then then able to find how to add a video as it showed me a video on how to do it. I realised that I had to embed the video in from YouTube. So I went on ‘add,’ which then gave me a list of other tabs in which I clicked on ‘Music and Video’ and then ‘Video.’ It gave me a bigger box in which I had to click on ‘Enter URL’ and then include the URL of the video form YouTube. I then had my video on the Homepage.
  • 3.
    Once placing myvideo where I wanted; I then added a little box onto which said to click on the video. I done this by clicking on ‘add,’ then clicking on text, it then gave me three different options in which I clicked on title. It gave me loads of different titles formats to choose from and I clicked on the one that seemed most appropriate. My next task on the layout design of the website said that I need to include an image of our Facebook wall. This was something that our group was no longer doing. So instead I rearranged the layout of my items to make less blank space on the page and I decided to add in a little box at the top that would tell the readers a little bit about this website I done this by once again clicking on ‘add,’ then clicking on ‘text’ however, this time I then clicked on ‘paragraph’ as I was going to be writing quite a bit more then my previous text. It gave me a box which is on my print screen which I could then add my own text into.
  • 4.
    By highlighting thetext, a toolbar then showed up which allowed me to change fonts, sixe of writing and various other aspects to do with the text within the text box. The main change I made to the text was making it central and enlarging the writing. This was now my final homepage. It was double checked by our teacher and our group in which they all said it was fine. Sara then decided she was going to make a few touches to the page, therefore the page was then handed over for her to finish off and I was now allowed to move onto my next page.