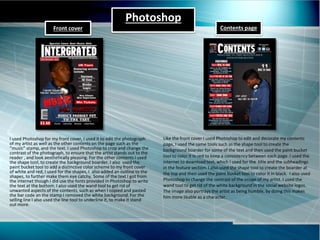
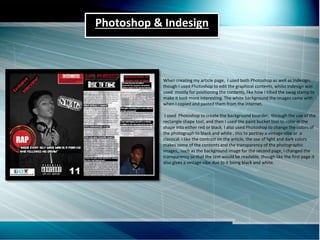
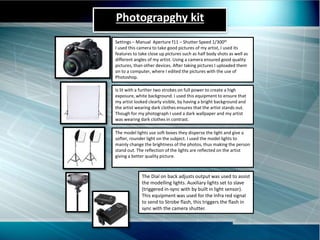
Q6. What have you learnt about technologies from
the process of constructing this product
Front cover
I used Photoshop for my front cover, I used it to edit the photograph
of my artist as well as the other contents on the page such as the
“music” stamp, and the text. I used Photoshop to crop and change the
contrast of the photograph, to ensure that the artist stands out to the
reader , and look aesthetically pleasing. For the other contents I used
the shape tool, to create the background boarder. I also used the
paint bucket tool to add a distinctive color scheme to my front cover
of white and red, I used for the shapes, I also added an outline to the
shapes, to further make them eye catchy. Some of the text I got from
the internet though I did use the fonts provided in Photoshop to write
the text at the bottom. I also used the wand tool to get rid of
unwanted aspects of the contents, such as when I copied and pasted
the bar code an the stamp I removed the white background. For the
selling line I also used the line tool to underline it, to make it stand
out more.
Like the front cover I used Photoshop to edit and decorate my contents
page, I used the same tools such as the shape tool to create the
background boarder for some of the text and then used the paint bucket
tool to color it in red to keep a consistency between each page. I used the
internet to download text, which I used for the title and the subheadings
in the feature section. I also used the shape tool to create the boarder at
the top and then used the paint bucket tool to color it in black. I also used
Photoshop to change the contrast of the image of my artist. I used the
wand tool to get rid of the white background in the social website logos.
The image also portrays the artist as being humble, by doing this makes
him more likable as a character.
Contents page
Photoshop
Photoshop & Indesign
When creating my article page, I used both Photoshop as well as Indesign,
though I used Photoshop to edit the graphical contents, whilst Indesign was
used mostly for positioning the contents, like how I tilted the swag stamp to
make it look more interesting. The white background the images came with
when I copied and pasted them from the internet.
I used Photoshop to create the background boarder, through the use of the
rectangle shape tool, and then I used the paint bucket tool to color in the
shape into either red or black. I also used Photoshop to change the colors of
the photograph to black and white , this to portray a vintage vibe or a
classical. I like the contrast on the article, the use of light and dark colors
makes some of the contents and the transparency of the photographic
images,, such as the background image for the second page, I changed the
transparency so that the text would be readable, though like the first page it
also gives a vintage vibe due to it being black and white.
Photograpghy kit
Settings – Manual Aperture f11 – Shutter Speed 1/300th
I used this camera to take good pictures of my artist, I used its
features to take close up pictures such as half body shots as well as
different angles of my artist. Using a camera ensured good quality
pictures, than other devices. After taking pictures I uploaded them
on to a computer, where I edited the pictures with the use of
Photoshop.
The model lights use soft boxes they disperse the light and give a
softer, rounder light on the subject. I used the model lights to
mainly change the brightness of the photos, thus making the person
stand out. The reflection of the lights are reflected on the artist
giving a better quality picture.
Is lit with a further two strobes on full power to create a high
exposure, white background. I used this equipment to ensure that
my artist looked clearly visible, by having a bright background and
the artist wearing dark clothes ensures that the artist stands out.
Though for my photograph I used a dark wallpaper and my artist
was wearing dark clothes in contrast.
The Dial on back adjusts output was used to assist
the modelling lights. Auxiliary lights set to slave
(triggered in-sync with by built in light sensor).
This equipment was used for the Infra red signal
to send to Strobe flash, this triggers the flash in
sync with the camera shutter.

Media evaluation q6

  • 1.
    Q6. What haveyou learnt about technologies from the process of constructing this product
  • 2.
    Front cover I usedPhotoshop for my front cover, I used it to edit the photograph of my artist as well as the other contents on the page such as the “music” stamp, and the text. I used Photoshop to crop and change the contrast of the photograph, to ensure that the artist stands out to the reader , and look aesthetically pleasing. For the other contents I used the shape tool, to create the background boarder. I also used the paint bucket tool to add a distinctive color scheme to my front cover of white and red, I used for the shapes, I also added an outline to the shapes, to further make them eye catchy. Some of the text I got from the internet though I did use the fonts provided in Photoshop to write the text at the bottom. I also used the wand tool to get rid of unwanted aspects of the contents, such as when I copied and pasted the bar code an the stamp I removed the white background. For the selling line I also used the line tool to underline it, to make it stand out more. Like the front cover I used Photoshop to edit and decorate my contents page, I used the same tools such as the shape tool to create the background boarder for some of the text and then used the paint bucket tool to color it in red to keep a consistency between each page. I used the internet to download text, which I used for the title and the subheadings in the feature section. I also used the shape tool to create the boarder at the top and then used the paint bucket tool to color it in black. I also used Photoshop to change the contrast of the image of my artist. I used the wand tool to get rid of the white background in the social website logos. The image also portrays the artist as being humble, by doing this makes him more likable as a character. Contents page Photoshop
  • 3.
    Photoshop & Indesign Whencreating my article page, I used both Photoshop as well as Indesign, though I used Photoshop to edit the graphical contents, whilst Indesign was used mostly for positioning the contents, like how I tilted the swag stamp to make it look more interesting. The white background the images came with when I copied and pasted them from the internet. I used Photoshop to create the background boarder, through the use of the rectangle shape tool, and then I used the paint bucket tool to color in the shape into either red or black. I also used Photoshop to change the colors of the photograph to black and white , this to portray a vintage vibe or a classical. I like the contrast on the article, the use of light and dark colors makes some of the contents and the transparency of the photographic images,, such as the background image for the second page, I changed the transparency so that the text would be readable, though like the first page it also gives a vintage vibe due to it being black and white.
  • 4.
    Photograpghy kit Settings –Manual Aperture f11 – Shutter Speed 1/300th I used this camera to take good pictures of my artist, I used its features to take close up pictures such as half body shots as well as different angles of my artist. Using a camera ensured good quality pictures, than other devices. After taking pictures I uploaded them on to a computer, where I edited the pictures with the use of Photoshop. The model lights use soft boxes they disperse the light and give a softer, rounder light on the subject. I used the model lights to mainly change the brightness of the photos, thus making the person stand out. The reflection of the lights are reflected on the artist giving a better quality picture. Is lit with a further two strobes on full power to create a high exposure, white background. I used this equipment to ensure that my artist looked clearly visible, by having a bright background and the artist wearing dark clothes ensures that the artist stands out. Though for my photograph I used a dark wallpaper and my artist was wearing dark clothes in contrast. The Dial on back adjusts output was used to assist the modelling lights. Auxiliary lights set to slave (triggered in-sync with by built in light sensor). This equipment was used for the Infra red signal to send to Strobe flash, this triggers the flash in sync with the camera shutter.