Downloaded 14 times

![Create a
Canvas App
In PowerApps the starting point was
[Create an app] – [Canvas] – [Start with your data]
Here I chose my SQL connector to automatically
build a standard app in Smartphone layout
Also add the
connector to the
Azure Blob Storage](https://image.slidesharecdn.com/powerapps-190421150935/75/PowerApps-and-Azure-SQL-Server-Blob-storage-4-2048.jpg)


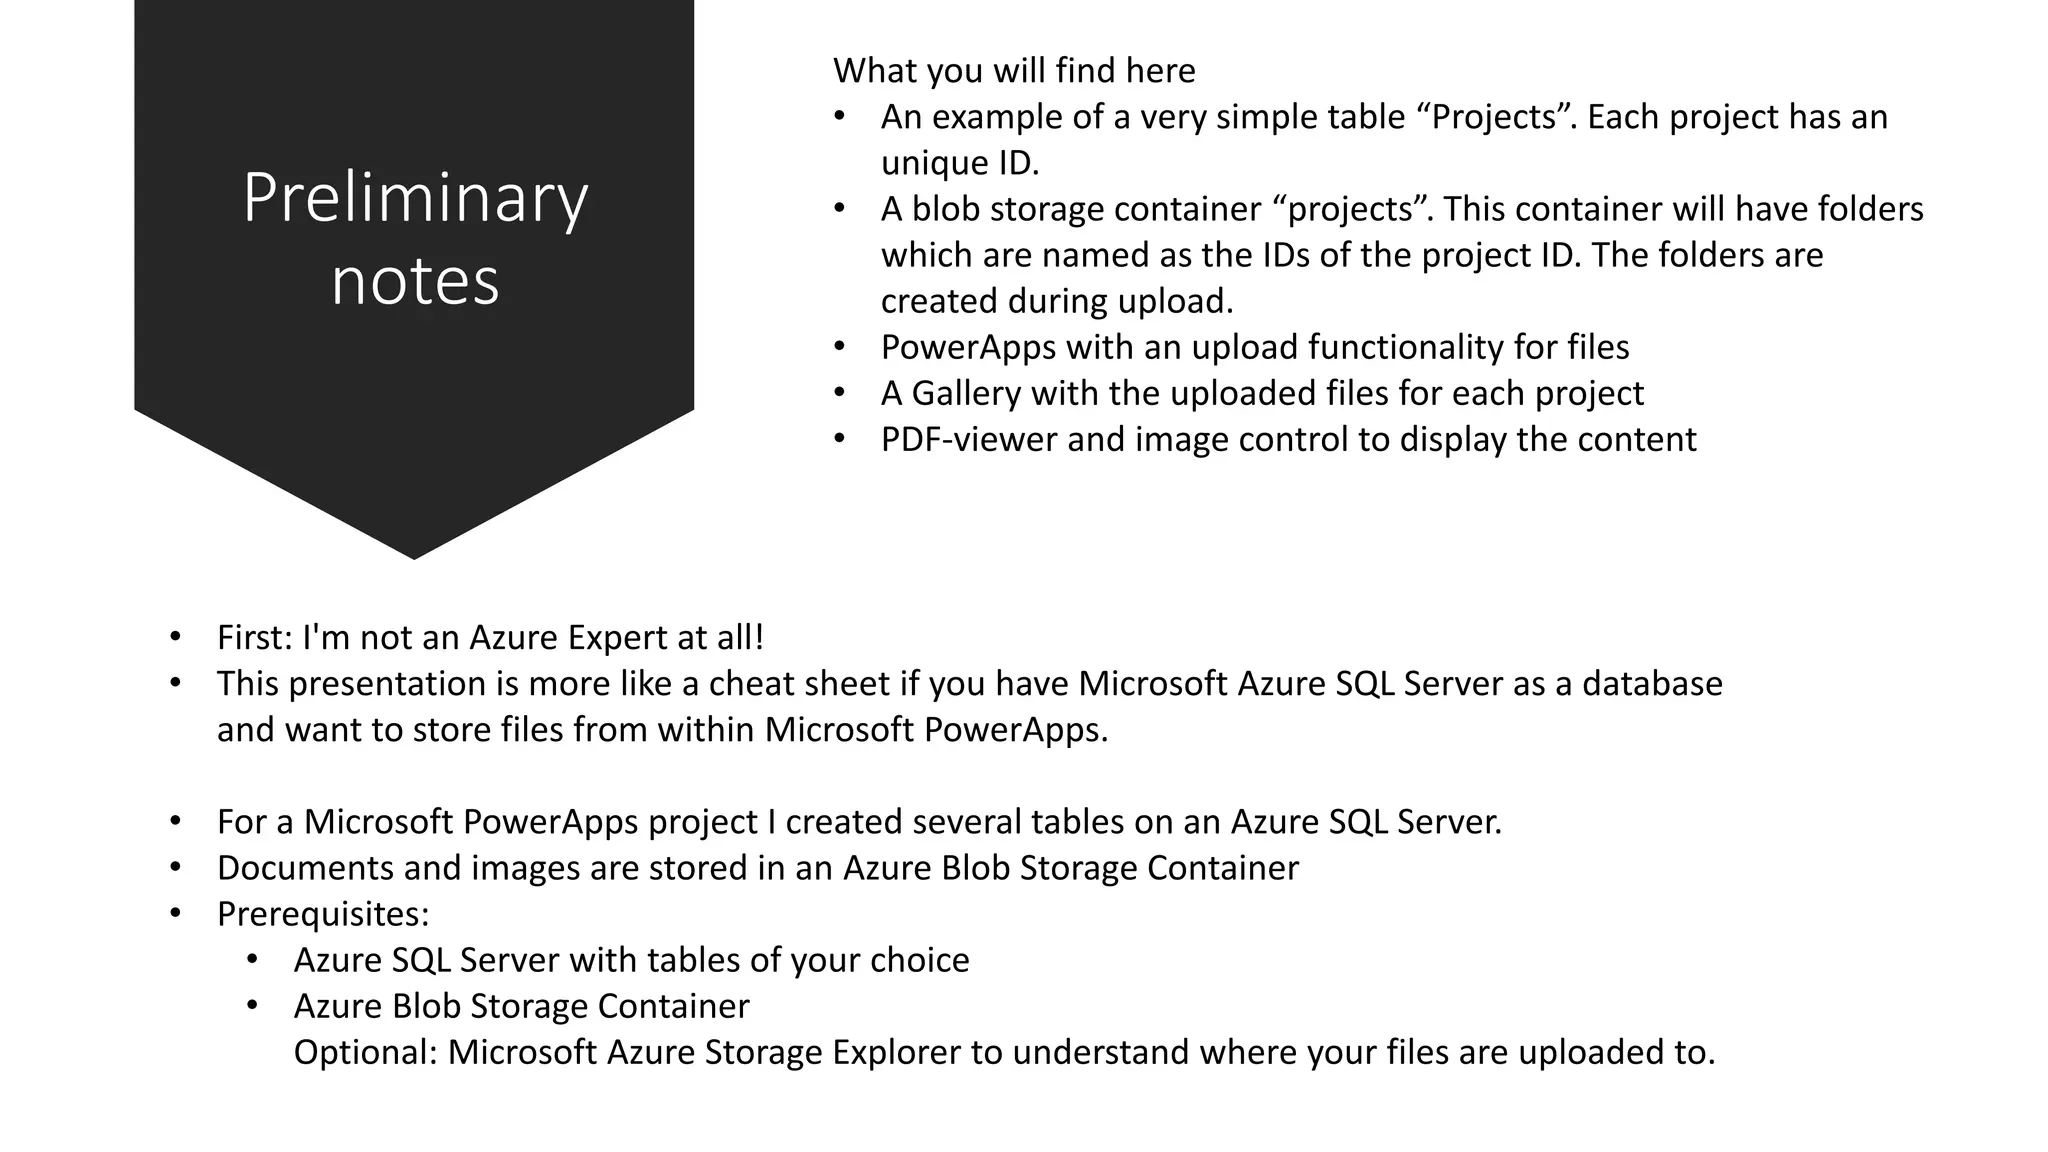
This document is a cheat sheet for uploading and displaying files from Microsoft PowerApps to an Azure SQL Server, detailing prerequisites such as creating tables and blob storage. It describes how to set up a canvas app in PowerApps to manage projects, upload files, and display them using controls like galleries and PDF viewers. The document also includes tips on integrating Azure Blob Storage and managing folder structures based on project IDs.