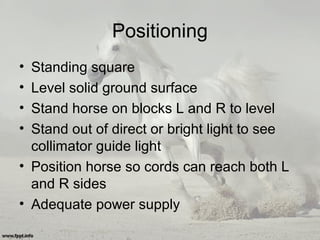
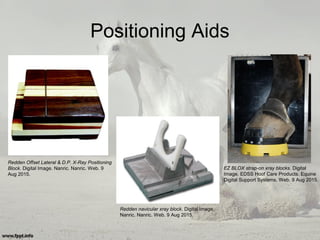
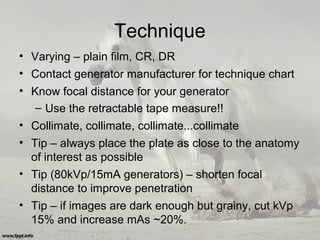
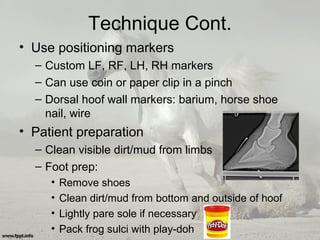
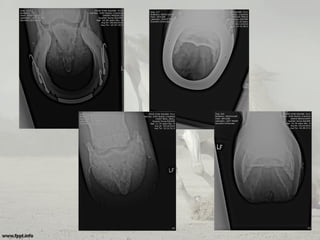
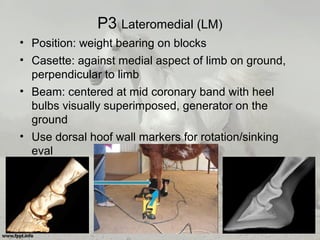
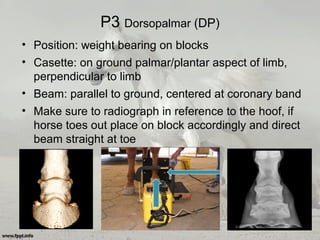
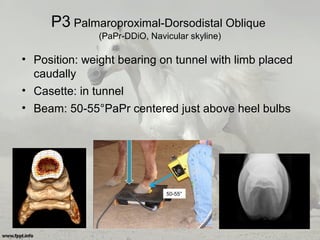
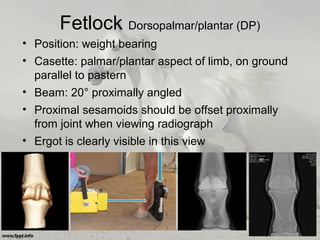
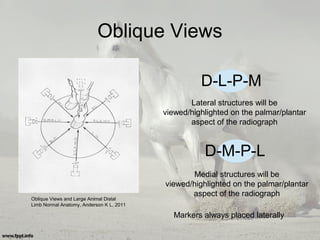
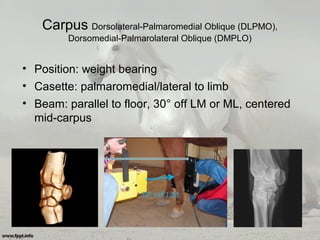
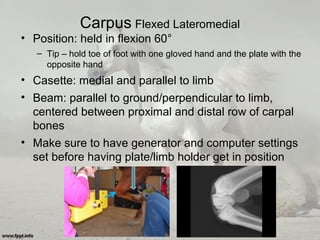
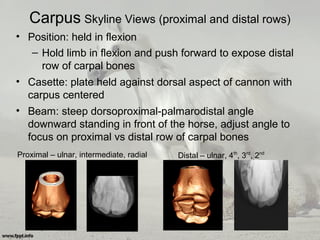
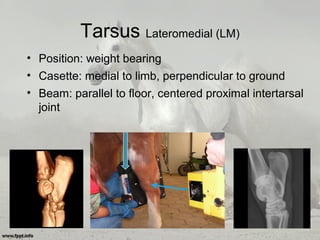
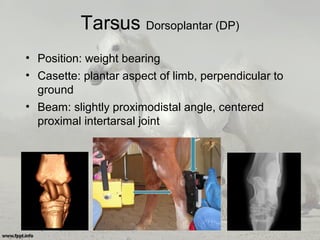
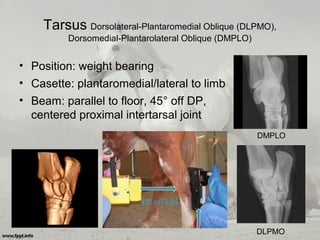
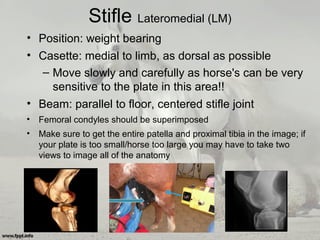
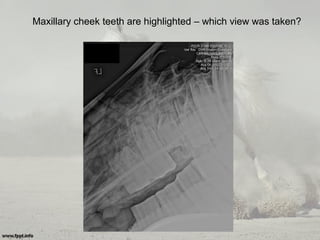
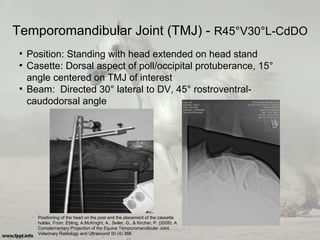
This document provides guidelines for positioning horses and acquiring quality radiographic images. It discusses restraint, safety precautions, positioning techniques, and tips for different limb and whole body views. Standard lateromedial, dorsopalmar and oblique views are described for the limbs, including markers and beam angulation. Dental, stifle, elbow and shoulder views are also outlined. The document emphasizes collimation, focal distance, and adjusting technique based on image quality. References are provided for further anatomical and radiographic study.


![Humeroradial Joint (Elbow)
• Medial-lateral (ML):
– Position: weight bearing or limb held extended
forward (more motion)
– Casette: against lateral aspect elbow
– Beam: directed medial-lateral
Love, N. Equine Appendicular Radiology [SlideShare slides]. Retrieved
from ://radfileshare.cvm.ncsu.edu/VMB976/setup/eqpositioning.pdf](https://image.slidesharecdn.com/positioningtechniquestipsforacquiringgoodimages-171223063320/85/Positioning-techniques-tips-for-acquiring-good-images-39-320.jpg)
![Humeroradial Joint (Elbow)
• Craniocaudal (CrCd):
– Position: weight bearing or limb held up with
radius parallel to floor
– Casette: against caudal aspect elbow
– Beam: centered elbow
joint, for standing view
may need to direct beam
slightly caudodistally
Love, N. Equine Appendicular Radiology [SlideShare slides]. Retrieved
from ://radfileshare.cvm.ncsu.edu/VMB976/setup/eqpositioning.pdf](https://image.slidesharecdn.com/positioningtechniquestipsforacquiringgoodimages-171223063320/85/Positioning-techniques-tips-for-acquiring-good-images-40-320.jpg)
![Love, N. Equine Appendicular Radiology [SlideShare slides]. Retrieved
from ://radfileshare.cvm.ncsu.edu/VMB976/setup/eqpositioning.pdf](https://image.slidesharecdn.com/positioningtechniquestipsforacquiringgoodimages-171223063320/85/Positioning-techniques-tips-for-acquiring-good-images-45-320.jpg)


![Xray film types and construction [Autosaved].pptx](https://cdn.slidesharecdn.com/ss_thumbnails/xrayfilmtypesandconstructionautosaved-240526175237-7ce35e4e-thumbnail.jpg?width=640&height=640&fit=bounds)


