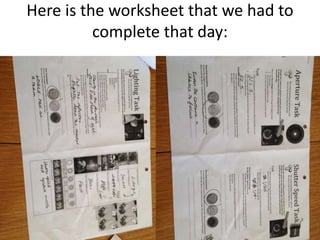
2. Today we learnt about how to take the best
photos for our music magazine.
We learnt that there are three main things you
have to bear in mind when trying to create the
best photo:
The aperture, shutter-speed, and lighting.
3. Learning about aperture:
• At the start of the lesson I had minimal
understanding about aperture.
• I learnt that the aperture is the hole in the lens of
the camera that lets light through.
• You can change the settings so that it can let
more or less light through.
• A change in aperture has an effect on the photo
that is taken.
• Photos with a lower aperture will be darker.
Whereas, photos with a higher aperture will be
brighter.
4. Practicing aperture:
• As a class, when practicing aperture we took
photographs of tiny little plastic toys.
• We had to see if we could take a photograph
where the miniature statue was the main
focus.
5. Learning about shutter speed:
• Like aperture, my understanding of shutter speed was also
minimal.
• Shutter speed can be defined as the length of time a
shutter is open when a camera is taking the photograph.
• Therefore, the higher the shutter speed the stiller the
photo whereas, the lower the shitter speed the blurrier the
photo.
• However, this is not necessarily a bad thing as some of the
photos you can create with a low shutter speed are
beautiful.
• We practiced by turning the lights off and create shapes
with a torch.
6. Practicing shutter speed:
• We practiced shutter speed with moving objects.
• For example, we had to throw a ball up in the air and
see if we could get the image of the ball without it
being blurry or looking like it was moving.
• Then we had to do the same with the ball but make it
look as though it was moving.
• My group and I also did this with our other teammates.
• For example, we would get someone to start running
and see if we could capture a perfectly still shot of
them as opposed to it actually looking like they were
moving.
7. Learning about lighting:
• I believe I had a stronger understanding of
lighting than I did of aperture and shutter-
speed just because when taking photographs
previously, I had always been aware of lighting
and how it effects photographs.
• Lighting can otherwise be known as ISO.
• ISO can be defined as the level of sensitivity
the camera available to light.
8. Practicing lighting/ISO:
• There were many things we did to practice
lighting/ISO.
• For example, our teacher set us up a miniature studio
with a light box, tripod for our camera and a reflector.
• With this we took photos of each other with the
reflectors and lightboxes positioned in different places.
• One example is when my friend Phoebe had the
reflector underneath her face and practically on the
bottom half of her face was visible because the
reflector wasn’t providing enough light to her whole
face.
9. Overall, the photography lesson was extremely
useful at teaching me the basics of photography.
Hopefully it will help me take the best photos
possible for my magazine.
10. Here is the worksheet that we had to
complete that day: