Downloaded 1,960 times


1. The document outlines the end-to-end procure to pay process including creating suppliers, creating a requisition and purchase order, receiving items, generating an invoice, validating and paying the invoice, and creating the accounting entries. 2. It provides step-by-step instructions and screenshots for each stage of the process from checking inventory quantities to approving purchase orders to paying invoices. 3. The stages covered are creating suppliers, creating a requisition and purchase order, receiving items against the purchase order, generating an invoice automatically upon receipt, validating and paying the invoice, and creating the accounting entries for the payment and invoice.
Overview of the Procure to Pay (P2P) process, goals, prerequisites, and process steps.
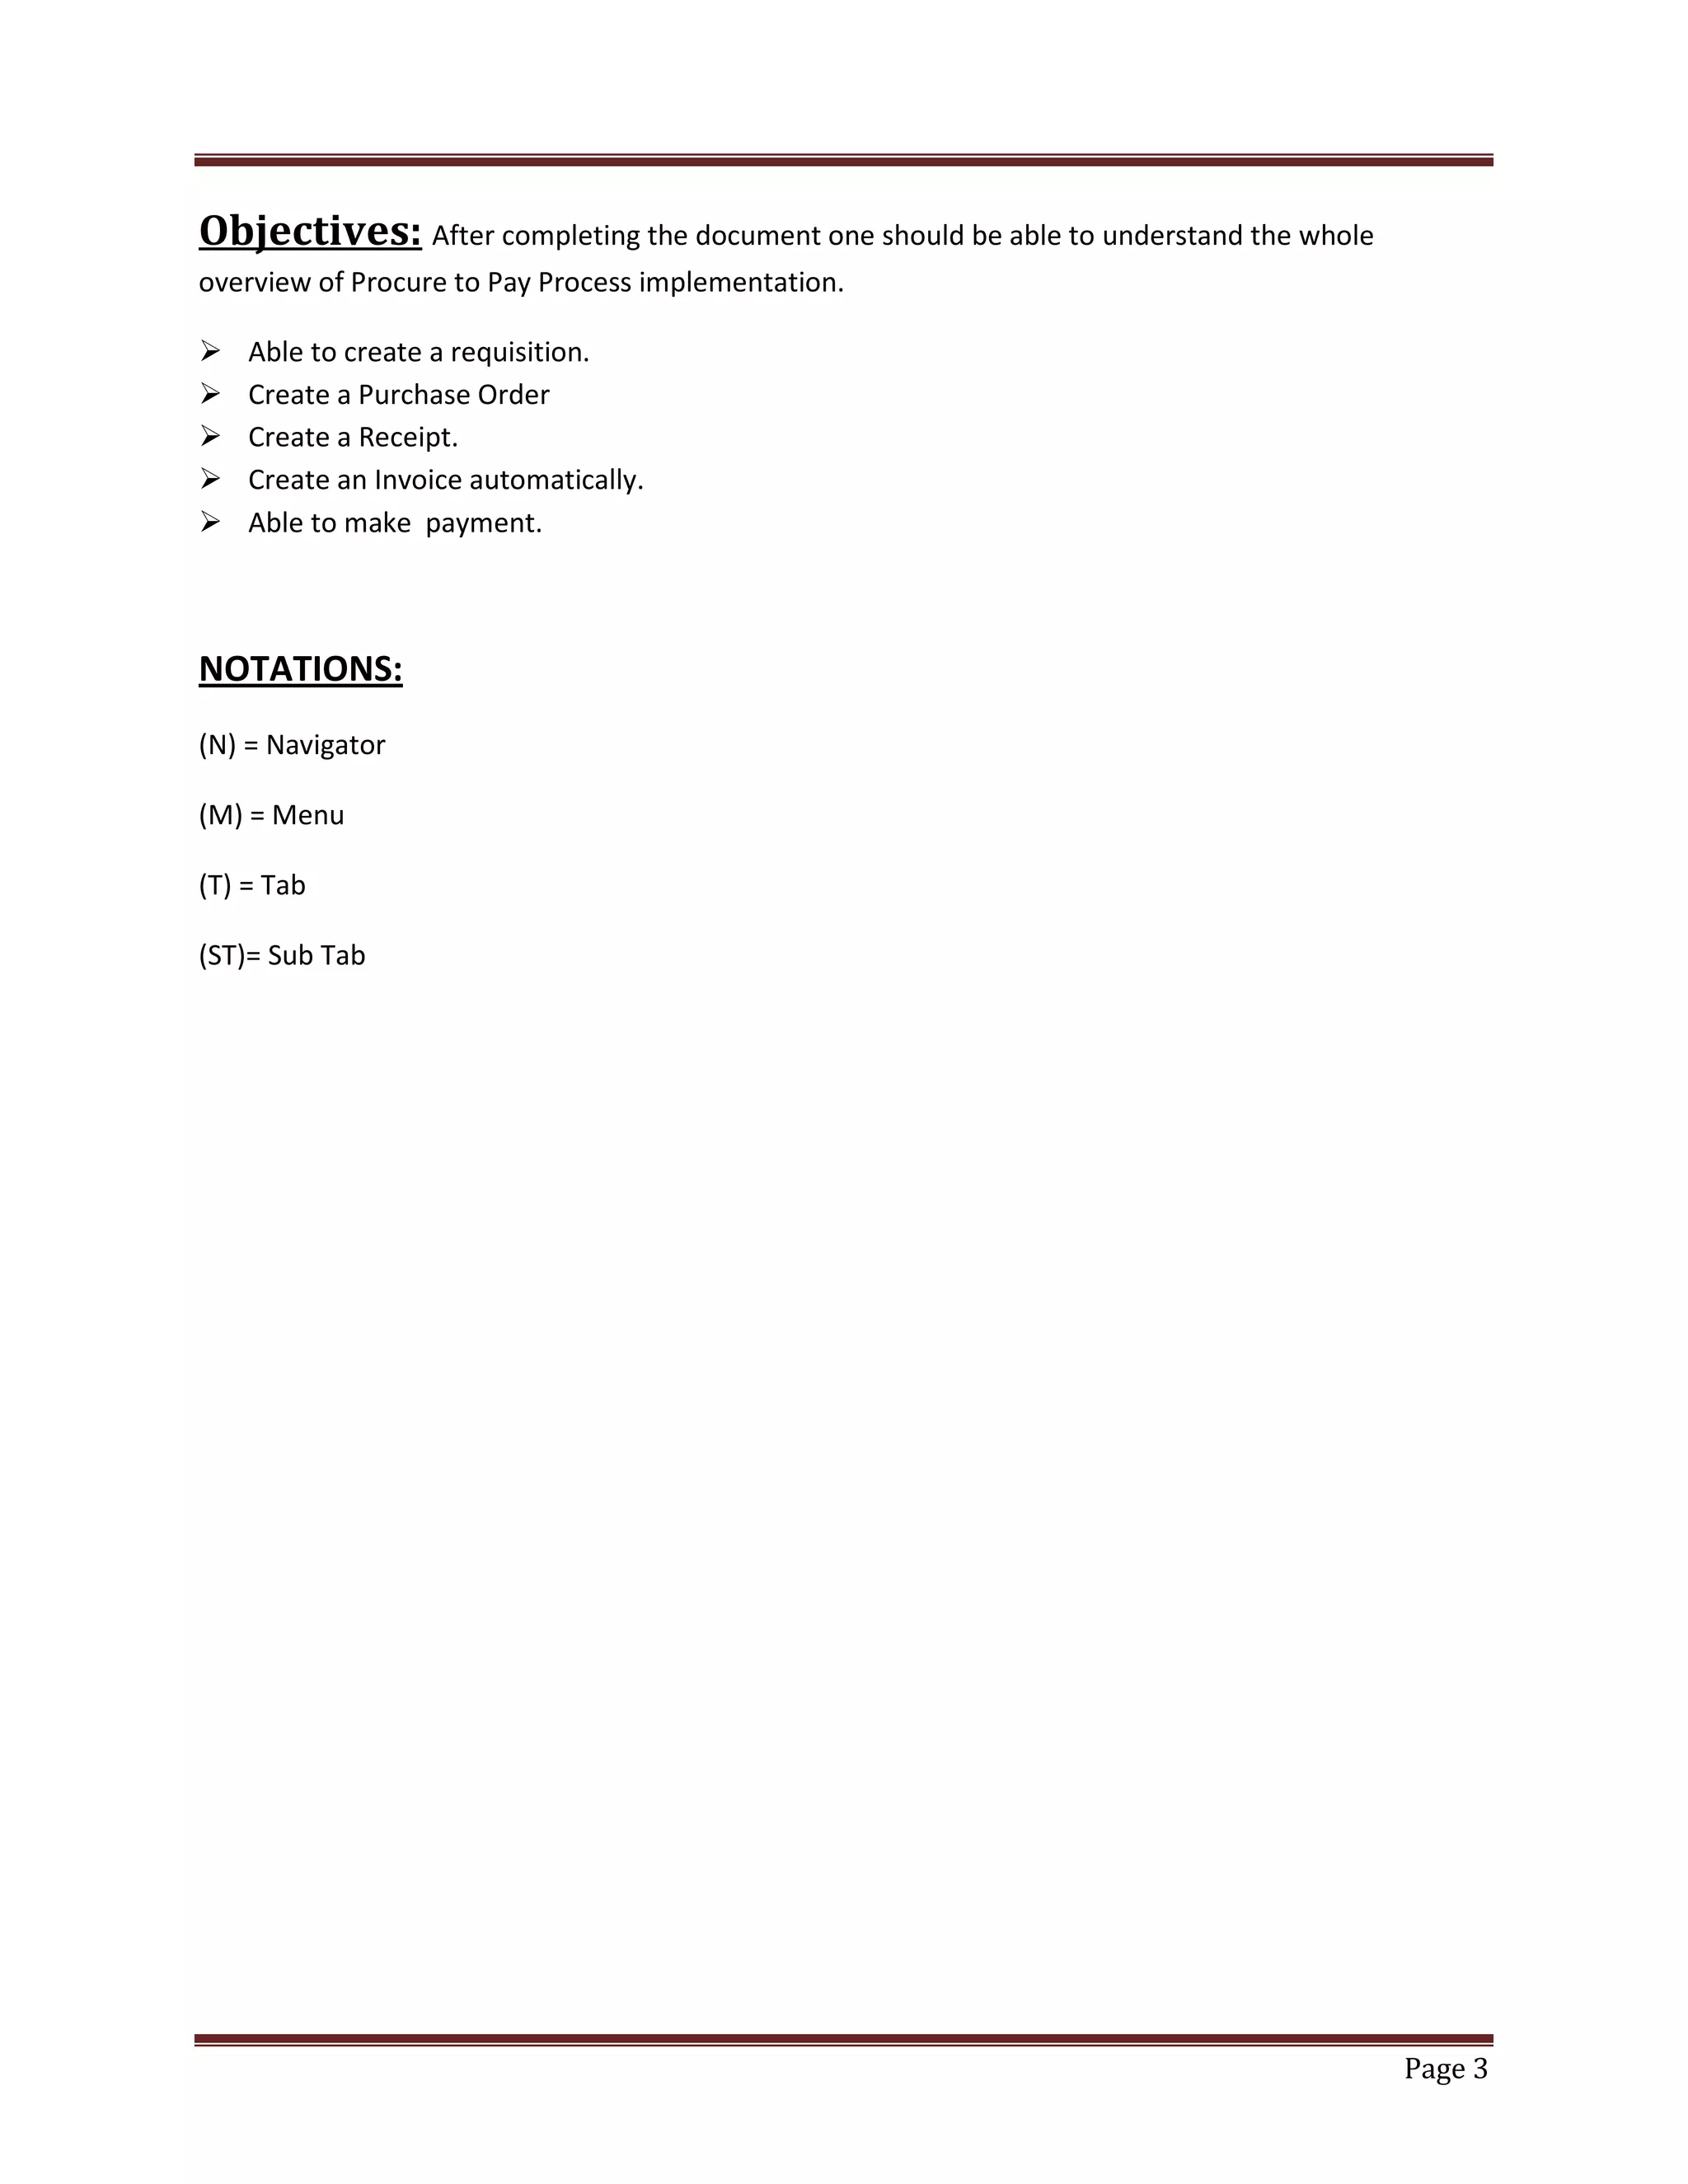
Goals include understanding P2P implementation and skills to create requisitions, purchase orders, receipts, and invoices.
Necessary conditions for P2P implementation, including login, module access, approval limits, and supplier setup.
Sequential steps from requisition to payment including checks on inventory and data validation.
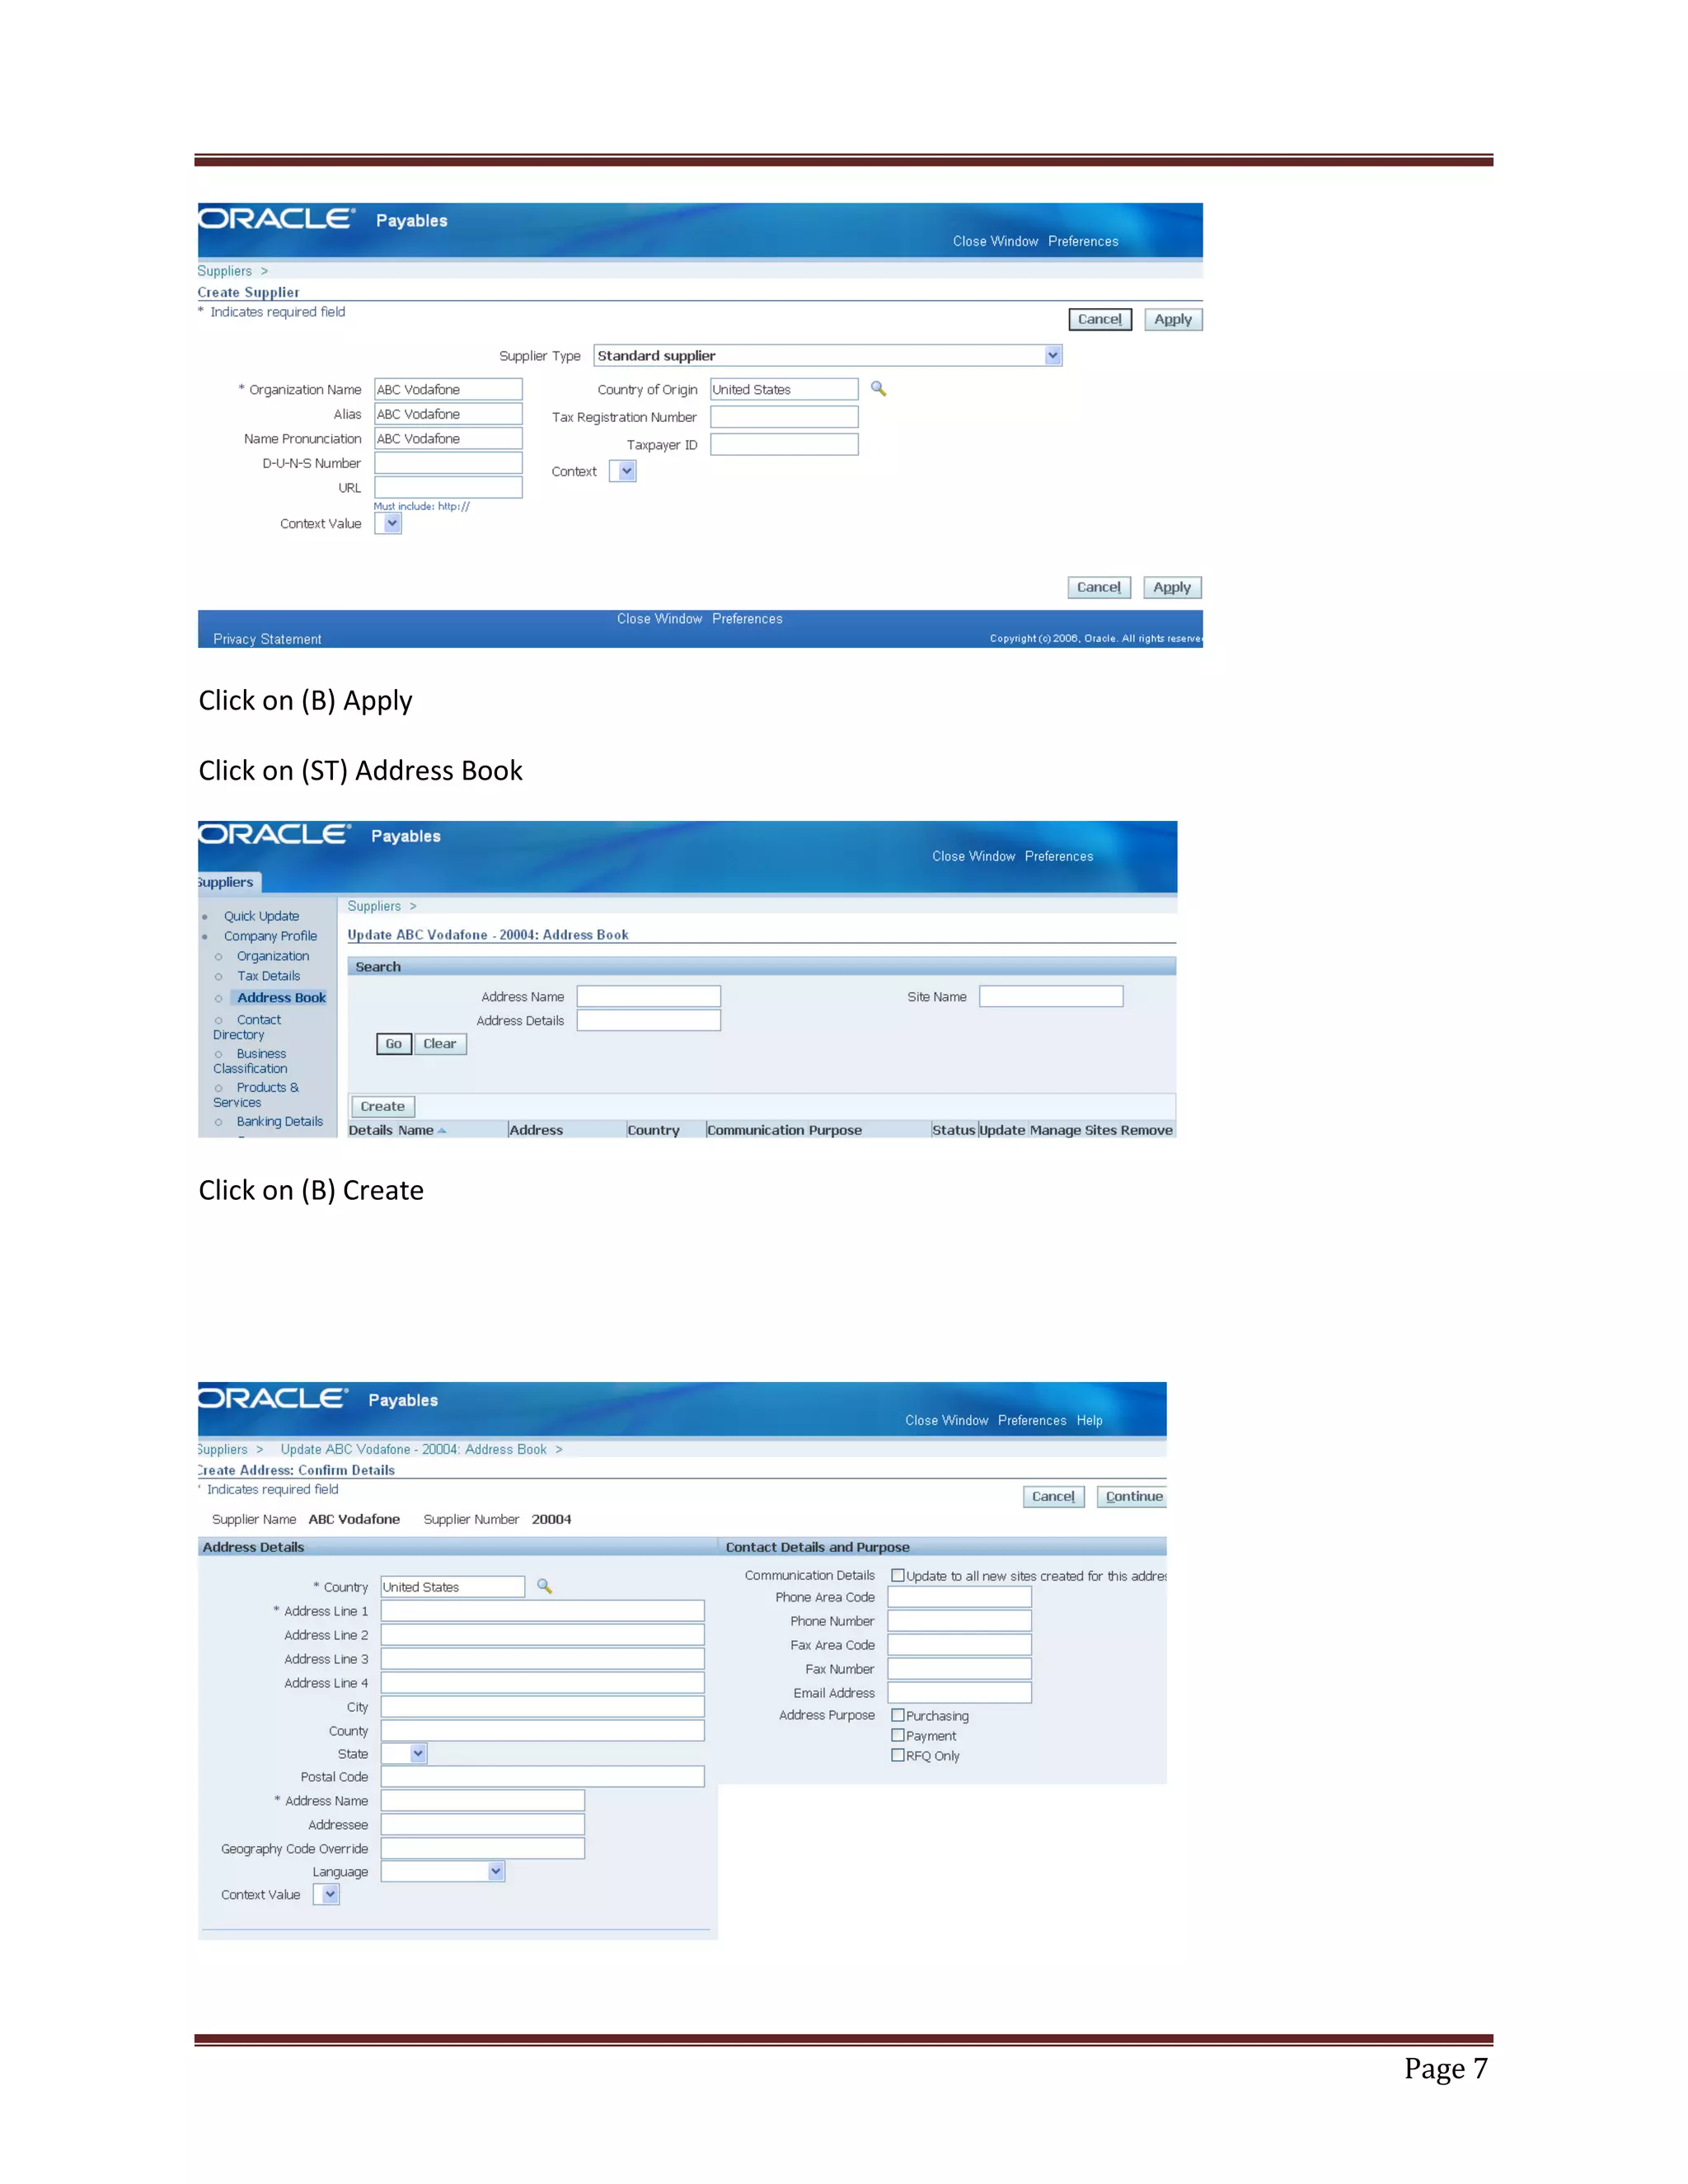
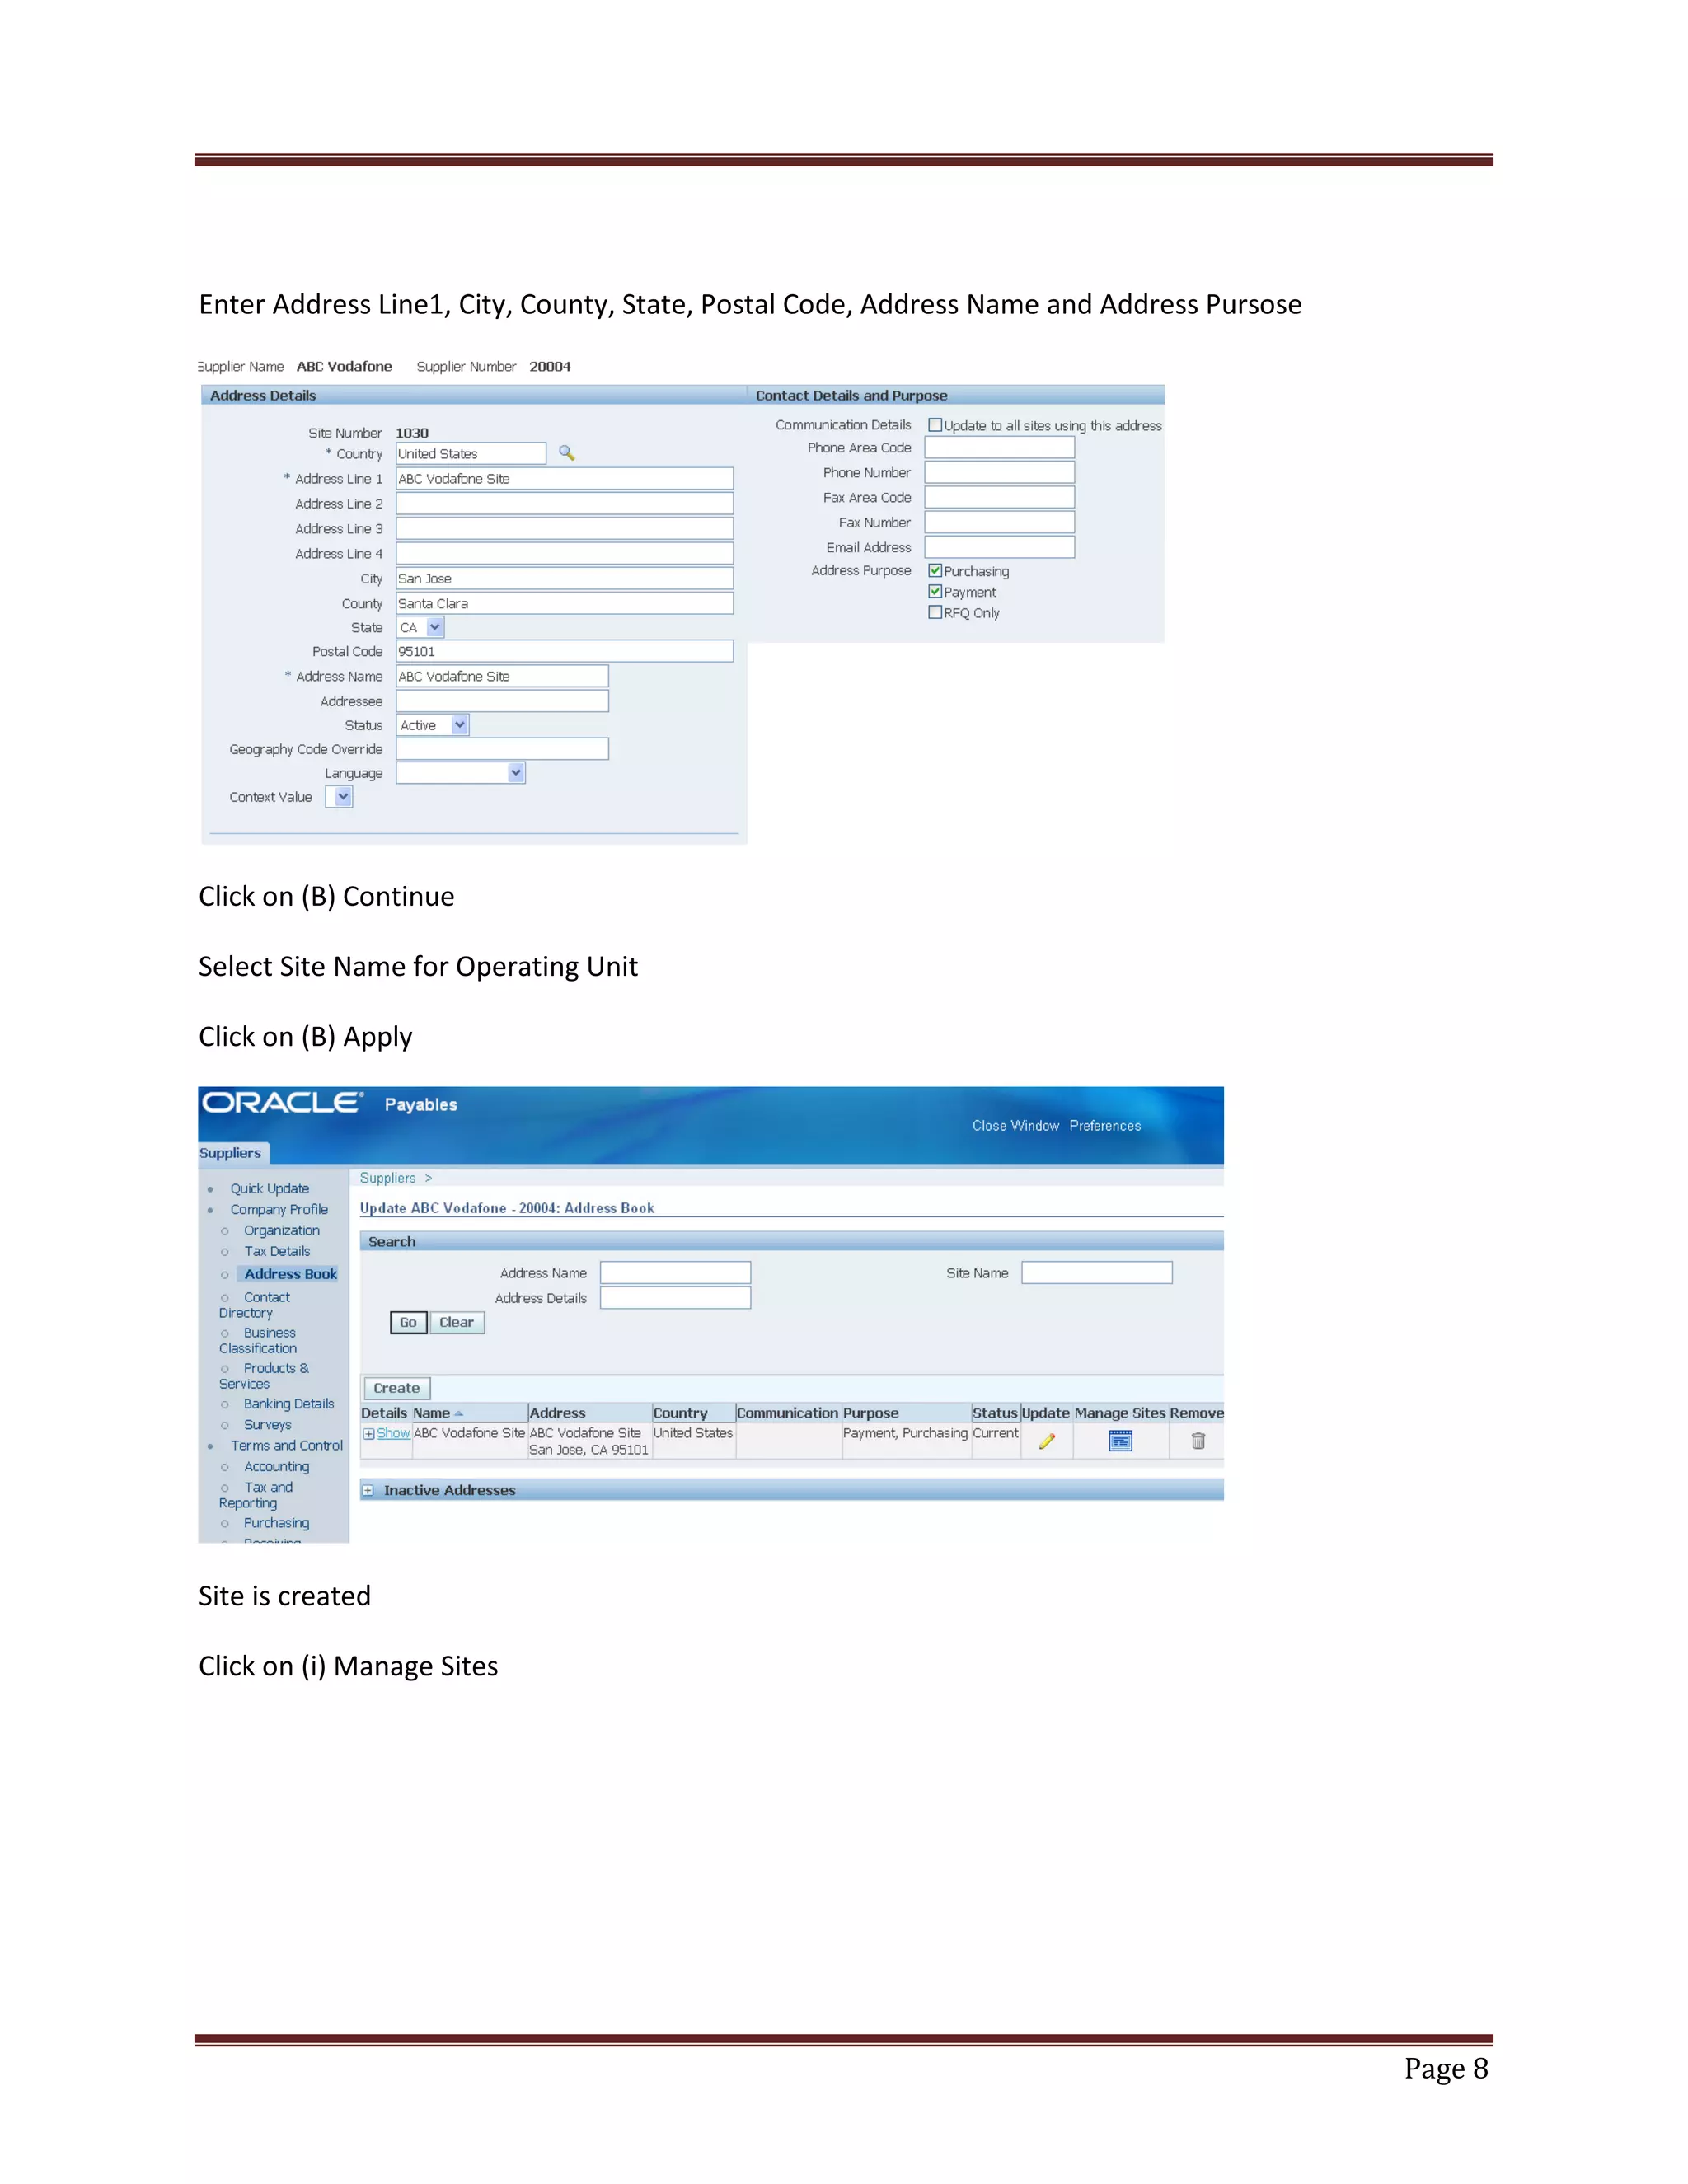
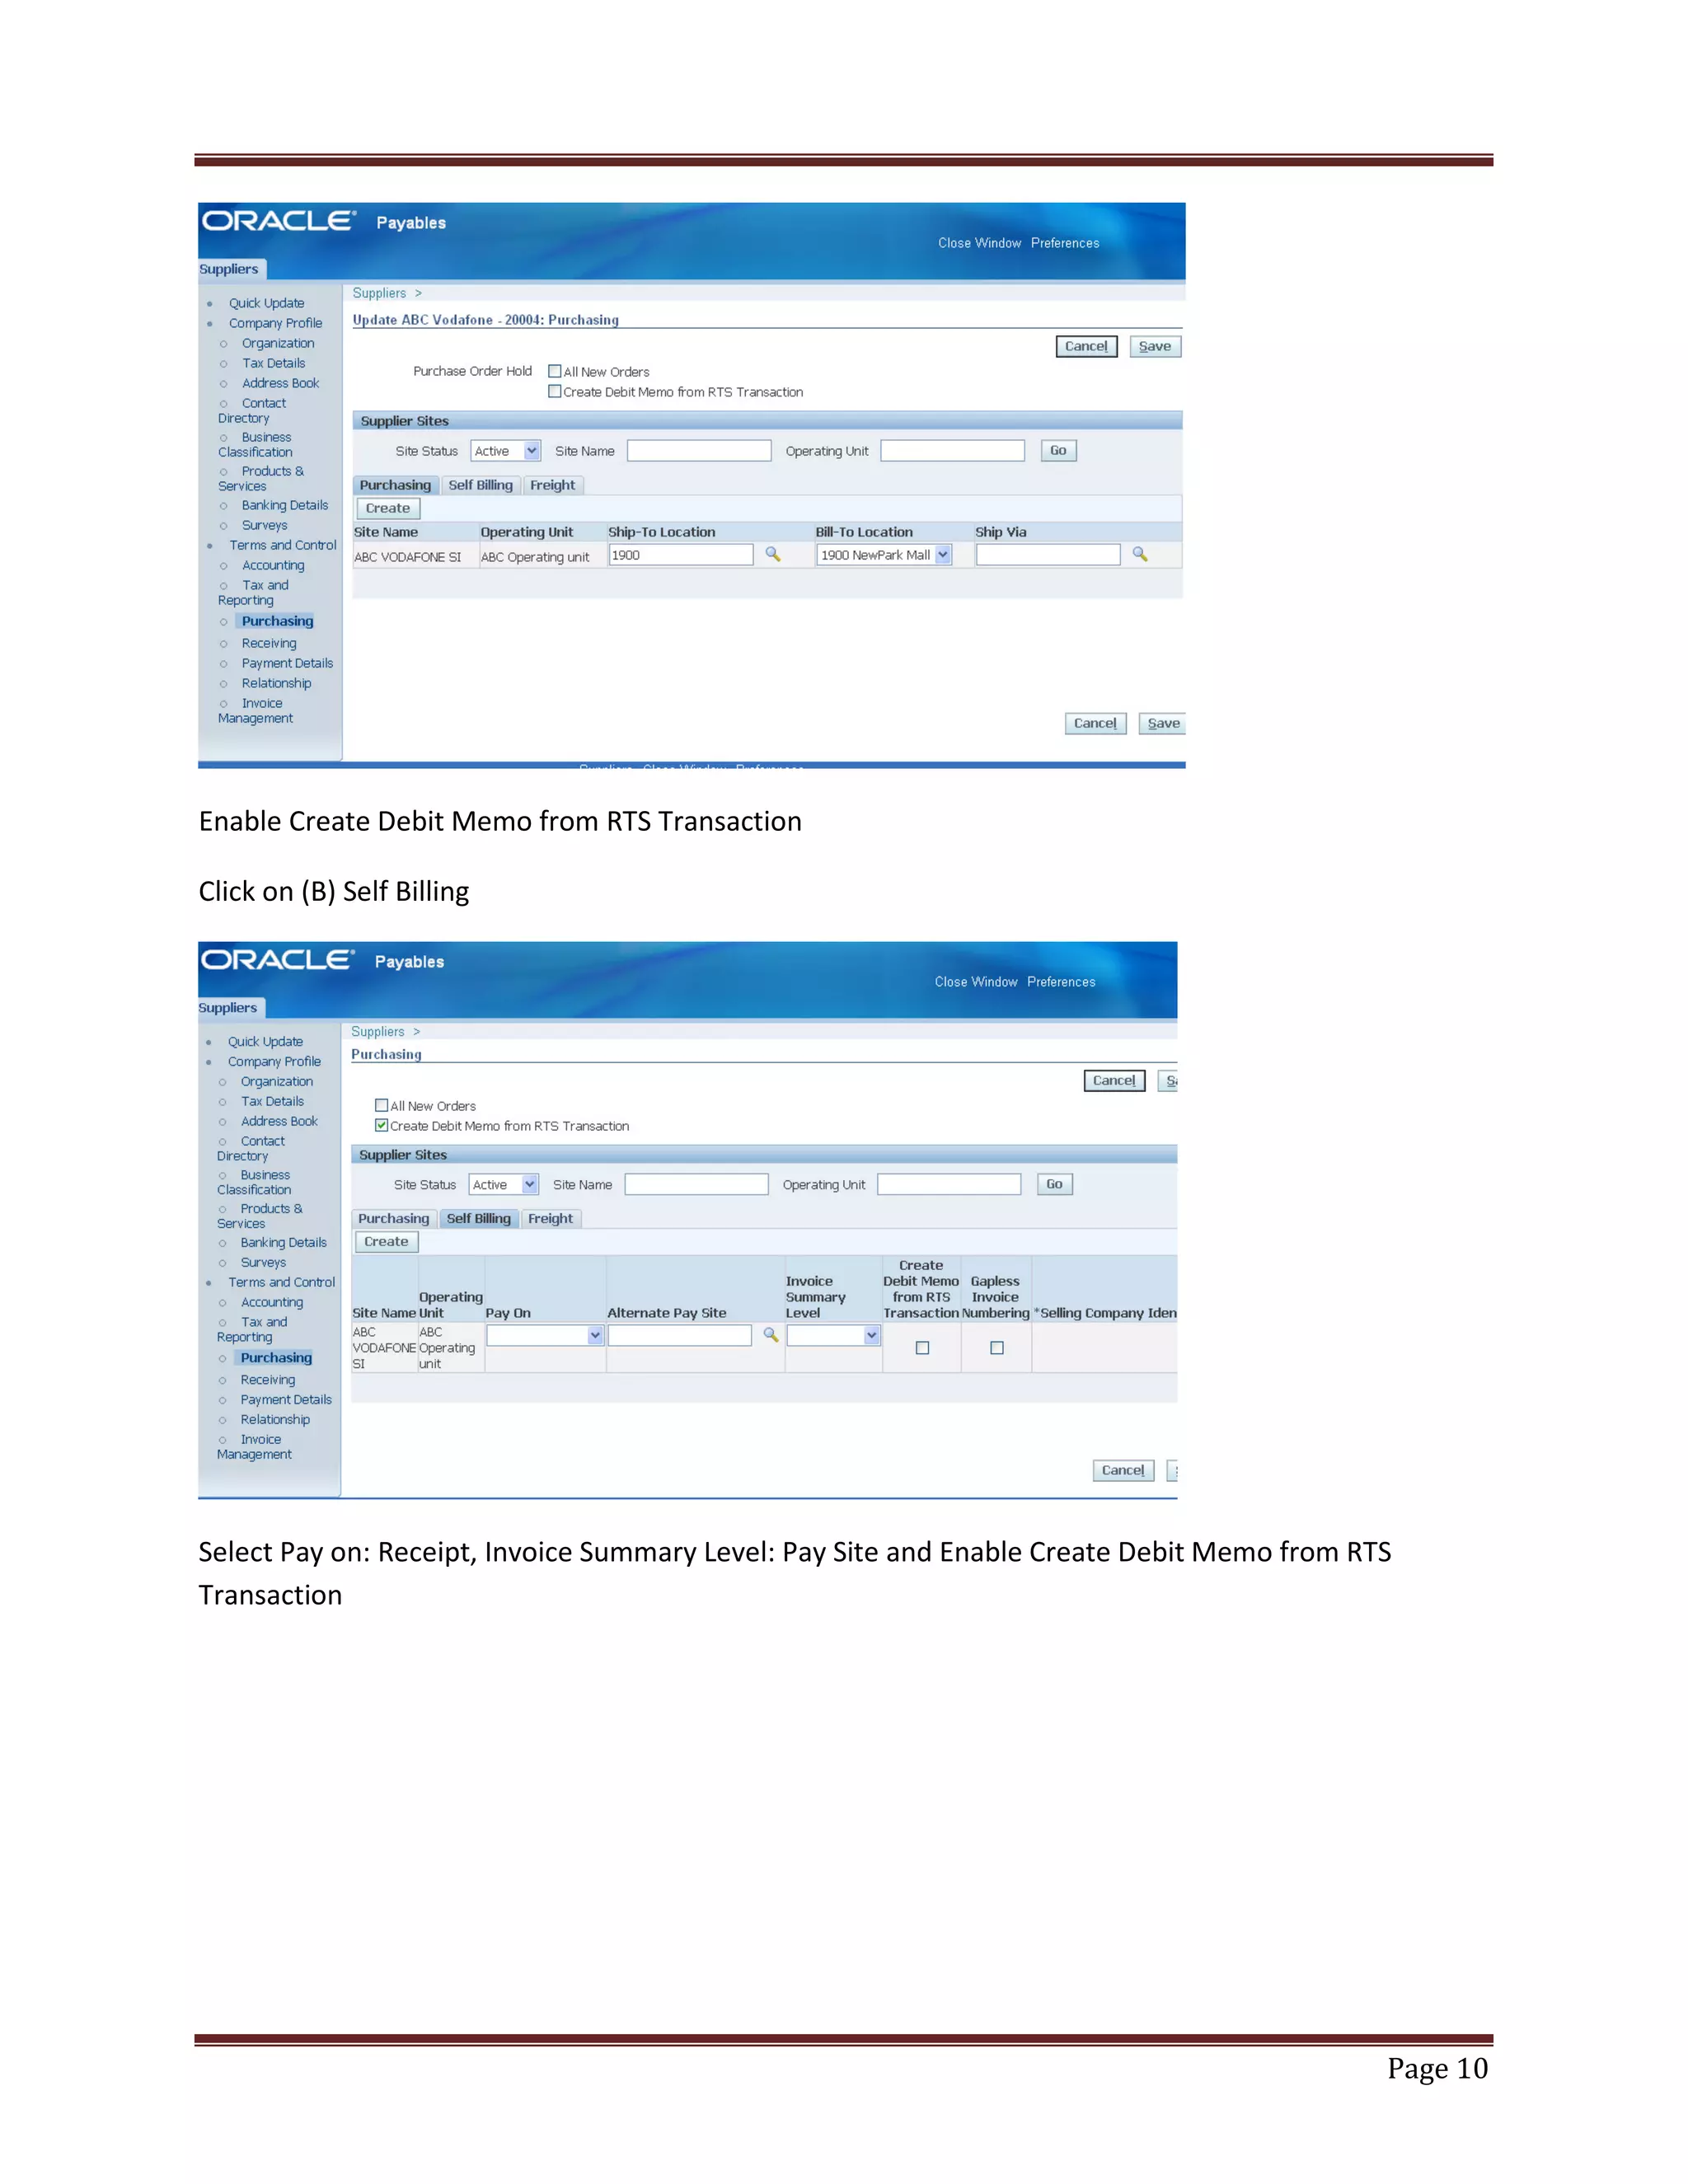
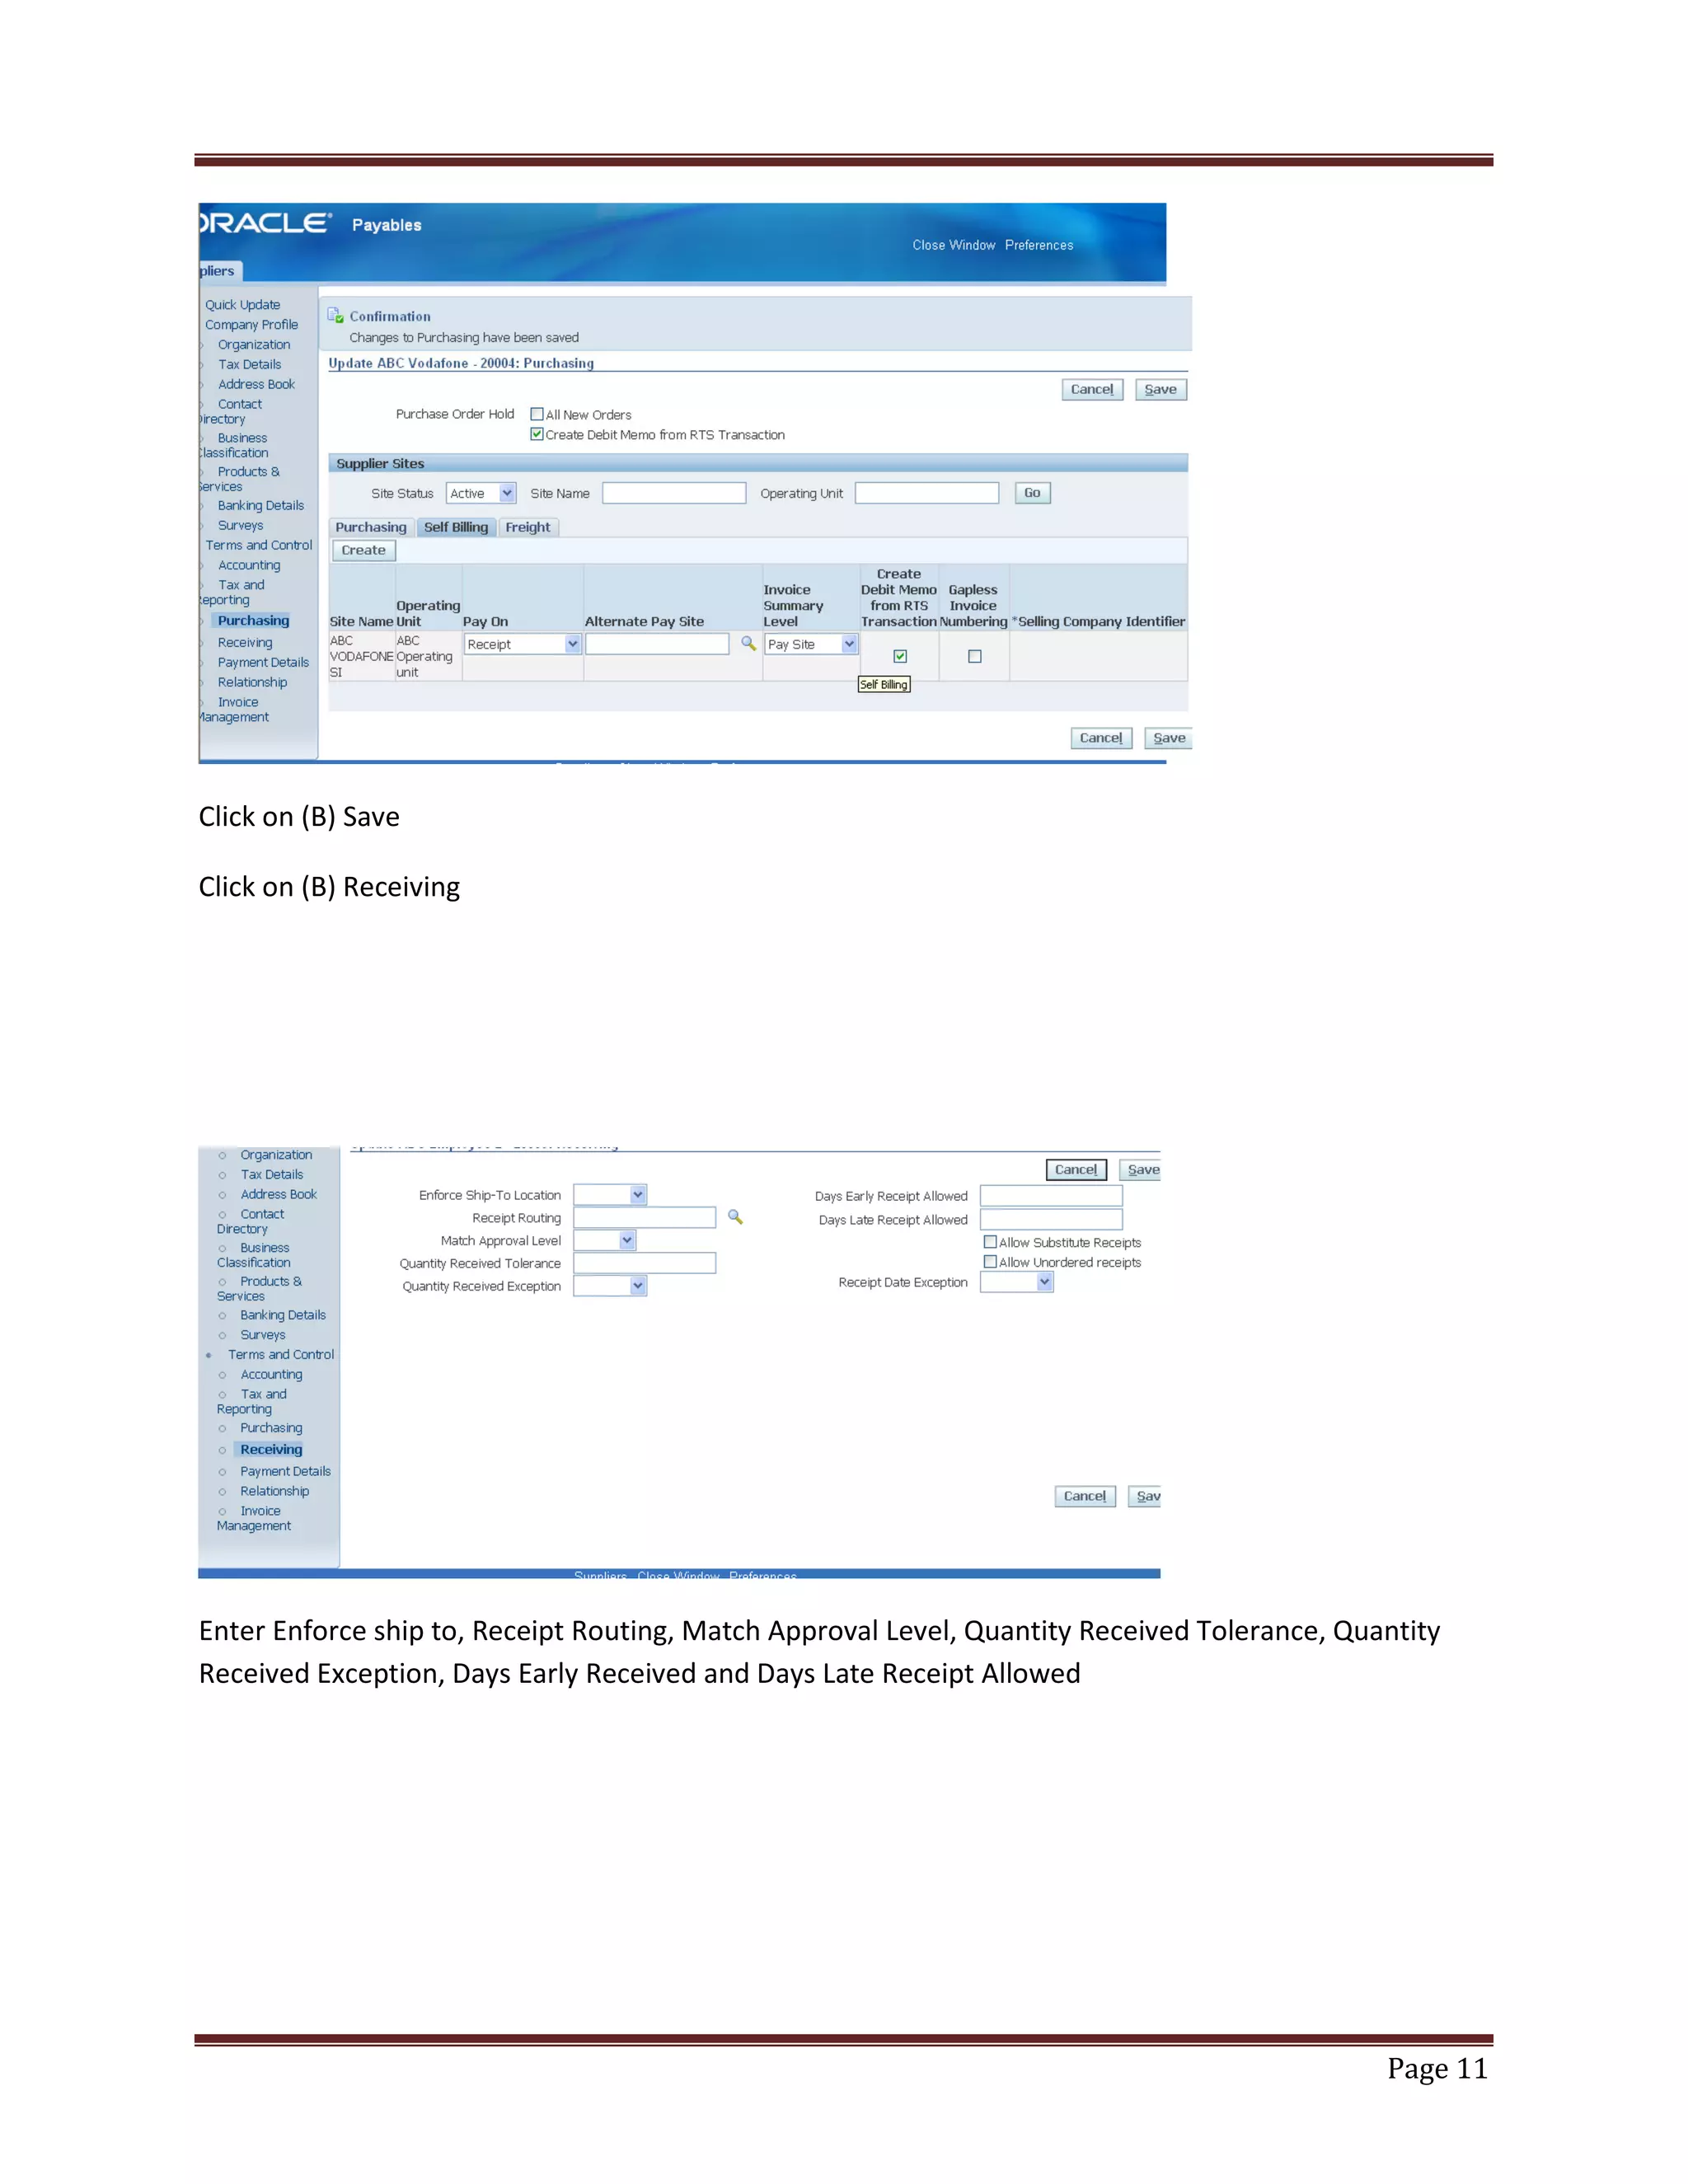
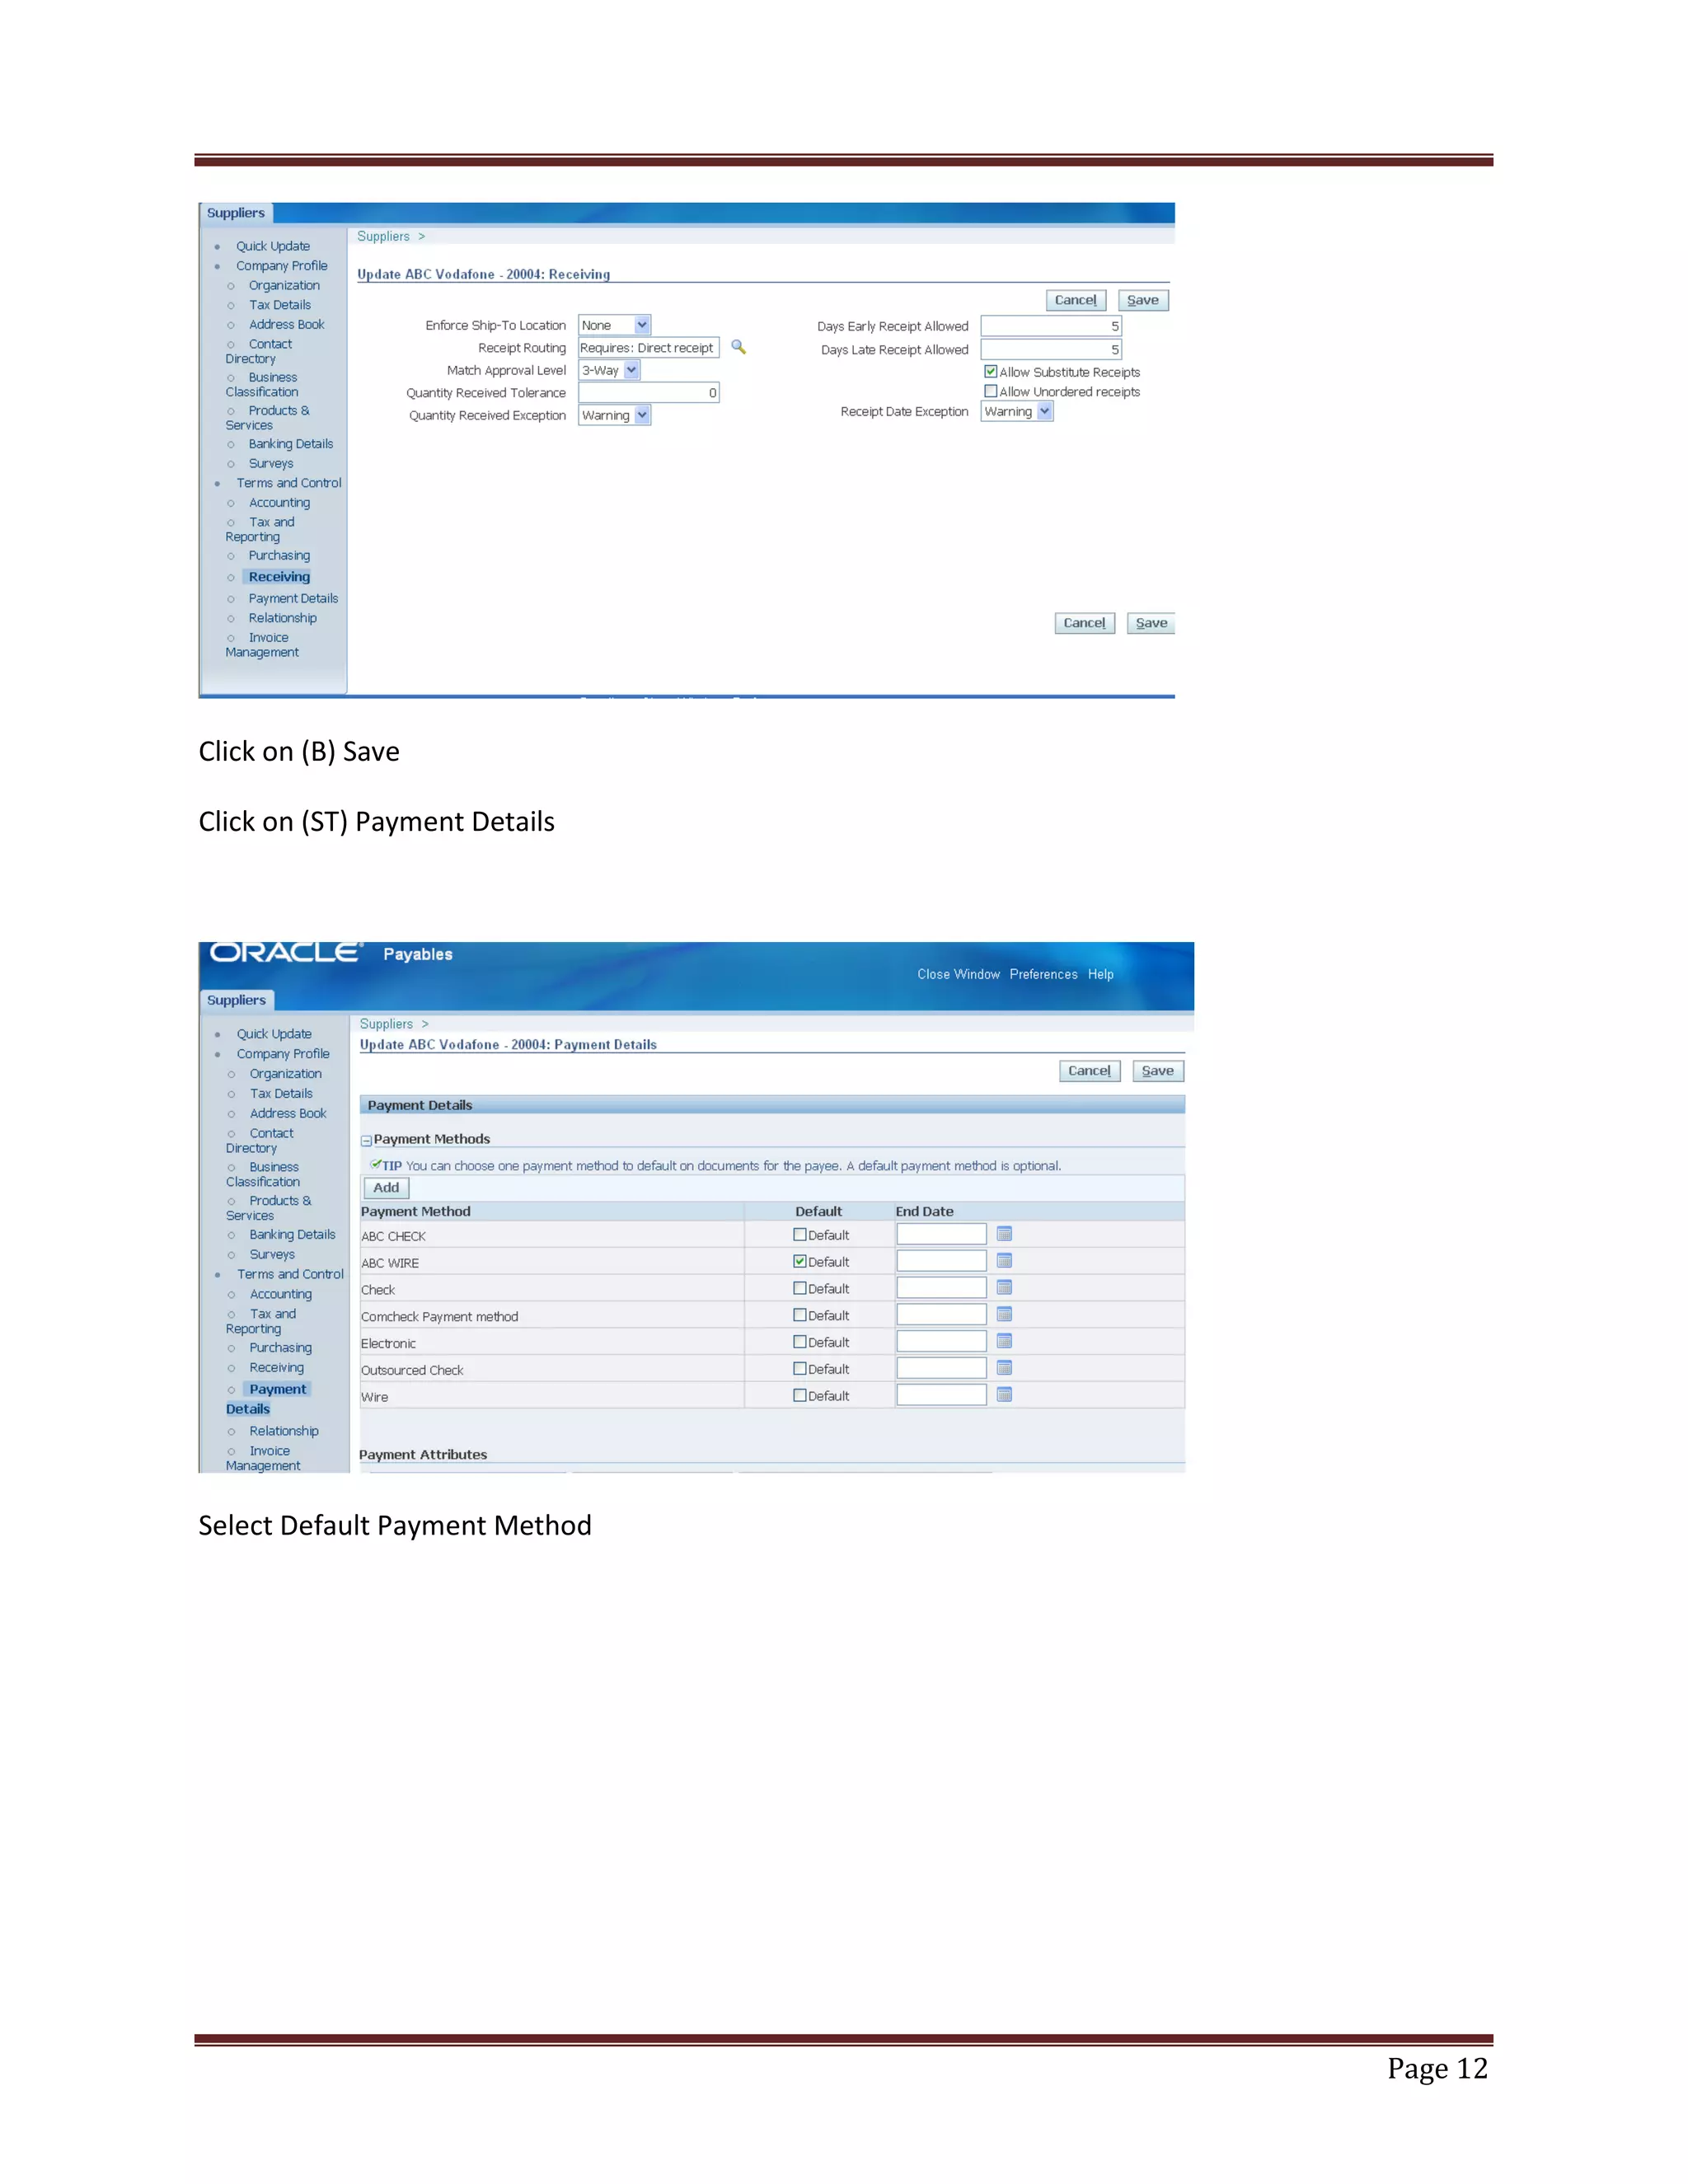
Procedure to create a standard supplier ABC Vodafone with focus on address setup and payment methods.
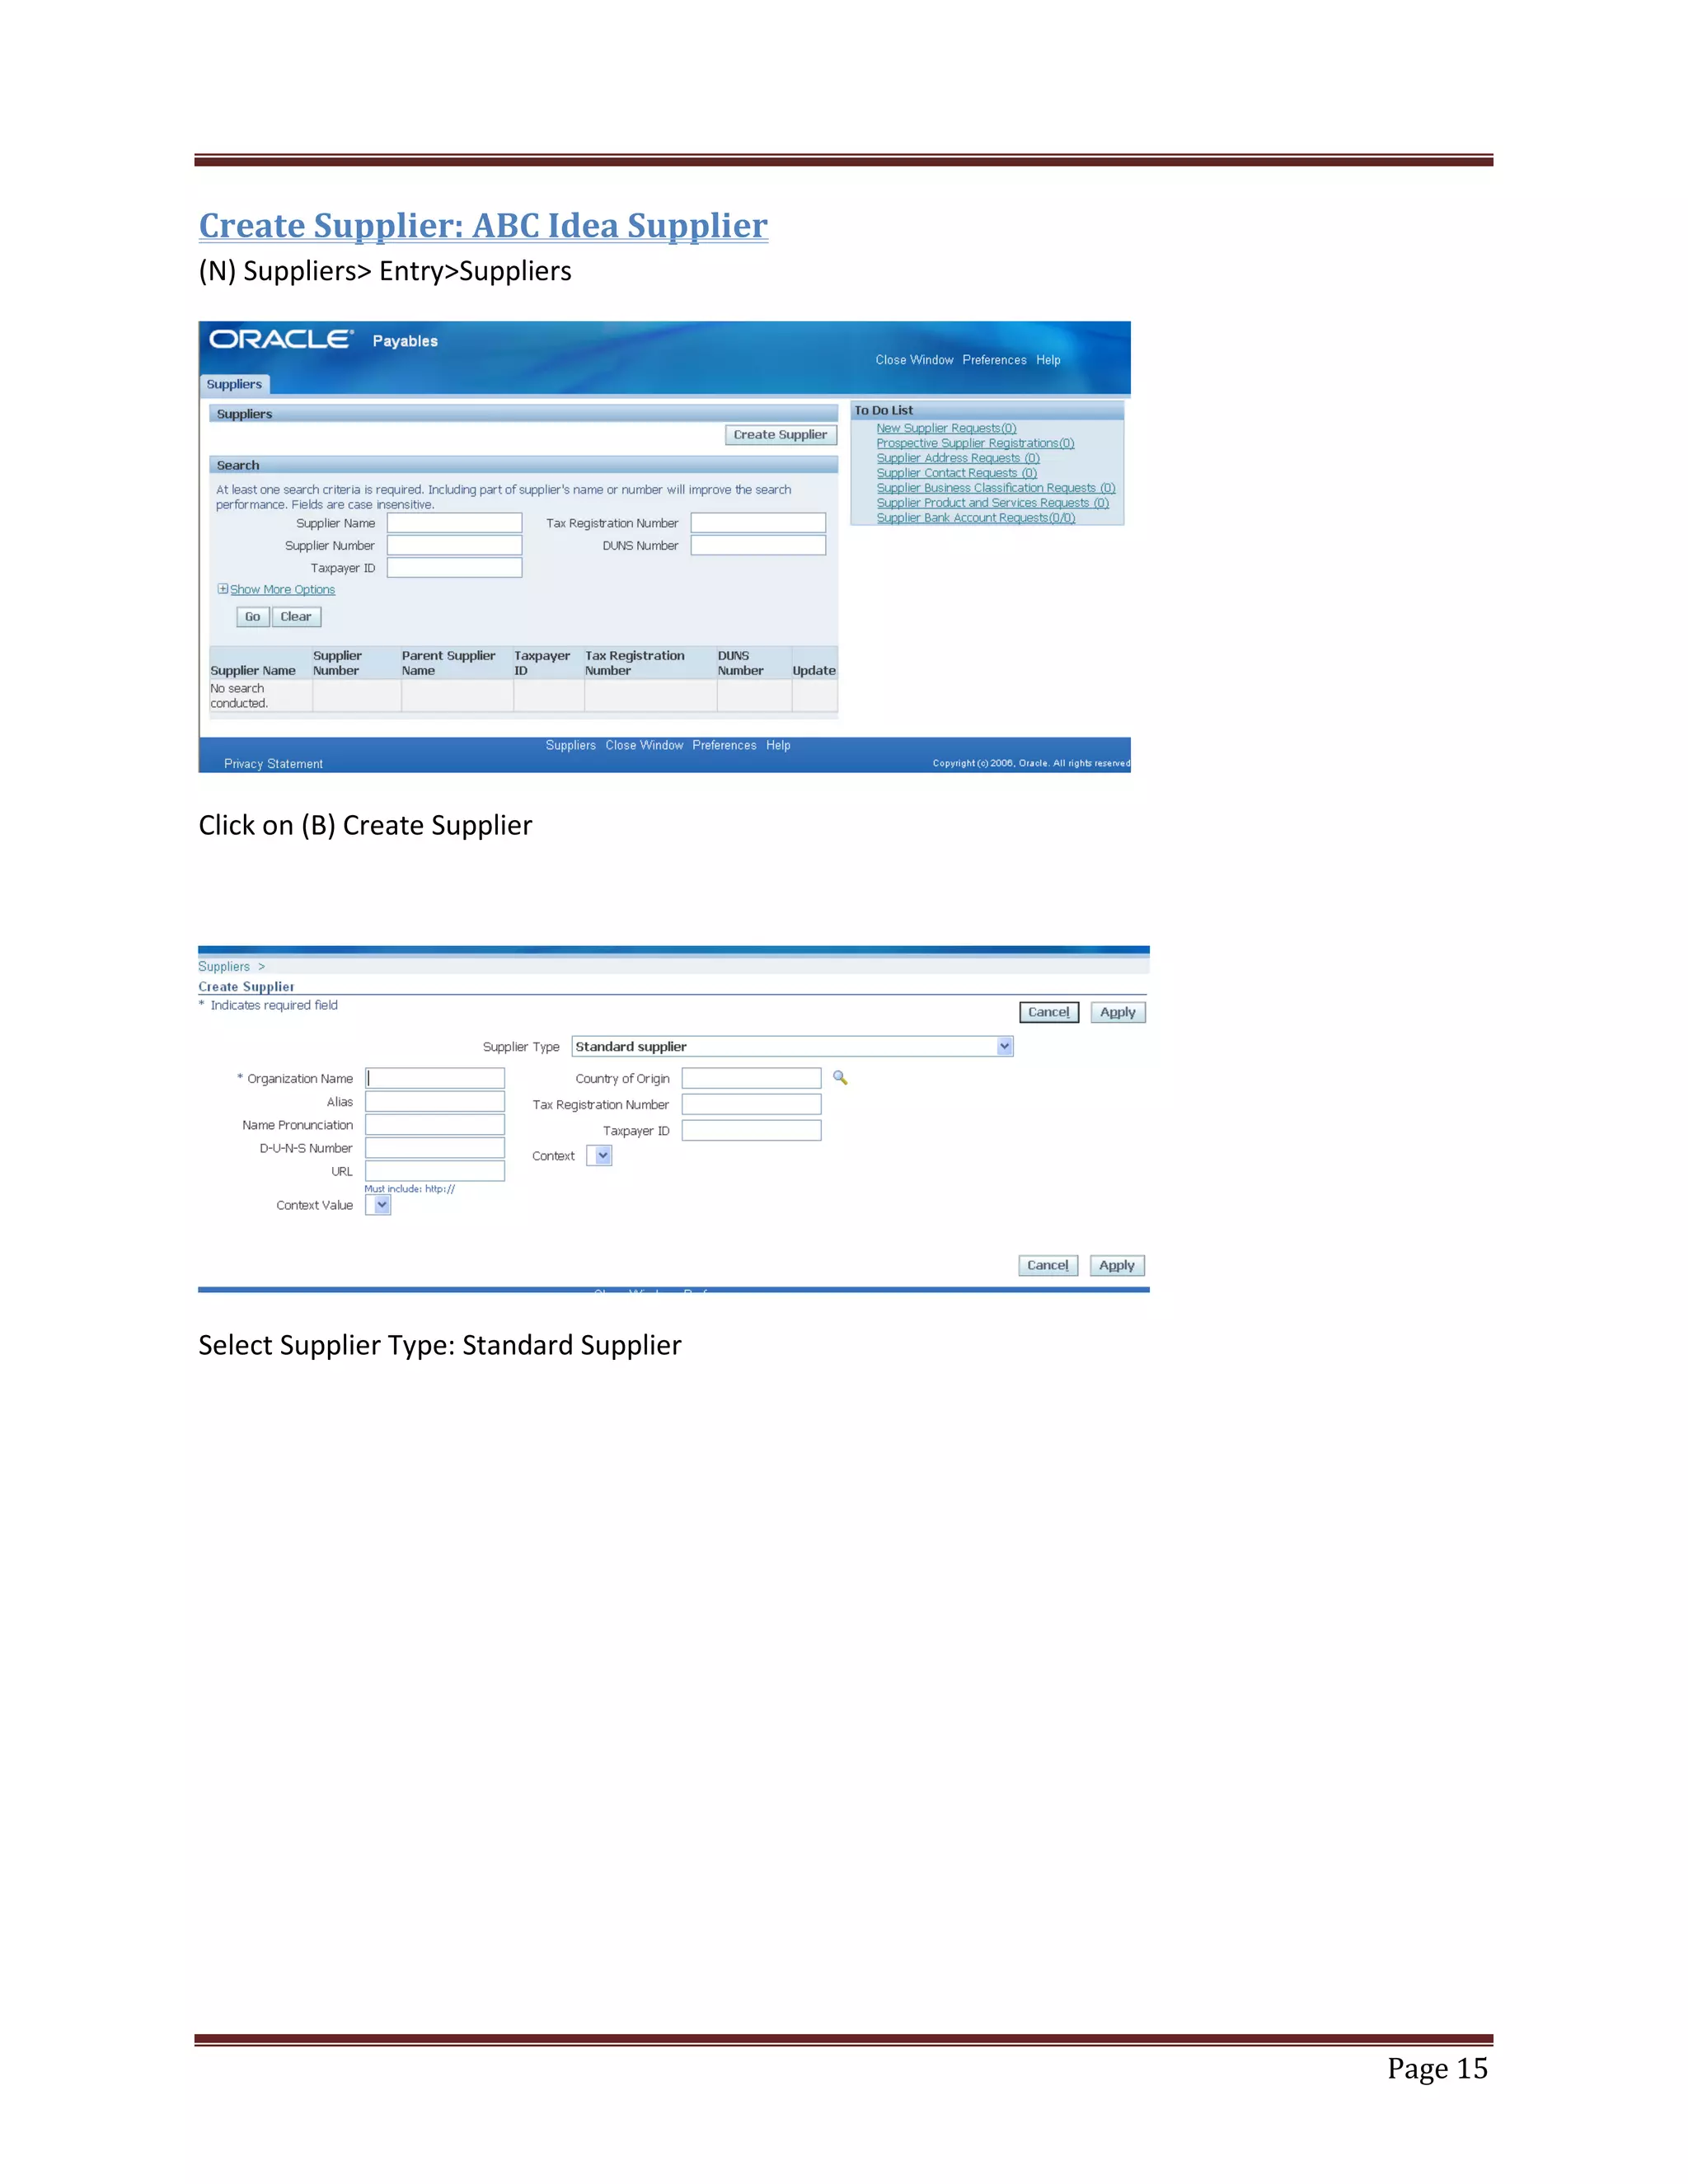
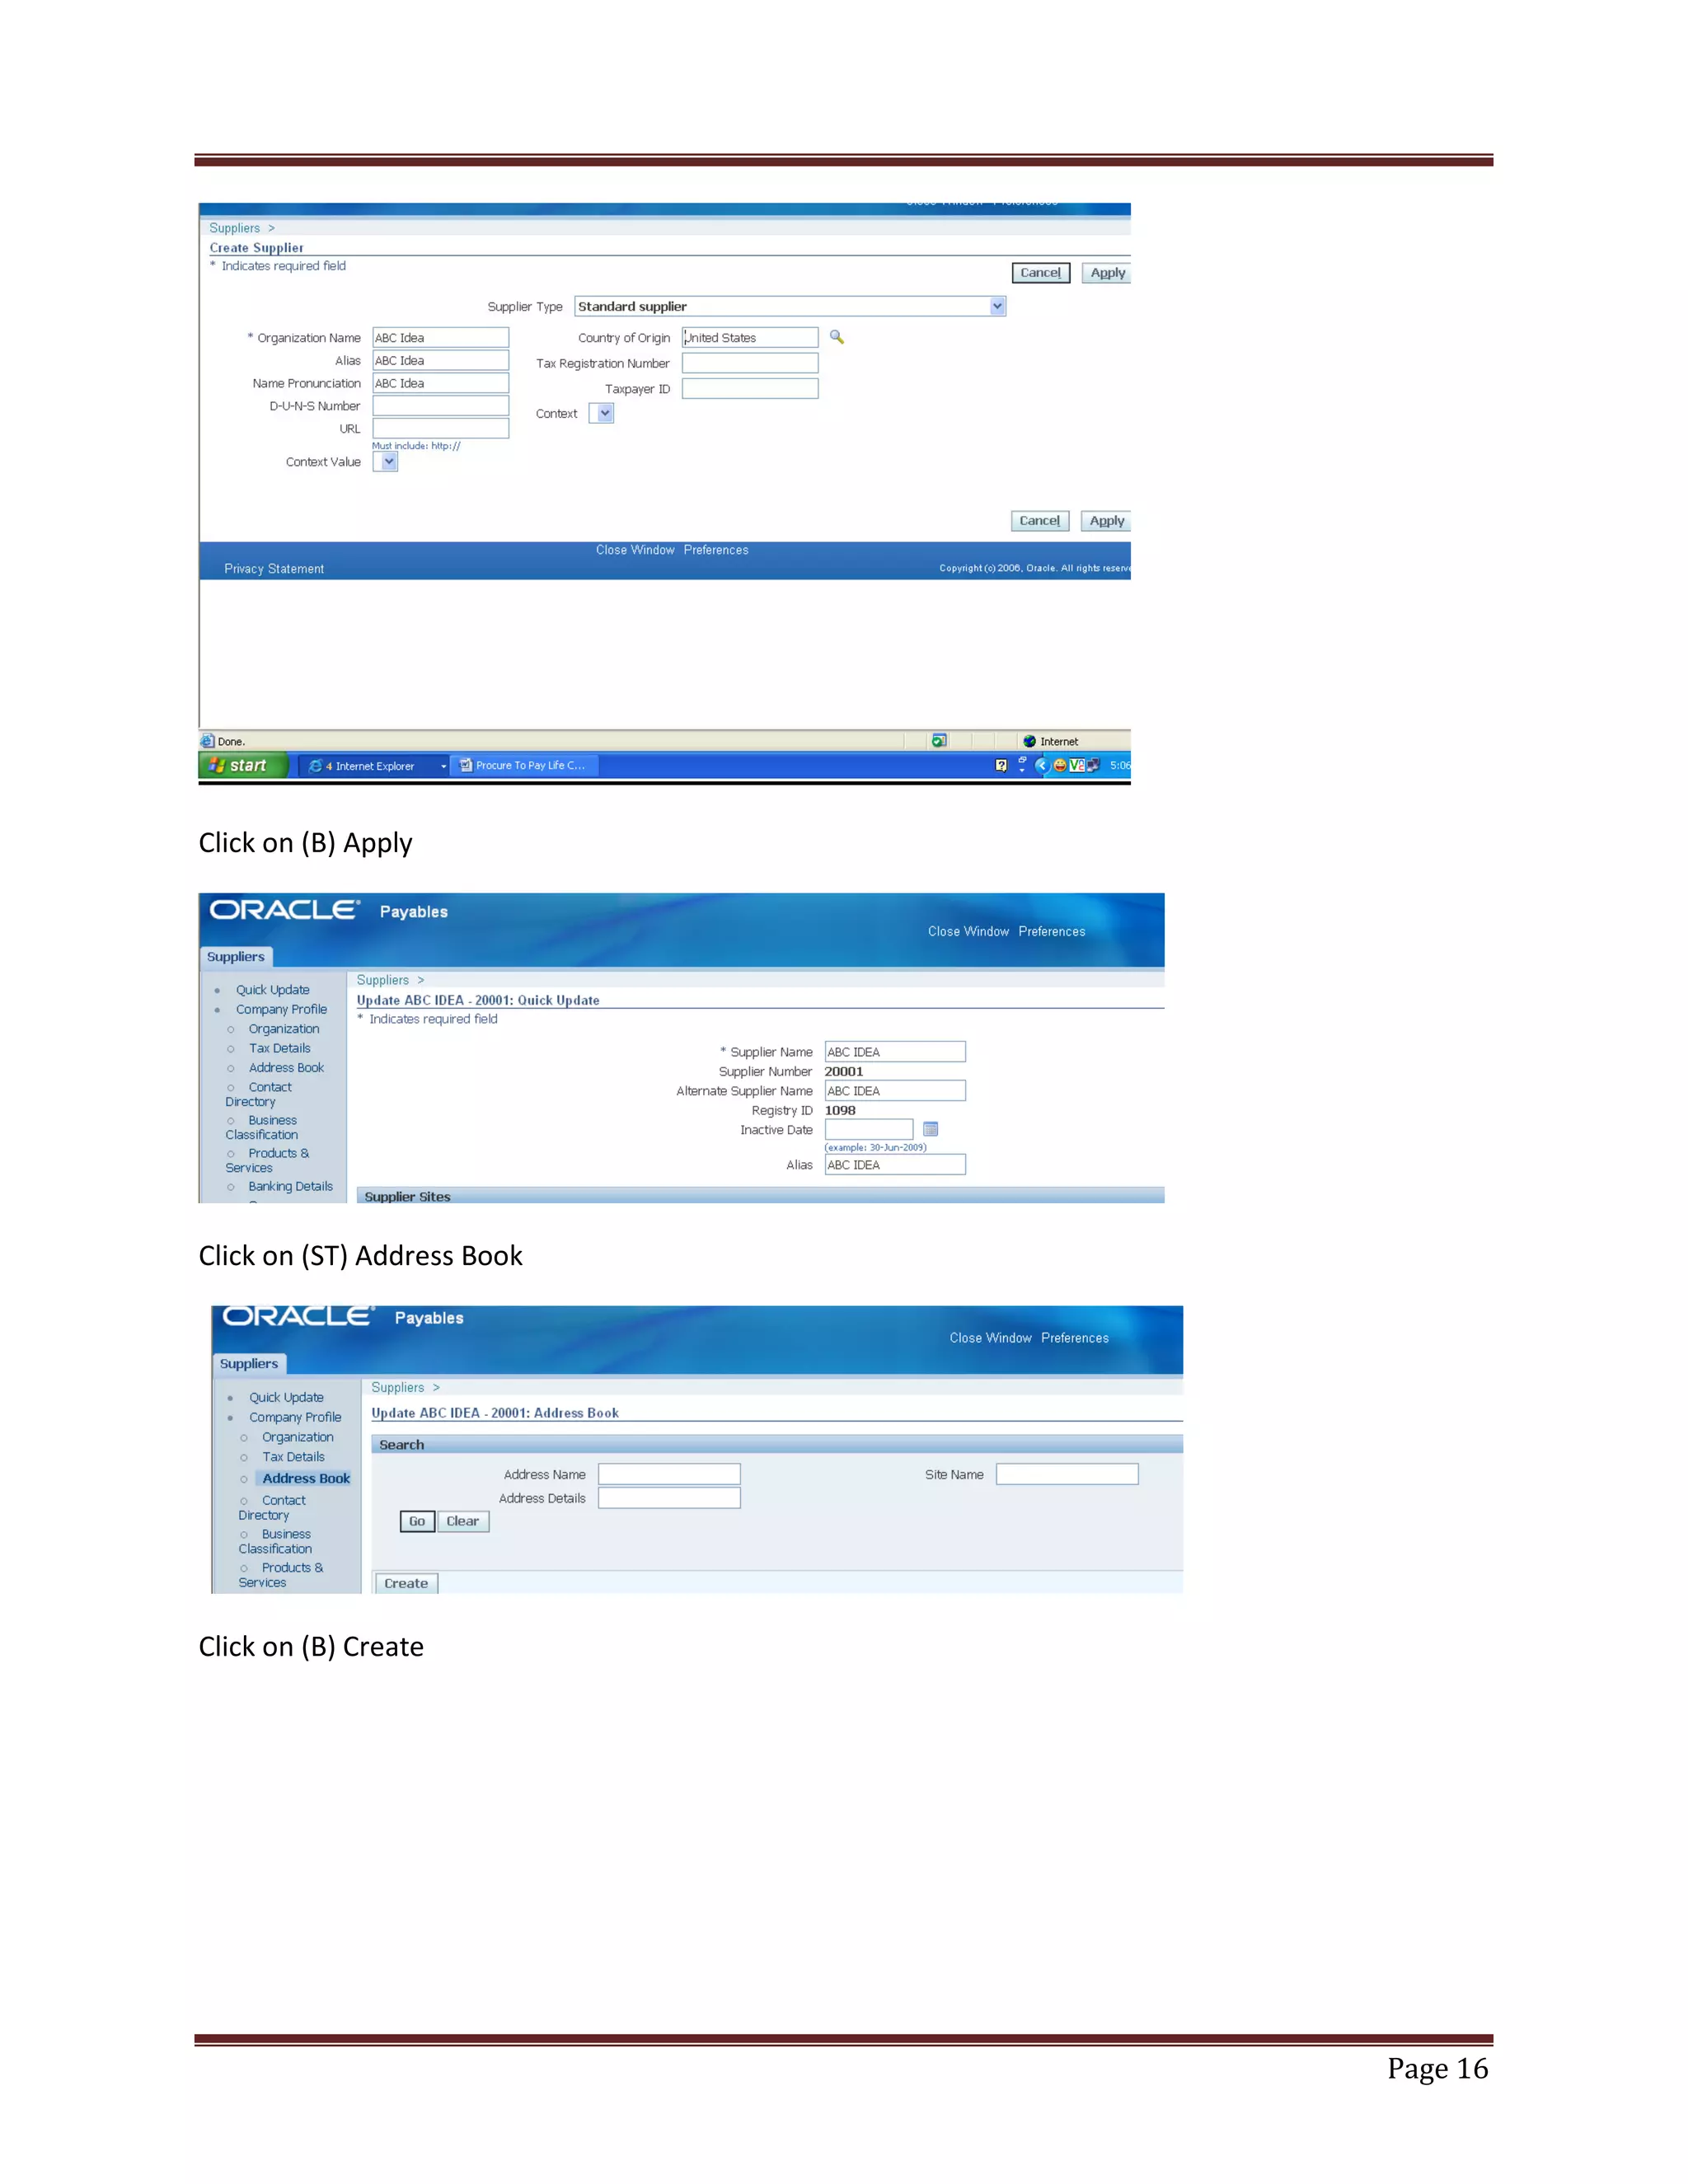
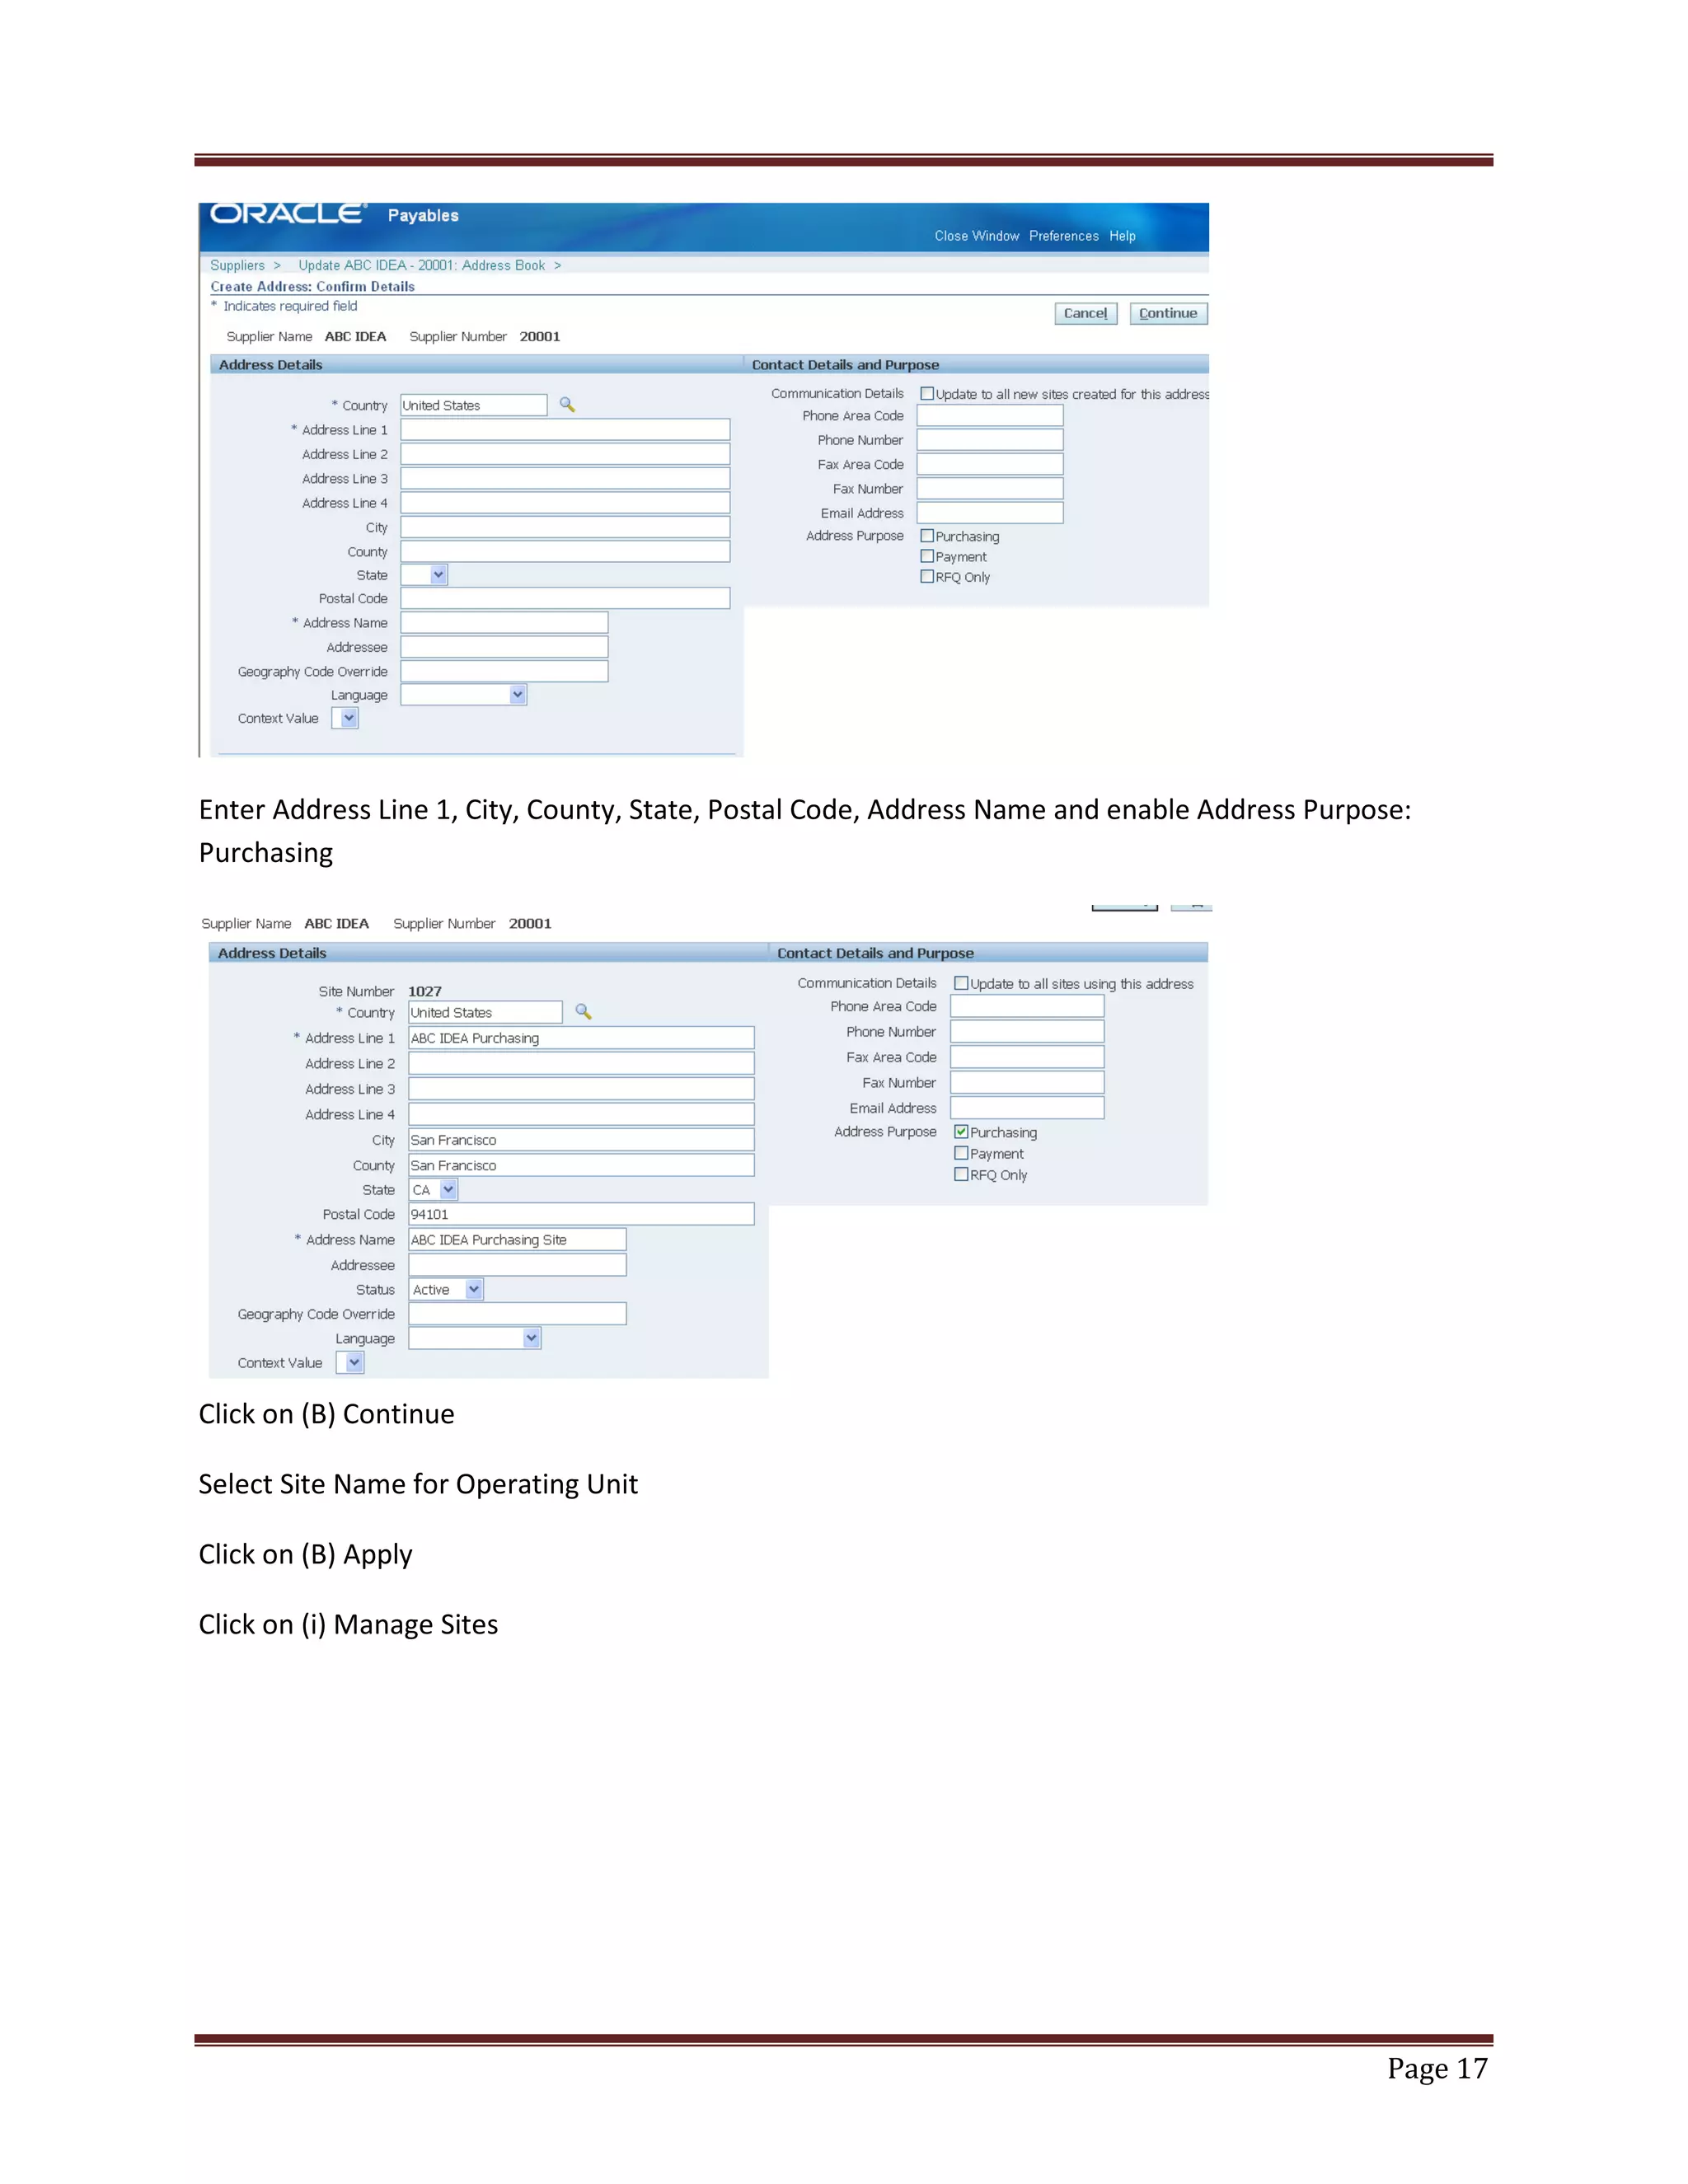
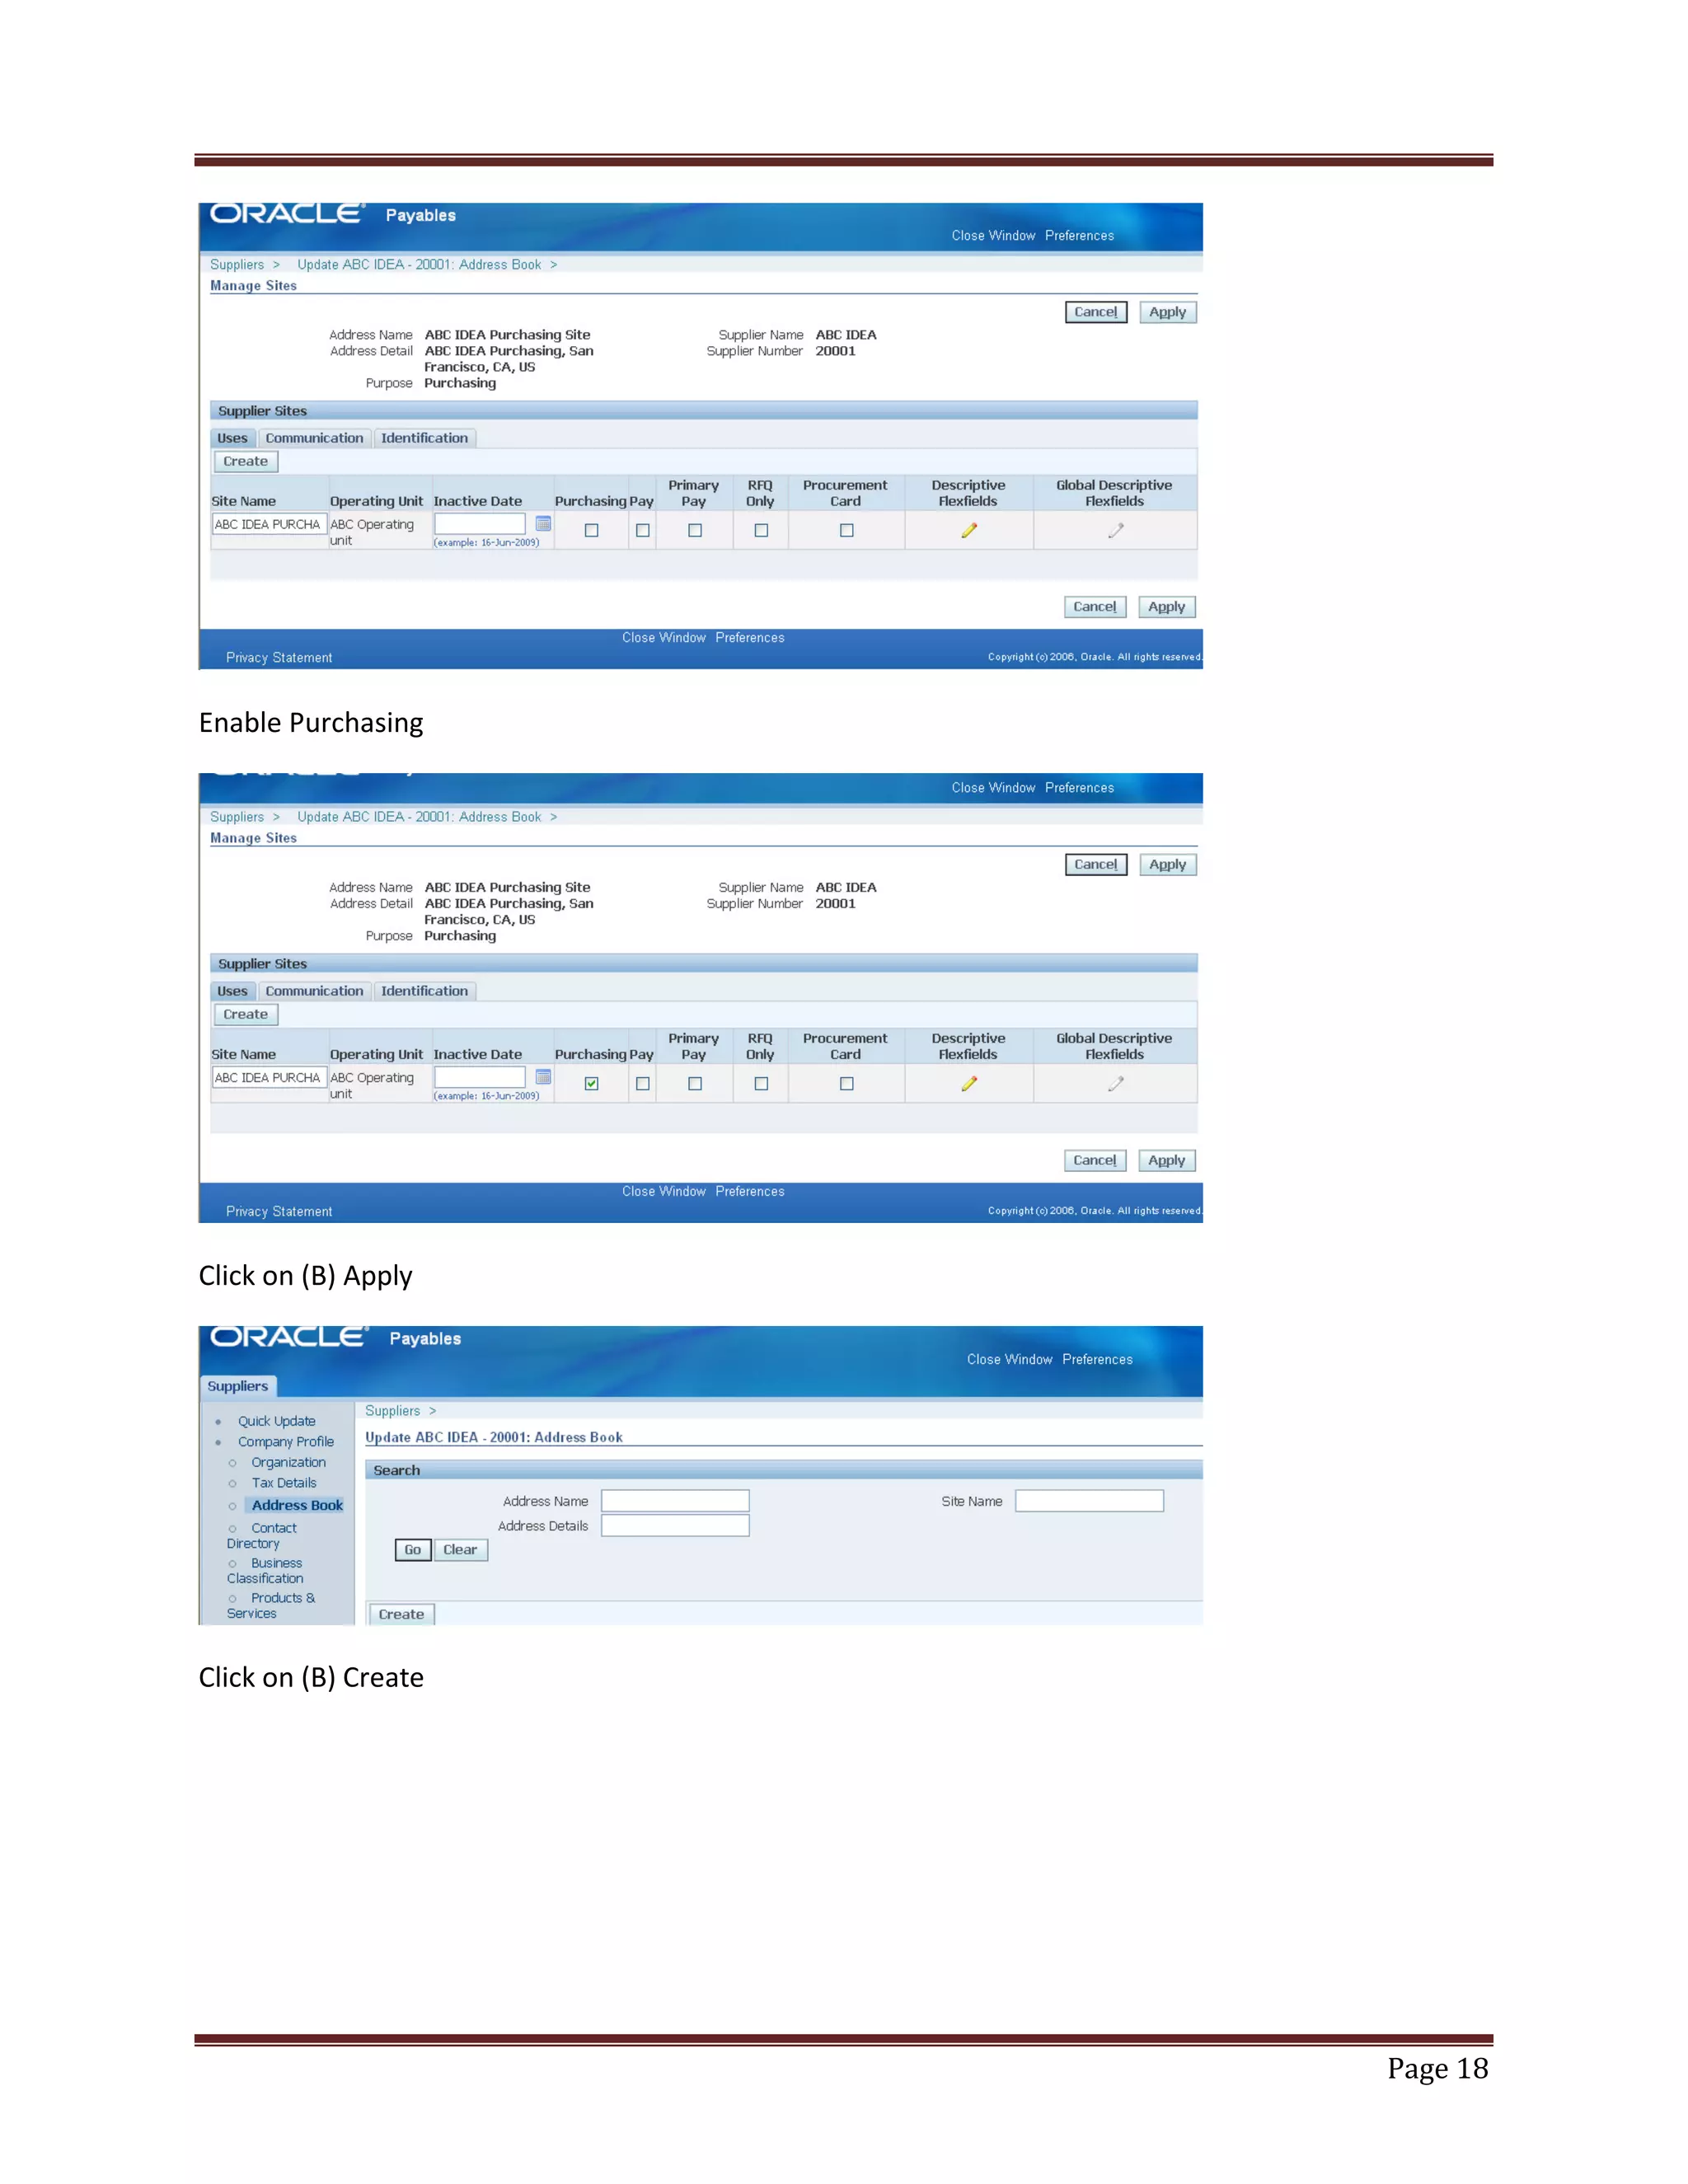
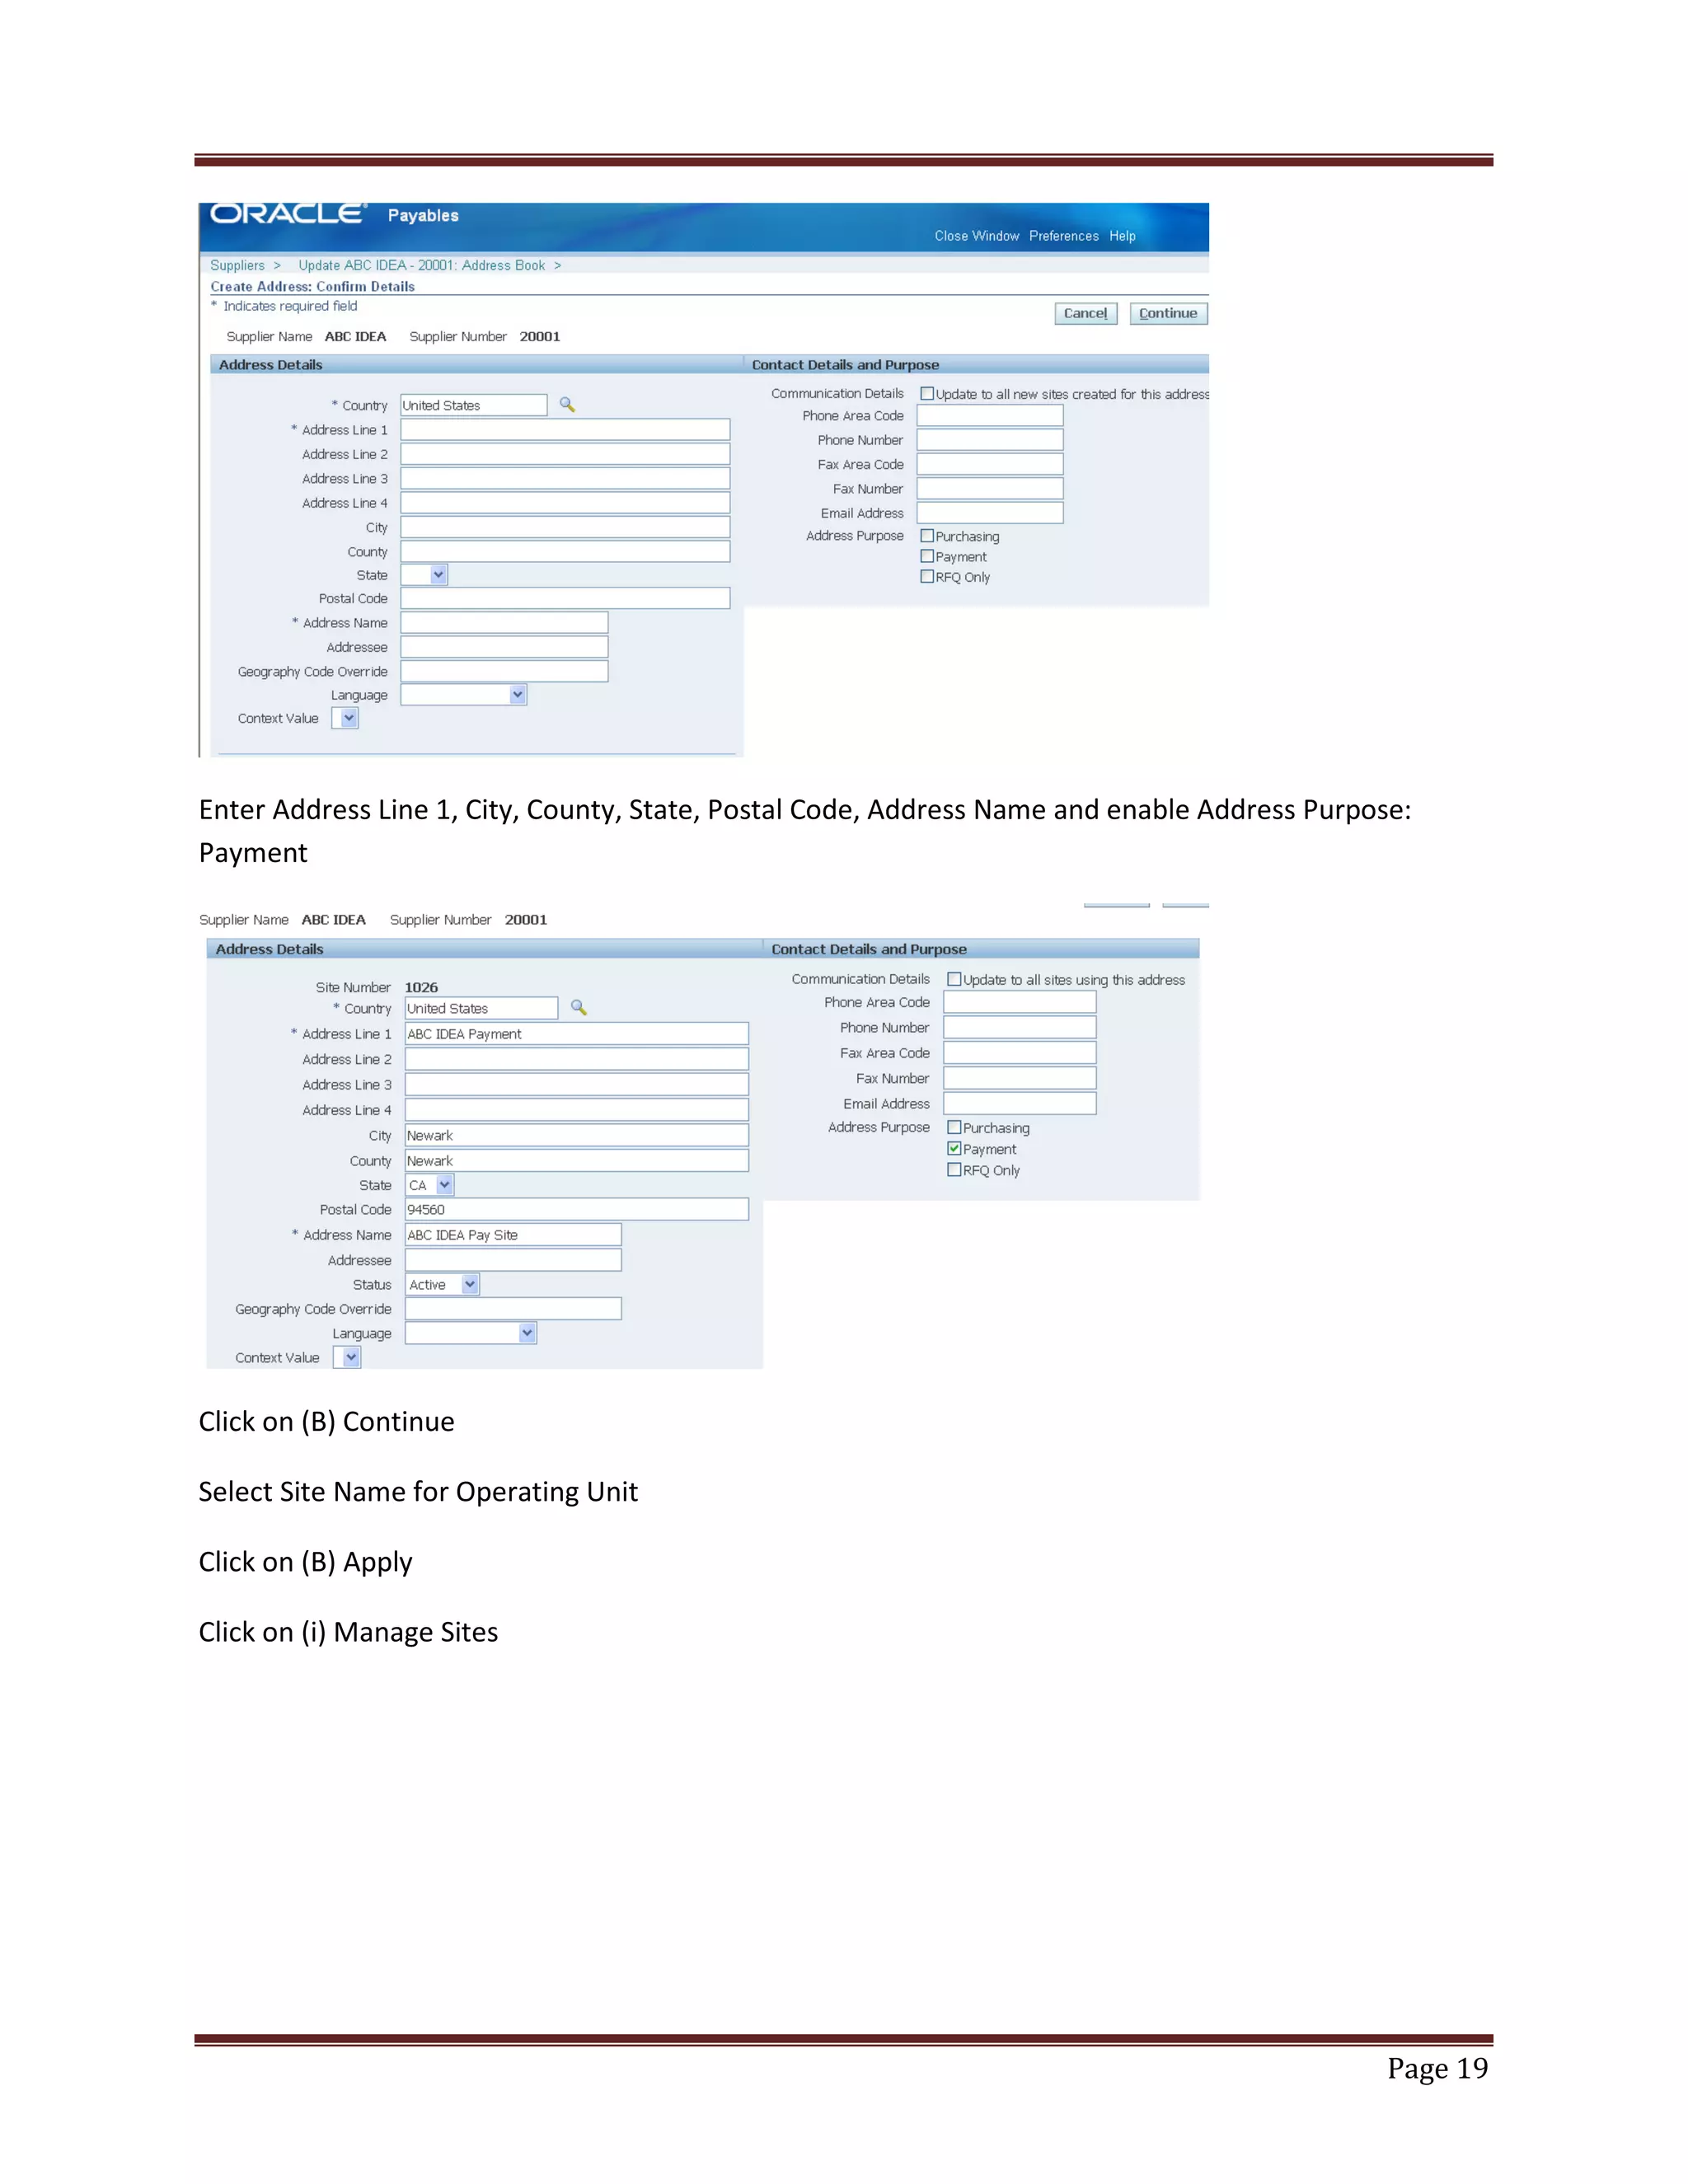
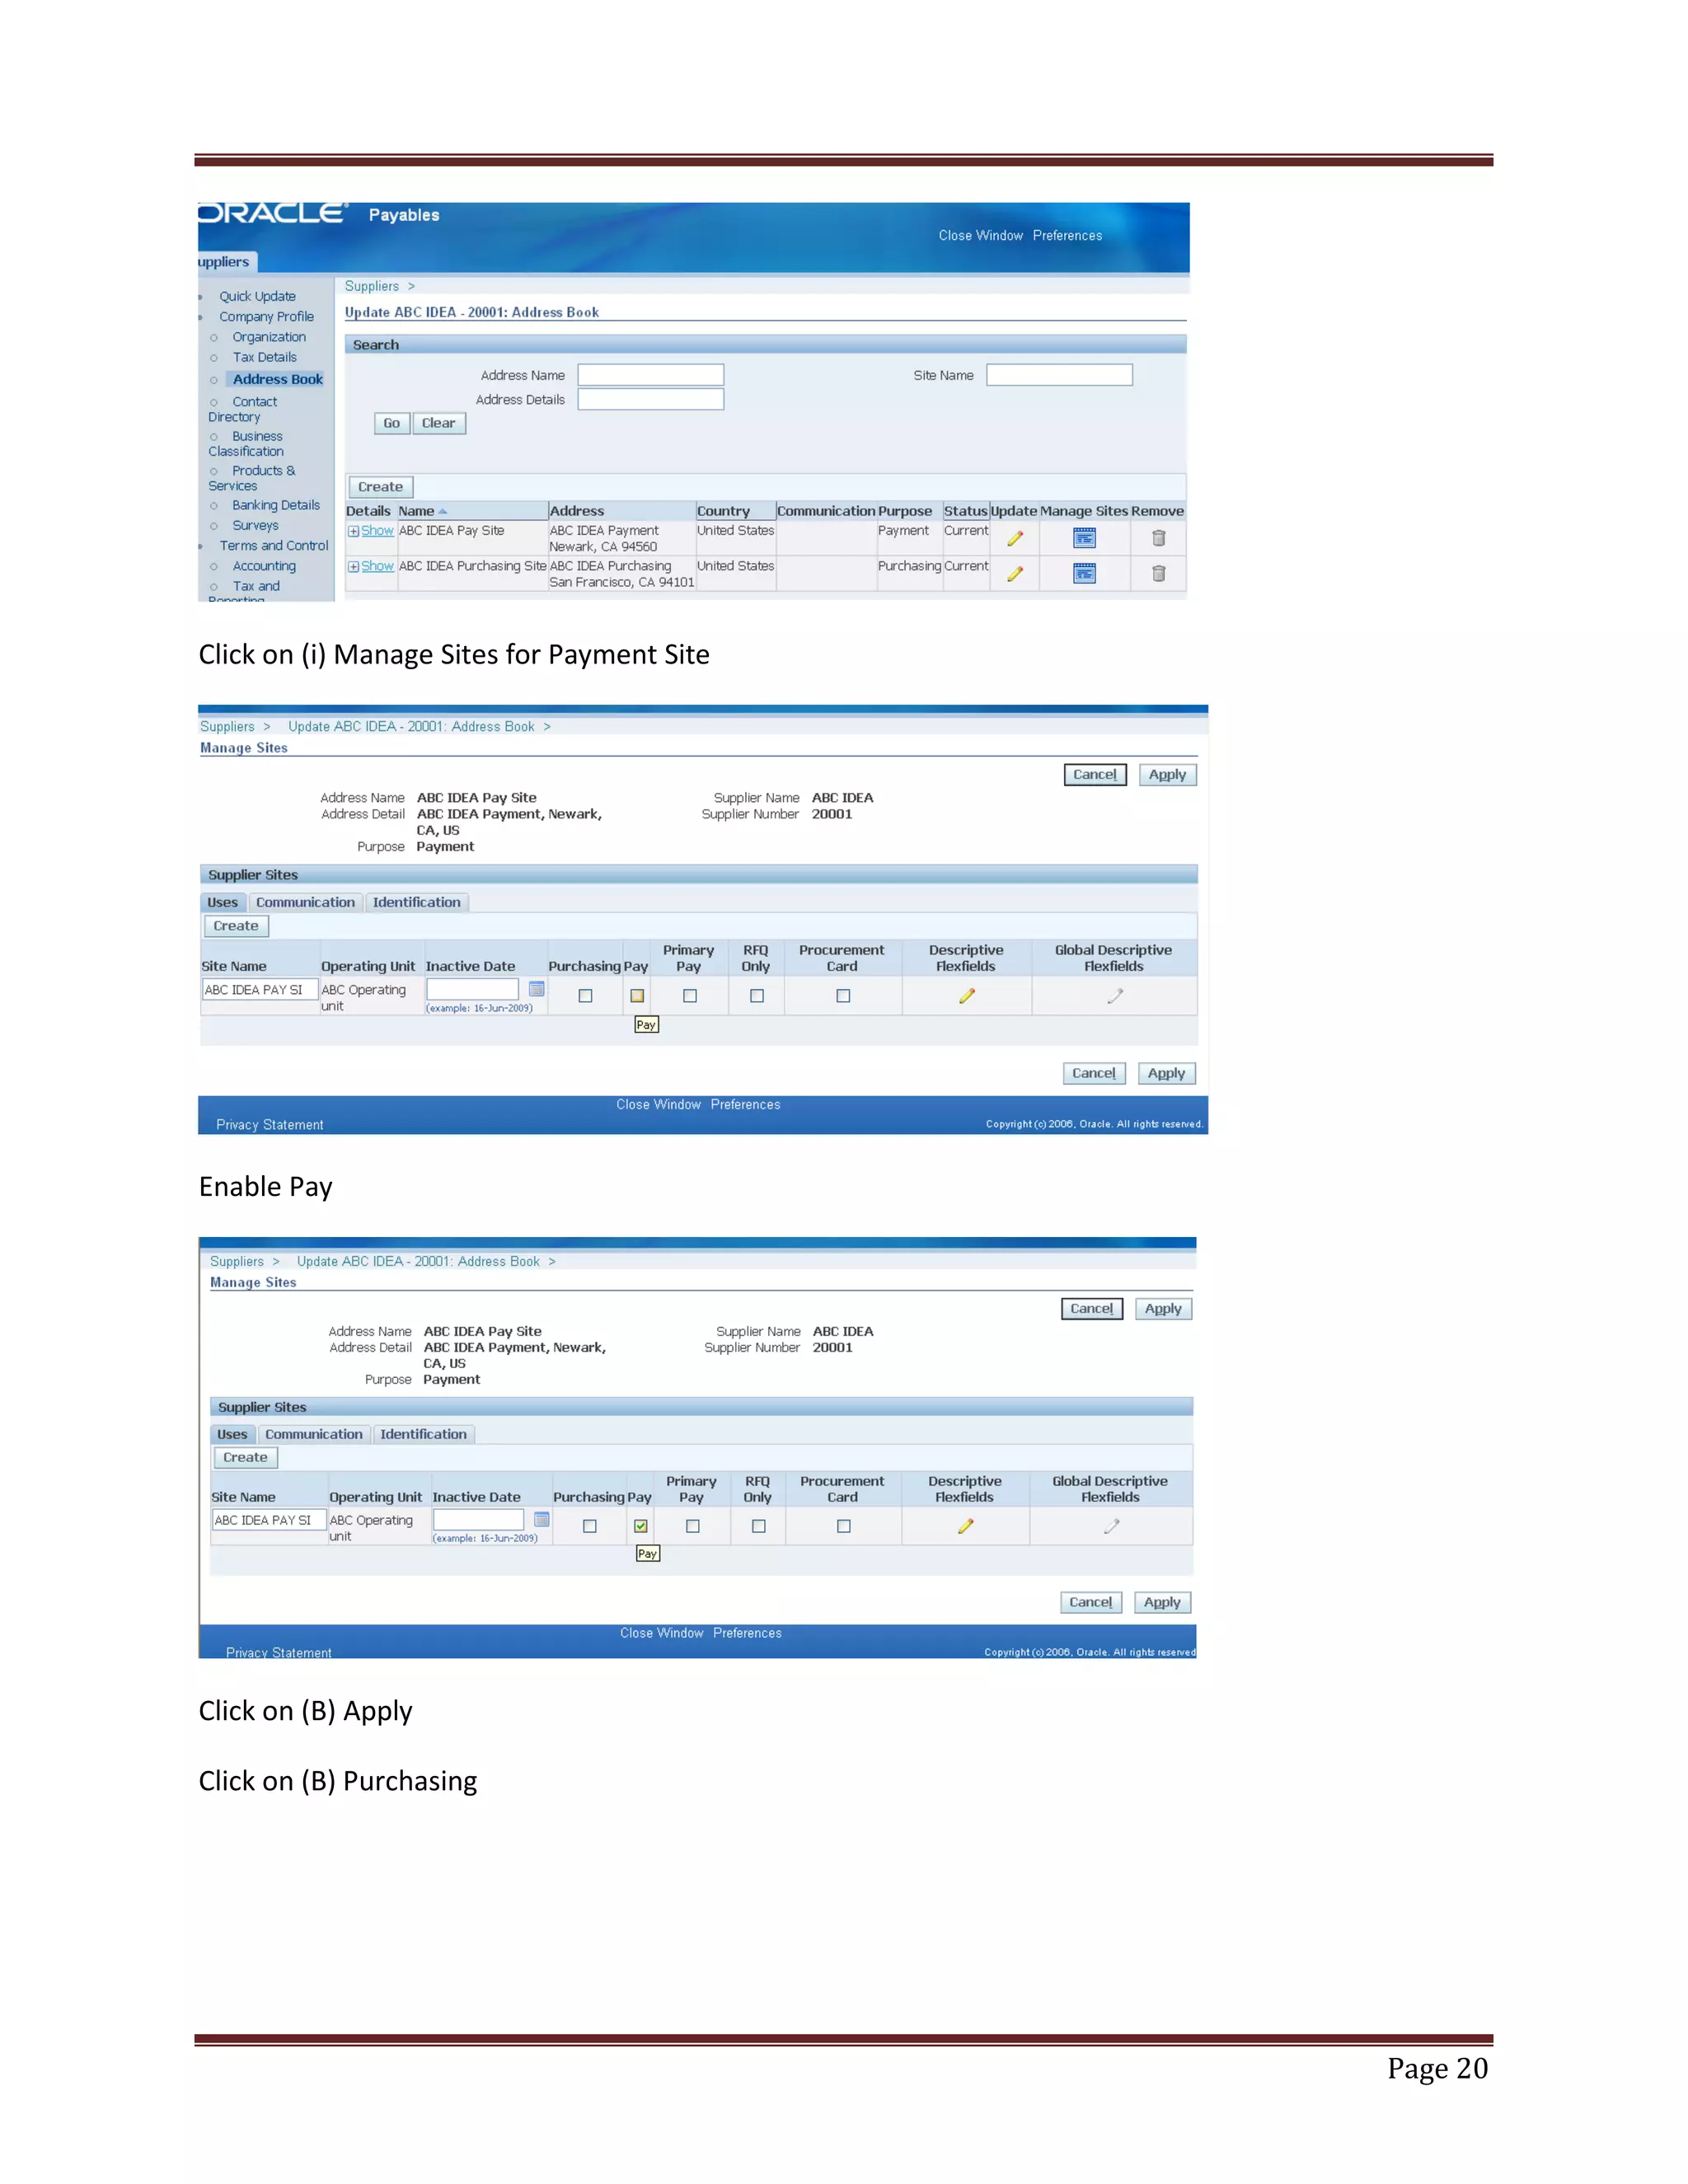
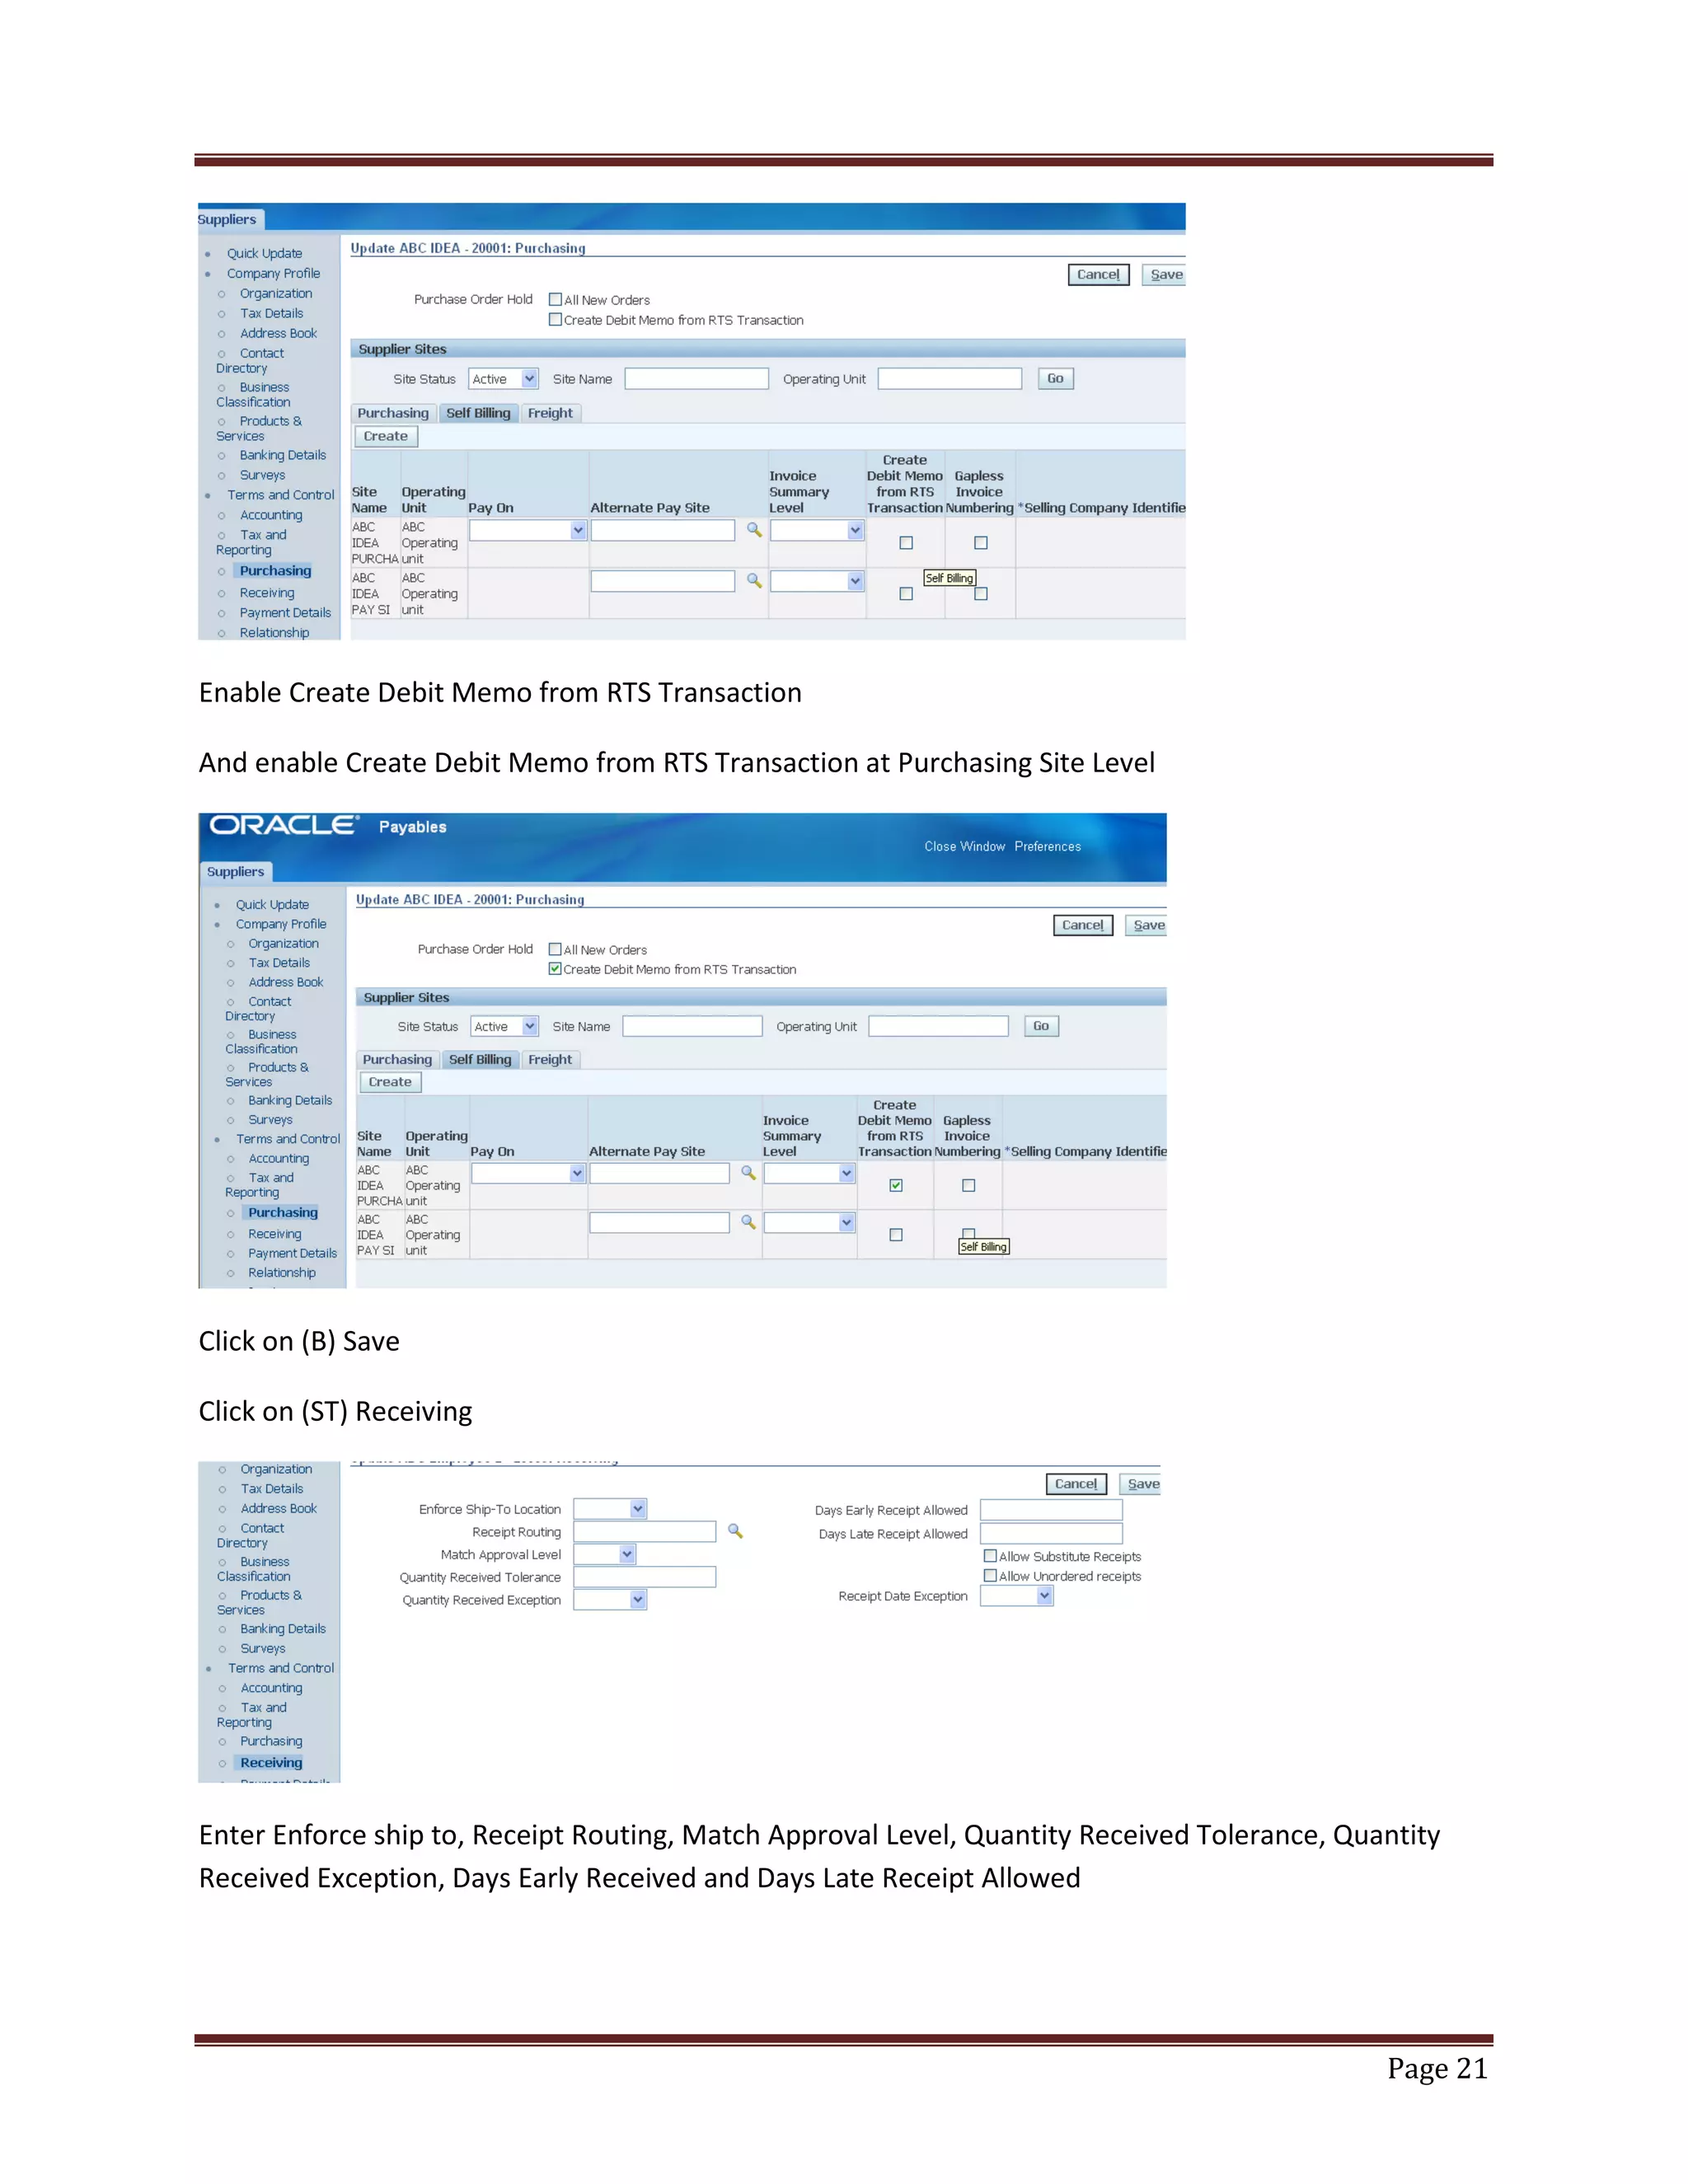
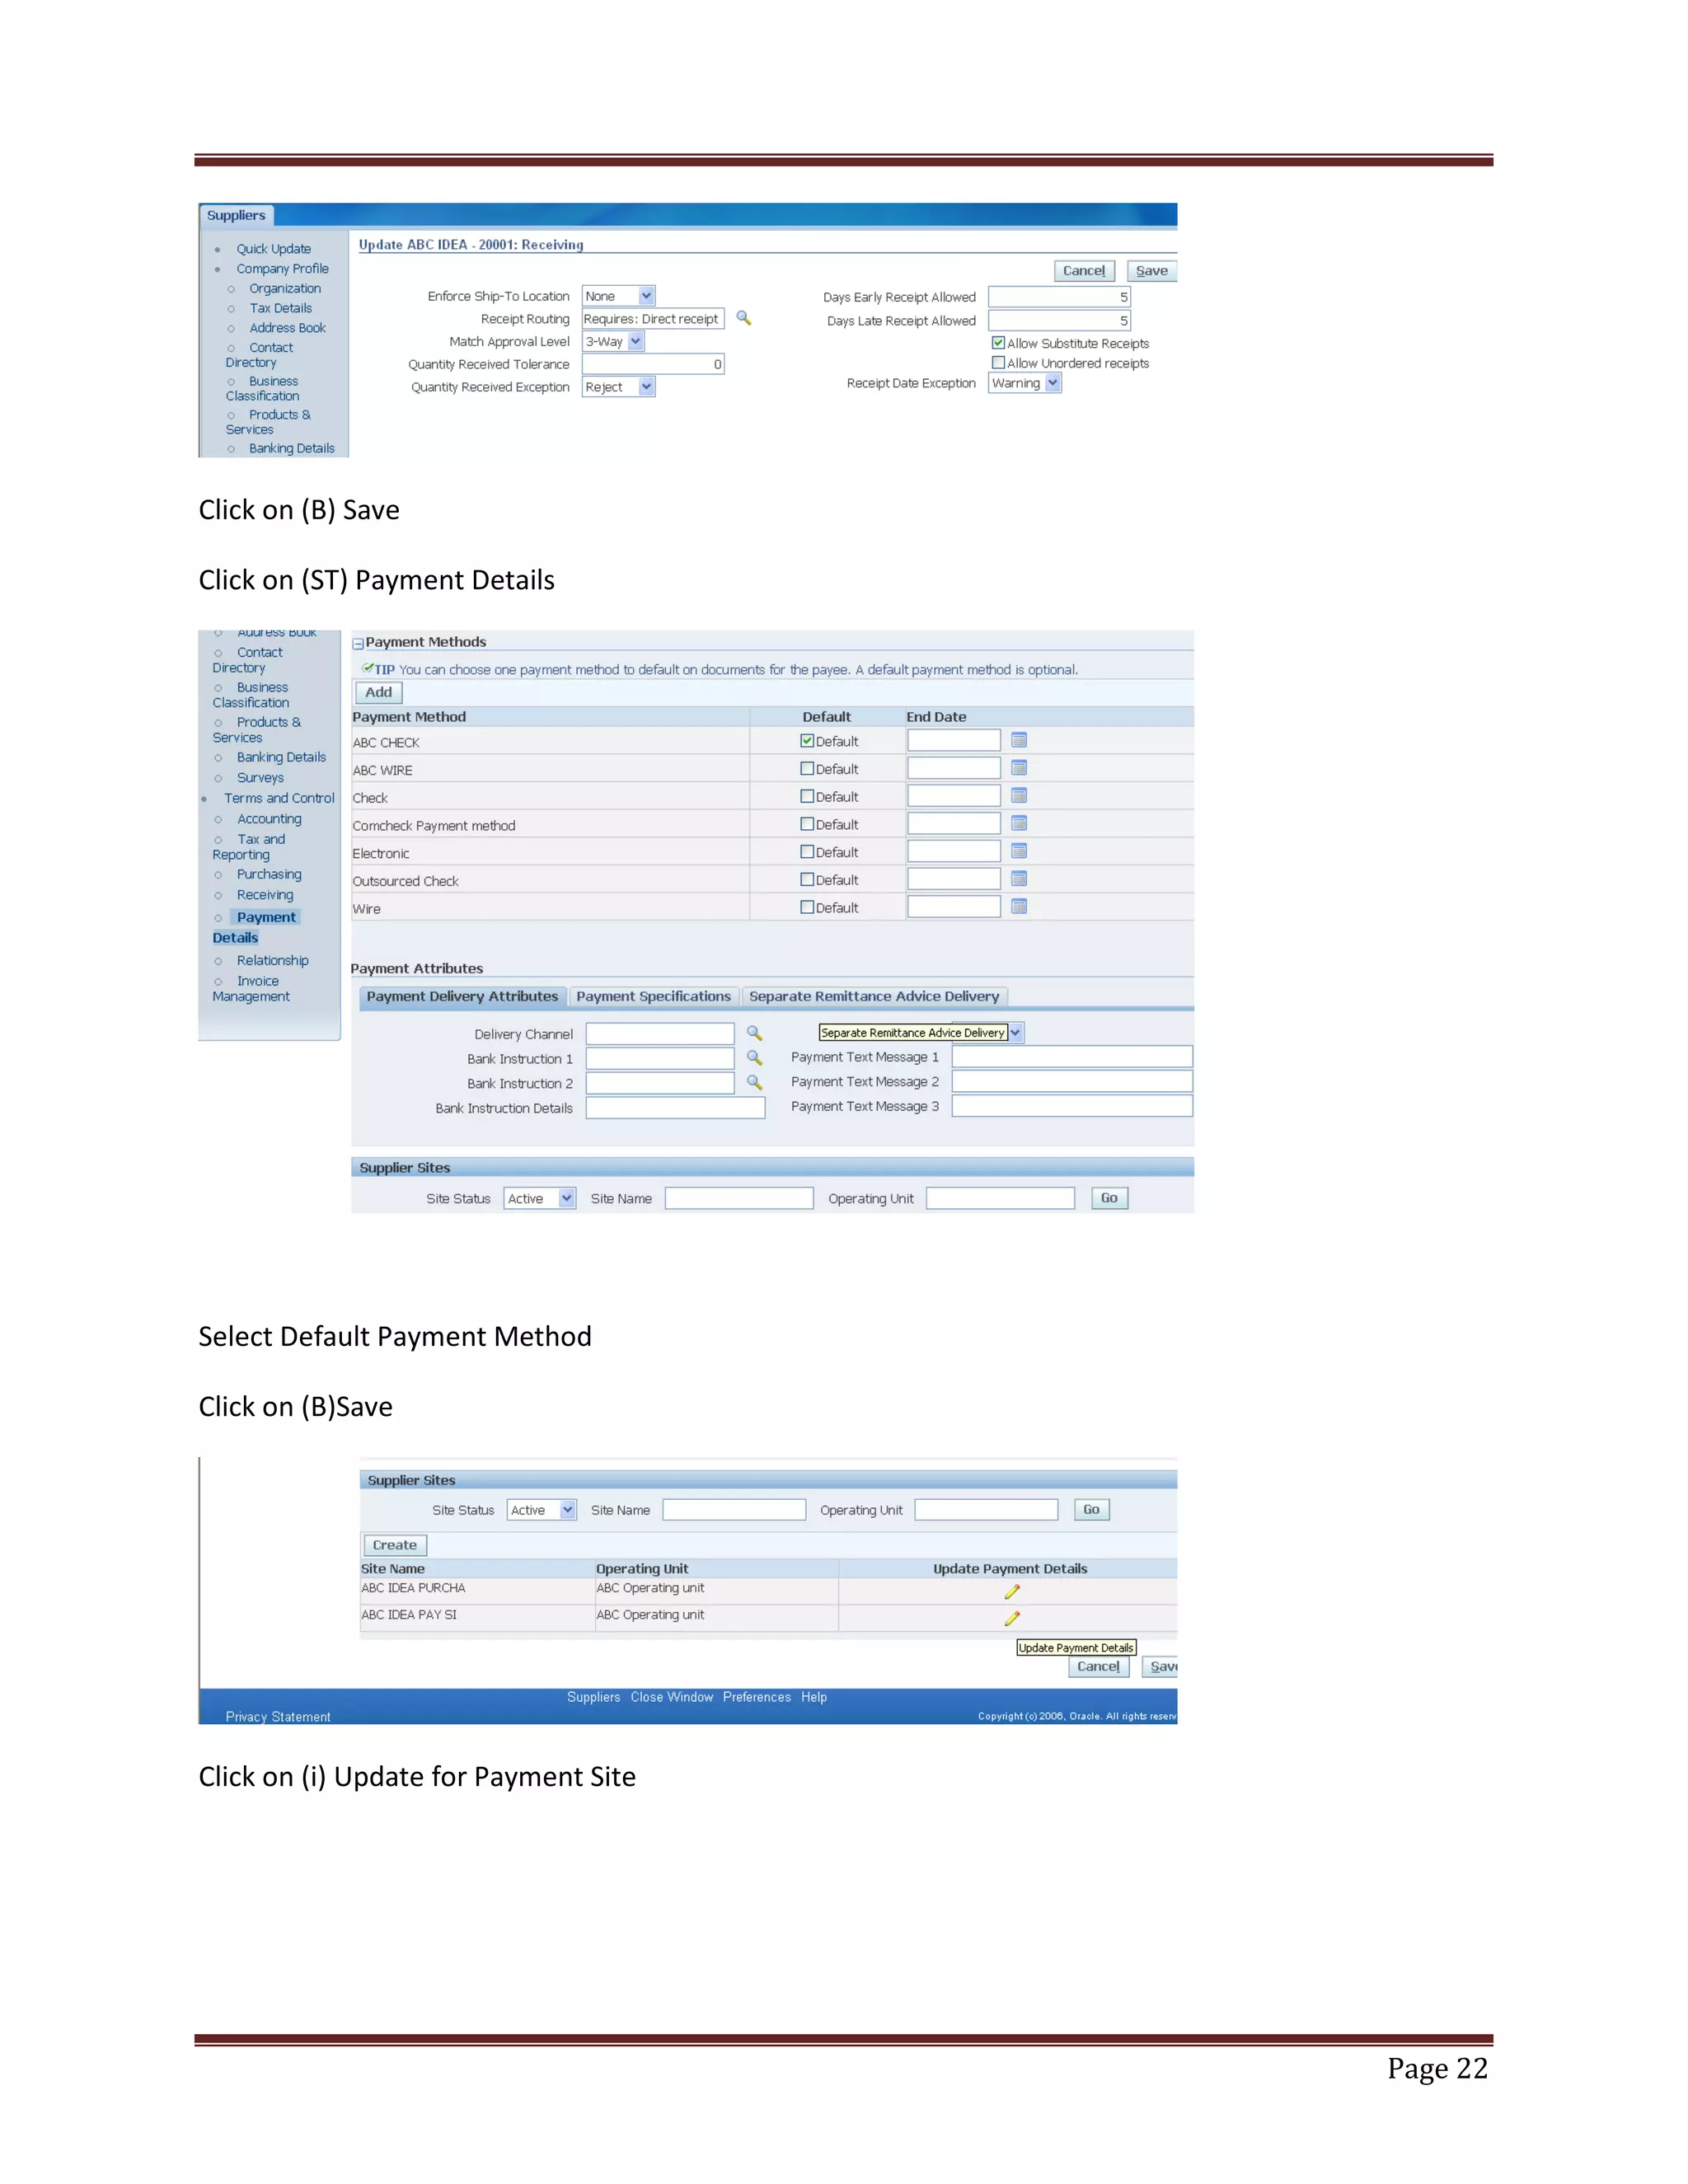
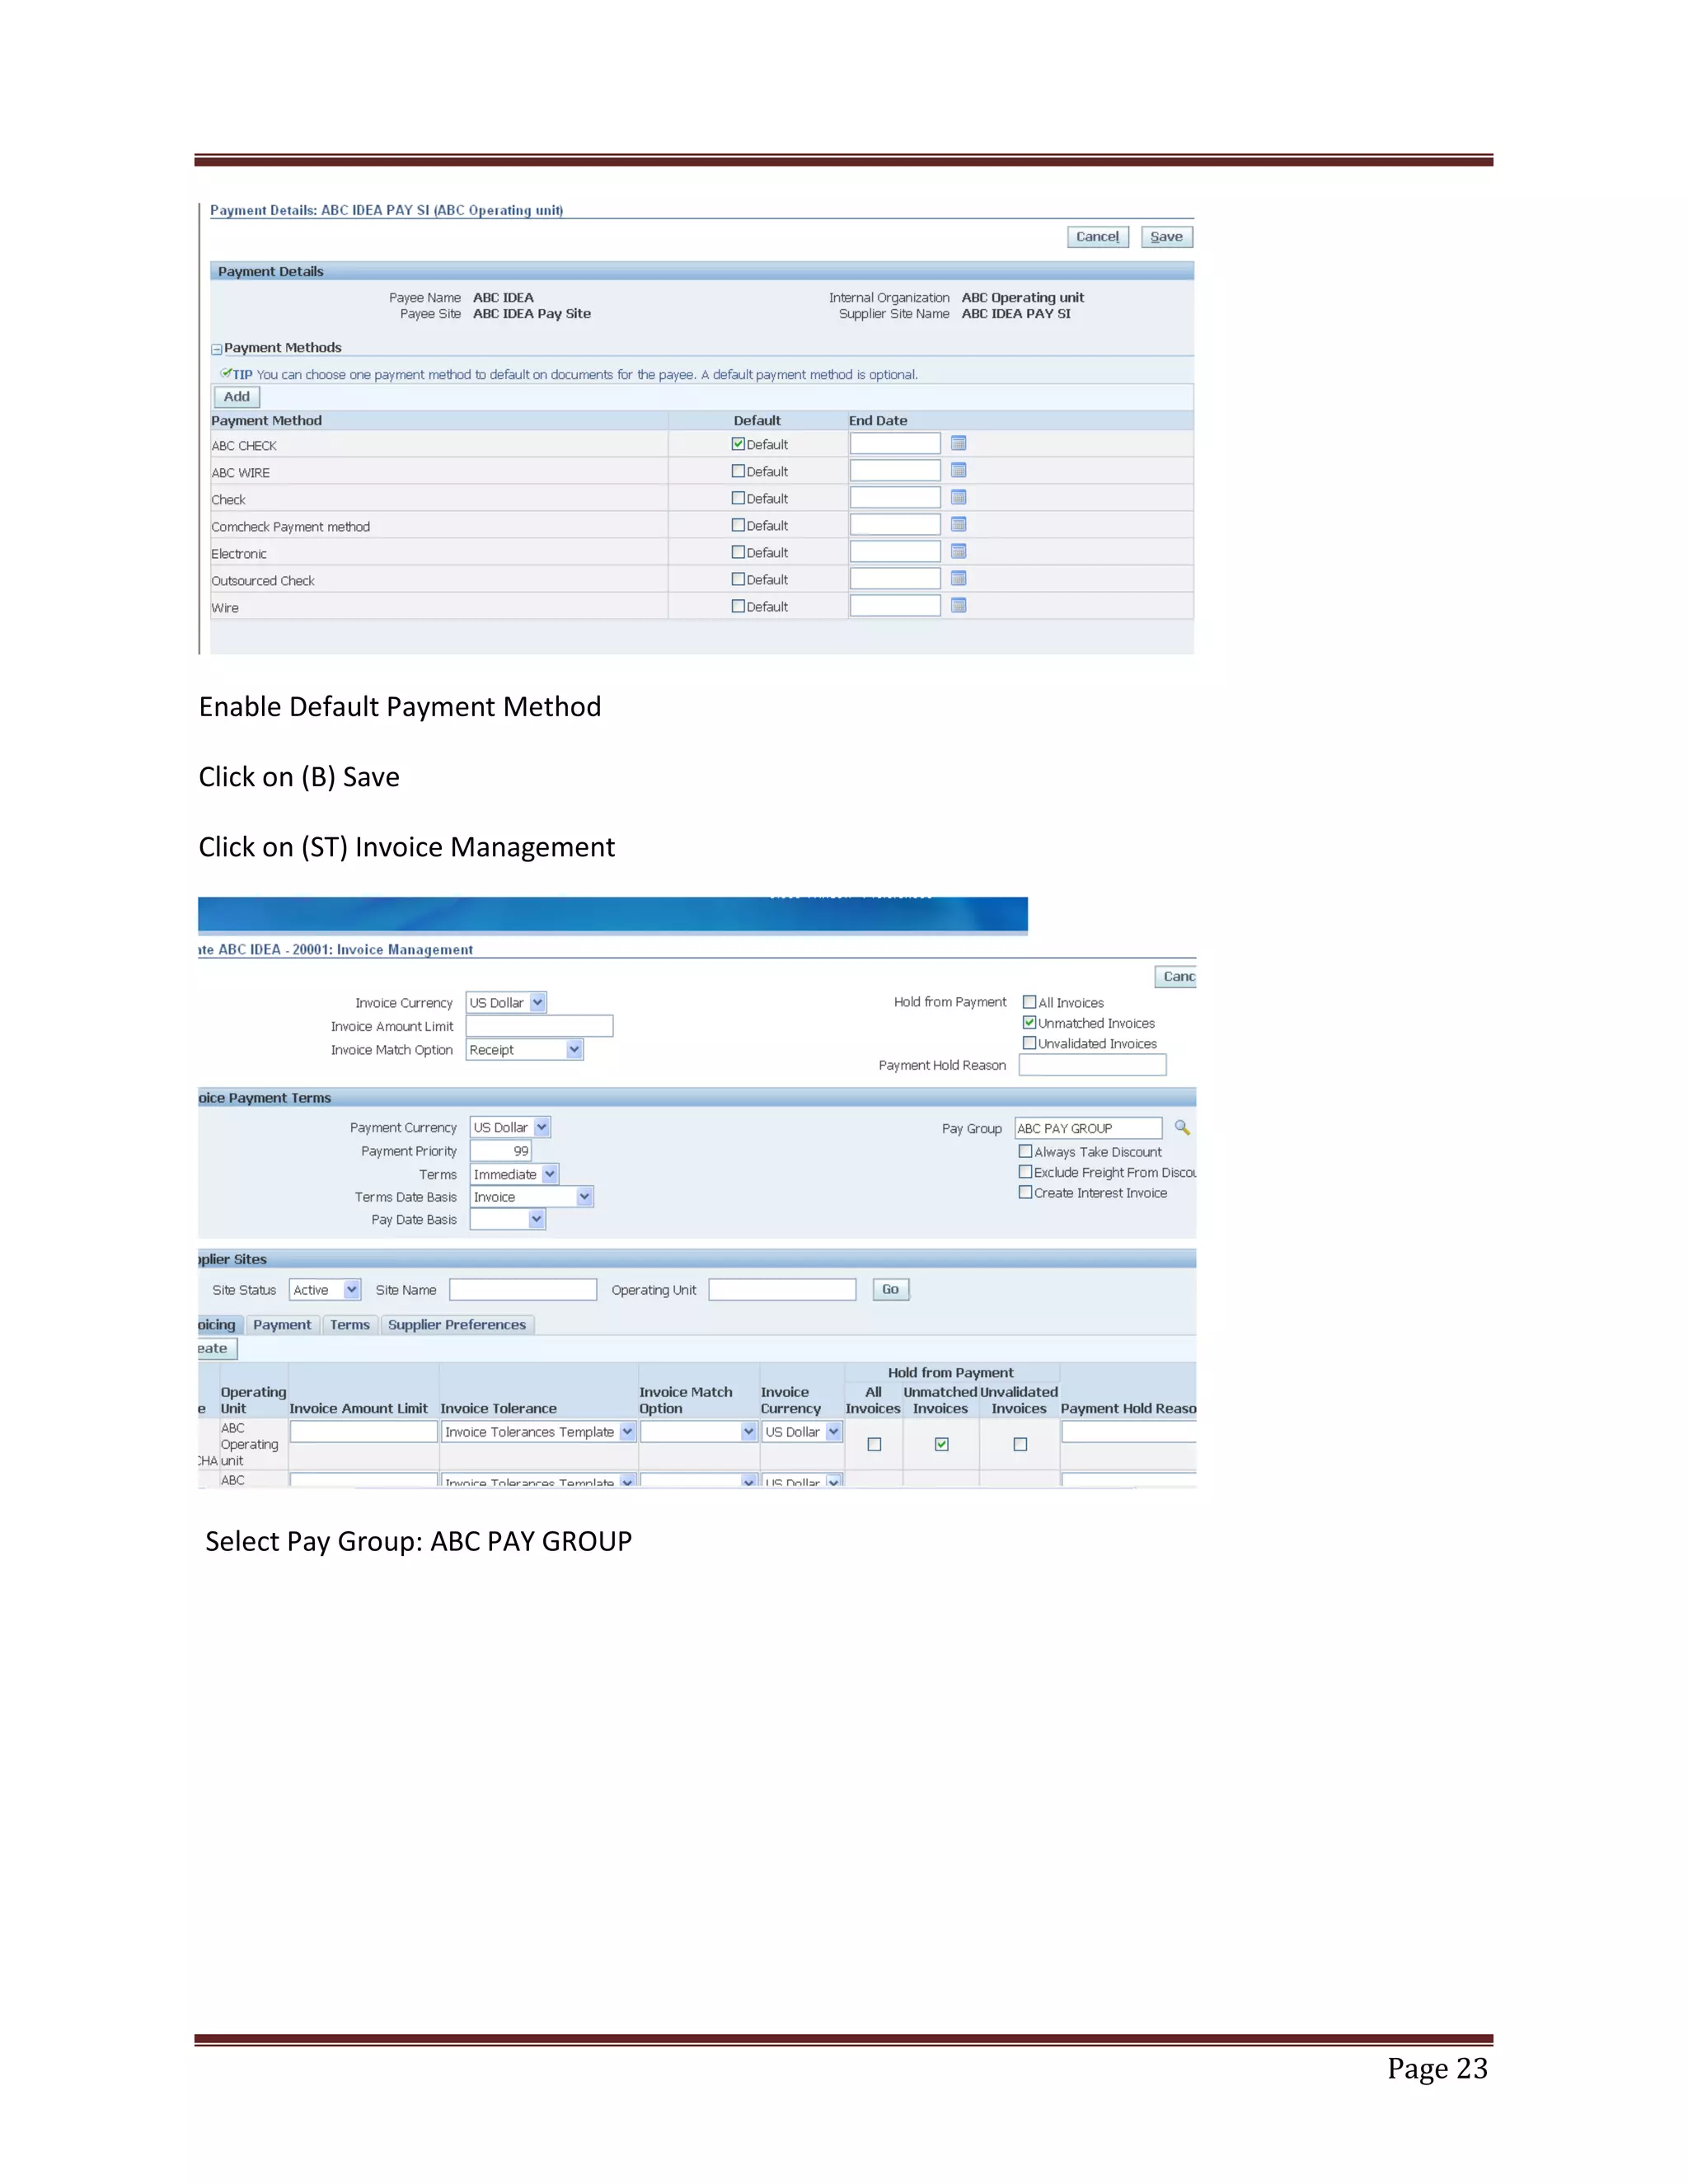
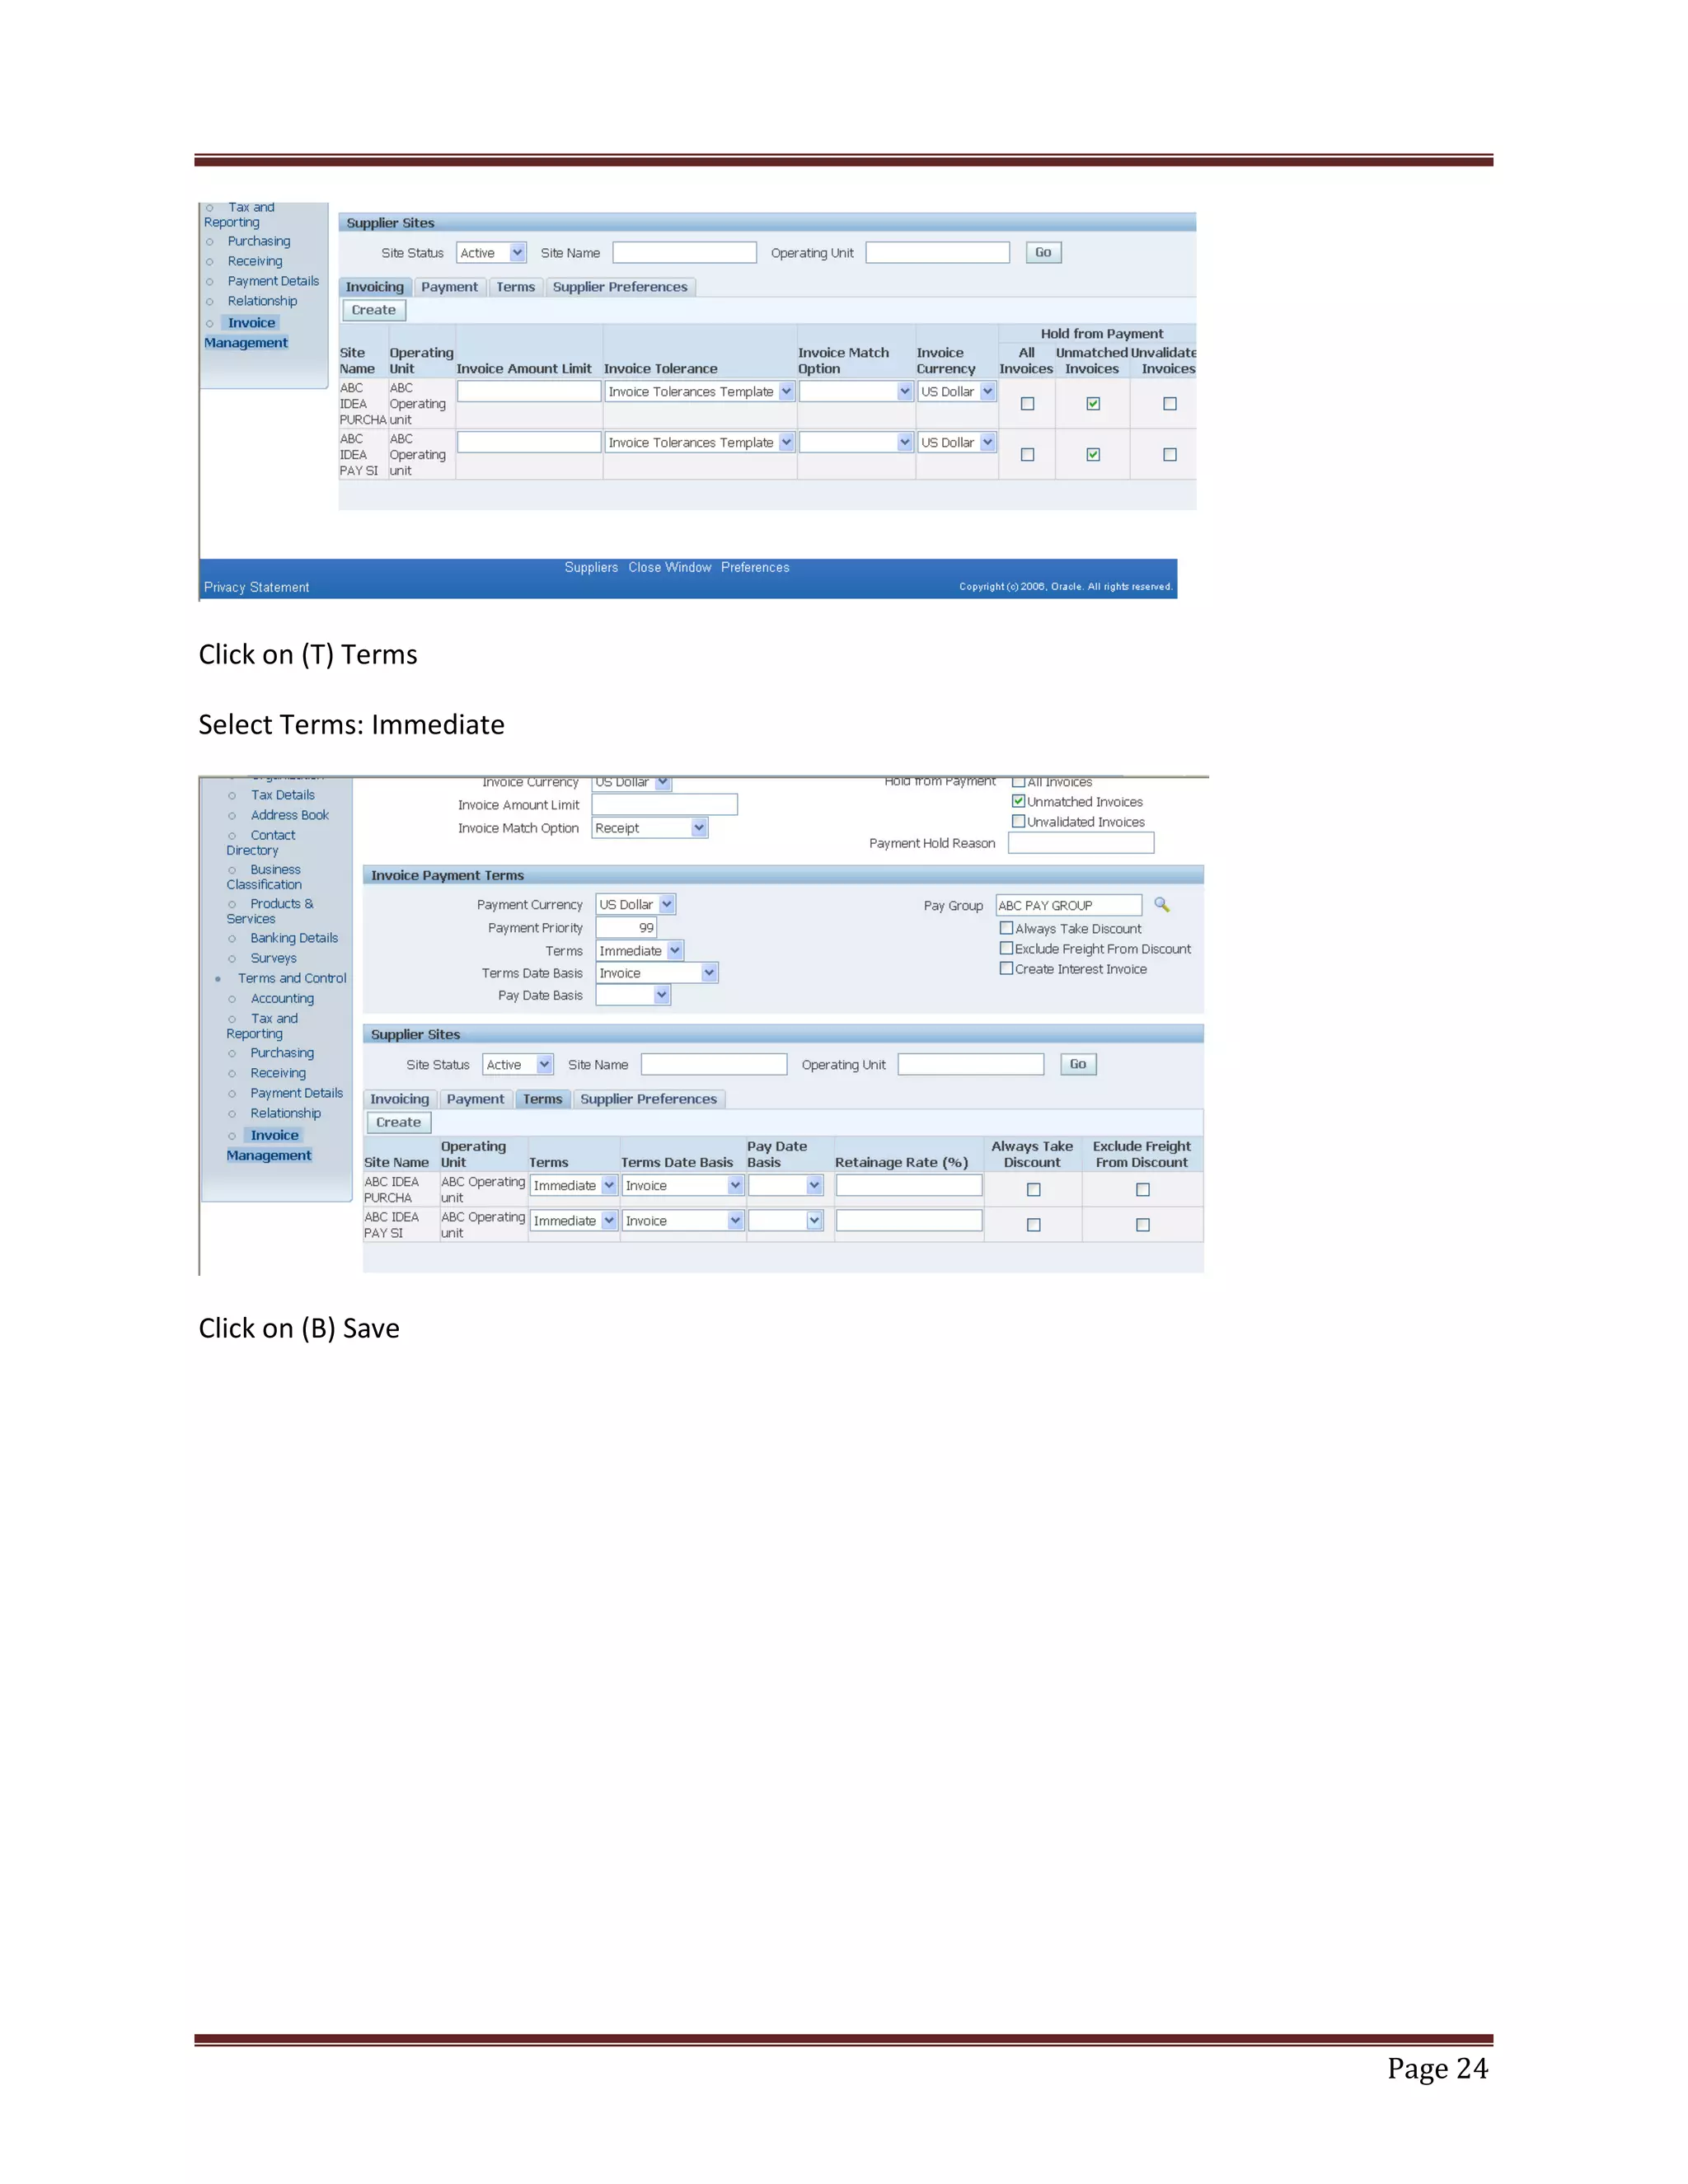
Detailed instructions for creating another supplier ABC Idea with similar steps as for Vodafone.
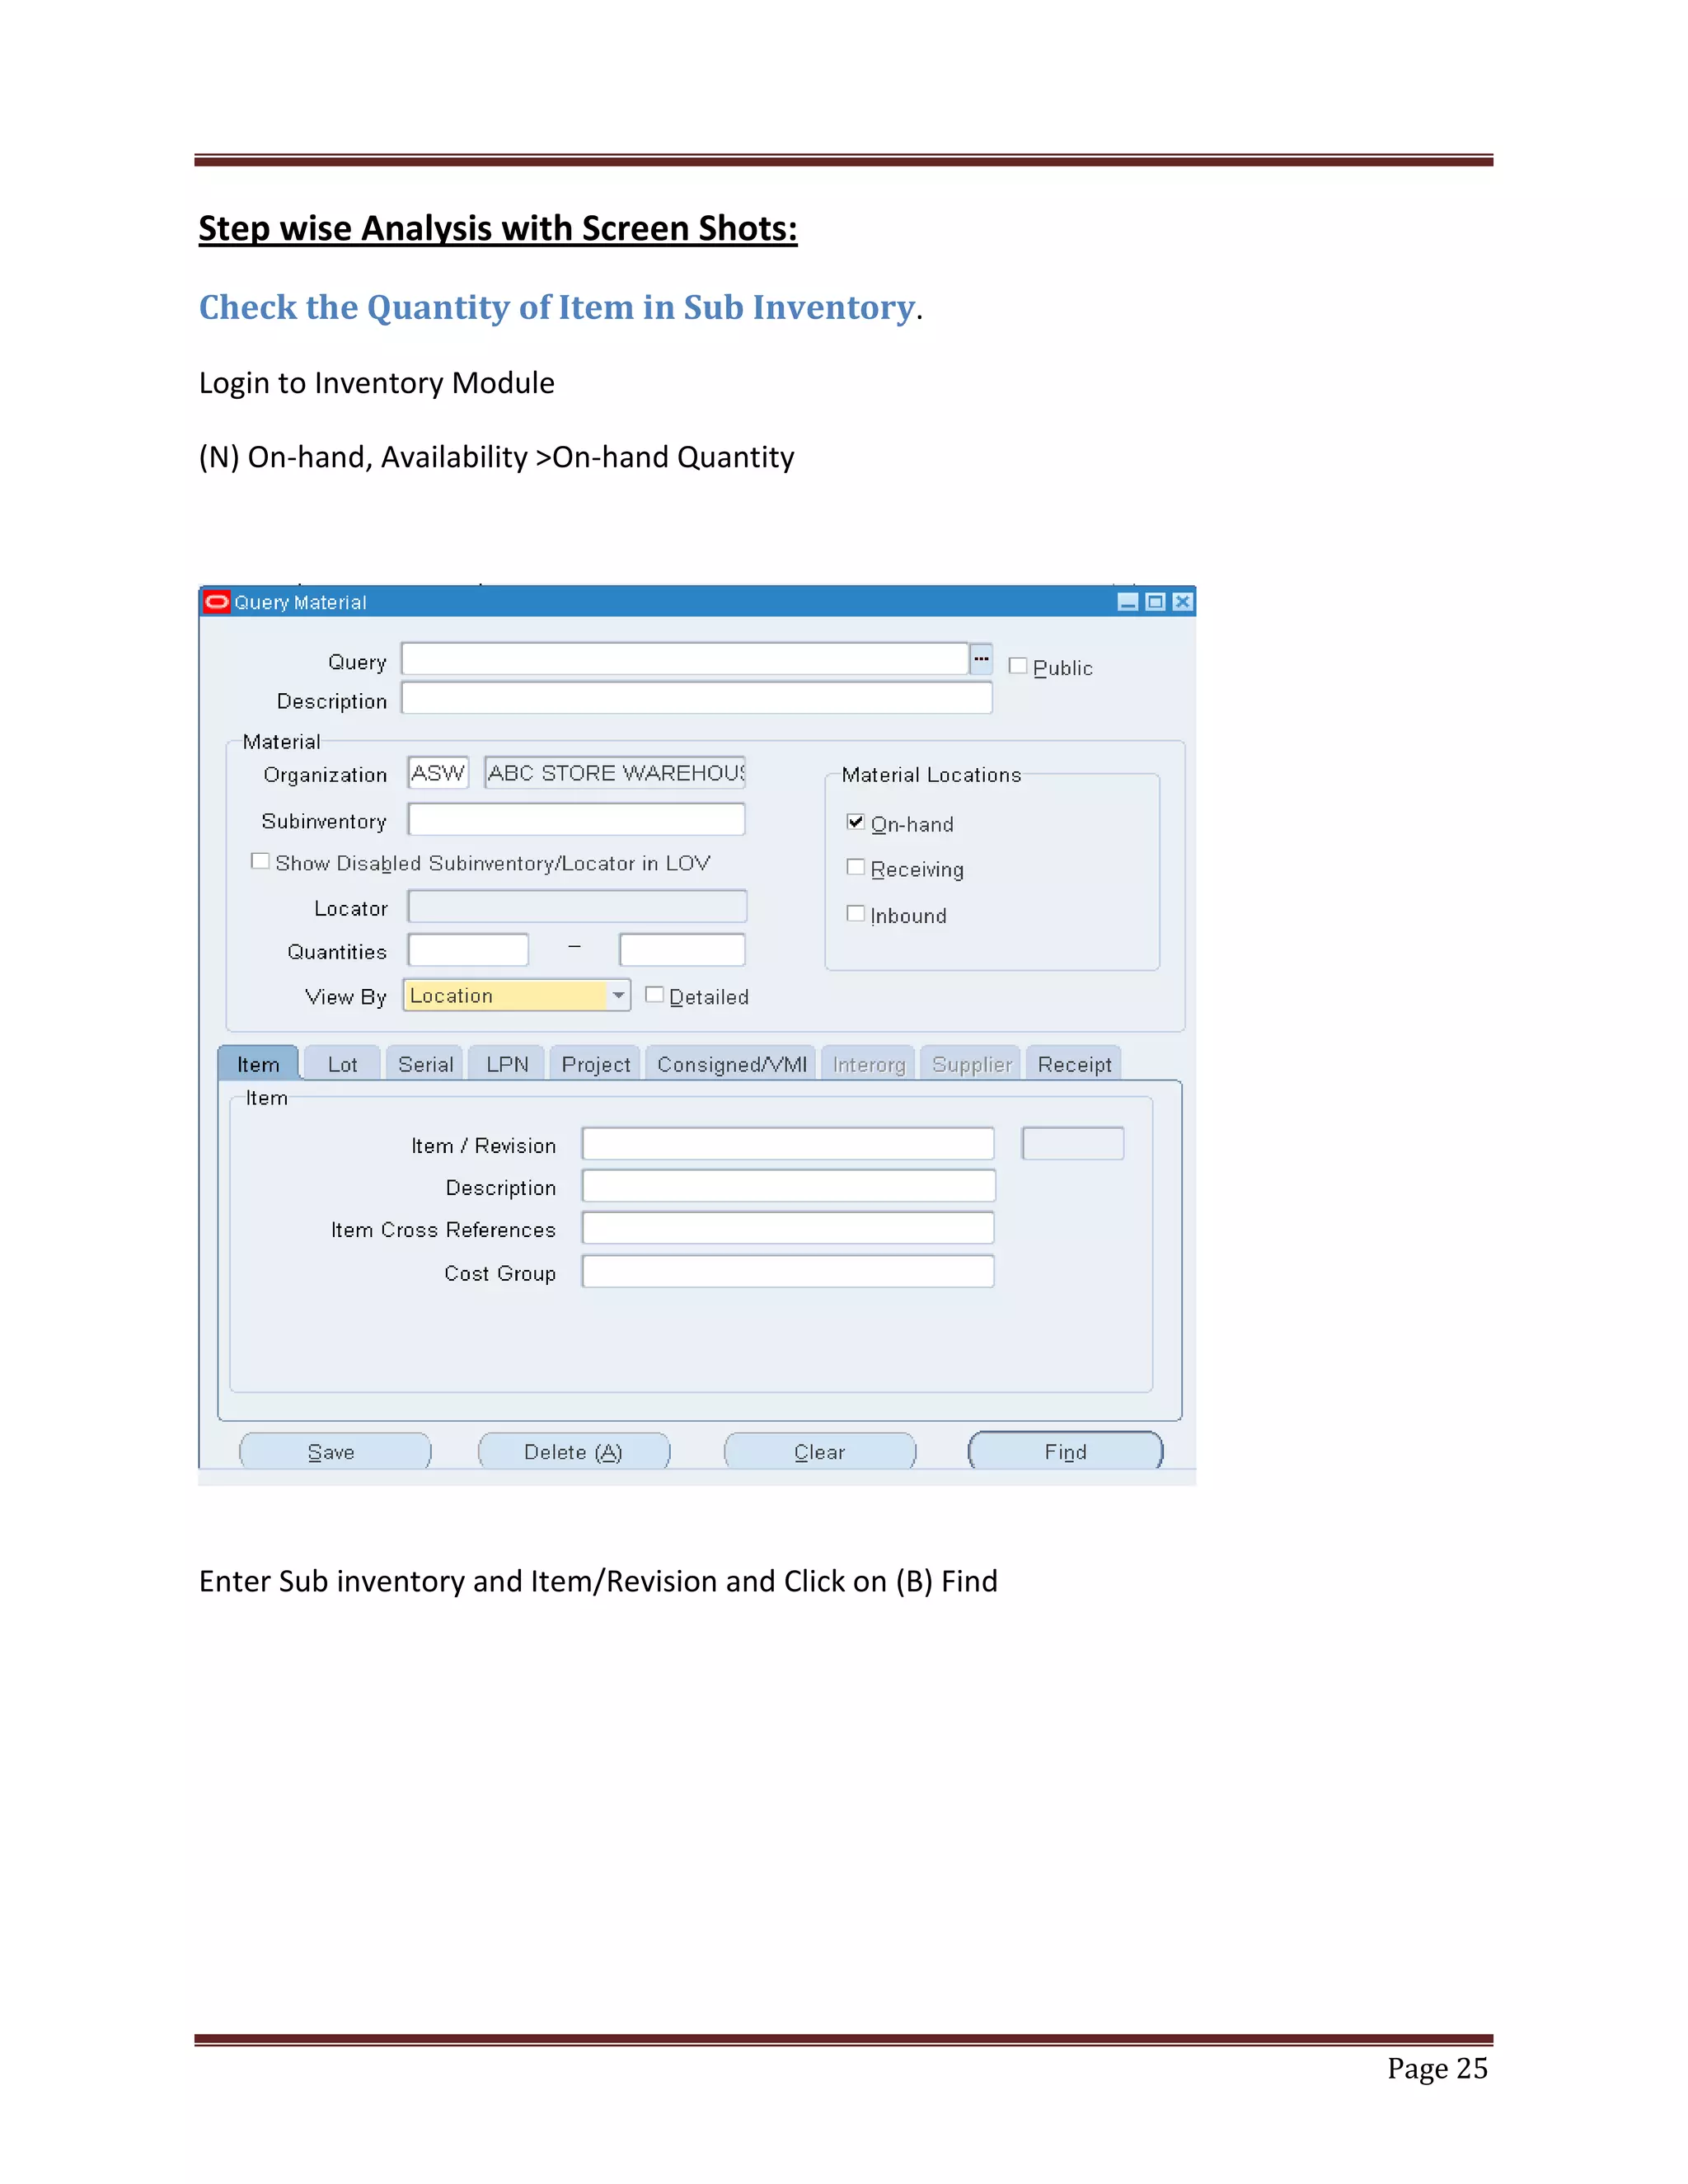
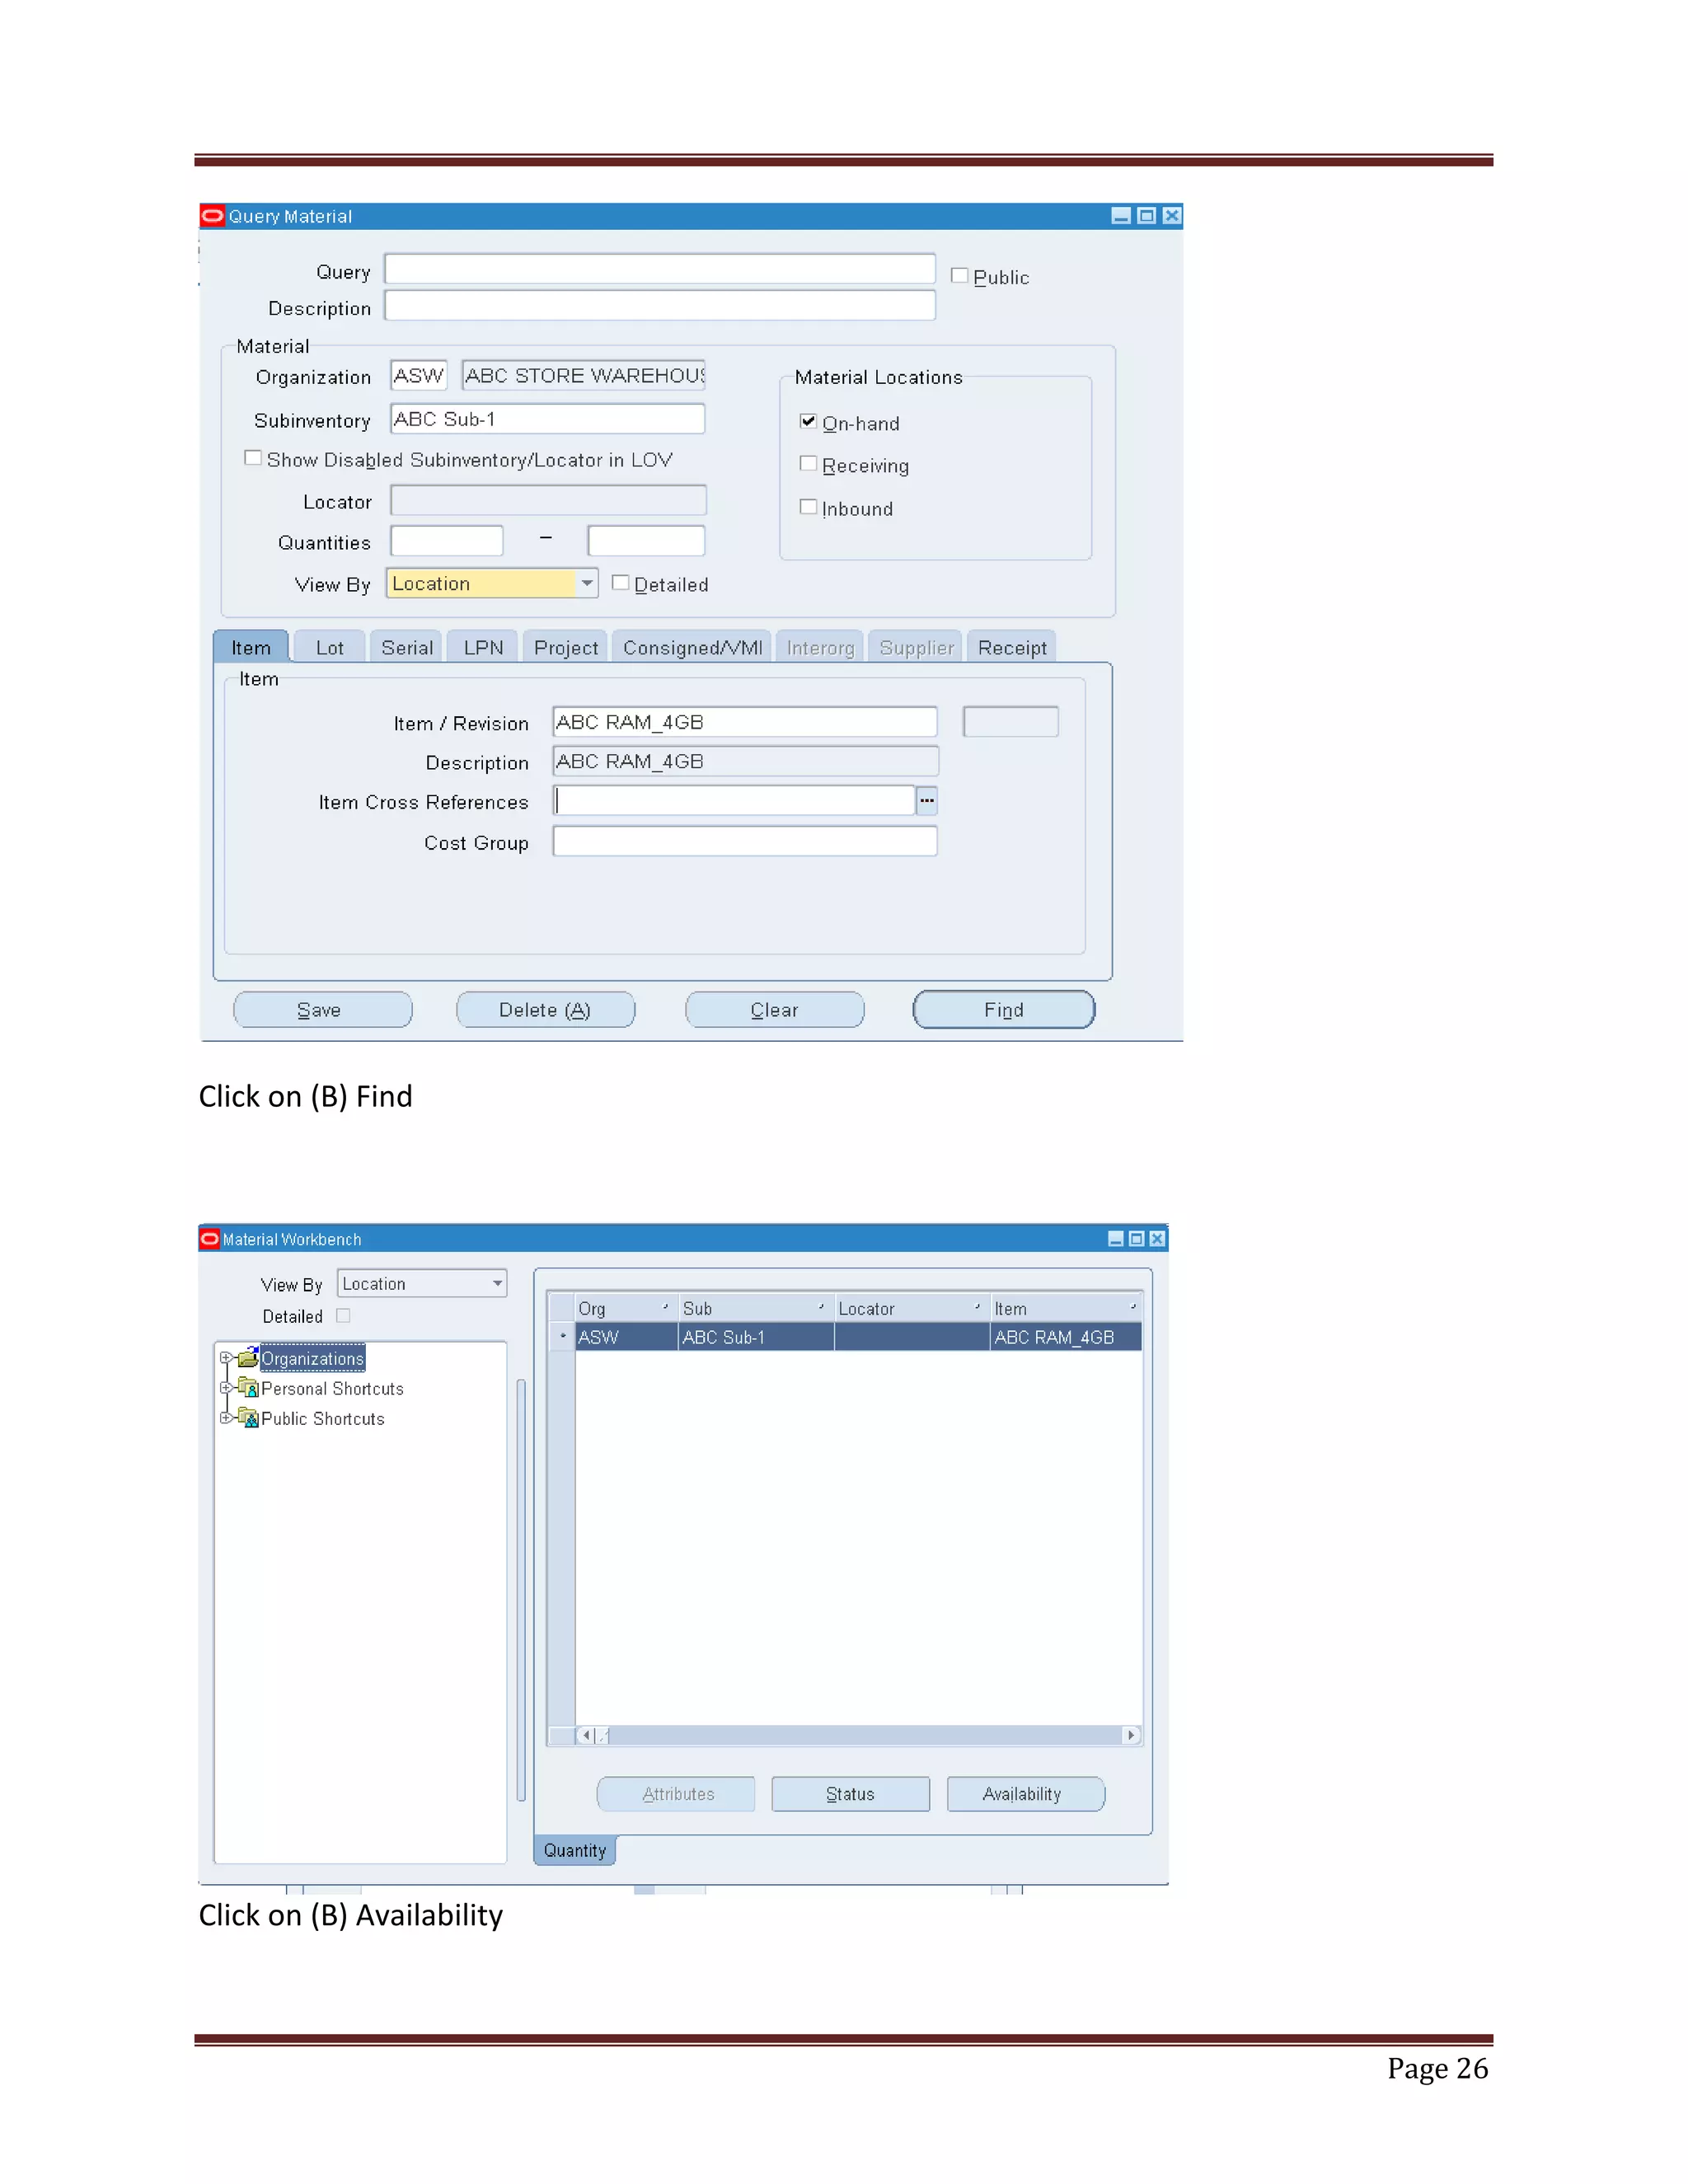
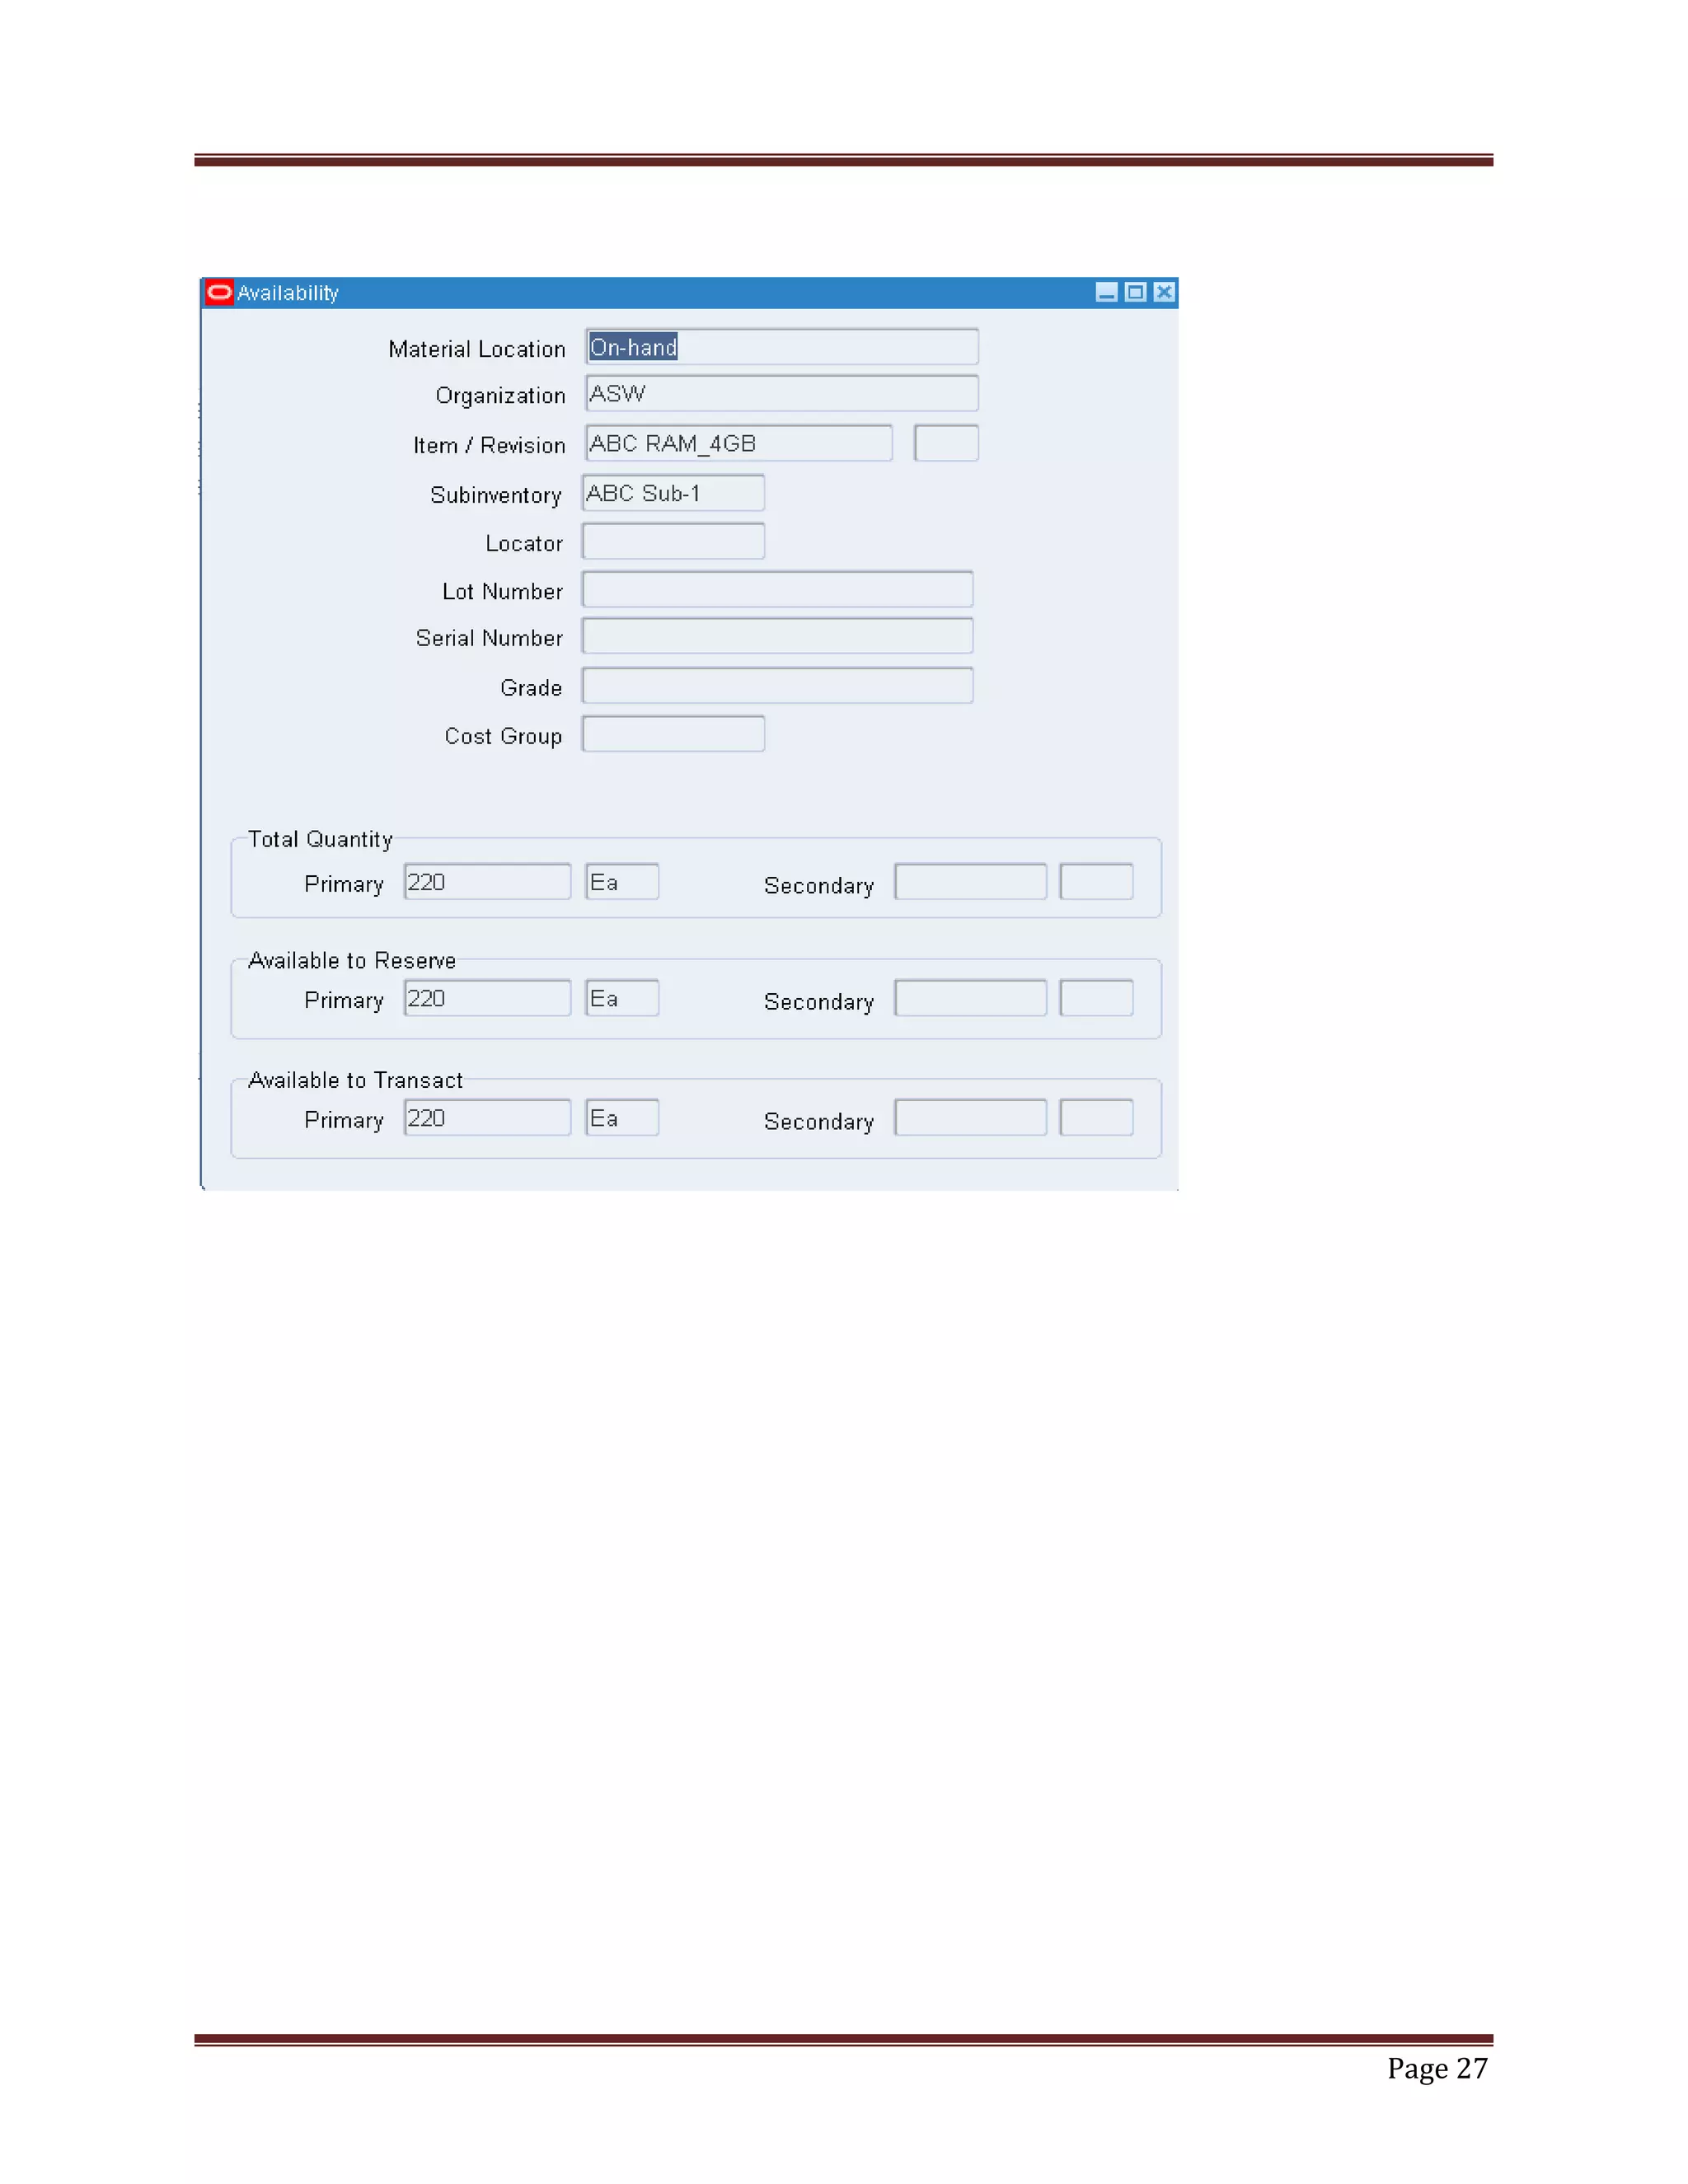
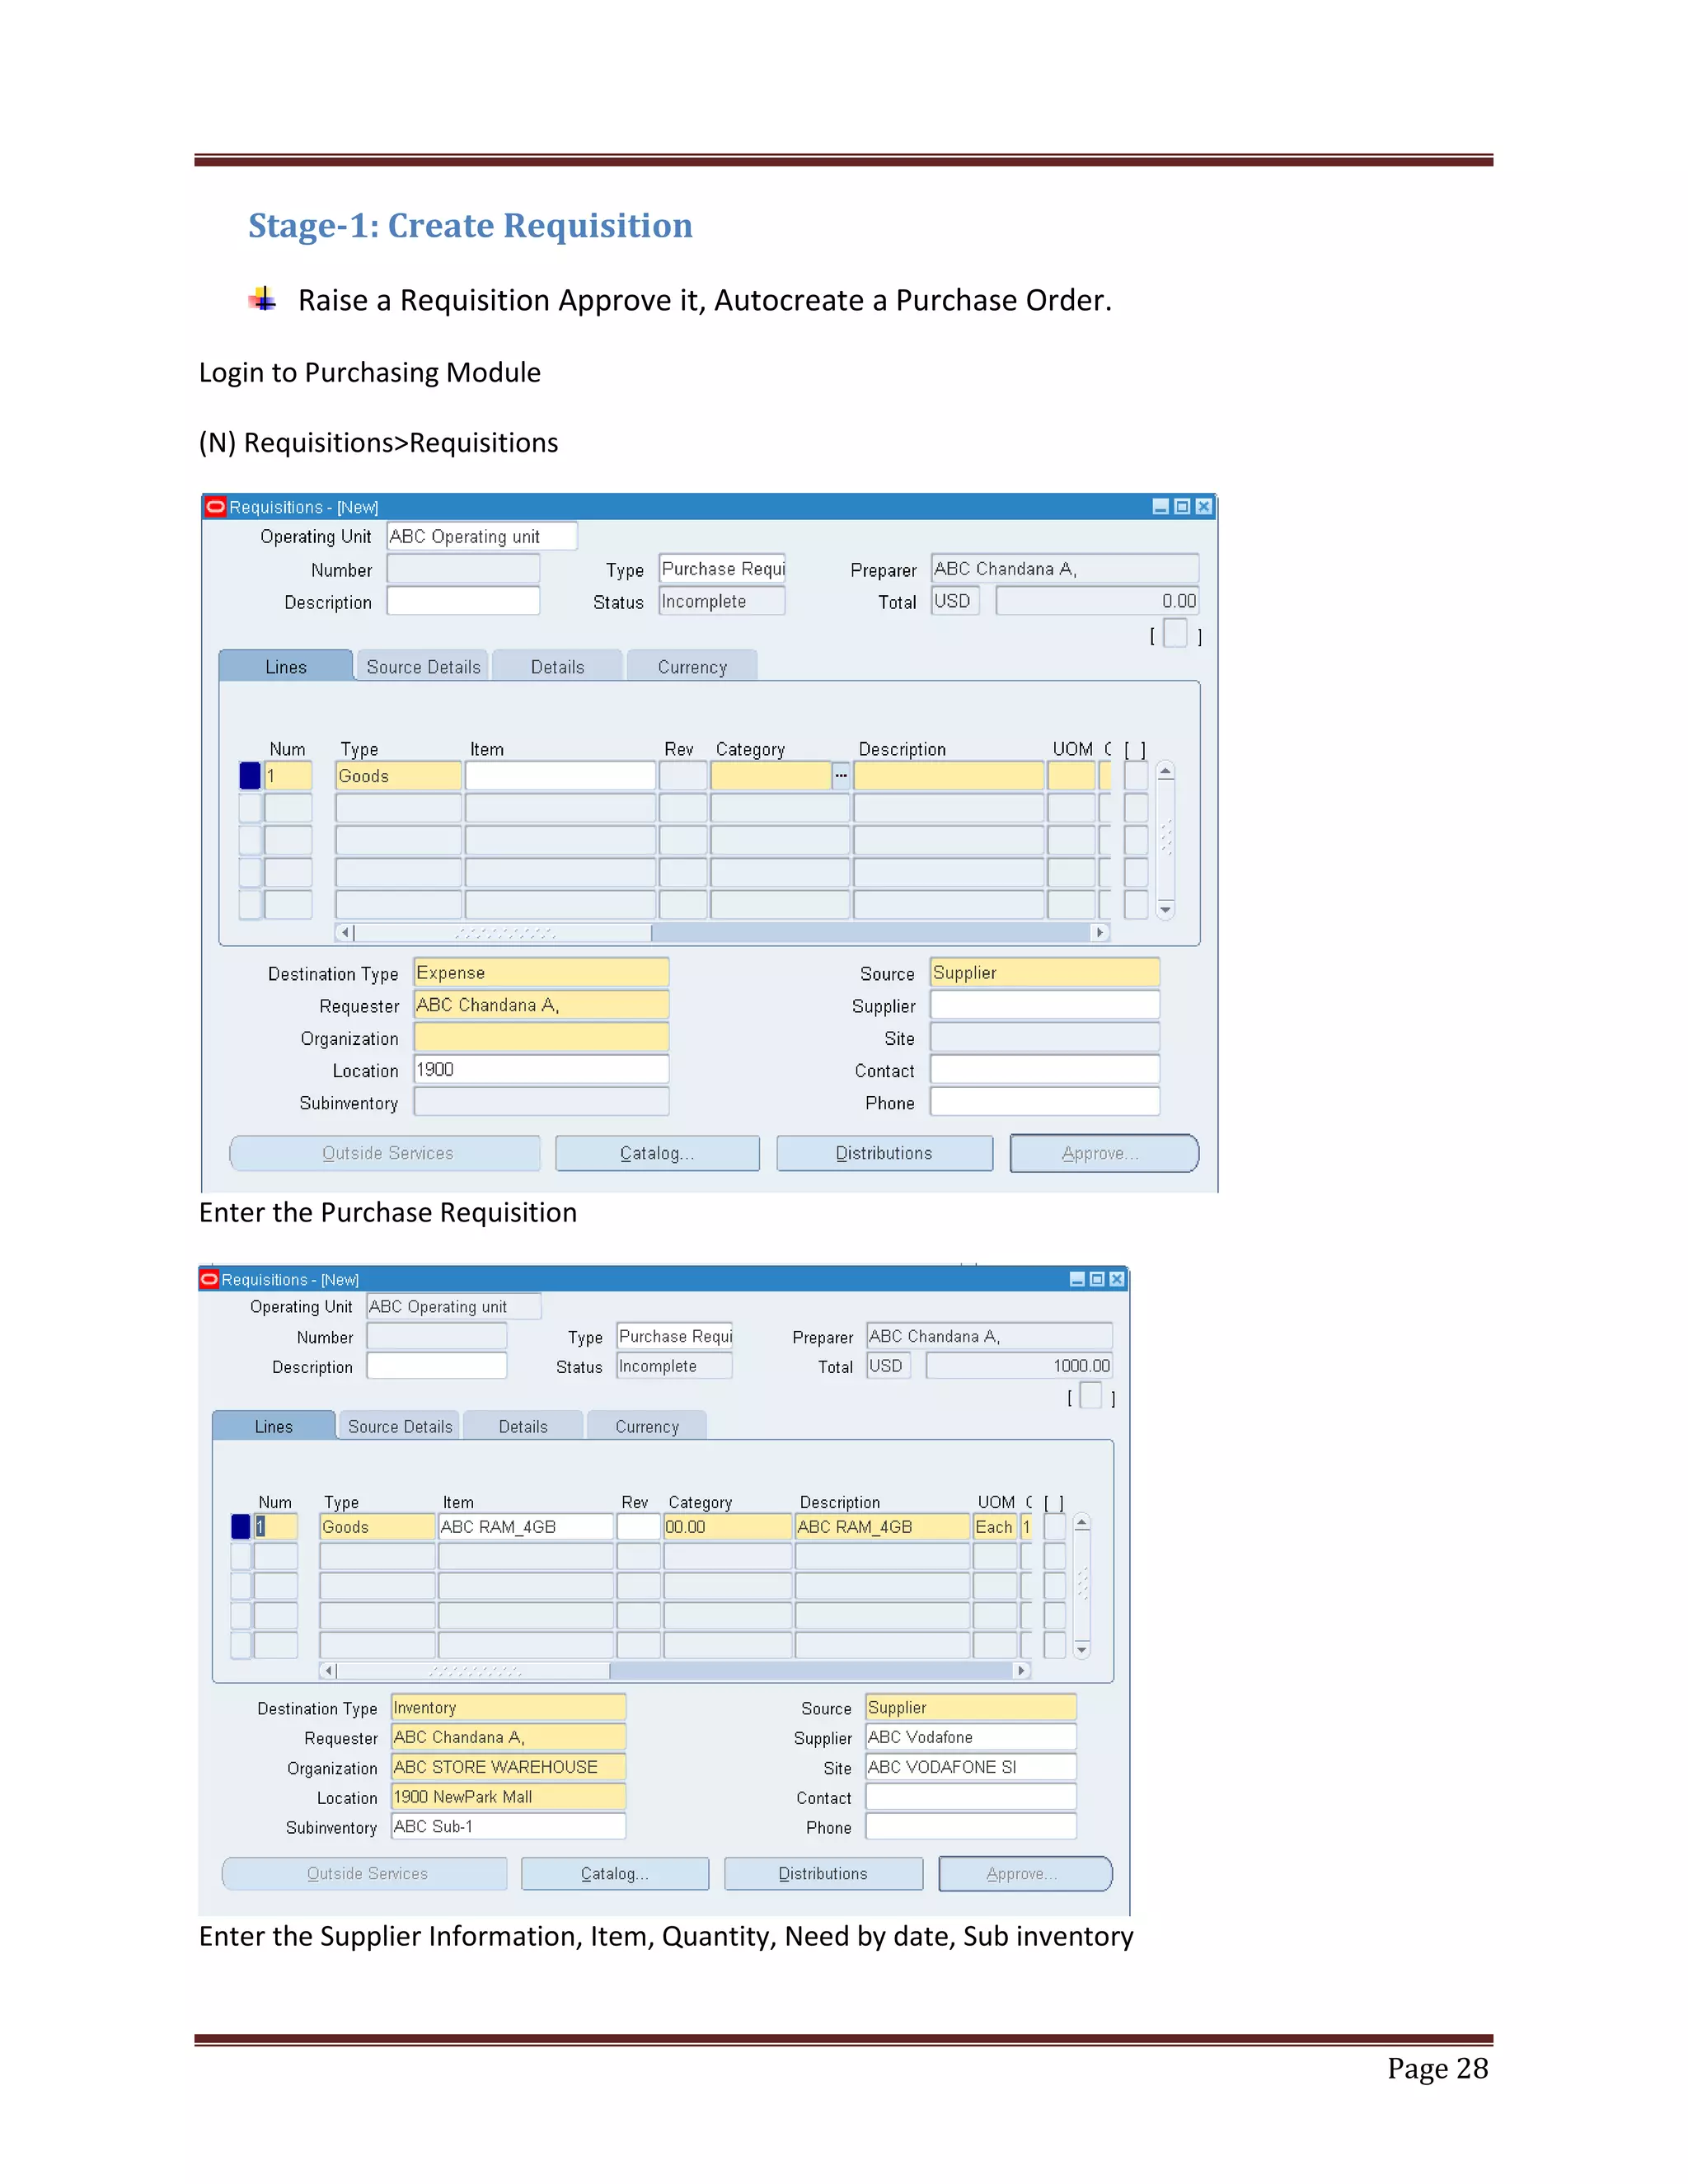
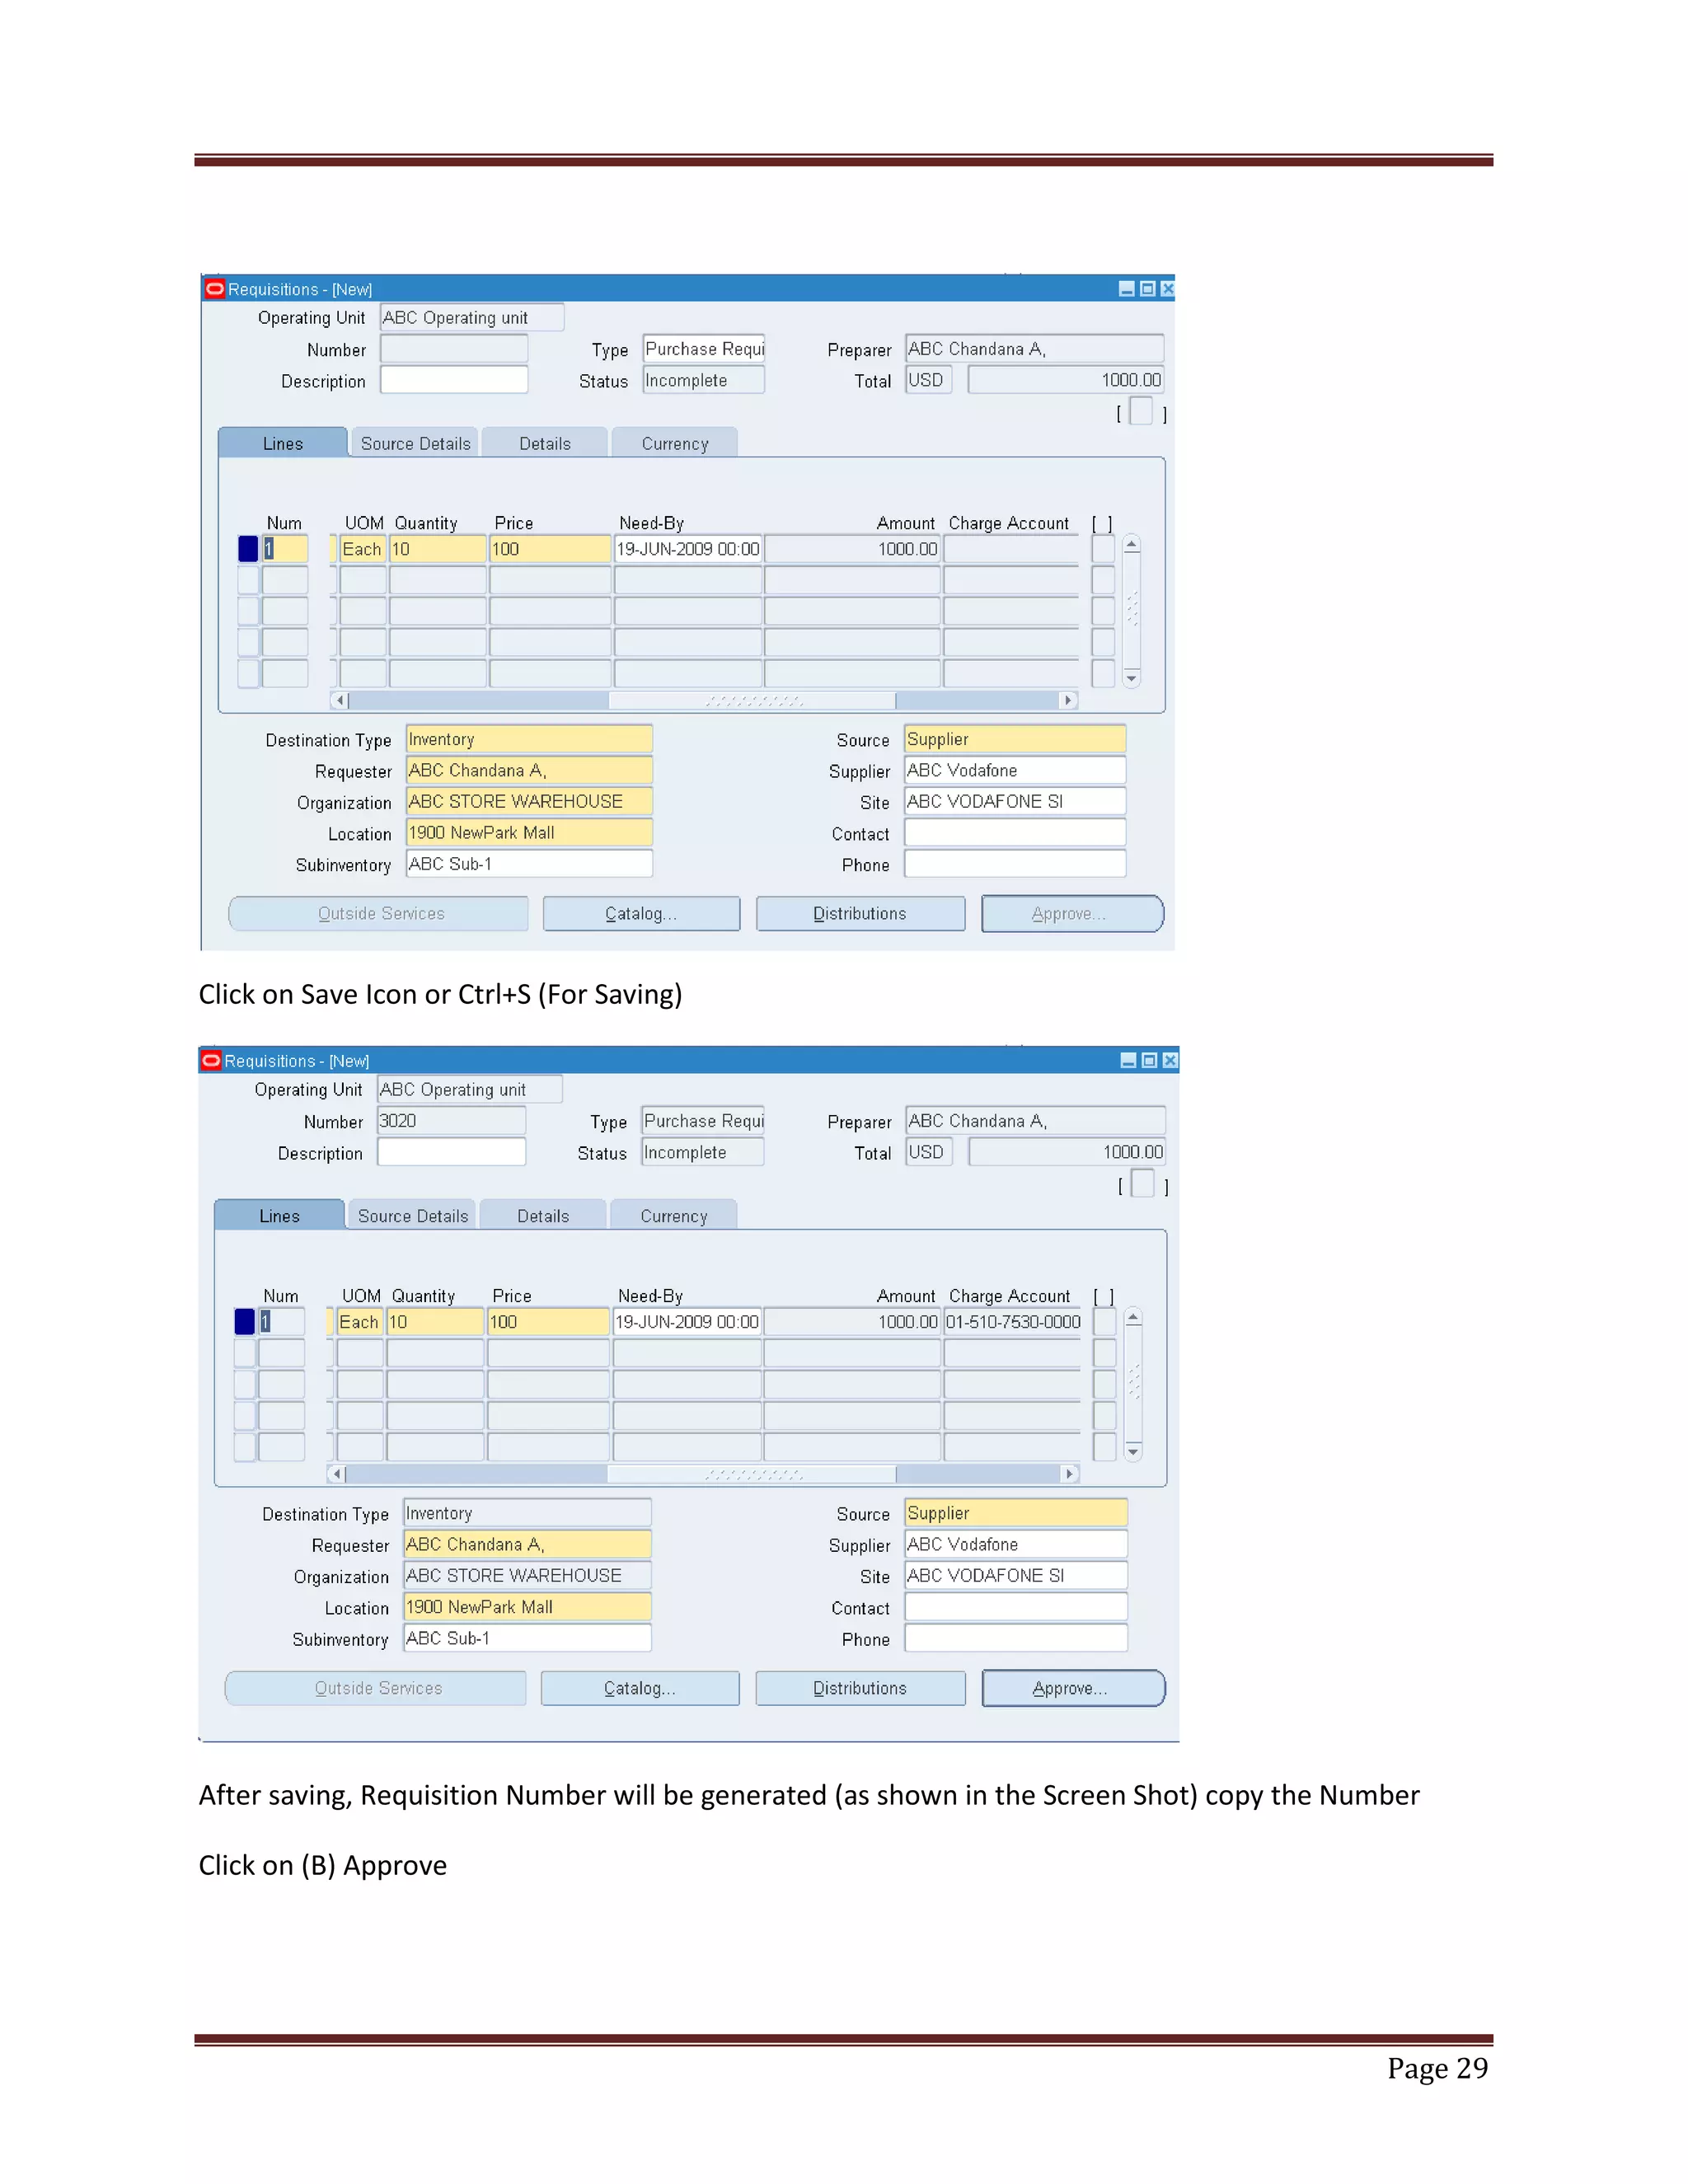
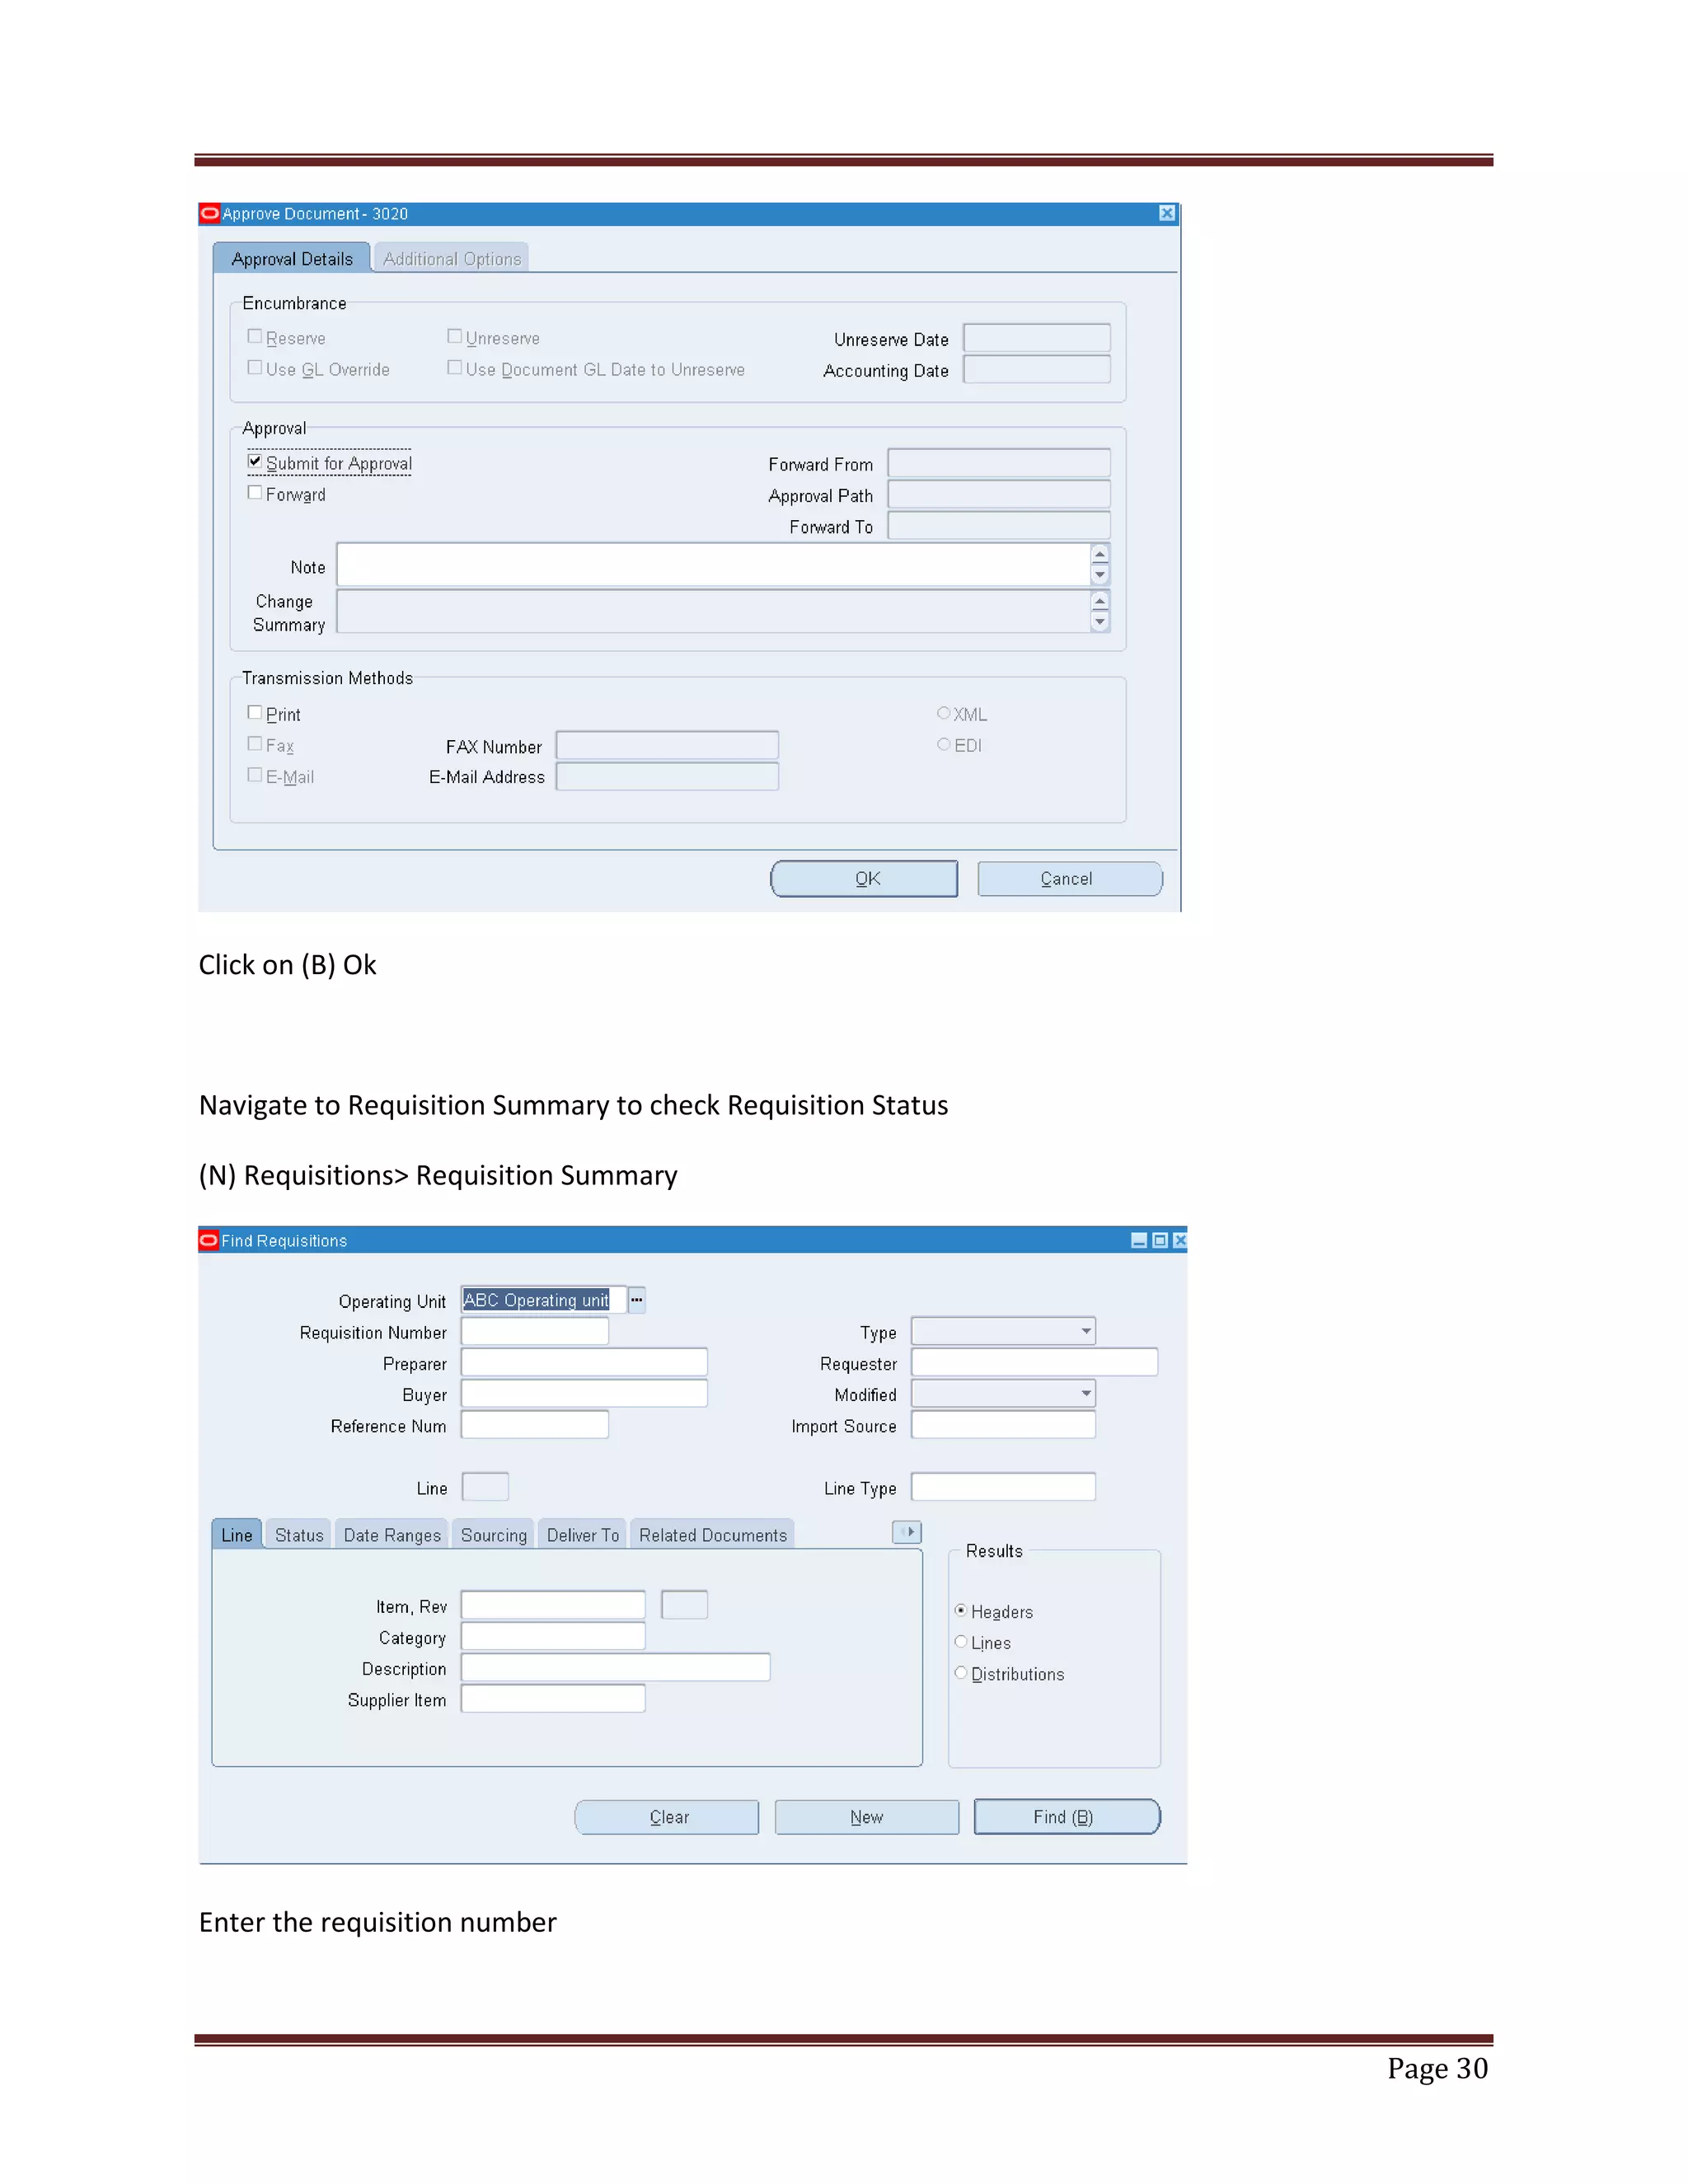
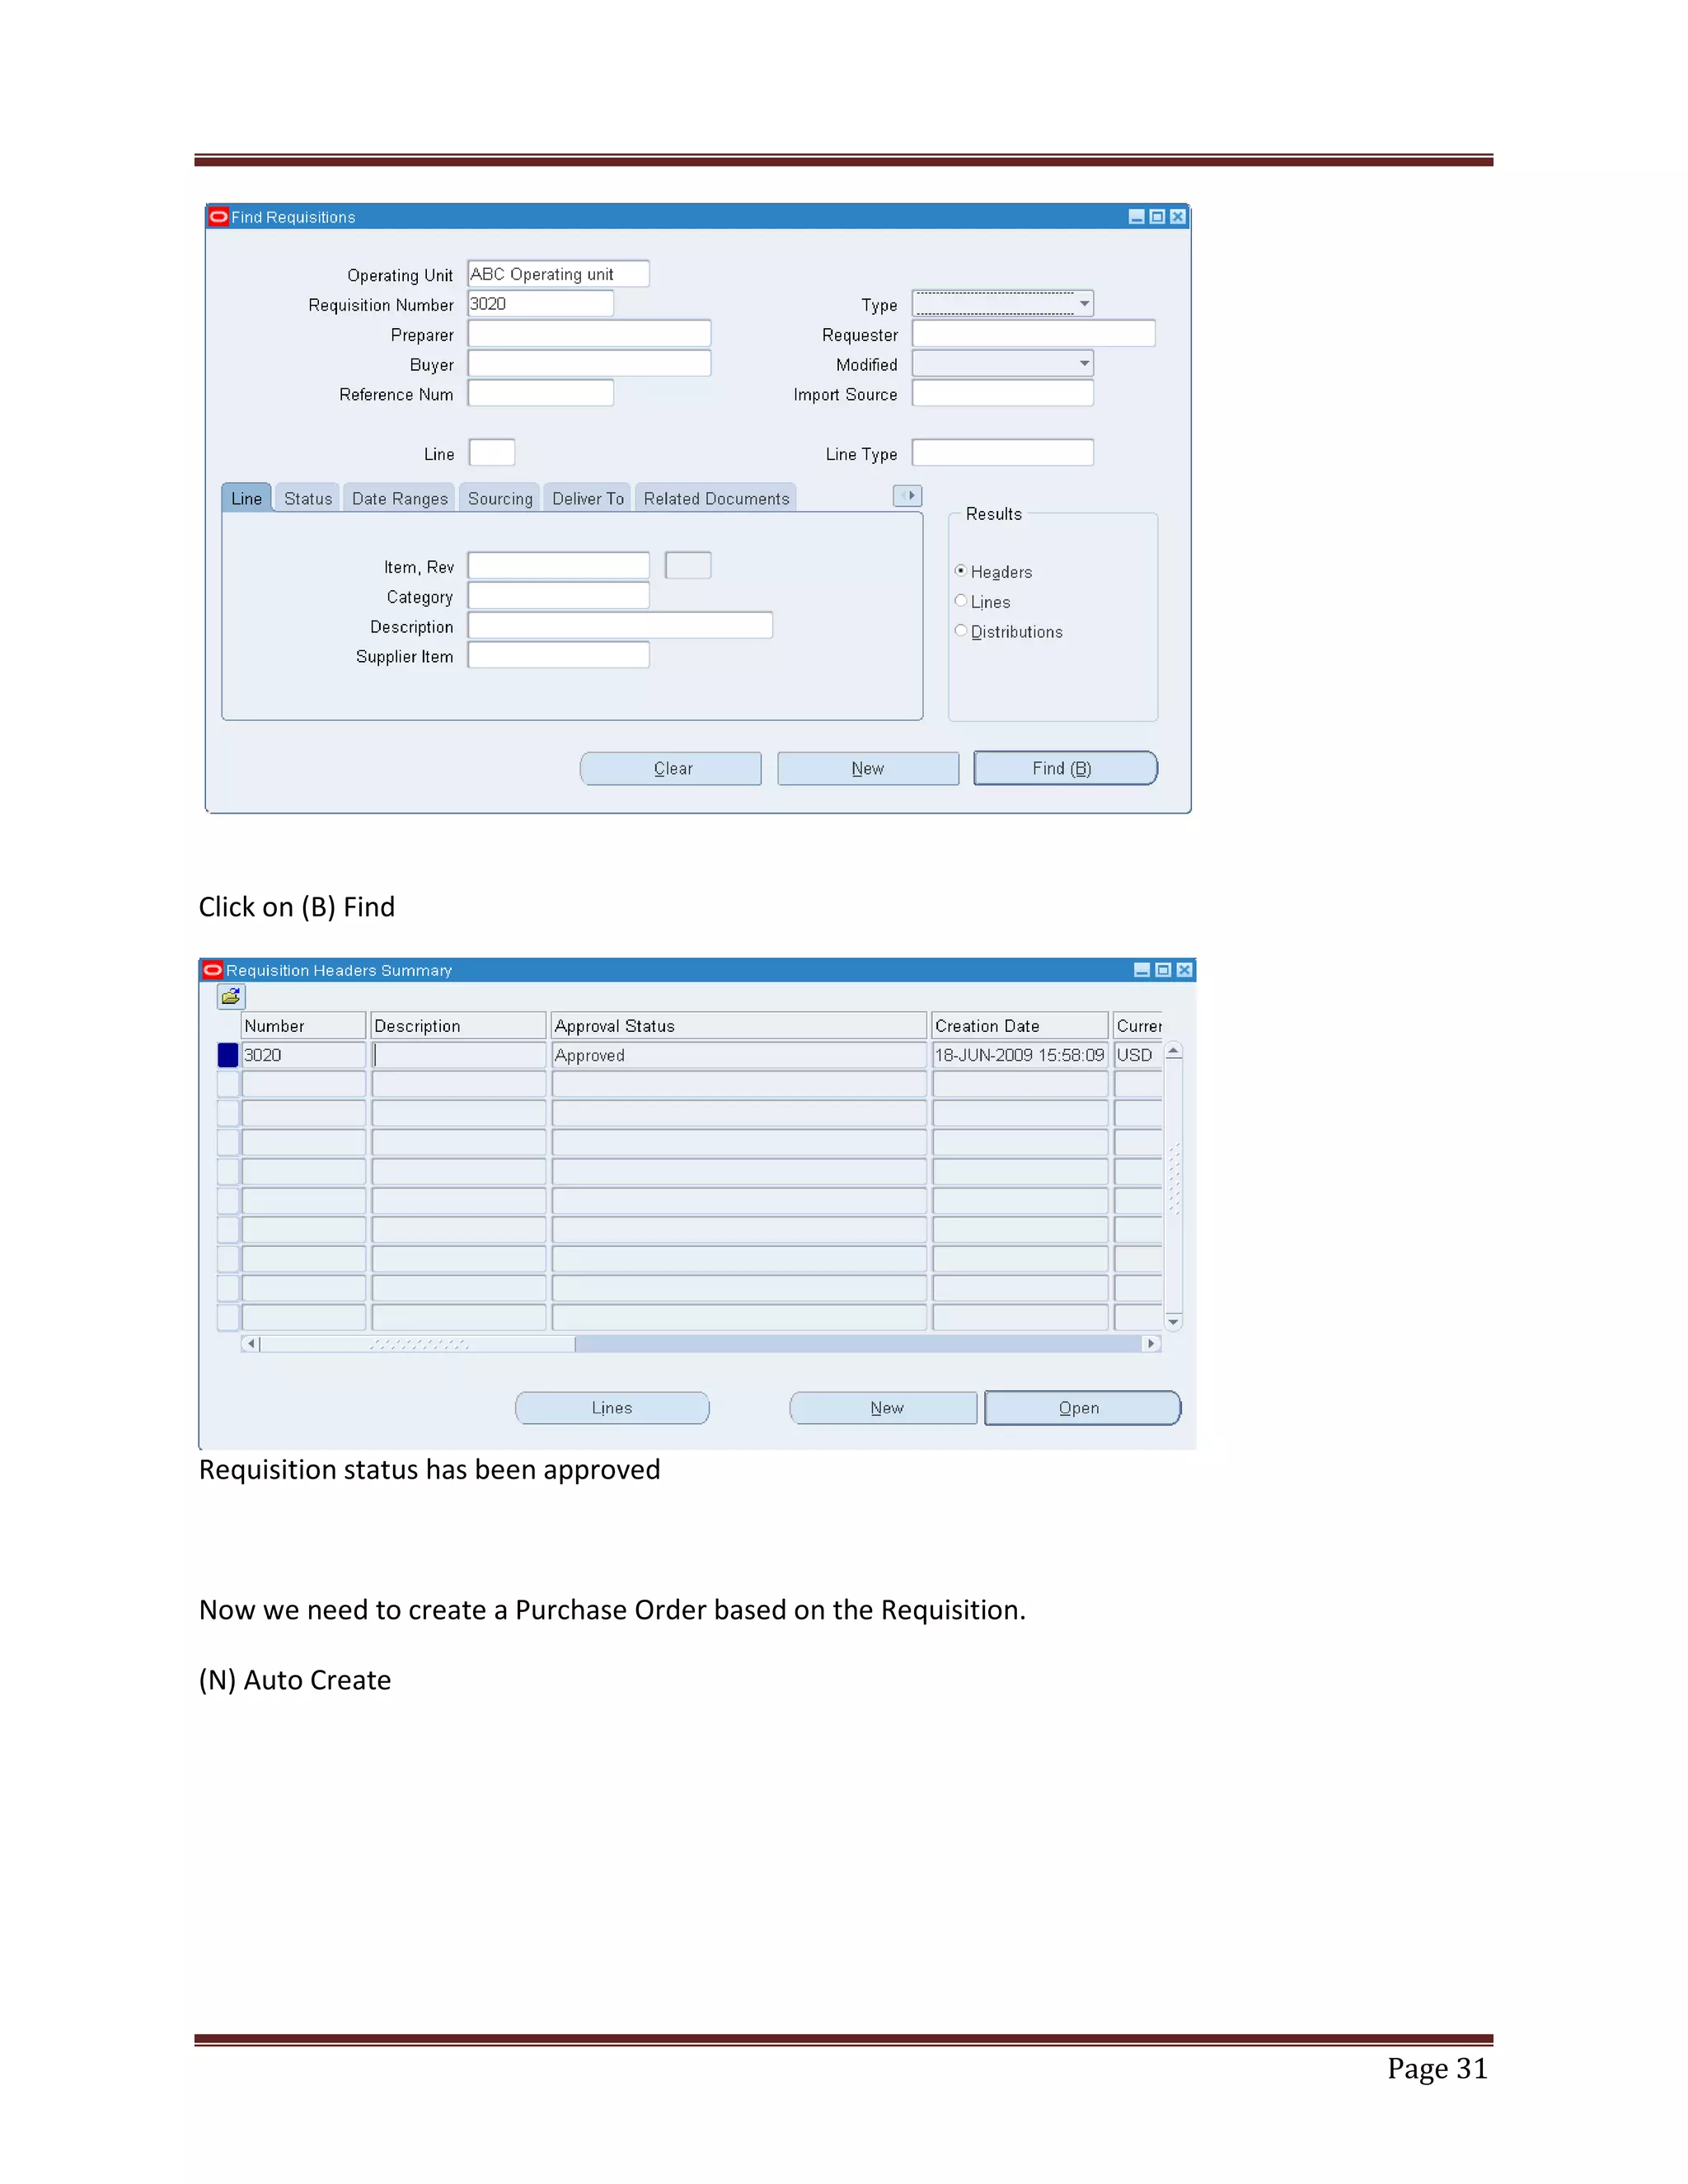
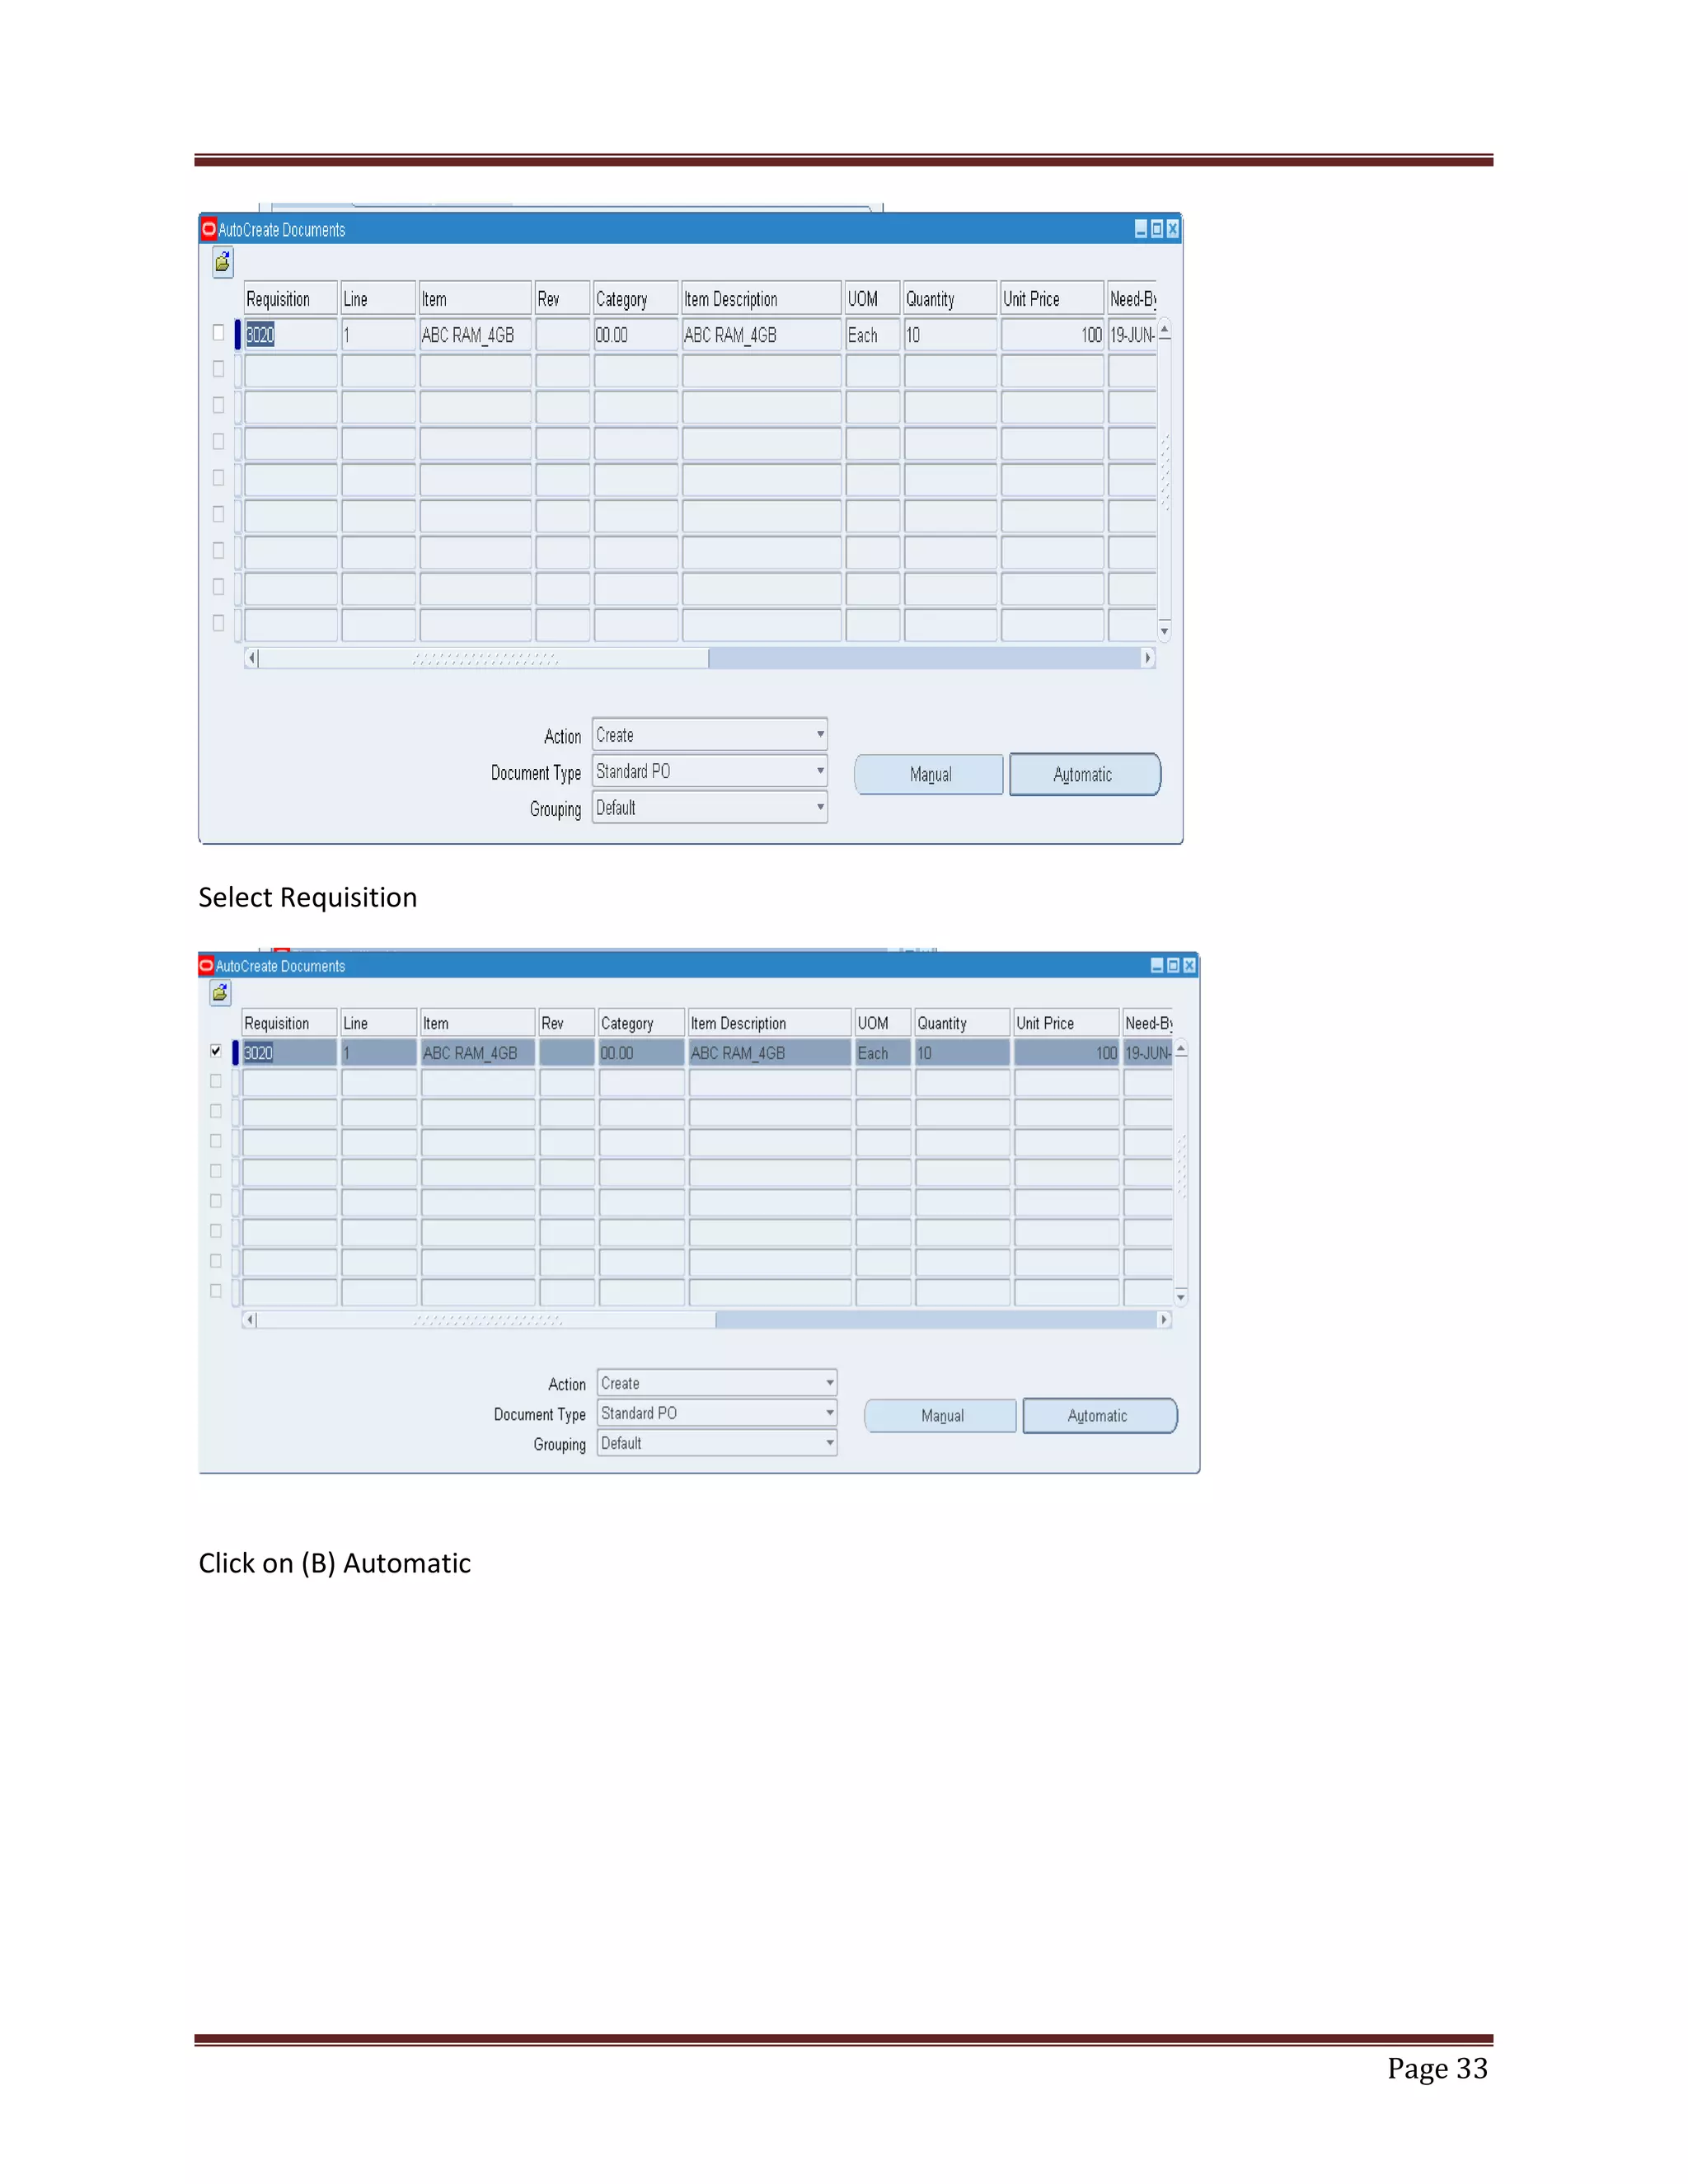
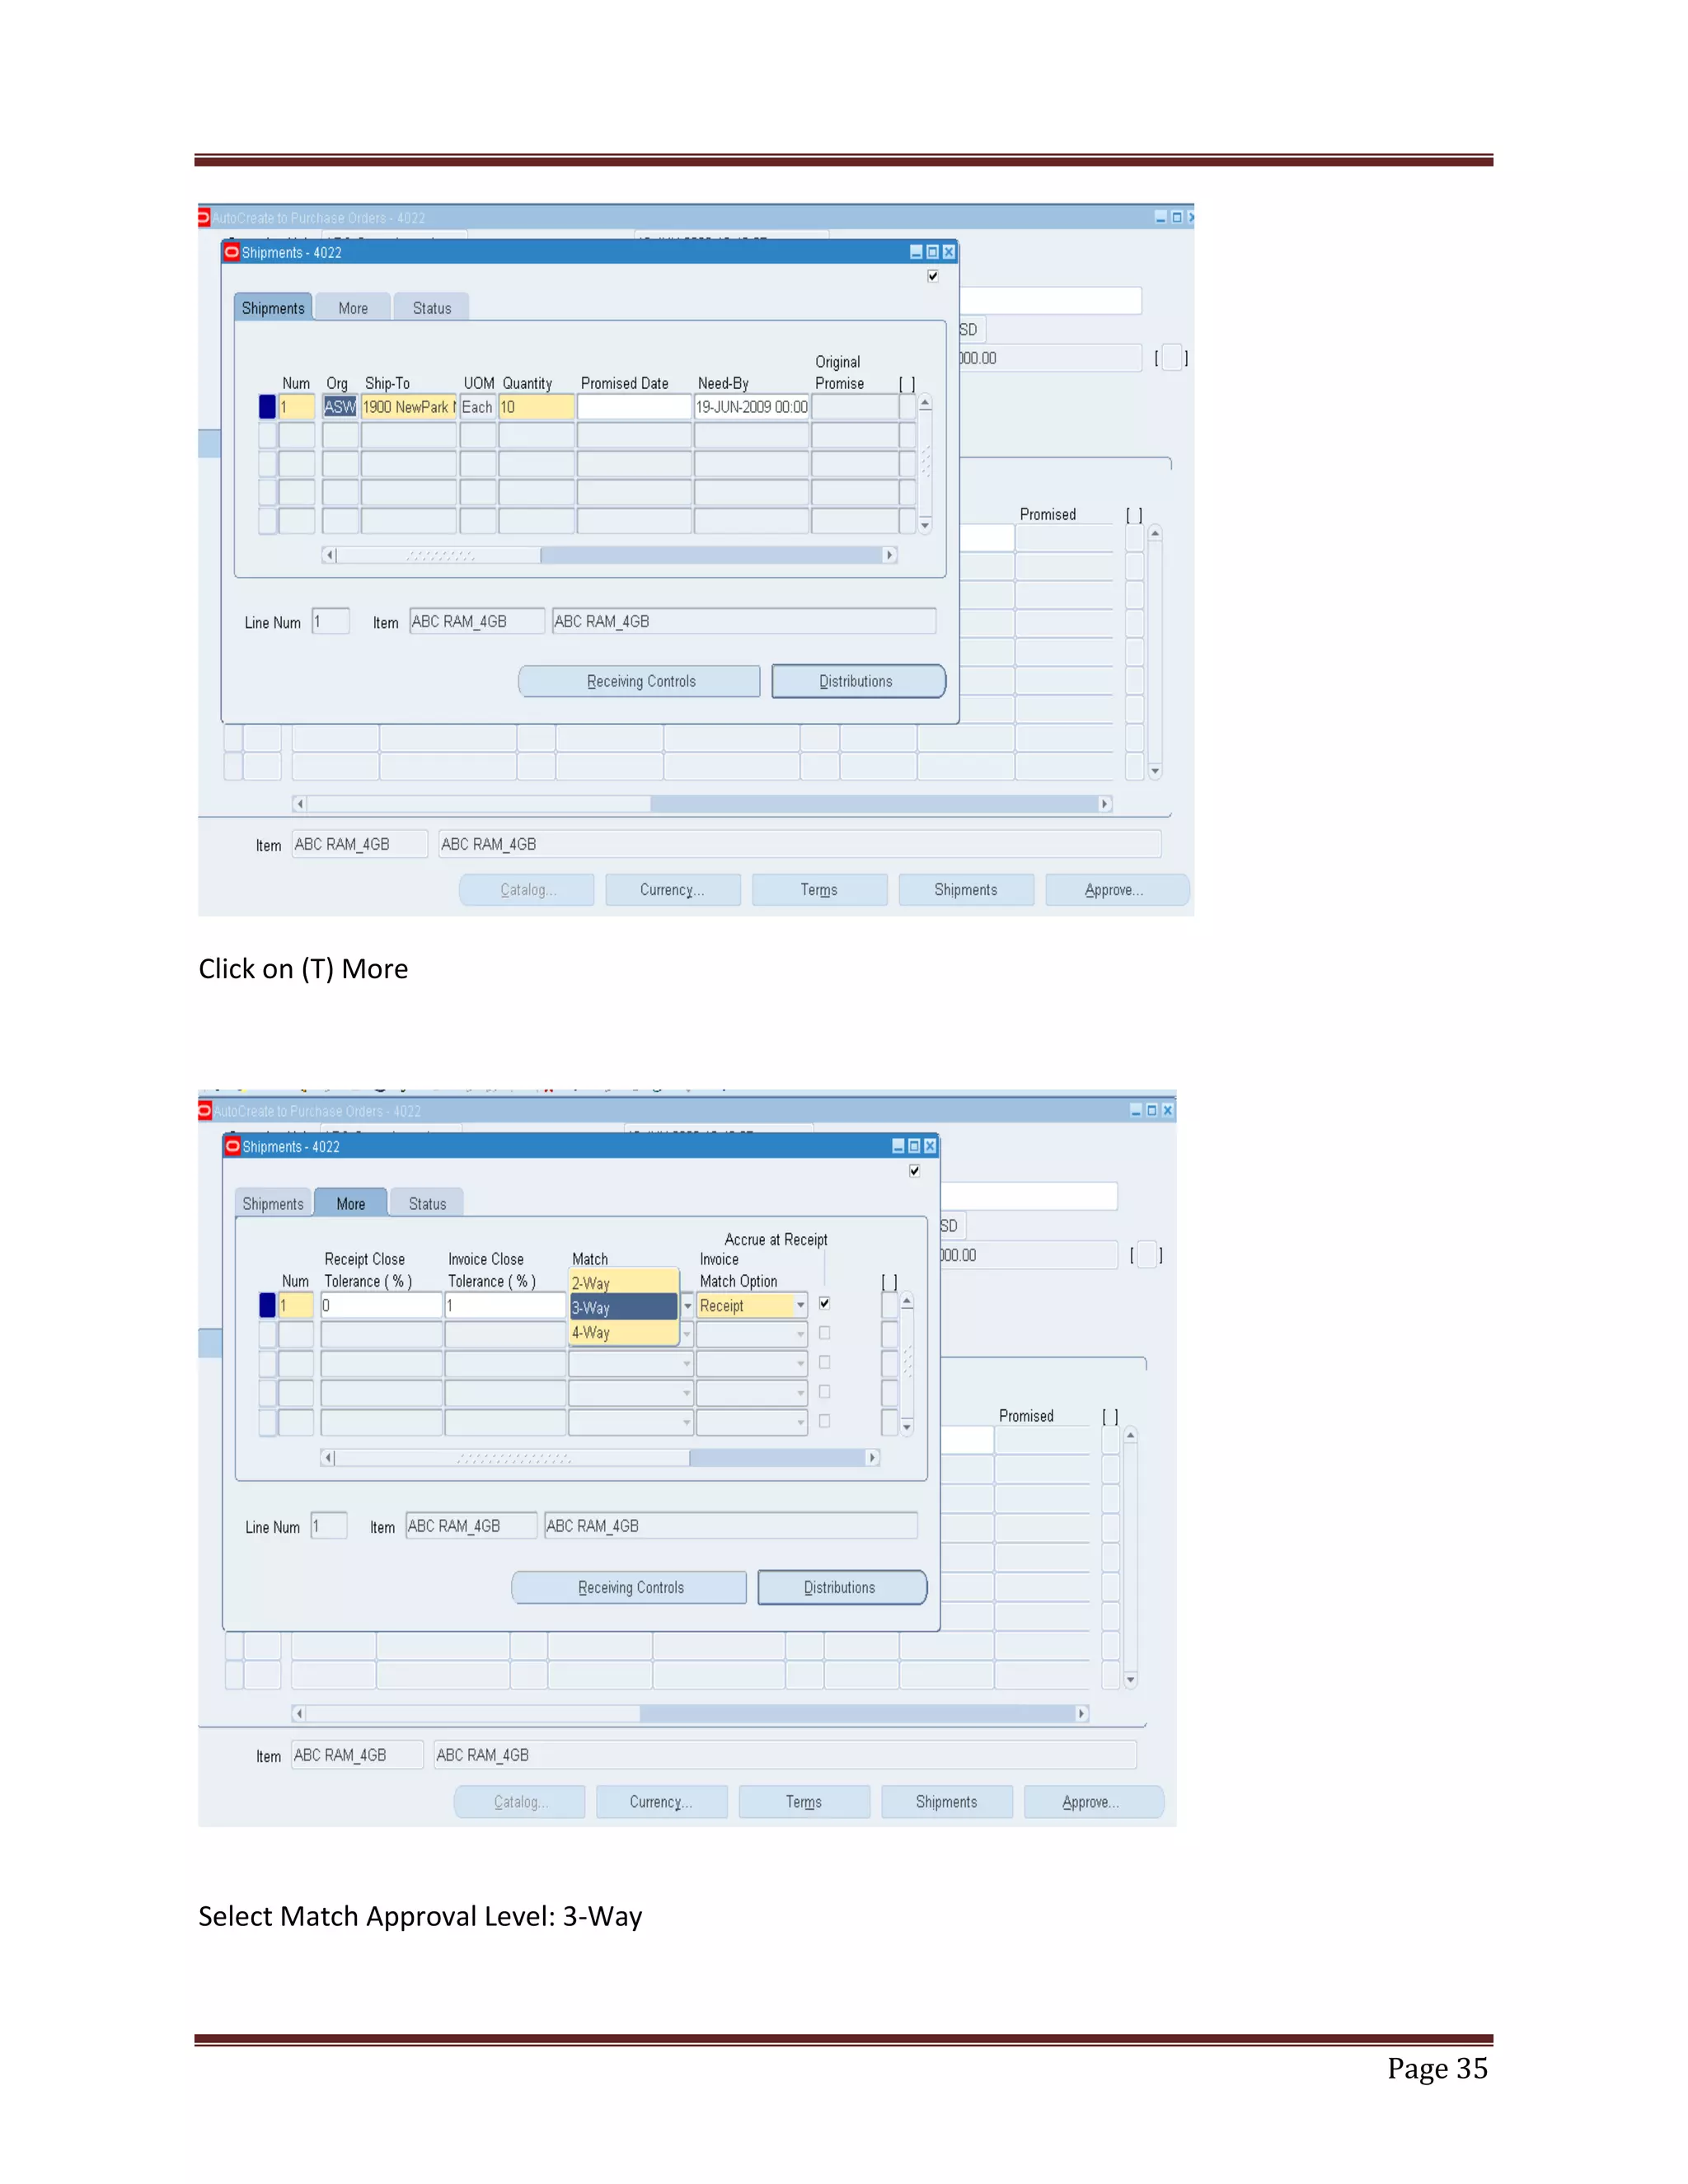
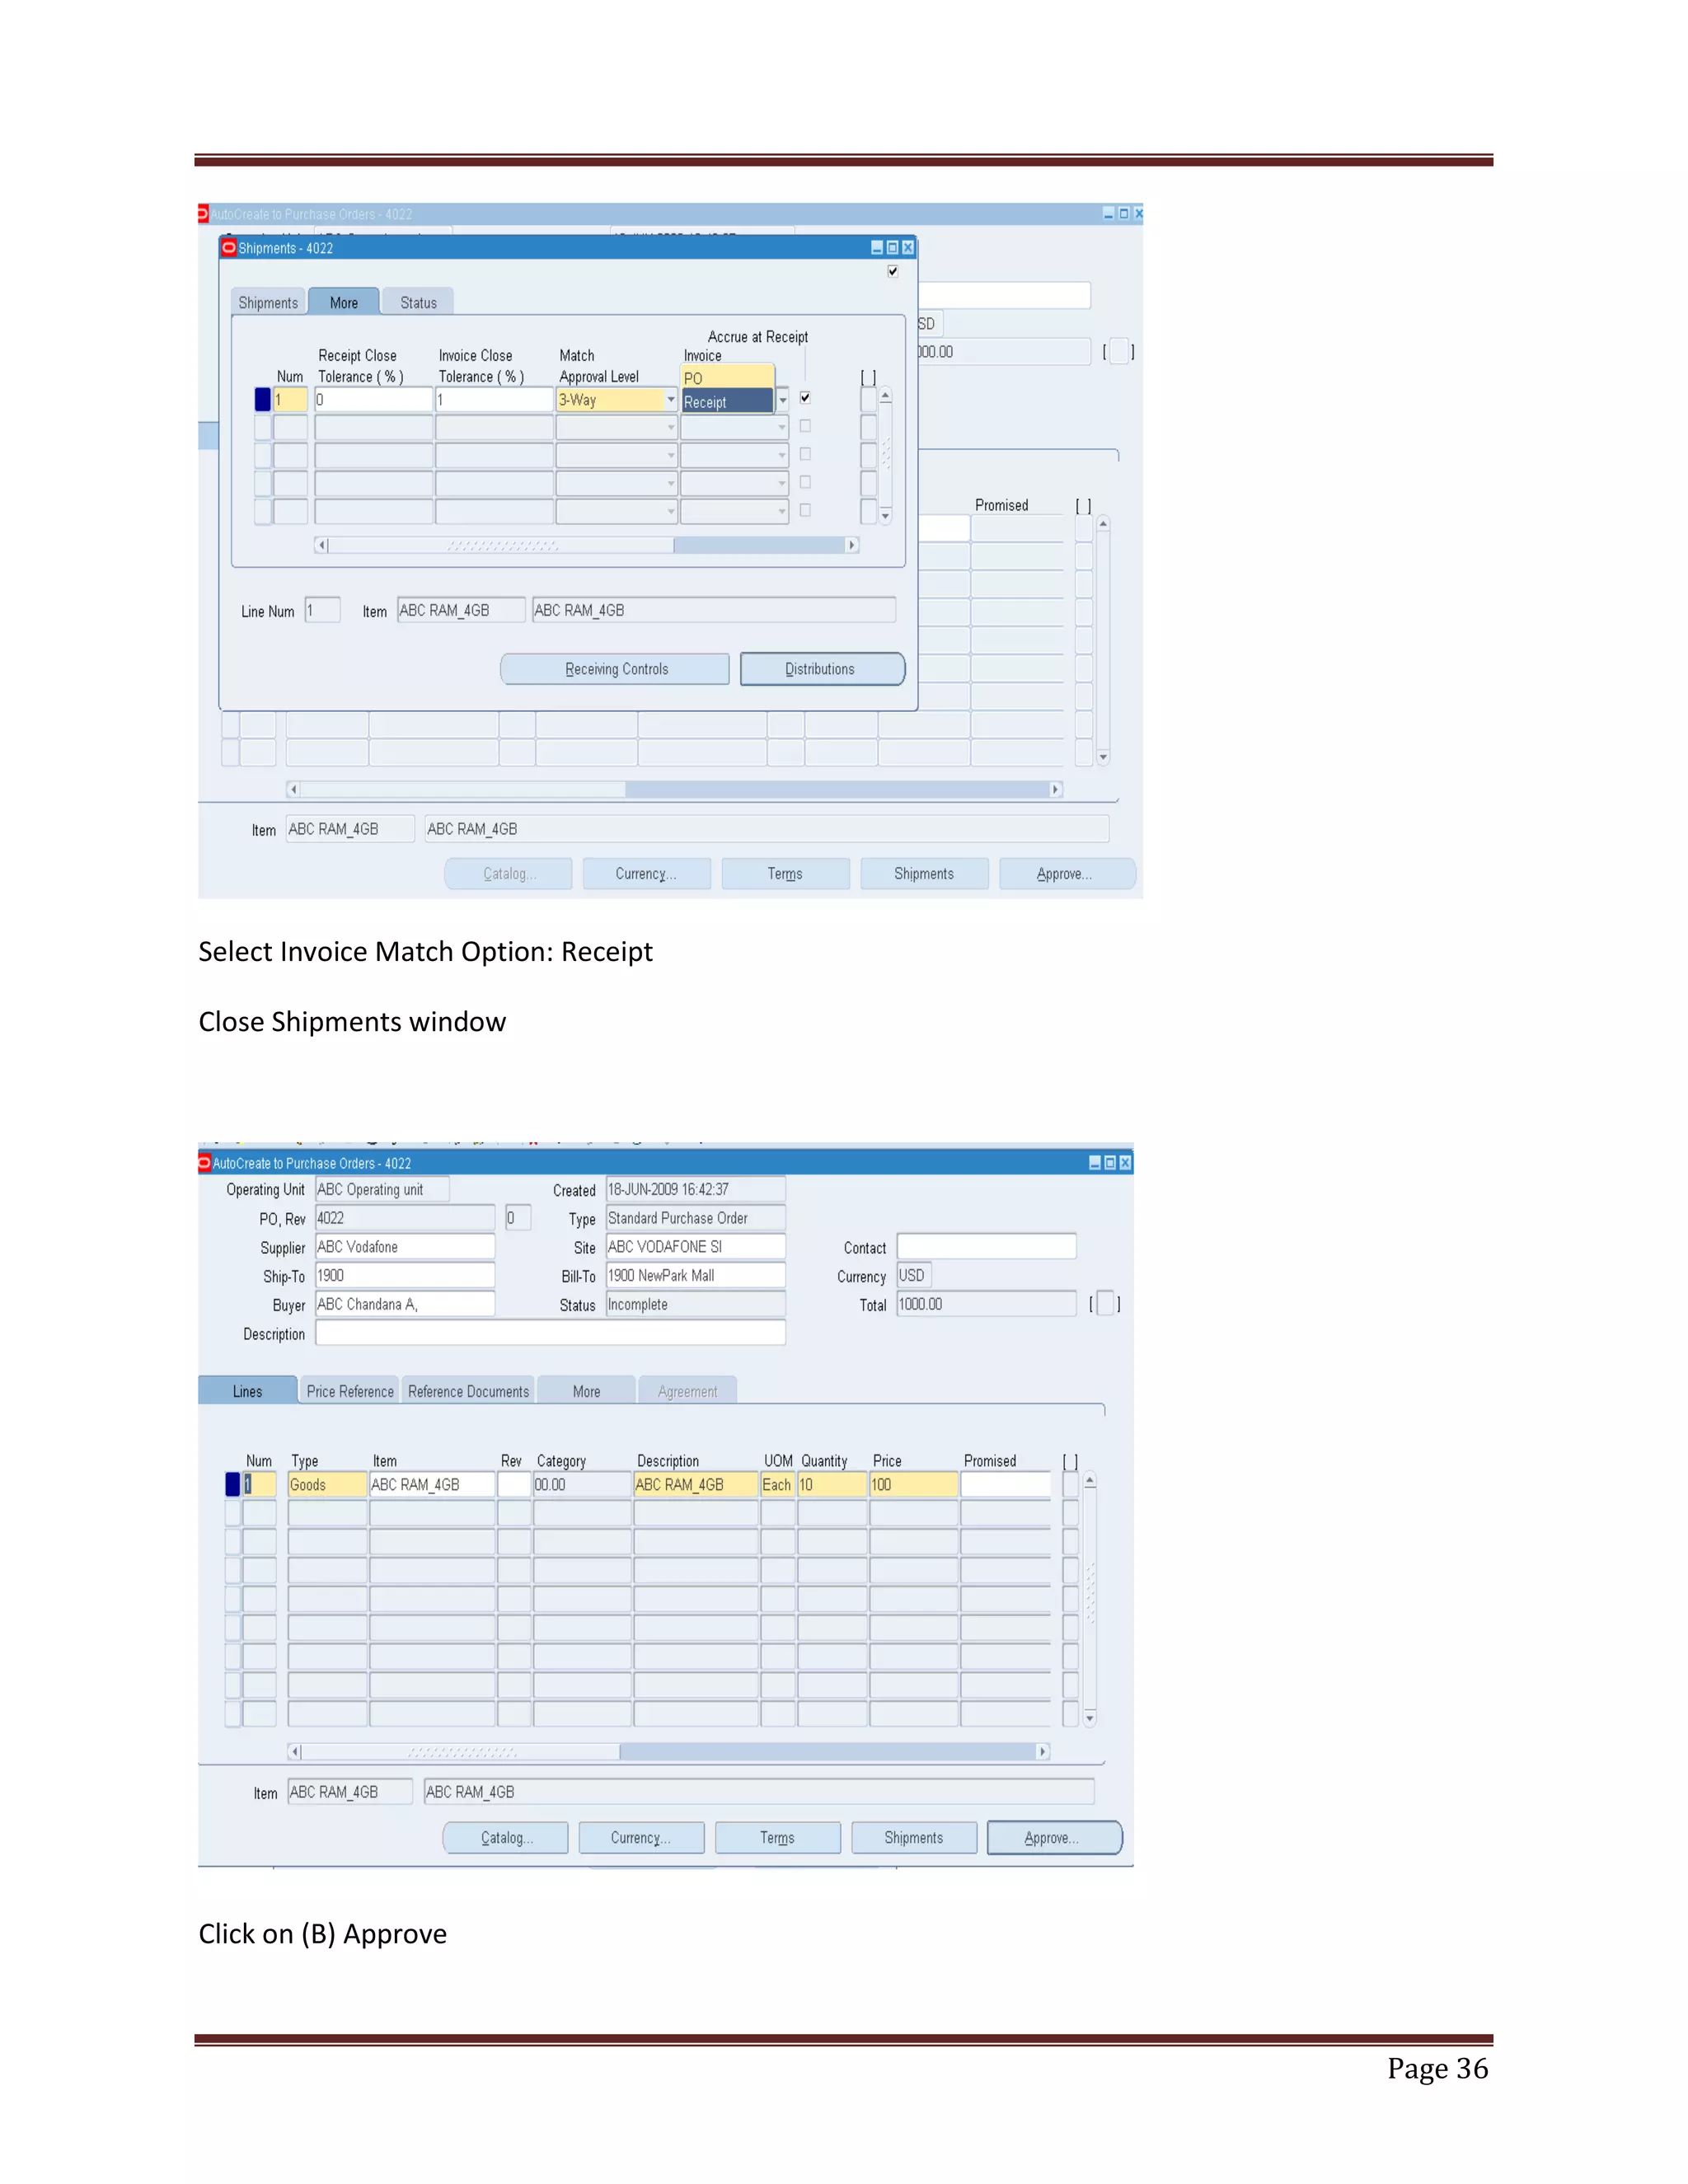
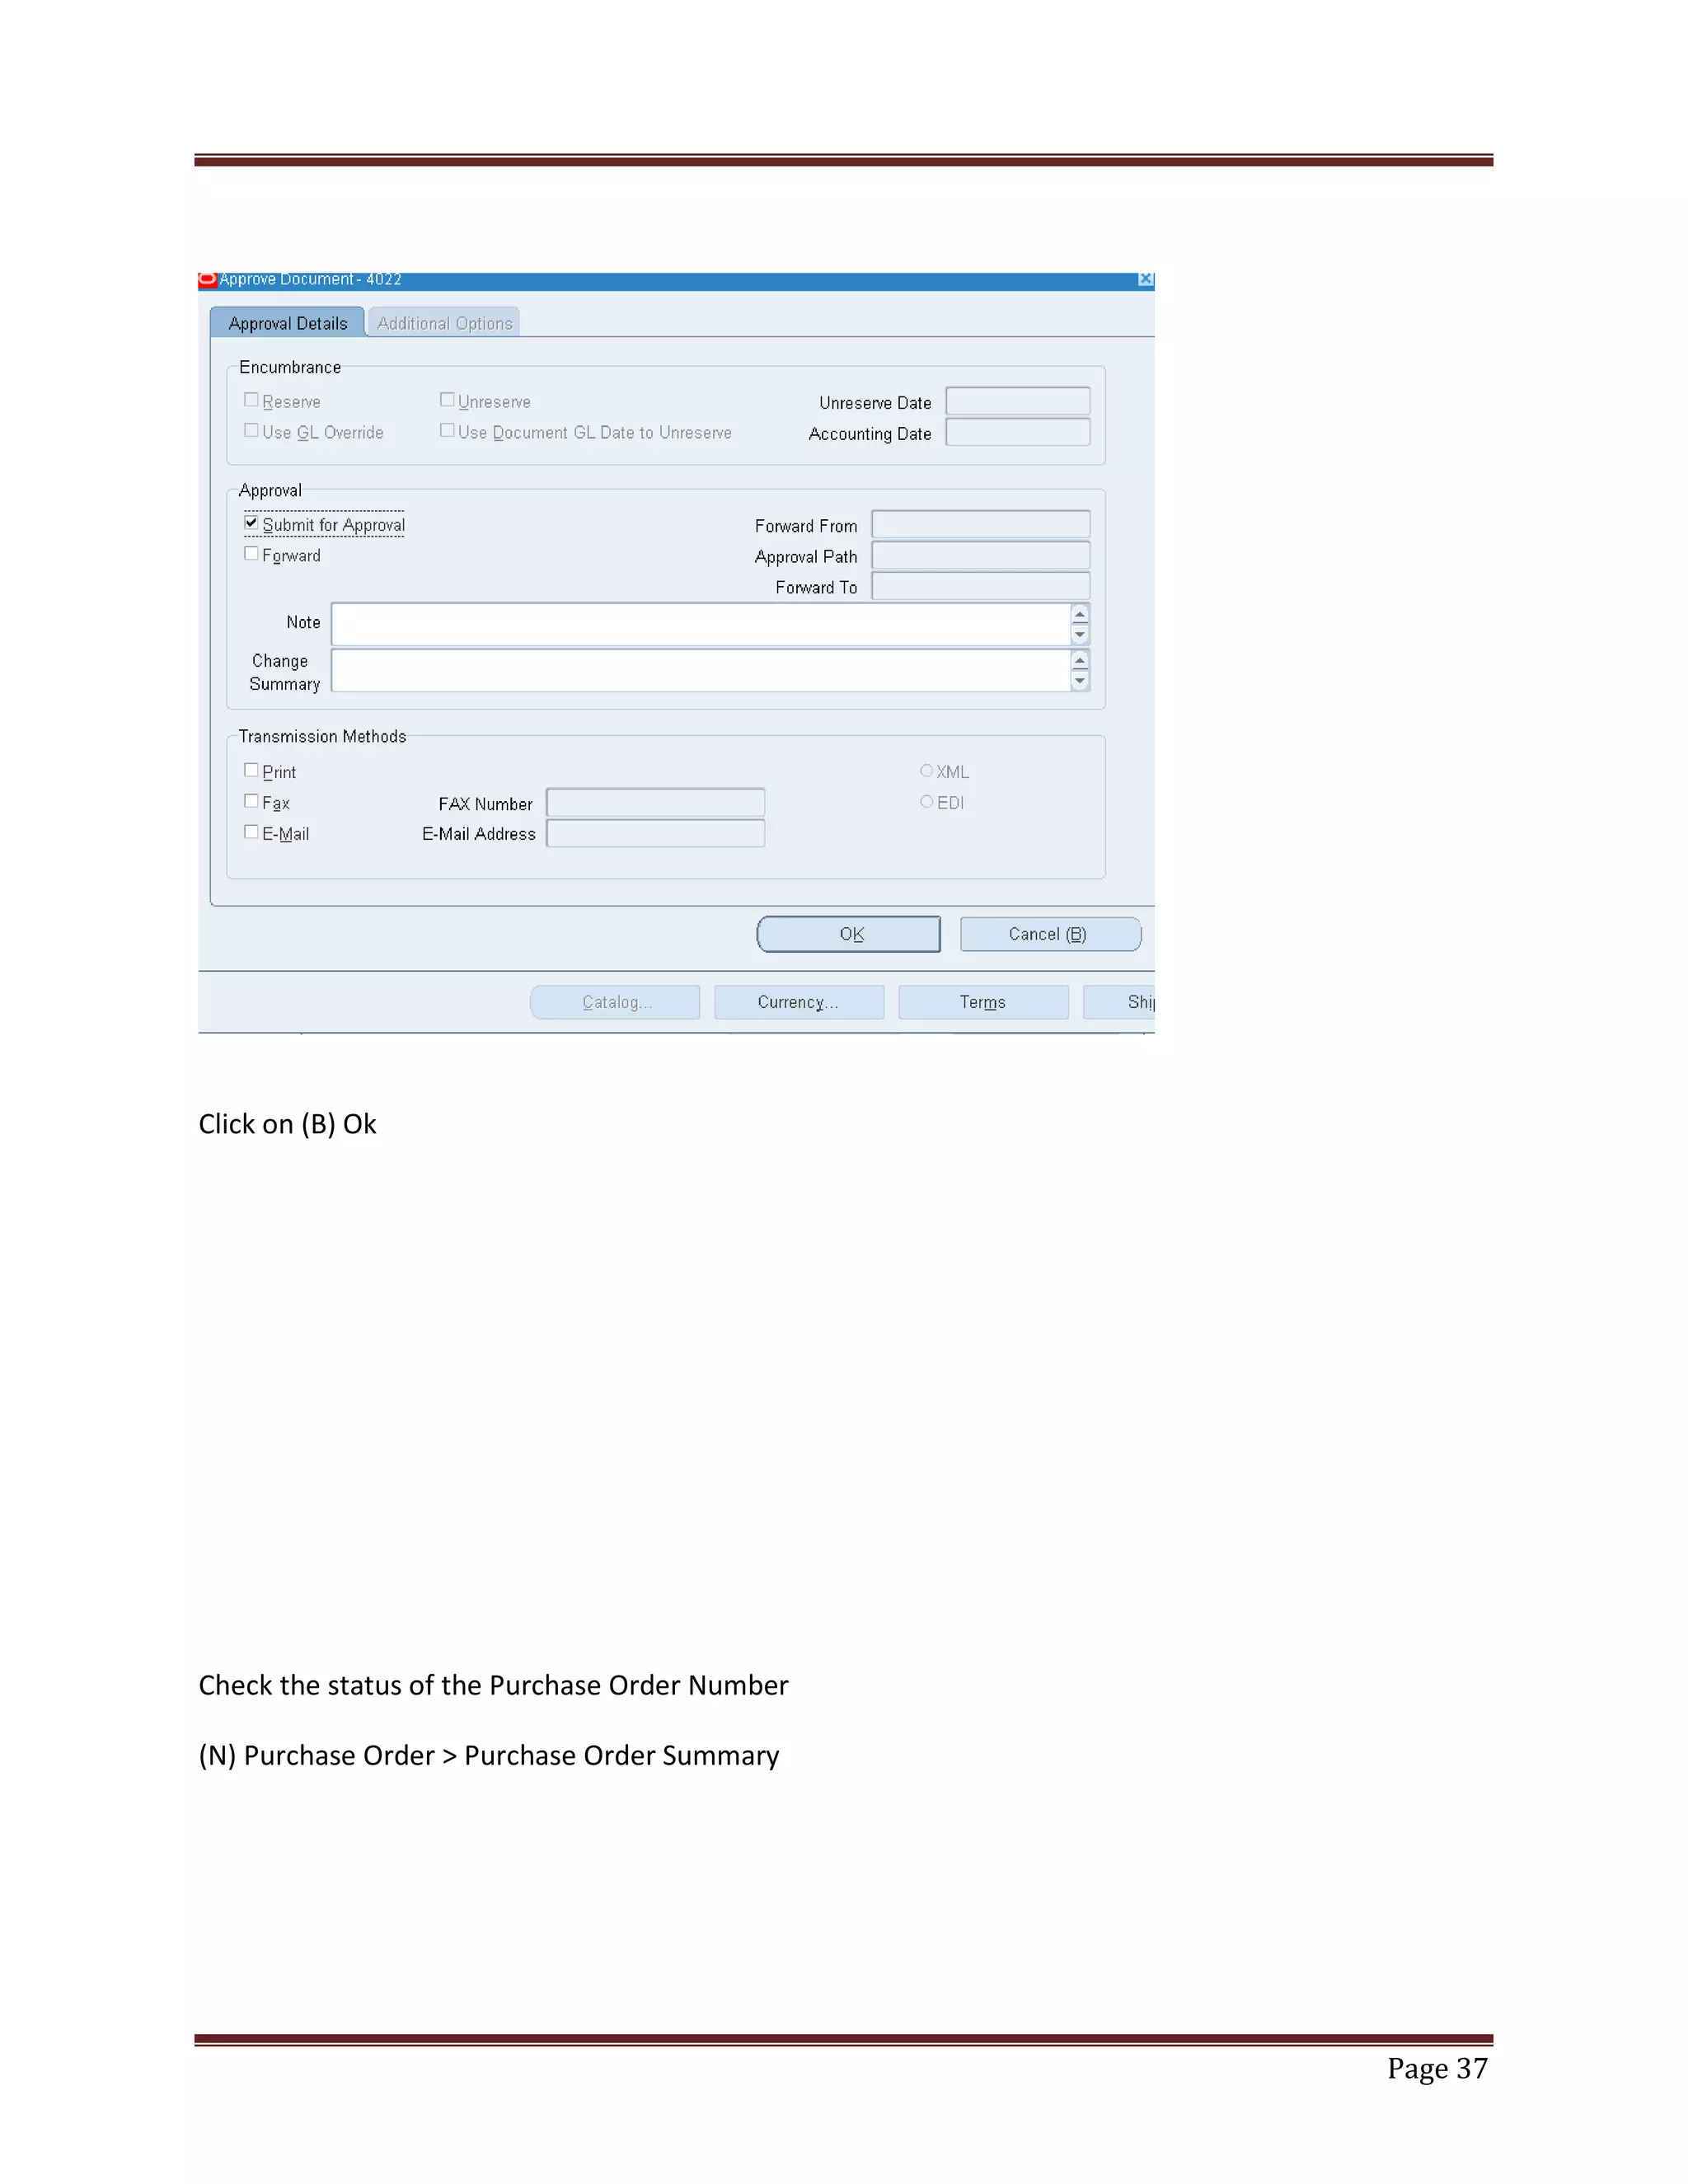
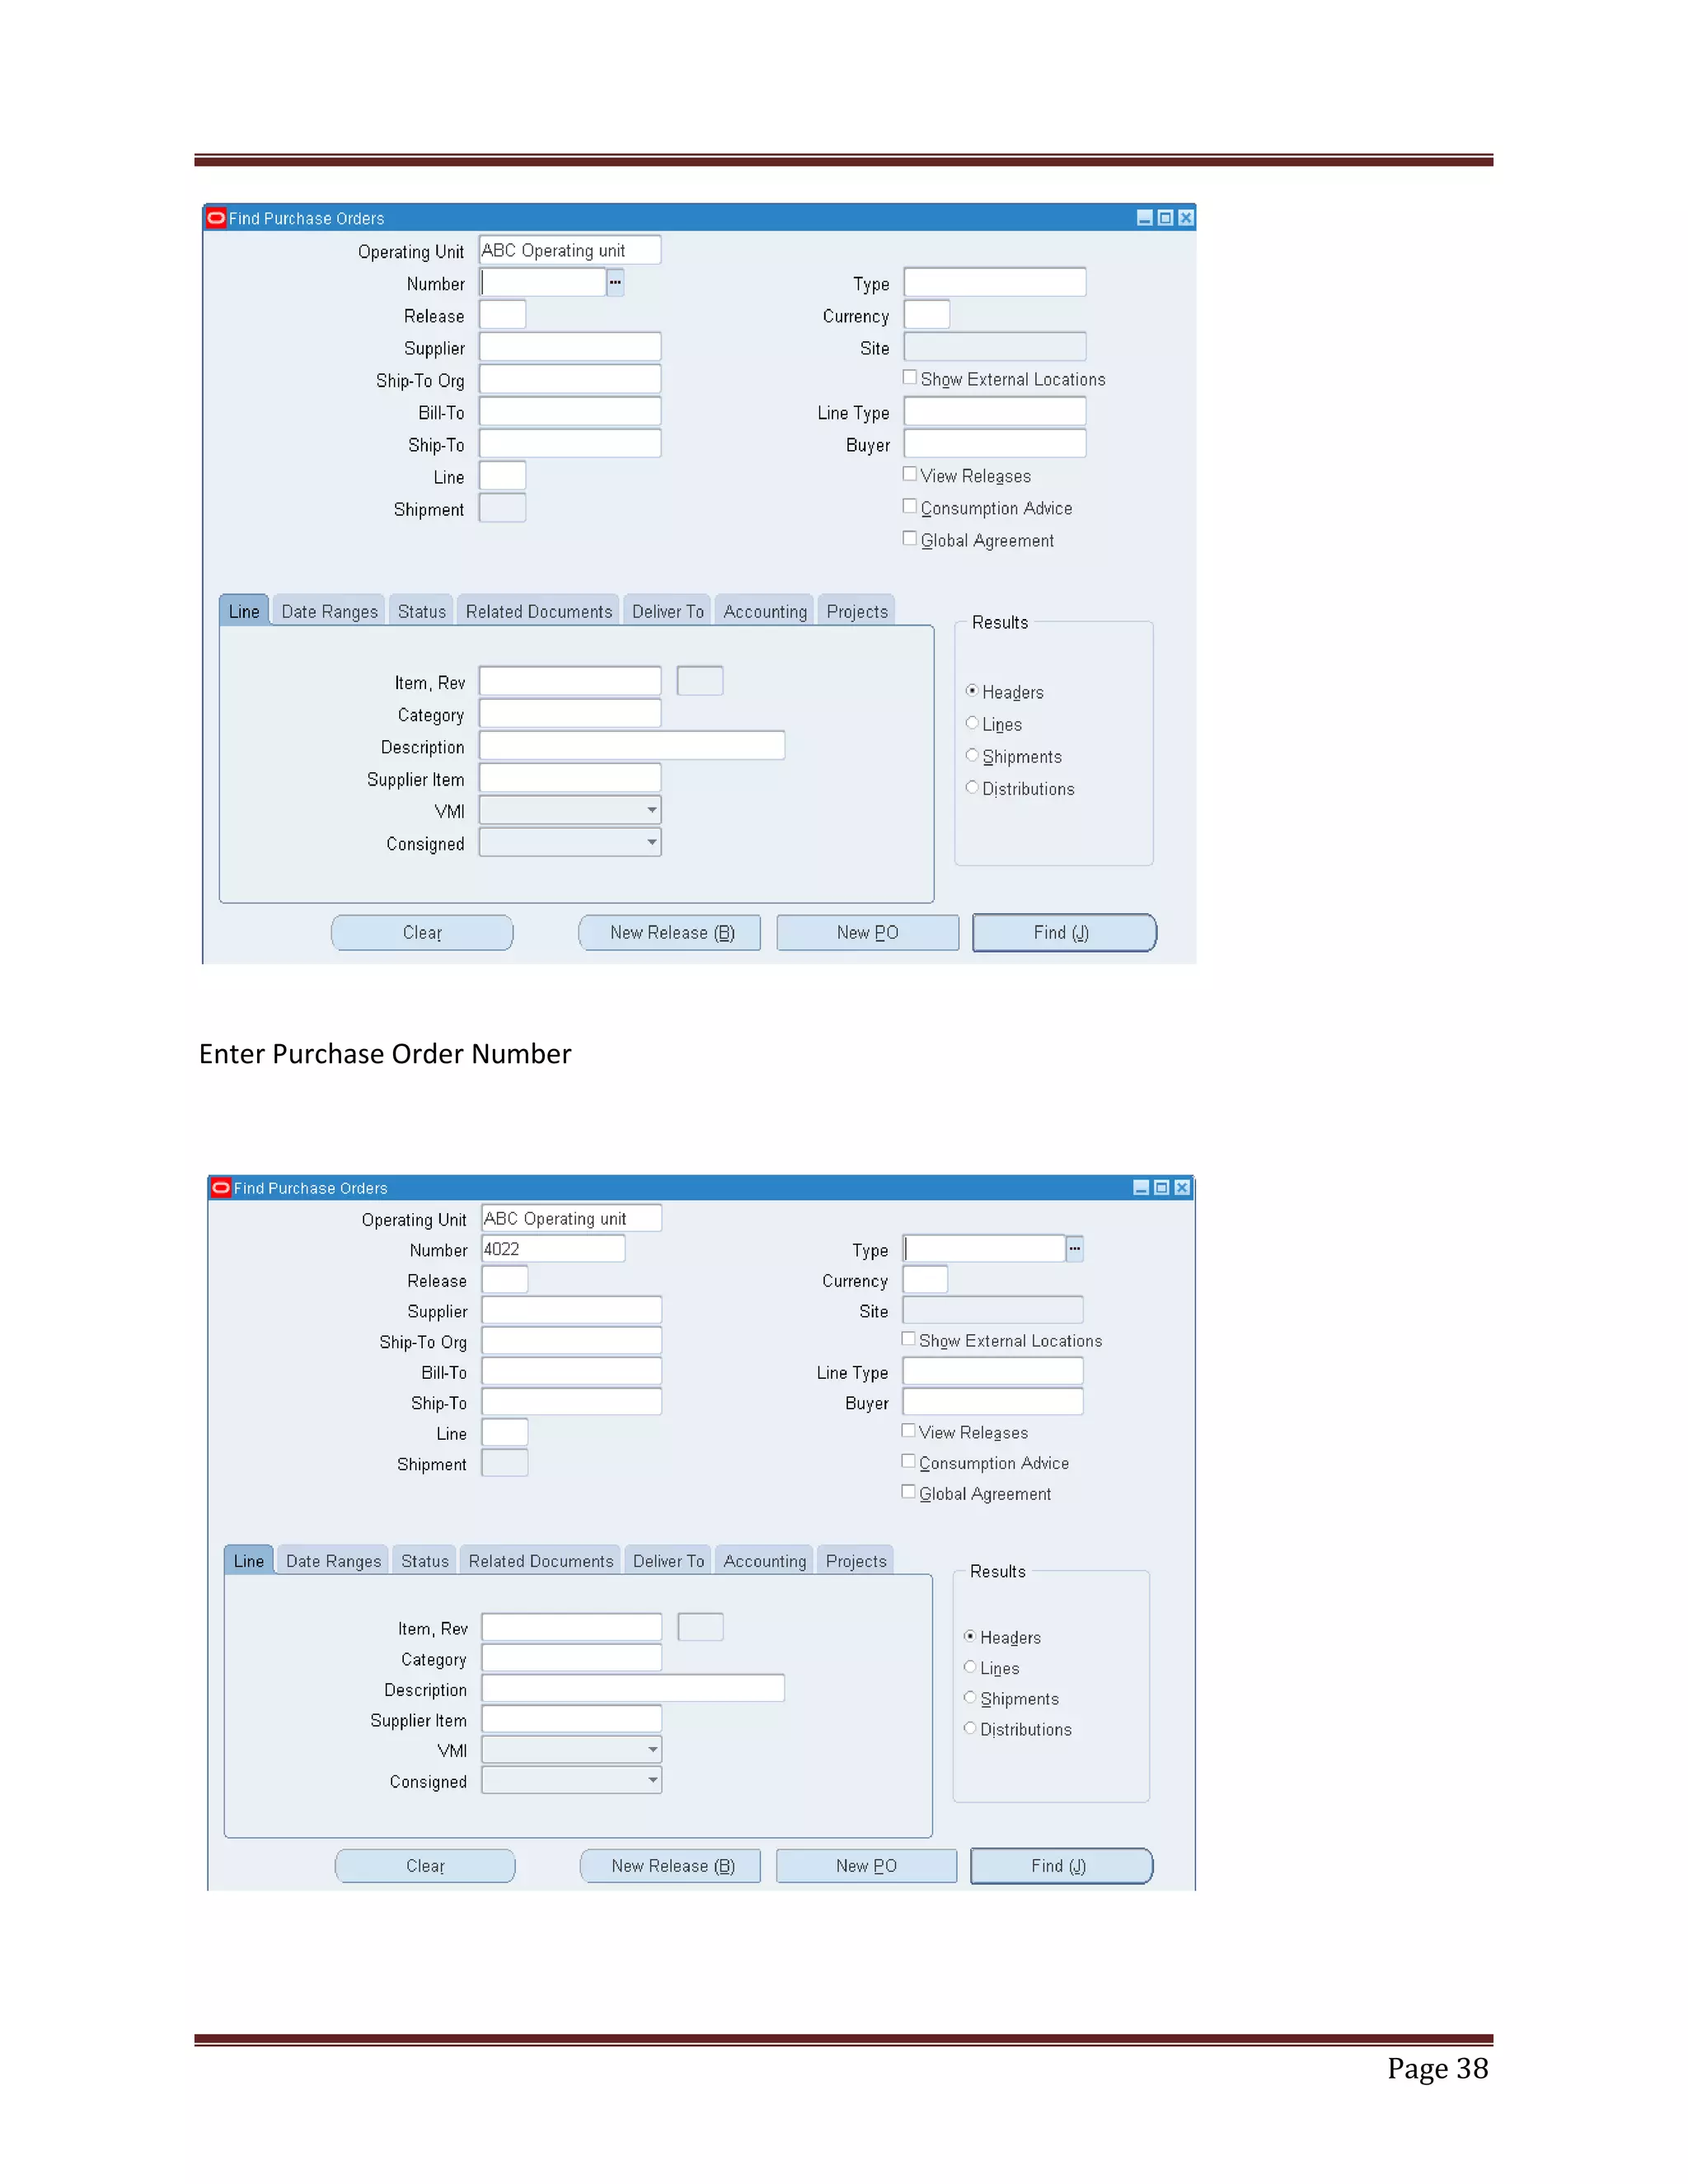
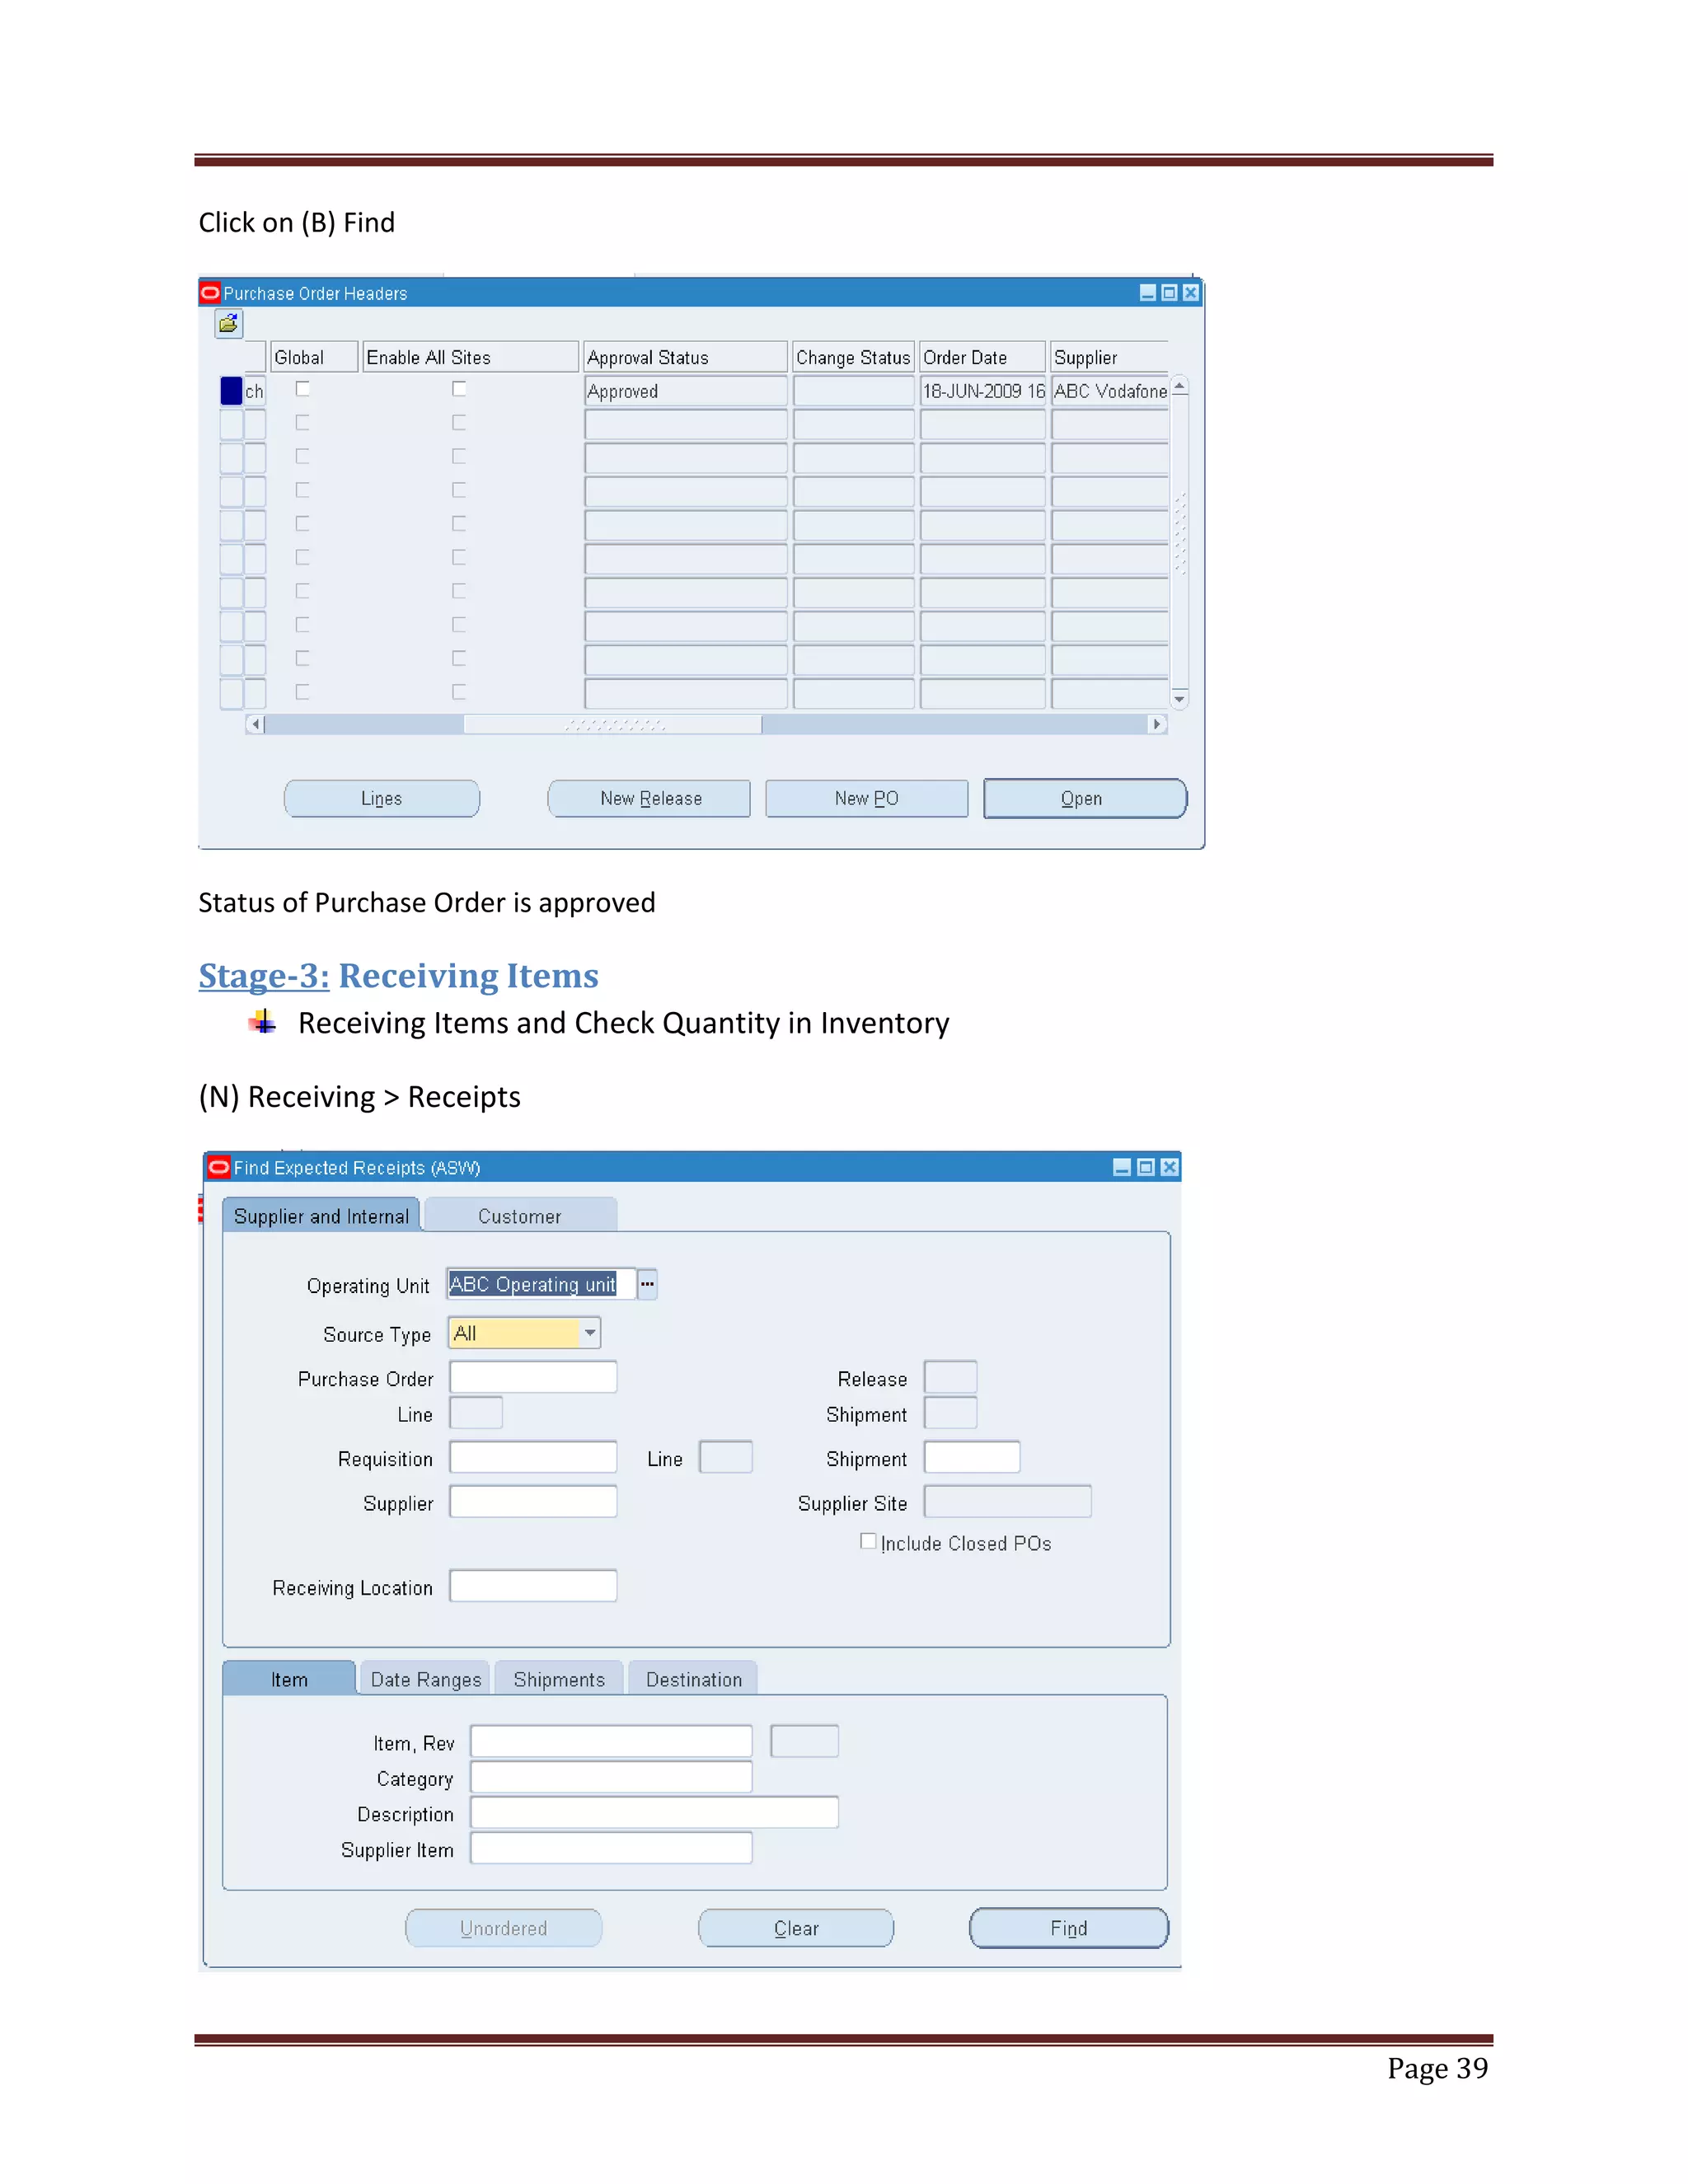
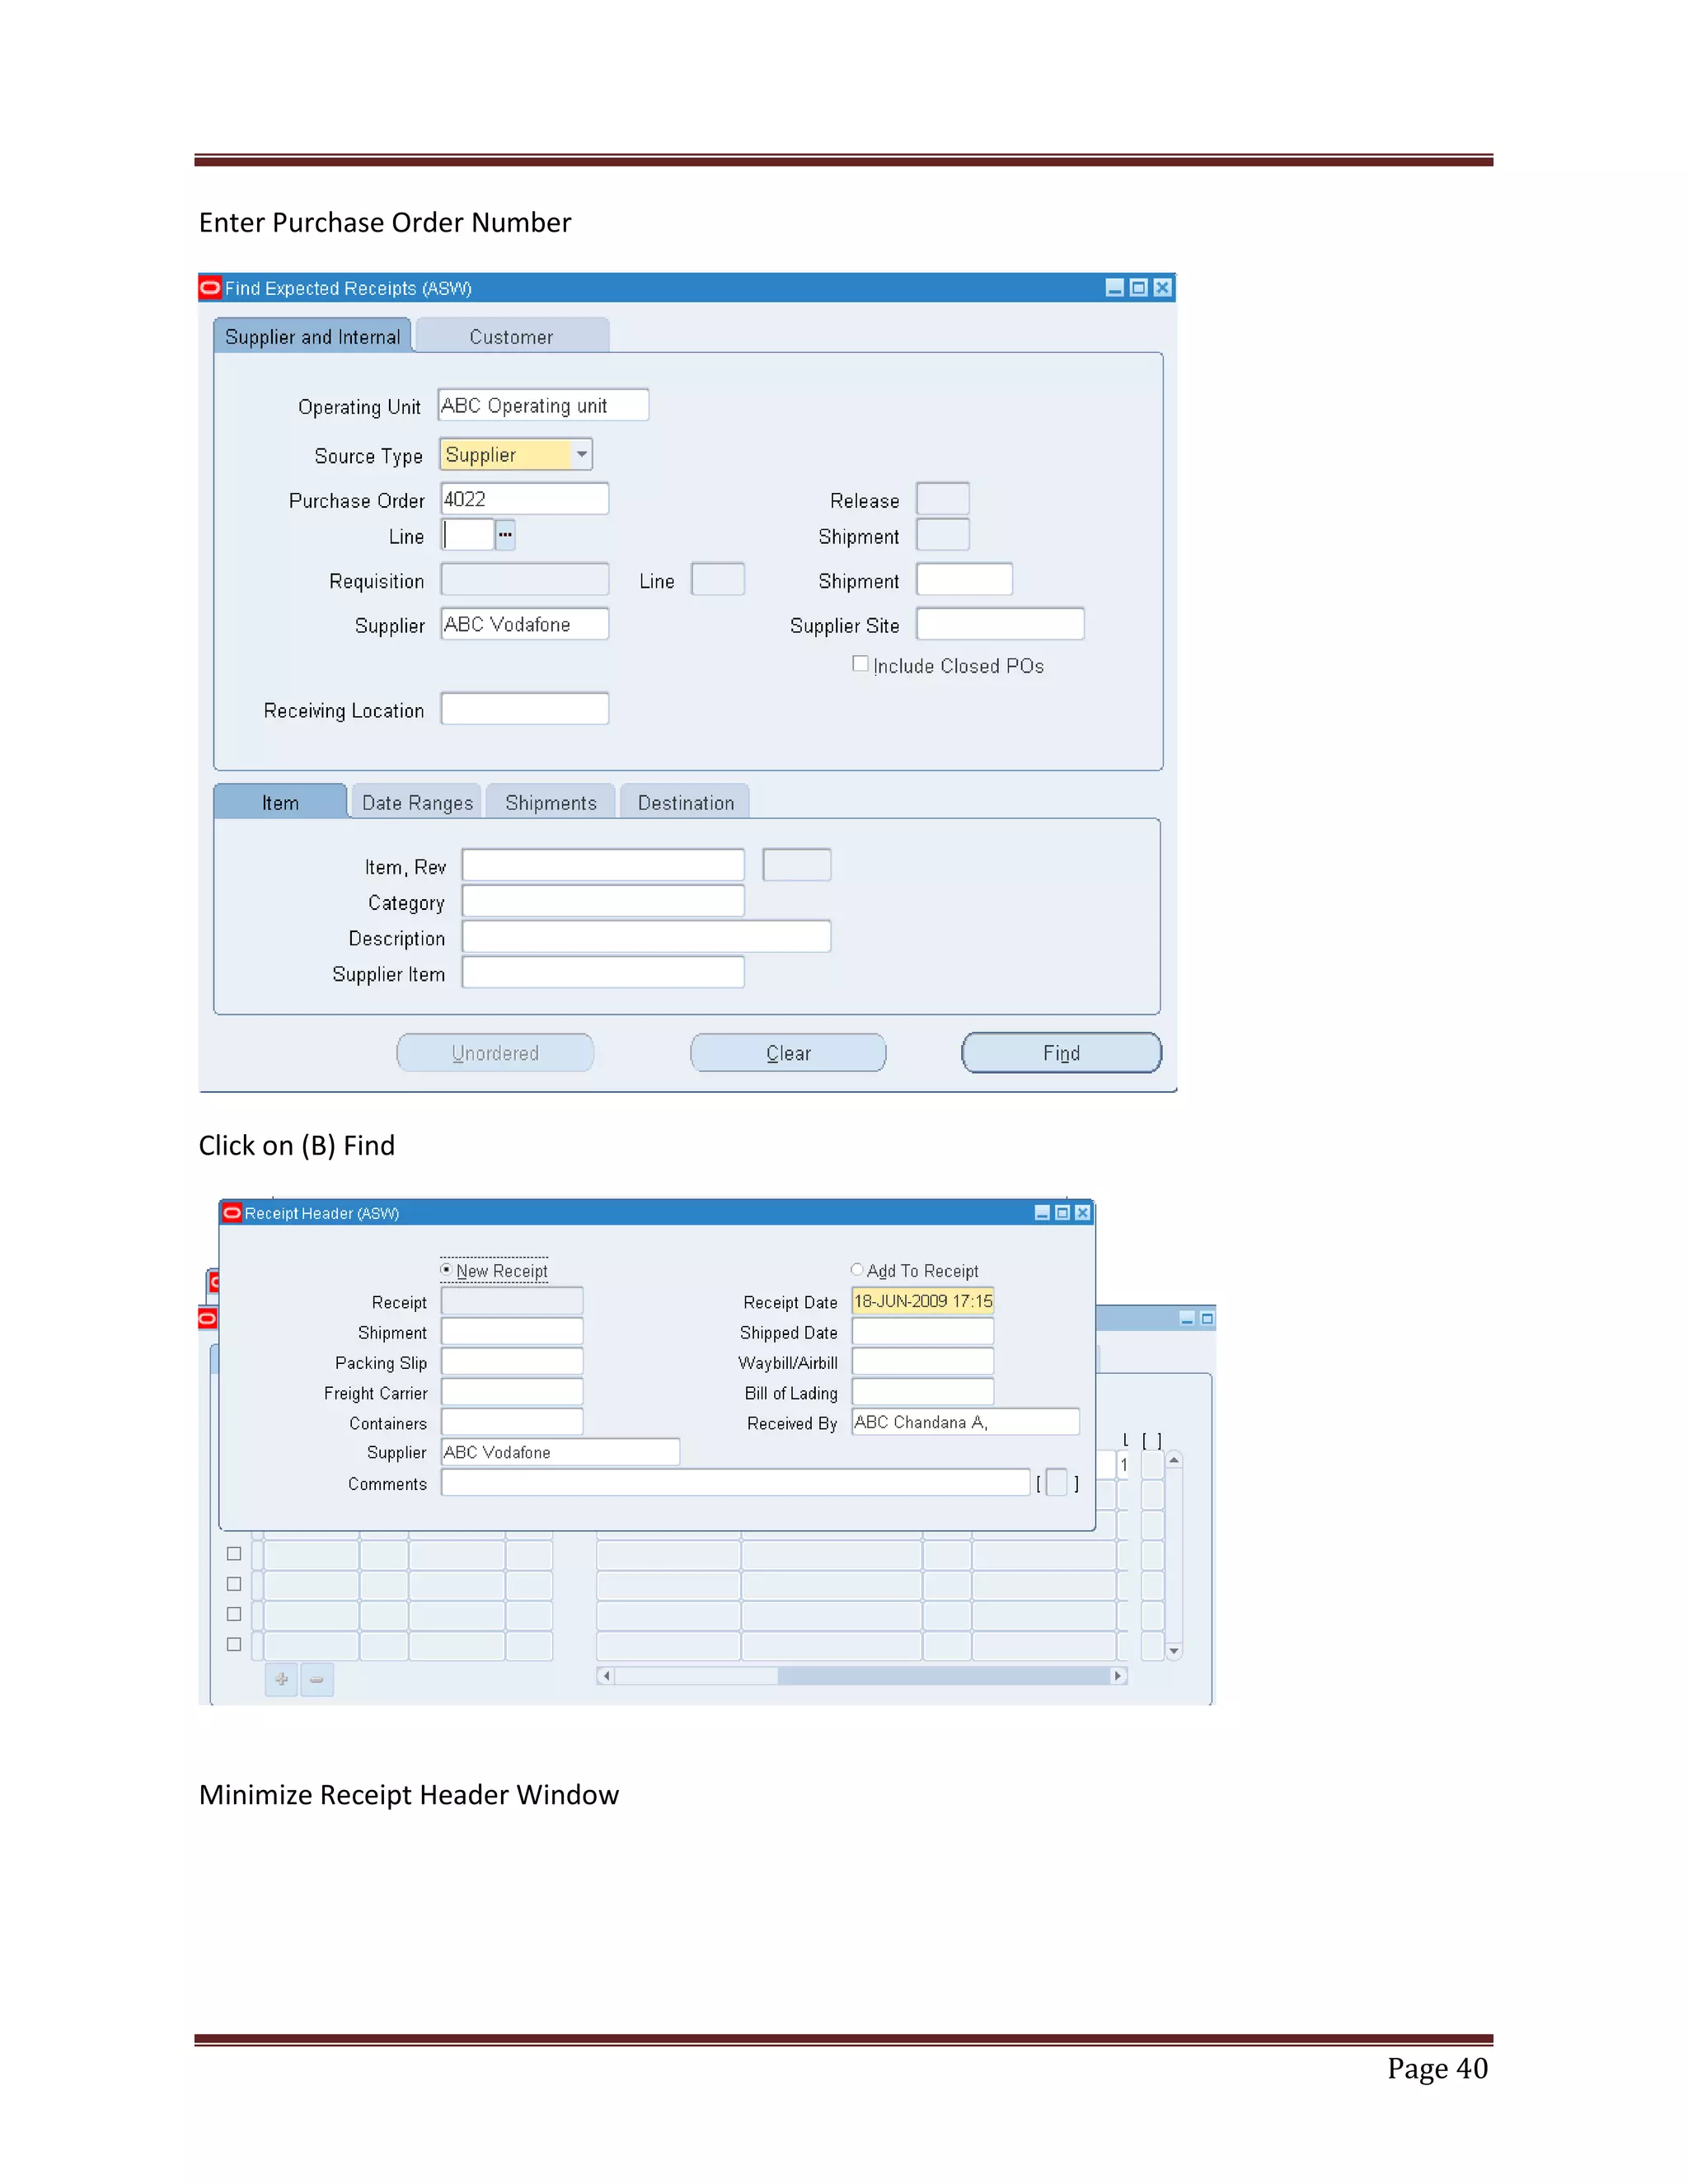
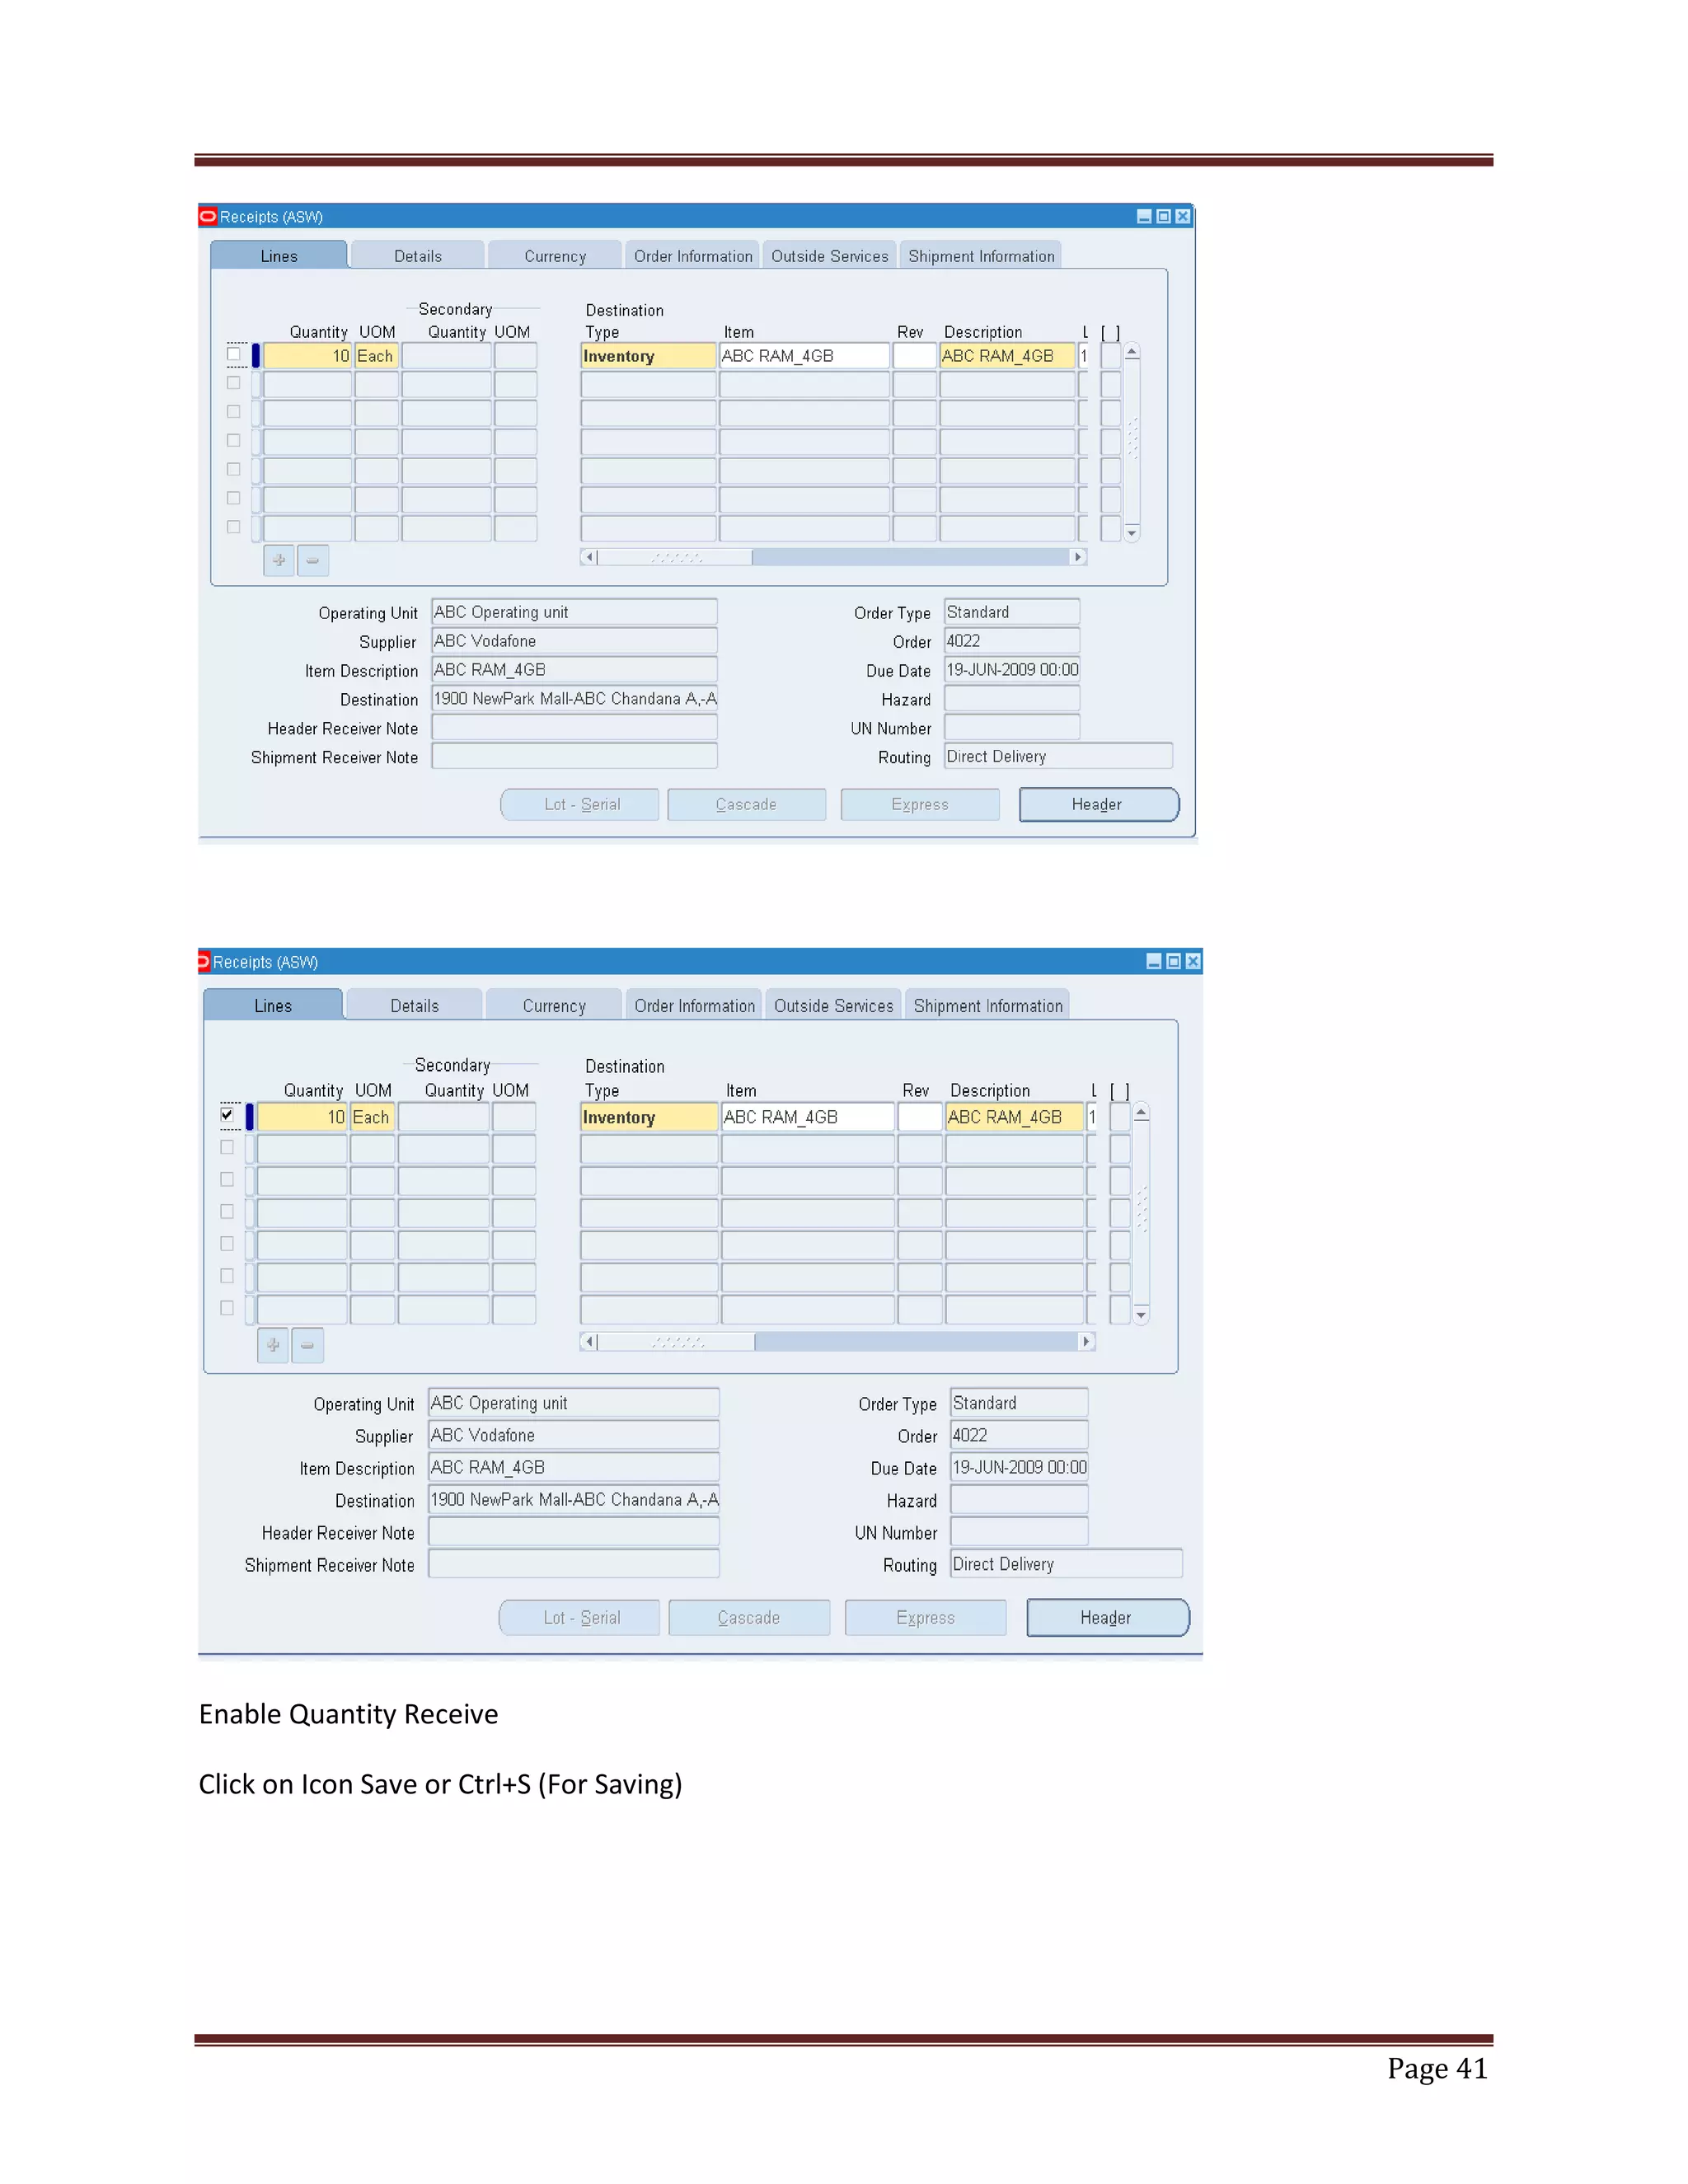
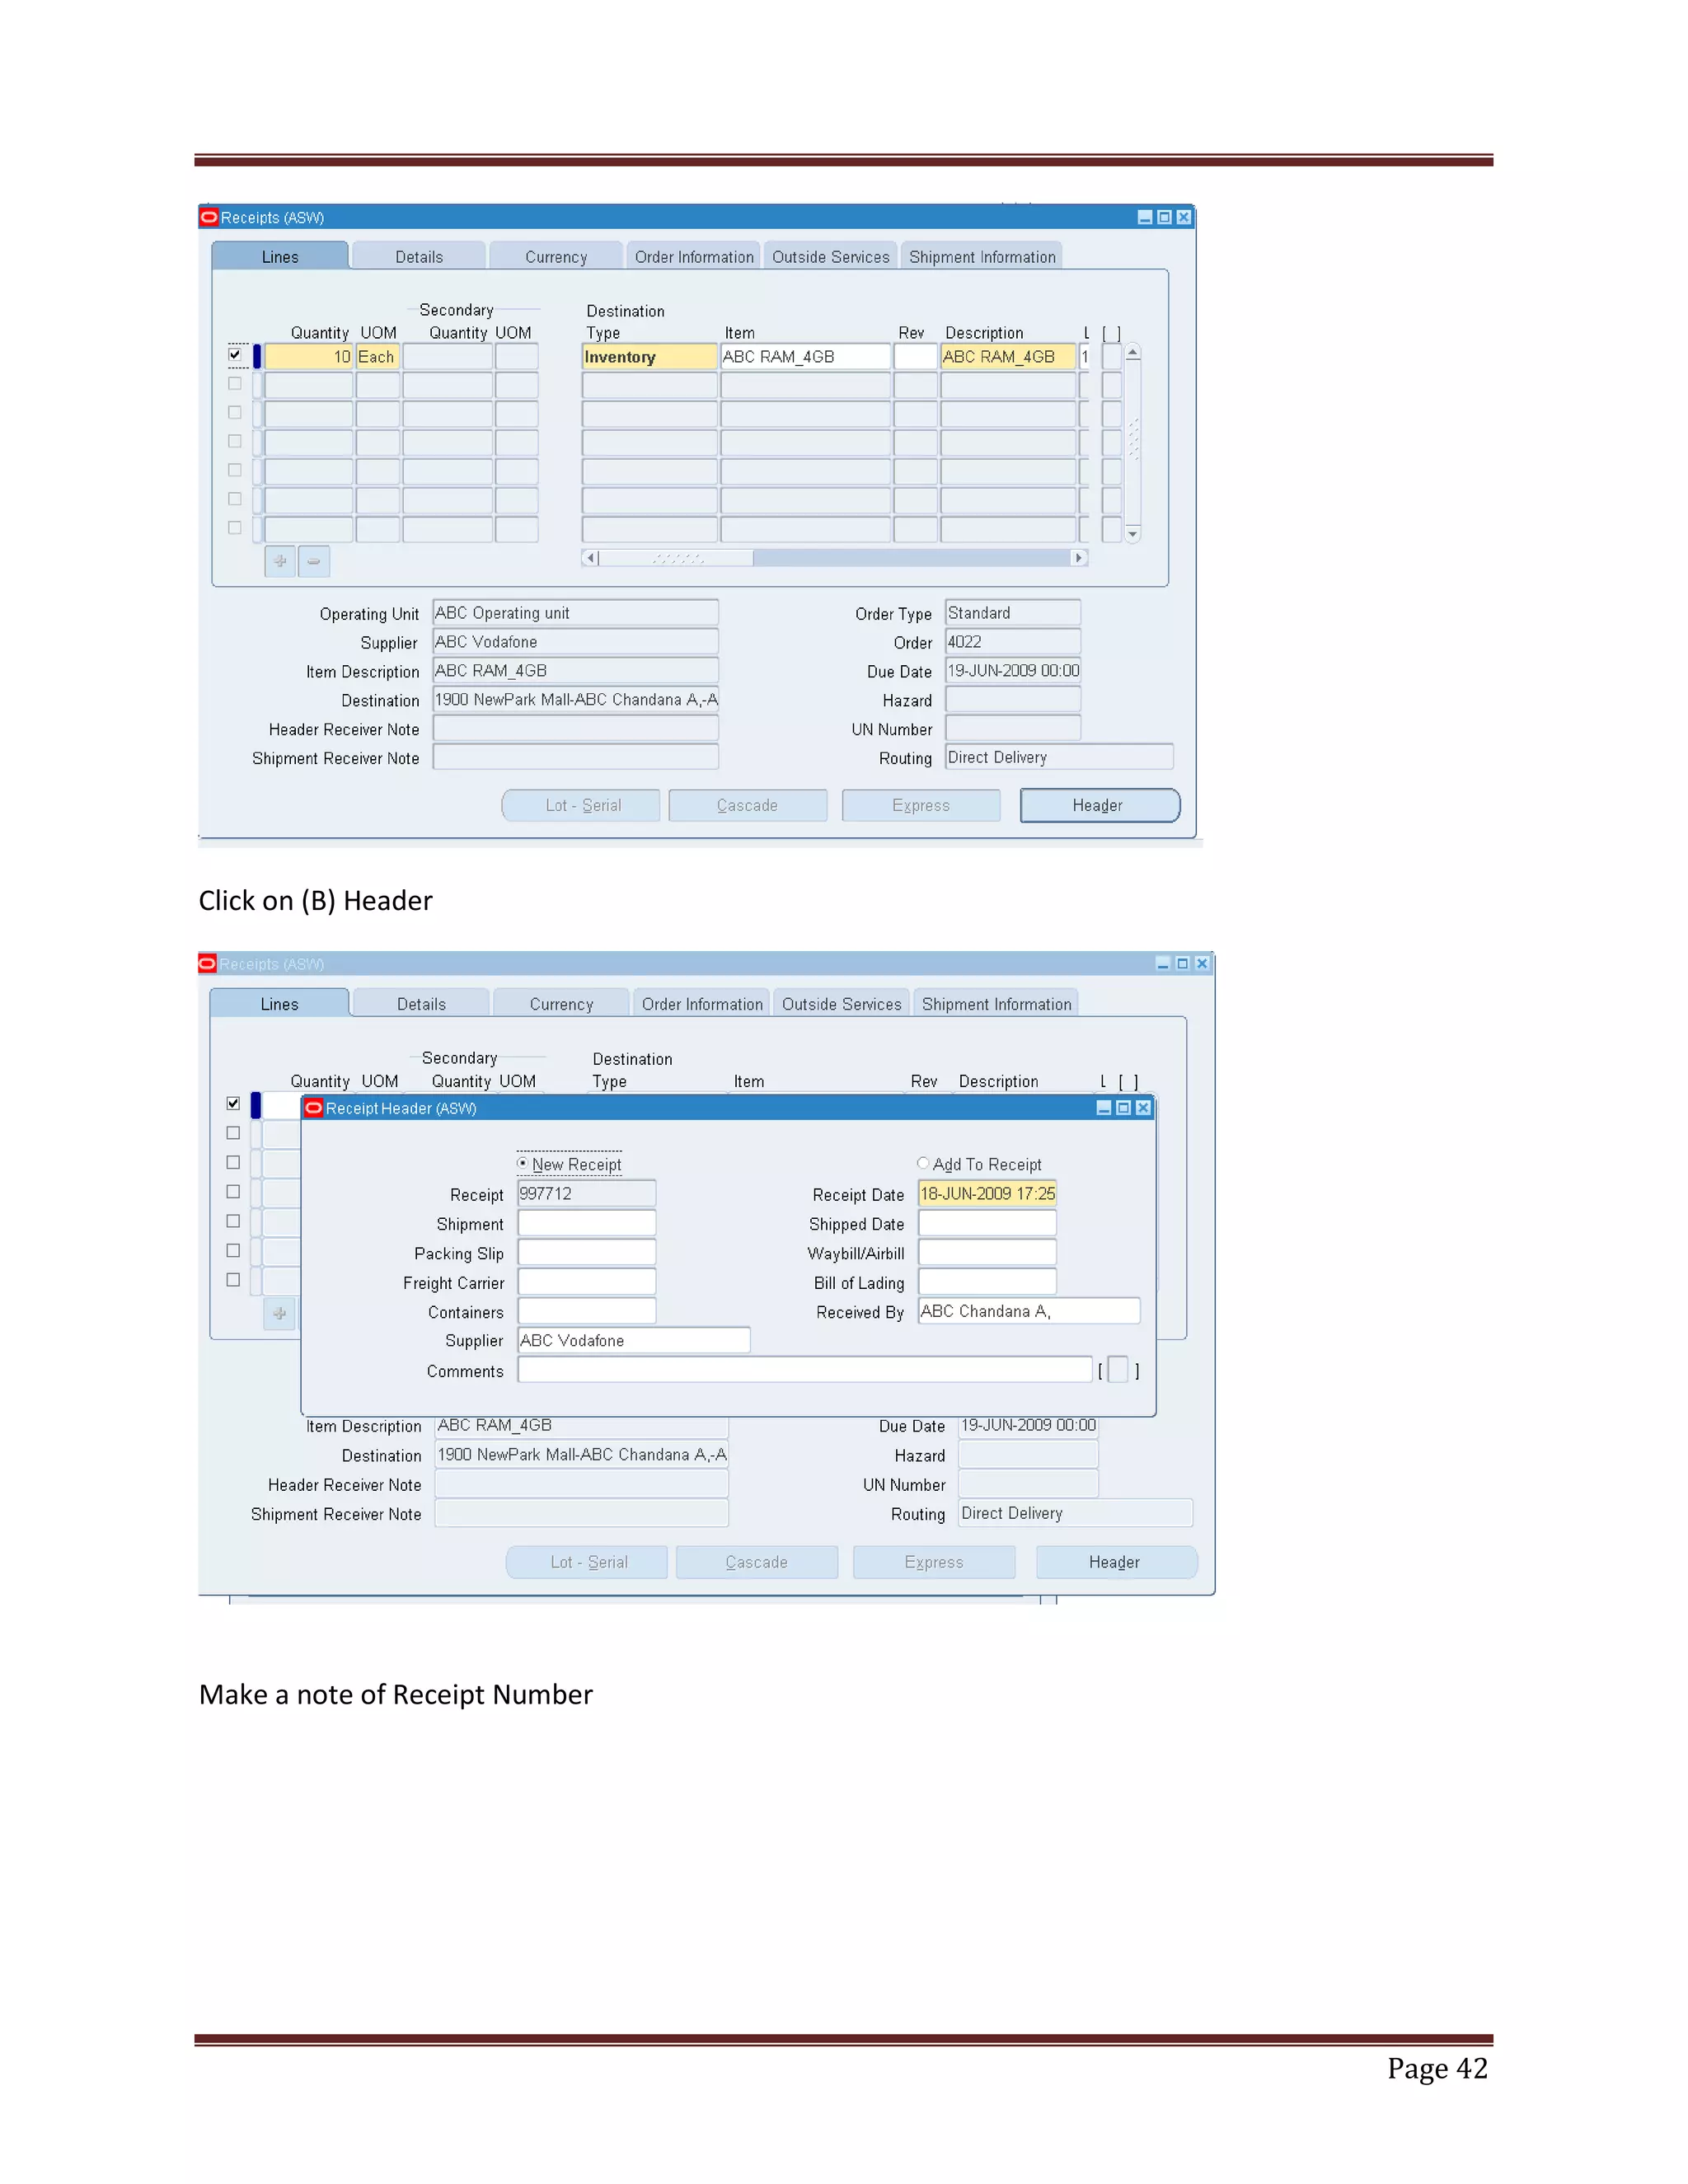
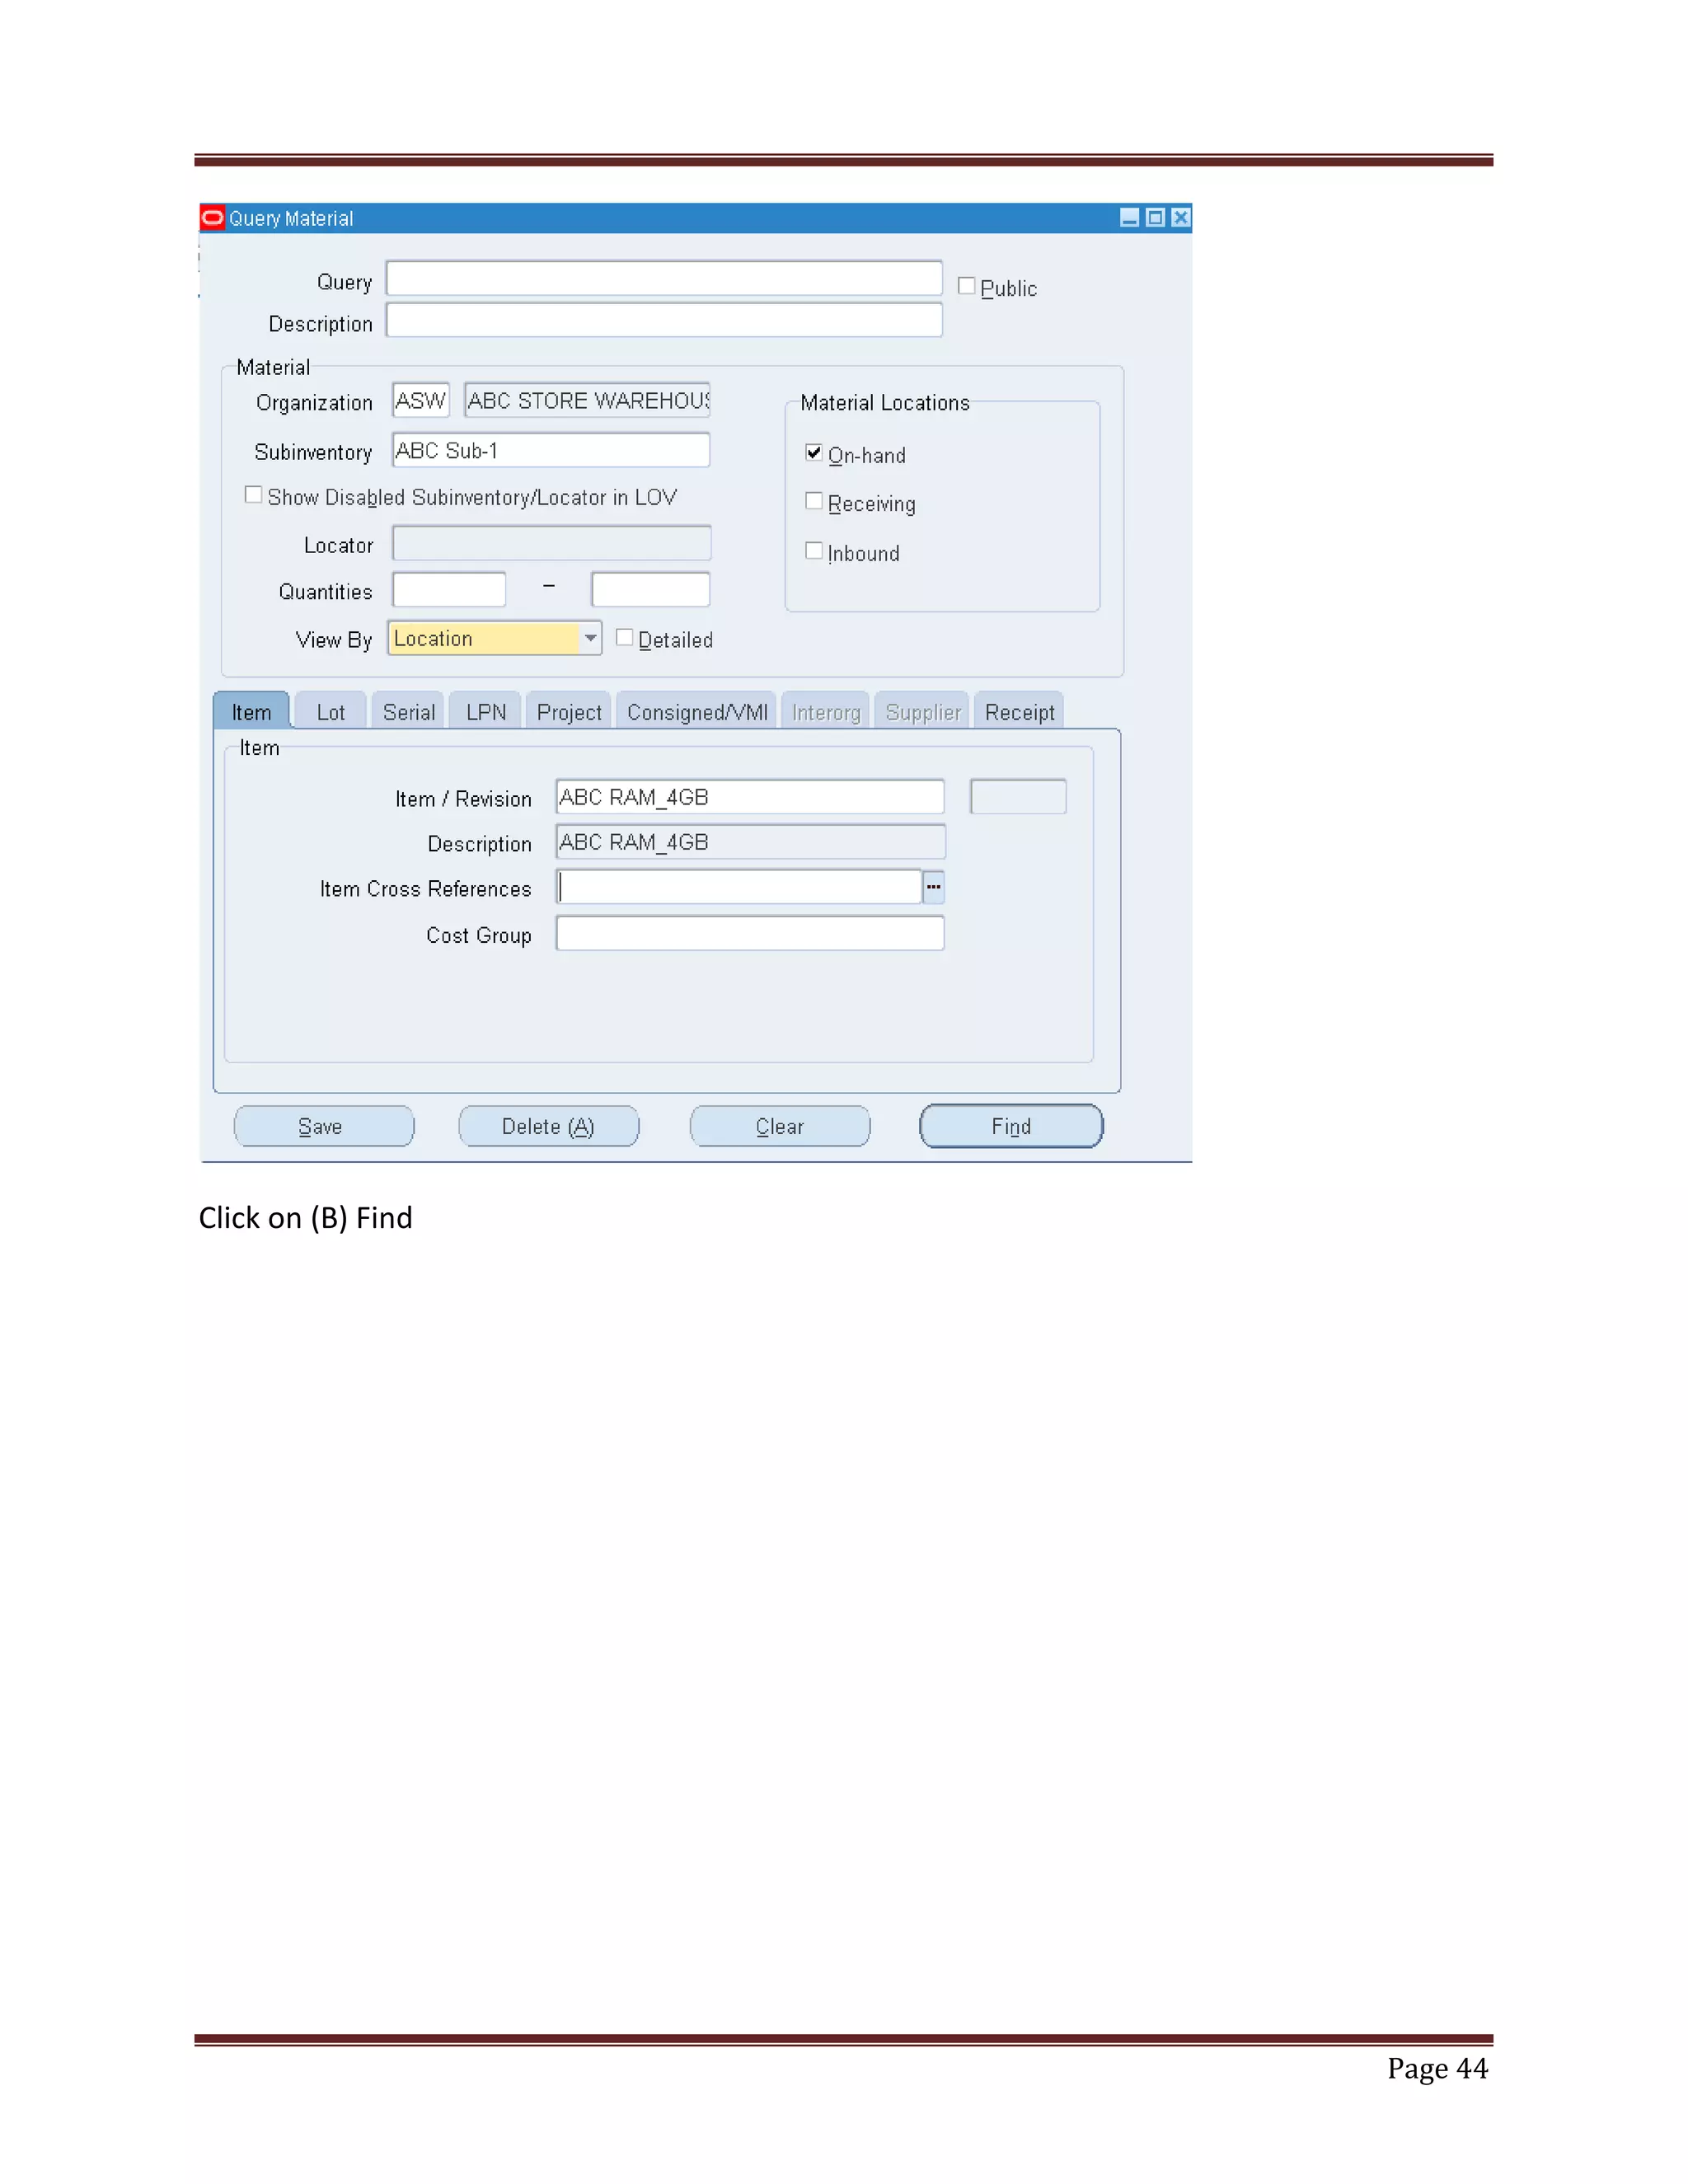
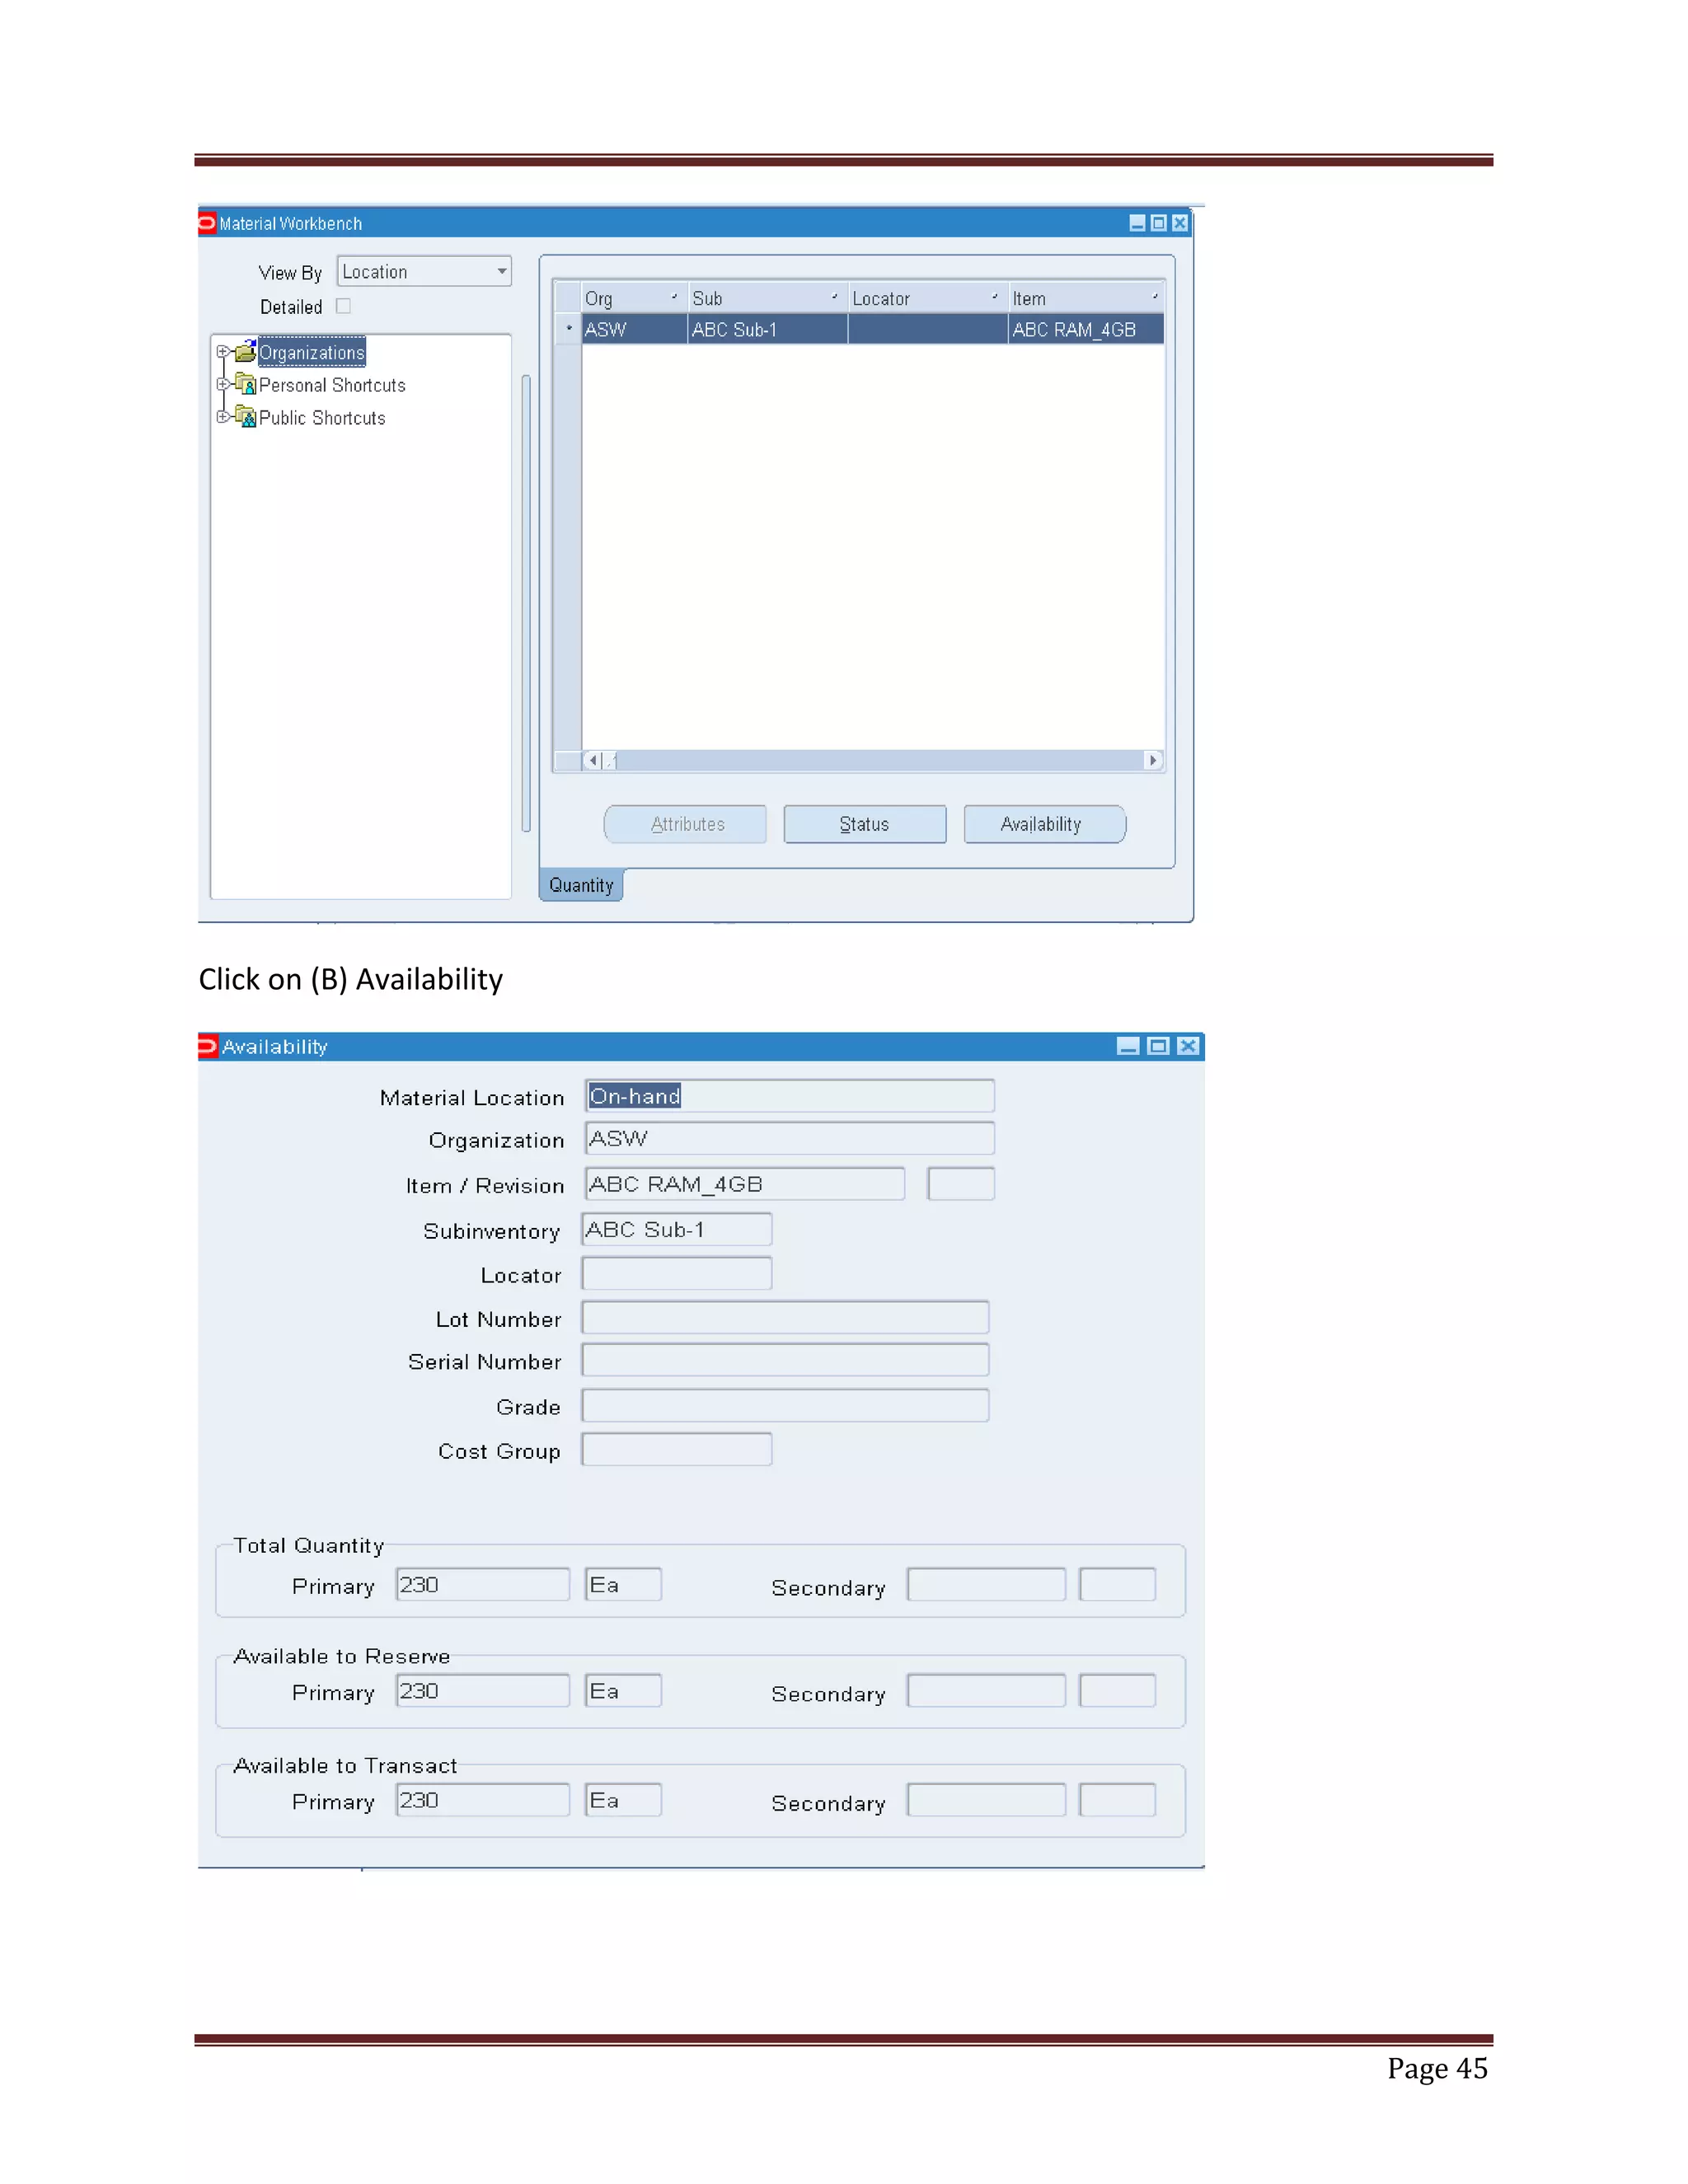
Steps to check item quantities in sub-inventory through the Inventory Module.Stages for creating and approving requisitions, leading to auto-generation of purchase orders.Procedures to receive items and verify quantities post-receipt in inventory.
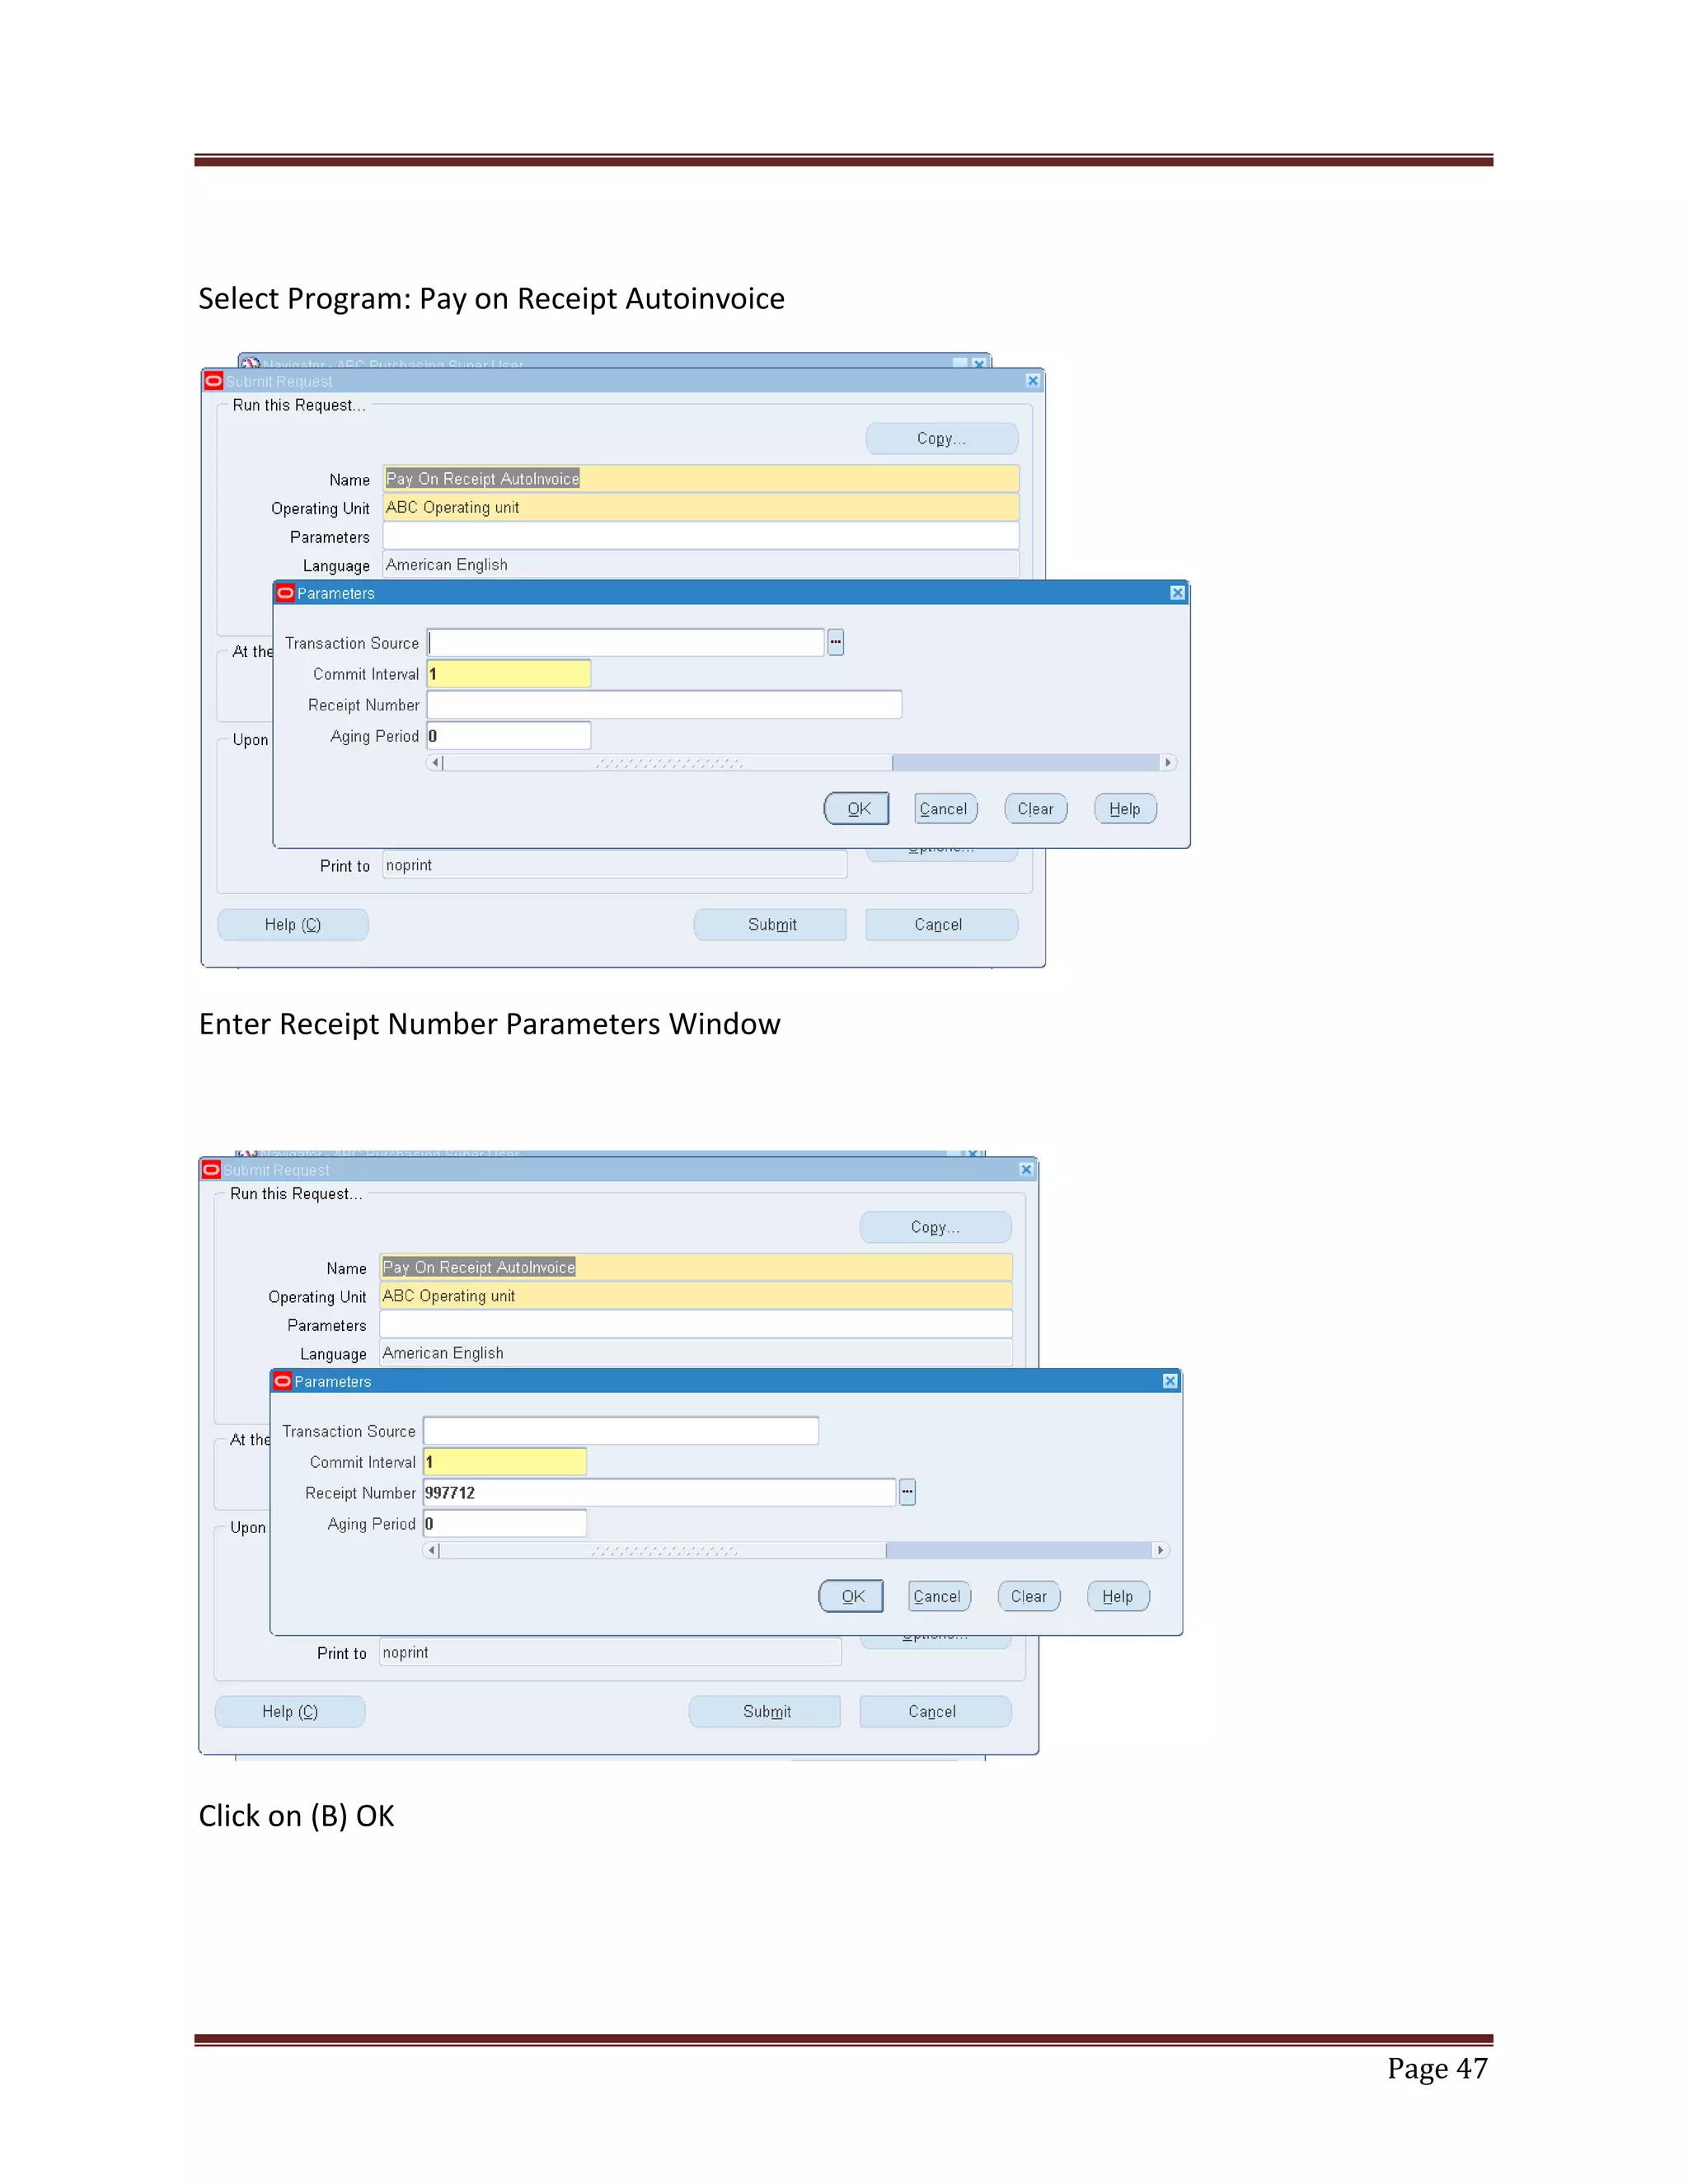
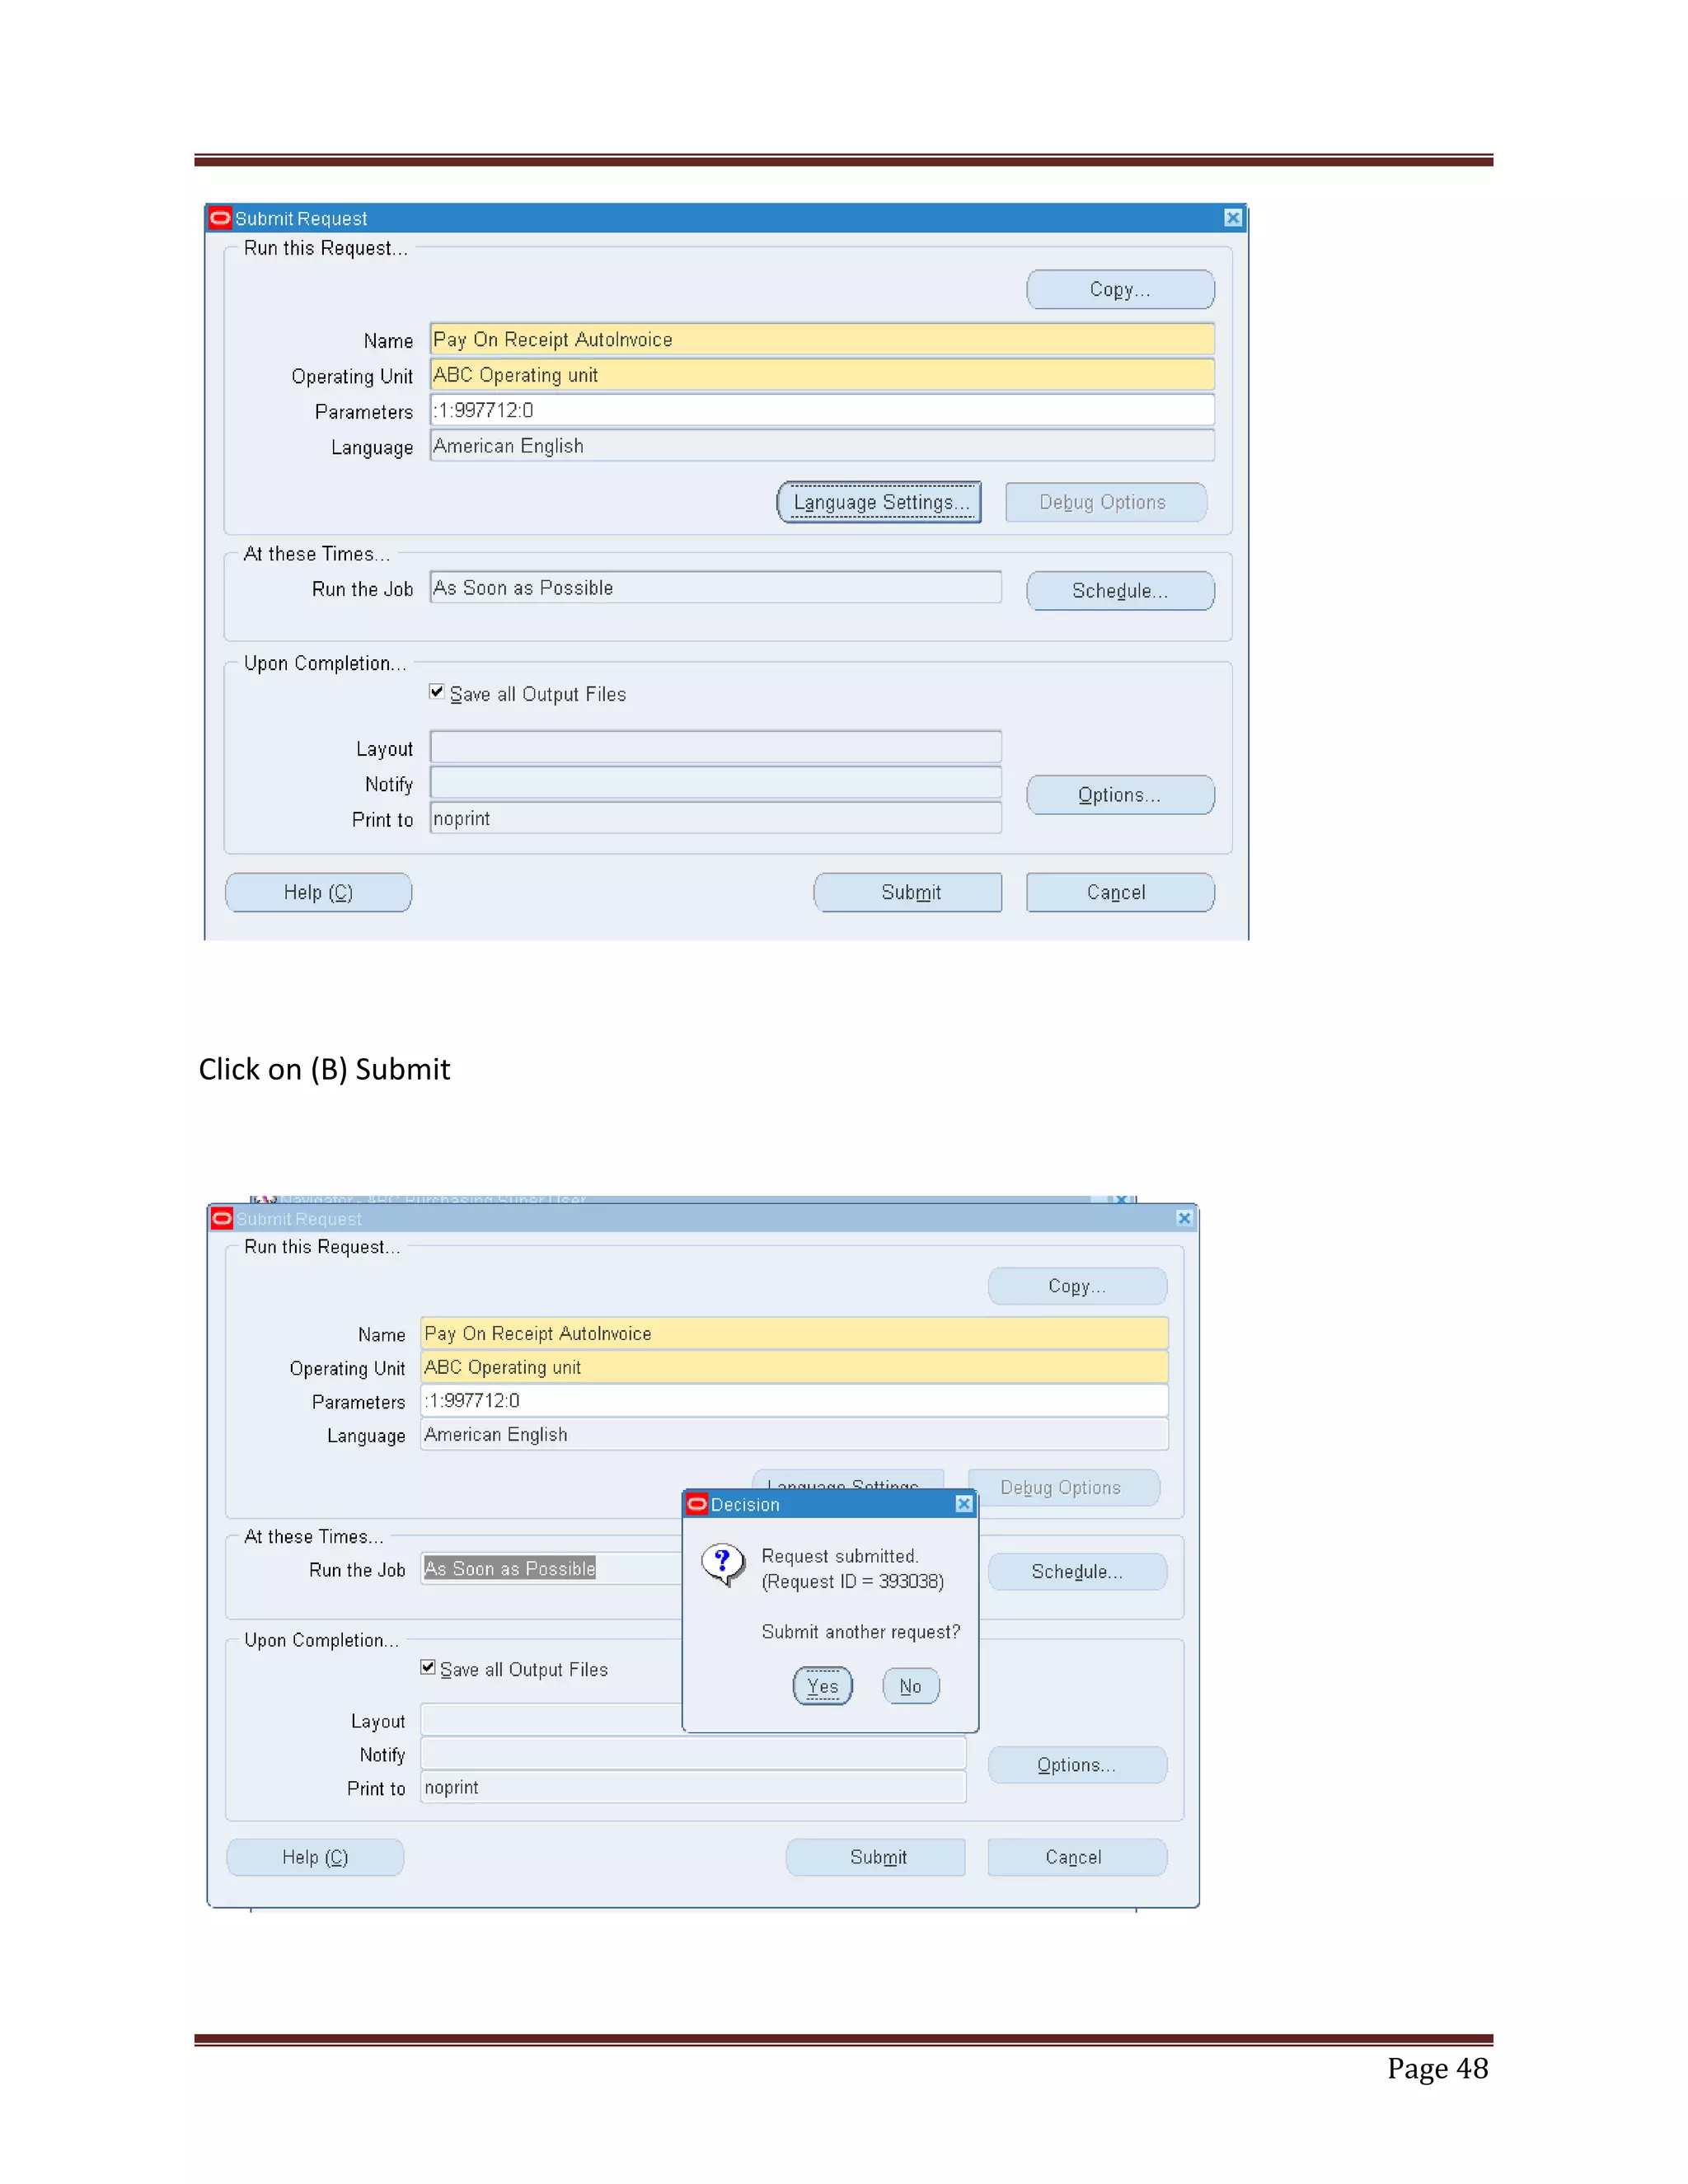
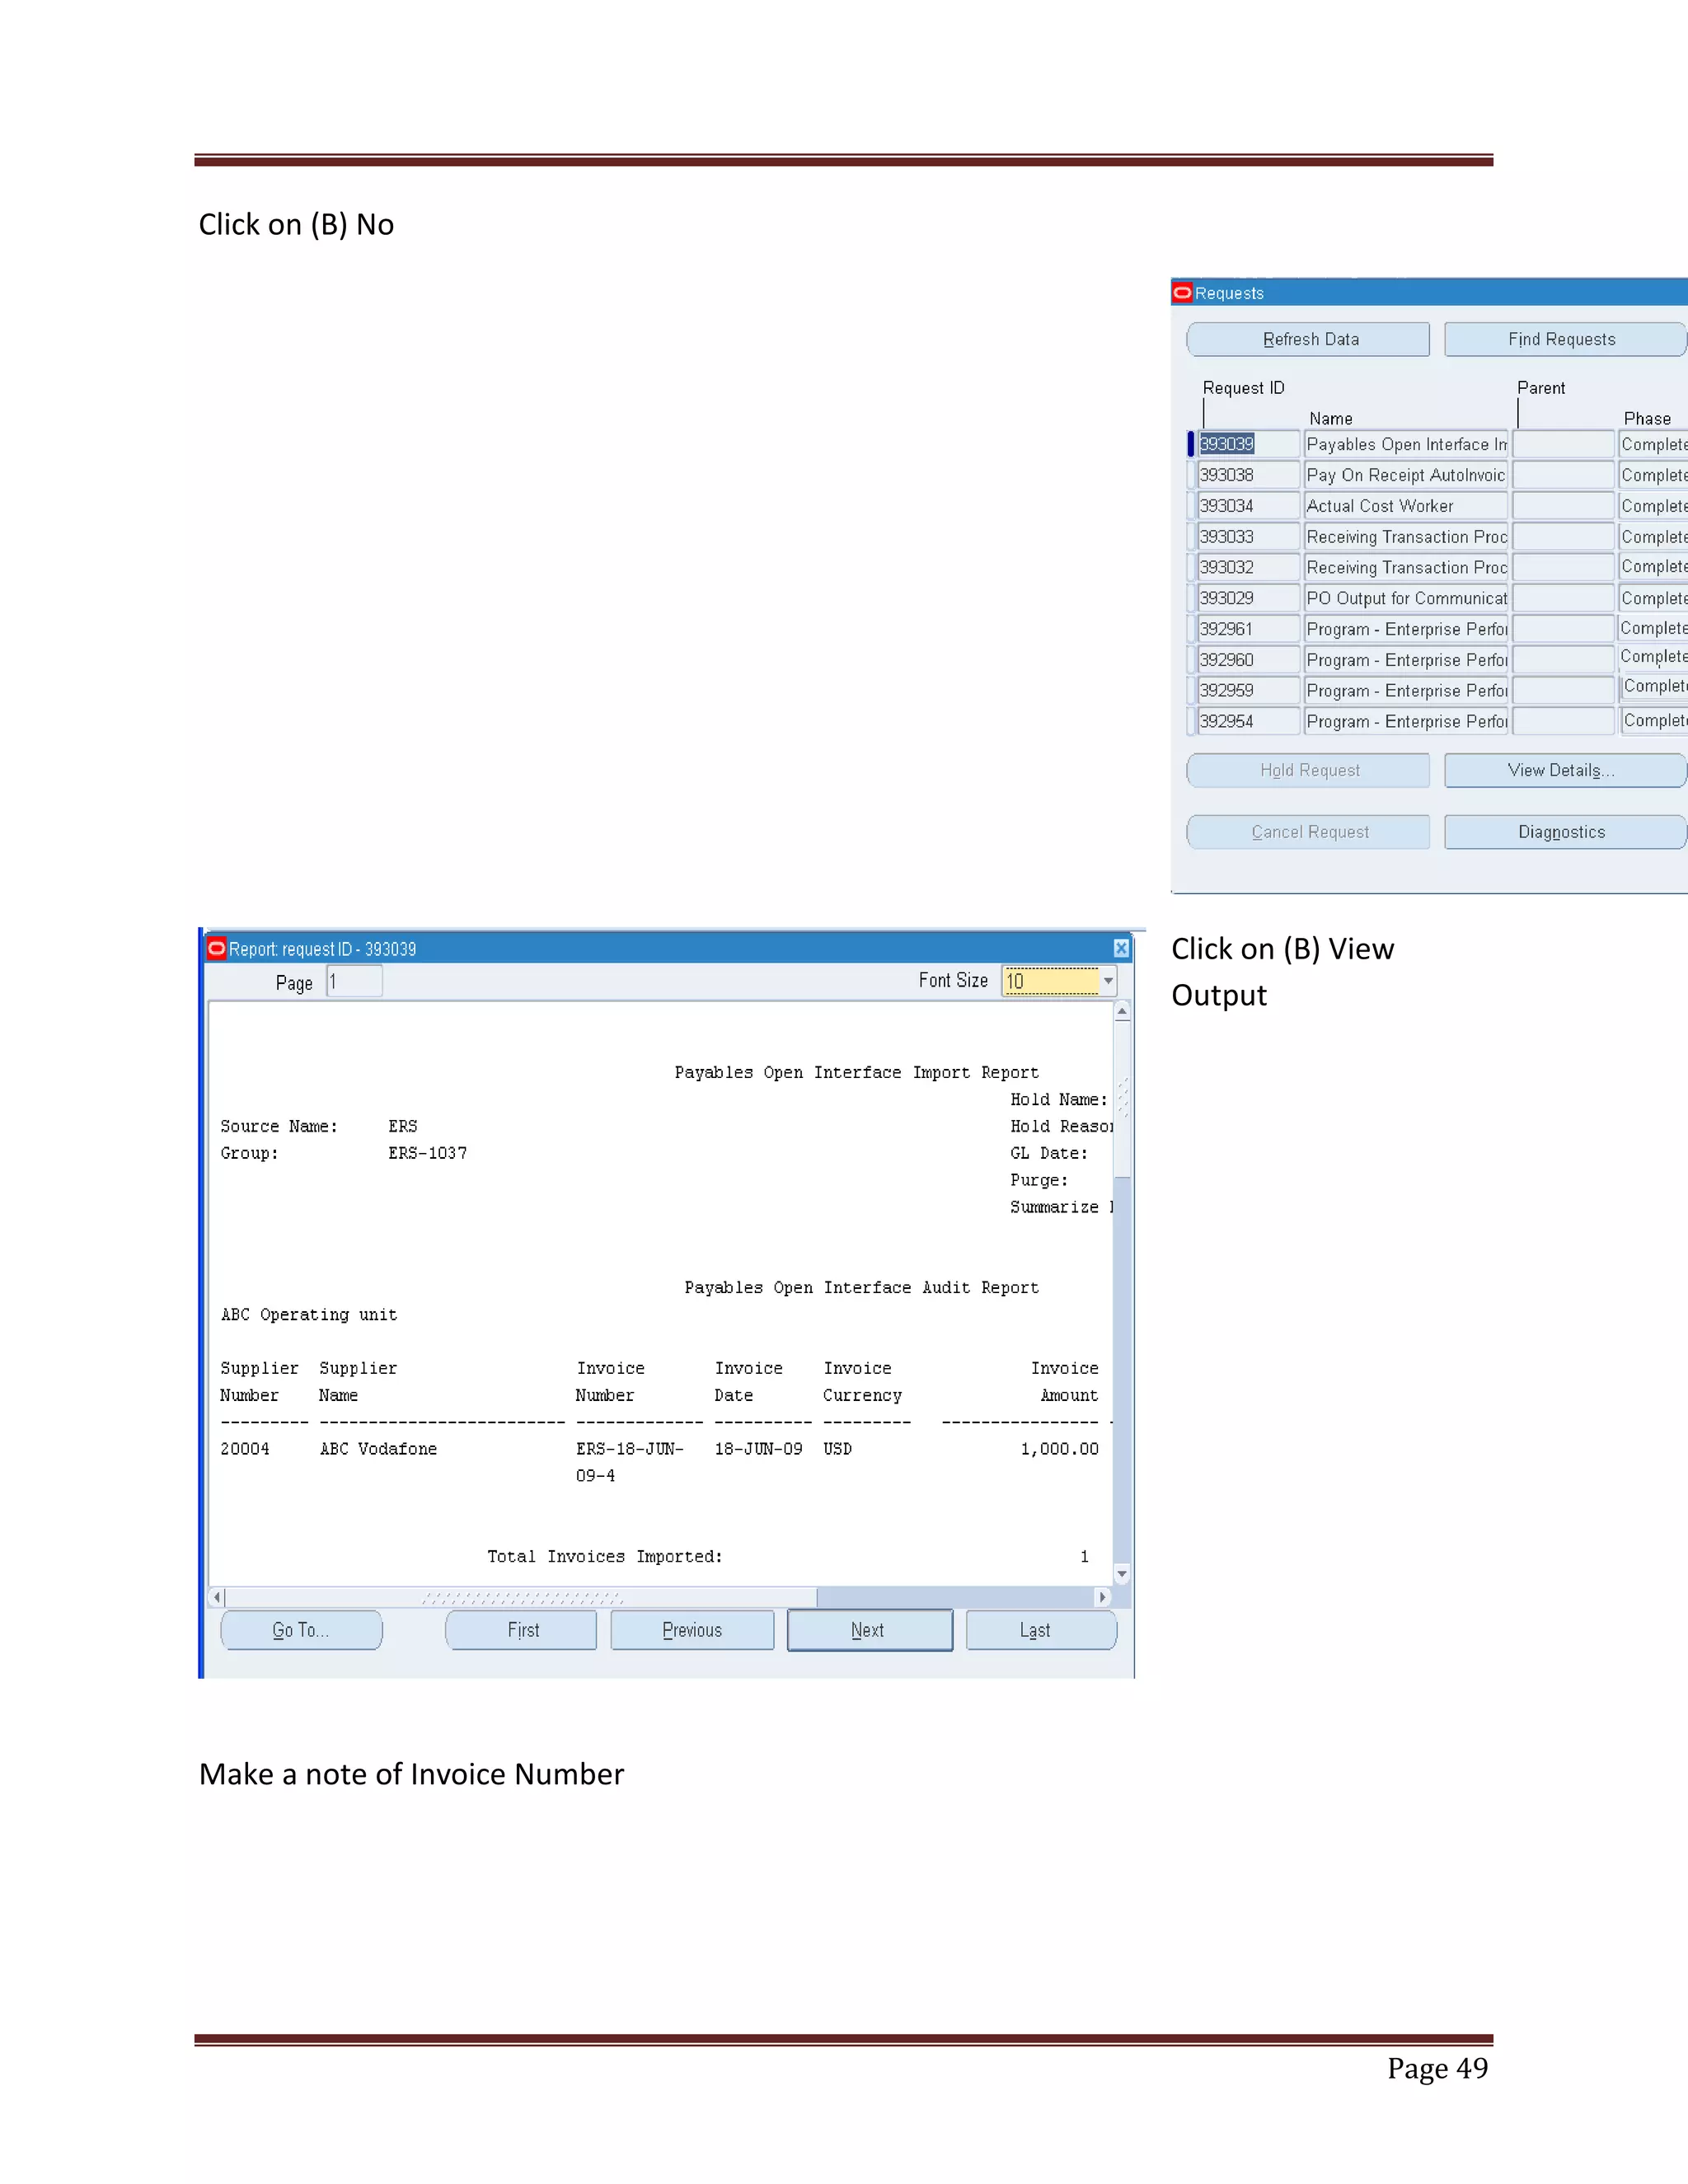
Steps to run auto invoice programs after receipt confirmation and create invoice numbers.
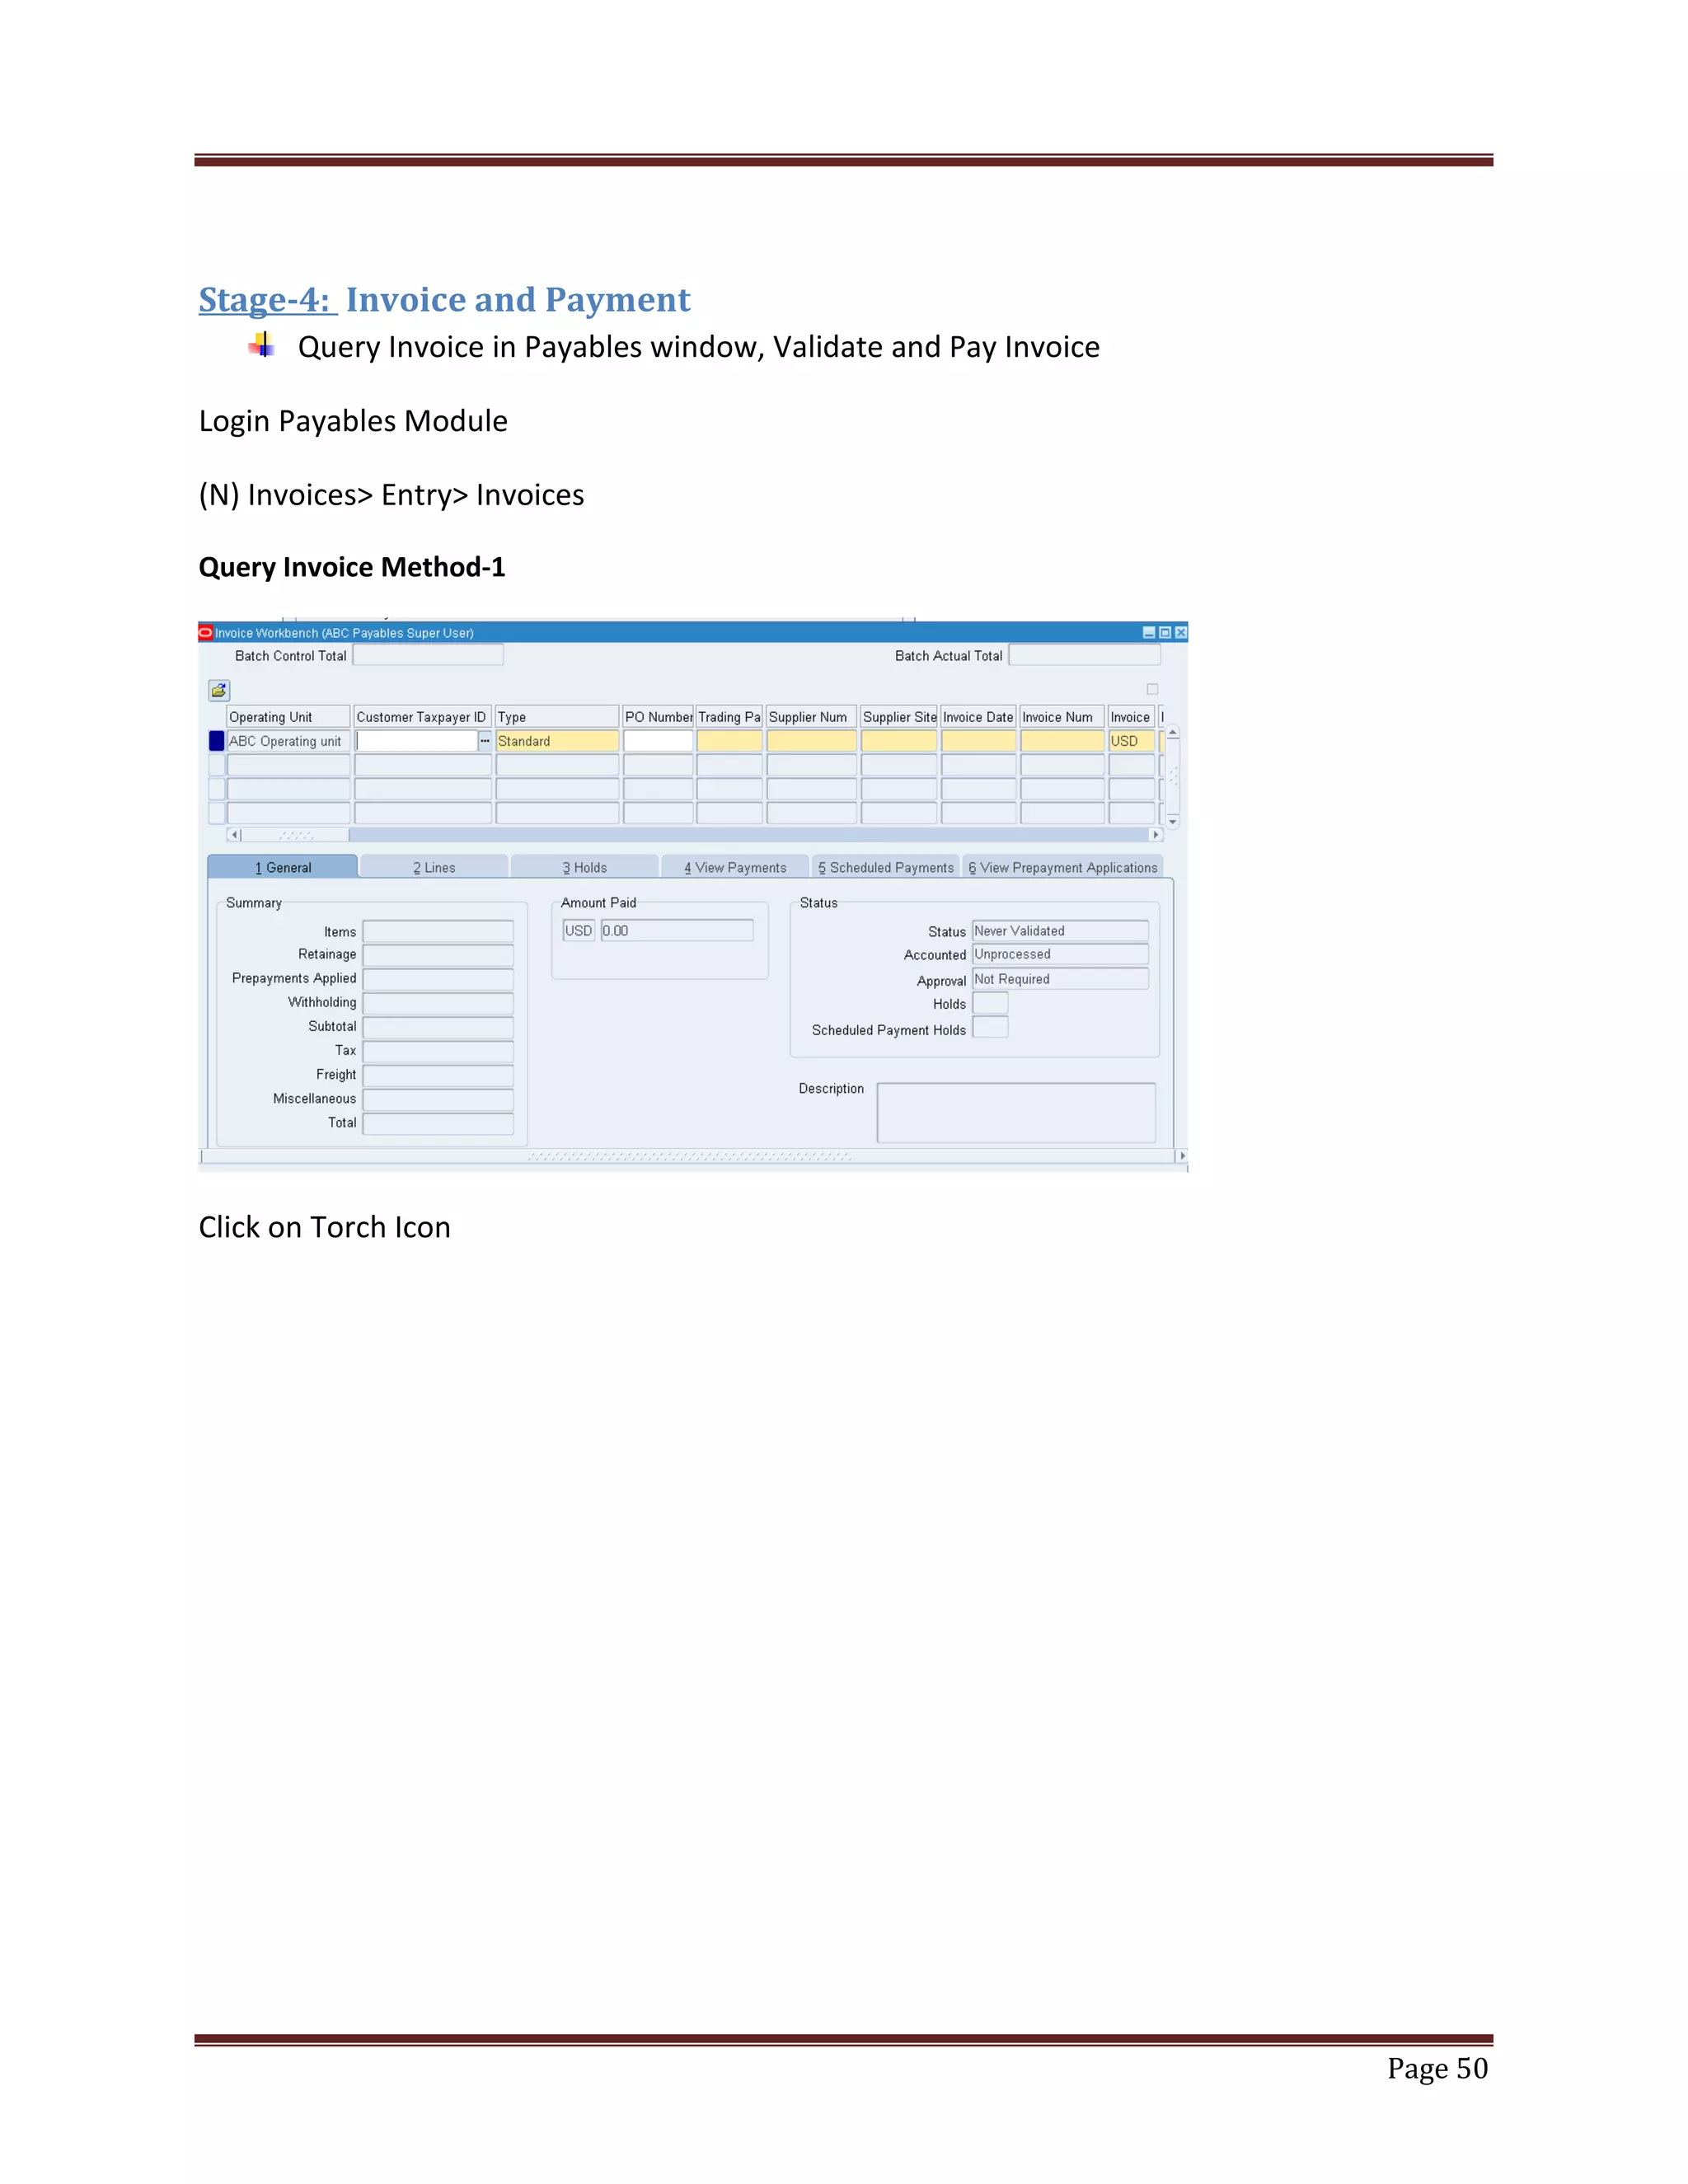
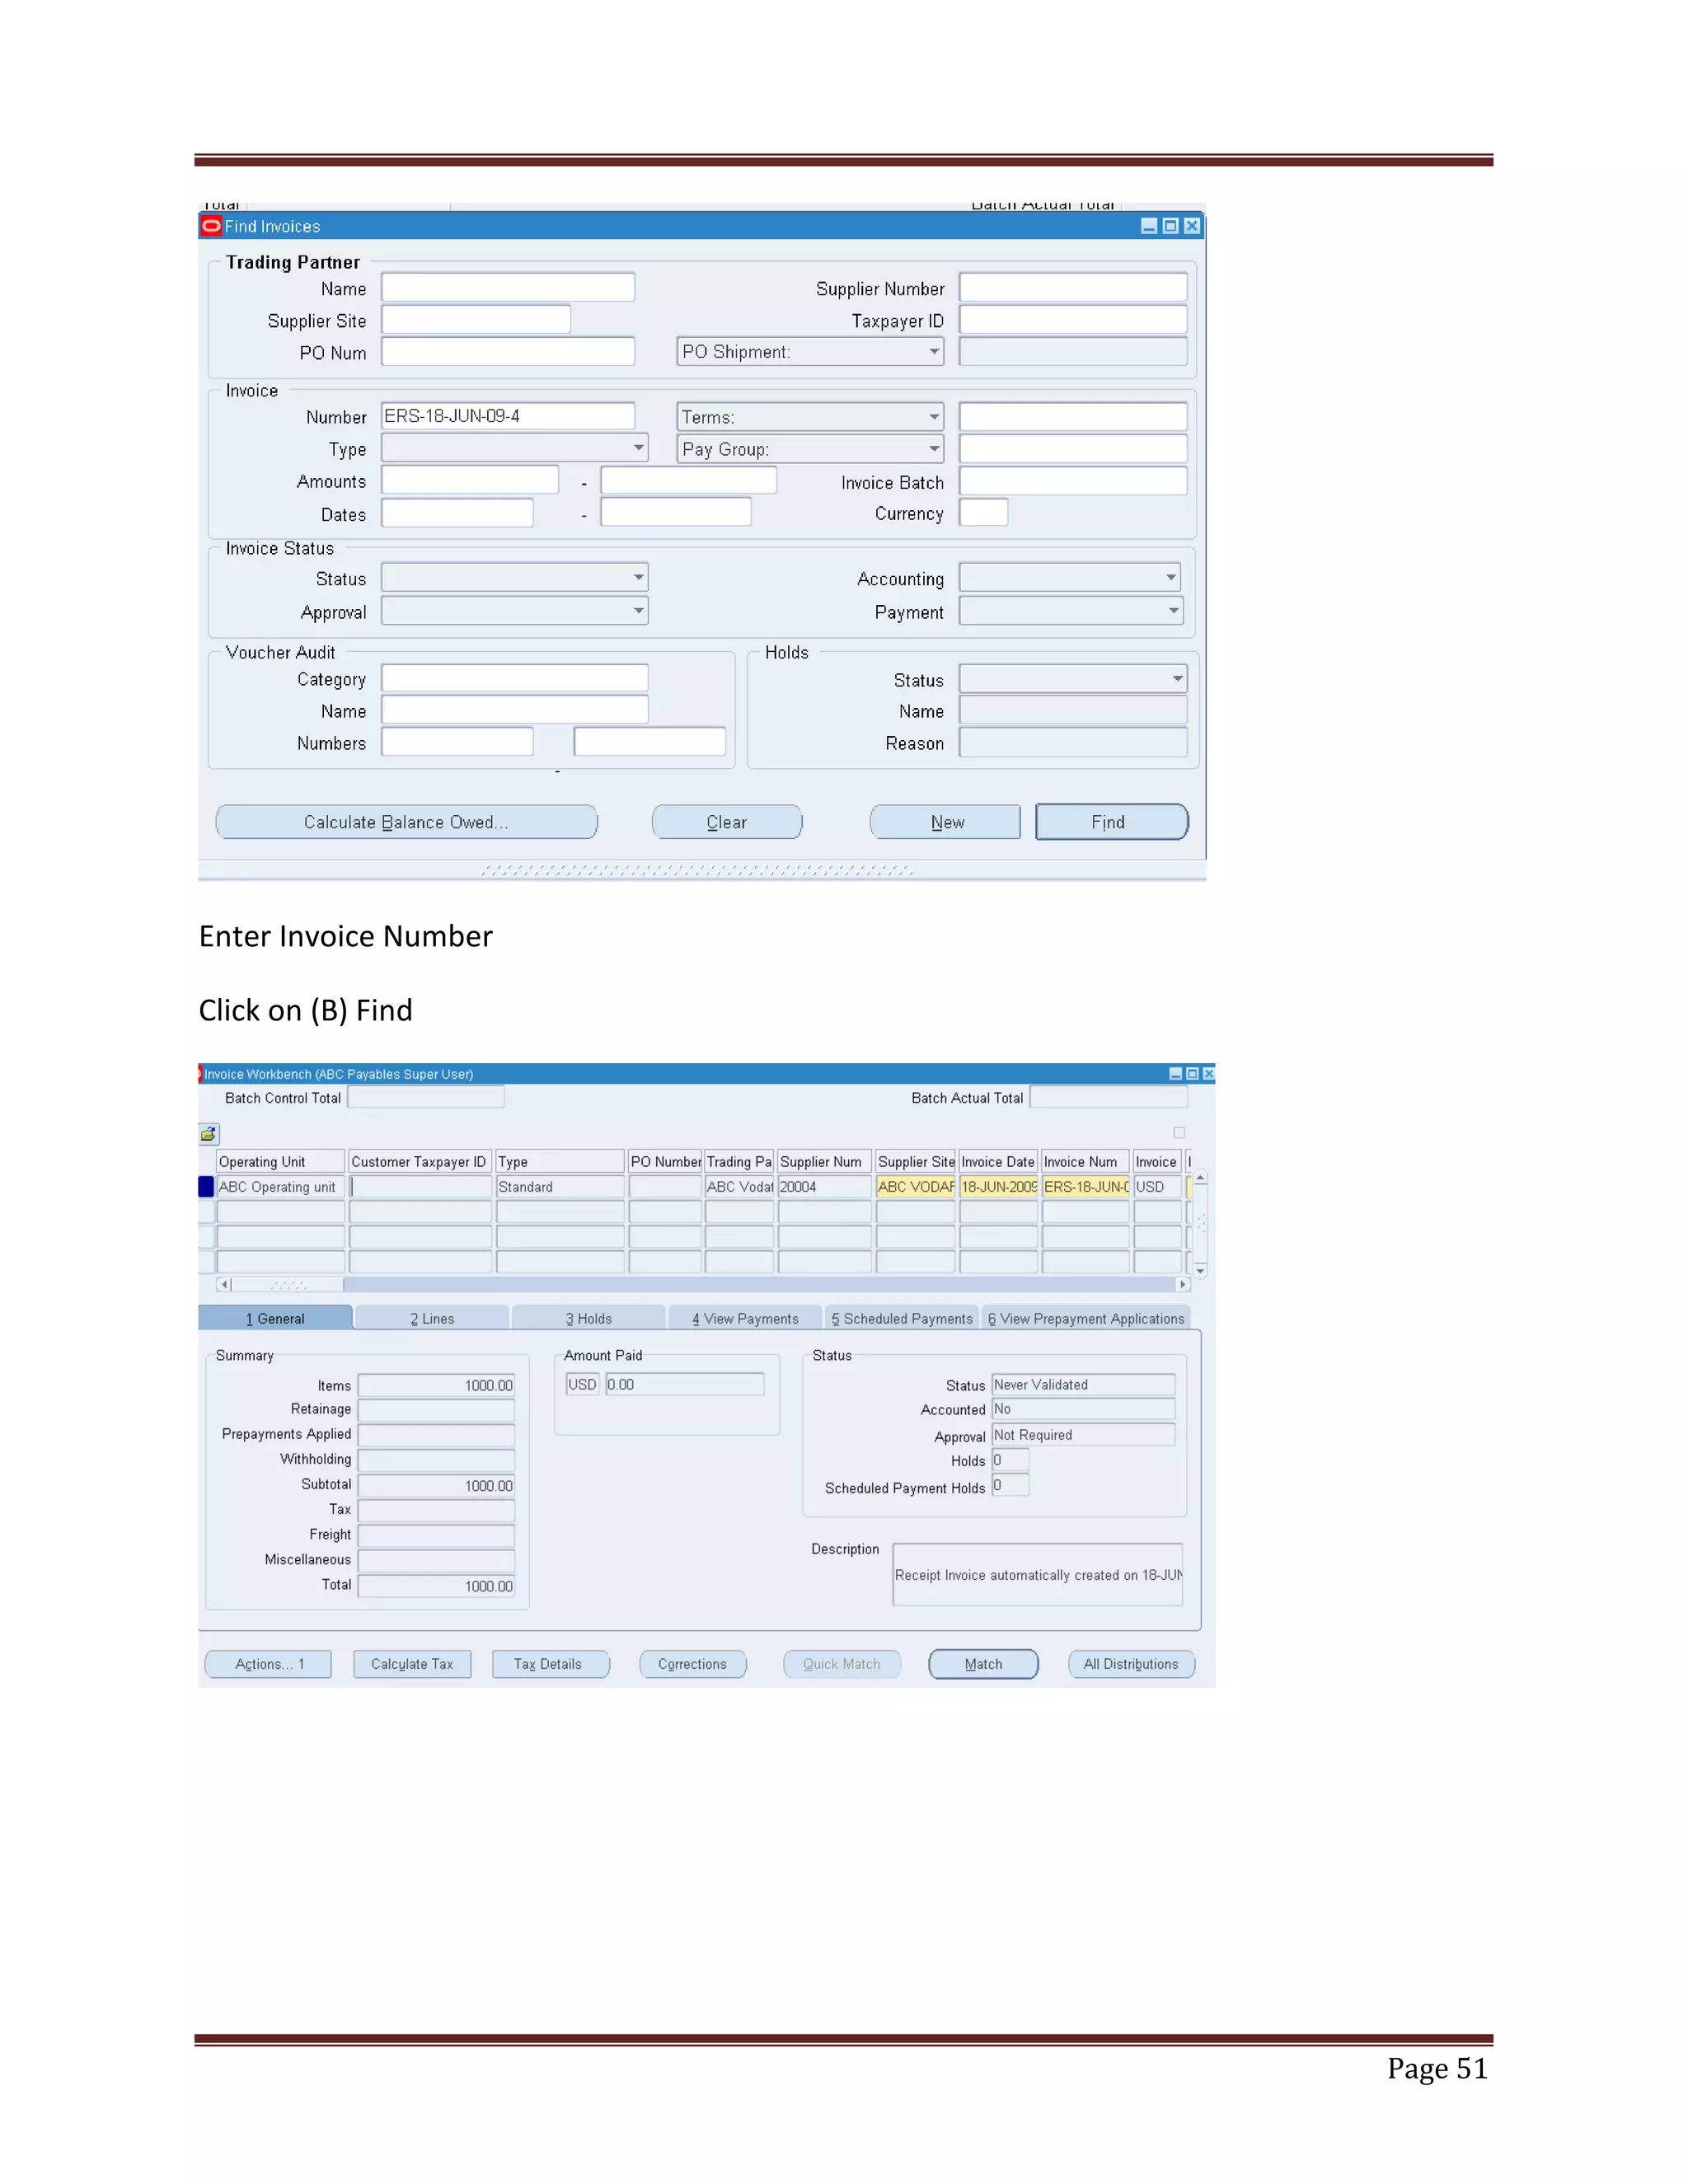
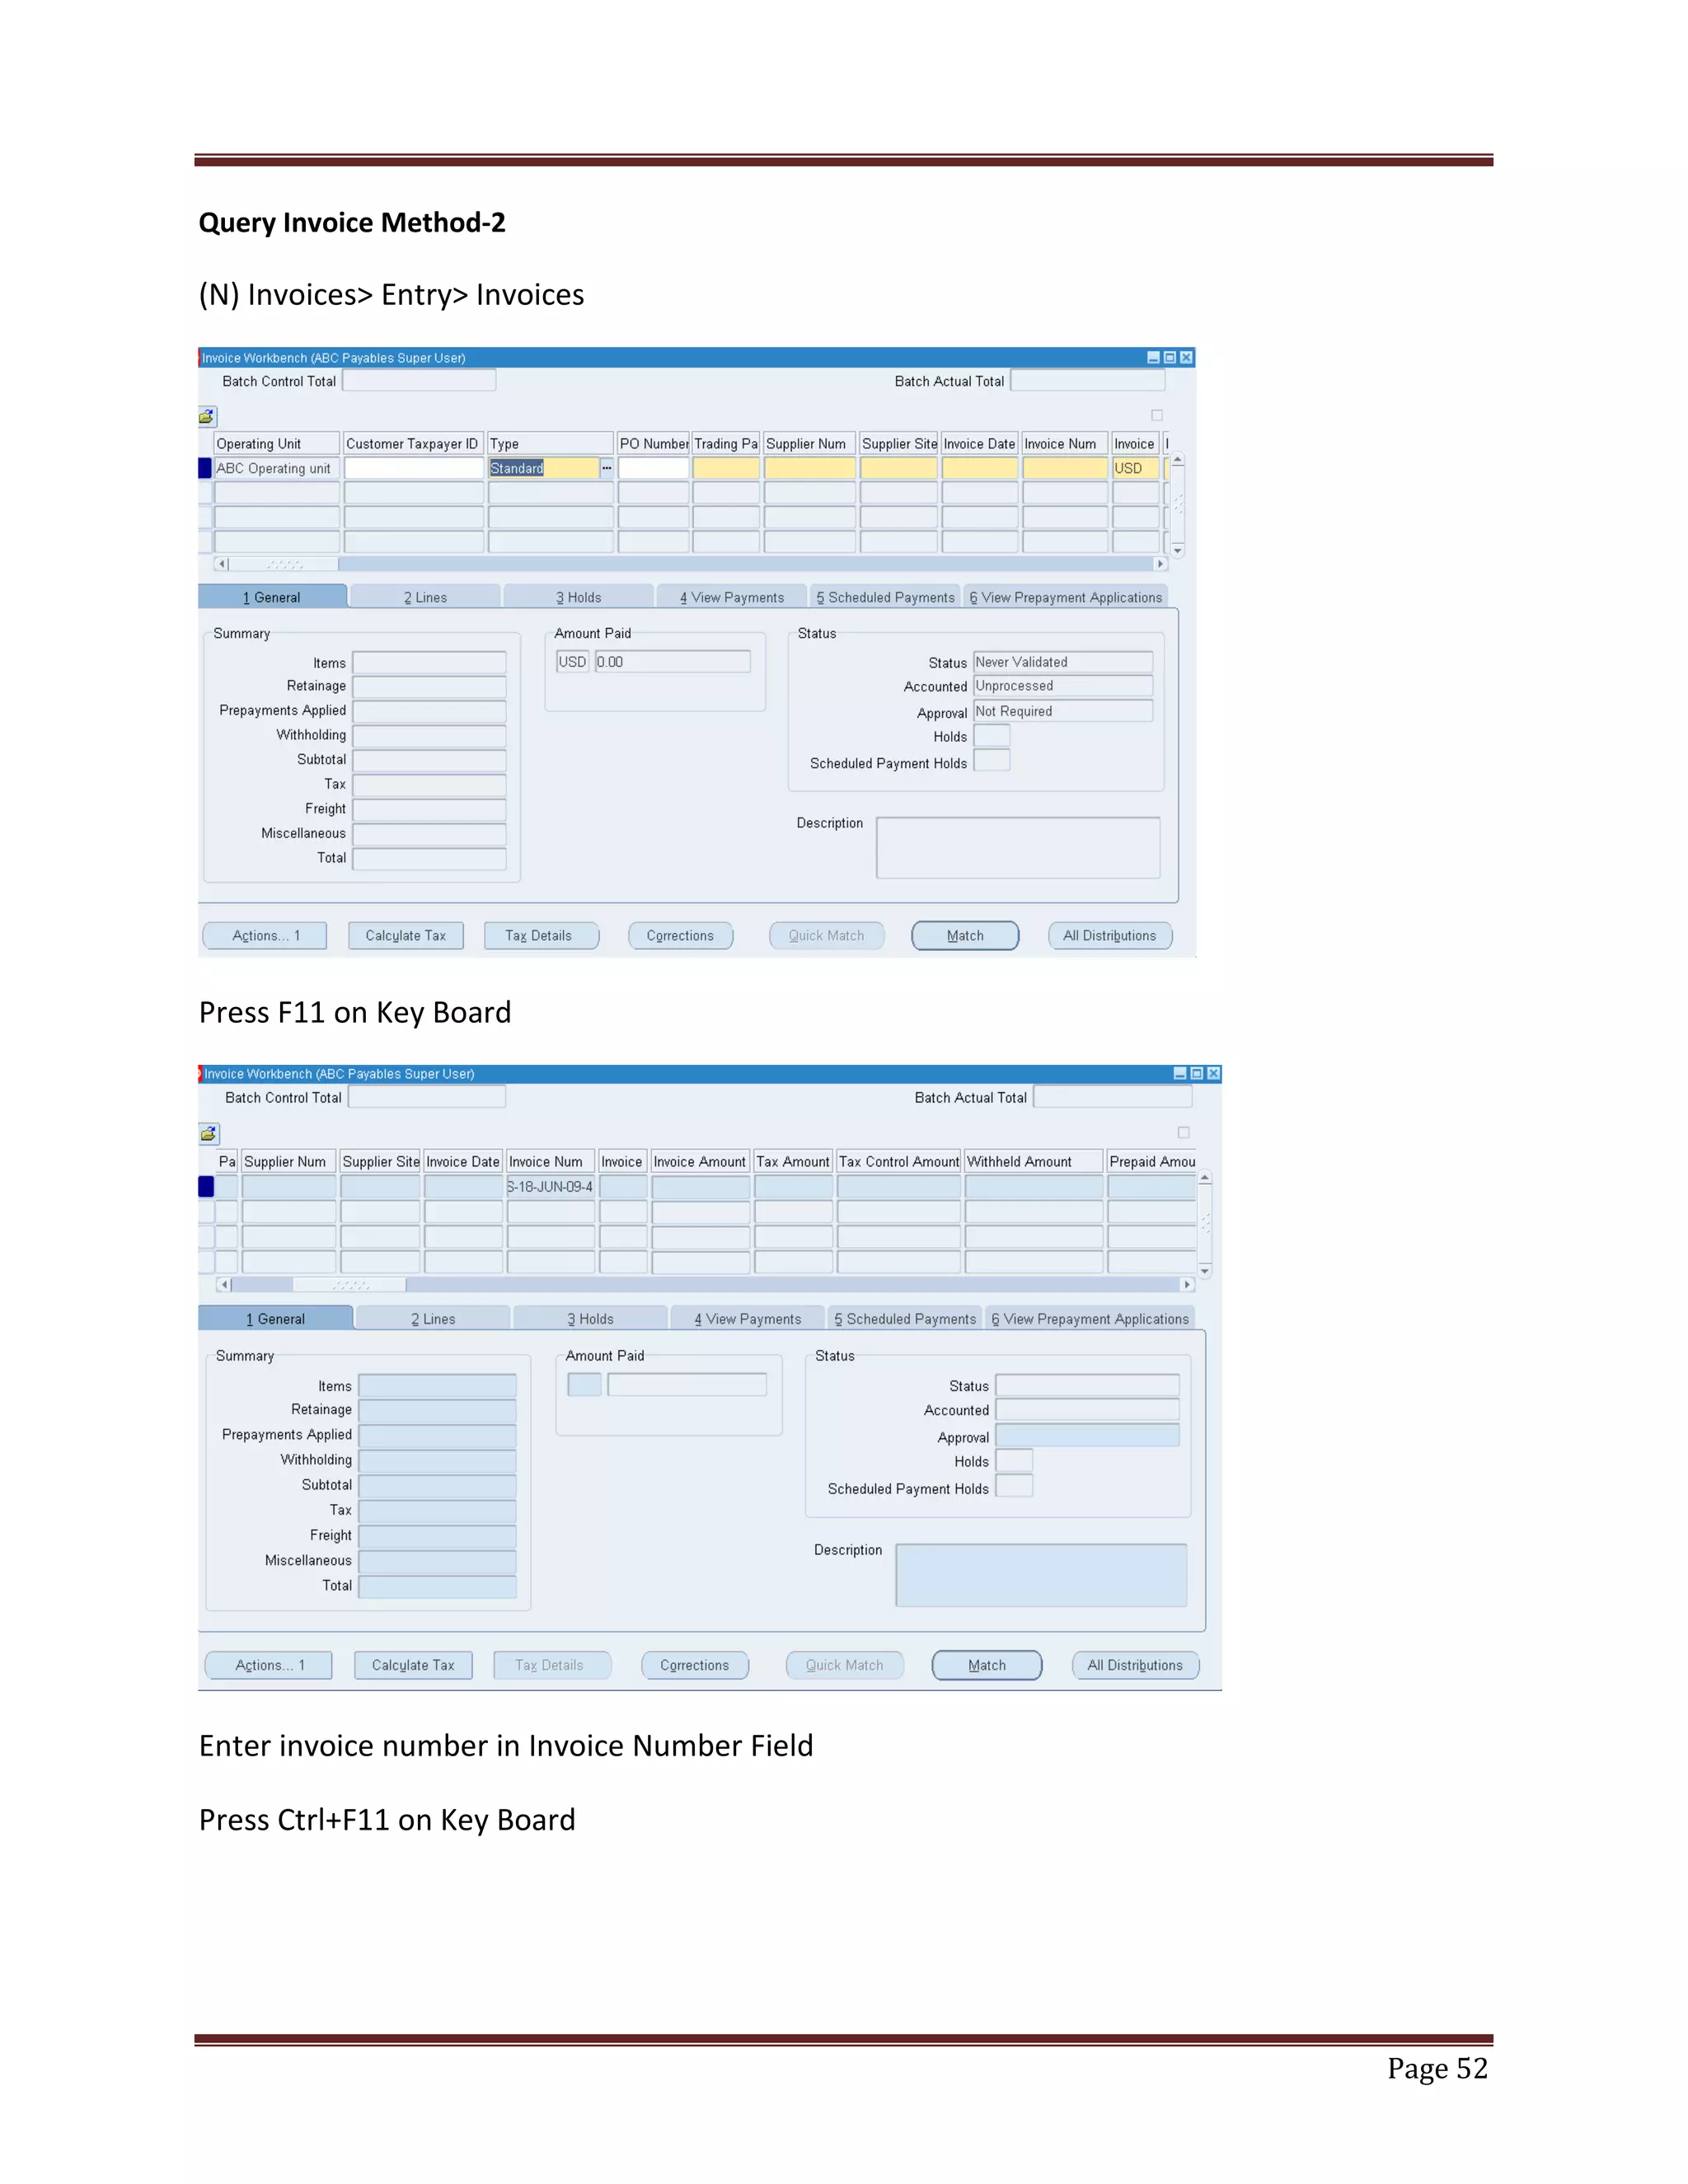
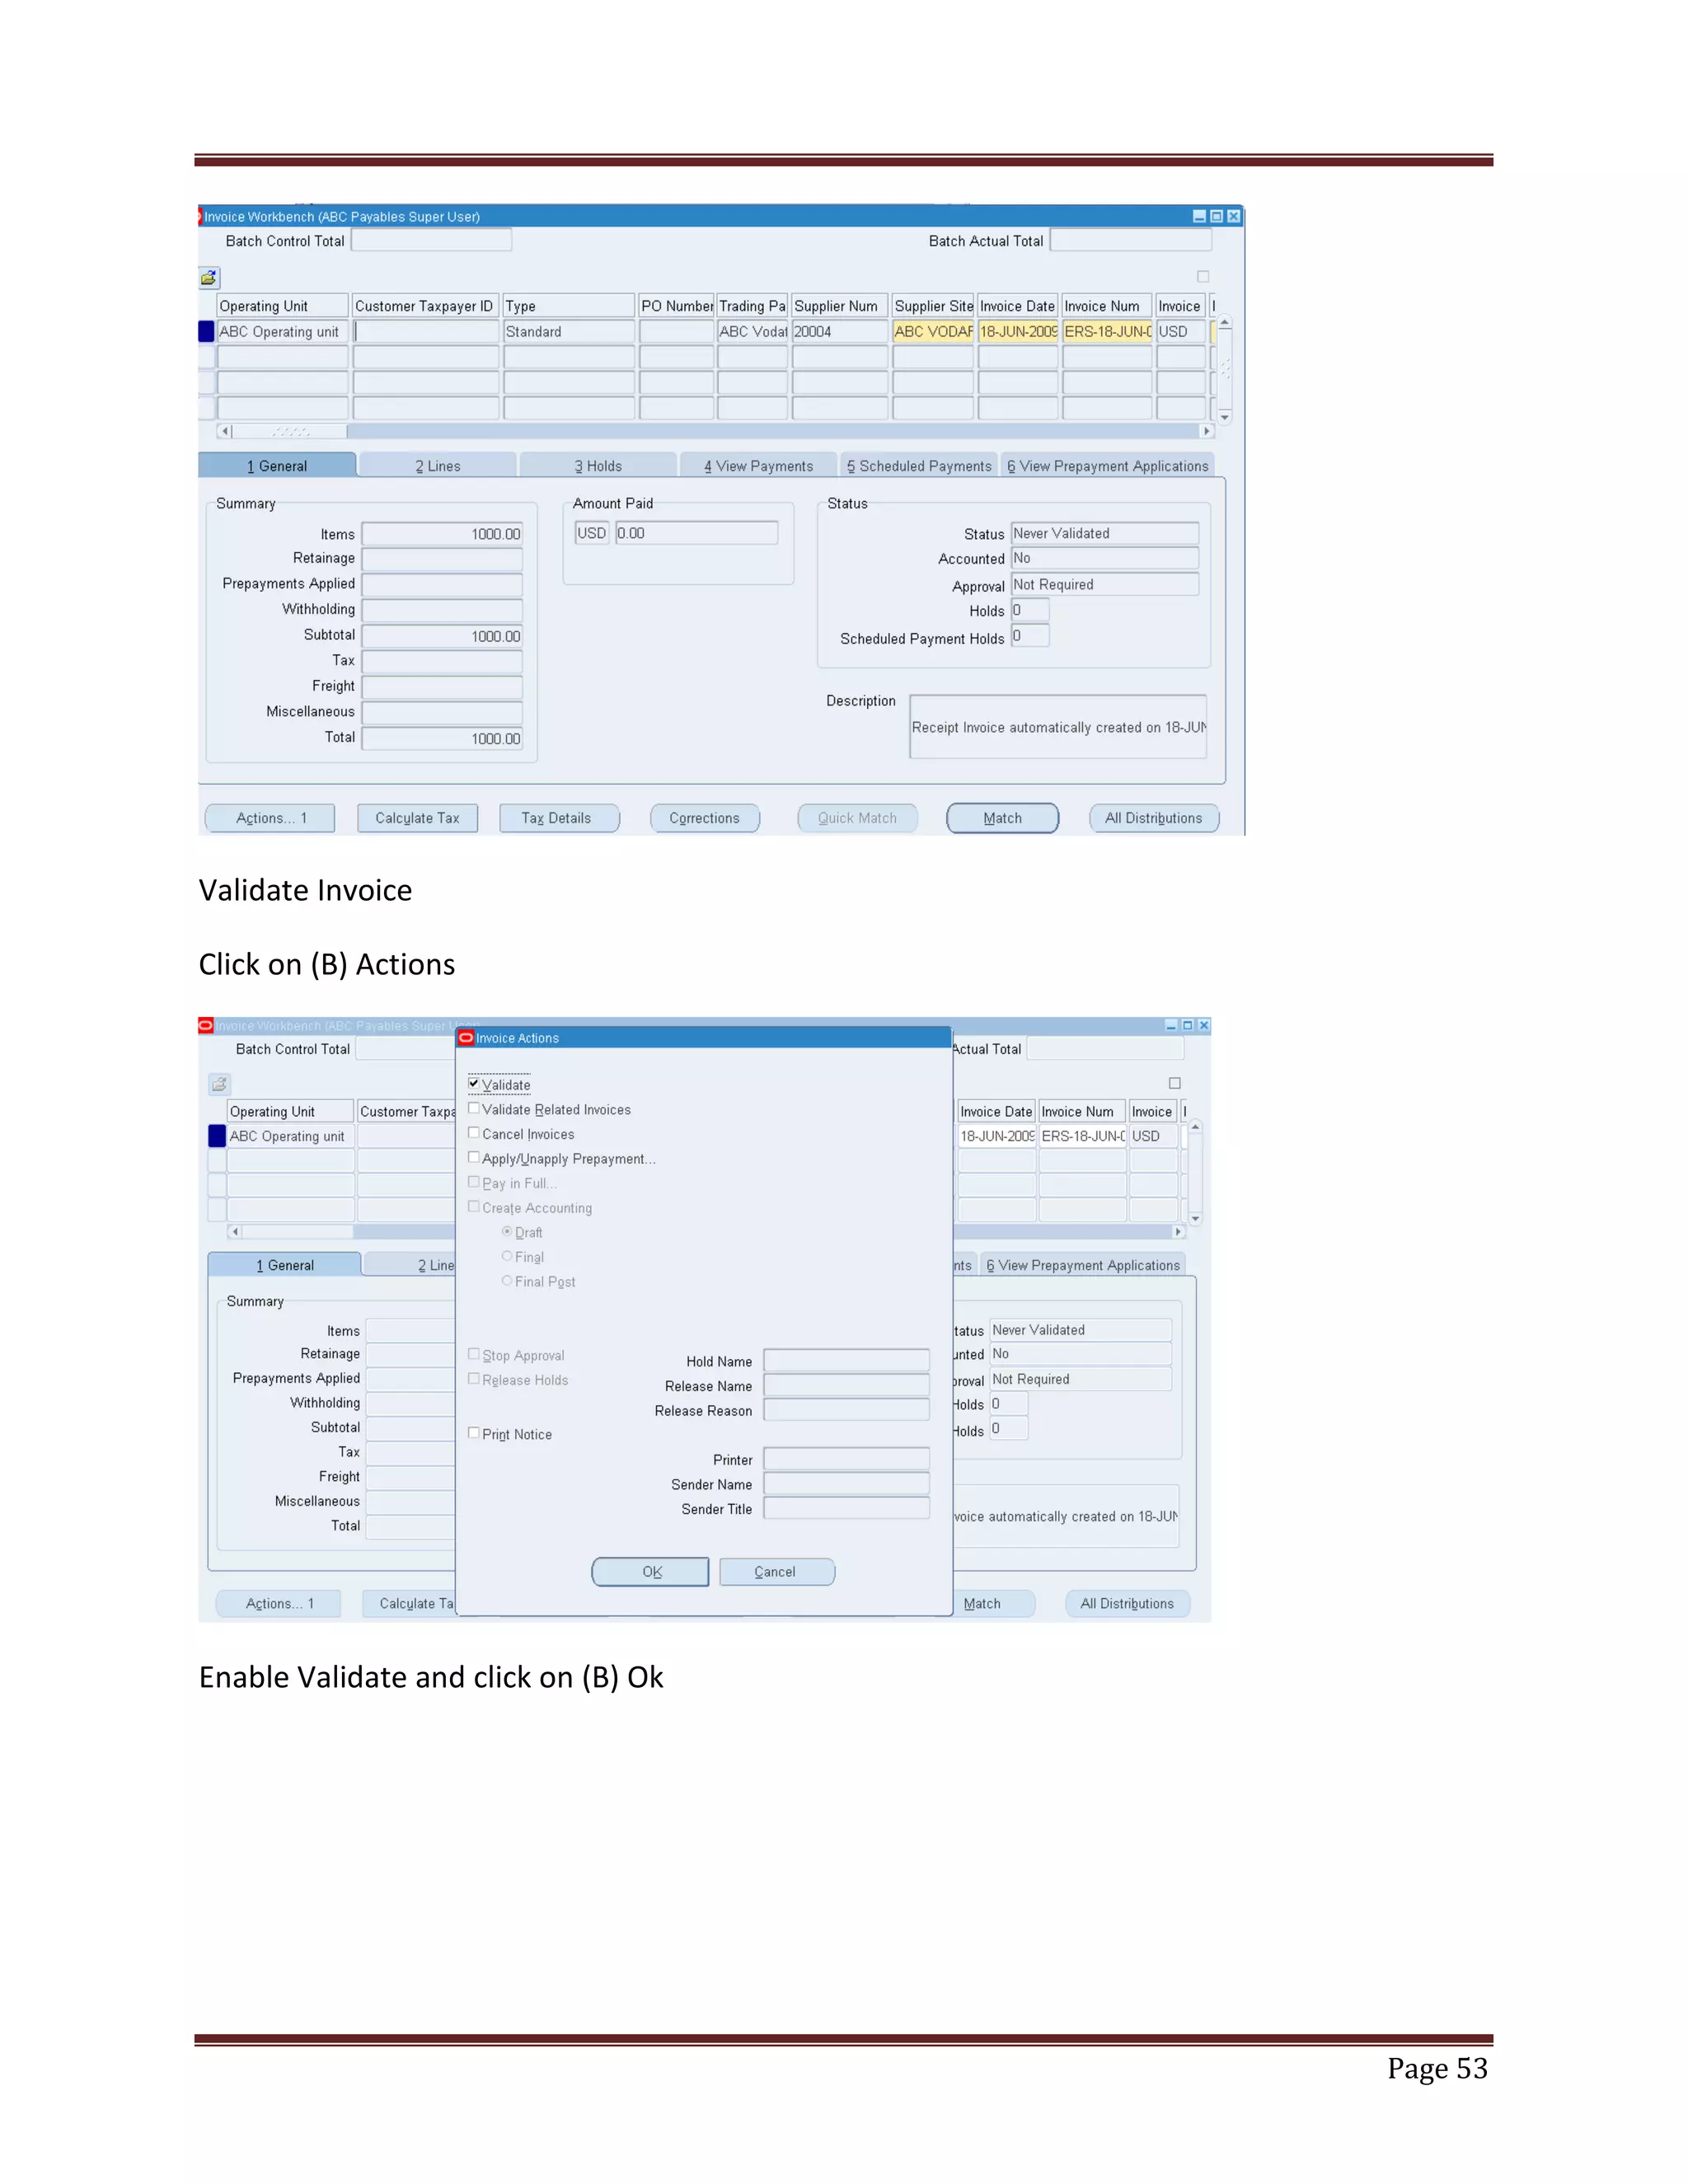
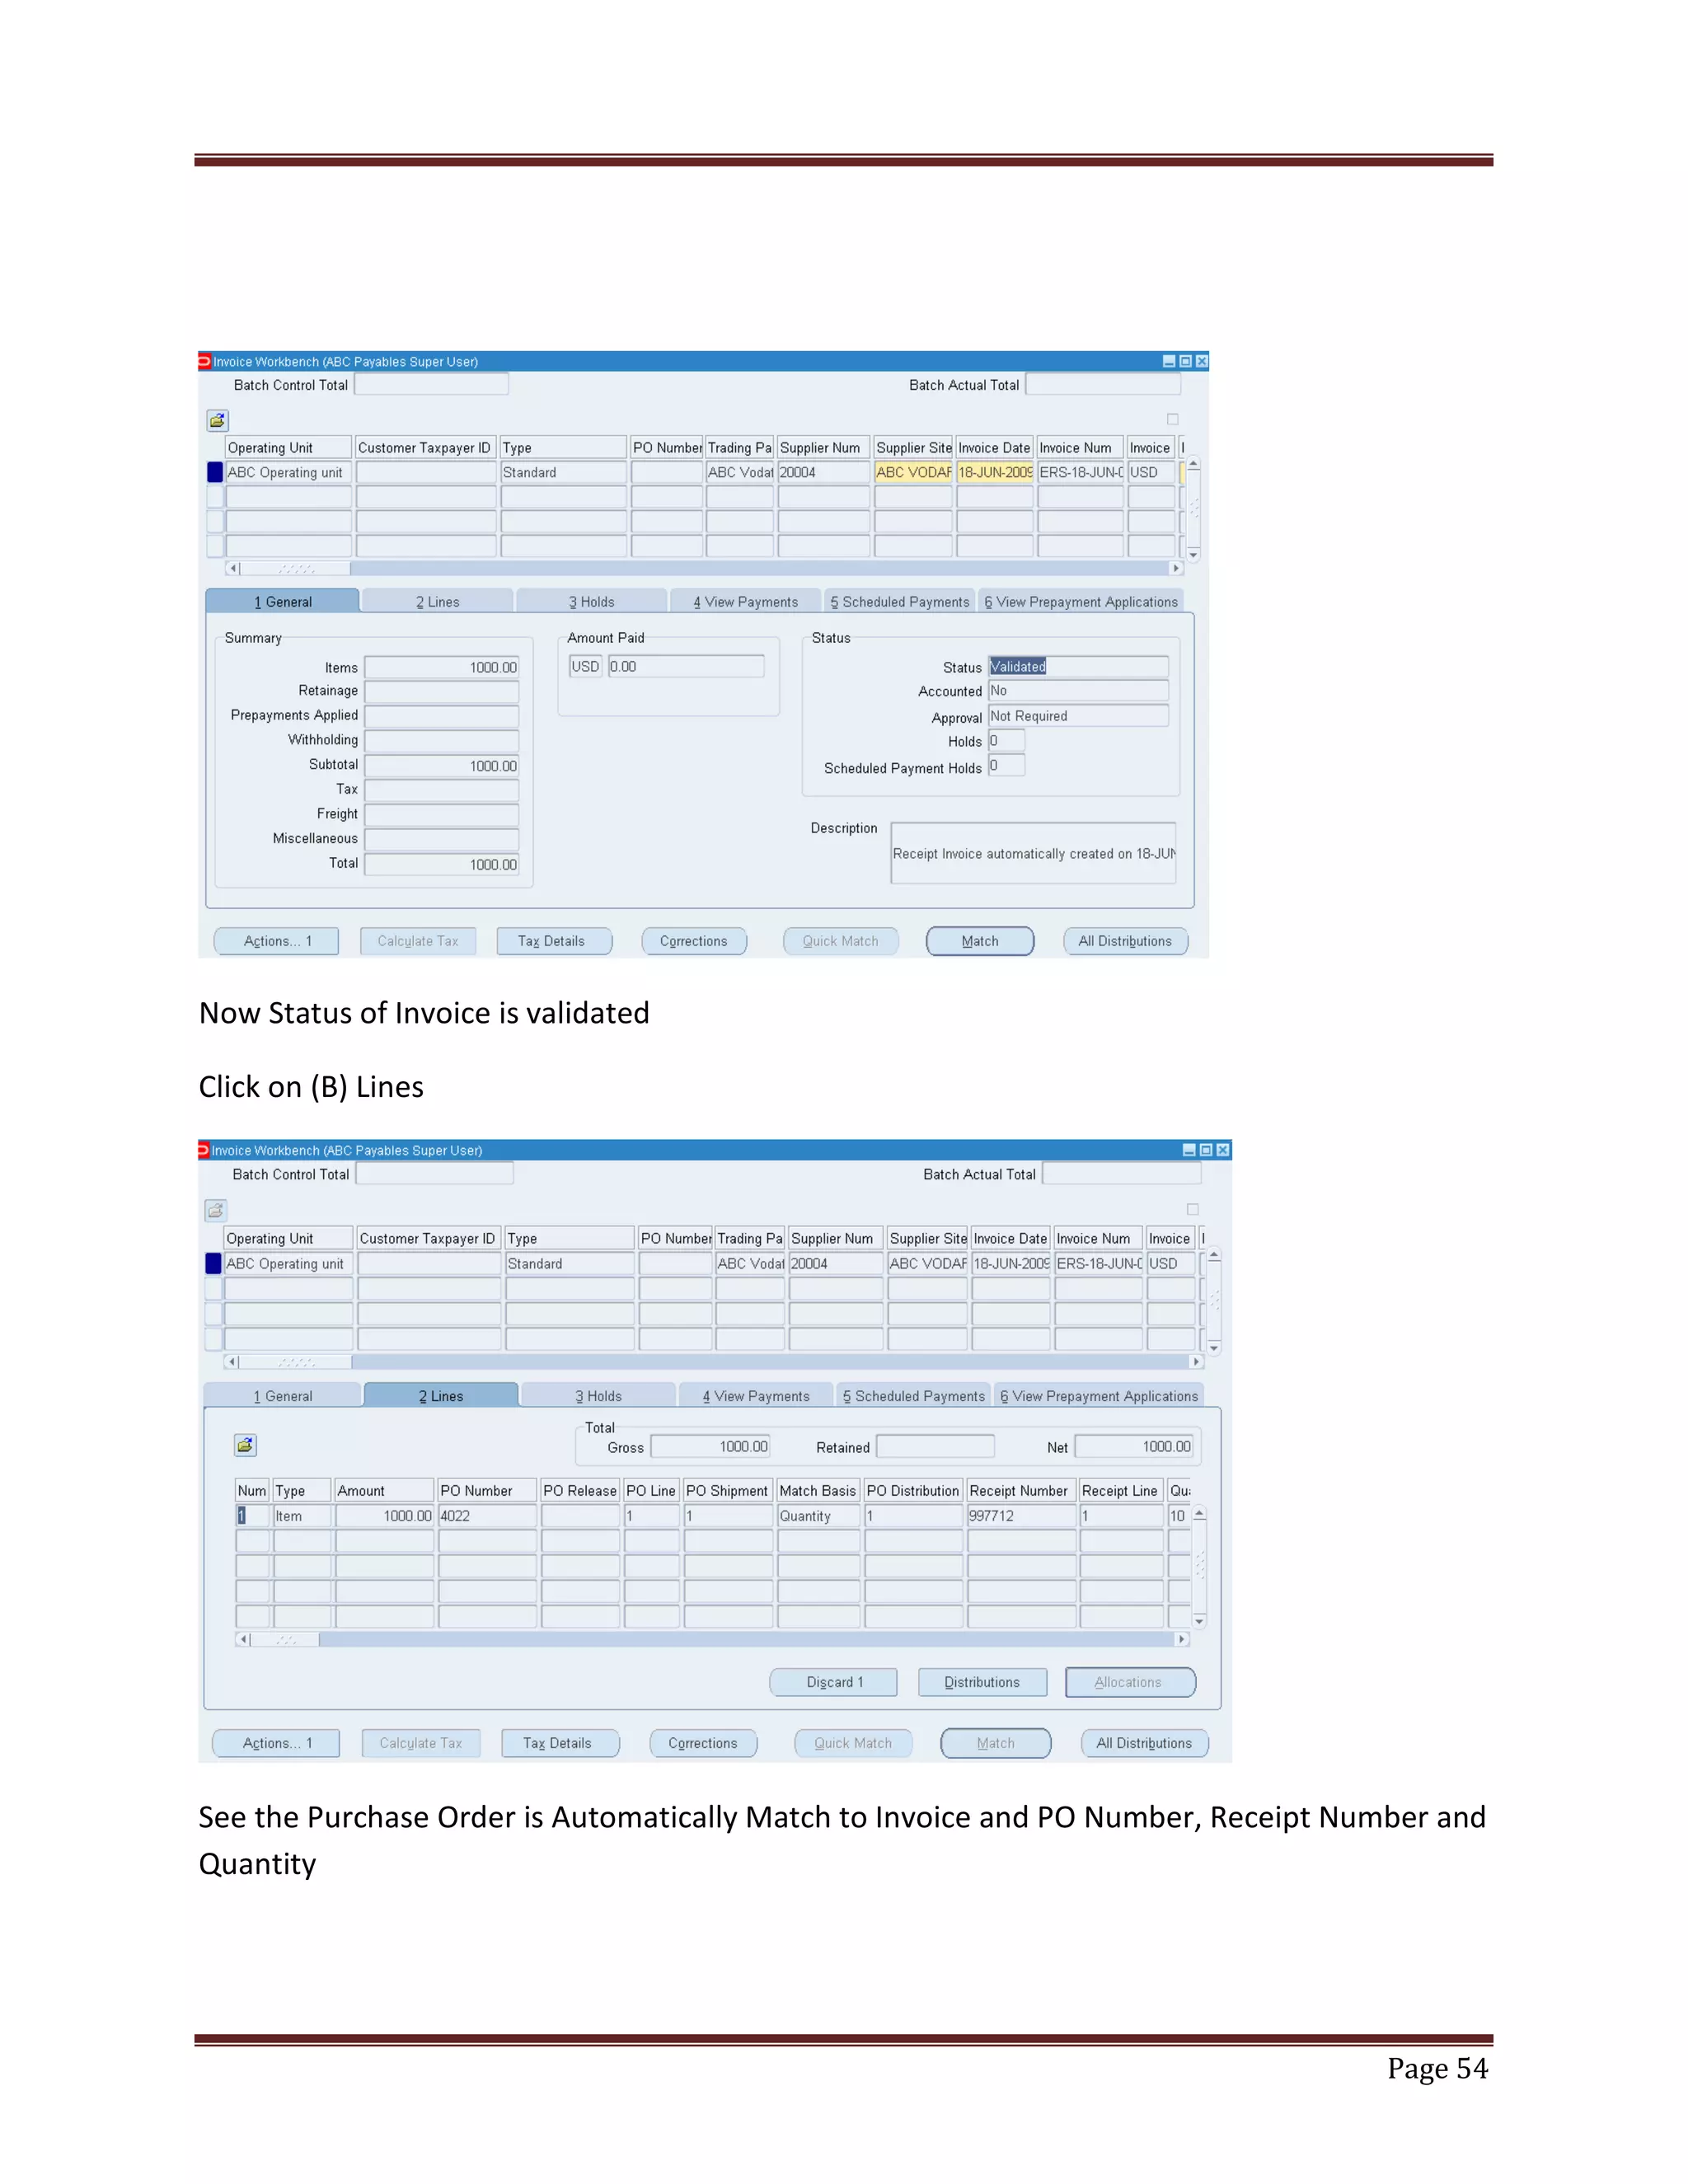
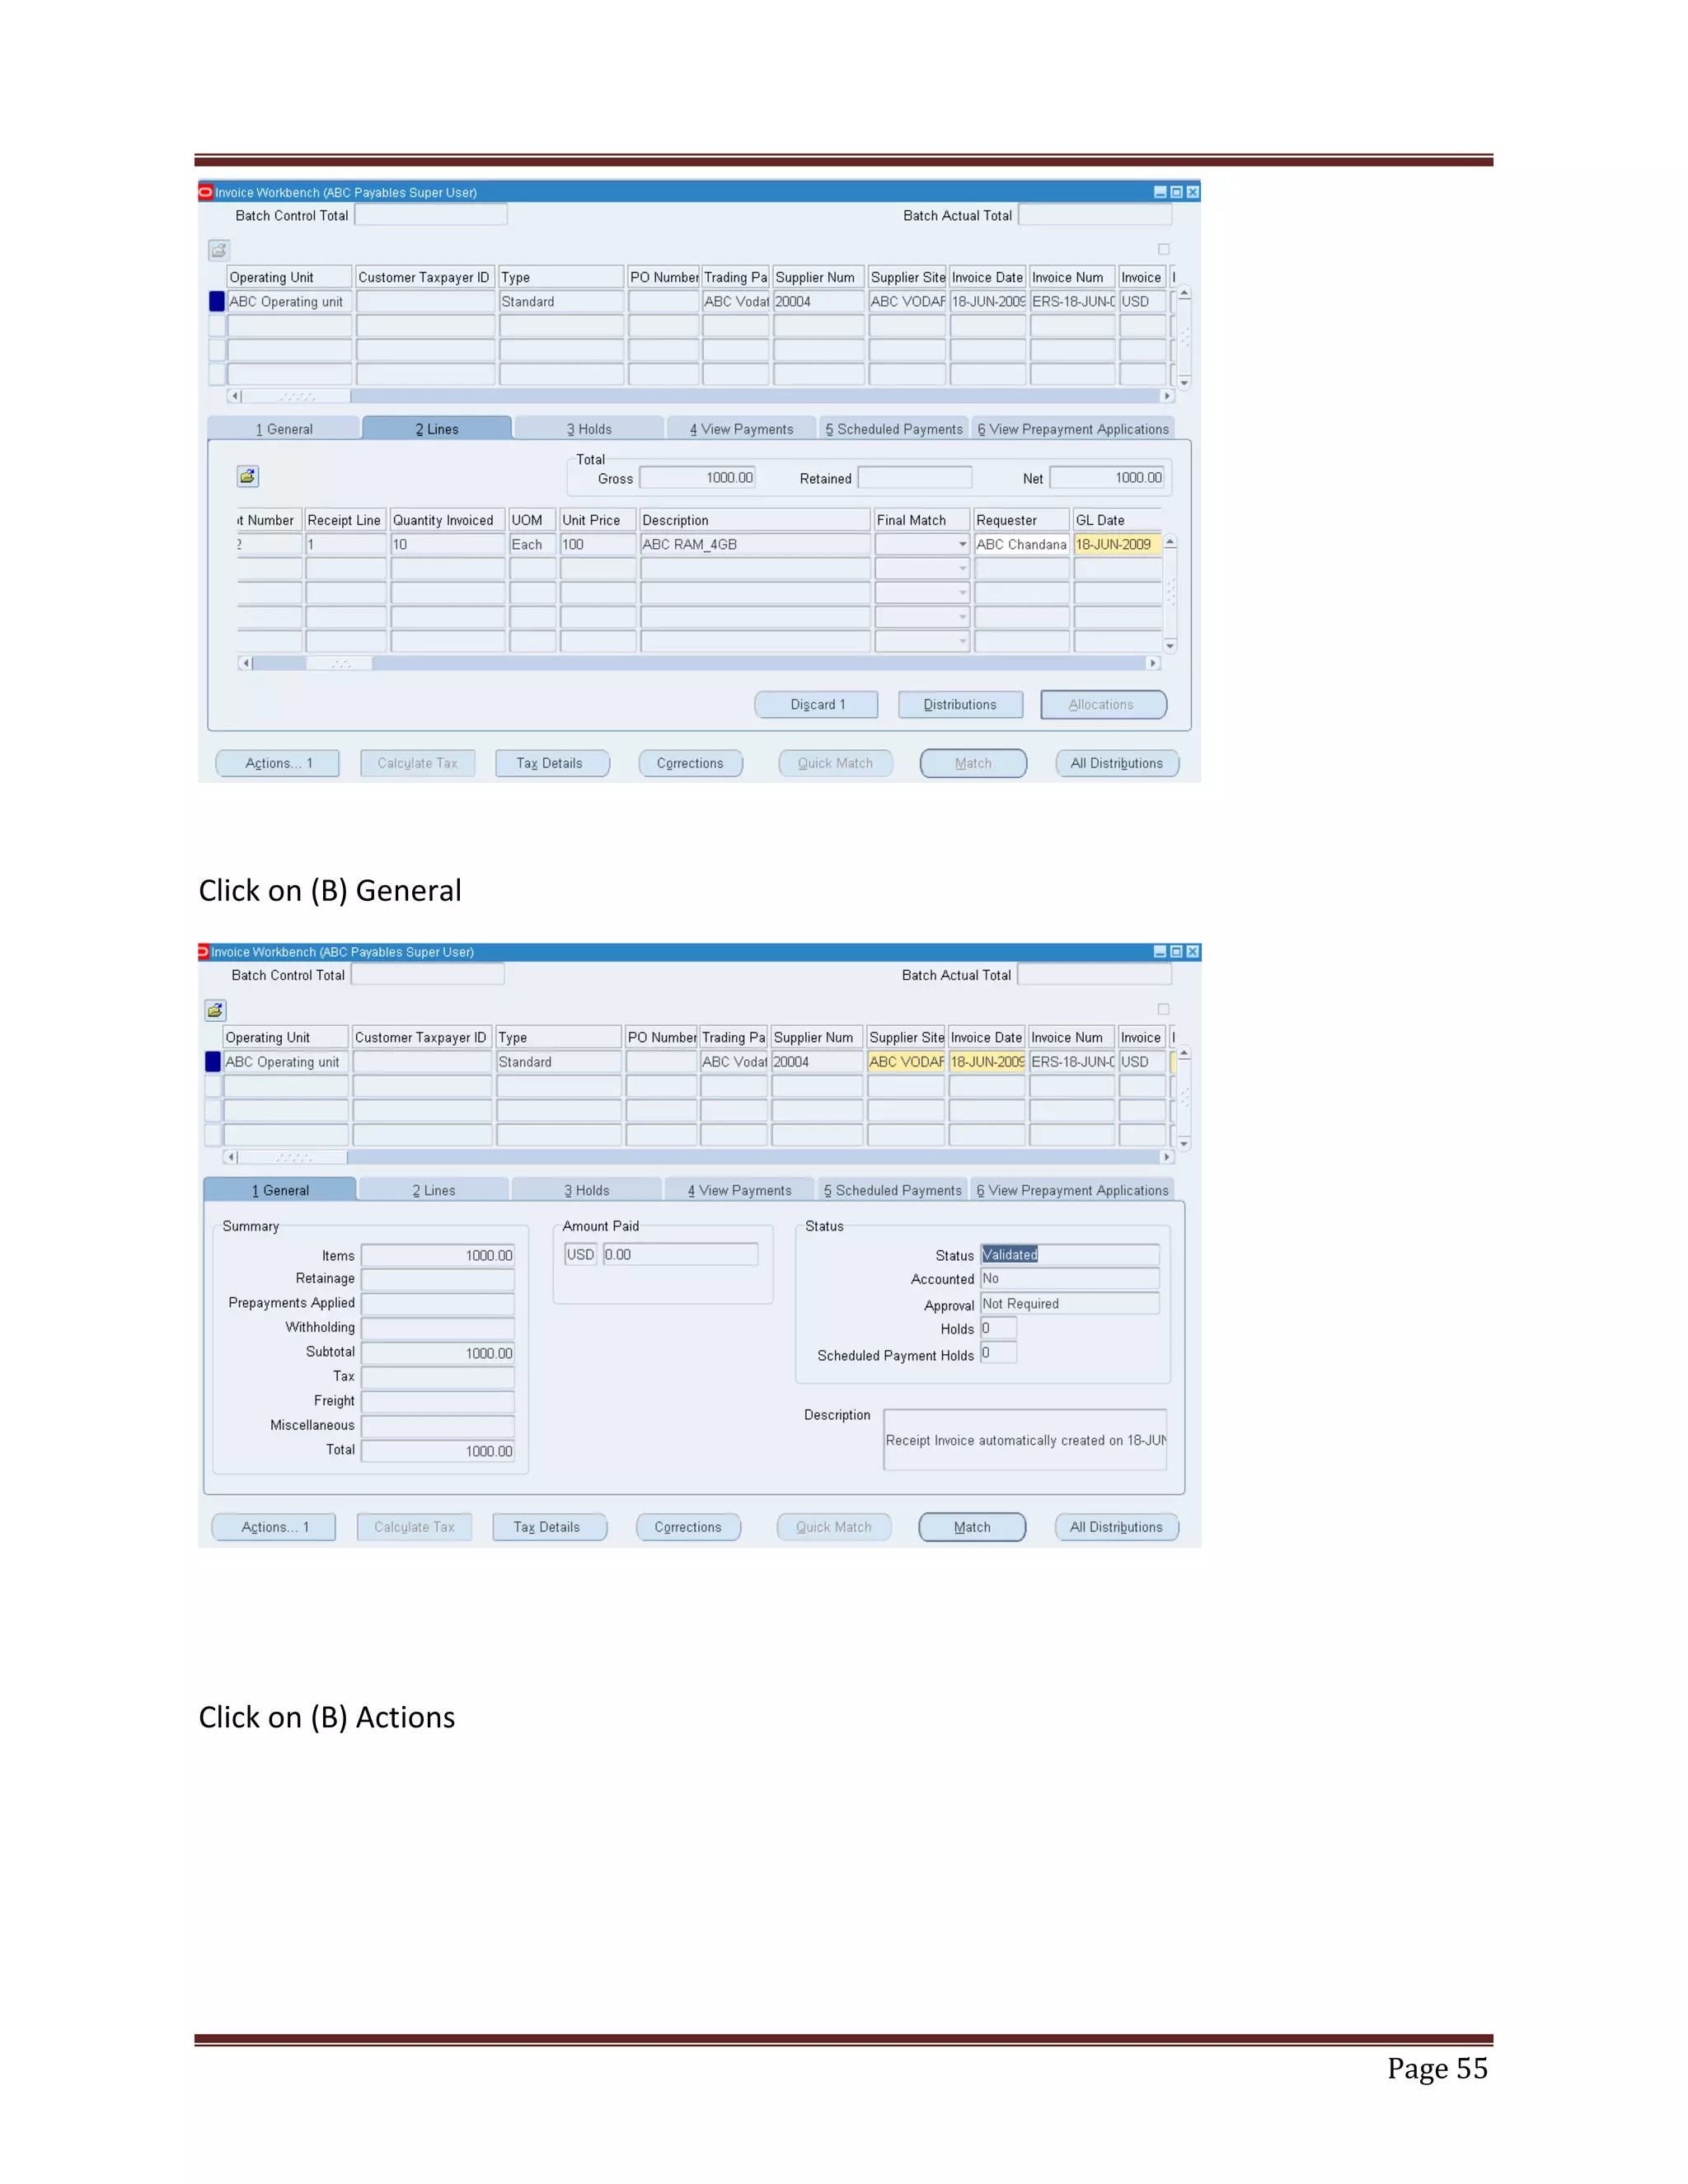
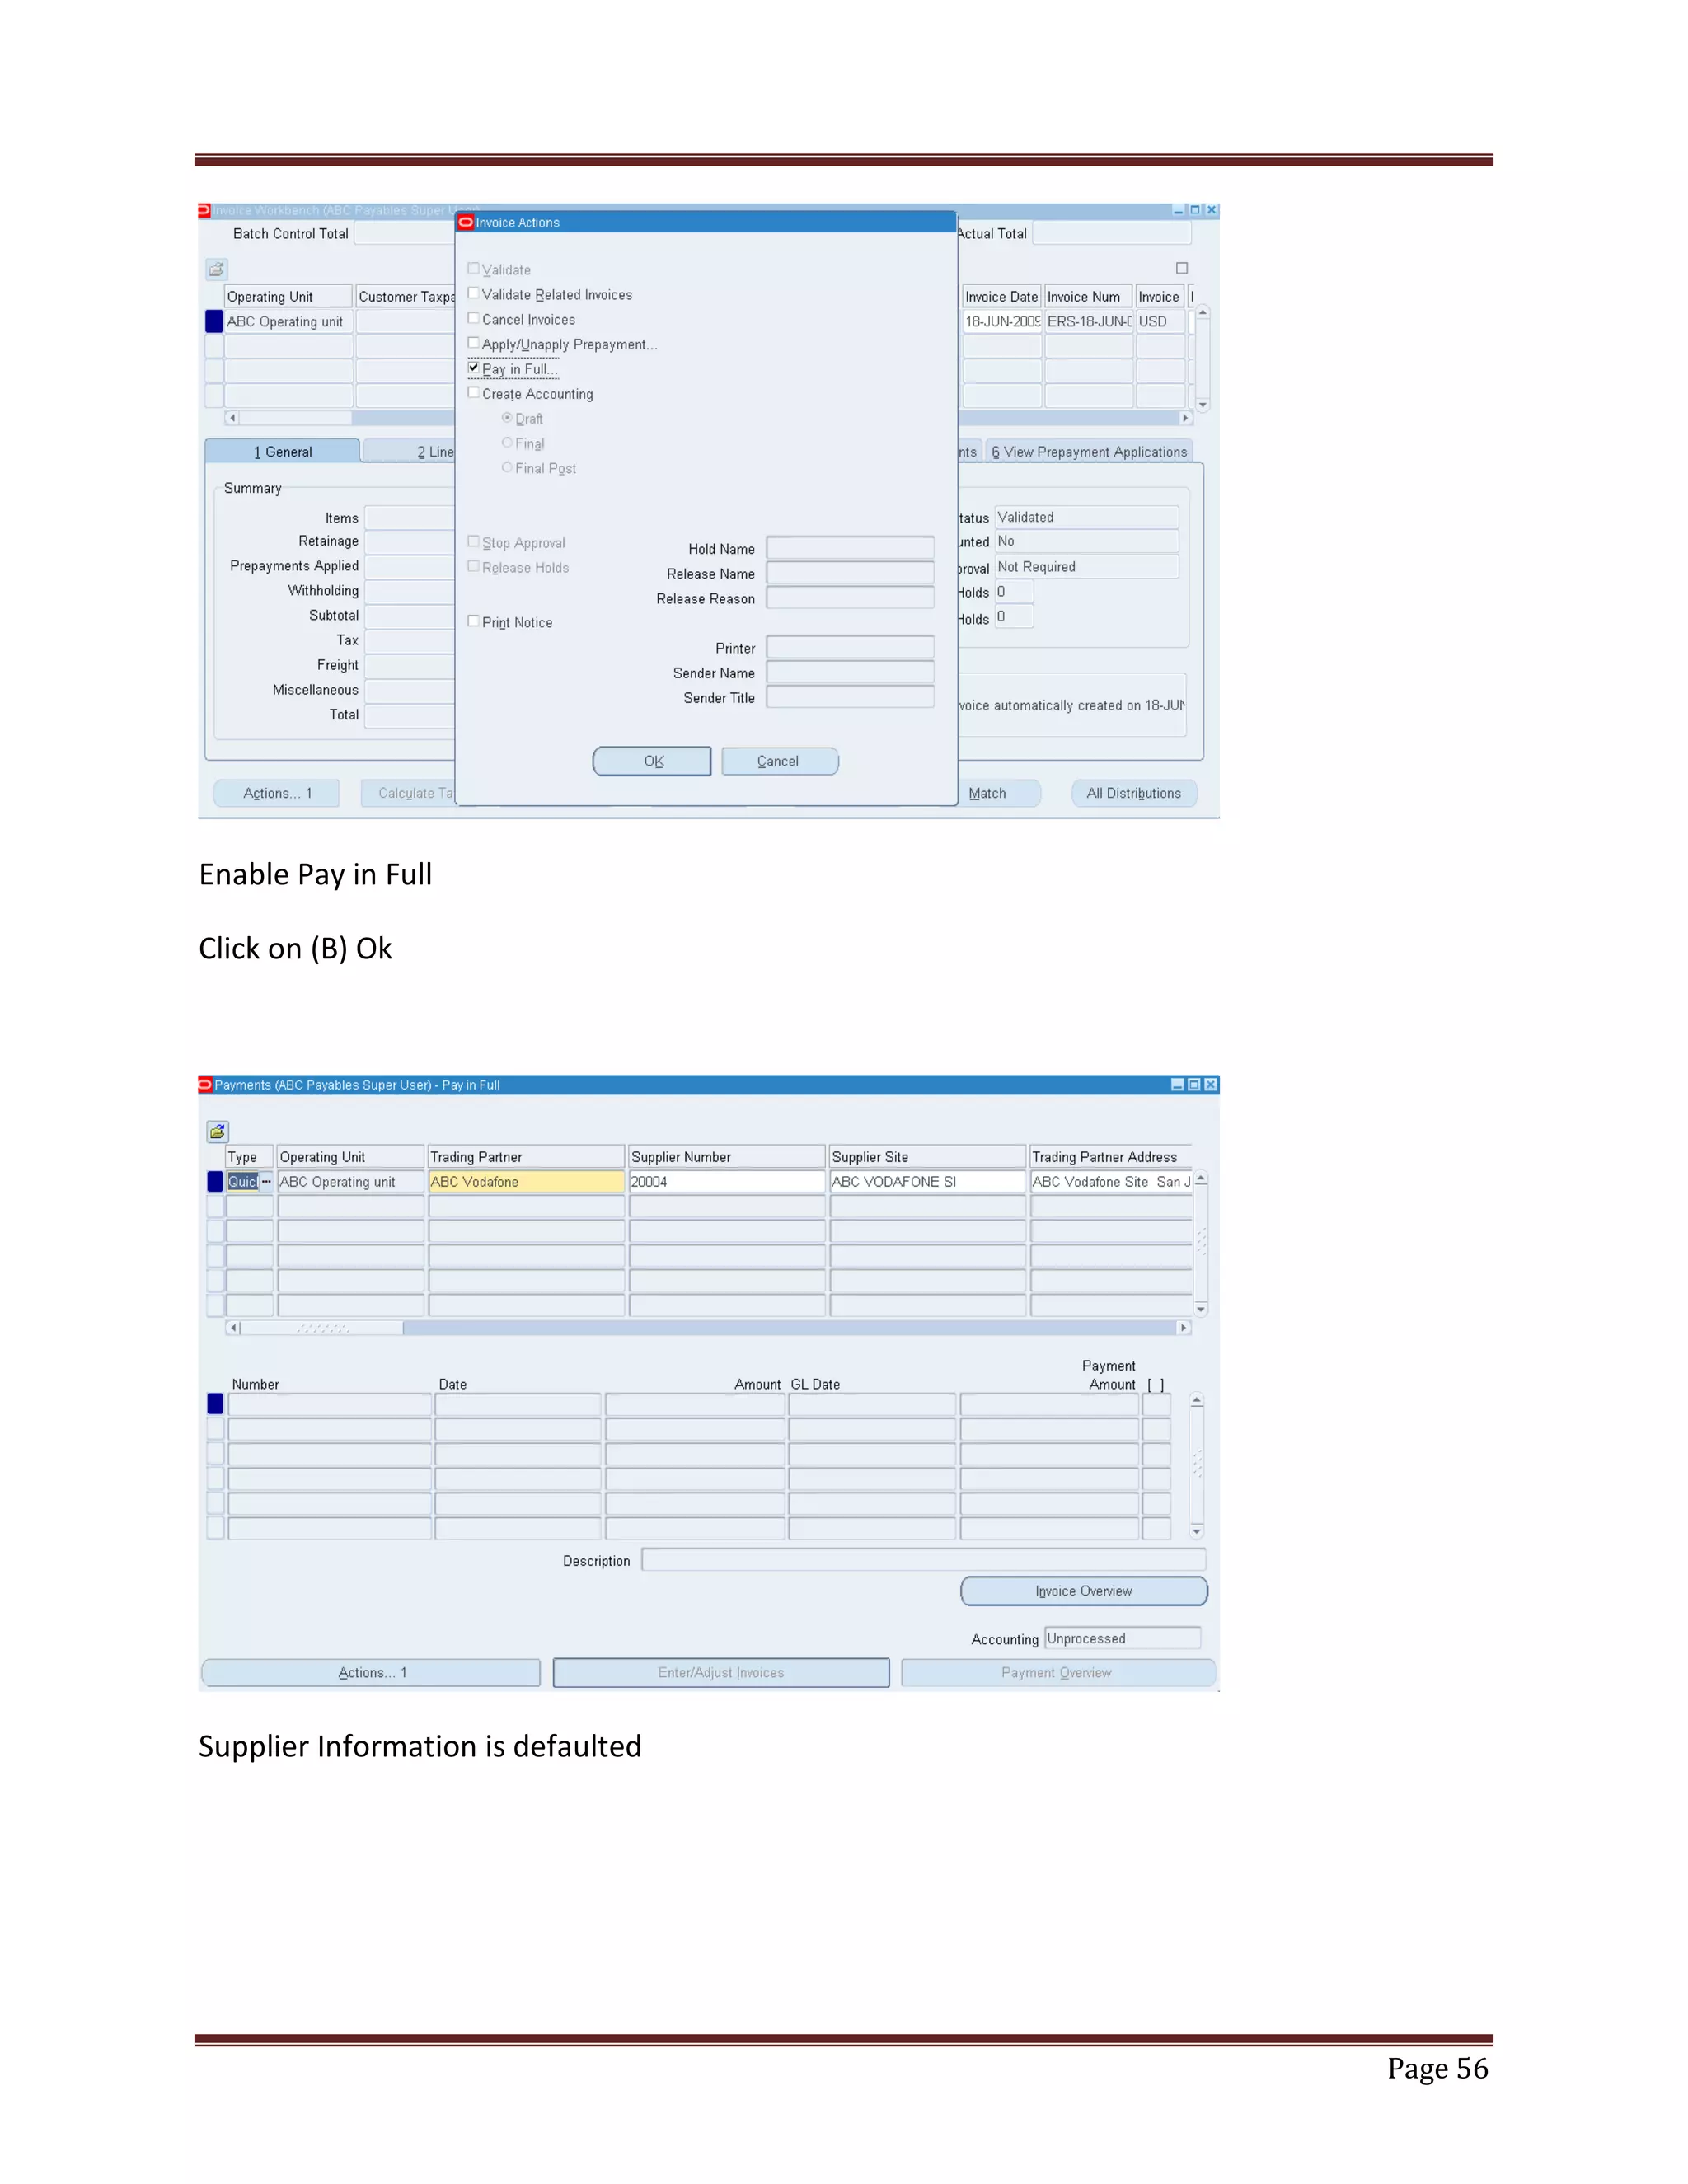
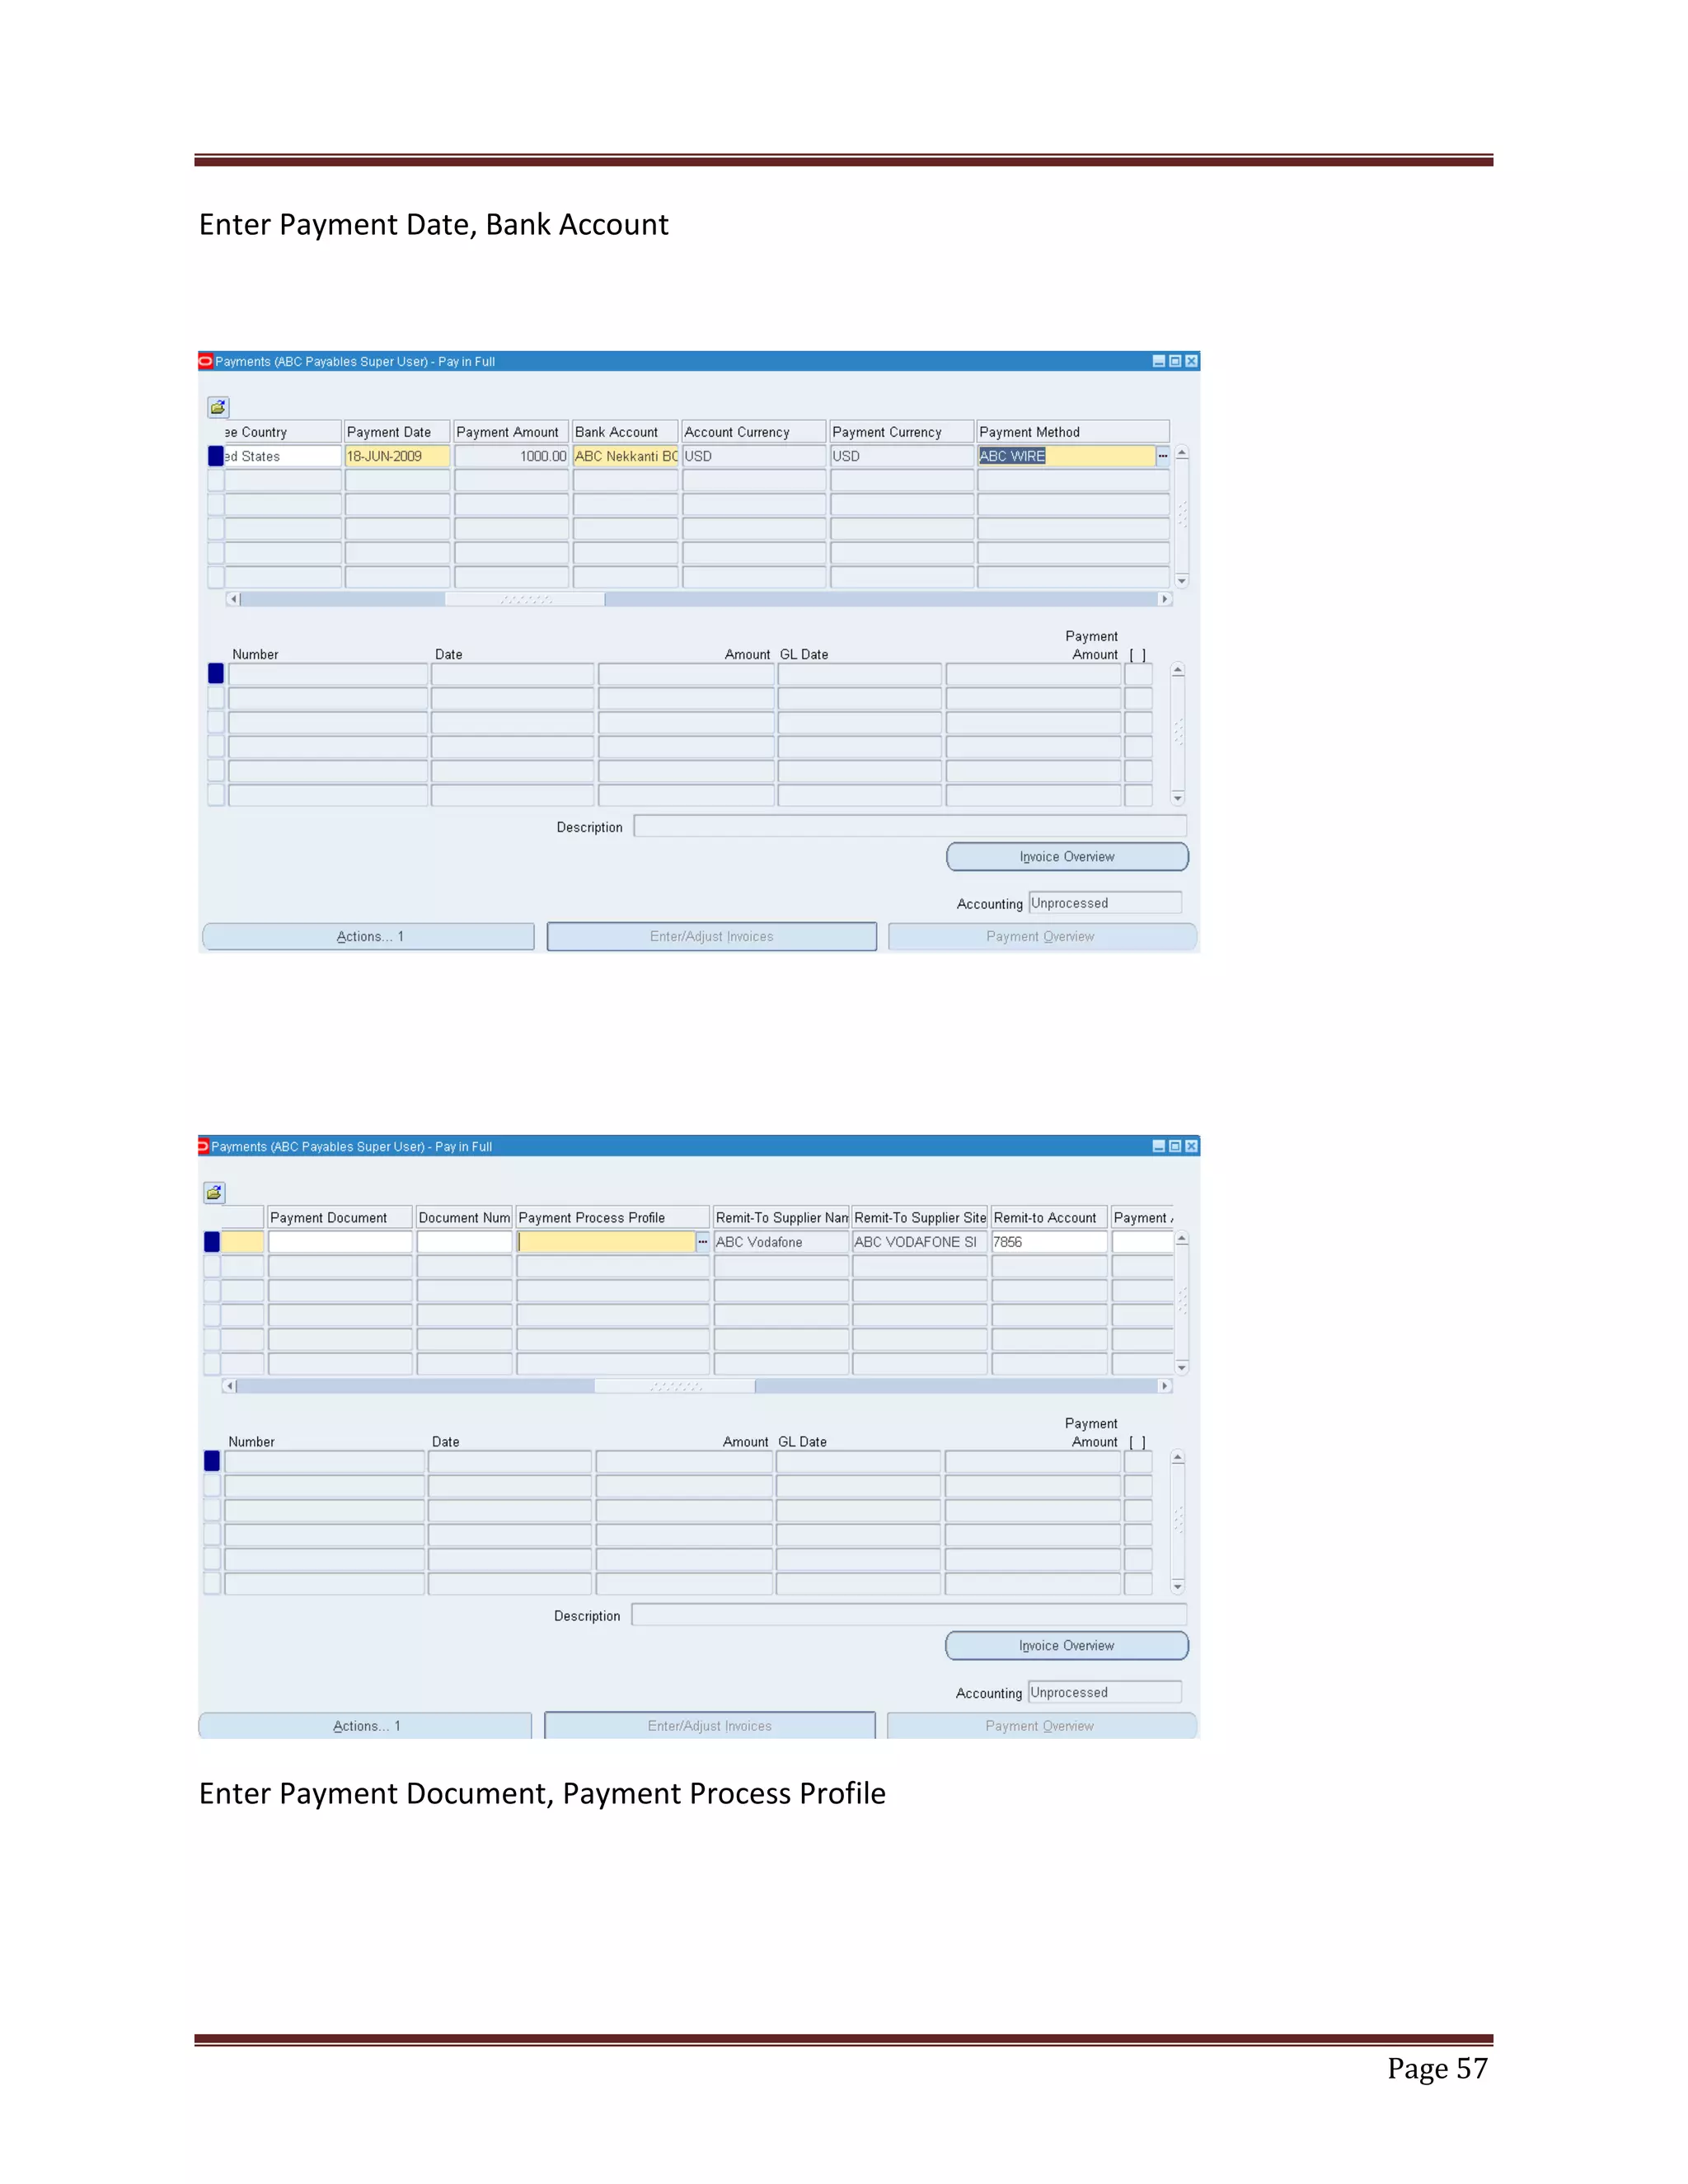
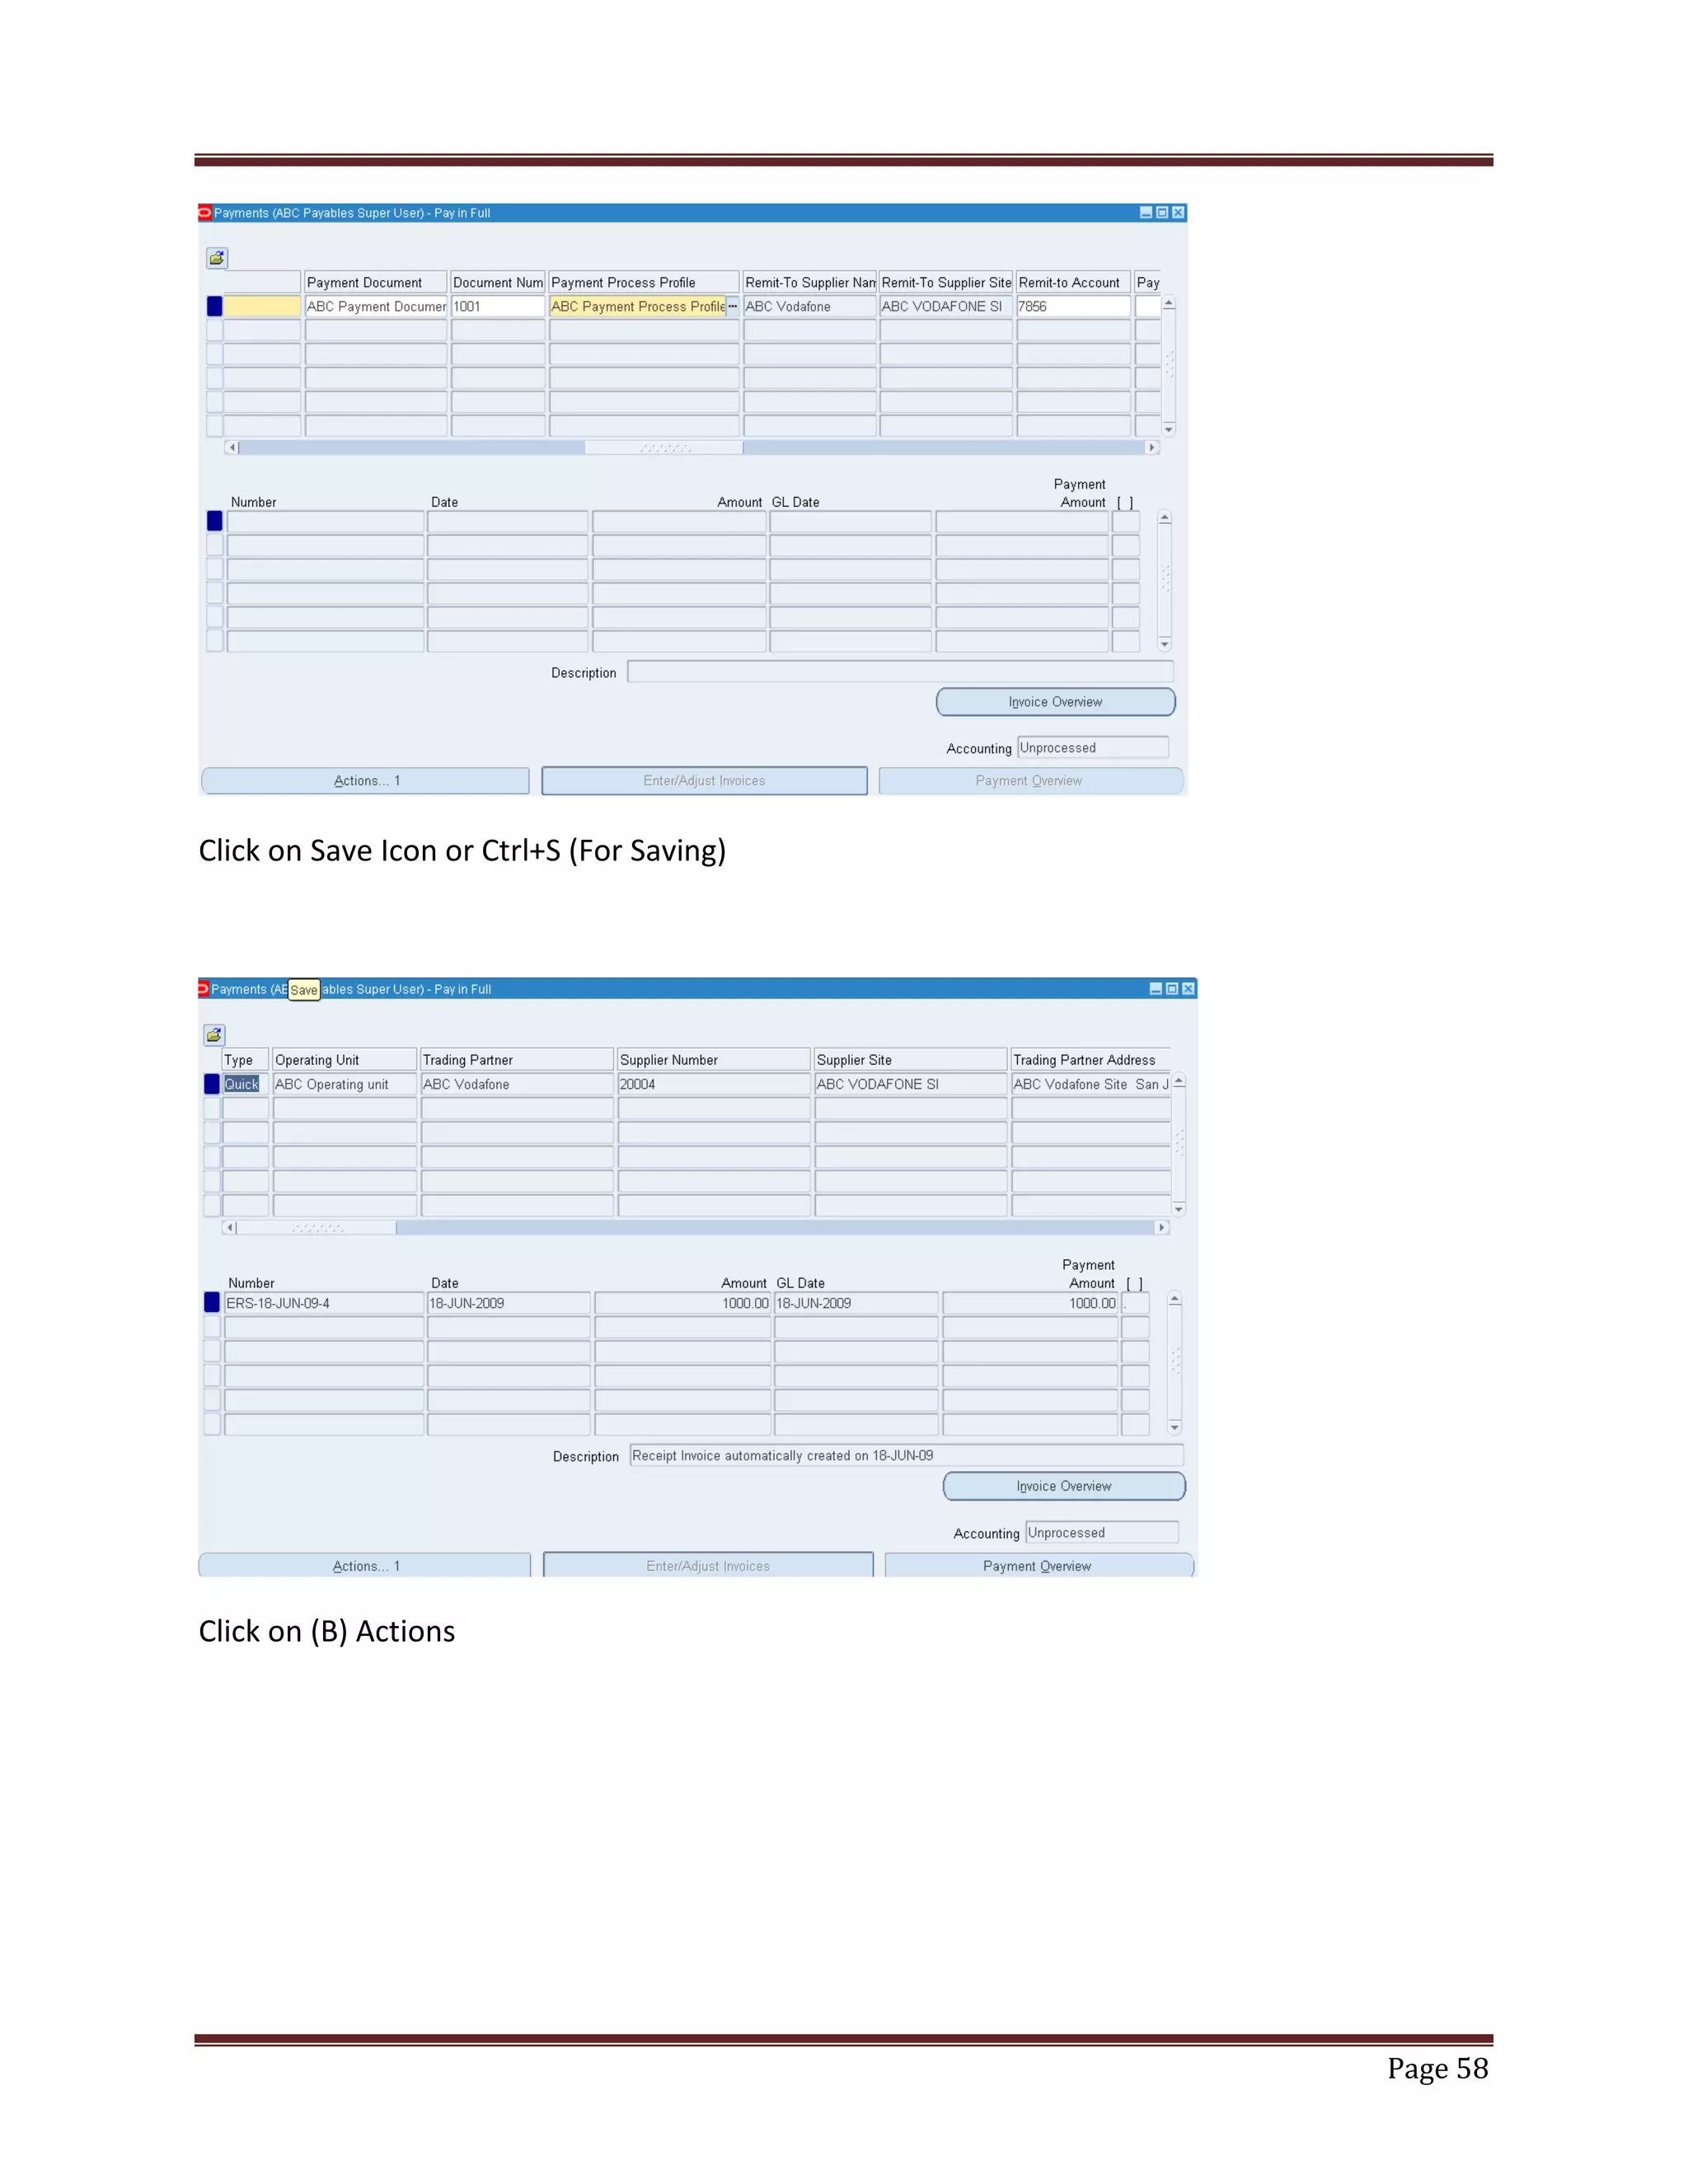
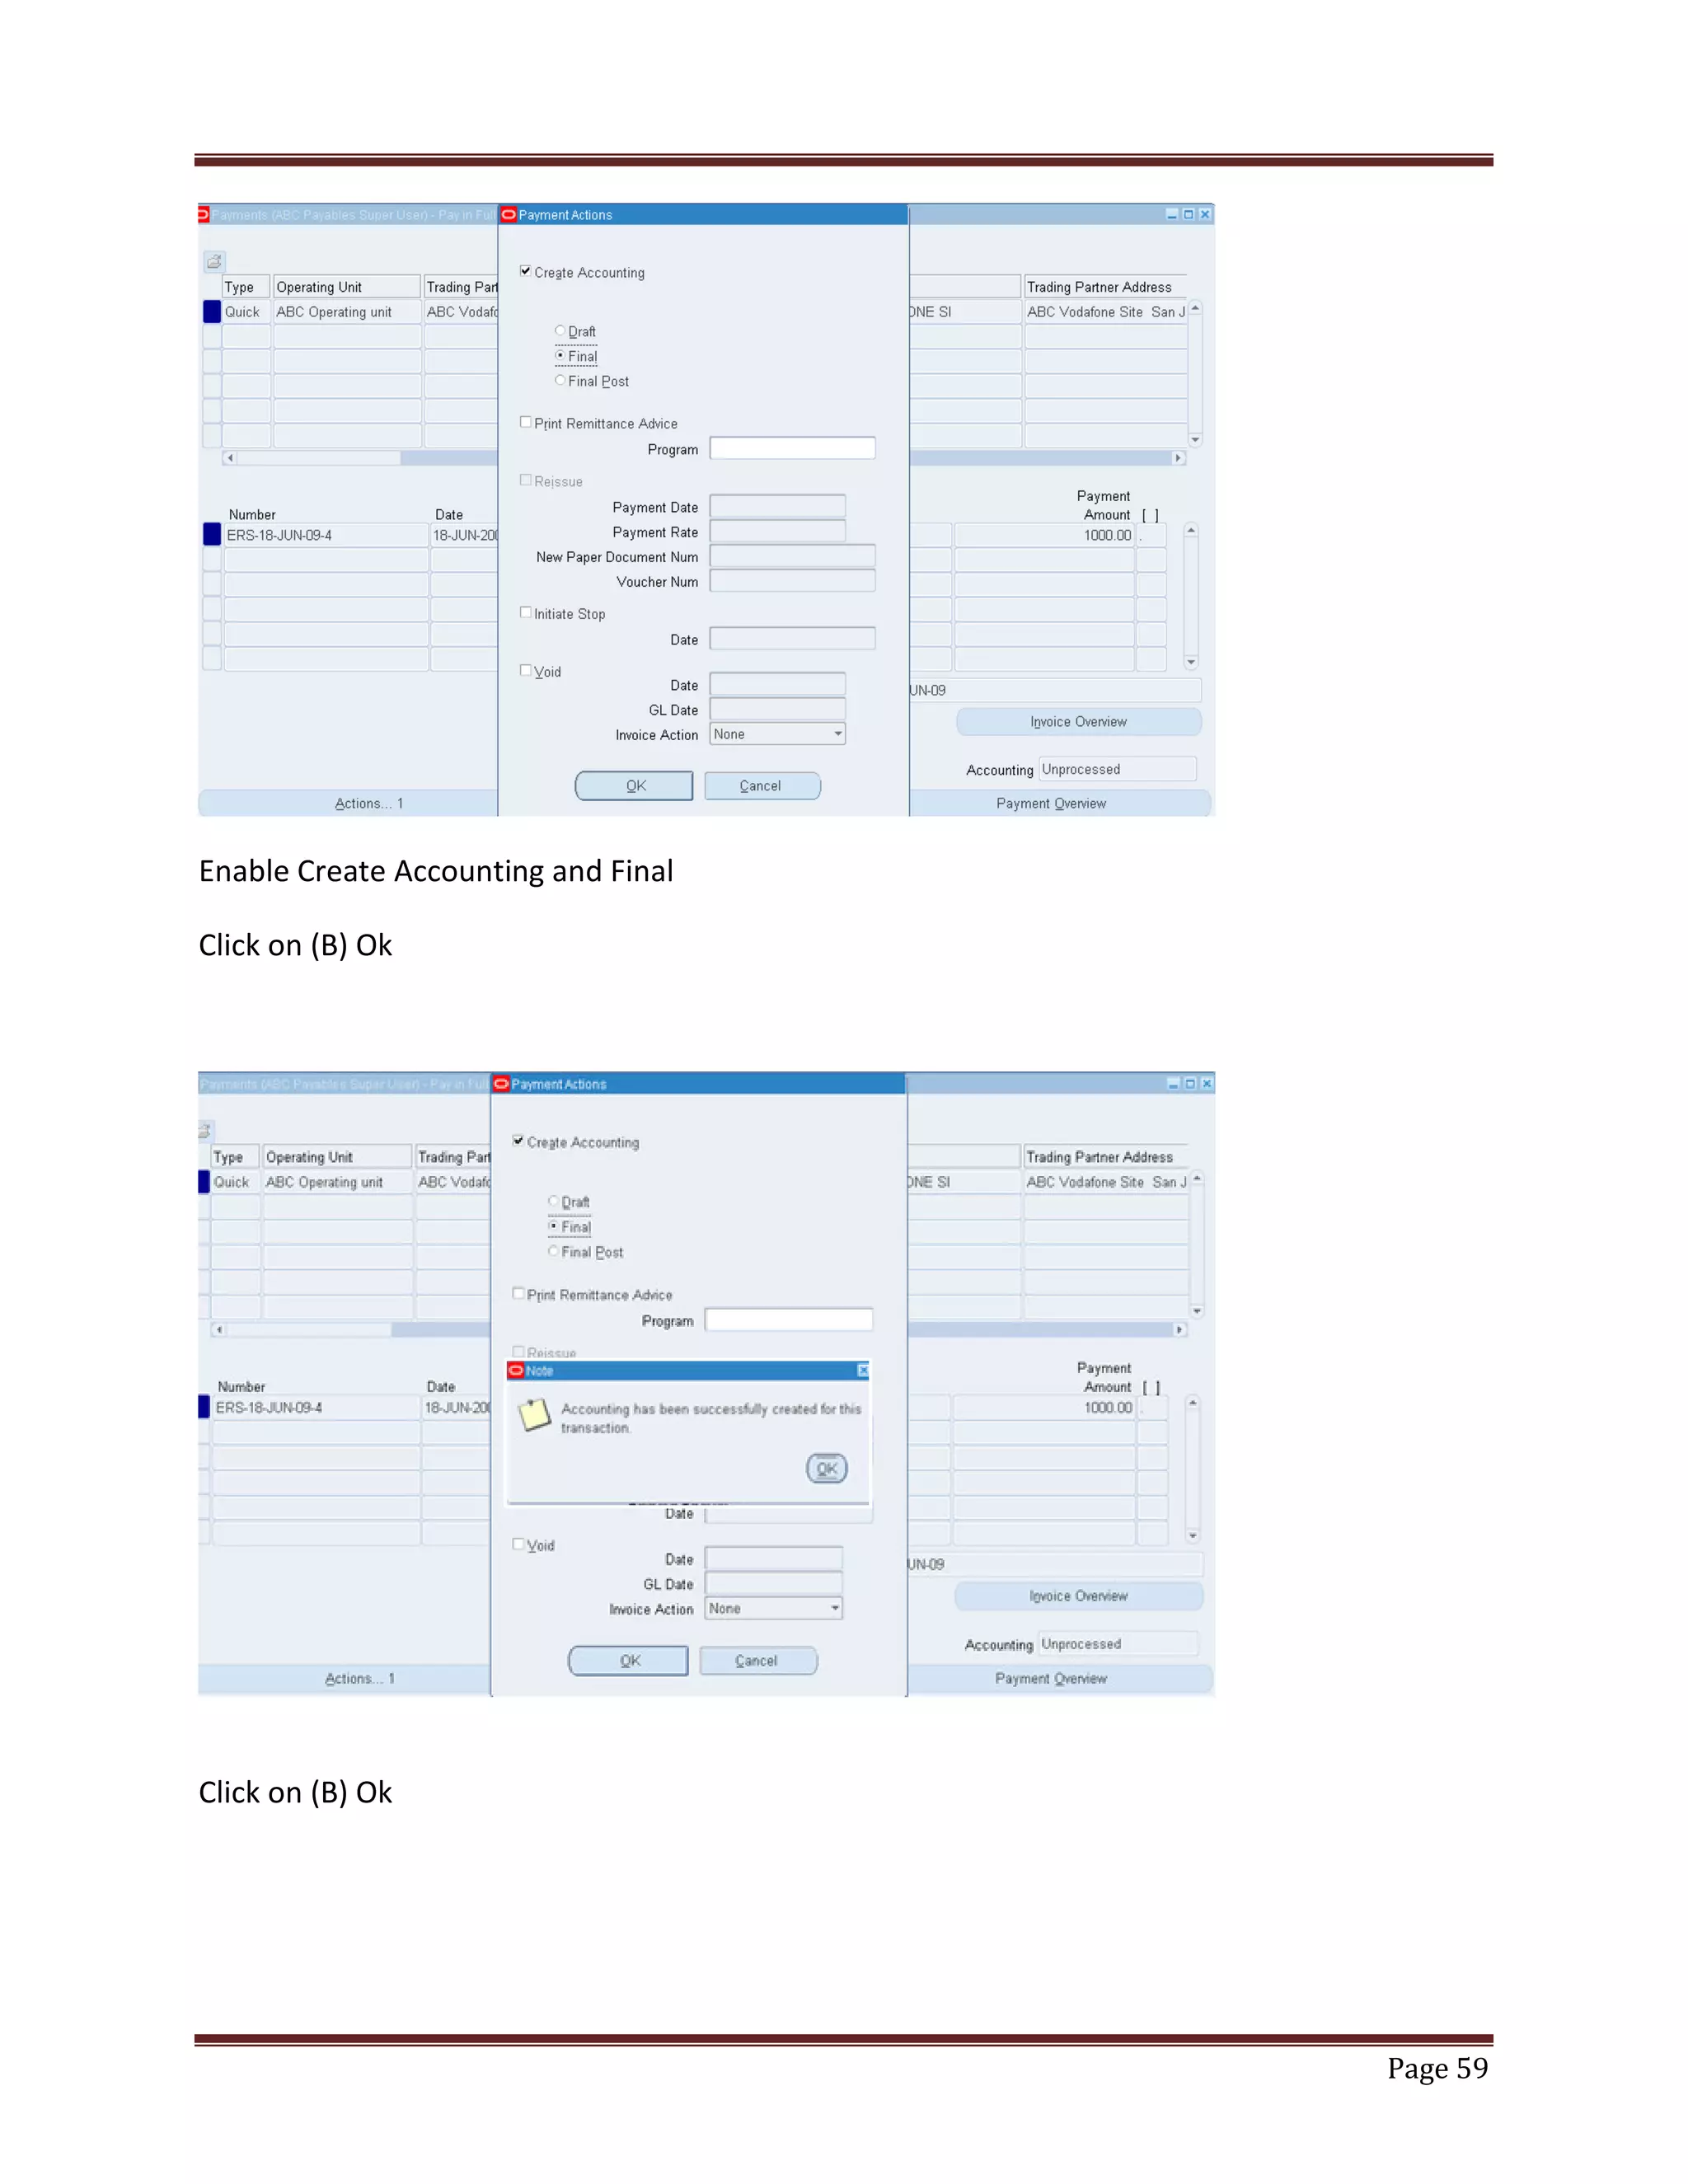
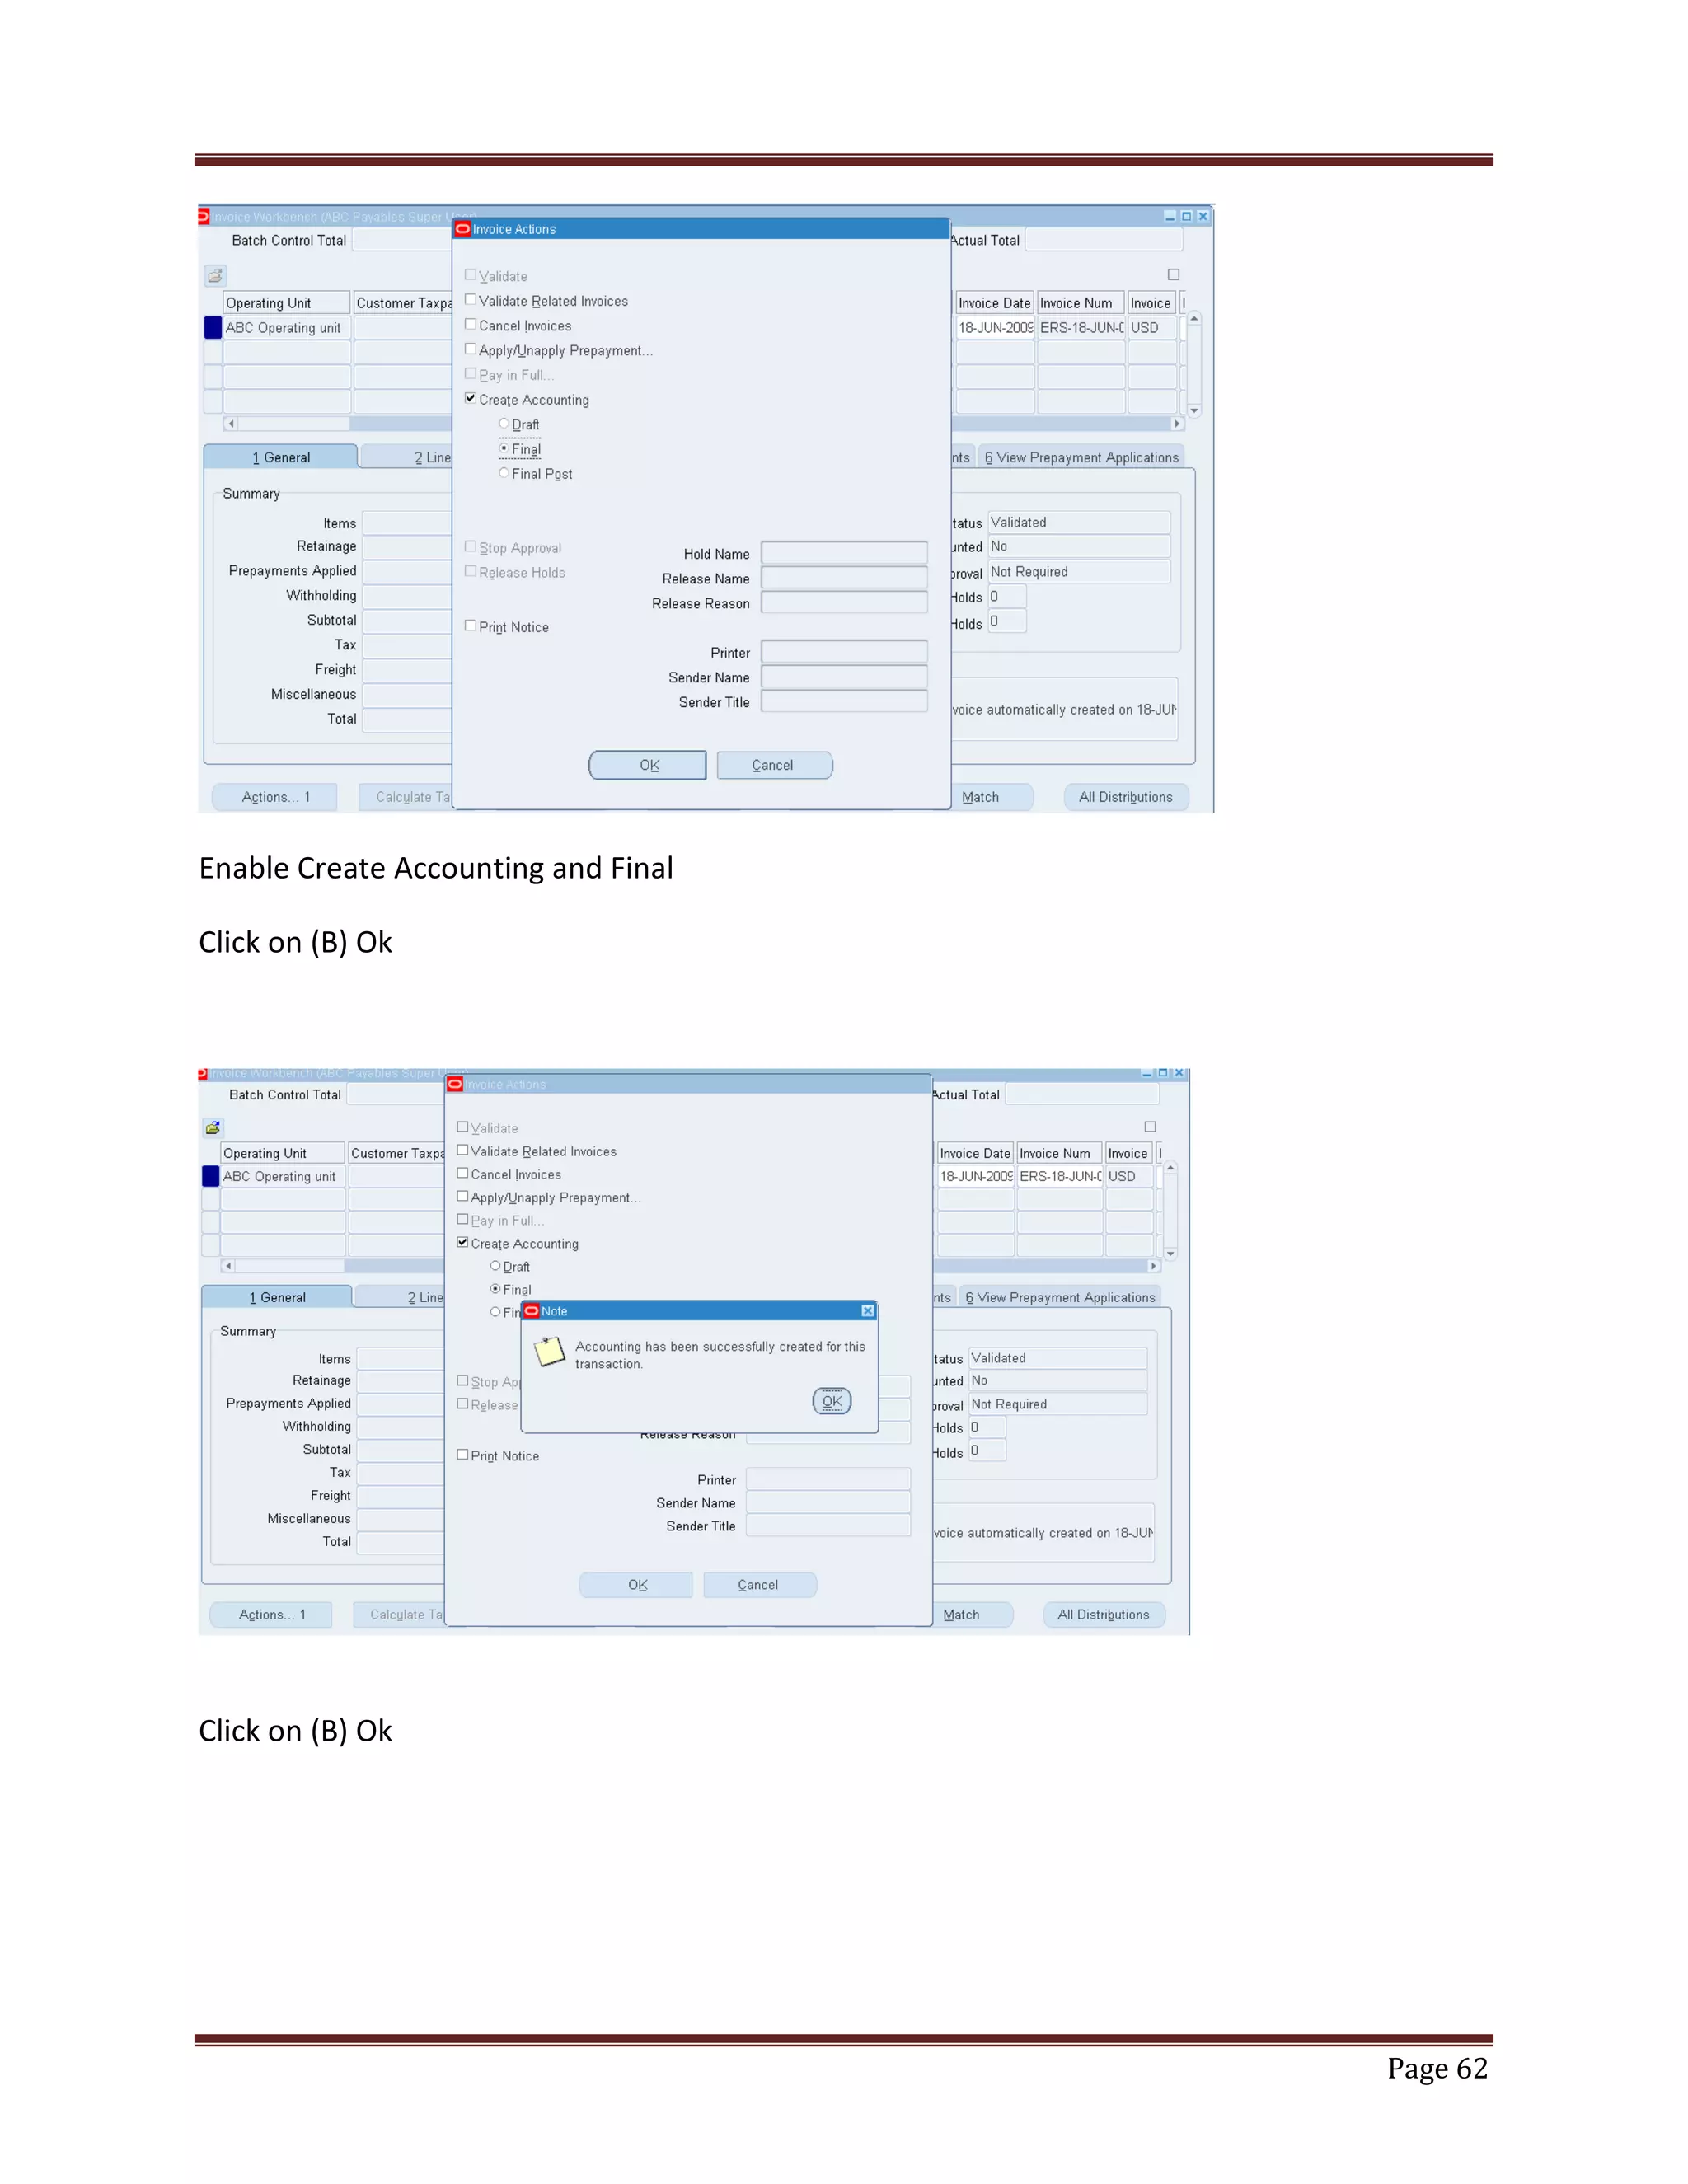
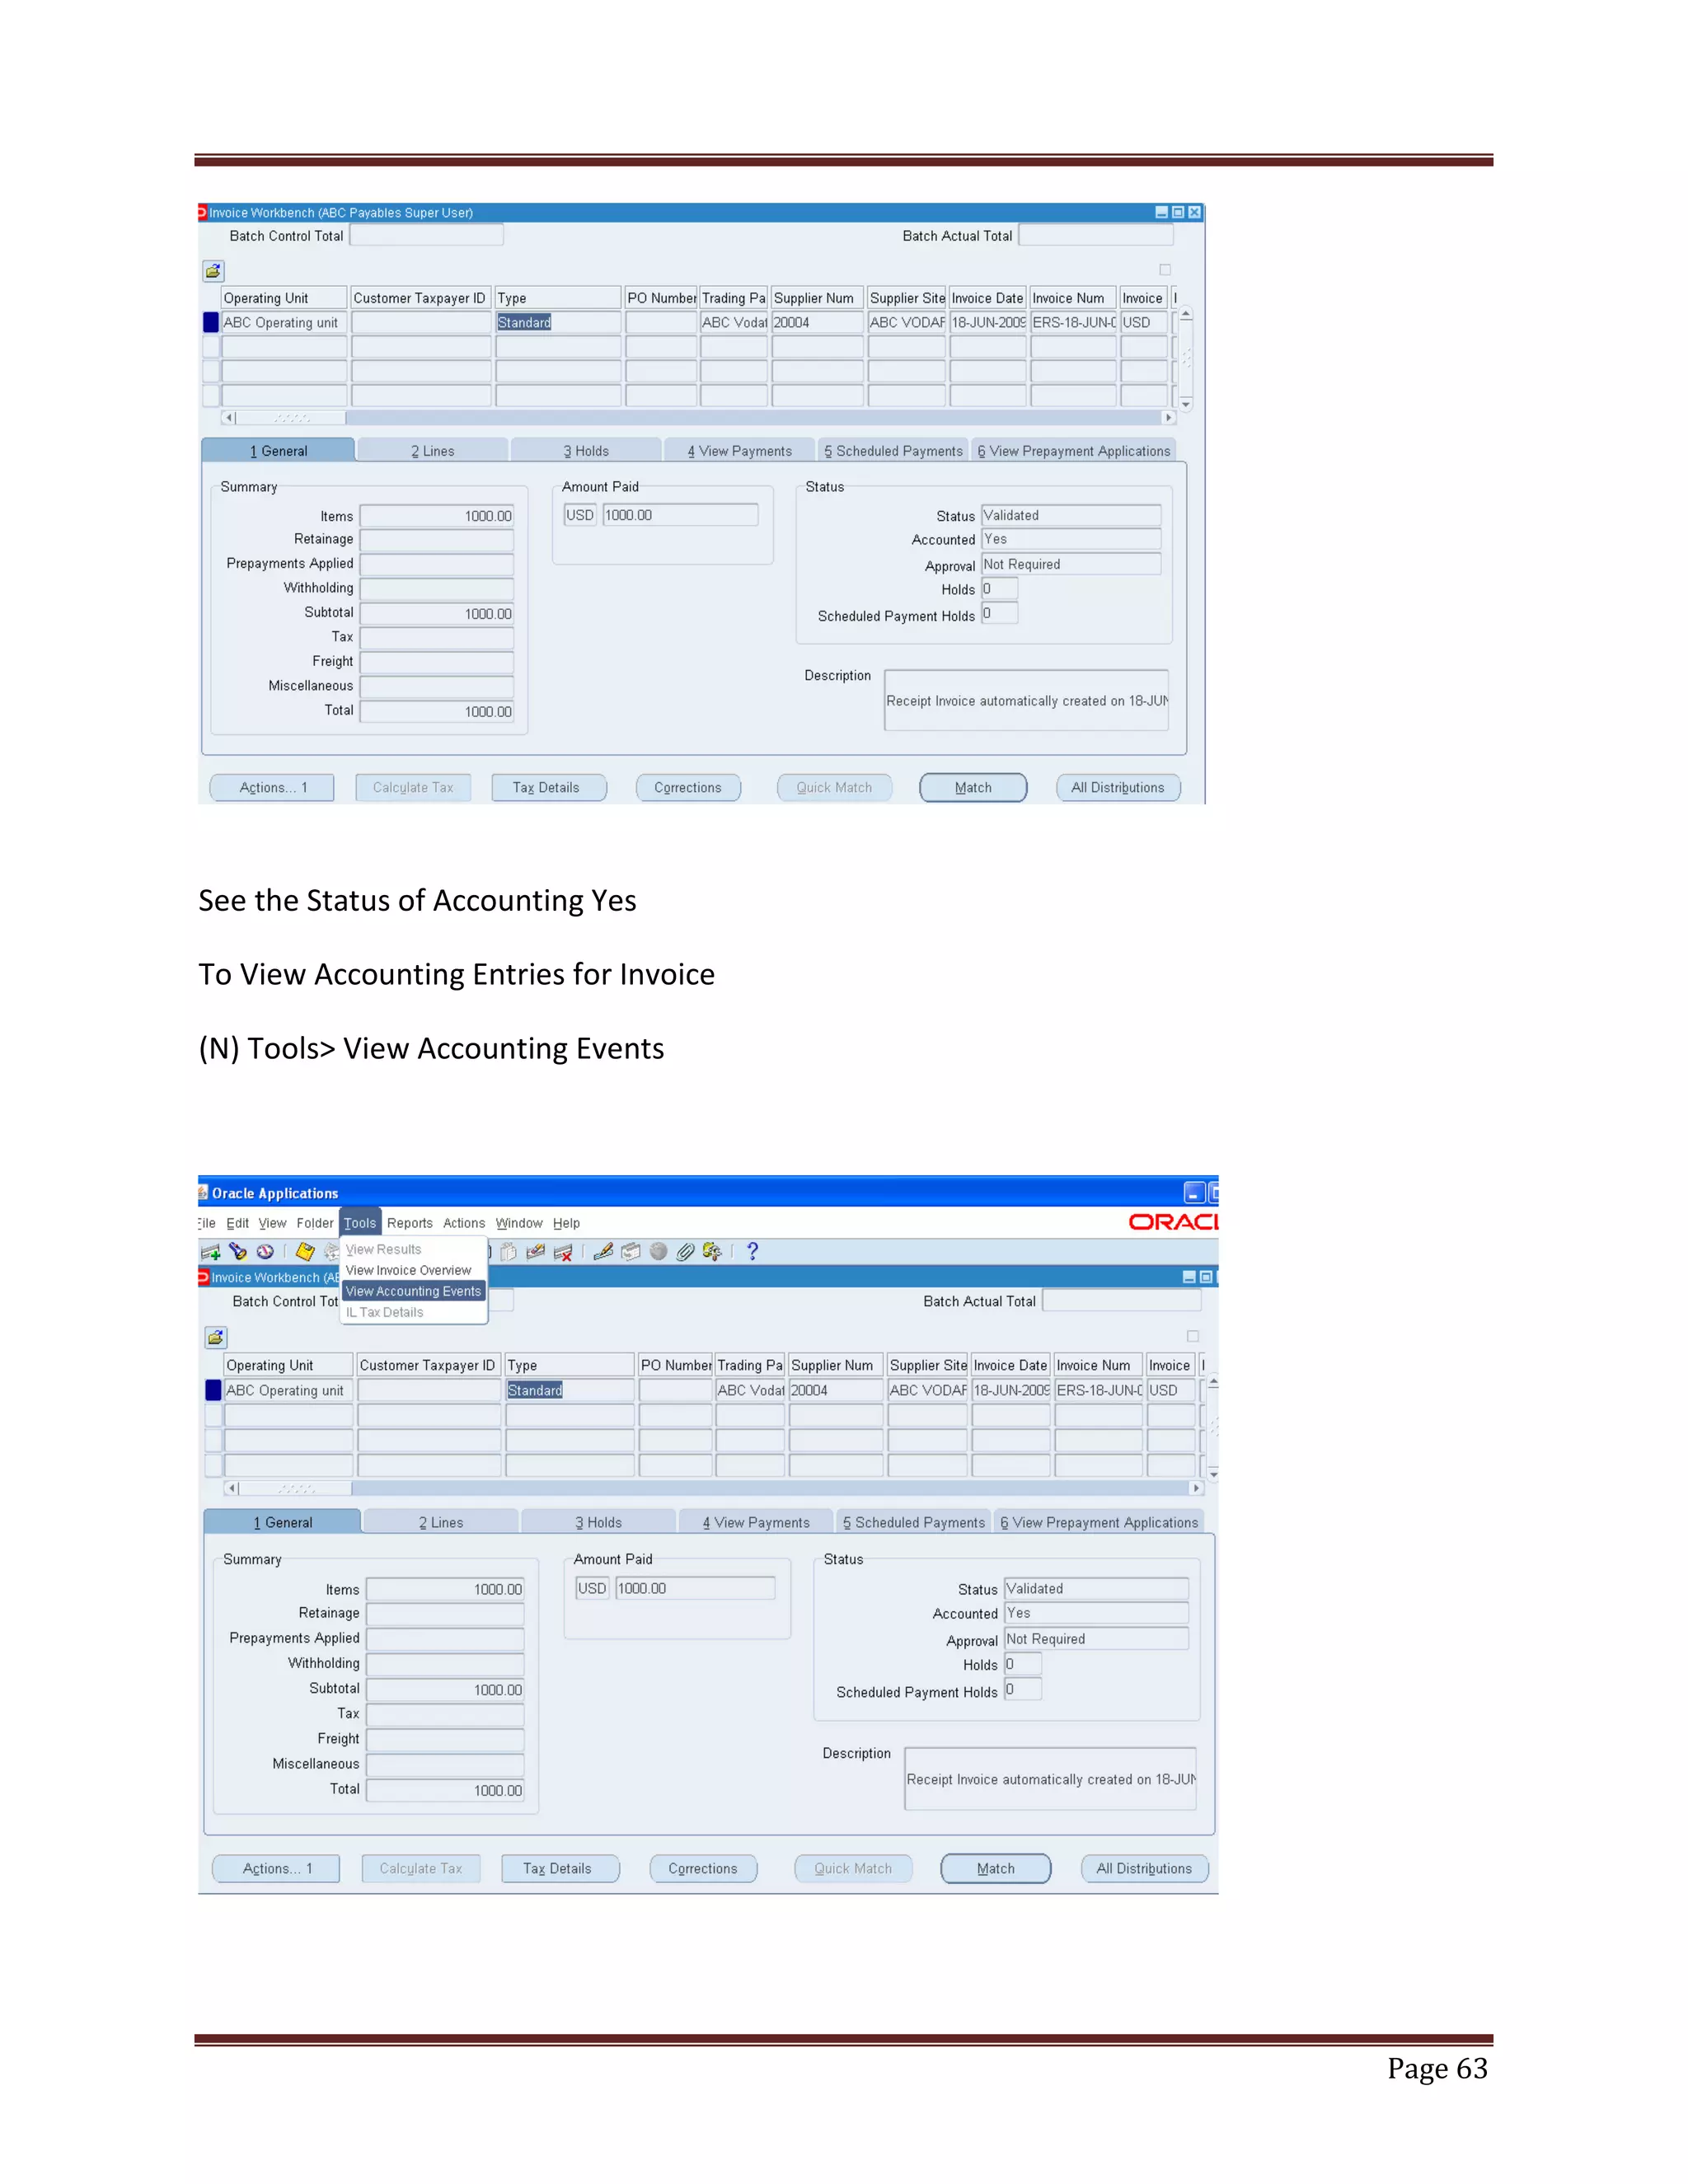
Steps to query, validate invoices, and process payments while tracking accounting status.
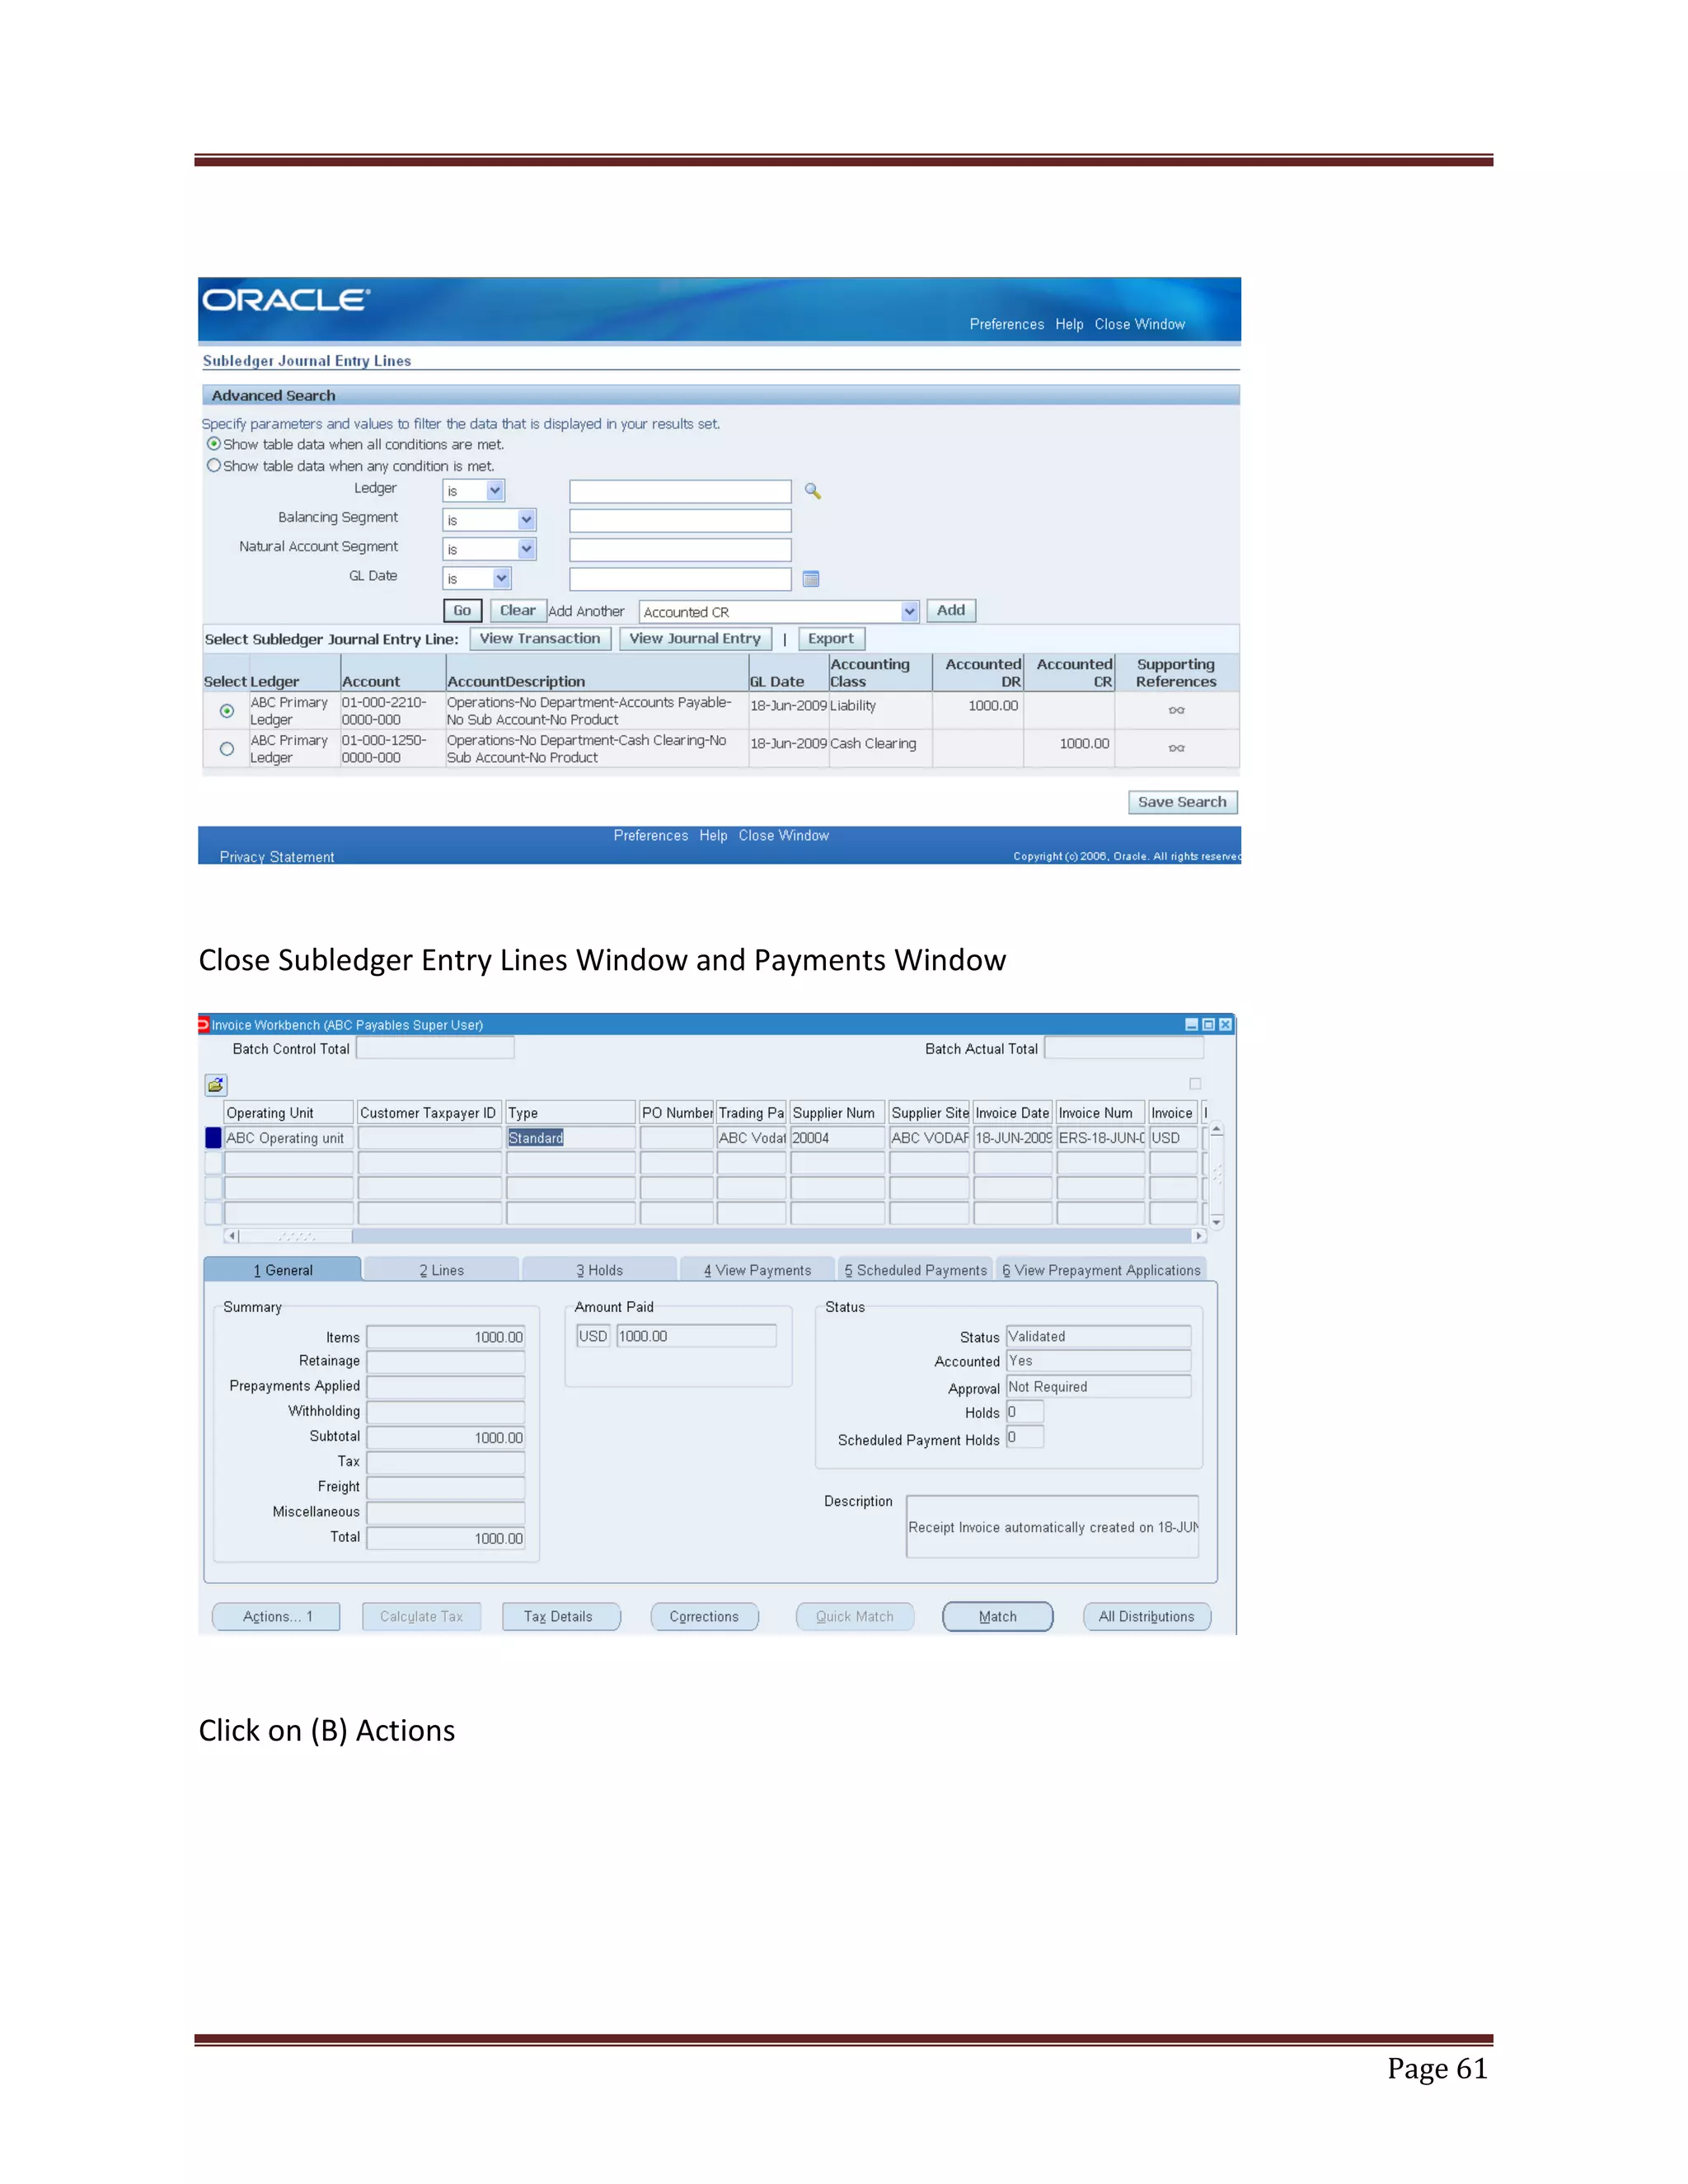
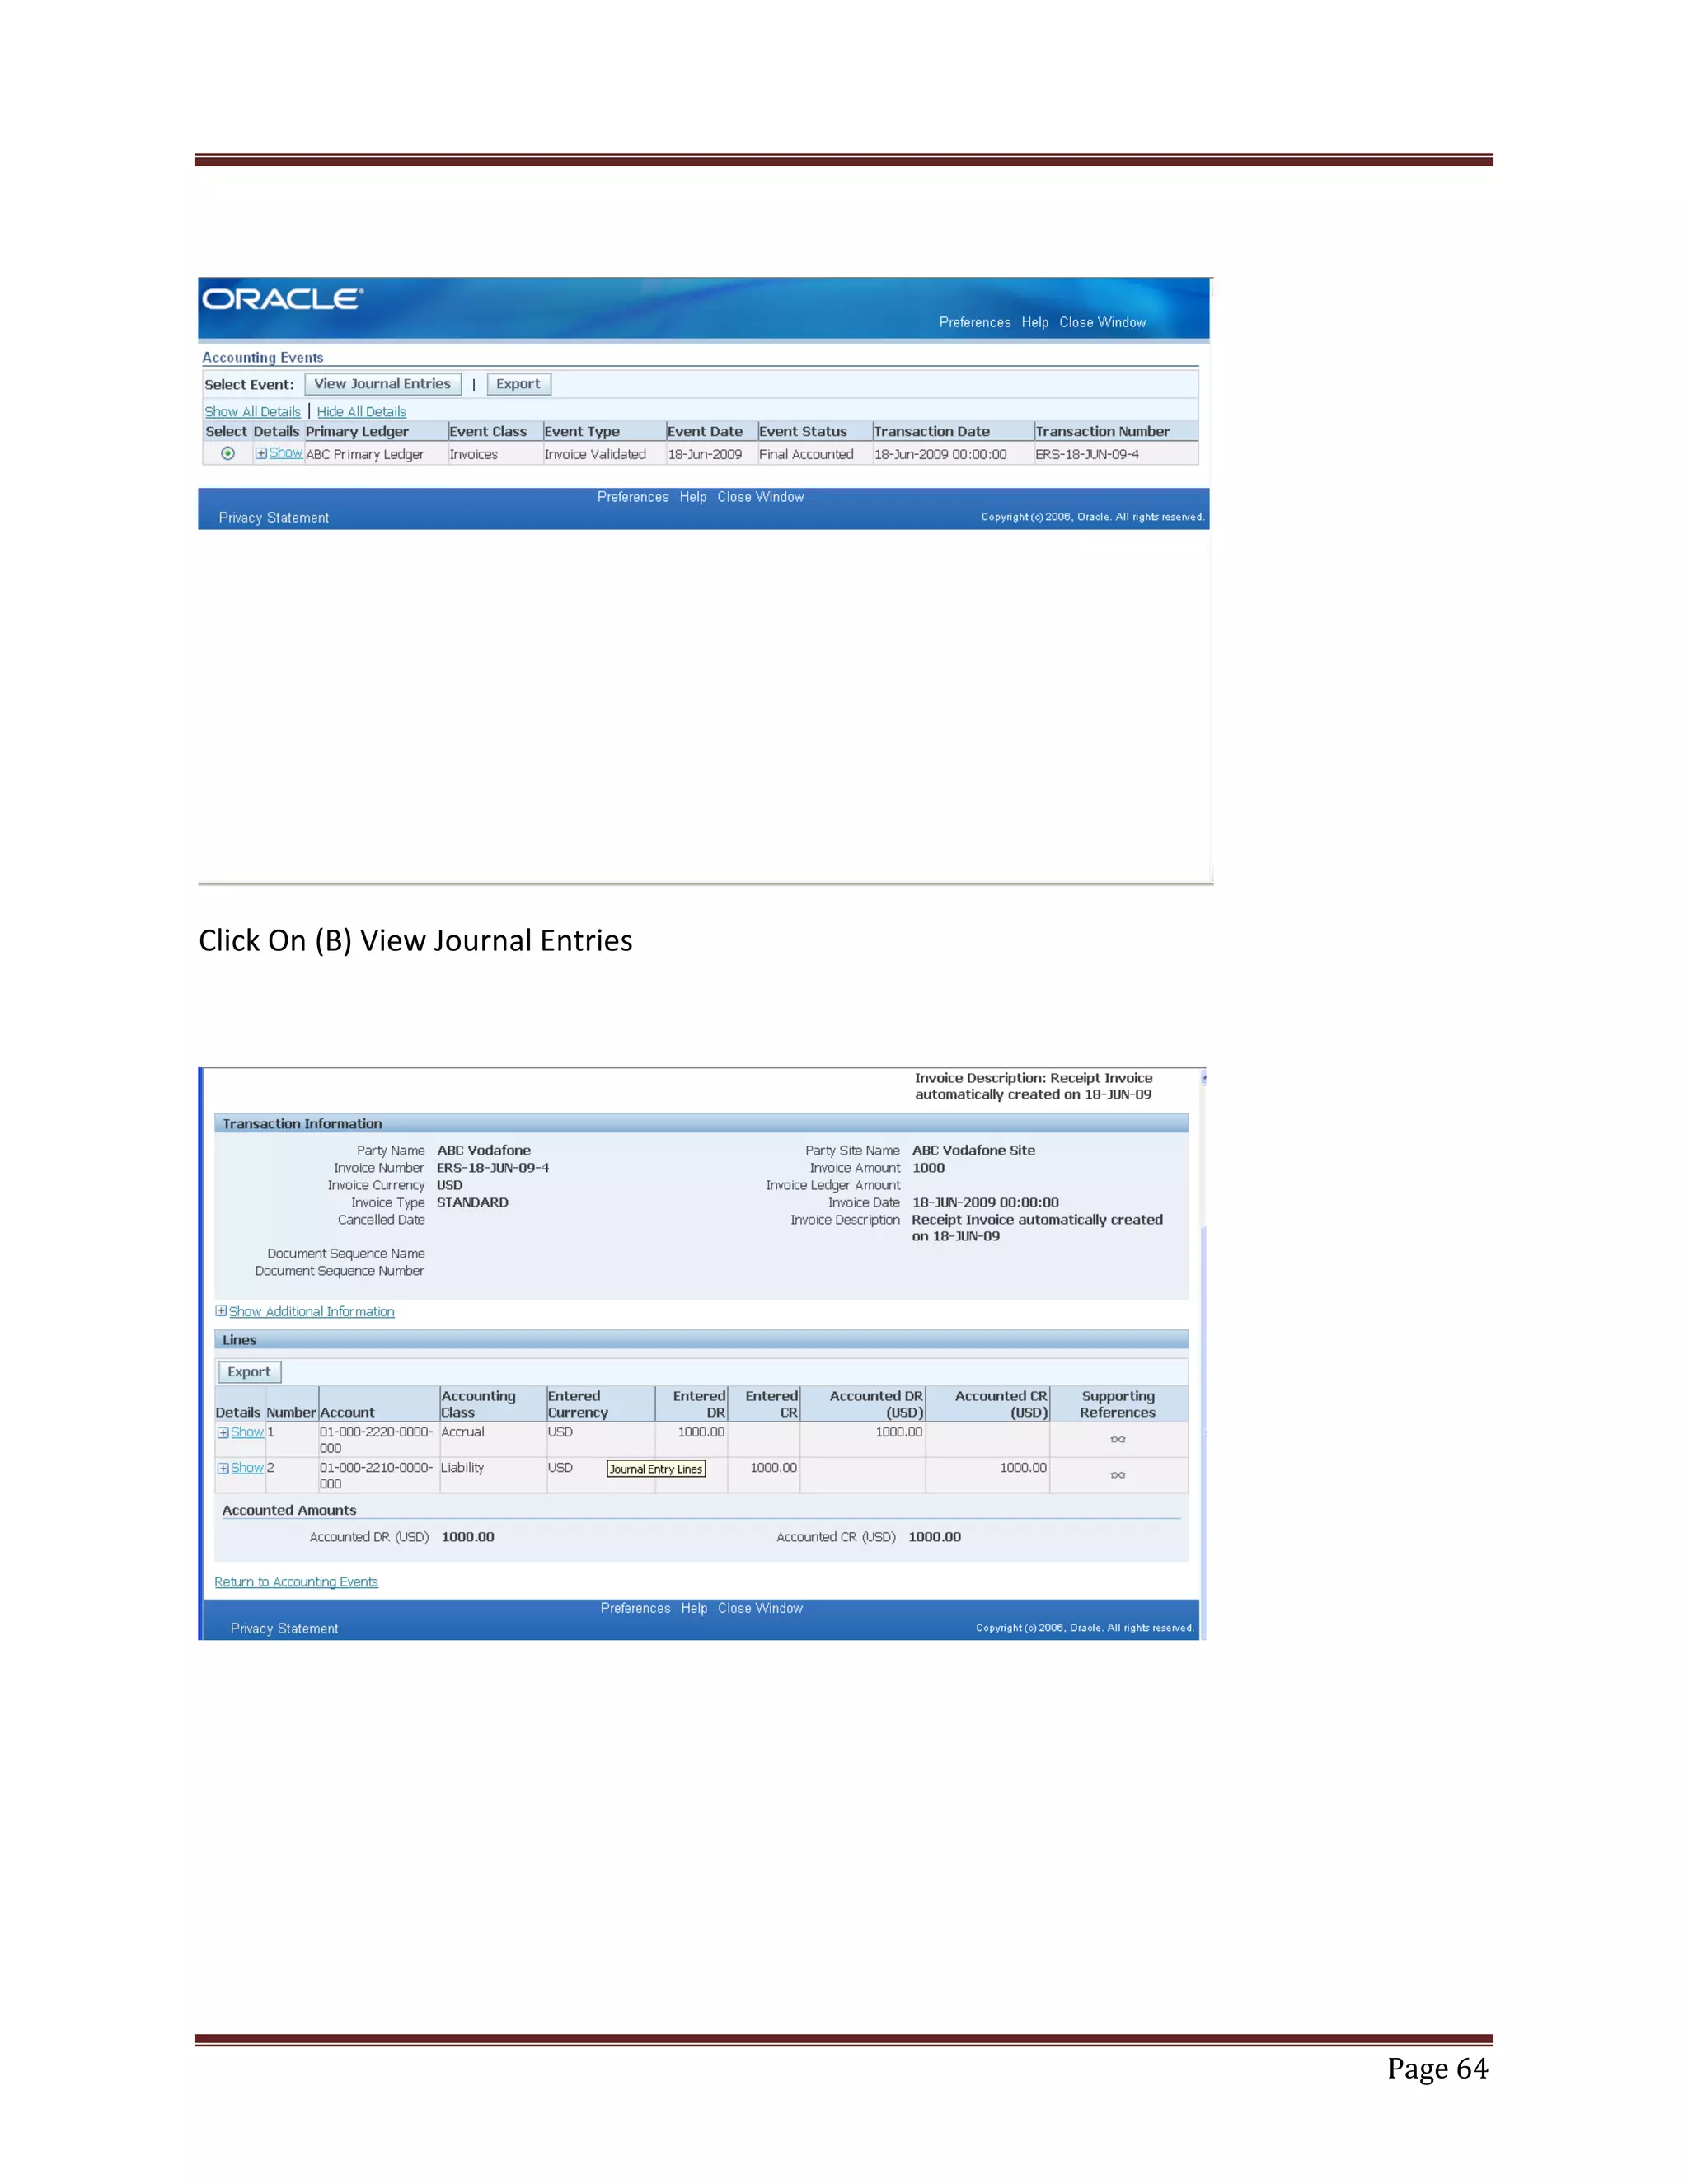
Creating and viewing accounts entries for payments and invoices, checking accounting status.