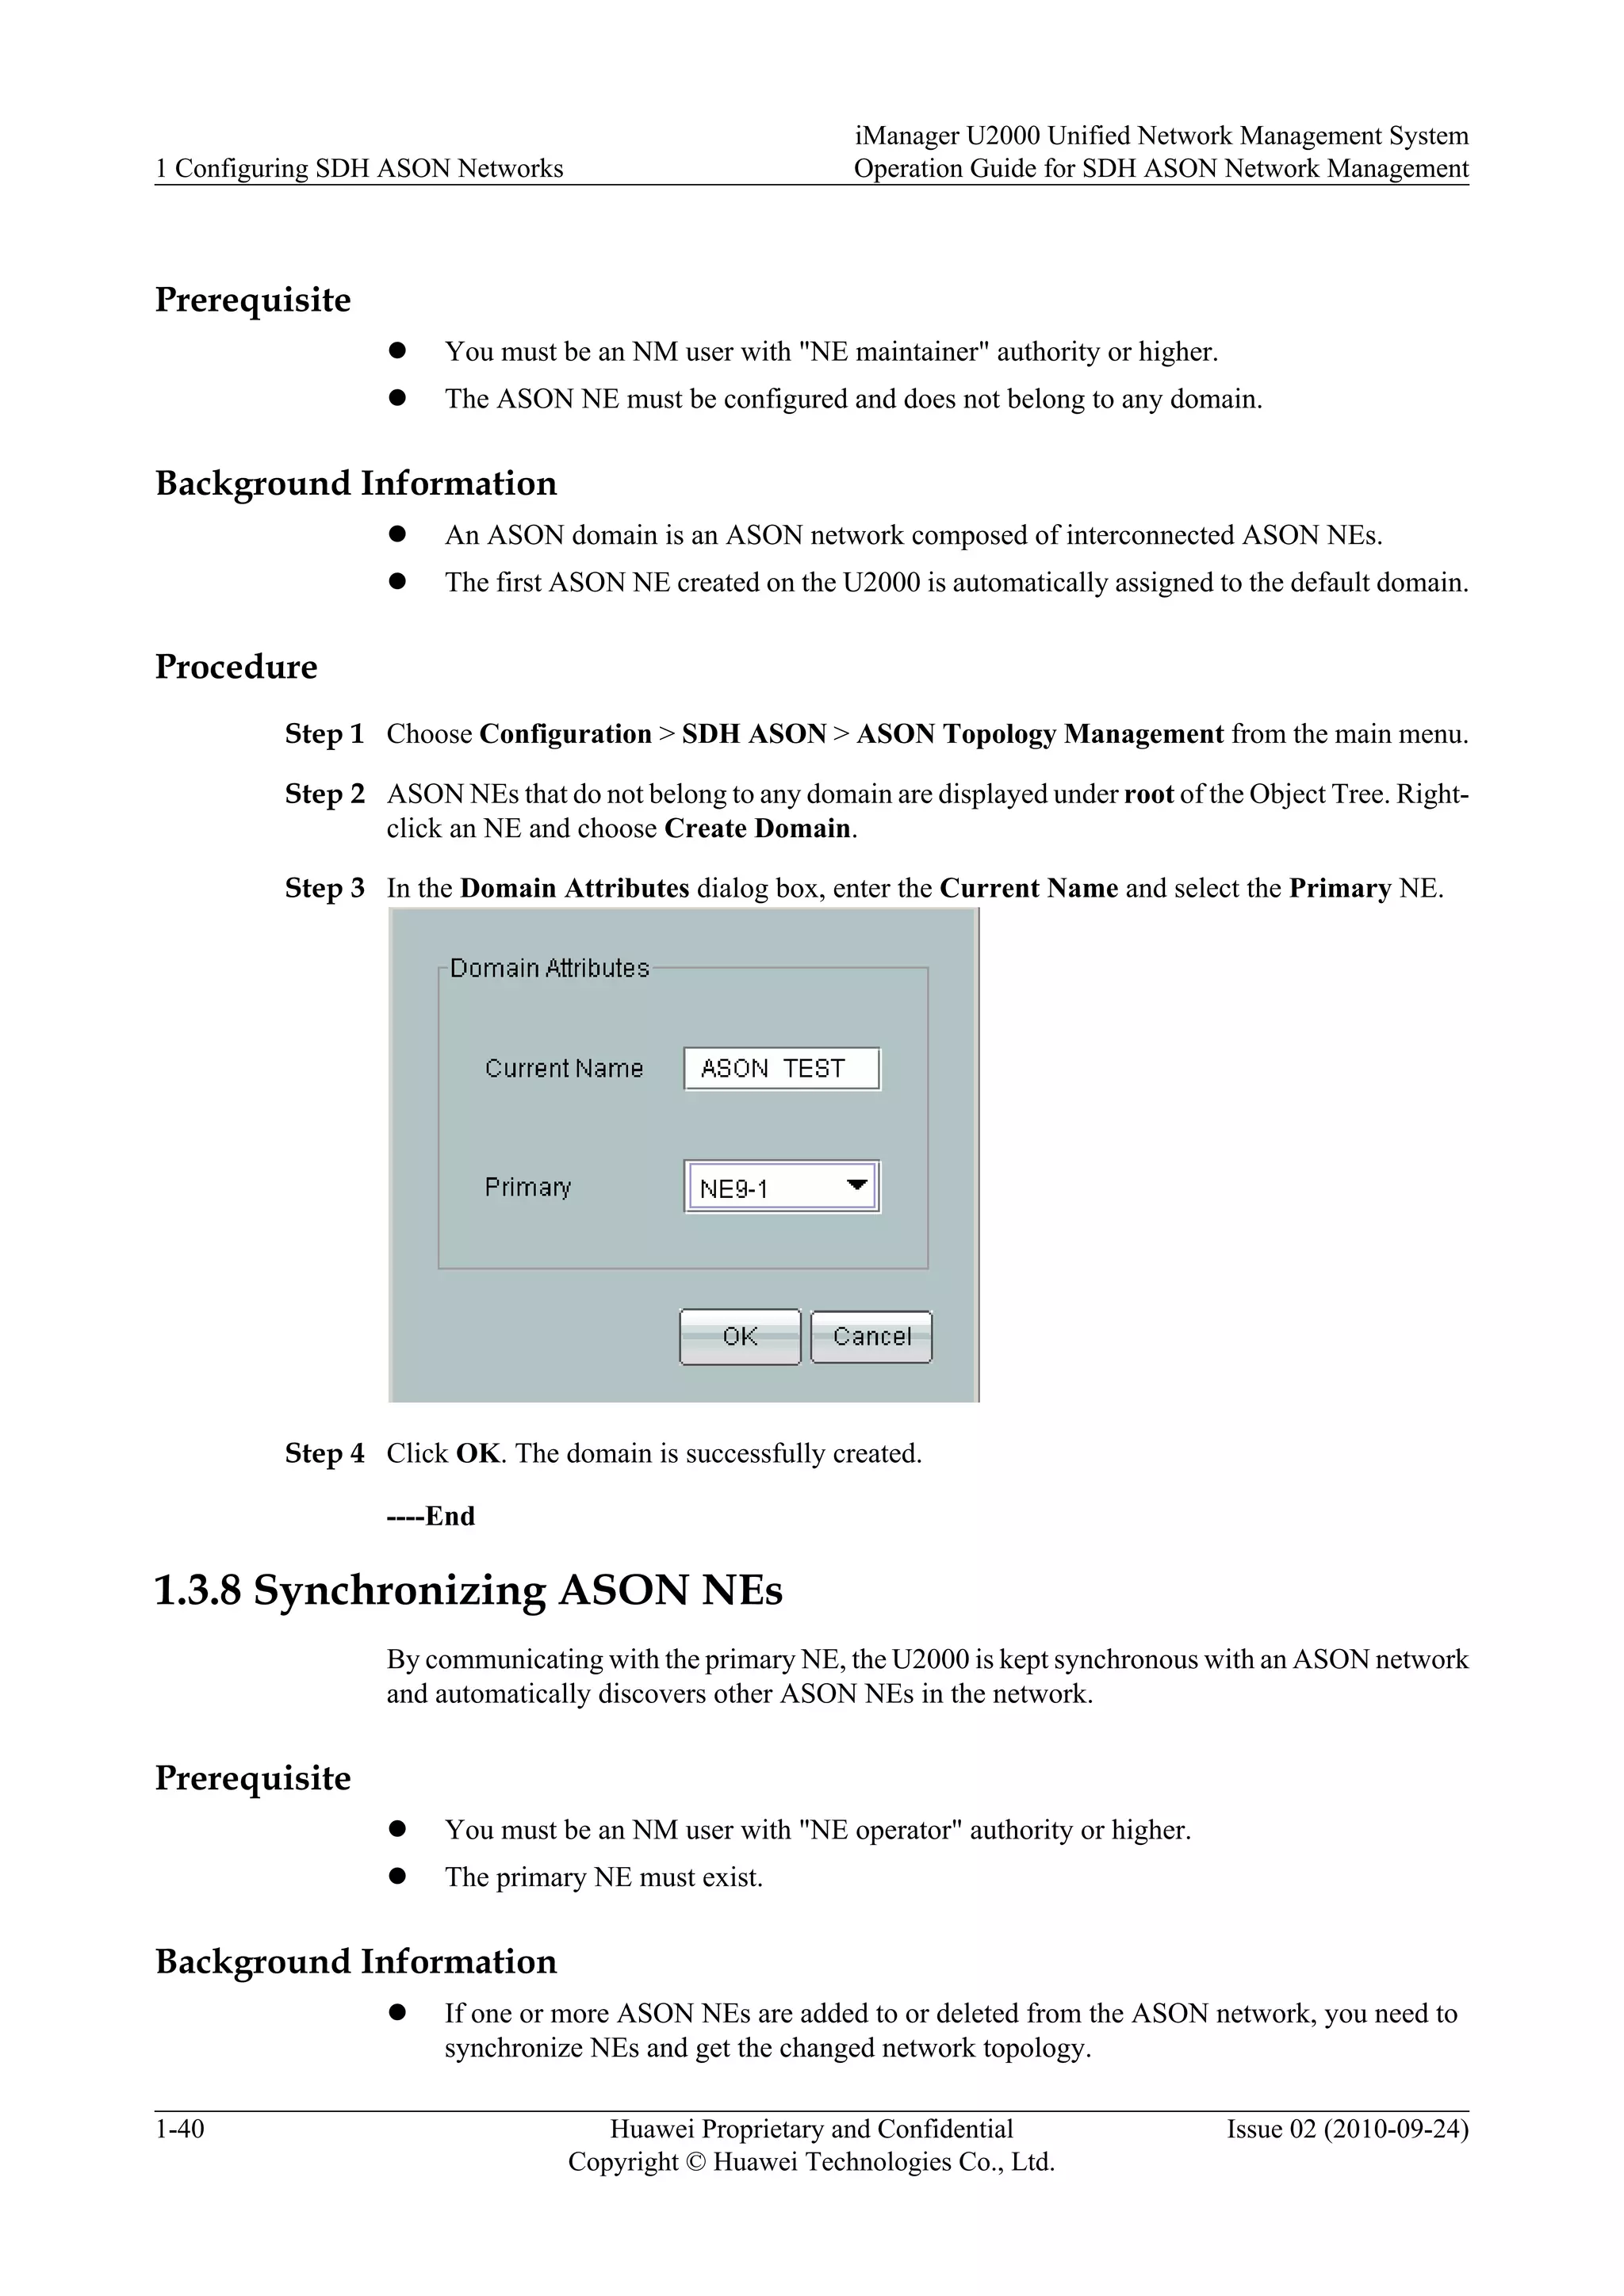
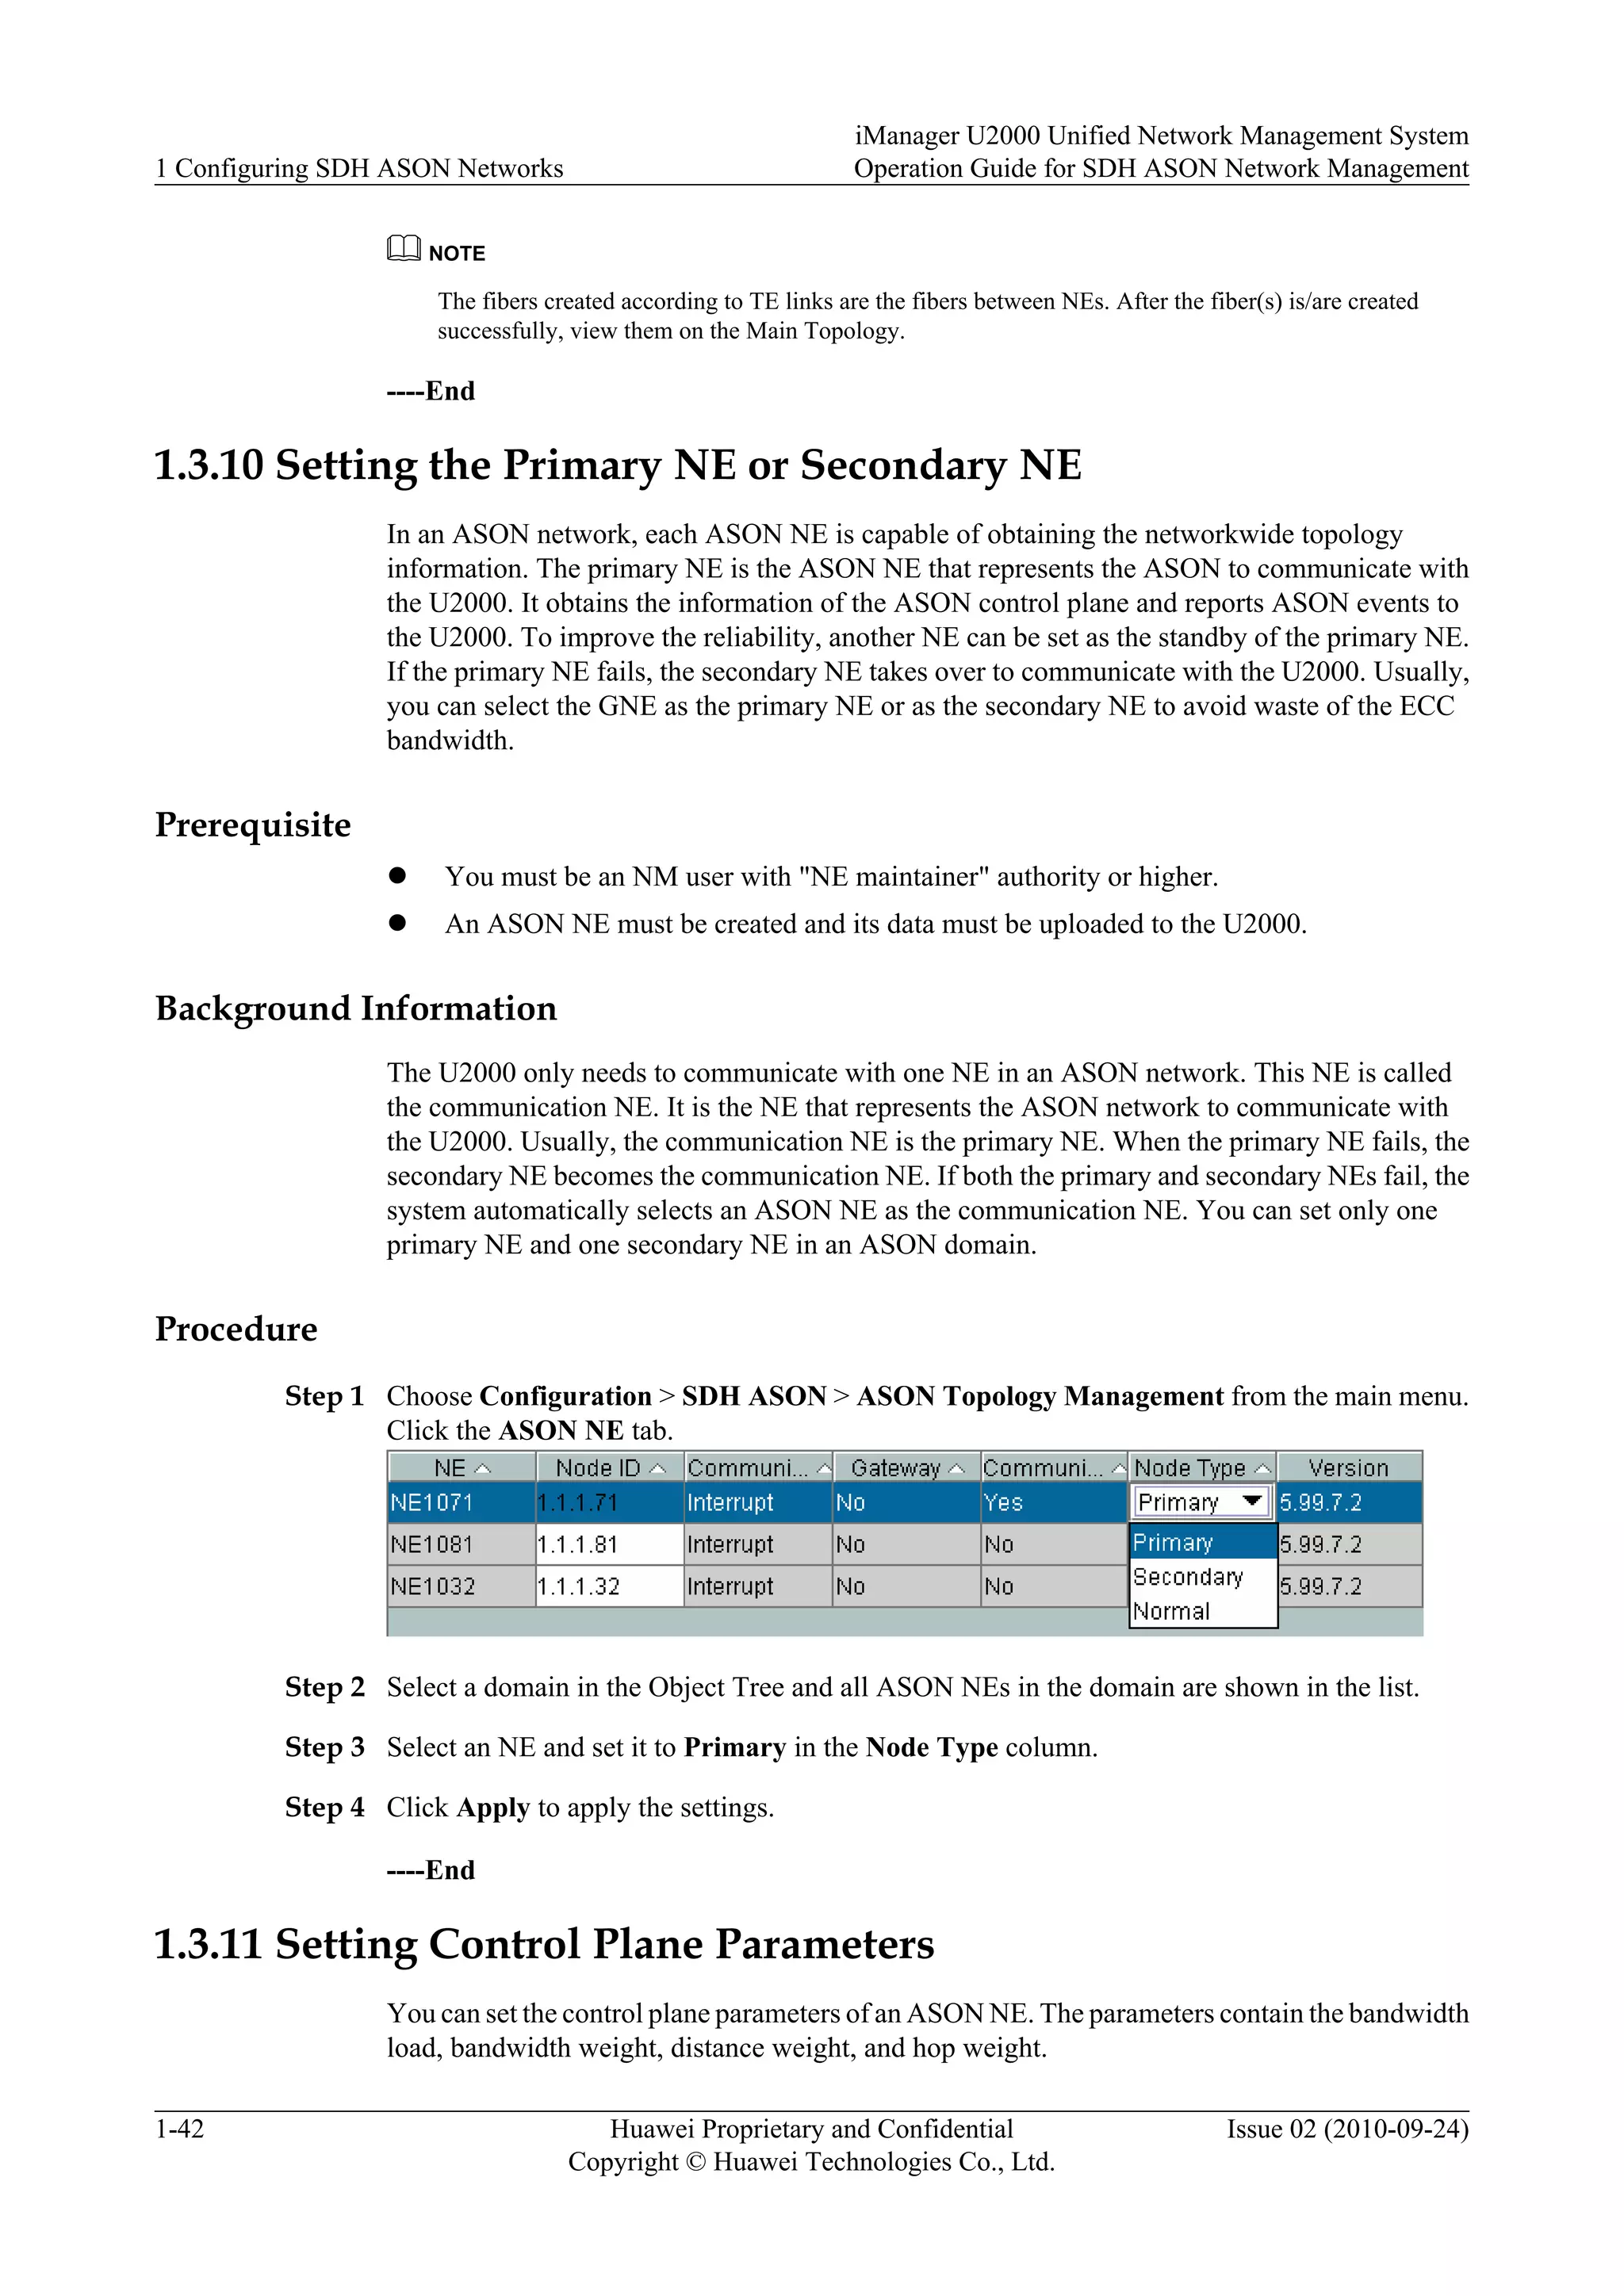
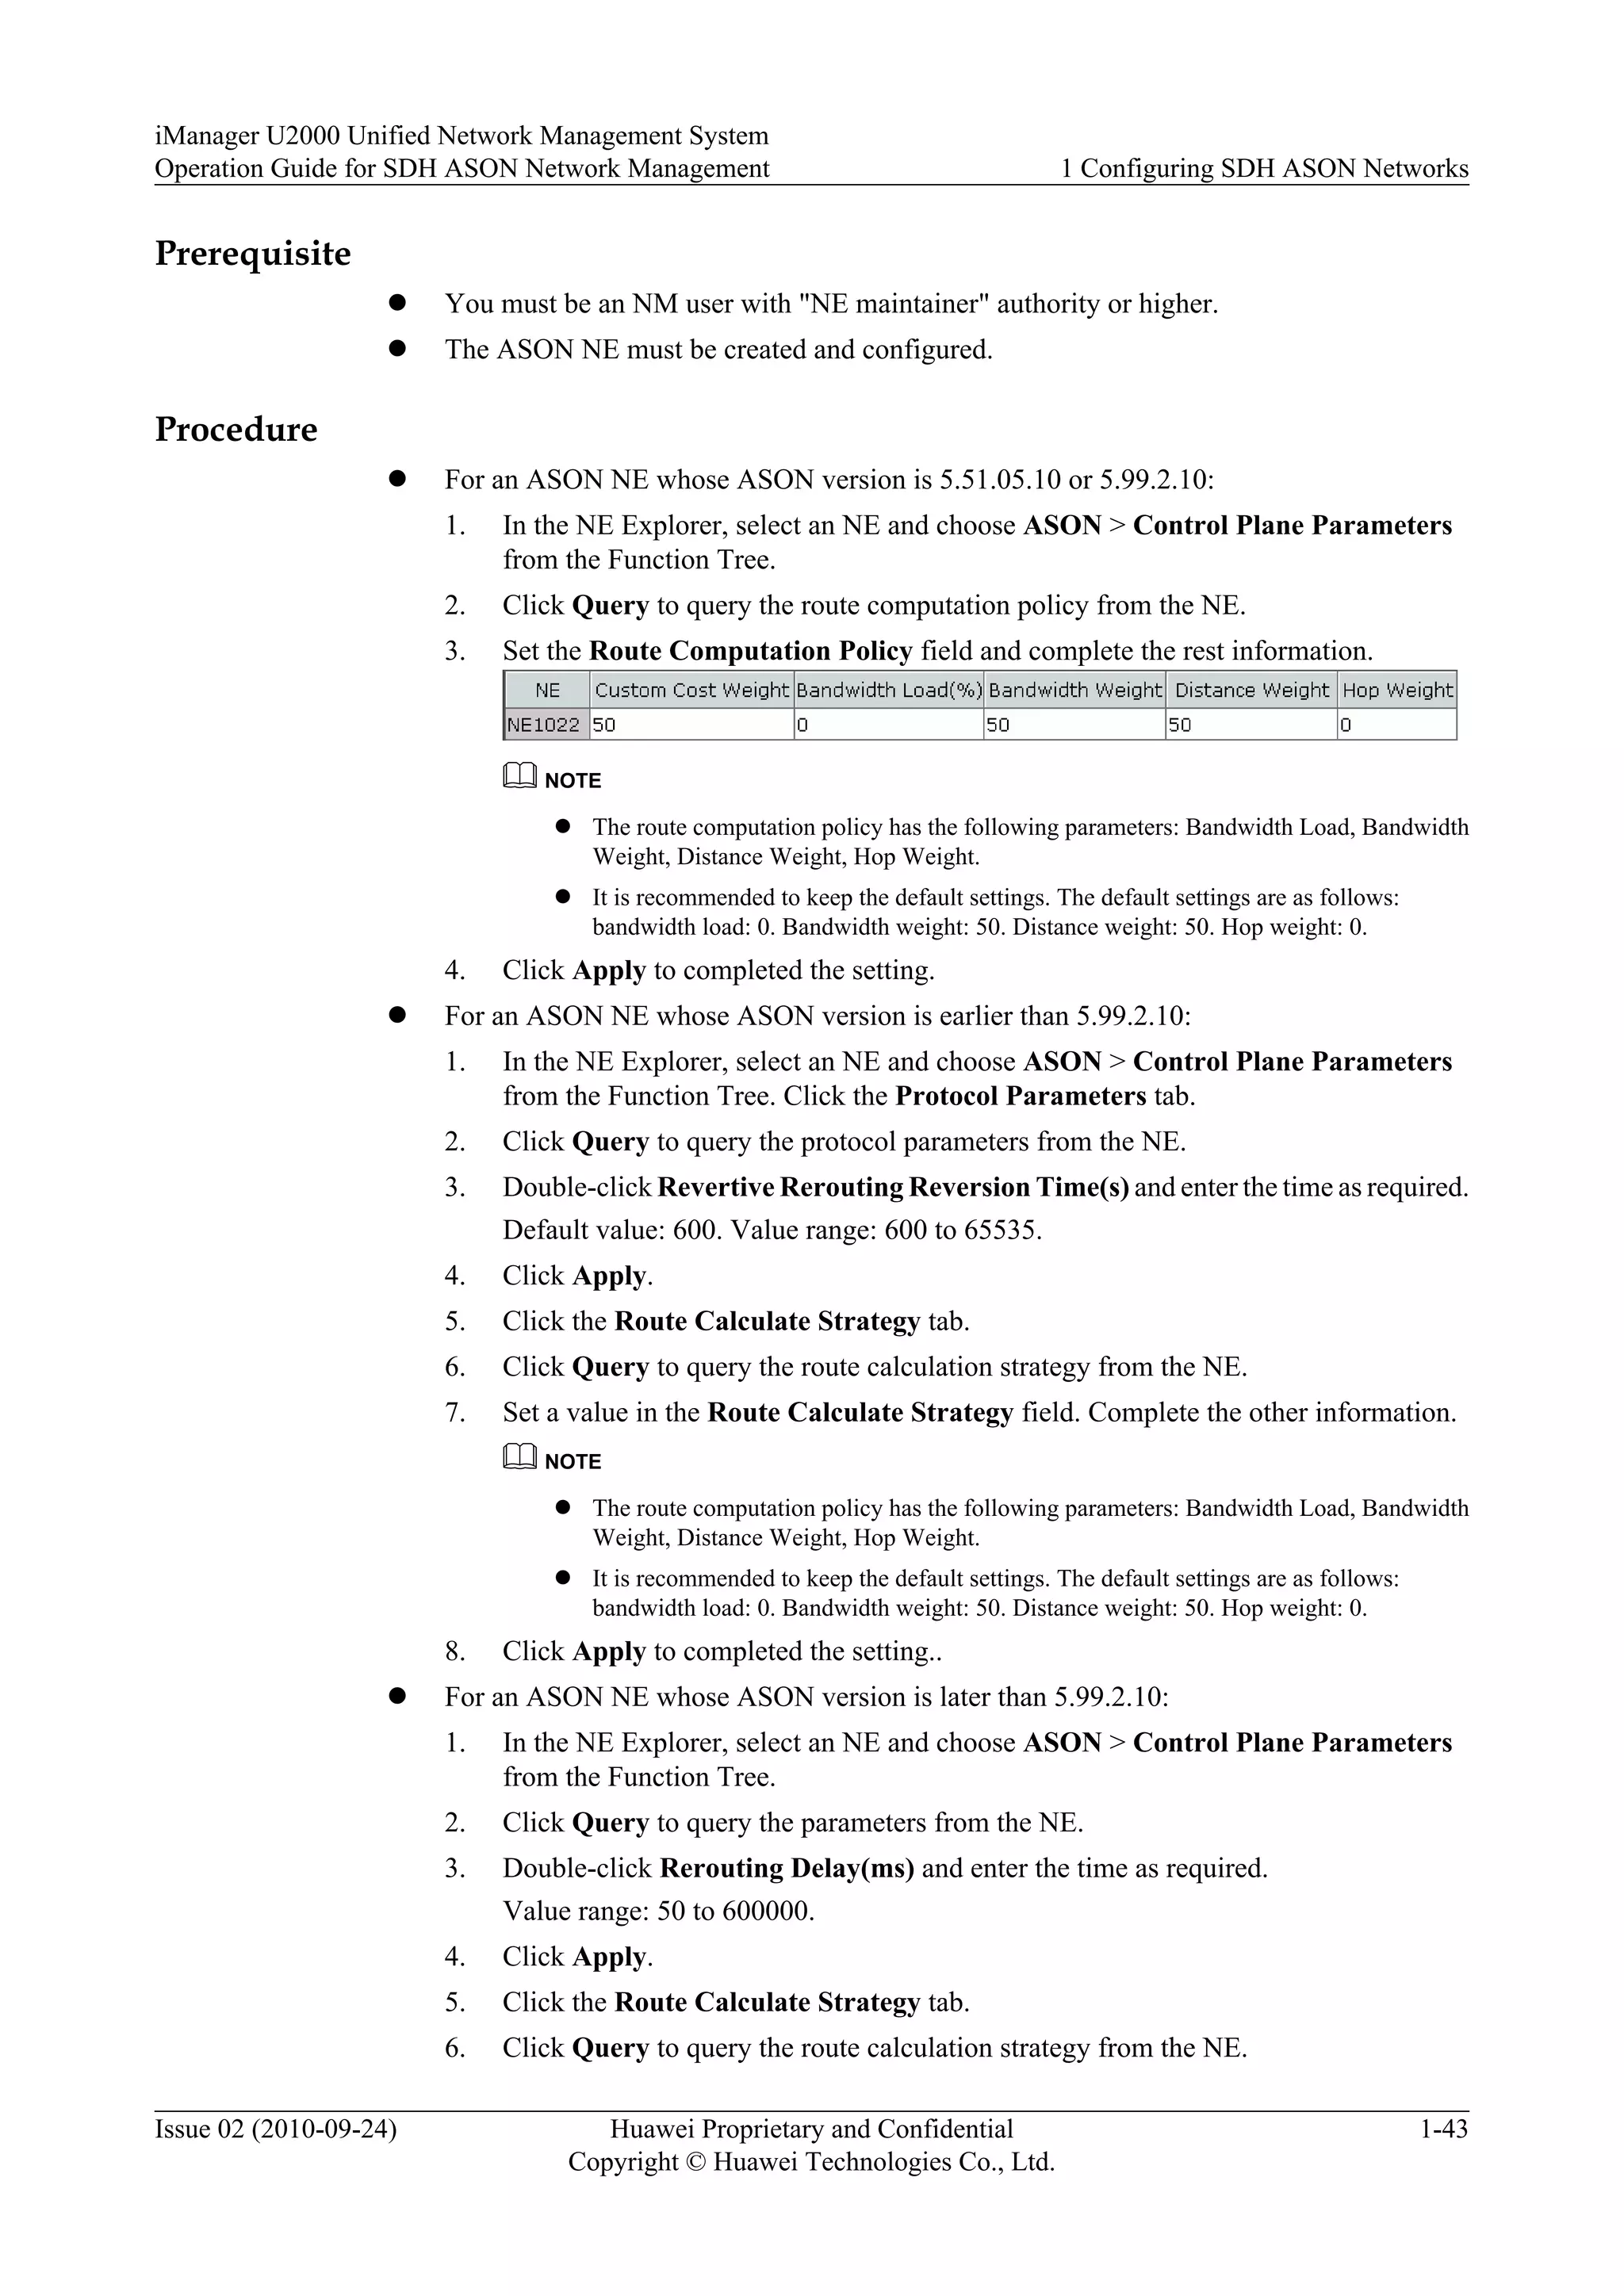
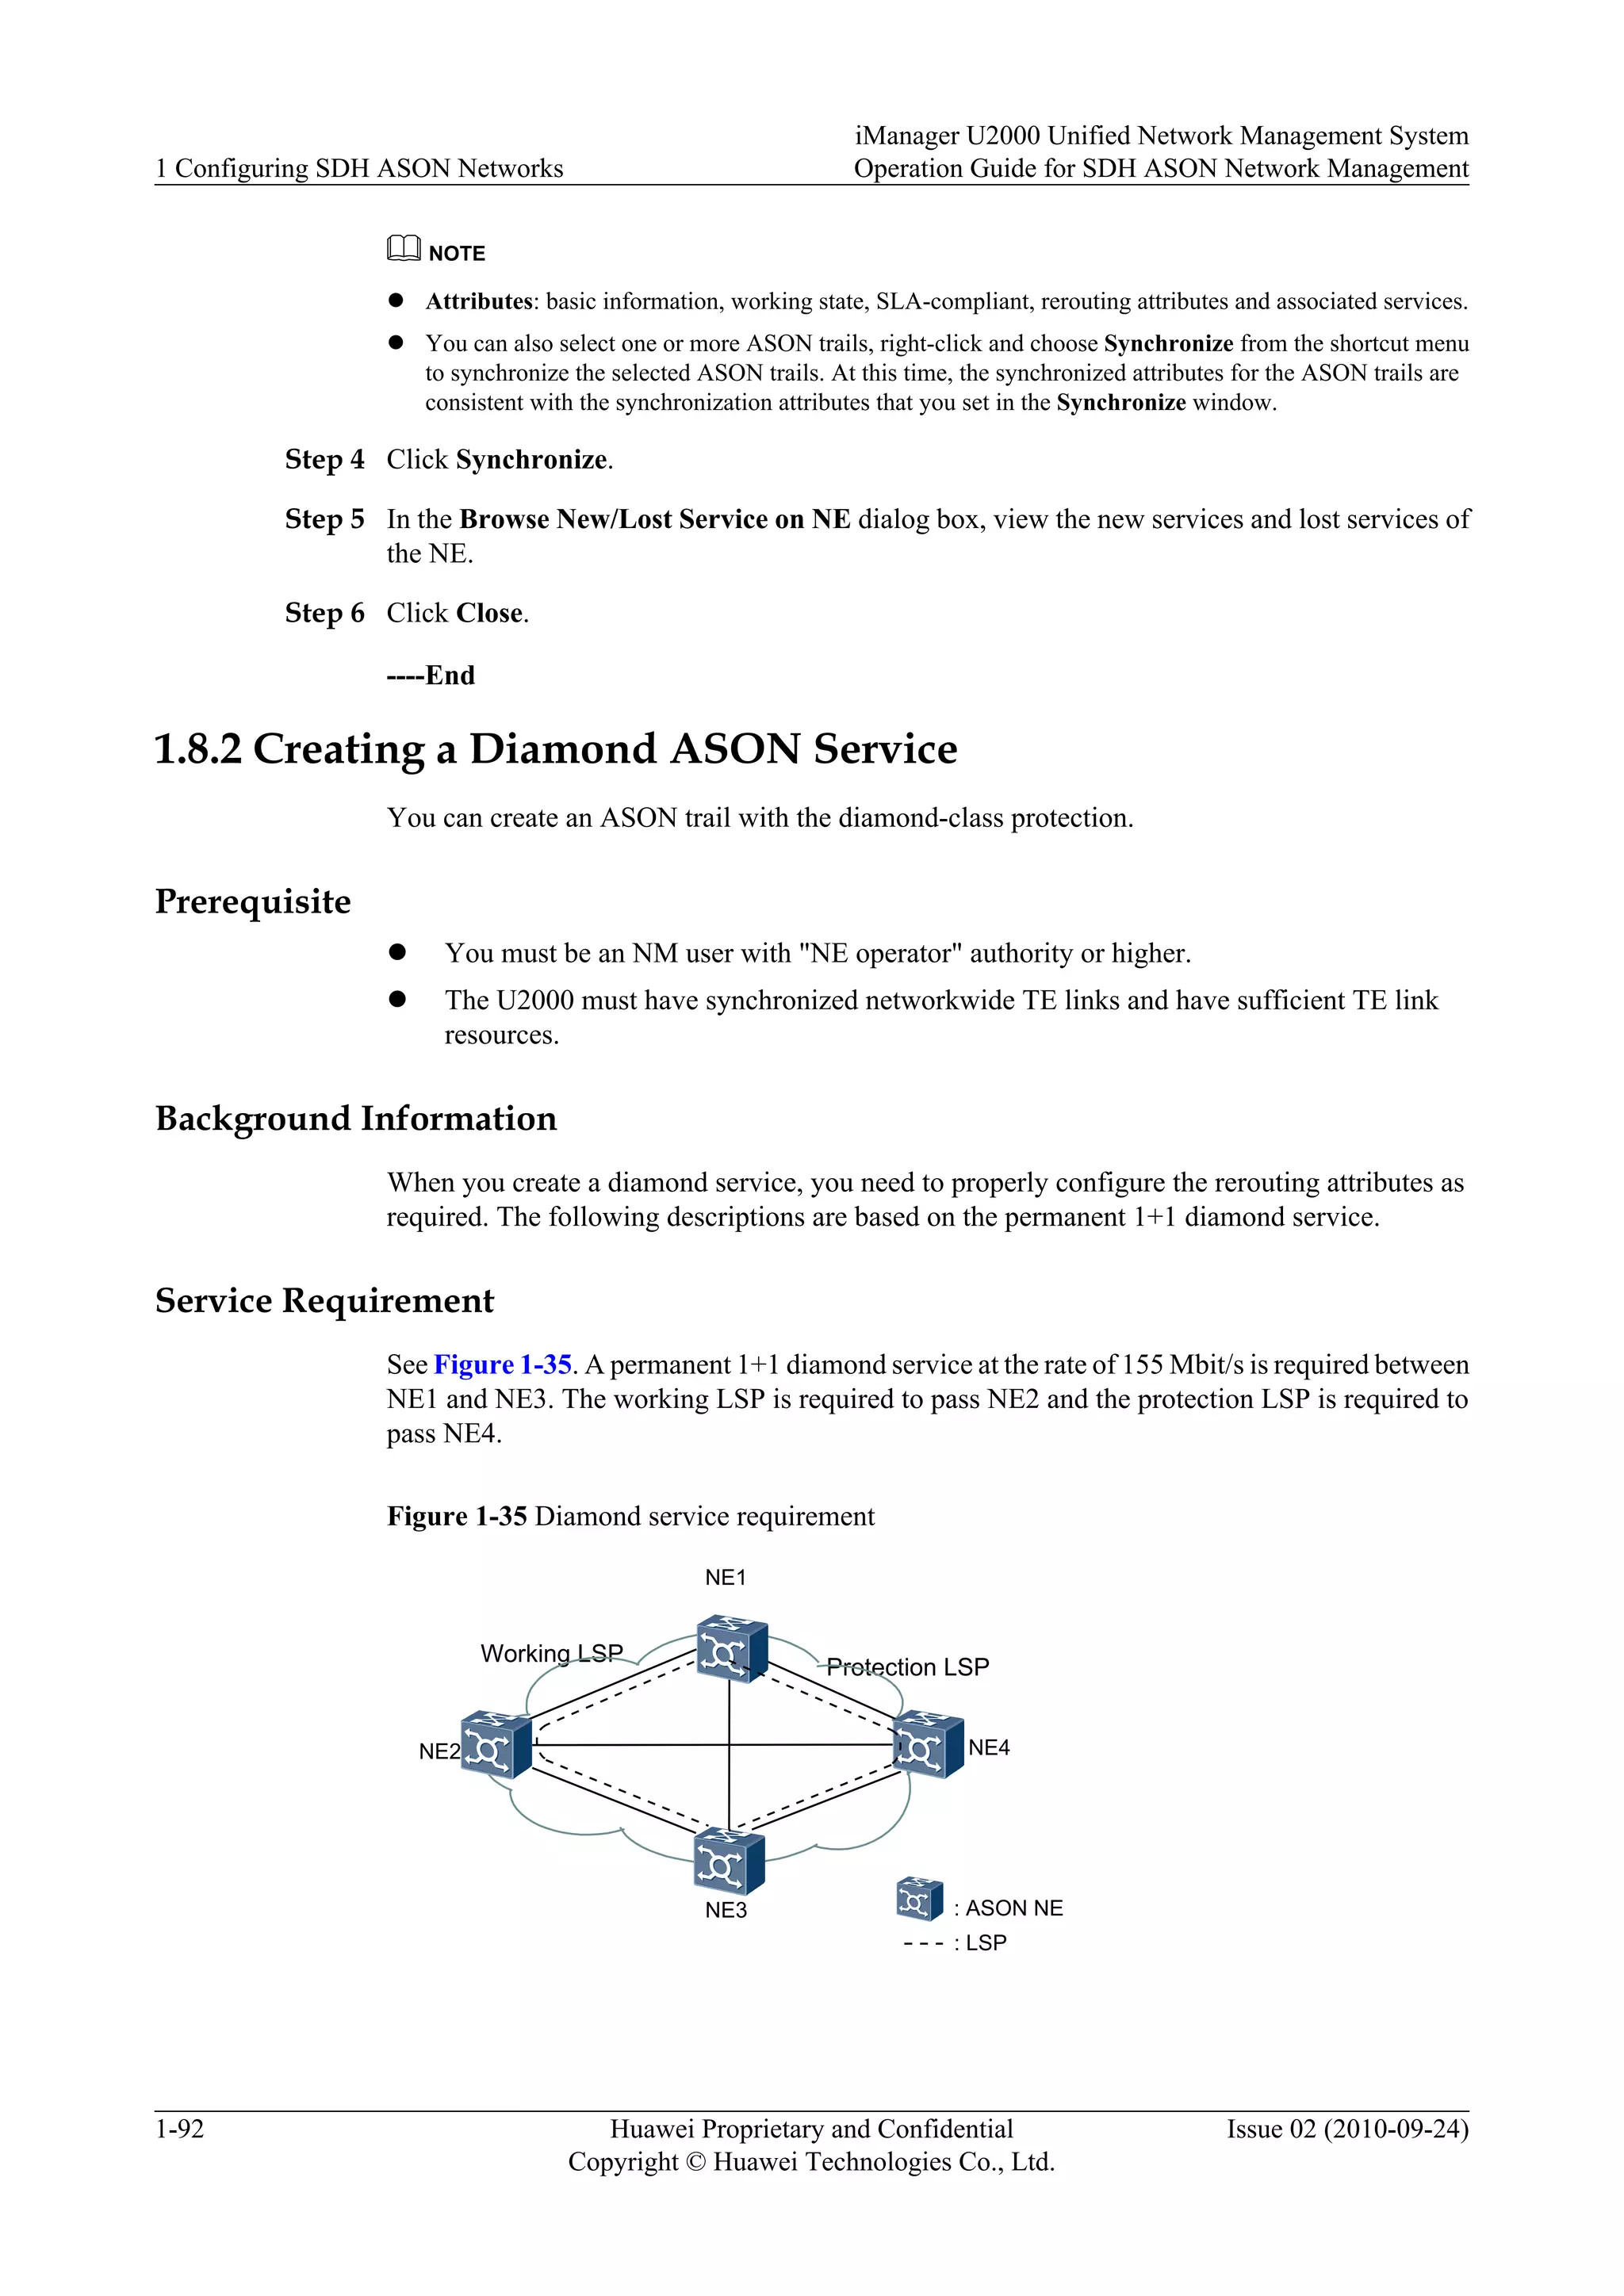
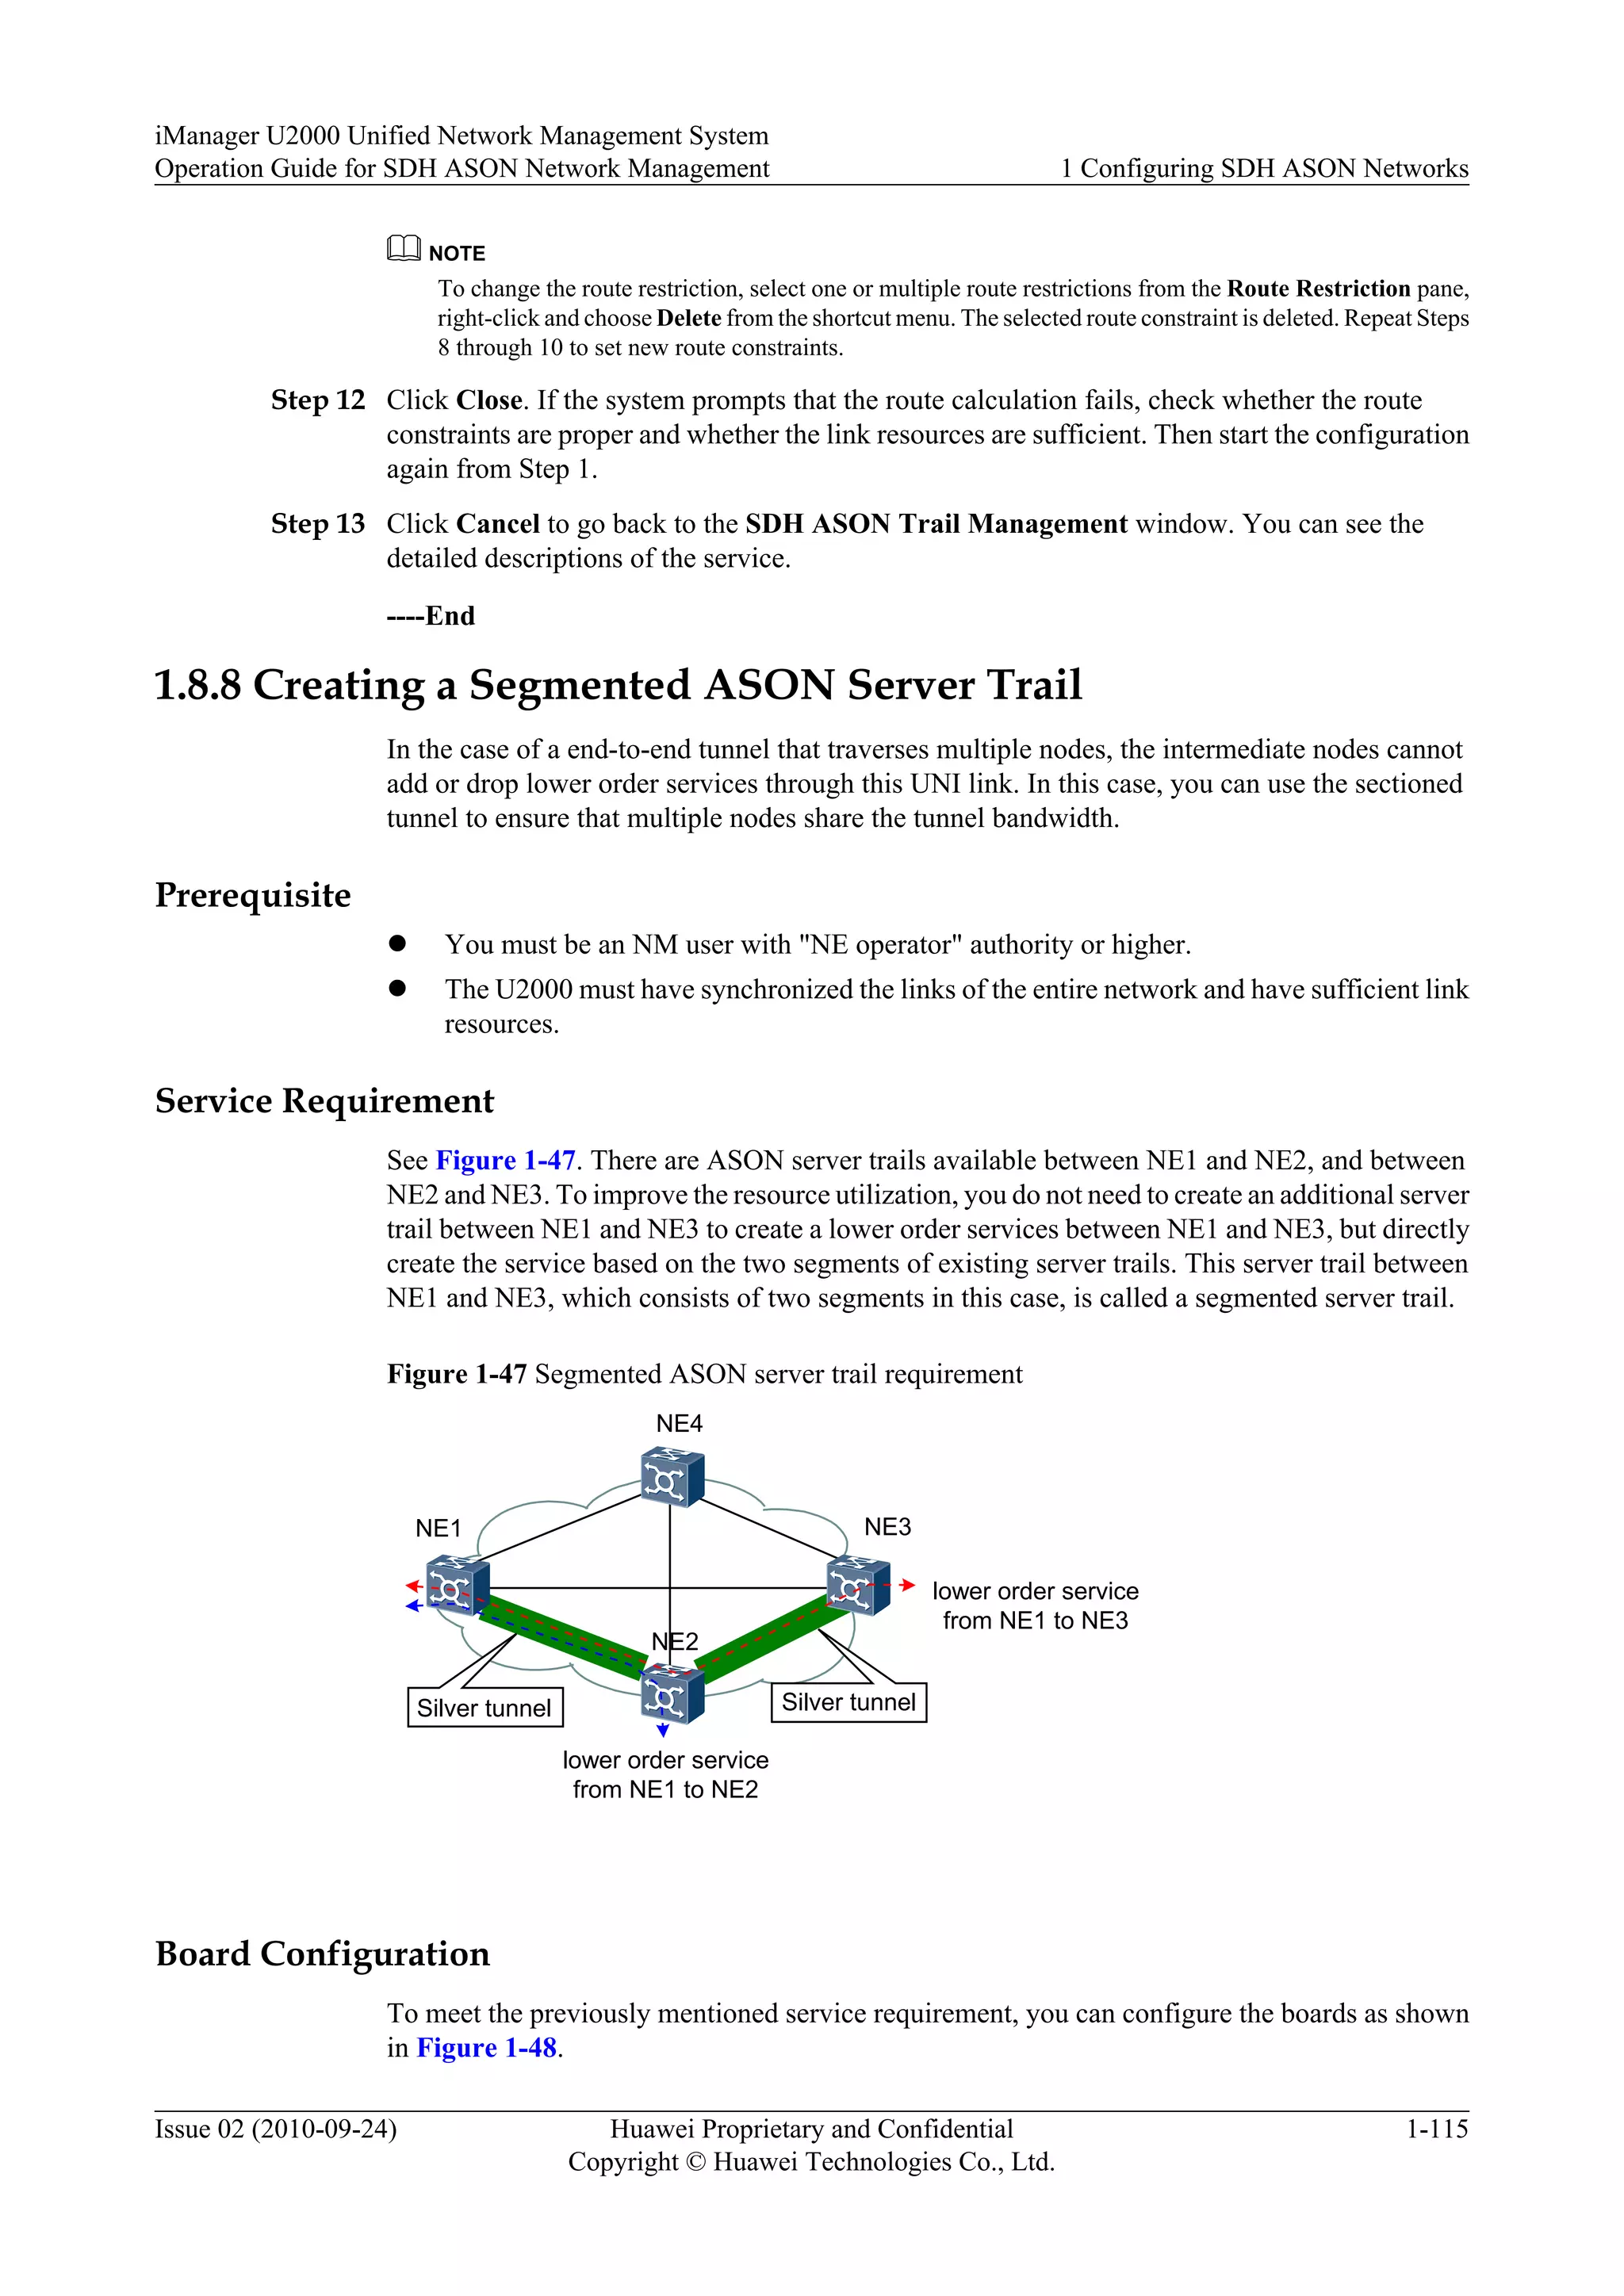
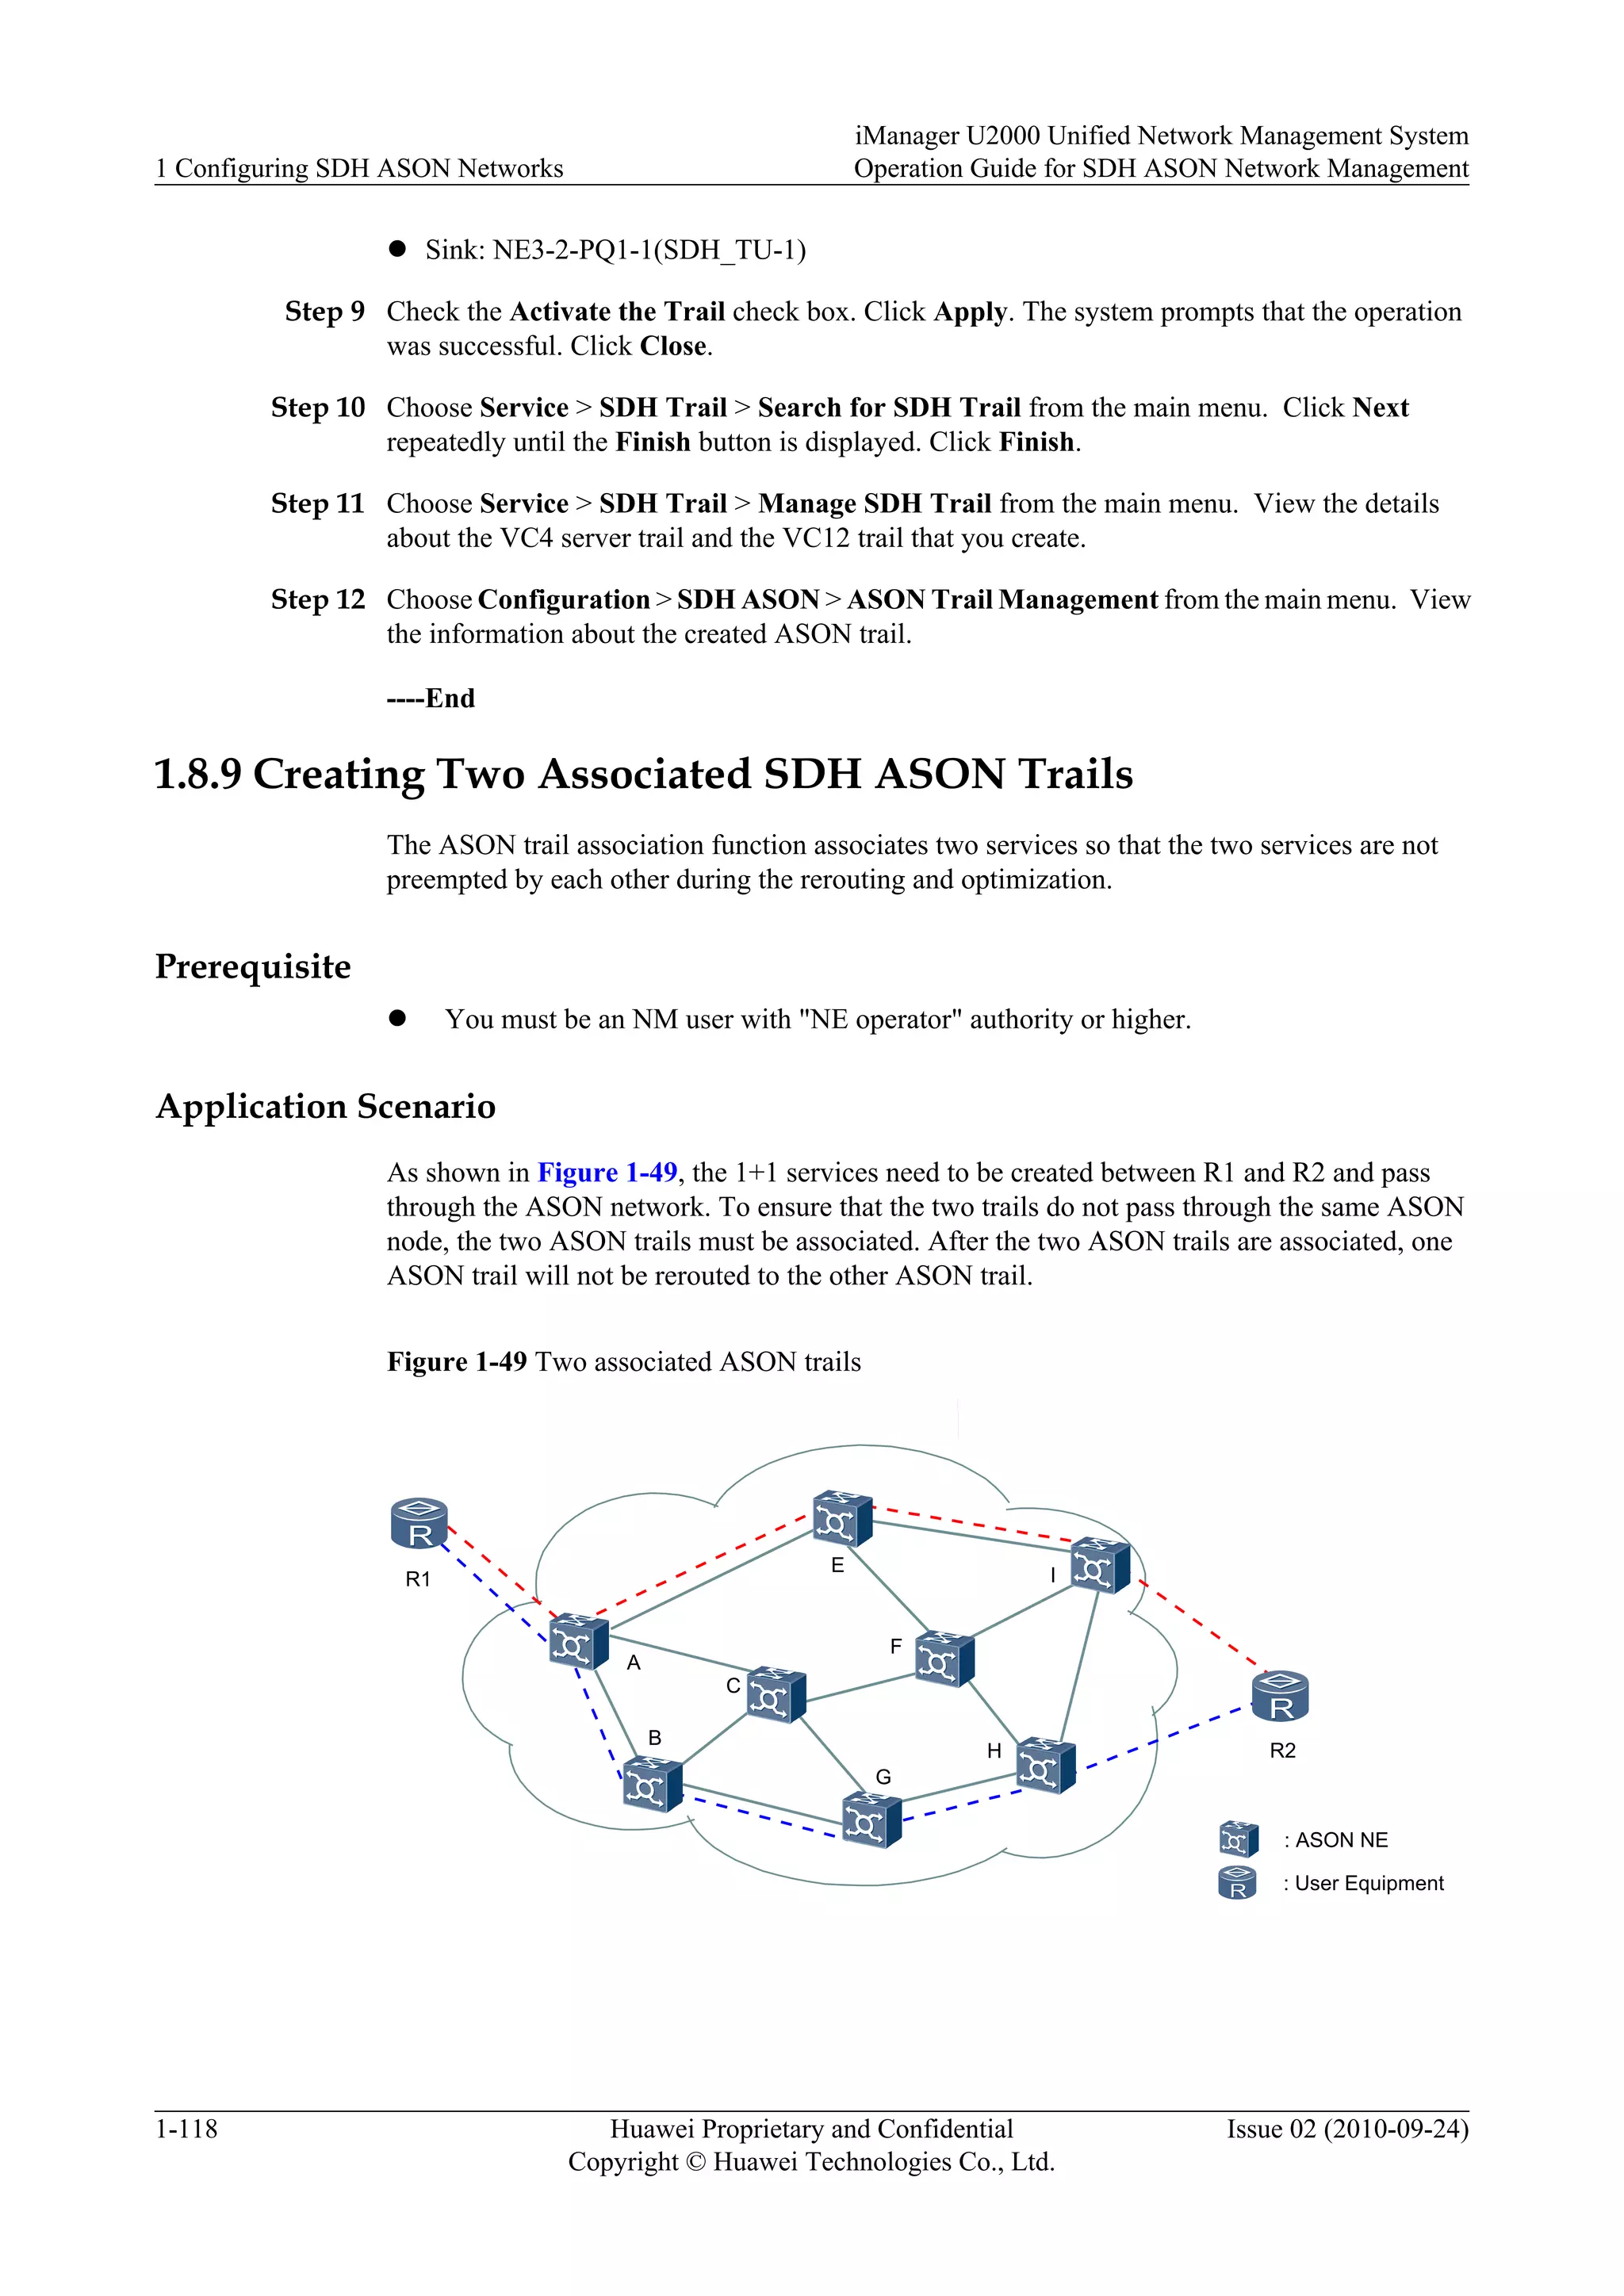
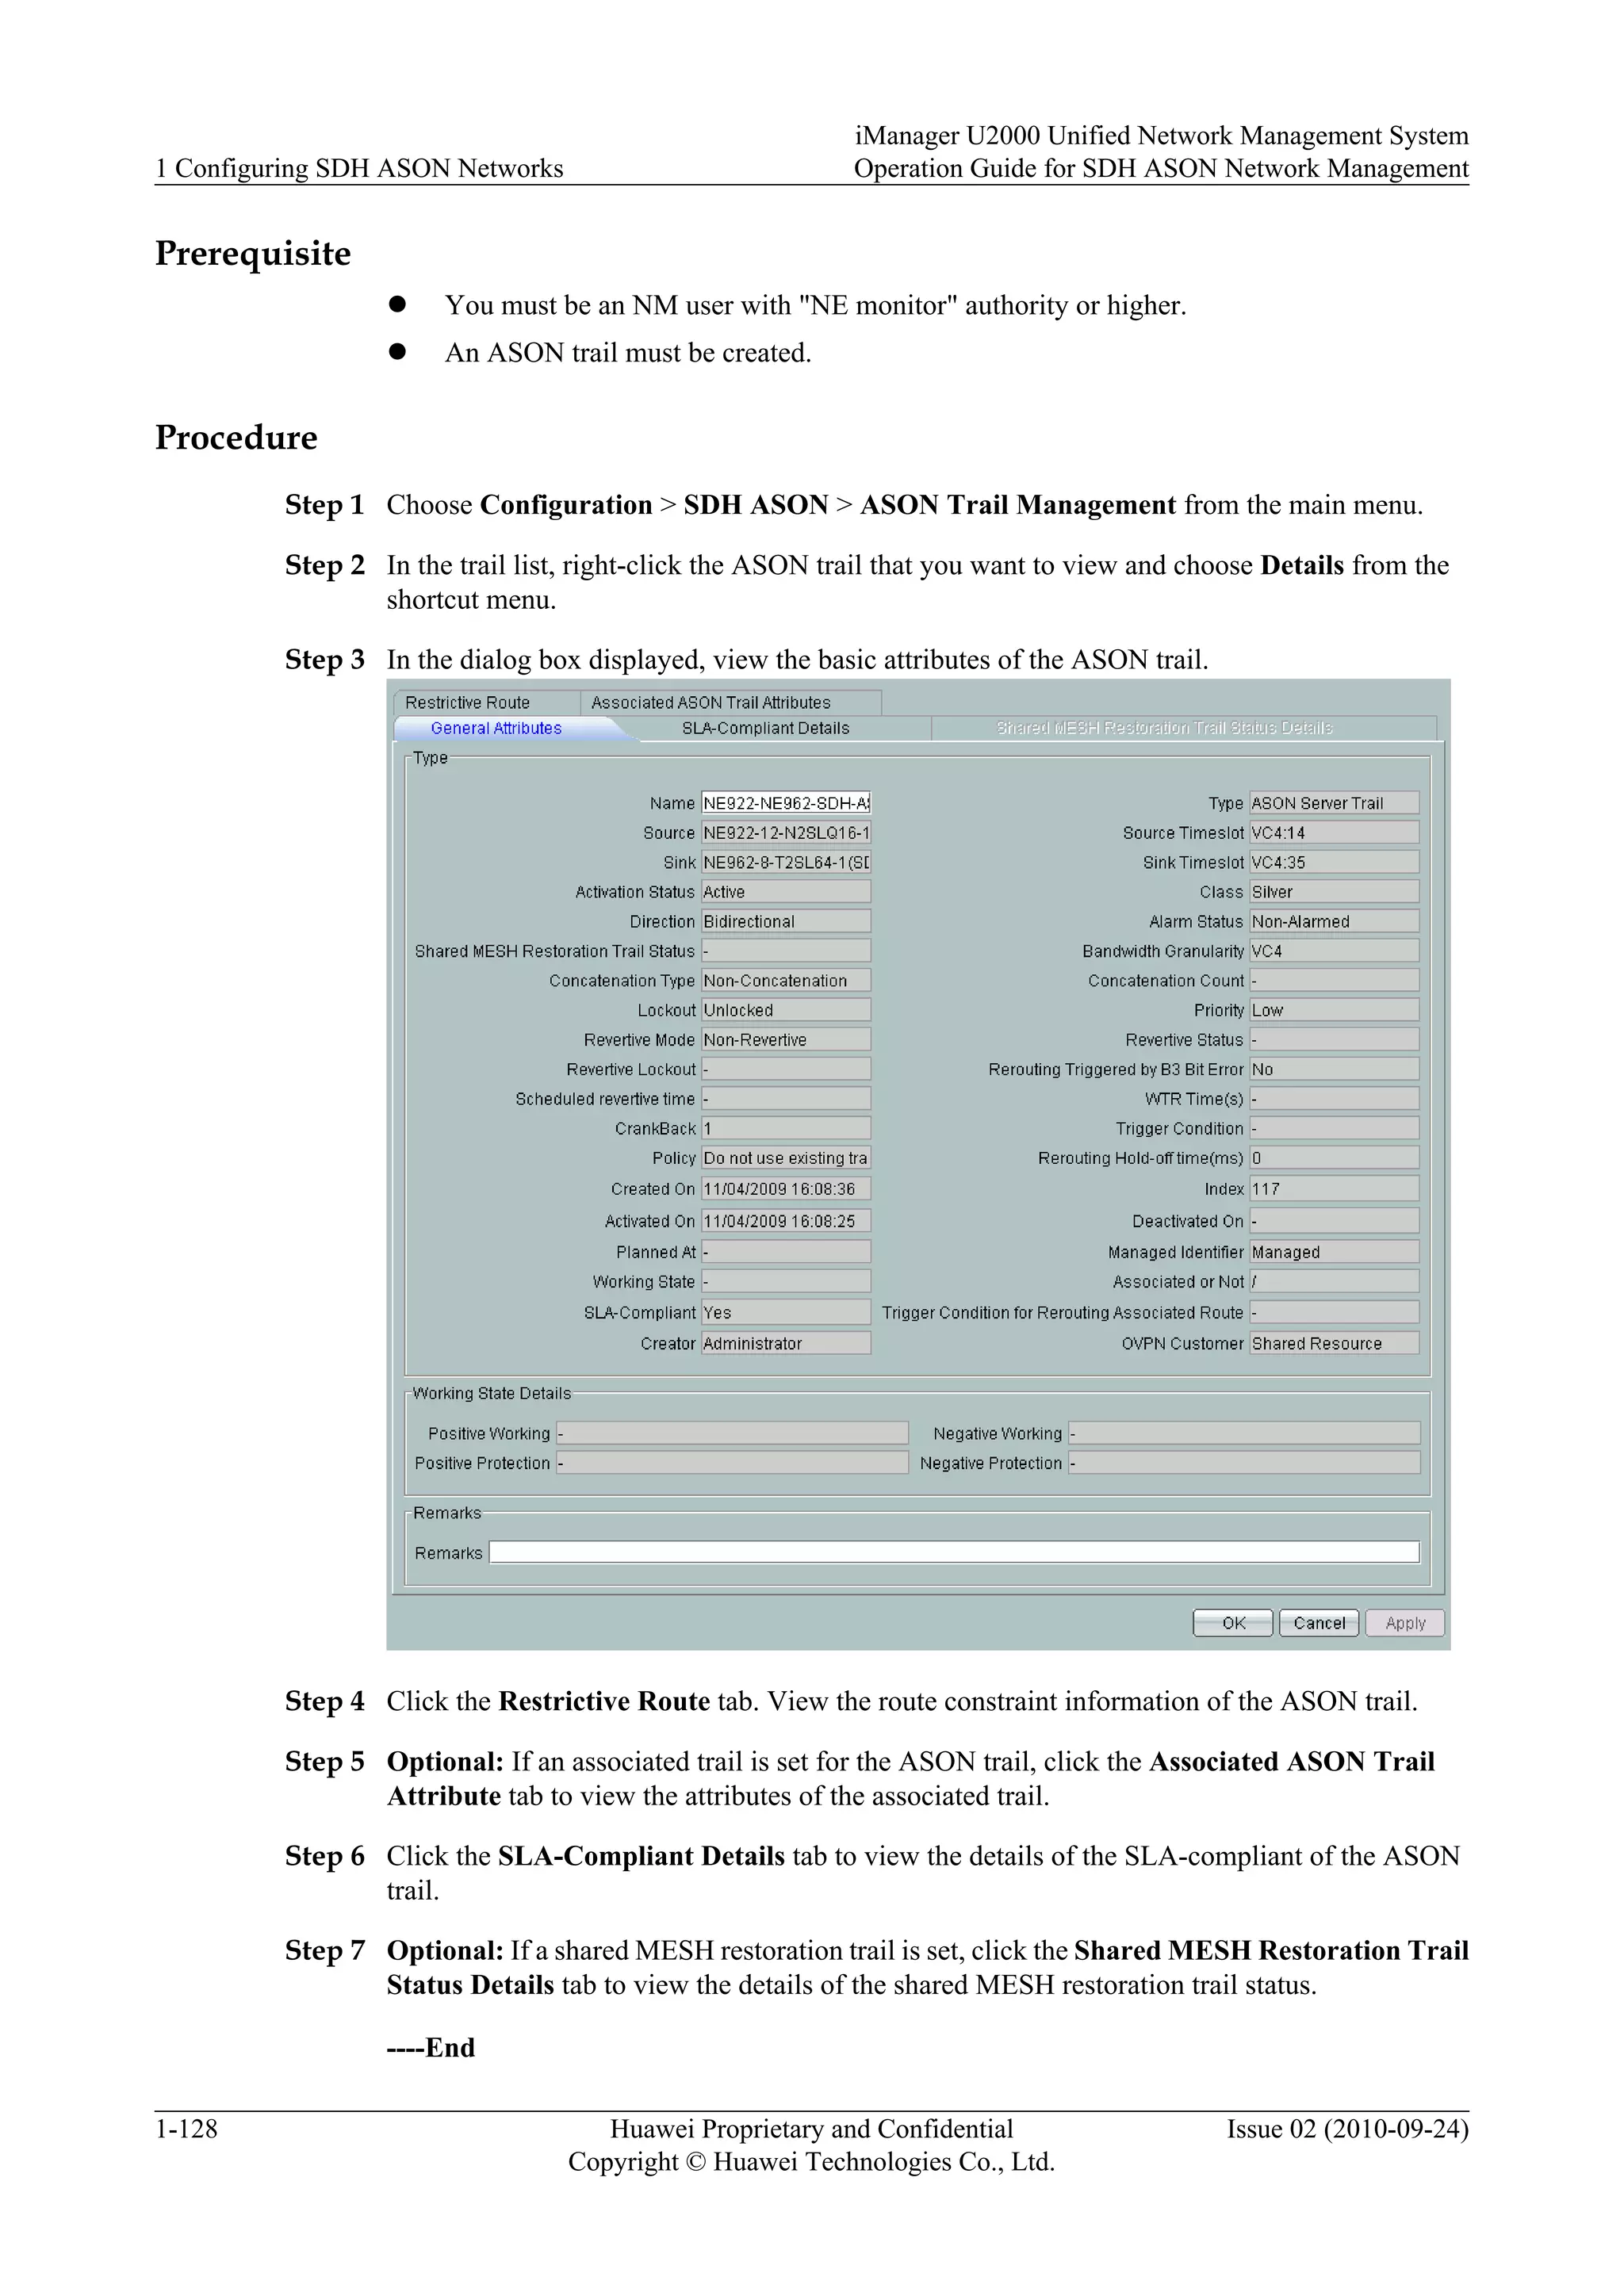
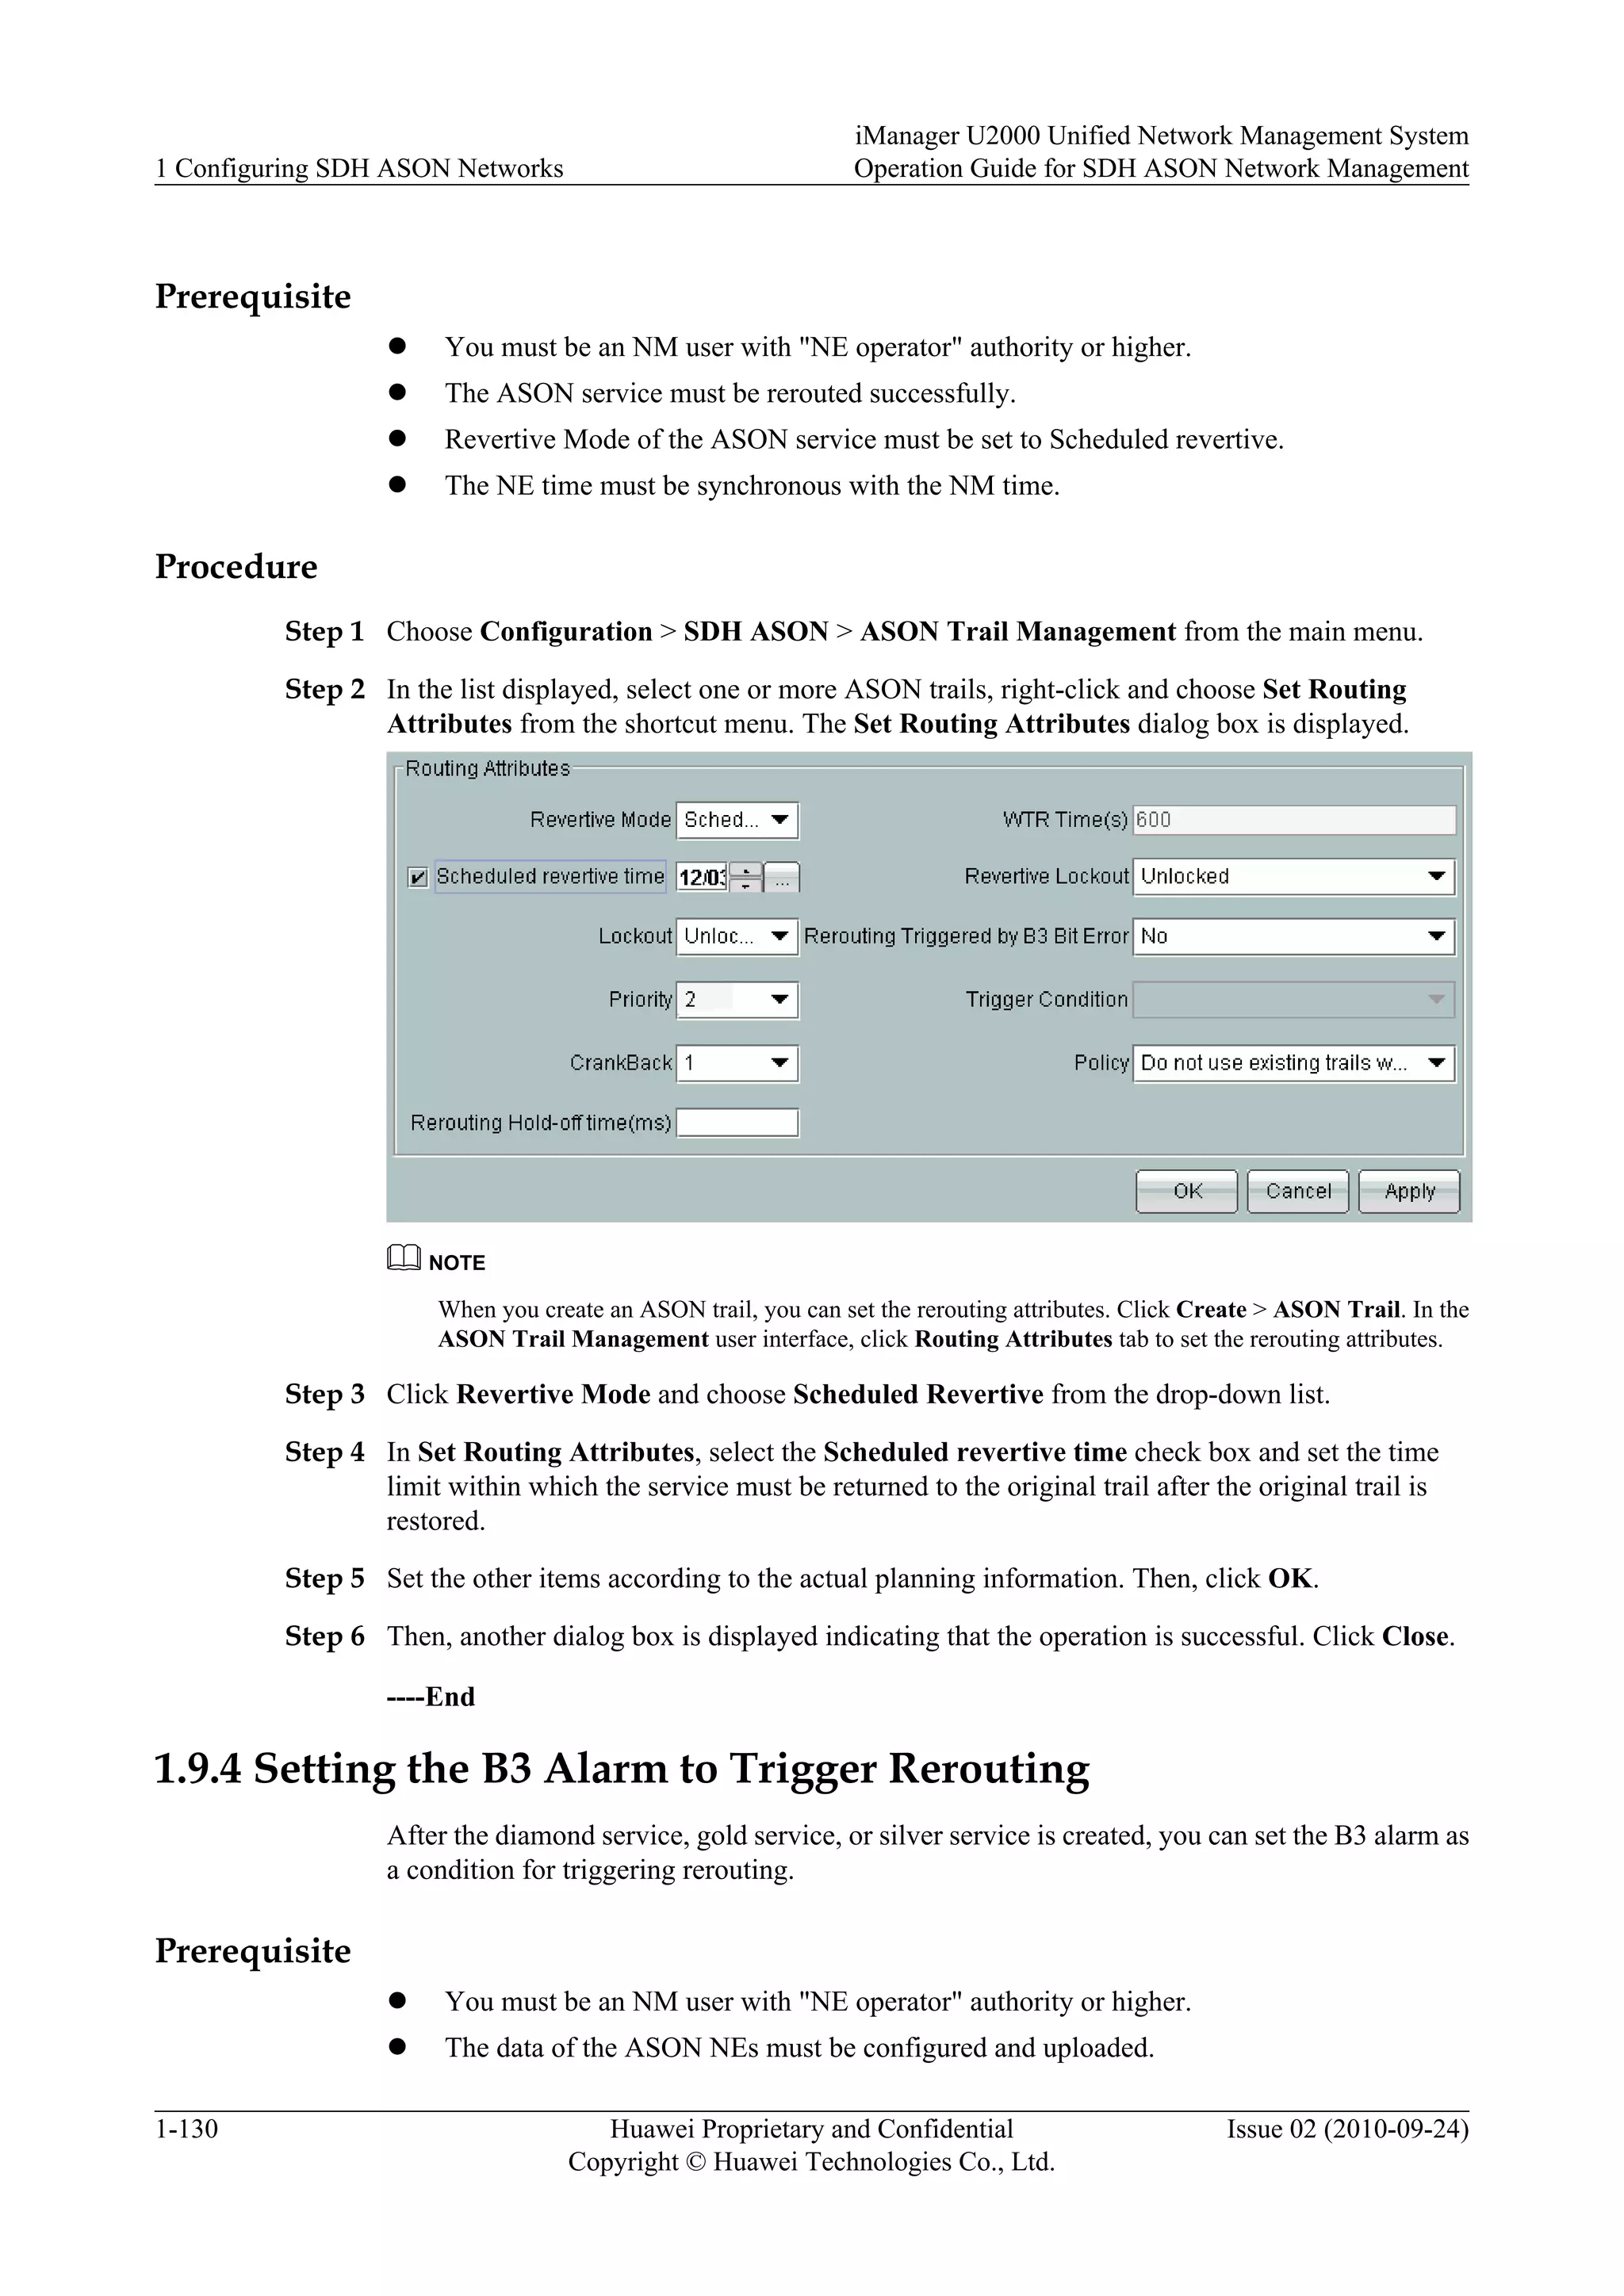
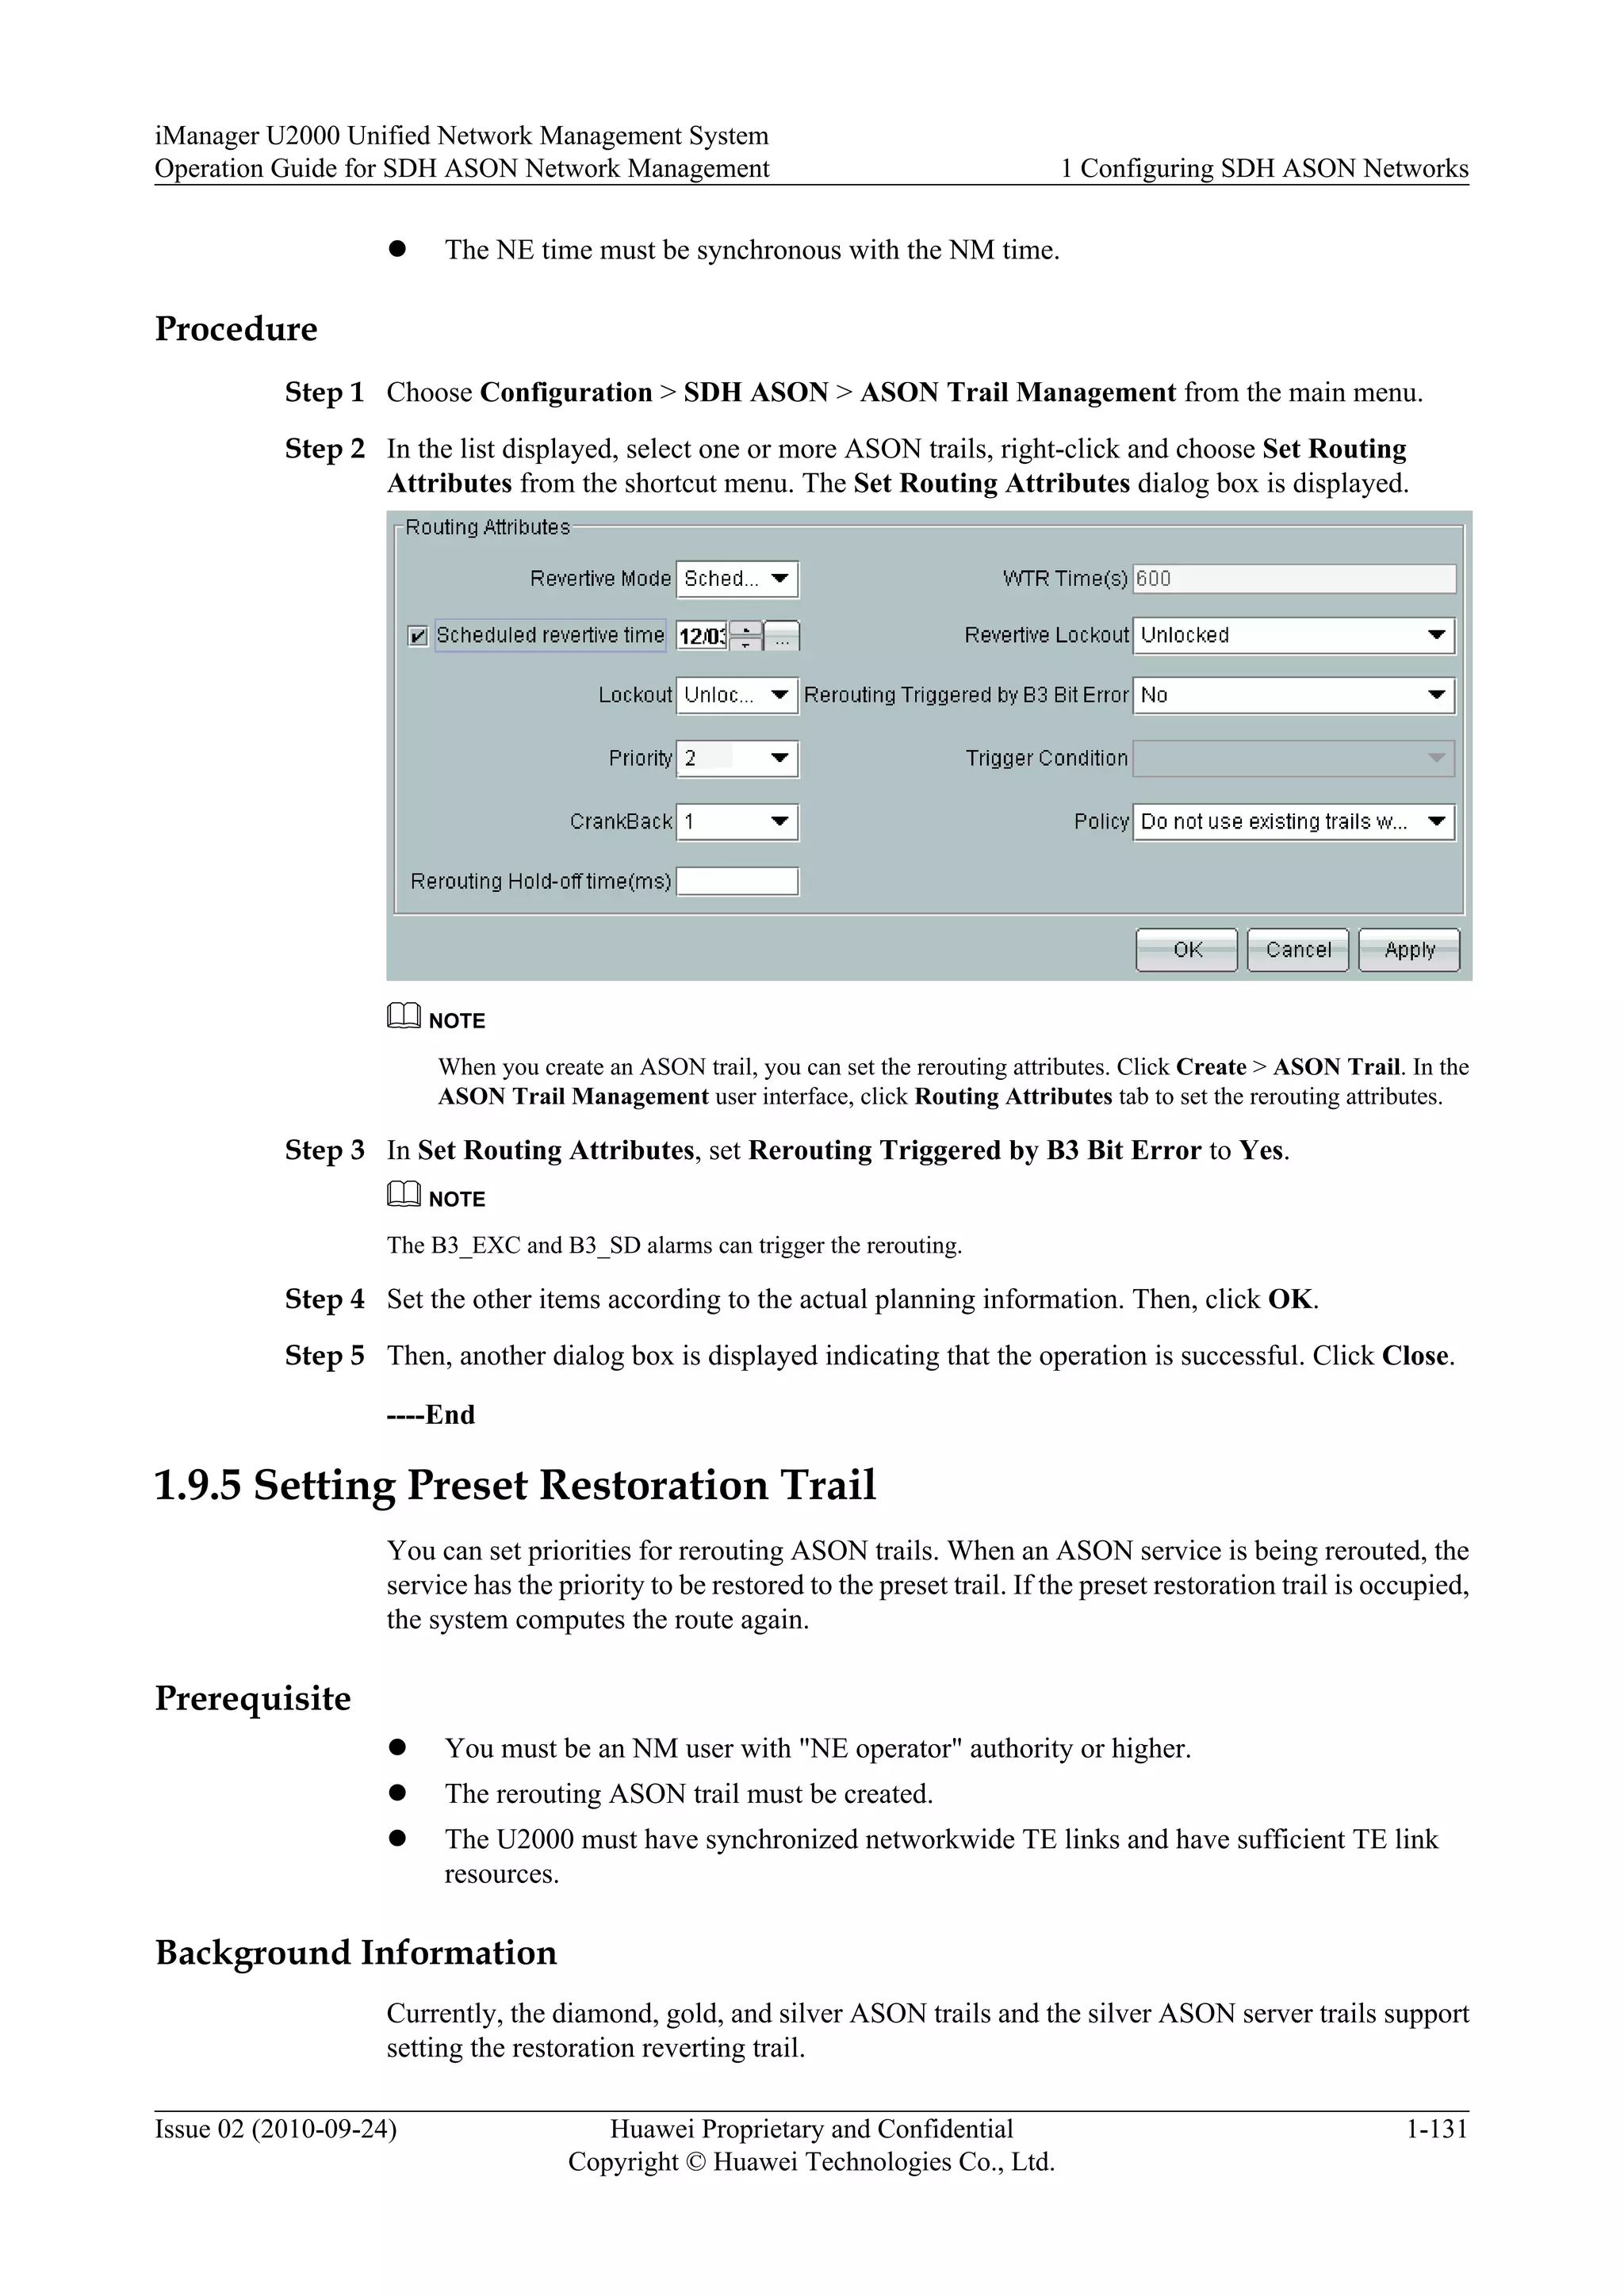
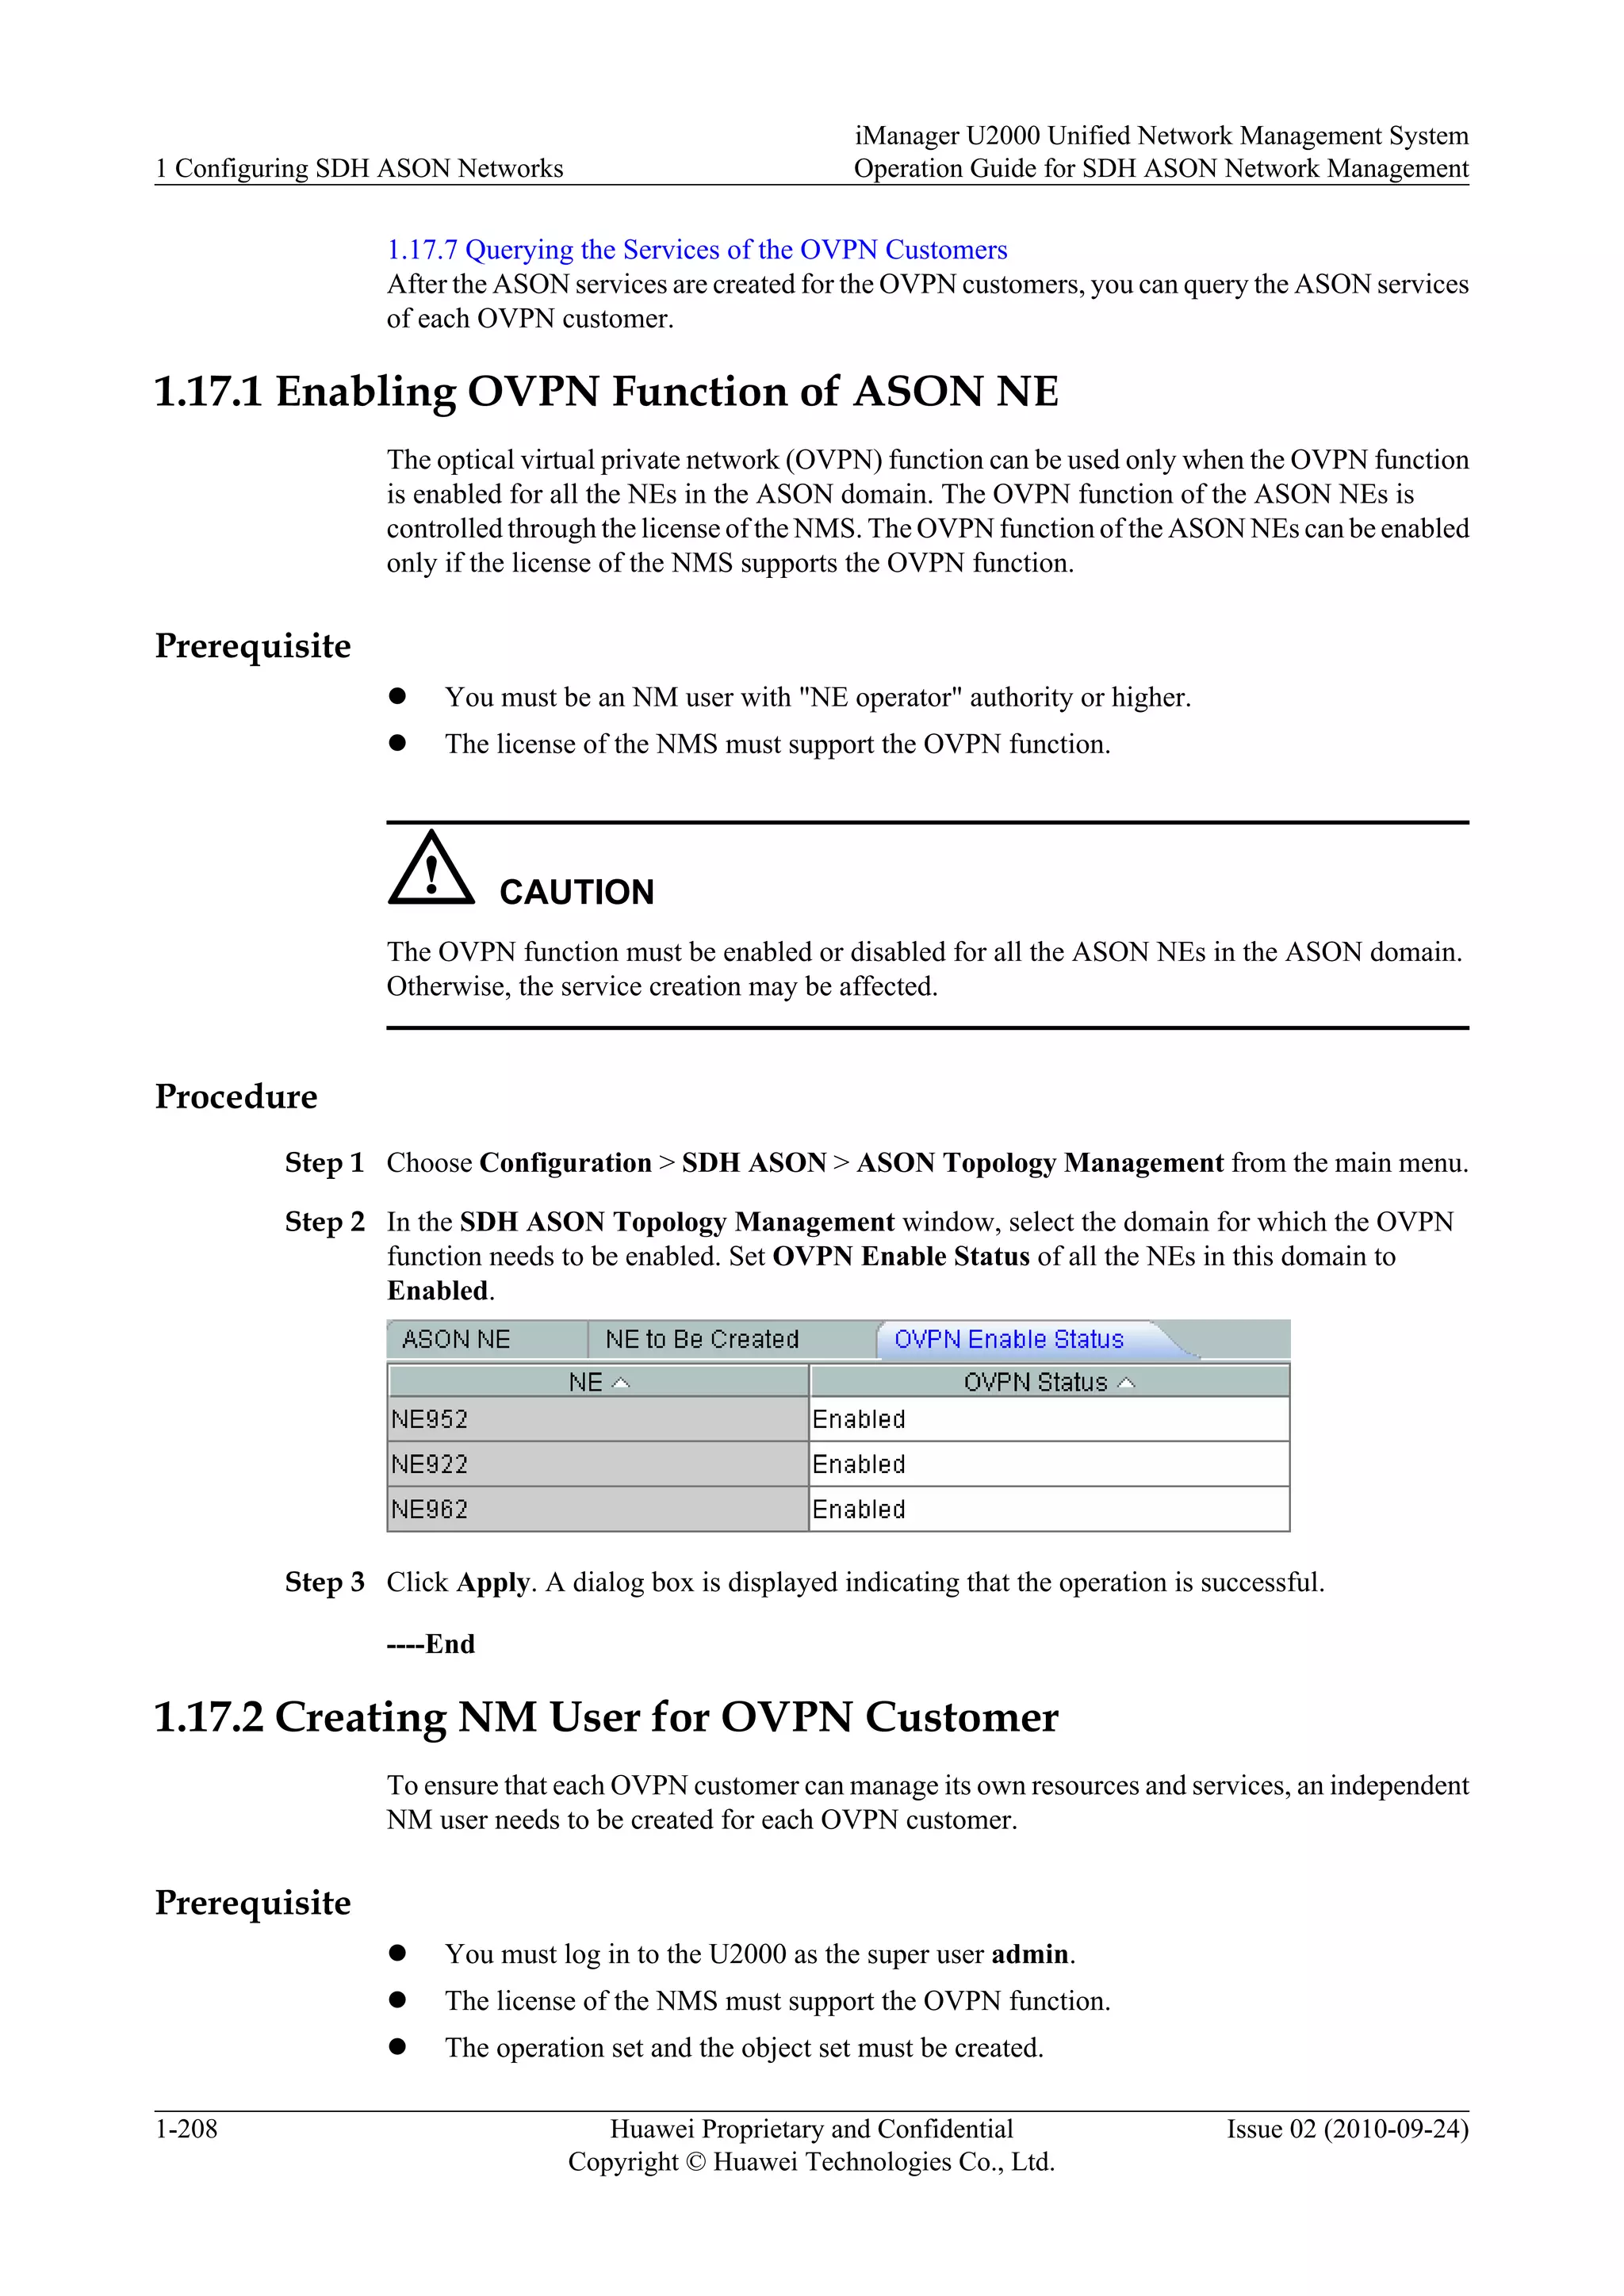
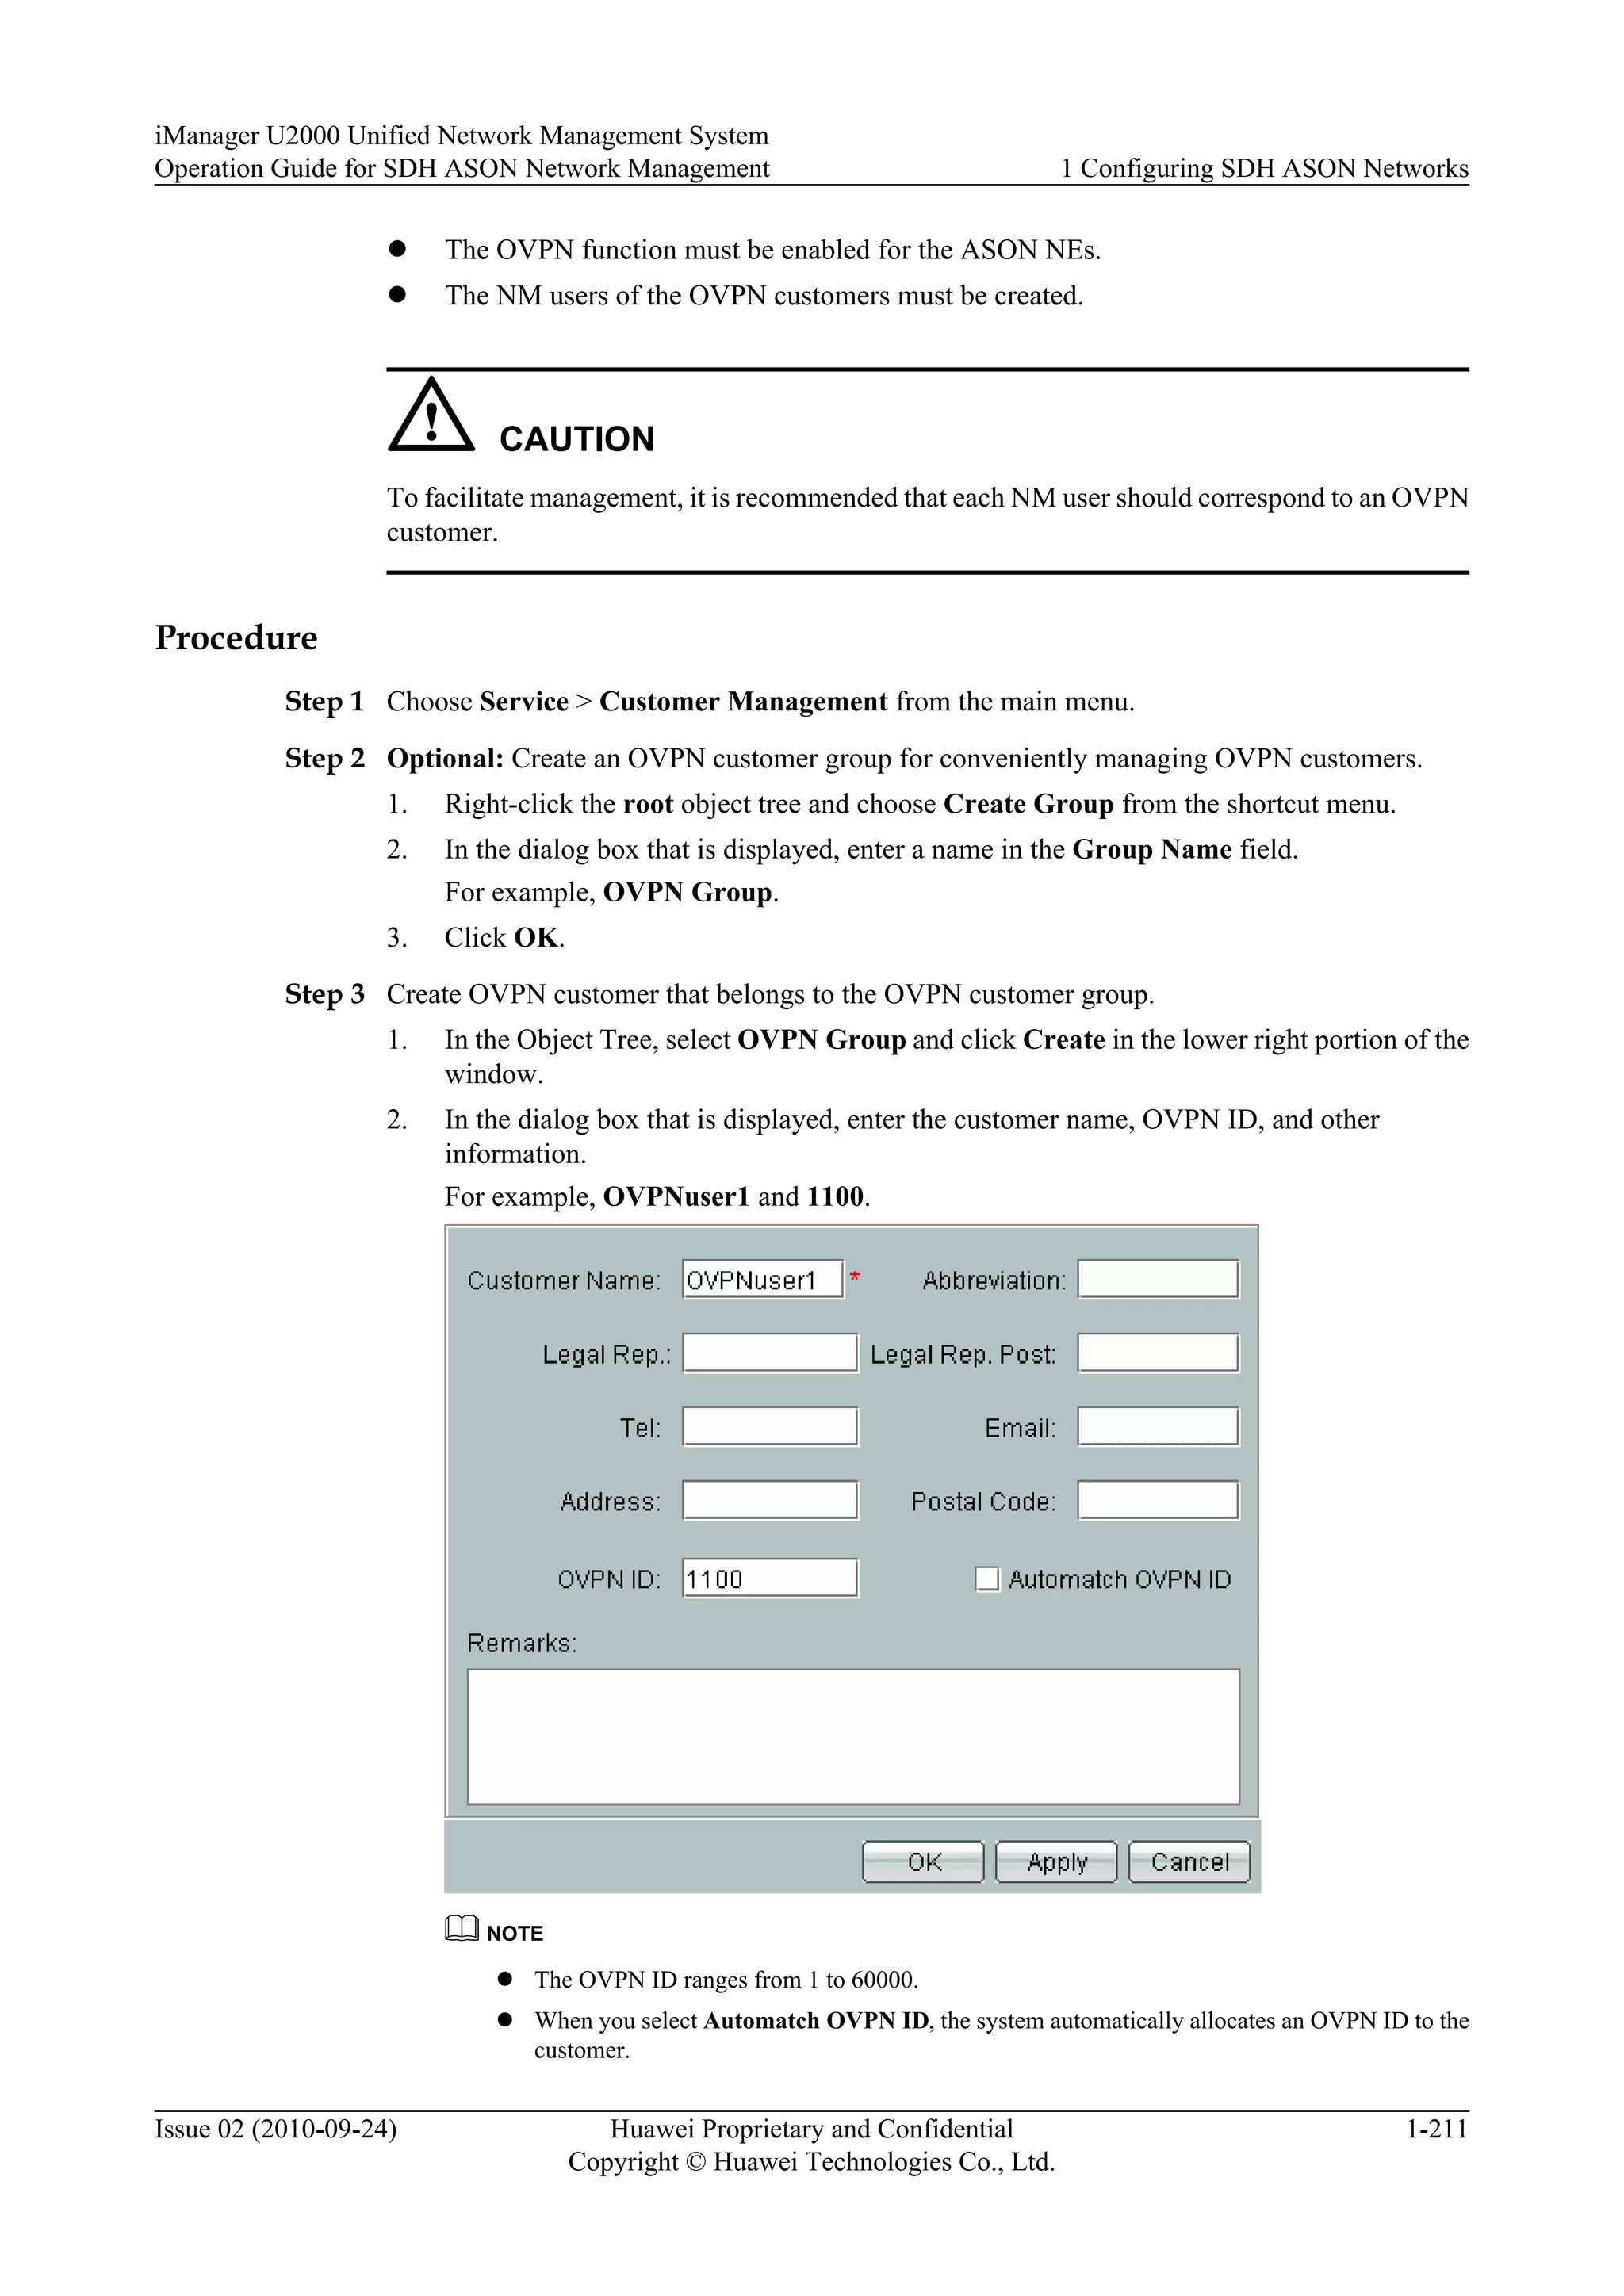
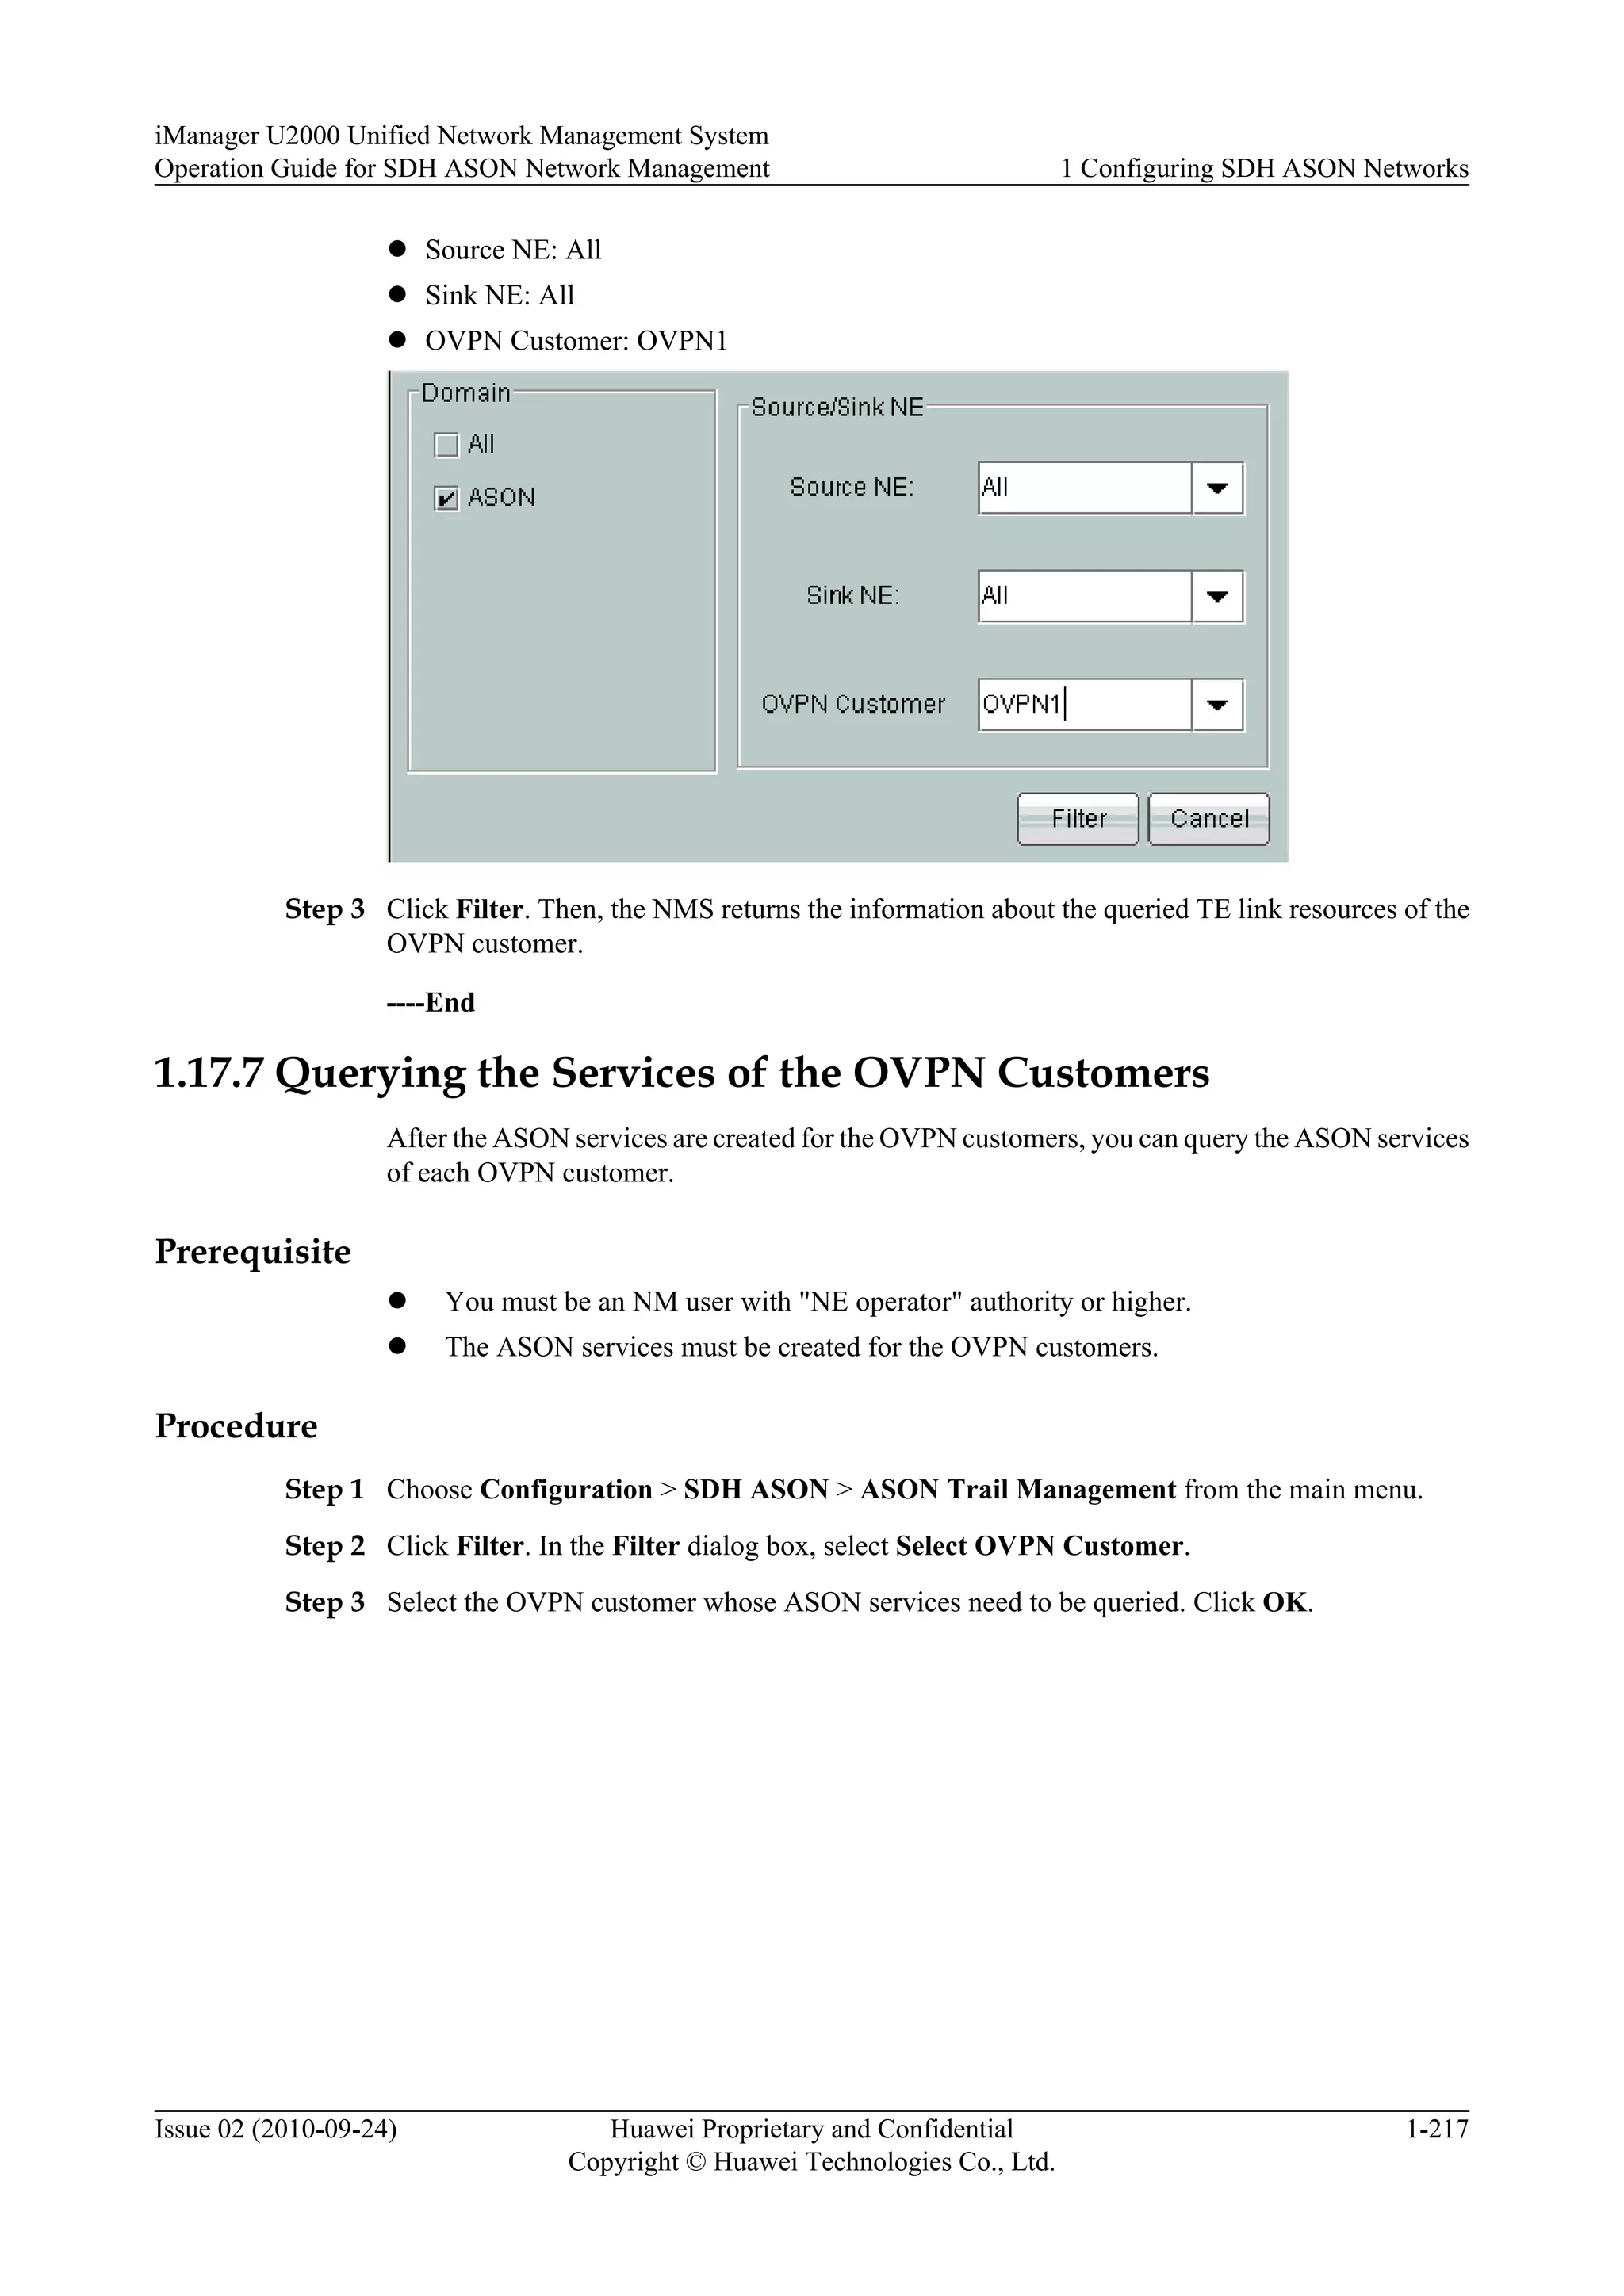
This document provides an overview and instructions for configuring and managing SDH ASON networks using the iManager U2000 network management system. It describes ASON concepts and protocols, how to create an ASON topology and domains, manage link resources and services, and configure the migration of services between traditional and ASON networks. The document also covers UNI, OVPN, and data import/export functions.


![Symbol Description
CAUTION
Indicates a potentially hazardous situation, which if not
avoided, could result in equipment damage, data loss,
performance degradation, or unexpected results.
TIP Indicates a tip that may help you solve a problem or save
time.
NOTE Provides additional information to emphasize or supplement
important points of the main text.
Command Conventions
The command conventions that may be found in this document are defined as follows.
Convention Description
Boldface The keywords of a command line are in boldface.
Italic Command arguments are in italics.
[ ] Items (keywords or arguments) in brackets [ ] are optional.
{ x | y | ... } Optional items are grouped in braces and separated by
vertical bars. One item is selected.
[ x | y | ... ] Optional items are grouped in brackets and separated by
vertical bars. One item is selected or no item is selected.
{ x | y | ... }* Optional items are grouped in braces and separated by
vertical bars. A minimum of one item or a maximum of all
items can be selected.
[ x | y | ... ]* Optional items are grouped in brackets and separated by
vertical bars. Several items or no item can be selected.
GUI Conventions
The GUI conventions that may be found in this document are defined as follows.
Convention Description
Boldface Buttons, menus, parameters, tabs, window, and dialog titles
are in boldface. For example, click OK.
> Multi-level menus are in boldface and separated by the ">"
signs. For example, choose File > Create > Folder.
About This Document
iManager U2000 Unified Network Management System
Operation Guide for SDH ASON Network Management
iv Huawei Proprietary and Confidential
Copyright © Huawei Technologies Co., Ltd.
Issue 02 (2010-09-24)](https://image.slidesharecdn.com/ogforsdhasonnetworkmanagement-v100r002c0102-170125131509/75/Og-for-sdh-ason-network-management-v100-r002c01-02-6-2048.jpg)


![Umts transmission features presentation v1[1].0](https://cdn.slidesharecdn.com/ss_thumbnails/umtstransmissionfeaturespresentationv11-131210031216-phpapp02-thumbnail.jpg?width=640&height=640&fit=bounds)
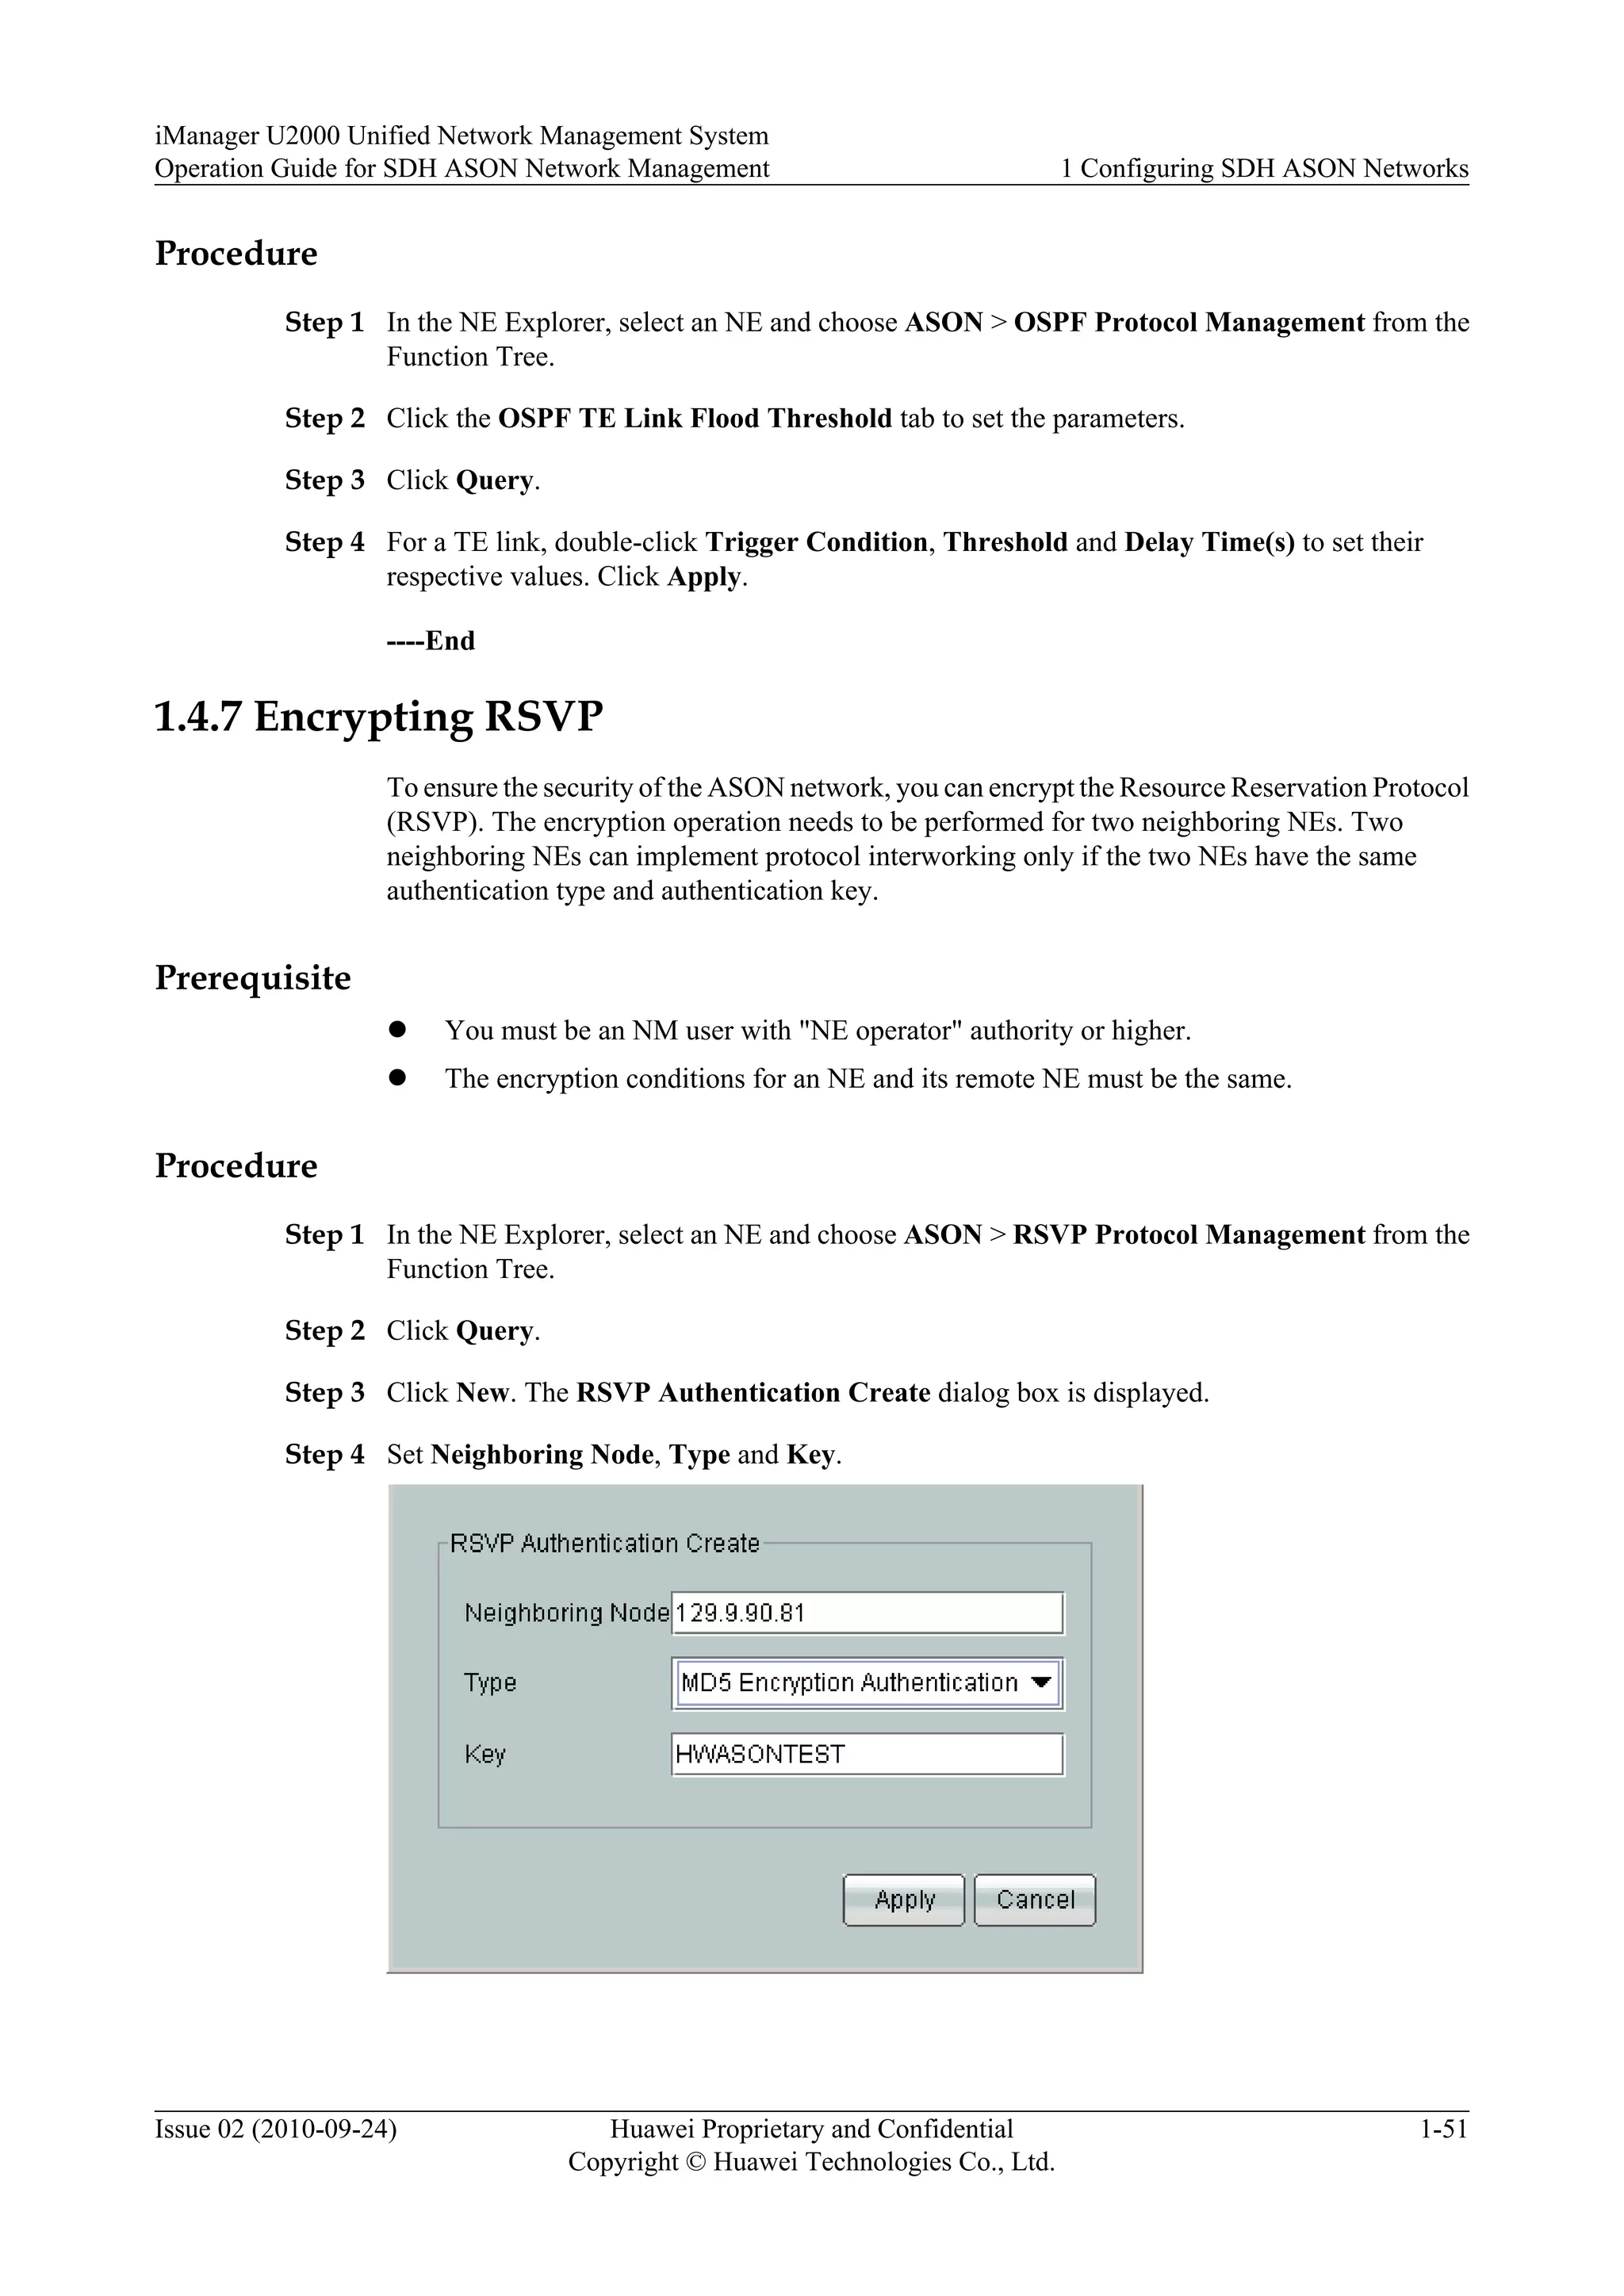
![MPLS L3 VPN Tutorial, by Nurul Islam Roman [APNIC 38]](https://cdn.slidesharecdn.com/ss_thumbnails/mplsl3vpnapnic381410820509-140915192004-phpapp02-thumbnail.jpg?width=640&height=640&fit=bounds)


