SlideShare a Scribd company logo
1 of 160
Download to read offline
UNESCO-NIGERIA TECHNICAL &
VOCATIONAL EDUCATION
REVITALISATION PROJECT-PHASE II
YEAR I SEMESTER II
THEORY
Version 1: December,2008
NATIONAL DIPLOMA IN
COMPUTER TECHNOLOGY
OOBASIC/VISUAL BASIC PROGRAMMING
COURSE CODE: COM 211
2
Table Of Contents
Concept of programming..................................................................................................4
How windows work.......................................................................................................... 5
The Visual Basic environment.......................................................................................... 5
Starting Visual Basic ........................................................................................................ 7
Stopping Visual Basic ...................................................................................................... 8
Getting online help ........................................................................................................... 8
Opening Application...................................................................................................... 12
Creating Simple application ( Wizard ) ........................................................................... 12
Running your application................................................................................................ 18
Creating Executable File................................................................................................. 19
Saving your application .................................................................................................. 20
VB Character set ............................................................................................................ 22
Relational Operators ....................................................................................................... 22
Arithmetic Operators ..................................................................................................... 22
Blank character............................................................................................................... 22
Data Types ..................................................................................................................... 22
Declaring Variables........................................................................................................26
Assigning Values to Variables ........................................................................................ 28
Mathematical Expressions .............................................................................................. 30
Conditional Operators..................................................................................................... 33
Properties of the Form .................................................................................................... 34
Intrinsic Controls............................................................................................................ 37
Label control .................................................................................................................. 38
Text Box ........................................................................................................................ 40
Focus In on Controls ...................................................................................................... 42
The Command Button .................................................................................................... 42
The PictureBox Control.................................................................................................. 44
The Image Control.......................................................................................................... 46
Creating non-wizard applications....................................................................................47
Adding Controls to applications...................................................................................... 47
Managing Controls ........................................................................................................ 48
Change the control properties ......................................................................................... 48
Handling Control Event.................................................................................................. 57
Writing Code................................................................................................................. 63
If...Then...Else Statement................................................................................................65
Select Case Statement..................................................................................................... 67
CheckBox Control.......................................................................................................... 72
Frame Control ................................................................................................................ 78
For...Next Statement....................................................................................................... 81
Sub Statement................................................................................................................. 84
Supplied Numeric Functions (Math Functions )..............................................................88
Abs Function .................................................................................................................. 88
Int Functions .................................................................................................................. 88
Rnd Function.................................................................................................................. 89
Sqr Function................................................................................................................... 90
Supplied String Function ................................................................................................ 90
Len Function .................................................................................................................. 90
Systems Development Cycle ............................................................................................ 4
Do...Loop Statement....................................................................................................... 80
WEEK 1
WEEK 2
WEEK 3
WEEK 4
WEEK 5
OptionButton Control ..................................................................................................... 69
WEEK 6
WEEK 7
WEEK 8
3
LCase and Functions ...................................................................................................... 91
UCase Function .............................................................................................................. 91
Asc Function .................................................................................................................. 92
Chr Function .................................................................................................................. 92
Supplied Time And Date Functions ................................................................................ 93
Now Function................................................................................................................. 93
Date Function ................................................................................................................. 93
Time Function ................................................................................................................ 93
Non-Arrays data values ..................................................................................................94
Arrays data values .......................................................................................................... 94
Declaring Fixed-Size Arrays........................................................................................... 95
Multidimensional Arrays ................................................................................................ 97
List Boxes Controls That Work Like Arrays...................................................................99
List Boxes: Controls That Work Like Arrays ................................................................ 109
Combo Boxes............................................................................................................... 117
The Timer Control........................................................................................................ 122
Scrolling the Scroll Bars ............................................................................................... 124
MsgBox Function.........................................................................................................128
InputBox Function........................................................................................................ 131
The Basic Elements of a Database................................................................................ 133
Using Data Control....................................................................................................... 134
Data Access Objects (DAO) ......................................................................................... 136
Visual Basic Wizard ..................................................................................................... 137
Data Form Wizard ........................................................................................................ 140
Menu Basics................................................................................................................. 147
Menu Control ............................................................................................................... 148
Menu Editor Command (Tools Menu) .......................................................................... 148
Menu Editor Dialog Box............................................................................................... 148
Creating Menus with the Menu Editor .......................................................................... 151
Writing Code for Menu Controls .................................................................................. 155
MsgBox Function ......................................................................................................... 156
InputBox Function........................................................................................................ 158
WEEK 9
WEEK 10
WEEK 11
WEEK 12
WEEK 13
WEEK 14
WEEK 15
4
WEEK 1:
INTRODUCTION
During this week you will learn:
• Concept of programming
• Systems Development Cycle
• How windows work
• The Visual Basic environment
• Starting Visual Basic
• Stopping Visual Basic
• Getting online help
• Opening Application
• Creating Simple application ( Wizard )
• Running your application
• Creating Executable File
• Saving your application
Concept of programming
A program is a set of detailed instructions that tells the computer what to do.
VISUAL BASIC is a high level programming language evolved from the earlier DOS
version called BASIC. BASIC means Beginners' All purpose Symbolic Instruction Code. It
is a fairly easy programming language to learn. The codes look a bit like English Language.
Visual Basic falls into a category of programming referred to as event-driven programming.
Event-driven programs respond to events from the computer, such as the mouse button being
pressed. The designer uses ready-made objects such as CommandButtons and TextBoxes, to
build user interfaces that make up the application. This approach to programming drastically
reduces the amount of code required to develop a Windows application.
Systems Development Cycle
Most IT projects work in cycles. First, the needs of the computer users must be analyzed.
This task is often performed by a professional Systems Analysts who will ask the users
exactly what they would like the system to do, and then draw up plans on how this can be
implemented on a real computer based system.
The programmer will take the specifications from the Systems Analyst and then convert the
broad brushstrokes into actual computer programs. Ideally at this point there should be
testing and input from the users so that what is produced by the programmers is actually
what they asked for.
Finally, there is the implementation process during which all users are introduced to the new
systems, which often involves an element of training.
Once the users start using the new system, they will often suggest new improvements and the
whole process is started all over again.
5
These are methodologies for defining a systems development cycle and often you will see
four key stages, as listed below.
• Feasibility Study
• Design
• Programming
• Implementation
How windows work
Windows is an GUI operating system. With GUI it easily recognized graphic icons be
selected using the mouse and commands chosen from menus, This is much easier for the user
than typing in the specific lines of code that were required by MS-Dos in order to perform
basic operations.
In GUI operating system, more than one application can be open at the same time. Processor
time is shared between computing tasks and this called multitasking.
The Visual Basic environment
The Visual Basic environment is made up of several windows. The initial appearance of the
windows on your screen will depend on the way your environment has been set up.
The tool bar The Visual Basic tool bar functions like the tool bar in any other Microsoft
application. It provides shortcuts for many of the common operating commands. It also
shows you the dimensions and location of the form currently being designed.
6
The tool box The tool box gives you access to the controls that you use on a form.
A control is an object such as a button, label or grid.
Controls are used on forms to display output or get input.
Each control appears as a button in the tool box. If the control you are
looking for is not in the toolbox, select Components from the Project menu.
If the tool box is not displayed on your screen, or if at any time during the
exercises you close it, choose Toolbox from the View menu.
The form designer window
This window is where you design the forms that make up your user interface.
If the form designer window is not displayed on your screen, or if at any time during the
exercises you close it, choose Object from the View menu.
The properties window :
A form, and each control on it, has a set of properties which control its characteristics such
as size, position and color.
The properties window lists all the properties a control has and their value. The default value
of a property can be changed by setting the property value using the properties window when
you design your application or changed by assigning a new value in code while your
application is running.
If the properties window is not displayed on your screen, or if at any time during the
exercises you close it, choose Properties Window from the View menu.
7
The project explorer window
A project is a collection of the forms and code that make up an application. Each form in
your application is represented by a file in the project explorer window.
A form file contains both the description of the screen layout for the form and the program
code associated with it. If the project explorer window is not displayed on your screen, or if
at any time during the exercises you close it, choose Project Explorer from the View menu.
The form layout window
Move the form in the screen in this window to set the position of your form when your
application is running.
You may wish to close the form layout window to allow more space
for the properties window. To open the window again, select Form
Layout Window from the View menu.
Starting Visual Basic
• From the Windows Start menu, choose Programs, Microsoft Visual Studio 6.0,
and then Microsoft Visual Basic 6.0.
• Visual Basic 6.0 will display the following dialog box as shown in this figure
8
Stopping Visual Basic
• From the File menu, choose Exit and then Microsoft Visual Basic 6.0. ask you to
• save changes in your project.
Getting online help
If you've used online help before, you may not think you need to read this section. Although
you might be able to figure out Visual Basic's online help yourself, the help is fairly
advanced and varies from most other online help you may be used to. This topic section
describes some of the help tools available from within Visual Basic.
The content-sensitive nature of Visual Basic's help system extends to almost every menu
option, screen element, control, window, and language command. When you want help and
aren't sure exactly where to turn first, press F1 and let Visual Basic give it a try. For
example, if you think you need to use the Picture Box control but want to read a description
first to make sure that you have the right control, click the Toolbox's Picture Box control and
then press F1. Visual Basic sees that you've clicked the Picture Box and returns with the help
screen shown in this figure
9
Click any screen element and press F1 for help
Throughout the help screens, Microsoft has scattered numerous links to related topics. When
you click any underlined word or phrase inside a help window, Visual Basic responds with a
pop-up definition or an additional help screen. Often, so may related topics appear
throughout the help system that when you click a link, Visual Basic displays a scrolling
Topics Found list, from which you can choose the description that most closely matches the
topic you need.
10
Help links often provide several alternatives.
When you click an Example hypertext link, Visual Basic displays a window similar to the
one shown in Figure. Although the help might look ambiguous at this point, you'll grow to
appreciate the helpful suggestion when you begin learn the Visual Basic language. The
Example help link shows you real Visual Basic language code that uses the item you've
requested help for. As a programmer, you'll therefore see how to implement the item inside
your own Visual Basic code by looking at the sample Visual Basic provides.
Visual Basic shows you sample code that uses the property or control.
11
The Help Menu
When you choose the first topic on the Help menu, Microsoft Visual Basic Topics, Visual
Basic displays a help dialog box . This dialog box contains the usual Windows-like help
tools. You can open and close the book icons on the Contents page to read about different
Visual Basic topics. You can search for a particular topic in the index by clicking the Index
tab. To locate every occurrence of a particular help reference word or phrase, you can click
the Find tab to build a comprehensive help database that returns multiple occurrences of
topics.
Example :
Get an instant definition for help links with a dotted underline.
Pop-up definition, Hyperlinks
Close the help window by clicking the window's Close button.
12
Opening Application
To open a project, you can do one of two things:
• Click File menu , Open project…
• Click the tool and specify the project you want to open.
Then select Hello project and press Open.
The project window will display the file “Hello.frm” from your project.
Creating Simple application ( Wizard )
You start the application wizard from the New Project dialog box or by choosing New
Project from the File menu. Click the VB Application Wizard icon to start the wizard. This
Figure shows the application wizard's opening screen.
13
Example
Assuming that you started the application wizard in the previous section, follow these steps
to build your first application:
1- Click the Next button to display the Interface Type dialog box. The wizard can
generate one of three types of user interfaces for the application you're generating:
− MDI (Multiple Document Interface) lets you create a program window that
contains embedded windows called child windows.
− SDI (Single Document Interface) lets you create a program with one or more
windows that exist at the same level (not windows within windows).
− Explorer Style lets you create programs that somewhat take on the Books
Online appearance, with a summary of topics or windows in a left pane and
the matching program details in the right pane.
2- The MDI option should already be selected. If not, click the MDI option.
14
3- Click Next to display the menu selection dialog box. You can select certain menu
options that will appear on your application's menu bar. By using the dialog box's
options, you can help ensure that your application retains the standard Windows
program look and feel. (You can add your own menu options after the wizard
generates the program's initial shell.) For now, leave these options selected: File,
Edit, Window, and Help.
15
4- Click Next to display the wizard's Resources dialog box. A resource might be a
menu, a text string, a control, a mouse cursor, or just about any item that appears in a
program.
5- Click Next, you'll bypass the Internet connectivity dialog box because you don't need
to add such connectivity to your first application shell.
16
6- Determines which forms appear in your application:
• A splash form is an opening title form that your users see when they first run
your application.
• A login form requests the user's ID and password, in case you want to add
security features to your application.
• The options dialog box gives users the ability to modify certain application
traits.
• The About box is accessed from most Windows Help menus and provides your
program description and version.
17
8. Check the About Box but leave the other options unchecked.
9. Click the Next button twice to display the final application wizard dialog box. (You'll
bypass the database access dialog box because you won't be retrieving database data
in this first application.)
10. Click the Finish button. The wizard generates the application before your eyes. You'll
see the wizard generating forms and titles; without the wizard, you would have to
perform these steps yourself. When finished, the application wizard displays a dialog
box to tell you that the application is completed.
18
11. Click OK to close the final application wizard dialog box. A summary report appears,
to describe the generated program.
Running your application
Now that the form is complete you can see it in action by running it by simply pressing F5
key. Or click on run button on the standard tool bar
When you have written code for the buttons, running the application will allow you to
activate the code. For now your buttons will not do anything.
19
Your form will appear like a window from any other Microsoft application.
Creating Executable File
- Click File, Then Make Project1.exe…
- Specify the location and the name of the project, then click OK.
20
Saving your application
The last step in this chapter is to save your application so that you can use it for the exercises
later in the book To do this Click on file , Click save project as .
Visual Basic first asks you to save the form and then the project file. Remember that each
represents a separate file.
Specify the filename for the form as hello.frm. The file extension “frm” indicates that the file
is a form file.
21
Always take care to ensure that you save all the files that make up a project.
22
WEEK 2 :
VISUAL BASIC CHARACRER SETS AND DATA TYPES
During this week you will learn :
• Basic character sets
• Data Types
VB Character set
Visual Basic Character set refers to those characters acceptable or allowed in VB
programming eg GB is unknown in English likewise X is unknown in Yoruba language.
The Microsoft Visual basic character sets consists of the following:
Alphabet A/ a – Z/z (Both Upper and Lower Case)
Numeric Digits 0 – 9
Decimal point (.)
Grouping Characters (eg. Comma, colons, Semicolons, single and double apostrophe,
parenthesis)
Relational Operators (eg. =, <>,>,< etc)
Arithmetic Operators (eg. +, -, /, =. etc)
Blank character
Data Types
The Visual Basic language works with all kinds of data. Before you learn how to manipulate
data, you will learn how to distinguish among the various data types, that Visual Basic
supports. Some data falls into more than one category. For example, a dollar amount can be
considered both a currency data type and a single data type. When you write a program, you
need to decide which data type best fits your program's data values.
23
Visual Basic data types.
Type Stores Memory
Requirement
Range of Values
Integer Whole numbers 2 bytes -32,768 to 32,767
Long Whole numbers 4 bytes Approximately +/- 2.1E9
Single Decimal numbers 4 bytes -3.402823E38 to -1.401298E-45 for
negative values and 1.401298E-45 to
3.402823E38 for positive values
Double Decimal numbers
(double-precision
floating-point)
8 bytes -1.79769313486232E308 to -
4.94065645841247E-324 for negative
values and 4.94065645841247E-324 to
1.79769313486232E308 for positive
values
Currency Numbers with up to
15 digits left of the
decimal and 4 digits
right of the decimal
8 bytes 922,337,203,685,477.5808 to
922,337,203,685,477.5807
String Text information 1 byte per
character
Up to 65,000 characters for fixed-length
strings and up to 2 billion characters for
dynamic strings
Byte Whole numbers 1 byte 0 to 255
Boolean Logical values 2 bytes True or False
Date Date and time
information
8 bytes Jan 1st 100 to December 31st 9999
The following data values can take on the integer data type:
21
0
-9455
32766
You can also store these integer data types as long data types, although doing so wastes
storage and time unless you plan to change the values later to extremely large or small
integer numbers that require the long data type.
The following data values must be stored in a long data type:
32768
-95445
24
492848559
The following data values can take on the single data type:
0.01
565.32
-192.3424
9543.5645
6.5440E-24
Of course, you can store these data values in double storage locations as well. Use double
data types only when you need to store extra large or small values.
The following data values take on the double data type:
-5968.5765934211133
4.532112E+92
928374.344838273567899990
What's that E Doing in the Numbers?: The E stands for exponent. Years ago, mathematicians
grew weary of writing long numbers. They developed a shortcut notation called scientific
notation. Visual Basic supports scientific notation. You can use scientific notation for single
and double numeric data values. When you use scientific notation, you don't have to write—
or type, in the case of program writing—extremely long numbers.
When a single or double numeric value contains the letter E, followed by a number, that
number is written in scientific notation. To convert a number written in scientific notation to
its non-abbreviated form, multiply the number to the left of E by 10 raised to the power
indicated by the number to the right of E. Therefore, 2.9876E+17 means to multiply 2.9876
by 10 raised to the 17th power, or 1017
. 1017
is a very large number—it is 10 followed by 16
zeroes. The bottom line is that 2.9876E+17 means the same as 29876 followed by 13 zeros.
If a number uses a negative exponent, you multiply the number to left of E by 10 raised to
negative power. Therefore, 2.9876E-17 means the same as 2.9876 multiplied by 10-17
—or
2.9876 divided by 1017
—which turns out to be a small number indeed.
The following data values can take on the currency data type:
123.45
0.69
63456.75
-1924.57
25
The currency data type can accept and track numeric values to four decimal places.
However, you typically store dollar and cent values in the currency storage locations, and
these kinds of values require only two decimal places.
Never use a currency data value along with a dollar sign. In other words, the following
cannot be a currency value even though it looks like one:
$5,234.56
Visual Basic does not want you to use a dollar sign or commas in numeric data of any kind—
unless, of course, your country uses the comma for the fractional portion of numbers. If your
data contains anything other than numbers, a plus sign, a minus sign, or an exponent, Visual
Basic cannot treat the data as if it were numeric; therefore, it cannot perform mathematical
calculations with the data. Instead, Visual Basic treats the data as string data.
The following data values take on the string data type:
"London Bridge"
"1932 Sycamore Street"
"^%#@#$%3939$%^&^&"
Notice the quotation marks around the three string values. string values require the quotation
marks, which tell Visual Basic where the string begins and ends. If you wanted to embed
spaces at the beginning or end of a string, you indicate those spaces by including them inside
the quotation marks. For example, here are three different strings, each with a different set of
embedded spaces: " house", "house ", " house ". You cannot embed quotation marks directly
inside a string; Visual Basic thinks the string ends as soon as it comes to the second
quotation mark, even if it is not the actual end of the string.
The following data values can take on the variant data type:
"^%#@#$%3939$%^&^&"
123.45
4.532112E+92
21
03-Mar-1996
Do these values look familiar? The variant data type can hold data of any other data type.
Think about the kind of data stored in label controls. You often want to display numbers,
dollar amounts, times, and dates in labels on a form. You can always store variant data in
these controls. The data that comes from these controls is also variant.
The following data values must be stored in a Boolean data type:
True
26
False
WEEK 3:
VARIABLE DECLARATION IN VISUAL BASIC/STORING AND
RETRIVING DATA IN A VARIABLE
During this week you will learn :
• Declaring Variables
• Assigning Values to Variables
• Mathematical Expressions
• Conditional Operators
Declaring Variables
Definition: To define a variable means to create and name a variable.
A program can have as many variables as you need it to have. Before you can use a variable,
you must request that Visual Basic create the variable by defining the variable first. When
you define a variable, you tell Visual Basic these two things:
• The name of the variable
• The data type of the variable
Once you define a variable, that variable always retains its original data type. Therefore, a
single-precision variable can hold only single-precision values. If you stored an integer in a
single-precision variable, Visual Basic would convert the integer to a single-precision
number before it stored the number in the variable. Such conversions are common, and they
typically do not cause many problems.
The Dim statement defines variables. Using Dim, you tell Visual Basic
• that you need a variable
• what to name the variable
27
• what kind of variable you want
Dim—short for dimension—is a Visual Basic statement that you write in an application’s
Code window. Whenever you learn a new statement, you need to learn the format for that
statement. Here is the format of the Dim statement:
Dim VarName AS DataType
VarName is a name that you supply. When Visual Basic executes the Dim statement at
runtime, it creates a variable in memory and assigns it the name you give in the VarName
location of the statement. DataType is one of the seven Visual Basic data types that you
learned .
Variable names must follow the naming rules
• Names can be as short as one character or as long as 40 characters.
• Names must begin with a letter of the alphabet and can be in either uppercase or
lowercase letters.
• After the initial letter, names can contain letters, numbers, or underscores in names.
• Names cannot be a reserved word.
• Never define two variables with the same name
Always use a Dim statement to define variables before you use variables. If the Options
Environment Require Variable Definition option is set to Yes—as it is by default—Visual
Basic will issue an error message whenever you use a variable that you have not defined.
This option prevents you from inadvertently misspelling variable names and helps you avoid
errors in your program.
Suppose that you give a partial program to another Visual Basic programmer to work on. If
you want to require that all variables be defined but are unsure of the other programmer's
Options Environment Require Variable Definition setting, select (general) from the Code
window's Object dropdown list and add the following special statement:
Option Explicit
No matter how the Options Environment setting is set, the programmer cannot slip variables
into your program without defining them properly in Dim statements. Again, requiring
variable definitions helps eliminate bugs down the road, so you are wise to get in the habit of
putting Option Explicit in the (general) section of every program’s Code window.
The following statement defines a variable named ProductTotal:
Dim ProductTotal As Currency
From the Dim statement, you know that the variable holds currency data and that its name is
ProductTotal. All Visual Basic commands and built-in routines require an initial capital
letter. Although you don't have to name your variables with an initial capital letter, most
Visual Basic programmers do for the sake of consistency. Additional caps help distinguish
28
individual words inside a name. (Remember that you cannot use spaces in the name of
variable.)
The following statements define integer, single-precision, and double-precision variables:
Dim Length As Integer
Dim Price As Single
Dim Structure As Double
If you want to write a program that stores the user's text box entry for the first name, you
would define a string like this:
Dim
FirstName As String
You can get fancy when you define strings. This FirstName string can hold any string from 0
to 65,500 characters long. You will learn in the next section how to store data in a string.
FirstName can hold data of virtually any size. You could store a small string in FirstName—
such as "Joe"—and then store a longer string in FirstName—such as "Mercedes". FirstName
is a variable-length string.
Sometimes you want to limit the amount of text that a string holds. For example, you might
need to define a string variable to hold a name that you read from the disk file. Later, you
will display the contents of the string in a label on the form. The form's label has a fixed
length, however—assuming that the AutoSize property is set to True. Therefore, you want to
keep the string variable to a reasonable length. The following Dim statement demonstrates
how you can add the * StringLength option when you want to define fixed-length strings:
Dim Title As String * 20
Assigning Values to Variables
Definition: A null string is a zero-length empty string that is often represented as "".
When you first define variables, Visual Basic stores zeroes in the numeric variables and null
strings in the string variables. Use the assignment statement when you want to put other data
values into variables. Variables hold data of specific data types, and many lines inside a
Visual Basic program's Code window consist of assignment statements that assign data to
variables. Here is the format of the assignment statement:
VarName = Expression
29
The Let command name is optional; it is rarely used these days. The VarName is a variable
name that you have defined using the Dim statement. Expression can be a constant, another
variable, or a mathematical expression.
Suppose that you need to store a minimum age value of 18 in an integer variable named
MinAge. The following assignment statements do that:
MinAge = 18
To store a temperature in a single-precision variable named TodayTemp, you could do this:
TodayTemp = 42.1
The data type of Expression must match the data type of the variable to which you are
assigning. In other words, the following statement is invalid. It would produce an error in
Visual Basic programs if you tried to use it.
TodayTemp = "Forty-Two point One"
If TodayTemp were a single-precision variable, you could not assign a string to it. However,
Visual Basic often makes a quick conversion for you when the conversion is trivial. For
example, it is possible to perform the following assignment even if you have defined
Measure to be a double-precision variable:
measurement
= 921.23
At first glance, it appears that 921.23 is a single-precision number because of its size. 921.23
is actually a variant data value. Recall that Visual Basic assumes all data constants are
variant unless you explicitly add a suffix character to the constant to make the constant a
different data type. Visual Basic can easily and safely convert the variant value to double-
precision. That's just what Visual Basic does, so the assignment works fine.
In addition to constants, you can assign other variables to variables. Consider the following
code:
Dim Sales As Single, NewSales As Single
Sales = 3945.42
NewSales = Sales
When the third statement finishes, both Sales and NewSales have the value 3945.42.
Feel free to assign variables to controls and controls to variables. Suppose, for example, that
the user types the value 18.34 in a text box's Text property. If the text box's Name property is
txtFactor, the following statement stores the value of the text box in a variable named
FactorVal:
FactorVal = txtFactor.Text
30
Suppose that you defined Title to be a string variable with a fixed length of 10, but a user
types Mondays Always Feel Blue in a text box's Text property that you want to assign to
Title. Visual Basic stores only the first ten characters of the control to Title and truncates the
rest of the title. Therefore, Title holds only the string "Mondays Al".
This is the first of several program code reviews that you will find throughout the rest of the
book.
Sub cmdJoke_Click ()
cmdJoke.Caption = "Bird Dogs Fly"
End Sub
If you have a variable that will contain simple true/false, yes/no, or on/off information, you
can declare it to be of type Boolean. The default value of Boolean is False. In the following
example, blnRunning is a Boolean variable which stores a simple yes/no setting.
Dim blnRunning As Boolean
' Check to see if the tape is running.
If Recorder.Direction = 1 Then
blnRunning = True
End if
Mathematical Expressions
Data values and controls are not the only kinds of assignments that you can make. With the
Visual Basic math operators, you can calculate and assign expression results to variables
when you code assignment statements that contain expressions.
Definition: An operator is a word or symbol that does math and data manipulation.
It is easy to make Visual Basic do your math. This table describes Visual Basic's primary
math operators. There are other operators, but the ones in Table will suffice for most of the
programs that you write. Look over the operators. You are already familiar with most of
them because they look and act just like their real-world counterparts.
The primary math operators.
Operator Example Description
+ Net + Disc Adds two values
- Price - 4.00 Subtracts one value from another value
* Total * Fact Multiplies two values
/ Tax / Adjust Divides one value by another value
^ Adjust ^ 3 Raises a value to a power
& or + Name1 & Name2 Concatenates two strings
31
Suppose that you wanted to store the difference between the annual sales (stored in a
variable named AnnualSales) and cost of sales (stored in a variable named CostOfSales) in a
variable named NetSales. Assuming that all three variables have been defined and initialized,
the following assignment statement computes the correct value for NetSales:
NetSales = AnnualSales - CostOfSales
This assignment tells Visual Basic to compute the value of the expression and to store the
result in the variable named NetSales. Of course, you can store the results of this expression
in Caption or Text properties, too.
If you want to raise a value by a power—which means to multiply the value by itself a
certain number of times—you can do so. The following code assigns 10000 to Value because
ten raised to the fourth power—10x10x10x10—is 10,000:
Years = 4
Value = 10 ^ Years
No matter how complex the expression is, Visual Basic computes the entire result before it
stores that result in the variable at the left of the equals sign. The following assignment
statement, for example, is rather lengthy, but Visual Basic computes the result and stores the
value in the variable named Ans:
Ans = 8 * Factor - Pi + 12 * MonthlyAmts
Combining expressions often produces unintended results because Visual Basic computes
mathematical results in a predetermined order. Visual Basic always calculates exponentiation
first if one or more ^ operators appear in the expression. Visual Basic then computes all
multiplication and division before any addition and subtraction.
Visual Basic assigns 13 to Result in the following assignment:
Result = 3 + 5 * 2
At first, you might think that Visual Basic would assign 16 to Result because 3 + 5 is 8 and 8
* 2 is 16. However, the rules state that Visual Basic always computes multiplication—and
division if division exists in the expression—before addition. Therefore, Visual Basic first
computes the value of 5 * 2, or 10, and next adds 3 to 10 to get 13. Only then does it assign
the 13 to Result.
If both multiplication and division appear in the same expression, Visual Basic calculates the
intermediate results from left to right. For example, Visual Basic assigns 20 to the following
expression:
Result = 8
/ 2 + 4 + 3 * 4
Visual Basic computes the division first because the division appears to the left of the
multiplication. If the multiplication appeared to the left of the division, Visual Basic would
32
have multiplied first. After Visual Basic calculates the intermediate answers for the division
and the multiplication, it performs the addition and stores the final answer of 20 in Result.
Note: The order of computation has many names. Programmers usually use one of these
terms: order of operators, operator precedence, or math hierarchy.
It is possible to override the operator precedence by using parentheses. Visual Basic always
computes the values inside any pair of parentheses before anything else in the expression,
even if it means ignoring operator precedence. The following assignment statement stores 16
in Result because the parentheses force Visual Basic to compute the addition before the
multiplication:
Result = (3 + 5) * 2
The following expression stores the fifth root of 125 in the variable named root5:
root5 = 125 ^ (1/5)
As you can see from this expression, Visual Basic supports fractional exponents.
Definition: Concatenation means the joining together of two or more strings.
One of Visual Basic's primary operators has nothing to do with math. The concatenation
operator joins one string to the end of another. Suppose that the user entered his first name in
a label control named lblFirst and his last name in a label control named lblLast. The
following concatenation expression stores the full name in the string variable named
FullName:
FullName = lblFirst & lblLast
There is a problem here, though, that might not be readily apparent—there is no space
between the two names. The & operator does not automatically insert a space because you
don’t always want spaces inserted when you concatenate two strings. Therefore, you might
have to concatenate a third string between the other two, as in
FullName = lblFirst & " " & lblLast
Visual Basic actually supports a synonym operator, the plus sign, for concatenation. In other
words, the following assignment statement is identical to the previous one:
FullName = lblFirst + " " + lblLast
Even Microsoft, the maker of Visual Basic, recommends that you use & for string
concatenation and reserve + for mathematical numeric additions. Using the same operator for
two different kinds of operations can lead to confusion.
33
Review: The math operators enable you to perform all kinds of calculations and
assignments. Visual Basic means never having to use a calculator again! When you use
expressions, however, remember operator precedence. When in doubt, use parentheses to
indicate exactly which operations in an expression you want Visual Basic to calculate first.
Conditional Operators
You can combine or modify search conditions using the standard logical operators listed in
the following table. The operators are listed in the order that they are evaluated.
Operator Meaning Example
NOT Logical opposite of
condition
NOT True = False
NOT False = True
AND Both conditions must
apply ( True)
True AND True = True
True AND False = False
False AND True = False
OR Either condition can
apply (True)
True OR True = True
True OR False = True
False OR True = True
False OR False = False
34
WEEK 4 :
BASIC CONTROLS
During this week you will learn :
• Properties of the Form
• Intrinsic Controls
• Label control
• Text Box
• Focus In on Controls
• The Command Button
• The PictureBox Control
• The Image Control
Properties of the Form
The form is yet another Visual Basic object. As such, it has property settings that you can set
and change while you design the application and during the program's execution. This
section explains all the form's property settings in detail.
This table describes the property settings of the form that appear in the Properties window
when you click the Form window and press F4. The form has more properties than the
command button, label, and text box controls, whose properties you saw in the previous unit.
As with all control property values, you never need to worry about all these properties at
once. Most of the time, the default values are satisfactory for your applications.
Properties of the form.
Property Description
AutoRedraw If True, Visual Basic automatically redraws graphic images that reside on
the form when another window hides the image or when the user resizes the
object. If False (the default), Visual Basic does not automatically redraw.
BackColor The background color of the form. You can enter a hexadecimal Windows
color value or select from the color palette.
BorderStyle Set to 0 for no border or border elements such as a control menu or
minimize and maximize buttons, 1 for a fixed-size border, 2 (the default)
for a sizable border, or 3 for a fixed-size border that includes a double-size
edge.
Caption The text that appears in the form's title bar. The default Caption is the Name
of the form.
Enabled If True (the default), the form can respond to events. Otherwise, Visual
Basic halts event processing for the form.
FillColor The color value used to fill shapes drawn on the form.
FillStyle Contains eight styles that determine the appearance of the interior patterns
35
of shapes drawn on the form.
FontBold Has no effect on the form's Caption property, but does affect text that you
eventually display on the form if you use the Print command.
FontItalic Has no effect on the form's Caption property, but does affect text that you
eventually display on the form if you use the Print command.
FontName Has no effect on the form's Caption property, but does affect text that you
eventually display on the form if you use the Print command.
FontSize Has no effect on the form's Caption property, but does affect text that you
eventually display on the form if you use the Print command.
FontStrikethru Has no effect on the form's Caption property, but does affect text that you
eventually display on the form if you use the Print command.
FontTransparent Has no effect on the form's Caption property, but does affect text that you
eventually display on the form if you use the Print command.
FontUnderline Has no effect on the form's Caption property, but does affect text that you
eventually display on the form if you use the Print command.
ForeColor The color of foreground text that you display on the form if you use the
Print command.
Height The form’s height in twips.
HelpContextID Provides the identifying number for the help text if you add advanced
context-sensitive help to your application.
Icon The picture icon that the user sees after minimizing the form.
KeyPreview If False (the default), the control with the focus receives these events:
KeyDown, KeyUp, and KeyPress before the form does . If True, the form
receives the events before the focused control.
Left The number of twips from the left edge of the screen to the left edge of the
form.
MaxButton If True (the default), the maximize button appears on the form at runtime.
If False, the user cannot maximize the form window.
MinButton If True (the default), the minimize button appears on the form at runtime.
If False, the user cannot minimize the form window.
MousePointer The shape to which the mouse cursor changes if the user moves the mouse
cursor over the form. The possible values range from 0 to 12 and represent
the different shapes the mouse cursor can take on.
Name The name of the form. By default, Visual Basic generates the name
Form1.
Picture A picture file that displays on the form's background.
ScaleMode Enables you to determine how to measure coordinates on the form. You
can choose from eight values. The default unit of measurement is twips,
indicated by 1. The other Scale... properties measure use twips.
Top The number of twips from the top edge of the screen to the top of the
form.
Visible True or False, indicating whether the user can see and, therefore, use the
form.
36
Width The width of the form in twips.
WindowState Describes the startup state of the form when the user runs the program. If
set to 0 (the default), the form first appears the same size as you designed
it. If set to 1, the form first appears minimized. If set to 2, the form first
appears maximized.
ScaleMode enables you to determine how to measure coordinates on the form. You can
choose from eight values. The default unit of measurement is twips. This table describes the
possible units of measurement.
37
The ScaleMode property values.
Value Description
0 Customized values
1 Twips (the default)
2 Points
3 Pixels
4 A standard character that is 120 twips wide and 240 twips high
5 Inches
6 Millimeters
7 Centimeters
Intrinsic Controls
In Microsoft Visual Basic jargon, intrinsic controls (or built-in controls) are those controls
visible in the Toolbox window when you launch the environment. This important group
includes controls, such as Label, TFextbox, and CommandButton controls, that are used in
nearly every application. As you know, Visual Basic can be extended using additional
Microsoft ActiveX Controls (formerly known as OCX controls, or OLE custom controls)
either provided in the Visual Basic package or available as commercial, shareware, or even
freeware third-party products. Even if such external controls are often more powerful than
built-in controls, intrinsic controls have a few advantages that you should always take into
account:
• Support for intrinsic controls is included in the MSVBVM60.DLL, the runtime file
that's distributed with every Visual Basic application. This means that if a program
exclusively uses intrinsic controls, you don't need to distribute any additional OCX
files, which greatly simplifies the installation process and reduces disk requirements.
• In general, Visual Basic can create and display intrinsic controls faster than it can
external ActiveX controls because the code for their management is already in the
Visual Basic runtime module and doesn't have to be loaded when a form references
an intrinsic control for the first time. Also, applications based on intrinsic controls
usually perform faster on machines with less memory; no extra memory is needed by
additional OCX modules.
• Because programs based exclusively on intrinsic controls require fewer ancillary
files, they can be downloaded faster through the Internet. Moreover, if end users
previously installed any other Visual Basic application, Visual Basic runtime files are
already installed on the target machine, which reduces download times to the
minimum.
For all these reasons, it's important to learn how to make the best of intrinsic controls. In this
chapter, I focus on their most important properties, methods, and events, and I also show
how to address some common programming issues using intrinsic controls exclusively.
38
Label control
The label holds text on the form. Although there are several ways to display text, the label
control enables you to post messages on the form that you can change by means of Visual
Basic code. The user, however, cannot change the value of a text control.
Label controls are vital to Visual Basic applications because you are always putting text on
the form for the user to read. Here are some of the uses for the label control:
Titles (boxed and unboxed)
Data descriptions
Color warning messages
Graphic descriptions
Instructions
Labels are extremely easy to place and initialize. If you don't want a message to appear in a
label when the user first starts the application, be sure to delete all the text from the label's
Caption property. This table lists the properties available for labels within the Properties
window.
label properties.
Property Description
Alignment Set to 0 for left-justification (the default), 1 for right-justification, or 2 for
centering the Caption within the label. Putting a border around the label or
shading the label a color often makes the justification stand out.
AutoSize If True, the control automatically adjusts its own size to shrinkwrap around
the contents of its caption. If False (the default), the control clips off the right
39
of the text if the label is not large enough to hold the entire caption.
BackColor The background color of the label. It is a hexadecimal number that represents
one of thousands of possible Windows color values. You can select from a
palette of colors displayed by Visual Basic when you are ready to set the
BackColor property. The default background color is the same as the form's
default background color.
BackStyle If set to 0, meaning transparent, the form’s background color comes through
the label’s background. If set to 1 (the default), the label's background color
hides the form behind the label.
BorderStyle Either 0 (the default) for no border or 1 for a fixed single-line border.
Caption The text that appears on a label.
Enabled If True (the default), the label control can respond to events. Otherwise,
Visual Basic halts event processing for that particular control.
FontBold If True (the default), the Caption displays in boldfaced characters.
FontItalic If True (the default), the caption displays in italicized character.
FontName The name of the label control’s style. You typically use the name of a
Windows True Type font.
FontSize The size, in points, of the font used for the label control's caption.
FontStrikethru If True (the default), the caption displays in strikethrough letters. In other
words, the characters have a line drawn through them.
FontUnderline If True (the default), the caption displays in underlined letters.
ForeColor The color of the text inside the caption.
Height The height of the label control in twips.
Index If the label control is part of a control array, the Index property provides the
numeric subscript for each particular label control.
Left The number of twips from the left edge of the Form window to the left edge
of the label control.
MousePointer
The shape to which the mouse cursor changes if the user moves the mouse
cursor over the label control. The possible values range from 0 to 12 and
represent the different shapes that the mouse cursor can take on.
Name The name of the control. By default, Visual Basic generates the names
Label1, Label2, and so on, as you add subsequent label controls to the form.
TabIndex The focus tab order begins at 0 and increments every time you add a new
control. You can change the focus order by changing value of the TabIndex
of the control. No two controls on the same form can have the same
TabIndex value.
Top The number of twips from the top edge of a label control to the top of the
form.
Visible True or False, indicating whether the user can see and, therefore, use the
label control.
Width The width of the label control in twips.
WordWrap If True, the text wraps to hold the entire caption. If False (the default), the
40
text does not wrap but is truncated to fit the caption.
Text Box
A TextBox control, sometimes called an edit field or edit control, displays information
Text box controls display default values and accept user input. Text box controls enable you
to determine how the user enters data and responds to questions and controls that you
display.
When you display a text box on a form, you give the user a chance to accept a default
value—the text box's initial Text property—or to change it to something else. The user can
enter text of any data type—numbers, letters, and special characters. He can scroll left and
right by using the arrow keys, and he can use the Ins and Del keys to insert and delete text
within the text box control.
Most of the text box's properties work like the label control's properties. Unlike the label,
however, the text box properties describe data-entry properties so that the control can deal
with user input instead of simple text display. This table describes the property values for the
text box control.
Text box properties.
Property Description
Alignment Set to 0 for left-justification (the default), 1 for right-justification, or 2 for
centering the Caption within the text box. If MultiLine contains False,
Visual Basic ignores the Alignment setting.
BackColor The background color of the text box. It is a hexadecimal number that
represents one of thousands of possible Windows color values. You can
select from a palette of colors displayed by Visual Basic when you are
ready to set the BackColor property. The default background color is the
same as the form's default background color.
BorderStyle Either 0 (the default) for no border or 1 for a fixed single-line border.
Enabled If True (the default), the text box can respond to events. Otherwise, Visual
Basic halts event processing for that particular control.
FontBold If True (the default), the Text displays in boldfaced characters.
FontItalic If True (the default), the Text displays in italicized characters.
FontName The name of the text box's style. You typically use the name of a Windows
True Type font.
FontSize The size, in points, of the font used for the text box control's Text value.
FontStrikethru If True (the default), the text value displays in strikethrough letters. In
other words, the characters have a line drawn through them.
FontUnderline If True (the default), the text value displays in underlined letters.
ForeColor The color of the text inside the Text property.
41
Height The height of the text box in twips.
HelpContextID If you add advanced context-sensitive help to your application, the
HelpContextID provides the identifying number for the help text.
HideSelection Keeps text highlighted even when the text box loses its focus.
Index If the text box is part of a control array, the Index property provides the
numeric subscript for each particular text box.
Left The number of twips from the left edge of the Form window to the left
edge of the text box.
MaxLength If set to 0 (the default), the limit of the Text value can be as great as
approximately 32,000 characters. Otherwise, the MaxLength specifies how
many characters the user can enter in the text box.
MousePointer The shape to which the mouse cursor changes if the user moves the mouse
cursor over the text box. The possible values range from 0 to 12 and
represent the different shapes that the mouse cursor can take on.
MultiLine If True, the text box can display more than one line of text. If False (the
default), the text box contains a single, and often long, line of text. The text
can contain a carriage return.
Name The name of the control. By default, Visual Basic generates the names
Text1, Text2, and so on, as you add subsequent text boxes to the form.
PasswordChar If you enter a character, such as an asterisk (*) for the PasswordChar,
Visual Basic does not display the user's text but instead displays the
PasswordChar as the user types the text. Use text boxes with a
PasswordChar set when the user needs to enter a password and you don't
want others looking over his shoulder to peek at the password.
ScrollBars Set to 0 (the default) for no scroll bars, 1 for a horizontal scroll bar, 2 for a
vertical scroll bar, or 3 for both kinds of scroll bars.
TabIndex The focus tab order begins at 0 and increments every time you add a new
control. You can change the focus order by changing the value of the
TabIndex of the control. No two controls on the same form can have the
same TabIndex value.
TabStop If True, the user can press Tab to move the focus to this label control. If
False, the label control cannot receive the focus.
Text The initial value that the user sees in the text box. The default value is the
name of the control. The value continues to update as the user enters new
text at runtime.
Top The number of twips from the top edge of a text box to the top of the form.
Visible True or False, indicating whether the user can see and, therefore, use the
text box.
Width The width of the text box in twips.
42
Focus In on Controls
As you learn about controls, you often hear the term focus. Learning about focus now saves
you a lot of trouble later.
Definition: Focus refers to the control that is currently highlighted.
The control with the focus is the next control that will accept the user's response. Most
Windows users instinctively understand focus even though very few have thought much
about focus. The control with the focus is always the control that is highlighted. The focus
often moves from control to control as the user works. The focus determines where the next
action will take place.
Only one control can have the focus at any one time, and not every control can get the focus.
Definition: The focus order determines the control next in line for the focus.
Every form has a focus order that determines the next control that will receive the focus.
When you see a dialog box such as a File Open dialog box, the OK button is almost always
the command button that has the focus. You can press Enter to select the OK command
button, click a different command button (such as a Cancel command button), or press Tab
until the command button that you want has the focus.
Through property settings, you can determine the focus order and whether a control can
receive the focus. Your form might have some controls that you don't want the user to be
able to highlight; therefore, you prevent them from getting the focus.
The Command Button
The command button is the cornerstone of most Windows applications. With the command
button, your user can respond to events, signal when something is ready for printing, and tell
the program when to terminate. Although all command buttons work in the same
fundamental way—they visually depress when the user clicks them, and they trigger events
such as Click events—numerous properties for command buttons uniquely define each one
and its behavior.
You are already familiar with several command button properties. You have seen that
command buttons vary in size and location. You might want to open a new project, add a
command button to the Form window by double-clicking the command button on the
toolbox, and press F4 to scroll through the Properties window.
Several of the property settings can accept a limited range of numeric values. Most of these
values are named in CONSTANT.TXT, and they are mentioned in this book as well. Some
property settings accept either True or False values, indicating a yes or no condition. For
example, if the Cancel property is set to True, that command button is the cancel command
button and all other command buttons must contain a False Cancel property because only
one command button on a form can have a True Cancel property.
43
Command button properties.
Property Description
BackColor The command button is one of the few controls for which the background
color property means very little. When you change the background color,
only the dotted line around the command button's caption changes color.
Cancel If True, Visual Basic automatically clicks this command button when the
user presses Esc. Only one command button can have a True Cancel
property value at a time. All command buttons initially have their Cancel
property set to False.
Caption The text that appears on the command button. If you precede any character
in the text with an ampersand (&),it acts as the access key. Therefore, the
access key for a command button with a Caption property set to E&xit is
Alt+X. The default Caption value is the command button's Name value.
Default The command button with the initial focus when the form first activates has
a Default property setting of True. All command buttons initially have False
Default property values until you change one of them.
Definition: An icon is a picture on the screen.
DragIcon The icon that appears when the user drags the command button around on
the form.
Because you only rarely enable the to user move a command button, you won’t use the
Drag... property settings very much.
Enabled If True (the default), the command button can respond to events. Otherwise,
Visual Basic halts event processing for that particular control.
FontBold If True (the default), the Caption displays in boldfaced characters.
FontItalic If True (the default), the caption displays in italicized characters.
FontName The name of the style of the command button caption. You typically use the
name of a Windows True Type font.
(margin)Definition: A point is 1/72 of one inch.
FontSize The size, in points, of the font used for the command button's caption.
FontStrikethru If True (the default), the caption displays in strikethrough letters. In other
words, characters have a line drawn through them.
FontUnderline If True (the default), the caption displays in underlined letters.
Height The height of the command button in twips.
HelpContextID If you add advanced context-sensitive help to your application, the
44
HelpContextID provides the identifying number for the help text.
Index If the command button is part of a control array, the Index property provides
the numeric subscript for each particular command button.
Left The number of twips from the left edge of the Form window to the left edge
of the command button.
MousePointer The shape to which the mouse cursor changes if the user moves the mouse
cursor over the command button. The possible values range from 0 to 12
and represent the different shapes that the mouse cursor can take on.
Name The name of the control. By default, Visual Basic generates the names
Command1, Command2, and so on, as you add subsequent command
buttons to the form.
TabIndex The focus tab order begins at 0 and increments every time you add a new
control. You can change the focus order by changing the TabIndex values of
the controls. No two controls on the same form can have the same TabIndex
value.
TabStop If True, the user can press Tab to move the focus to this command button. If
False, the command button cannot receive the focus.
Tag Not used by Visual Basic. The programmer can use it for an identifying
comments applied to the command button.
Top The number of twips from the top edge of a command button to the top of
the form.
Visible True or False, indicating whether the user can see and, therefore, use the
command button.
Width The width of the command button in twips.
The PictureBox Control
PictureBox controls are among the most powerful and complex items in the Visual Basic
Toolbox window. In a sense, these controls are more similar to forms than to other controls.
For example, PictureBox controls support all the properties related to graphic output,
including AutoRedraw, ClipControls, HasDC, FontTransparent, CurrentX, CurrentY, and all
the Drawxxxx, Fillxxxx, and Scalexxxx properties. PictureBox controls also support all
graphic methods, such as Cls, PSet, Point, Line, and Circle and conversion methods, such as
ScaleX, ScaleY, TextWidth, and TextHeight. In other words, all the techniques that I
described for forms can also be used for PictureBox controls (and therefore won't be covered
again in this section).
Loading images
Once you place a PictureBox on a form, you might want to load an image in it, which you do
by setting the Picture property in the Properties window. You can load images in many
different graphic formats, including bitmaps (BMP), device independent bitmaps (DIB),
metafiles (WMF), enhanced metafiles (EMF), GIF and JPEG compressed files, and icons
(ICO and CUR). You can decide whether a control should display a border, resetting the
BorderStyle to 0-None if necessary. Another property that comes handy in this phase is
45
AutoSize: Set it to True and let the control automatically resize itself to fit the assigned
image.
You might want to set the Align property of a PictureBox control to something other than the
0-None value. By doing that, you attach the control to one of the four form borders and have
Visual Basic automatically move and resize the PictureBox control when the form is resized.
PictureBox controls expose a Resize event, so you can trap it if you need to move and resize
its child controls too.
You can do more interesting things at run time. To begin with, you can programmatically
load any image in the control using the LoadPicture function:
Picture1.Picture = LoadPicture("c:windowssetup.bmp")
and you can clear the current image using either one of the following statements:
' These are equivalent.
Picture1.Picture = LoadPicture("")
Set Picture1.Picture = Nothing
The LoadPicture function has been extended in Visual Basic 6 to support icon files
containing multiple icons. The new syntax is the following:
LoadPicture(filename, [size], [colordepth], [x], [y])
where values in square brackets are optional. If filename is an icon file, you can select a
particular icon using the size or colordepth arguments. Valid sizes are 0-vbLPSmall, 1-
vbLPLarge (system icons whose sizes depend on the video driver), 2-vbLPSmallShell, 3-
vbLPLargeShell (shell icons whose dimensions are affected by the Caption Button property
as set in the Appearance tab in the screen's Properties dialog box), and 4-vbLPCustom (size
is determined by x and y). Valid color depths are 0-vbLPDefault (the icon in the file that best
matches current screen settings), 1-vbLPMonochrome, 2-vbLPVGAColor (16 colors), and 3-
vbLPColor (256 colors).
You can copy an image from one PictureBox control to another by assigning the target
control's Picture property:
Picture2.Picture = Picture1.Picture
46
The PaintPicture demonstration program shows several graphic effects.
The Image Control
Image controls are far less complex than PictureBox controls. They don't support graphical
methods or the AutoRedraw and the ClipControls properties, and they can't work as
containers, just to hint at their biggest limitations. Nevertheless, you should always strive to
use Image controls instead of PictureBox controls because they load faster and consume less
memory and system resources. Remember that Image controls are windowless objects that
are actually managed by Visual Basic without creating a Windows object. Image controls
can load bitmaps and JPEG and GIF images.
When you're working with an Image control, you typically load a bitmap into its Picture
property either at design time or at run time using the LoadPicture function. Image controls
don't expose the AutoSize property because by default they resize to display the contained
image (as it happens with PictureBox controls set at AutoSize = True). On the other hand,
Image controls support a Stretch property that, if True, resizes the image (distorting it if
necessary) to fit the control. In a sense, the Stretch property somewhat remedies the lack of
the PaintPicture method for this control. In fact, you can zoom in to or reduce an image by
loading it in an Image control and then setting its Stretch property to True to change its width
and height:
' Load a bitmap.
Image1.Stretch = False
Image1.Picture = LoadPicture("c:windowssetup.bmp")
' Reduce it by a factor of two.
Image1.Stretch = True
Image1.Move 0, 0, Image1.Width / 2, Image1.Width / 2
Image controls support all the usual mouse events. For this reason, many Visual Basic
developers have used Image controls to simulate graphical buttons and toolbars. Now that
Visual Basic natively supports these controls, you'd probably better use Image controls only
for what they were originally intended.
47
WEEK 5:
ADDING AND ACTIVATING VB CONTROLS IN A PROGRAM
During this week you will learn :
• Creating non-wizard applications
• Adding Controls to applications
• Managing Controls
• Change the control properties
• Common Properties
• Handling Control Event
• Common Events
• Writing Code
Creating non-wizard applications
You can create a single project .
1. On the File menu, click Create Project to display the Create Project dialog box.
2. In the New Project box, Click Standard.EXE and then Click OK.
Adding Controls to applications
To place a control on the form, you can do one of two things:
• Double-click the Toolbox control. Visual Basic places and centers the control on
your form. You then have to move and size the control to your preferences.
• Click the control and move the mouse pointer to the Form window. Drag to draw the
control's outline on your form in the placement and size you need.
48
Managing Controls
Moving controls
Controls can be moved around a form by dragging them with the mouse.
Deleting Controls
First selected the control you want to delete, then you can use many ways
- Press Delete Key
- Right Click then select Delete.
- From Edit menu Select Delete
Resizing controls
Before a control can be resized it must be selected. When a control is selected it will be
surrounded by black dots or handles. Clicking and dragging one of these handles will adjust
the size of the control.
Change the control properties
The properties window lists all the properties a control has and their value. The default value
of a property can be changed. Just select the property first then change its value.
49
Common Properties
At first glance, it might seem that Visual Basic 6 supports countless properties for various
objects. Fortunately, there's a set of properties many objects of different classes share. In this
section, we'll examine these common properties.
The Left, Top, Width, and Height Properties
All visible objects—forms and controls—expose these properties, which affect the object's
position and size. These values are always relative to the object's container—that is, the
screen for a form and the parent form for a control. A control can also be contained in
another control, which is said to be its container: In this case, Top and Left properties are
relative to such a container control. By default, these properties are measured in twips, a unit
that lets you create resolution-independent user interfaces, but you can switch to another
unit, for example, pixels or inches, by setting the container's ScaleMode property. But you
can't change the unit used for forms because they have no container: Left, Top, Width, and
Height properties for forms are always measured in twips.
While you can enter numeric values for these properties right in the Properties window at
design time, you often set them in a visual manner by moving and resizing the control on its
parent form. Keep in mind that Visual Basic also offers many interactive commands in the
Format menu that let you resize, align, and space multiple controls in one operation. You can
also access and modify these properties through code to move or resize objects at run time:
' Double a form's width, and move it to the
' upper left corner of the screen.
Form1.Width = Form1.Width * 2
Form1.Left = 0
Form1.Top = 0
Note that while all controls—even invisible ones—expose these four properties at design
time in the Properties window, controls that are inherently invisible—Timer controls, for
example—don't support these properties at run time, and you can't therefore read or modify
them through code.
CAUTION
Controls don't necessarily have to support all four properties in a uniform manner. For
example, ComboBox controls' Height property can be read but not written to, both at design
time and run time. As far as I know, this is the only example of a property that appears in the
Properties window but can't be modified at design time. This happens because the height of a
ComboBox control depends on the control's Font attributes. Remember this exception when
writing code that modifies the Height property for all the controls in a form.
The ForeColor and BackColor Properties
Most visible objects expose ForeColor and BackColor properties, which affect the color of
the text and the color of the background, respectively. The colors of a few controls—scroll
bars, for example—are dictated by Microsoft Windows, however, and you won't find
ForeColor and BackColor entries in the Properties window. In other cases, the effect of these
properties depends on other properties: for example, setting the BackColor property of a
Label control has no effect if you set the BackStyle property of that Label to 0-Transparent.
50
CommandButton controls are peculiar in that they expose a BackColor property but not a
ForeColor property, and the background color is active only if you also set the Style property
to 1-Graphical. (Because the default value for the Style property is 0-Standard, it might take
you a while until you understand why the BackColor property doesn't affect the background
color in the usual manner.)
When you're setting one of these two properties in the Properties window, you can select
either a standard Windows color or a custom color using the System tab in the first case and
the Palette tab in the second, as you can see in Figure. My first suggestion is always use a
standard color value unless you have a very good reason to use a custom color. System
colors display well on any Windows machine, are likely to conform to your customers'
tastes, and contribute to making your application look well integrated in the system. My
second suggestion is if you want to use custom colors, develop a consistent color scheme and
use it throughout your application. I also have a third suggestion: Never mix standard and
custom colors on the same form, and don't use a standard color for the ForeColor property
and a custom color for the BackColor property of the same control (or vice versa), because
the user might change the system palette in a way that makes the control completely
unreadable.
You can choose from several ways to assign a color in code. Visual Basic provides a set of
symbolic constants that correspond to all the colors that appear in the System tab in the
Properties window at design time:
' Make Label1 appear in a selected state.
Label1.ForeColor = vbHighlightText
Label1.BackColor = vbHighlight
All the symbolic constants are shown in the following table.
Constant Hex Value Description
vb3DDKShadow &H80000015 Darkest shadow
vb3Dface &H8000000F Dark shadow color for 3-D display elements
vb3Dhighlight &H80000014 Highlight color for 3-D display elements
vb3Dlight &H80000016 Second lightest of the 3-D colors after
vb3Dhighlight
vb3Dshadow &H80000010 Color of automatic window shadows
vbActiveBorder &H8000000A Active window border color
vbActiveTitleBar &H80000002 Active window caption color
vbActiveTitleBarText &H80000009 Text color in active caption, size box, scroll
bar arrow box
vbApplicationWorkspace &H8000000C Background color of multiple-document
interface (MDI) applications
vbButtonFace &H8000000F Face shading on command buttons
vbButtonShadow &H80000010 Edge shading on command buttons
51
vbButtonText &H80000012 Text color on push buttons
vbDesktop &H80000001 Desktop color
vbGrayText &H80000011 Grayed (disabled) text
vbHighlight &H8000000D Background color of items selected in a
control
vbHighlightText &H8000000E Text color of items selected in a control
vbInactiveBorder &H8000000B Inactive window border color
vbInactiveCaptionText &H80000013 Color of text in an inactive caption
vbInactiveTitleBar &H80000003 Inactive window caption color
vbInactiveTitleBarText &H80000013 Text color in inactive window caption, size
box, scroll bar arrow box
vbInfoBackground &H80000018 Background color of ToolTips
vbInfoText &H80000017 Color of text in ToolTips
vbMenuBar &H80000004 Menu background color
vbMenuText &H80000007 Text color in menus
vbScrollBars &H80000000 Scroll bar gray area color
vbTitleBarText &H80000009 Text color in active caption, size box, scroll
bar arrow box
vbWindowBackground &H80000005 Window background color
vbWindowFrame &H80000006 Window frame color
vbWindowText &H80000008 Text color in windows
You can also browse them in the Object Browser window, after clicking the
SystemColorConstants item in the leftmost list box. (If you don't see it, first select <All
libraries> or VBRUN in the top ComboBox control). Note that all the values of these
constants are negative.
52
When you're assigning a custom color, you can use one of the symbolic constants that Visual
Basic defines for the most common colors (vbBlack, vbBlue, vbCyan, vbGreen, vbMagenta,
vbRed, vbWhite, and vbYellow), or you can use a numeric decimal or hexadecimal constant:
' These statements are equivalent.
Text1.BackColor = vbCyan
Text1.BackColor = 16776960
Text1.BackColor = &HFFFF00
You can also use an RGB function to build a color value composed of its red, green, and blue
components. Finally, to ease the porting of existing QuickBasic applications, Visual Basic
supports the QBColor function:
' These statements are equivalent to the ones above.
Text1.BackColor = RGB(0, 255, 255) ' red, green, blue values
Text1.BackColor = QBColor(11)
The Font Property
Forms and those controls that can display strings of characters expose the Font property. At
design time, you set font attributes using a common dialog box, which you can see in Figure.
Dealing with fonts at run time, however, is less simple because you must account for the fact
that Font is a compound object, and you must assign its properties separately. Font objects
expose the Name, Size, Bold, Italic, Underline, and Strikethrough properties.
Text1.Font.Name = "Tahoma"
Text1.Font.Size = 12
Text1.Font.Bold = True
53
Text1.Font.Underline = True
At design time the Font dialog box lets you modify all font attributes at once and preview
the result.
It should be made clear, however, that the preceding code actually assigns the same Font
objects to both controls. This means that if you later change Text1's font attributes, the
appearance of Text2 will also be affected. This behavior is perfectly consistent with the Font
object's nature, even though the reasons for. You can take advantage of this approach—for
example, if all the controls in your form always use the same font—but you should
absolutely avoid it when the controls in question are supposed to have independent font
attributes.
Visual Basic 6 still supports old-style Font properties such as FontName, FontSize,
FontBold, FontItalic, FontUnderline, and FontStrikethru, but you can modify them only
through code because they don't appear in the Properties window at design time. You can use
the syntax that you like most because the two forms are perfectly interchangeable. In this
book, however, I mostly follow the newer object-oriented syntax.
The Font.Size property (or the equivalent FontSize property) is peculiar because in general
you can't be sure that Visual Basic is able to create a font of that particular size, especially if
you aren't working with a TrueType font. The short code snippet below proves this.
Text1.Font.Name = "Courier"
Text1.Font.Size = 22
Print Text1.Font.Size ' Prints 19.5
54
The Caption and Text Properties
The Caption property is a string of characters that appears inside a control (or in the title bar
of a form) and that the user can't directly modify. Conversely, the Text property corresponds
to the "contents" of a control and is usually editable by the end user. No intrinsic control
exposes both a Caption and a Text property, so in practice a look at the Properties window
can resolve your doubts as to what you're working with. Label, CommandButton, CheckBox,
OptionButton, Data, and Frame controls expose the Caption property, whereas TextBox,
ListBox, and ComboBox controls expose the Text property.
The Caption property is special in that it can include an ampersand (&) character to associate
a hot key with the control. The Text property, when present, is always the default property
for the control, which means that it can be omitted in code:
' These statements are equivalent.
Text2.Text = Text1.Text
Text2 = Text1
The Parent and Container Properties
The Parent property is a run time_only property (that is, you don't see it in the Properties
window), which returns a reference to the form that hosts the control. The Container property
is also a run time_only property, which returns a reference to the container of the control.
These two properties are correlated, in that they return the same object—the parent form—
when a control is placed directly on the form surface.
While you can't move a control from one form to another using the Parent property (which is
read-only), you can move a control to another container by assigning a different value to its
Container property (which is a read-write property). Because you're assigning objects and
not plain values, you must use the Set keyword:
' Move Text1 into the Picture1 container.
Set Text1.Container = Picture1
' Move it back on the form's surface.
Set Text1.Container = Form1
The Enabled and Visible Properties
By default, all controls and forms are both visible and enabled at run time. For a number of
reasons, however, you might want to hide them or show them in a disabled state. For
example, you might use a hidden DriveListBox control simply to enumerate all the drives in
the system. In this case, you set the Visible property of the DriveListBox control to False in
the Properties window at design time. More frequently, however, you change these
properties at run time:
' Enable or disable the Text1 control when
' the user clicks on the Check1 CheckBox control.
Private Sub Check1_Click()
Text1.Enabled = (Check1.Value = vbChecked)
End Sub
55
Disabled controls don't react to user's actions, but otherwise they're fully functional and can
be manipulated through code. Invisible controls are automatically disabled, so you never
need to set both these properties to False. All mouse events for disabled or invisible controls
are passed to the underlying container or to the form itself.
If an object works as a container for other objects—for instance, a Form is a container for its
controls and a Frame control can be a container for a group of OptionButton controls—
setting its Visible or Enabled properties indirectly affects the state of its contained objects.
This feature can often be exploited to reduce the amount of code you write to enable or
disable a group of related controls.
The TabStop and TabIndex Properties
If a control is able to receive the input focus, it exposes the TabStop property. Most intrinsic
controls support this property, including TextBox, OptionButton, CheckBox,
CommandButton, OLE, ComboBox, both types of scroll bars, the ListBox control, and all its
variations. In general, intrinsic lightweight controls don't support this property because they
can never receive the input focus. The default value for this property is True, but you can set
it to False either at design time or run time.
If a control supports the TabStop property, it also supports the TabIndex property, which
affects the Tab order sequence—that is, the sequence in which the controls are visited when
the user presses the Tab key repeatedly. The TabIndex property is also supported by Label
and Frame controls, but since these two controls don't support the TabStop property, the
resulting effect is that when the user clicks on a Label or a Frame control (or presses the hot
key specified in the Label or Frame Caption property), the input focus goes to the control
that follows in the Tab order sequence. You can exploit this feature to use Label and Frame
controls to provide hot keys to other controls:
' Let the user press the Alt+N hot key
' to move the input focus on the Text1 control.
Label1.Caption = "&Name"
Text1.TabIndex = Label1.TabIndex + 1
The MousePointer and MouseIcon Properties
These properties affect the shape of the mouse cursor when it hovers over a control.
Windows permits a very flexible mouse cursor management in that each form and each
control can display a different cursor, and you can also set an application-wide mouse cursor
using the Screen global object. Nevertheless, the rules that affect the actual cursor used aren't
straightforward:
• If the Screen.MousePointer property is set to a value different from 0-vbDefault, the
mouse cursor reflects this value and no other properties are considered. But when the
mouse floats over a different application (or the desktop), the cursor appearance
depends on that application's current state, not yours.
• If Screen.MousePointer is 0 and the mouse cursor is over a control, Visual Basic
checks that control's MousePointer property; if this value is different from 0-
vbDefault, the mouse cursor is set to this value.
• If Screen.MousePointer is 0 and the mouse is over a form's surface or it's over a
control whose MousePointer property is 0, Visual Basic uses the value stored in the
form's MousePointer property.
56
If you want to show an hourglass cursor, wherever the user moves the mouse, use this code:
' A lengthy routine
Screen.MousePointer = vbHourglass
...
' Do your stuff here
...
' but remember to restore default pointer.
Screen.MousePointer = vbDefault
Here's another example:
' Show a crosshair cursor when the mouse is over the Picture1
' control and an hourglass elsewhere on the parent form.
Picture1.MousePointer = vbCrosshair
MousePointer = vbHourglass
The MouseIcon property is used to display a custom, user-defined mouse cursor. In this case,
you must set the MousePointer to the special value 99-vbCustom and then assign an icon to
the MouseIcon property:
' Display a red Stop sign mouse cursor. The actual path may differ,
' depending on the main directory where you installed Visual Basic.
MousePointer = vbCustom
MouseIcon = LoadPicture("d:vb6graphicsiconscomputermsgbox01.ico")
You don't need to load a custom mouse cursor at run time using the LoadPicture command.
For example, you can assign it to the MouseIcon property at design time in the Properties
window, as you can see in Figure, and activate it only when needed by setting the
MousePointer property to 99-vbCustom. If you need to alternate among multiple cursors for
the same control but don't want to distribute additional files, you can load additional ICO
files in hidden Image controls and switch among them at run time.
57
The Tag Property
All controls support the Tag property, without exception. This is true even for ActiveX
controls, including any third-party controls. How can I be so certain that all controls support
this property? The reason is that the property is provided by Visual Basic itself, not by the
control. Tag isn't the only property provided by Visual Basic to any control: Index, Visible,
TabStop, TabIndex, ToolTipText, HelpContextID, and WhatsThisHelpID properties all
belong to the same category. These properties are collectively known as extender properties.
Note that a few extender properties are available only under certain conditions. For example,
TabStop is present only if the control can actually receive the focus. The Tag property is
distinctive because it's guaranteed to be always available, and you can reference it in code
without any risk of raising a run-time error.
The Tag property has no particular meaning to Visual Basic: It's simply a container for any
data related to the control that you want to store. For example, you might use it to store the
initial value displayed in a control so that you can easily restore it if the user wants to undo
his or her changes.
Handling Control Event
Visual Basic applications work by executing code written in the Visual Basic programming
language. Code is associated with events.
58
Each Visual Basic object has a set of events. Events are actions which Visual Basic can
detect and respond to. For example, a user clicking on a command button on a form will
generate a click event for that button.
When an event is generated Visual Basic will run any code you have entered for that event.
Common Events
Visual Basic 6 forms and controls support common events. In this section, we'll describe
these events in some detail.
The Click and DblClick Events
A Click event occurs when the user left-clicks on a control, whereas the DblClick event
occurs—you guessed it—when he or she double-clicks on the control using the left mouse
button. But don't be fooled by this apparent simplicity because the Click event can occur
under different circumstances as well. For example, whenever a CheckBox or an
OptionButton control's Value property changes through code, Visual Basic fires a Click
event, exactly as if the user had clicked on it. This behavior is useful because it lets you deal
with the two different cases in a uniform way. ListBox and ComboBox controls also fire
Click events whenever their ListIndex properties change.
Click and DblClick events don't pass arguments to the program, and therefore you can't
count on these events to tell you where the mouse cursor is. To get this information, you
must trap the MouseDown event instead, about which I'll say more later in this chapter. Also
notice that when you double-click on a control, it receives both the Click and the DblClick
events. This makes it difficult to distinguish single clicks from double-clicks because when
Visual Basic calls your Click event procedure you don't know whether it will later call the
DblClick procedure. At any rate, you should avoid assigning different functions to click and
double-click actions on the same control because it tends to confuse the user.
The Change Event
The Change event is the simplest event offered by Visual Basic: Whenever the contents of a
control change, Visual Basic fires a Change event. Unfortunately, this simple scheme hasn't
been consistently followed in the Visual Basic architecture. As I explained in the previous
section, when you click on CheckBox and OptionButton controls, they fire a Click event
(rather than a Change event). Fortunately, this inconsistency isn't a serious one.
TextBox and ComboBox controls raise a Change event when the user types something in the
editable area of the control. (But be careful, the ComboBox control raises a Click event when
the user selects an item from the list portion rather than types in a box.) Both scroll bar
controls raise the Change event when the user clicks on either arrows or moves the scroll
boxes. The Change event is also supported by the PictureBox, DriveListBox, and DirListBox
controls.
The Change event also fires when the contents of the control are changed through code. This
behavior often leads to some inefficiencies in the program. For instance, many programmers
initialize the Text properties of all TextBox controls in the form's Load event, thus firing
many Change events that tend to slow down the loading process.
59
The GotFocus and LostFocus Events
These events are conceptually very simple: GotFocus fires when a control receives the input
focus, and LostFocus fires when the input focus leaves it and passes to another control. At
first glance, these events seem ideal for implementing a sort of validation mechanism—that
is, a piece of code that checks the contents of a field and notifies the user if the input value
isn't correct as soon as he or she moves the focus to another control. In practice, the sequence
of these events is subject to several factors, including the presence of MsgBox and DoEvents
statements. Fortunately, Visual Basic 6 has introduced the new Validate event, which
elegantly solves the problem of field validation
Finally, note that forms support both GotFocus and LostFocus events, but these events are
raised only when the form doesn't contain any control that can receive the input focus, either
because all of the controls are invisible or the TabStop property for each of them is set to
False.
The KeyPress, KeyDown, and KeyUp Events
These events fire whenever the end user presses a key while a control has the input focus.
The exact sequence is as follows: KeyDown (the users presses the key), KeyPress (Visual
Basic translates the key into an ANSI numeric code), and KeyUp (the user releases the key).
Only keys that correspond to control keys (Ctrl+x, BackSpace, Enter, and Escape) and
printable characters activate the KeyPress event. For all other keys—including arrow keys,
function keys, Alt+x key combinations, and so on—this event doesn't fire and only the
KeyDown and KeyUp events are raised.
The KeyPress event is the simplest of the three. It's passed the ANSI code of the key that has
been pressed by the user, so you often need to convert it to a string using the Chr$() function:
Private Text1_KeyPress(KeyAscii As Integer)
MsgBox "User pressed " & Chr$(KeyAscii)
End Sub
If you modify the KeyAscii parameter, your changes affect how the program interprets the
key. You can also "eat" a key by setting this parameter to 0, as shown in the code below.
Private Sub Text1_KeyPress(KeyAscii As Integer)
' Convert all keys to uppercase, and reject blanks.
KeyAscii = Asc(UCase$(Chr$(KeyAscii)
If KeyAscii = Asc(" ") Then KeyAscii = 0
End Sub
The KeyDown and KeyUp events receive two parameters, KeyCode and Shift. The former is
the code of the pressed key, the latter is an Integer value that reports the state of the Ctrl,
Shift, and Alt keys; because this value is bit-coded, you have to use the AND operator to
extract the relevant information:
Private Sub Text1_KeyDown(KeyCode As Integer, Shift As Integer)
If Shift And vbShiftMask Then
' Shift key pressed
End If
If Shift And vbCtrlMask Then
National diploma in computer technology   unesco-nigeria tve

More Related Content

What's hot

Syllabus diploma ict [1](1)
Syllabus diploma ict [1](1)Syllabus diploma ict [1](1)
Syllabus diploma ict [1](1)gwadenya
 
Smart pass management platform for face&amp;temperature reader complete tutor...
Smart pass management platform for face&amp;temperature reader complete tutor...Smart pass management platform for face&amp;temperature reader complete tutor...
Smart pass management platform for face&amp;temperature reader complete tutor...Carmen Huang
 
Food and beverage_services_converted
Food and beverage_services_convertedFood and beverage_services_converted
Food and beverage_services_convertedManoj Rathour
 
Unigraphics Full.......
Unigraphics Full.......Unigraphics Full.......
Unigraphics Full.......Adesh C
 
Informatica student meterial
Informatica student meterialInformatica student meterial
Informatica student meterialSunil Kotthakota
 
Ug recording excelmacros
Ug recording excelmacrosUg recording excelmacros
Ug recording excelmacrosHarry Adnan
 
Sap hr implementation config rc - Aditi Tarafdar
Sap hr implementation config rc - Aditi TarafdarSap hr implementation config rc - Aditi Tarafdar
Sap hr implementation config rc - Aditi TarafdarAditi Tarafdar
 
Electroneumática: Manual automatización industrial
Electroneumática: Manual automatización industrialElectroneumática: Manual automatización industrial
Electroneumática: Manual automatización industrialSANTIAGO PABLO ALBERTO
 
Planta de almacén para productos de tela Drill Cotton 100
 Planta de almacén para productos  de tela Drill Cotton 100 Planta de almacén para productos  de tela Drill Cotton 100
Planta de almacén para productos de tela Drill Cotton 100Yariza Jorge Ramírez
 
React native notes for professionals
React native notes for professionalsReact native notes for professionals
React native notes for professionalsZafer Galip Ozberk
 

What's hot (19)

Syllabus diploma ict [1](1)
Syllabus diploma ict [1](1)Syllabus diploma ict [1](1)
Syllabus diploma ict [1](1)
 
Course lab 2_guide_eng
Course lab 2_guide_engCourse lab 2_guide_eng
Course lab 2_guide_eng
 
Windows XP Registry Guide
Windows XP Registry GuideWindows XP Registry Guide
Windows XP Registry Guide
 
It project development fundamentals
It project development fundamentalsIt project development fundamentals
It project development fundamentals
 
PFM lecture note.CO
PFM lecture note.COPFM lecture note.CO
PFM lecture note.CO
 
Smart pass management platform for face&amp;temperature reader complete tutor...
Smart pass management platform for face&amp;temperature reader complete tutor...Smart pass management platform for face&amp;temperature reader complete tutor...
Smart pass management platform for face&amp;temperature reader complete tutor...
 
Food and beverage_services_converted
Food and beverage_services_convertedFood and beverage_services_converted
Food and beverage_services_converted
 
Student Book Module 2
Student Book Module 2Student Book Module 2
Student Book Module 2
 
Unigraphics Full.......
Unigraphics Full.......Unigraphics Full.......
Unigraphics Full.......
 
Informatica student meterial
Informatica student meterialInformatica student meterial
Informatica student meterial
 
Test PPT
Test PPTTest PPT
Test PPT
 
APEX
APEXAPEX
APEX
 
TI 84/84+Guidebook
TI 84/84+GuidebookTI 84/84+Guidebook
TI 84/84+Guidebook
 
Ug recording excelmacros
Ug recording excelmacrosUg recording excelmacros
Ug recording excelmacros
 
Sap hr implementation config rc - Aditi Tarafdar
Sap hr implementation config rc - Aditi TarafdarSap hr implementation config rc - Aditi Tarafdar
Sap hr implementation config rc - Aditi Tarafdar
 
Electroneumática: Manual automatización industrial
Electroneumática: Manual automatización industrialElectroneumática: Manual automatización industrial
Electroneumática: Manual automatización industrial
 
Planta de almacén para productos de tela Drill Cotton 100
 Planta de almacén para productos  de tela Drill Cotton 100 Planta de almacén para productos  de tela Drill Cotton 100
Planta de almacén para productos de tela Drill Cotton 100
 
Threading
ThreadingThreading
Threading
 
React native notes for professionals
React native notes for professionalsReact native notes for professionals
React native notes for professionals
 

Similar to National diploma in computer technology unesco-nigeria tve

html-css-bootstrap-javascript-and-jquery
html-css-bootstrap-javascript-and-jqueryhtml-css-bootstrap-javascript-and-jquery
html-css-bootstrap-javascript-and-jqueryMD. NURUL ISLAM
 
2009 ncdd-csf-technical-manual-vol-i-study-design-guidelines
2009 ncdd-csf-technical-manual-vol-i-study-design-guidelines2009 ncdd-csf-technical-manual-vol-i-study-design-guidelines
2009 ncdd-csf-technical-manual-vol-i-study-design-guidelinesChhay Teng
 
Python_Programming_and_Numerical_Methods_A_Guide_for_Engineers_and.pdf
Python_Programming_and_Numerical_Methods_A_Guide_for_Engineers_and.pdfPython_Programming_and_Numerical_Methods_A_Guide_for_Engineers_and.pdf
Python_Programming_and_Numerical_Methods_A_Guide_for_Engineers_and.pdfjankoabel2022
 
NeuroDimension Neuro Solutions HELP
NeuroDimension Neuro Solutions HELPNeuroDimension Neuro Solutions HELP
NeuroDimension Neuro Solutions HELPESCOM
 
First7124911 visual-cpp-and-mfc-programming
First7124911 visual-cpp-and-mfc-programmingFirst7124911 visual-cpp-and-mfc-programming
First7124911 visual-cpp-and-mfc-programmingxmeszeus
 
Nvidia cuda programming_guide_0.8.2
Nvidia cuda programming_guide_0.8.2Nvidia cuda programming_guide_0.8.2
Nvidia cuda programming_guide_0.8.2Piyush Mittal
 
Learn python the right way
Learn python the right wayLearn python the right way
Learn python the right wayDianaLaCruz2
 
Software Engineering
Software EngineeringSoftware Engineering
Software EngineeringSoftware Guru
 
bonino_thesis_final
bonino_thesis_finalbonino_thesis_final
bonino_thesis_finalDario Bonino
 
Protective Device Coordination
Protective Device CoordinationProtective Device Coordination
Protective Device Coordinationjoeengi
 
photoshop_reference.pdf
photoshop_reference.pdfphotoshop_reference.pdf
photoshop_reference.pdfRamaDaoud1
 

Similar to National diploma in computer technology unesco-nigeria tve (20)

Bwl red book
Bwl red bookBwl red book
Bwl red book
 
Red book Blueworks Live
Red book Blueworks LiveRed book Blueworks Live
Red book Blueworks Live
 
html-css-bootstrap-javascript-and-jquery
html-css-bootstrap-javascript-and-jqueryhtml-css-bootstrap-javascript-and-jquery
html-css-bootstrap-javascript-and-jquery
 
2009 ncdd-csf-technical-manual-vol-i-study-design-guidelines
2009 ncdd-csf-technical-manual-vol-i-study-design-guidelines2009 ncdd-csf-technical-manual-vol-i-study-design-guidelines
2009 ncdd-csf-technical-manual-vol-i-study-design-guidelines
 
Icp
IcpIcp
Icp
 
Python_Programming_and_Numerical_Methods_A_Guide_for_Engineers_and.pdf
Python_Programming_and_Numerical_Methods_A_Guide_for_Engineers_and.pdfPython_Programming_and_Numerical_Methods_A_Guide_for_Engineers_and.pdf
Python_Programming_and_Numerical_Methods_A_Guide_for_Engineers_and.pdf
 
NeuroDimension Neuro Solutions HELP
NeuroDimension Neuro Solutions HELPNeuroDimension Neuro Solutions HELP
NeuroDimension Neuro Solutions HELP
 
Ostrander_Project_Final_Report
Ostrander_Project_Final_ReportOstrander_Project_Final_Report
Ostrander_Project_Final_Report
 
First7124911 visual-cpp-and-mfc-programming
First7124911 visual-cpp-and-mfc-programmingFirst7124911 visual-cpp-and-mfc-programming
First7124911 visual-cpp-and-mfc-programming
 
Javanotes6 linked
Javanotes6 linkedJavanotes6 linked
Javanotes6 linked
 
Javanotes5 linked
Javanotes5 linkedJavanotes5 linked
Javanotes5 linked
 
Montero Dea Camera Ready
Montero Dea Camera ReadyMontero Dea Camera Ready
Montero Dea Camera Ready
 
test6
test6test6
test6
 
Nvidia cuda programming_guide_0.8.2
Nvidia cuda programming_guide_0.8.2Nvidia cuda programming_guide_0.8.2
Nvidia cuda programming_guide_0.8.2
 
Learn python the right way
Learn python the right wayLearn python the right way
Learn python the right way
 
Software Engineering
Software EngineeringSoftware Engineering
Software Engineering
 
Hibernate Reference
Hibernate ReferenceHibernate Reference
Hibernate Reference
 
bonino_thesis_final
bonino_thesis_finalbonino_thesis_final
bonino_thesis_final
 
Protective Device Coordination
Protective Device CoordinationProtective Device Coordination
Protective Device Coordination
 
photoshop_reference.pdf
photoshop_reference.pdfphotoshop_reference.pdf
photoshop_reference.pdf
 

Recently uploaded

Nightside clouds and disequilibrium chemistry on the hot Jupiter WASP-43b
Nightside clouds and disequilibrium chemistry on the hot Jupiter WASP-43bNightside clouds and disequilibrium chemistry on the hot Jupiter WASP-43b
Nightside clouds and disequilibrium chemistry on the hot Jupiter WASP-43bSérgio Sacani
 
GFP in rDNA Technology (Biotechnology).pptx
GFP in rDNA Technology (Biotechnology).pptxGFP in rDNA Technology (Biotechnology).pptx
GFP in rDNA Technology (Biotechnology).pptxAleenaTreesaSaji
 
Broad bean, Lima Bean, Jack bean, Ullucus.pptx
Broad bean, Lima Bean, Jack bean, Ullucus.pptxBroad bean, Lima Bean, Jack bean, Ullucus.pptx
Broad bean, Lima Bean, Jack bean, Ullucus.pptxjana861314
 
Unlocking the Potential: Deep dive into ocean of Ceramic Magnets.pptx
Unlocking  the Potential: Deep dive into ocean of Ceramic Magnets.pptxUnlocking  the Potential: Deep dive into ocean of Ceramic Magnets.pptx
Unlocking the Potential: Deep dive into ocean of Ceramic Magnets.pptxanandsmhk
 
9654467111 Call Girls In Raj Nagar Delhi Short 1500 Night 6000
9654467111 Call Girls In Raj Nagar Delhi Short 1500 Night 60009654467111 Call Girls In Raj Nagar Delhi Short 1500 Night 6000
9654467111 Call Girls In Raj Nagar Delhi Short 1500 Night 6000Sapana Sha
 
Recombinant DNA technology (Immunological screening)
Recombinant DNA technology (Immunological screening)Recombinant DNA technology (Immunological screening)
Recombinant DNA technology (Immunological screening)PraveenaKalaiselvan1
 
Green chemistry and Sustainable development.pptx
Green chemistry  and Sustainable development.pptxGreen chemistry  and Sustainable development.pptx
Green chemistry and Sustainable development.pptxRajatChauhan518211
 
Natural Polymer Based Nanomaterials
Natural Polymer Based NanomaterialsNatural Polymer Based Nanomaterials
Natural Polymer Based NanomaterialsAArockiyaNisha
 
Biopesticide (2).pptx .This slides helps to know the different types of biop...
Biopesticide (2).pptx  .This slides helps to know the different types of biop...Biopesticide (2).pptx  .This slides helps to know the different types of biop...
Biopesticide (2).pptx .This slides helps to know the different types of biop...RohitNehra6
 
GBSN - Microbiology (Unit 1)
GBSN - Microbiology (Unit 1)GBSN - Microbiology (Unit 1)
GBSN - Microbiology (Unit 1)Areesha Ahmad
 
Labelling Requirements and Label Claims for Dietary Supplements and Recommend...
Labelling Requirements and Label Claims for Dietary Supplements and Recommend...Labelling Requirements and Label Claims for Dietary Supplements and Recommend...
Labelling Requirements and Label Claims for Dietary Supplements and Recommend...Lokesh Kothari
 
DIFFERENCE IN BACK CROSS AND TEST CROSS
DIFFERENCE IN  BACK CROSS AND TEST CROSSDIFFERENCE IN  BACK CROSS AND TEST CROSS
DIFFERENCE IN BACK CROSS AND TEST CROSSLeenakshiTyagi
 
Animal Communication- Auditory and Visual.pptx
Animal Communication- Auditory and Visual.pptxAnimal Communication- Auditory and Visual.pptx
Animal Communication- Auditory and Visual.pptxUmerFayaz5
 
Disentangling the origin of chemical differences using GHOST
Disentangling the origin of chemical differences using GHOSTDisentangling the origin of chemical differences using GHOST
Disentangling the origin of chemical differences using GHOSTSérgio Sacani
 
Traditional Agroforestry System in India- Shifting Cultivation, Taungya, Home...
Traditional Agroforestry System in India- Shifting Cultivation, Taungya, Home...Traditional Agroforestry System in India- Shifting Cultivation, Taungya, Home...
Traditional Agroforestry System in India- Shifting Cultivation, Taungya, Home...jana861314
 
Recombination DNA Technology (Nucleic Acid Hybridization )
Recombination DNA Technology (Nucleic Acid Hybridization )Recombination DNA Technology (Nucleic Acid Hybridization )
Recombination DNA Technology (Nucleic Acid Hybridization )aarthirajkumar25
 
All-domain Anomaly Resolution Office U.S. Department of Defense (U) Case: “Eg...
All-domain Anomaly Resolution Office U.S. Department of Defense (U) Case: “Eg...All-domain Anomaly Resolution Office U.S. Department of Defense (U) Case: “Eg...
All-domain Anomaly Resolution Office U.S. Department of Defense (U) Case: “Eg...Sérgio Sacani
 
Pests of cotton_Borer_Pests_Binomics_Dr.UPR.pdf
Pests of cotton_Borer_Pests_Binomics_Dr.UPR.pdfPests of cotton_Borer_Pests_Binomics_Dr.UPR.pdf
Pests of cotton_Borer_Pests_Binomics_Dr.UPR.pdfPirithiRaju
 

Recently uploaded (20)

Nightside clouds and disequilibrium chemistry on the hot Jupiter WASP-43b
Nightside clouds and disequilibrium chemistry on the hot Jupiter WASP-43bNightside clouds and disequilibrium chemistry on the hot Jupiter WASP-43b
Nightside clouds and disequilibrium chemistry on the hot Jupiter WASP-43b
 
GFP in rDNA Technology (Biotechnology).pptx
GFP in rDNA Technology (Biotechnology).pptxGFP in rDNA Technology (Biotechnology).pptx
GFP in rDNA Technology (Biotechnology).pptx
 
Broad bean, Lima Bean, Jack bean, Ullucus.pptx
Broad bean, Lima Bean, Jack bean, Ullucus.pptxBroad bean, Lima Bean, Jack bean, Ullucus.pptx
Broad bean, Lima Bean, Jack bean, Ullucus.pptx
 
Unlocking the Potential: Deep dive into ocean of Ceramic Magnets.pptx
Unlocking  the Potential: Deep dive into ocean of Ceramic Magnets.pptxUnlocking  the Potential: Deep dive into ocean of Ceramic Magnets.pptx
Unlocking the Potential: Deep dive into ocean of Ceramic Magnets.pptx
 
9654467111 Call Girls In Raj Nagar Delhi Short 1500 Night 6000
9654467111 Call Girls In Raj Nagar Delhi Short 1500 Night 60009654467111 Call Girls In Raj Nagar Delhi Short 1500 Night 6000
9654467111 Call Girls In Raj Nagar Delhi Short 1500 Night 6000
 
Recombinant DNA technology (Immunological screening)
Recombinant DNA technology (Immunological screening)Recombinant DNA technology (Immunological screening)
Recombinant DNA technology (Immunological screening)
 
Green chemistry and Sustainable development.pptx
Green chemistry  and Sustainable development.pptxGreen chemistry  and Sustainable development.pptx
Green chemistry and Sustainable development.pptx
 
Natural Polymer Based Nanomaterials
Natural Polymer Based NanomaterialsNatural Polymer Based Nanomaterials
Natural Polymer Based Nanomaterials
 
Biopesticide (2).pptx .This slides helps to know the different types of biop...
Biopesticide (2).pptx  .This slides helps to know the different types of biop...Biopesticide (2).pptx  .This slides helps to know the different types of biop...
Biopesticide (2).pptx .This slides helps to know the different types of biop...
 
GBSN - Microbiology (Unit 1)
GBSN - Microbiology (Unit 1)GBSN - Microbiology (Unit 1)
GBSN - Microbiology (Unit 1)
 
9953056974 Young Call Girls In Mahavir enclave Indian Quality Escort service
9953056974 Young Call Girls In Mahavir enclave Indian Quality Escort service9953056974 Young Call Girls In Mahavir enclave Indian Quality Escort service
9953056974 Young Call Girls In Mahavir enclave Indian Quality Escort service
 
Labelling Requirements and Label Claims for Dietary Supplements and Recommend...
Labelling Requirements and Label Claims for Dietary Supplements and Recommend...Labelling Requirements and Label Claims for Dietary Supplements and Recommend...
Labelling Requirements and Label Claims for Dietary Supplements and Recommend...
 
Engler and Prantl system of classification in plant taxonomy
Engler and Prantl system of classification in plant taxonomyEngler and Prantl system of classification in plant taxonomy
Engler and Prantl system of classification in plant taxonomy
 
DIFFERENCE IN BACK CROSS AND TEST CROSS
DIFFERENCE IN  BACK CROSS AND TEST CROSSDIFFERENCE IN  BACK CROSS AND TEST CROSS
DIFFERENCE IN BACK CROSS AND TEST CROSS
 
Animal Communication- Auditory and Visual.pptx
Animal Communication- Auditory and Visual.pptxAnimal Communication- Auditory and Visual.pptx
Animal Communication- Auditory and Visual.pptx
 
Disentangling the origin of chemical differences using GHOST
Disentangling the origin of chemical differences using GHOSTDisentangling the origin of chemical differences using GHOST
Disentangling the origin of chemical differences using GHOST
 
Traditional Agroforestry System in India- Shifting Cultivation, Taungya, Home...
Traditional Agroforestry System in India- Shifting Cultivation, Taungya, Home...Traditional Agroforestry System in India- Shifting Cultivation, Taungya, Home...
Traditional Agroforestry System in India- Shifting Cultivation, Taungya, Home...
 
Recombination DNA Technology (Nucleic Acid Hybridization )
Recombination DNA Technology (Nucleic Acid Hybridization )Recombination DNA Technology (Nucleic Acid Hybridization )
Recombination DNA Technology (Nucleic Acid Hybridization )
 
All-domain Anomaly Resolution Office U.S. Department of Defense (U) Case: “Eg...
All-domain Anomaly Resolution Office U.S. Department of Defense (U) Case: “Eg...All-domain Anomaly Resolution Office U.S. Department of Defense (U) Case: “Eg...
All-domain Anomaly Resolution Office U.S. Department of Defense (U) Case: “Eg...
 
Pests of cotton_Borer_Pests_Binomics_Dr.UPR.pdf
Pests of cotton_Borer_Pests_Binomics_Dr.UPR.pdfPests of cotton_Borer_Pests_Binomics_Dr.UPR.pdf
Pests of cotton_Borer_Pests_Binomics_Dr.UPR.pdf
 

National diploma in computer technology unesco-nigeria tve

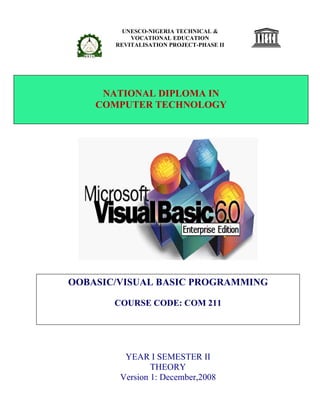
  • 1. UNESCO-NIGERIA TECHNICAL & VOCATIONAL EDUCATION REVITALISATION PROJECT-PHASE II YEAR I SEMESTER II THEORY Version 1: December,2008 NATIONAL DIPLOMA IN COMPUTER TECHNOLOGY OOBASIC/VISUAL BASIC PROGRAMMING COURSE CODE: COM 211
  • 2. 2 Table Of Contents Concept of programming..................................................................................................4 How windows work.......................................................................................................... 5 The Visual Basic environment.......................................................................................... 5 Starting Visual Basic ........................................................................................................ 7 Stopping Visual Basic ...................................................................................................... 8 Getting online help ........................................................................................................... 8 Opening Application...................................................................................................... 12 Creating Simple application ( Wizard ) ........................................................................... 12 Running your application................................................................................................ 18 Creating Executable File................................................................................................. 19 Saving your application .................................................................................................. 20 VB Character set ............................................................................................................ 22 Relational Operators ....................................................................................................... 22 Arithmetic Operators ..................................................................................................... 22 Blank character............................................................................................................... 22 Data Types ..................................................................................................................... 22 Declaring Variables........................................................................................................26 Assigning Values to Variables ........................................................................................ 28 Mathematical Expressions .............................................................................................. 30 Conditional Operators..................................................................................................... 33 Properties of the Form .................................................................................................... 34 Intrinsic Controls............................................................................................................ 37 Label control .................................................................................................................. 38 Text Box ........................................................................................................................ 40 Focus In on Controls ...................................................................................................... 42 The Command Button .................................................................................................... 42 The PictureBox Control.................................................................................................. 44 The Image Control.......................................................................................................... 46 Creating non-wizard applications....................................................................................47 Adding Controls to applications...................................................................................... 47 Managing Controls ........................................................................................................ 48 Change the control properties ......................................................................................... 48 Handling Control Event.................................................................................................. 57 Writing Code................................................................................................................. 63 If...Then...Else Statement................................................................................................65 Select Case Statement..................................................................................................... 67 CheckBox Control.......................................................................................................... 72 Frame Control ................................................................................................................ 78 For...Next Statement....................................................................................................... 81 Sub Statement................................................................................................................. 84 Supplied Numeric Functions (Math Functions )..............................................................88 Abs Function .................................................................................................................. 88 Int Functions .................................................................................................................. 88 Rnd Function.................................................................................................................. 89 Sqr Function................................................................................................................... 90 Supplied String Function ................................................................................................ 90 Len Function .................................................................................................................. 90 Systems Development Cycle ............................................................................................ 4 Do...Loop Statement....................................................................................................... 80 WEEK 1 WEEK 2 WEEK 3 WEEK 4 WEEK 5 OptionButton Control ..................................................................................................... 69 WEEK 6 WEEK 7 WEEK 8
  • 3. 3 LCase and Functions ...................................................................................................... 91 UCase Function .............................................................................................................. 91 Asc Function .................................................................................................................. 92 Chr Function .................................................................................................................. 92 Supplied Time And Date Functions ................................................................................ 93 Now Function................................................................................................................. 93 Date Function ................................................................................................................. 93 Time Function ................................................................................................................ 93 Non-Arrays data values ..................................................................................................94 Arrays data values .......................................................................................................... 94 Declaring Fixed-Size Arrays........................................................................................... 95 Multidimensional Arrays ................................................................................................ 97 List Boxes Controls That Work Like Arrays...................................................................99 List Boxes: Controls That Work Like Arrays ................................................................ 109 Combo Boxes............................................................................................................... 117 The Timer Control........................................................................................................ 122 Scrolling the Scroll Bars ............................................................................................... 124 MsgBox Function.........................................................................................................128 InputBox Function........................................................................................................ 131 The Basic Elements of a Database................................................................................ 133 Using Data Control....................................................................................................... 134 Data Access Objects (DAO) ......................................................................................... 136 Visual Basic Wizard ..................................................................................................... 137 Data Form Wizard ........................................................................................................ 140 Menu Basics................................................................................................................. 147 Menu Control ............................................................................................................... 148 Menu Editor Command (Tools Menu) .......................................................................... 148 Menu Editor Dialog Box............................................................................................... 148 Creating Menus with the Menu Editor .......................................................................... 151 Writing Code for Menu Controls .................................................................................. 155 MsgBox Function ......................................................................................................... 156 InputBox Function........................................................................................................ 158 WEEK 9 WEEK 10 WEEK 11 WEEK 12 WEEK 13 WEEK 14 WEEK 15
  • 4. 4 WEEK 1: INTRODUCTION During this week you will learn: • Concept of programming • Systems Development Cycle • How windows work • The Visual Basic environment • Starting Visual Basic • Stopping Visual Basic • Getting online help • Opening Application • Creating Simple application ( Wizard ) • Running your application • Creating Executable File • Saving your application Concept of programming A program is a set of detailed instructions that tells the computer what to do. VISUAL BASIC is a high level programming language evolved from the earlier DOS version called BASIC. BASIC means Beginners' All purpose Symbolic Instruction Code. It is a fairly easy programming language to learn. The codes look a bit like English Language. Visual Basic falls into a category of programming referred to as event-driven programming. Event-driven programs respond to events from the computer, such as the mouse button being pressed. The designer uses ready-made objects such as CommandButtons and TextBoxes, to build user interfaces that make up the application. This approach to programming drastically reduces the amount of code required to develop a Windows application. Systems Development Cycle Most IT projects work in cycles. First, the needs of the computer users must be analyzed. This task is often performed by a professional Systems Analysts who will ask the users exactly what they would like the system to do, and then draw up plans on how this can be implemented on a real computer based system. The programmer will take the specifications from the Systems Analyst and then convert the broad brushstrokes into actual computer programs. Ideally at this point there should be testing and input from the users so that what is produced by the programmers is actually what they asked for. Finally, there is the implementation process during which all users are introduced to the new systems, which often involves an element of training. Once the users start using the new system, they will often suggest new improvements and the whole process is started all over again.
  • 5. 5 These are methodologies for defining a systems development cycle and often you will see four key stages, as listed below. • Feasibility Study • Design • Programming • Implementation How windows work Windows is an GUI operating system. With GUI it easily recognized graphic icons be selected using the mouse and commands chosen from menus, This is much easier for the user than typing in the specific lines of code that were required by MS-Dos in order to perform basic operations. In GUI operating system, more than one application can be open at the same time. Processor time is shared between computing tasks and this called multitasking. The Visual Basic environment The Visual Basic environment is made up of several windows. The initial appearance of the windows on your screen will depend on the way your environment has been set up. The tool bar The Visual Basic tool bar functions like the tool bar in any other Microsoft application. It provides shortcuts for many of the common operating commands. It also shows you the dimensions and location of the form currently being designed.
  • 6. 6 The tool box The tool box gives you access to the controls that you use on a form. A control is an object such as a button, label or grid. Controls are used on forms to display output or get input. Each control appears as a button in the tool box. If the control you are looking for is not in the toolbox, select Components from the Project menu. If the tool box is not displayed on your screen, or if at any time during the exercises you close it, choose Toolbox from the View menu. The form designer window This window is where you design the forms that make up your user interface. If the form designer window is not displayed on your screen, or if at any time during the exercises you close it, choose Object from the View menu. The properties window : A form, and each control on it, has a set of properties which control its characteristics such as size, position and color. The properties window lists all the properties a control has and their value. The default value of a property can be changed by setting the property value using the properties window when you design your application or changed by assigning a new value in code while your application is running. If the properties window is not displayed on your screen, or if at any time during the exercises you close it, choose Properties Window from the View menu.
  • 7. 7 The project explorer window A project is a collection of the forms and code that make up an application. Each form in your application is represented by a file in the project explorer window. A form file contains both the description of the screen layout for the form and the program code associated with it. If the project explorer window is not displayed on your screen, or if at any time during the exercises you close it, choose Project Explorer from the View menu. The form layout window Move the form in the screen in this window to set the position of your form when your application is running. You may wish to close the form layout window to allow more space for the properties window. To open the window again, select Form Layout Window from the View menu. Starting Visual Basic • From the Windows Start menu, choose Programs, Microsoft Visual Studio 6.0, and then Microsoft Visual Basic 6.0. • Visual Basic 6.0 will display the following dialog box as shown in this figure
  • 8. 8 Stopping Visual Basic • From the File menu, choose Exit and then Microsoft Visual Basic 6.0. ask you to • save changes in your project. Getting online help If you've used online help before, you may not think you need to read this section. Although you might be able to figure out Visual Basic's online help yourself, the help is fairly advanced and varies from most other online help you may be used to. This topic section describes some of the help tools available from within Visual Basic. The content-sensitive nature of Visual Basic's help system extends to almost every menu option, screen element, control, window, and language command. When you want help and aren't sure exactly where to turn first, press F1 and let Visual Basic give it a try. For example, if you think you need to use the Picture Box control but want to read a description first to make sure that you have the right control, click the Toolbox's Picture Box control and then press F1. Visual Basic sees that you've clicked the Picture Box and returns with the help screen shown in this figure
  • 9. 9 Click any screen element and press F1 for help Throughout the help screens, Microsoft has scattered numerous links to related topics. When you click any underlined word or phrase inside a help window, Visual Basic responds with a pop-up definition or an additional help screen. Often, so may related topics appear throughout the help system that when you click a link, Visual Basic displays a scrolling Topics Found list, from which you can choose the description that most closely matches the topic you need.
  • 10. 10 Help links often provide several alternatives. When you click an Example hypertext link, Visual Basic displays a window similar to the one shown in Figure. Although the help might look ambiguous at this point, you'll grow to appreciate the helpful suggestion when you begin learn the Visual Basic language. The Example help link shows you real Visual Basic language code that uses the item you've requested help for. As a programmer, you'll therefore see how to implement the item inside your own Visual Basic code by looking at the sample Visual Basic provides. Visual Basic shows you sample code that uses the property or control.
  • 11. 11 The Help Menu When you choose the first topic on the Help menu, Microsoft Visual Basic Topics, Visual Basic displays a help dialog box . This dialog box contains the usual Windows-like help tools. You can open and close the book icons on the Contents page to read about different Visual Basic topics. You can search for a particular topic in the index by clicking the Index tab. To locate every occurrence of a particular help reference word or phrase, you can click the Find tab to build a comprehensive help database that returns multiple occurrences of topics. Example : Get an instant definition for help links with a dotted underline. Pop-up definition, Hyperlinks Close the help window by clicking the window's Close button.
  • 12. 12 Opening Application To open a project, you can do one of two things: • Click File menu , Open project… • Click the tool and specify the project you want to open. Then select Hello project and press Open. The project window will display the file “Hello.frm” from your project. Creating Simple application ( Wizard ) You start the application wizard from the New Project dialog box or by choosing New Project from the File menu. Click the VB Application Wizard icon to start the wizard. This Figure shows the application wizard's opening screen.
  • 13. 13 Example Assuming that you started the application wizard in the previous section, follow these steps to build your first application: 1- Click the Next button to display the Interface Type dialog box. The wizard can generate one of three types of user interfaces for the application you're generating: − MDI (Multiple Document Interface) lets you create a program window that contains embedded windows called child windows. − SDI (Single Document Interface) lets you create a program with one or more windows that exist at the same level (not windows within windows). − Explorer Style lets you create programs that somewhat take on the Books Online appearance, with a summary of topics or windows in a left pane and the matching program details in the right pane. 2- The MDI option should already be selected. If not, click the MDI option.
  • 14. 14 3- Click Next to display the menu selection dialog box. You can select certain menu options that will appear on your application's menu bar. By using the dialog box's options, you can help ensure that your application retains the standard Windows program look and feel. (You can add your own menu options after the wizard generates the program's initial shell.) For now, leave these options selected: File, Edit, Window, and Help.
  • 15. 15 4- Click Next to display the wizard's Resources dialog box. A resource might be a menu, a text string, a control, a mouse cursor, or just about any item that appears in a program. 5- Click Next, you'll bypass the Internet connectivity dialog box because you don't need to add such connectivity to your first application shell.
  • 16. 16 6- Determines which forms appear in your application: • A splash form is an opening title form that your users see when they first run your application. • A login form requests the user's ID and password, in case you want to add security features to your application. • The options dialog box gives users the ability to modify certain application traits. • The About box is accessed from most Windows Help menus and provides your program description and version.
  • 17. 17 8. Check the About Box but leave the other options unchecked. 9. Click the Next button twice to display the final application wizard dialog box. (You'll bypass the database access dialog box because you won't be retrieving database data in this first application.) 10. Click the Finish button. The wizard generates the application before your eyes. You'll see the wizard generating forms and titles; without the wizard, you would have to perform these steps yourself. When finished, the application wizard displays a dialog box to tell you that the application is completed.
  • 18. 18 11. Click OK to close the final application wizard dialog box. A summary report appears, to describe the generated program. Running your application Now that the form is complete you can see it in action by running it by simply pressing F5 key. Or click on run button on the standard tool bar When you have written code for the buttons, running the application will allow you to activate the code. For now your buttons will not do anything.
  • 19. 19 Your form will appear like a window from any other Microsoft application. Creating Executable File - Click File, Then Make Project1.exe… - Specify the location and the name of the project, then click OK.
  • 20. 20 Saving your application The last step in this chapter is to save your application so that you can use it for the exercises later in the book To do this Click on file , Click save project as . Visual Basic first asks you to save the form and then the project file. Remember that each represents a separate file. Specify the filename for the form as hello.frm. The file extension “frm” indicates that the file is a form file.
  • 21. 21 Always take care to ensure that you save all the files that make up a project.
  • 22. 22 WEEK 2 : VISUAL BASIC CHARACRER SETS AND DATA TYPES During this week you will learn : • Basic character sets • Data Types VB Character set Visual Basic Character set refers to those characters acceptable or allowed in VB programming eg GB is unknown in English likewise X is unknown in Yoruba language. The Microsoft Visual basic character sets consists of the following: Alphabet A/ a – Z/z (Both Upper and Lower Case) Numeric Digits 0 – 9 Decimal point (.) Grouping Characters (eg. Comma, colons, Semicolons, single and double apostrophe, parenthesis) Relational Operators (eg. =, <>,>,< etc) Arithmetic Operators (eg. +, -, /, =. etc) Blank character Data Types The Visual Basic language works with all kinds of data. Before you learn how to manipulate data, you will learn how to distinguish among the various data types, that Visual Basic supports. Some data falls into more than one category. For example, a dollar amount can be considered both a currency data type and a single data type. When you write a program, you need to decide which data type best fits your program's data values.
  • 23. 23 Visual Basic data types. Type Stores Memory Requirement Range of Values Integer Whole numbers 2 bytes -32,768 to 32,767 Long Whole numbers 4 bytes Approximately +/- 2.1E9 Single Decimal numbers 4 bytes -3.402823E38 to -1.401298E-45 for negative values and 1.401298E-45 to 3.402823E38 for positive values Double Decimal numbers (double-precision floating-point) 8 bytes -1.79769313486232E308 to - 4.94065645841247E-324 for negative values and 4.94065645841247E-324 to 1.79769313486232E308 for positive values Currency Numbers with up to 15 digits left of the decimal and 4 digits right of the decimal 8 bytes 922,337,203,685,477.5808 to 922,337,203,685,477.5807 String Text information 1 byte per character Up to 65,000 characters for fixed-length strings and up to 2 billion characters for dynamic strings Byte Whole numbers 1 byte 0 to 255 Boolean Logical values 2 bytes True or False Date Date and time information 8 bytes Jan 1st 100 to December 31st 9999 The following data values can take on the integer data type: 21 0 -9455 32766 You can also store these integer data types as long data types, although doing so wastes storage and time unless you plan to change the values later to extremely large or small integer numbers that require the long data type. The following data values must be stored in a long data type: 32768 -95445
  • 24. 24 492848559 The following data values can take on the single data type: 0.01 565.32 -192.3424 9543.5645 6.5440E-24 Of course, you can store these data values in double storage locations as well. Use double data types only when you need to store extra large or small values. The following data values take on the double data type: -5968.5765934211133 4.532112E+92 928374.344838273567899990 What's that E Doing in the Numbers?: The E stands for exponent. Years ago, mathematicians grew weary of writing long numbers. They developed a shortcut notation called scientific notation. Visual Basic supports scientific notation. You can use scientific notation for single and double numeric data values. When you use scientific notation, you don't have to write— or type, in the case of program writing—extremely long numbers. When a single or double numeric value contains the letter E, followed by a number, that number is written in scientific notation. To convert a number written in scientific notation to its non-abbreviated form, multiply the number to the left of E by 10 raised to the power indicated by the number to the right of E. Therefore, 2.9876E+17 means to multiply 2.9876 by 10 raised to the 17th power, or 1017 . 1017 is a very large number—it is 10 followed by 16 zeroes. The bottom line is that 2.9876E+17 means the same as 29876 followed by 13 zeros. If a number uses a negative exponent, you multiply the number to left of E by 10 raised to negative power. Therefore, 2.9876E-17 means the same as 2.9876 multiplied by 10-17 —or 2.9876 divided by 1017 —which turns out to be a small number indeed. The following data values can take on the currency data type: 123.45 0.69 63456.75 -1924.57
  • 25. 25 The currency data type can accept and track numeric values to four decimal places. However, you typically store dollar and cent values in the currency storage locations, and these kinds of values require only two decimal places. Never use a currency data value along with a dollar sign. In other words, the following cannot be a currency value even though it looks like one: $5,234.56 Visual Basic does not want you to use a dollar sign or commas in numeric data of any kind— unless, of course, your country uses the comma for the fractional portion of numbers. If your data contains anything other than numbers, a plus sign, a minus sign, or an exponent, Visual Basic cannot treat the data as if it were numeric; therefore, it cannot perform mathematical calculations with the data. Instead, Visual Basic treats the data as string data. The following data values take on the string data type: "London Bridge" "1932 Sycamore Street" "^%#@#$%3939$%^&^&" Notice the quotation marks around the three string values. string values require the quotation marks, which tell Visual Basic where the string begins and ends. If you wanted to embed spaces at the beginning or end of a string, you indicate those spaces by including them inside the quotation marks. For example, here are three different strings, each with a different set of embedded spaces: " house", "house ", " house ". You cannot embed quotation marks directly inside a string; Visual Basic thinks the string ends as soon as it comes to the second quotation mark, even if it is not the actual end of the string. The following data values can take on the variant data type: "^%#@#$%3939$%^&^&" 123.45 4.532112E+92 21 03-Mar-1996 Do these values look familiar? The variant data type can hold data of any other data type. Think about the kind of data stored in label controls. You often want to display numbers, dollar amounts, times, and dates in labels on a form. You can always store variant data in these controls. The data that comes from these controls is also variant. The following data values must be stored in a Boolean data type: True
  • 26. 26 False WEEK 3: VARIABLE DECLARATION IN VISUAL BASIC/STORING AND RETRIVING DATA IN A VARIABLE During this week you will learn : • Declaring Variables • Assigning Values to Variables • Mathematical Expressions • Conditional Operators Declaring Variables Definition: To define a variable means to create and name a variable. A program can have as many variables as you need it to have. Before you can use a variable, you must request that Visual Basic create the variable by defining the variable first. When you define a variable, you tell Visual Basic these two things: • The name of the variable • The data type of the variable Once you define a variable, that variable always retains its original data type. Therefore, a single-precision variable can hold only single-precision values. If you stored an integer in a single-precision variable, Visual Basic would convert the integer to a single-precision number before it stored the number in the variable. Such conversions are common, and they typically do not cause many problems. The Dim statement defines variables. Using Dim, you tell Visual Basic • that you need a variable • what to name the variable
  • 27. 27 • what kind of variable you want Dim—short for dimension—is a Visual Basic statement that you write in an application’s Code window. Whenever you learn a new statement, you need to learn the format for that statement. Here is the format of the Dim statement: Dim VarName AS DataType VarName is a name that you supply. When Visual Basic executes the Dim statement at runtime, it creates a variable in memory and assigns it the name you give in the VarName location of the statement. DataType is one of the seven Visual Basic data types that you learned . Variable names must follow the naming rules • Names can be as short as one character or as long as 40 characters. • Names must begin with a letter of the alphabet and can be in either uppercase or lowercase letters. • After the initial letter, names can contain letters, numbers, or underscores in names. • Names cannot be a reserved word. • Never define two variables with the same name Always use a Dim statement to define variables before you use variables. If the Options Environment Require Variable Definition option is set to Yes—as it is by default—Visual Basic will issue an error message whenever you use a variable that you have not defined. This option prevents you from inadvertently misspelling variable names and helps you avoid errors in your program. Suppose that you give a partial program to another Visual Basic programmer to work on. If you want to require that all variables be defined but are unsure of the other programmer's Options Environment Require Variable Definition setting, select (general) from the Code window's Object dropdown list and add the following special statement: Option Explicit No matter how the Options Environment setting is set, the programmer cannot slip variables into your program without defining them properly in Dim statements. Again, requiring variable definitions helps eliminate bugs down the road, so you are wise to get in the habit of putting Option Explicit in the (general) section of every program’s Code window. The following statement defines a variable named ProductTotal: Dim ProductTotal As Currency From the Dim statement, you know that the variable holds currency data and that its name is ProductTotal. All Visual Basic commands and built-in routines require an initial capital letter. Although you don't have to name your variables with an initial capital letter, most Visual Basic programmers do for the sake of consistency. Additional caps help distinguish
  • 28. 28 individual words inside a name. (Remember that you cannot use spaces in the name of variable.) The following statements define integer, single-precision, and double-precision variables: Dim Length As Integer Dim Price As Single Dim Structure As Double If you want to write a program that stores the user's text box entry for the first name, you would define a string like this: Dim FirstName As String You can get fancy when you define strings. This FirstName string can hold any string from 0 to 65,500 characters long. You will learn in the next section how to store data in a string. FirstName can hold data of virtually any size. You could store a small string in FirstName— such as "Joe"—and then store a longer string in FirstName—such as "Mercedes". FirstName is a variable-length string. Sometimes you want to limit the amount of text that a string holds. For example, you might need to define a string variable to hold a name that you read from the disk file. Later, you will display the contents of the string in a label on the form. The form's label has a fixed length, however—assuming that the AutoSize property is set to True. Therefore, you want to keep the string variable to a reasonable length. The following Dim statement demonstrates how you can add the * StringLength option when you want to define fixed-length strings: Dim Title As String * 20 Assigning Values to Variables Definition: A null string is a zero-length empty string that is often represented as "". When you first define variables, Visual Basic stores zeroes in the numeric variables and null strings in the string variables. Use the assignment statement when you want to put other data values into variables. Variables hold data of specific data types, and many lines inside a Visual Basic program's Code window consist of assignment statements that assign data to variables. Here is the format of the assignment statement: VarName = Expression
  • 29. 29 The Let command name is optional; it is rarely used these days. The VarName is a variable name that you have defined using the Dim statement. Expression can be a constant, another variable, or a mathematical expression. Suppose that you need to store a minimum age value of 18 in an integer variable named MinAge. The following assignment statements do that: MinAge = 18 To store a temperature in a single-precision variable named TodayTemp, you could do this: TodayTemp = 42.1 The data type of Expression must match the data type of the variable to which you are assigning. In other words, the following statement is invalid. It would produce an error in Visual Basic programs if you tried to use it. TodayTemp = "Forty-Two point One" If TodayTemp were a single-precision variable, you could not assign a string to it. However, Visual Basic often makes a quick conversion for you when the conversion is trivial. For example, it is possible to perform the following assignment even if you have defined Measure to be a double-precision variable: measurement = 921.23 At first glance, it appears that 921.23 is a single-precision number because of its size. 921.23 is actually a variant data value. Recall that Visual Basic assumes all data constants are variant unless you explicitly add a suffix character to the constant to make the constant a different data type. Visual Basic can easily and safely convert the variant value to double- precision. That's just what Visual Basic does, so the assignment works fine. In addition to constants, you can assign other variables to variables. Consider the following code: Dim Sales As Single, NewSales As Single Sales = 3945.42 NewSales = Sales When the third statement finishes, both Sales and NewSales have the value 3945.42. Feel free to assign variables to controls and controls to variables. Suppose, for example, that the user types the value 18.34 in a text box's Text property. If the text box's Name property is txtFactor, the following statement stores the value of the text box in a variable named FactorVal: FactorVal = txtFactor.Text
  • 30. 30 Suppose that you defined Title to be a string variable with a fixed length of 10, but a user types Mondays Always Feel Blue in a text box's Text property that you want to assign to Title. Visual Basic stores only the first ten characters of the control to Title and truncates the rest of the title. Therefore, Title holds only the string "Mondays Al". This is the first of several program code reviews that you will find throughout the rest of the book. Sub cmdJoke_Click () cmdJoke.Caption = "Bird Dogs Fly" End Sub If you have a variable that will contain simple true/false, yes/no, or on/off information, you can declare it to be of type Boolean. The default value of Boolean is False. In the following example, blnRunning is a Boolean variable which stores a simple yes/no setting. Dim blnRunning As Boolean ' Check to see if the tape is running. If Recorder.Direction = 1 Then blnRunning = True End if Mathematical Expressions Data values and controls are not the only kinds of assignments that you can make. With the Visual Basic math operators, you can calculate and assign expression results to variables when you code assignment statements that contain expressions. Definition: An operator is a word or symbol that does math and data manipulation. It is easy to make Visual Basic do your math. This table describes Visual Basic's primary math operators. There are other operators, but the ones in Table will suffice for most of the programs that you write. Look over the operators. You are already familiar with most of them because they look and act just like their real-world counterparts. The primary math operators. Operator Example Description + Net + Disc Adds two values - Price - 4.00 Subtracts one value from another value * Total * Fact Multiplies two values / Tax / Adjust Divides one value by another value ^ Adjust ^ 3 Raises a value to a power & or + Name1 & Name2 Concatenates two strings
  • 31. 31 Suppose that you wanted to store the difference between the annual sales (stored in a variable named AnnualSales) and cost of sales (stored in a variable named CostOfSales) in a variable named NetSales. Assuming that all three variables have been defined and initialized, the following assignment statement computes the correct value for NetSales: NetSales = AnnualSales - CostOfSales This assignment tells Visual Basic to compute the value of the expression and to store the result in the variable named NetSales. Of course, you can store the results of this expression in Caption or Text properties, too. If you want to raise a value by a power—which means to multiply the value by itself a certain number of times—you can do so. The following code assigns 10000 to Value because ten raised to the fourth power—10x10x10x10—is 10,000: Years = 4 Value = 10 ^ Years No matter how complex the expression is, Visual Basic computes the entire result before it stores that result in the variable at the left of the equals sign. The following assignment statement, for example, is rather lengthy, but Visual Basic computes the result and stores the value in the variable named Ans: Ans = 8 * Factor - Pi + 12 * MonthlyAmts Combining expressions often produces unintended results because Visual Basic computes mathematical results in a predetermined order. Visual Basic always calculates exponentiation first if one or more ^ operators appear in the expression. Visual Basic then computes all multiplication and division before any addition and subtraction. Visual Basic assigns 13 to Result in the following assignment: Result = 3 + 5 * 2 At first, you might think that Visual Basic would assign 16 to Result because 3 + 5 is 8 and 8 * 2 is 16. However, the rules state that Visual Basic always computes multiplication—and division if division exists in the expression—before addition. Therefore, Visual Basic first computes the value of 5 * 2, or 10, and next adds 3 to 10 to get 13. Only then does it assign the 13 to Result. If both multiplication and division appear in the same expression, Visual Basic calculates the intermediate results from left to right. For example, Visual Basic assigns 20 to the following expression: Result = 8 / 2 + 4 + 3 * 4 Visual Basic computes the division first because the division appears to the left of the multiplication. If the multiplication appeared to the left of the division, Visual Basic would
  • 32. 32 have multiplied first. After Visual Basic calculates the intermediate answers for the division and the multiplication, it performs the addition and stores the final answer of 20 in Result. Note: The order of computation has many names. Programmers usually use one of these terms: order of operators, operator precedence, or math hierarchy. It is possible to override the operator precedence by using parentheses. Visual Basic always computes the values inside any pair of parentheses before anything else in the expression, even if it means ignoring operator precedence. The following assignment statement stores 16 in Result because the parentheses force Visual Basic to compute the addition before the multiplication: Result = (3 + 5) * 2 The following expression stores the fifth root of 125 in the variable named root5: root5 = 125 ^ (1/5) As you can see from this expression, Visual Basic supports fractional exponents. Definition: Concatenation means the joining together of two or more strings. One of Visual Basic's primary operators has nothing to do with math. The concatenation operator joins one string to the end of another. Suppose that the user entered his first name in a label control named lblFirst and his last name in a label control named lblLast. The following concatenation expression stores the full name in the string variable named FullName: FullName = lblFirst & lblLast There is a problem here, though, that might not be readily apparent—there is no space between the two names. The & operator does not automatically insert a space because you don’t always want spaces inserted when you concatenate two strings. Therefore, you might have to concatenate a third string between the other two, as in FullName = lblFirst & " " & lblLast Visual Basic actually supports a synonym operator, the plus sign, for concatenation. In other words, the following assignment statement is identical to the previous one: FullName = lblFirst + " " + lblLast Even Microsoft, the maker of Visual Basic, recommends that you use & for string concatenation and reserve + for mathematical numeric additions. Using the same operator for two different kinds of operations can lead to confusion.
  • 33. 33 Review: The math operators enable you to perform all kinds of calculations and assignments. Visual Basic means never having to use a calculator again! When you use expressions, however, remember operator precedence. When in doubt, use parentheses to indicate exactly which operations in an expression you want Visual Basic to calculate first. Conditional Operators You can combine or modify search conditions using the standard logical operators listed in the following table. The operators are listed in the order that they are evaluated. Operator Meaning Example NOT Logical opposite of condition NOT True = False NOT False = True AND Both conditions must apply ( True) True AND True = True True AND False = False False AND True = False OR Either condition can apply (True) True OR True = True True OR False = True False OR True = True False OR False = False
  • 34. 34 WEEK 4 : BASIC CONTROLS During this week you will learn : • Properties of the Form • Intrinsic Controls • Label control • Text Box • Focus In on Controls • The Command Button • The PictureBox Control • The Image Control Properties of the Form The form is yet another Visual Basic object. As such, it has property settings that you can set and change while you design the application and during the program's execution. This section explains all the form's property settings in detail. This table describes the property settings of the form that appear in the Properties window when you click the Form window and press F4. The form has more properties than the command button, label, and text box controls, whose properties you saw in the previous unit. As with all control property values, you never need to worry about all these properties at once. Most of the time, the default values are satisfactory for your applications. Properties of the form. Property Description AutoRedraw If True, Visual Basic automatically redraws graphic images that reside on the form when another window hides the image or when the user resizes the object. If False (the default), Visual Basic does not automatically redraw. BackColor The background color of the form. You can enter a hexadecimal Windows color value or select from the color palette. BorderStyle Set to 0 for no border or border elements such as a control menu or minimize and maximize buttons, 1 for a fixed-size border, 2 (the default) for a sizable border, or 3 for a fixed-size border that includes a double-size edge. Caption The text that appears in the form's title bar. The default Caption is the Name of the form. Enabled If True (the default), the form can respond to events. Otherwise, Visual Basic halts event processing for the form. FillColor The color value used to fill shapes drawn on the form. FillStyle Contains eight styles that determine the appearance of the interior patterns
  • 35. 35 of shapes drawn on the form. FontBold Has no effect on the form's Caption property, but does affect text that you eventually display on the form if you use the Print command. FontItalic Has no effect on the form's Caption property, but does affect text that you eventually display on the form if you use the Print command. FontName Has no effect on the form's Caption property, but does affect text that you eventually display on the form if you use the Print command. FontSize Has no effect on the form's Caption property, but does affect text that you eventually display on the form if you use the Print command. FontStrikethru Has no effect on the form's Caption property, but does affect text that you eventually display on the form if you use the Print command. FontTransparent Has no effect on the form's Caption property, but does affect text that you eventually display on the form if you use the Print command. FontUnderline Has no effect on the form's Caption property, but does affect text that you eventually display on the form if you use the Print command. ForeColor The color of foreground text that you display on the form if you use the Print command. Height The form’s height in twips. HelpContextID Provides the identifying number for the help text if you add advanced context-sensitive help to your application. Icon The picture icon that the user sees after minimizing the form. KeyPreview If False (the default), the control with the focus receives these events: KeyDown, KeyUp, and KeyPress before the form does . If True, the form receives the events before the focused control. Left The number of twips from the left edge of the screen to the left edge of the form. MaxButton If True (the default), the maximize button appears on the form at runtime. If False, the user cannot maximize the form window. MinButton If True (the default), the minimize button appears on the form at runtime. If False, the user cannot minimize the form window. MousePointer The shape to which the mouse cursor changes if the user moves the mouse cursor over the form. The possible values range from 0 to 12 and represent the different shapes the mouse cursor can take on. Name The name of the form. By default, Visual Basic generates the name Form1. Picture A picture file that displays on the form's background. ScaleMode Enables you to determine how to measure coordinates on the form. You can choose from eight values. The default unit of measurement is twips, indicated by 1. The other Scale... properties measure use twips. Top The number of twips from the top edge of the screen to the top of the form. Visible True or False, indicating whether the user can see and, therefore, use the form.
  • 36. 36 Width The width of the form in twips. WindowState Describes the startup state of the form when the user runs the program. If set to 0 (the default), the form first appears the same size as you designed it. If set to 1, the form first appears minimized. If set to 2, the form first appears maximized. ScaleMode enables you to determine how to measure coordinates on the form. You can choose from eight values. The default unit of measurement is twips. This table describes the possible units of measurement.
  • 37. 37 The ScaleMode property values. Value Description 0 Customized values 1 Twips (the default) 2 Points 3 Pixels 4 A standard character that is 120 twips wide and 240 twips high 5 Inches 6 Millimeters 7 Centimeters Intrinsic Controls In Microsoft Visual Basic jargon, intrinsic controls (or built-in controls) are those controls visible in the Toolbox window when you launch the environment. This important group includes controls, such as Label, TFextbox, and CommandButton controls, that are used in nearly every application. As you know, Visual Basic can be extended using additional Microsoft ActiveX Controls (formerly known as OCX controls, or OLE custom controls) either provided in the Visual Basic package or available as commercial, shareware, or even freeware third-party products. Even if such external controls are often more powerful than built-in controls, intrinsic controls have a few advantages that you should always take into account: • Support for intrinsic controls is included in the MSVBVM60.DLL, the runtime file that's distributed with every Visual Basic application. This means that if a program exclusively uses intrinsic controls, you don't need to distribute any additional OCX files, which greatly simplifies the installation process and reduces disk requirements. • In general, Visual Basic can create and display intrinsic controls faster than it can external ActiveX controls because the code for their management is already in the Visual Basic runtime module and doesn't have to be loaded when a form references an intrinsic control for the first time. Also, applications based on intrinsic controls usually perform faster on machines with less memory; no extra memory is needed by additional OCX modules. • Because programs based exclusively on intrinsic controls require fewer ancillary files, they can be downloaded faster through the Internet. Moreover, if end users previously installed any other Visual Basic application, Visual Basic runtime files are already installed on the target machine, which reduces download times to the minimum. For all these reasons, it's important to learn how to make the best of intrinsic controls. In this chapter, I focus on their most important properties, methods, and events, and I also show how to address some common programming issues using intrinsic controls exclusively.
  • 38. 38 Label control The label holds text on the form. Although there are several ways to display text, the label control enables you to post messages on the form that you can change by means of Visual Basic code. The user, however, cannot change the value of a text control. Label controls are vital to Visual Basic applications because you are always putting text on the form for the user to read. Here are some of the uses for the label control: Titles (boxed and unboxed) Data descriptions Color warning messages Graphic descriptions Instructions Labels are extremely easy to place and initialize. If you don't want a message to appear in a label when the user first starts the application, be sure to delete all the text from the label's Caption property. This table lists the properties available for labels within the Properties window. label properties. Property Description Alignment Set to 0 for left-justification (the default), 1 for right-justification, or 2 for centering the Caption within the label. Putting a border around the label or shading the label a color often makes the justification stand out. AutoSize If True, the control automatically adjusts its own size to shrinkwrap around the contents of its caption. If False (the default), the control clips off the right
  • 39. 39 of the text if the label is not large enough to hold the entire caption. BackColor The background color of the label. It is a hexadecimal number that represents one of thousands of possible Windows color values. You can select from a palette of colors displayed by Visual Basic when you are ready to set the BackColor property. The default background color is the same as the form's default background color. BackStyle If set to 0, meaning transparent, the form’s background color comes through the label’s background. If set to 1 (the default), the label's background color hides the form behind the label. BorderStyle Either 0 (the default) for no border or 1 for a fixed single-line border. Caption The text that appears on a label. Enabled If True (the default), the label control can respond to events. Otherwise, Visual Basic halts event processing for that particular control. FontBold If True (the default), the Caption displays in boldfaced characters. FontItalic If True (the default), the caption displays in italicized character. FontName The name of the label control’s style. You typically use the name of a Windows True Type font. FontSize The size, in points, of the font used for the label control's caption. FontStrikethru If True (the default), the caption displays in strikethrough letters. In other words, the characters have a line drawn through them. FontUnderline If True (the default), the caption displays in underlined letters. ForeColor The color of the text inside the caption. Height The height of the label control in twips. Index If the label control is part of a control array, the Index property provides the numeric subscript for each particular label control. Left The number of twips from the left edge of the Form window to the left edge of the label control. MousePointer The shape to which the mouse cursor changes if the user moves the mouse cursor over the label control. The possible values range from 0 to 12 and represent the different shapes that the mouse cursor can take on. Name The name of the control. By default, Visual Basic generates the names Label1, Label2, and so on, as you add subsequent label controls to the form. TabIndex The focus tab order begins at 0 and increments every time you add a new control. You can change the focus order by changing value of the TabIndex of the control. No two controls on the same form can have the same TabIndex value. Top The number of twips from the top edge of a label control to the top of the form. Visible True or False, indicating whether the user can see and, therefore, use the label control. Width The width of the label control in twips. WordWrap If True, the text wraps to hold the entire caption. If False (the default), the
  • 40. 40 text does not wrap but is truncated to fit the caption. Text Box A TextBox control, sometimes called an edit field or edit control, displays information Text box controls display default values and accept user input. Text box controls enable you to determine how the user enters data and responds to questions and controls that you display. When you display a text box on a form, you give the user a chance to accept a default value—the text box's initial Text property—or to change it to something else. The user can enter text of any data type—numbers, letters, and special characters. He can scroll left and right by using the arrow keys, and he can use the Ins and Del keys to insert and delete text within the text box control. Most of the text box's properties work like the label control's properties. Unlike the label, however, the text box properties describe data-entry properties so that the control can deal with user input instead of simple text display. This table describes the property values for the text box control. Text box properties. Property Description Alignment Set to 0 for left-justification (the default), 1 for right-justification, or 2 for centering the Caption within the text box. If MultiLine contains False, Visual Basic ignores the Alignment setting. BackColor The background color of the text box. It is a hexadecimal number that represents one of thousands of possible Windows color values. You can select from a palette of colors displayed by Visual Basic when you are ready to set the BackColor property. The default background color is the same as the form's default background color. BorderStyle Either 0 (the default) for no border or 1 for a fixed single-line border. Enabled If True (the default), the text box can respond to events. Otherwise, Visual Basic halts event processing for that particular control. FontBold If True (the default), the Text displays in boldfaced characters. FontItalic If True (the default), the Text displays in italicized characters. FontName The name of the text box's style. You typically use the name of a Windows True Type font. FontSize The size, in points, of the font used for the text box control's Text value. FontStrikethru If True (the default), the text value displays in strikethrough letters. In other words, the characters have a line drawn through them. FontUnderline If True (the default), the text value displays in underlined letters. ForeColor The color of the text inside the Text property.
  • 41. 41 Height The height of the text box in twips. HelpContextID If you add advanced context-sensitive help to your application, the HelpContextID provides the identifying number for the help text. HideSelection Keeps text highlighted even when the text box loses its focus. Index If the text box is part of a control array, the Index property provides the numeric subscript for each particular text box. Left The number of twips from the left edge of the Form window to the left edge of the text box. MaxLength If set to 0 (the default), the limit of the Text value can be as great as approximately 32,000 characters. Otherwise, the MaxLength specifies how many characters the user can enter in the text box. MousePointer The shape to which the mouse cursor changes if the user moves the mouse cursor over the text box. The possible values range from 0 to 12 and represent the different shapes that the mouse cursor can take on. MultiLine If True, the text box can display more than one line of text. If False (the default), the text box contains a single, and often long, line of text. The text can contain a carriage return. Name The name of the control. By default, Visual Basic generates the names Text1, Text2, and so on, as you add subsequent text boxes to the form. PasswordChar If you enter a character, such as an asterisk (*) for the PasswordChar, Visual Basic does not display the user's text but instead displays the PasswordChar as the user types the text. Use text boxes with a PasswordChar set when the user needs to enter a password and you don't want others looking over his shoulder to peek at the password. ScrollBars Set to 0 (the default) for no scroll bars, 1 for a horizontal scroll bar, 2 for a vertical scroll bar, or 3 for both kinds of scroll bars. TabIndex The focus tab order begins at 0 and increments every time you add a new control. You can change the focus order by changing the value of the TabIndex of the control. No two controls on the same form can have the same TabIndex value. TabStop If True, the user can press Tab to move the focus to this label control. If False, the label control cannot receive the focus. Text The initial value that the user sees in the text box. The default value is the name of the control. The value continues to update as the user enters new text at runtime. Top The number of twips from the top edge of a text box to the top of the form. Visible True or False, indicating whether the user can see and, therefore, use the text box. Width The width of the text box in twips.
  • 42. 42 Focus In on Controls As you learn about controls, you often hear the term focus. Learning about focus now saves you a lot of trouble later. Definition: Focus refers to the control that is currently highlighted. The control with the focus is the next control that will accept the user's response. Most Windows users instinctively understand focus even though very few have thought much about focus. The control with the focus is always the control that is highlighted. The focus often moves from control to control as the user works. The focus determines where the next action will take place. Only one control can have the focus at any one time, and not every control can get the focus. Definition: The focus order determines the control next in line for the focus. Every form has a focus order that determines the next control that will receive the focus. When you see a dialog box such as a File Open dialog box, the OK button is almost always the command button that has the focus. You can press Enter to select the OK command button, click a different command button (such as a Cancel command button), or press Tab until the command button that you want has the focus. Through property settings, you can determine the focus order and whether a control can receive the focus. Your form might have some controls that you don't want the user to be able to highlight; therefore, you prevent them from getting the focus. The Command Button The command button is the cornerstone of most Windows applications. With the command button, your user can respond to events, signal when something is ready for printing, and tell the program when to terminate. Although all command buttons work in the same fundamental way—they visually depress when the user clicks them, and they trigger events such as Click events—numerous properties for command buttons uniquely define each one and its behavior. You are already familiar with several command button properties. You have seen that command buttons vary in size and location. You might want to open a new project, add a command button to the Form window by double-clicking the command button on the toolbox, and press F4 to scroll through the Properties window. Several of the property settings can accept a limited range of numeric values. Most of these values are named in CONSTANT.TXT, and they are mentioned in this book as well. Some property settings accept either True or False values, indicating a yes or no condition. For example, if the Cancel property is set to True, that command button is the cancel command button and all other command buttons must contain a False Cancel property because only one command button on a form can have a True Cancel property.
  • 43. 43 Command button properties. Property Description BackColor The command button is one of the few controls for which the background color property means very little. When you change the background color, only the dotted line around the command button's caption changes color. Cancel If True, Visual Basic automatically clicks this command button when the user presses Esc. Only one command button can have a True Cancel property value at a time. All command buttons initially have their Cancel property set to False. Caption The text that appears on the command button. If you precede any character in the text with an ampersand (&),it acts as the access key. Therefore, the access key for a command button with a Caption property set to E&xit is Alt+X. The default Caption value is the command button's Name value. Default The command button with the initial focus when the form first activates has a Default property setting of True. All command buttons initially have False Default property values until you change one of them. Definition: An icon is a picture on the screen. DragIcon The icon that appears when the user drags the command button around on the form. Because you only rarely enable the to user move a command button, you won’t use the Drag... property settings very much. Enabled If True (the default), the command button can respond to events. Otherwise, Visual Basic halts event processing for that particular control. FontBold If True (the default), the Caption displays in boldfaced characters. FontItalic If True (the default), the caption displays in italicized characters. FontName The name of the style of the command button caption. You typically use the name of a Windows True Type font. (margin)Definition: A point is 1/72 of one inch. FontSize The size, in points, of the font used for the command button's caption. FontStrikethru If True (the default), the caption displays in strikethrough letters. In other words, characters have a line drawn through them. FontUnderline If True (the default), the caption displays in underlined letters. Height The height of the command button in twips. HelpContextID If you add advanced context-sensitive help to your application, the
  • 44. 44 HelpContextID provides the identifying number for the help text. Index If the command button is part of a control array, the Index property provides the numeric subscript for each particular command button. Left The number of twips from the left edge of the Form window to the left edge of the command button. MousePointer The shape to which the mouse cursor changes if the user moves the mouse cursor over the command button. The possible values range from 0 to 12 and represent the different shapes that the mouse cursor can take on. Name The name of the control. By default, Visual Basic generates the names Command1, Command2, and so on, as you add subsequent command buttons to the form. TabIndex The focus tab order begins at 0 and increments every time you add a new control. You can change the focus order by changing the TabIndex values of the controls. No two controls on the same form can have the same TabIndex value. TabStop If True, the user can press Tab to move the focus to this command button. If False, the command button cannot receive the focus. Tag Not used by Visual Basic. The programmer can use it for an identifying comments applied to the command button. Top The number of twips from the top edge of a command button to the top of the form. Visible True or False, indicating whether the user can see and, therefore, use the command button. Width The width of the command button in twips. The PictureBox Control PictureBox controls are among the most powerful and complex items in the Visual Basic Toolbox window. In a sense, these controls are more similar to forms than to other controls. For example, PictureBox controls support all the properties related to graphic output, including AutoRedraw, ClipControls, HasDC, FontTransparent, CurrentX, CurrentY, and all the Drawxxxx, Fillxxxx, and Scalexxxx properties. PictureBox controls also support all graphic methods, such as Cls, PSet, Point, Line, and Circle and conversion methods, such as ScaleX, ScaleY, TextWidth, and TextHeight. In other words, all the techniques that I described for forms can also be used for PictureBox controls (and therefore won't be covered again in this section). Loading images Once you place a PictureBox on a form, you might want to load an image in it, which you do by setting the Picture property in the Properties window. You can load images in many different graphic formats, including bitmaps (BMP), device independent bitmaps (DIB), metafiles (WMF), enhanced metafiles (EMF), GIF and JPEG compressed files, and icons (ICO and CUR). You can decide whether a control should display a border, resetting the BorderStyle to 0-None if necessary. Another property that comes handy in this phase is
  • 45. 45 AutoSize: Set it to True and let the control automatically resize itself to fit the assigned image. You might want to set the Align property of a PictureBox control to something other than the 0-None value. By doing that, you attach the control to one of the four form borders and have Visual Basic automatically move and resize the PictureBox control when the form is resized. PictureBox controls expose a Resize event, so you can trap it if you need to move and resize its child controls too. You can do more interesting things at run time. To begin with, you can programmatically load any image in the control using the LoadPicture function: Picture1.Picture = LoadPicture("c:windowssetup.bmp") and you can clear the current image using either one of the following statements: ' These are equivalent. Picture1.Picture = LoadPicture("") Set Picture1.Picture = Nothing The LoadPicture function has been extended in Visual Basic 6 to support icon files containing multiple icons. The new syntax is the following: LoadPicture(filename, [size], [colordepth], [x], [y]) where values in square brackets are optional. If filename is an icon file, you can select a particular icon using the size or colordepth arguments. Valid sizes are 0-vbLPSmall, 1- vbLPLarge (system icons whose sizes depend on the video driver), 2-vbLPSmallShell, 3- vbLPLargeShell (shell icons whose dimensions are affected by the Caption Button property as set in the Appearance tab in the screen's Properties dialog box), and 4-vbLPCustom (size is determined by x and y). Valid color depths are 0-vbLPDefault (the icon in the file that best matches current screen settings), 1-vbLPMonochrome, 2-vbLPVGAColor (16 colors), and 3- vbLPColor (256 colors). You can copy an image from one PictureBox control to another by assigning the target control's Picture property: Picture2.Picture = Picture1.Picture
  • 46. 46 The PaintPicture demonstration program shows several graphic effects. The Image Control Image controls are far less complex than PictureBox controls. They don't support graphical methods or the AutoRedraw and the ClipControls properties, and they can't work as containers, just to hint at their biggest limitations. Nevertheless, you should always strive to use Image controls instead of PictureBox controls because they load faster and consume less memory and system resources. Remember that Image controls are windowless objects that are actually managed by Visual Basic without creating a Windows object. Image controls can load bitmaps and JPEG and GIF images. When you're working with an Image control, you typically load a bitmap into its Picture property either at design time or at run time using the LoadPicture function. Image controls don't expose the AutoSize property because by default they resize to display the contained image (as it happens with PictureBox controls set at AutoSize = True). On the other hand, Image controls support a Stretch property that, if True, resizes the image (distorting it if necessary) to fit the control. In a sense, the Stretch property somewhat remedies the lack of the PaintPicture method for this control. In fact, you can zoom in to or reduce an image by loading it in an Image control and then setting its Stretch property to True to change its width and height: ' Load a bitmap. Image1.Stretch = False Image1.Picture = LoadPicture("c:windowssetup.bmp") ' Reduce it by a factor of two. Image1.Stretch = True Image1.Move 0, 0, Image1.Width / 2, Image1.Width / 2 Image controls support all the usual mouse events. For this reason, many Visual Basic developers have used Image controls to simulate graphical buttons and toolbars. Now that Visual Basic natively supports these controls, you'd probably better use Image controls only for what they were originally intended.
  • 47. 47 WEEK 5: ADDING AND ACTIVATING VB CONTROLS IN A PROGRAM During this week you will learn : • Creating non-wizard applications • Adding Controls to applications • Managing Controls • Change the control properties • Common Properties • Handling Control Event • Common Events • Writing Code Creating non-wizard applications You can create a single project . 1. On the File menu, click Create Project to display the Create Project dialog box. 2. In the New Project box, Click Standard.EXE and then Click OK. Adding Controls to applications To place a control on the form, you can do one of two things: • Double-click the Toolbox control. Visual Basic places and centers the control on your form. You then have to move and size the control to your preferences. • Click the control and move the mouse pointer to the Form window. Drag to draw the control's outline on your form in the placement and size you need.
  • 48. 48 Managing Controls Moving controls Controls can be moved around a form by dragging them with the mouse. Deleting Controls First selected the control you want to delete, then you can use many ways - Press Delete Key - Right Click then select Delete. - From Edit menu Select Delete Resizing controls Before a control can be resized it must be selected. When a control is selected it will be surrounded by black dots or handles. Clicking and dragging one of these handles will adjust the size of the control. Change the control properties The properties window lists all the properties a control has and their value. The default value of a property can be changed. Just select the property first then change its value.
  • 49. 49 Common Properties At first glance, it might seem that Visual Basic 6 supports countless properties for various objects. Fortunately, there's a set of properties many objects of different classes share. In this section, we'll examine these common properties. The Left, Top, Width, and Height Properties All visible objects—forms and controls—expose these properties, which affect the object's position and size. These values are always relative to the object's container—that is, the screen for a form and the parent form for a control. A control can also be contained in another control, which is said to be its container: In this case, Top and Left properties are relative to such a container control. By default, these properties are measured in twips, a unit that lets you create resolution-independent user interfaces, but you can switch to another unit, for example, pixels or inches, by setting the container's ScaleMode property. But you can't change the unit used for forms because they have no container: Left, Top, Width, and Height properties for forms are always measured in twips. While you can enter numeric values for these properties right in the Properties window at design time, you often set them in a visual manner by moving and resizing the control on its parent form. Keep in mind that Visual Basic also offers many interactive commands in the Format menu that let you resize, align, and space multiple controls in one operation. You can also access and modify these properties through code to move or resize objects at run time: ' Double a form's width, and move it to the ' upper left corner of the screen. Form1.Width = Form1.Width * 2 Form1.Left = 0 Form1.Top = 0 Note that while all controls—even invisible ones—expose these four properties at design time in the Properties window, controls that are inherently invisible—Timer controls, for example—don't support these properties at run time, and you can't therefore read or modify them through code. CAUTION Controls don't necessarily have to support all four properties in a uniform manner. For example, ComboBox controls' Height property can be read but not written to, both at design time and run time. As far as I know, this is the only example of a property that appears in the Properties window but can't be modified at design time. This happens because the height of a ComboBox control depends on the control's Font attributes. Remember this exception when writing code that modifies the Height property for all the controls in a form. The ForeColor and BackColor Properties Most visible objects expose ForeColor and BackColor properties, which affect the color of the text and the color of the background, respectively. The colors of a few controls—scroll bars, for example—are dictated by Microsoft Windows, however, and you won't find ForeColor and BackColor entries in the Properties window. In other cases, the effect of these properties depends on other properties: for example, setting the BackColor property of a Label control has no effect if you set the BackStyle property of that Label to 0-Transparent.
  • 50. 50 CommandButton controls are peculiar in that they expose a BackColor property but not a ForeColor property, and the background color is active only if you also set the Style property to 1-Graphical. (Because the default value for the Style property is 0-Standard, it might take you a while until you understand why the BackColor property doesn't affect the background color in the usual manner.) When you're setting one of these two properties in the Properties window, you can select either a standard Windows color or a custom color using the System tab in the first case and the Palette tab in the second, as you can see in Figure. My first suggestion is always use a standard color value unless you have a very good reason to use a custom color. System colors display well on any Windows machine, are likely to conform to your customers' tastes, and contribute to making your application look well integrated in the system. My second suggestion is if you want to use custom colors, develop a consistent color scheme and use it throughout your application. I also have a third suggestion: Never mix standard and custom colors on the same form, and don't use a standard color for the ForeColor property and a custom color for the BackColor property of the same control (or vice versa), because the user might change the system palette in a way that makes the control completely unreadable. You can choose from several ways to assign a color in code. Visual Basic provides a set of symbolic constants that correspond to all the colors that appear in the System tab in the Properties window at design time: ' Make Label1 appear in a selected state. Label1.ForeColor = vbHighlightText Label1.BackColor = vbHighlight All the symbolic constants are shown in the following table. Constant Hex Value Description vb3DDKShadow &H80000015 Darkest shadow vb3Dface &H8000000F Dark shadow color for 3-D display elements vb3Dhighlight &H80000014 Highlight color for 3-D display elements vb3Dlight &H80000016 Second lightest of the 3-D colors after vb3Dhighlight vb3Dshadow &H80000010 Color of automatic window shadows vbActiveBorder &H8000000A Active window border color vbActiveTitleBar &H80000002 Active window caption color vbActiveTitleBarText &H80000009 Text color in active caption, size box, scroll bar arrow box vbApplicationWorkspace &H8000000C Background color of multiple-document interface (MDI) applications vbButtonFace &H8000000F Face shading on command buttons vbButtonShadow &H80000010 Edge shading on command buttons
  • 51. 51 vbButtonText &H80000012 Text color on push buttons vbDesktop &H80000001 Desktop color vbGrayText &H80000011 Grayed (disabled) text vbHighlight &H8000000D Background color of items selected in a control vbHighlightText &H8000000E Text color of items selected in a control vbInactiveBorder &H8000000B Inactive window border color vbInactiveCaptionText &H80000013 Color of text in an inactive caption vbInactiveTitleBar &H80000003 Inactive window caption color vbInactiveTitleBarText &H80000013 Text color in inactive window caption, size box, scroll bar arrow box vbInfoBackground &H80000018 Background color of ToolTips vbInfoText &H80000017 Color of text in ToolTips vbMenuBar &H80000004 Menu background color vbMenuText &H80000007 Text color in menus vbScrollBars &H80000000 Scroll bar gray area color vbTitleBarText &H80000009 Text color in active caption, size box, scroll bar arrow box vbWindowBackground &H80000005 Window background color vbWindowFrame &H80000006 Window frame color vbWindowText &H80000008 Text color in windows You can also browse them in the Object Browser window, after clicking the SystemColorConstants item in the leftmost list box. (If you don't see it, first select <All libraries> or VBRUN in the top ComboBox control). Note that all the values of these constants are negative.
  • 52. 52 When you're assigning a custom color, you can use one of the symbolic constants that Visual Basic defines for the most common colors (vbBlack, vbBlue, vbCyan, vbGreen, vbMagenta, vbRed, vbWhite, and vbYellow), or you can use a numeric decimal or hexadecimal constant: ' These statements are equivalent. Text1.BackColor = vbCyan Text1.BackColor = 16776960 Text1.BackColor = &HFFFF00 You can also use an RGB function to build a color value composed of its red, green, and blue components. Finally, to ease the porting of existing QuickBasic applications, Visual Basic supports the QBColor function: ' These statements are equivalent to the ones above. Text1.BackColor = RGB(0, 255, 255) ' red, green, blue values Text1.BackColor = QBColor(11) The Font Property Forms and those controls that can display strings of characters expose the Font property. At design time, you set font attributes using a common dialog box, which you can see in Figure. Dealing with fonts at run time, however, is less simple because you must account for the fact that Font is a compound object, and you must assign its properties separately. Font objects expose the Name, Size, Bold, Italic, Underline, and Strikethrough properties. Text1.Font.Name = "Tahoma" Text1.Font.Size = 12 Text1.Font.Bold = True
  • 53. 53 Text1.Font.Underline = True At design time the Font dialog box lets you modify all font attributes at once and preview the result. It should be made clear, however, that the preceding code actually assigns the same Font objects to both controls. This means that if you later change Text1's font attributes, the appearance of Text2 will also be affected. This behavior is perfectly consistent with the Font object's nature, even though the reasons for. You can take advantage of this approach—for example, if all the controls in your form always use the same font—but you should absolutely avoid it when the controls in question are supposed to have independent font attributes. Visual Basic 6 still supports old-style Font properties such as FontName, FontSize, FontBold, FontItalic, FontUnderline, and FontStrikethru, but you can modify them only through code because they don't appear in the Properties window at design time. You can use the syntax that you like most because the two forms are perfectly interchangeable. In this book, however, I mostly follow the newer object-oriented syntax. The Font.Size property (or the equivalent FontSize property) is peculiar because in general you can't be sure that Visual Basic is able to create a font of that particular size, especially if you aren't working with a TrueType font. The short code snippet below proves this. Text1.Font.Name = "Courier" Text1.Font.Size = 22 Print Text1.Font.Size ' Prints 19.5
  • 54. 54 The Caption and Text Properties The Caption property is a string of characters that appears inside a control (or in the title bar of a form) and that the user can't directly modify. Conversely, the Text property corresponds to the "contents" of a control and is usually editable by the end user. No intrinsic control exposes both a Caption and a Text property, so in practice a look at the Properties window can resolve your doubts as to what you're working with. Label, CommandButton, CheckBox, OptionButton, Data, and Frame controls expose the Caption property, whereas TextBox, ListBox, and ComboBox controls expose the Text property. The Caption property is special in that it can include an ampersand (&) character to associate a hot key with the control. The Text property, when present, is always the default property for the control, which means that it can be omitted in code: ' These statements are equivalent. Text2.Text = Text1.Text Text2 = Text1 The Parent and Container Properties The Parent property is a run time_only property (that is, you don't see it in the Properties window), which returns a reference to the form that hosts the control. The Container property is also a run time_only property, which returns a reference to the container of the control. These two properties are correlated, in that they return the same object—the parent form— when a control is placed directly on the form surface. While you can't move a control from one form to another using the Parent property (which is read-only), you can move a control to another container by assigning a different value to its Container property (which is a read-write property). Because you're assigning objects and not plain values, you must use the Set keyword: ' Move Text1 into the Picture1 container. Set Text1.Container = Picture1 ' Move it back on the form's surface. Set Text1.Container = Form1 The Enabled and Visible Properties By default, all controls and forms are both visible and enabled at run time. For a number of reasons, however, you might want to hide them or show them in a disabled state. For example, you might use a hidden DriveListBox control simply to enumerate all the drives in the system. In this case, you set the Visible property of the DriveListBox control to False in the Properties window at design time. More frequently, however, you change these properties at run time: ' Enable or disable the Text1 control when ' the user clicks on the Check1 CheckBox control. Private Sub Check1_Click() Text1.Enabled = (Check1.Value = vbChecked) End Sub
  • 55. 55 Disabled controls don't react to user's actions, but otherwise they're fully functional and can be manipulated through code. Invisible controls are automatically disabled, so you never need to set both these properties to False. All mouse events for disabled or invisible controls are passed to the underlying container or to the form itself. If an object works as a container for other objects—for instance, a Form is a container for its controls and a Frame control can be a container for a group of OptionButton controls— setting its Visible or Enabled properties indirectly affects the state of its contained objects. This feature can often be exploited to reduce the amount of code you write to enable or disable a group of related controls. The TabStop and TabIndex Properties If a control is able to receive the input focus, it exposes the TabStop property. Most intrinsic controls support this property, including TextBox, OptionButton, CheckBox, CommandButton, OLE, ComboBox, both types of scroll bars, the ListBox control, and all its variations. In general, intrinsic lightweight controls don't support this property because they can never receive the input focus. The default value for this property is True, but you can set it to False either at design time or run time. If a control supports the TabStop property, it also supports the TabIndex property, which affects the Tab order sequence—that is, the sequence in which the controls are visited when the user presses the Tab key repeatedly. The TabIndex property is also supported by Label and Frame controls, but since these two controls don't support the TabStop property, the resulting effect is that when the user clicks on a Label or a Frame control (or presses the hot key specified in the Label or Frame Caption property), the input focus goes to the control that follows in the Tab order sequence. You can exploit this feature to use Label and Frame controls to provide hot keys to other controls: ' Let the user press the Alt+N hot key ' to move the input focus on the Text1 control. Label1.Caption = "&Name" Text1.TabIndex = Label1.TabIndex + 1 The MousePointer and MouseIcon Properties These properties affect the shape of the mouse cursor when it hovers over a control. Windows permits a very flexible mouse cursor management in that each form and each control can display a different cursor, and you can also set an application-wide mouse cursor using the Screen global object. Nevertheless, the rules that affect the actual cursor used aren't straightforward: • If the Screen.MousePointer property is set to a value different from 0-vbDefault, the mouse cursor reflects this value and no other properties are considered. But when the mouse floats over a different application (or the desktop), the cursor appearance depends on that application's current state, not yours. • If Screen.MousePointer is 0 and the mouse cursor is over a control, Visual Basic checks that control's MousePointer property; if this value is different from 0- vbDefault, the mouse cursor is set to this value. • If Screen.MousePointer is 0 and the mouse is over a form's surface or it's over a control whose MousePointer property is 0, Visual Basic uses the value stored in the form's MousePointer property.
  • 56. 56 If you want to show an hourglass cursor, wherever the user moves the mouse, use this code: ' A lengthy routine Screen.MousePointer = vbHourglass ... ' Do your stuff here ... ' but remember to restore default pointer. Screen.MousePointer = vbDefault Here's another example: ' Show a crosshair cursor when the mouse is over the Picture1 ' control and an hourglass elsewhere on the parent form. Picture1.MousePointer = vbCrosshair MousePointer = vbHourglass The MouseIcon property is used to display a custom, user-defined mouse cursor. In this case, you must set the MousePointer to the special value 99-vbCustom and then assign an icon to the MouseIcon property: ' Display a red Stop sign mouse cursor. The actual path may differ, ' depending on the main directory where you installed Visual Basic. MousePointer = vbCustom MouseIcon = LoadPicture("d:vb6graphicsiconscomputermsgbox01.ico") You don't need to load a custom mouse cursor at run time using the LoadPicture command. For example, you can assign it to the MouseIcon property at design time in the Properties window, as you can see in Figure, and activate it only when needed by setting the MousePointer property to 99-vbCustom. If you need to alternate among multiple cursors for the same control but don't want to distribute additional files, you can load additional ICO files in hidden Image controls and switch among them at run time.
  • 57. 57 The Tag Property All controls support the Tag property, without exception. This is true even for ActiveX controls, including any third-party controls. How can I be so certain that all controls support this property? The reason is that the property is provided by Visual Basic itself, not by the control. Tag isn't the only property provided by Visual Basic to any control: Index, Visible, TabStop, TabIndex, ToolTipText, HelpContextID, and WhatsThisHelpID properties all belong to the same category. These properties are collectively known as extender properties. Note that a few extender properties are available only under certain conditions. For example, TabStop is present only if the control can actually receive the focus. The Tag property is distinctive because it's guaranteed to be always available, and you can reference it in code without any risk of raising a run-time error. The Tag property has no particular meaning to Visual Basic: It's simply a container for any data related to the control that you want to store. For example, you might use it to store the initial value displayed in a control so that you can easily restore it if the user wants to undo his or her changes. Handling Control Event Visual Basic applications work by executing code written in the Visual Basic programming language. Code is associated with events.
  • 58. 58 Each Visual Basic object has a set of events. Events are actions which Visual Basic can detect and respond to. For example, a user clicking on a command button on a form will generate a click event for that button. When an event is generated Visual Basic will run any code you have entered for that event. Common Events Visual Basic 6 forms and controls support common events. In this section, we'll describe these events in some detail. The Click and DblClick Events A Click event occurs when the user left-clicks on a control, whereas the DblClick event occurs—you guessed it—when he or she double-clicks on the control using the left mouse button. But don't be fooled by this apparent simplicity because the Click event can occur under different circumstances as well. For example, whenever a CheckBox or an OptionButton control's Value property changes through code, Visual Basic fires a Click event, exactly as if the user had clicked on it. This behavior is useful because it lets you deal with the two different cases in a uniform way. ListBox and ComboBox controls also fire Click events whenever their ListIndex properties change. Click and DblClick events don't pass arguments to the program, and therefore you can't count on these events to tell you where the mouse cursor is. To get this information, you must trap the MouseDown event instead, about which I'll say more later in this chapter. Also notice that when you double-click on a control, it receives both the Click and the DblClick events. This makes it difficult to distinguish single clicks from double-clicks because when Visual Basic calls your Click event procedure you don't know whether it will later call the DblClick procedure. At any rate, you should avoid assigning different functions to click and double-click actions on the same control because it tends to confuse the user. The Change Event The Change event is the simplest event offered by Visual Basic: Whenever the contents of a control change, Visual Basic fires a Change event. Unfortunately, this simple scheme hasn't been consistently followed in the Visual Basic architecture. As I explained in the previous section, when you click on CheckBox and OptionButton controls, they fire a Click event (rather than a Change event). Fortunately, this inconsistency isn't a serious one. TextBox and ComboBox controls raise a Change event when the user types something in the editable area of the control. (But be careful, the ComboBox control raises a Click event when the user selects an item from the list portion rather than types in a box.) Both scroll bar controls raise the Change event when the user clicks on either arrows or moves the scroll boxes. The Change event is also supported by the PictureBox, DriveListBox, and DirListBox controls. The Change event also fires when the contents of the control are changed through code. This behavior often leads to some inefficiencies in the program. For instance, many programmers initialize the Text properties of all TextBox controls in the form's Load event, thus firing many Change events that tend to slow down the loading process.
  • 59. 59 The GotFocus and LostFocus Events These events are conceptually very simple: GotFocus fires when a control receives the input focus, and LostFocus fires when the input focus leaves it and passes to another control. At first glance, these events seem ideal for implementing a sort of validation mechanism—that is, a piece of code that checks the contents of a field and notifies the user if the input value isn't correct as soon as he or she moves the focus to another control. In practice, the sequence of these events is subject to several factors, including the presence of MsgBox and DoEvents statements. Fortunately, Visual Basic 6 has introduced the new Validate event, which elegantly solves the problem of field validation Finally, note that forms support both GotFocus and LostFocus events, but these events are raised only when the form doesn't contain any control that can receive the input focus, either because all of the controls are invisible or the TabStop property for each of them is set to False. The KeyPress, KeyDown, and KeyUp Events These events fire whenever the end user presses a key while a control has the input focus. The exact sequence is as follows: KeyDown (the users presses the key), KeyPress (Visual Basic translates the key into an ANSI numeric code), and KeyUp (the user releases the key). Only keys that correspond to control keys (Ctrl+x, BackSpace, Enter, and Escape) and printable characters activate the KeyPress event. For all other keys—including arrow keys, function keys, Alt+x key combinations, and so on—this event doesn't fire and only the KeyDown and KeyUp events are raised. The KeyPress event is the simplest of the three. It's passed the ANSI code of the key that has been pressed by the user, so you often need to convert it to a string using the Chr$() function: Private Text1_KeyPress(KeyAscii As Integer) MsgBox "User pressed " & Chr$(KeyAscii) End Sub If you modify the KeyAscii parameter, your changes affect how the program interprets the key. You can also "eat" a key by setting this parameter to 0, as shown in the code below. Private Sub Text1_KeyPress(KeyAscii As Integer) ' Convert all keys to uppercase, and reject blanks. KeyAscii = Asc(UCase$(Chr$(KeyAscii) If KeyAscii = Asc(" ") Then KeyAscii = 0 End Sub The KeyDown and KeyUp events receive two parameters, KeyCode and Shift. The former is the code of the pressed key, the latter is an Integer value that reports the state of the Ctrl, Shift, and Alt keys; because this value is bit-coded, you have to use the AND operator to extract the relevant information: Private Sub Text1_KeyDown(KeyCode As Integer, Shift As Integer) If Shift And vbShiftMask Then ' Shift key pressed End If If Shift And vbCtrlMask Then