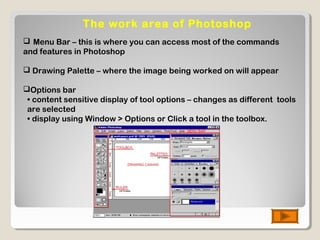
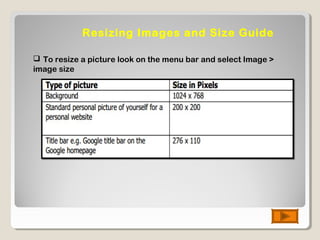
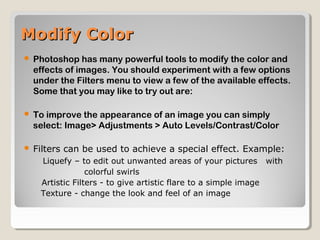
LearningLearning
Adobe PhotoshopAdobe Photoshop
By Nor Hasnizar Mohamad
Enter
What is Photoshop?
 Adobe Photoshop is a professional image editing
software package that can be used by experts and
novices alike.
 While this handout offers some very basic tips on using
the tools available in Photoshop, more comprehensive
guidance can be accessed on the web or in the help
menu of your version of Photoshop.
 The version used for this tutorial is Adobe Photoshop
CS.
The work area of Photoshop
 Menu Bar – this is where you can access most of the commands
and features in Photoshop
 Drawing Palette – where the image being worked on will appear
Options bar
• content sensitive display of tool options – changes as different tools
are selected
• display using Window > Options or Click a tool in the toolbox.
 Tool box - for creating an editing images (display or hide using
Windows > Tools)
 Palettes - to monitor and modify images (there are 5 palettes
by default)
• Palette Well - to organize palettes in work area
• Drag a palette’s tab into the palette well to store it in
the palette well
• Once in the palette well click on the palette tab to use it
Resizing Images and Size Guide
 To resize a picture look on the menu bar and select Image >
image size
Modify ColorModify Color
 Photoshop has many powerful tools to modify the color and
effects of images. You should experiment with a few options
under the Filters menu to view a few of the available effects.
Some that you may like to try out are:
 To improve the appearance of an image you can simply
select: Image> Adjustments > Auto Levels/Contrast/Color
 Filters can be used to achieve a special effect. Example:
Liquefy – to edit out unwanted areas of your pictures with
colorful swirls
Artistic Filters - to give artistic flare to a simple image
Texture - change the look and feel of an image
LayersLayers
 The Layers window shows the various layers that your image is
made up of
 To make a new layer, Layer > New > Layer in the menu bar
 To work on a different layer, click on that layer. The eyeball will
appear next to that layer
 can drag layers up and down the list
 create a new layer for each part of your image. This allows you to go
back and edit the layers individually
A.Layers palette menu
B.Layer Set
C.Layer
D.Layer thumbnail
E.Layer effect
F.New Layer icon
Using the ToolUsing the Tool
Brush toolBrush tool
Select the brush tool and
drawing some brush
strokes on the canvas
Select on the shape tool
and create on the canvas
Pencil ToolPencil Tool
Select pencil tool from
brush tool in the tools
pallete and click on the
canvas
Drag some pencil line
on the canvas. You can
select a brush size on
from options bar
Selection ToolSelection Tool
Use the rectangular Selection Tool on the
Toolbox to select area to work on.
To add to a selection, hold Shift before
dragging.
You can press Ctrl+D to "deselect" and
remove the selection at any time
To make the selection exactly square, start
dragging, then hold Shift..
Patch ToolPatch Tool
Module

Module

  • 1.
  • 2.
    What is Photoshop? Adobe Photoshop is a professional image editing software package that can be used by experts and novices alike.  While this handout offers some very basic tips on using the tools available in Photoshop, more comprehensive guidance can be accessed on the web or in the help menu of your version of Photoshop.  The version used for this tutorial is Adobe Photoshop CS.
  • 3.
    The work areaof Photoshop  Menu Bar – this is where you can access most of the commands and features in Photoshop  Drawing Palette – where the image being worked on will appear Options bar • content sensitive display of tool options – changes as different tools are selected • display using Window > Options or Click a tool in the toolbox.
  • 4.
     Tool box- for creating an editing images (display or hide using Windows > Tools)  Palettes - to monitor and modify images (there are 5 palettes by default) • Palette Well - to organize palettes in work area • Drag a palette’s tab into the palette well to store it in the palette well • Once in the palette well click on the palette tab to use it
  • 5.
    Resizing Images andSize Guide  To resize a picture look on the menu bar and select Image > image size
  • 6.
    Modify ColorModify Color Photoshop has many powerful tools to modify the color and effects of images. You should experiment with a few options under the Filters menu to view a few of the available effects. Some that you may like to try out are:  To improve the appearance of an image you can simply select: Image> Adjustments > Auto Levels/Contrast/Color  Filters can be used to achieve a special effect. Example: Liquefy – to edit out unwanted areas of your pictures with colorful swirls Artistic Filters - to give artistic flare to a simple image Texture - change the look and feel of an image
  • 7.
    LayersLayers  The Layerswindow shows the various layers that your image is made up of  To make a new layer, Layer > New > Layer in the menu bar  To work on a different layer, click on that layer. The eyeball will appear next to that layer  can drag layers up and down the list  create a new layer for each part of your image. This allows you to go back and edit the layers individually
  • 8.
    A.Layers palette menu B.LayerSet C.Layer D.Layer thumbnail E.Layer effect F.New Layer icon
  • 9.
    Using the ToolUsingthe Tool Brush toolBrush tool Select the brush tool and drawing some brush strokes on the canvas Select on the shape tool and create on the canvas
  • 10.
    Pencil ToolPencil Tool Selectpencil tool from brush tool in the tools pallete and click on the canvas Drag some pencil line on the canvas. You can select a brush size on from options bar
  • 11.
    Selection ToolSelection Tool Usethe rectangular Selection Tool on the Toolbox to select area to work on. To add to a selection, hold Shift before dragging. You can press Ctrl+D to "deselect" and remove the selection at any time To make the selection exactly square, start dragging, then hold Shift..
  • 12.