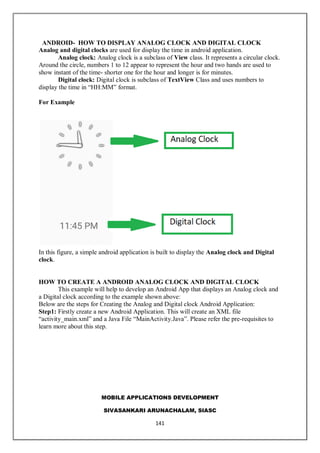
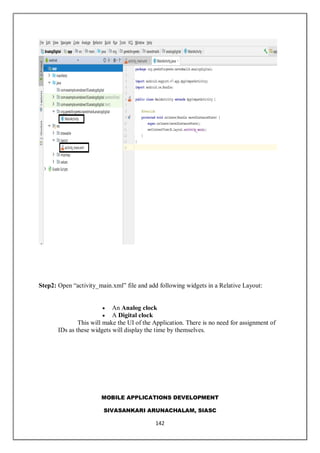
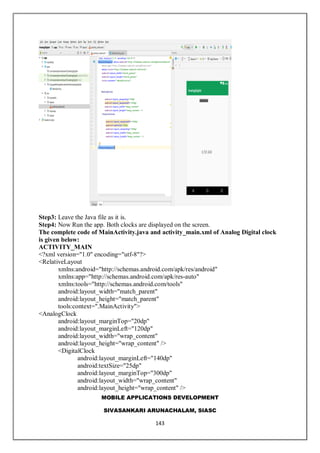
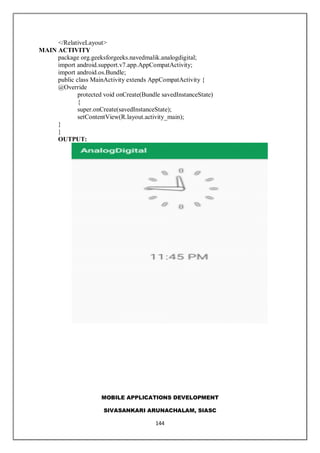
The document provides an extensive overview of mobile application development, focusing on native, web, and hybrid apps, including their characteristics, advantages, and disadvantages. It covers the development process, programming languages, frameworks, and essential tools for each app type, while explaining the differences between them. Additionally, it outlines the importance of mobile operating systems and how they influence app development strategies.


![MOBILE APPLICATIONS DEVELOPMENT
SIVASANKARI ARUNACHALAM, SIASC
64
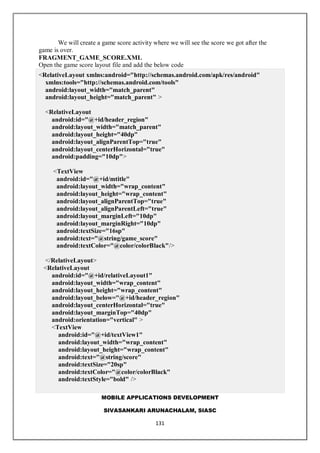
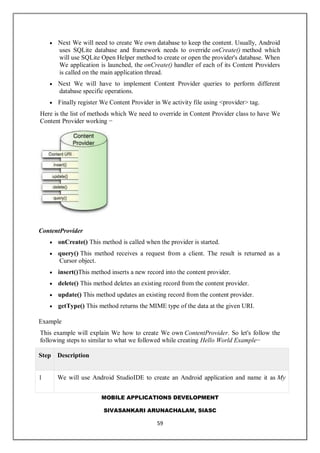
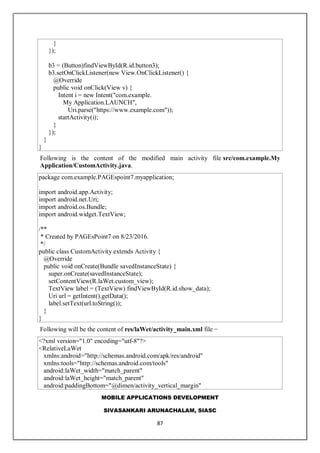
long rowID = db.insert( STUDENTS_TABLE_NAME, "", values);
/**
* If record is added successfully
*/
if (rowID > 0) {
Uri _uri = ContentUris.withAppendedId(CONTENT_URI, rowID);
getContext().getContentResolver().notifyChange(_uri, null);
return _uri;
}
throw new SQLException("Failed to add a record into " + uri);
}
@Override
public Cursor query(Uri uri, String[] projection,
String selection,String[] selectionArgs, String sortOrder) {
SQLiteQueryBuilder qb = new SQLiteQueryBuilder();
qb.setTables(STUDENTS_TABLE_NAME);
switch (uriMatcher.match(uri)) {
case STUDENTS:
qb.setProjectionMap(STUDENTS_PROJECTION_MAP);
break;
case STUDENT_ID:
qb.appendWhere( _ID + "=" + uri.getPathSegments().get(1));
break;
default:
}
if (sortOrder == null || sortOrder == ""){
/**
* By default sort on student names
*/
sortOrder = NAME;
}
Cursor c = qb.query(db, projection, selection,
selectionArgs,null, null, sortOrder);
/**
* register to watch a content URI for changes
*/
c.setNotificationUri(getContext().getContentResolver(), uri);
return c;
}](https://image.slidesharecdn.com/androidsivabookcsandca-210815154935/85/MOBILE-APPLICATIONS-DEVELOPMENT-ANDROID-BY-SIVASANKARI-64-320.jpg)
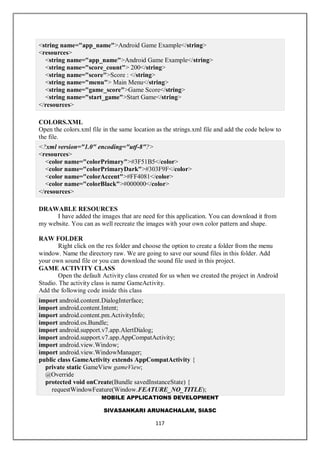
![MOBILE APPLICATIONS DEVELOPMENT
SIVASANKARI ARUNACHALAM, SIASC
65
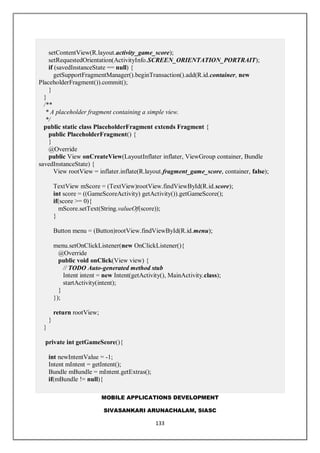
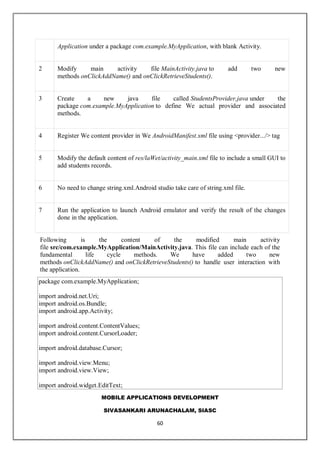
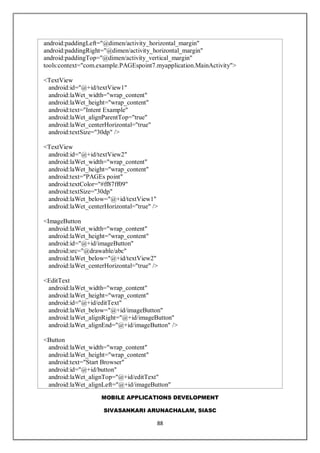
@Override
public int delete(Uri uri, String selection, String[] selectionArgs) {
int count = 0;
switch (uriMatcher.match(uri)){
case STUDENTS:
count = db.delete(STUDENTS_TABLE_NAME, selection, selectionArgs);
break;
case STUDENT_ID:
String id = uri.getPathSegments().get(1);
count = db.delete( STUDENTS_TABLE_NAME, _ID + " = " + id +
(!TextUtils.isEmpty(selection) ? "
AND (" + selection + ')' : ""), selectionArgs);
break;
default:
throw new IllegalArgumentException("Unknown URI " + uri);
}
getContext().getContentResolver().notifyChange(uri, null);
return count;
}
@Override
public int update(Uri uri, ContentValues values,
String selection, String[] selectionArgs) {
int count = 0;
switch (uriMatcher.match(uri)) {
case STUDENTS:
count = db.update(STUDENTS_TABLE_NAME, values, selection, selectionArgs);
break;
case STUDENT_ID:
count = db.update(STUDENTS_TABLE_NAME, values,
_ID + " = " + uri.getPathSegments().get(1) +
(!TextUtils.isEmpty(selection) ? "
AND (" +selection + ')' : ""), selectionArgs);
break;
default:
throw new IllegalArgumentException("Unknown URI " + uri );
}
getContext().getContentResolver().notifyChange(uri, null);
return count;
}
@Override](https://image.slidesharecdn.com/androidsivabookcsandca-210815154935/85/MOBILE-APPLICATIONS-DEVELOPMENT-ANDROID-BY-SIVASANKARI-65-320.jpg)


![MOBILE APPLICATIONS DEVELOPMENT
SIVASANKARI ARUNACHALAM, SIASC
119
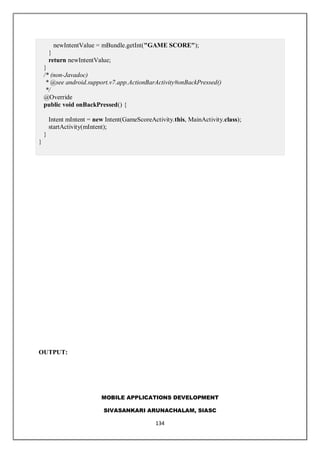
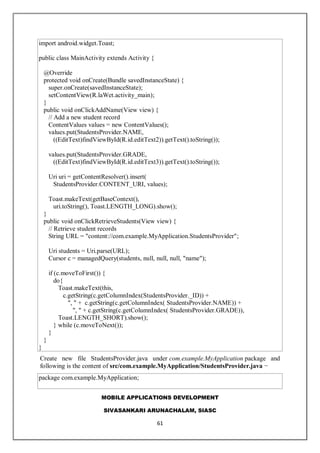
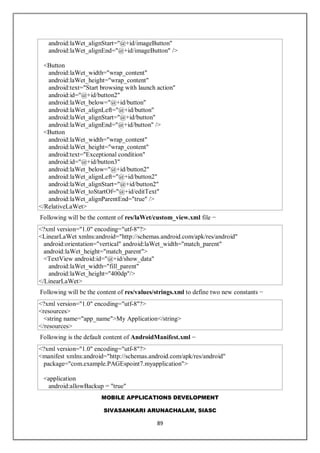
import android.content.Intent;
import android.graphics.Bitmap;
import android.graphics.BitmapFactory;
import android.graphics.Canvas;
import android.graphics.Color;
import android.graphics.Paint;
import android.graphics.Rect;
import android.media.AudioManager;
import android.media.SoundPool;
import android.util.AttributeSet;
import android.view.MotionEvent;
import android.view.View;
import java.util.ArrayList;
import java.util.Collections;
import java.util.List;
import java.util.Random;
public class GameView extends View {
private int blockWidth;
private int blockHeight;
private int mWidth;
private int mHeight;
private Paint backgroundPaint;
private Paint foreground;
@SuppressWarnings("unused")
private List<ButtonClass> myListButton;
private Bitmap skyBitmap;
private Bitmap purpleBitmap;
private Bitmap blueBitmap;
private Bitmap overlayer;
private Bitmap backgroundOverlayer;
private Bitmap sound;
private Bitmap soundmute;
private Bitmap pauseButton;
private Bitmap createBitmap;
private Context context;
private Canvas newCanvas;
private Paint paint;
private Paint mForeground;
private Bitmap sky;
private Bitmap purple;
private Bitmap blue;
@SuppressWarnings("unused")
private int[ ][ ] buttonValues;
private boolean touching = false;
@SuppressWarnings("unused")
private ArrayList<String> allTouched = new ArrayList<String>();
private int numberGenerated = -1;](https://image.slidesharecdn.com/androidsivabookcsandca-210815154935/85/MOBILE-APPLICATIONS-DEVELOPMENT-ANDROID-BY-SIVASANKARI-119-320.jpg)
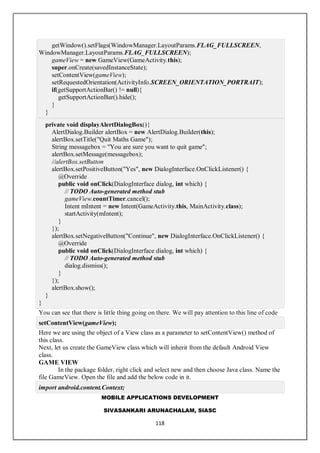
![MOBILE APPLICATIONS DEVELOPMENT
SIVASANKARI ARUNACHALAM, SIASC
120
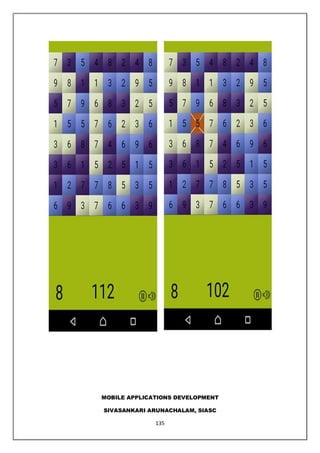
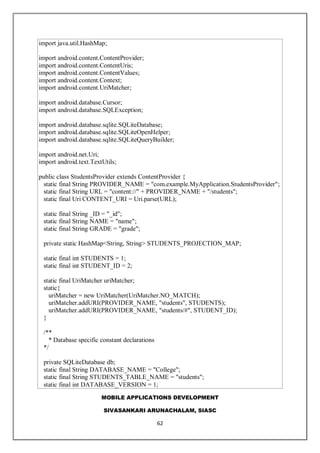
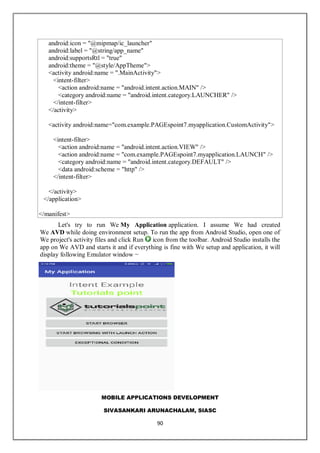
@SuppressWarnings("unused")
private ButtonClass clickObject;
@SuppressWarnings("unused")
private Bitmap[ ][ ] mBackgroundBitmap;
private ButtonClass[ ] [ ] boardGame;
private int currentGamePoint = 0;
private boolean changeQuestion;
private int startCount = 0;
private Rect headerRect;
private Rect soundRect;
private Rect questionRect;
private Paint mPaint;
private Rect pauseRect;
private SoundPool makeSound;
private int soundPoolId;
private boolean isSoundLoaded = false;
private boolean soundOn;
public MyCountDownTimer countTimer;
private final long startTime = 120 * 1000;
private final long interval = 1000;
private long gameTimer;
@SuppressWarnings("unused")
private boolean controlTimer = false;
private boolean pauseTimer = false;
private long initTimer = -1;
public GameView(Context context) {
super(context);
// TODO Auto-generated constructor stub
init(context);
}
public GameView(Context context, AttributeSet attrs) {
super(context, attrs);
init(context);
}
private void init(Context context){
setFocusable(true);
soundOn = true;
myListButton = new ArrayList<ButtonClass>();
countTimer = new MyCountDownTimer(startTime, interval);
countTimer.start();
makeSound = new SoundPool(10, AudioManager.STREAM_MUSIC, 0);
soundPoolId = makeSound.load(context, R.raw.clickone, 1);
makeSound.setOnLoadCompleteListener(new
SoundPool.OnLoadCompleteListener(){
@Override
public void onLoadComplete(SoundPool soundPool, int sampleId, int status) {
// TODO Auto-generated method stub](https://image.slidesharecdn.com/androidsivabookcsandca-210815154935/85/MOBILE-APPLICATIONS-DEVELOPMENT-ANDROID-BY-SIVASANKARI-120-320.jpg)
![MOBILE APPLICATIONS DEVELOPMENT
SIVASANKARI ARUNACHALAM, SIASC
122
canvas.drawColor(Color.parseColor("#9fb711"));
newCanvas.drawColor(Color.parseColor("#9fb711"));
foreground.setTextSize(blockHeight * 0.5f);
Paint.FontMetrics fm = foreground.getFontMetrics();
// draw the header of the game here before the main game
/*canvas.drawRect(headerRect, mPaint);
canvas.drawText("Maths Trick", 60, 30, foreground);
canvas.drawText("Score : " + String.valueOf(currentGamePoint), mWidth - 60, 30,
foreground);
newCanvas.drawRect(headerRect, paint);*/
for(int i = 0; i < 8; i++){
for(int j = 0; j < 8; j++){
ButtonClass gameSquareObject = boardGame[i][j];
if(gameSquareObject.getSelected() && !gameSquareObject.getAnswer()){
newCanvas.drawBitmap(overlayer, null,
gameSquareObject.getCoordinate(), paint);
}
else if(gameSquareObject.getSelected() && gameSquareObject.getAnswer()){
newCanvas.drawBitmap(backgroundOverlayer, null,
gameSquareObject.getCoordinate(), paint);
}
else{
newCanvas.drawBitmap(gameSquareObject.getButtonBitmap(), null,
gameSquareObject.getCoordinate(), paint);
}
}
}
//Draw Button fonts and values of the bitmap
int x = blockHeight / 2;
float y = blockHeight / 2 - (fm.ascent + fm.descent) / 2;
for(int i = 0; i < 8; i++){
for(int j = 0; j < 8; j++){
ButtonClass gameSquareObject = boardGame[i][j];
if(gameSquareObject.getAnswer()){
//newCanvas.drawText(String.valueOf(gameSquareObject.getWrittenNumber()),
i * blockHeight + x, j * blockHeight + y, foreground);
}else{
newCanvas.drawText(String.valueOf(gameSquareObject.getWrittenNumber()),
i * blockHeight + x, j * blockHeight + y, foreground);
}
}
}
newCanvas.drawLine(0, newCanvas.getHeight(), mWidth, newCanvas.getHeight(),
mForeground);
canvas.drawBitmap(createBitmap, 0, 50, null);
//check if a number is click and check if a result has been acheived
foreground.setTextSize(blockHeight);](https://image.slidesharecdn.com/androidsivabookcsandca-210815154935/85/MOBILE-APPLICATIONS-DEVELOPMENT-ANDROID-BY-SIVASANKARI-122-320.jpg)
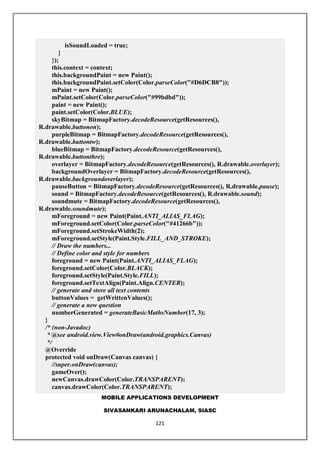
![MOBILE APPLICATIONS DEVELOPMENT
SIVASANKARI ARUNACHALAM, SIASC
123
if(startCount == 0){
String numberString = String.valueOf(numberGenerated);
canvas.drawRect(questionRect, backgroundPaint);
int xs = (30 + questionRect.left + questionRect.width()) / 2;
int ys = questionRect.top + 15 + (questionRect.height() / 2) ;
canvas.drawText(numberString, xs, ys, foreground);
}
if(soundOn){
canvas.drawBitmap(sound, null, soundRect, backgroundPaint);
}else{
canvas.drawBitmap(soundmute, null, soundRect, backgroundPaint);
}
canvas.drawBitmap(pauseButton, null, pauseRect, backgroundPaint);
canvas.drawText(String.valueOf(gameTimer), mWidth / 2, mHeight - 50,
foreground);
if(touching){
}
else{
System.out.println("It is not touching");
if(changeQuestion){
//display the question to be asked
String numberString = String.valueOf(numberGenerated);
canvas.drawRect(questionRect, backgroundPaint);
int xs = ((questionRect.left + questionRect.width()) / 2);
int ys = questionRect.top + 15 + (questionRect.height() / 2) ;
foreground.setTextSize(blockHeight);
canvas.drawText(numberString, xs, ys, foreground);
}
}
}
// get all the bitmap for each object
private Bitmap[][] returnDrawBitmap(){
Bitmap[] buttonBitmap = new Bitmap[3];
buttonBitmap[0] = sky;
buttonBitmap[1] = purple;
buttonBitmap[2] = blue;
Bitmap[][] allTiless = new Bitmap[8][8];
for(int i = 0; i < allTiless.length; i++){
for(int j = 0; j < allTiless.length; j++){
int index = generateBasicMathsNumber(2, 0);
Bitmap mBitmap = buttonBitmap[index];
allTiless[i][j] = mBitmap;
}
}
return allTiless;
}
//get all the rectangle in the object class](https://image.slidesharecdn.com/androidsivabookcsandca-210815154935/85/MOBILE-APPLICATIONS-DEVELOPMENT-ANDROID-BY-SIVASANKARI-123-320.jpg)
![MOBILE APPLICATIONS DEVELOPMENT
SIVASANKARI ARUNACHALAM, SIASC
124
private Rect[][] returnRect(){
Rect[][] allRect = new Rect[8][8];
for(int i = 0; i < 8; i++){
for(int j = 0; j < 8; j++){
allRect[i][j] = new Rect(i * blockWidth - 1, j * blockWidth - 1, (1 + i) *
blockWidth, (1 + j) * blockWidth);
}
}
return allRect;
}
// Get all the written text in the button
private int[][] getWrittenValues(){
int[][] textValues = new int[8][8];
for(int i = 0; i < 8; i++){
for(int j = 0; j < 8; j++){
int newValue = generateBasicMathsNumber(9, 1);
textValues[i][j] = newValue;
}
}
return textValues;
}
// Get all selection
private boolean[][] getSelecedButtons(){
boolean[][] textValues = new boolean[8][8];
for(int i = 0; i < 8; i++){
for(int j = 0; j < 8; j++){
textValues[i][j] = false;
}
}
return textValues;
}
// Get all answer
private boolean[][] getAnswers(){
boolean[][] textValues = new boolean[8][8];
for(int i = 0; i < 8; i++){
for(int j = 0; j < 8; j++){
textValues[i][j] = false;
}
}
return textValues;
}
private ButtonClass[][] mathBoardValues(){
Bitmap[][] buttonImage = returnDrawBitmap();
int[][] text = getWrittenValues();
Rect[][] mRect = returnRect();
boolean[][] selected = getSelecedButtons();
boolean[][] answered = getAnswers();](https://image.slidesharecdn.com/androidsivabookcsandca-210815154935/85/MOBILE-APPLICATIONS-DEVELOPMENT-ANDROID-BY-SIVASANKARI-124-320.jpg)
![MOBILE APPLICATIONS DEVELOPMENT
SIVASANKARI ARUNACHALAM, SIASC
125
ButtonClass[][] mGameBoard = new ButtonClass[8][8];
for(int i = 0; i < 8; i++){
for(int j = 0; j < 8; j++){
Bitmap bObject = buttonImage[i][j];
int mText = text[i][j];
Rect rect = mRect[i][j];
boolean select = selected[i][j];
boolean answer = answered[i][j];
ButtonClass mButtonClass = new ButtonClass(bObject, mText, rect, select,
answer);
mGameBoard[i][j] = mButtonClass;
}
}
return mGameBoard;
}
private static int generateBasicMathsNumber(int max, int min){
Random r = new Random();
int i = r.nextInt(max - min + 1) + min;
return i;
}
/* (non-Javadoc)
* @see android.view.View#onSizeChanged(int, int, int, int)
*/
@Override
protected void onSizeChanged(int w, int h, int oldw, int oldh) {
// TODO Auto-generated method stub
blockWidth = (int) (w / 8f);
blockHeight = blockWidth;
mWidth = w;
mHeight = h;
sky = Bitmap.createScaledBitmap(skyBitmap, blockWidth, blockWidth, false);
purple = Bitmap.createScaledBitmap(purpleBitmap, blockWidth, blockWidth,
false);
blue = Bitmap.createScaledBitmap(blueBitmap, blockWidth, blockWidth, false);
overlayer = Bitmap.createScaledBitmap(overlayer, blockWidth, blockWidth, false);
backgroundOverlayer = Bitmap.createScaledBitmap(backgroundOverlayer,
blockWidth, blockWidth, false);
sound = Bitmap.createScaledBitmap(sound, 50, 40, false);
soundmute = Bitmap.createScaledBitmap(soundmute, 50, 40, false);
pauseButton = Bitmap.createScaledBitmap(pauseButton, 50, 50, false);
mBackgroundBitmap = returnDrawBitmap();
boardGame = mathBoardValues();
createBitmap = Bitmap.createBitmap(mWidth, blockWidth * 8,
Bitmap.Config.ARGB_8888);
newCanvas = new Canvas(createBitmap);
headerRect = new Rect(0, 0, mWidth, 80);
soundRect = new Rect(w - 60, h - 80, w - 10, h - 40);](https://image.slidesharecdn.com/androidsivabookcsandca-210815154935/85/MOBILE-APPLICATIONS-DEVELOPMENT-ANDROID-BY-SIVASANKARI-125-320.jpg)

![MOBILE APPLICATIONS DEVELOPMENT
SIVASANKARI ARUNACHALAM, SIASC
127
*/
@Override
public boolean onTouchEvent(MotionEvent event) {
// TODO Auto-generated method stub
final int action = event.getAction();
int x = (int)event.getX();
int y = (int)event.getY();
turnSoundOffOn(x, y);
System.out.println("The coordinates are " + "Y " + y + " x " + x);
if (action==MotionEvent.ACTION_DOWN) {
checkCollision(x, y);
checkSelectedAnswers();
togglePause(x, y);
touching = true;
// check if there is collision
}
if(action == MotionEvent.ACTION_UP){
touching = false;
}
invalidate();
return true;
}
private void checkCollision(int x, int y){
for(int i = 0; i < 8; i++){
for(int j = 0; j < 8; j++){
ButtonClass gameSquareObject = boardGame[i][j];
if(gameSquareObject.getCoordinate().contains(x, y - 50)){
//System.out.println("Pointers " + y + " " + x);
if(gameSquareObject.getSelected() && gameSquareObject.getAnswer()){
return;
}
if(gameSquareObject.getSelected() && !gameSquareObject.getAnswer()){
gameSquareObject.setSelected(false);
}else{
gameSquareObject.setSelected(true);
}
}
}
}
}
private void checkSelectedAnswers(){
int mAnswers = 0;
for(int i = 0; i < 8; i++){
for(int j = 0; j < 8; j++){
ButtonClass gameSquareObject = boardGame[i][j];
if(gameSquareObject.getSelected() && !gameSquareObject.getAnswer()){
mAnswers += gameSquareObject.getWrittenNumber();](https://image.slidesharecdn.com/androidsivabookcsandca-210815154935/85/MOBILE-APPLICATIONS-DEVELOPMENT-ANDROID-BY-SIVASANKARI-127-320.jpg)
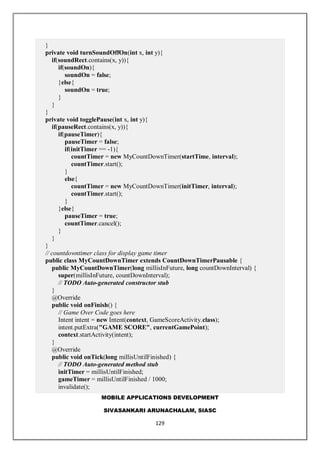
![MOBILE APPLICATIONS DEVELOPMENT
SIVASANKARI ARUNACHALAM, SIASC
128
}
}
}
if(mAnswers > numberGenerated){
// reset all the selected columns
resetAllSelectedAnswers();
}
if(mAnswers == numberGenerated){
//Assign a game point
currentGamePoint += 100;
playSound();
// delete all the current selected buttons
System.out.println("Remaining values " + checkNumberofButtonRemaining());
if(assignFinalNumber()){
numberGenerated = checkNumberofButtonRemaining();
}else{
numberGenerated = questionNumberGeneration();
}
startCount = 1;
markButtonForDeleted();
changeQuestion = true;
}
}
private void resetAllSelectedAnswers(){
for(int i = 0; i < 8; i++){
for(int j = 0; j < 8; j++){
ButtonClass gameSquareObject = boardGame[i][j];
if(gameSquareObject.getSelected() && !gameSquareObject.getAnswer()){
gameSquareObject.setSelected(false);
}
}
}
}
private void markButtonForDeleted(){
for(int i = 0; i < 8; i++){
for(int j = 0; j < 8; j++){
ButtonClass gameSquareObject = boardGame[i][j];
if(gameSquareObject.getSelected()){
gameSquareObject.setAnswer(true);
}
}
}
}
private void playSound(){
if(isSoundLoaded && soundOn){
makeSound.play(soundPoolId, 1, 1, 0, 0, 1);
}](https://image.slidesharecdn.com/androidsivabookcsandca-210815154935/85/MOBILE-APPLICATIONS-DEVELOPMENT-ANDROID-BY-SIVASANKARI-128-320.jpg)
![MOBILE APPLICATIONS DEVELOPMENT
SIVASANKARI ARUNACHALAM, SIASC
130
}
}
private int checkNumberofButtonRemaining(){
int numRemaining = 0;
for(int i = 0; i < 8; i++){
for(int j = 0; j < 8; j++){
ButtonClass gameSquareObject = boardGame[i][j];
if(!gameSquareObject.getSelected() && !gameSquareObject.getAnswer()){
numRemaining += gameSquareObject.getWrittenNumber();
}
}
}
return numRemaining;
}
private int questionNumberGeneration(){
int returnValue = 0;
List<String> data = new ArrayList<String>();
for(int i = 0; i < 8; i++){
for(int j = 0; j < 8; j++){
ButtonClass gameSquareObject = boardGame[i][j];
if(!gameSquareObject.getSelected() && !gameSquareObject.getAnswer()){
String values = String.valueOf(gameSquareObject.getWrittenNumber());
data.add(values);
}
}
}
Collections.shuffle(data);
returnValue = Integer.parseInt(data.get(0)) + Integer.parseInt(data.get(0));
return returnValue;
}
private boolean assignFinalNumber(){
int numLeft = checkNumberofButtonRemaining();
if(numLeft <= 10){
return true;
}
return false;
}
private void gameOver(){
if(numberGenerated == 0){
Intent intent = new Intent(context, GameScoreActivity.class);
intent.putExtra("GAME SCORE", currentGamePoint);
context.startActivity(intent);
}
}
//End of the game class
}](https://image.slidesharecdn.com/androidsivabookcsandca-210815154935/85/MOBILE-APPLICATIONS-DEVELOPMENT-ANDROID-BY-SIVASANKARI-130-320.jpg)