This document serves as a guide for using Microsoft Project 2016, covering the user interface, initial settings, various operations, and project management techniques. Key topics include creating and formatting tasks, finding the critical path, managing calendars, and assigning resources. Detailed instructions for each function are provided to facilitate effective project planning and scheduling.


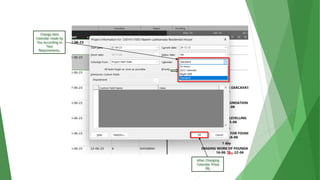
![Yearly Exception
• Let us take example of 15th August That Occurs as Holiday
in Calendar Every Year.
• So You don’t need to add exception every year manually.
• To do so 1st Create the Exception of Independence Day for
Current Year & Double Click on It.
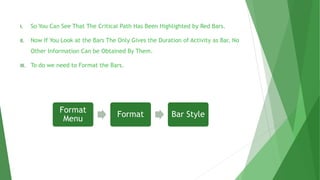
Project Menu
Change
Working Time
Select The
Calendar
Exception
[Details]](https://image.slidesharecdn.com/masteringprojectplanningwithmicrosoftproject2016-240407102754-00ccfc3f/85/Mastering-Project-Planning-with-Microsoft-Project-2016-pptx-36-320.jpg)
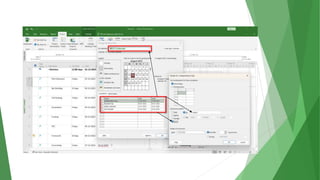
![Weekly Exception
• Let us Take any Company that has alternate Saturday or
Sunday holiday.
• To do So Create an Exception..
Project
Menu
Change
Working
Time
Select The
Calendar
Work Weeks
[Details]](https://image.slidesharecdn.com/masteringprojectplanningwithmicrosoftproject2016-240407102754-00ccfc3f/85/Mastering-Project-Planning-with-Microsoft-Project-2016-pptx-38-320.jpg)
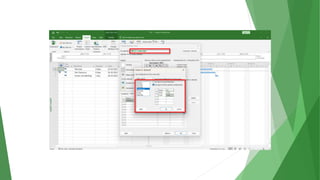
![Monthly Exception
• Let us Take any Company that has Saturday or Sunday
holiday.
• To do So Create an Exception..
Project
Menu
Change
Working
Time
Select The
Calendar
Exception
[Details]](https://image.slidesharecdn.com/masteringprojectplanningwithmicrosoftproject2016-240407102754-00ccfc3f/85/Mastering-Project-Planning-with-Microsoft-Project-2016-pptx-40-320.jpg)
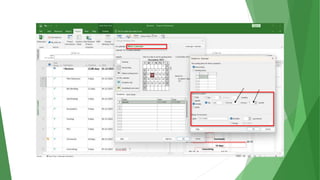
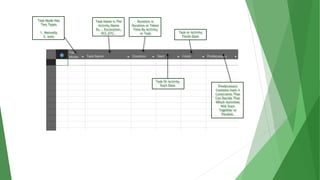
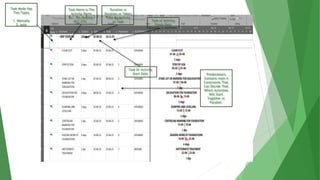
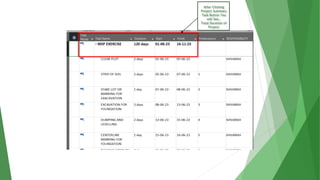
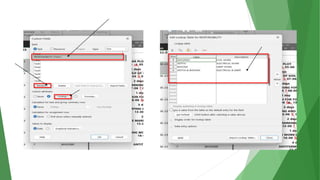
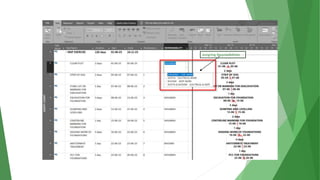
![New Columns (Responsibility)
• Let Us Take You want to Add Responsible Person For Any
Activity or Task You Have to Add New Column for it..
• To Do So
Add New Column
[Right Click]
Column Fields
Rename TEXT 1
[Responsibilities]
Custom
Attributes
Look Up Add Value
Add Description /
Name](https://image.slidesharecdn.com/masteringprojectplanningwithmicrosoftproject2016-240407102754-00ccfc3f/85/Mastering-Project-Planning-with-Microsoft-Project-2016-pptx-43-320.jpg)
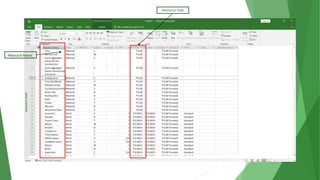
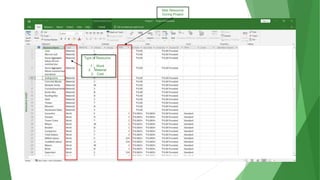
![Resource Sheet
• In Resource Sheet We Add All Resources Who’s Needed
During an Overall Project.
• To Do So
Task Menu
Gantt Bar
Chart
[Dropdown]
Resource
Sheet](https://image.slidesharecdn.com/masteringprojectplanningwithmicrosoftproject2016-240407102754-00ccfc3f/85/Mastering-Project-Planning-with-Microsoft-Project-2016-pptx-47-320.jpg)