
More Related Content
What's hot
What's hot (20)
Viewers also liked
Viewers also liked (16)
Similar to Air vision2 user_guide
Similar to Air vision2 user_guide (20)
Recently uploaded
Recently uploaded (20)
Air vision2 user_guide
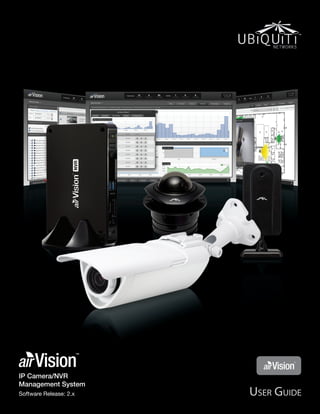
- 1. IP Camera/NVR Management System Software Release: 2.x
- 2. i Table of Contents Ubiquiti Networks, Inc. airVision™ User Guide Table of Contents Chapter 1: Installation. . . . . . . . . . . . . . . . . . . . . . . . . . . . . . . . . . . . . . . . . . . . . . 1 Overview. . . . . . . . . . . . . . . . . . . . . . . . . . . . . . . . . . . . . . . . . . . . . . . . . . . . . . . . . . . . . . . . . . . . . . . . . 1 System Requirements. . . . . . . . . . . . . . . . . . . . . . . . . . . . . . . . . . . . . . . . . . . . . . . . . . . . . . . . . . . . 1 Hardware Installation. . . . . . . . . . . . . . . . . . . . . . . . . . . . . . . . . . . . . . . . . . . . . . . . . . . . . . . . . . . . . 1 Software Installation. . . . . . . . . . . . . . . . . . . . . . . . . . . . . . . . . . . . . . . . . . . . . . . . . . . . . . . . . . . . . . 1 Chapter 2: Using the airVision Software. . . . . . . . . . . . . . . . . . . . . . . . . . . . . 4 Interface Tabs. . . . . . . . . . . . . . . . . . . . . . . . . . . . . . . . . . . . . . . . . . . . . . . . . . . . . . . . . . . . . . . . . . . . 4 Common Interface Options. . . . . . . . . . . . . . . . . . . . . . . . . . . . . . . . . . . . . . . . . . . . . . . . . . . . . . . 4 Chapter 3: Map Tab. . . . . . . . . . . . . . . . . . . . . . . . . . . . . . . . . . . . . . . . . . . . . . . . . 9 Adding a Map. . . . . . . . . . . . . . . . . . . . . . . . . . . . . . . . . . . . . . . . . . . . . . . . . . . . . . . . . . . . . . . . . . . . 9 Chapter 4: Live View Tab. . . . . . . . . . . . . . . . . . . . . . . . . . . . . . . . . . . . . . . . . . . 14 Views. . . . . . . . . . . . . . . . . . . . . . . . . . . . . . . . . . . . . . . . . . . . . . . . . . . . . . . . . . . . . . . . . . . . . . . . . . . 14 View Playlists. . . . . . . . . . . . . . . . . . . . . . . . . . . . . . . . . . . . . . . . . . . . . . . . . . . . . . . . . . . . . . . . . . . . 16 Cameras . . . . . . . . . . . . . . . . . . . . . . . . . . . . . . . . . . . . . . . . . . . . . . . . . . . . . . . . . . . . . . . . . . . . . . . . 18 Chapter 5: Devices Tab. . . . . . . . . . . . . . . . . . . . . . . . . . . . . . . . . . . . . . . . . . . . 19 Cameras . . . . . . . . . . . . . . . . . . . . . . . . . . . . . . . . . . . . . . . . . . . . . . . . . . . . . . . . . . . . . . . . . . . . . . . . 19 NVRs. . . . . . . . . . . . . . . . . . . . . . . . . . . . . . . . . . . . . . . . . . . . . . . . . . . . . . . . . . . . . . . . . . . . . . . . . . . . 21 Chapter 6: Statistics Tab. . . . . . . . . . . . . . . . . . . . . . . . . . . . . . . . . . . . . . . . . . . 28 Motion Distribution. . . . . . . . . . . . . . . . . . . . . . . . . . . . . . . . . . . . . . . . . . . . . . . . . . . . . . . . . . . . . 28 NVR Statistics. . . . . . . . . . . . . . . . . . . . . . . . . . . . . . . . . . . . . . . . . . . . . . . . . . . . . . . . . . . . . . . . . . . . 29 Chapter 7: Recordings Tab. . . . . . . . . . . . . . . . . . . . . . . . . . . . . . . . . . . . . . . . . 30 Date Range. . . . . . . . . . . . . . . . . . . . . . . . . . . . . . . . . . . . . . . . . . . . . . . . . . . . . . . . . . . . . . . . . . . . . .30 Recording Filters . . . . . . . . . . . . . . . . . . . . . . . . . . . . . . . . . . . . . . . . . . . . . . . . . . . . . . . . . . . . . . . . 30 Device Filters. . . . . . . . . . . . . . . . . . . . . . . . . . . . . . . . . . . . . . . . . . . . . . . . . . . . . . . . . . . . . . . . . . . . 30 Recordings View . . . . . . . . . . . . . . . . . . . . . . . . . . . . . . . . . . . . . . . . . . . . . . . . . . . . . . . . . . . . . . . . 31 Chapter 8: Analytics Tab. . . . . . . . . . . . . . . . . . . . . . . . . . . . . . . . . . . . . . . . . . . 33 Creating a New Zone. . . . . . . . . . . . . . . . . . . . . . . . . . . . . . . . . . . . . . . . . . . . . . . . . . . . . . . . . . . . 33 Editing a Zone. . . . . . . . . . . . . . . . . . . . . . . . . . . . . . . . . . . . . . . . . . . . . . . . . . . . . . . . . . . . . . . . . . . 35 Deleting a Zone. . . . . . . . . . . . . . . . . . . . . . . . . . . . . . . . . . . . . . . . . . . . . . . . . . . . . . . . . . . . . . . . . 35 Appendix A: Mobile Support. . . . . . . . . . . . . . . . . . . . . . . . . . . . . . . . . . . . . . 36 Mobile Site. . . . . . . . . . . . . . . . . . . . . . . . . . . . . . . . . . . . . . . . . . . . . . . . . . . . . . . . . . . . . . . . . . . . . . 36 Appendix B: Contact Information. . . . . . . . . . . . . . . . . . . . . . . . . . . . . . . . . . 39 Ubiquiti Networks Support. . . . . . . . . . . . . . . . . . . . . . . . . . . . . . . . . . . . . . . . . . . . . . . . . . . . . . 39
- 3. 1Ubiquiti Networks, Inc. Chapter 1: InstallationairVision™ User Guide Chapter 1: Installation Overview airVision™ is a powerful, flexible, integrated IP video management platform for video surveillance designed to work with Ubiquiti’s airCam™ product line. airVision has an intuitive, configurable, and feature-packed user interface with advanced features such as motion detection, auto‑discovery, user-level security, storage management, reporting, and mobile device support. airVision is pre-installed on the airVision NVR. This chapter provides instructions for users that wish to install the airVision software on a computer. System Requirements • Intel Atom D2500 CPU, 2 GB RAM, 100 GB HDD • Microsoft Windows 7+ 64-bit or Ubuntu 12.04+ / Debian 6+ 64-bit • Java Runtime Environment 1.6+ • FlashPlayer 11 • Web Browser: Mozilla Firefox, Google Chrome, Apple Safari, or Microsoft Internet Explorer 10 (or above) Hardware Installation Ensure your cameras are running the latest version of the camera firmware. The latest firmware can be found at downloads.ubnt.com/airvision Follow the directions in the Quick Start Guide that accompanied your airCam to install your camera. Software Installation Download the latest version of the airVision software at downloads.ubnt.com/airvision 1. Launch the executable (.exe) file. You may be asked to allow the program to make changes to this computer. If so, you will need to click Yes. 2. The airVision NVR Setup Wizard will start. Click Next. 3. To continue, you must click I agree to accept the license agreement. 4. The airVision Setup Wizard will start. Click Next. 5. If your computer doesn’t have Java 1.6 or above installed, you will be prompted to install it. Click Install to continue. Click Close when it is finished installing. 6. Be sure that Start AirVision 2 after installation is selected and click Finish. 7. The airVision software will start. Once airVision has started, click the airVision tray icon and select Open in Browser. airVision tray icon
- 4. 2Ubiquiti Networks, Inc. Chapter 1: InstallationairVision™ User Guide Launching the airVision Software If you selected Start AirVision after installation when you installed the software, airVision will launch automatically. When you need to launch the software again or if you didn’t select the option, you can launch airVision via the following methods. 1. Launch the airVision software using one of the following methods: • Start > Programs • airVision desktop icon. 2. The airVision software will start. Once airVision has started, click the airVision tray icon and select Open in Browser. airVision tray icon Configuring the airVision Software 1. You may receive a security certificate warning, click Proceed anyway. 2. The airVision License Agreement will appear. To begin you must accept the terms and click I accept. 3. The airVision Setup Wizard will appear: a. Enter a system name for the NVR. b. Select your preferred language. c. Specify your time zone. d. Click Next. 4. Enter an administrator email address, name, and password to use when accessing the airVision Controller Interface. Confirm your password. Click Next.
- 5. 3Ubiquiti Networks, Inc. Chapter 1: InstallationairVision™ User Guide 5. Choose one of the following: • To set up this airVision NVR as a new airVision Controller, select Create a new Controller. Click Next. • To link this airVision NVR to an existing airVision Controller, click Detect Controllers and select the Controller from the drop‑down list. Click Next. 6. Select your desired management settings. To enable automatic airCam management, enter the airCam login username and password. Click Next. 7. Review your settings. Click Finish to save your settings, or click Back to make changes. When finished, the airVision Controller Interface will launch. 8. A login screen will appear for the airVision Controller Interface. Enter the email address and password that you created, and click Login. Proceed to the next chapter for information on using the airVision software.
- 6. 4 Chapter 2: Using the airVision Software Ubiquiti Networks, Inc. airVision™ User Guide Chapter 2: Using the airVision Software The airVision software has a browser-based interface for easy configuration and management. To access the interface, perform the following steps: 1. Launch the airVision application if it hasn’t already been started. Windows users, go to: Start > All Programs > Ubiquiti airVision2 > airVision2 2. The airVision software will start. Once airVision has started, click the airVision tray icon and select Open in Browser. 3. The login screen will appear. Enter the email address and password in the appropriate fields and click Login. Interface Tabs The airVision software consists of six primary tabs. This User Guide covers each tab with a chapter. For details on a specific tab, refer to the appropriate chapter. • “Map Tab” on page 9 • “Live View Tab” on page 14 • “Devices Tab” on page 19 • “Statistics Tab” on page 28 • “Recordings Tab” on page 30 • “Analytics Tab” on page 33 Common Interface Options The common interface options are accessible from all tabs in the airVision interface. Cameras • connected Drop-down clickable list of all of the cameras that are online. • disconnected Displays a list of cameras that were previously online but are no longer accessible. • unmanaged Drop-down clickable list of all of the cameras that are not yet managed but are available for management. NVRs • connected Drop-down clickable list of all of the NVRs that are online. • disconnected Displays a list of NVRs that were previously online but are no longer accessible. • unmanaged Drop-down clickable list of all of the NVRs that are not yet managed but are available for management. Time/Date The current time and date are displayed on the screen. Welcome <username> The welcome on the left has a drop-down menu that allows you to select or create camera profiles or log out. Camera Profiles Camera profiles can be created to easily save and select different camera recording configurations.
- 7. 5 Chapter 2: Using the airVision Software Ubiquiti Networks, Inc. airVision™ User Guide Recent Motion Recordings Displays a list of recent motion recordings, including the date and time the recording occurred and camera details. Clear Clears the list of Recent Recordings. This doesn’t delete the actual recordings; it just removes the entries from this list. Search Allows you to search for specific text. Simply begin typing; there is no need to press enter. The results are filtered in real time as soon as you type two or more characters. Time Displays the date and time that the recording took place. The year/month/day and hour:minute:seconds are displayed. Type The type of recording. Info Displays the zone information. Camera Displays the name of the camera that captured the recording. It is a clickable link that will open the Camera Details window. For details on the Camera Details window, refer to “Camera Details Window” on page 21. Archived Recordings Search Allows you to search for specific text. Simply begin typing; there is no need to press enter. The results are filtered in real time as soon as you type two or more characters. Time Displays the date and time that the recording took place. The year/month/day and hour:minute:seconds are displayed. Type The type of recording. Info Displays the zone information. Camera Displays the name of the camera that captured the event. It is a clickable link that will open the Camera Details window. For details on the Camera Details window, refer to “Camera Details Window” on page 21. Download Click the Download button to save a .MP4 video file of the selected clip to your computer. Archive If you wish to remove a recording from the list of archived recordings, simply click the Archive button on the right and it will be removed from the list. This doesn’t delete the actual recording. Delete Click Delete to immediately delete a recording permanently. Alerts Today/All Pending/Archived Displays a list of Alerts. Toggle between alerts from Today, All Pending, and Archived alerts. Time Occurred Displays the date and time that the event took place. The year/month/day and hour:minute:seconds are displayed. Message Details of the alert are listed here. Some messages contain clickable links, which are underlined and gray. These links will open the device details window. Admin Displays the name of the associated admin (if applicable). Actions Allows you to archive alert messages.
- 8. 6 Chapter 2: Using the airVision Software Ubiquiti Networks, Inc. airVision™ User Guide Settings My Account Settings My Account Settings Full Name The name associated with the currently logged in account. Email Address The email address used to log in to the current session. Password Enter the password to use for this account. Confirm Confirm the password. Language Select your language preference. Alert Notification Click to include this account when email alert notifications are sent out. API Access Enable API Access Check to allow access to airVision from external applications. User Accounts (Only visible to admin) Users Full Name The full name of the user. Email Address The email address used to log in. Password The password to use for this account. Confirm Password Confirmation of the password. User Group Select an existing user group, create a new user group, or select custom access to assign camera access, API access, and choose whether to allow alert notifications. Group Create groups to give custom access rights to multiple users. Create User Group Group Name Enter a name for the group. External API Access When this is enabled, users in this group will be allowed to enable or disable external API access. Alert Notification When enabled, users in this group have the ability to receive alert notifications via email. Alert notifications still need to be configured. This just grants them the rights to receive them. Refer to “Alerts” on page 22 for details on configuring alerts.
- 9. 7 Chapter 2: Using the airVision Software Ubiquiti Networks, Inc. airVision™ User Guide Camera Access Visible When this is enabled, the camera itself is visible to the user group. If only this item is enabled, users cannot configure the camera, view the live feed, or view or edit recordings. Configurable When enabled, the camera settings can be configured by users in the group. View Feed When enabled, the live feed is accessible by users in the group. View Recordings Grants access to view recordings. Users can play the videos in airVision or download MP4 clips. Edit Recordings When enabled, users of this group can edit recordings, allowing archiving and deletion. NVR Access Visible When this is enabled, the NVR itself is visible to the user group. Configurable When enabled, the NVR settings can be configured by users in the group. System Settings System Configuration Public Host Name / IP Public Host / IP information for the airVision system. Public Port Public port for use with the airVision system. Time Zone The time zone the airVision Controller is located in. Check for Updates airVision automatically checks for system updates but doesn’t install them unless requested. If you do not want airVision to check for updates, select this option. Performance Statistics Gathering airVision gathers performance statistics and provides them to Ubiquiti for reference in an effort to continuously improve performance. If you want to opt out of statistics gathering, click this option. Email Server Configuration Account Email Address Enter the account information for the email address being used to send the alert. Host Name Enter the host information (typically the SMTP settings). Port Enter the port number, which is usually 465. Use SSL If your email provider requires and SSL‑encrypted connection, click this. Use Authentication If your email provider requires authentication, click this and enter the username and password associated with the account email address. Username Enter the username associated with the email address. Password Enter the password associated with the email address. Send Test Email Click send to send a test email once all of your email settings are configured. Alert Configuration Enable Connection Alerts Whenever a device is connected or disconnected, an email alert will be sent out if this is enabled. Enable Motion Alerts When a motion event occurs, an email will be sent out if this option is enabled. Motion Alert Cool Down Defines the amount of time (in seconds) to wait after a motion event before sending out another motion event email alert. Auto Management Configuration Auto Management When enabled, newly discovered cameras will automatically be managed by airVision. airCam Username Enter the airCam username. airCam Password Enter the airCam password. Motion Record When enabled, cameras that are automatically managed will have motion recording enabled. Full Time Record When enabled, cameras that are automatically managed will have full-time recording enabled. Firmware Updates Check to enable automatic airCam firmware updates.
- 10. 8 Chapter 2: Using the airVision Software Ubiquiti Networks, Inc. airVision™ User Guide System Profiles Allows you to define and save camera profiles. You can create a new profile by adding cameras manually or select the camera information from the current camera profile. Add New Profile Name Enter a name for the camera profile. Camera Profiles add camera Select add camera to select which cameras you want to include in the profile. from current profile This will duplicate all of the current camera settings. For each camera you can select motion record, full-time record, and a recording schedule. Motion and full-time recording can both be enabled on one camera as well. Once you’ve finished all of your camera profile settings, click Save. Admin Server Information Version The airVision software version is displayed here. If there is an update, airVision will automatically download it and display it here (unless check for updates is disabled). Support Info Download Support Info Select this option to download a file to your computer with information about your configuration that can be emailed to our support team. Logs Error Log Displays a log of all error messages. Connection Log Displays a log of all connections and disconnections. Recording Log Displays a log of all recording activity. Purge Log Displays a log of all purge activity.
- 11. 9 Chapter 3: Map Tab Ubiquiti Networks, Inc. airVision™ User Guide Chapter 3: Map Tab The airVision software allows you to upload map images of your location or use Google Maps™ for a visual representation of your camera layout. When you initially launch airVision, a default sample map is displayed. Adding a Map You can add an image you’ve created as a map image or use Google Maps to generate an image for use as a background. Image Maps To add a custom map, you must first create the image using an illustration, image editing, or blueprint application that exports .jpg, .gif, or .png file formats. Once you’ve created the map, you can upload it to the airVision software by performing the following steps: 1. Click the Add button.
- 12. 10 Chapter 3: Map Tab Ubiquiti Networks, Inc. airVision™ User Guide 2. Enter a map name in the Label field and click Upload an Image. 3. Select the file to use as a map (valid file formats are .jpg, .gif, and .png). Click Open. 4. Click Add Map. 5. You can adjust the zoom using the slider on the right. 6. Drag the Camera icon(s) from the Cameras list on the left to the appropriate location(s) on the map. The camera will appear in the area that you place it. For additional information on the camera icon options, refer to “Camera Icons” on page 12.
- 13. 11 Chapter 3: Map Tab Ubiquiti Networks, Inc. airVision™ User Guide Google Maps To create a custom map using Google Maps, perform the following steps: 1. Click the Add button. 2. Enter a map name in the Label field and click Use Google Maps. Click Continue. 3. The default Google Map location will appear. Type in the desired address and click Set Location. 4. Drag the zoom slider on the left to full magnification by sliding it all the way up to the plus (+) sign. Click the Add Map button. 5. You can adjust the zoom using the slider on the right. 6. Drag the Camera icon(s) from the Cameras list on the left to the appropriate location(s) on the map.
- 14. 12 Chapter 3: Map Tab Ubiquiti Networks, Inc. airVision™ User Guide Camera Icons airCam airCam Dome airCam Mini Camera Camera icons can be placed on the map to show the location of the camera. They lock into the position they are placed. To move the camera position on the map, click and hold the camera icon until the arrows appear and then drag the camera to another location on the map. airCam Camera Click the Camera icon to reveal additional options. Click a blank area of the map to hide the additional options. Adjustable Camera Field icon Configuration icon Remove icon Live Feed icon airCam Camera Adjustable Camera Field The field of view for the camera is predefined based on the camera type. Just adjust the direction and distance. The field of view changes to red when motion is detected and transitions in various shades every 10 seconds until returning to green after a minute. Motion 10 Seconds 20 Seconds 30 Seconds 40 Seconds No Motion airCam Camera
- 15. 13 Chapter 3: Map Tab Ubiquiti Networks, Inc. airVision™ User Guide Configuration Brings up the Configuration window. There are five main tabs to select from in the Configuration window: Details, Statistics, Recordings, Alerts, and Configuration. The Configuration tab is displayed initially. • Details Displays the IP Address, Model, Firmware, Uptime, Assigned NVR, NVR IP, and Mode of NVR operation. • Statistics Displays CPU Utilization, Network, and Disk Usage statistics. • Recordings Displays the most recent recordings from the selected camera. The duration, date and time of the recording, and recording type are displayed. • Alerts Connection and motion alerts can be enabled from here. A schedule of when motion alerts should be sent can also be defined here. • Configuration Camera configuration settings are displayed and can be edited from this tab. It includes several sub-tabs: • Basic Configuration Defines the camera alias and NVR assignment. • Recording Defines whether motion, full‑time, or both recording modes are enabled. Seconds before and after a motion event are defined here too. • Connection Defines the hostname, ports, username, and password. • Source Defines the source video settings including resolution, bit rate, frame rate, refresh rate, and orientation. • Image & Audio Settings Defines image settings including gamma, brightness, contrast, hue, saturation, sharpness, and denoise. Microphone volume levels are also defined here. • Scheduling Allows you to define camera recording schedules. • Broadcast Settings for streaming to RTMP (Real Time Messaging Protocol) push capable CDN (Content Delivery Network). • Maintenance Displays current firmware version and allows for firmware updates. • Time Stamp Time zone and NTP server settings are defined here. • Remove Removes the camera from its location on the map and places in the Unplaced Cameras list on the left. Live Feed Click this icon to view a live feed of the selected camera. You can click on the arrows in the upper right of the live feed window to expand the view to full-screen. Press the esc key to return to the minimized view. Click the window and a popup allows you to adjust the resolution and set the view to Contrain Proportions or Fill Screen. Click the X in the upper right corner to close the Live Feed window. Remove Remove the camera from the map. Map: If multiple maps have been uploaded, you can select which map you want to view using this option. Configure Maps Use this option to add maps or edit the current map(s).
- 16. 14 Chapter 4: Live View Tab Ubiquiti Networks, Inc. airVision™ User Guide Chapter 4: Live View Tab The Live View tab provides access to your live camera feeds. You can view individual cameras or create custom multiple camera views. Note: Camera streams are viewable without assigning the camera to an NVR, but for optimal performance, cameras should be assigned to a monitor. Views Custom views can be created to allow you to monitor multiple cameras from a single view. Create a New View To create a new camera view, perform the following steps: 1. Click the Add icon next to Views.
- 17. 15 Chapter 4: Live View Tab Ubiquiti Networks, Inc. airVision™ User Guide 2. Click-drag a camera from the list of Cameras to the area on the right that says “Drag and drop a camera here”. 3. Click-drag additional cameras to the desired positions on the screen. A blue position indicator highlights the area where the camera will be placed. Release the mouse to lock a camera into place. The scale of the camera is determined by the location it is placed on the screen and the number of cameras in the view. 4. To finalize your camera view, click Save New in the lower right corner. 5. Enter a name for the camera view in the Save As field and click Save. Renaming a View To rename a view, perform the following steps: 1. Click the Edit icon of the view you want to rename. 2. Enter a new name and click Save.
- 18. 16 Chapter 4: Live View Tab Ubiquiti Networks, Inc. airVision™ User Guide Adding Cameras to an Existing View To add cameras to an existing view, perform the following steps: 1. Click the view that you want to add cameras to. 2. Click-drag additional cameras to the desired positions on the screen. A blue position indicator highlights the area where the camera will be placed. Release the mouse to lock a camera into place. If you want to replace an existing camera with another, simply click‑drag the new camera from the list and place it over the camera you want to replace in the view. 3. You can save the updated view as a new view or replace the existing view. Click Save to replace the existing view. Click Save New if you want to save it as a new view. Deleting a View To delete an existing view, perform the following steps: 1. Click the Delete icon next to the view that you want to delete. 2. Click Confirm. View Playlists You can create playlists to display a rotation of individual live camera feeds and/or pre-defined multi-camera views. The amount of time that each feed is displayed can be 5, 10, 15, 30, or 60 seconds. Create a New Playlist To create a new playlist, perform the following steps: 1. Click the Add icon next to View Playlists.
- 19. 17 Chapter 4: Live View Tab Ubiquiti Networks, Inc. airVision™ User Guide 2. Click-drag a camera from the list of Cameras or a view from the list of Views to the area on the right that says “Drag and drop a camera here”. 3. Add addtional cameras and/or views to the Playlist Editor until the playlist suits your needs. If you want to remove a camera or view, click the Delete icon. 4. The playlist plays each selection for 10 seconds by default before moving on to the next item in the playlist. To change the value, click the 10s next to the item in the playlist and select 5s, 15s, 30s, or 60s. This will determine the number of seconds this camera or view will be displayed during the playlist rotation. 5. Enter a name for the playlist in the Name field. If you want the playlist available to all users, click the checkbox next to available for all users. Click Save. Editing a Playlist To edit a playlist, perform the following steps: 1. Click the Edit icon of the playlist you want to edit. 2. Adjust the time of any camera and/or view in the playlist by clicking the Time icon. 3. Delete any camera and/or view in the playlist by clicking the Delete icon. 4. Click Save. Deleting a Playlist To delete an existing playlist, perform the following steps: 1. Click the Delete icon of the playlist you want to delete. 2. Click Confirm to remove the playlist.
- 20. 18 Chapter 4: Live View Tab Ubiquiti Networks, Inc. airVision™ User Guide Cameras Displays a list of available camera feeds. Click a camera to view a live feed. Display Settings The image resolution, display settings, and audio muting can be changed by clicking a live camera feed. • 720P 720 pixels of vertical resolution • 480P 480 pixels of vertical resolution • 240P 240 pixels of vertical resolution • Constrain Proportions Fits the image to the display area without stretching the image. • Fill Screen Stretches the image to fill the screen. • Mute Audio Mute or unmute the audio feed. Not all cameras support audio.
- 21. 19 Chapter 5: Devices Tab Ubiquiti Networks, Inc. airVision™ User Guide Chapter 5: Devices Tab The Devices tab displays two separate device lists, one for cameras and one for NVRs. Cameras Cameras are displayed with their name, model, firmware, recording mode, image resolution, NVR assignment, hostname/IP address, throughput, last recording date/time, camera status, and action buttons to view the live feed of the camera or configure the camera. Add Camera Click the Add Camera button to manually add a camera. The Add Camera window will appear.
- 22. 20 Chapter 5: Devices Tab Ubiquiti Networks, Inc. airVision™ User Guide Connection Alias This is the user-friendly name of the camera. Hostname/IP Displays the host name or IP address of the camera. SSH Port The port used for SSH access to the camera. The standard default port is 22. RTSP Port The RTSP port is typically port 554. Authorization Username The username used to access the camera. Password The password used to access the camera. NVR Assignment NVR Selectable from the drop-down list or unassigned. Configure Selected Click the Configure Selected button to configure camera settings. Multiple cameras can be selected at one time. The Configure Selected Cameras window will appear. Recording Settings NVR Assignment Allows you to change the NVR that the cameras are assigned to. Select from the drop-down list of available NVRs. Enable Full Time Recording Allows you to turn on or off full-time recording for the selected camera(s). Enable Motion Recording Allows you to turn on or off motion recording for the selected camera(s). Recording Pre-Padding When motion recording is enabled, this defines the amount of time (in seconds) that is included in a video clip before the triggering motion. Recording Post Padding When motion recording is enabled, this defines the amount of time (in seconds) that is included in a video clip after the last triggering motion. Video Settings Resolution Camera resolution settings can be configured here. Higher resolutions provide sharper images but consume more bandwidth and disk space. Bit Rate Configures the bit rate for the selected camera(s). Higher bit rates provide better quality images but consume more bandwidth and disk space. Frame Rate Configures the frames per second. Higher frame rates provide less lapse between images but consume more bandwidth and disk space. Refresh Rate Configures the refresh rate, 50 Hz or 60 Hz. Orientation Allows you to change the camera image orientation. For examples, see Orientation under “Image & Audio Settings” on page 24. Firmware Upload Allows you to upload a firmware file to the selected camera(s). Use Last Uploaded Uses the last firmware file uploaded to the selected camera(s). Use Latest Uses the latest version of the firmware available for the selected camera(s). Search Search Allows you to search the tables for specific search criteria. Any text that is entered is used as real-time search criteria, and anything that doesn’t match the entered characters will be removed from the view. Delete the search string to return to an unfiltered view. Managed/Unmanaged/Disconnected Managed cameras are shown by default. You can select Unmanaged or Disconnected for a list of cameras that are not yet managed or are no longer connected. Camera Displays the name of the camera. Click the name to open the Camera Details window for the specific camera.
- 23. 21 Chapter 5: Devices Tab Ubiquiti Networks, Inc. airVision™ User Guide Model Displays the camera model information. Firmware Displays the version of software used on the camera. Record Mode Displays the operation mode that the camera is in. Resolution Displays the current image resolution setting for the camera. NVR Displays the NVR that is being used for recordings by the camera. Click the name to open the NVR Details window for the specific NVR. Note: An NVR will also automatically downscale attached cameras when viewing the live feed. Hostname Displays the hostname of the camera. Click the hostname to access the camera configuration interface of the selected camera. The login screen for the camera configuration will appear. Refer to the airCam Camera Configuration Interface User Guide available on our website at documentation.ubnt.com/airvision Tx Displays the camera throughput. Last Recording Displays the date and time of the last recording made by the camera. Click it to view the last recording, and the Event Viewer will open and play the recording. Status Displays the connection status information. Actions Select an Action button to perform the desired action: Icon Action Description Live Feed Click to view a live feed of the camera in that row. Configure Configure the camera in that row. Refer to “Configuration” on page 22 for additional details. Manage If automanagement is not enabled under Settings > System Settings, new cameras will appear under the Unmanaged tab. Click the Unmanaged tab and click the Manage button to manage an unmanaged camera. You will need to enter the user name and password for the camera. NVRs Search Search Allows you to search the tables for specific search criteria. Any text that is entered is used as real-time search criteria and anything that doesn’t match the entered characters will be removed from the view. Delete the search string to return to an unfiltered view. Managed/Unmanaged/Disconnected Managed cameras are shown by default. You can select Unmanaged or Disconnected for a list of NVRs that are not yet managed or are no longer connected. NVR Displays the alias or IP address of the NVR. Click the name to open the NVR Details window of the NVR. Hostname Displays the hostname or IP address of the NVR. Version Displays the version number of the NVR firmware. CPU Usage Displays the percentage of the CPU being utilized by the NVR. Disk Usage Displays the amount of disk space being used. Memory Free Displays the amount of memory available. Status Displays the connection status information. Actions Allows you to manage an NVR or edit the configuration settings. Clicking a Device Link The clickable device and recording links are highlighted in blue. Details vary based on the selection. Camera Details Window The Camera Details window has five clickable tabs: Details, Statistics, Recordings, Alerts, and Configuration. Details Displays a preview of the camera feed, map location, and details on the selected camera. Click the camera feed preview to view the live feed, or click the map preview to see the location of the camera on the map. Assigned NVR Displays the name of the NVR that the camera has been assigned to. Motion Record Displays whether motion recording is on or off. Full Time Record Displays whether full-time recording is on or off. Hostname/IP Displays the host name or IP address of the camera. MAC Displays the MAC address of the camera. Model Displays the camera model information. Firmware Displays the version of firmware used on the camera. Uptime Displays the amount of time the camera has been running without interruption.
- 24. 22 Chapter 5: Devices Tab Ubiquiti Networks, Inc. airVision™ User Guide Last Recording The date and time of the selected camera’s last recording. Statistics Statistics are shown for CPU Utilization %, Network, and Disk Usage. CPU Utilization % Displays the percentage of CPU utilization. Network Displays a chart of transmit and receive data to and from the camera for the last 24 hours. The chart displays the information in kbps. Disk Usage Displays a chart of the disk usage for the last 24 hours. Recordings Recordings for the selected camera can be viewed from this tab. A chart of recordings made by the selected camera in the last 24 hours is also displayed here. Duration Displays the time duration of the recording. Time Displays the date and time of the recording. Info Displays the cause of the recording. Actions Action buttons are as follows: Icon Action Description Export Exports an .MP4 of the selected video to your system default download folder. Archive Select this to archive a recording for quick access from the Archived Recordings tab. Icon Action Description Delete Deletes the selected recording. Clicking the bars of the chart will display recordings made during the selected time frame. Playlist The right side of the Playback window displays a playlist of the selected recordings. Thumbnails display a preview of the recording and recording length. The camera name, date, and time of the recording are displayed next to the thumbnail. Playback Controls Previous Play the previous recording in the playlist. Next Play the next recording in the playlist. Config Adjust the camera settings: • Constrain Proportions Fits the image to the display area without stretching the image. • Fill Screen Stretches the image to fill the screen. • Mute Audio Mute or unmute the audio feed. Not all cameras support audio. • Show Motion When enabled, graphic elements are overlaid during playback to indicate where motion was detected to trigger the recording. Download Click the Download button to download an .MP4 video file of the selected clip to your computer. Archive Click to archive a recording. The recording will be listed under the Archived Recordings tab and will not be deleted.
- 25. 23 Chapter 5: Devices Tab Ubiquiti Networks, Inc. airVision™ User Guide Delete Click to immediately delete a recording permanently. Toggle Playlist Click this button to show/hide the playlist thumbnails in the Playback window. Alerts Enable Connection Alerts Click the checkbox Email me when camera goes offline/online. Connection alerts will be sent out when the connection status changes. Enable Motion Alerts Click the checkbox Email me when motion is detected. Motion alerts will be sent out when motion is detected during the times selected in the Motion Alert Schedule. Motion Alert Schedule Select or create a motion alert schedule. Only motion that is detected during the time in the selected schedule will trigger an email notification. Configuration Basic Configuration Alias This field defines the name of the camera. NVR Assignment Defines the NVR that the selected camera is assigned to. Recording Record Mode Allows you to define the recording mode of the camera on the NVR. You can select either of the options below or both of them to have full-time recordings and motion clips: • Motion Record All captured images are analyzed and clips are generated when motion is detected in zones specified on the Analytics tab. -- Seconds to Record Before Motion Defines the amount of time in the video clip before the triggering motion occurs. -- Seconds to Record After Motion Defines the amount of time in the video clip after the triggering motion occurs. • Full Time Record Continuous clips of a fixed length are generated regardless of motion; this is similar to a time‑lapse video recorder. There is no motion detection used in this mode. Connection Hostname The hostname or IP address of the camera. SSH Port The port used for SSH access to the camera. The standard default port is 22. RTSP Port The RTSP port is typically port 554. Username The username used to access the camera. Password The password used to access the camera. Source
- 26. 24 Chapter 5: Devices Tab Ubiquiti Networks, Inc. airVision™ User Guide Resolution Displays the current resolution setting for the camera and allows you to change the setting. Note: The selected resolution must be supported by the camera or the image may not appear correctly. Bit Rate The bit rate can be 256, 512, 1024, 2048, or 4096. Typically larger numbers are used for higher quality. Frame Rate Selects the frames per second. Larger frame rates capture more images per second but require more bandwidth and storage space. Refresh Rate The refresh rate is 50 Hz or 60 Hz. Typically this depends on the region. Orientation Defines the image orientation. Below are the options for image orientation. Orientation Description Example Normal Displays the video feed in normal mode. Flip Horizontally Flips the entire image horizontally. Flip Vertically Flips the entire image vertically. Inverted Flips the entire image horizontally and vertically. Image Orientation Options Image & Audio Settings The image settings can be adjusted using the adjustment sliders. Click View Feed to view a live feed of the camera to view your settings adjustments as you make them. Gamma Adjusts the gamma correction of the image using the adjustment slider. The range is from 0 to 100. Brightness Adjusts the image brightness using the adjustment slider. The range is from 0 (darkest) to 100 (brightest). Contrast Adjusts the image contrast using the adjustment slider. The value goes from 0 (lowest) to 100 (highest). Hue Adjusts the image hue using the adjustment slider. The range is from 0 (lowest) to 100 (highest). Saturation Adjusts the image color saturation using the adjustment slider. The range is from 0 (no color) to 100 (maximum color). Sharpness Adjusts the image sharpness using the adjustment slider. The range is from 0 to 100. Denoise Adjusts the denoise image filter using the adjustment slider. The range is 0 to 100. Mic Volume Level This option only appears if audio is supported on the selected camera. The volume level range is from 0 to 100. Reset to Default Returns all of the Image & Audio Settings to their default values. Scheduling Set Schedule Schedules can be created by clicking the Add icon. To edit a schedule, click the Edit icon. Select the desired schedule from the drop-down list. Creating a New Schedule 1. Click the Add icon. 2. Enter a schedule name in the Schedule Name field. 3. Click and drag a timeline on a day of the week and start time. You can adjust the timeline by clicking and holding at the start or end point of a timeline. Note: You can add specific calendar dates to the schedule by clicking the Add Date button. 4. Click the Edit icon, which is visible when you rollover the upper right end of a timeline. Select the type of recording that you want applied to this timeline. For
- 27. 25 Chapter 5: Devices Tab Ubiquiti Networks, Inc. airVision™ User Guide additional information on recording options, refer to “Recording” on page 23. 5. Repeat steps 5 and 6 until you have the schedule defined correctly. 6. Click Save to save the schedule. Note: For regions that aren’t defined, the camera will go back to default mode. Maintenance The version of the camera firmware is displayed here. You can update the firmware and reboot the camera from here. Update Firmware Click Check Now to check the website for newer firmware for the camera. Click Manual Update to manually select a firmware file from your computer. Automatic Updates Click this option to automatically update the camera firmware when new updates become available. Reboot Click this button to reboot the camera. Time Stamp NTP Server When Use airVision’s NTP Server is selected, airVision’s time server is used for video time stamps. When deselected, the Override NTP Server field allows you to specify an alternate time server for the selected camera. Time Zone By default the camera uses airVision’s Time Zone settings (as configured during installation or edited in Settings > System Settings > Time Zone). To override the time zone and use a different time zone for the selected camera, deselect the checkbox Use airVision’s Time Zone settings and select a time zone from the drop‑down list. Remove Remove Click the Unmanage button only if you no longer wish to manage the camera in airVision. If you remove it, all configurations and history for this camera will be lost. View Feed Click to view a live feed of the camera. Use the Full Screen icon in the upper right to toggle between full screen and the standard view. Save Click save to apply and configuration changes. Revert Click to revert to the last saved configuration. NVR Details Window The NVR Details window has five clickable tabs: Details, Statistics, Cameras, Alerts, and Configuration. Details Hostname/IP Displays the host name or IP address of the NVR. Model Displays the NVR model information. Version Displays the version number of the NVR firmware. CPU Displays the NVR CPU details. CPU Load Displays the percentage of the CPU being utilized by the NVR. Disk Usage Displays the amount of disk space used and the total amount of disk space. The amount of free space available is displayed in parenthesis. Memory Free Displays the amount of free memory available and the total memory. Statistics
- 28. 26 Chapter 5: Devices Tab Ubiquiti Networks, Inc. airVision™ User Guide CPU Utilization % Displays a chart with the low, average, and high CPU utilization details for the last 24 hours. You can place the mouse over areas in the timeline for specific details. Network (Peak) Displays a chart of transmit and receive data to and from the NVR for the last 24 hours. The chart displays the information in kbps. Disk Usage Displays a chart of the disk usage for the last 24 hours. Cameras Camera Displays the name of the camera. Mode Displays the camera recording mode. Hostname The hostname or IP address of the camera. Tx Displays the camera transmission rate in kbps. Status Displays the connection status of the camera. Actions Icon Action Description Live Feed Click to view a live feed of the camera in that row. Configure Configure the camera in that row. Alerts Enable Connection Alerts Click Email me when NVR goes offline/online to receive messages when an NVR offline/online event occurs. Refer to “Email Server Configuration” on page 7 for details on configuring email. Configuration Basic Configuration Alias This is the name of the NVR. Hostname The hostname or IP address of the NVR. Storage Storage Path Defines the path to where video clips are stored.
- 29. 27 Chapter 5: Devices Tab Ubiquiti Networks, Inc. airVision™ User Guide Storage Based Auto Purge Storage Based Auto Purge is enabled when Automatically delete oldest recordings to keep the specified amount free is selected. When enabled, the oldest recordings that have not been archived will be deleted when the amount of disk space available reaches the amount defined next to the Amount of Disk Space to Keep Free (MB) option. Amount of Disk Space to Keep Free (MB) Defines the amount of disk space to keep free when Storage Based Auto Purge is enabled. Date Based Auto Purge Date Based Auto Purge is enabled when Automatically delete recordings after a certain amount of days is selected. When enabled, recordings are deleted after the number of days specified in # Days to Retain Recordings Before Deleting field. # Days to Retain Recordings Before Deleting Defines the number of days to keep recordings before deleting them when Date Based Auto Purge is enabled. Synchronize Database Synchronize This option prepares a list for removal of recordings that no longer have videos associated with them. Orphaned video files are also included in the list. Remove Unmanage Click the Unmanage button only if you no longer wish to manage the NVR in airVision.
- 30. 28 Chapter 6: Statistics Tab Ubiquiti Networks, Inc. airVision™ User Guide Chapter 6: Statistics Tab The Statistics tab displays the following: • Motion Distribution • By Camera • By Zone • By Time • NVR Statistics • CPU Utilization • Network • Disk & Memory • Disk Usage Motion Distribution The default statistics displayed show data from all cameras and zones for the last 24 hours. You can modify the time frame, cameras, and zones included by clicking the Edit icon in the upper right. Remove checkmarks from any cameras that you want to exclude from the chart. To deselect zones, click the Plus [+] sign next to the camera to reveal available zones. Remove checkmarks from the zones you want to exclude. Click Update after you’ve removed the checkmarks from the cameras and zones you want to exclude.
- 31. 29 Chapter 6: Statistics Tab Ubiquiti Networks, Inc. airVision™ User Guide Motion Distribution by Camera Displays a pie chart representation of motion distributed by camera that occurred during the specified time frame (24 hours by default). You can place the cursor over areas of the chart to view the total number of recordings for each camera during the specified time frame. The percentage of activity for each camera is also displayed. Click an area of the chart to see a playlist of recordings for the selected camera during the specified time frame. Motion Distribution by Zone Displays a pie chart representation of motion distributed by zone that occurred during the specified time frame (24 hours by default). You can place the cursor over areas of the chart to view the total number of recordings for each zone during the specified time frame. The percentage of activity for each zone is also displayed. Click an area of the chart to see a playlist of recordings for the selected zone during the specified time frame. Motion Distribution by Time Displays a bar chart representation of motion distributed by time that occurred during the specified time frame (24 hours by default). You can place the cursor over areas of the chart to view the total number of recordings for each time slot during the specified time frame. Click a bar of the chart to see a playlist of the recordings created during the selected time period. NVR Statistics By default, statistics for all NVRs for the last 24 hours are displayed. You can modify the time frame and the NVRs selected by clicking the Edit icon in the upper right of the NVR Statistics area. CPU Utilization % Displays the CPU Utilization of the selected NVR(s). Place the cursor over the timeline to view detailed statistics during the timeline. Network (Peak) The Network chart details the transmit and receive bandwidth usage from all of the cameras connected to the selected NVR(s). Place the cursor over the timeline to view detailed statistics during the timeline. Disk & Memory A visual representation of the amount of free space and used space is displayed. Place the cursor over the graphs to display detailed disk space statistics. Disk Usage Displays a chart of disk usage for the specified time frame. Place the cursor over the chart to display details.
- 32. 30 Chapter 7: Recordings Tab Ubiquiti Networks, Inc. airVision™ User Guide Chapter 7: Recordings Tab The Recordings tab allows you to search recordings by date, recording type, and camera. Date Range Select Quick Links display recordings from selected time frames. Recording and device filters will filter quick link content results. • Today Displays a list of all recordings from today. • Last 7 Days Displays a list of recordings from the last 7 days. • Last Month Displays a list of recordings from the last month. From Click in the From date field and a calendar will appear and allow you to select a start date. Click the time field and either manually enter a time or use the arrows to select an hour. To Click in the To date field and a calendar will appear that will allow you to select an end date. Click the time field and either manually enter a time or use the arrows to select an hour. Recording Filters • Motion Detection Select this if you want your search results to include motion detection recordings. • Recording Select this if you want your search to include standard recordings. Device Filters Devices allows you to select cameras and zones that you want included in recording searches. Every camera that has a checkmark next to it will be included in your search.
- 33. 31 Chapter 7: Recordings Tab Ubiquiti Networks, Inc. airVision™ User Guide Searching Zones For cameras that have multiple zones configured, you can select individual zones to search. To search individual zones, perform the following steps: 1. Click the Plus [+]sign to the left of the checkbox and camera icon. 2. Deselect any zones that you do not want to search. 3. Select the date range by entering values in the From and To fields under Date Range. 4. Ensure that Motion Detection is selected under Recording Type. 5. Click the Search button and the results will appear in the Recordings view. Recordings View Play Place a checkmark next to the videos that you want to play. If you want to sort them by duration, time, info, or camera, then click the appropriate title in the Recordings window. Once you click the Play button, the selected recordings will open in the Playback window according to the sort selection you have applied. Archive Place a checkmark next to videos that you want to make accessible via the Archived Recordings tab, and then click the Archive button. Archived videos are not deleted. Delete Place a checkmark next to videos that you want to permanently delete and then click the Delete button. Search Allows you to search the results for specific search criteria. Any text that is entered is used as real‑time search criteria, and anything that doesn’t match the entered characters will be removed from the view. Delete the search string to return to an unfiltered view. Select All The Select All button allows you to select all of the recordings in the Playback window. You can play, archive, or delete them. Select All button Duration Videos are listed below the Duration header with a thumbnail preview and the length of the clip in the lower right corner. The Duration header can be used to sort videos by recording length, either descending from shortest to longest or from longest to shortest. Time By default the clips are sorted by time and date. If you enter a date range, the first clips to appear are the oldest (closest to the From date and time). If you select a Quick Link, the clips are sorted from newest to oldest. To toggle the date and time sorting, click the Time header. Type Displays the recording type. Click the header to group all of the same types of recording. Info Displays the recording zone and camera name. Click the header to group all of the same zones.
- 34. 32 Chapter 7: Recordings Tab Ubiquiti Networks, Inc. airVision™ User Guide Camera Displays the name of the camera. Click the name to open the Camera Details window for the specific camera. Click the header to group the camera recordings based on the camera. Actions The actions are as follows: • Download Click the Download button to save a .MP4 video file of the selected clip to your computer. • Archive Click to archive a recording. The recording will be listed under the Archived Recordings tab and will not be deleted. • Delete Click Delete to immediately delete a recording permanently. Playback Window Playlist The right side of the Playback window displays a playlist of the selected recordings. Thumbnails display a preview of the recording and recording length. The camera name, date, and time of the recording are displayed next to the thumbnail. Playback Controls Previous Play the previous recording in the playlist. Next Play the next recording in the playlist. Config Adjust the camera settings: • Constrain Proportions Fits the image to the display area without stretching the image. • Fill Screen Stretches the image to fill the screen. • Mute Audio Mute or unmute the audio feed. Not all cameras support audio. • Show Motion When enabled, graphic elements are overlaid during playback to indicate where motion was detected to trigger the recording. Download Click the Download button to download an .MP4 video file of the selected clip to your computer. Archive Click to archive a recording. The recording will be listed under the Archived Recordings tab and will not be deleted. Delete Click to immediately delete a recording permanently. Toggle Playlist Click this button to show/hide the playlist thumbnails in the Playback window.
- 35. 33 Chapter 8: Analytics Tab Ubiquiti Networks, Inc. airVision™ User Guide Chapter 8: Analytics Tab The Analytics tab allows you to define zones for motion detection. You can define multiple zones for each camera and adjust the sensitivity threshold. This allows your NVR to record only when motion is detected in areas of a camera feed that you’ve defined. Setting the sensitivity level allows you to define how much motion is required to trigger the motion detection recording. Creating a New Zone 1. Click the camera that you want to create a zone for. 2. A default zone is created for each camera that encompasses the entire viewing area. The zone has the same name as the camera. Click the x next to the zone name to delete the default zone. 3. Click the area on the image where you want to start the zone.
- 36. 34 Chapter 8: Analytics Tab Ubiquiti Networks, Inc. airVision™ User Guide 4. Click to define as many additional points as you need until you close the zone by clicking the starting point again. 5. The Zone Settings window will appear. Enter a name for the zone in the Label field. 6. Adjust the sensitivity using the Sensitivity slider. If you want to test the sensitivity, click the Test button. As various degrees of motion occur, you’ll see different level spikes. Adjust the sensitivity to a level that best suits your needs. Motion spikes that exceed the sensitivity threshold you define will be recorded when motion detection is enabled. Click Test again to stop the test. 7. (Optional) If you want to create additional zones, click the desired areas on the feed and follow the same steps. 8. Once you’ve created your zone(s), click Save to add the zone(s) or Discard to discard the zone(s). Save button
- 37. 35 Chapter 8: Analytics Tab Ubiquiti Networks, Inc. airVision™ User Guide Editing a Zone 1. Click the zone that you want to edit. 2. If you want to expand or reduce the zone coverage, click-drag the points you want to change. To delete a point, click it without dragging it. If you need to add a point, click in between two defined points (white in color) to add another point to the zone. 3. If you need to change the zone name or sensitivity level of the zone, click . Settings button 4. Once you’ve made all your changes, click Save to apply the changes or Discard to discard the changes. Save button Deleting a Zone 1. Click the x next to the zone you want to delete.
- 38. 36 Appendix A: Mobile Support Ubiquiti Networks, Inc. airVision™ User Guide Appendix A: Mobile Support You can access the airVision user interface from iOS and Android-based smart phones and tablets. airVision has a mobile site and a desktop site. Smart phones default to the mobile site and tablets use the desktop site. Mobile Site 1. To connect to the web interface, enter the IP address of the airVision server in your web browser. 2. Select airVision Controller. 3. Enter the email address and password used to login to your airVision Controller. airCams After login, a list of managed airCams is displayed. Menu Camera Detail Links Menu
- 39. 37 Appendix A: Mobile Support Ubiquiti Networks, Inc. airVision™ User Guide Camera Details Displays a preview of camera video feed. Click on the image to view the live feed. State Displays that current state of the camera. Host Displays the host name or IP address of the camera. Motion Record Displays whether motion recording is on or off. Full Time Record Displays whether full time recording is on or off. Recordings Search Recordings Search Start Time Touch in the field below Start Time and a calendar will appear that will allow you to select a beginning date and time. Touch Set. End Time Touch in the field below End Time and a calendar will appear that will allow you to select an ending date and time. Touch Set. All Cameras Touch to select all available cameras.
- 40. 38 Appendix A: Mobile Support Ubiquiti Networks, Inc. airVision™ User Guide Recording Details Displays a preview of the recording. Click on the image to view the recording. Recorded At Displays the date and time of the recording. Cause Displays what triggered the recording. Camera Displays the name of the camera. Notes Displays the name of the zone (if applicable). Settings Live Feed Resolution Displays the resolution of the live feed. Touch it to change the resolution. Select 720p, 480p, or 240p resolution.
- 41. 39 Appendix B: Contact Information Ubiquiti Networks, Inc. airVision™ User Guide Appendix B: Contact Information Ubiquiti Networks Support Ubiquiti Support Engineers are located around the world and are dedicated to helping customers resolve software, hardware compatibility, or field issues as quickly as possible. We strive to respond to support inquiries within a 24-hour period. Online Resources Support: support.ubnt.com Community: community.ubnt.com Downloads: downloads.ubnt.com 2580 Orchard Parkway San Jose, CA 95131 www.ubnt.com © 2011-2013 Ubiquiti Networks, Inc. All rights reserved. airVision™ , airCam™ , and Ubiquiti Networks™ are trademarks of Ubiquiti Networks, Inc. Google Maps™ is a trademark of Google, Inc. WPA™ and WPA2™ are trademarks of the Wi-Fi Alliance.