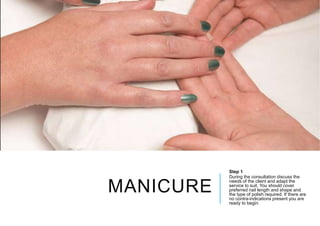
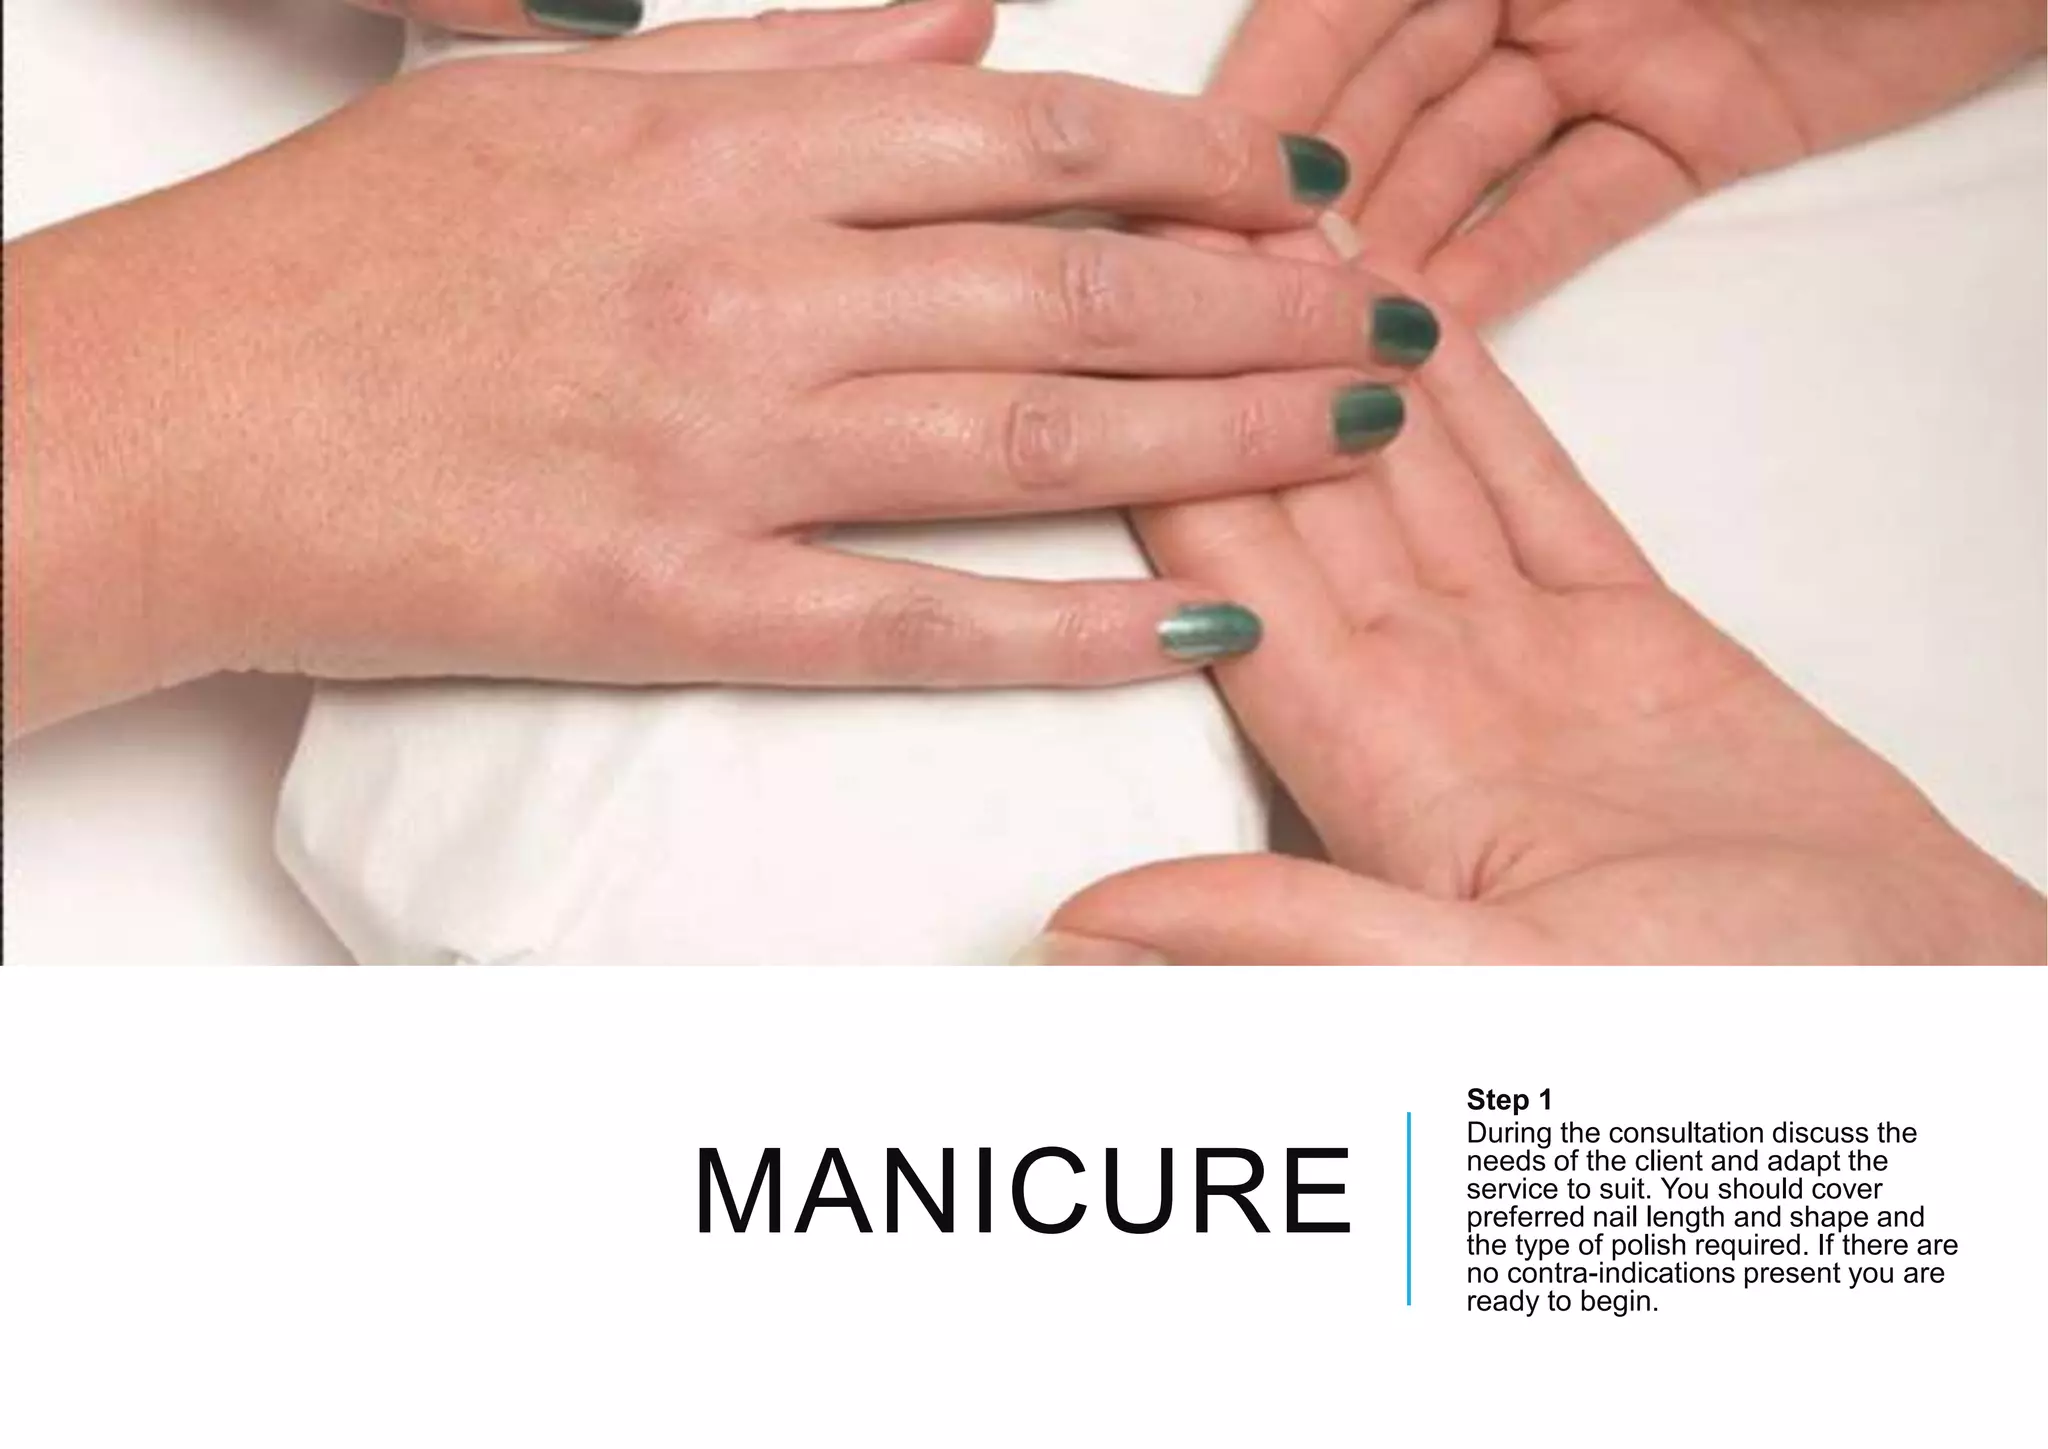
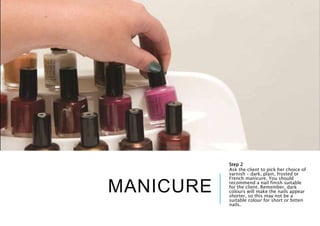
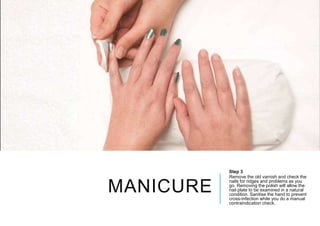
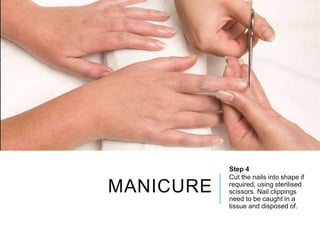
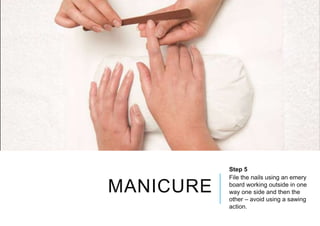
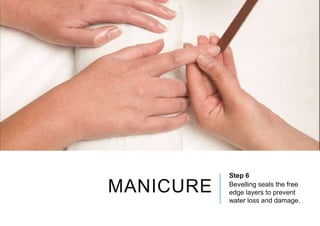
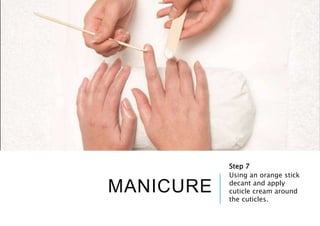
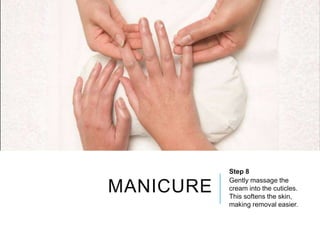
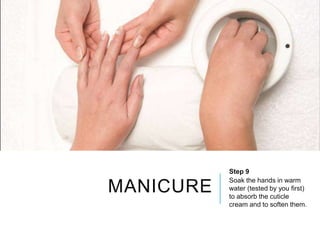
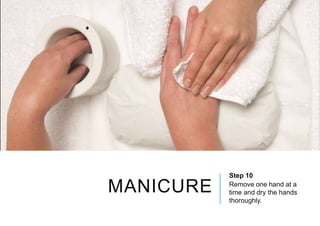
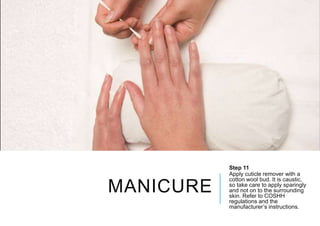
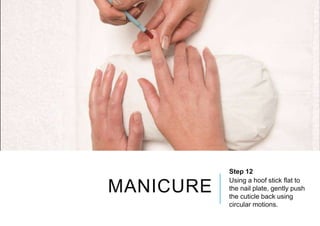
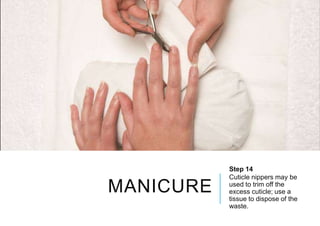
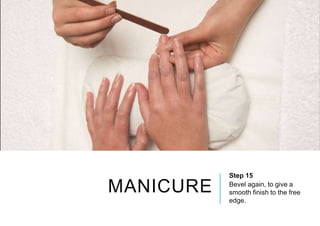
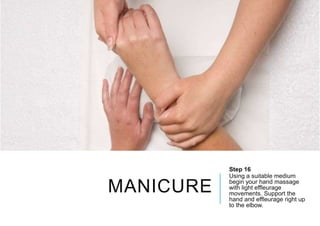
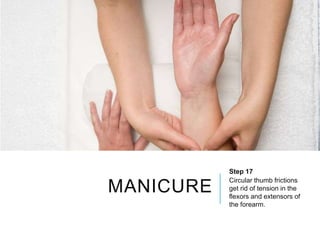
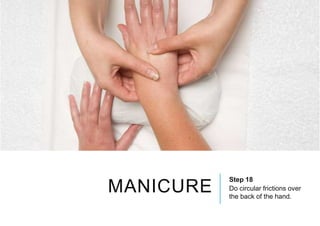
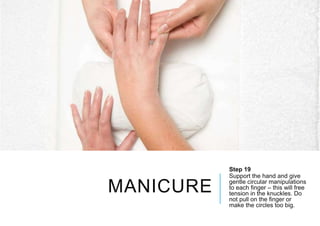
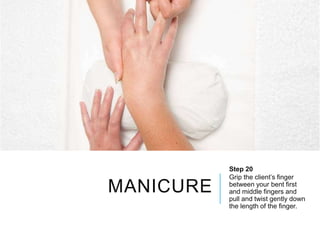
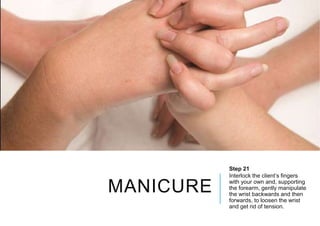
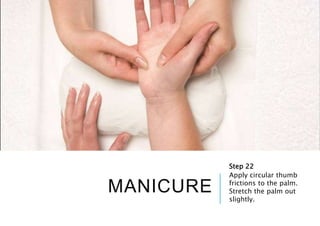
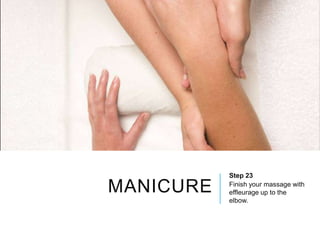
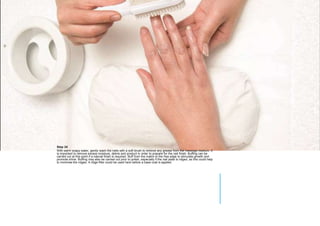
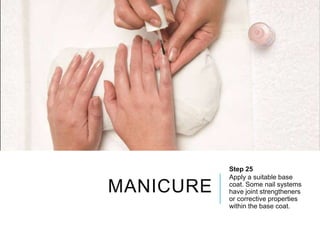
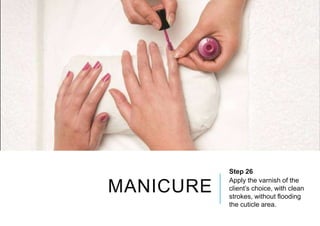
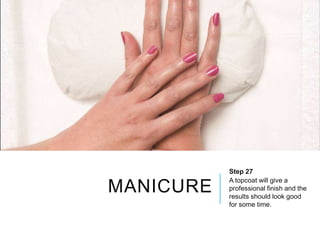
MANICURE
Step 1
During the consultation discuss the
needs of the client and adapt the
service to suit. You should cover
preferred nail length and shape and
the type of polish required. If there are
no contra-indications present you are
ready to begin.
MANICURE
Step 2
Ask the client to pick her choice of
varnish – dark, plain, frosted or
French manicure. You should
recommend a nail finish suitable
for the client. Remember, dark
colours will make the nails appear
shorter, so this may not be a
suitable colour for short or bitten
nails.
MANICURE
Step 3
Remove the old varnish and check the
nails for ridges and problems as you
go. Removing the polish will allow the
nail plate to be examined in a natural
condition. Sanitise the hand to prevent
cross-infection while you do a manual
contraindication check.
MANICURE
Step 4
Cut the nails into shape if
required, using sterilised
scissors. Nail clippings
need to be caught in a
tissue and disposed of.
MANICURE
Step 5
File the nails using an emery
board working outside in one
way one side and then the
other – avoid using a sawing
action.
MANICURE
Step 6
Bevelling seals the free
edge layers to prevent
water loss and damage.
MANICURE
Step 7
Using an orange stick
decant and apply
cuticle cream around
the cuticles.
MANICURE
Step 8
Gently massage the
cream into the cuticles.
This softens the skin,
making removal easier.
MANICURE
Step 9
Soak the hands in warm
water (tested by you first)
to absorb the cuticle
cream and to soften them.
MANICURE
Step 10
Remove one hand at a
time and dry the hands
thoroughly.
MANICURE
Step 11
Apply cuticle remover with a
cotton wool bud. It is caustic,
so take care to apply sparingly
and not on to the surrounding
skin. Refer to COSHH
regulations and the
manufacturer’s instructions.
MANICURE
Step 12
Using a hoof stick flat to
the nail plate, gently push
the cuticle back using
circular motions.
MANICURE
Step 13
You may need to use the cuticle knife
to ease the excess cuticle away from
the nail plate. This should be kept flat
and the nail plate should be damp so
that the nail plate is not scratched.
The knife should also be kept flat to
avoid cutting the cuticle.
MANICURE
Step 14
Cuticle nippers may be
used to trim off the
excess cuticle; use a
tissue to dispose of the
waste.
MANICURE
Step 15
Bevel again, to give a
smooth finish to the free
edge.
MANICURE
Step 16
Using a suitable medium
begin your hand massage
with light effleurage
movements. Support the
hand and effleurage right up
to the elbow.
MANICURE
Step 17
Circular thumb frictions
get rid of tension in the
flexors and extensors of
the forearm.
MANICURE
Step 18
Do circular frictions over
the back of the hand.
MANICURE
Step 19
Support the hand and give
gentle circular manipulations
to each finger – this will free
tension in the knuckles. Do
not pull on the finger or
make the circles too big.
MANICURE
Step 20
Grip the client’s finger
between your bent first
and middle fingers and
pull and twist gently down
the length of the finger.
MANICURE
Step 21
Interlock the client’s fingers
with your own and, supporting
the forearm, gently manipulate
the wrist backwards and then
forwards, to loosen the wrist
and get rid of tension.
MANICURE
Step 22
Apply circular thumb
frictions to the palm.
Stretch the palm out
slightly.
MANICURE
Step 23
Finish your massage with
effleurage up to the
elbow.
MANICURE
Step 24
With warm soapy water, gently wash the nails with a soft brush to remove any grease from the massage medium. It
is important to remove excess moisture, debris and product in order to prepare for the nail finish. Buffing can be
carried out at this point if a natural finish is required. Buff from the matrix to the free edge to stimulate growth and
promote shine. Buffing may also be carried out prior to polish, especially if the nail plate is ridged, as this could help
to minimise the ridges. A ridge filler could be used here before a base coat is applied.
MANICURE
Step 25
Apply a suitable base
coat. Some nail systems
have joint strengtheners
or corrective properties
within the base coat.
MANICURE
Step 26
Apply the varnish of the
client’s choice, with clean
strokes, without flooding
the cuticle area.
MANICURE
Step 27
A topcoat will give a
professional finish and the
results should look good
for some time.

Manicure procedure

  • 1.
    MANICURE Step 1 During theconsultation discuss the needs of the client and adapt the service to suit. You should cover preferred nail length and shape and the type of polish required. If there are no contra-indications present you are ready to begin.
  • 2.
    MANICURE Step 2 Ask theclient to pick her choice of varnish – dark, plain, frosted or French manicure. You should recommend a nail finish suitable for the client. Remember, dark colours will make the nails appear shorter, so this may not be a suitable colour for short or bitten nails.
  • 3.
    MANICURE Step 3 Remove theold varnish and check the nails for ridges and problems as you go. Removing the polish will allow the nail plate to be examined in a natural condition. Sanitise the hand to prevent cross-infection while you do a manual contraindication check.
  • 4.
    MANICURE Step 4 Cut thenails into shape if required, using sterilised scissors. Nail clippings need to be caught in a tissue and disposed of.
  • 5.
    MANICURE Step 5 File thenails using an emery board working outside in one way one side and then the other – avoid using a sawing action.
  • 6.
    MANICURE Step 6 Bevelling sealsthe free edge layers to prevent water loss and damage.
  • 7.
    MANICURE Step 7 Using anorange stick decant and apply cuticle cream around the cuticles.
  • 8.
    MANICURE Step 8 Gently massagethe cream into the cuticles. This softens the skin, making removal easier.
  • 9.
    MANICURE Step 9 Soak thehands in warm water (tested by you first) to absorb the cuticle cream and to soften them.
  • 10.
    MANICURE Step 10 Remove onehand at a time and dry the hands thoroughly.
  • 11.
    MANICURE Step 11 Apply cuticleremover with a cotton wool bud. It is caustic, so take care to apply sparingly and not on to the surrounding skin. Refer to COSHH regulations and the manufacturer’s instructions.
  • 12.
    MANICURE Step 12 Using ahoof stick flat to the nail plate, gently push the cuticle back using circular motions.
  • 13.
    MANICURE Step 13 You mayneed to use the cuticle knife to ease the excess cuticle away from the nail plate. This should be kept flat and the nail plate should be damp so that the nail plate is not scratched. The knife should also be kept flat to avoid cutting the cuticle.
  • 14.
    MANICURE Step 14 Cuticle nippersmay be used to trim off the excess cuticle; use a tissue to dispose of the waste.
  • 15.
    MANICURE Step 15 Bevel again,to give a smooth finish to the free edge.
  • 16.
    MANICURE Step 16 Using asuitable medium begin your hand massage with light effleurage movements. Support the hand and effleurage right up to the elbow.
  • 17.
    MANICURE Step 17 Circular thumbfrictions get rid of tension in the flexors and extensors of the forearm.
  • 18.
    MANICURE Step 18 Do circularfrictions over the back of the hand.
  • 19.
    MANICURE Step 19 Support thehand and give gentle circular manipulations to each finger – this will free tension in the knuckles. Do not pull on the finger or make the circles too big.
  • 20.
    MANICURE Step 20 Grip theclient’s finger between your bent first and middle fingers and pull and twist gently down the length of the finger.
  • 21.
    MANICURE Step 21 Interlock theclient’s fingers with your own and, supporting the forearm, gently manipulate the wrist backwards and then forwards, to loosen the wrist and get rid of tension.
  • 22.
    MANICURE Step 22 Apply circularthumb frictions to the palm. Stretch the palm out slightly.
  • 23.
    MANICURE Step 23 Finish yourmassage with effleurage up to the elbow.
  • 24.
    MANICURE Step 24 With warmsoapy water, gently wash the nails with a soft brush to remove any grease from the massage medium. It is important to remove excess moisture, debris and product in order to prepare for the nail finish. Buffing can be carried out at this point if a natural finish is required. Buff from the matrix to the free edge to stimulate growth and promote shine. Buffing may also be carried out prior to polish, especially if the nail plate is ridged, as this could help to minimise the ridges. A ridge filler could be used here before a base coat is applied.
  • 25.
    MANICURE Step 25 Apply asuitable base coat. Some nail systems have joint strengtheners or corrective properties within the base coat.
  • 26.
    MANICURE Step 26 Apply thevarnish of the client’s choice, with clean strokes, without flooding the cuticle area.
  • 27.
    MANICURE Step 27 A topcoatwill give a professional finish and the results should look good for some time.