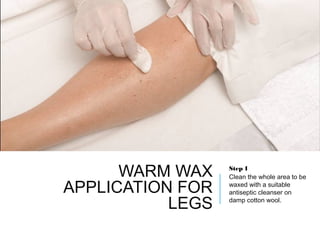
4. WARM WAX
APPLICATION FOR
LEGS
Step 4
To avoid cross-infection,
drizzle the wax onto
another spatula – it will
also help you to check that
the consistency is
workable.
5. WARM WAX
APPLICATION FOR
LEGS
Step 5
If temperature is acceptable
to you, apply a small area on
to the legs to check with the
client that the temperature is
tolerable for her.
6. WARM WAX
APPLICATION FOR
LEGS
Step 6
Following the hair growth,
i.e downward, apply a thin
even strip of wax to the
leg, approximately the
width of the paper strip.
9. WARM WAX
APPLICATION FOR
LEGS
Step 9
Holding the leg, grip the wax
strip edge and pull the strip
off. It is almost a peeling
back of the strip, but it must
be quick to minimise pain.
10. WARM WAX
APPLICATION FOR
LEGS
Step 10
Any missed hairs, too
short for the wax to pick,
can be tweezed out.
Sterilise the tweezers first.
13. WARM WAX
APPLICATION FOR
LEGS
Step 13
Ask the client to turn over
– remember to ensure you
put the back of the couch
down first. Repeat the
cleansing and blotting
process.
14. WARM WAX
APPLICATION FOR
LEGS
Step 14
As the hairs grow in
different directions, you will
need to cut the wax strips
into manageable sizes.
15. WARM WAX
APPLICATION FOR
LEGS
Step 15
Check the direction of the
hair growth, which may be
diagonal as shown here.
Remember to test the wax
again – first on yourself and
then on your client.
16. WARM WAX
APPLICATION FOR
LEGS
Step 16
Apply a thin even strip of
wax to the leg, following the
hair growth, i.e diagonally as
shown here, and repeat the
process as for front of leg.