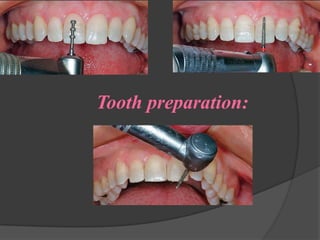
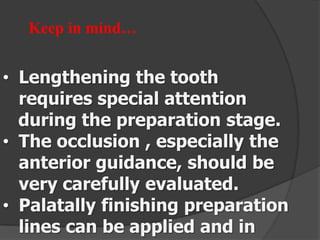
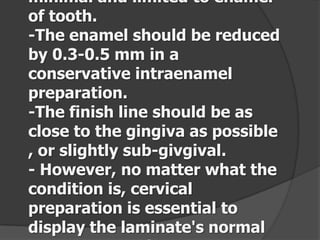
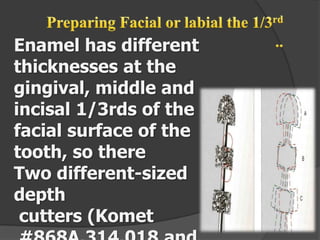
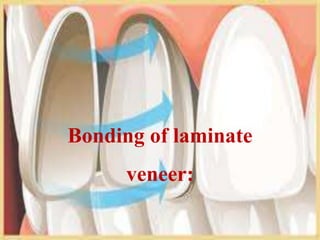
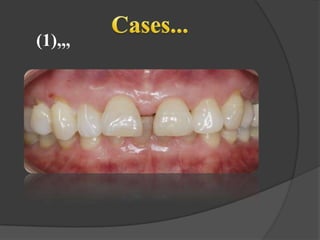
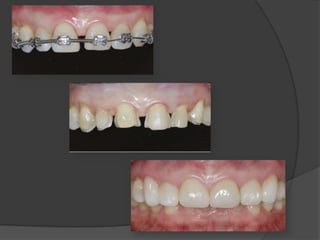
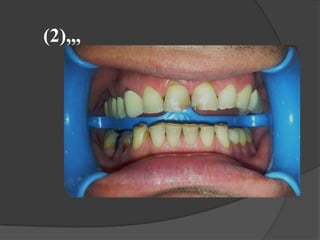
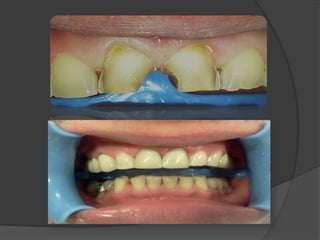
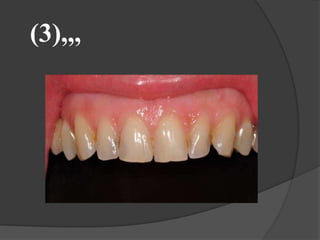
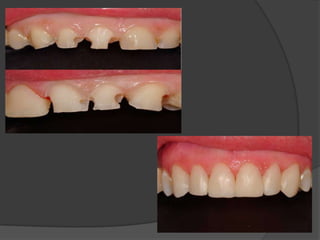
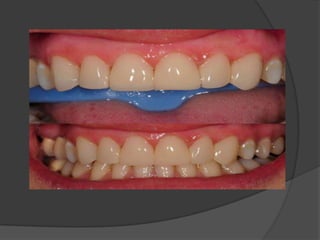
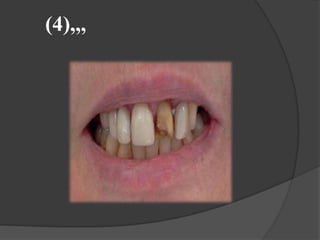
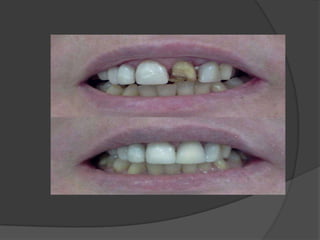
te veneer ,,
A veneer is a thin layer of
restorative material placed over
a tooth surface, either to
improve the aesthetics of a
tooth, or to protect a damaged
tooth surface.
It has a translucent quality
which means that they give a
natural looking tooth,
1- Fractured tooth

2 -Intrinsic staining
3- In case of multiple teeth to

create a

"Hollywood“

type of makeover
4- Small teeth.
6- In case of worn away the edges
of the teeth
7- Lengthen teeth that have been
shortened
by wear,
8- Fill the black triangles between
teeth .
9- Provide a uniform color, shape,
and symmetry,
and make the teeth appear
12- Enamel hypoplasia
13- Closure of diastemas
14- Root exposure
15- Abrasion and erosion
16- Large pulp size
17- Anatomical maleform teeth
18- Tooth wear
1-High caries index.
2- Poor plaque control.
3-Extensive existing restoration.
4-BruxximS.
5-Posterior teeth.
6-Edge to edge or cross bite.
7- Short teeth.
8- In case of orthodontics.
9-Simulated straightening of the
teeth
for younger people with
healthy teeth
10- Crowding of misaligmed

teeth with inadquate enamel
present
1. Esthetic .
2. Stain resistant and Stronge.

3. The color of a laminate
veneer can be selected such

that it makes dark teeth appear
whiter.
5 . Minimal tooth preparation req
6. Color stability.

7-Resist abrasion.
8-Well tolerated by gingiva.
Tooth preparation:
Keep in mind…

• Lengthening the tooth
requires special attention
during the preparation stage.
• The occlusion , especially the
anterior guidance, should be
very carefully evaluated.
• Palatally finishing preparation
lines can be applied and in
minimal and limited to enamel
of tooth.
-The enamel should be reduced
by 0.3-0.5 mm in a
conservative intraenamel
preparation.
-The finish line should be as
close to the gingiva as possible
, or slightly sub-givgival.
- However, no matter what the
condition is, cervical
preparation is essential to
display the laminate's normal
Enamel has different
thicknesses at the
gingival, middle and
incisal 1/3rds of the
facial surface of the
tooth, so there
Two different-sized
depth
cutters (Komet
-Three-wheel
diamond depth
cutter , creats the
depth-orientation
groove (0.3) mm in
G half of the L.S.
-Three-wheel
diamond bur
(0.5)mm reduction
in incisal
-Remove tooth
There are two basic techniques for the placement
of the incisal finish line;

1)The first terminates the
prepared facial surface
at the incisal edge.
* There is no incisal reduction or
prep of the lingual
surface and it can be in the form
of a window or
(2) In the second
technique, the incisal edge is
slightly reduced and the
porcelain overlaps the incisal
edge, terminating on the
lingual surface.
* In a retrospective clinical
evaluation the two techniques
-Reduction

the proximal by
using the round-end. - open
the contacts area without
breaking.
- To correct an uneven
finish line,
ensure that the diamond is
parallel with the long
- Examination of the prepared
teeth is necessary.
-The dentist must be careful to

remove any sharp angles.
-Smooth margins that are fully
-The retraction cord should be left
in place if possible during the
impression.
-Use a polysiloxane or polyether
material for the impression
- Or we can use A polyvinyl
siloxane impression material to
take a full arch impression.
-The tray is seated and the
material was allowed to set
completely before it’s
removed from the patient’s
mouth
-The opposing arch
impression is also taken in
a polyvinyl material
-A hard-setting occlusal
registration was taken bite
The veneers should first be tried-in
before they are
bonded to eliminate unexpected
surprises.
When the patient arrives for the final
appointment.
what to do :

- First anesthetized for the
comfort of the patient.
_ Clean with flouride free
-Frist do good isolation.
-Sparated with soft matrix strip.
-Etche 15 to 30 sec with 37%
phosphoric acid.
-Applied Boinding agent.
-Put thin lyer of luting agent.
-Apply veneer slightly without force.
-Excess cement is removed.
-Partial curing for 5 to 10 sce.
-Aemove of all excess.
-Veneer should be cured from
all directions for at least
1.Initial follow-up :
-Scheduled one week postcementation to evaluate tissue
response and margins,
-At 3-4 month intervals.
2.Clean it by brush and floss every
day for good oral hygiene.
3.Avoid using vertical strokes
during scaling,
4.Avoid the use of acidulated
Bonding of laminate
veneer:
Dentin bonding is a
micromechanical bond but
it is more complex and
difficult and Hydrophilic

Ceramics Bonding is .
resins must be used
micromechanical bond
(1),,,
(2),,,
(3),,,
(4),,,
1-http://www.ncbi.nlm.nih.gov/pubmed
2-http://www.slideshare.net/aneeqa_yaqub/dentalveneers?from_search=7
3-CONTEMPORARY ESTHETIC DENTISTRY
4-Science and Art of Porcelain Laminate Veneers
Thank
you
Done by :
Lubna Al-Tareb
Keffaya Al-shareff
Noha Al-zomani
Shrooqe Al-taibi

“ Laminate veneer ,,

  • 2.
  • 3.
    A veneer isa thin layer of restorative material placed over a tooth surface, either to improve the aesthetics of a tooth, or to protect a damaged tooth surface. It has a translucent quality which means that they give a natural looking tooth,
  • 6.
    1- Fractured tooth 2-Intrinsic staining 3- In case of multiple teeth to create a "Hollywood“ type of makeover 4- Small teeth.
  • 7.
    6- In caseof worn away the edges of the teeth 7- Lengthen teeth that have been shortened by wear, 8- Fill the black triangles between teeth . 9- Provide a uniform color, shape, and symmetry, and make the teeth appear
  • 8.
    12- Enamel hypoplasia 13-Closure of diastemas 14- Root exposure 15- Abrasion and erosion 16- Large pulp size 17- Anatomical maleform teeth 18- Tooth wear
  • 9.
    1-High caries index. 2-Poor plaque control. 3-Extensive existing restoration. 4-BruxximS. 5-Posterior teeth. 6-Edge to edge or cross bite. 7- Short teeth. 8- In case of orthodontics.
  • 10.
    9-Simulated straightening ofthe teeth for younger people with healthy teeth 10- Crowding of misaligmed teeth with inadquate enamel present
  • 11.
    1. Esthetic . 2.Stain resistant and Stronge. 3. The color of a laminate veneer can be selected such that it makes dark teeth appear whiter.
  • 12.
    5 . Minimaltooth preparation req 6. Color stability. 7-Resist abrasion. 8-Well tolerated by gingiva.
  • 17.
  • 18.
    Keep in mind… •Lengthening the tooth requires special attention during the preparation stage. • The occlusion , especially the anterior guidance, should be very carefully evaluated. • Palatally finishing preparation lines can be applied and in
  • 19.
    minimal and limitedto enamel of tooth. -The enamel should be reduced by 0.3-0.5 mm in a conservative intraenamel preparation. -The finish line should be as close to the gingiva as possible , or slightly sub-givgival. - However, no matter what the condition is, cervical preparation is essential to display the laminate's normal
  • 21.
    Enamel has different thicknessesat the gingival, middle and incisal 1/3rds of the facial surface of the tooth, so there Two different-sized depth cutters (Komet
  • 22.
    -Three-wheel diamond depth cutter ,creats the depth-orientation groove (0.3) mm in G half of the L.S. -Three-wheel diamond bur (0.5)mm reduction in incisal -Remove tooth
  • 23.
    There are twobasic techniques for the placement of the incisal finish line; 1)The first terminates the prepared facial surface at the incisal edge. * There is no incisal reduction or prep of the lingual surface and it can be in the form of a window or
  • 24.
    (2) In thesecond technique, the incisal edge is slightly reduced and the porcelain overlaps the incisal edge, terminating on the lingual surface. * In a retrospective clinical evaluation the two techniques
  • 25.
    -Reduction the proximal by usingthe round-end. - open the contacts area without breaking. - To correct an uneven finish line, ensure that the diamond is parallel with the long
  • 26.
    - Examination ofthe prepared teeth is necessary. -The dentist must be careful to remove any sharp angles. -Smooth margins that are fully
  • 28.
    -The retraction cordshould be left in place if possible during the impression. -Use a polysiloxane or polyether material for the impression - Or we can use A polyvinyl siloxane impression material to take a full arch impression.
  • 29.
    -The tray isseated and the material was allowed to set completely before it’s removed from the patient’s mouth -The opposing arch impression is also taken in a polyvinyl material -A hard-setting occlusal registration was taken bite
  • 30.
    The veneers shouldfirst be tried-in before they are bonded to eliminate unexpected surprises. When the patient arrives for the final appointment. what to do : - First anesthetized for the comfort of the patient. _ Clean with flouride free
  • 31.
    -Frist do goodisolation. -Sparated with soft matrix strip. -Etche 15 to 30 sec with 37% phosphoric acid. -Applied Boinding agent. -Put thin lyer of luting agent. -Apply veneer slightly without force. -Excess cement is removed. -Partial curing for 5 to 10 sce. -Aemove of all excess. -Veneer should be cured from all directions for at least
  • 33.
    1.Initial follow-up : -Scheduledone week postcementation to evaluate tissue response and margins, -At 3-4 month intervals. 2.Clean it by brush and floss every day for good oral hygiene. 3.Avoid using vertical strokes during scaling, 4.Avoid the use of acidulated
  • 34.
  • 36.
    Dentin bonding isa micromechanical bond but it is more complex and difficult and Hydrophilic Ceramics Bonding is . resins must be used micromechanical bond
  • 39.
  • 41.
  • 43.
  • 46.
  • 48.
  • 49.
    Thank you Done by : LubnaAl-Tareb Keffaya Al-shareff Noha Al-zomani Shrooqe Al-taibi