Downloaded 12 times


![Simple-Openni
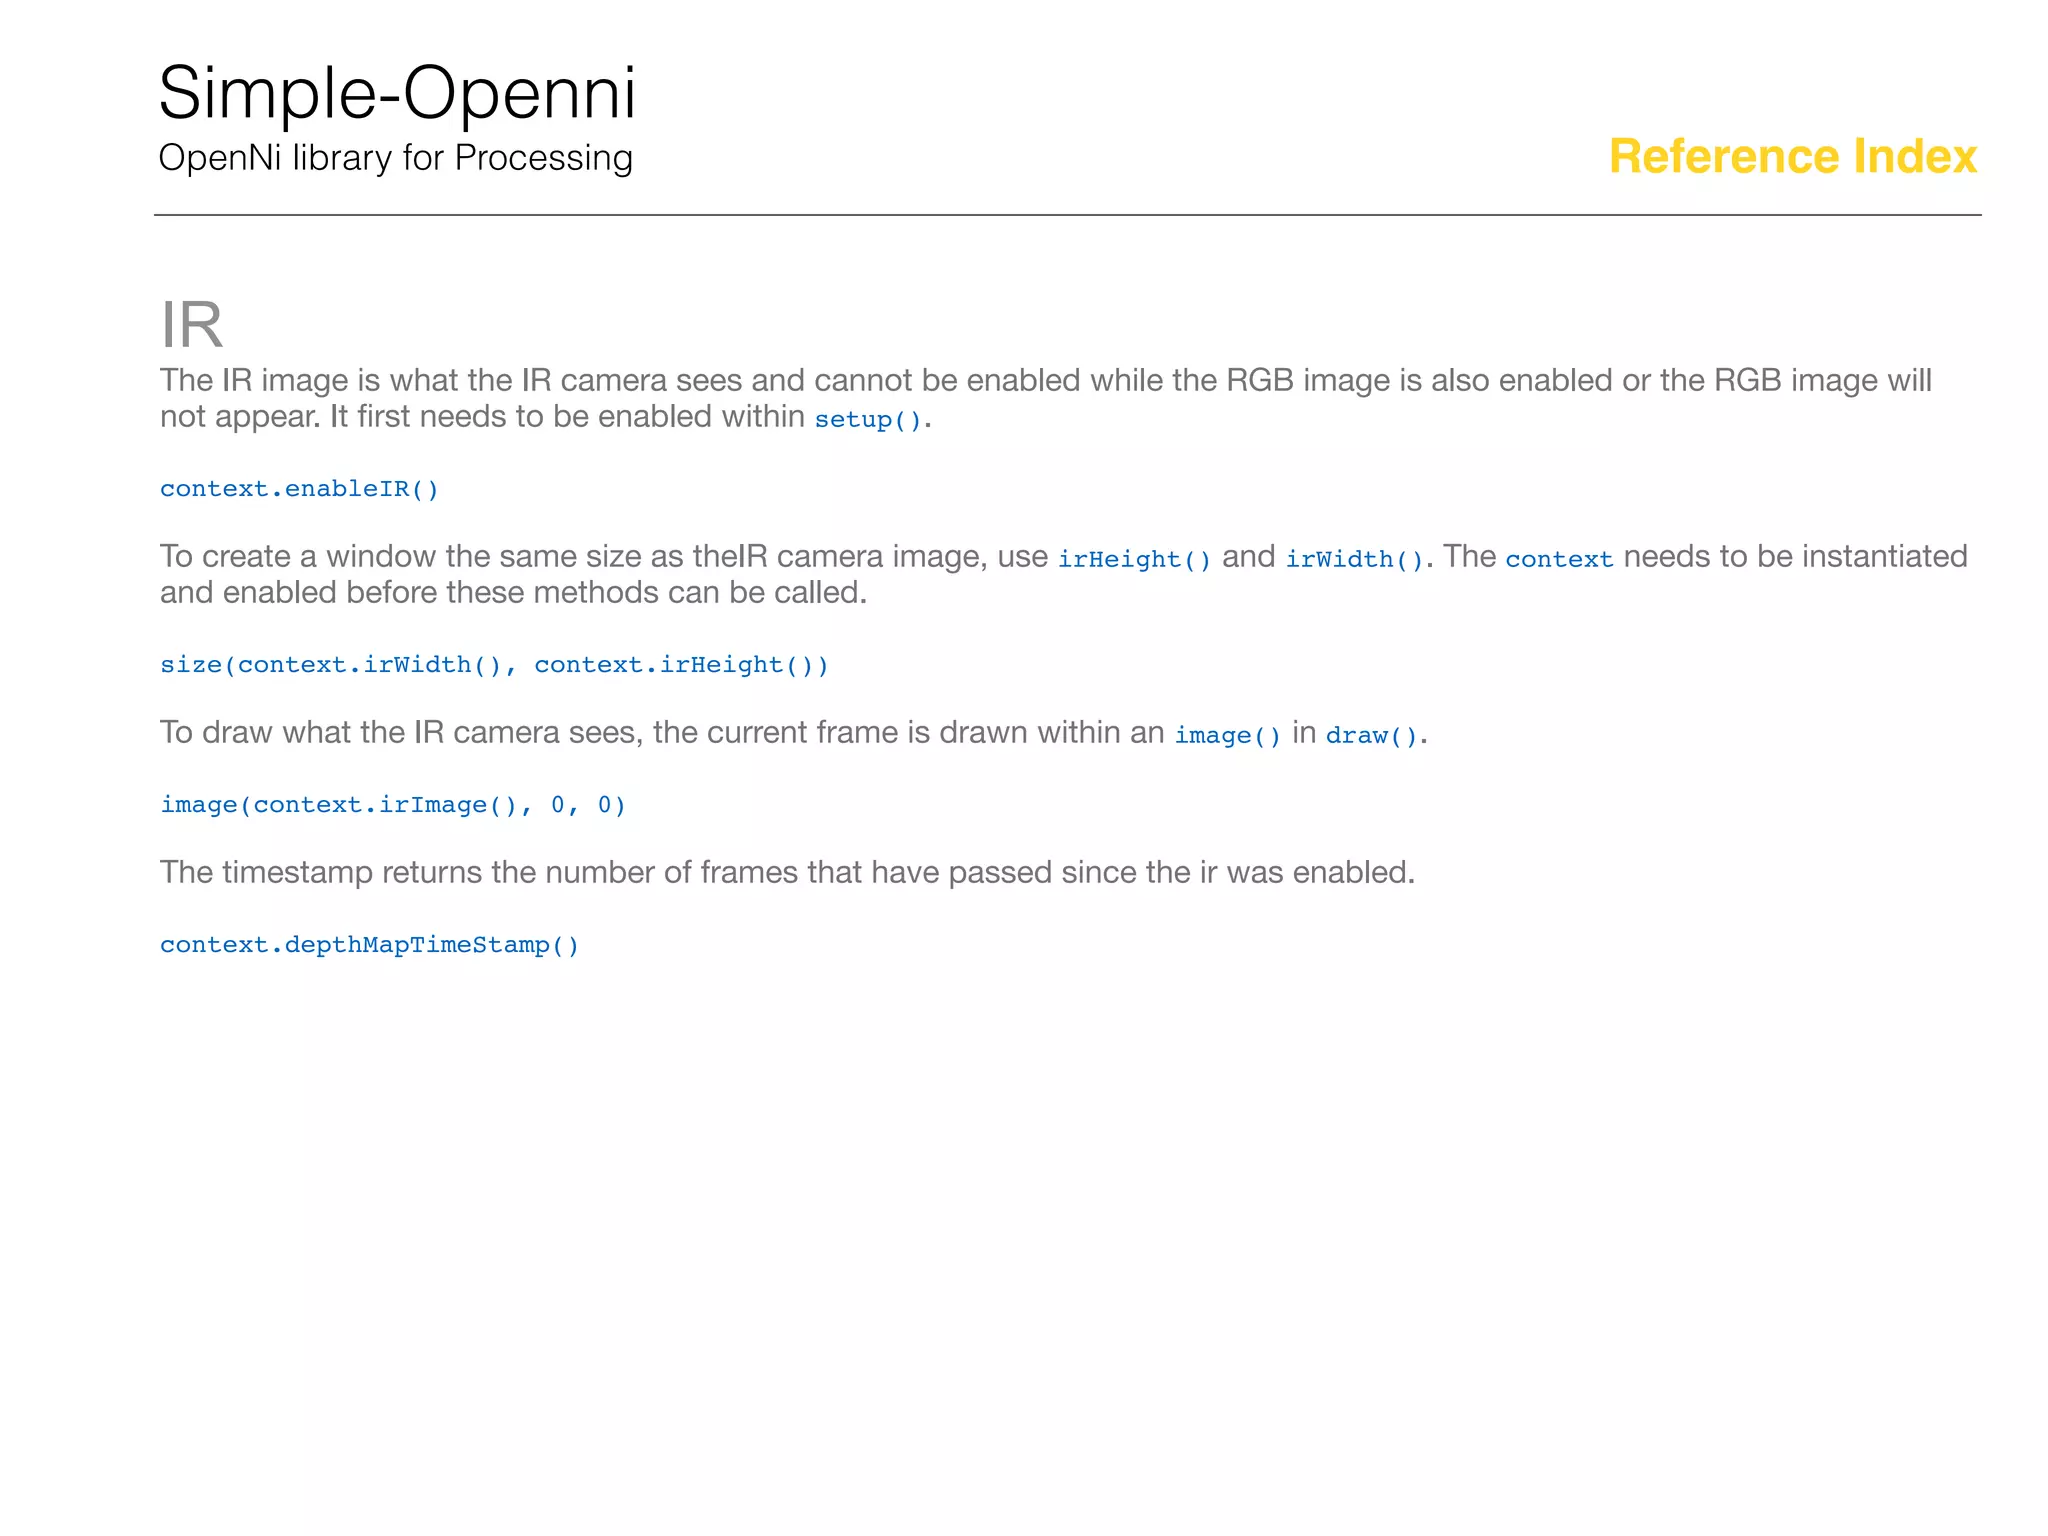
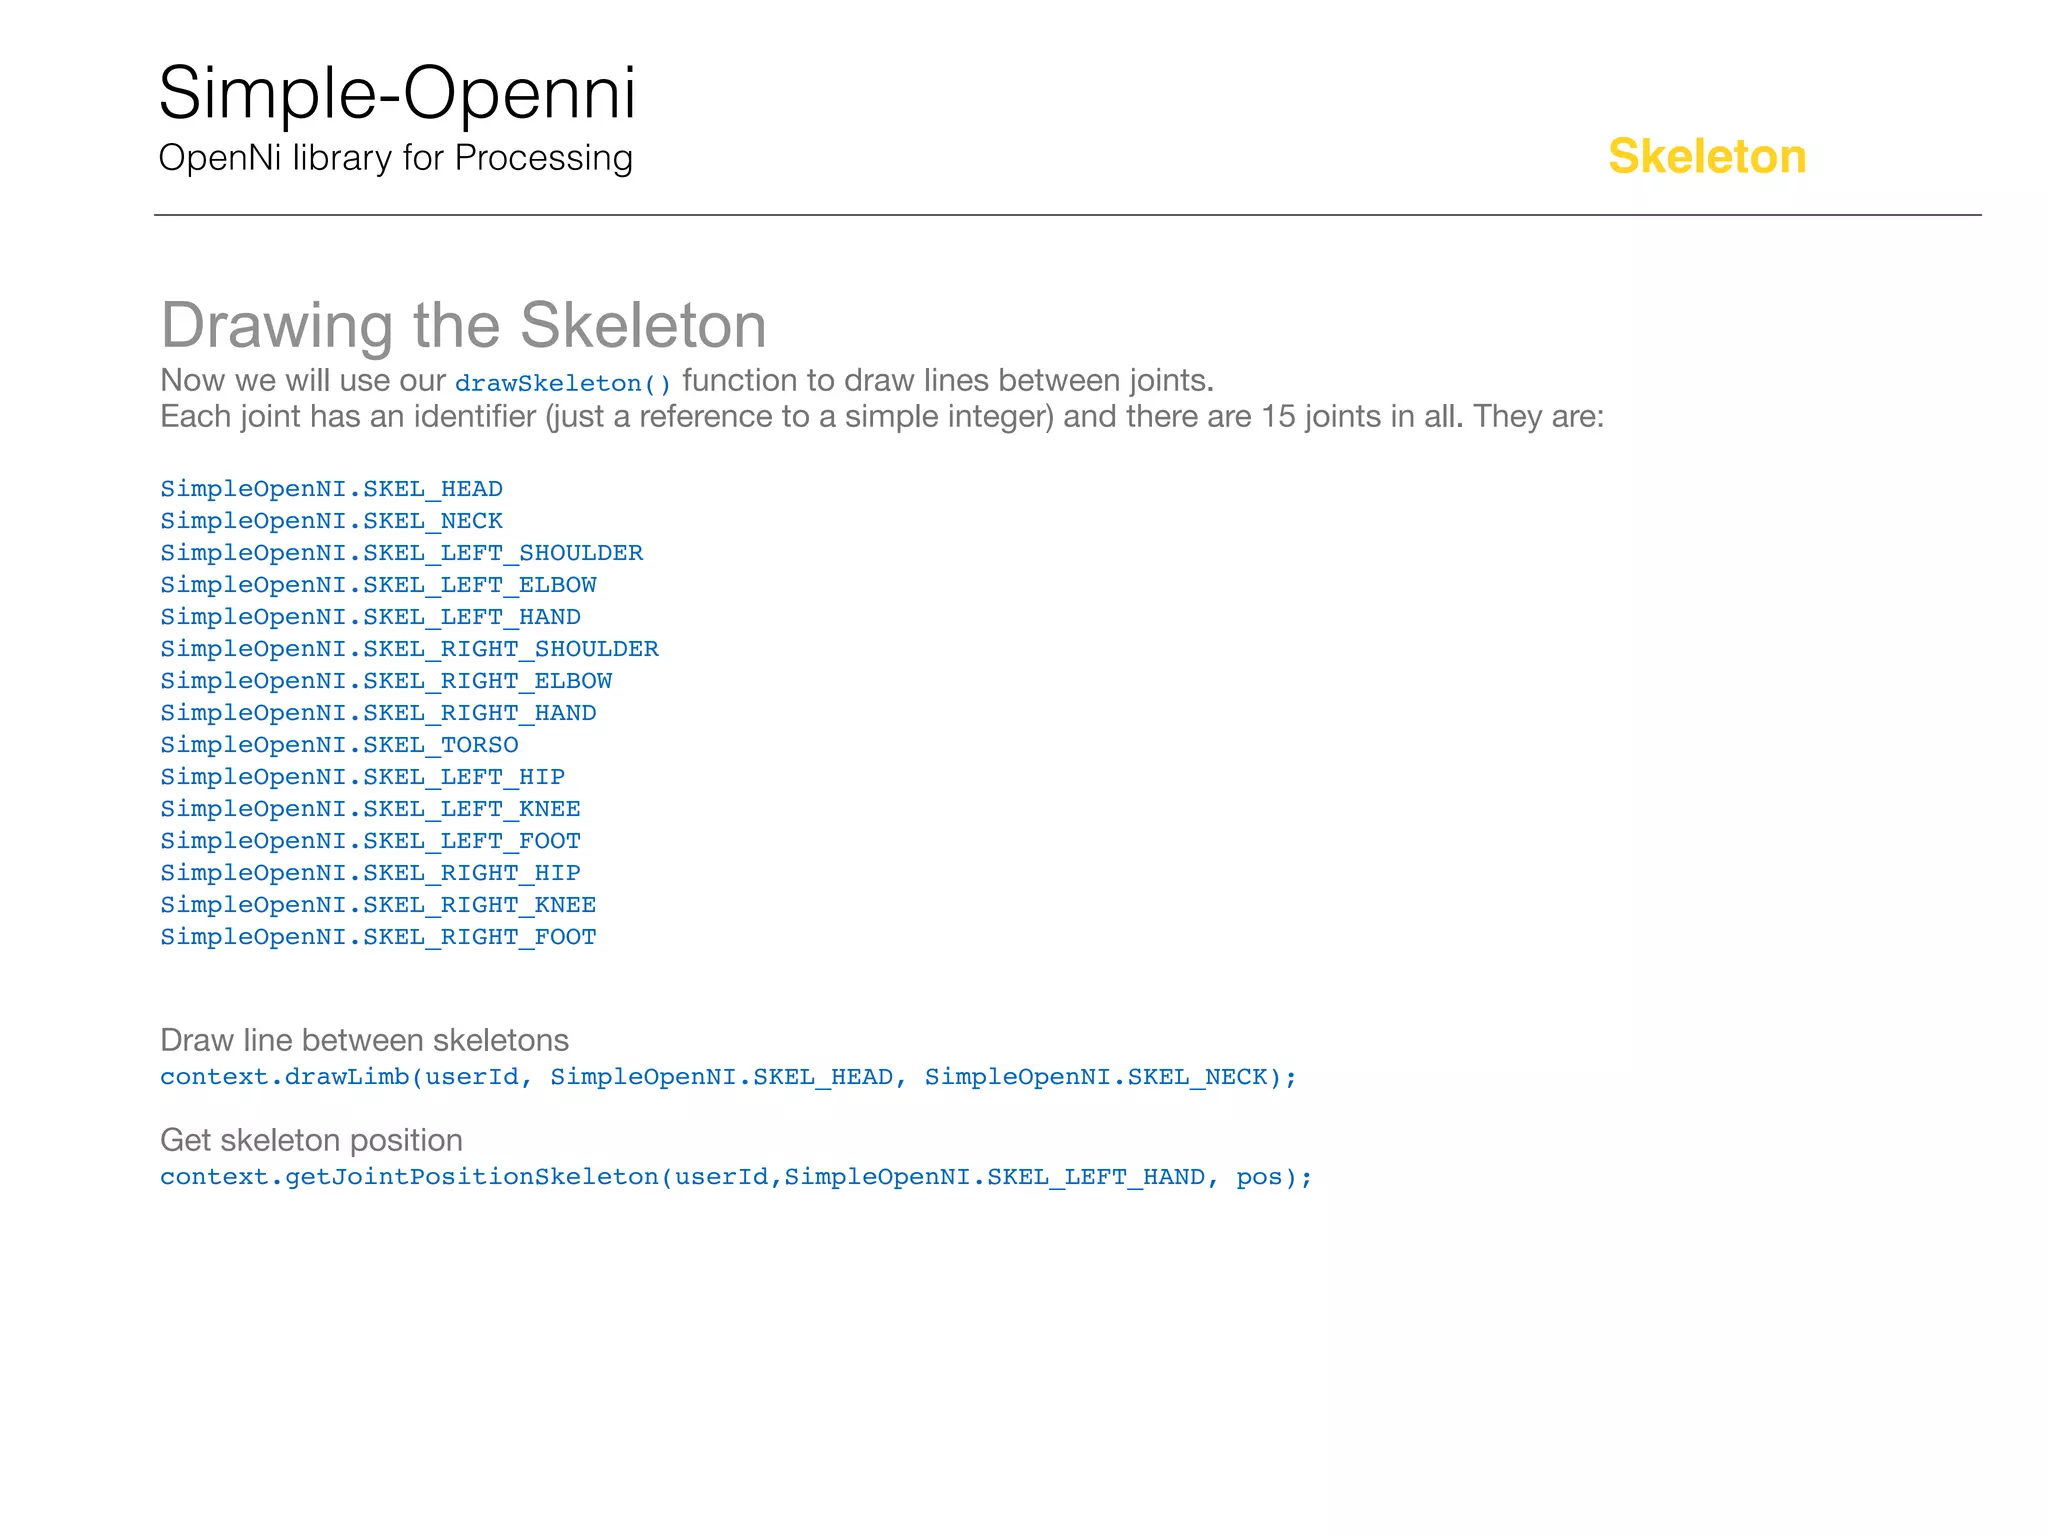
OpenNi library for Processing
Depth
The depth image is calculated by the IR camera and the pseudorandom array of IR points projected onto the scene. It first
needs to be enabled within setup().
context.enableDepth()
To create a window the same size as the depth image, use depthHeight() and dpethWidth(). The context needs to be
instantiated and depth enabled before these methods can be called.
size(context.depthWidth(), context.depthHeight())
To draw a grayscale image of the depth values, the current frame is drawn within an image() in draw().
image(context.depthImage(), 0, 0)
The default colour of the drawn depth image is gray, but the colour can be changed. For instance, the below code shades the
image in blue instead of gray.
context.setDepthImageColor(100, 150, 200)
Like Processing, there are two colour modes for the depth image. The default is RGB, but can be switched to HSB.
context.setDepthImageColorMode(0) // for RGB
context.setDepthImageColorMode(1) // for HSB
An array containing all of the distances in millimetres can be requested with depthMap()
int[] dmap = context.depthMap()
The size of the depth map can also be requested.
int dsize = context.depthMapSize()
To draw the depth image, the current frame is drawn within an image() in draw().
image(context.depthImage(), 0, 0)
Reference Index](https://image.slidesharecdn.com/kinectworkshotfabcafetaipei-160221194522/75/Kinect-v1-Processing-workshot-fabcafe_taipei-11-2048.jpg)


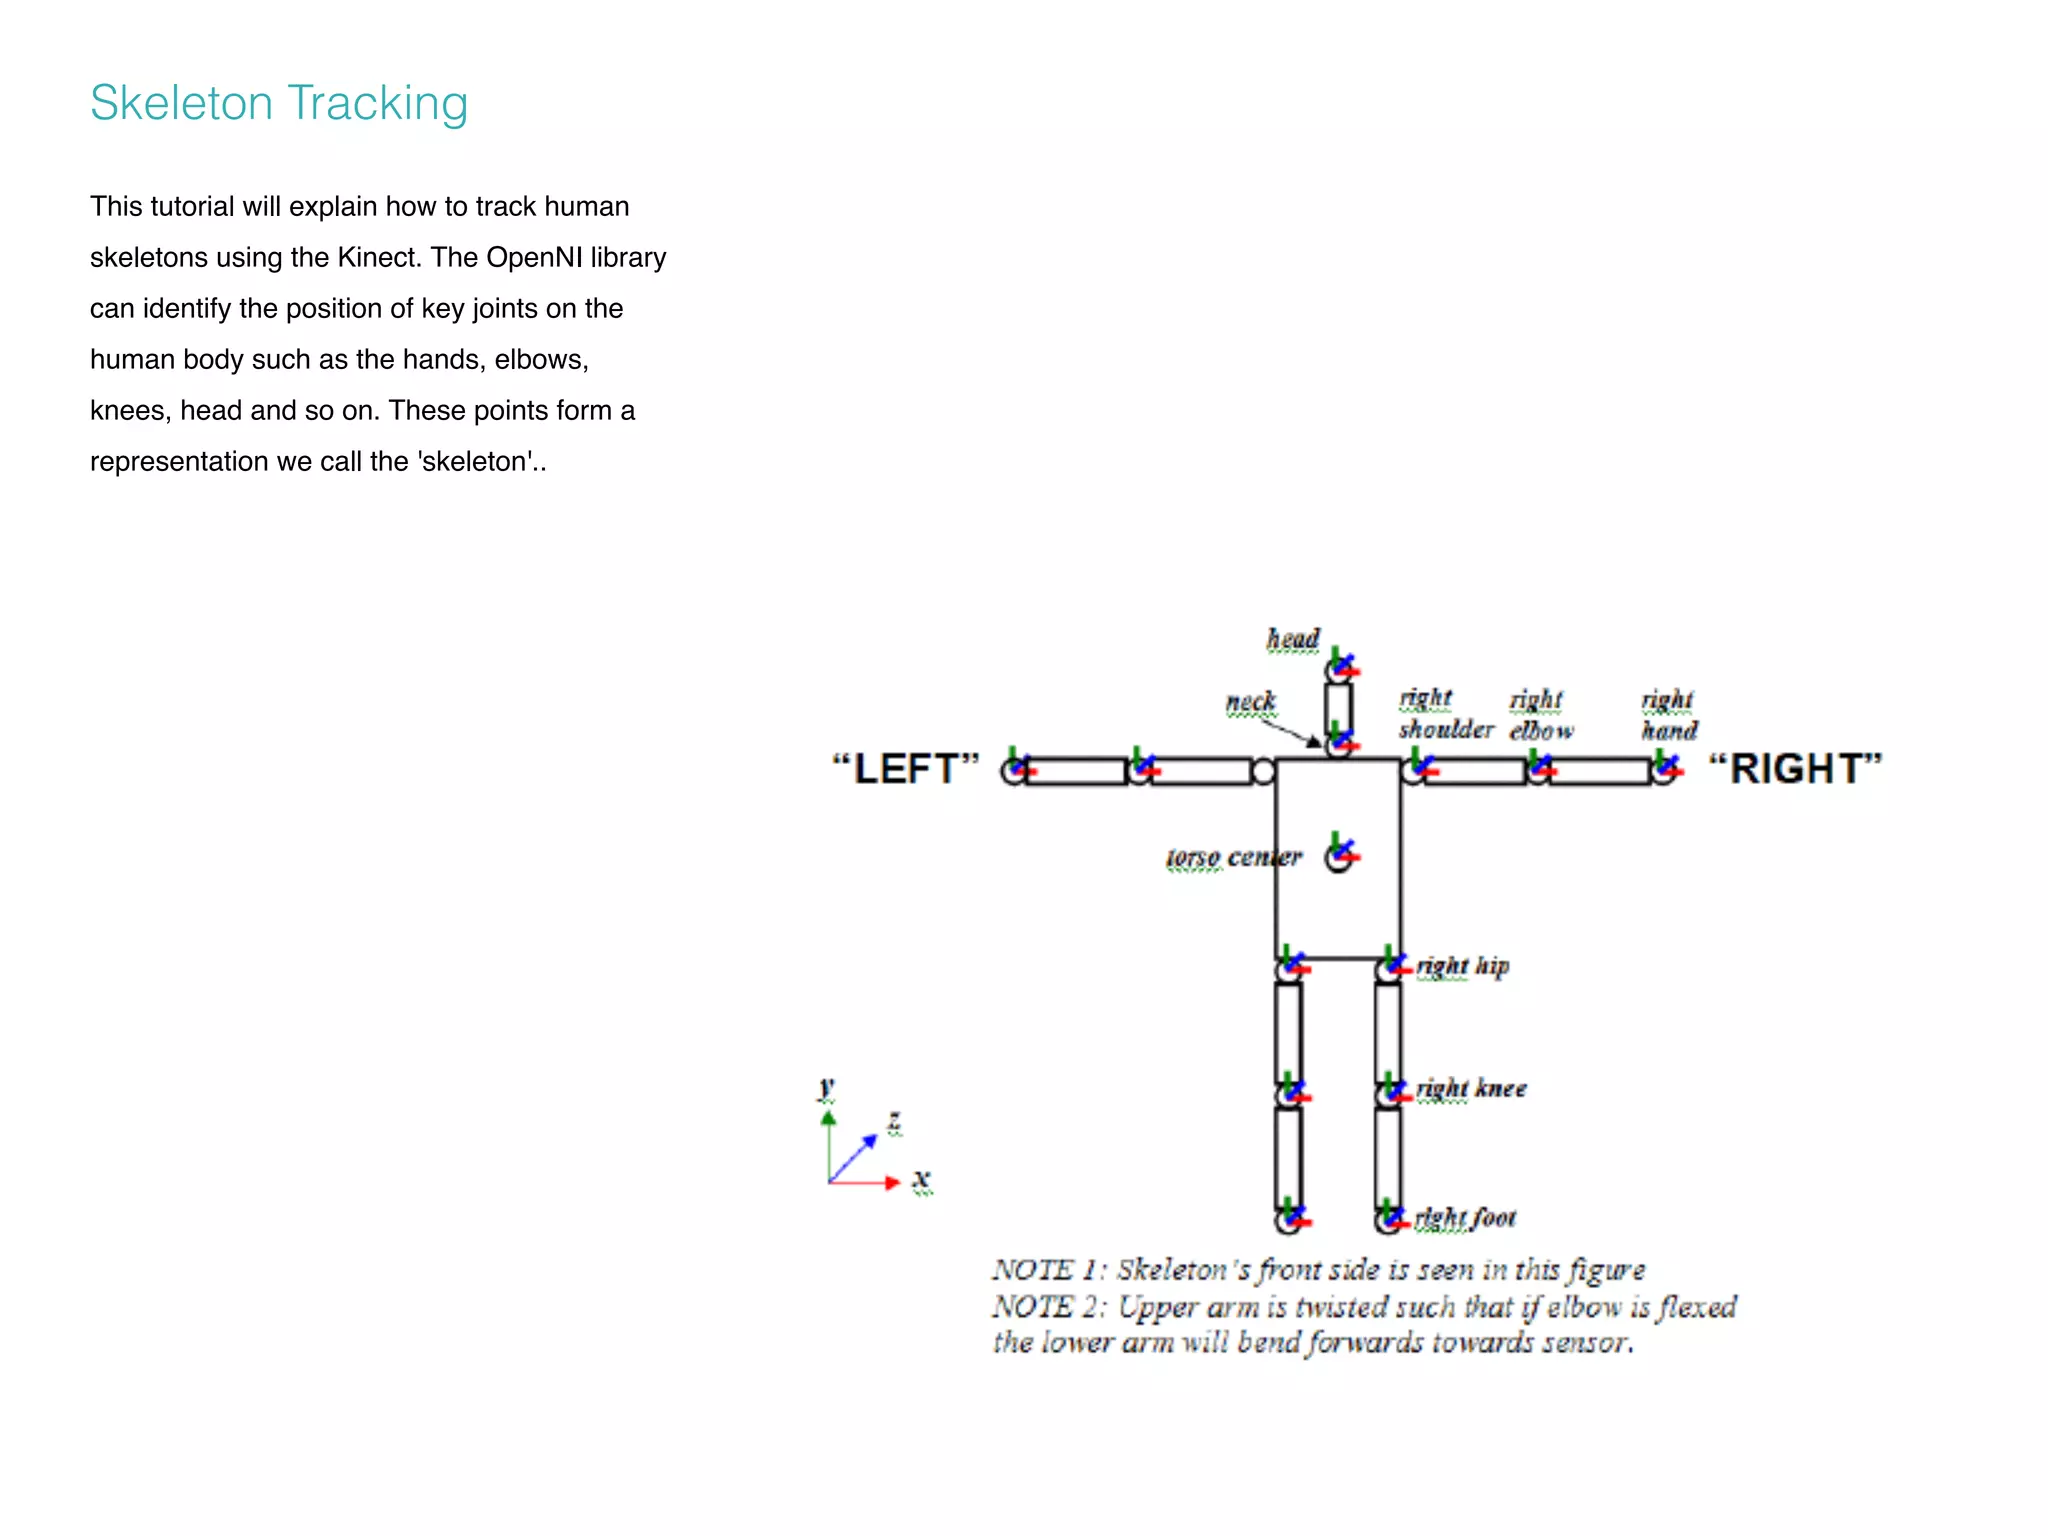


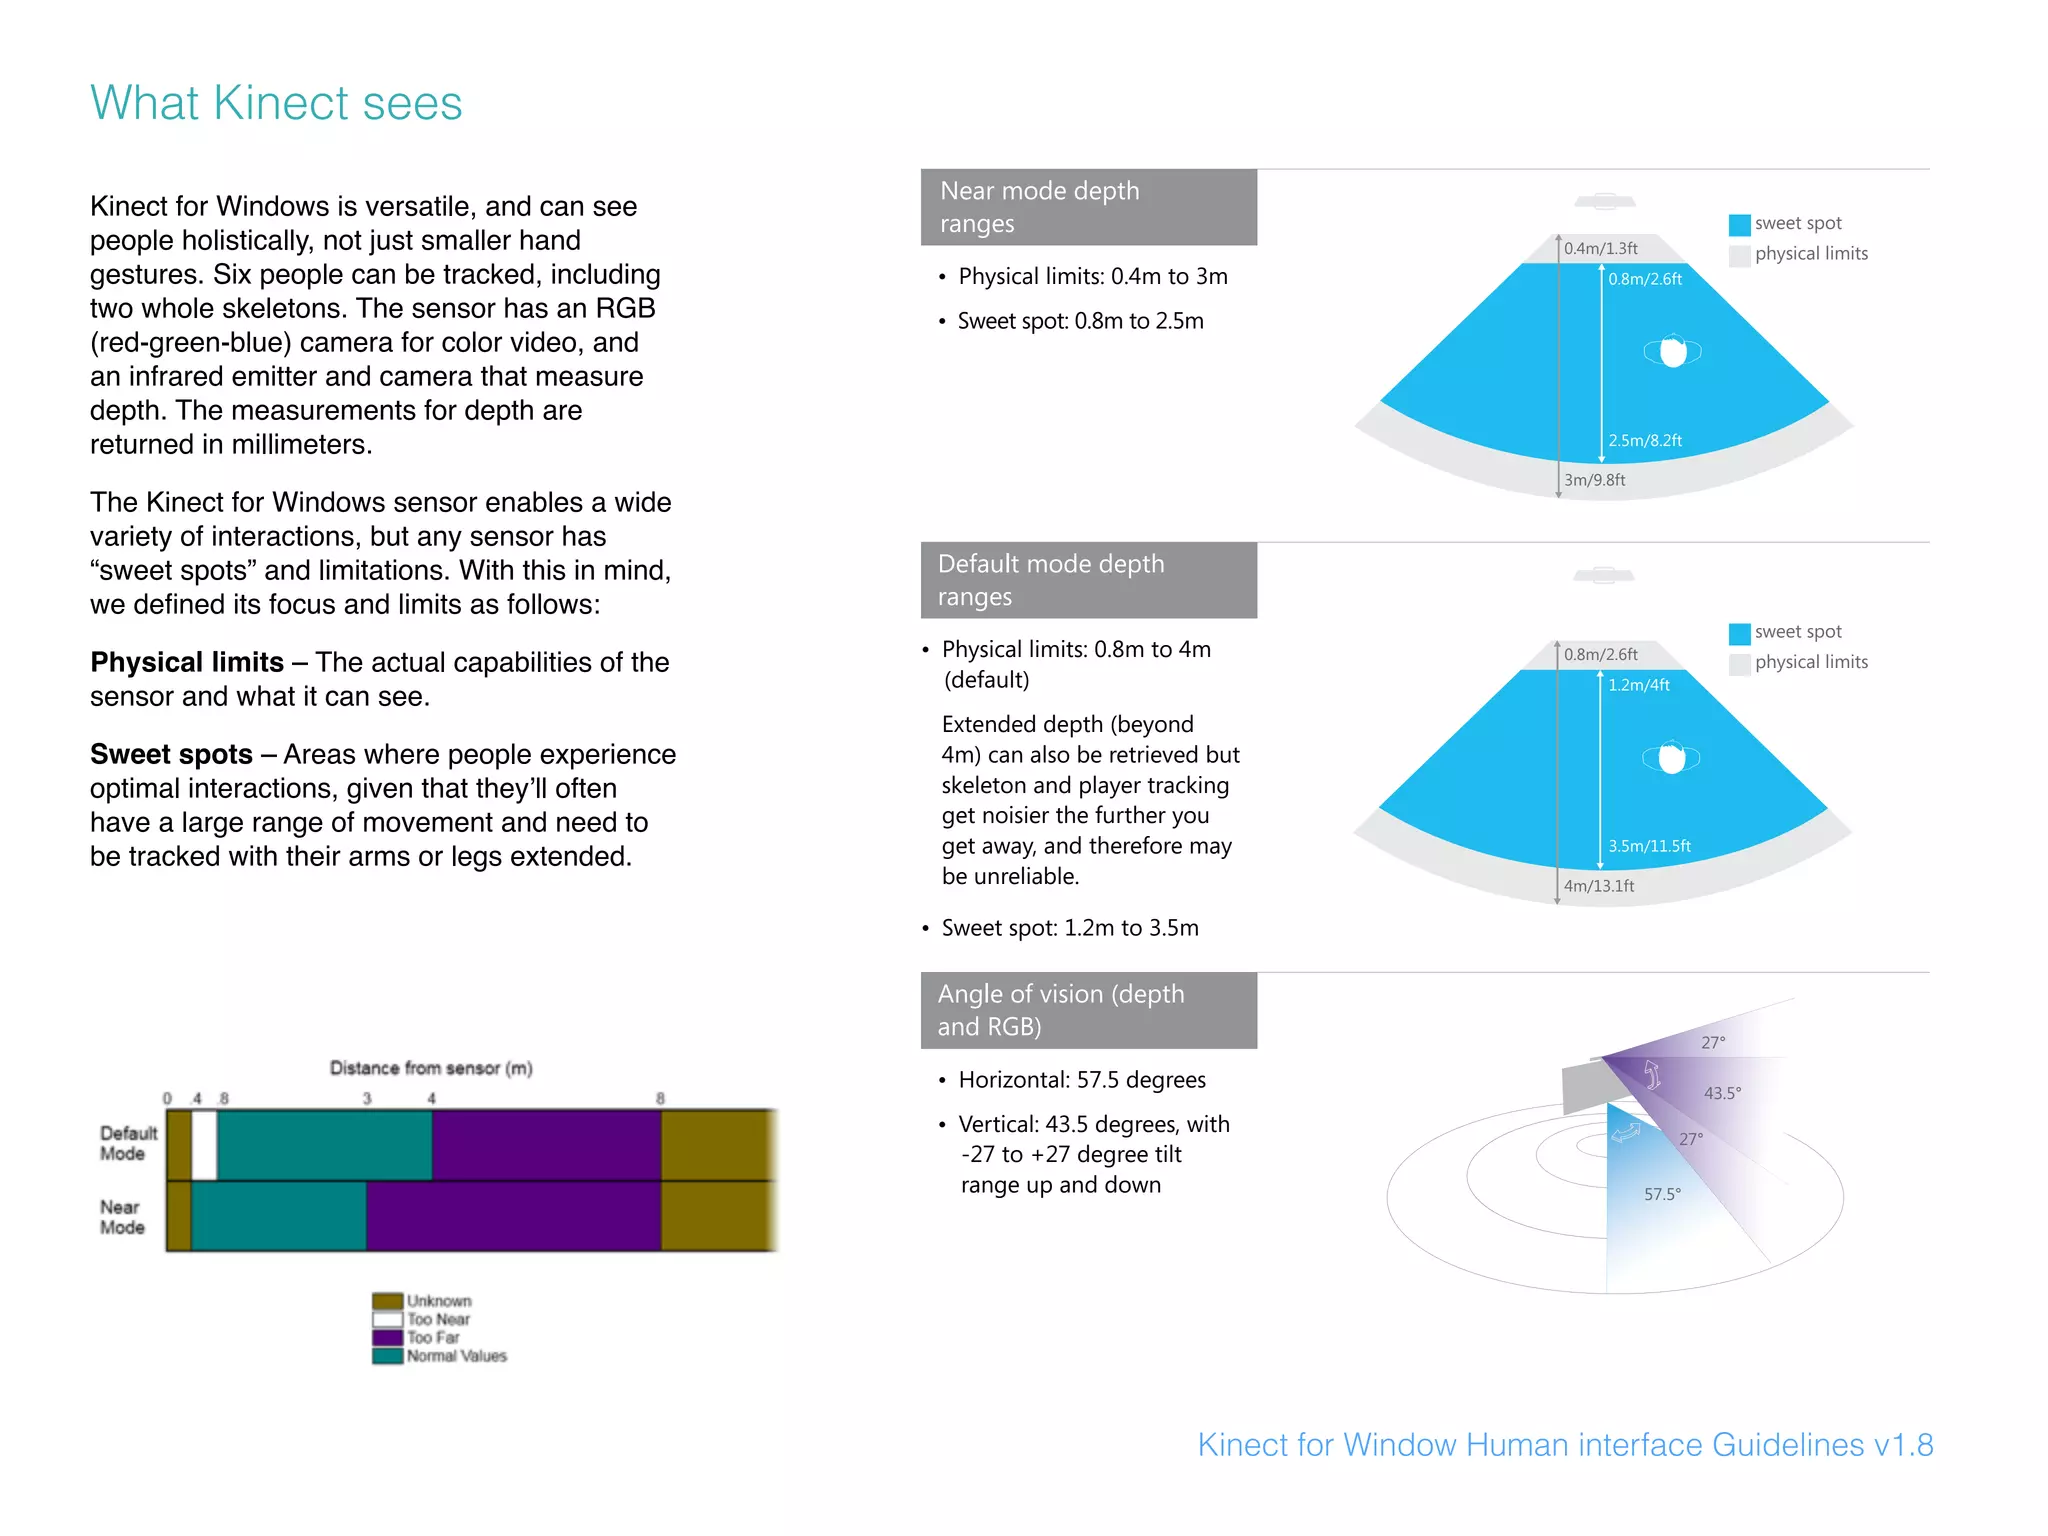
The document provides a detailed overview of the Kinect for Windows sensor and SDK, describing its capabilities, limitations, and practical implementations for interactive design. It outlines the physical limits, sweet spots for tracking, and includes guidelines for using gesture controls and skeleton tracking in applications. Additionally, it discusses how to integrate and program with the Kinect sensor using the Simple OpenNI library for Processing.