Download to read offline
![DotNetNuke is constantly changing as it evolves so the best way to get up-to-date
help and information is to use theDotNetNuke message board.
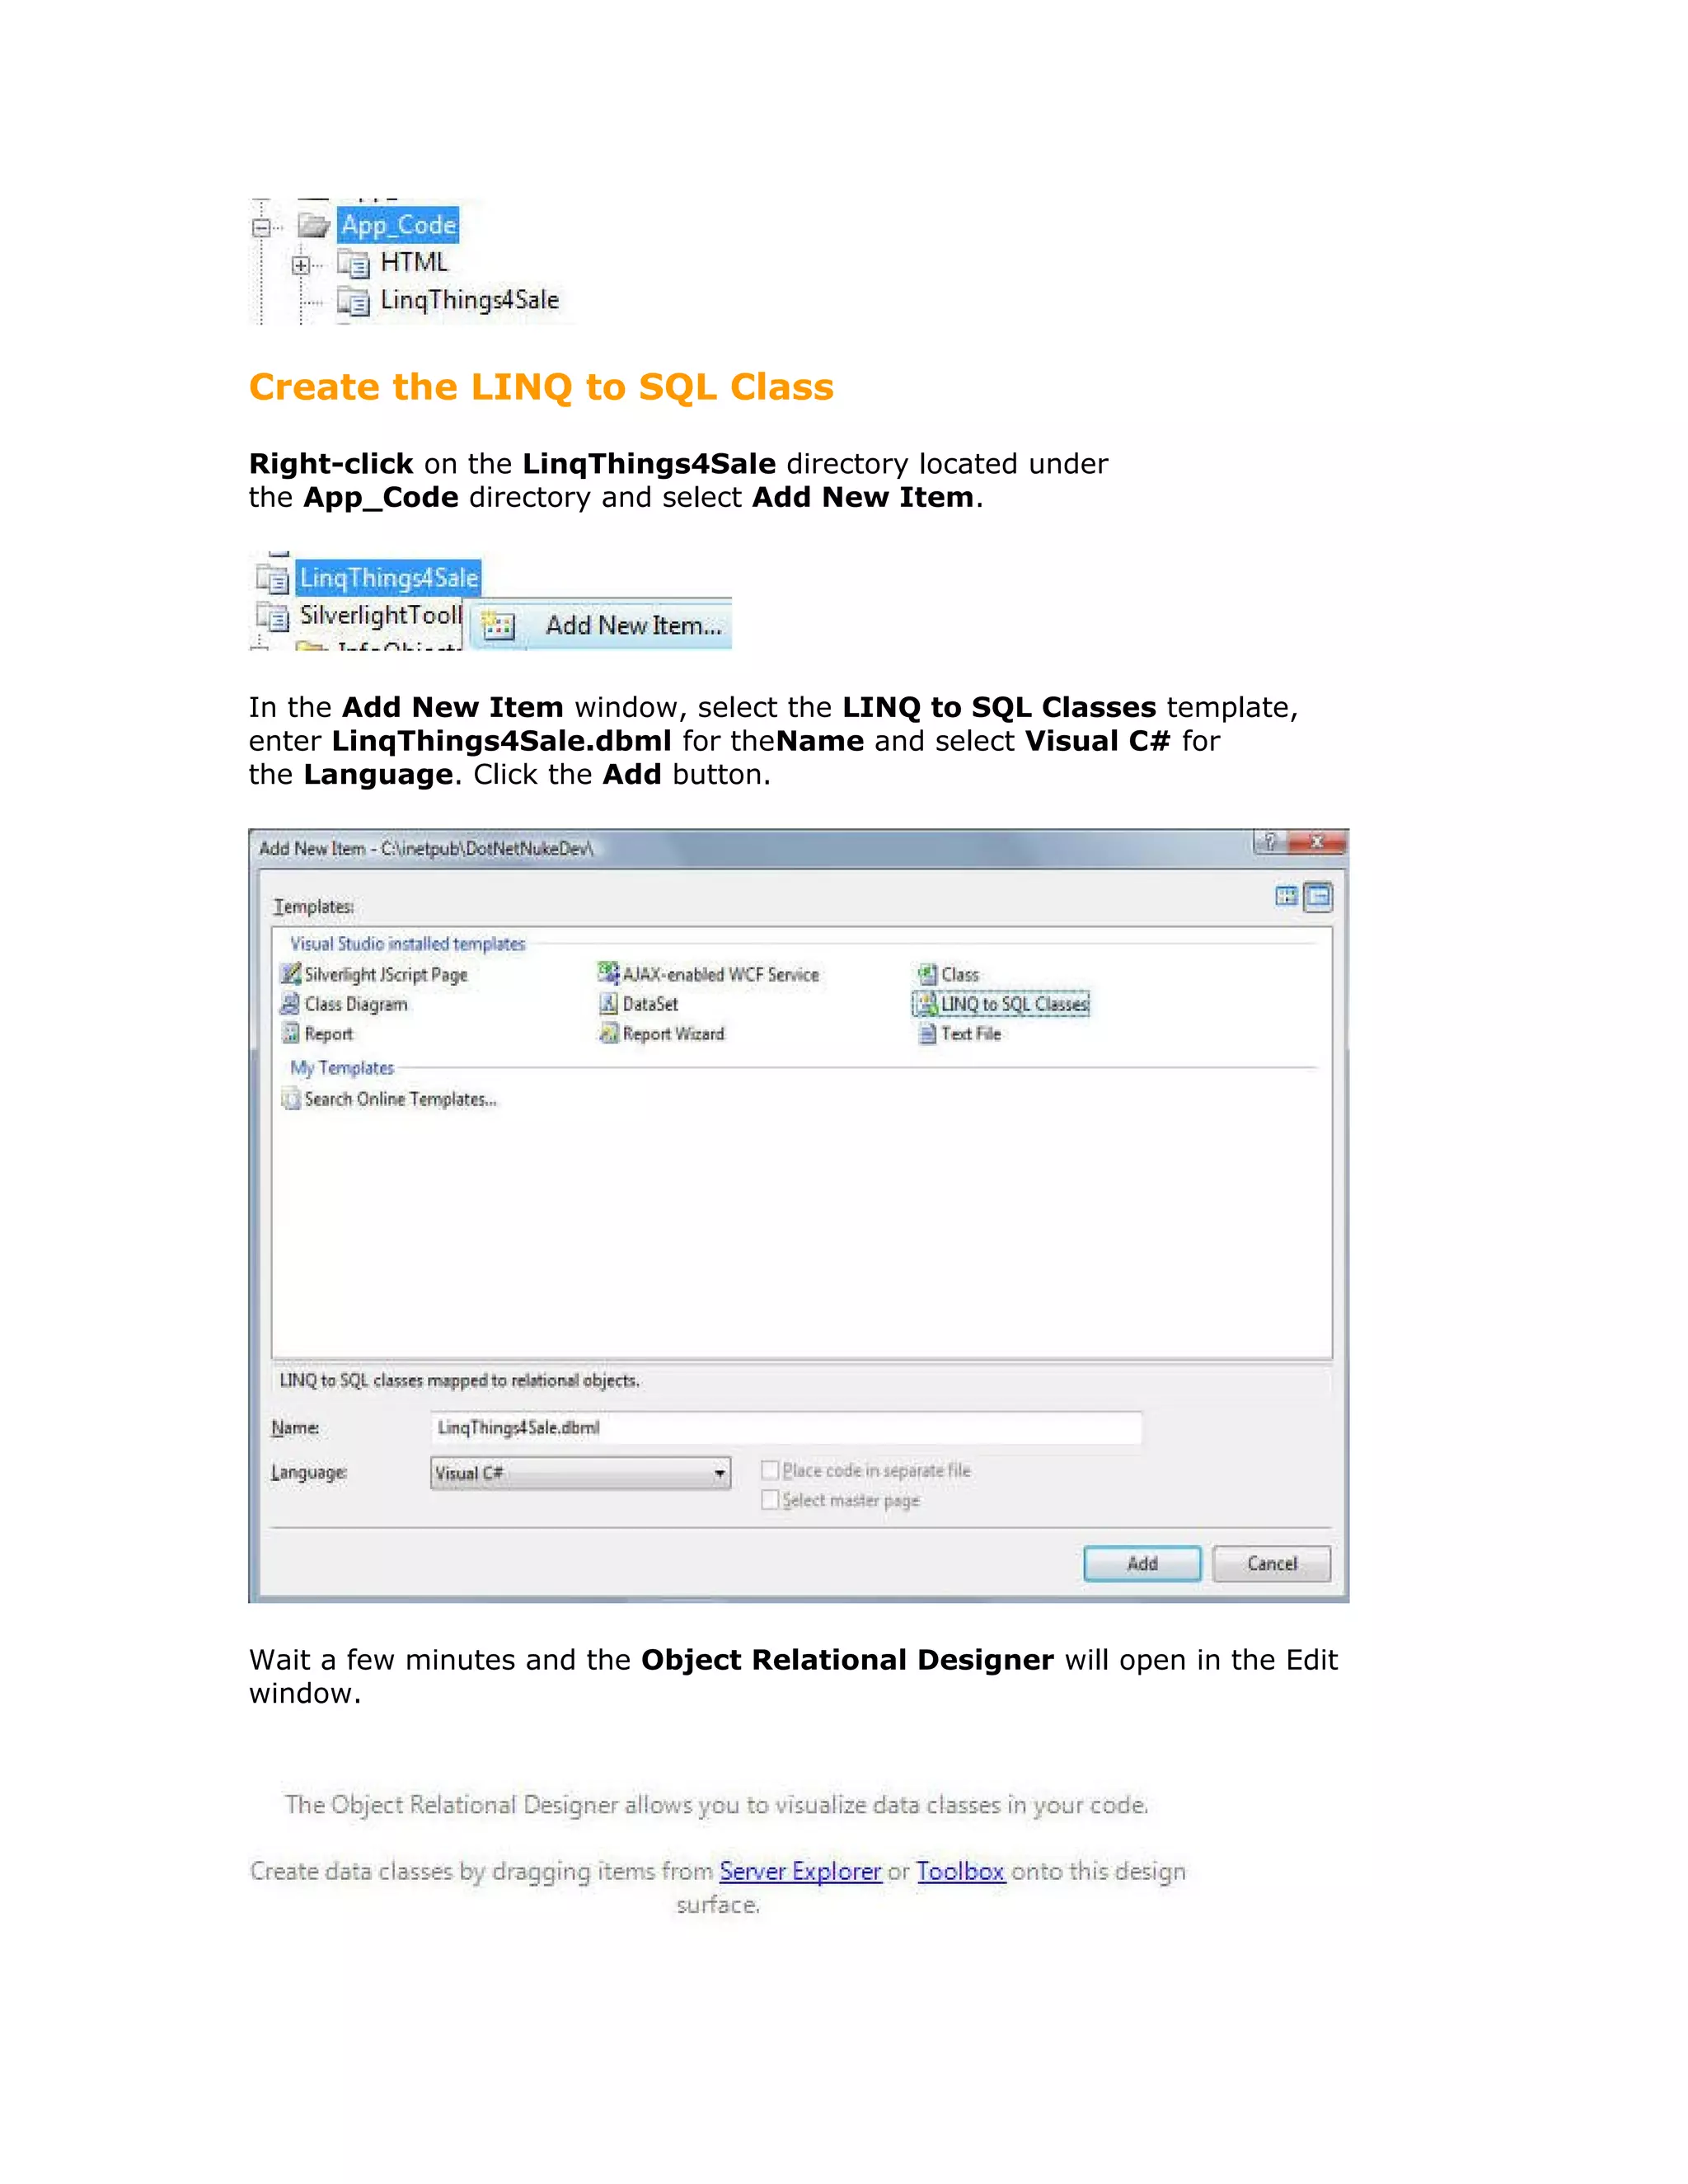
Create the Table
Log into the website using the Host account.
Click on the HOST menu and select SQL
Paste the following script into the box:
Collapse | Copy Code
CREATE TABLE ThingsForSale (
[ID] [int] IDENTITY(1,1) NOT NULL,
[ModuleId] [int] NOT NULL,
[UserID] [int] NULL,
[Category] [nvarchar](25),
[Description] [nvarchar](500),
[Price] [float] NULL
) ON [PRIMARY]
ALTER TABLE ThingsForSale ADD
CONSTRAINT [PK_ThingsForSale] PRIMARY KEY CLUSTERED
([ID]) ON [PRIMARY]](https://image.slidesharecdn.com/creating-a-dotnetnuke-160211090110/75/Creating-a-dot-netnuke-3-2048.jpg)


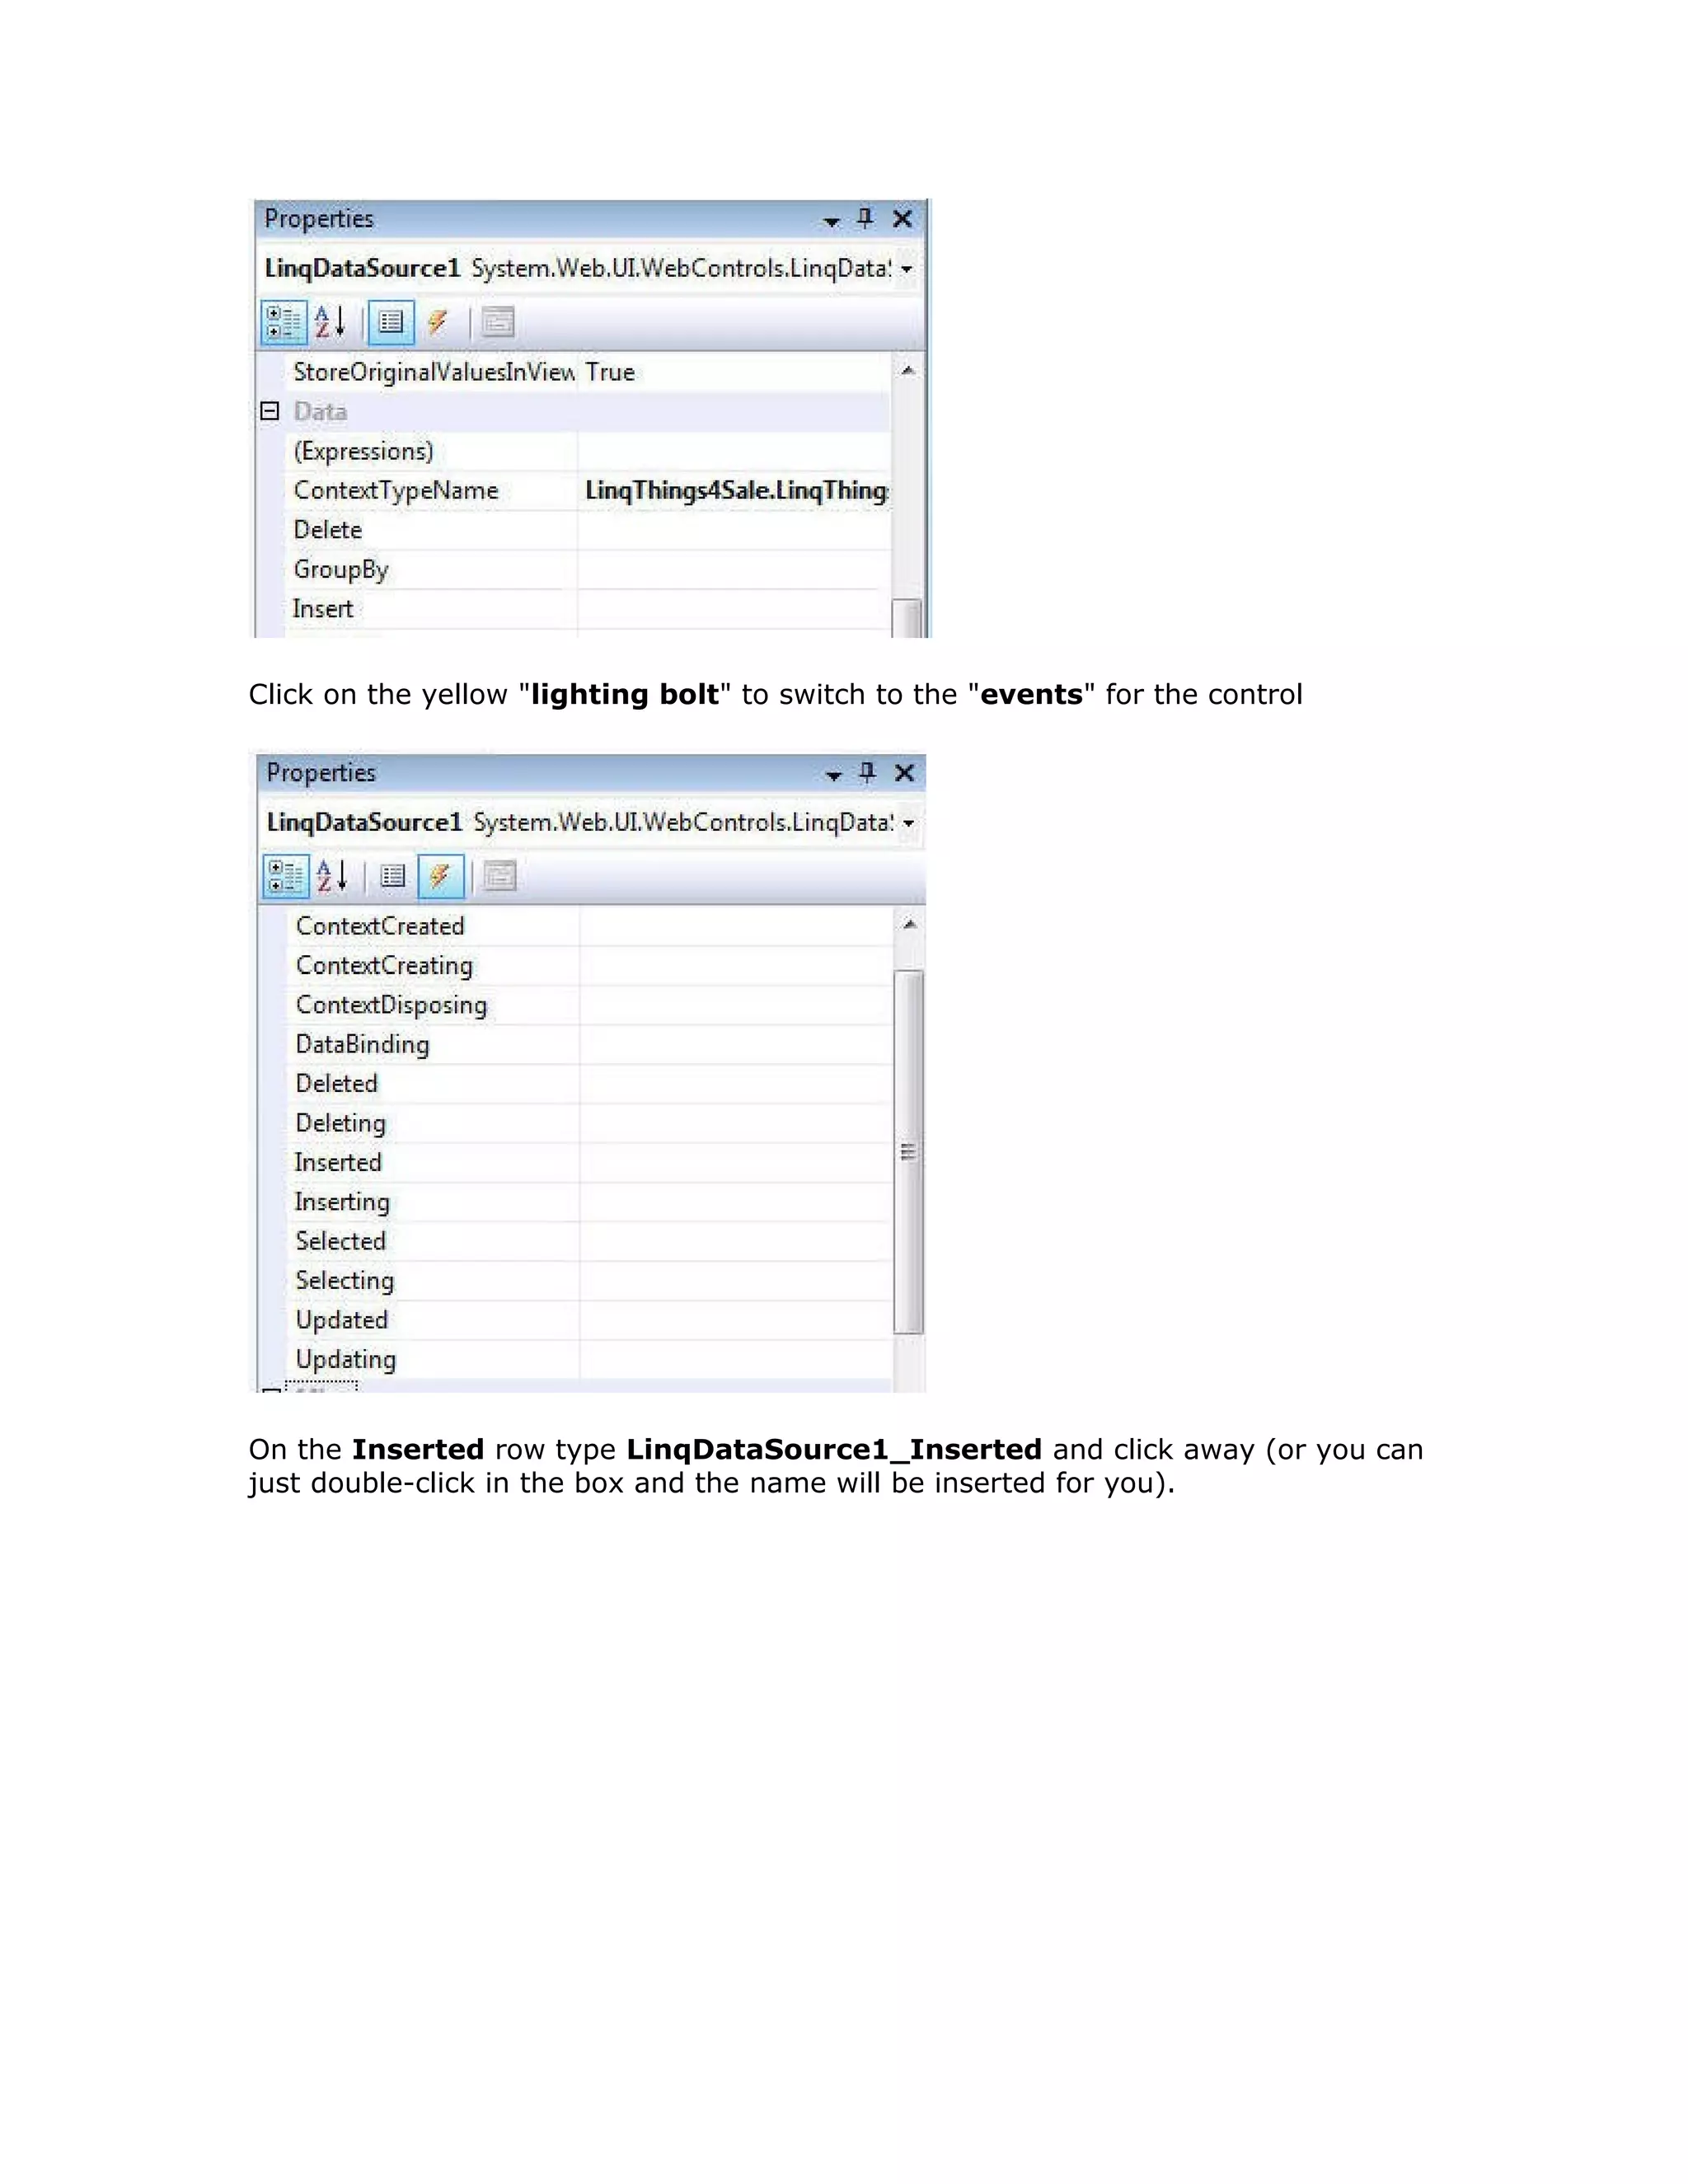

![Add code so the method reads:
Collapse | Copy Code
protected void LinqDataSource1_Inserting(object sender,
LinqDataSourceInsertEventArgs e)
{
ThingsForSale ThingsForSale = (ThingsForSale)e.NewObject;
ThingsForSale.UserID =
Entities.Users.UserController.GetCurrentUserInfo().UserID;
ThingsForSale.ModuleId = ModuleId;
}
(this method casts "e" which is an instance of the object containing the data about to
be inserted, as a ThingsForSale object. It then sets the UserID and the
ModuleId. ) On the Selecting row typeLinqDataSource1_Selecting and click
away.
Add code so the method reads:
Collapse | Copy Code
protected void LinqDataSource1_Selecting(object sender,
LinqDataSourceSelectEventArgs e)
{
e.WhereParameters["ModuleId"] = ModuleId;
}
(this method passes the current ModuleId to the LinqDataSource control. You will
recall that a where clause was defined to expect a ModuleId to be passed.)
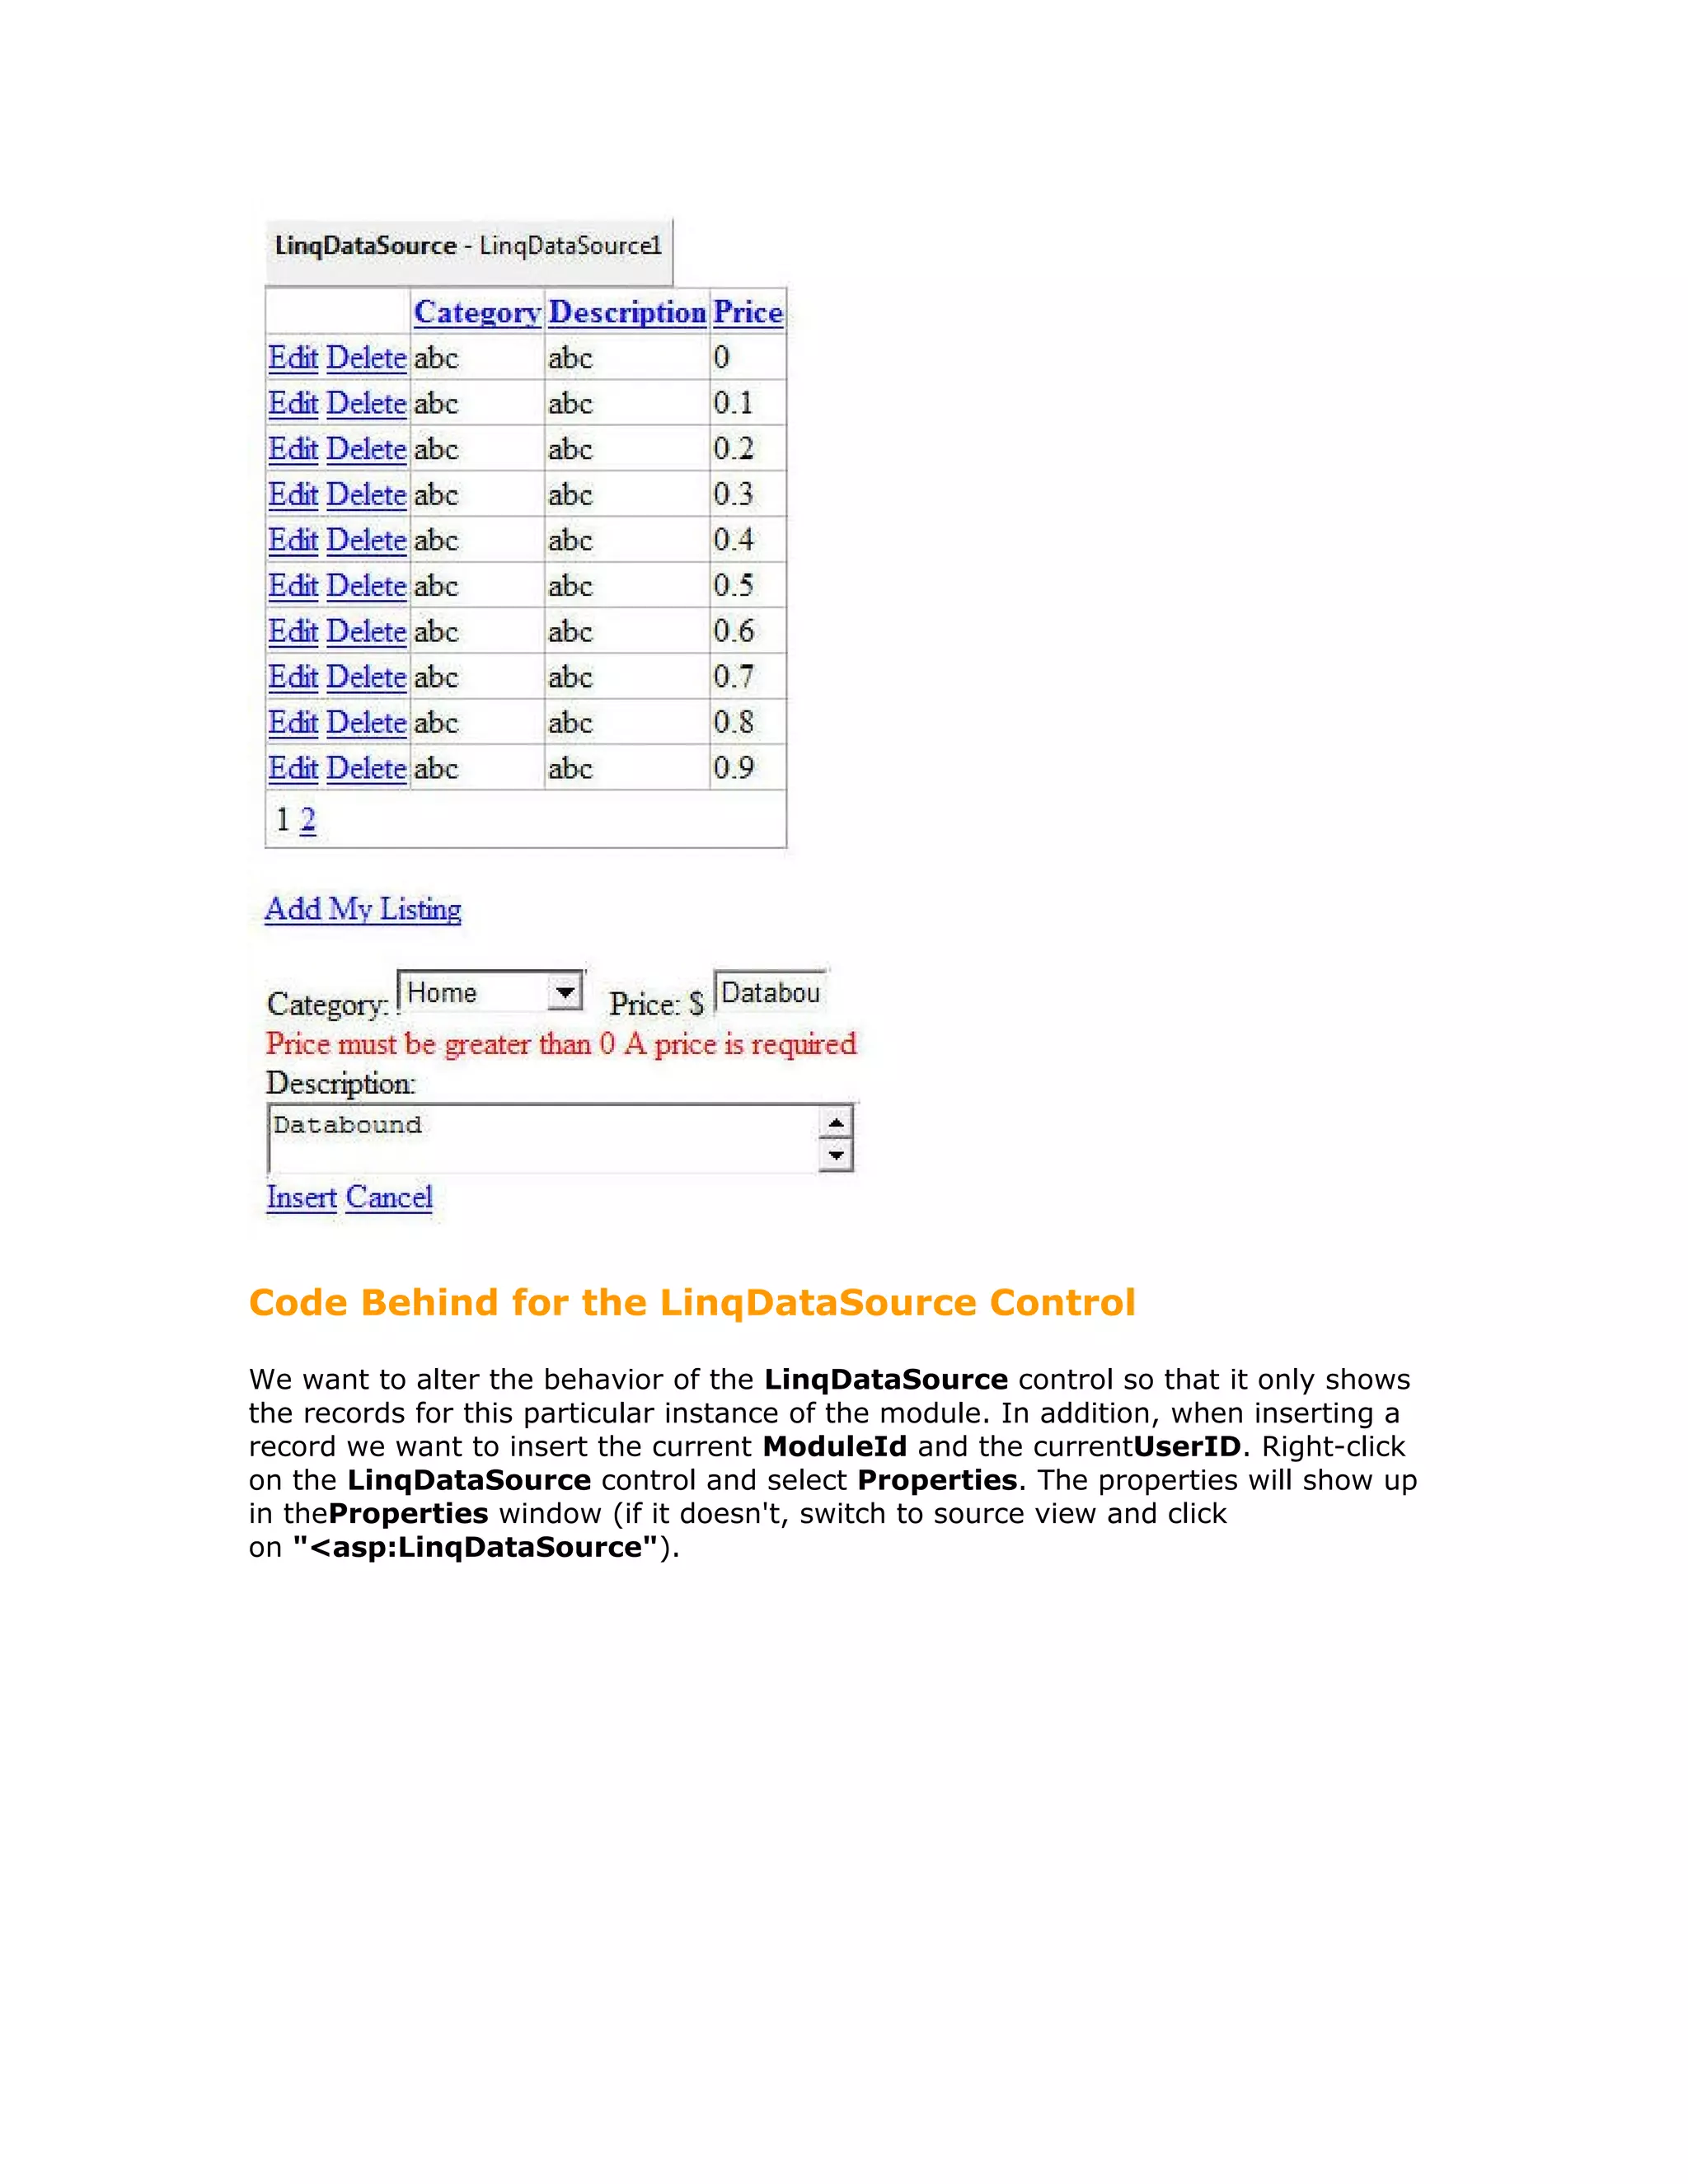
Code Behind for the Add My Listing link
Double-click on the Add My Listing link.](https://image.slidesharecdn.com/creating-a-dotnetnuke-160211090110/75/Creating-a-dot-netnuke-30-2048.jpg)
![Add code so the method reads:
Collapse | Copy Code
protected void LinkButton1_Click(object sender, EventArgs e)
{
this.FormView1.Visible = true;
this.GridView1.DataBind();
}
(this method makes the entry form visible. )
Code Behind for the GridView
Right-click on the GridView control and select Properties. The properties will show
up in the Properties window (if it doesn't, switch to source view and click
on "<asp:GridView"). Switch to events and enterGridView1_RowDataBound for
the RowDataBound row and click away.
Add code so the method reads:
Collapse | Copy Code
protected void GridView1_RowDataBound(object sender, GridViewRowEventArgs e)
{
if ((e.Row.RowType == DataControlRowType.DataRow))
{
ThingsForSale ThingsForSale = ((ThingsForSale)(e.Row.DataItem));
if ((PortalSecurity.IsInRole("Administrators"))
|| (Entities.Users.UserController.GetCurrentUserInfo().UserID ==
(int)ThingsForSale.UserID))
{
e.Row.Cells[0].Enabled = true;](https://image.slidesharecdn.com/creating-a-dotnetnuke-160211090110/75/Creating-a-dot-netnuke-31-2048.jpg)
![}
else
{
e.Row.Cells[0].Text = " ";
}
}
}
(this method casts "e" which is an instance of the object that contains the data for
the current row, as a ThingsForSale object. It then compares the UserID to the
UserID of the current user. If the UserID matches the current user or the current
user is an administrator it enables the first column on the GridView (this allows a
user to edit the row)).
Add Additional Methods to the Code behind
Add these two methods to the code behind:
Collapse | Copy Code
protected void InsertButton_Click(object sender, EventArgs e)
{
this.FormView1.Visible = false;
LinkButton1.Text = "Update Successful - Add Another Listing";
this.GridView1.DataBind();
}
protected void InsertCancelButton_Click(object sender, EventArgs e)
{
this.FormView1.Visible = false;
this.GridView1.DataBind();
}
(The events for these two methods was created when the code was pasted in the
earlier step) Alter thePage_Load method in the code behind so it reads:
Collapse | Copy Code
protected void Page_Load(object sender, EventArgs e)
{
if ((PortalSecurity.IsInRole("Registered Users") ||
PortalSecurity.IsInRole("Administrators")))
{
LinkButton1.Enabled = true;
}
else
{
LinkButton1.Text = "You must be logged in to add a Listing";
LinkButton1.Enabled = false;
}
}
(This code determines if the user is logged in and displays the Add Listing link if they
are).
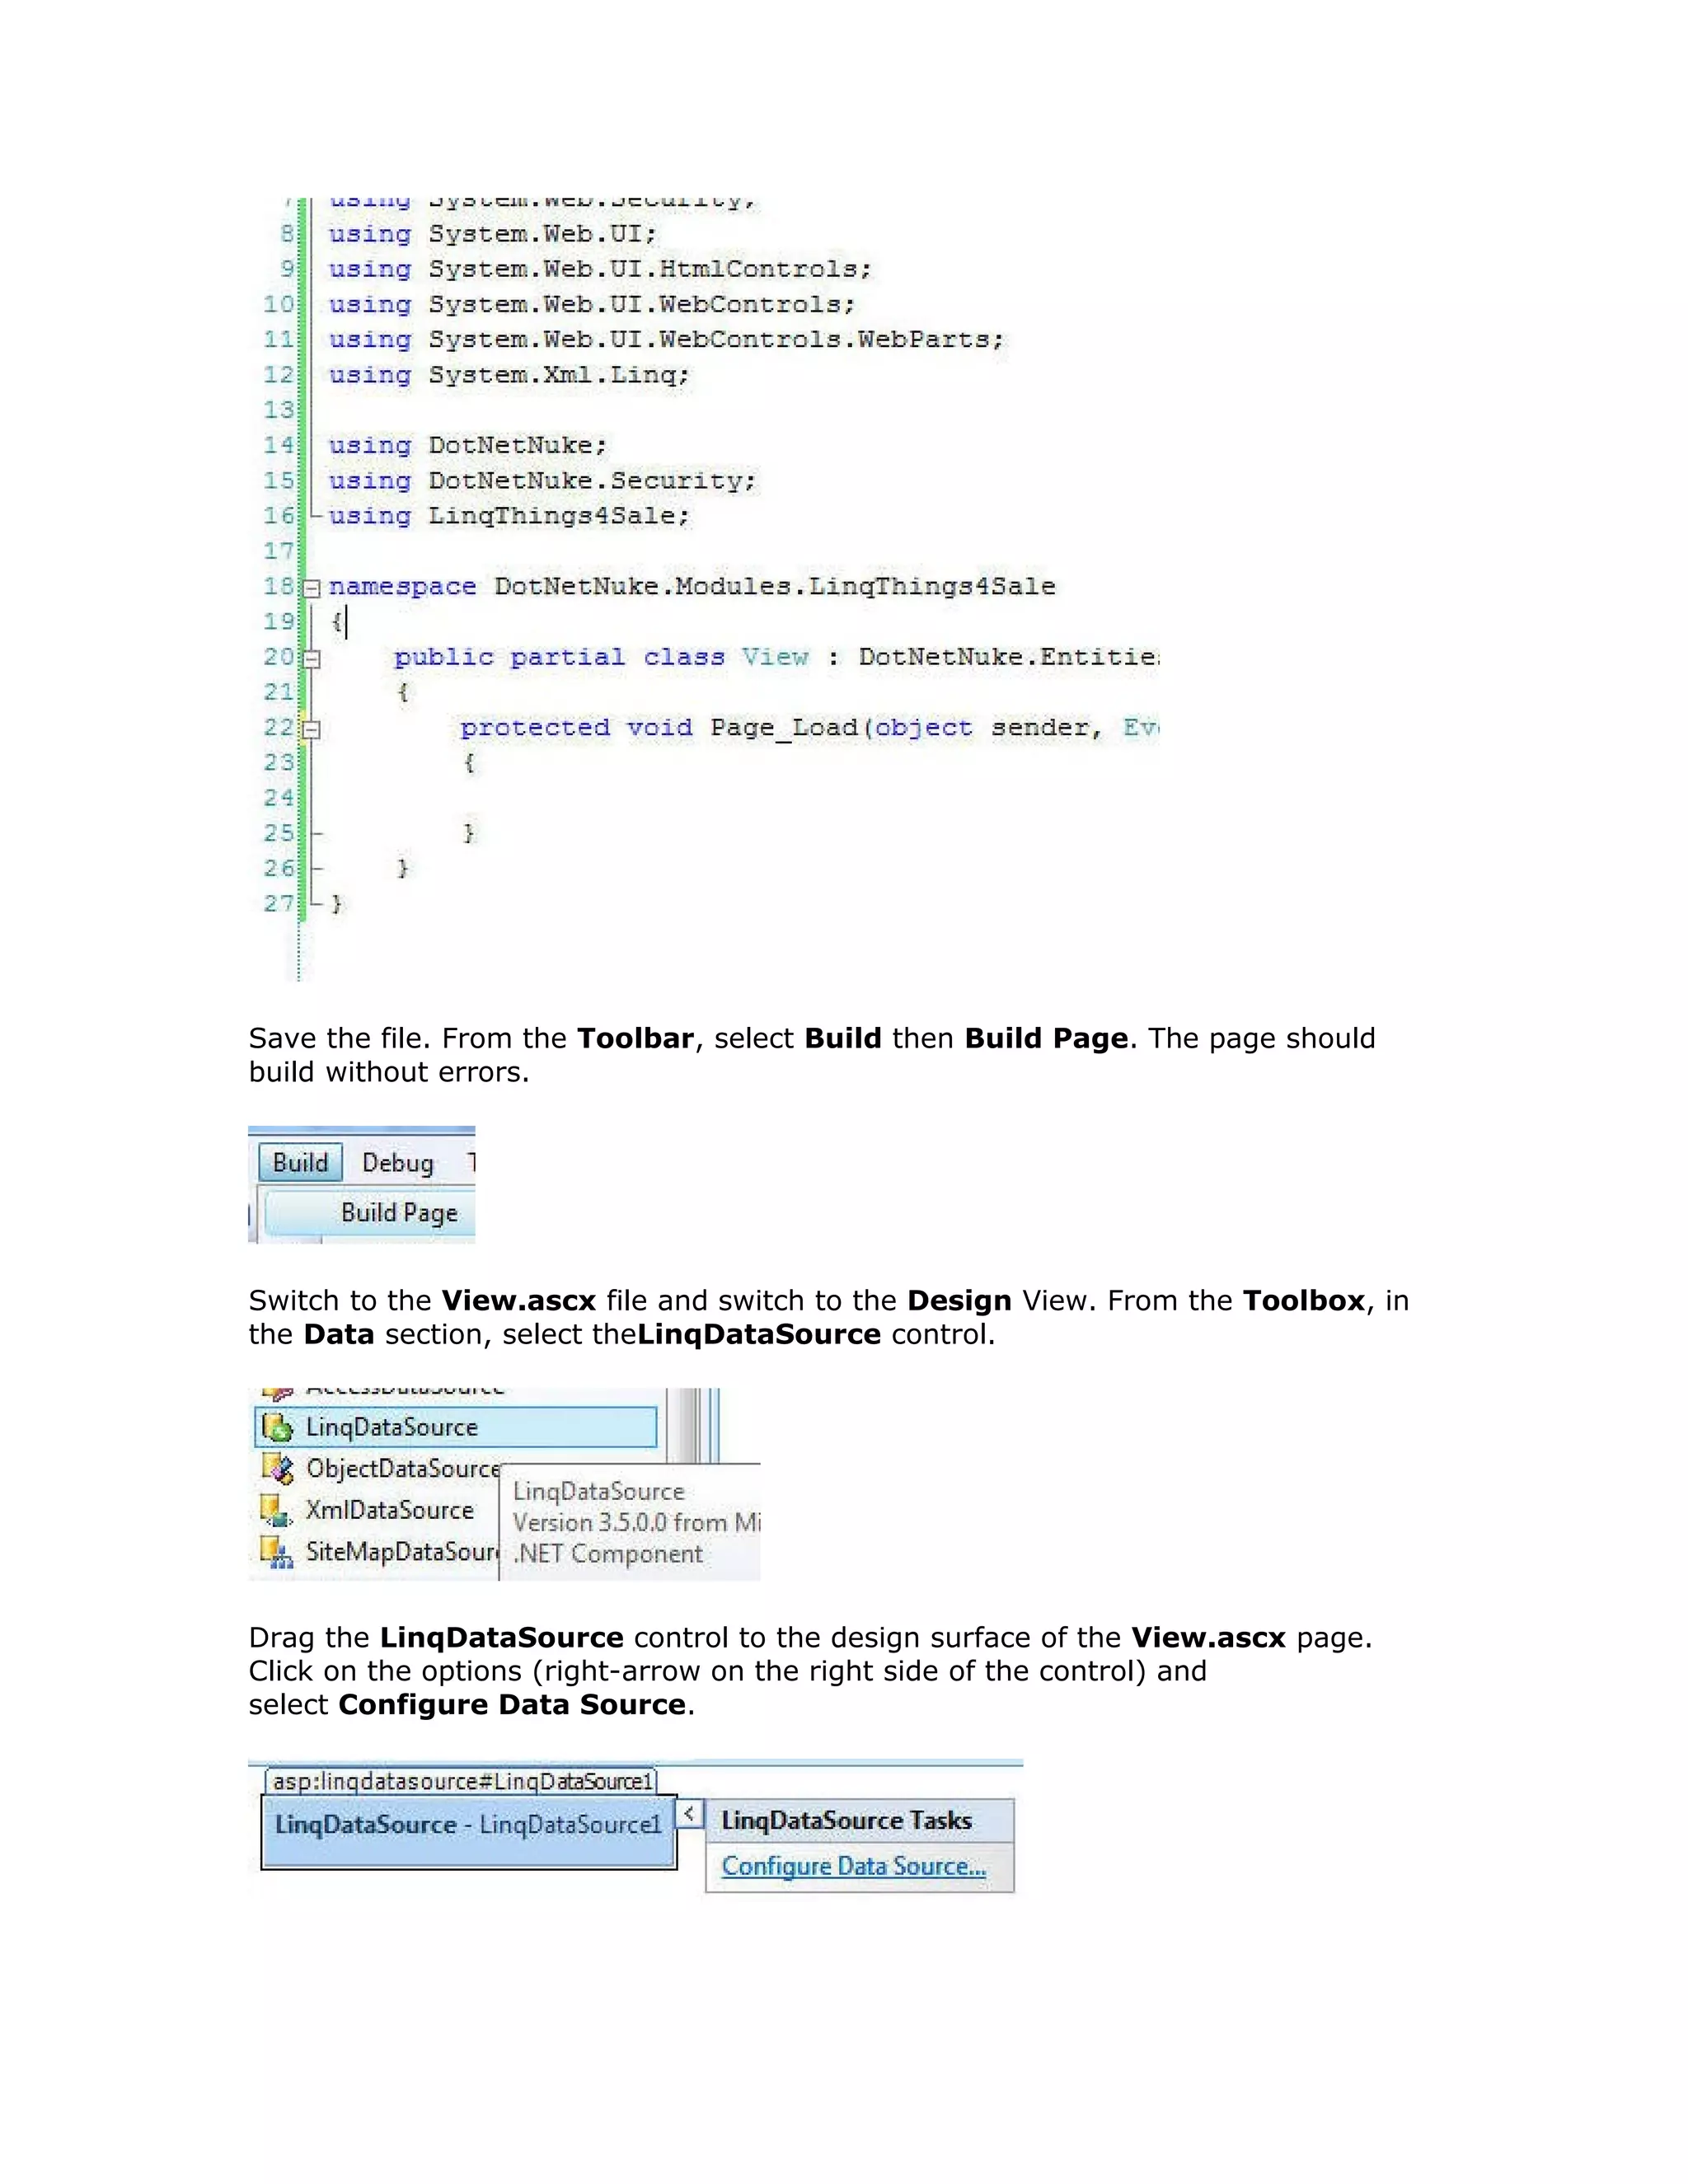
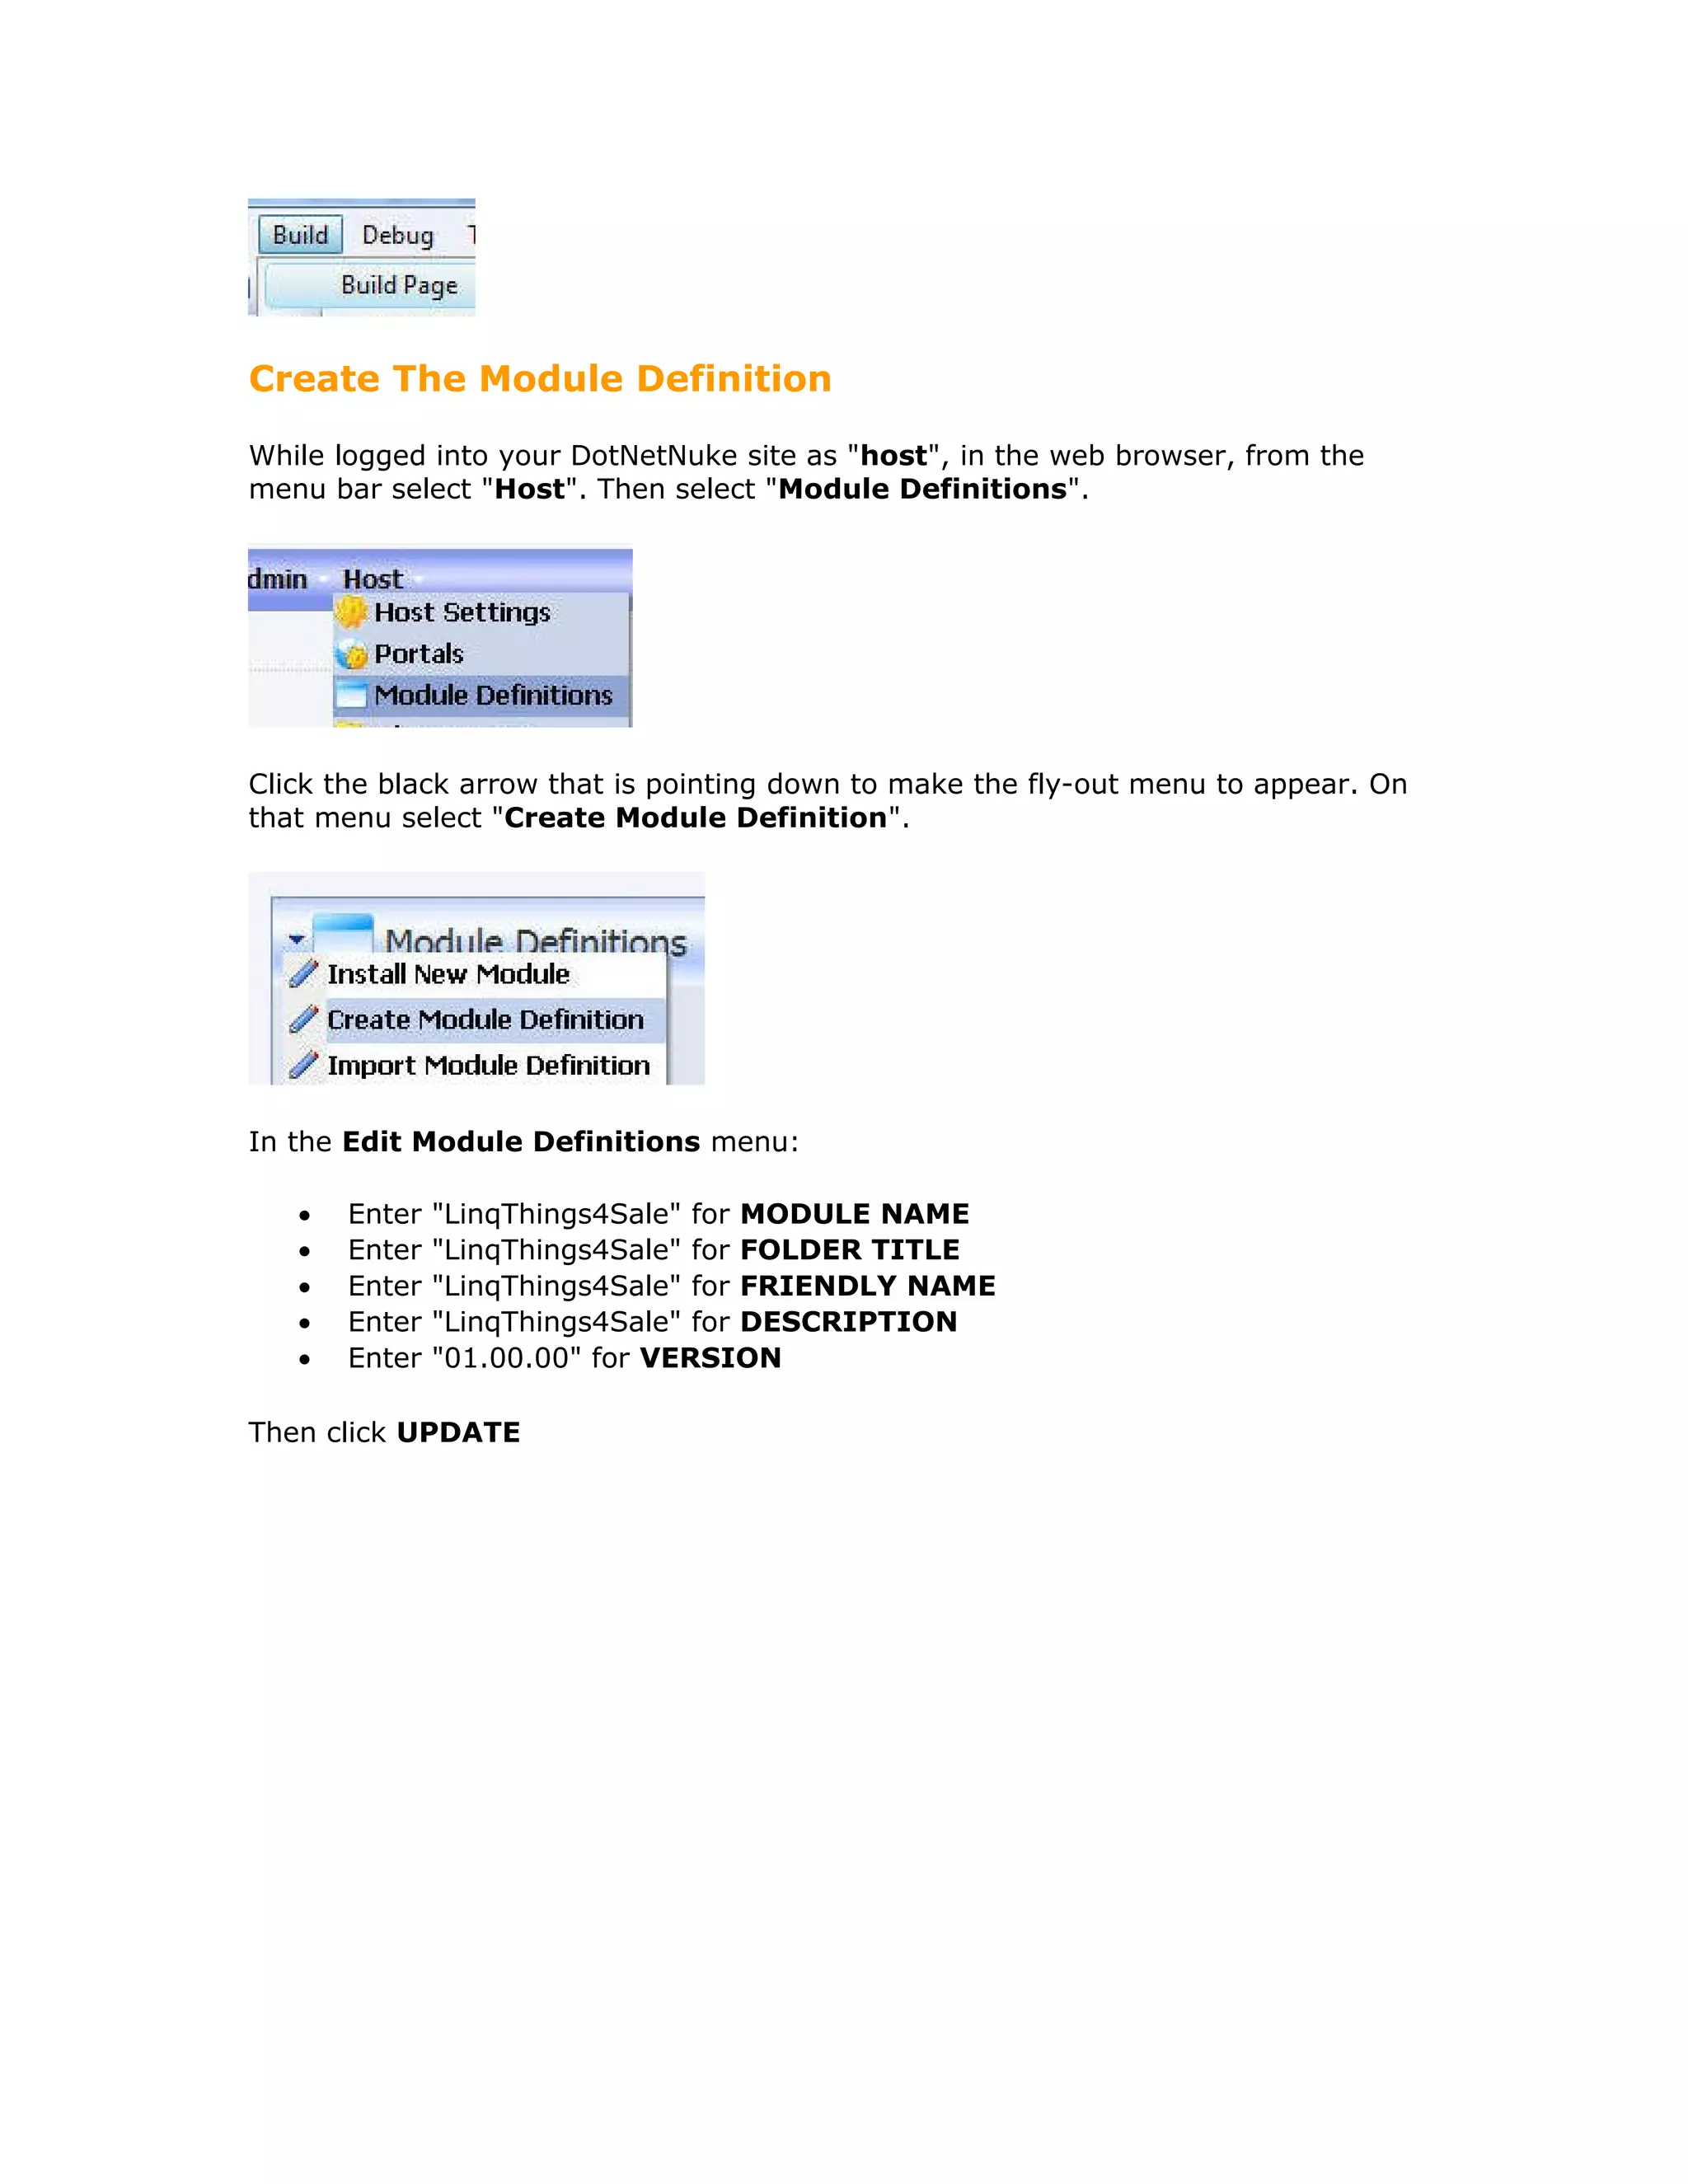
Save the file. From the Toolbar, select Build then Build Page. The page should
build without errors.](https://image.slidesharecdn.com/creating-a-dotnetnuke-160211090110/75/Creating-a-dot-netnuke-32-2048.jpg)

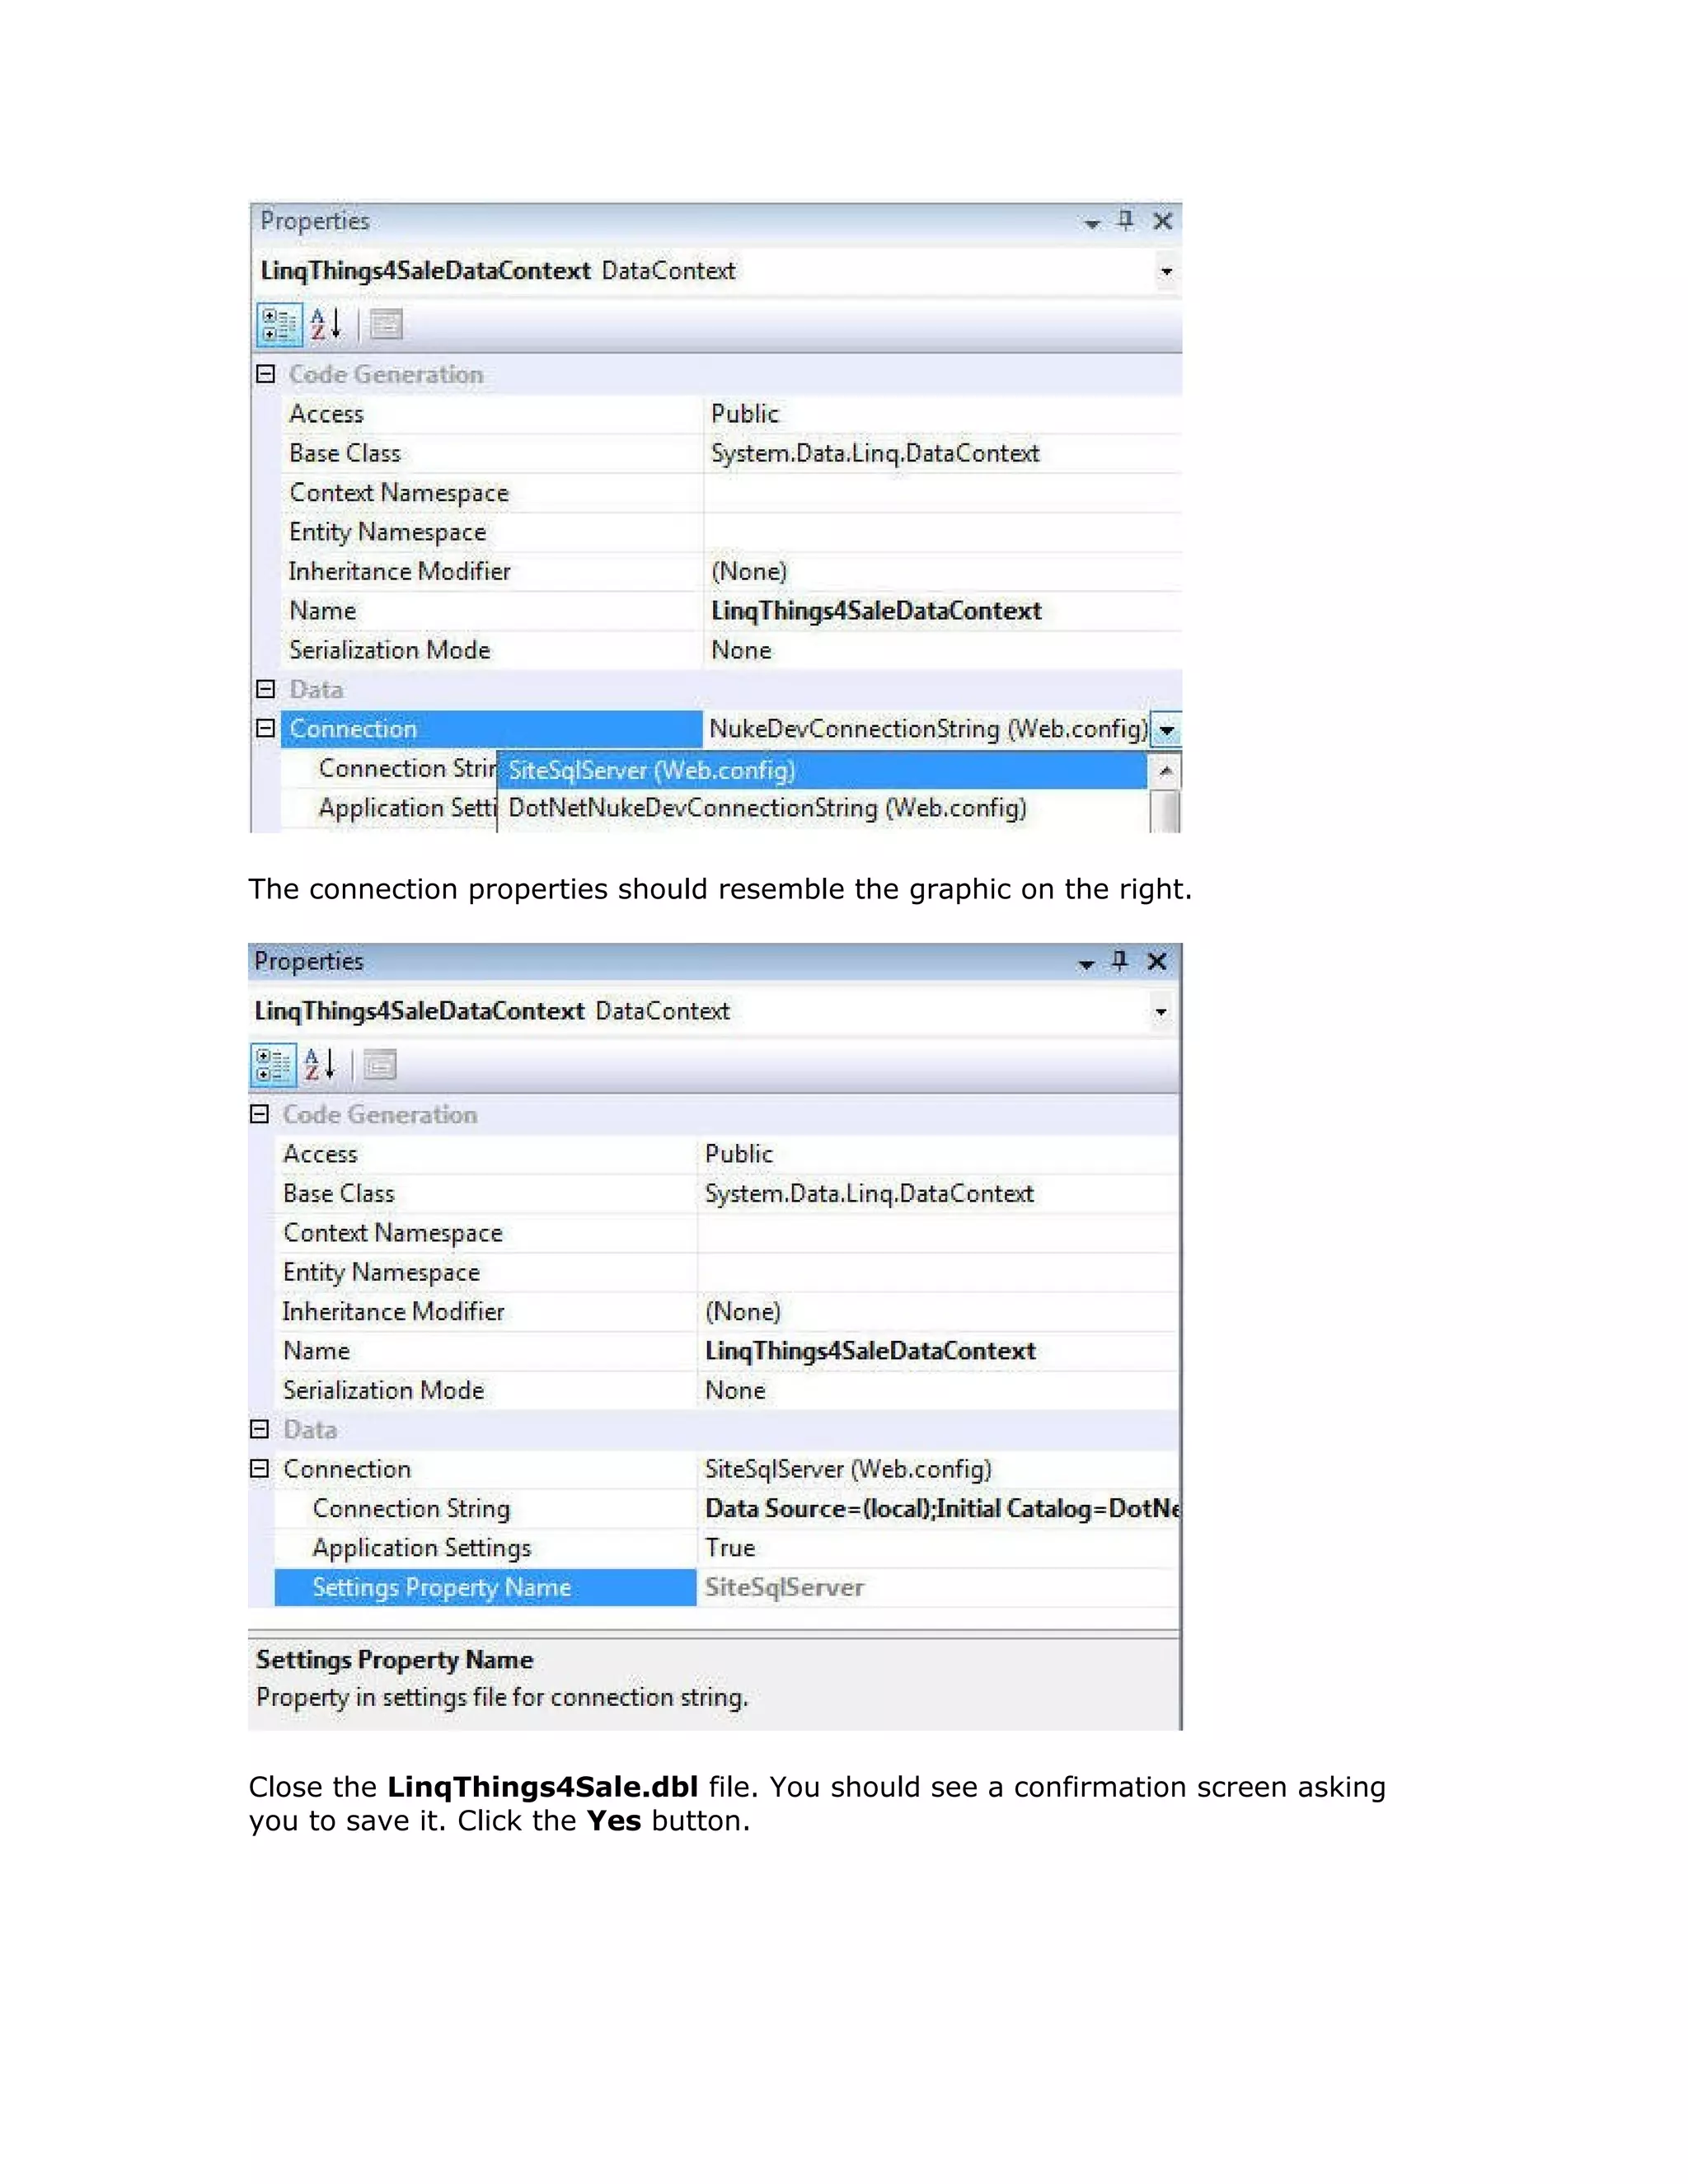
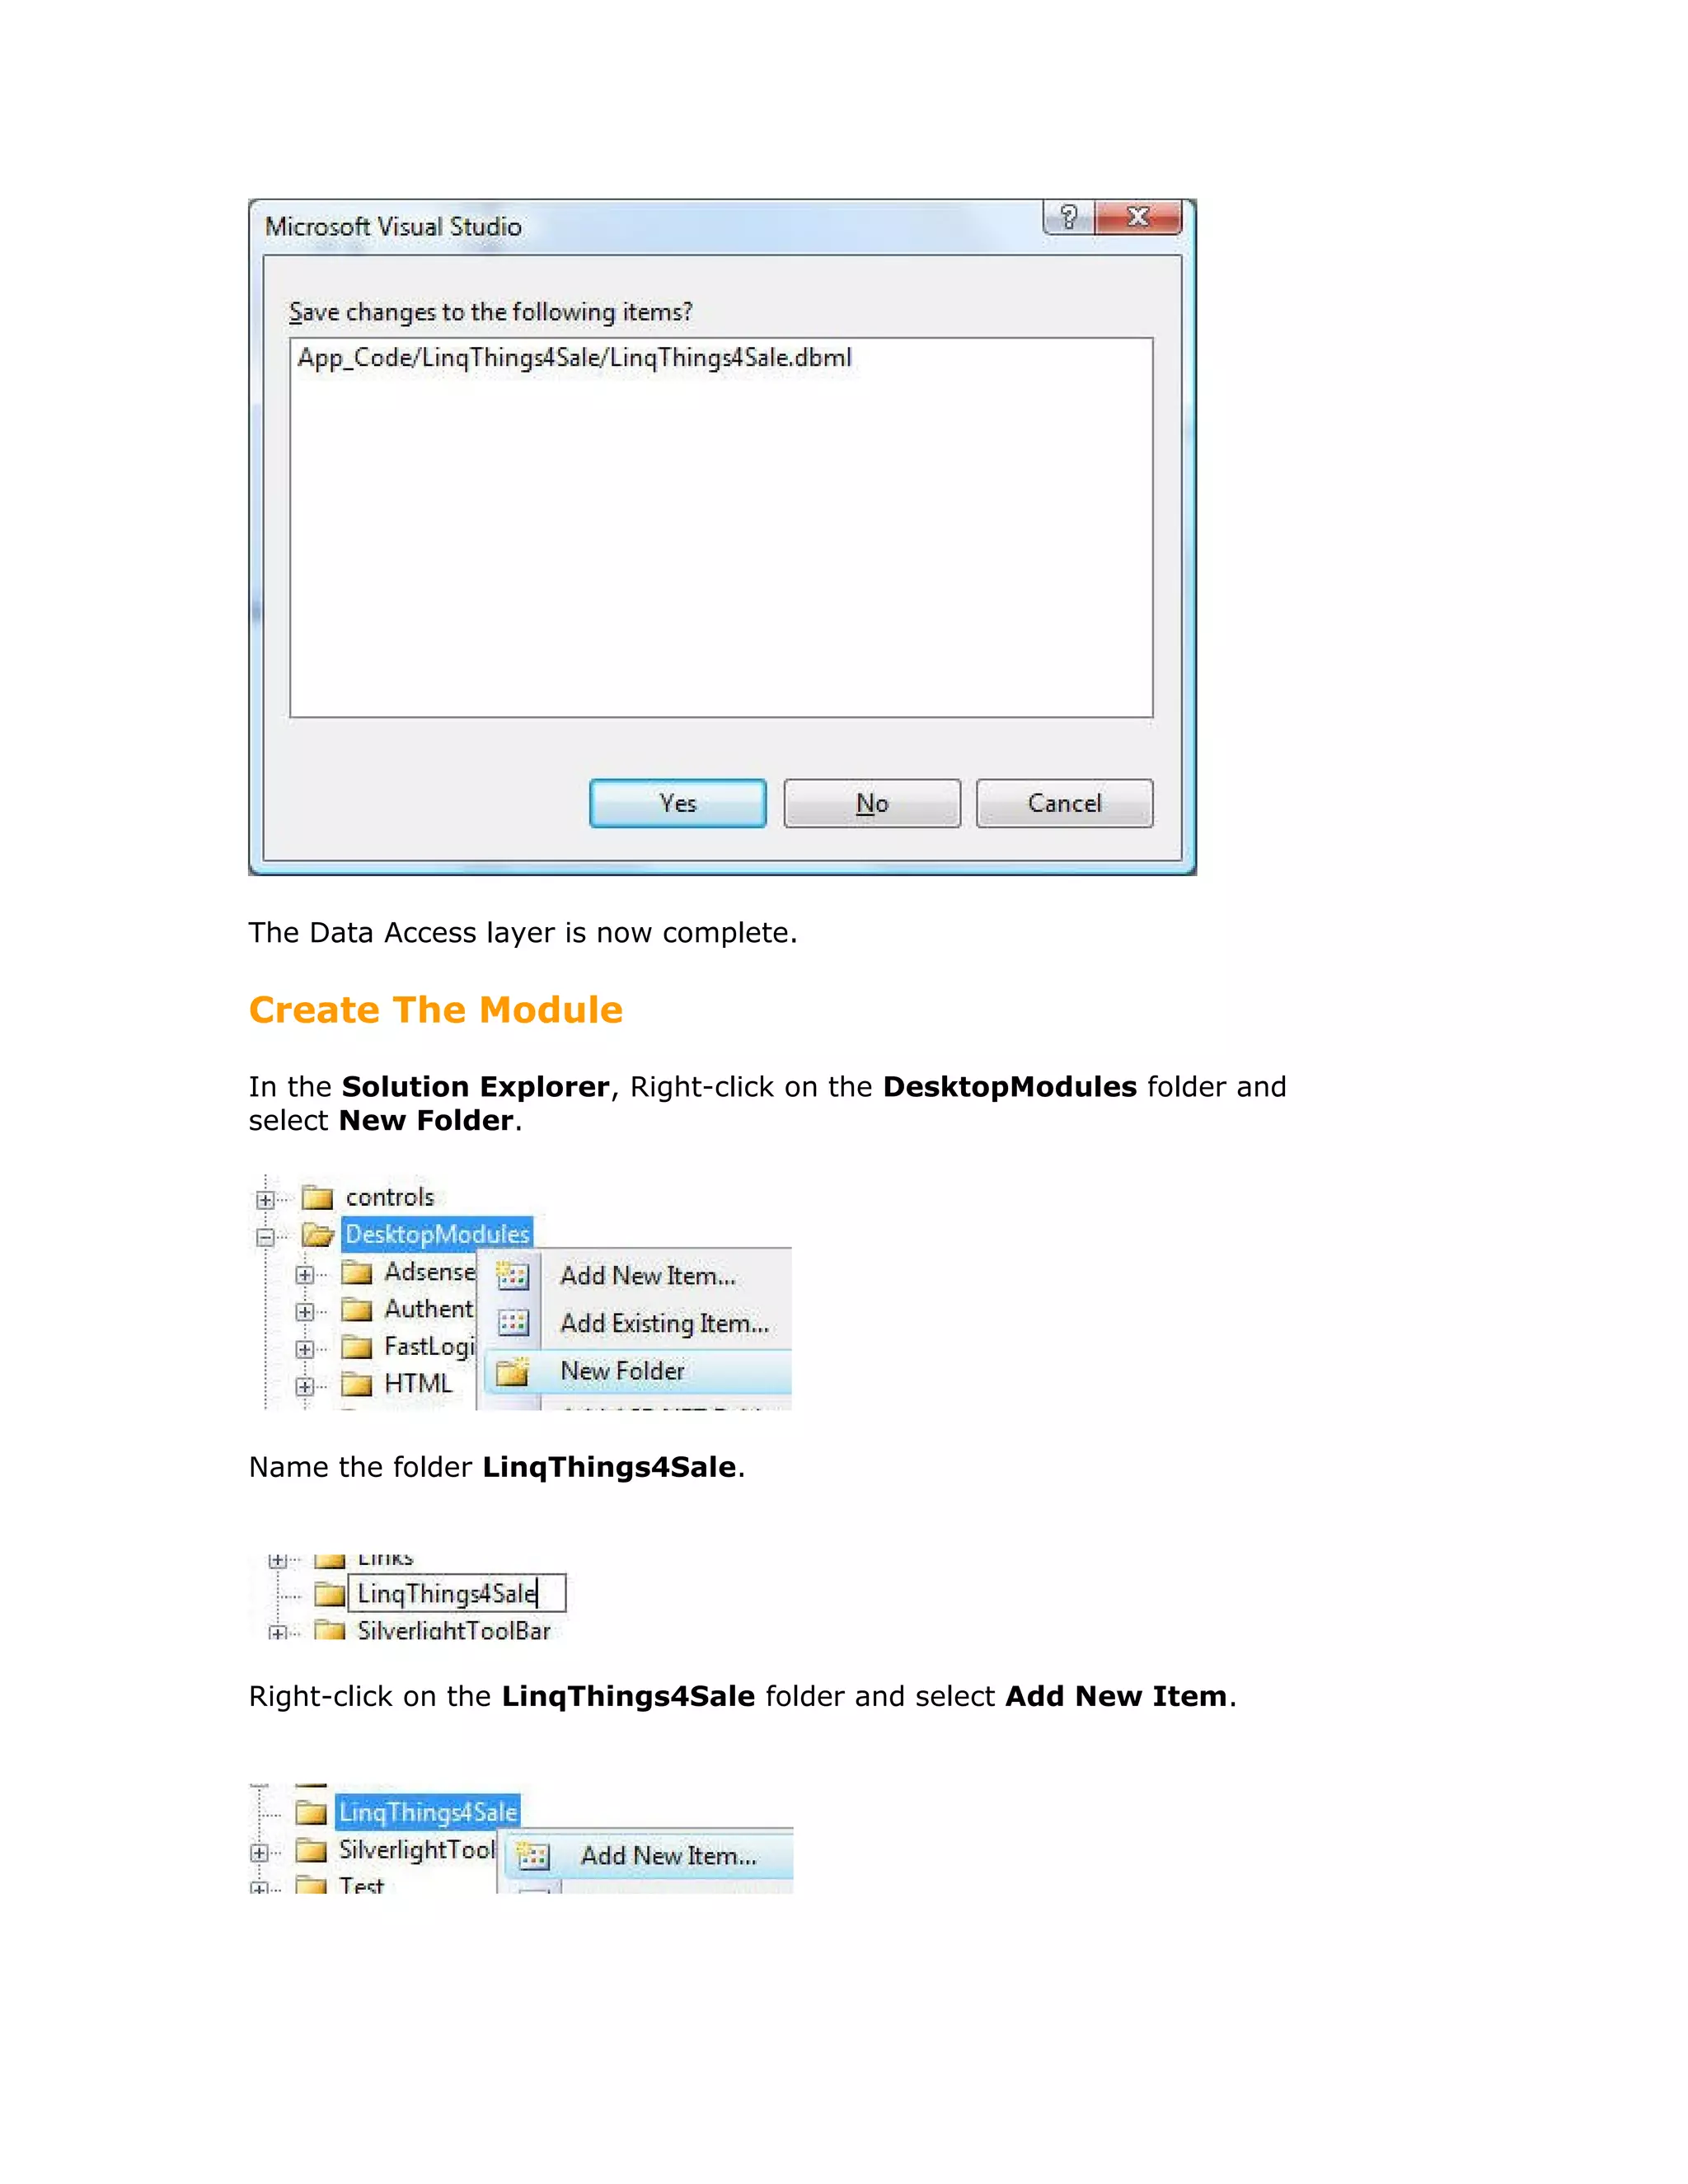
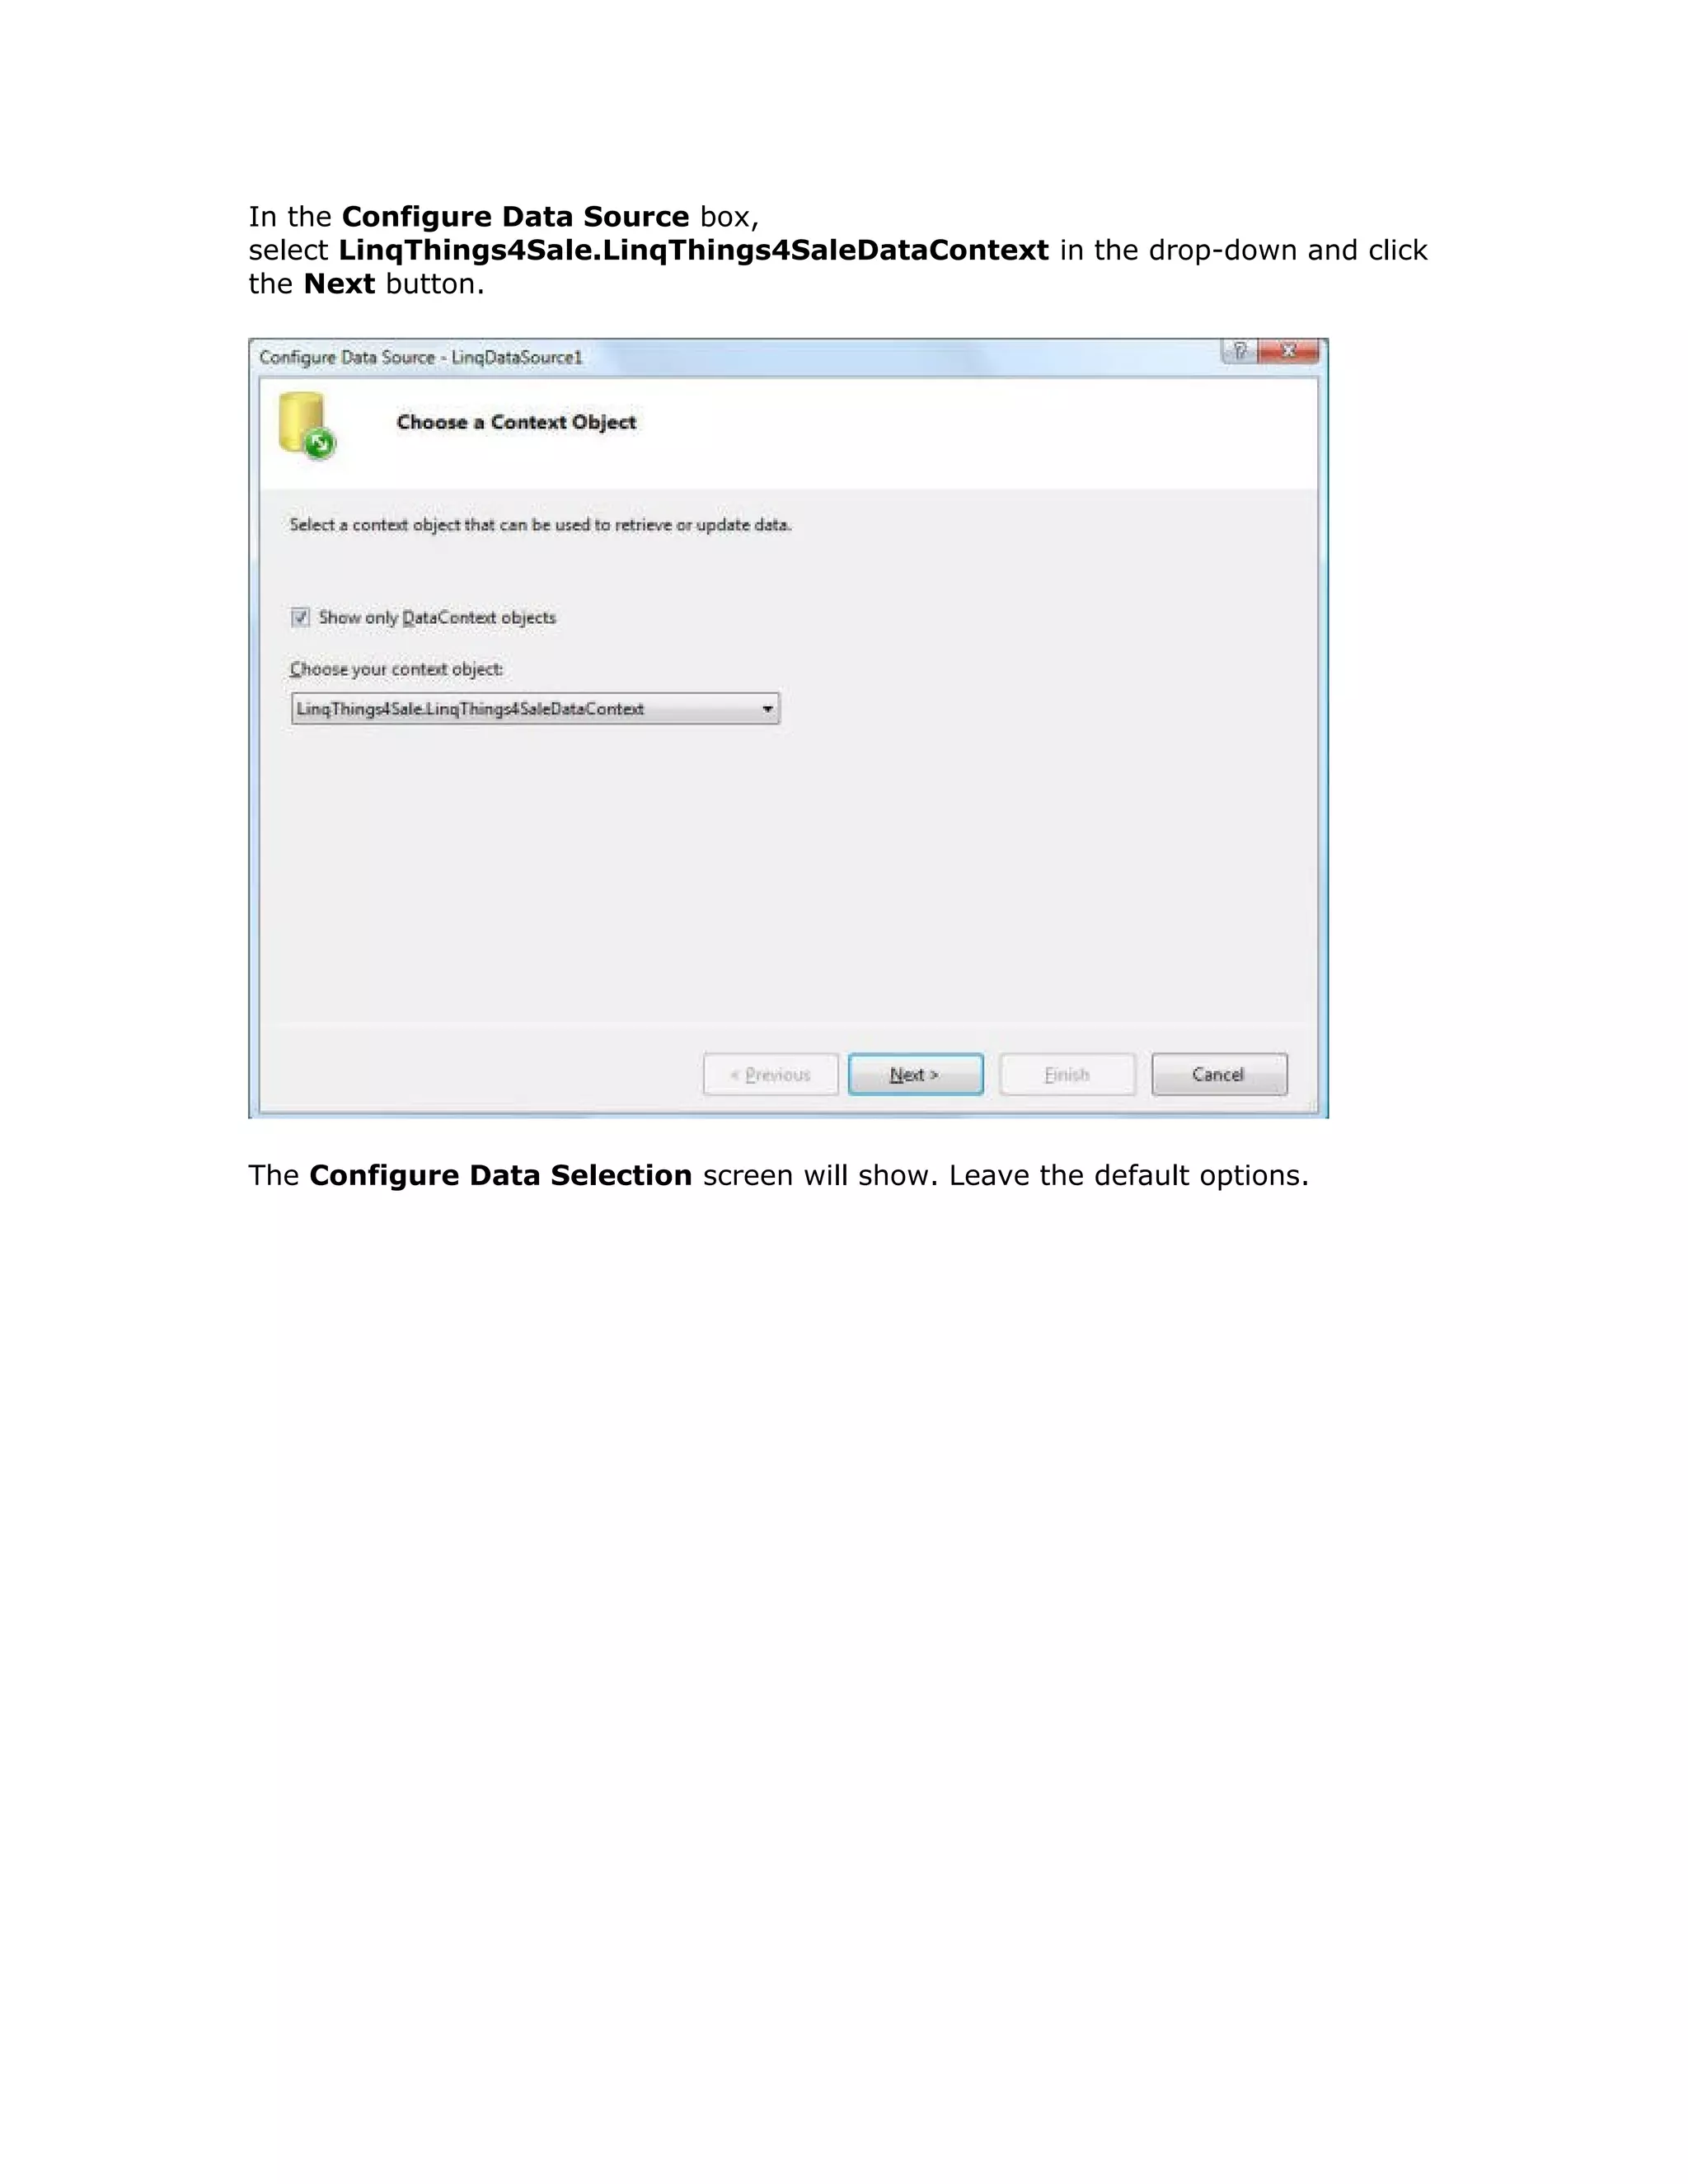
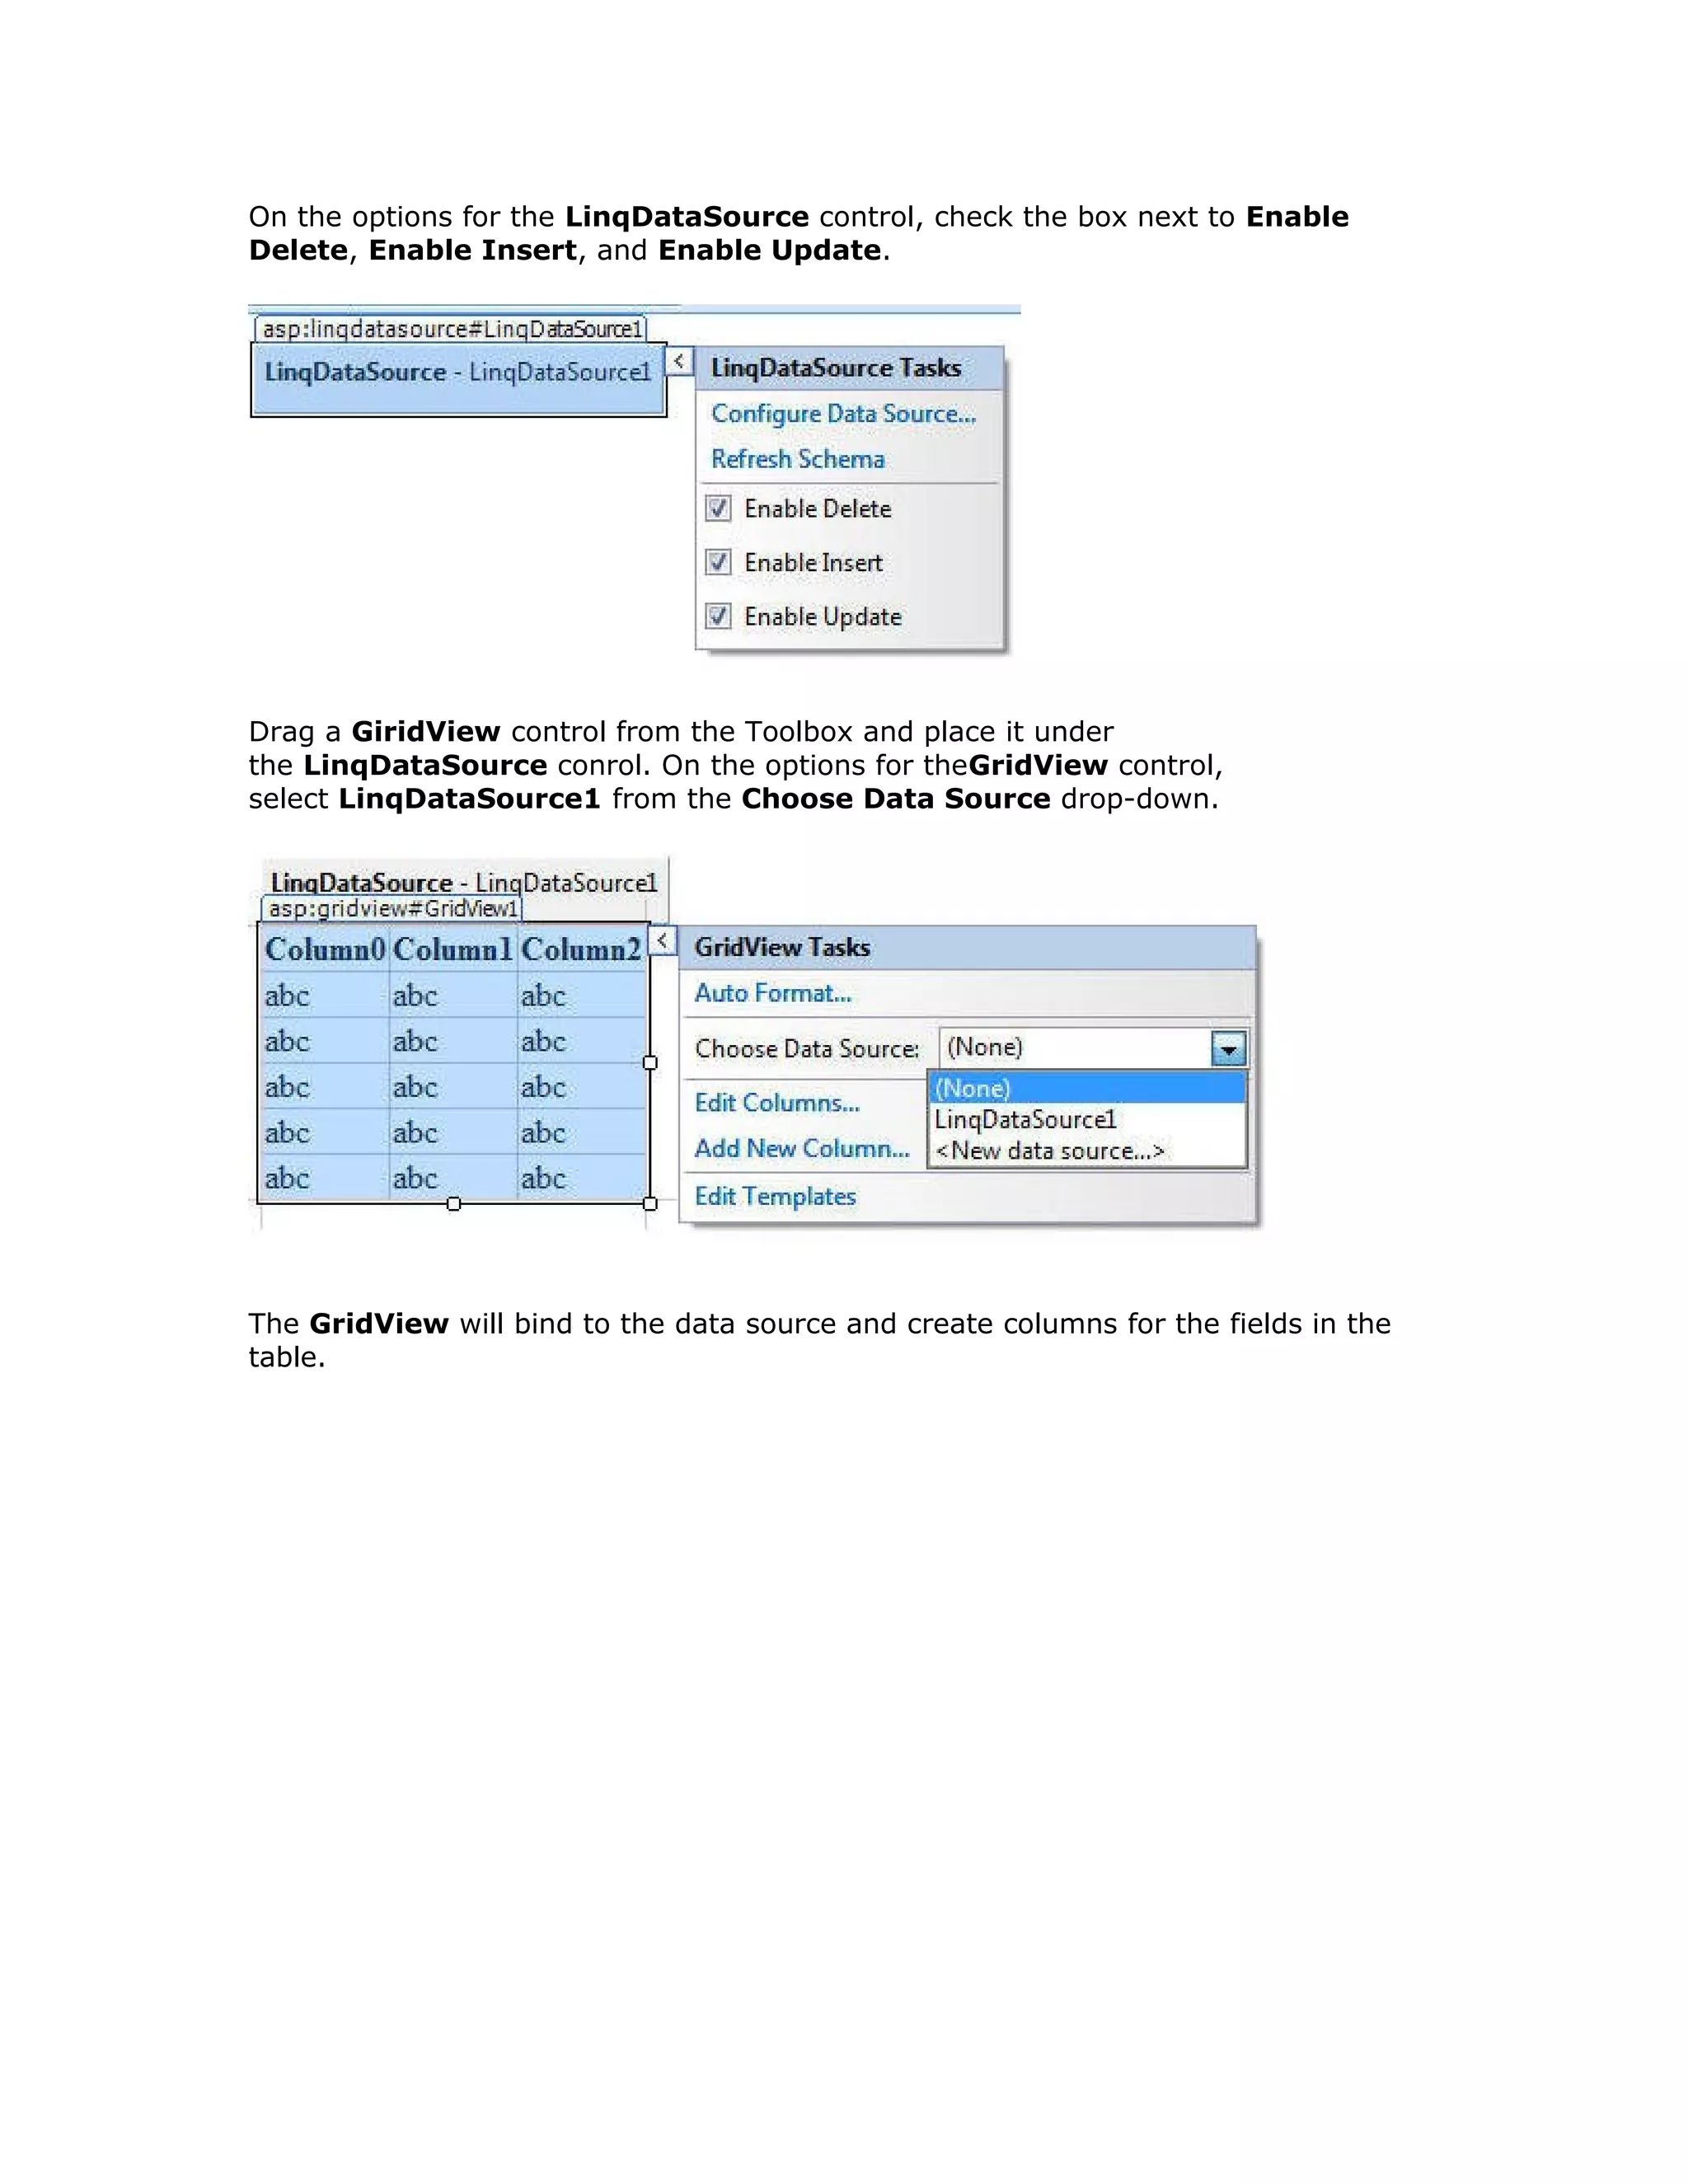
This document provides instructions for creating a DotNetNuke module using LINQ to SQL. It describes setting up the development environment with DotNetNuke and Visual Studio, creating a database table, generating a LINQ to SQL class to access the database, and building the module interface with ASP.NET controls bound to a LINQ data source. The module allows users to view, insert, update and delete records in the database table through a GridView and FormView control.