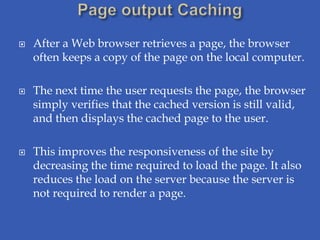
The document discusses various techniques for deploying and managing ASP.NET web applications. It covers deployment options like using Visual Studio or an MSI file. It also covers configuring launch conditions, custom actions, caching, and publishing/precompiling applications.
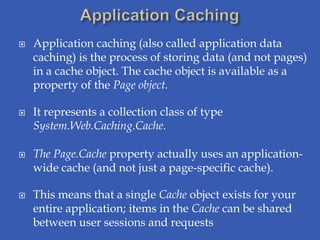
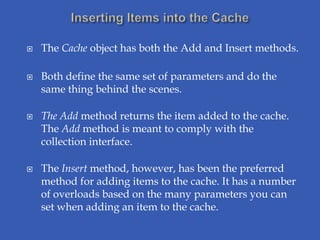
Getting the service description (WSDL)
Configure Service Bus
Import Resources
Configure Business Service
Config ure the Credit Card Validation Proxy
Configure Message Flow(Validate & Report)
Adding a Pipeline Pair ->Add Stage ->Add Action(Reporting) ->Add Validate Action
This lesson describes the whole exercise from the perspective of a Process Developer
defining Human Task Services, System Services, Business Rules, Conditional Logic, Script Tasks and binding them to the process activities. We will also generate and customize User Interface Forms. Lastly, we will deploy the BPM process to the BPM Suite’s runtime engine.
• Create a new ADF Skin and check Skin values being used
• Change the page background and font family
• Update the look and feel for table headers and links
• Change the pane body and shape of tabs
• Implement dynamic skin change
CyberLab Training Division :
ASP.NET is a web application framework developed and marketed by Microsoft to allow programmers to build dynamic web sites. It allows you to use a full featured programming language such as C# or VB.NET to build web applications easily.
This tutorial covers all the basic elements of ASP.NET that a beginner would require to get started.
Audience
This tutorial has been prepared for the beginners to help them understand basic ASP.NET programming. After completing this tutorial you will find yourself at a moderate level of expertise in ASP.NET programming from where you can take yourself to next levels.
Prerequisites
Before proceeding with this tutorial, you should have a basic understanding of .NET programming language. As we are going to develop web-based applications using ASP.NET web application framework, it will be good if you have an understanding of other web technologies such as HTML, CSS, AJAX. etc
ASP.NET supports three different development models:
Web Pages, MVC (Model View Controller), and Web Forms.
For More Details.
Visit: http://www.cyberlabzone.com
N-Tier Application with Windows Forms - Deployment and SecurityPeter Gfader
Part 1: Deployment of .NET Winforms apps
History
Deployment & Updates
Security
Issues & Warnings
Configuration and user settings
Part 2: Security
Role-based security
Authentication and Authorization
Impersonation
Code Access Security
Assembly Strong Naming
Using galen framework for automated cross browser layout testingSarah Elson
Galen Framework is a test automation framework which was originally introduced to perform cross browser layout testing of a web application in a browser. Nowadays, it has become a fully functional testing framework with rich reporting and test management system. This framework supports both Java and Javascript.
Software Delivery At the Speed of AI: Inflectra Invests In AI-Powered QualityInflectra
In this insightful webinar, Inflectra explores how artificial intelligence (AI) is transforming software development and testing. Discover how AI-powered tools are revolutionizing every stage of the software development lifecycle (SDLC), from design and prototyping to testing, deployment, and monitoring.
Learn about:
• The Future of Testing: How AI is shifting testing towards verification, analysis, and higher-level skills, while reducing repetitive tasks.
• Test Automation: How AI-powered test case generation, optimization, and self-healing tests are making testing more efficient and effective.
• Visual Testing: Explore the emerging capabilities of AI in visual testing and how it's set to revolutionize UI verification.
• Inflectra's AI Solutions: See demonstrations of Inflectra's cutting-edge AI tools like the ChatGPT plugin and Azure Open AI platform, designed to streamline your testing process.
Whether you're a developer, tester, or QA professional, this webinar will give you valuable insights into how AI is shaping the future of software delivery.
Slack (or Teams) Automation for Bonterra Impact Management (fka Social Soluti...Jeffrey Haguewood
Sidekick Solutions uses Bonterra Impact Management (fka Social Solutions Apricot) and automation solutions to integrate data for business workflows.
We believe integration and automation are essential to user experience and the promise of efficient work through technology. Automation is the critical ingredient to realizing that full vision. We develop integration products and services for Bonterra Case Management software to support the deployment of automations for a variety of use cases.
This video focuses on the notifications, alerts, and approval requests using Slack for Bonterra Impact Management. The solutions covered in this webinar can also be deployed for Microsoft Teams.
Interested in deploying notification automations for Bonterra Impact Management? Contact us at sales@sidekicksolutionsllc.com to discuss next steps.
Connector Corner: Automate dynamic content and events by pushing a buttonDianaGray10
Here is something new! In our next Connector Corner webinar, we will demonstrate how you can use a single workflow to:
Create a campaign using Mailchimp with merge tags/fields
Send an interactive Slack channel message (using buttons)
Have the message received by managers and peers along with a test email for review
But there’s more:
In a second workflow supporting the same use case, you’ll see:
Your campaign sent to target colleagues for approval
If the “Approve” button is clicked, a Jira/Zendesk ticket is created for the marketing design team
But—if the “Reject” button is pushed, colleagues will be alerted via Slack message
Join us to learn more about this new, human-in-the-loop capability, brought to you by Integration Service connectors.
And...
Speakers:
Akshay Agnihotri, Product Manager
Charlie Greenberg, Host
Encryption in Microsoft 365 - ExpertsLive Netherlands 2024Albert Hoitingh
In this session I delve into the encryption technology used in Microsoft 365 and Microsoft Purview. Including the concepts of Customer Key and Double Key Encryption.
Securing your Kubernetes cluster_ a step-by-step guide to success !KatiaHIMEUR1
Today, after several years of existence, an extremely active community and an ultra-dynamic ecosystem, Kubernetes has established itself as the de facto standard in container orchestration. Thanks to a wide range of managed services, it has never been so easy to set up a ready-to-use Kubernetes cluster.
However, this ease of use means that the subject of security in Kubernetes is often left for later, or even neglected. This exposes companies to significant risks.
In this talk, I'll show you step-by-step how to secure your Kubernetes cluster for greater peace of mind and reliability.
JMeter webinar - integration with InfluxDB and GrafanaRTTS
Watch this recorded webinar about real-time monitoring of application performance. See how to integrate Apache JMeter, the open-source leader in performance testing, with InfluxDB, the open-source time-series database, and Grafana, the open-source analytics and visualization application.
In this webinar, we will review the benefits of leveraging InfluxDB and Grafana when executing load tests and demonstrate how these tools are used to visualize performance metrics.
Length: 30 minutes
Session Overview
-------------------------------------------
During this webinar, we will cover the following topics while demonstrating the integrations of JMeter, InfluxDB and Grafana:
- What out-of-the-box solutions are available for real-time monitoring JMeter tests?
- What are the benefits of integrating InfluxDB and Grafana into the load testing stack?
- Which features are provided by Grafana?
- Demonstration of InfluxDB and Grafana using a practice web application
To view the webinar recording, go to:
https://www.rttsweb.com/jmeter-integration-webinar
Smart TV Buyer Insights Survey 2024 by 91mobiles.pdf91mobiles
91mobiles recently conducted a Smart TV Buyer Insights Survey in which we asked over 3,000 respondents about the TV they own, aspects they look at on a new TV, and their TV buying preferences.
The Art of the Pitch: WordPress Relationships and SalesLaura Byrne
Clients don’t know what they don’t know. What web solutions are right for them? How does WordPress come into the picture? How do you make sure you understand scope and timeline? What do you do if sometime changes?
All these questions and more will be explored as we talk about matching clients’ needs with what your agency offers without pulling teeth or pulling your hair out. Practical tips, and strategies for successful relationship building that leads to closing the deal.
Accelerate your Kubernetes clusters with Varnish CachingThijs Feryn
A presentation about the usage and availability of Varnish on Kubernetes. This talk explores the capabilities of Varnish caching and shows how to use the Varnish Helm chart to deploy it to Kubernetes.
This presentation was delivered at K8SUG Singapore. See https://feryn.eu/presentations/accelerate-your-kubernetes-clusters-with-varnish-caching-k8sug-singapore-28-2024 for more details.
Transcript: Selling digital books in 2024: Insights from industry leaders - T...BookNet Canada
The publishing industry has been selling digital audiobooks and ebooks for over a decade and has found its groove. What’s changed? What has stayed the same? Where do we go from here? Join a group of leading sales peers from across the industry for a conversation about the lessons learned since the popularization of digital books, best practices, digital book supply chain management, and more.
Link to video recording: https://bnctechforum.ca/sessions/selling-digital-books-in-2024-insights-from-industry-leaders/
Presented by BookNet Canada on May 28, 2024, with support from the Department of Canadian Heritage.
DevOps and Testing slides at DASA ConnectKari Kakkonen
My and Rik Marselis slides at 30.5.2024 DASA Connect conference. We discuss about what is testing, then what is agile testing and finally what is Testing in DevOps. Finally we had lovely workshop with the participants trying to find out different ways to think about quality and testing in different parts of the DevOps infinity loop.
FIDO Alliance Osaka Seminar: Passkeys and the Road Ahead.pdf
Deploying configuring caching
1.
2. After you’ve developed and tested your
application, it’s time to deploy it to a production
environment.
The deployment process can be automated with
tools and scripts, managed and governed by IT
departments, or deployed directly by developers
through Microsoft Visual Studio.
Additionally, many Web developers must release
their applications commercially; this means other
people need to be able to deploy them in
environments that the developer knows nothing
about.
3. There are times, when you might need more control
over how your application gets deployed.
Check dependencies (such as particular operating
system versions or service packs),
add registry entries for your application,
download and install prerequisites,
set security,
add dependent dynamic-link libraries (DLLs),
and so on.
4. For all these purposes you will find a number of
setup Editors of following types in the View menu
of Visual Studio :
Launch Conditions
Registry
User Interface
Custom Actions
File System
File Types
5. A launch condition is used to check the
requirements for your application installation.
For example, you can check for specific versions of
Windows or verify that specific service packs are
present before you allow an install.
Launch conditions can provide a useful message to
the user if a requirement is missing.
6. Following are the common launch conditions :
File Launch Condition : if you want to verify that a
specific DLL is present
Registry Launch Condition : search a target
computer for a specific registry key or value
Windows Installer Launch Condition : to determine
if a specific package is installed
.NET Framework Launch Condition : checks the
runtime version of the .NET Framework on the
target computer
Internet Information Services Launch Condition :
This searches for the presence of the right version of
Microsoft Internet Information Services (IIS
7. To create and manage new launch conditions, you use the
Launch Conditions editor in the View menu.
There are two main branches of the Launch Conditions
editor:
• Search Target Machine
• Launch Conditions
Typically, you must add an item to each of these two
nodes.
For example, if you want to verify that a specific DLL is
present, you must Add File Search under Search Target
Machine and store the result of the search in a property.
You then Add Launch Condition under Launch
Conditions that uses the search condition’s property.
8. To add a basic search condition, start by right-clicking the Search
Target Machine node in the Launch Conditions editor. You will have
three search condition types to choose from:
File Search This search type allows you to define a search for a file.
You set the FileName to the name of the file you are searching for, the
Folder to search, and the Property to a variable name you use for
tracking the results of the search.
Registry Search This search type allows you to specify a registry
search. You set the Root property to a place to start looking in the
registry, the RegKey to a registry key to search for, and the Value
property to a value you hope to be set for the given key. You store the
results of your search in the Property property as a variable name that
can be used in a related launch condition.
Windows Installer Search This search type allows you to search for a
registered component. You set the ComponentId to a GUID of the
component for which you are searching. You set the Property
property to a variable that indicates the results of your search.
9. Right-click the Launch Conditions folder, and then select
Add Launch Condition.
With the new launch condition selected, view the
Properties window to configure your launch condition.
You can set the Condition property to match the Property
value of a search condition or specify a different
condition.
To download software to resolve the missing launch
condition, provide a URL in the InstallUrl property.
In the Message property, type a message to be displayed
to the person installing your Web application if a
condition is not met.
10. To create a grouped launch condition, you right-click the
root node, Requirements On Target Machine.
Doing so simply creates both a search and a launch
condition. However, these items are preconfigured to
work together. You simply need to tweak their
properties according to your needs.
11. Although rare, there might still be times when you need to add
registry entries during setup.
From the View menu, select Registry Editor.
To add a registry setting in a nested key, you need to add each
nested key to the editor.
For example, to add a setting to
HKEY_LOCAL_MACHINESOFTWAREMicrosoftASP.NET, you
need to add the SOFTWARE, Microsoft, and ASP.NET keys to
the HKEY_LOCAL_MACHINE hive in the Registry Settings
editor.
Right-click the key to which you want to add a setting, select
New, and then select String Value, Environment String
Value, Binary Value, or DWORD Value. Type the name of the
value, and then press Enter.
12. Administrators responsible for deploying and
managing your Web applications can also add
custom setup wizard pages.
These pages enable you to perform the following
types of tasks:
Display a license agreement A Web Setup Project
provides a dialog box template for requiring the
user to accept a license agreement.
Modify settings in the Web.config file You can use
user input to modify configuration settings without
requiring administrators to know how to configure
an Extensible Markup Language (XML) file.
13. Perform custom configuration You can use a
custom configuration to prompt the user for
information that might be stored in the registry or
in another unusual location.
Activate or register your application You can
prompt the user for a product key or registration
information. Prompts can be either required or
optional.
To add a custom setup wizard page to your Web
deployment project, you use the View | User
Interface Editor
14. You add a custom action to your setup project through
the View | Custom Actions Editor
The Custom Actions editor displays the four setup
phases. You can right-click the phase to which you
want to add a custom action.
You then select Add Custom Action. Doing so launches
the Select Item In Project dialog box.
From here you can select to add a custom .exe or script
file from current project or elsewhere to execute at the
appropriate phase of deployment.
15. Custom actions can run in any of the four phases of
setup:
Install This phase performs the bulk of the work done
during setup
Commit This phase finalizes these changes. After the
Commit phase, setup cannot be rolled back and the
application should be uninstalled with Add or Remove
Programs.
RollBack The Rollback phase runs only if setup fails or
is cancelled. It occurs instead of the Commit phase and
removes any new files or settings.
Uninstall This phase removes files and settings from
the computer when the application is removed with
Add or Remove Programs.
16. There are typically two generated to the target build
directory for Web Setup Projects:
Setup.exe
<Websetupprojectname>.msi
Although users are more familiar with using Setup.exe to
install an application, the .msi file is smaller, far more
versatile, and familiar to most systems administrators.
The only disadvantage to deploying the application with
the .msi file is that the target Web server must have
Windows Installer. Most Web servers already have this
component, however.
17. There are many scenarios in which you simply need to
copy changes between two servers.
There might be some changes from your development
environment up to staging or even from staging to
production in some limited scenarios.
In these cases, you can use the Copy Web tool to publish
changes between source and remote sites.
You can also use the tool to synchronize files.
This involves copying only changed files and detecting
possible versioning conflicts in which the same file on
both the source and remote site have been separately
edited.
18. To launch the Copy Web tool you typically open the Web
site you intend as the source. Then right-click the site in
Solution Explorer and choose Copy Web Site.
The Copy Web tool displays two panes: Source Web Site
and Remote Web Site.
To set up a remote Web site, you must create a connection
by clicking Connect at the top of the tool.
This launches the Open Web Site dialog box, which allows
you to find a Web site.
19. You can copy or synchronize files between the source and
the remote Web site in several different ways:
Copy individual files in either direction
Copy the entire site Right-click the Source Web Site pane,
and then select Copy Site To Remote. To copy the Remote
Web Site to the source Web site, right-click the Remote
Web Site pane, and then select Copy Site To Source.
Synchronize individual files Select files in either the
source or remote Web site, and then click Synchronize
Selected Files.
Synchronize the entire site Right-click the Source Web
Site pane, and then select Synchronize Site.
20. To precompile and publish a Web application, follow
these steps:
1. Open the Web site you wish to precompile and publish.
2. Next, you can right-click your Web application in
Solution Explorer and select Publish Web Site.
Alternatively, you can select the Build menu and then
choose Publish Web Site.
3. In the Publish Web Site dialog box, specify a location to
which to publish.
21. ASP.NET caching stores frequently accessed data or
whole Web pages in memory where they can be retrieved
faster than they could be from a file or database.
Data that changes infrequently and is accessed by a lot of
users is a good candidate for caching.
The first access of this data would load it into the cache;
subsequent requests would be served from the cache until
the cache expires.
22. There are two different types of caching in ASP.
NET:
Application caching : This represents a
collection that can store any object in memory
and automatically remove the object based on
memory limitations, time limits, or other
dependencies.
Page output caching : This is ASP.NET’s ability
to store a rendered page, portion of a page, or
version of a page in memory to reduce the time
required to render the page in future requests.
23. Application caching (also called application data
caching) is the process of storing data (and not pages)
in a cache object. The cache object is available as a
property of the Page object.
It represents a collection class of type
System.Web.Caching.Cache.
The Page.Cache property actually uses an application-
wide cache (and not just a page-specific cache).
This means that a single Cache object exists for your
entire application; items in the Cache can be shared
between user sessions and requests
24. You work with the Cache object like you would Session or
similar objects. You can assign items directly to the cache
by giving them a name (key) and assigning them an object
(value).
Cache["Greeting"] = "Hello, world!";
if (Cache["Greeting"] != null)
value = (string)Cache["Greeting"];
else
value = "Hello, world!";
You wouldn’t normally cache a static string in your
application; you’d more likely cache a file, a database
query result, or other data that is shared and expensive to
obtain.
25. The Cache object has both the Add and Insert methods.
Both define the same set of parameters and do the
same thing behind the scenes.
The Add method returns the item added to the cache.
The Add method is meant to comply with the
collection interface.
The Insert method, however, has been the preferred
method for adding items to the cache. It has a number
of overloads based on the many parameters you can
set when adding an item to the cache.
26. A cache dependency links a cached item to
something else such as a file or another item in
the cache.
ASP.NET monitors the dependency and
invalidates the cache if the dependent item
changes.
Cache.Insert("FileCache", "CacheContents", new
System.Web.Caching.CacheDependency(
Server.MapPath("SourceFile.xml")));
27. Many times you want to cache data for a specific
amount of time.
This allows you to limit the amount of time
between cache refresh.
To do so, you pass the absoluteExpiration parameter
to the Cache.Insert method.
Cache.Insert("FileCache", "CacheContents", null, DateTime.Now.Add
Minutes(10), Cache.NoSlidingExpiration);
28. Sliding expiration indicates the amount of time
that must elapse between subsequent requests
before an item is removed from the cache.
This allows most frequently used cached objects
to stay in your cache longer
You set a sliding expiration by passing a
TimeSpan to the slidingExpiration parameter of the
Insert method.
29. After a Web browser retrieves a page, the browser
often keeps a copy of the page on the local computer.
The next time the user requests the page, the browser
simply verifies that the cached version is still valid,
and then displays the cached page to the user.
This improves the responsiveness of the site by
decreasing the time required to load the page. It also
reduces the load on the server because the server is
not required to render a page.