Surface mount technology involves attaching electronic components directly to the surface of a printed circuit board rather than inserting them into holes. This allows for components to be placed closer together, enabling denser layouts. Key advantages include smaller component size, higher density, cheaper PCB manufacturing by eliminating plated through-holes, and improved shock and vibration resistance. Disadvantages include greater heat generation and difficulty of inspection and rework. Proper solder paste application and reflow profile are critical for good joint formation and mechanical reliability.
Introduction into Surface Mount TechnologyShanmugaVelC1
This document provides an overview of surface mount technology (SMT) used for printed circuit boards (PCBs). It discusses what surface mount is, the differences between surface mount and through-hole components, advantages and disadvantages of SMT, common PCB materials like FR-4, how to design SMT layouts and footprints, the SMT assembly process including solder paste printing and reflow soldering, inspection and rework, and guidelines for ordering SMT components and specifying PCB fabrication.
1. Surface mount technology (SMT) involves mounting electronic components directly onto the surface of printed circuit boards, without leads inserted into holes. This allows for higher circuit densities and smaller components compared to traditional through-hole technology.
2. SMT was developed in the 1960s and became widely used in the late 1980s. It largely replaced through-hole technology due to advantages like greater automation potential, reduced board size, and lower costs.
3. The key SMT processes are solder paste application, component placement, soldering (typically reflow soldering), cleaning, and potential rework. Reflow soldering heats up the whole board at once to melt solder, while wave
1. Surface mount technology (SMT) involves mounting electronic components directly onto the surface of printed circuit boards rather than inserting them into holes. This allows for higher circuit densities and smaller components.
2. Key SMT processes include solder paste application, component placement, soldering via reflow or wave soldering methods, cleaning, and potential repair or rework.
3. Reflow soldering is now more common than wave soldering. It involves heating components on the board to melt solder paste using a reflow oven. This bonds components directly to pads on the circuit board surface.
Surface mount technology involves attaching electronic components directly to the surface of printed circuit boards, as opposed to through-hole technology where components are inserted into holes. There are three main types of surface mount assemblies depending on whether components are mounted on one or both sides of the board. The surface mount process involves designing the board, applying solder paste, placing components, soldering, cleaning, and potential repair. Infrared and hot gas soldering are two common soldering techniques used. Reworking involves removing faulty components and soldering new ones in their place.
The document discusses Surface Mount Technology (SMT) used in electronic circuit board production. SMT involves mounting electronic components directly onto the surface of printed circuit boards rather than inserting them into holes. The key steps of SMT include receiving printed circuit boards, applying glue, placing chips and integrated circuits using specialized machines, curing the boards in a reflow oven, conducting visual and automated inspections, and any needed repairs. The document outlines the advantages of SMT, such as higher component density, improved mechanical and electrical performance, and faster automated assembly.
The document discusses the process of electronics assembly, which involves attaching component leads to circuit boards through soldering. It describes the key steps of the assembly process, including component placement using surface mount technology (SMT), solder paste application, reflow soldering, and inspection techniques. Examples are provided of different component types, printed wiring boards, and potential defects from improper soldering.
Moving to Manufacture: What Are You Producing? Designing Kits, Designing Printed circuit boards, Software Choices, The Design Process, Manufacturing Printed Circuit Boards, Etching Boards, Milling Boards. Assembly, Testing, Mass-Producing the Case and Other Fixtures, Certification, Costs, Scaling Up Software, Deployment, Correctness and Maintainability, Security, Performance, User Community. Ethics: Characterizing the Internet of Things, Privacy, Control, Disrupting Control, Crowdsourcing, Environment, Physical Thing, Electronics, Internet Service, Solutions, The Internet of Things as Part of the Solution, Cautious Optimism, The Open Internet of Things Definition.
The document discusses the process of printed circuit board (PCB) design, fabrication, and installation. It covers:
- The key components of a PCB including pads, traces, vias, and layers
- The PCB fabrication process including film generation, drilling, electroplating, imaging, etching, solder mask application, and silkscreening
- How components are attached to the board through surface mount or through-hole methods and the importance of carefully soldering to avoid shorts
Flip chip is an advanced packaging technique where bare semiconductor chips are flipped upside down and bonded directly to a printed circuit board using solder bumps. It was introduced by IBM in 1962 as Solid Logic Technology and later converted to Controlled Collapse Chip Connection. Flip chip packaging provides shorter interconnect lengths, lower inductance and higher density interconnects compared to wire bonding. It allows for area array interconnect layouts and has become the standard for high performance integrated circuits. Reliability can be improved through underfilling, which compensates for thermal expansion differences and protects the solder joints.
This document discusses a new rapid prototyping method called CNC-RP that uses computer numerical controlled (CNC) machining to create parts layer-by-layer from multiple orientations. It begins by introducing rapid prototyping and its limitations. It then describes the CNC-RP method which machines complex parts from numerous orientations using thin layered toolpaths. The document outlines the process for creating a sample part and notes that fixture planning and processing times are reduced compared to conventional CNC machining. It proposes that CNC-RP could provide an affordable way to automatically create prototypes and tooling plans for CNC machining.
High Voltage PCB Design Presentation by AltiumAltium
Looking for High Voltage PCB design resources?
Take a look at Altium's resources for electrical engineers and PCB designers here.
Or view the original presentation at: https://resources.altium.com/presentations/high-voltage-pcb-design-presentation
Or for even more information on High Voltage PCB Design, click here:
https://resources.altium.com/pcb-design-blog/high-voltage-pcb-design-creepage-and-clearance-distance
This document provides details about Sujoy Halder's internship training in PCB design from July 1, 2021 to August 3, 2021 at Internshala Training. It includes an introduction to printed circuit boards covering materials, components, and manufacturing processes. It also describes the use of EAGLE software for schematic capture and PCB layout. Specific topics covered include surface mount technology, routing, heat dissipation, and creating a power supply board. Sujoy received a certificate of completion after scoring 51% on the final assessment.
Project Report on SMT and through-hole technologylakshya bhardwaj
SMT and Through-hole technology and their assembly line, different types of Soldering, ESD protection, Conformal coating, etc, all about PCB Production
Electronic manufacturing v3.0 - Fab Academy 2016seeedstudio
Open source and DIY electronics are filling Fab Labs and maker spaces with new tools for incredible creations. How can we design tools to change how people make things? How to scale DIY electronics to millions of users?
https://plus.google.com/u/0/events/ca5ss0rvia897dk3qgloqo1gjr0
This document provides information about printed circuit boards (PCBs) including:
- PCBs connect electronic components using conducting traces on insulating boards
- Traces, pads, vias and components are key parts of a PCB
- Multilayer PCBs use multiple conducting layers separated by insulating material
- Proper PCB design considers factors like component size and placement, heat dissipation, and high frequency effects
- The PCB fabrication process involves applying conductive and insulating materials then etching away unwanted material.
PCBs are non-conductive boards that hold electronic components connected by copper traces. They minimize wiring and space in electronic circuits. PCBs can be single sided, double sided, or multi-layered. Components include active parts like transistors and ICs or passive parts like resistors and capacitors. PCBs are designed then mass produced through processes like etching, drilling, and assembly. They are widely used in applications such as medical devices, military systems, aerospace equipment, and telecommunications infrastructure.
Electronic circuit design and component selection.pptxmaheshmp16
This document provides an overview of the electronic circuit design and component selection process. It discusses testing circuits, selecting components, PCB design, manufacturing, and assembly. Key steps include testing circuits using breadboards or simulations, choosing components based on specifications, laying out PCB traces with consideration for power/ground planes and signal routing, and assembling boards using soldering or pick-and-place machines. Tips are provided for design rules, decoupling, and ordering PCB fabrication and assembly services.
A printed circuit board (PCB) connects electronic components using copper traces laminated onto a non-conductive substrate. The PCB design process involves laying out the circuit components, pads, traces, and vias on different layers. High-frequency PCBs require special considerations like minimizing inductance and capacitive coupling between traces. Thorough testing and simulation of PCB designs can help avoid issues prior to manufacturing.
JSK Innovative Technology Pvt Ltd is an ISO certified electronics company that specializes in home automation products like LED drivers. It discusses the PCB design and manufacturing process, including types of PCB boards, materials used, design software, manufacturing steps, and surface mount vs through-hole assembly techniques. The document provides details on each stage of the PCB design and production process.
This document discusses Surface Mount Technology (SMT), which involves mounting electronic components directly onto the surface of printed circuit boards rather than inserting them into holes. It provides an overview of SMT, including its advantages over traditional through-hole mounting, different types of SMT, surface mount components, the SMT assembly process, and applications. Key advantages noted are higher density packaging, improved reliability, and easier automation of the manufacturing process.
Increasing the Strength and Reliability of Press FitsDesign World
Retaining compounds increase the strength and reliability of traditional press and shrink fits. Retaining compounds improve the distribution of stress, which increases maximum load transmission and performance. They create a physical barrier that eliminates fretting, oxidation and galvanic corrosion, which increase service life.
Recent chemical advances in retaining address assembly process variables including gaps, surface finish and cleanliness ensuring consistent performance. Application equipment provides repeatable precision dispensing.
• Recent innovations in retaining: tolerance, higher temperature resistance, primerless formulas
• New data on retaining advancements: test results on strength, oil and chemical tolerance
• How to use retaining compounds to augment a press fit for increased reliability
• Application case histories for retaining including cost and performance
This document provides information on improving wave soldering processes. It discusses the basic 6 steps of wave/selective soldering including component preparation, flux application, preheating, soldering, and cooling. It also covers topics like preforming lead components, hole sizes, selective pallets, wave nozzle configurations, solder alloys, fluxing methods, preheating, and common problems troubleshooting wave soldering. The document is from Shenzhen Southern Machinery and provides their contact information.
In Plant training (internship) at Schneider ElectricSujith Js
In Plant Training at Schneider Electric in the department of Manufacturing Technology.
At Jigani, Bangalore.
• Topic: Study and Analysis of manufacturing of PCB.
Schneider Electric is a European multinational corporation founded in 1836 that specializes in electricity distribution, automation and energy management. It has over 150,000 employees worldwide and is headquartered in Rueil-Malmaison, France. Schneider Electric provides products such as programmable logic controllers, sensors, drives, uninterruptible power supplies, breakers, switchgear and motor controls.
In Plant training(Internship) at Schneider Electric,BangaloreSujith Js
In Plant Training at Schneider Electric in the department of Manufacturing Technology.
At Jigani, Bangalore.
• Topic: Study and Analysis of manufacturing of PCB.
This document discusses printed circuit board (PCB) design. It begins with an introduction to PCBs, describing how they mechanically support and electrically connect electronic components using conductive tracks on insulating substrates. It then discusses the basic materials that make up PCBs like copper foil and plating. The document outlines the main fabrication steps for PCBs which include setting up, imaging, etching, drilling, masking, and electrical testing. It also describes the characteristics of through-hole and surface mount technology. The etching and assembly processes are explained in more detail. Finally, the document provides an overview of PCB design and routing software like EAGLE and includes an example of a power supply board.
A review on techniques and modelling methodologies used for checking electrom...nooriasukmaningtyas
The proper function of the integrated circuit (IC) in an inhibiting electromagnetic environment has always been a serious concern throughout the decades of revolution in the world of electronics, from disjunct devices to today’s integrated circuit technology, where billions of transistors are combined on a single chip. The automotive industry and smart vehicles in particular, are confronting design issues such as being prone to electromagnetic interference (EMI). Electronic control devices calculate incorrect outputs because of EMI and sensors give misleading values which can prove fatal in case of automotives. In this paper, the authors have non exhaustively tried to review research work concerned with the investigation of EMI in ICs and prediction of this EMI using various modelling methodologies and measurement setups.
Low power architecture of logic gates using adiabatic techniquesnooriasukmaningtyas
The growing significance of portable systems to limit power consumption in ultra-large-scale-integration chips of very high density, has recently led to rapid and inventive progresses in low-power design. The most effective technique is adiabatic logic circuit design in energy-efficient hardware. This paper presents two adiabatic approaches for the design of low power circuits, modified positive feedback adiabatic logic (modified PFAL) and the other is direct current diode based positive feedback adiabatic logic (DC-DB PFAL). Logic gates are the preliminary components in any digital circuit design. By improving the performance of basic gates, one can improvise the whole system performance. In this paper proposed circuit design of the low power architecture of OR/NOR, AND/NAND, and XOR/XNOR gates are presented using the said approaches and their results are analyzed for powerdissipation, delay, power-delay-product and rise time and compared with the other adiabatic techniques along with the conventional complementary metal oxide semiconductor (CMOS) designs reported in the literature. It has been found that the designs with DC-DB PFAL technique outperform with the percentage improvement of 65% for NOR gate and 7% for NAND gate and 34% for XNOR gate over the modified PFAL techniques at 10 MHz respectively.
More Related Content
Similar to Intro_to_SMT 11111111111111116512066666666666666666666587+941111111
The document discusses the process of printed circuit board (PCB) design, fabrication, and installation. It covers:
- The key components of a PCB including pads, traces, vias, and layers
- The PCB fabrication process including film generation, drilling, electroplating, imaging, etching, solder mask application, and silkscreening
- How components are attached to the board through surface mount or through-hole methods and the importance of carefully soldering to avoid shorts
Flip chip is an advanced packaging technique where bare semiconductor chips are flipped upside down and bonded directly to a printed circuit board using solder bumps. It was introduced by IBM in 1962 as Solid Logic Technology and later converted to Controlled Collapse Chip Connection. Flip chip packaging provides shorter interconnect lengths, lower inductance and higher density interconnects compared to wire bonding. It allows for area array interconnect layouts and has become the standard for high performance integrated circuits. Reliability can be improved through underfilling, which compensates for thermal expansion differences and protects the solder joints.
This document discusses a new rapid prototyping method called CNC-RP that uses computer numerical controlled (CNC) machining to create parts layer-by-layer from multiple orientations. It begins by introducing rapid prototyping and its limitations. It then describes the CNC-RP method which machines complex parts from numerous orientations using thin layered toolpaths. The document outlines the process for creating a sample part and notes that fixture planning and processing times are reduced compared to conventional CNC machining. It proposes that CNC-RP could provide an affordable way to automatically create prototypes and tooling plans for CNC machining.
High Voltage PCB Design Presentation by AltiumAltium
Looking for High Voltage PCB design resources?
Take a look at Altium's resources for electrical engineers and PCB designers here.
Or view the original presentation at: https://resources.altium.com/presentations/high-voltage-pcb-design-presentation
Or for even more information on High Voltage PCB Design, click here:
https://resources.altium.com/pcb-design-blog/high-voltage-pcb-design-creepage-and-clearance-distance
This document provides details about Sujoy Halder's internship training in PCB design from July 1, 2021 to August 3, 2021 at Internshala Training. It includes an introduction to printed circuit boards covering materials, components, and manufacturing processes. It also describes the use of EAGLE software for schematic capture and PCB layout. Specific topics covered include surface mount technology, routing, heat dissipation, and creating a power supply board. Sujoy received a certificate of completion after scoring 51% on the final assessment.
Project Report on SMT and through-hole technologylakshya bhardwaj
SMT and Through-hole technology and their assembly line, different types of Soldering, ESD protection, Conformal coating, etc, all about PCB Production
Electronic manufacturing v3.0 - Fab Academy 2016seeedstudio
Open source and DIY electronics are filling Fab Labs and maker spaces with new tools for incredible creations. How can we design tools to change how people make things? How to scale DIY electronics to millions of users?
https://plus.google.com/u/0/events/ca5ss0rvia897dk3qgloqo1gjr0
This document provides information about printed circuit boards (PCBs) including:
- PCBs connect electronic components using conducting traces on insulating boards
- Traces, pads, vias and components are key parts of a PCB
- Multilayer PCBs use multiple conducting layers separated by insulating material
- Proper PCB design considers factors like component size and placement, heat dissipation, and high frequency effects
- The PCB fabrication process involves applying conductive and insulating materials then etching away unwanted material.
PCBs are non-conductive boards that hold electronic components connected by copper traces. They minimize wiring and space in electronic circuits. PCBs can be single sided, double sided, or multi-layered. Components include active parts like transistors and ICs or passive parts like resistors and capacitors. PCBs are designed then mass produced through processes like etching, drilling, and assembly. They are widely used in applications such as medical devices, military systems, aerospace equipment, and telecommunications infrastructure.
Electronic circuit design and component selection.pptxmaheshmp16
This document provides an overview of the electronic circuit design and component selection process. It discusses testing circuits, selecting components, PCB design, manufacturing, and assembly. Key steps include testing circuits using breadboards or simulations, choosing components based on specifications, laying out PCB traces with consideration for power/ground planes and signal routing, and assembling boards using soldering or pick-and-place machines. Tips are provided for design rules, decoupling, and ordering PCB fabrication and assembly services.
A printed circuit board (PCB) connects electronic components using copper traces laminated onto a non-conductive substrate. The PCB design process involves laying out the circuit components, pads, traces, and vias on different layers. High-frequency PCBs require special considerations like minimizing inductance and capacitive coupling between traces. Thorough testing and simulation of PCB designs can help avoid issues prior to manufacturing.
JSK Innovative Technology Pvt Ltd is an ISO certified electronics company that specializes in home automation products like LED drivers. It discusses the PCB design and manufacturing process, including types of PCB boards, materials used, design software, manufacturing steps, and surface mount vs through-hole assembly techniques. The document provides details on each stage of the PCB design and production process.
This document discusses Surface Mount Technology (SMT), which involves mounting electronic components directly onto the surface of printed circuit boards rather than inserting them into holes. It provides an overview of SMT, including its advantages over traditional through-hole mounting, different types of SMT, surface mount components, the SMT assembly process, and applications. Key advantages noted are higher density packaging, improved reliability, and easier automation of the manufacturing process.
Increasing the Strength and Reliability of Press FitsDesign World
Retaining compounds increase the strength and reliability of traditional press and shrink fits. Retaining compounds improve the distribution of stress, which increases maximum load transmission and performance. They create a physical barrier that eliminates fretting, oxidation and galvanic corrosion, which increase service life.
Recent chemical advances in retaining address assembly process variables including gaps, surface finish and cleanliness ensuring consistent performance. Application equipment provides repeatable precision dispensing.
• Recent innovations in retaining: tolerance, higher temperature resistance, primerless formulas
• New data on retaining advancements: test results on strength, oil and chemical tolerance
• How to use retaining compounds to augment a press fit for increased reliability
• Application case histories for retaining including cost and performance
This document provides information on improving wave soldering processes. It discusses the basic 6 steps of wave/selective soldering including component preparation, flux application, preheating, soldering, and cooling. It also covers topics like preforming lead components, hole sizes, selective pallets, wave nozzle configurations, solder alloys, fluxing methods, preheating, and common problems troubleshooting wave soldering. The document is from Shenzhen Southern Machinery and provides their contact information.
In Plant training (internship) at Schneider ElectricSujith Js
In Plant Training at Schneider Electric in the department of Manufacturing Technology.
At Jigani, Bangalore.
• Topic: Study and Analysis of manufacturing of PCB.
Schneider Electric is a European multinational corporation founded in 1836 that specializes in electricity distribution, automation and energy management. It has over 150,000 employees worldwide and is headquartered in Rueil-Malmaison, France. Schneider Electric provides products such as programmable logic controllers, sensors, drives, uninterruptible power supplies, breakers, switchgear and motor controls.
In Plant training(Internship) at Schneider Electric,BangaloreSujith Js
In Plant Training at Schneider Electric in the department of Manufacturing Technology.
At Jigani, Bangalore.
• Topic: Study and Analysis of manufacturing of PCB.
This document discusses printed circuit board (PCB) design. It begins with an introduction to PCBs, describing how they mechanically support and electrically connect electronic components using conductive tracks on insulating substrates. It then discusses the basic materials that make up PCBs like copper foil and plating. The document outlines the main fabrication steps for PCBs which include setting up, imaging, etching, drilling, masking, and electrical testing. It also describes the characteristics of through-hole and surface mount technology. The etching and assembly processes are explained in more detail. Finally, the document provides an overview of PCB design and routing software like EAGLE and includes an example of a power supply board.
Similar to Intro_to_SMT 11111111111111116512066666666666666666666587+941111111 (20)
A review on techniques and modelling methodologies used for checking electrom...nooriasukmaningtyas
The proper function of the integrated circuit (IC) in an inhibiting electromagnetic environment has always been a serious concern throughout the decades of revolution in the world of electronics, from disjunct devices to today’s integrated circuit technology, where billions of transistors are combined on a single chip. The automotive industry and smart vehicles in particular, are confronting design issues such as being prone to electromagnetic interference (EMI). Electronic control devices calculate incorrect outputs because of EMI and sensors give misleading values which can prove fatal in case of automotives. In this paper, the authors have non exhaustively tried to review research work concerned with the investigation of EMI in ICs and prediction of this EMI using various modelling methodologies and measurement setups.
Low power architecture of logic gates using adiabatic techniquesnooriasukmaningtyas
The growing significance of portable systems to limit power consumption in ultra-large-scale-integration chips of very high density, has recently led to rapid and inventive progresses in low-power design. The most effective technique is adiabatic logic circuit design in energy-efficient hardware. This paper presents two adiabatic approaches for the design of low power circuits, modified positive feedback adiabatic logic (modified PFAL) and the other is direct current diode based positive feedback adiabatic logic (DC-DB PFAL). Logic gates are the preliminary components in any digital circuit design. By improving the performance of basic gates, one can improvise the whole system performance. In this paper proposed circuit design of the low power architecture of OR/NOR, AND/NAND, and XOR/XNOR gates are presented using the said approaches and their results are analyzed for powerdissipation, delay, power-delay-product and rise time and compared with the other adiabatic techniques along with the conventional complementary metal oxide semiconductor (CMOS) designs reported in the literature. It has been found that the designs with DC-DB PFAL technique outperform with the percentage improvement of 65% for NOR gate and 7% for NAND gate and 34% for XNOR gate over the modified PFAL techniques at 10 MHz respectively.
Understanding Inductive Bias in Machine LearningSUTEJAS
This presentation explores the concept of inductive bias in machine learning. It explains how algorithms come with built-in assumptions and preferences that guide the learning process. You'll learn about the different types of inductive bias and how they can impact the performance and generalizability of machine learning models.
The presentation also covers the positive and negative aspects of inductive bias, along with strategies for mitigating potential drawbacks. We'll explore examples of how bias manifests in algorithms like neural networks and decision trees.
By understanding inductive bias, you can gain valuable insights into how machine learning models work and make informed decisions when building and deploying them.
Harnessing WebAssembly for Real-time Stateless Streaming PipelinesChristina Lin
Traditionally, dealing with real-time data pipelines has involved significant overhead, even for straightforward tasks like data transformation or masking. However, in this talk, we’ll venture into the dynamic realm of WebAssembly (WASM) and discover how it can revolutionize the creation of stateless streaming pipelines within a Kafka (Redpanda) broker. These pipelines are adept at managing low-latency, high-data-volume scenarios.
6th International Conference on Machine Learning & Applications (CMLA 2024)ClaraZara1
6th International Conference on Machine Learning & Applications (CMLA 2024) will provide an excellent international forum for sharing knowledge and results in theory, methodology and applications of on Machine Learning & Applications.
Presentation of IEEE Slovenia CIS (Computational Intelligence Society) Chapte...University of Maribor
Slides from talk presenting:
Aleš Zamuda: Presentation of IEEE Slovenia CIS (Computational Intelligence Society) Chapter and Networking.
Presentation at IcETRAN 2024 session:
"Inter-Society Networking Panel GRSS/MTT-S/CIS
Panel Session: Promoting Connection and Cooperation"
IEEE Slovenia GRSS
IEEE Serbia and Montenegro MTT-S
IEEE Slovenia CIS
11TH INTERNATIONAL CONFERENCE ON ELECTRICAL, ELECTRONIC AND COMPUTING ENGINEERING
3-6 June 2024, Niš, Serbia
Advanced control scheme of doubly fed induction generator for wind turbine us...IJECEIAES
This paper describes a speed control device for generating electrical energy on an electricity network based on the doubly fed induction generator (DFIG) used for wind power conversion systems. At first, a double-fed induction generator model was constructed. A control law is formulated to govern the flow of energy between the stator of a DFIG and the energy network using three types of controllers: proportional integral (PI), sliding mode controller (SMC) and second order sliding mode controller (SOSMC). Their different results in terms of power reference tracking, reaction to unexpected speed fluctuations, sensitivity to perturbations, and resilience against machine parameter alterations are compared. MATLAB/Simulink was used to conduct the simulations for the preceding study. Multiple simulations have shown very satisfying results, and the investigations demonstrate the efficacy and power-enhancing capabilities of the suggested control system.
We have compiled the most important slides from each speaker's presentation. This year’s compilation, available for free, captures the key insights and contributions shared during the DfMAy 2024 conference.
Embedded machine learning-based road conditions and driving behavior monitoringIJECEIAES
Car accident rates have increased in recent years, resulting in losses in human lives, properties, and other financial costs. An embedded machine learning-based system is developed to address this critical issue. The system can monitor road conditions, detect driving patterns, and identify aggressive driving behaviors. The system is based on neural networks trained on a comprehensive dataset of driving events, driving styles, and road conditions. The system effectively detects potential risks and helps mitigate the frequency and impact of accidents. The primary goal is to ensure the safety of drivers and vehicles. Collecting data involved gathering information on three key road events: normal street and normal drive, speed bumps, circular yellow speed bumps, and three aggressive driving actions: sudden start, sudden stop, and sudden entry. The gathered data is processed and analyzed using a machine learning system designed for limited power and memory devices. The developed system resulted in 91.9% accuracy, 93.6% precision, and 92% recall. The achieved inference time on an Arduino Nano 33 BLE Sense with a 32-bit CPU running at 64 MHz is 34 ms and requires 2.6 kB peak RAM and 139.9 kB program flash memory, making it suitable for resource-constrained embedded systems.
International Conference on NLP, Artificial Intelligence, Machine Learning an...gerogepatton
International Conference on NLP, Artificial Intelligence, Machine Learning and Applications (NLAIM 2024) offers a premier global platform for exchanging insights and findings in the theory, methodology, and applications of NLP, Artificial Intelligence, Machine Learning, and their applications. The conference seeks substantial contributions across all key domains of NLP, Artificial Intelligence, Machine Learning, and their practical applications, aiming to foster both theoretical advancements and real-world implementations. With a focus on facilitating collaboration between researchers and practitioners from academia and industry, the conference serves as a nexus for sharing the latest developments in the field.
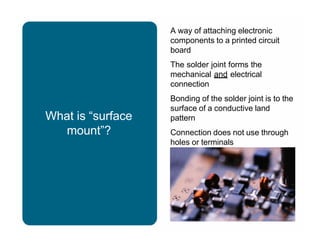
1. What is “surface
mount”?
A way of attaching electronic
components to a printed circuit
board
The solder joint forms the
mechanical and electrical
connection
Bonding of the solder joint is to the
surface of a conductive land
pattern
Connection does not use through
holes or terminals
3. Advantages of SMT
• smaller parts
• denser layout
• cheaper pcbs (no holes to drill)
• improved shock and vibration
characteristics
• improved frequency response
• easier to shield from EMI / RFI
• easier to automate
manufacturing
4. Disadvantages of SMT
• more heat generated
• small clearance makes cleaning
difficult
• visual inspection difficult
• good joint formation important for
mechanical reliability of assembly
• harder to hand assemble
• greater number of different
materials to match CTE’s
5. Printed Circuit Boards
(PCBs)
Most commonly encountered
types of substrates:
– Laminates (FR-4, etc.)
– Ceramics
– Flex
For more information, see
High Performance Printed
Circuit Boards by Harper
(McGraw-Hill)
6. FR-4
FR-4 is the most widely used
material because it’s
adequate for most
applications and cheap
When not to use FR-4:
– High reliability and/or hot
components: high Tg, like FR-405,
or even higher temp with ceramic
– High frequency: low dielectric loss
(tan d), such as PTFE (Teflon)
– High speed digital lower dielectric
constants (er), polyimide or PTFE
– Form factors: flex can turn corners
– Need CTE match to chip: ceramic
7. Some PCB Laminate Materials
NEMA
Grade
Resin
System
Reinforcement Description
FR-2 Phenolic Paper Punchable, flame resistant
FR-3 Epoxy Paper Flame resistant, high insulation
resistance
FR-4 Epoxy Woven glass Flame resistance, Tg ~ 130C
FR-5 Epoxy Woven glass Flame resistant, higher Tg, better
thermal
FR-6 Polyester Glass matte Flame resistant, low capacitance
or high impact applications
CEM-1 Epoxy Paper and
glass
Paper core and glass surface,
self-extinguishing, excellent
punching, longer drill life and
minimal dust.
CEM-3 Epoxy Woven glass
and glass
matte
Nonwoven glass core and woven
glass surface, similar to FR-4,
longer drill life
8. How to make PCBs
• Make (buy) FR4 laminate core
• Pattern Cu
• Laminate (press and heat)
• Drill
• Plate Cu
• Route images
• Test
9. How Laminates are Made
Roll of
woven
glass
Impregnate
glass with
epoxy resin
Dry/Cure
Cut
Prepreg: semicured
material that is dry
and nontacky. It
can be stored.
Prepreg
Copper Foil
Press
FR4 core
laminate
10. How PCBs are Made
FR4 laminate core
Pattern Cu
Layer with prepreg and laminate
(press and heat)
Drill (plate outer layer and holes)
Pattern outer layer
(Route images & test)
11. SMT Layout
Use a layout program to do
design, component
placement, and footprint
definition:
•Cadence’s Allegro or Orcad
•Pads/Innoveda’s PowerPCB
•Mentor’s Board Station
•Protel
•others
12. Footprints
• Design libraries are available for
most parts
• New footprints can be added
manually
• Often footprints can be
downloaded from the part vendor
or from Topline
(http://www.toplinedummy.com)
• There are IPC design guidelines
(IPC-SM-782 at http://www.ipc.org)
and Jedec component definitions
(http://www.jedec.org)
In prototypes, you’re most
concerned with fitting the part on
the board properly, but in real
products we consider joint
geometry for manufacturing yield
and product reliability.
(footprint = pad dimensions and land patterns)
13. How to Specify PCBs
This is the information you should provide when ordering PCBs:
1. Quantity and lead time
2. X-Y dimensions/boards per panel, number of sides with components
3. Board material, thickness (4 layer boards usually 0.062”) and tolerances
4. Layer count and copper weight for layers:
- ½ oz or 1oz copper on outer layers (less copper means shorter etch
times)
- 1 oz copper on inner layers (carry more current for ground/power planes)
5. Metallization (SnPb/HASL, organic, Cu-Ni-Au, immersion Sn or Ag or Au)
6. Minimum line and space width (< 0.008” costs more)
7. Hole count, min hole dim and finish (holes < 0.015” cost more)
8. Surface mount pad count and minimum pad pitch
9. Silkscreen and solder mask (usually green LPI)
10.Electrical testing requirements (need netlist for electrical test)
11.Gerber data (always create a README file)
14. May not be available as
surface mount:
•Some connectors
•Transformers/solenoids
•Large electrolytic caps
• QFP, SOIC, TSOP
(gull wing)
• area array (BGA,
CSP, flip chip)
• chip resistors,
capacitors
•small outline
transistors (SOT)
• PLCC (J lead)
Common
SMT components
15. Ordering SMT Components
For small numbers of parts (prototype quantities), use
component distributors, such as:
• Digi-Key http://www.digikey.com
• Newark http://www.newark.com
• Keytronics http://www.keytronics.com
• Avnet http://www.avnet.com
• Jameco http://www.jameco.com
• EDX http://www.edxelectronics.com
Etc., etc., etc.
Online ordering is easy. Look around for good prices.
16. Specifying SMT Components
Components are usually ordered by part number. Make sure
you have the correct:
• Functional specs and tolerances
• Package type (QFP, TSOP, etc.)
• Lead type (gull wing, J-lead, etc.)
• X-Y dimensions (e.g. TSOPs can have the same number of pins but
different body lengths and widths)
• Pins/pin outs/footprint
• Bulk packaging (tape & reel, tubes, trays)
• Quantity
for the part number you request.
Ordering more is cheaper per part, but don’t order parts you
won’t use.
17. Assembly
Surface mount assembly process
steps:
•Solder paste printing or dispensing
•Component placement
•Reflow
•Inspection
•Rework/backload
•Cleaning
A good reference: Surface Mount
Technology by Prasad (ITP)
18. Paste and printing
Solder paste has tiny metal
spheres of the alloy mixed with
flux, solvents, and thixotropic
materials
Methods of applying solder paste:
• Stencil printing
• Syringe dispensing
Most influential step affecting yield
19. Reflow
Once parts have
been placed on the
solder paste bricks,
the entire board is
placed in an oven
and taken through a
temperature profile
like:
20. Inspection/Test
Rework/Backload
Cleaning
• Look for wrong/misplaced
components and poor solder joints
• Fix problems and add parts that
can’t survive the high temperature
of the reflow oven
• Wash to remove flux residues
21. Assembly- yourself
Use large components / large pitch
Dispense (usually SnPb solder
paste)
– Use a robust paste with a wide
process window
– Alpha WS609(if you can clean the
board or don’t care about long term
reliability)
– Kester R244 if you can’t clean
Hand place components with
tweezers
– don’t let paste dry out
– don’t push down too hard
– always use ESD protection
Hot plate
– only needs to be molten (~200C) for
60-90s
Clean, if necessary
22. Rework and hand
soldering
Defects happen in the best
manufacturing process:
• Wrong part
• Reversed polarity
• Misaligned part
• Shorts/bridging/excess solder
• Opens/insufficient solder
• Nonwetting/unreflowed solder
unreflowed solder paste
24. Removing Components
(using hot air solder system)
1.Applying flux to all
land/leaded areas
2.Position the
nozzle over part
3.Turn on vacuum
and and set
vacuum cup on
part
4.Lower nozzle and
melt all joints
5.Lift component
25. Remove Old Solder
(with blade tip on soldering iron)
1.Apply flux to
lands
2.Lay braid on
solder to be
removed
3.Place iron tip on
braid, and when
solder flow
stops, remove
braid and tip
26. Re-tin and Level Pads
(with blade tip on soldering iron)
• Apply flux to
lands
• Tin the blade tip
• Place the blade
lightly along the
center line of the
row of lands
• Gently draw the
tip off the lands
after the solder
melts
27. Install New Component
(using hot air pencil)
1.Dispense solder
paste in a long,
single line over
pads
2.Place component
3.Adjust air
pressure
4.Dry paste until it
appears dull
5.Move tip closer
and heat until
solder melts
6.Clean, if
necessary
28. Fixing Shorts
1.Apply flux to the
bridged leads
2.Clean tip of
soldering iron
3.Hold the tip so
that it runs
parallel to the
row of leads
4.Bring the flat
surface of the tip
down on the
bridge and wait
for reflow
5.Draw the bridge
gently down
away from the
component
29. Fixing Opens
1.Apply flux to
open lead
2.Used flux cored
solder wire to
apply tin to the
soldering tip
3.Bring the tip in at
a 45o
angle and
make contact
with lead and
land where they
meet
4.Draw the tip
away