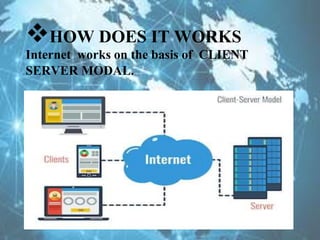
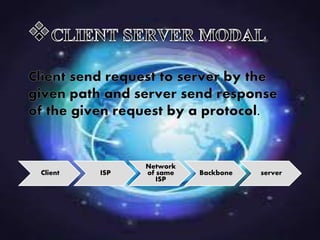
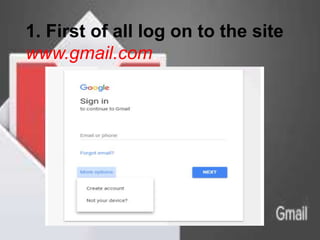
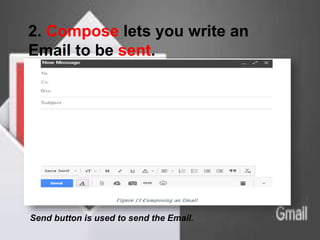
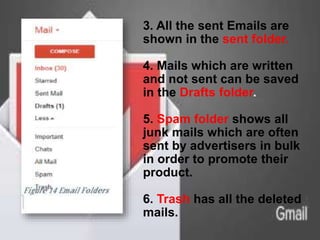
IT
201
INTERNET AND ITS
APPLICATIONS
INTRODUCTION
HISTORY OF INTERNET
HOW DOES IT WORKS
Internet works on the basis of CLIENT
SERVER MODAL.
Client ISP
Network
of same
ISP
Backbone server
PROTOCOL
Intranet
World wide web
Website
Webpages
Multimedia files
Hyperlinks
Web browser
A web browser is a container in
which web pages are opened. For
ex- Internet explorer,
Mozilla Firefox, Apple safari etc.
Web address or URL
Domain naming system (DNS)
Uses of internet
Advantages of internet
2.CONNECTIVITY ,COMMUNICATION
AND SHARING
3.ADDRESS,MAPPING AND CONTACT
INFORMATION
4.BANKING,BILLS AND SHOPPING
5.SELLING AND MAKING MONEY
6.ENTERTAINMENT
7. CLOUD COMPUTING AND CLOUD
STORAGE
Disadvantages of internet
2. NEVER BEING ABLE TO DISCONNECT
FROM WORK
3.IDENTITY THEFT, HACKING, VIRUSES
AND CHEATING
4.SPAM AND ADVERTISING
5. AFFECT FOCUS AND PATIENCE
6. DEPRESSION, LONELINESS AND
SOCIAL ISOLATION
7. HEALTH ISSUES AND OBESITY
Online banking
Online Banking provides a virtual bank at
your fingertips which can be used to do
almost any work which you can do at a
bank whether it is transacting money i.e.
sending or receiving money, making fixed
deposit, change of address, nominating an
account, recurring or fixed deposit etc.
Let’s go through the virtual tour
of HDFC bank’s online portal.
The ACCOUNT TAB shows the account
balance.
The Funds transfer tab lets you transfer funds
from your account to other accounts within
that bank or other banks through RTGS/NEFT
or IMPS.
The Bill Pay & Recharge tab lets you pay all
your post-paid and prepaid bills.
All your Credit/Debit cards can be managed
with the help of Cards tab.
ONLINE RESERVATION
EMAIL
Online email service provider
There are many web based online email
service providers.
www.gmail.com,
www.yahoomail.com
These are some of the most popular
sites which offer online email account
creation for free.
We will now learn how to
create an Email account with
the help of Gmail.com……
1. First of all log on to the site
www.gmail.com.
2. Click on More options and choose
Create account.
3. Fill in all the required details as
displayed below.
4. After filling in the required details an
email address is created which is
created in the
format below:-
username@hostname
Username is the name provided by the
user and the hostname is the name of
the service provider. Using the
username and password the user can
log in to the account and send or receive
Emails.
We will now learn how to send or
receive the email on the GMAIL
ACCOUNT.
Sending And Receiving
1. After logging into the account, check the
folders listed towards the left of the window. The
snapshot below shows the Inbox folder towards
left . Towards the right of the folder we have all
the received Emails.
2. Compose lets you write an
Email to be sent.
Send button is used to send the Email.
3. All the sent Emails are
shown in the sent folder.
4. Mails which are written
and not sent can be saved
in the Drafts folder.
5. Spam folder shows all
junk mails which are often
sent by advertisers in bulk
in order to promote their
product.
6. Trash has all the deleted
mails.
Thank you

INTERNET AND ITS APPLICATION RESOURCES