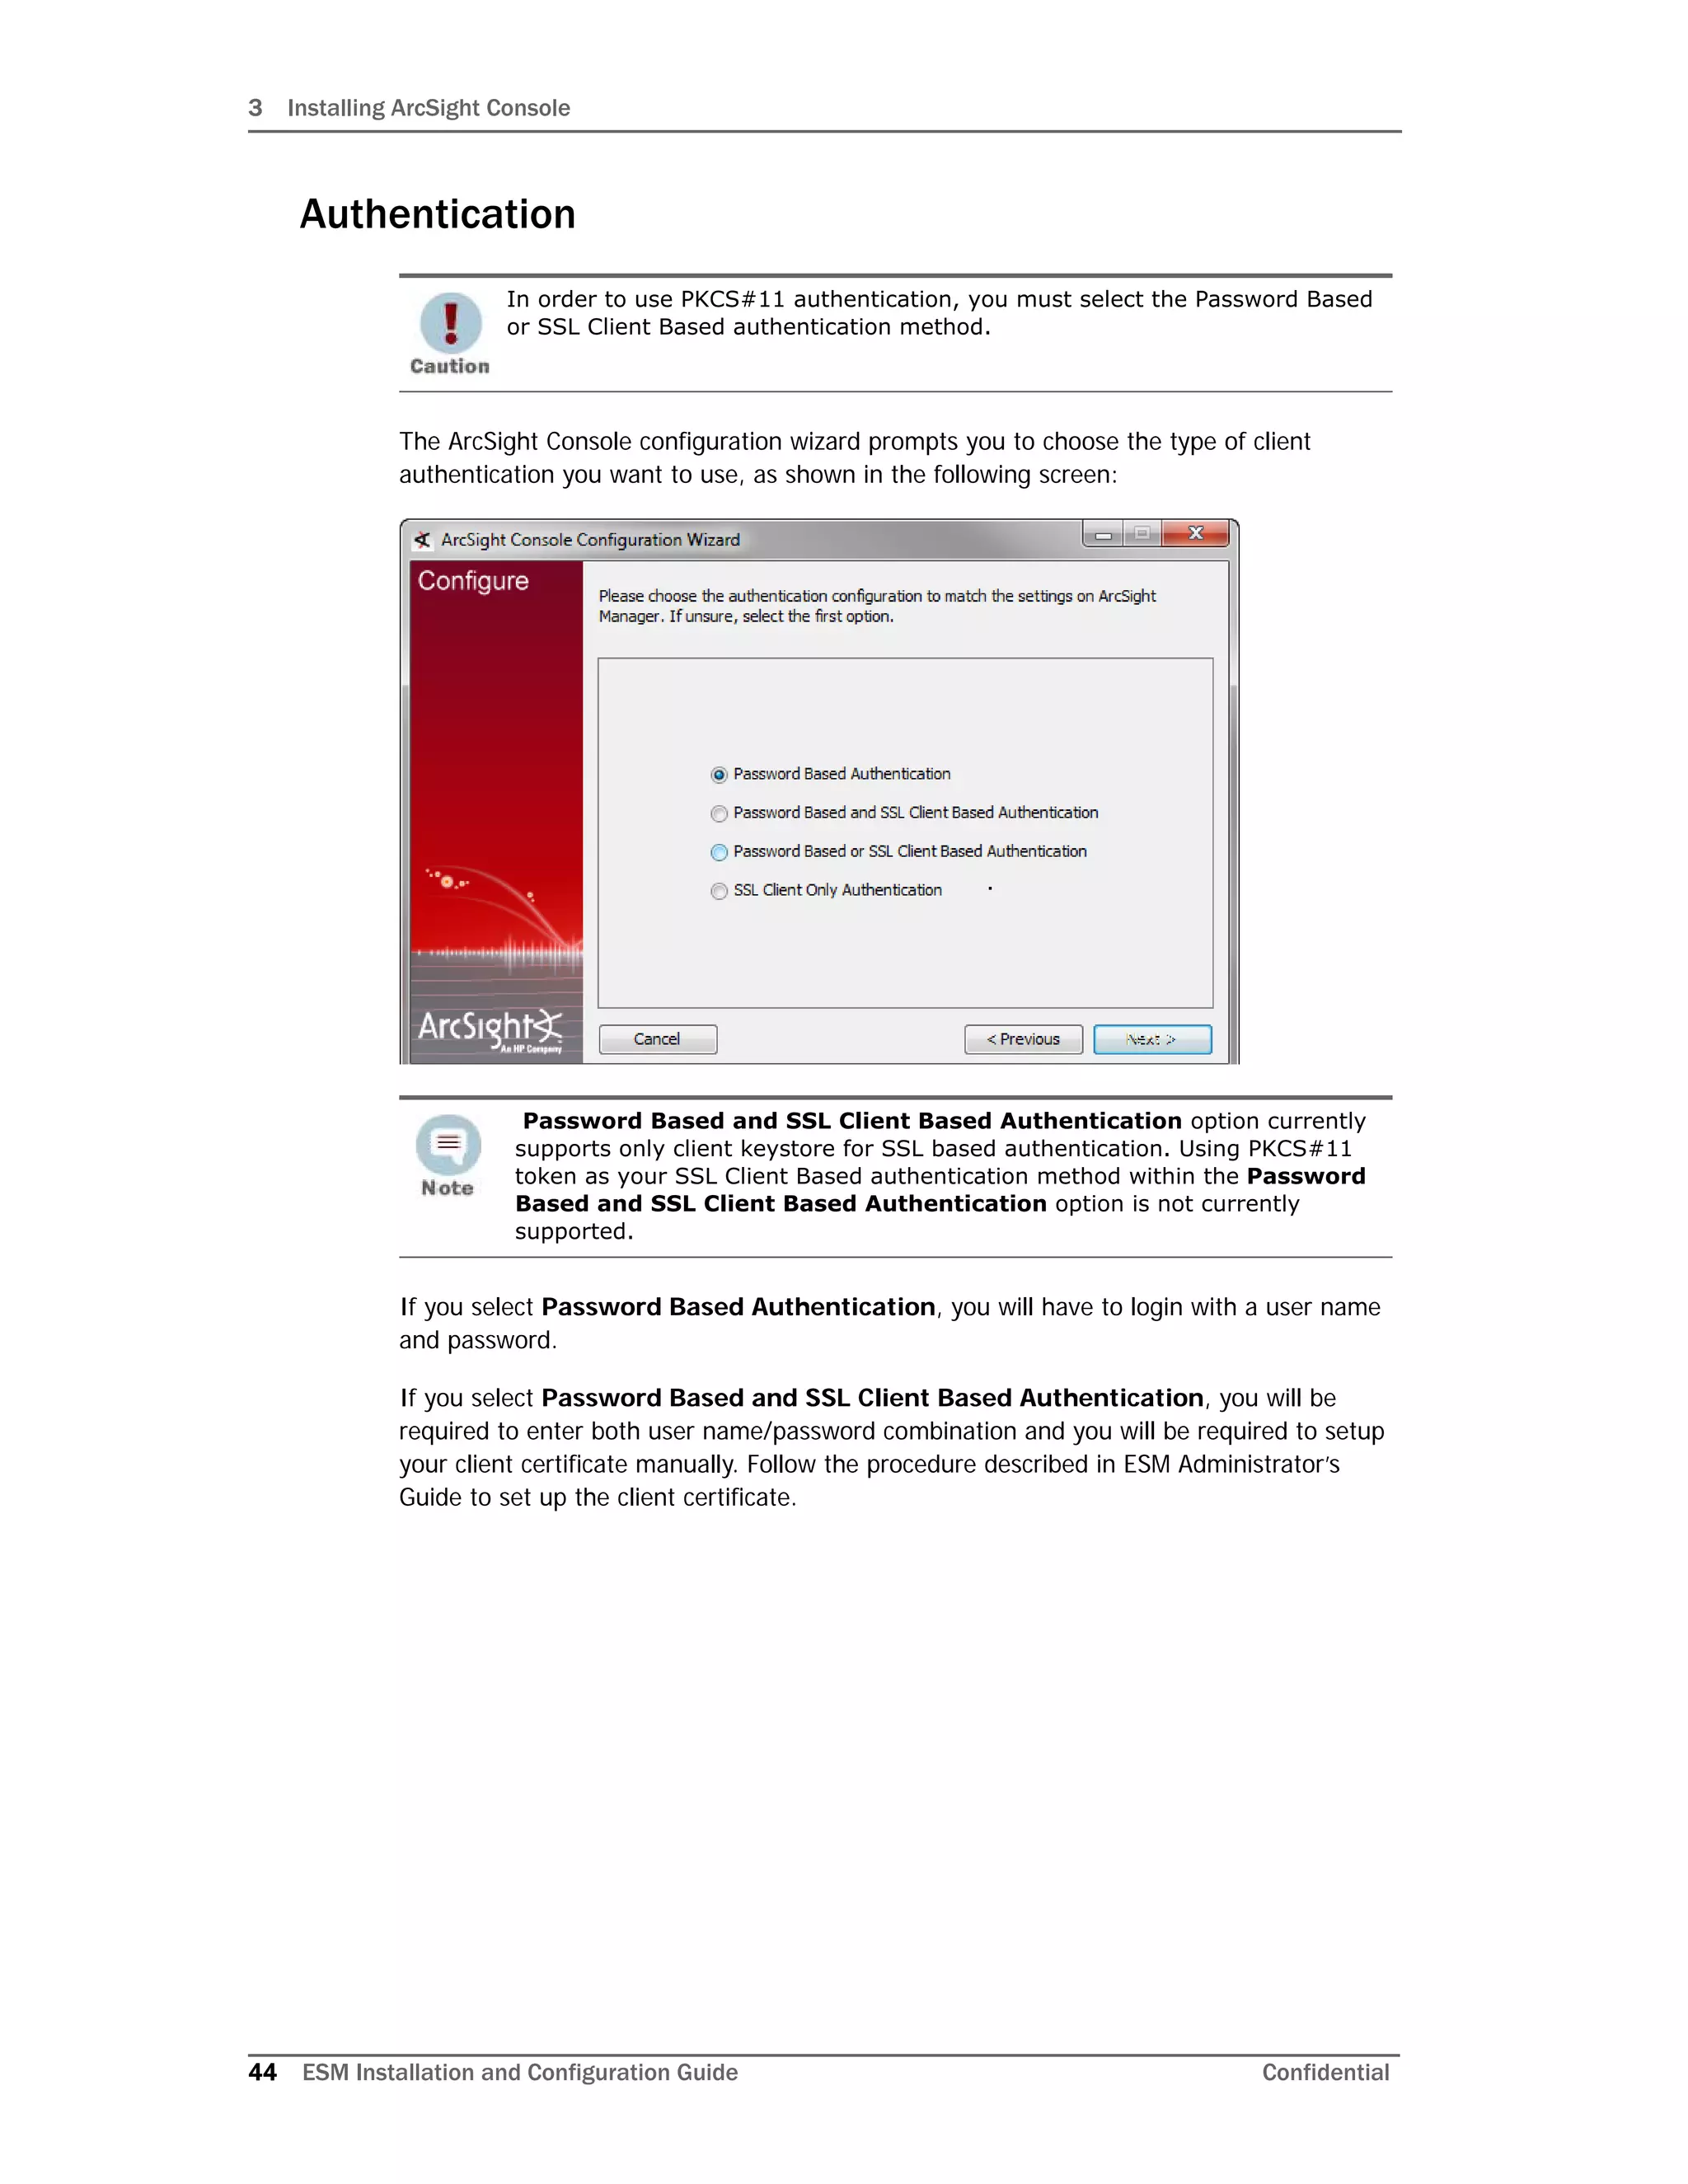
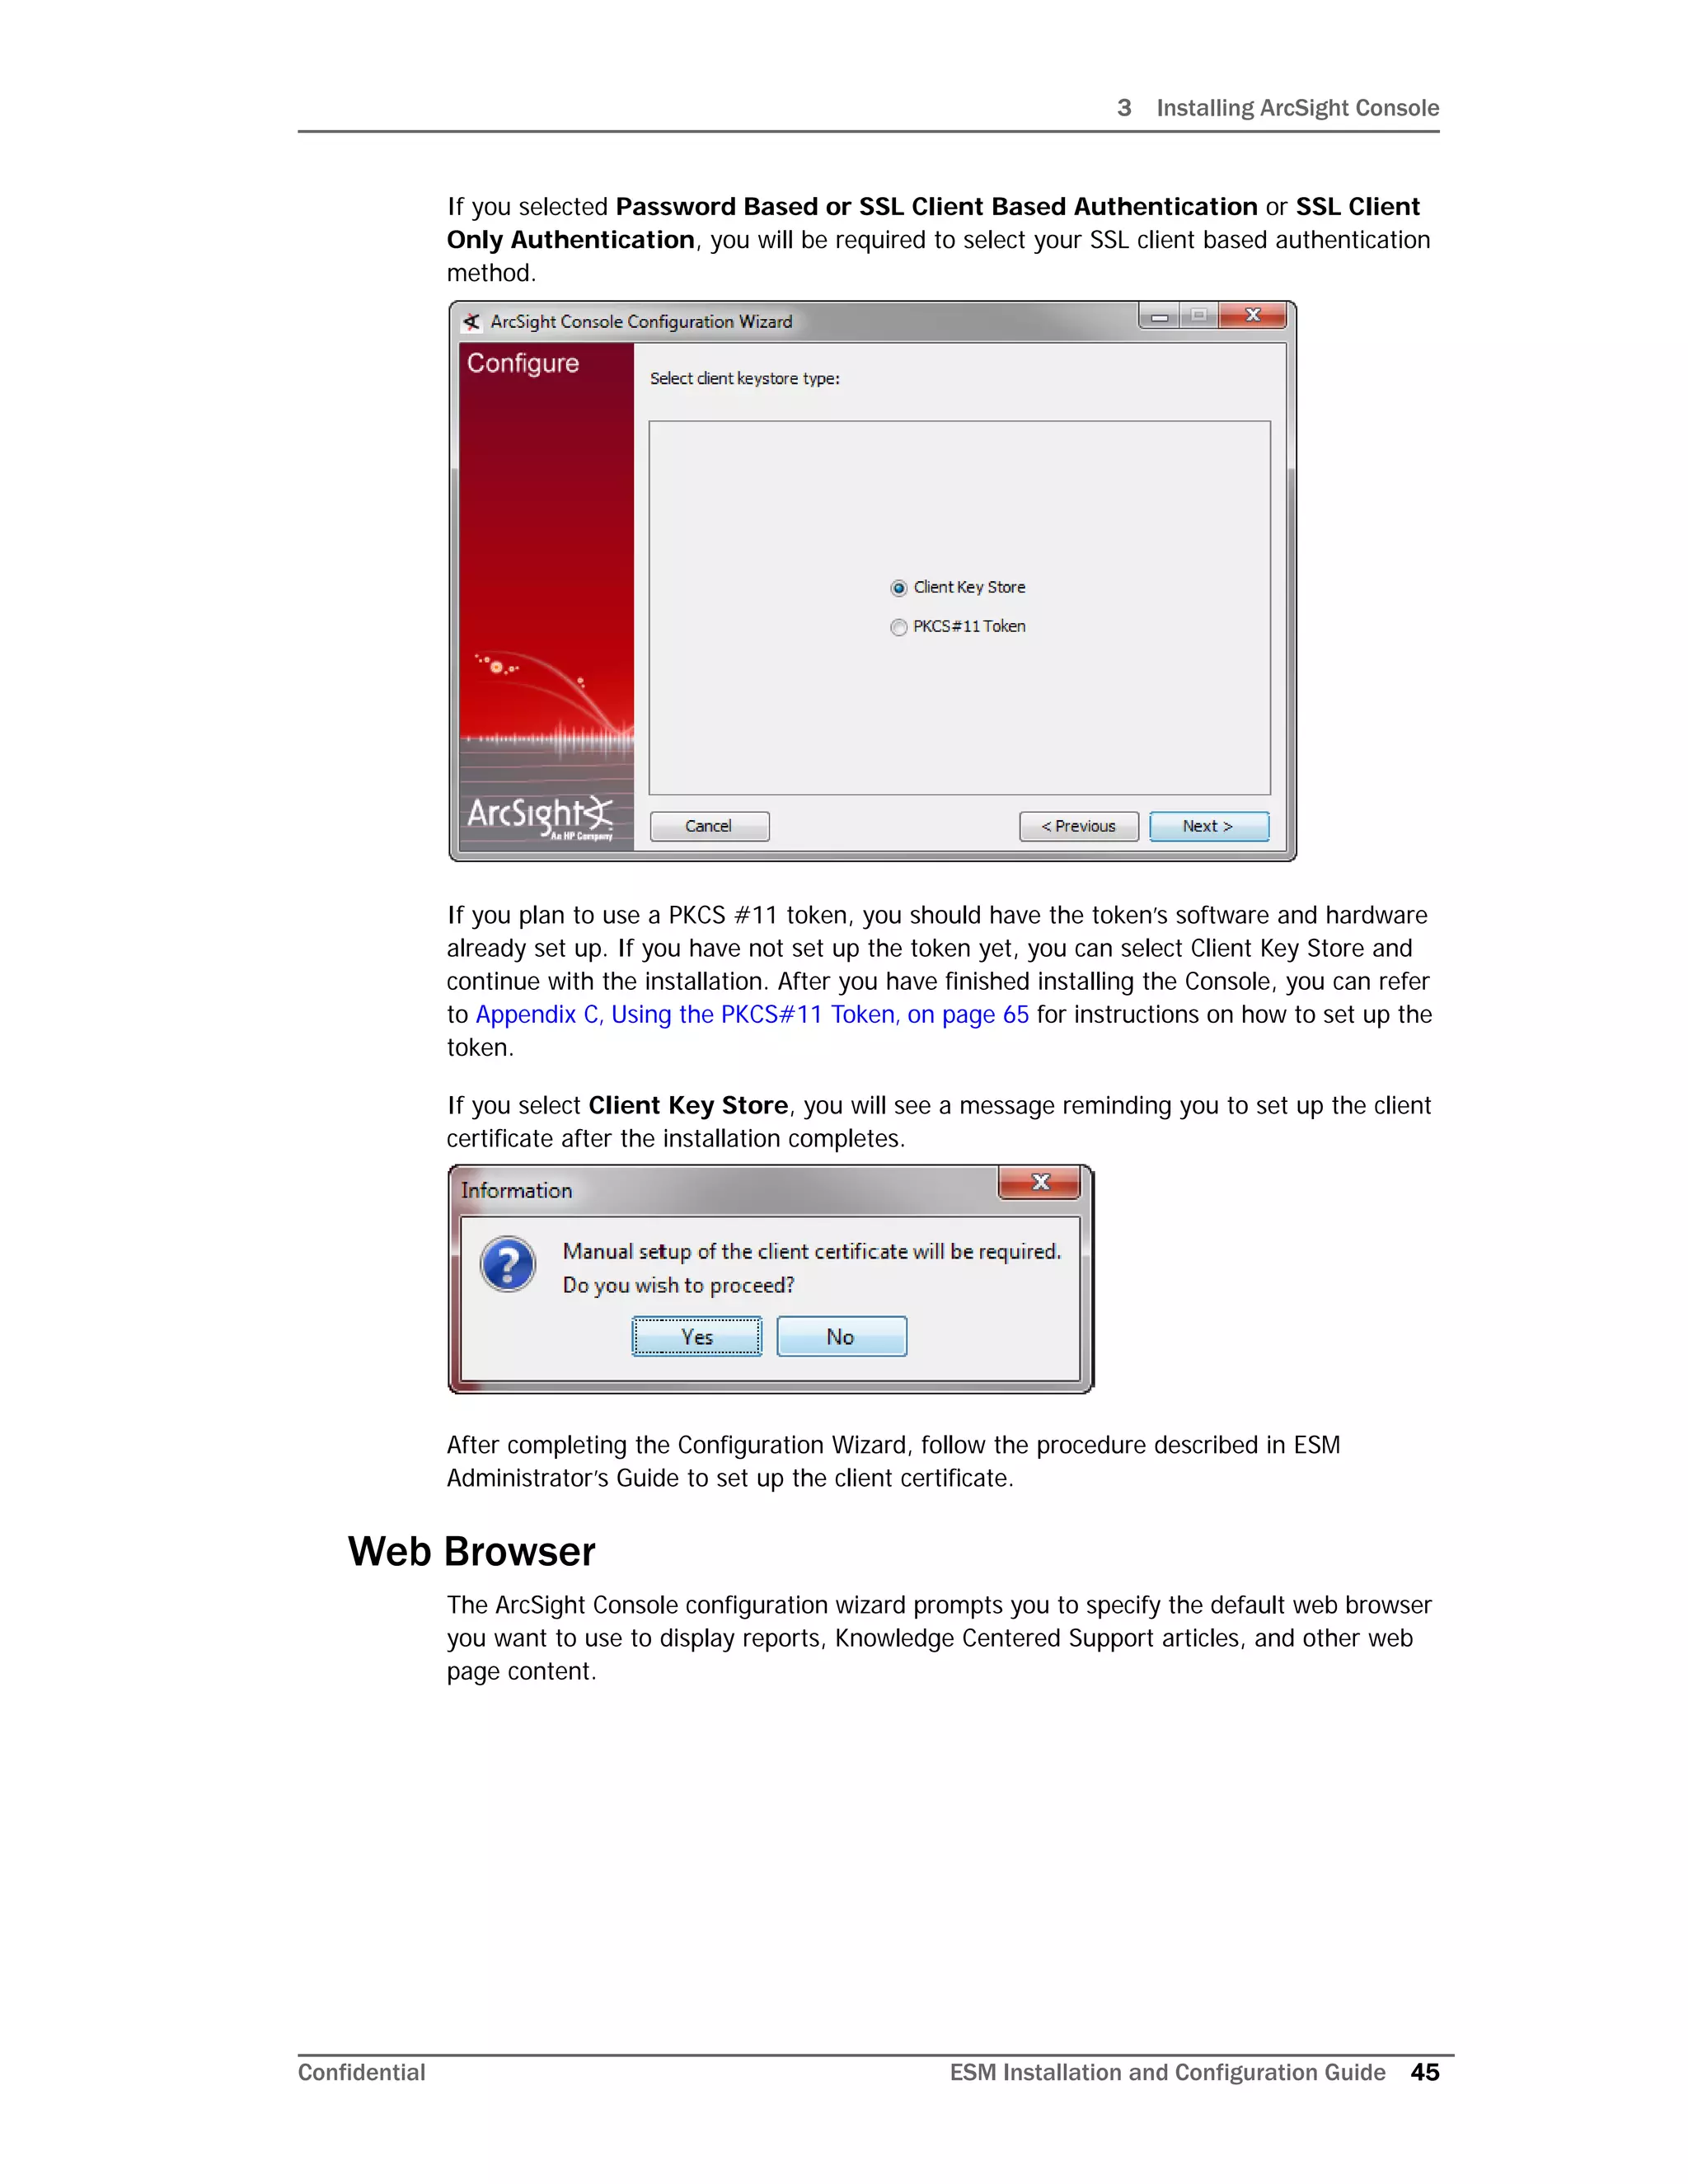
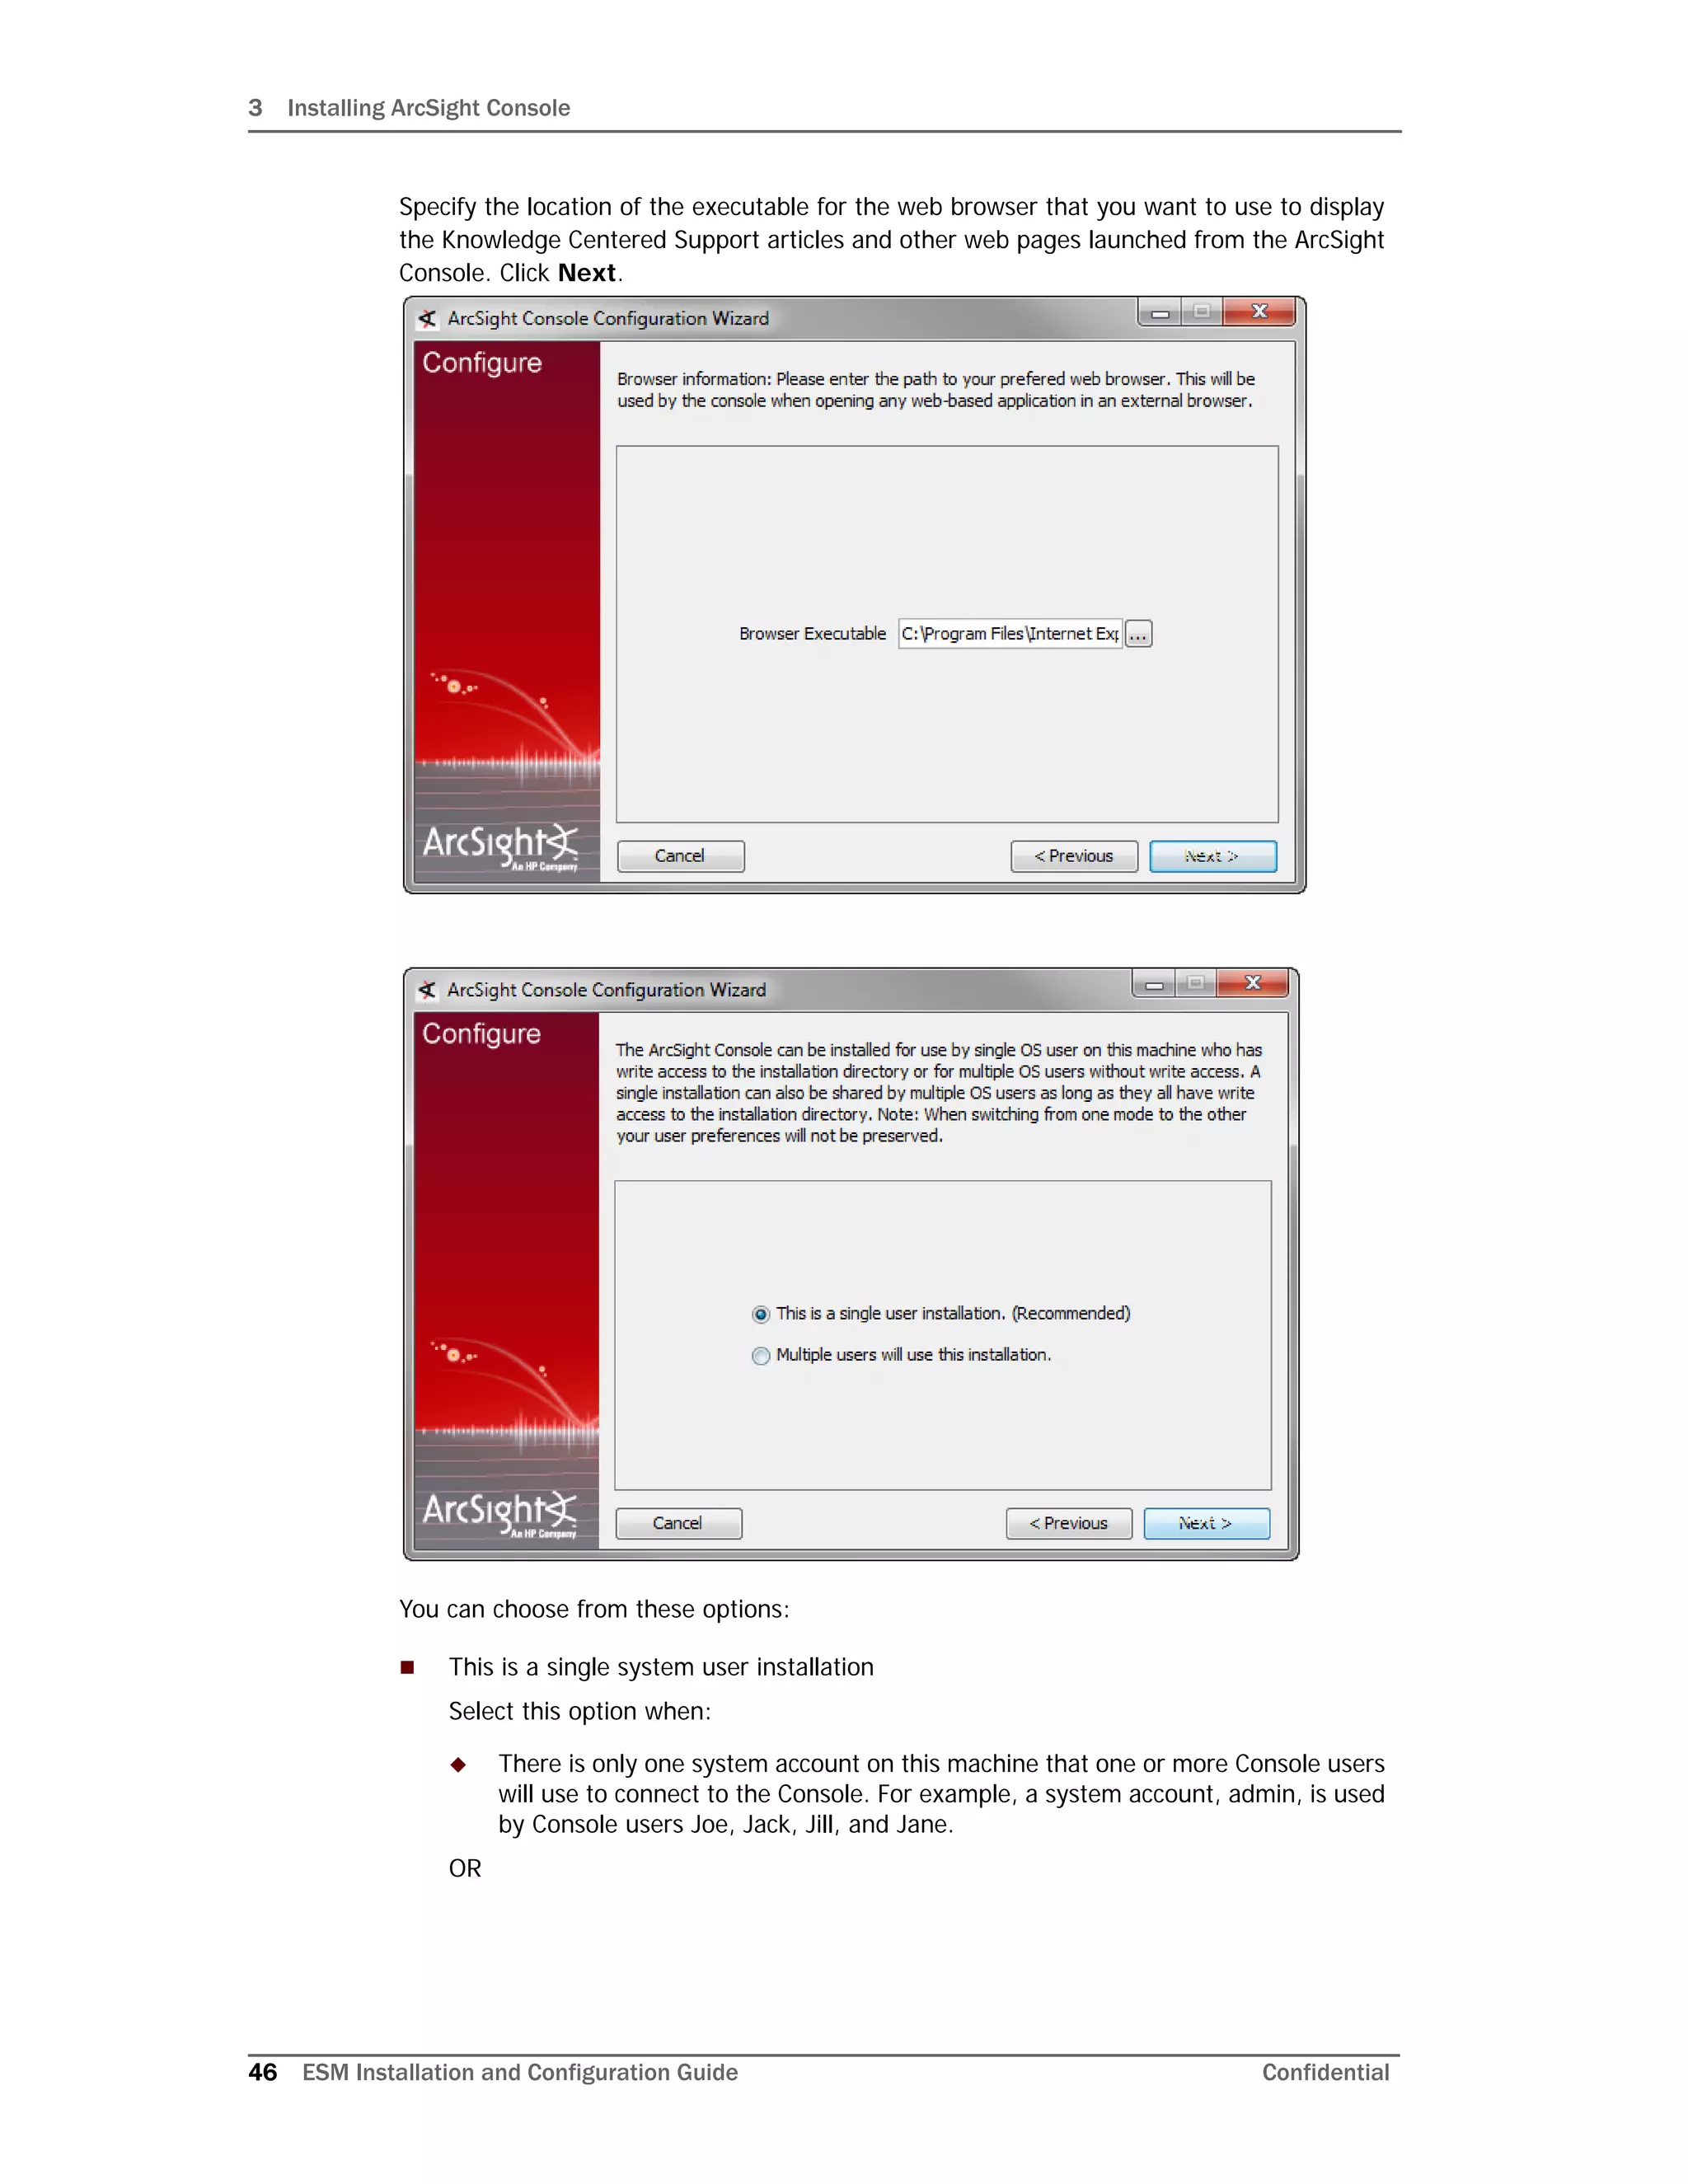
This document provides instructions for installing and configuring the ArcSight ESM 6.5c software. It discusses the ESM components, including the Manager, CORR-Engine, Command Center, Console, SmartConnectors, and ArcSight Web. It then describes the directory structure, security best practices, and system requirements for installation. The document provides step-by-step instructions for installing ESM and its components, configuring the software, and troubleshooting any issues. It also includes information on uninstalling ESM.


![3 Installing ArcSight Console
48 ESM Installation and Configuration Guide Confidential
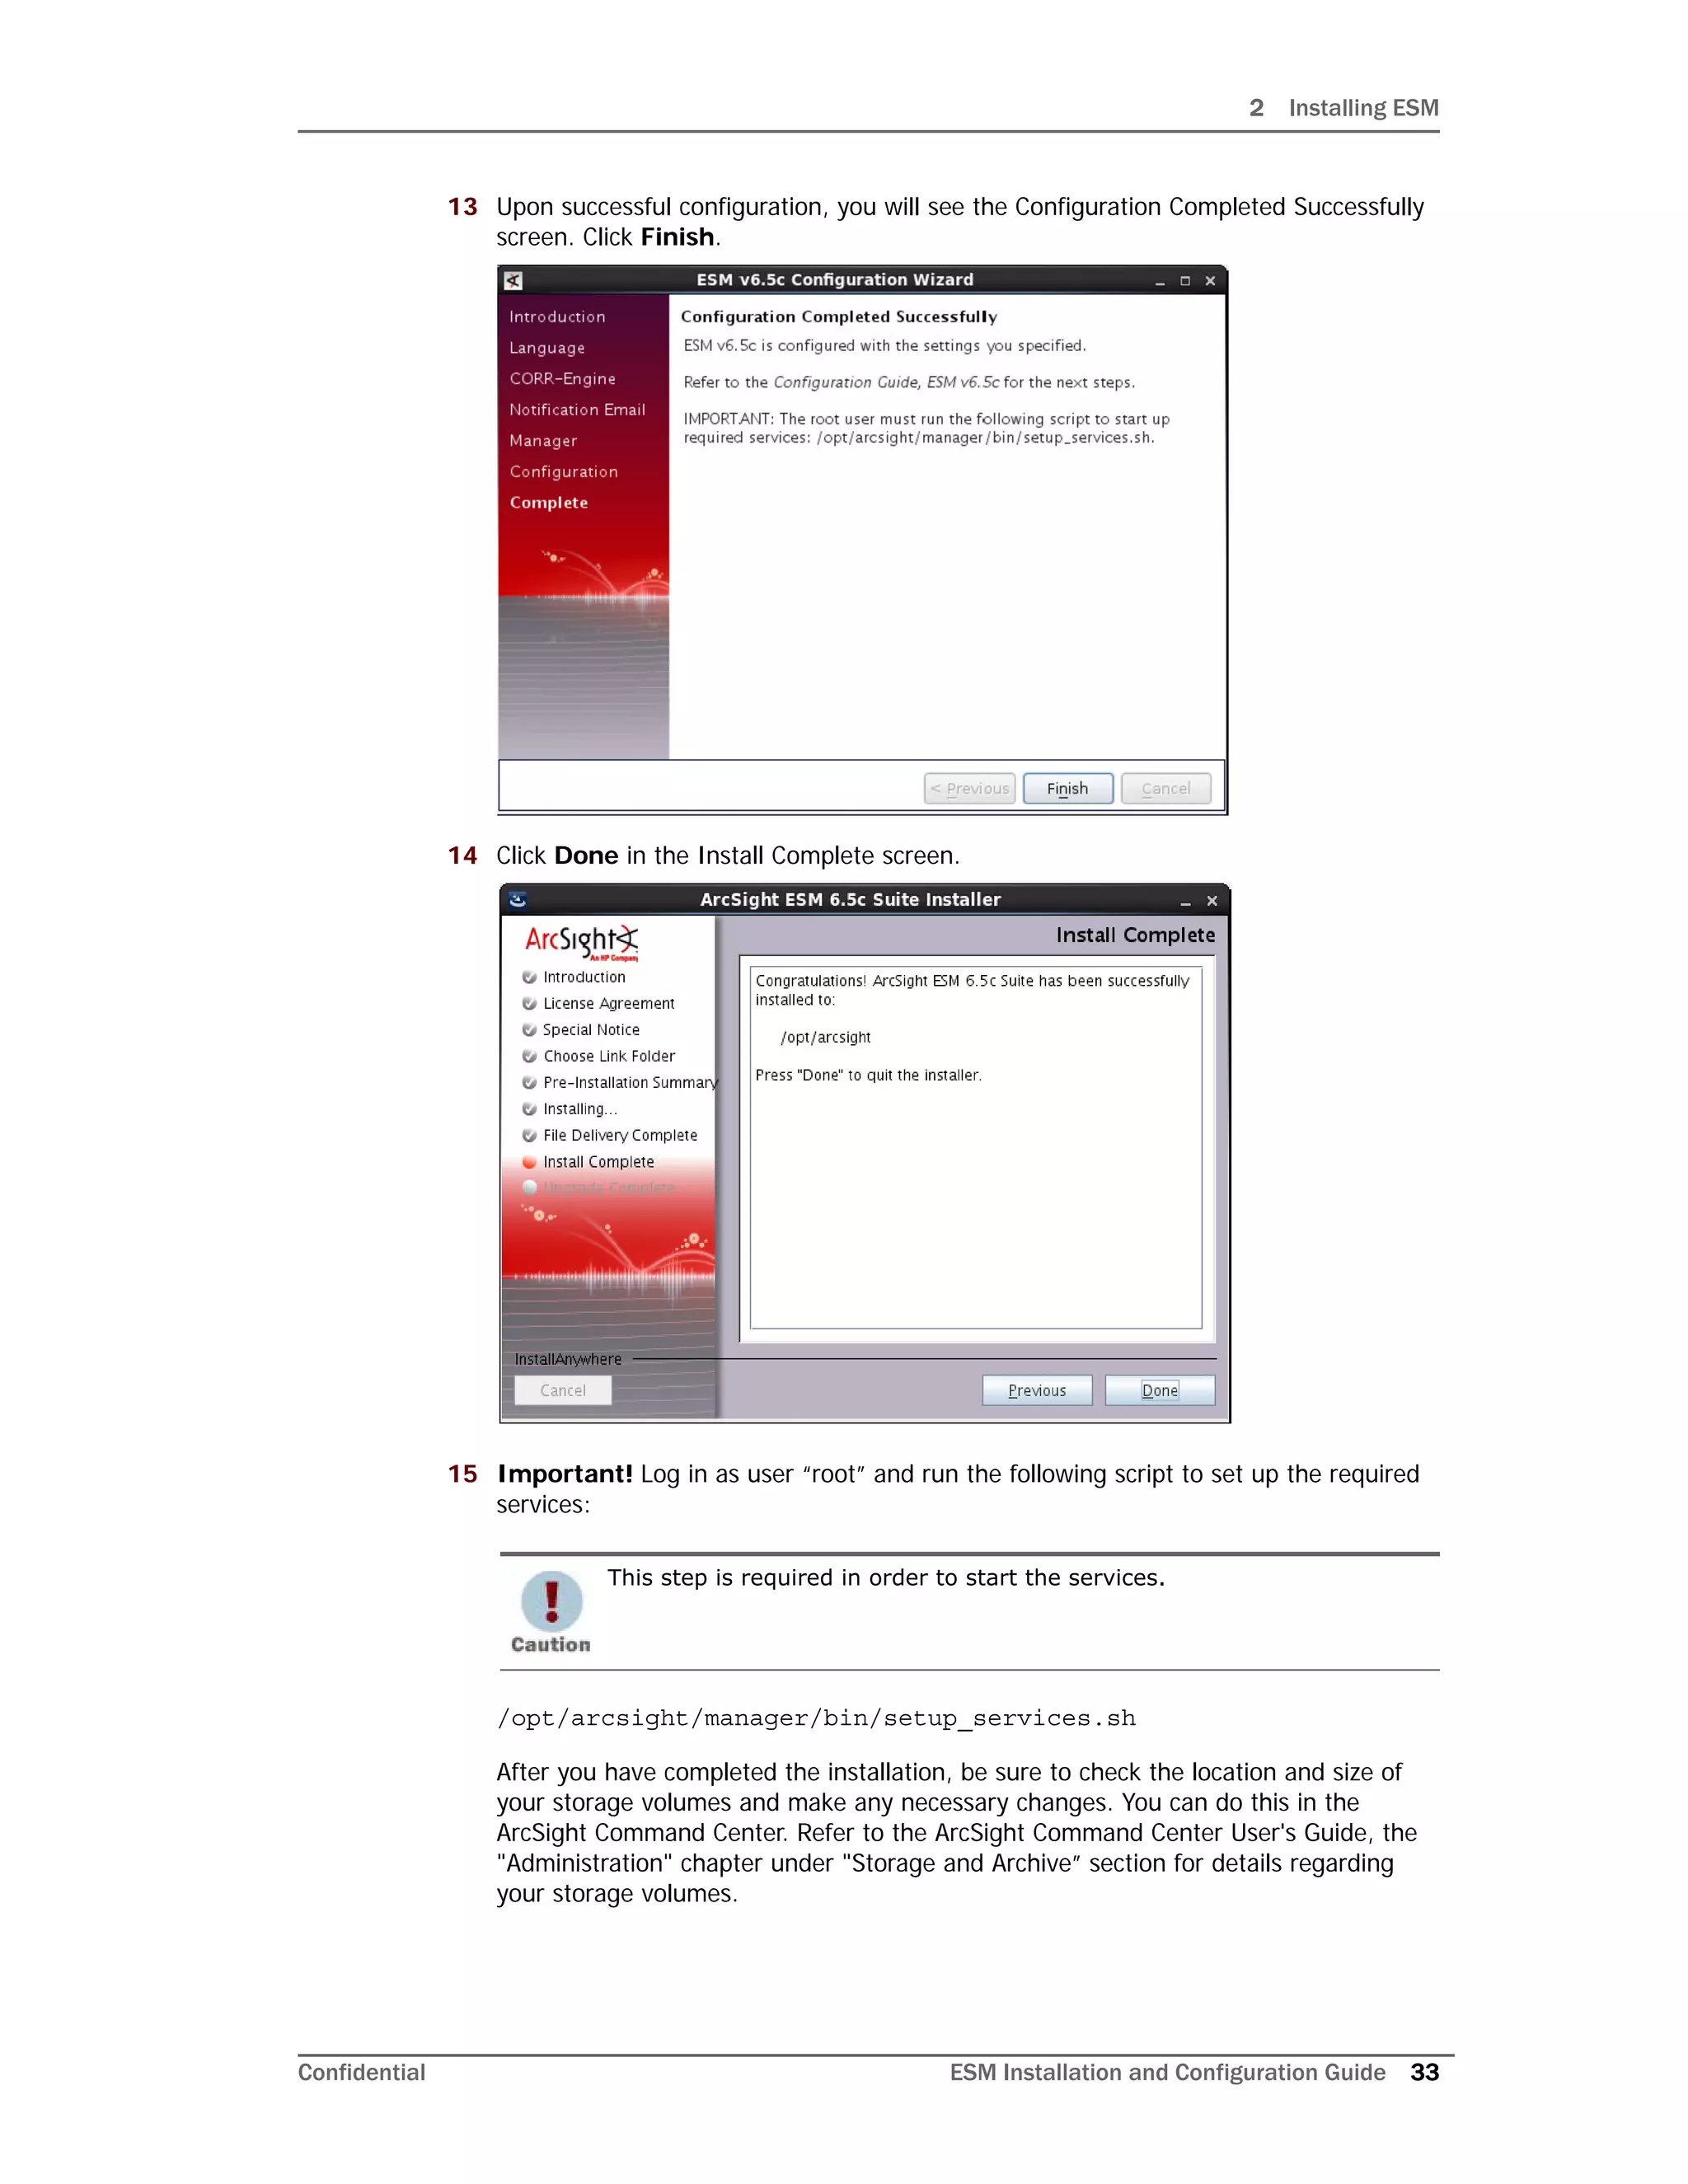
You have completed configuring your ArcSight Console. Click Finish in the following
screen.
Click Done in the next screen.
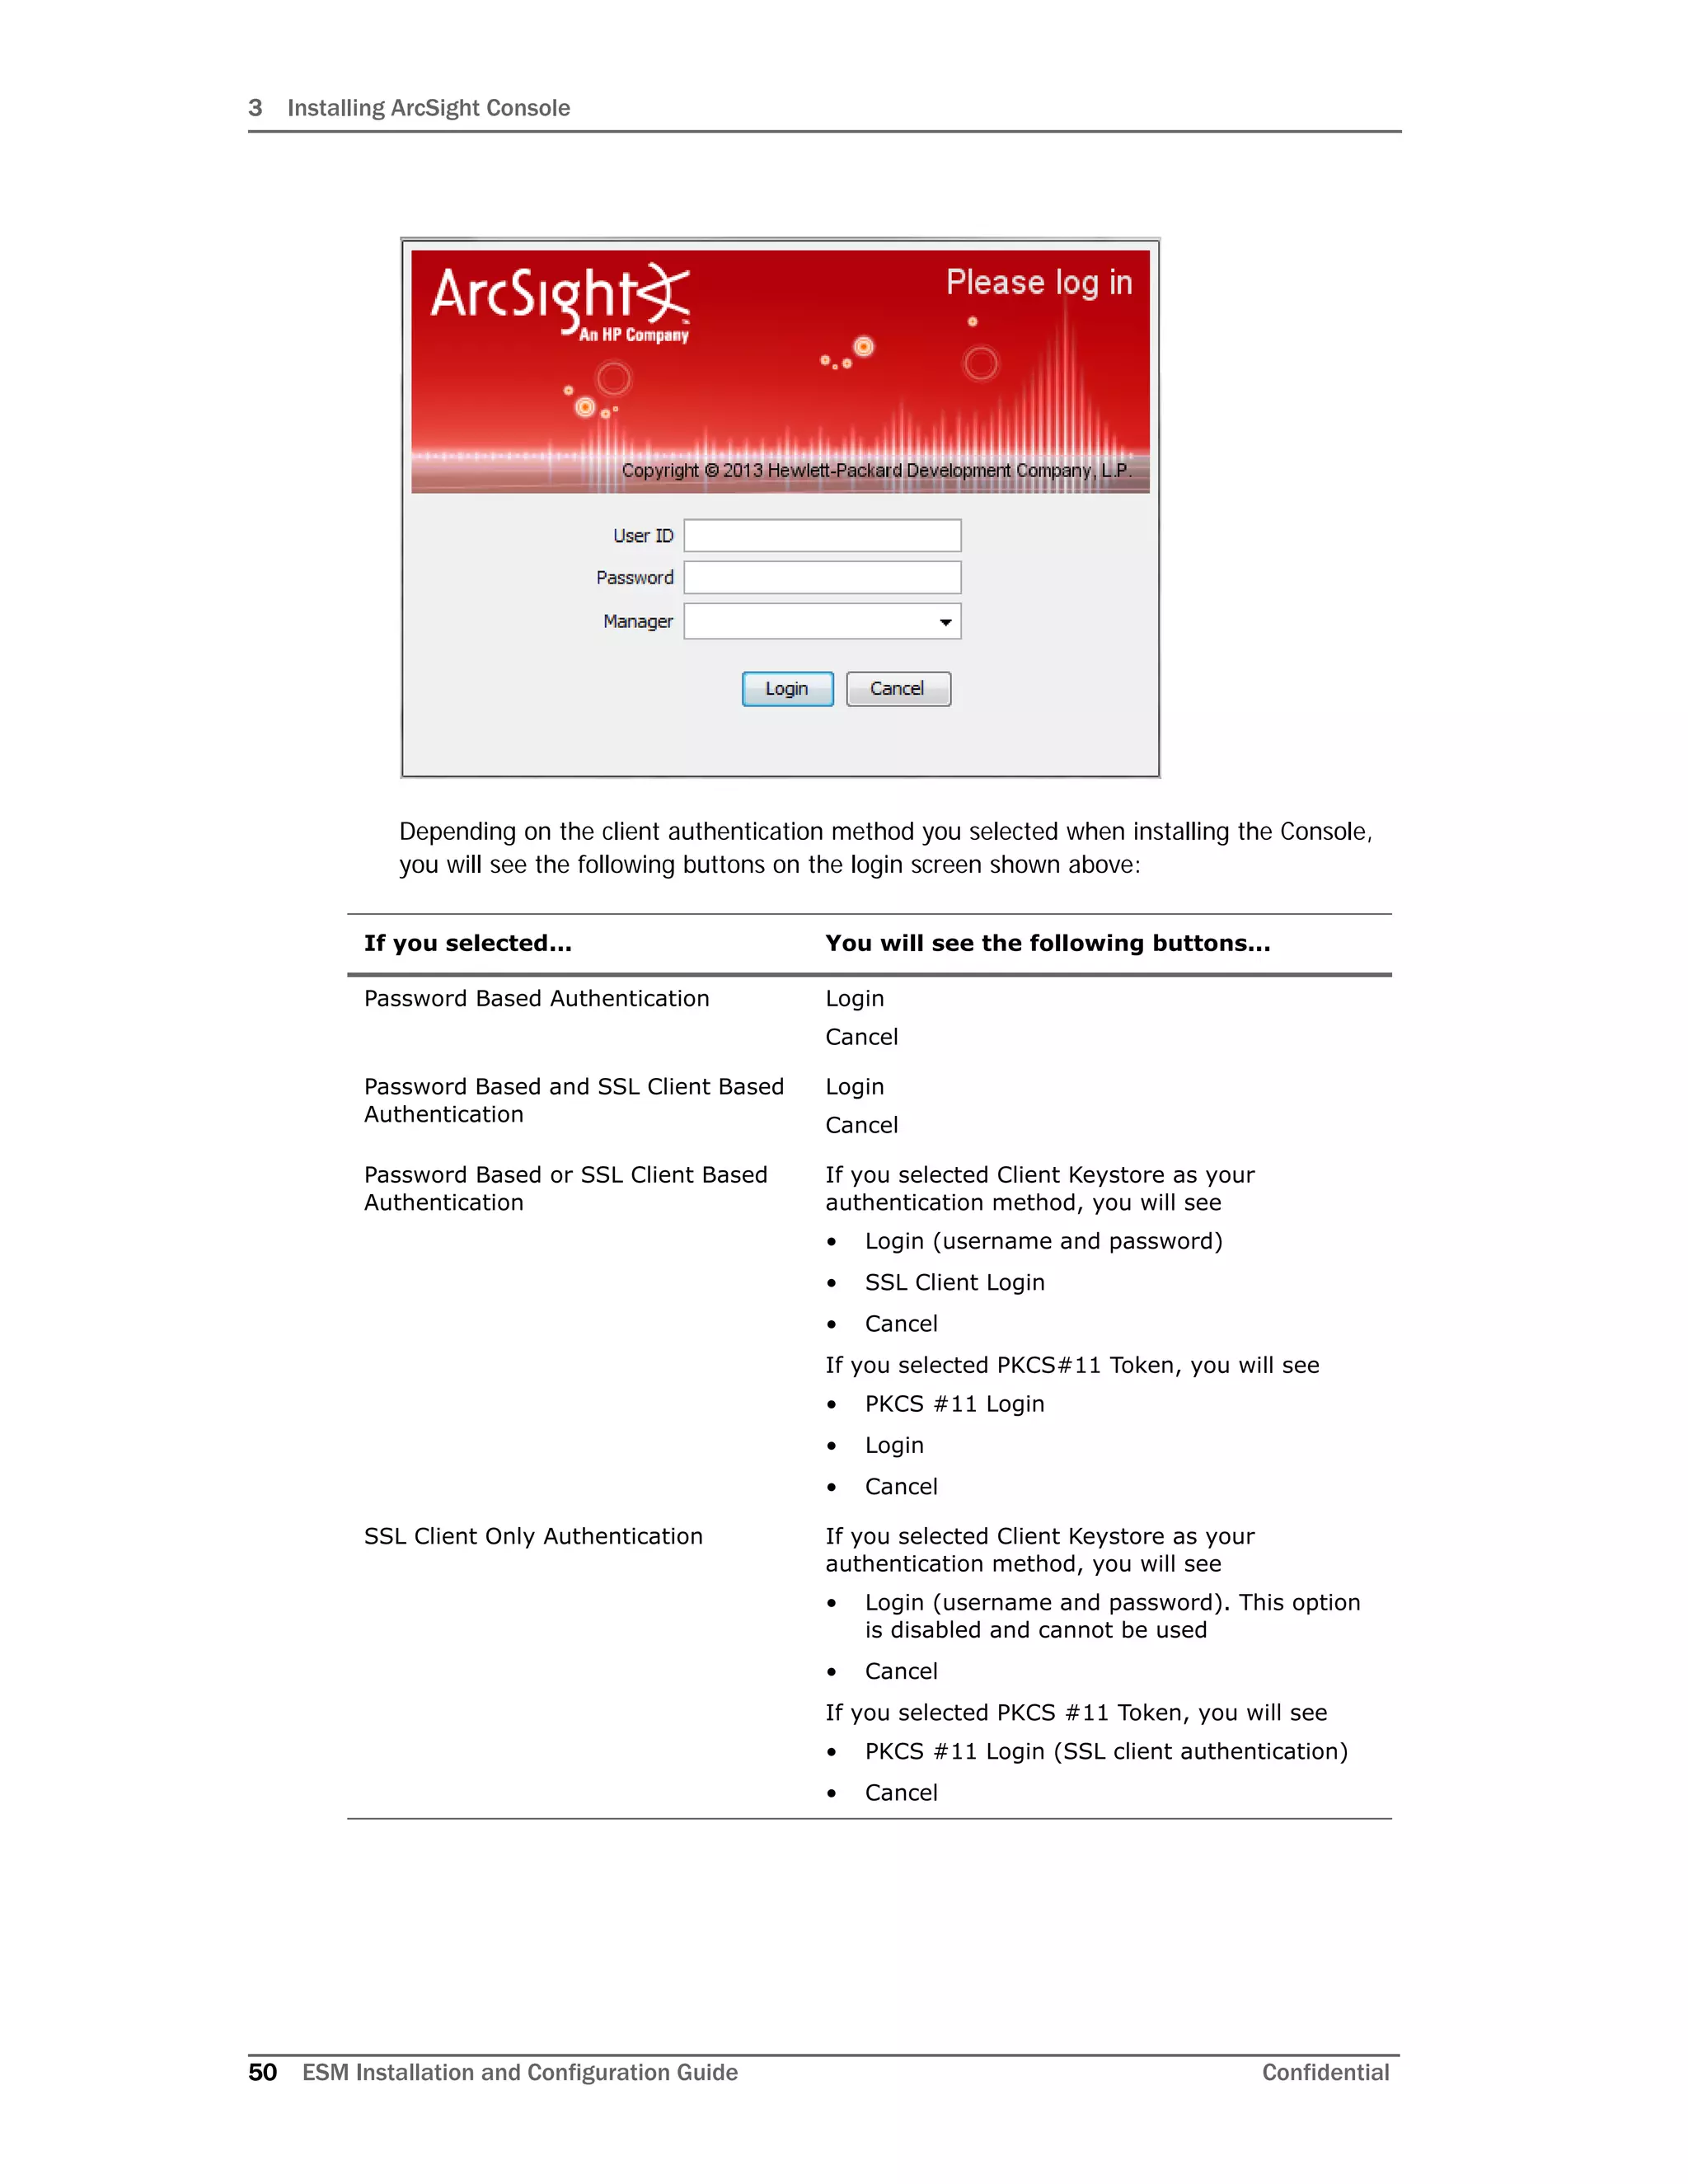
Importing the Console’s Certificate into the Browser
The online help from the Console gets displayed in a browser. Follow these steps in order to
view the online help in an external browser if you are using SSL Client Based authentication
mode:
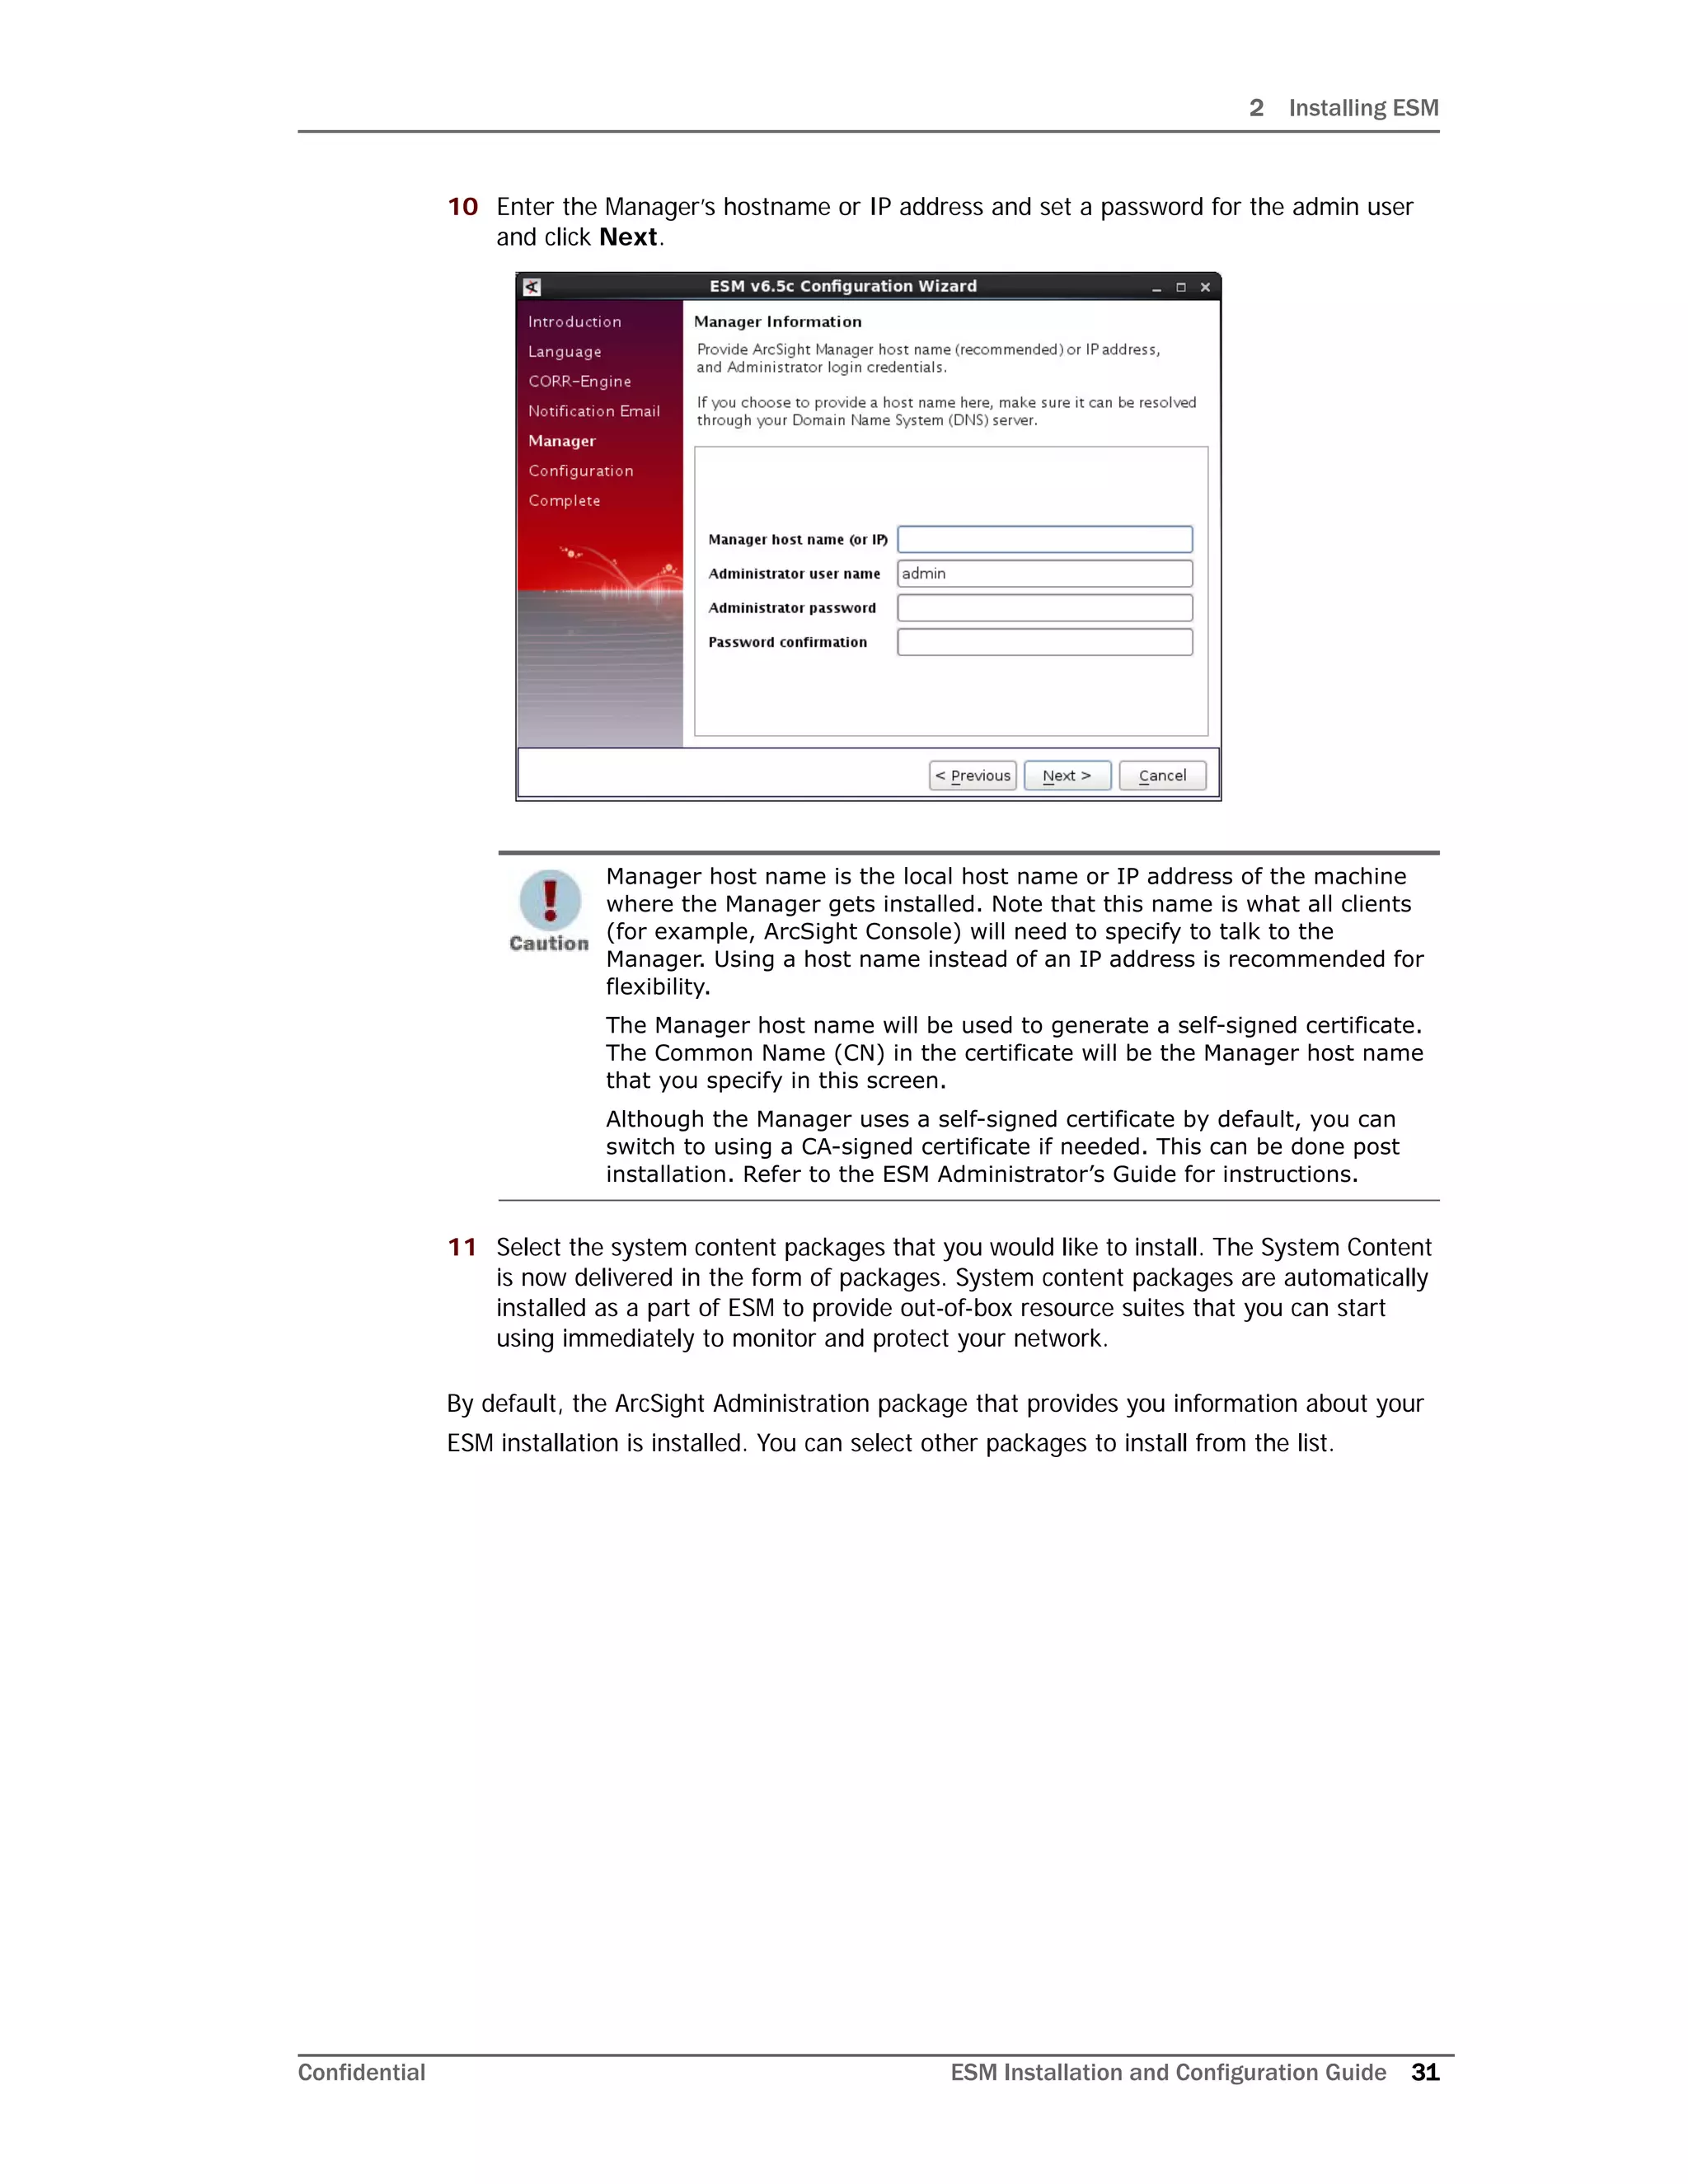
1 Export the keypair from the Console. You will need to do this using the keytoolgui.
Refer to the Administrator’s Guide for ESM in the "Using Keytoolgui to Export a Key
Pair" section.
2 Import the Console’s keypair into the Browser.
You have installed the ArcSight Console successfully. Please be sure to install any available
patches for the Console. Refer to the ArcSight ESM Patch Release Notes for instructions on
how to install a patch for the Console.
Character Set Encoding
Install the Console on a machine that uses the same character set encoding as the
Manager.
If the character encodings do not match, then user IDs and passwords are restricted to
using the following characters:
a-z A-Z 0-9_@.#$%^&*+?<>.{}|,()-[]
On Mac OS X 10.5 update 8 and later:
The Mac OS update changed the password for the cacerts file in the system's
JRE. Before you start the Console, you need to change the default password
for the cacerts file by setting it to the following in the client.properties
file (create the file if it does not exist) in the Console’s currentconfig
folder by adding:
ssl.truststore.password=changeme](https://image.slidesharecdn.com/esminstallguide6-170530091709/75/Installation-Guide-for-ESM-6-5c-48-2048.jpg)