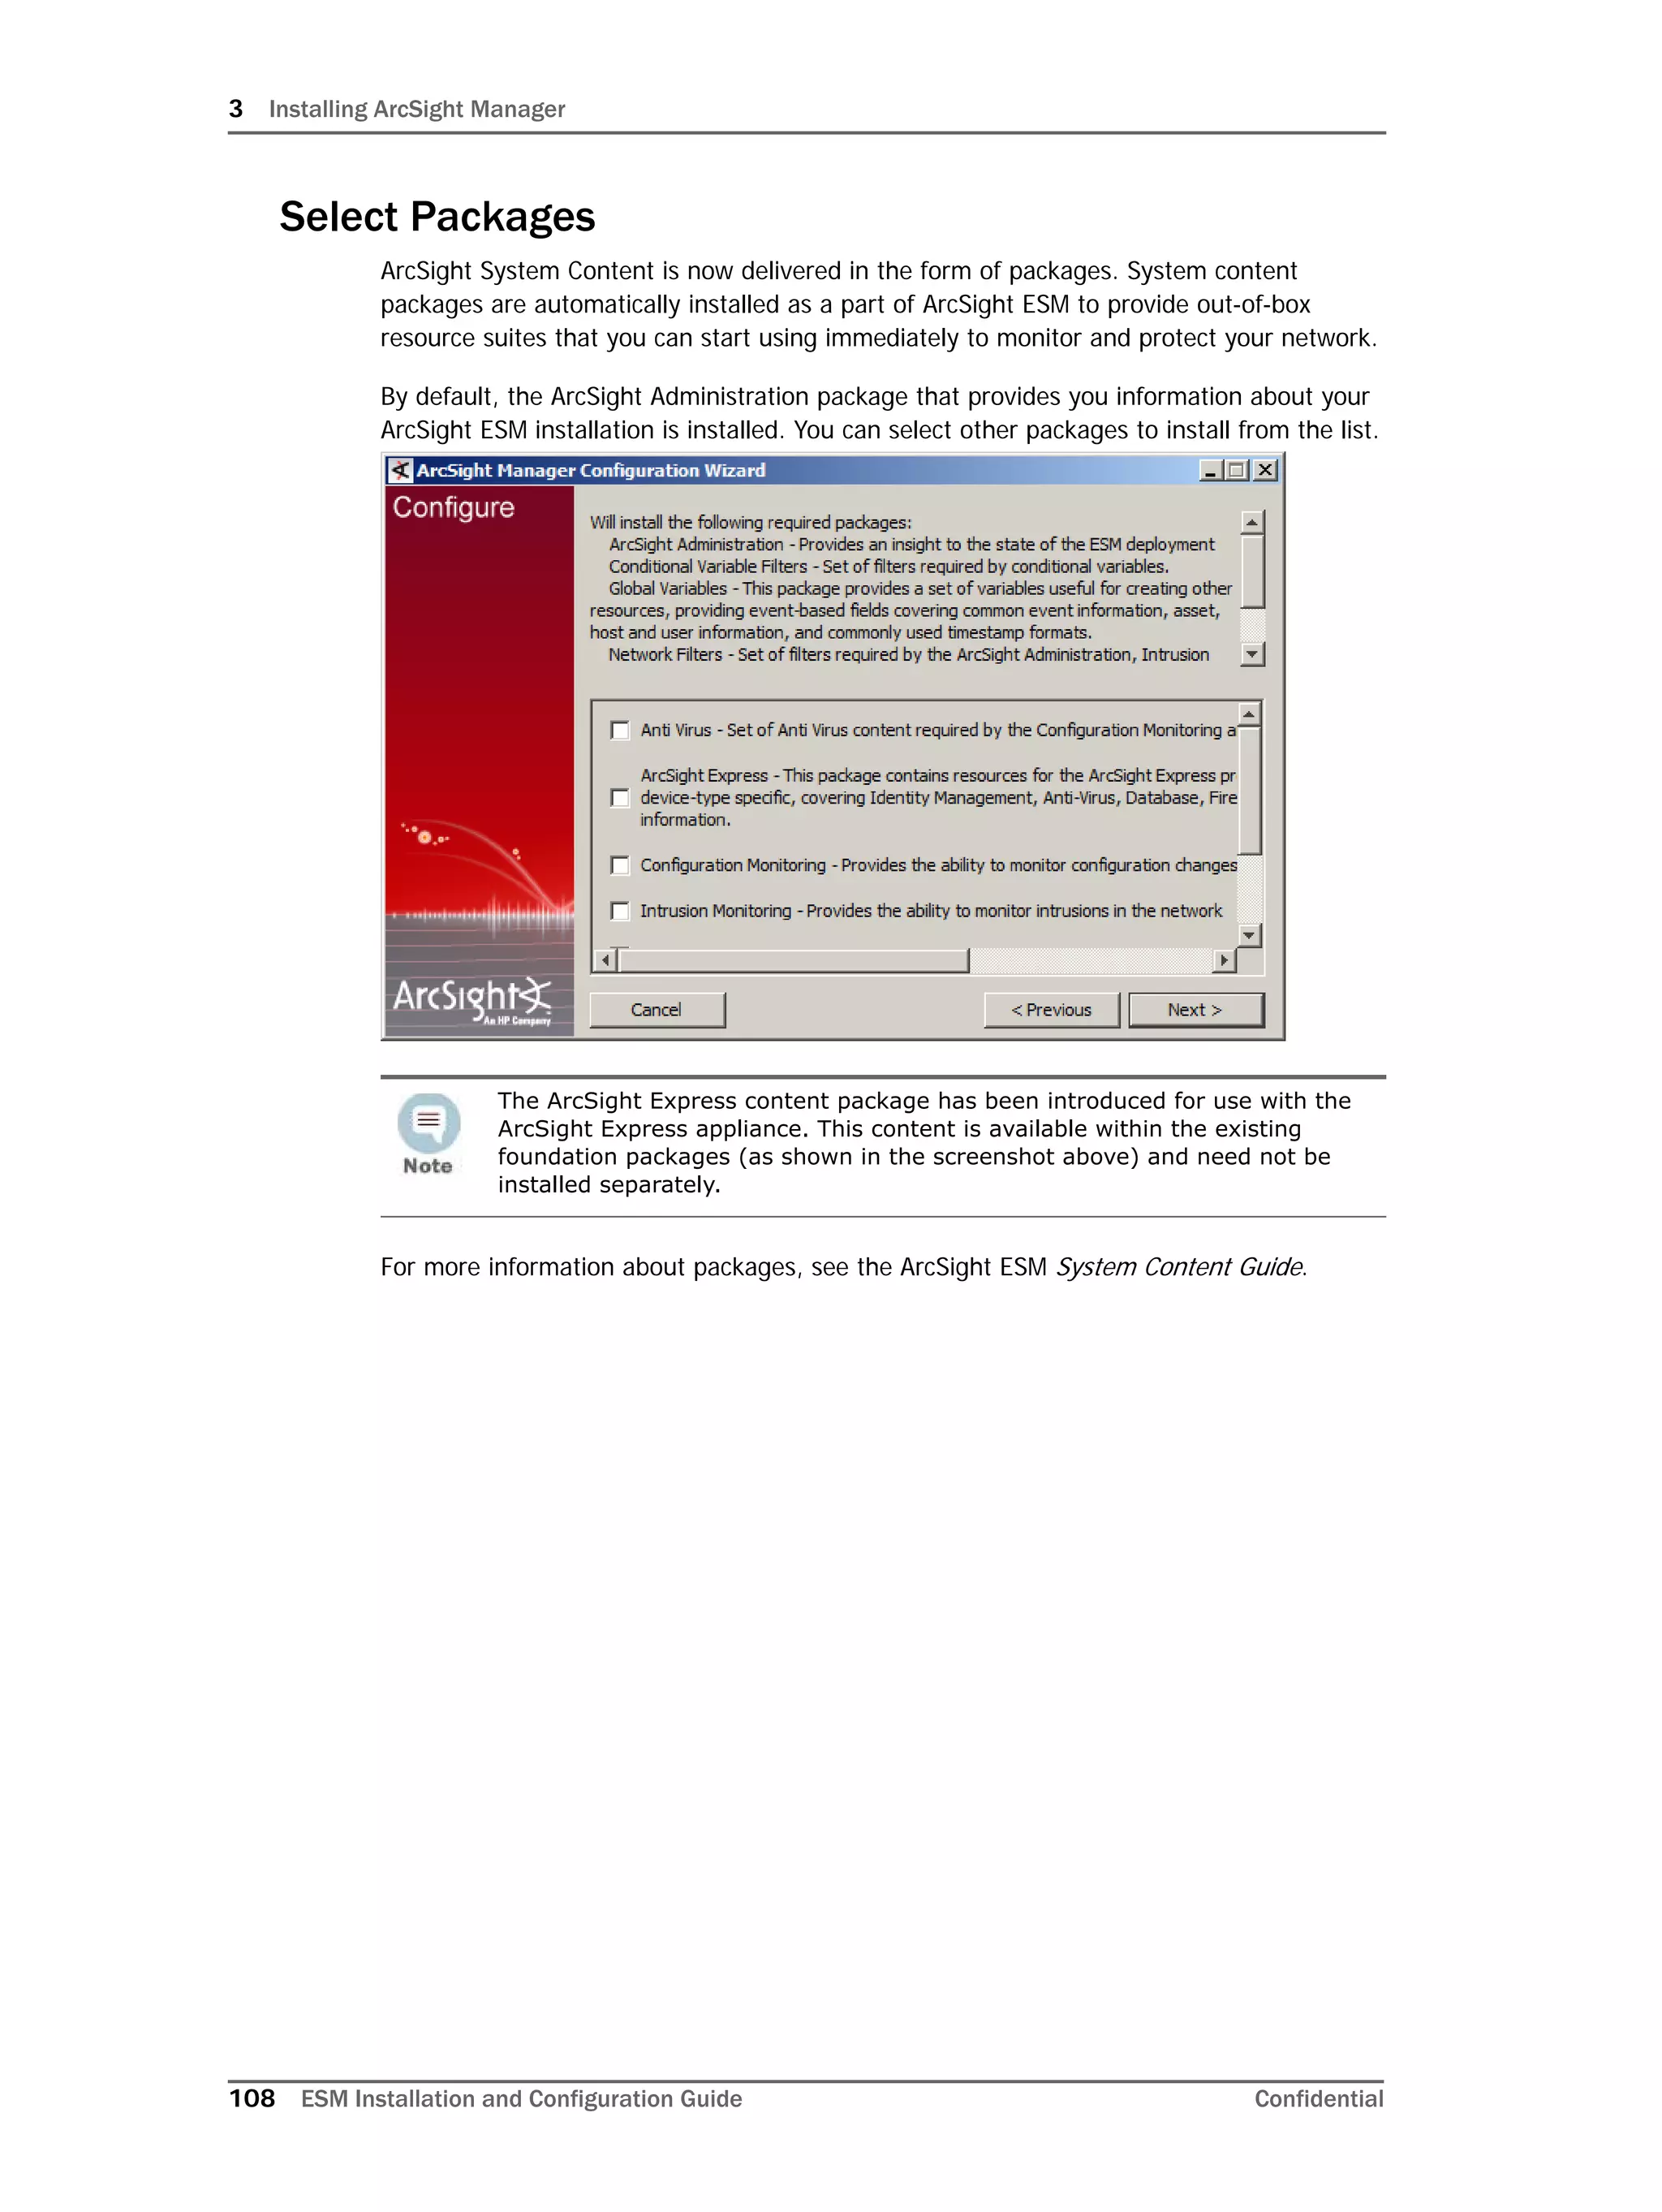
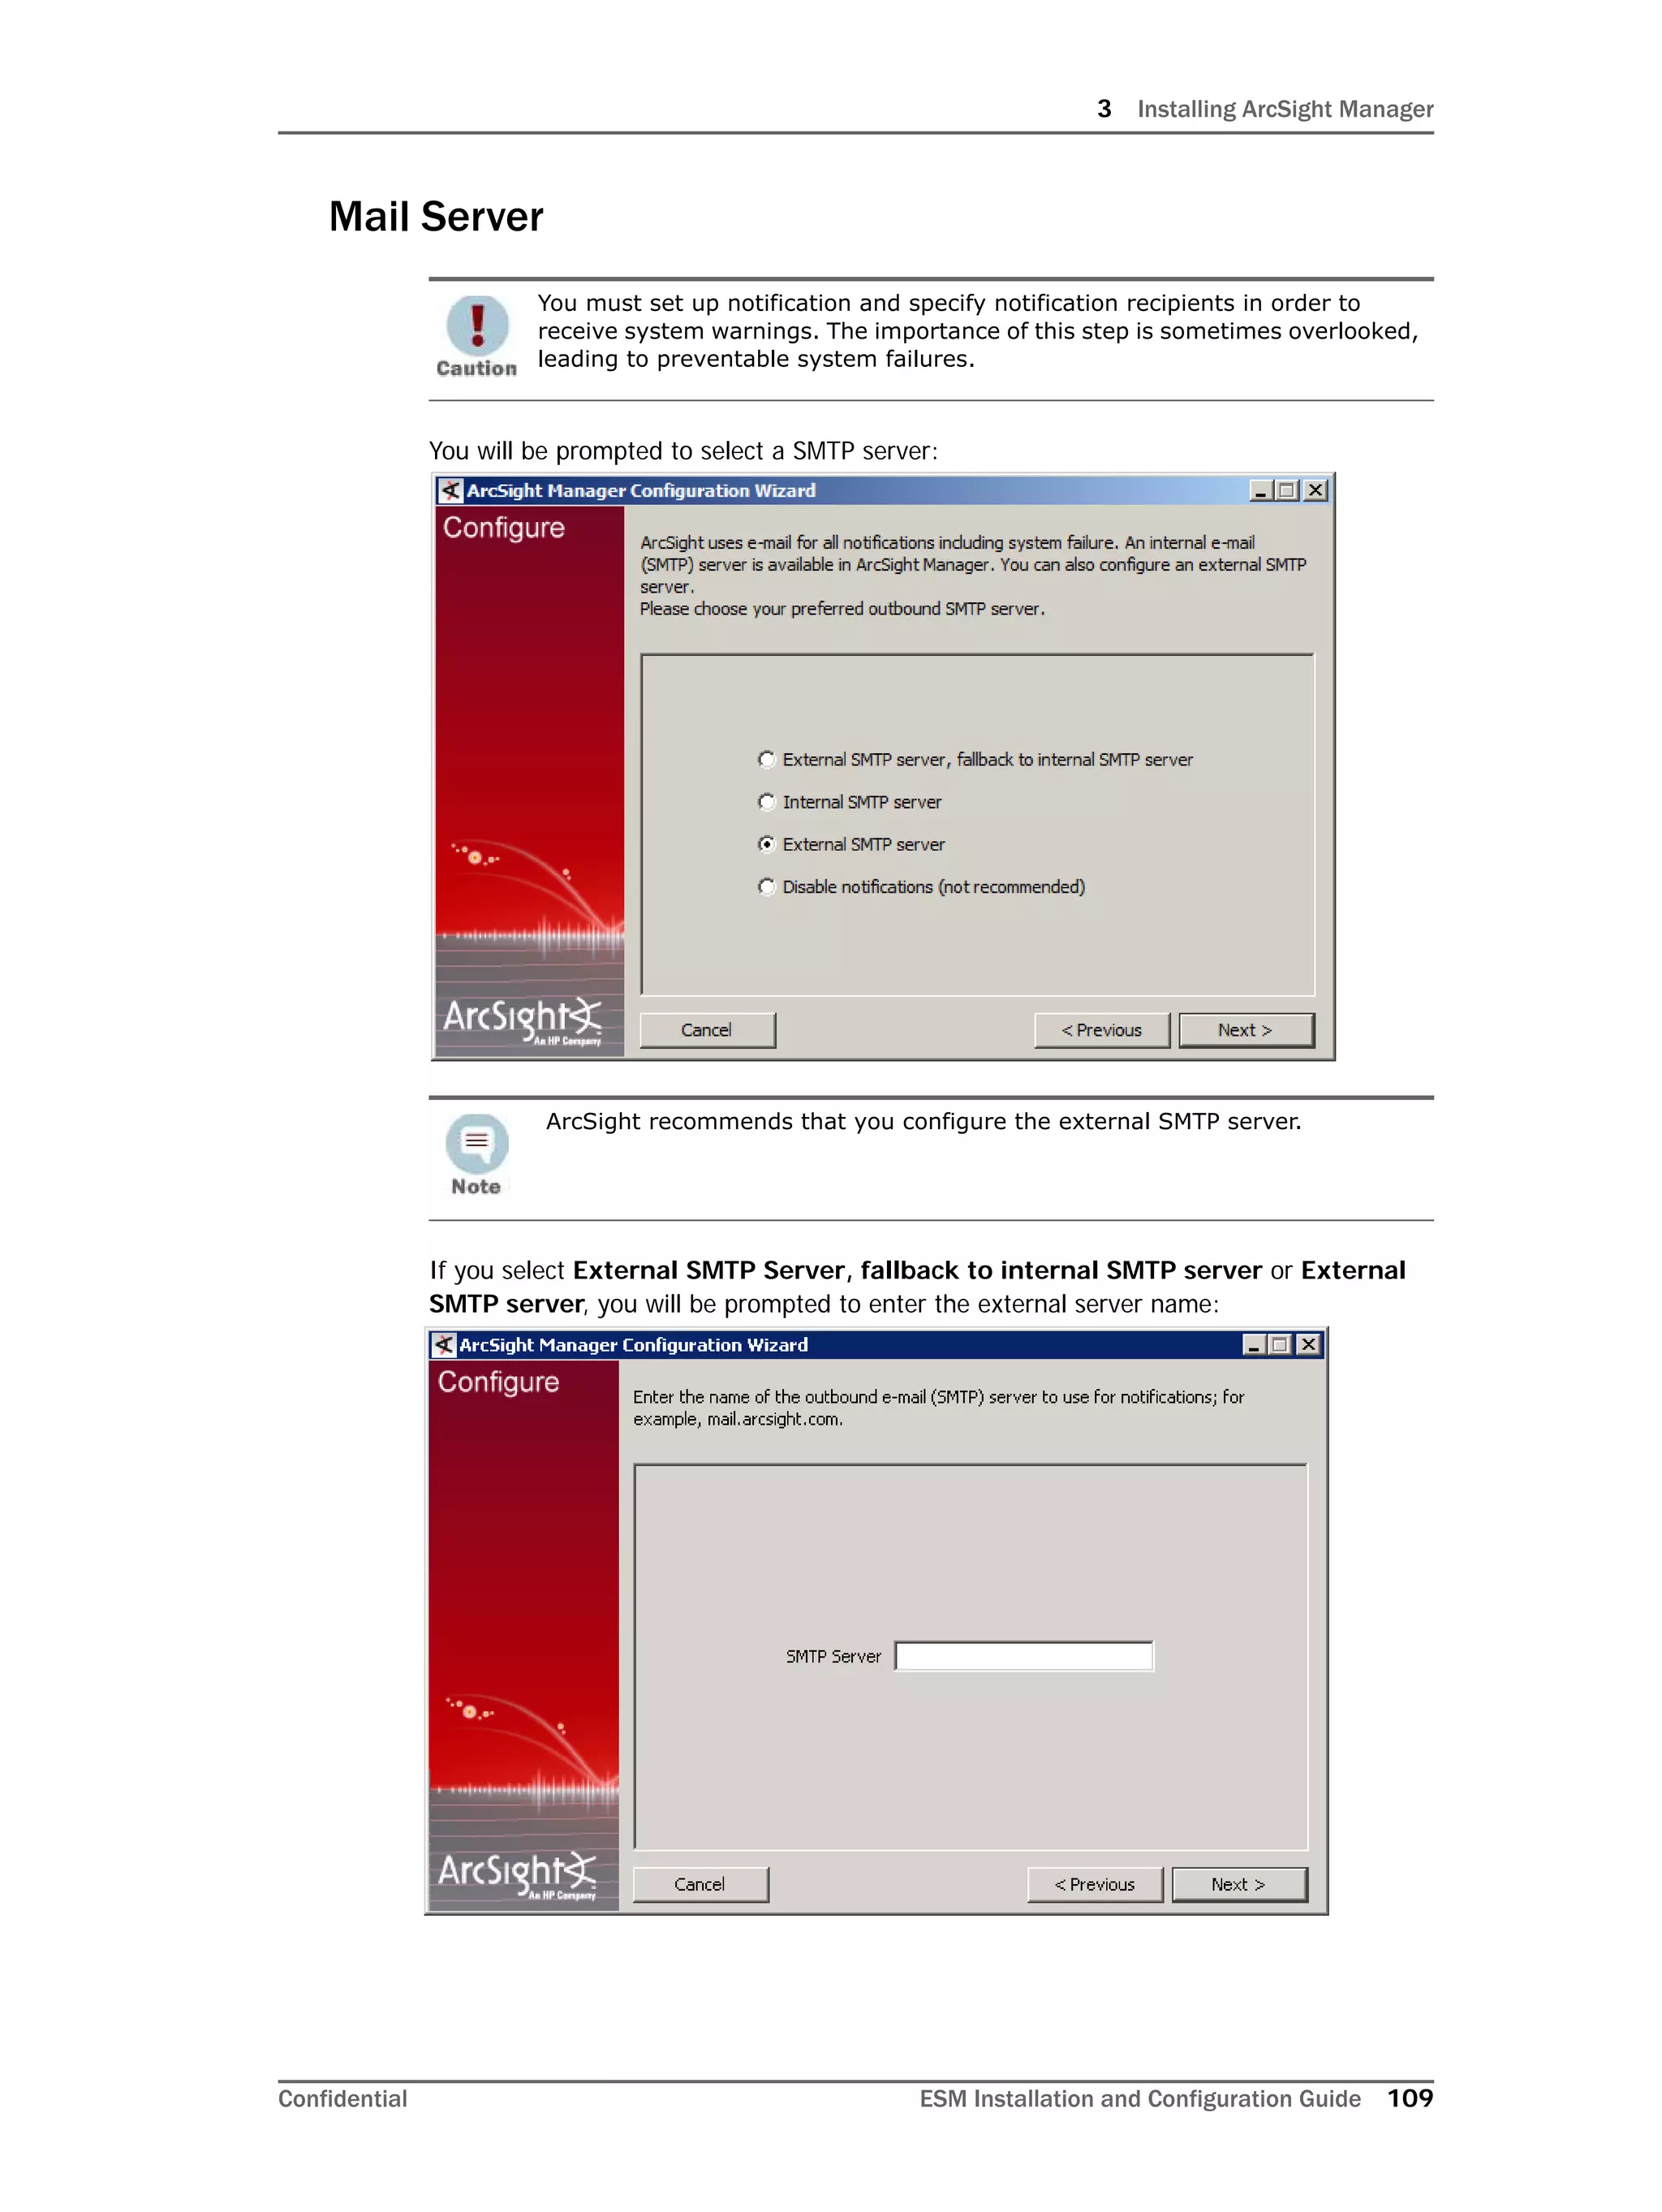
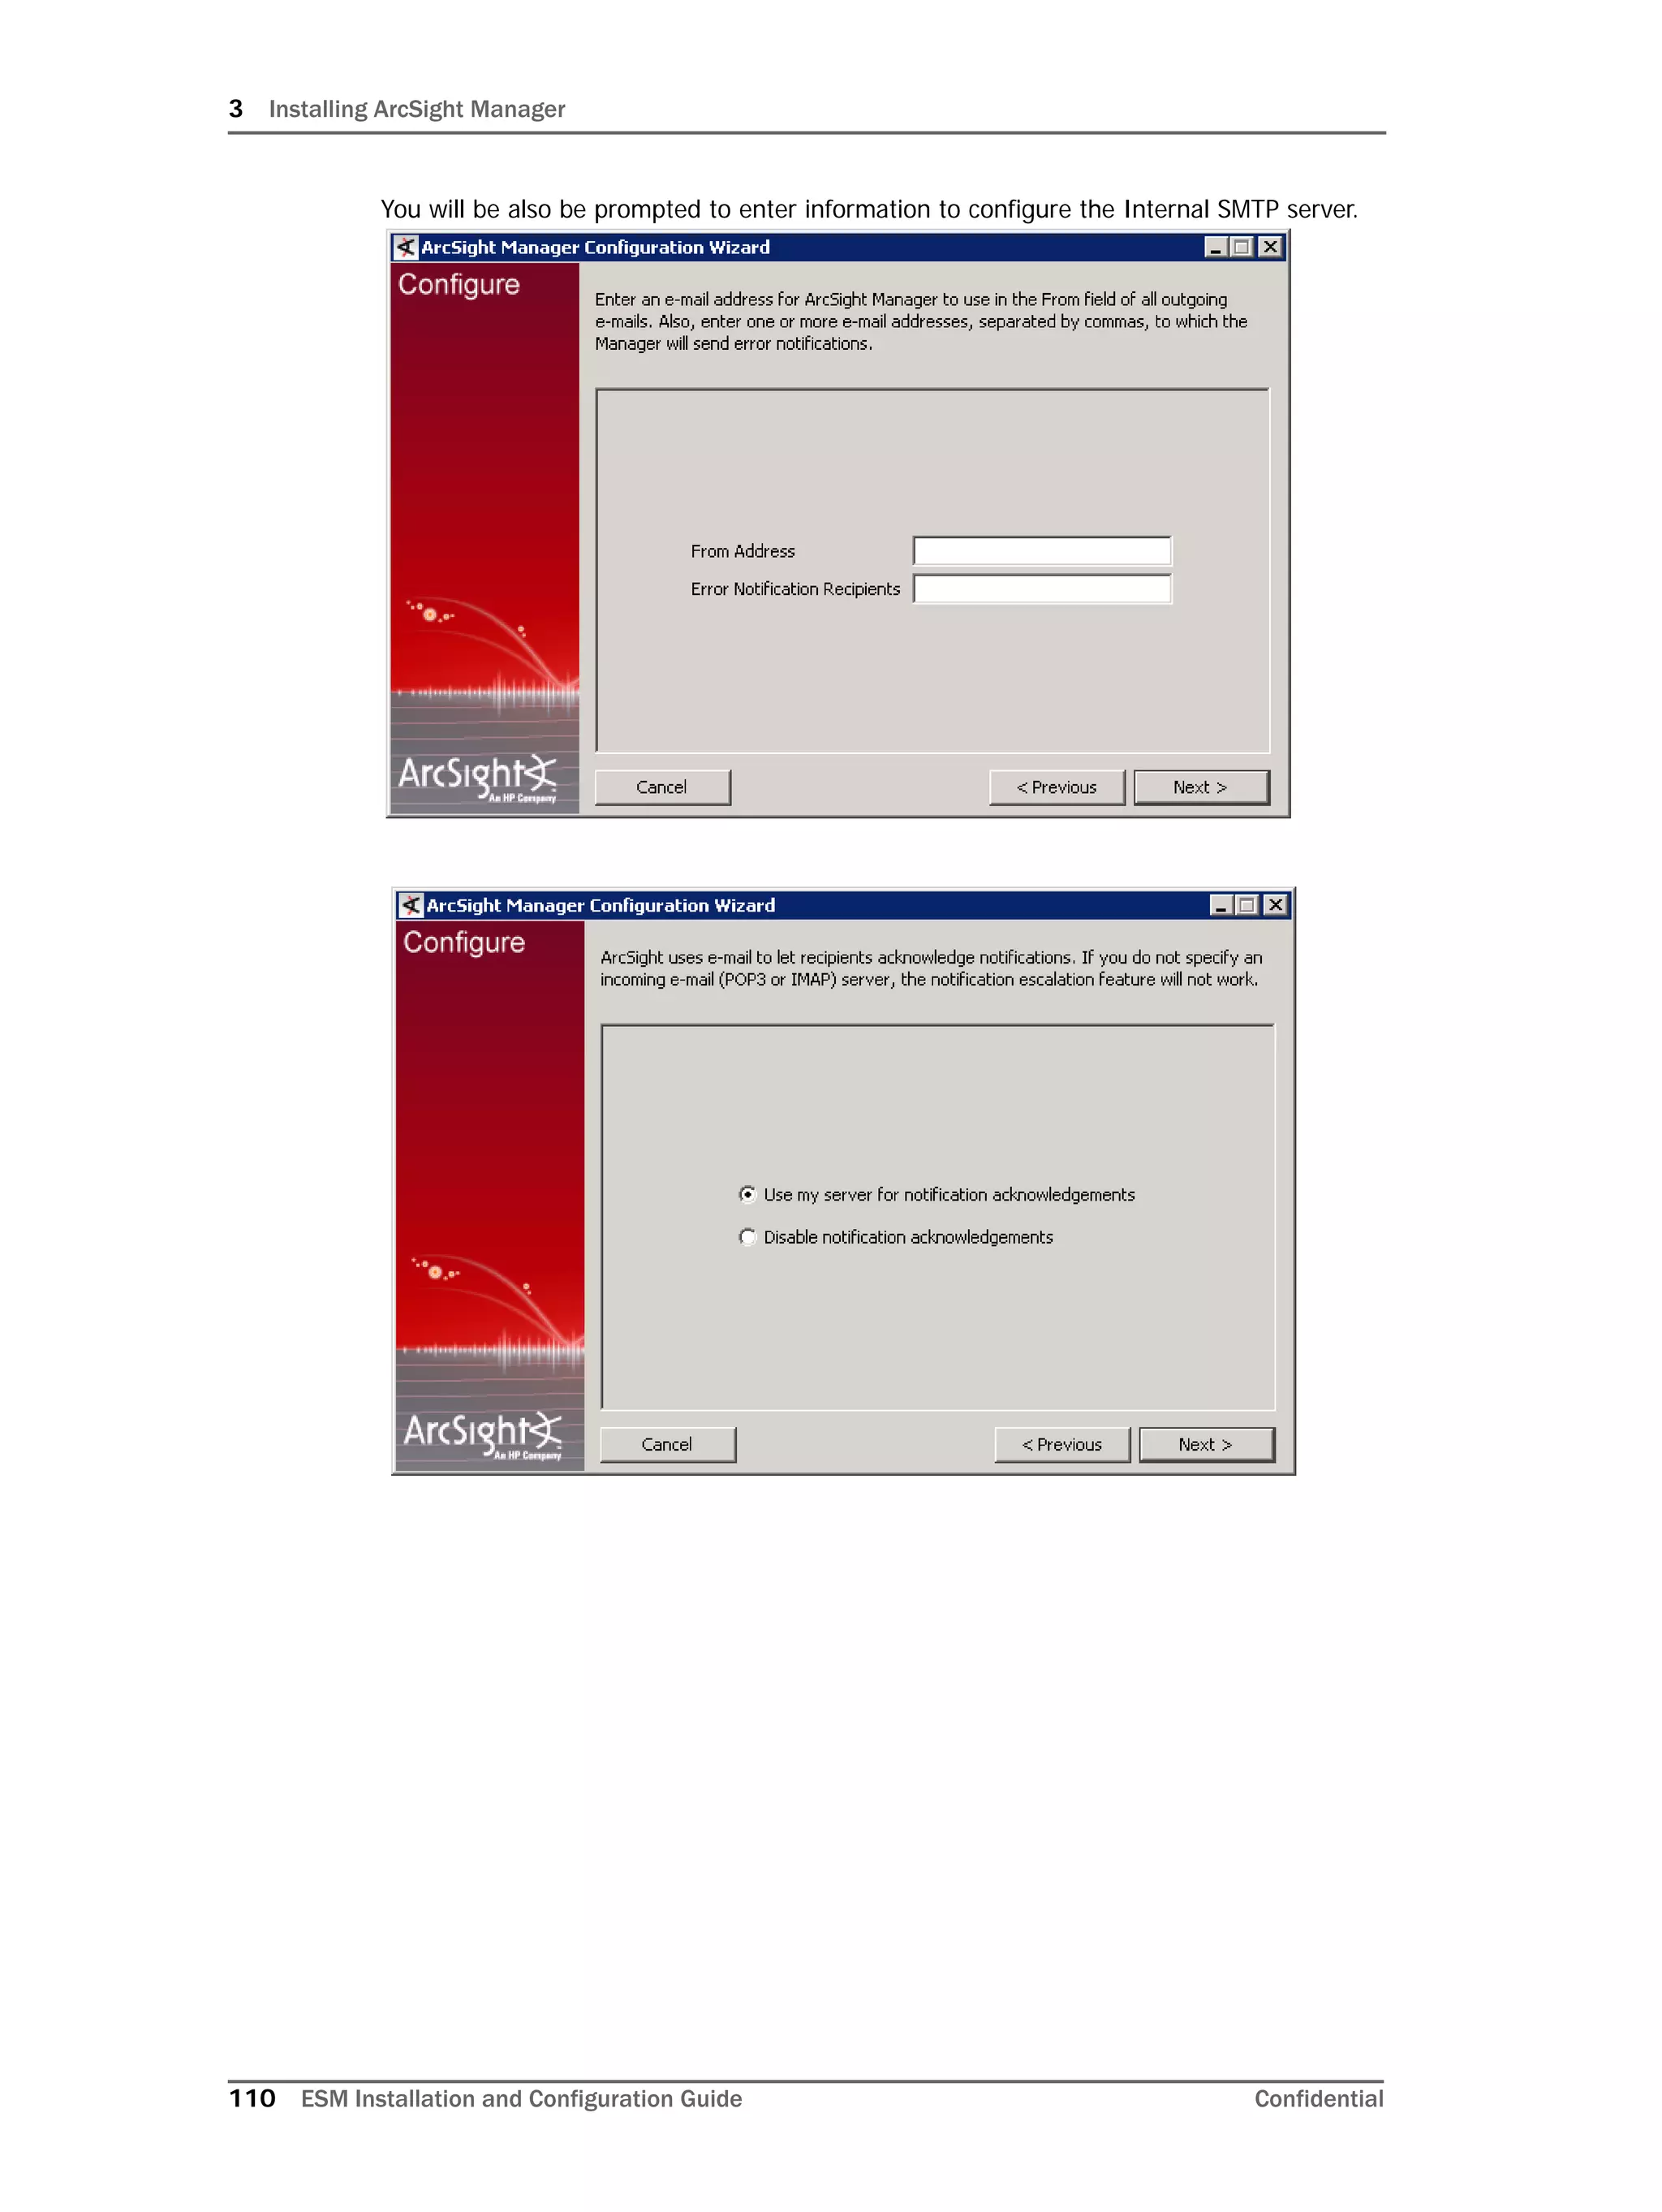
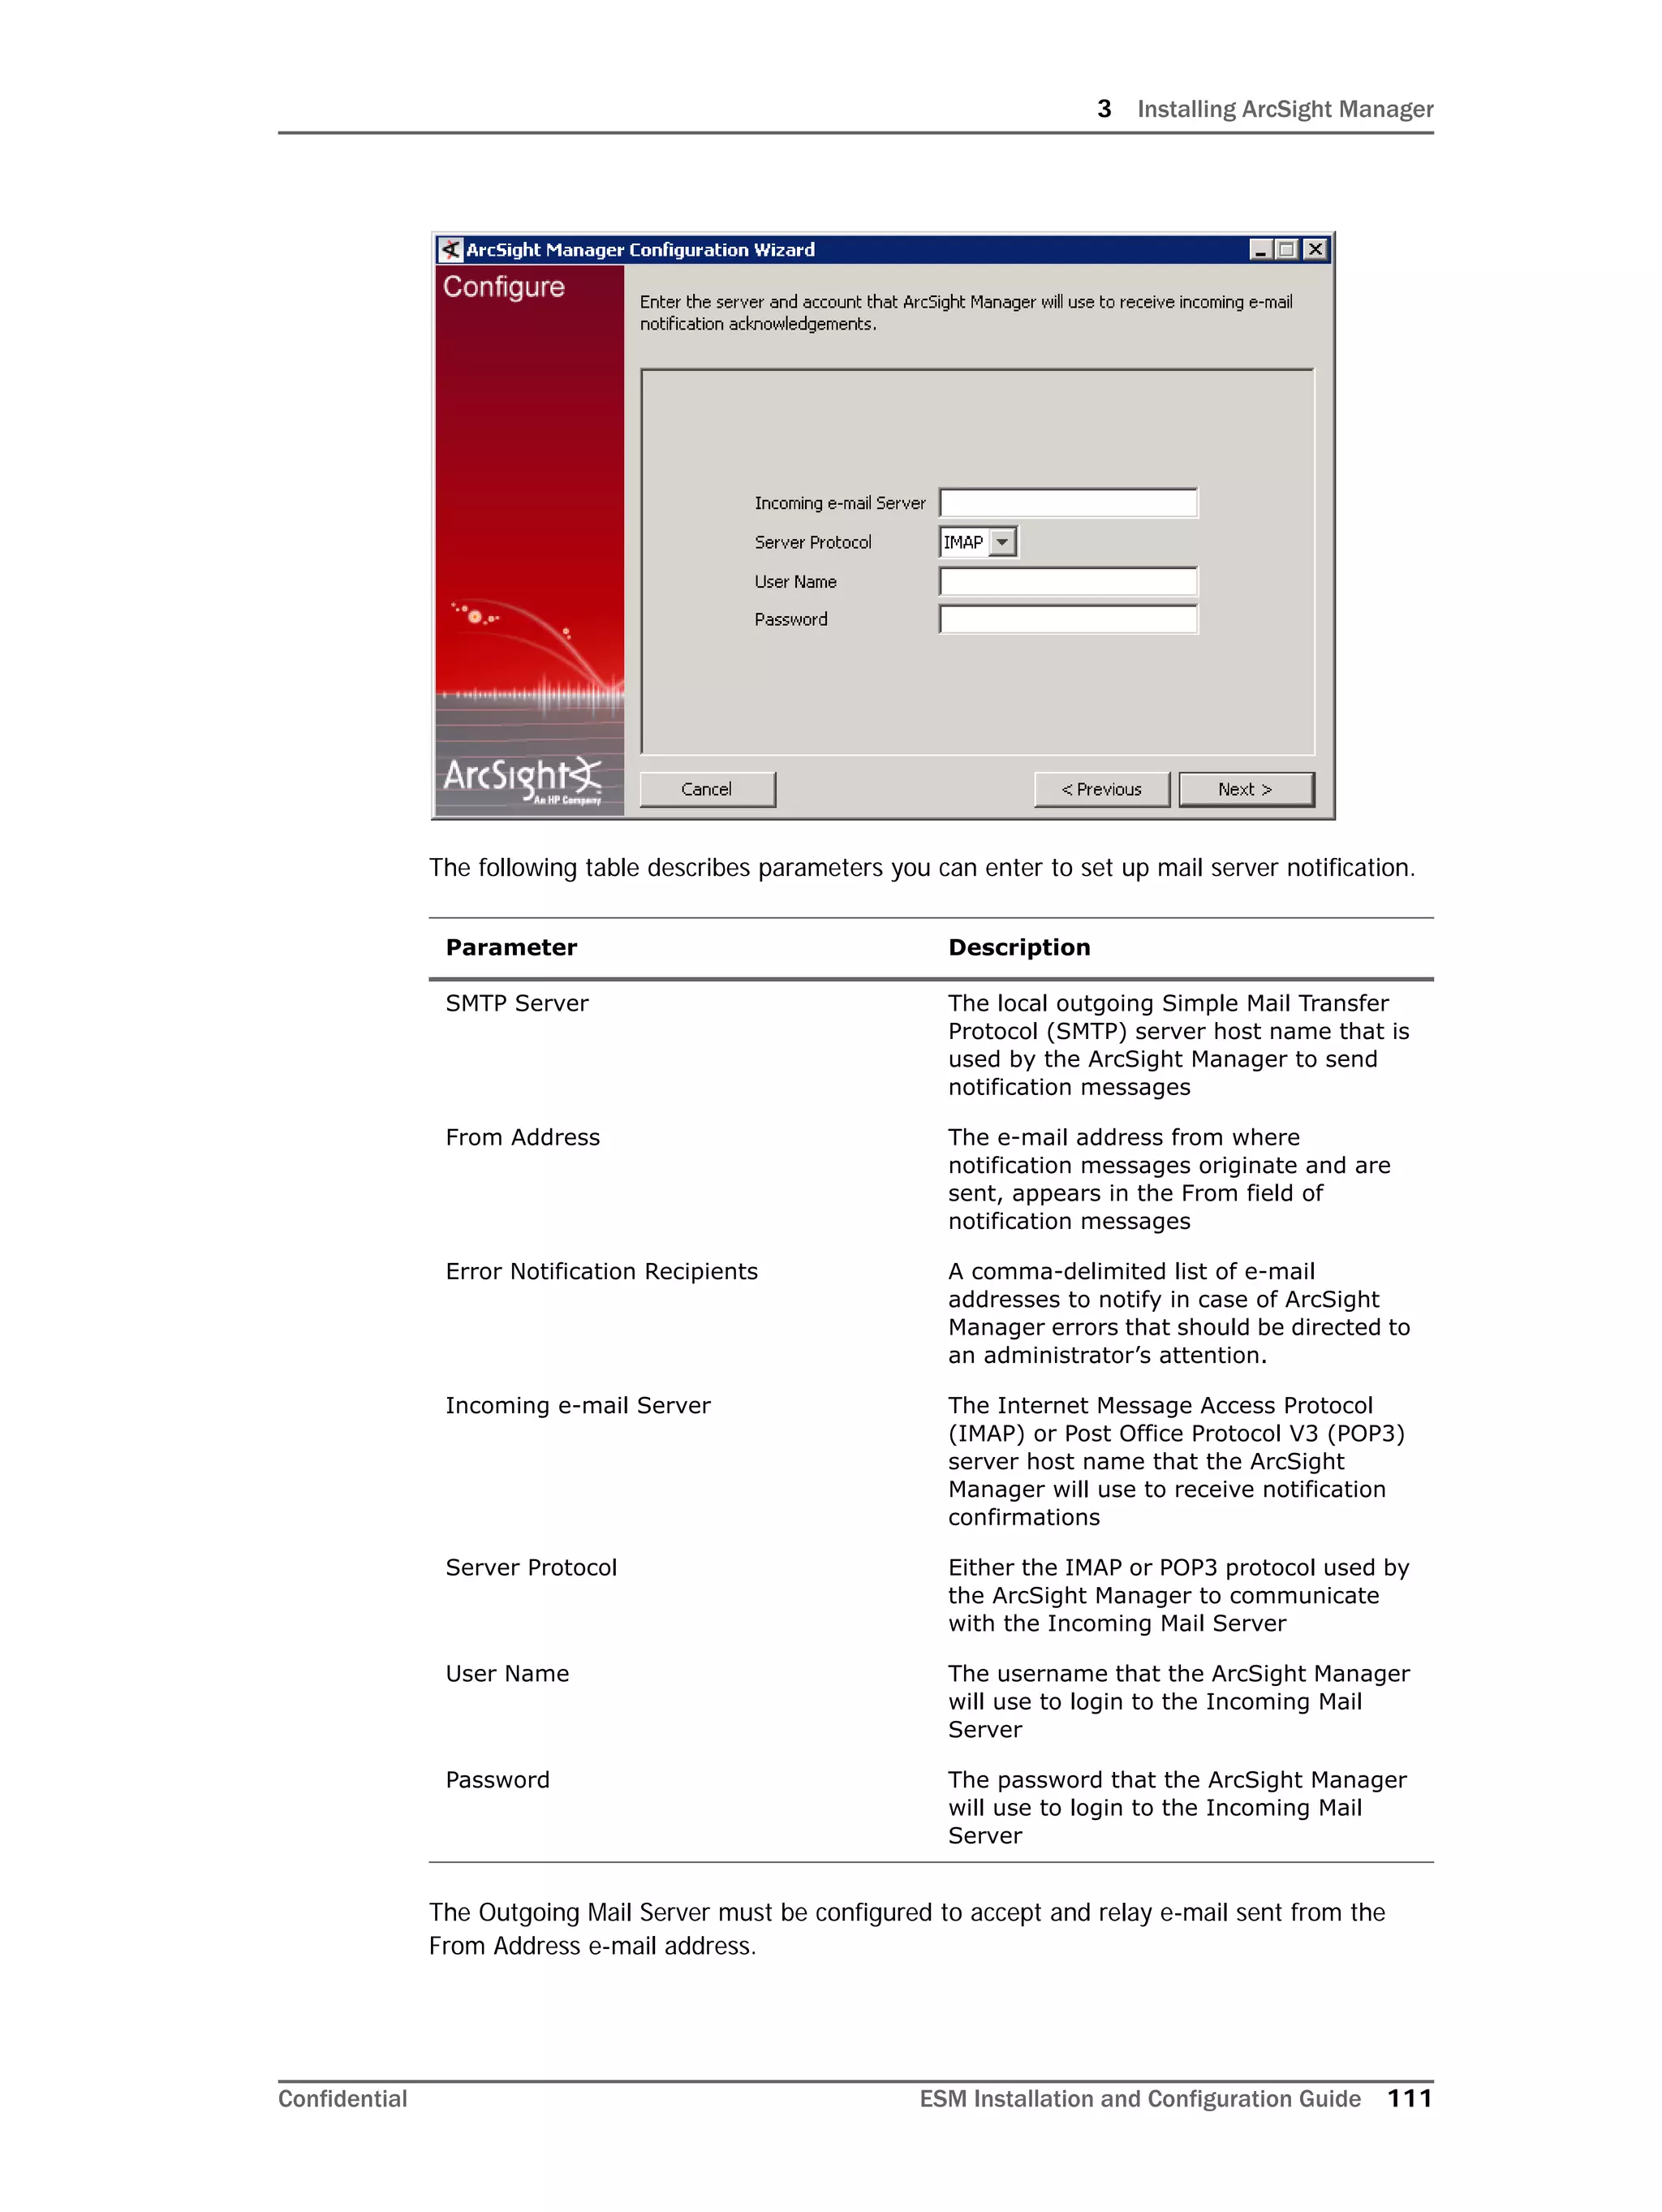
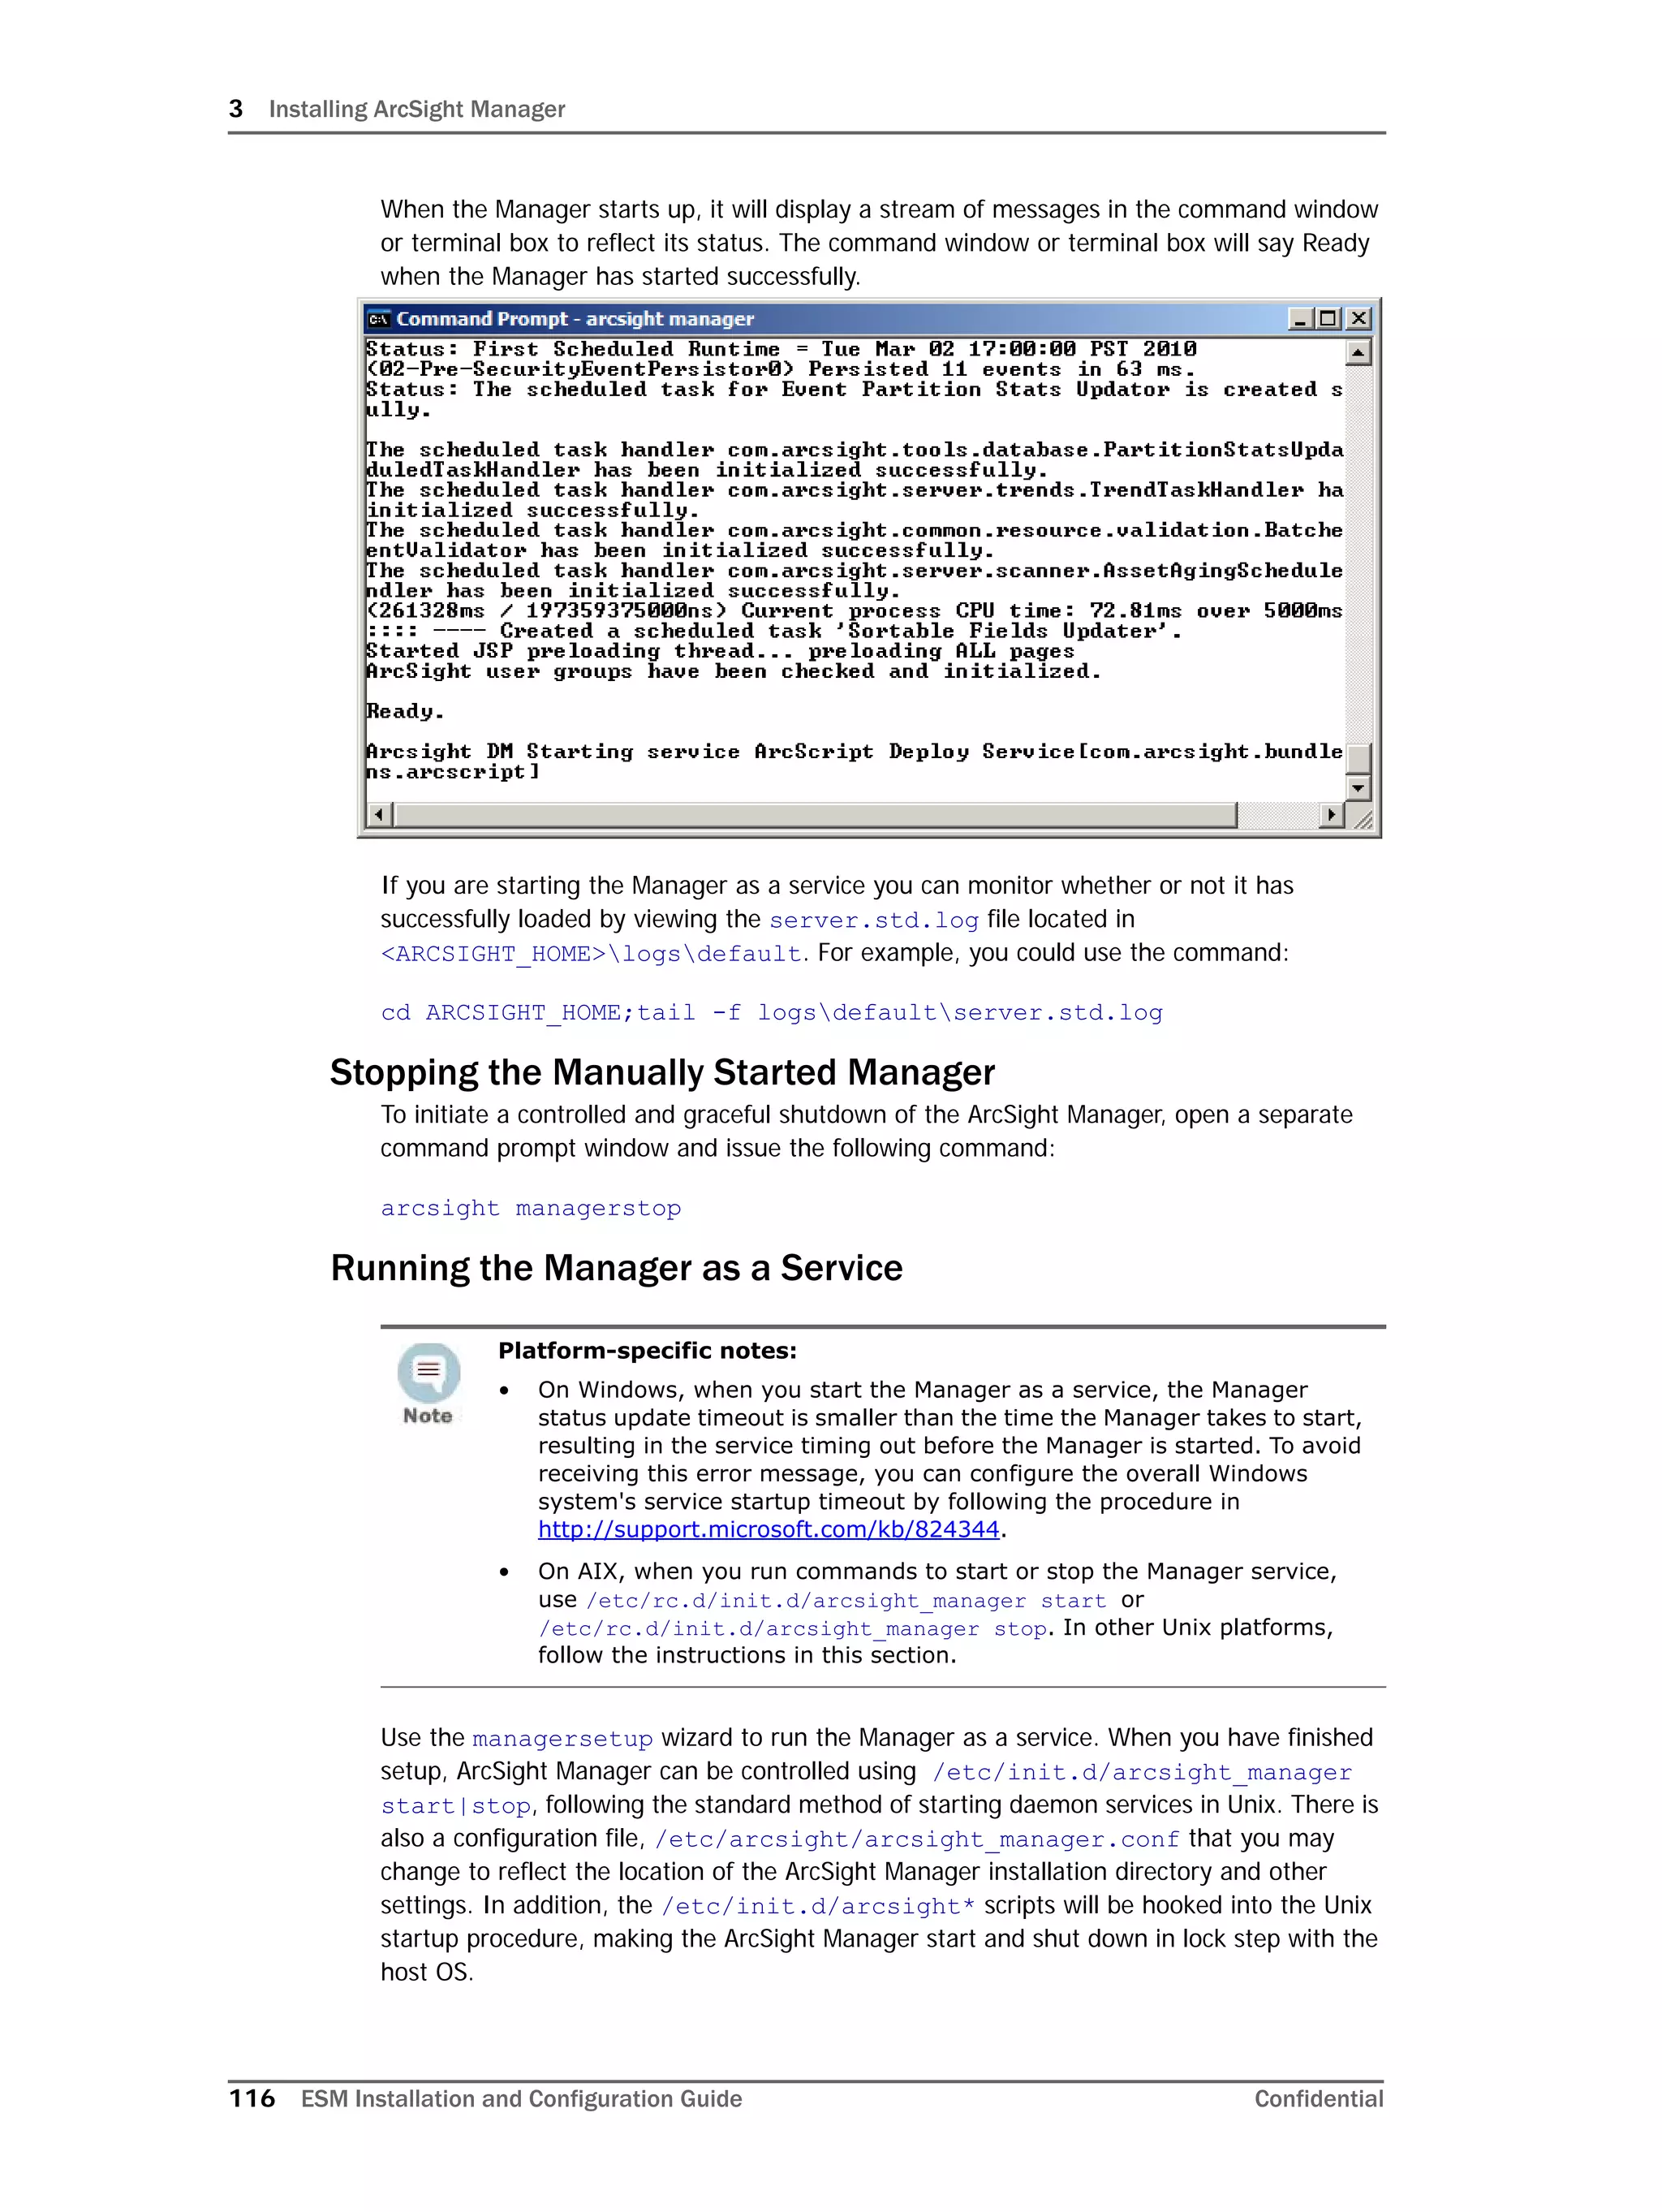
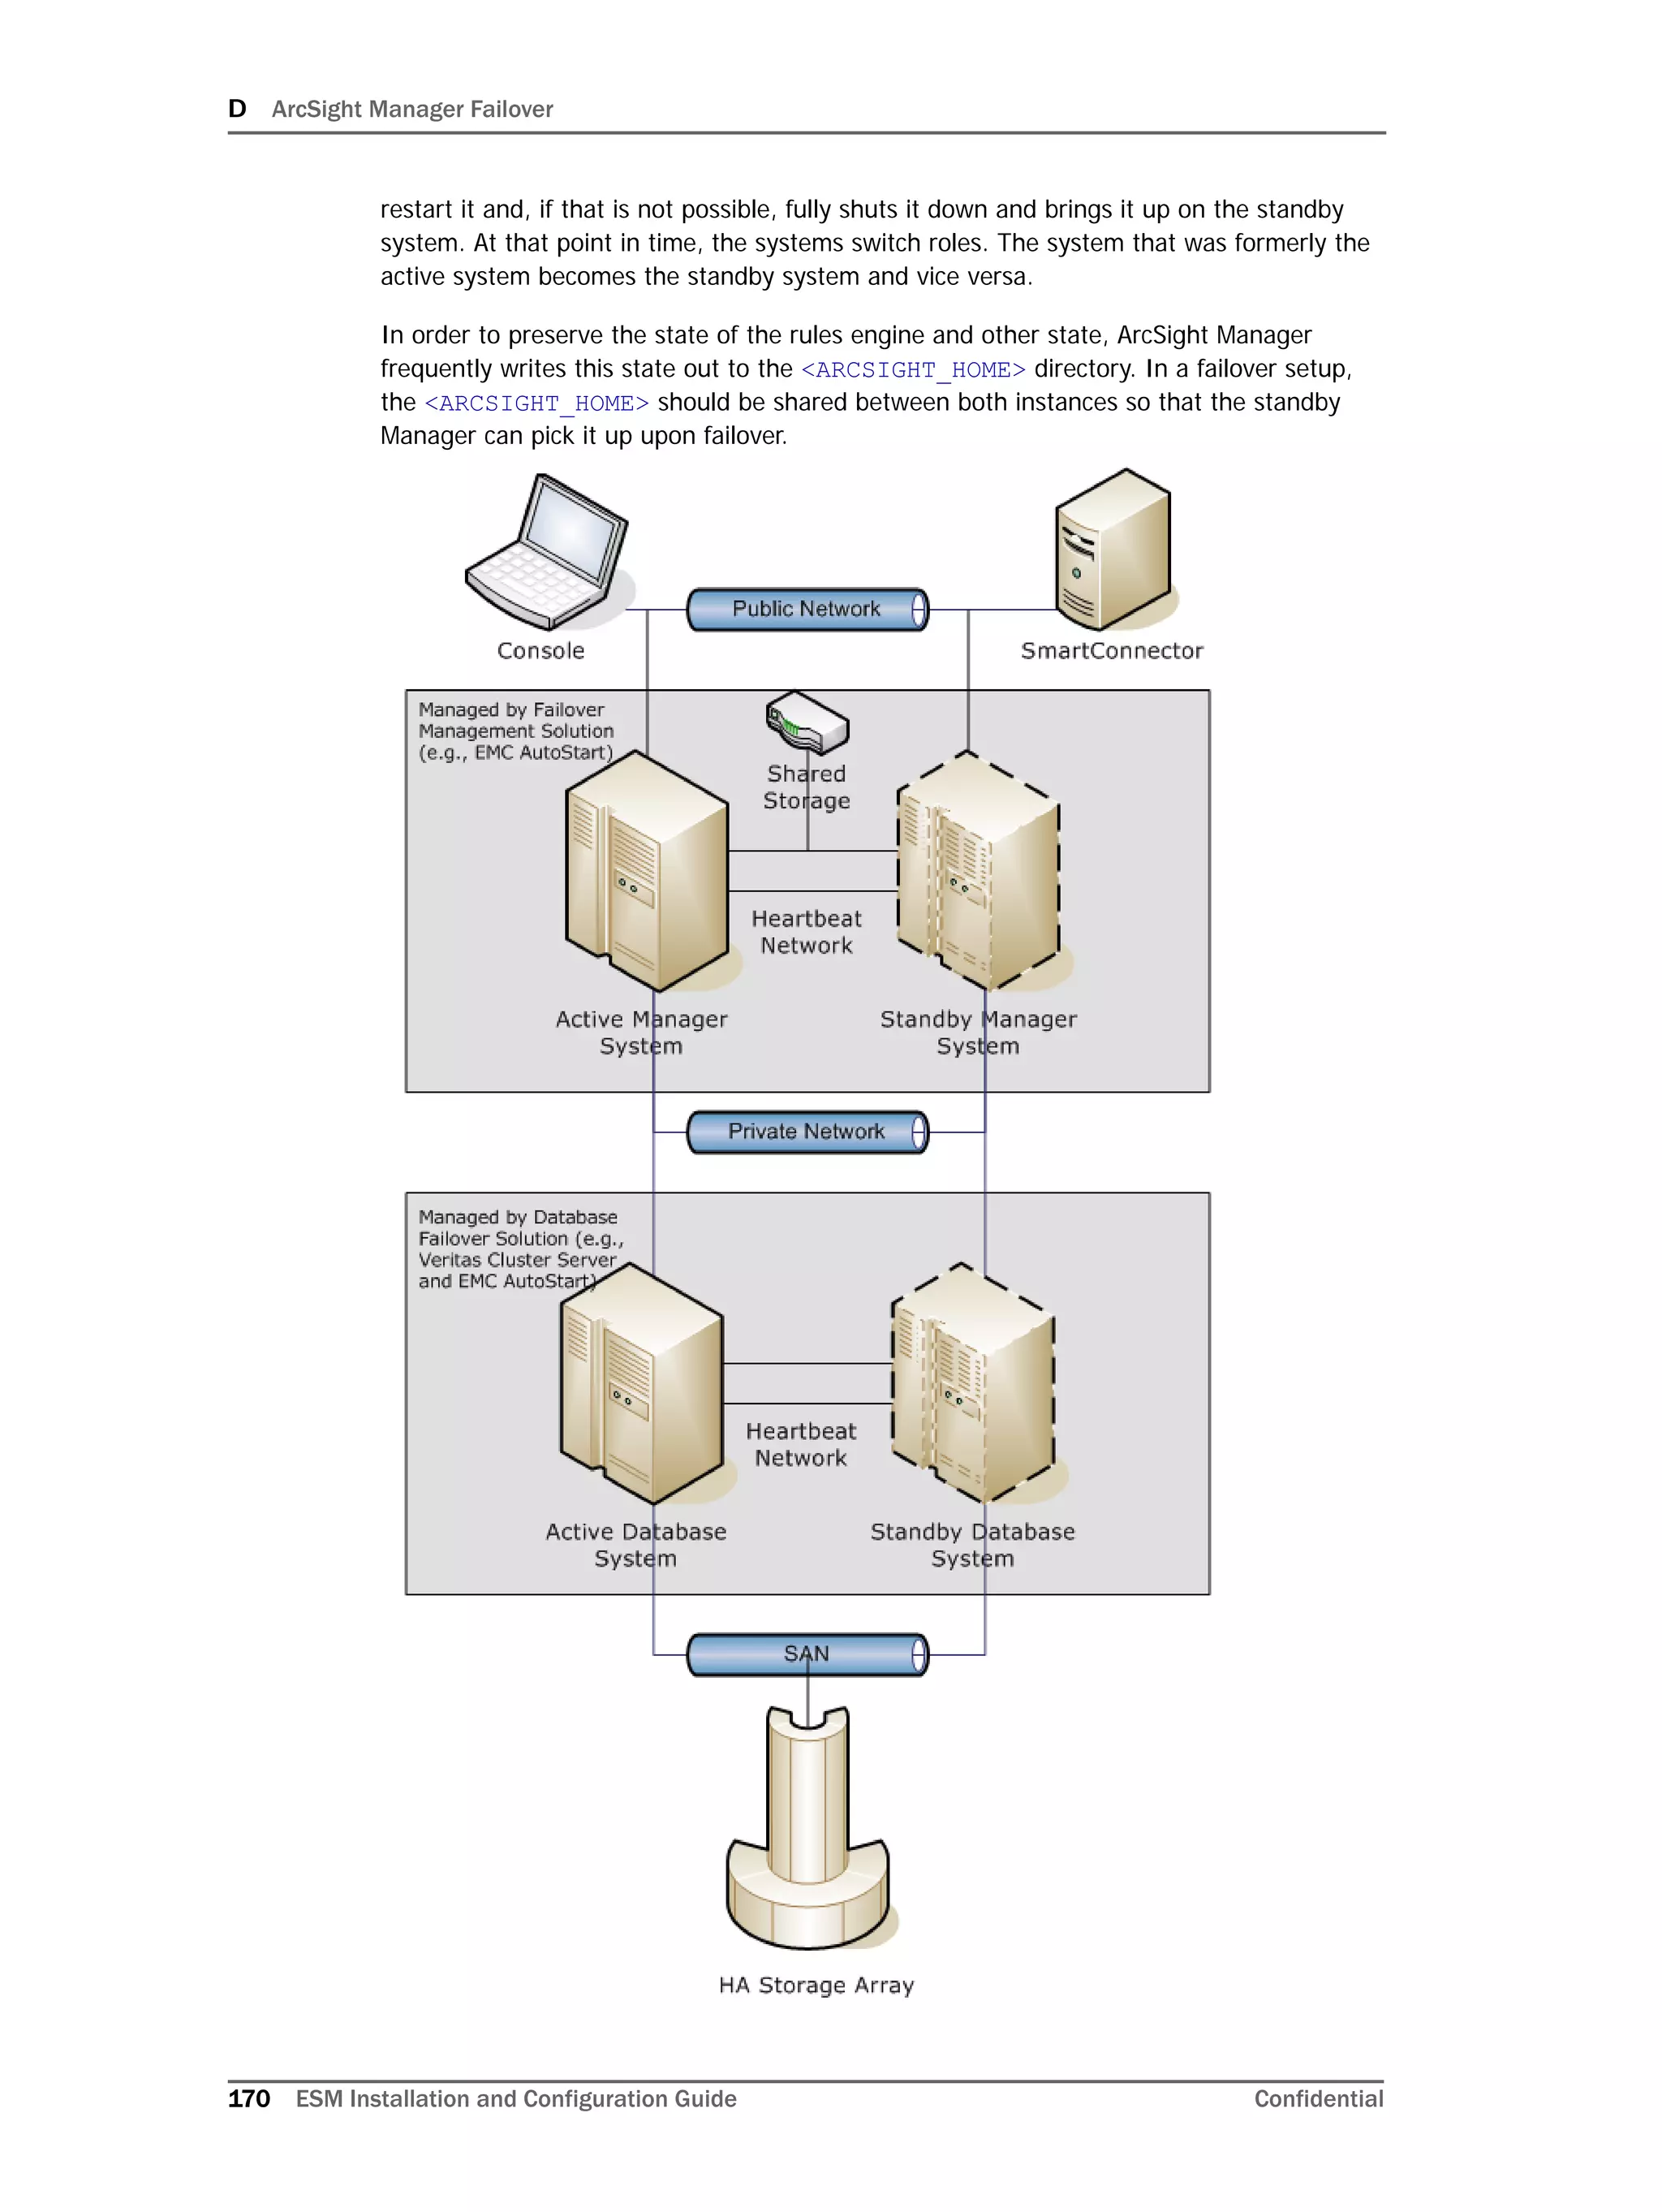
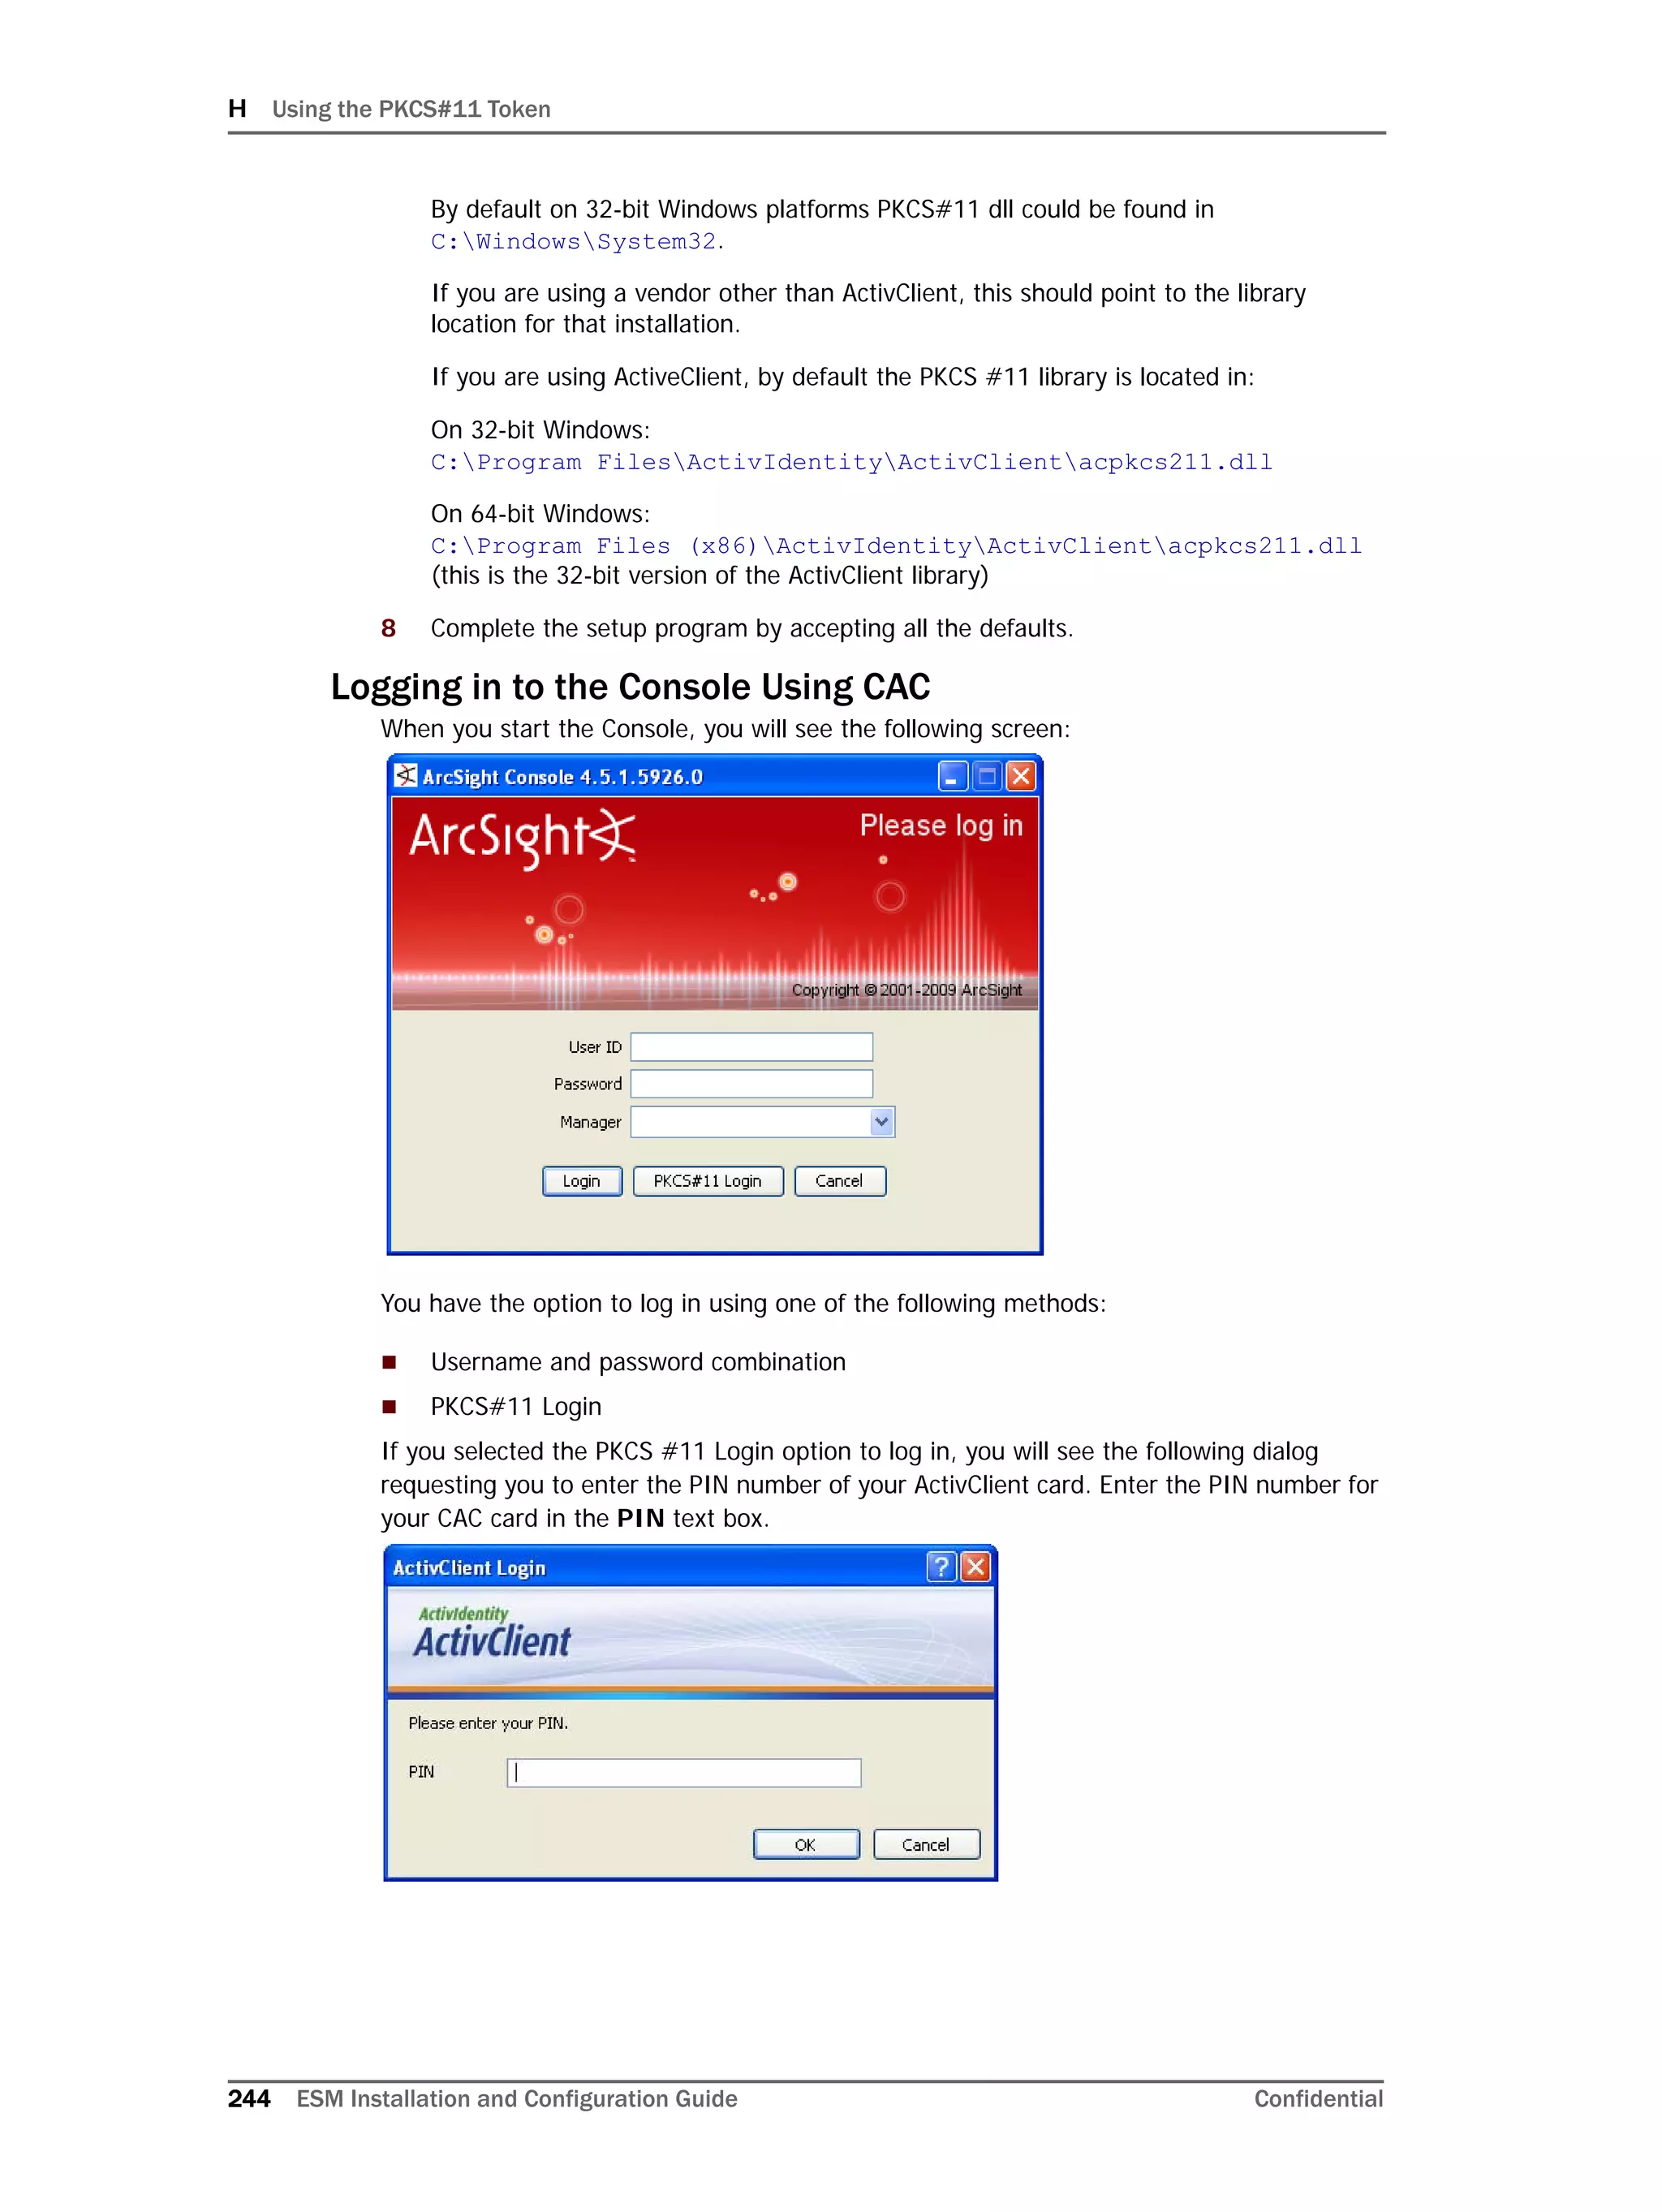
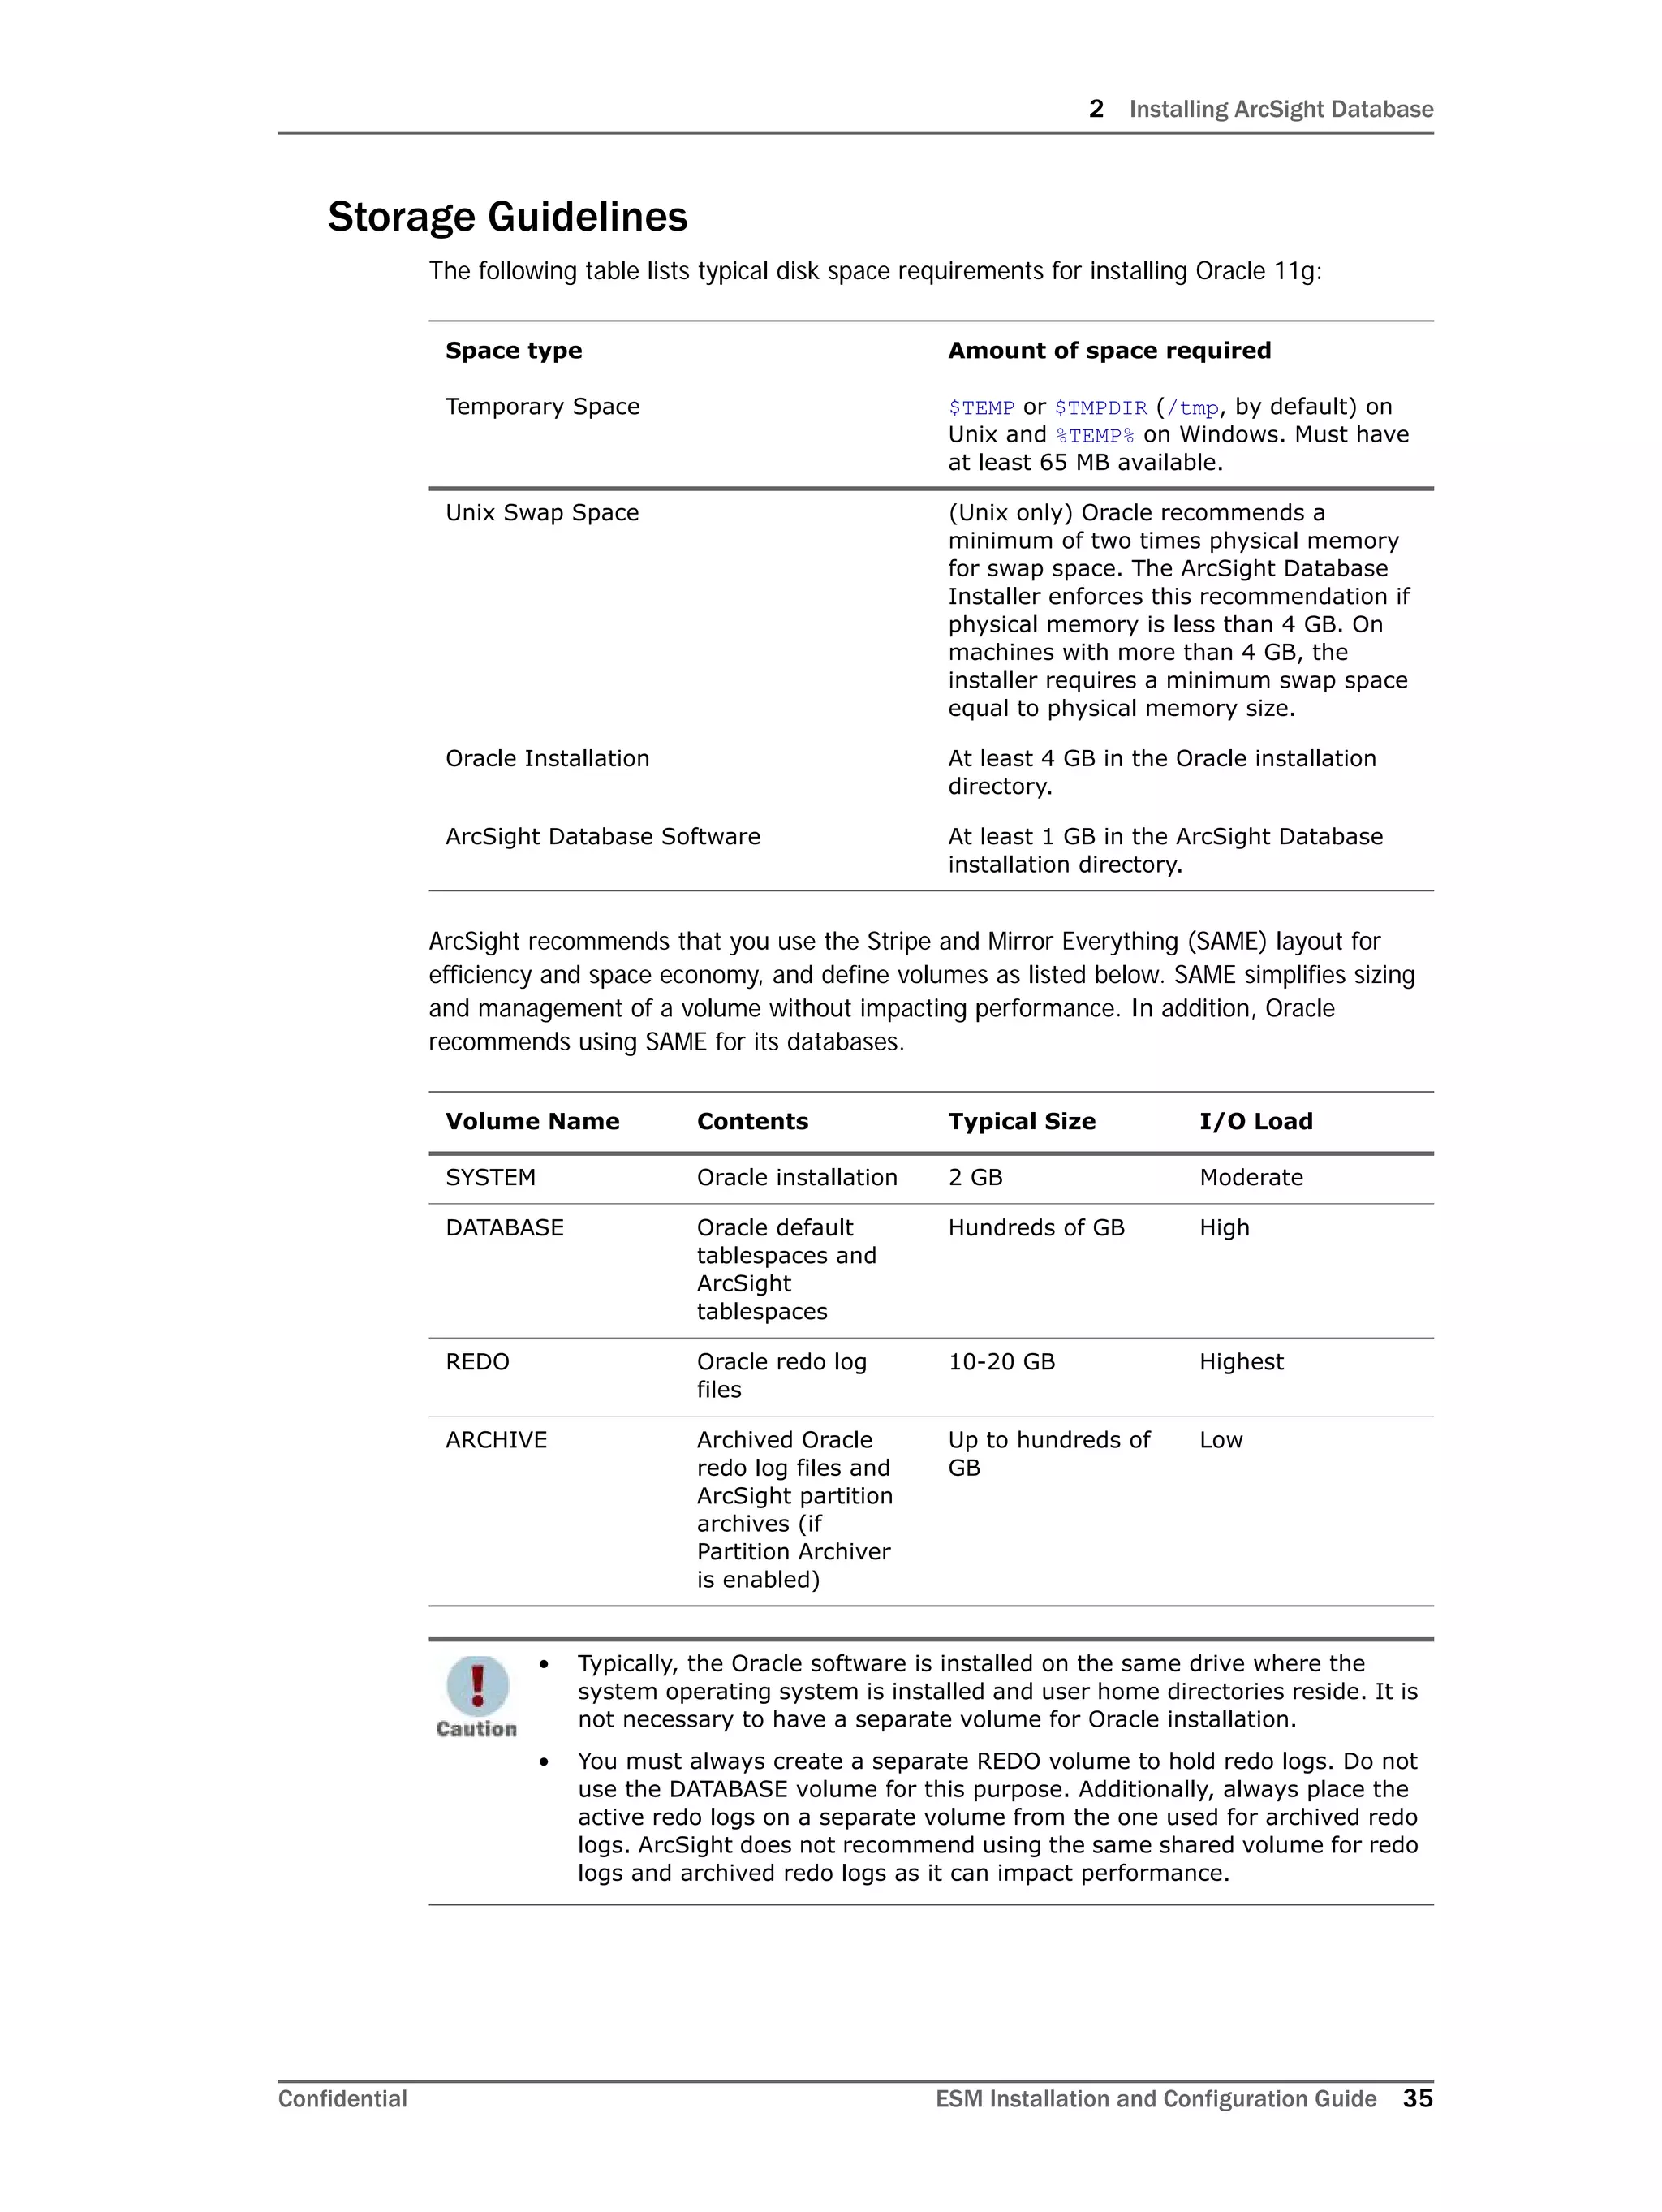
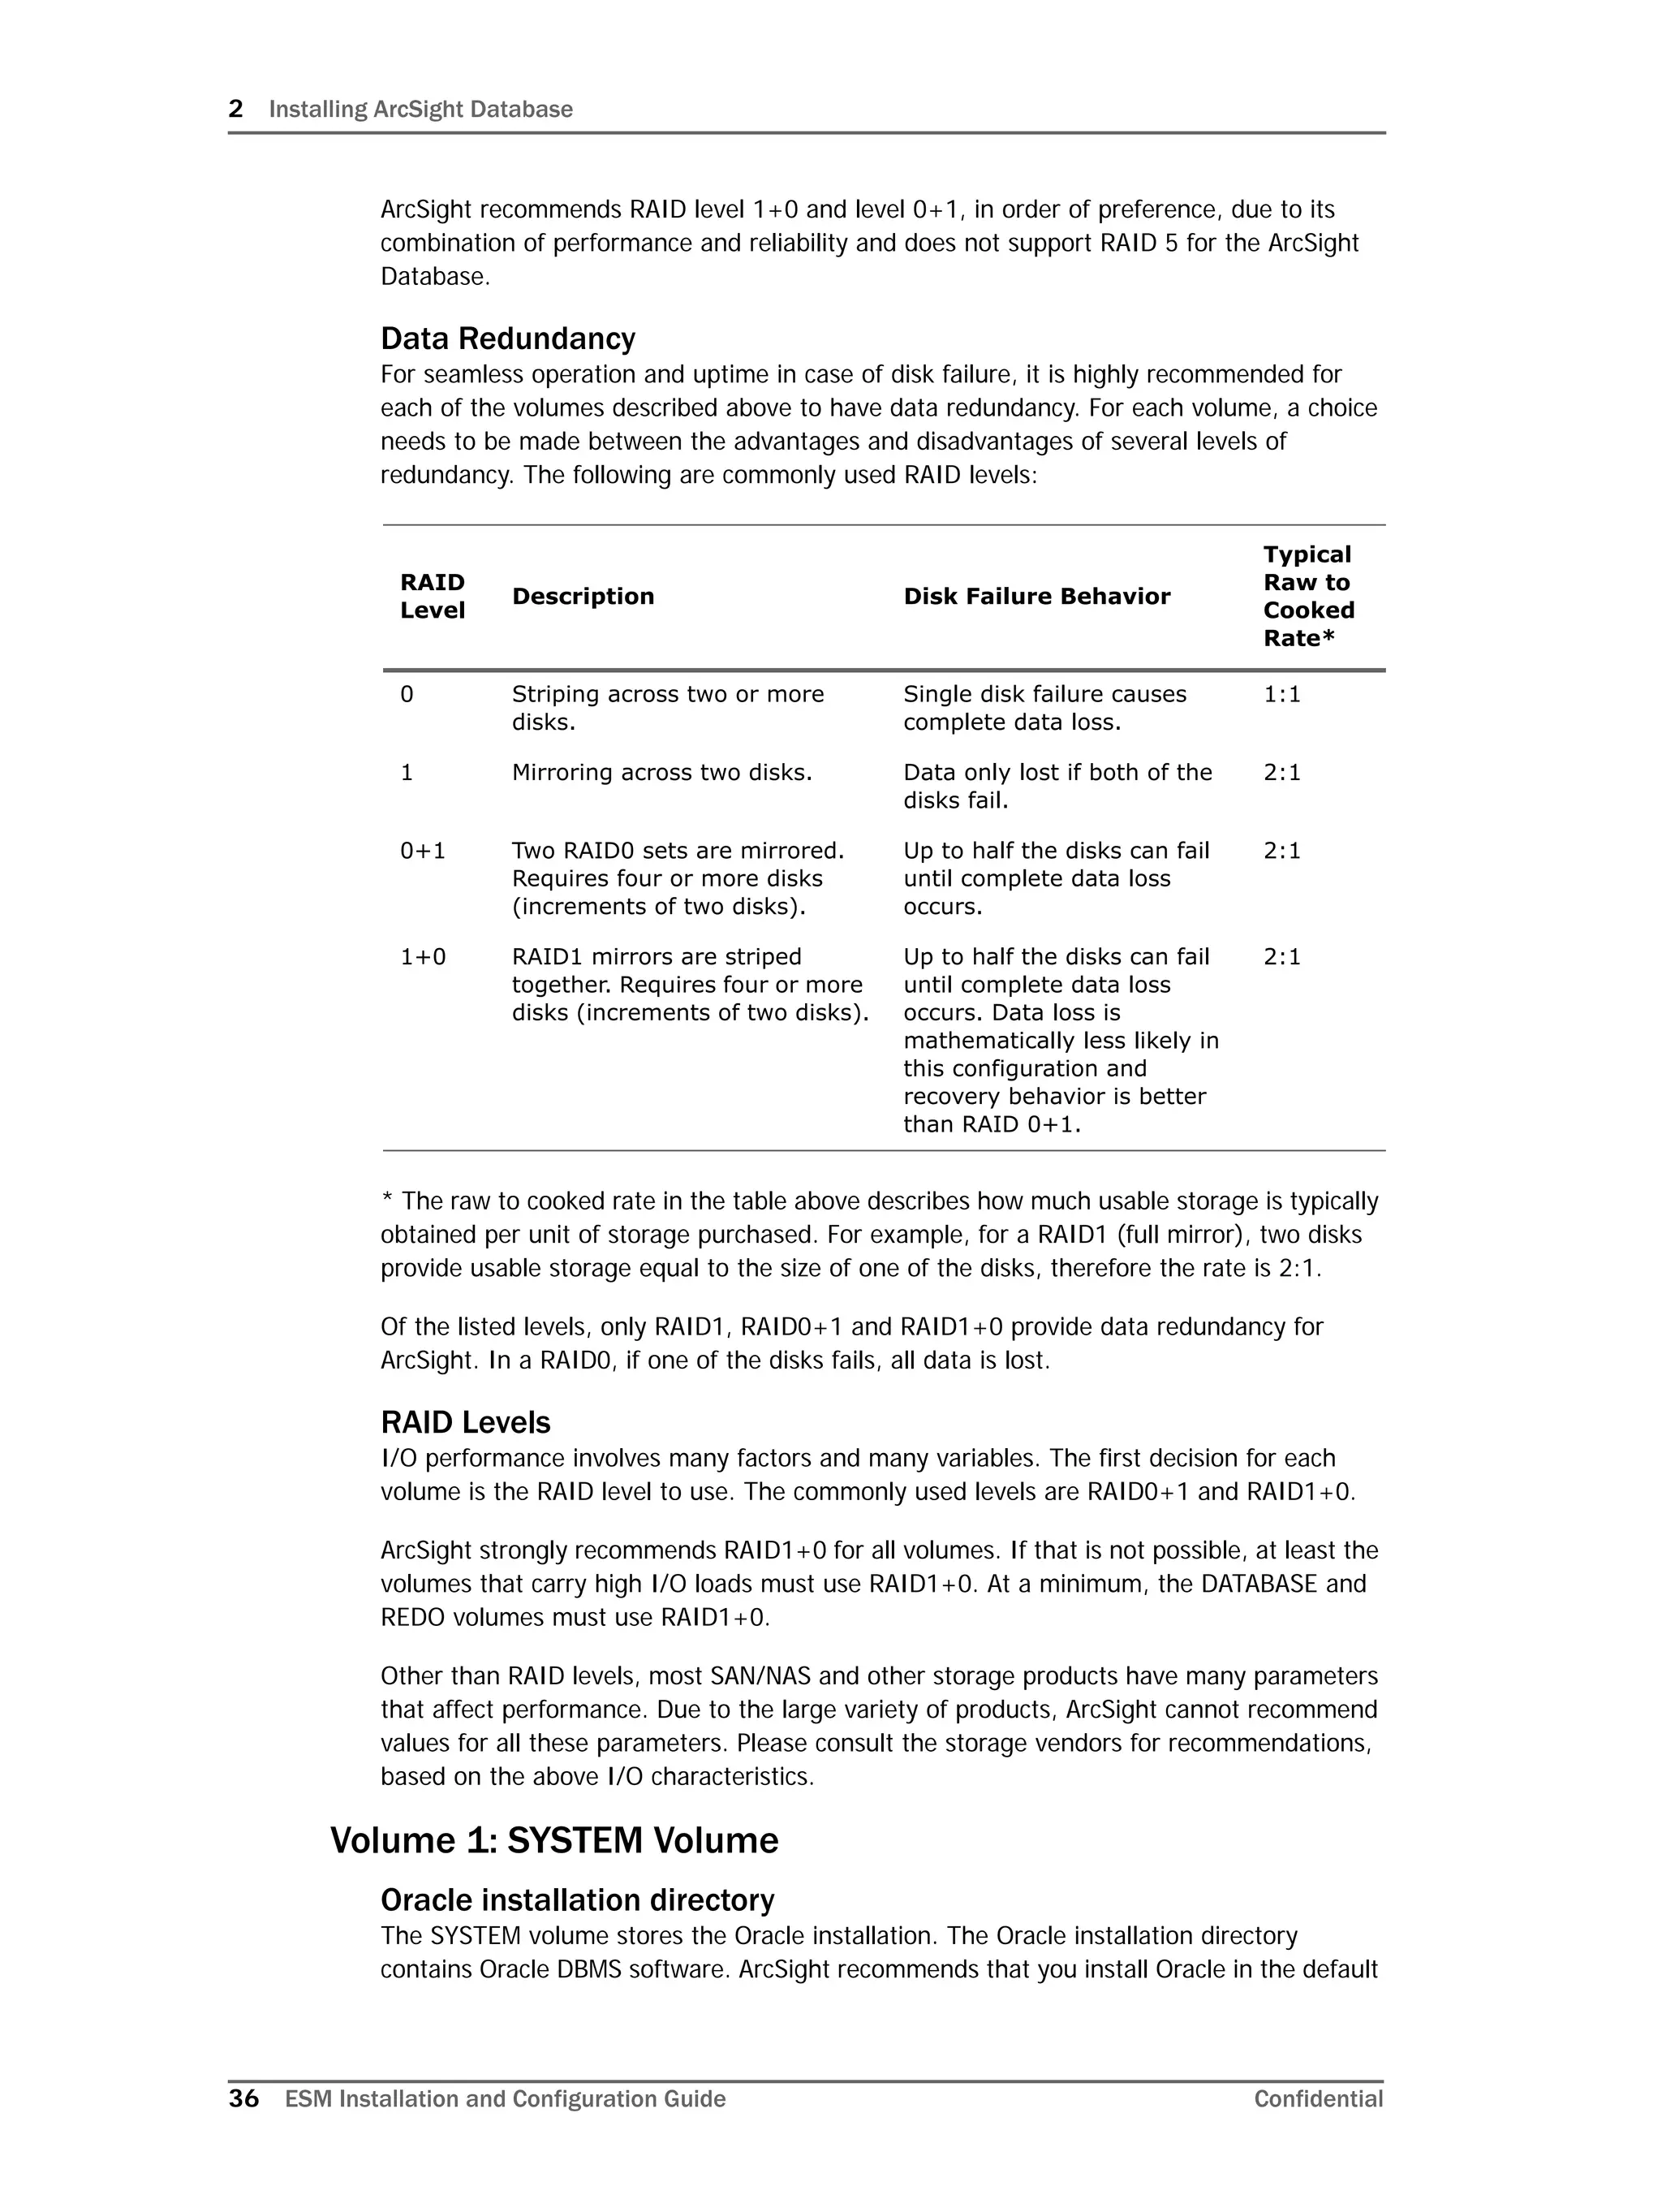
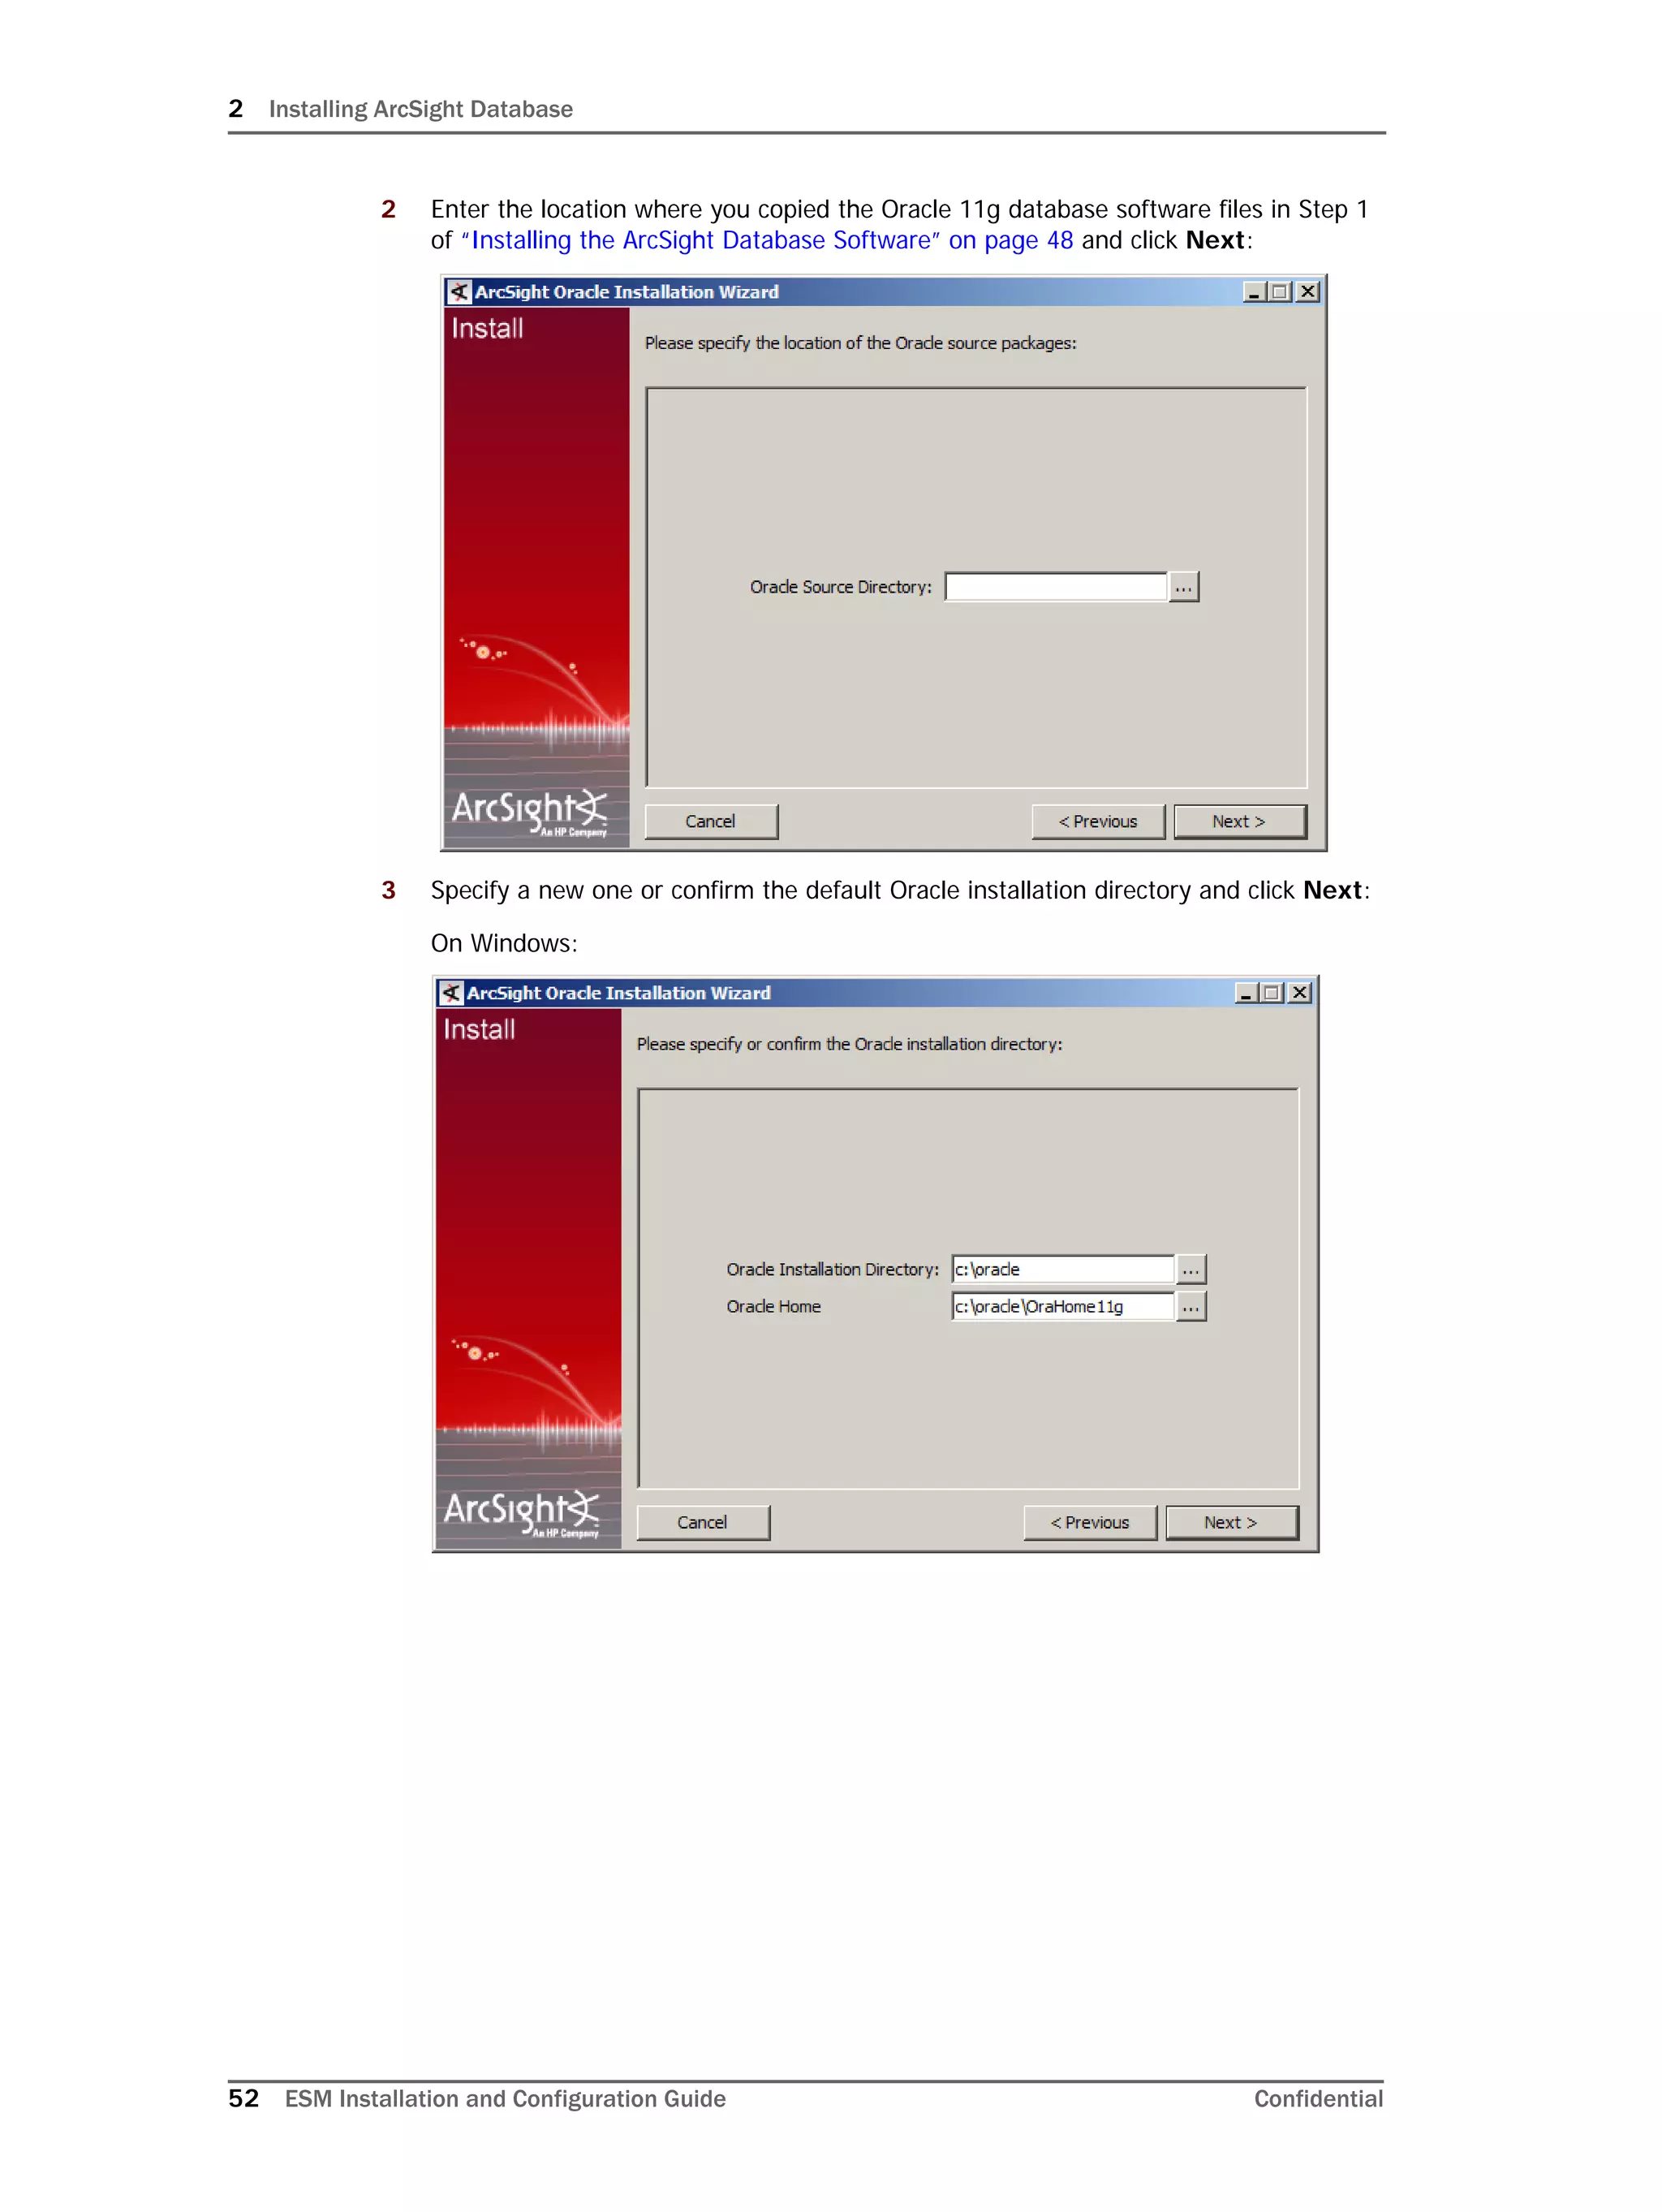
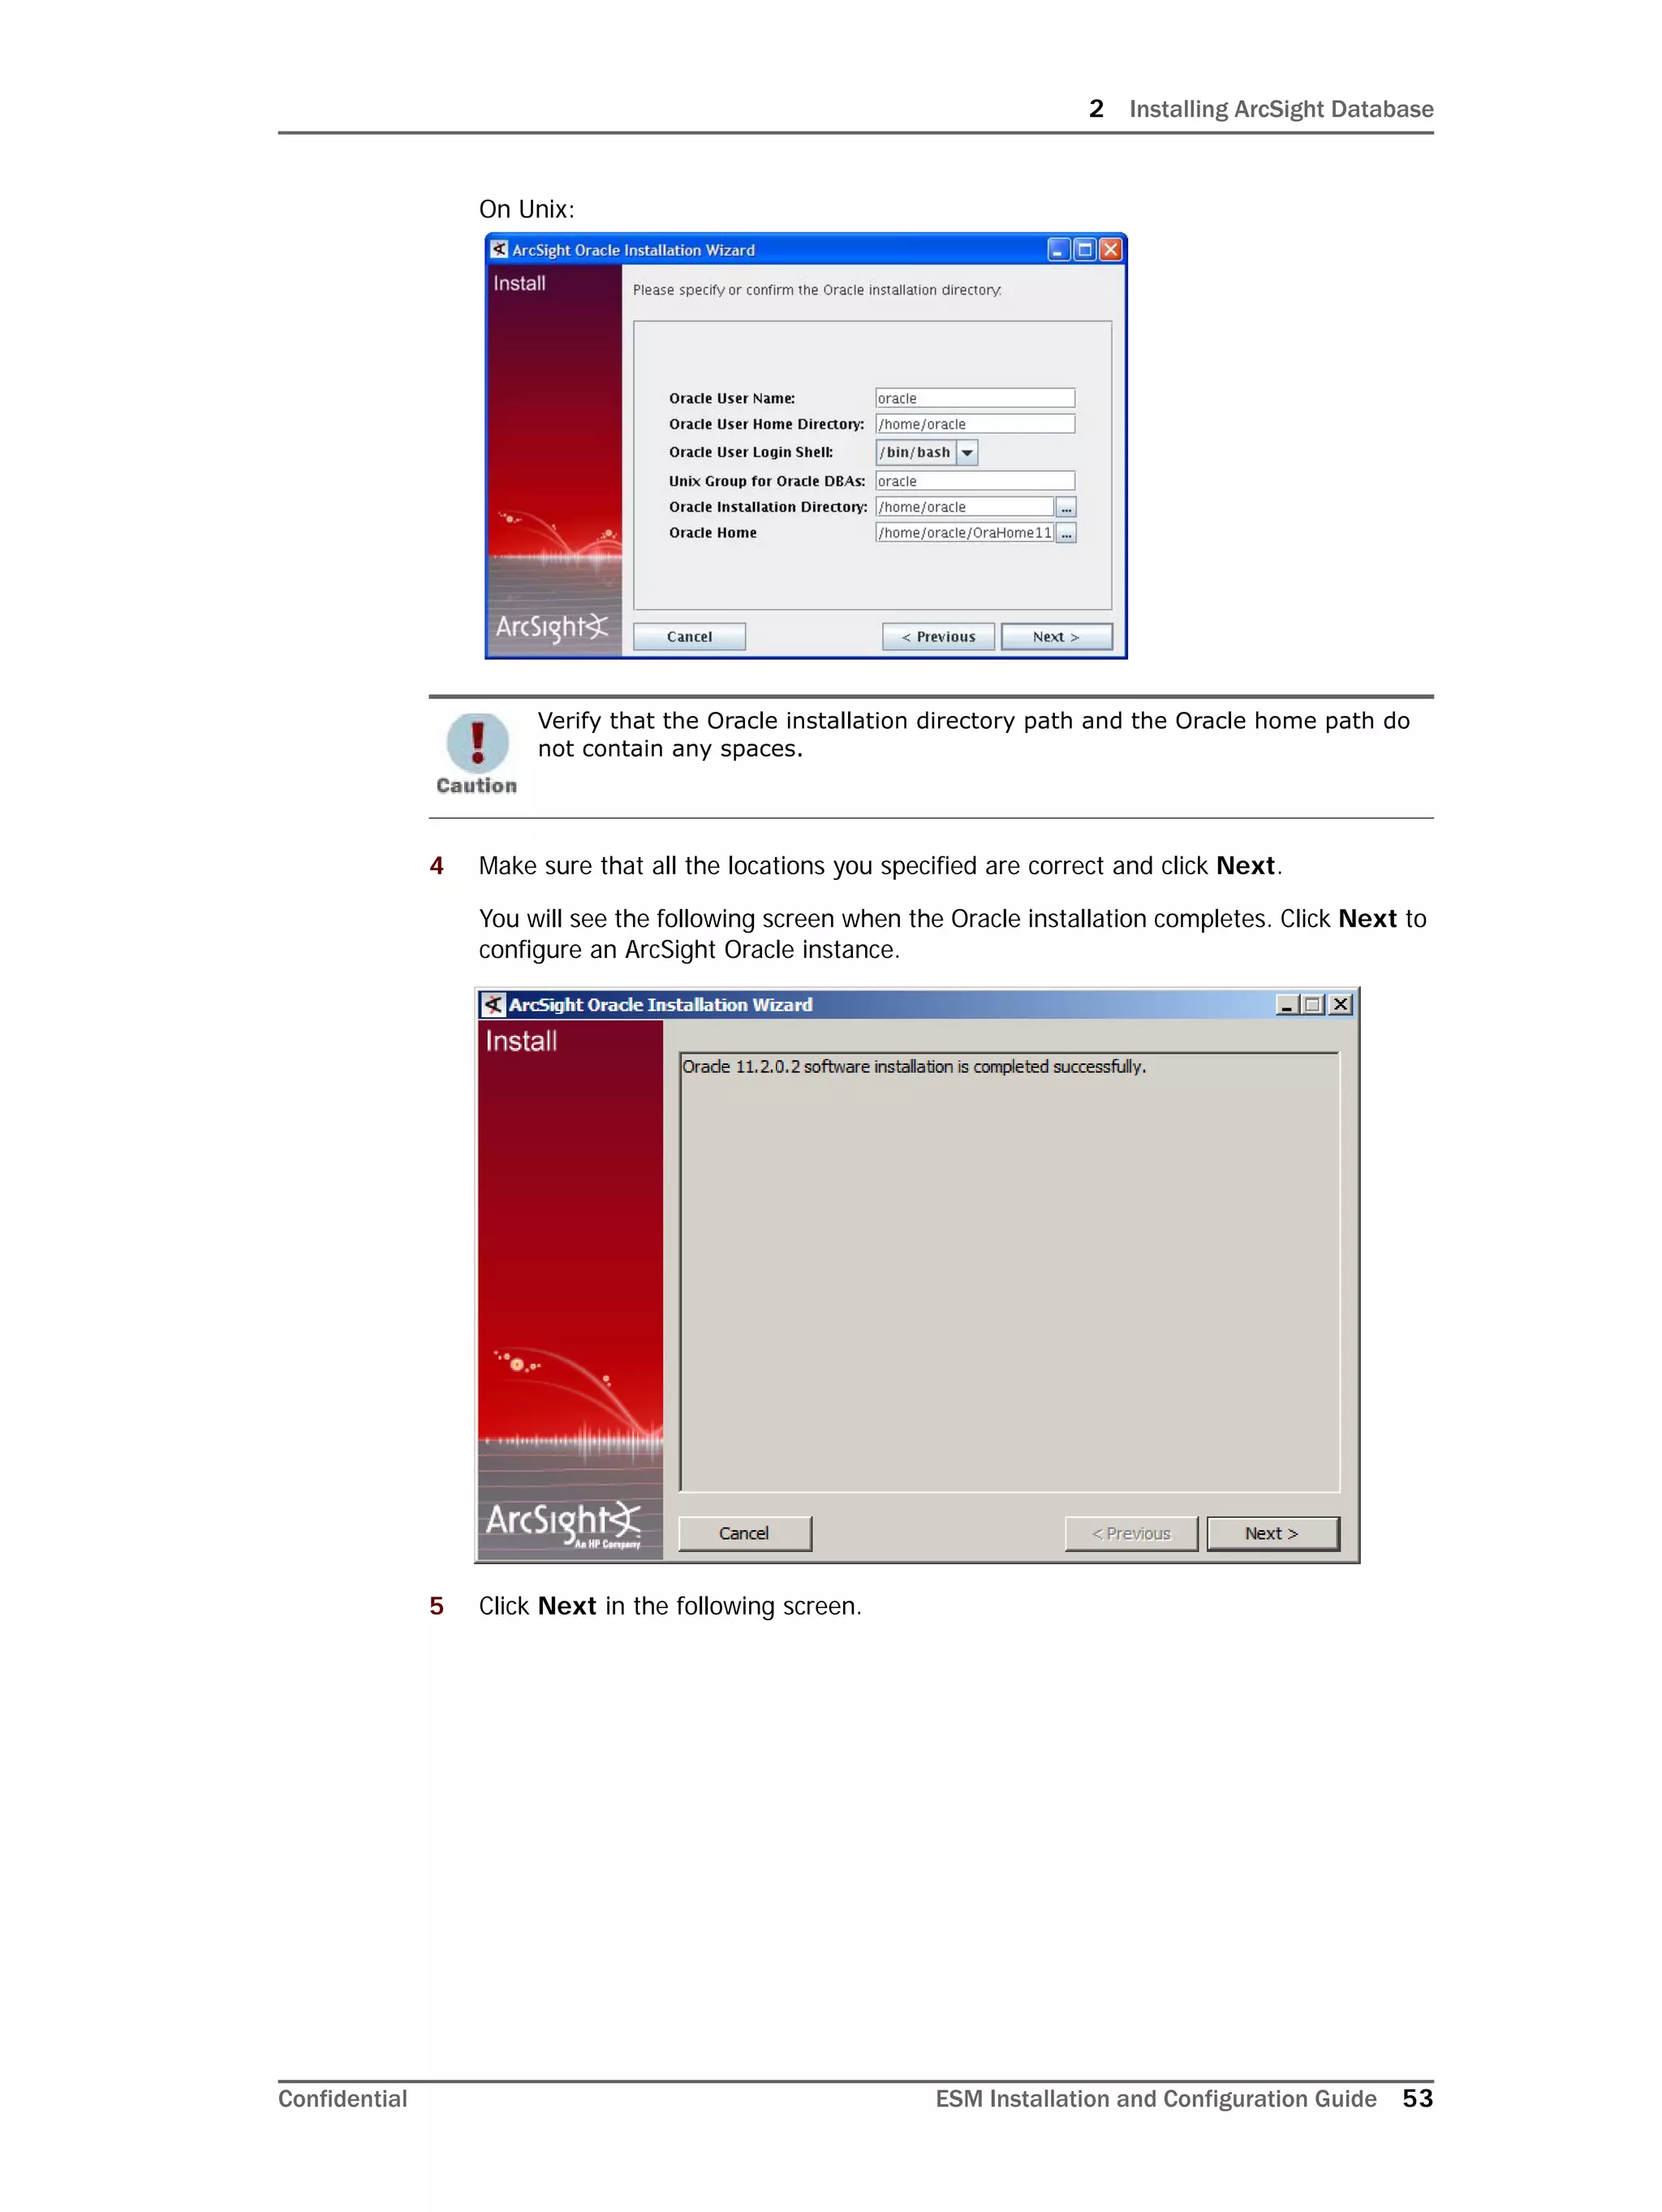
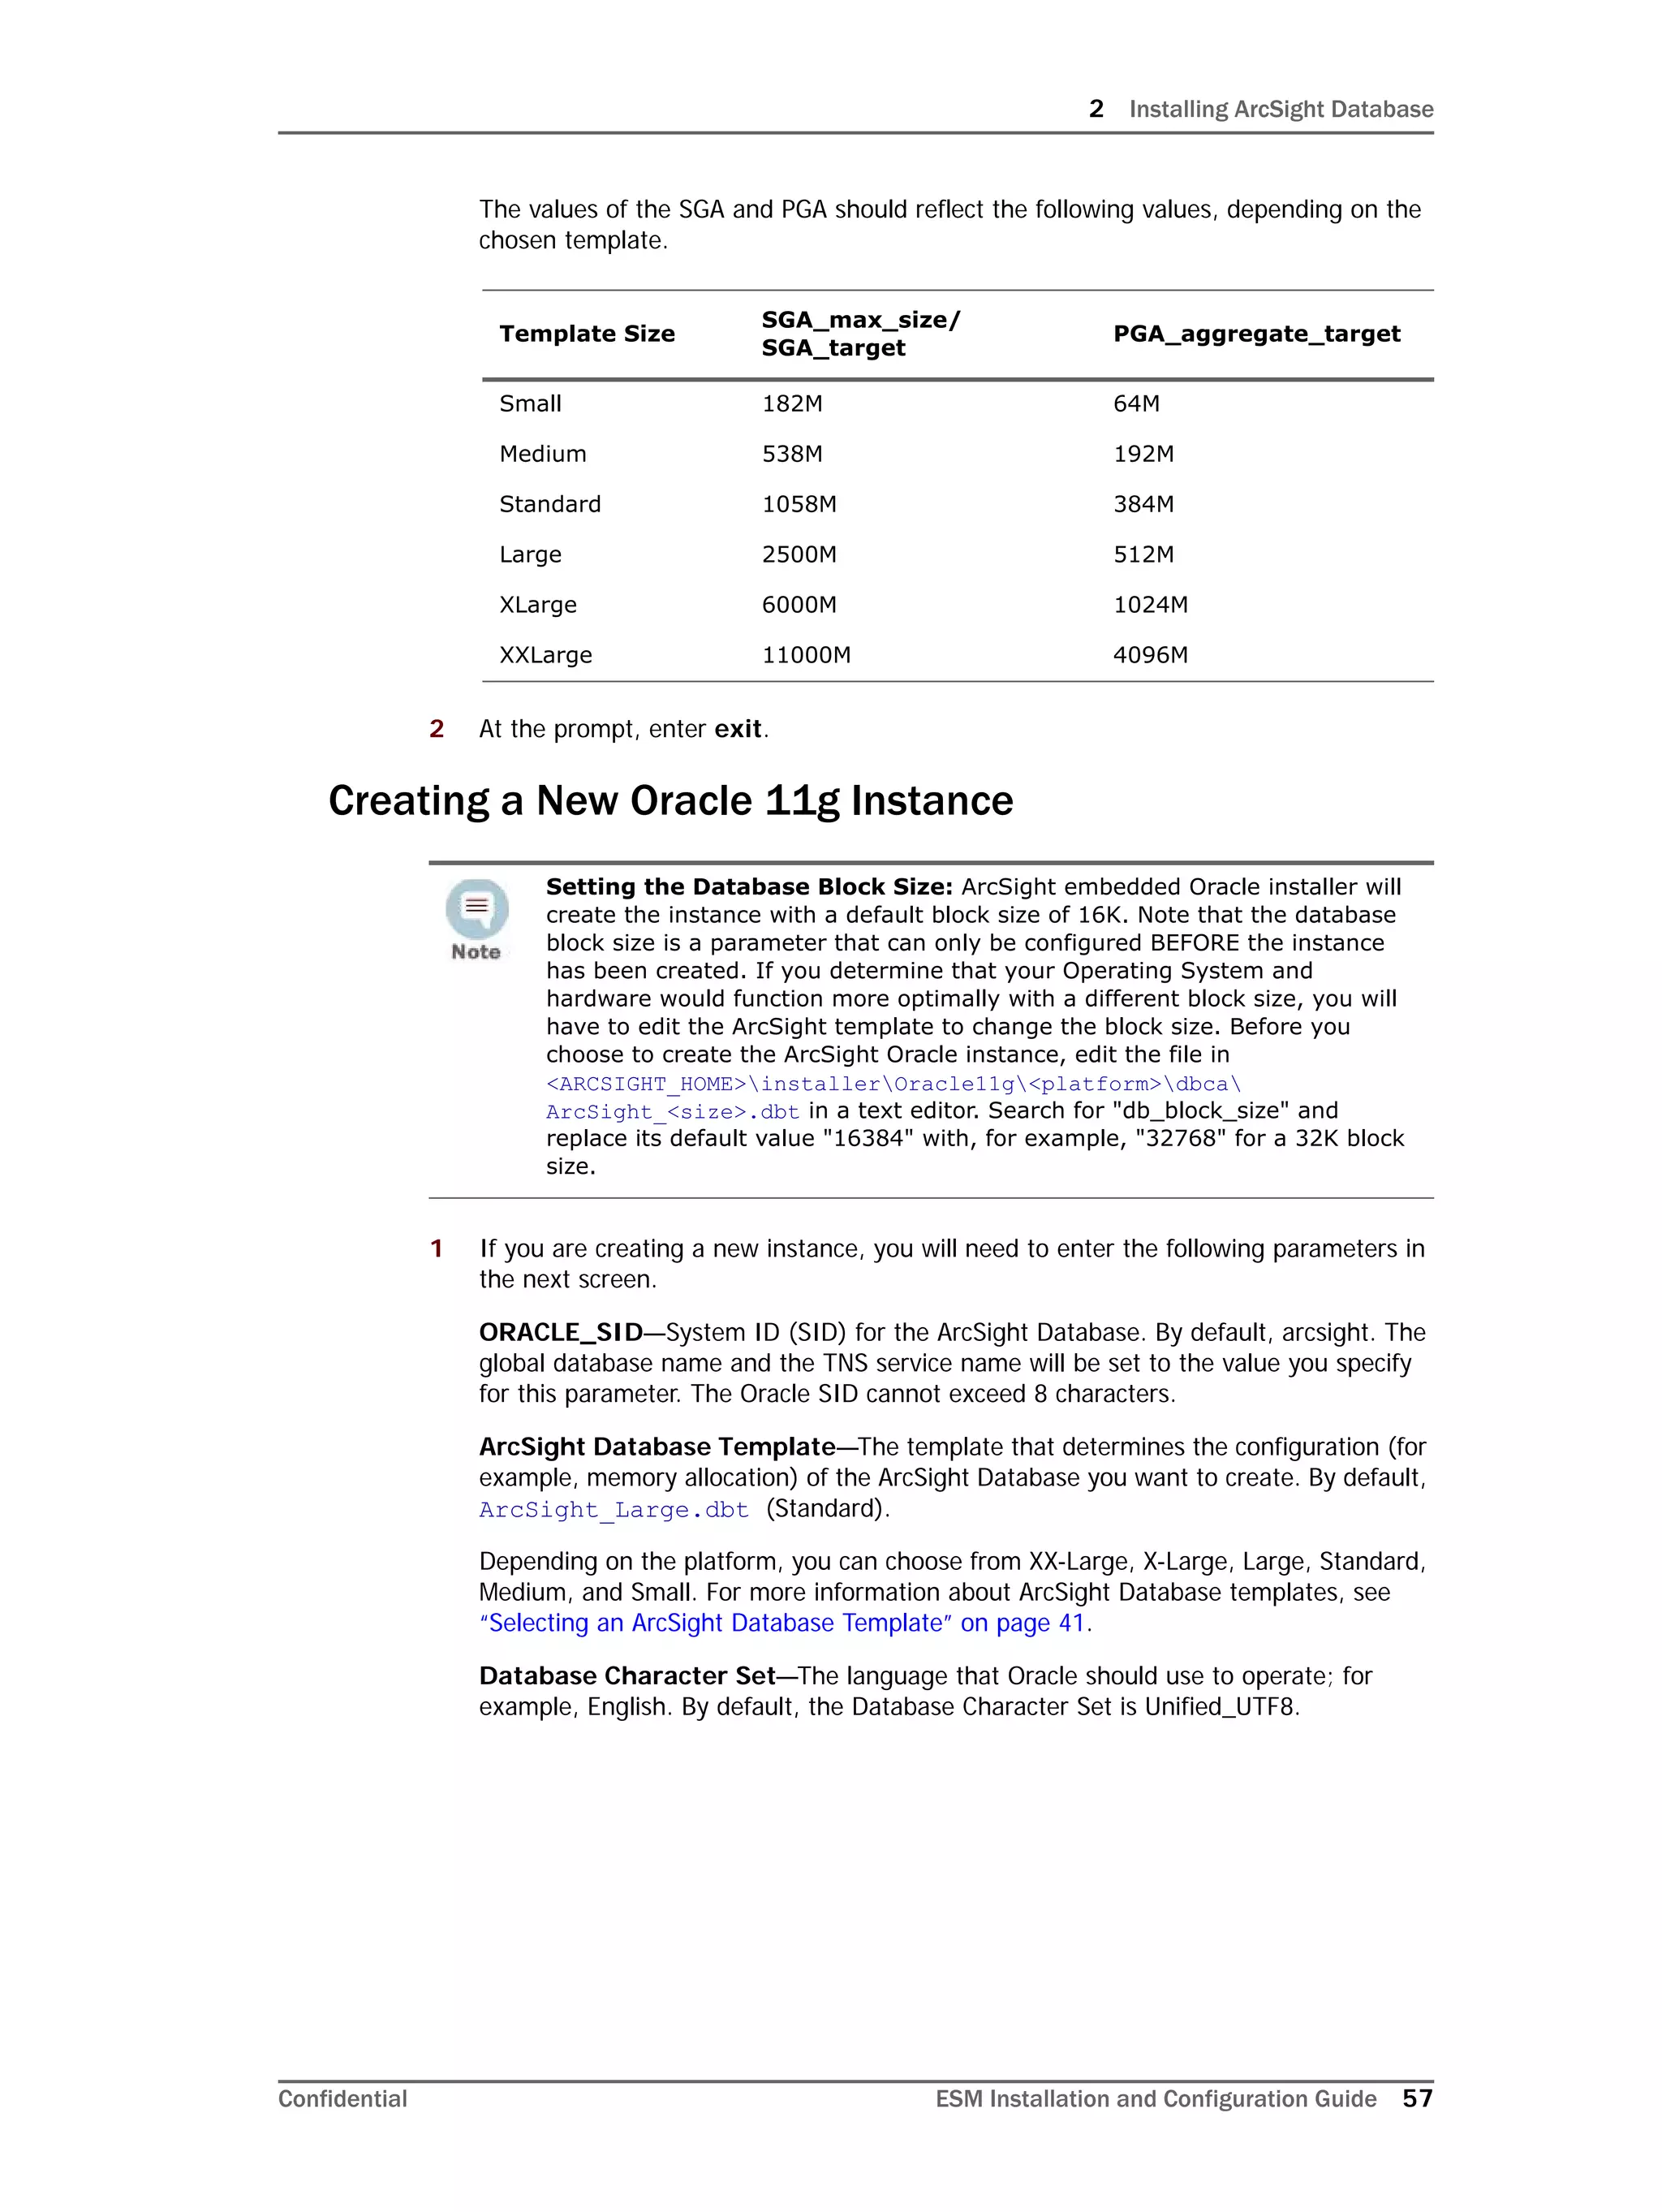
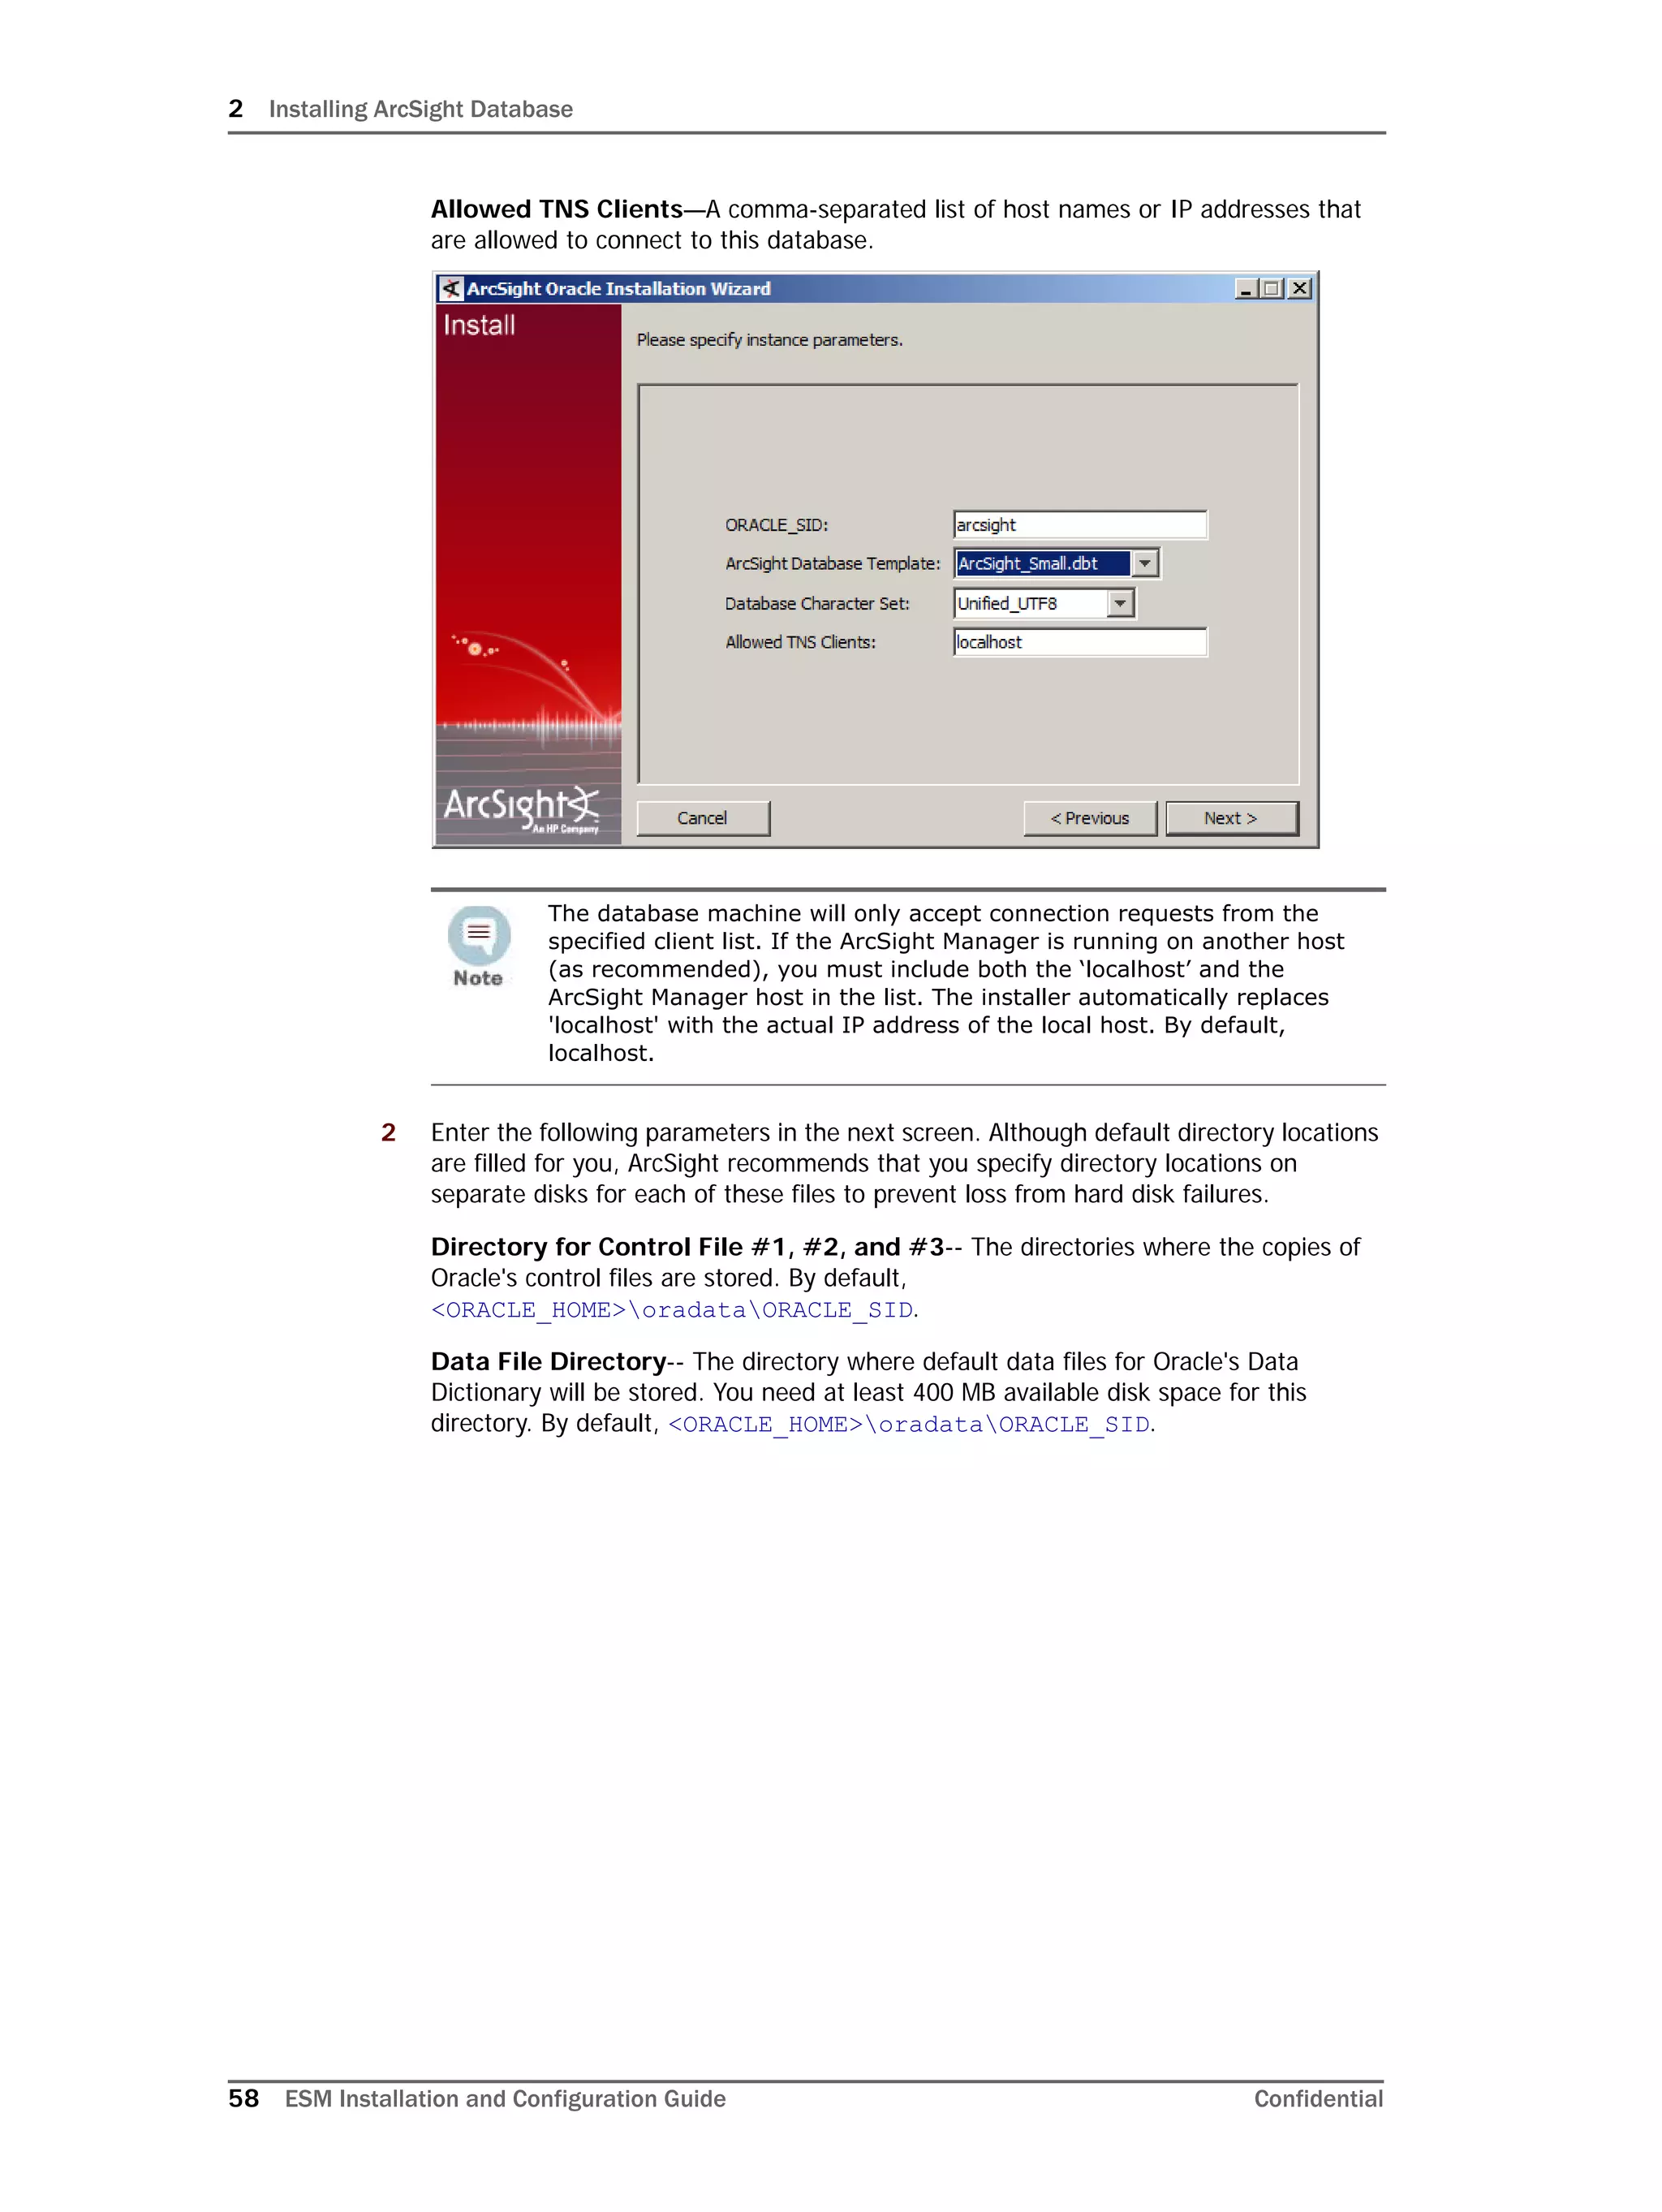
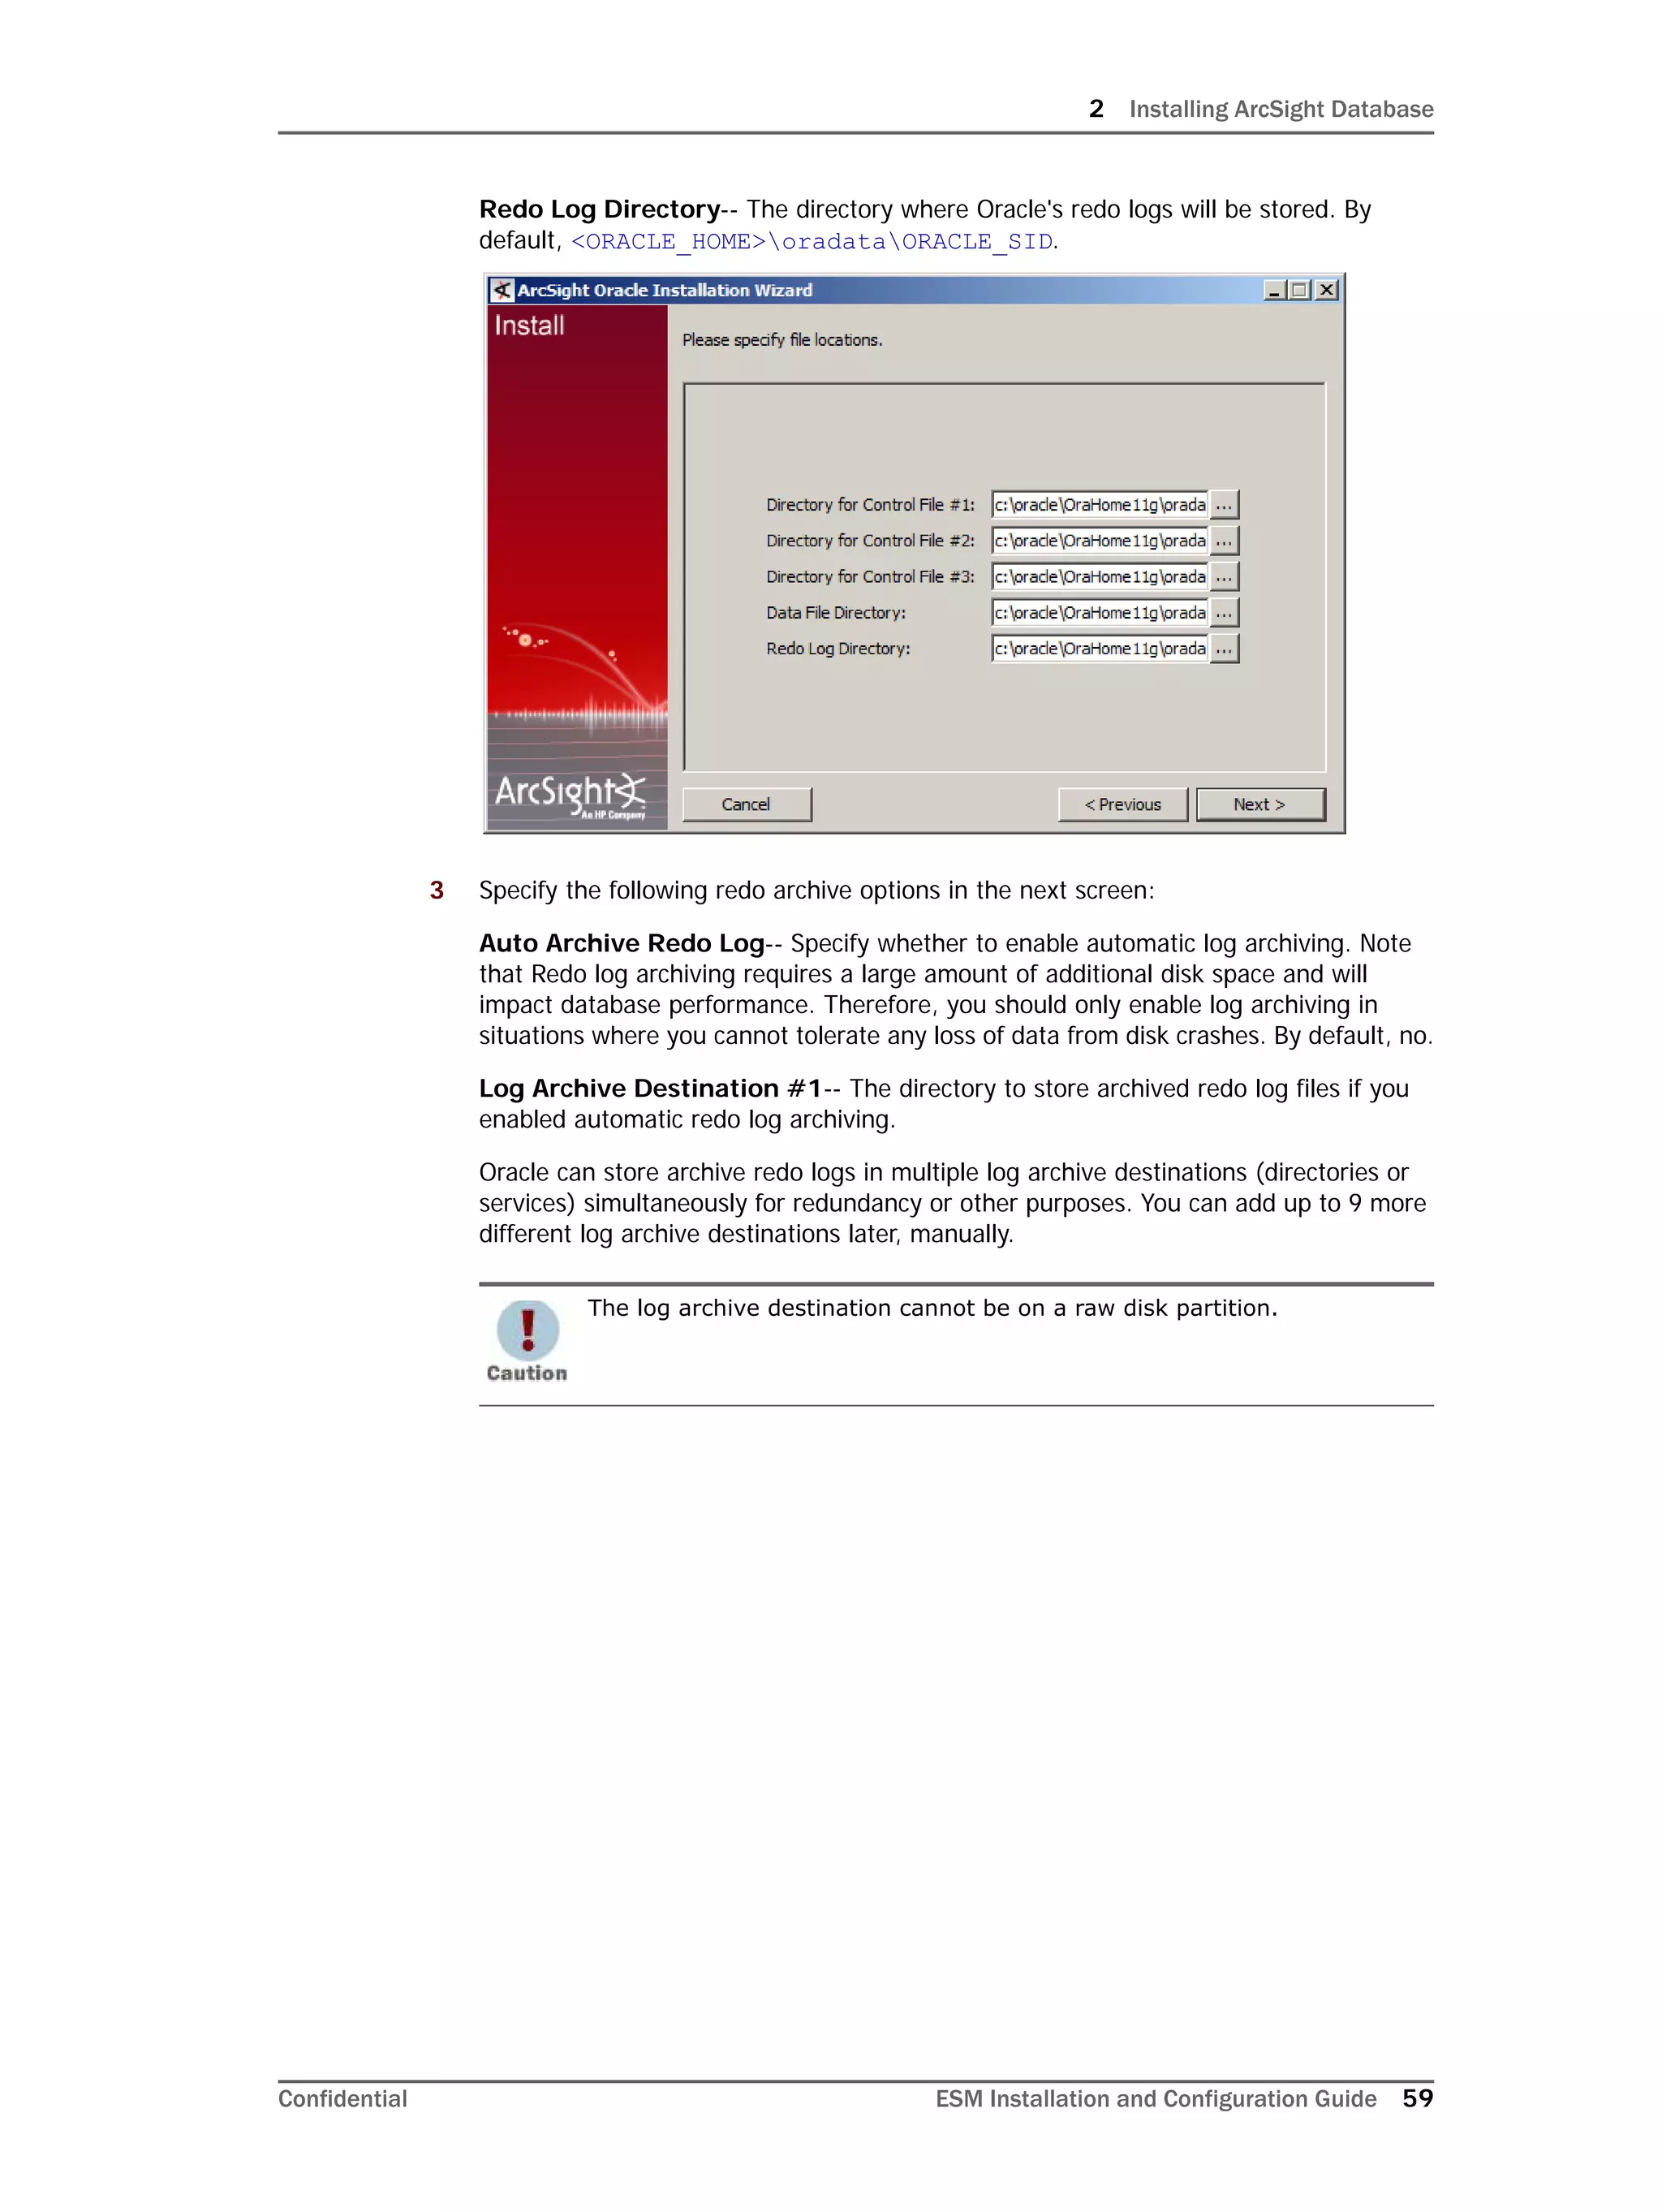
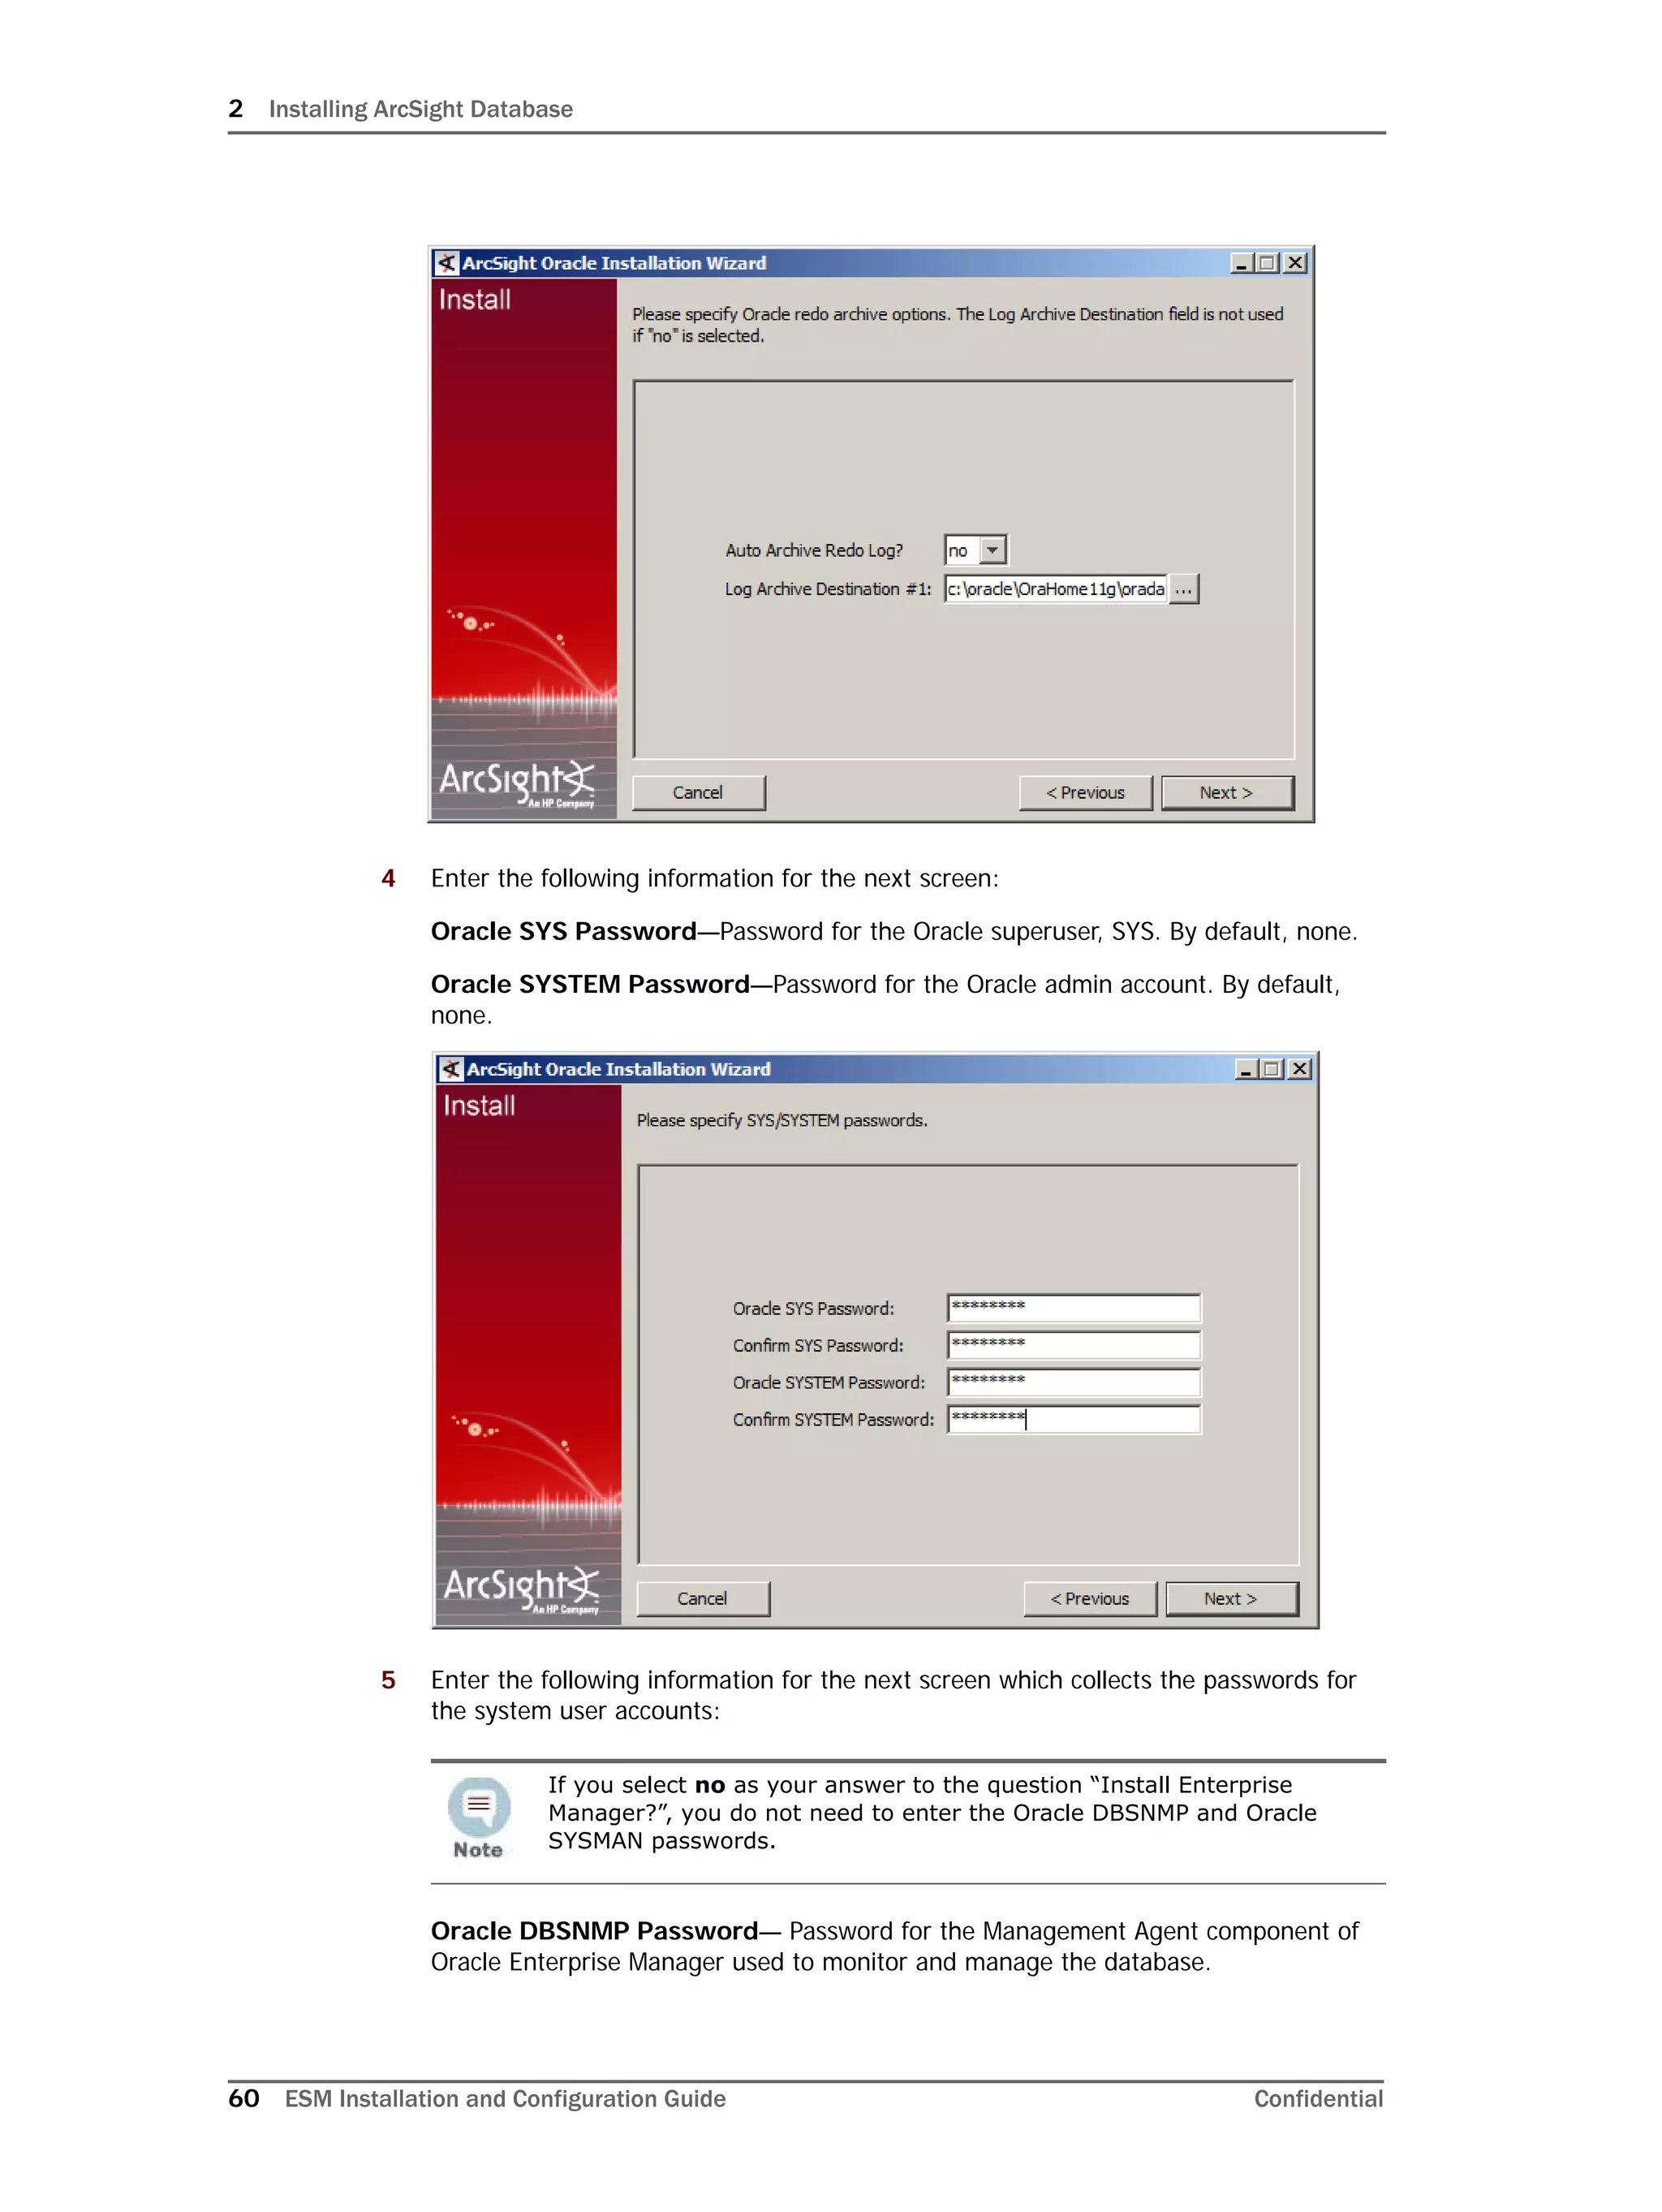
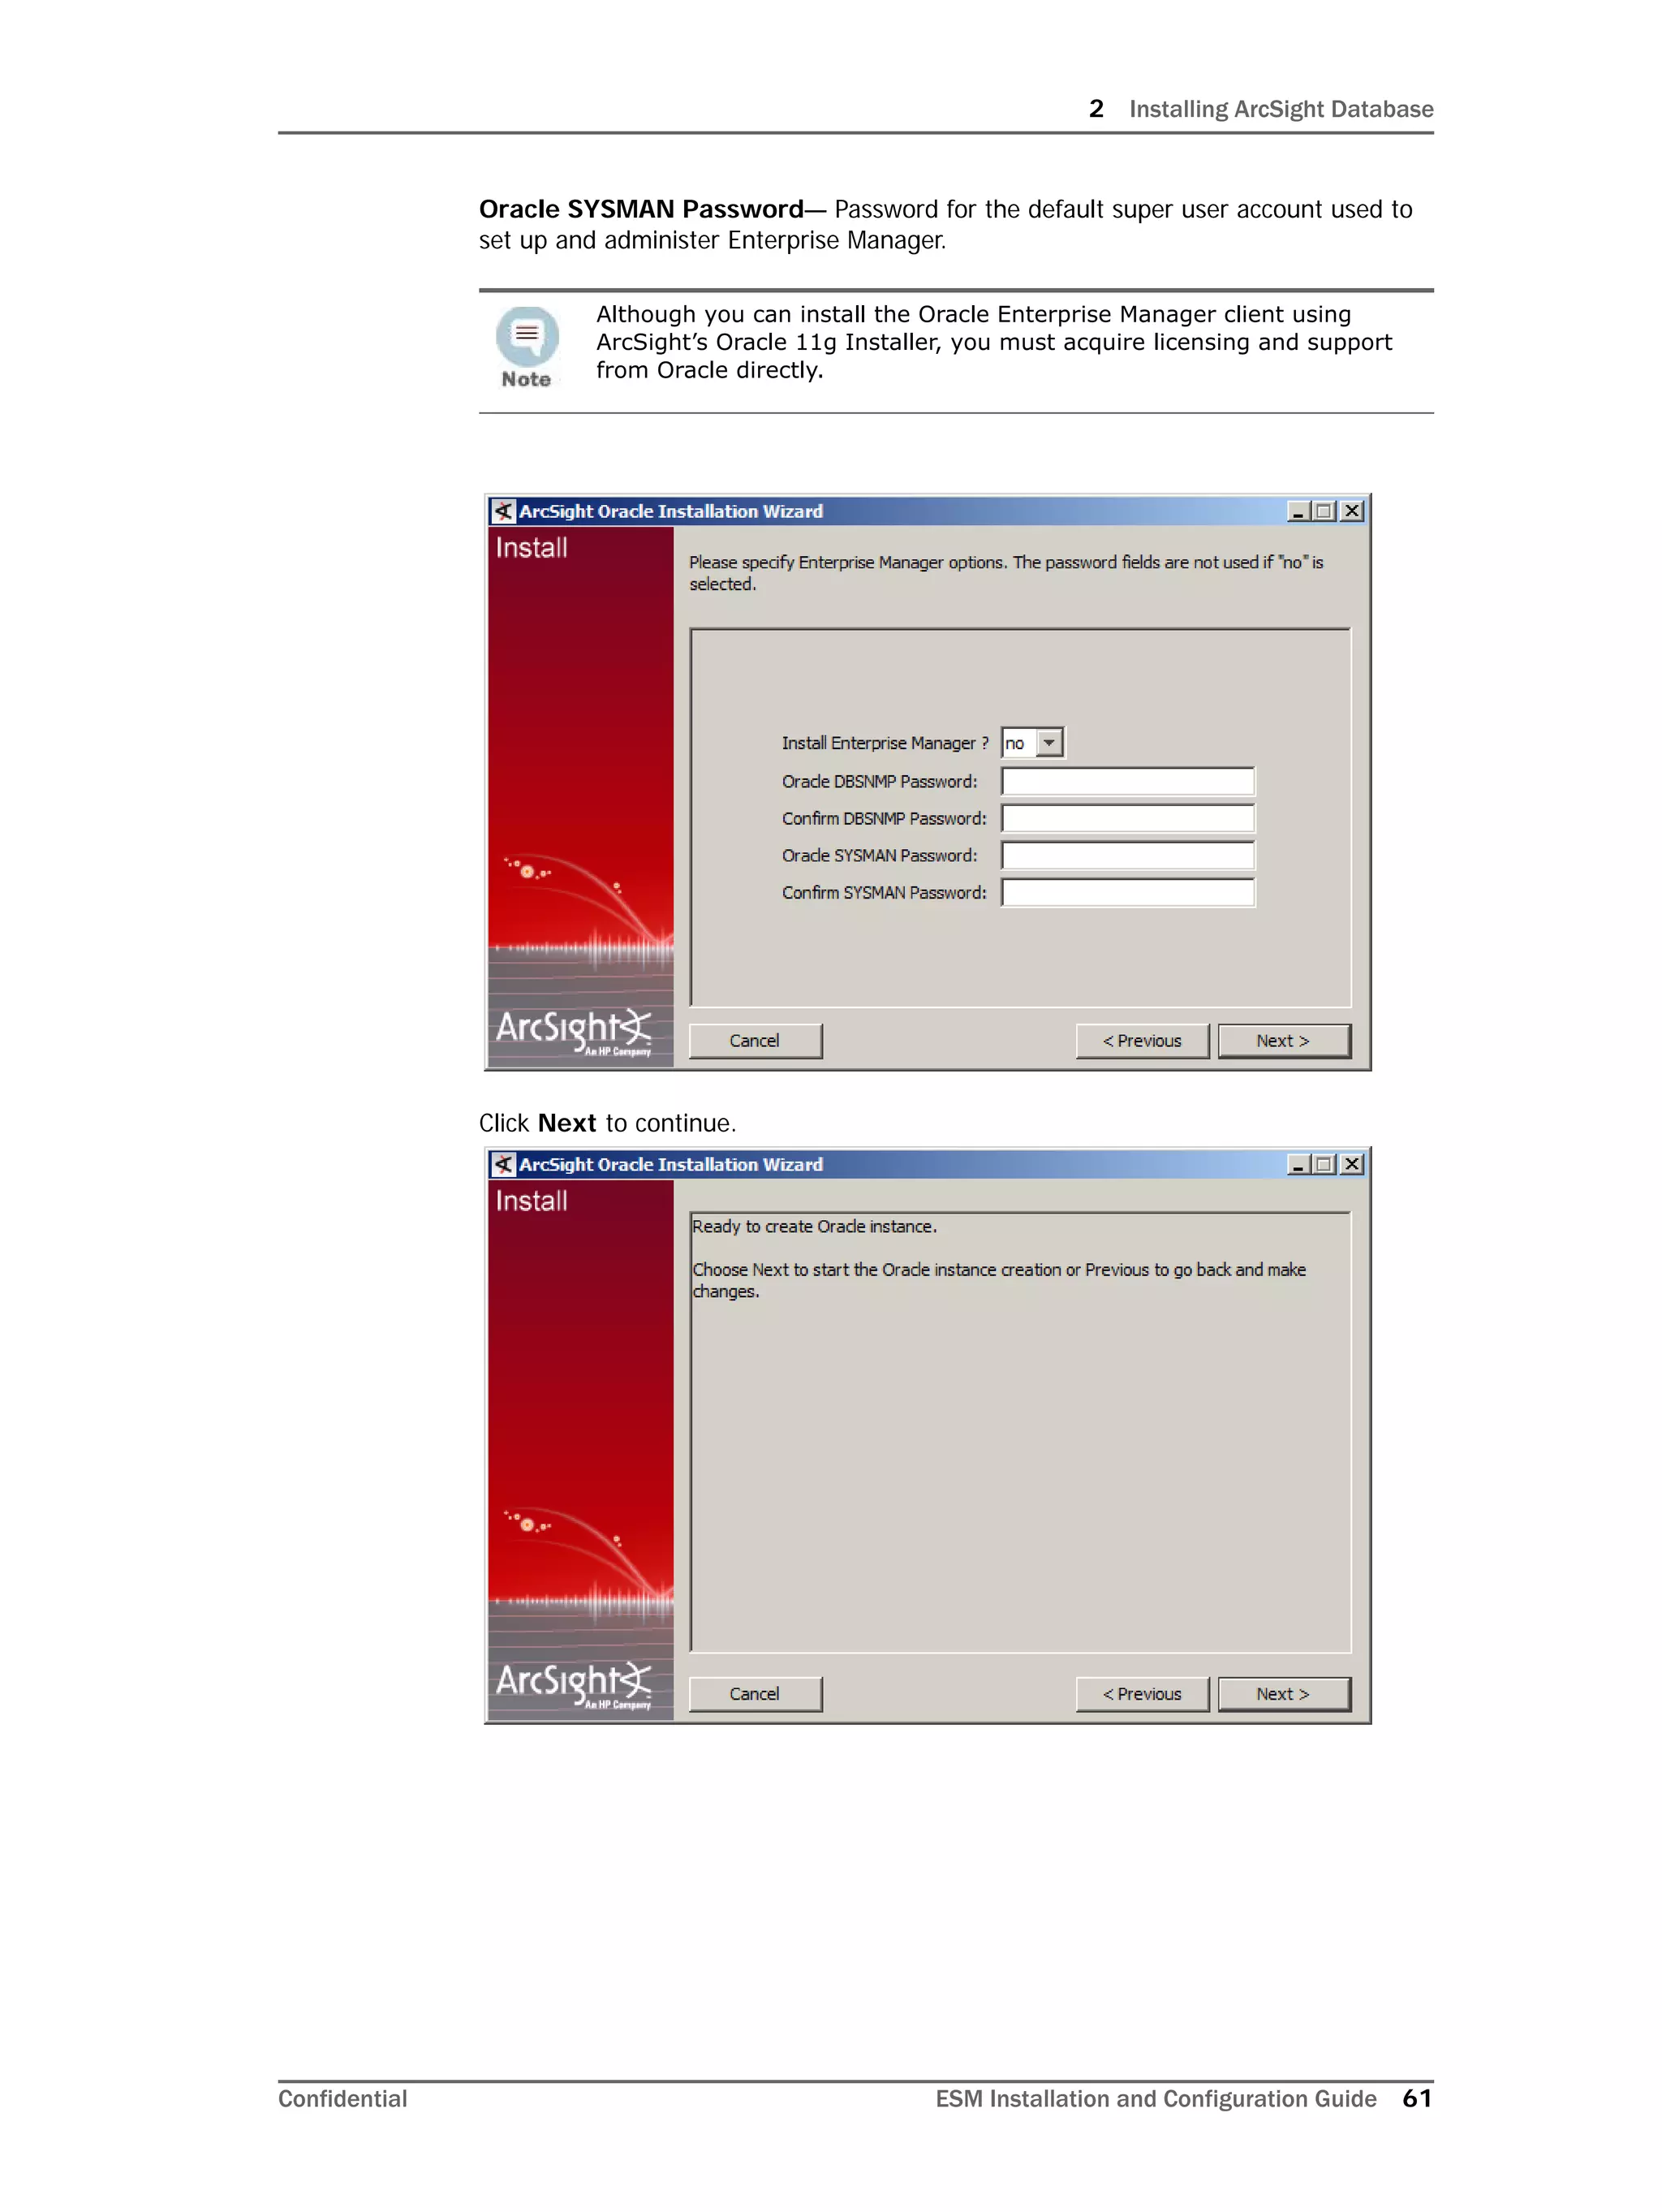
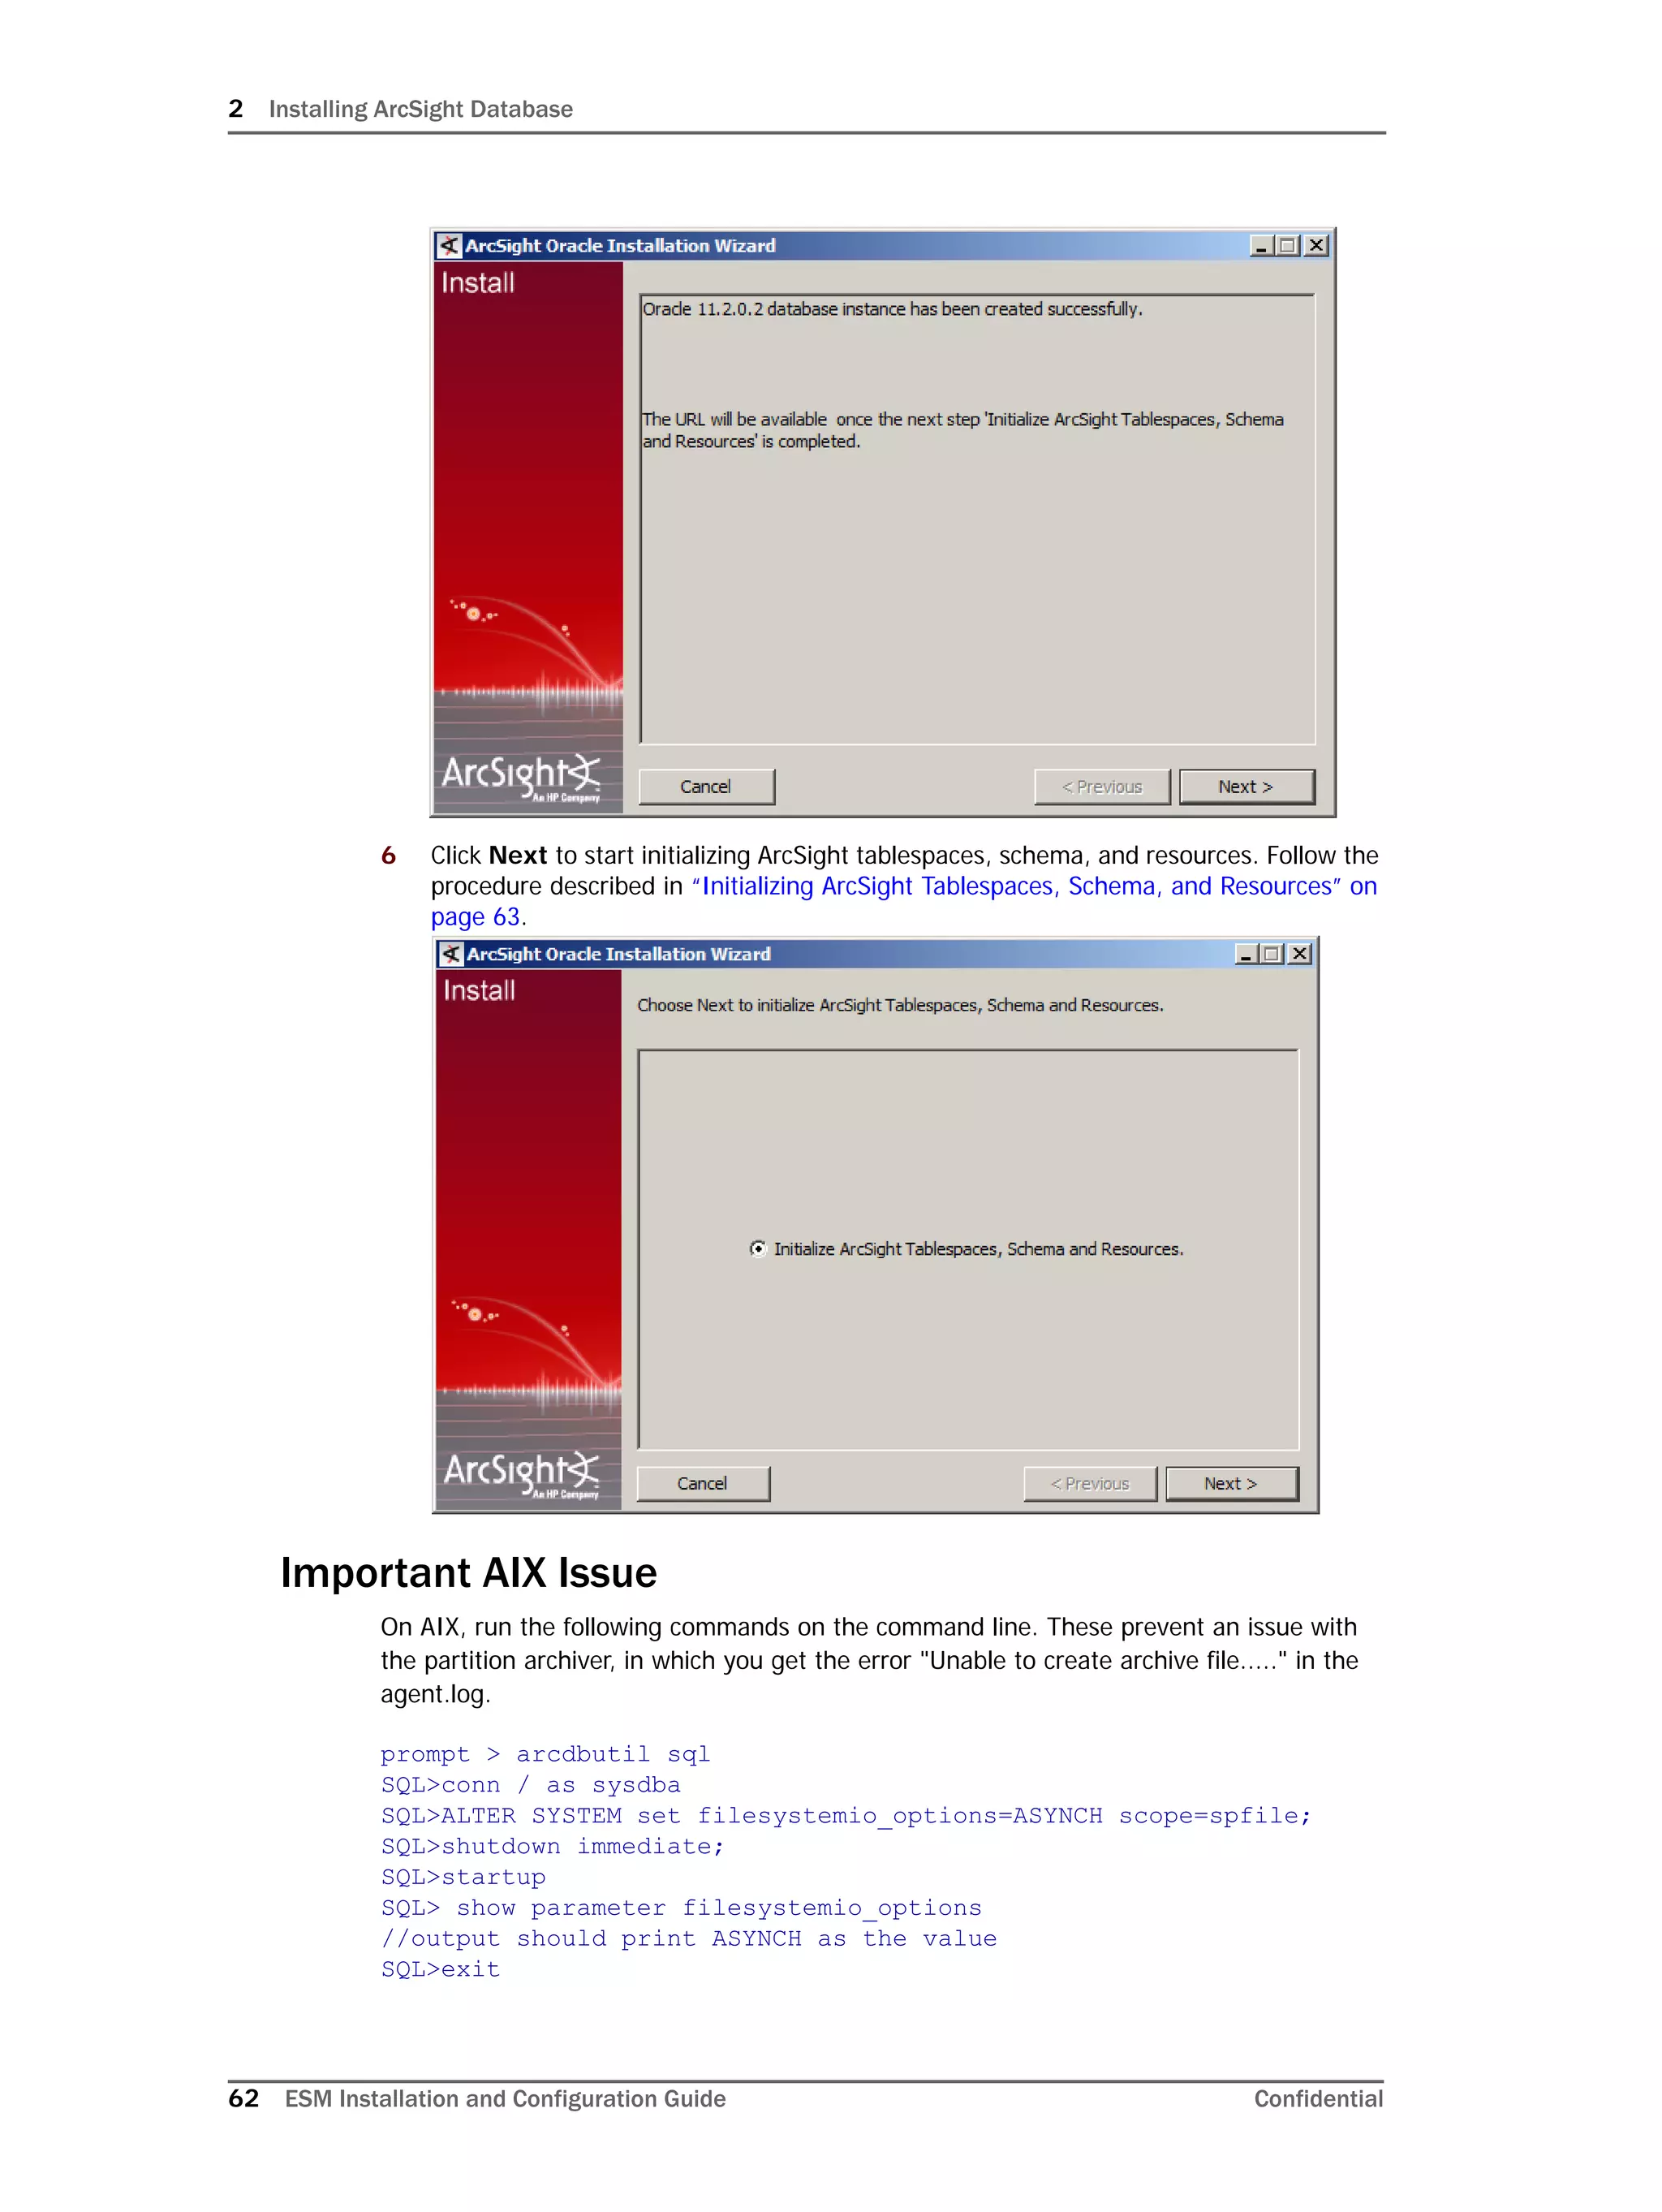
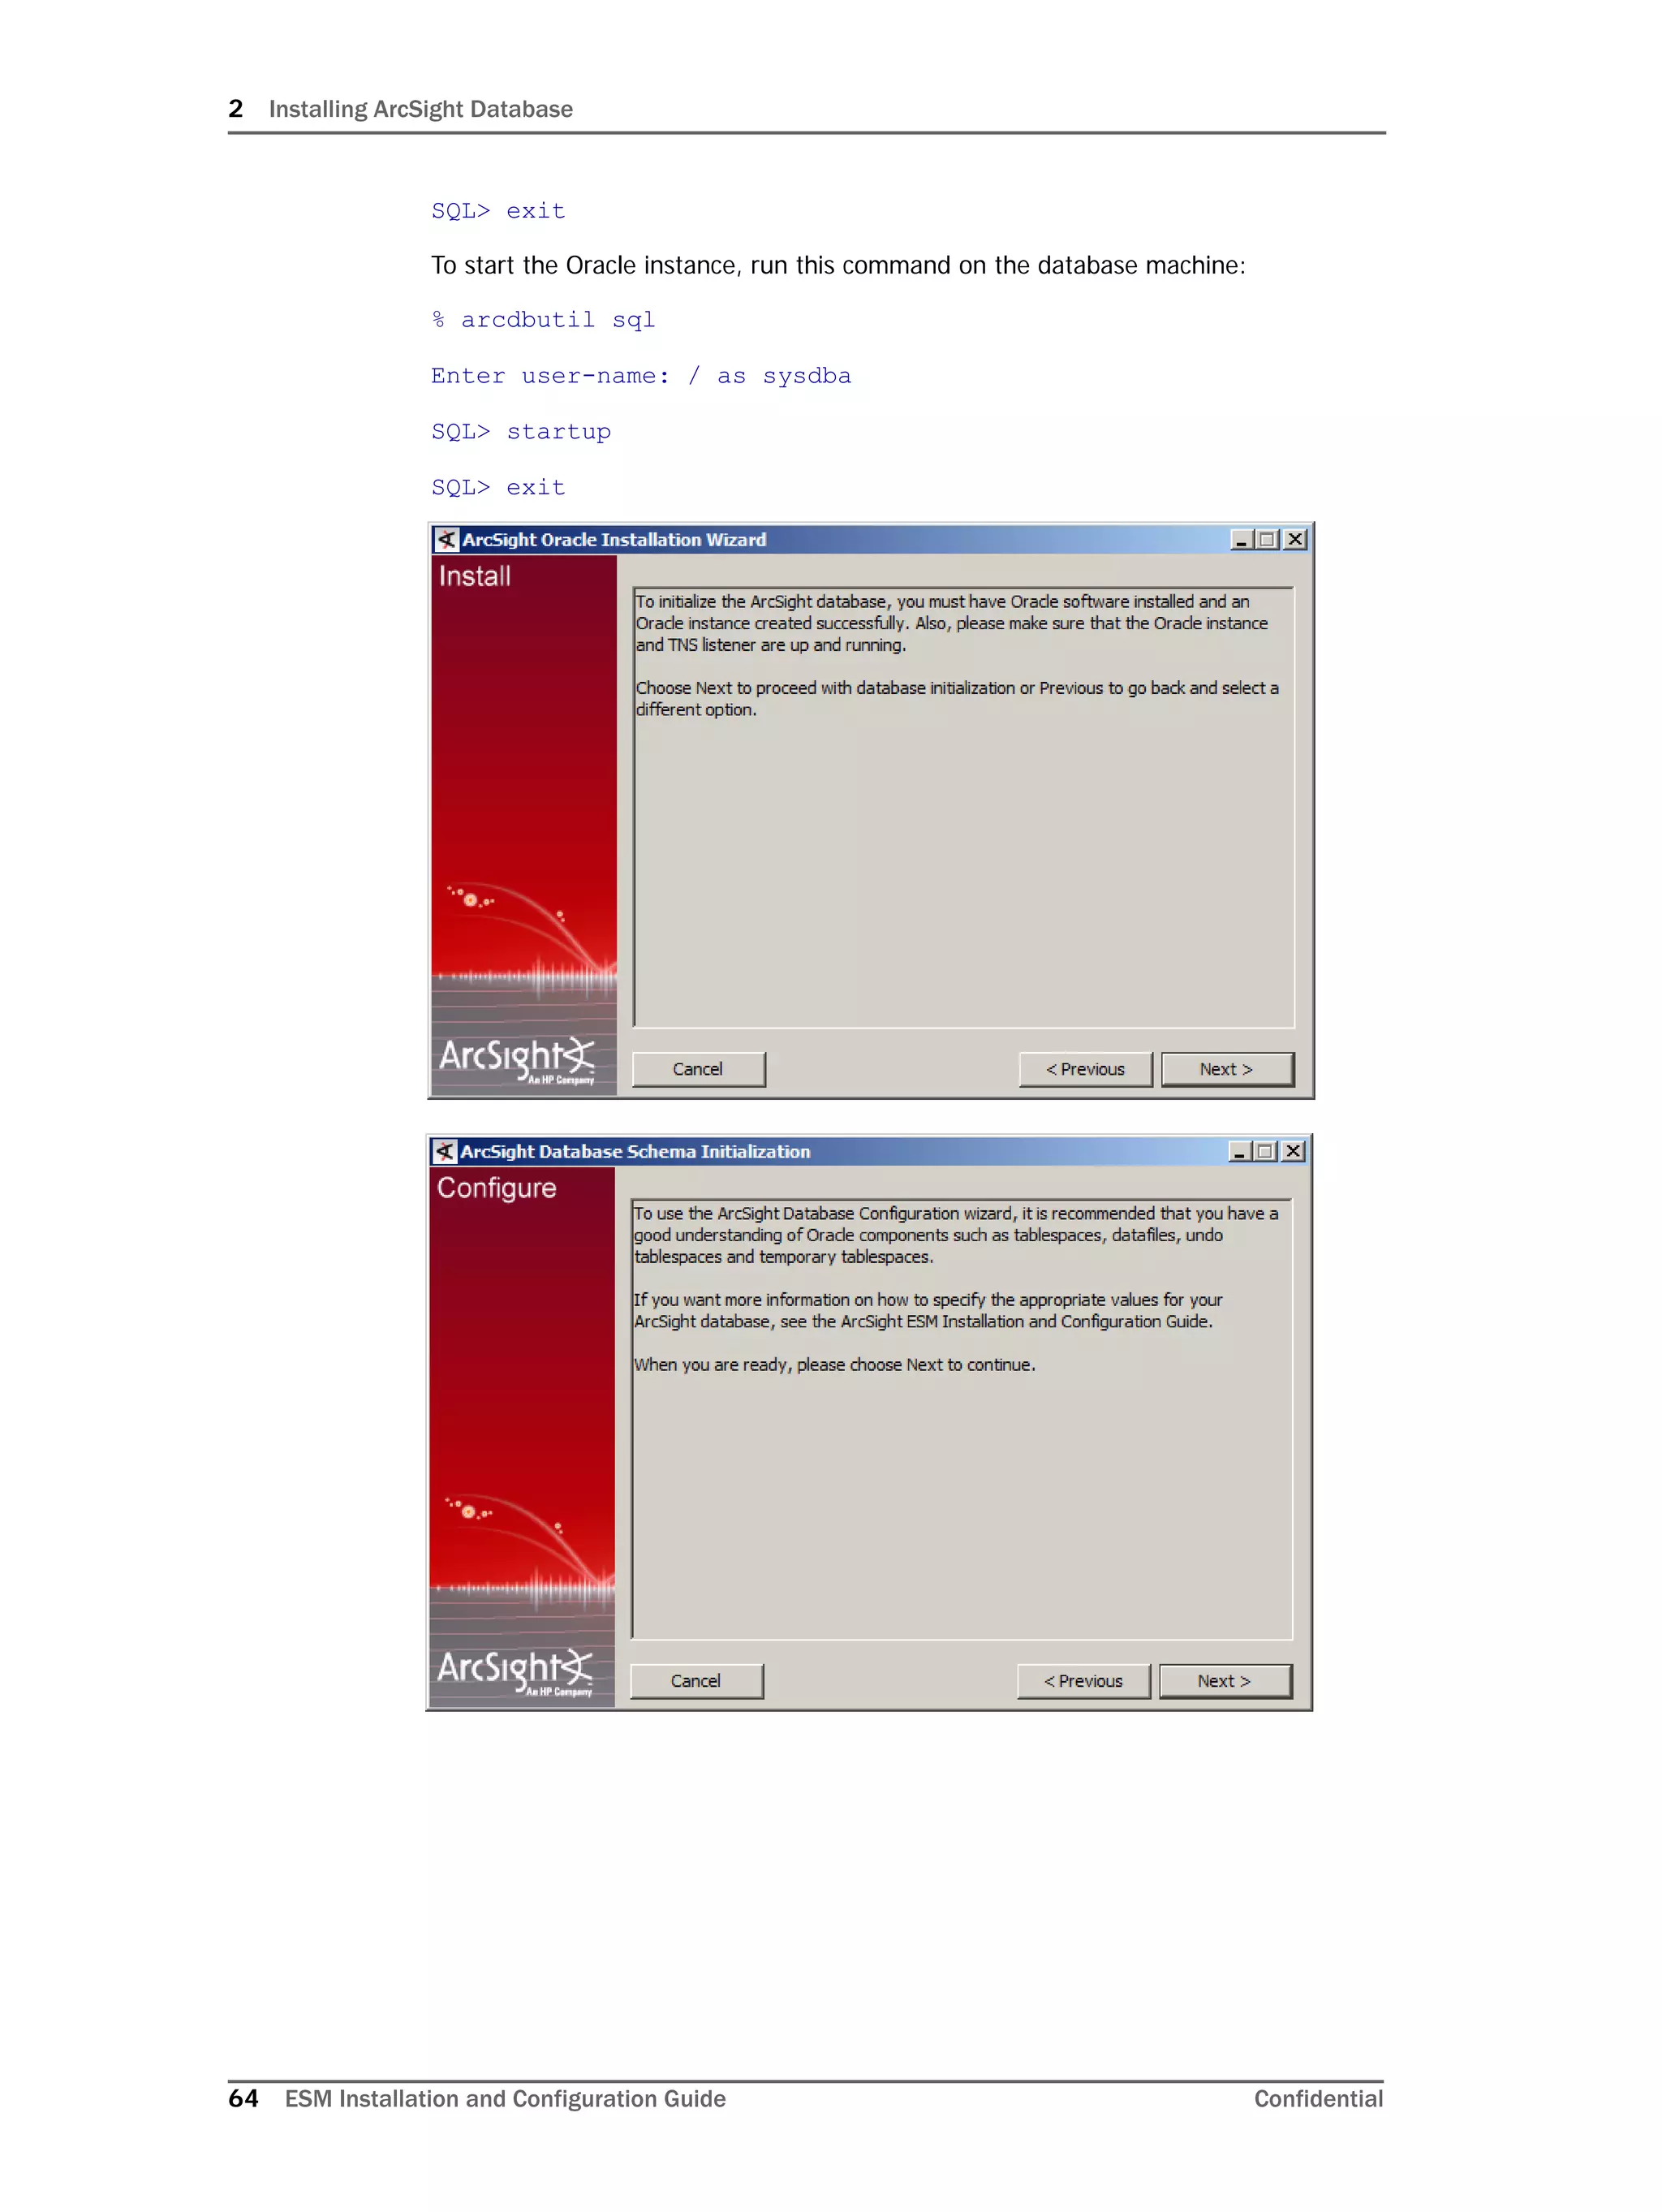
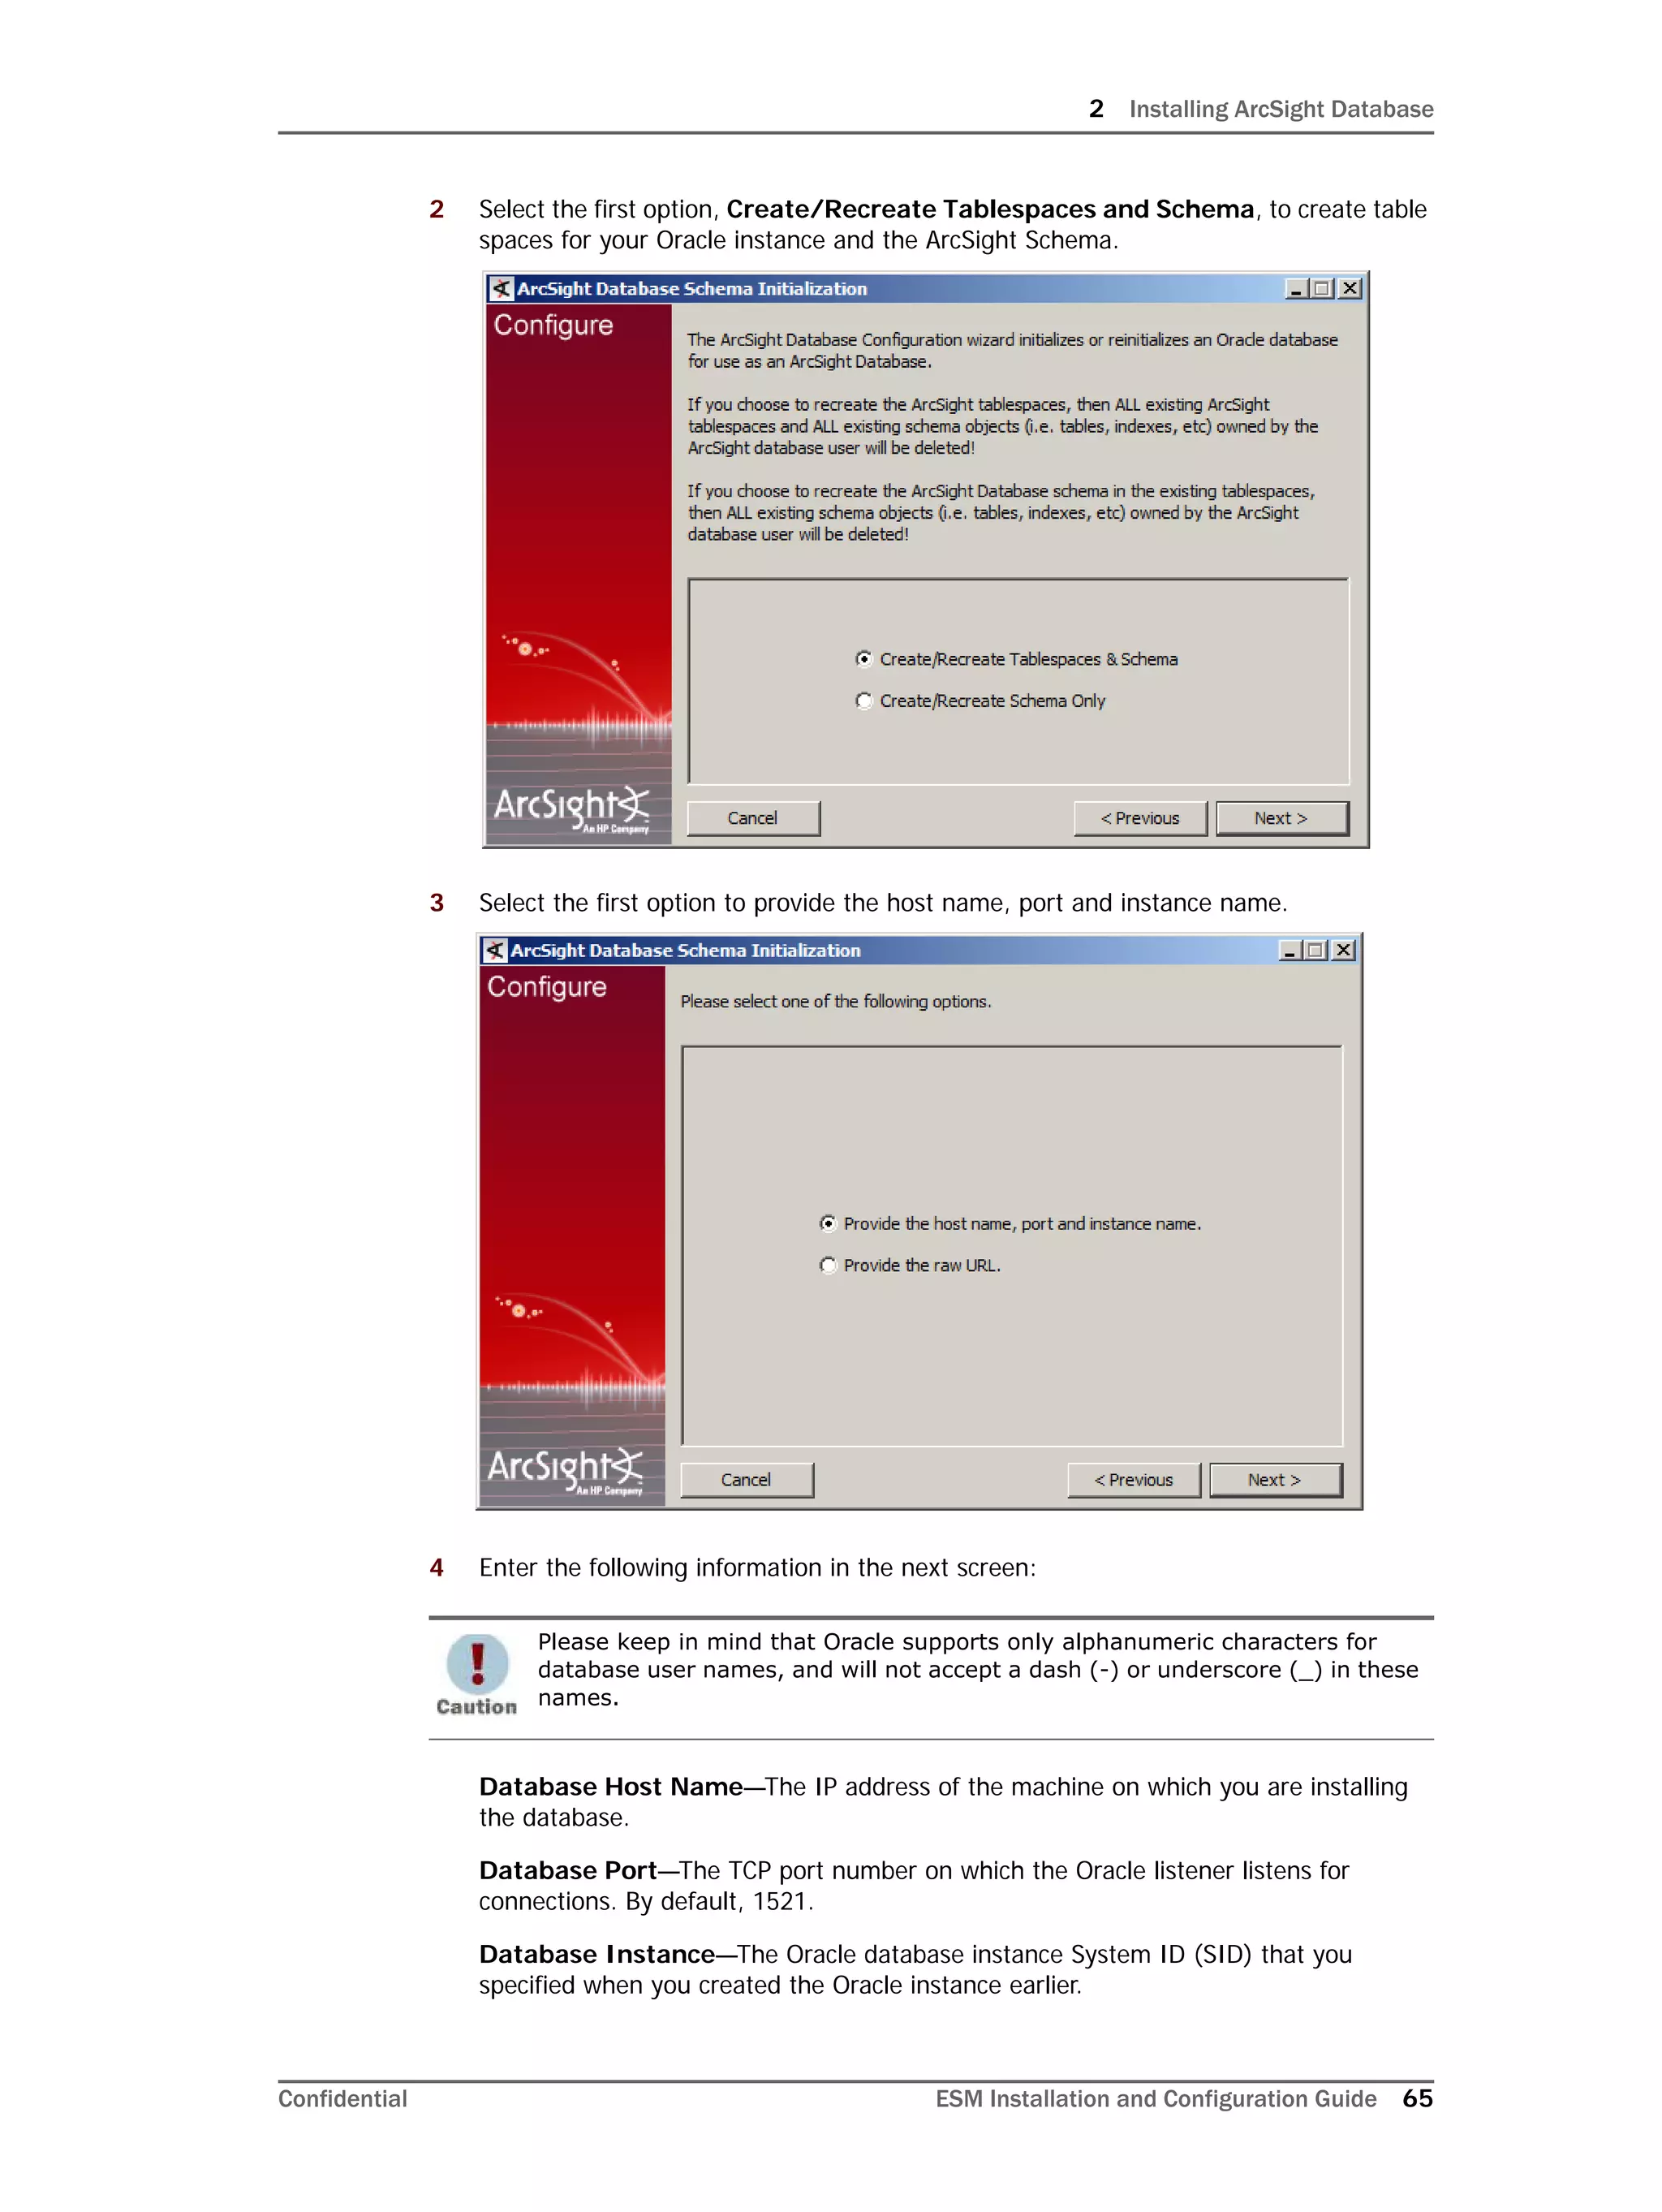
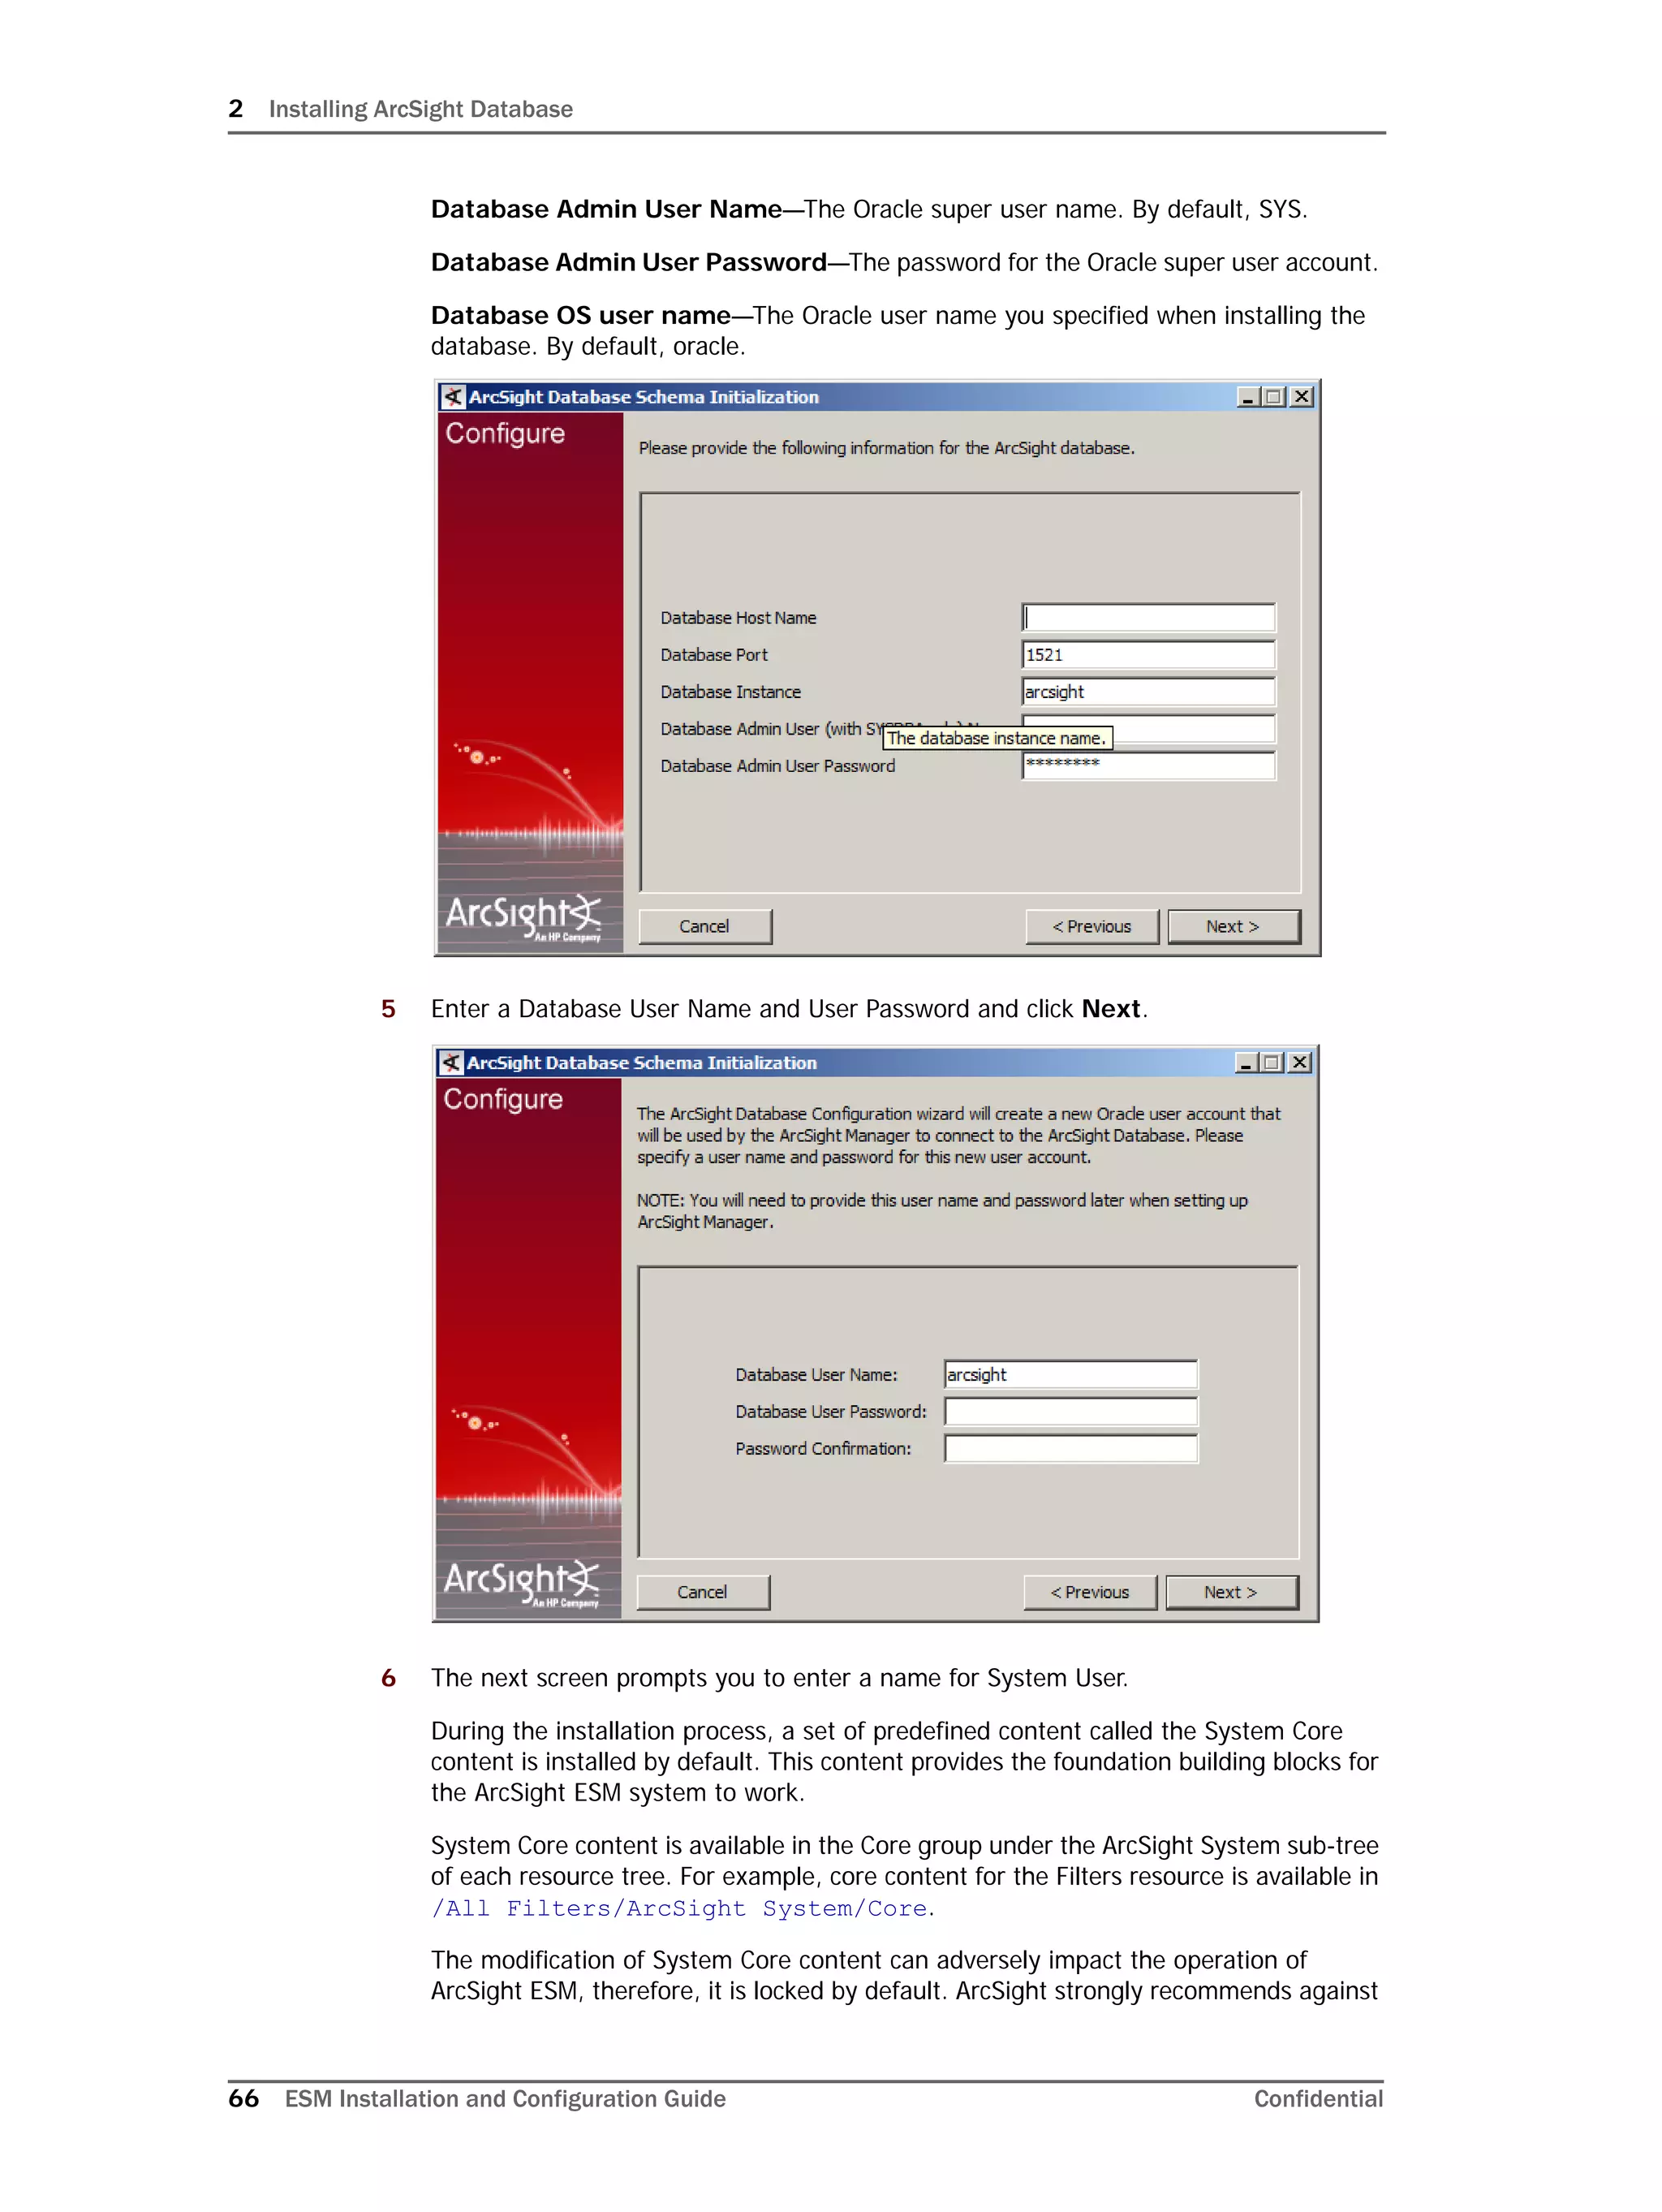
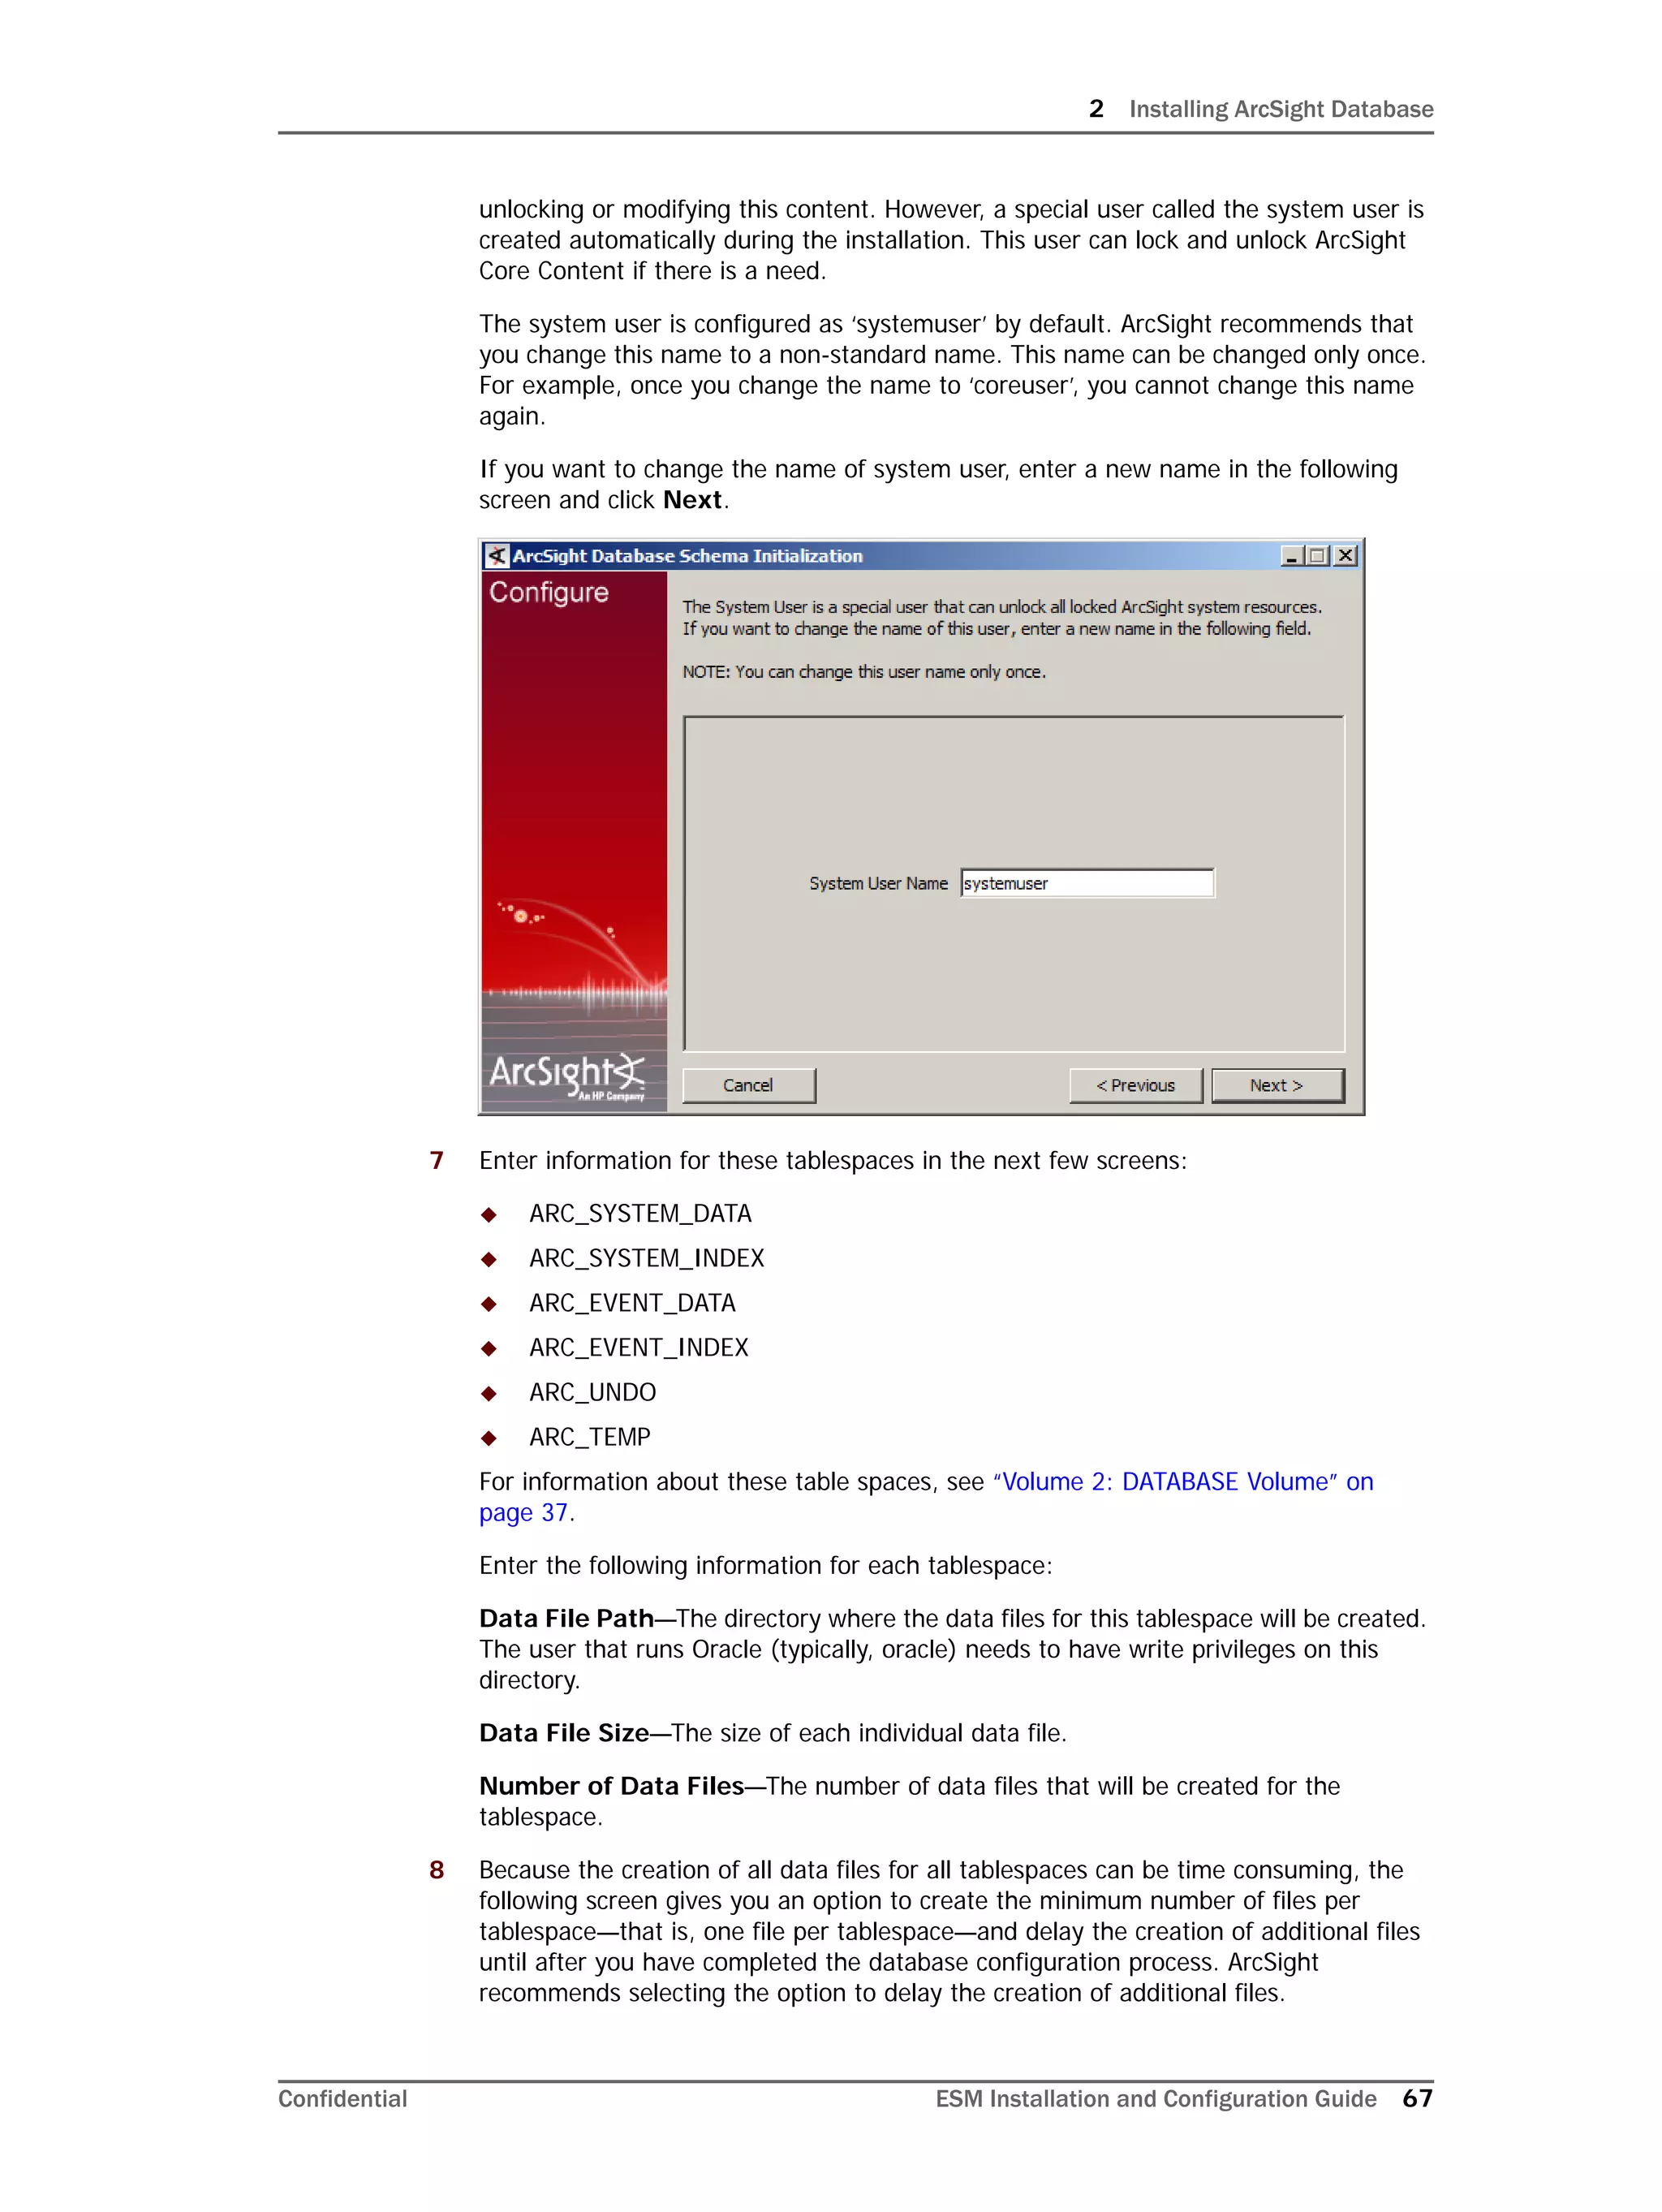
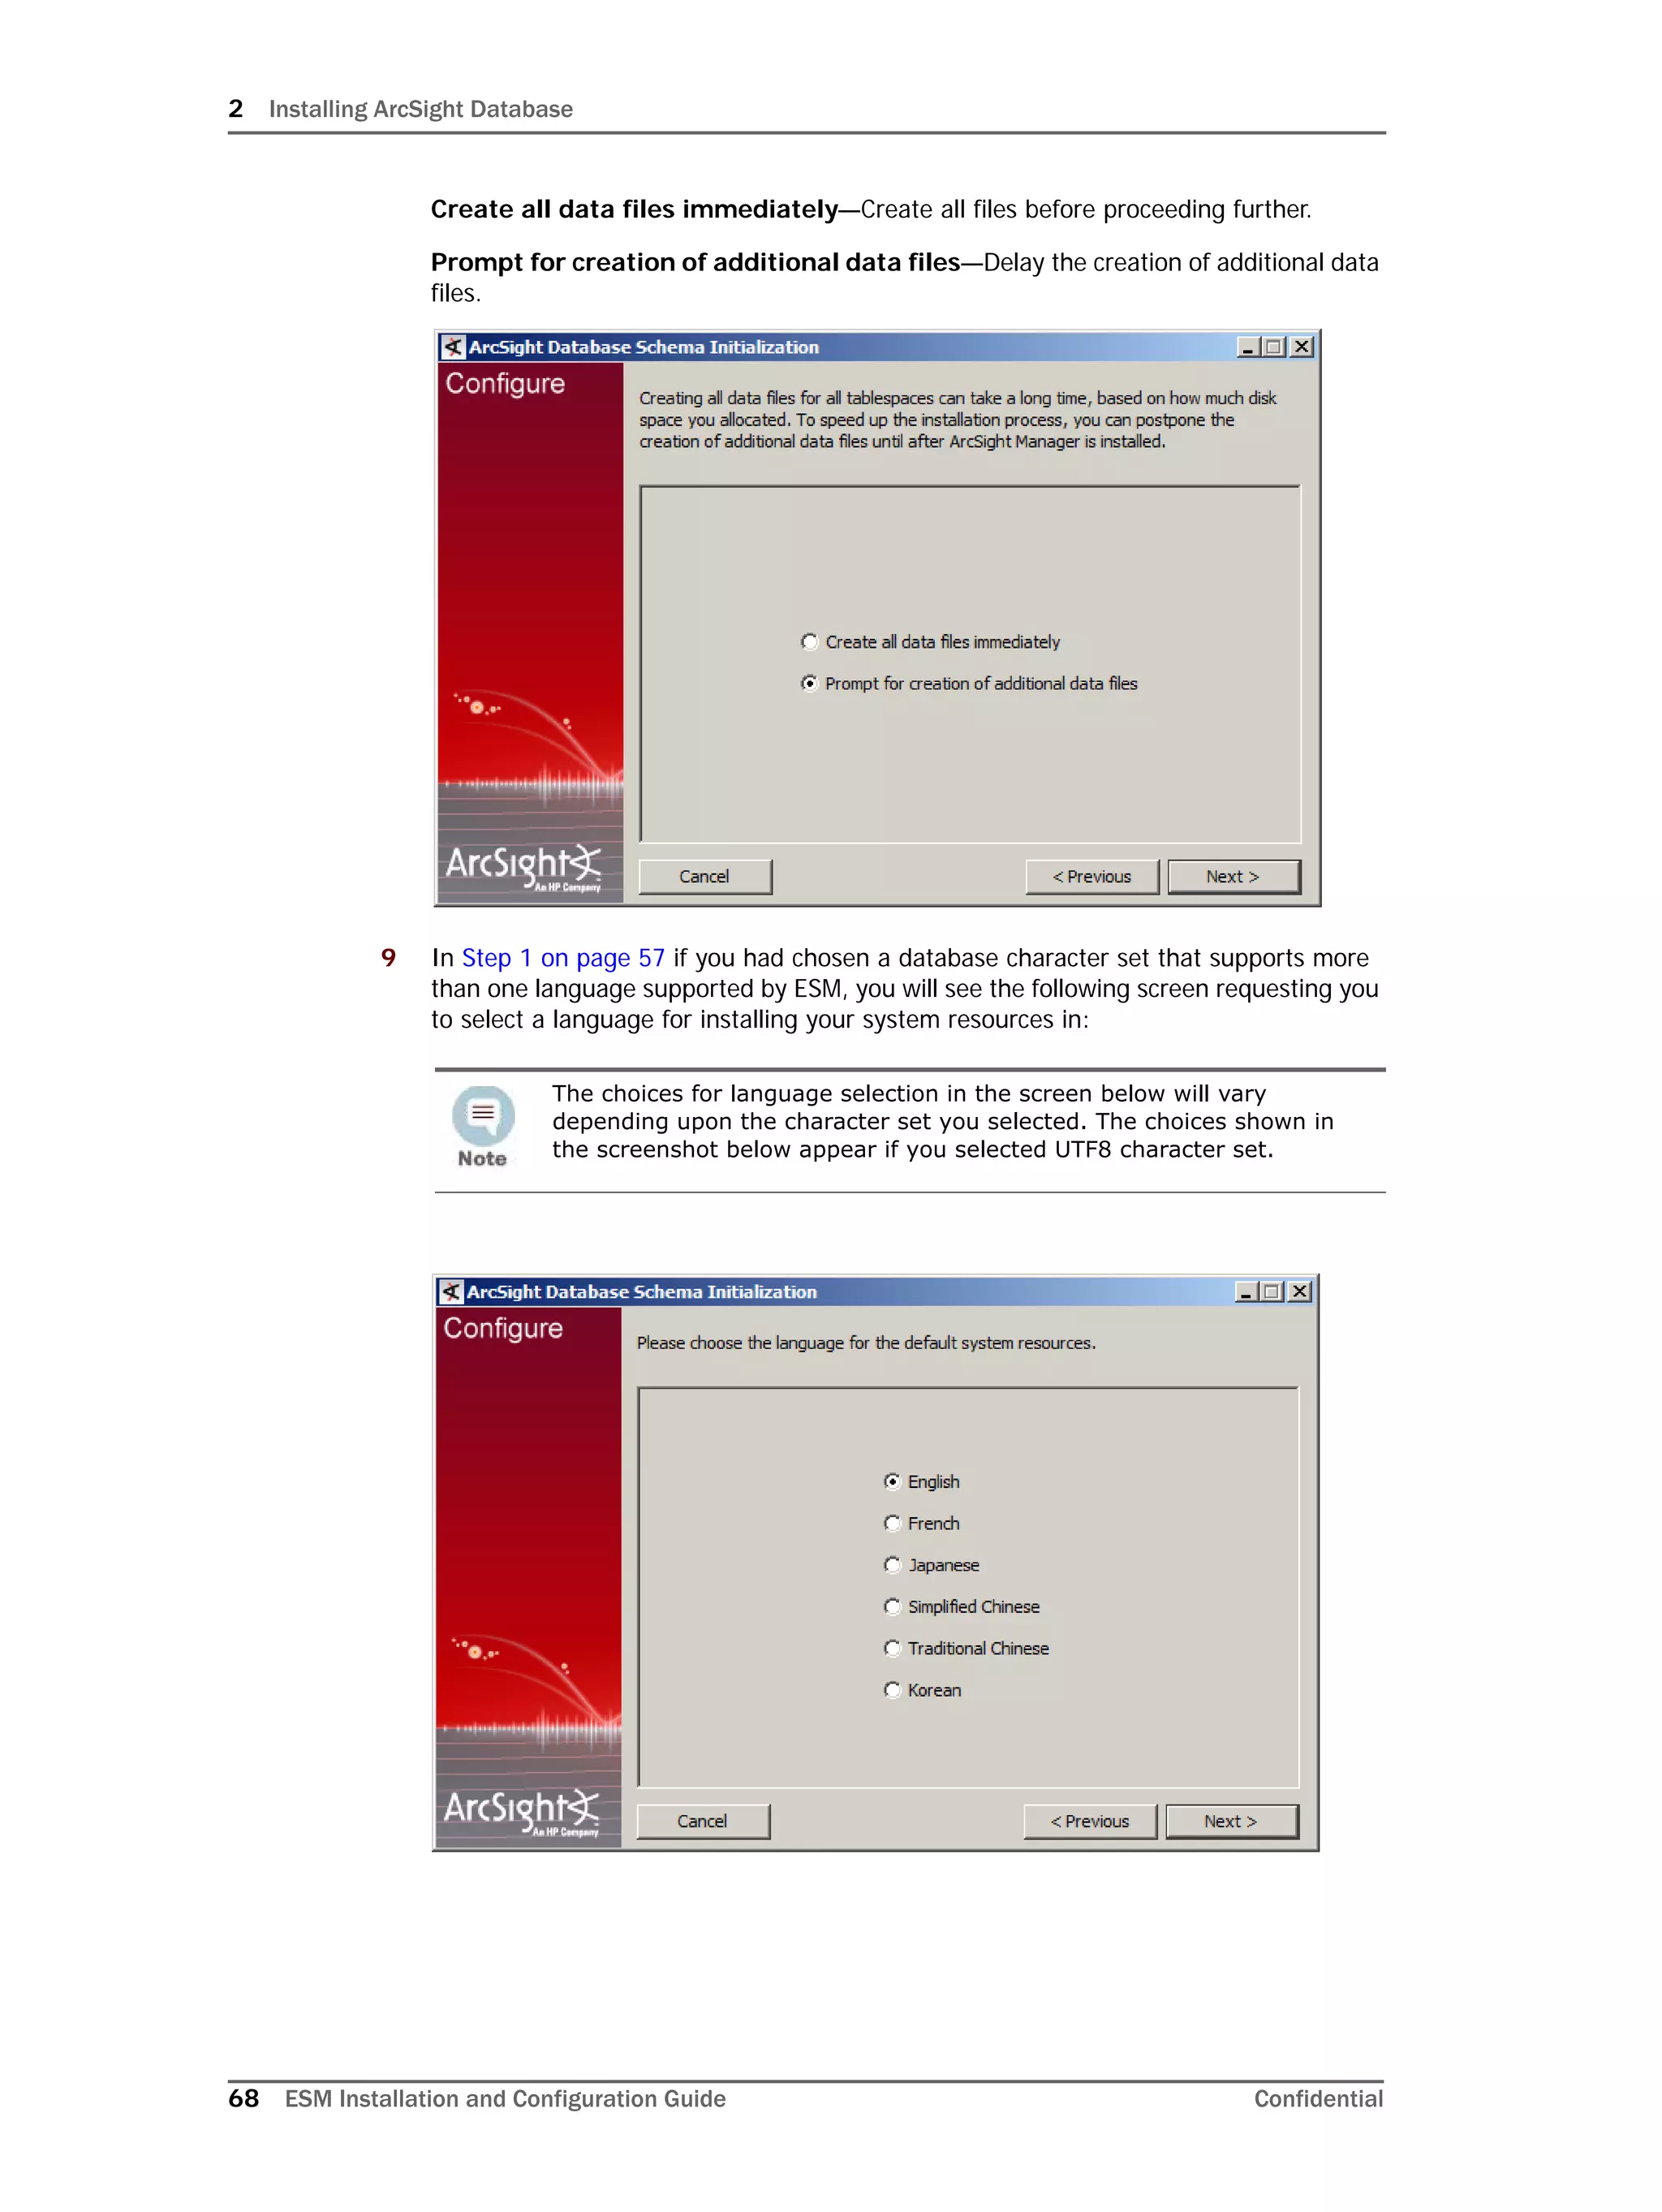
This document provides instructions for installing and configuring the ArcSight Database component. It includes guidelines for sizing and preparing the database platform, installing the Oracle database software, creating a new Oracle instance, and initializing the ArcSight schema, tablespaces and resources. The document also covers restarting or reconfiguring the database, and configuring partition management functionality.


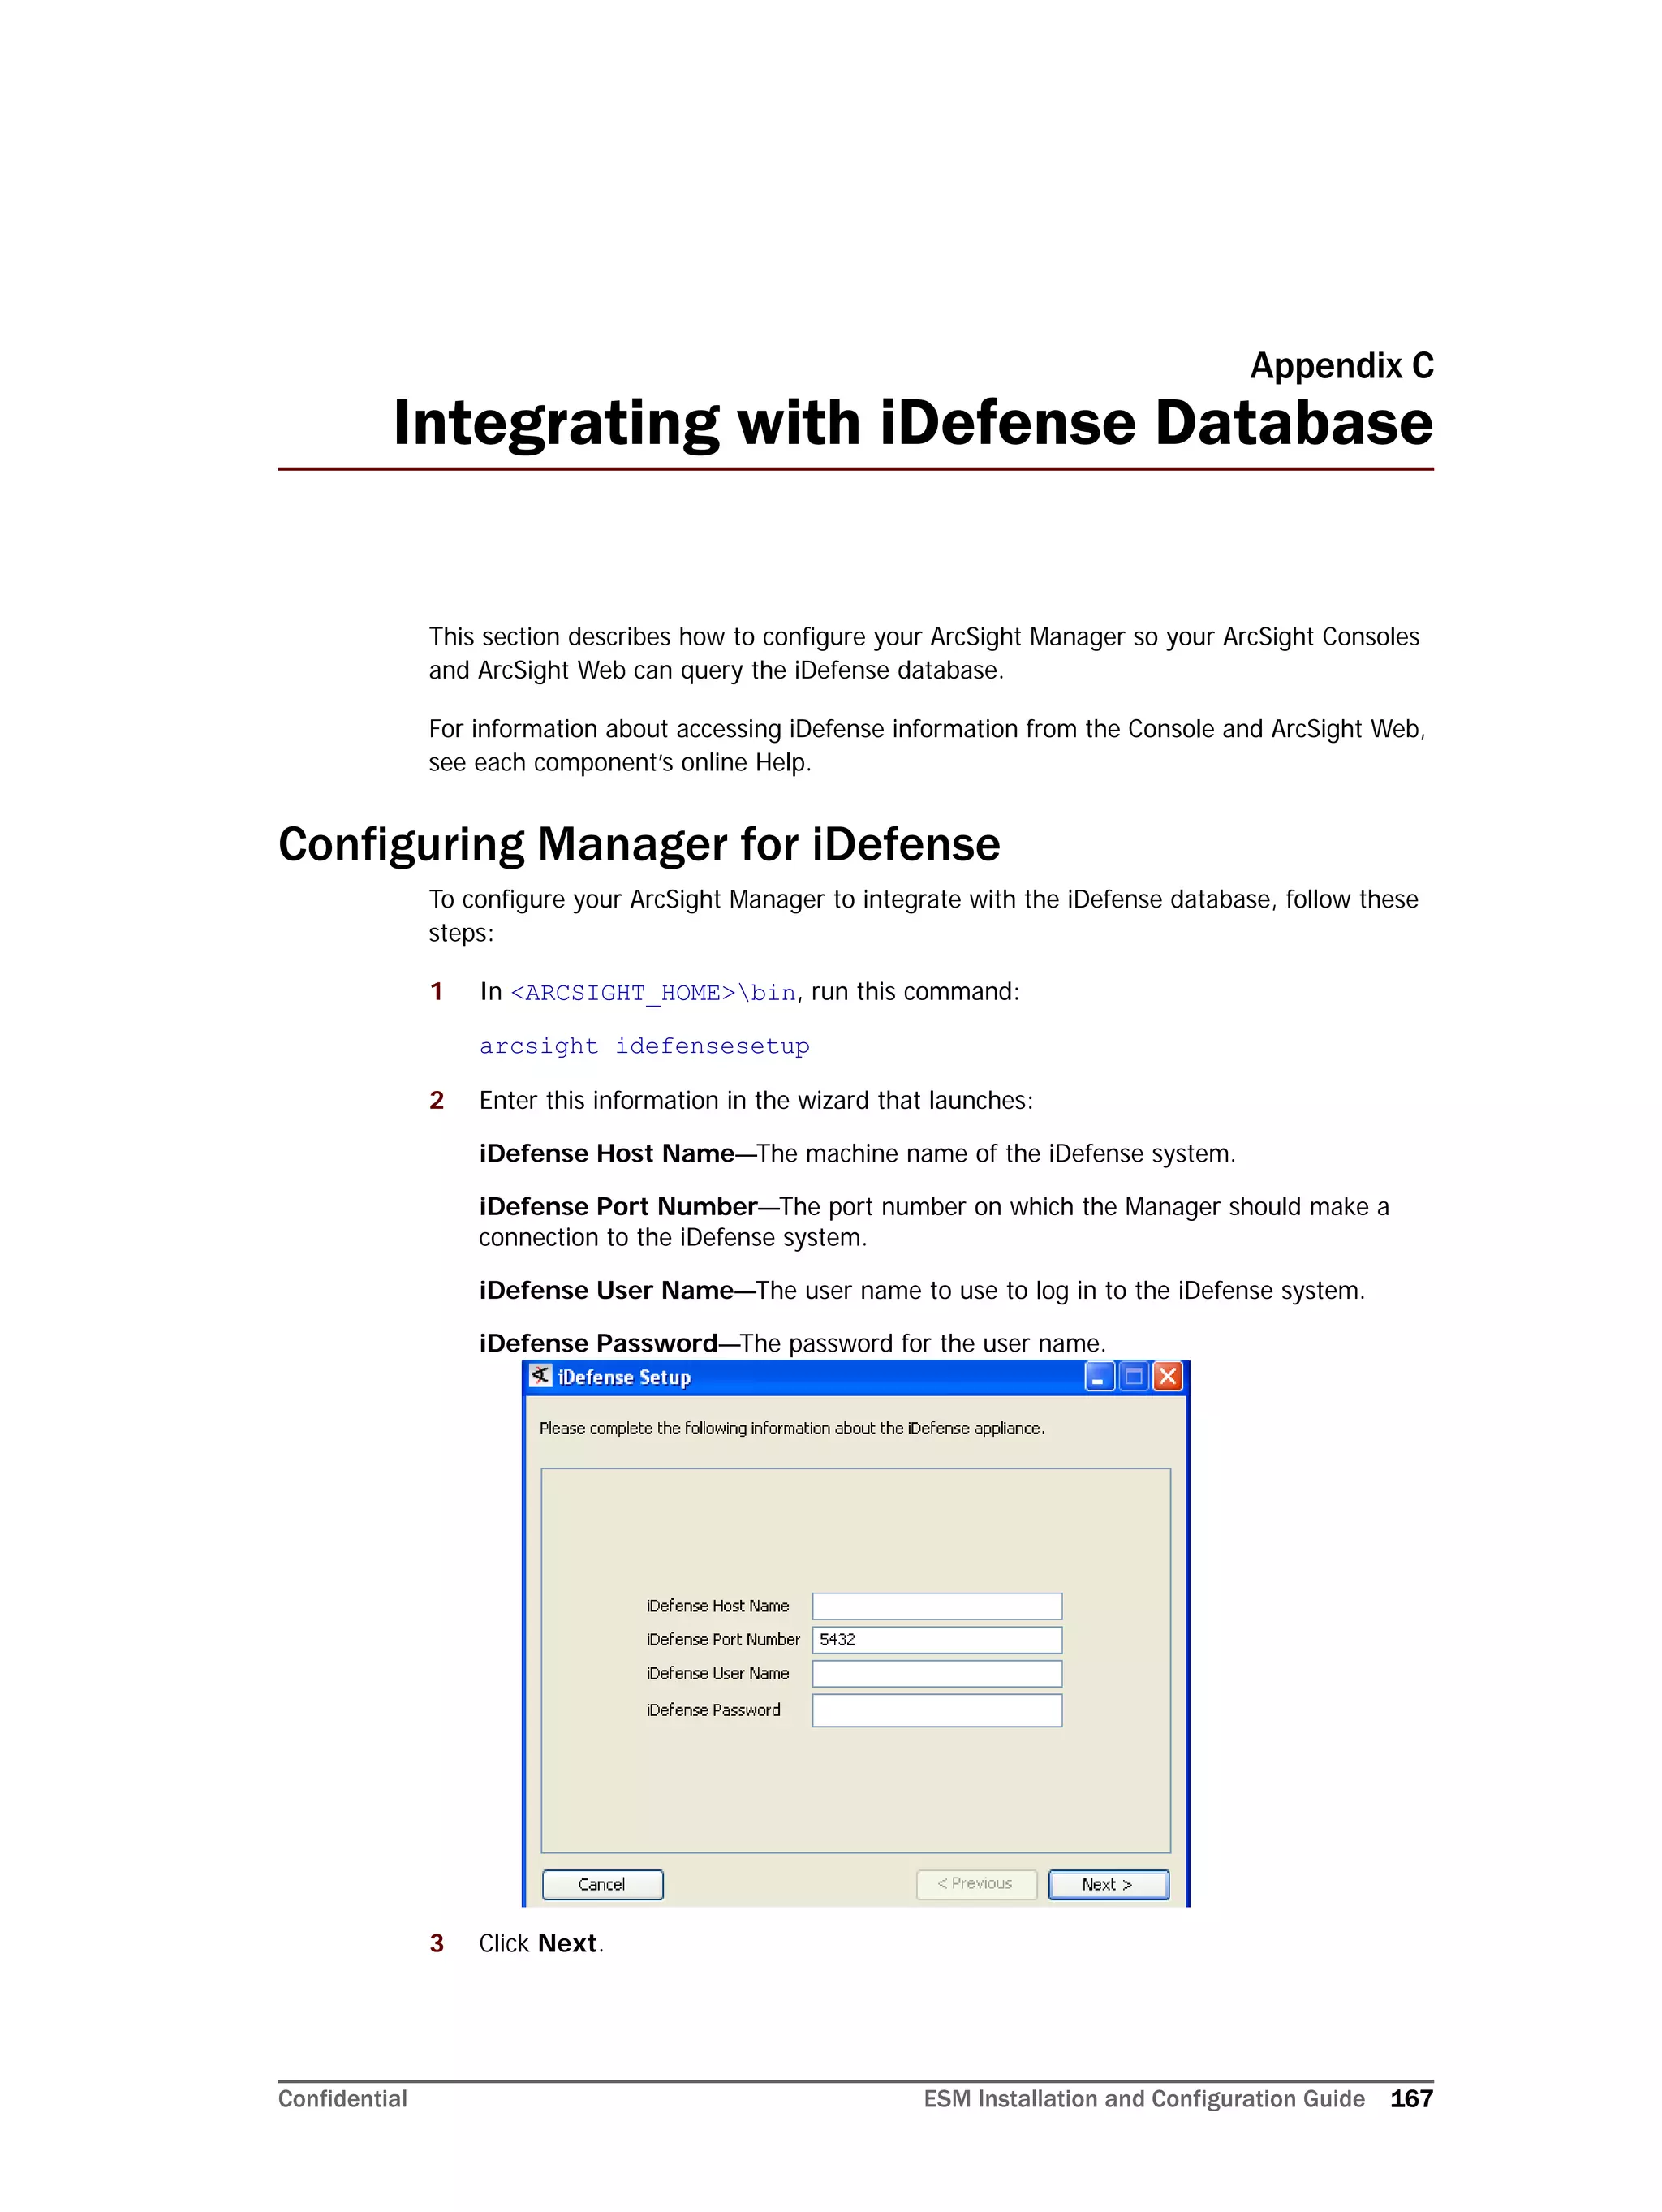
![2 Installing ArcSight Database
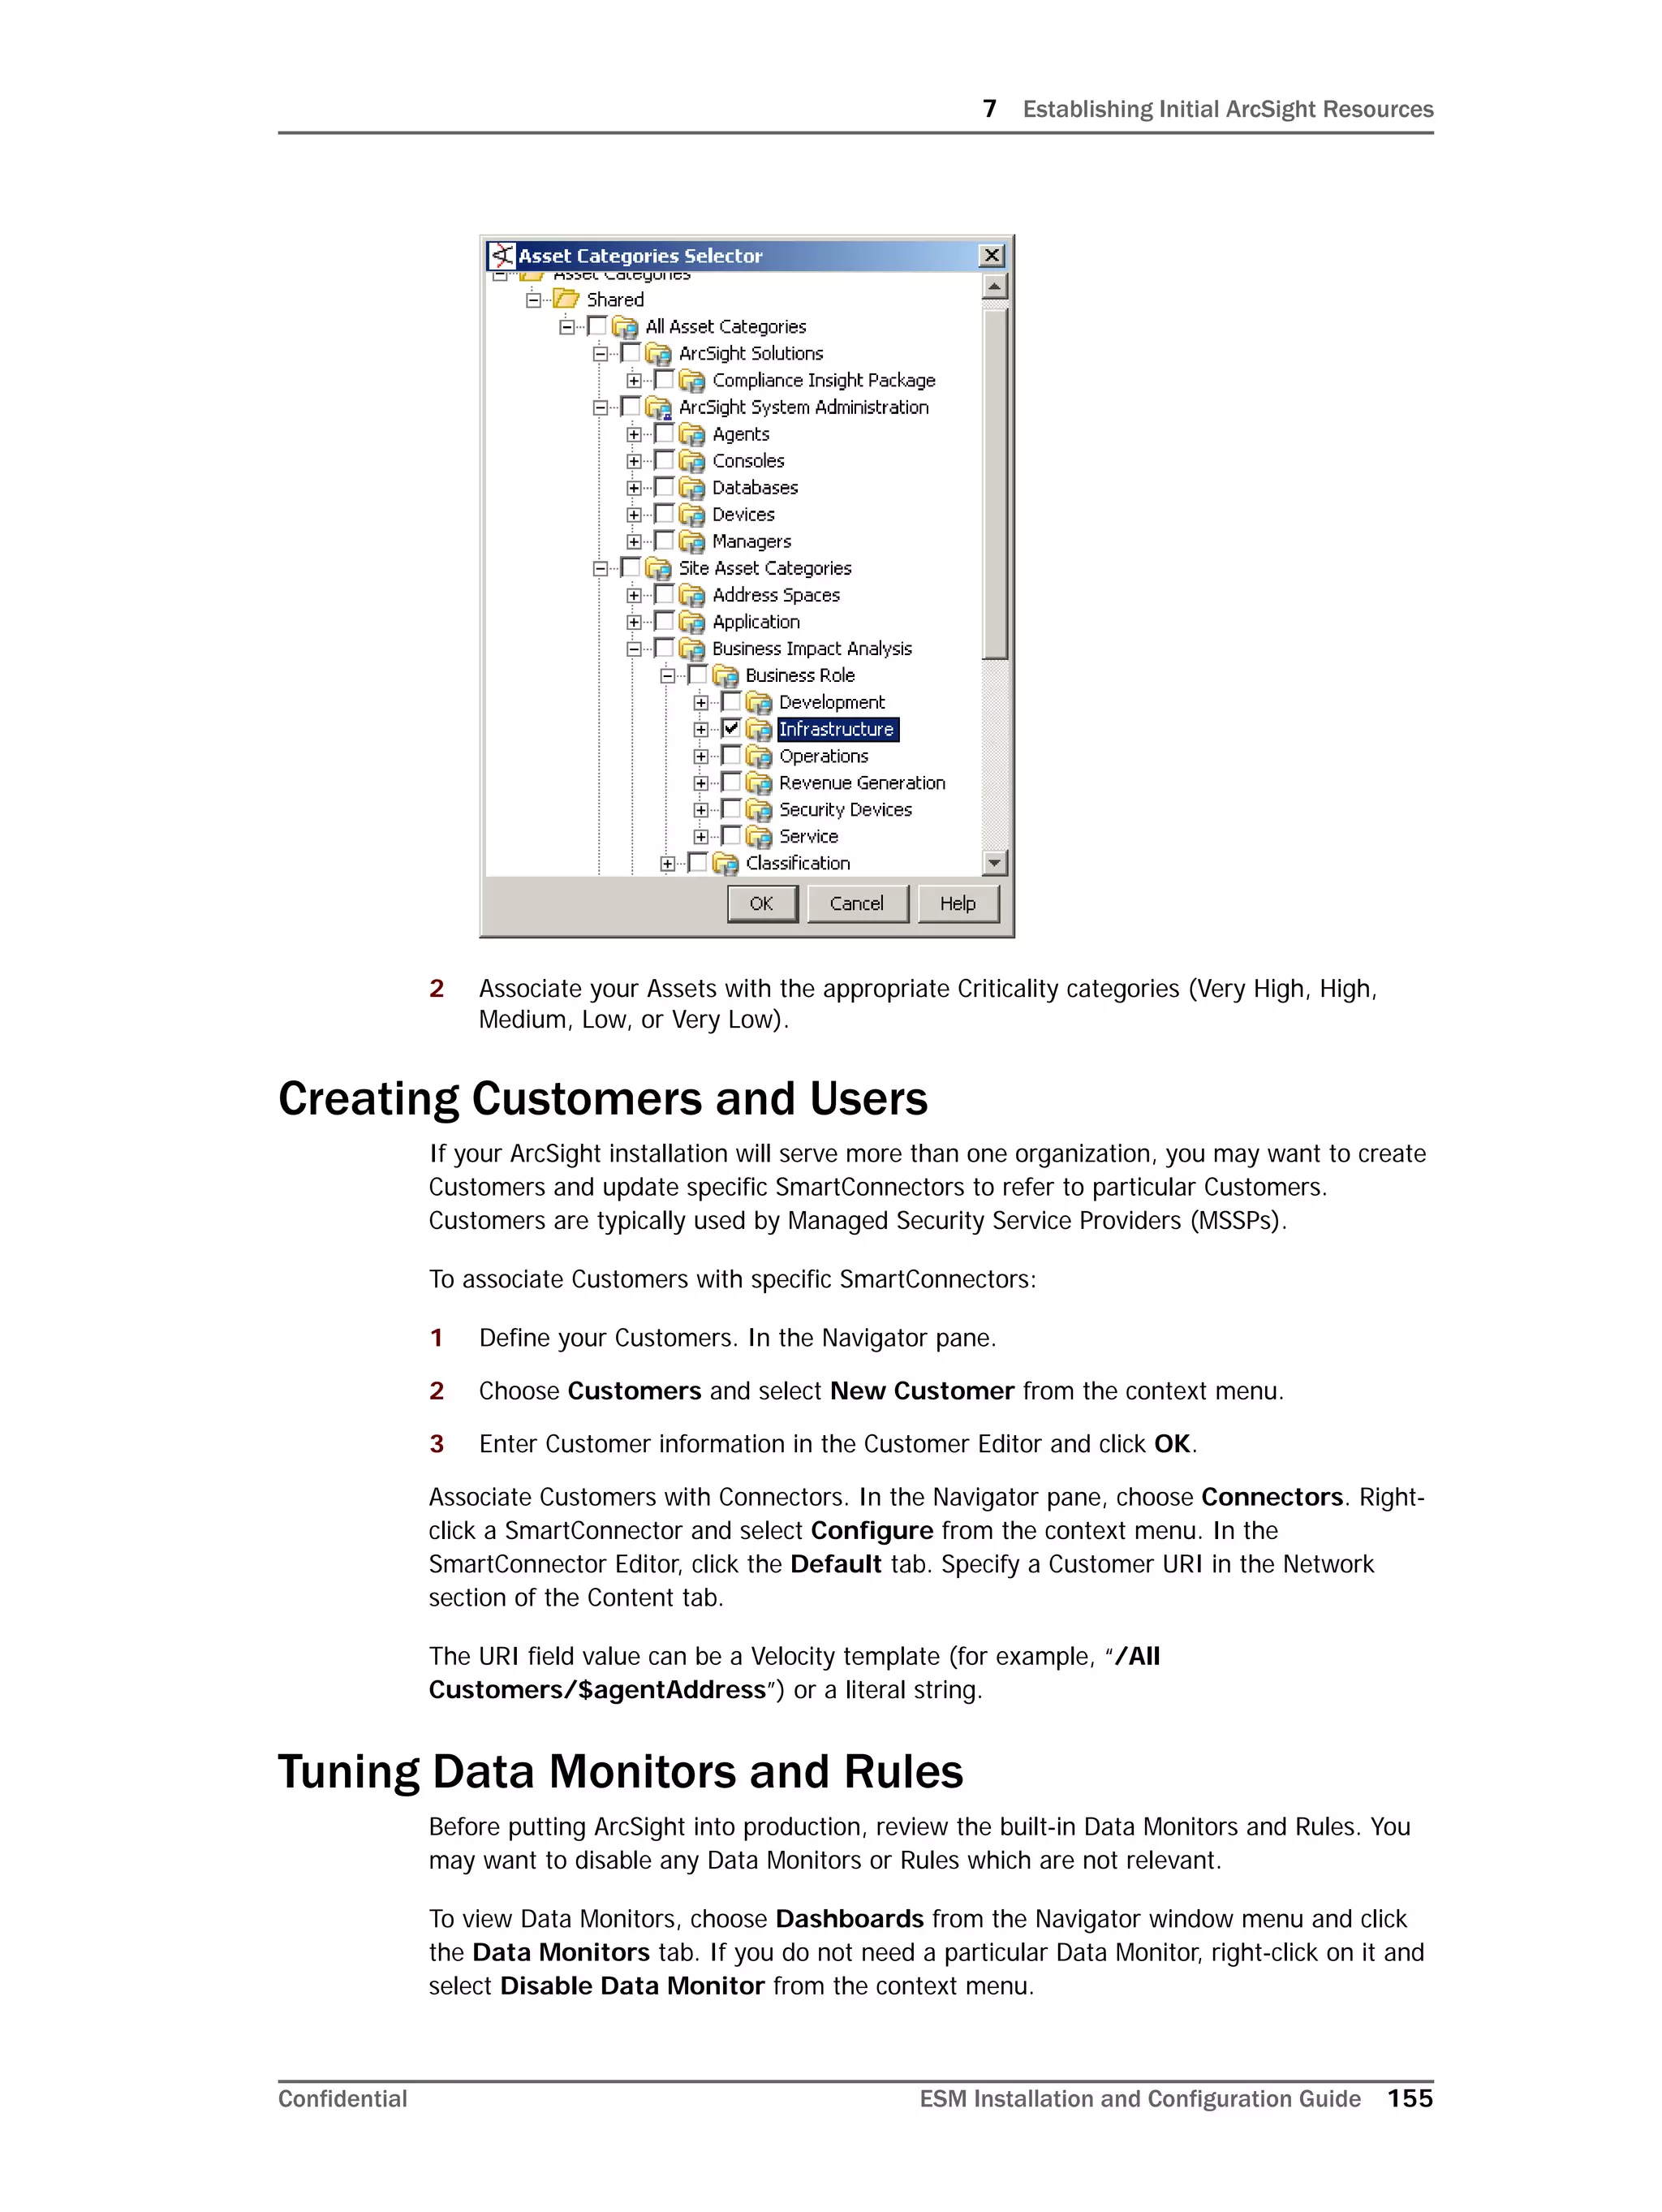
Confidential ESM Installation and Configuration Guide 75
Restarting or Reconfiguring ArcSight Database
If you exit the ArcSight Database Configuration Wizard at any step or need to re-initialize
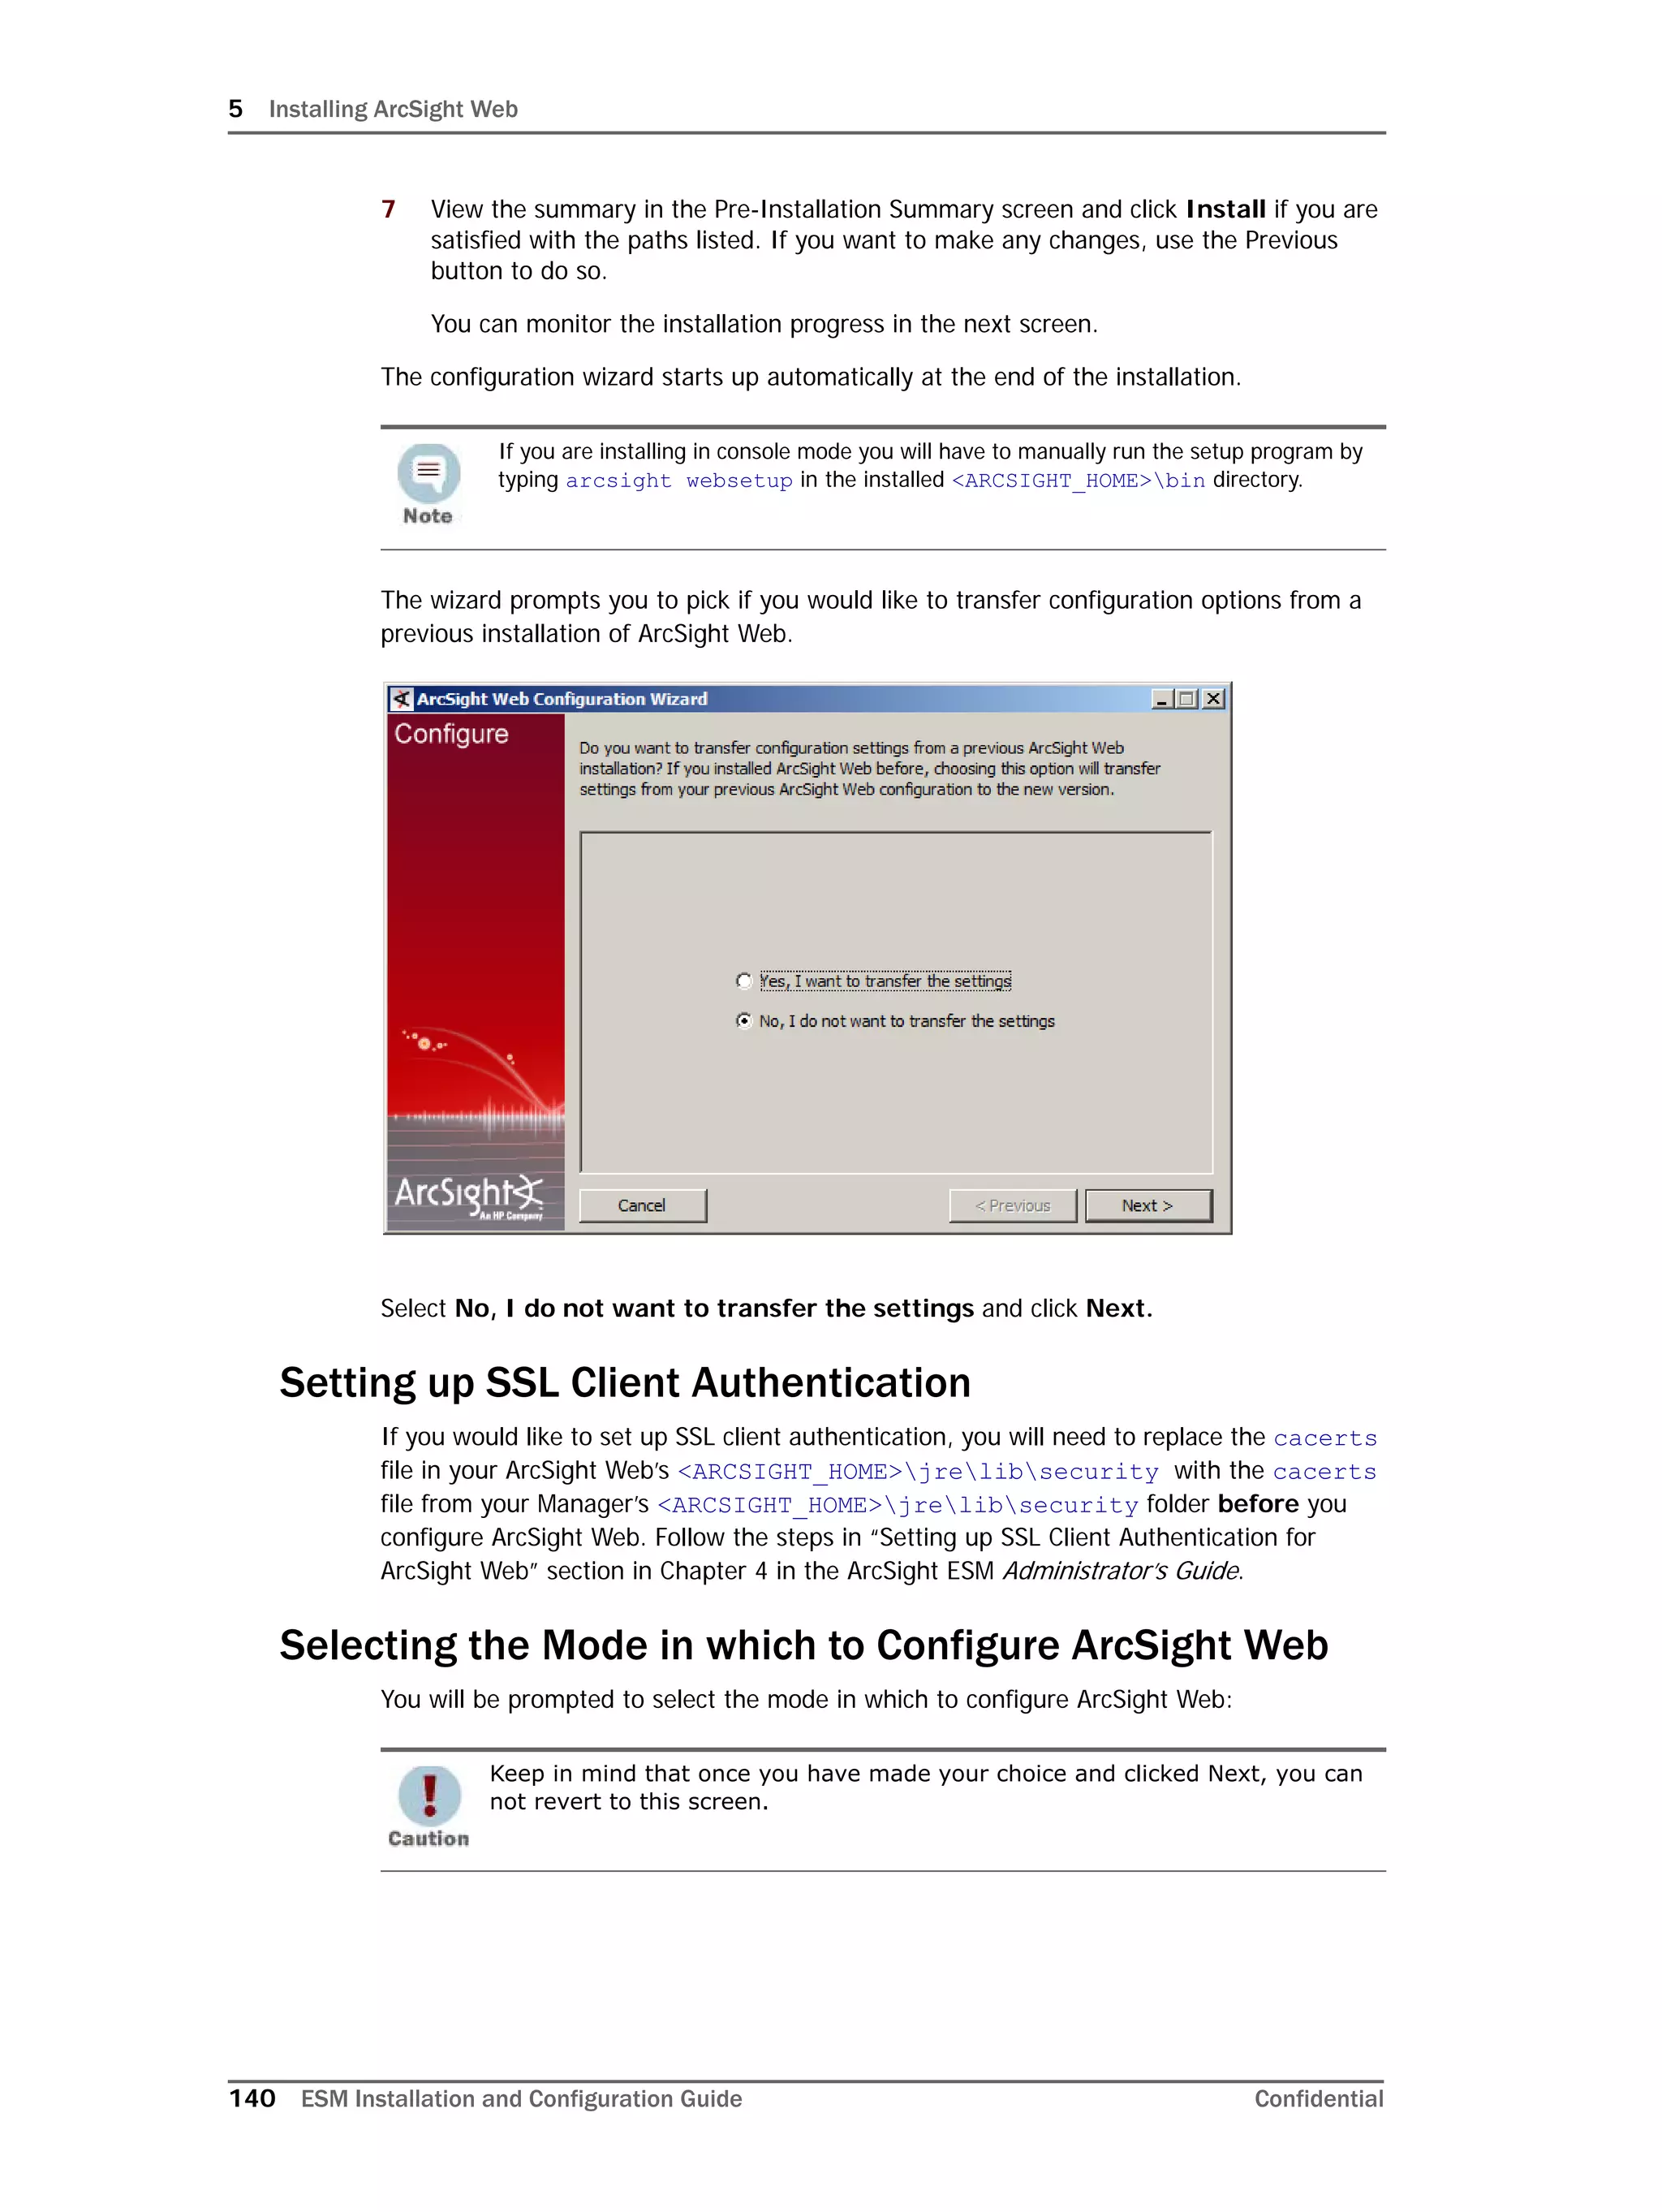
Oracle at a later date, run the following command in <ARCSIGHT_HOME>bin to restart
the configuration process:
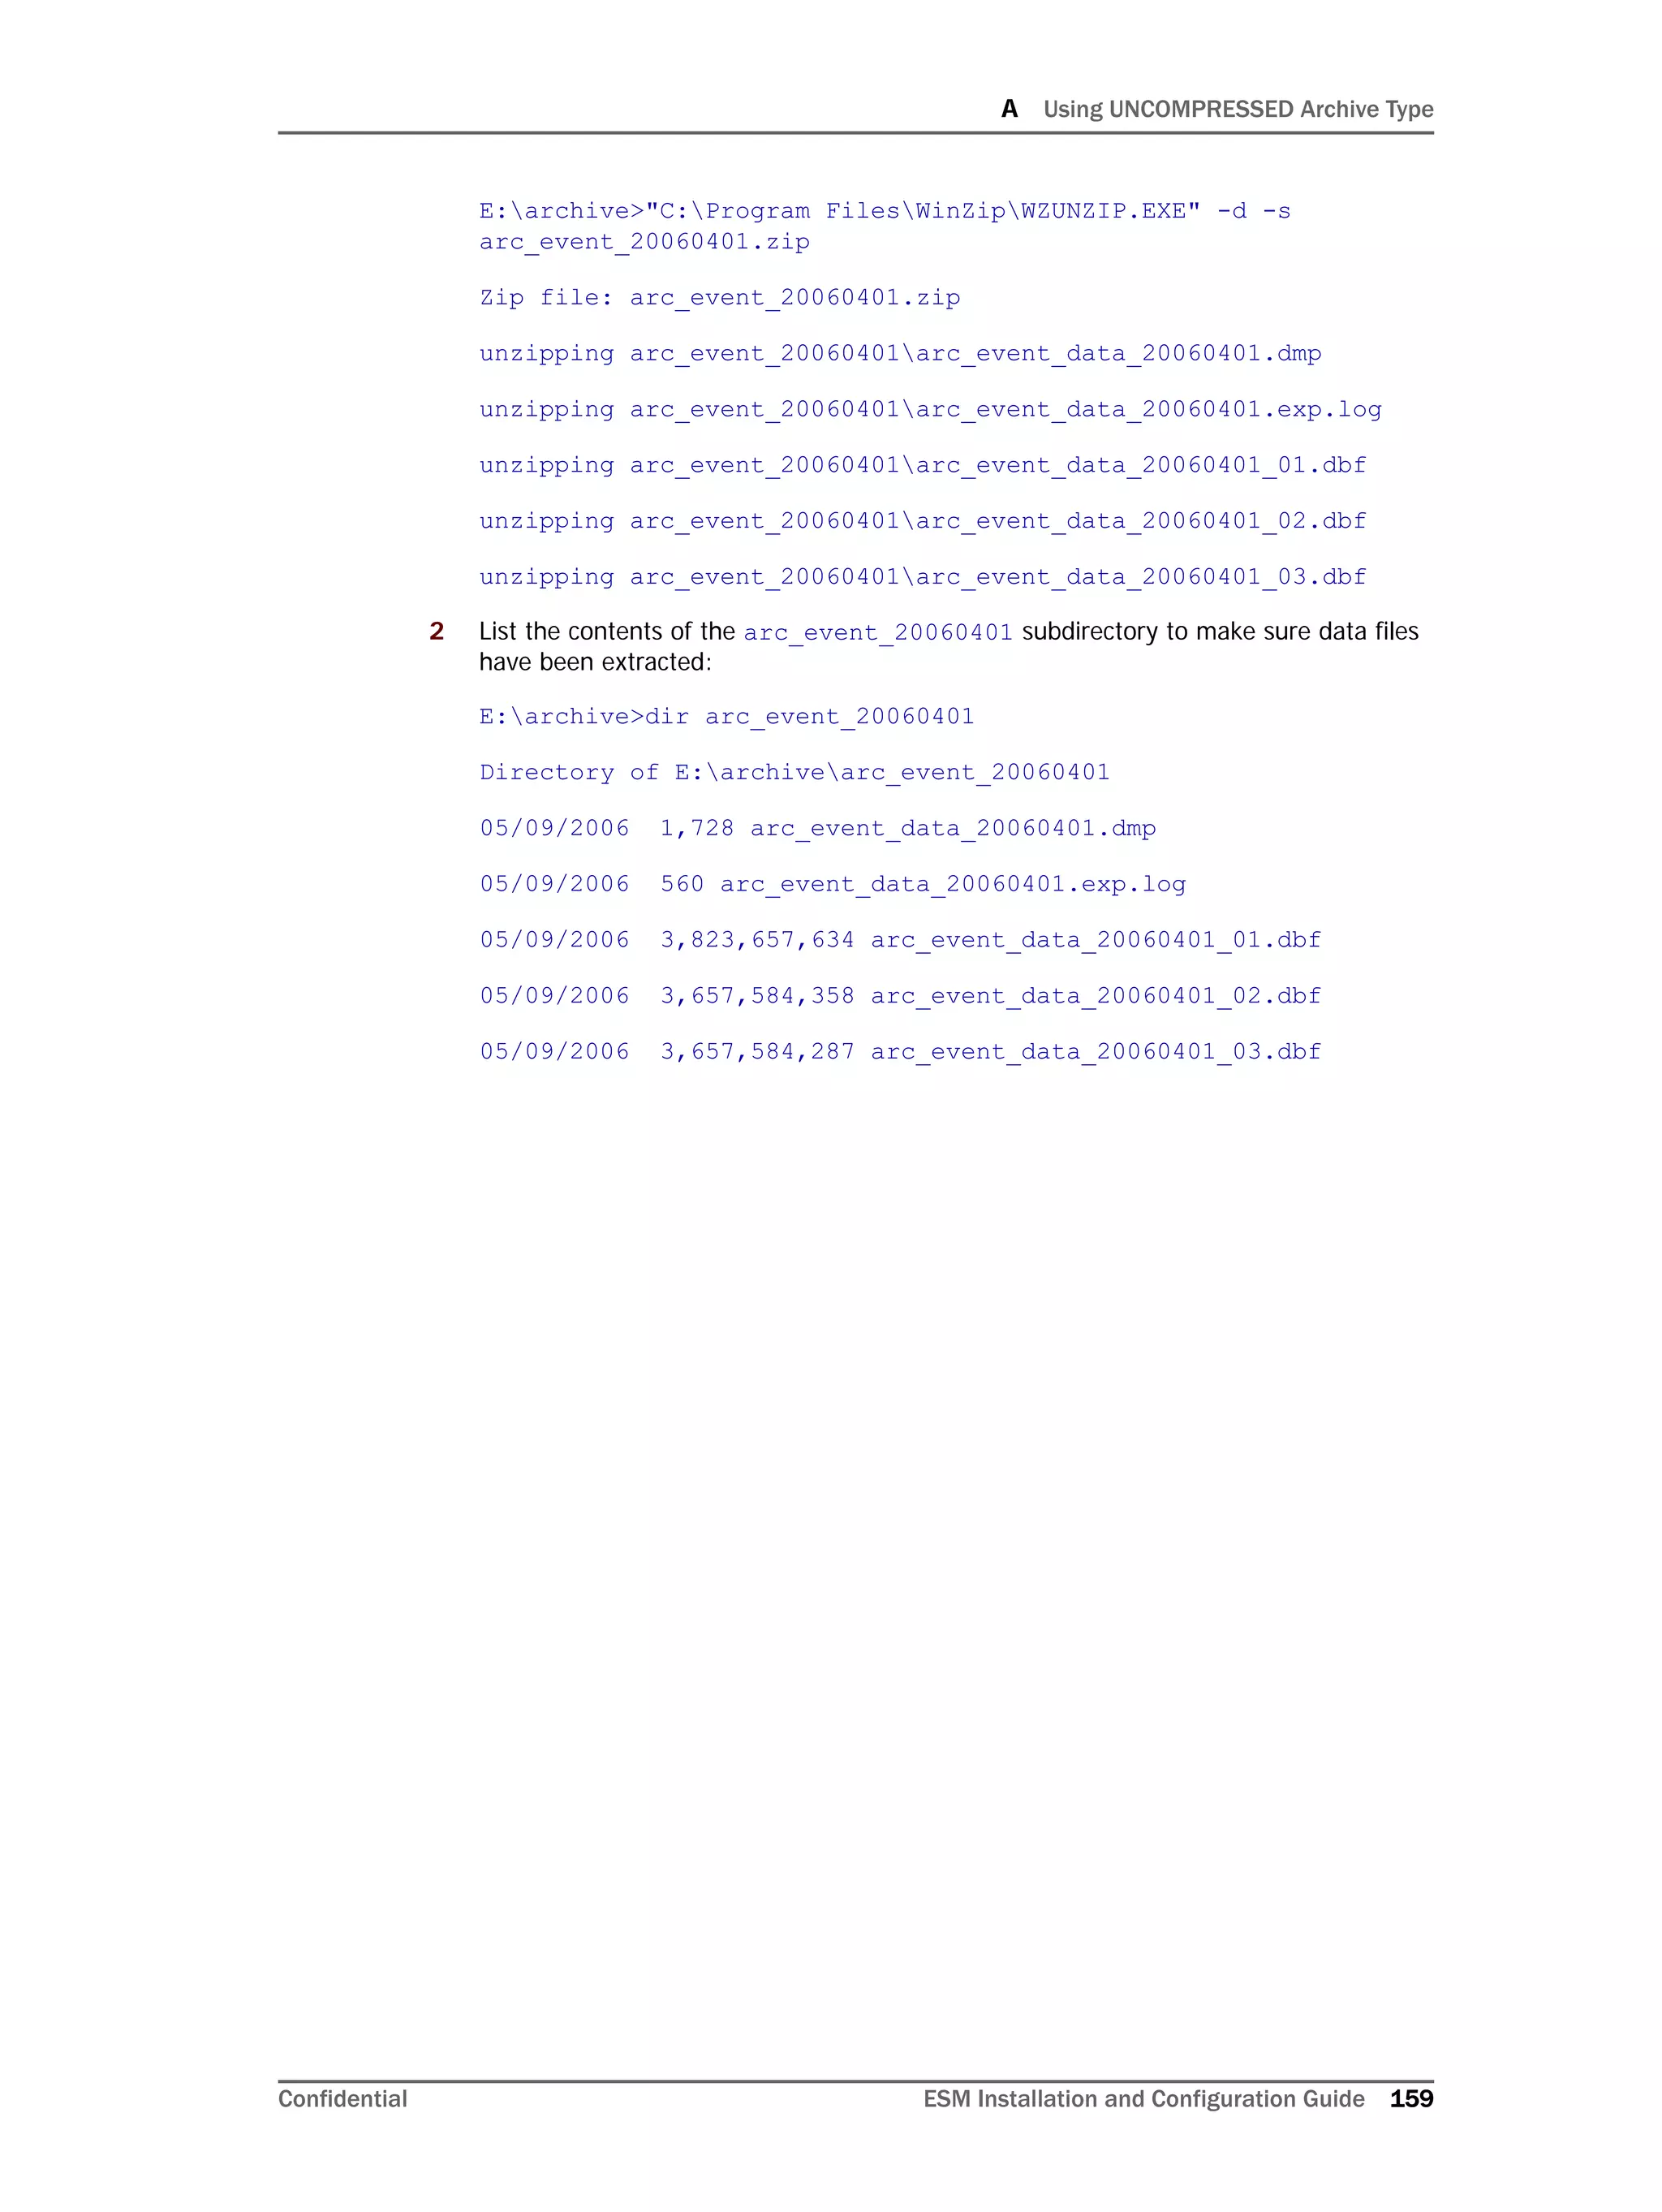
arcsight databasesetup
Re-initialization will delete all resource and event data. However, the wizard allows you to
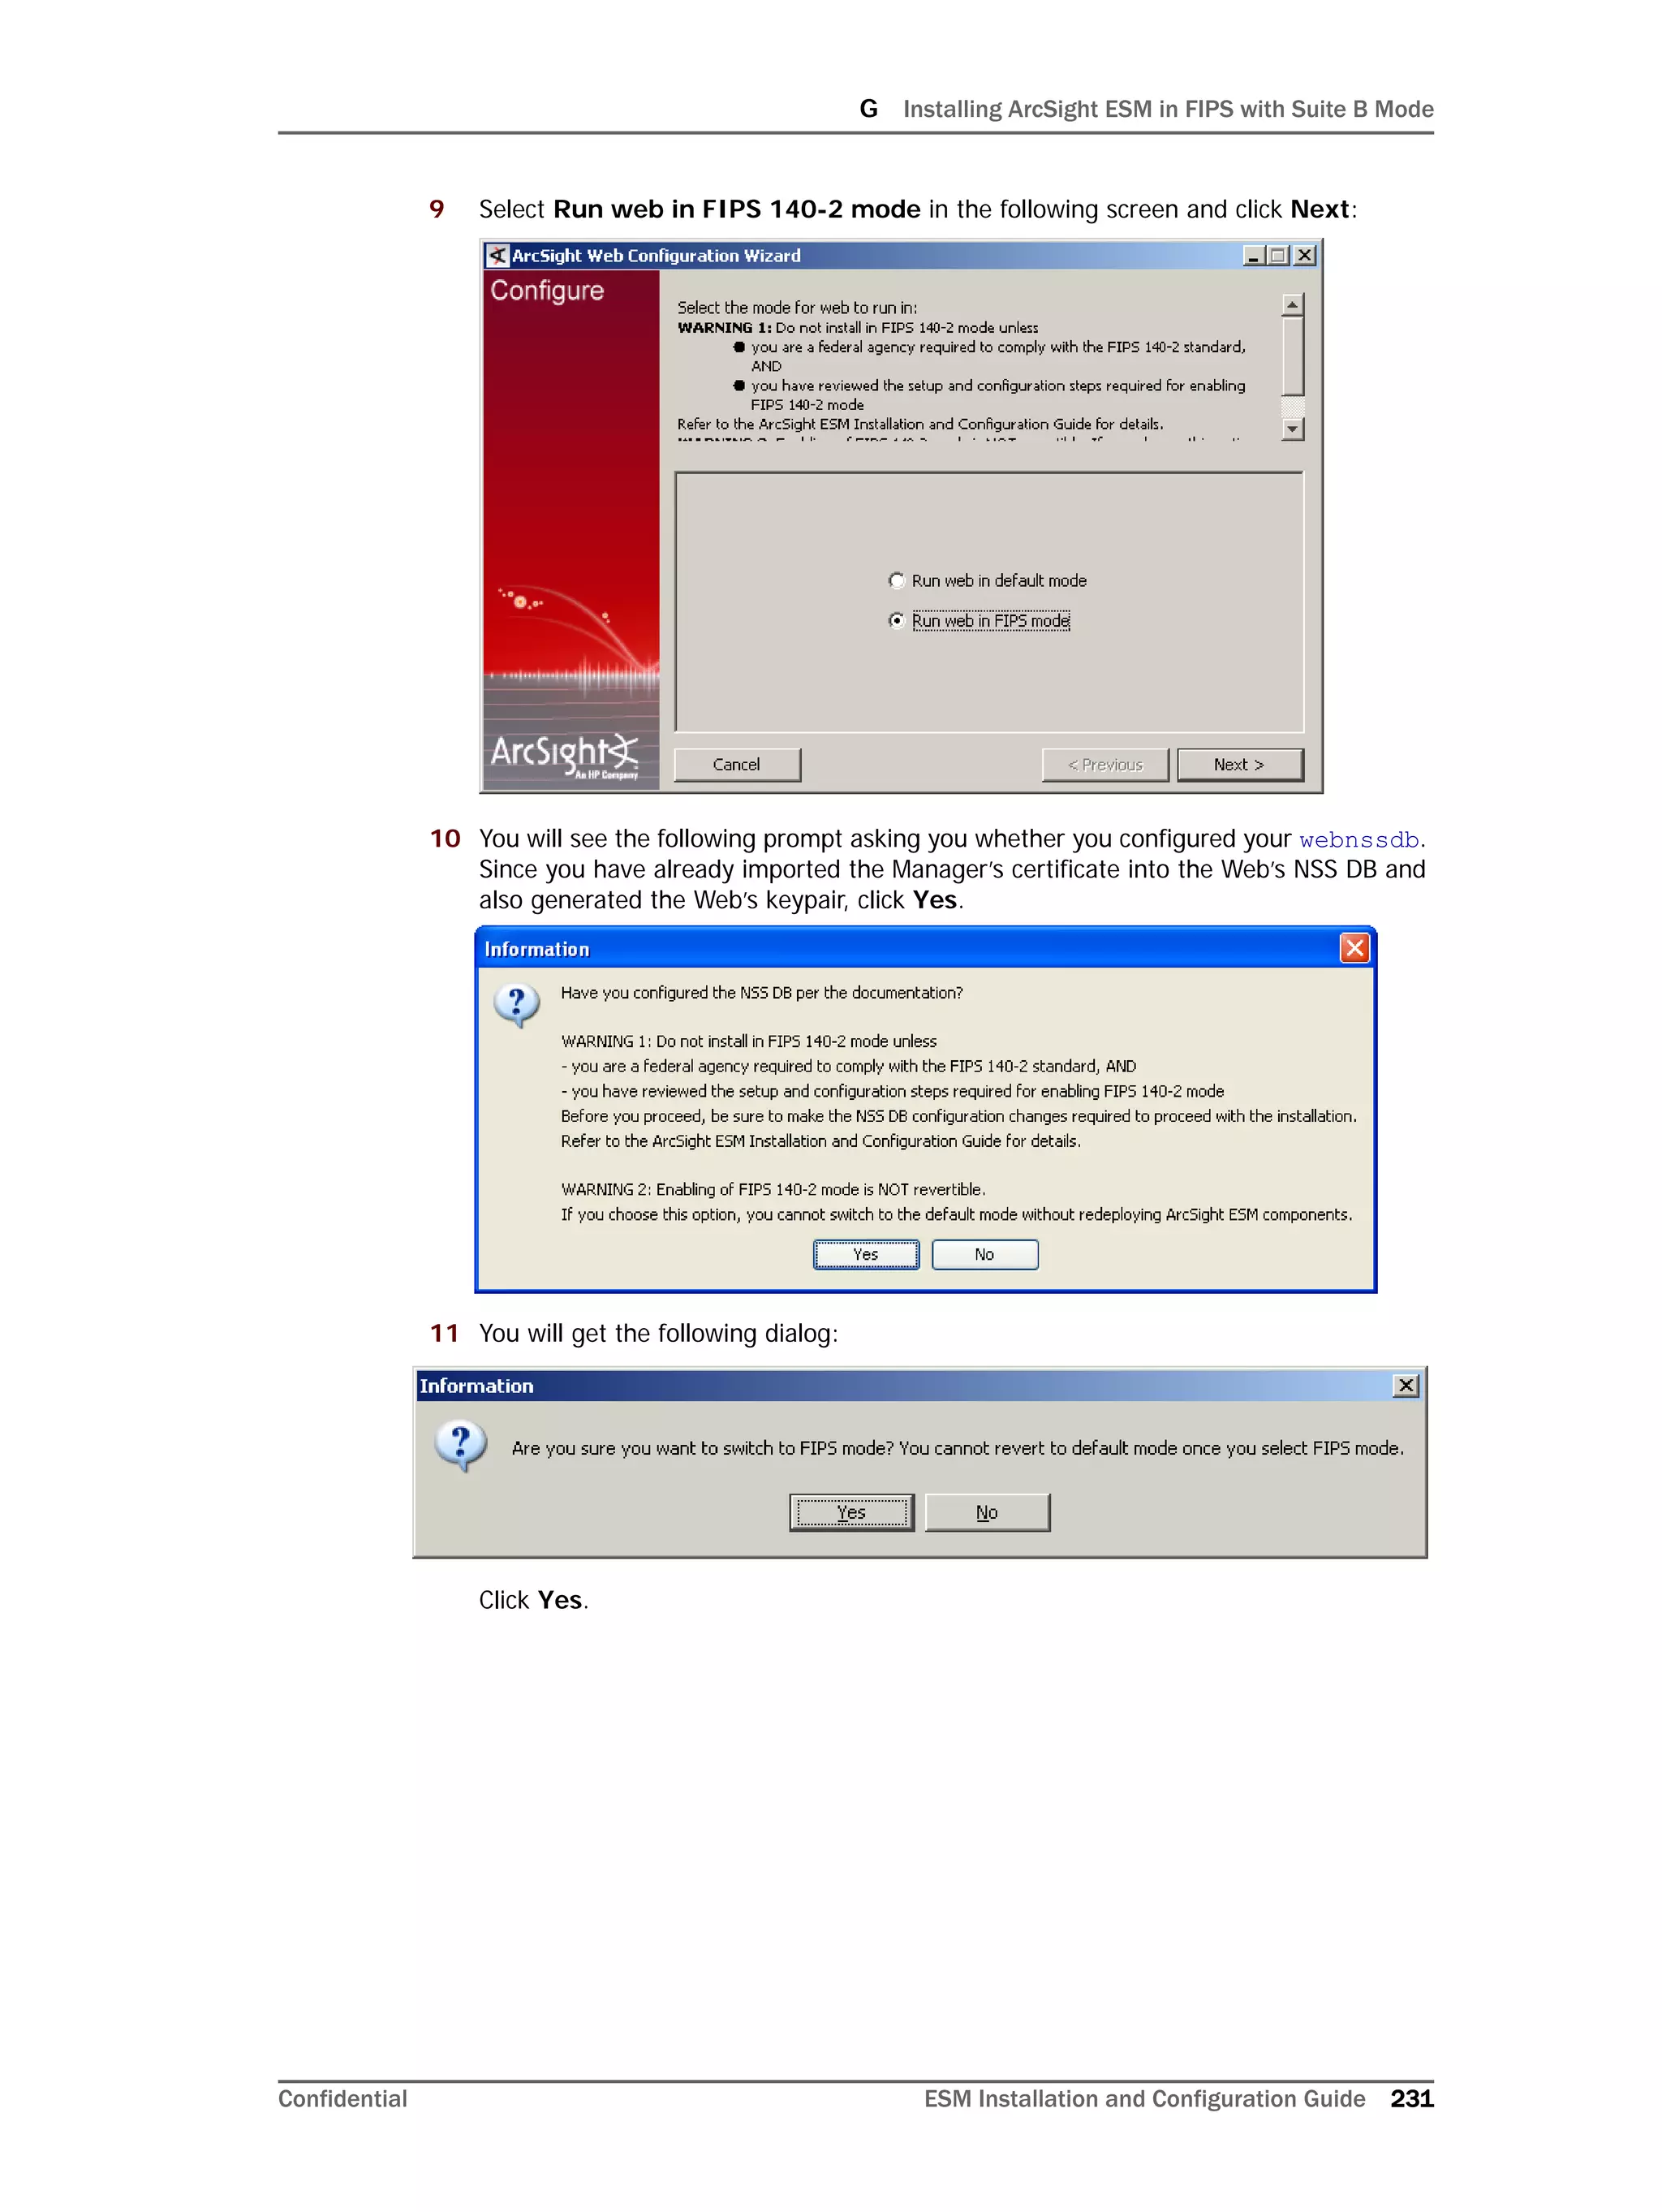
avoid recreating the ArcSight Database user account and tablespaces.
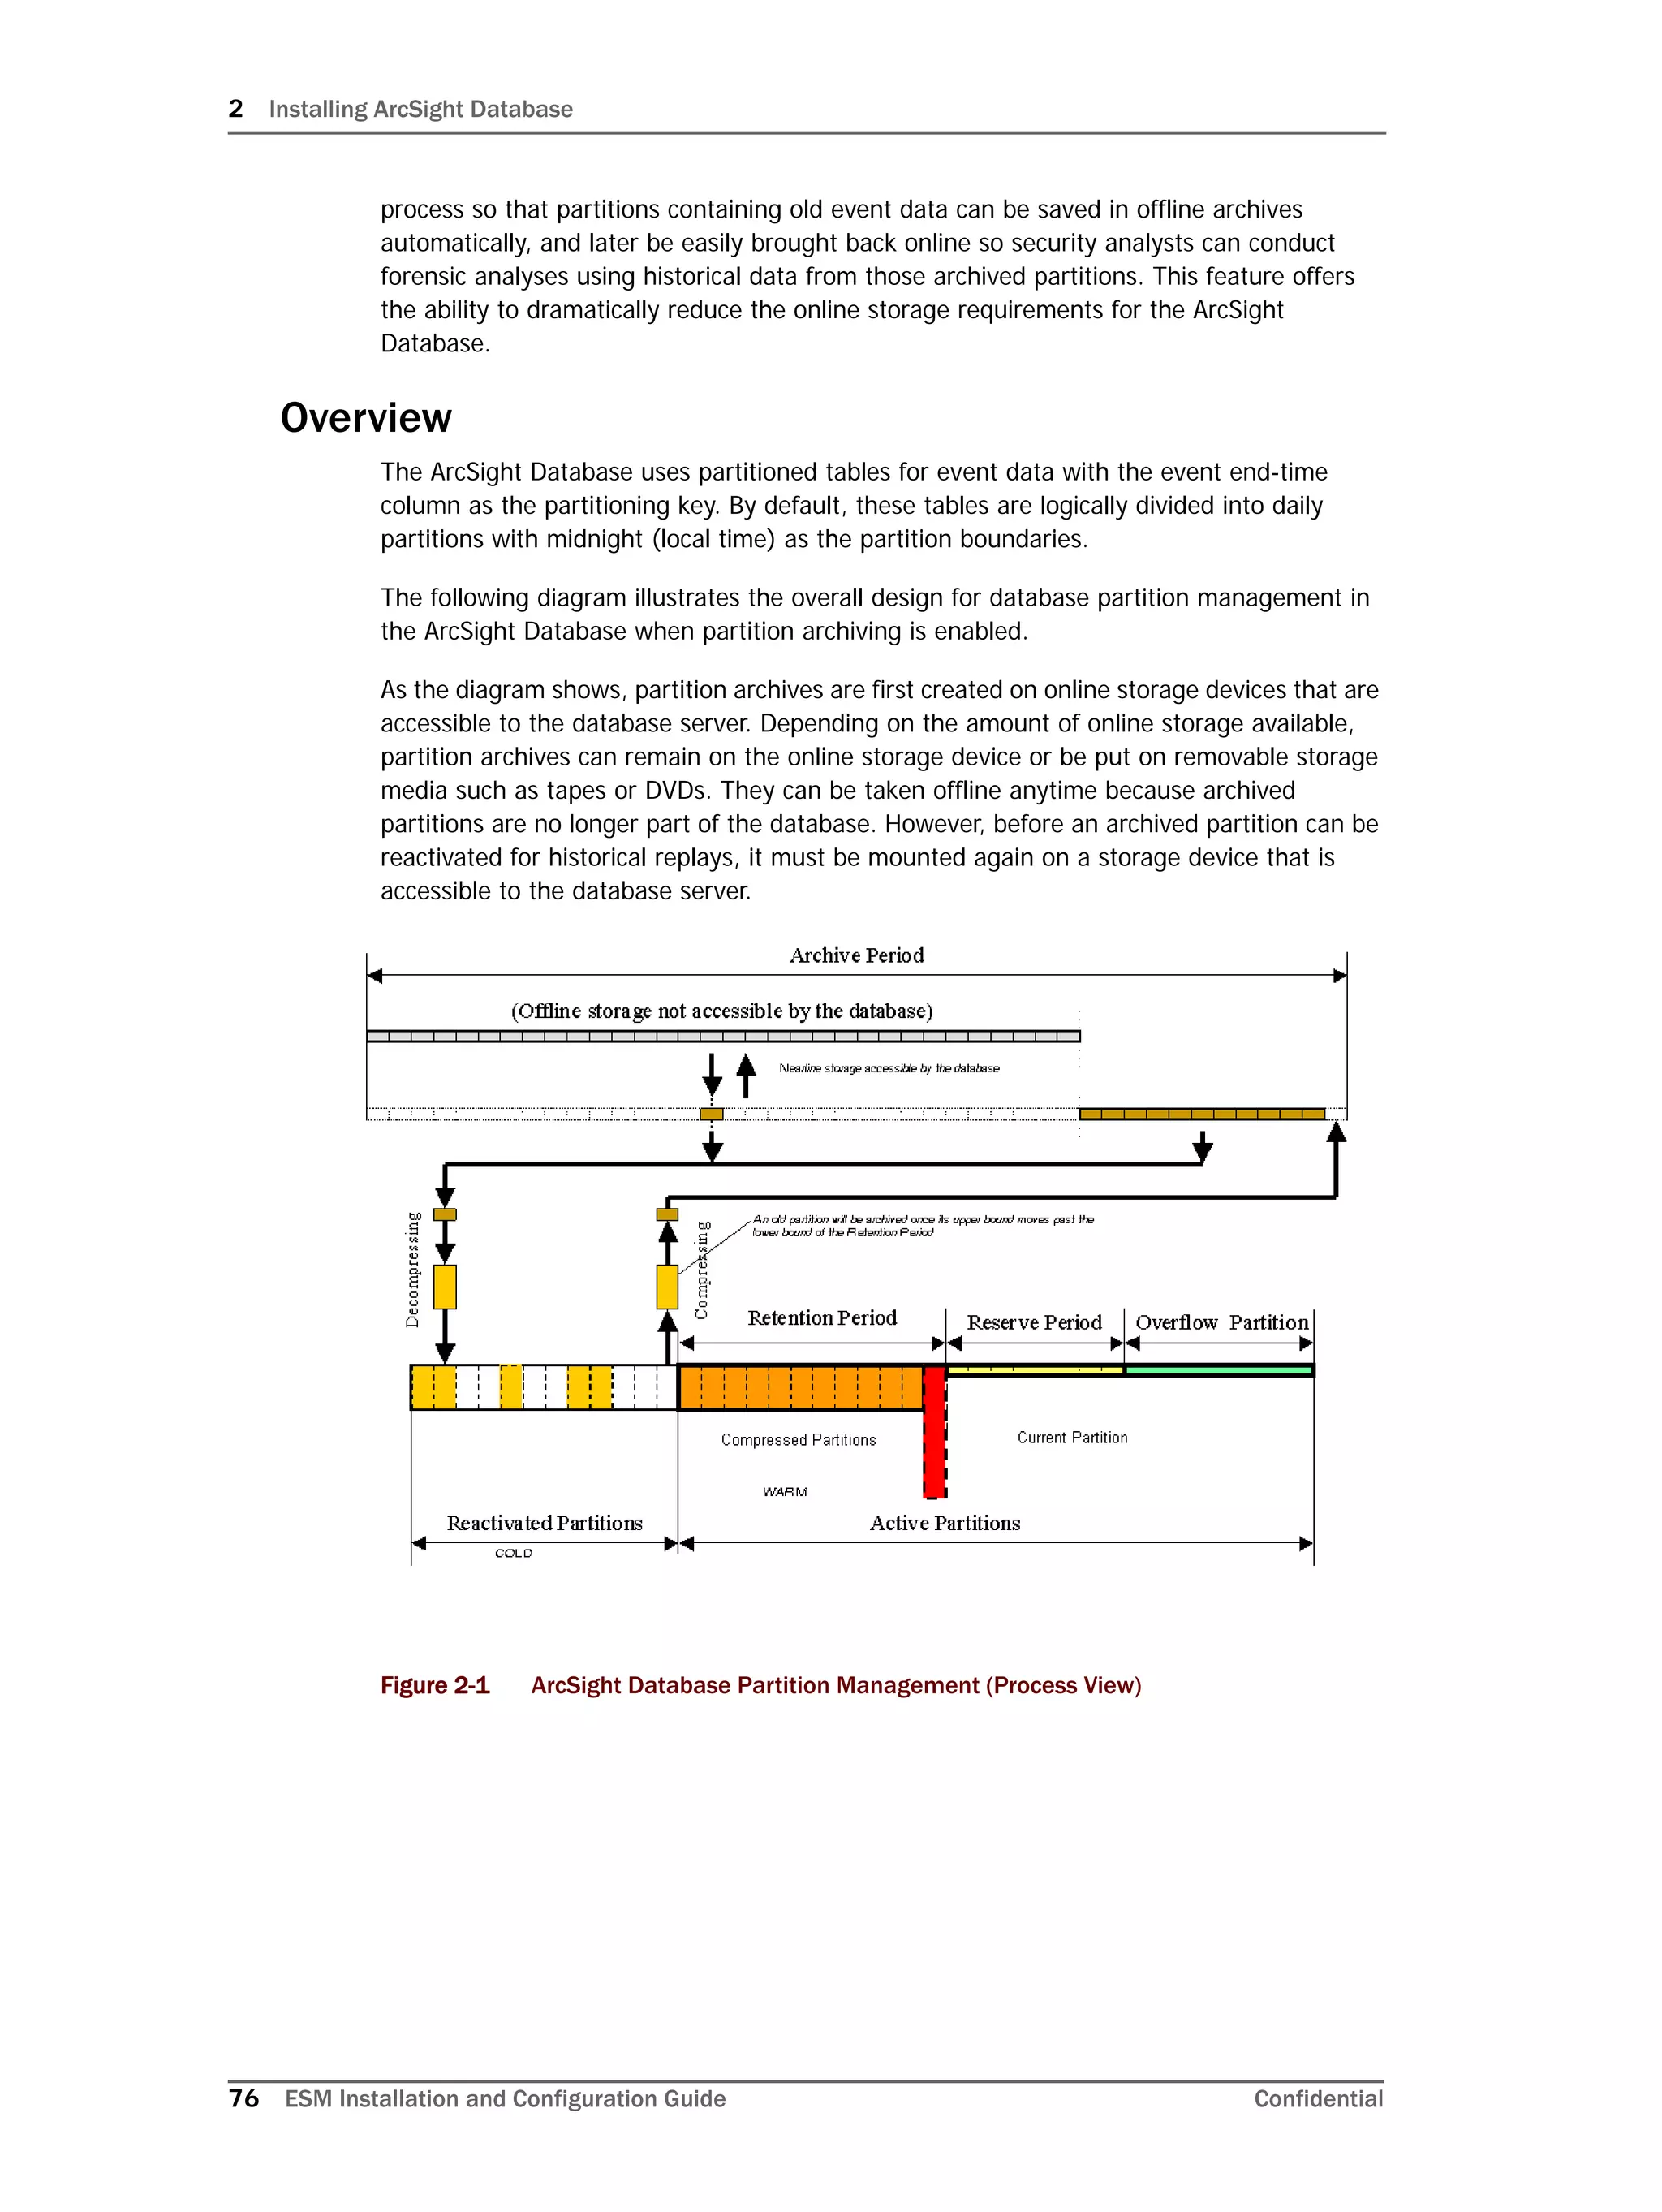
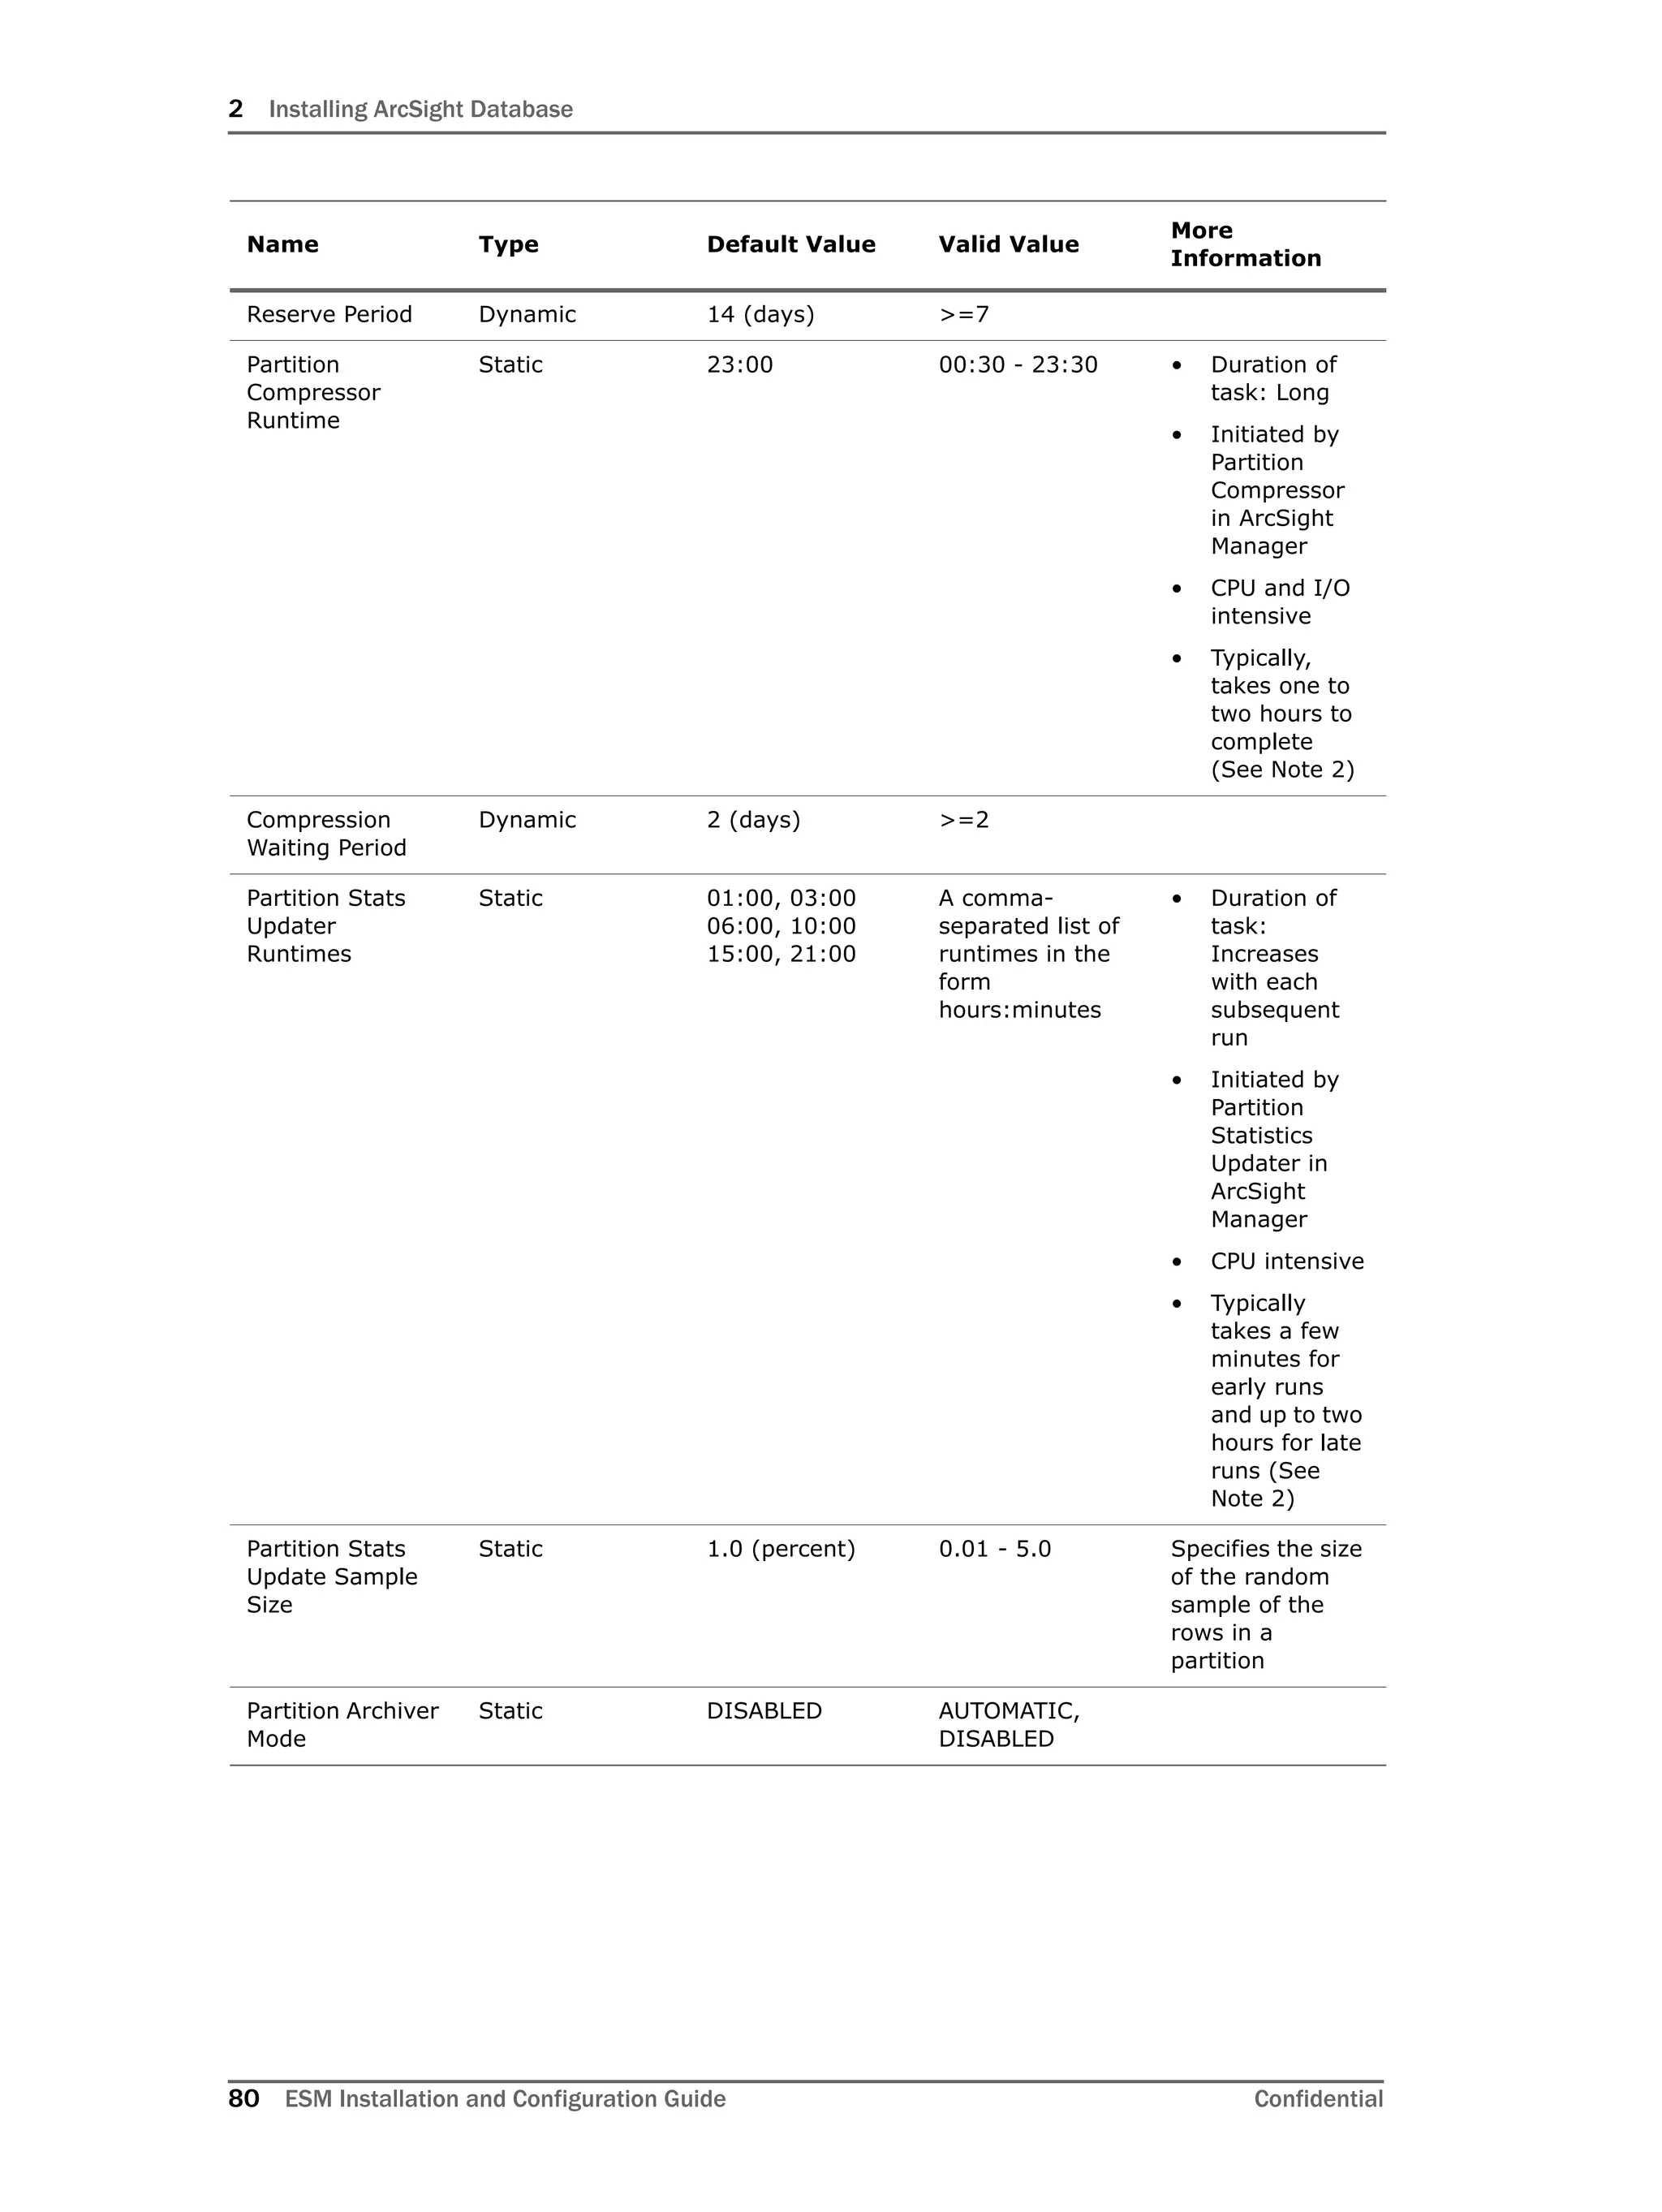
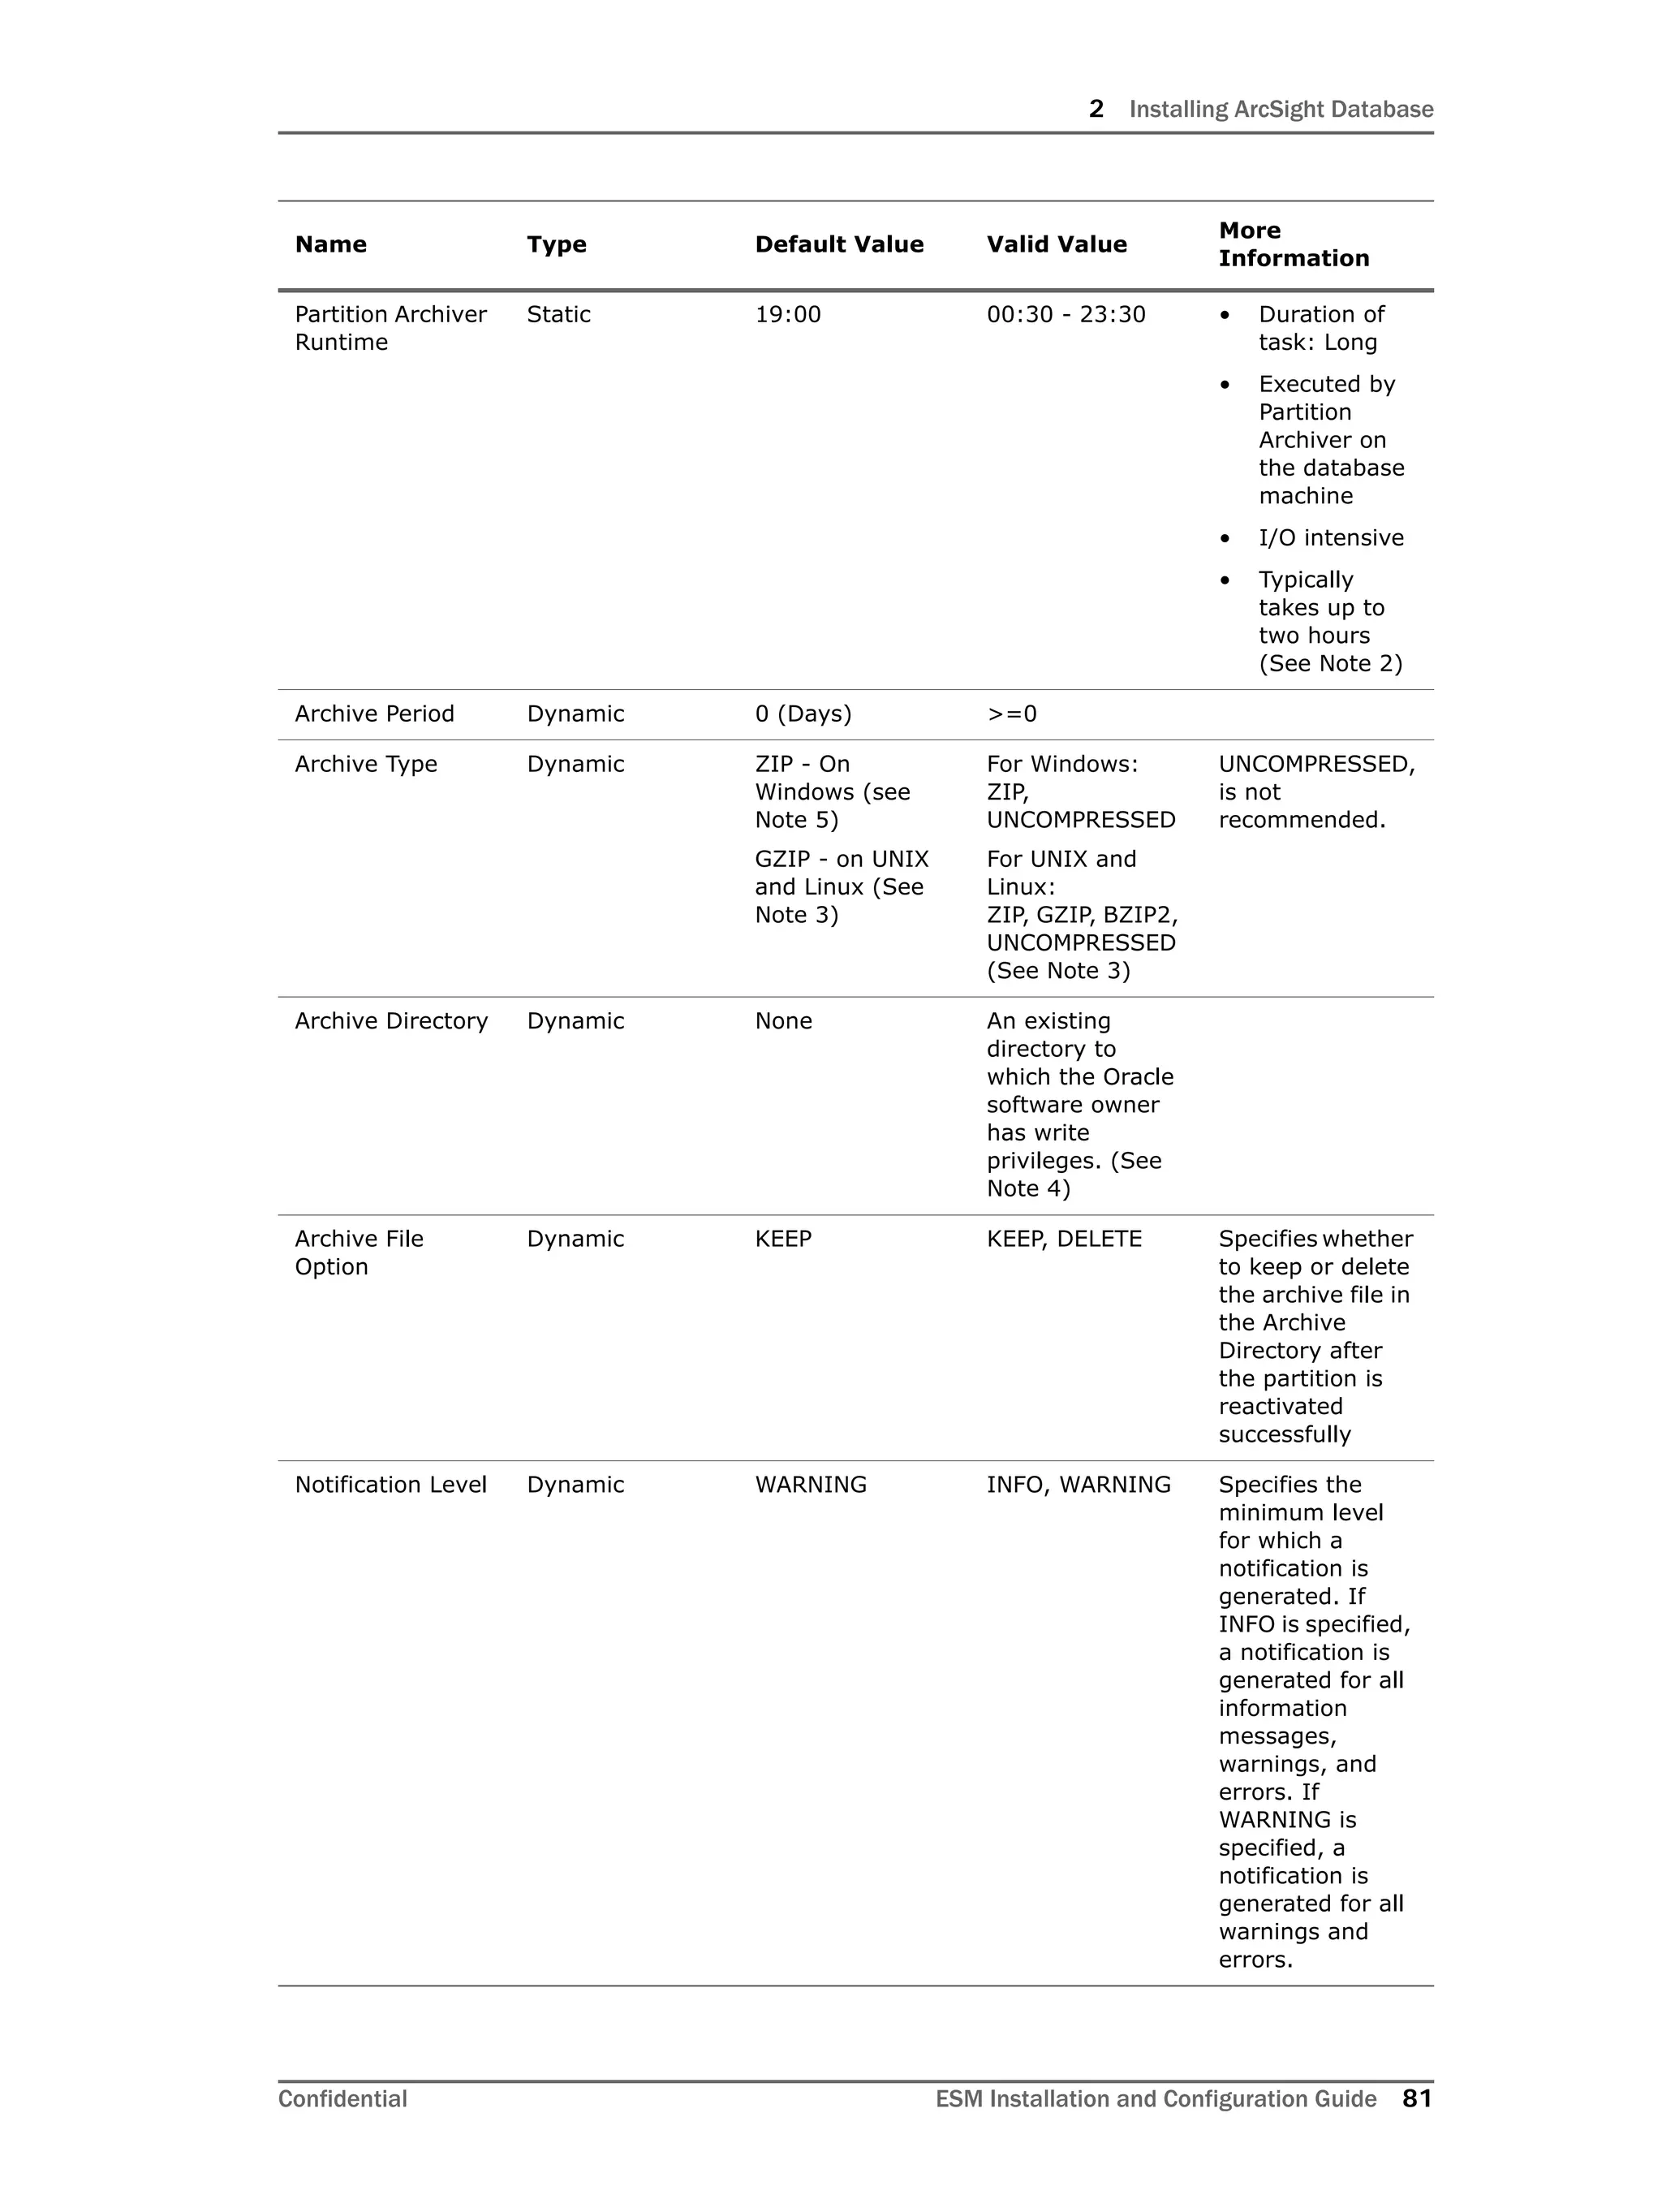
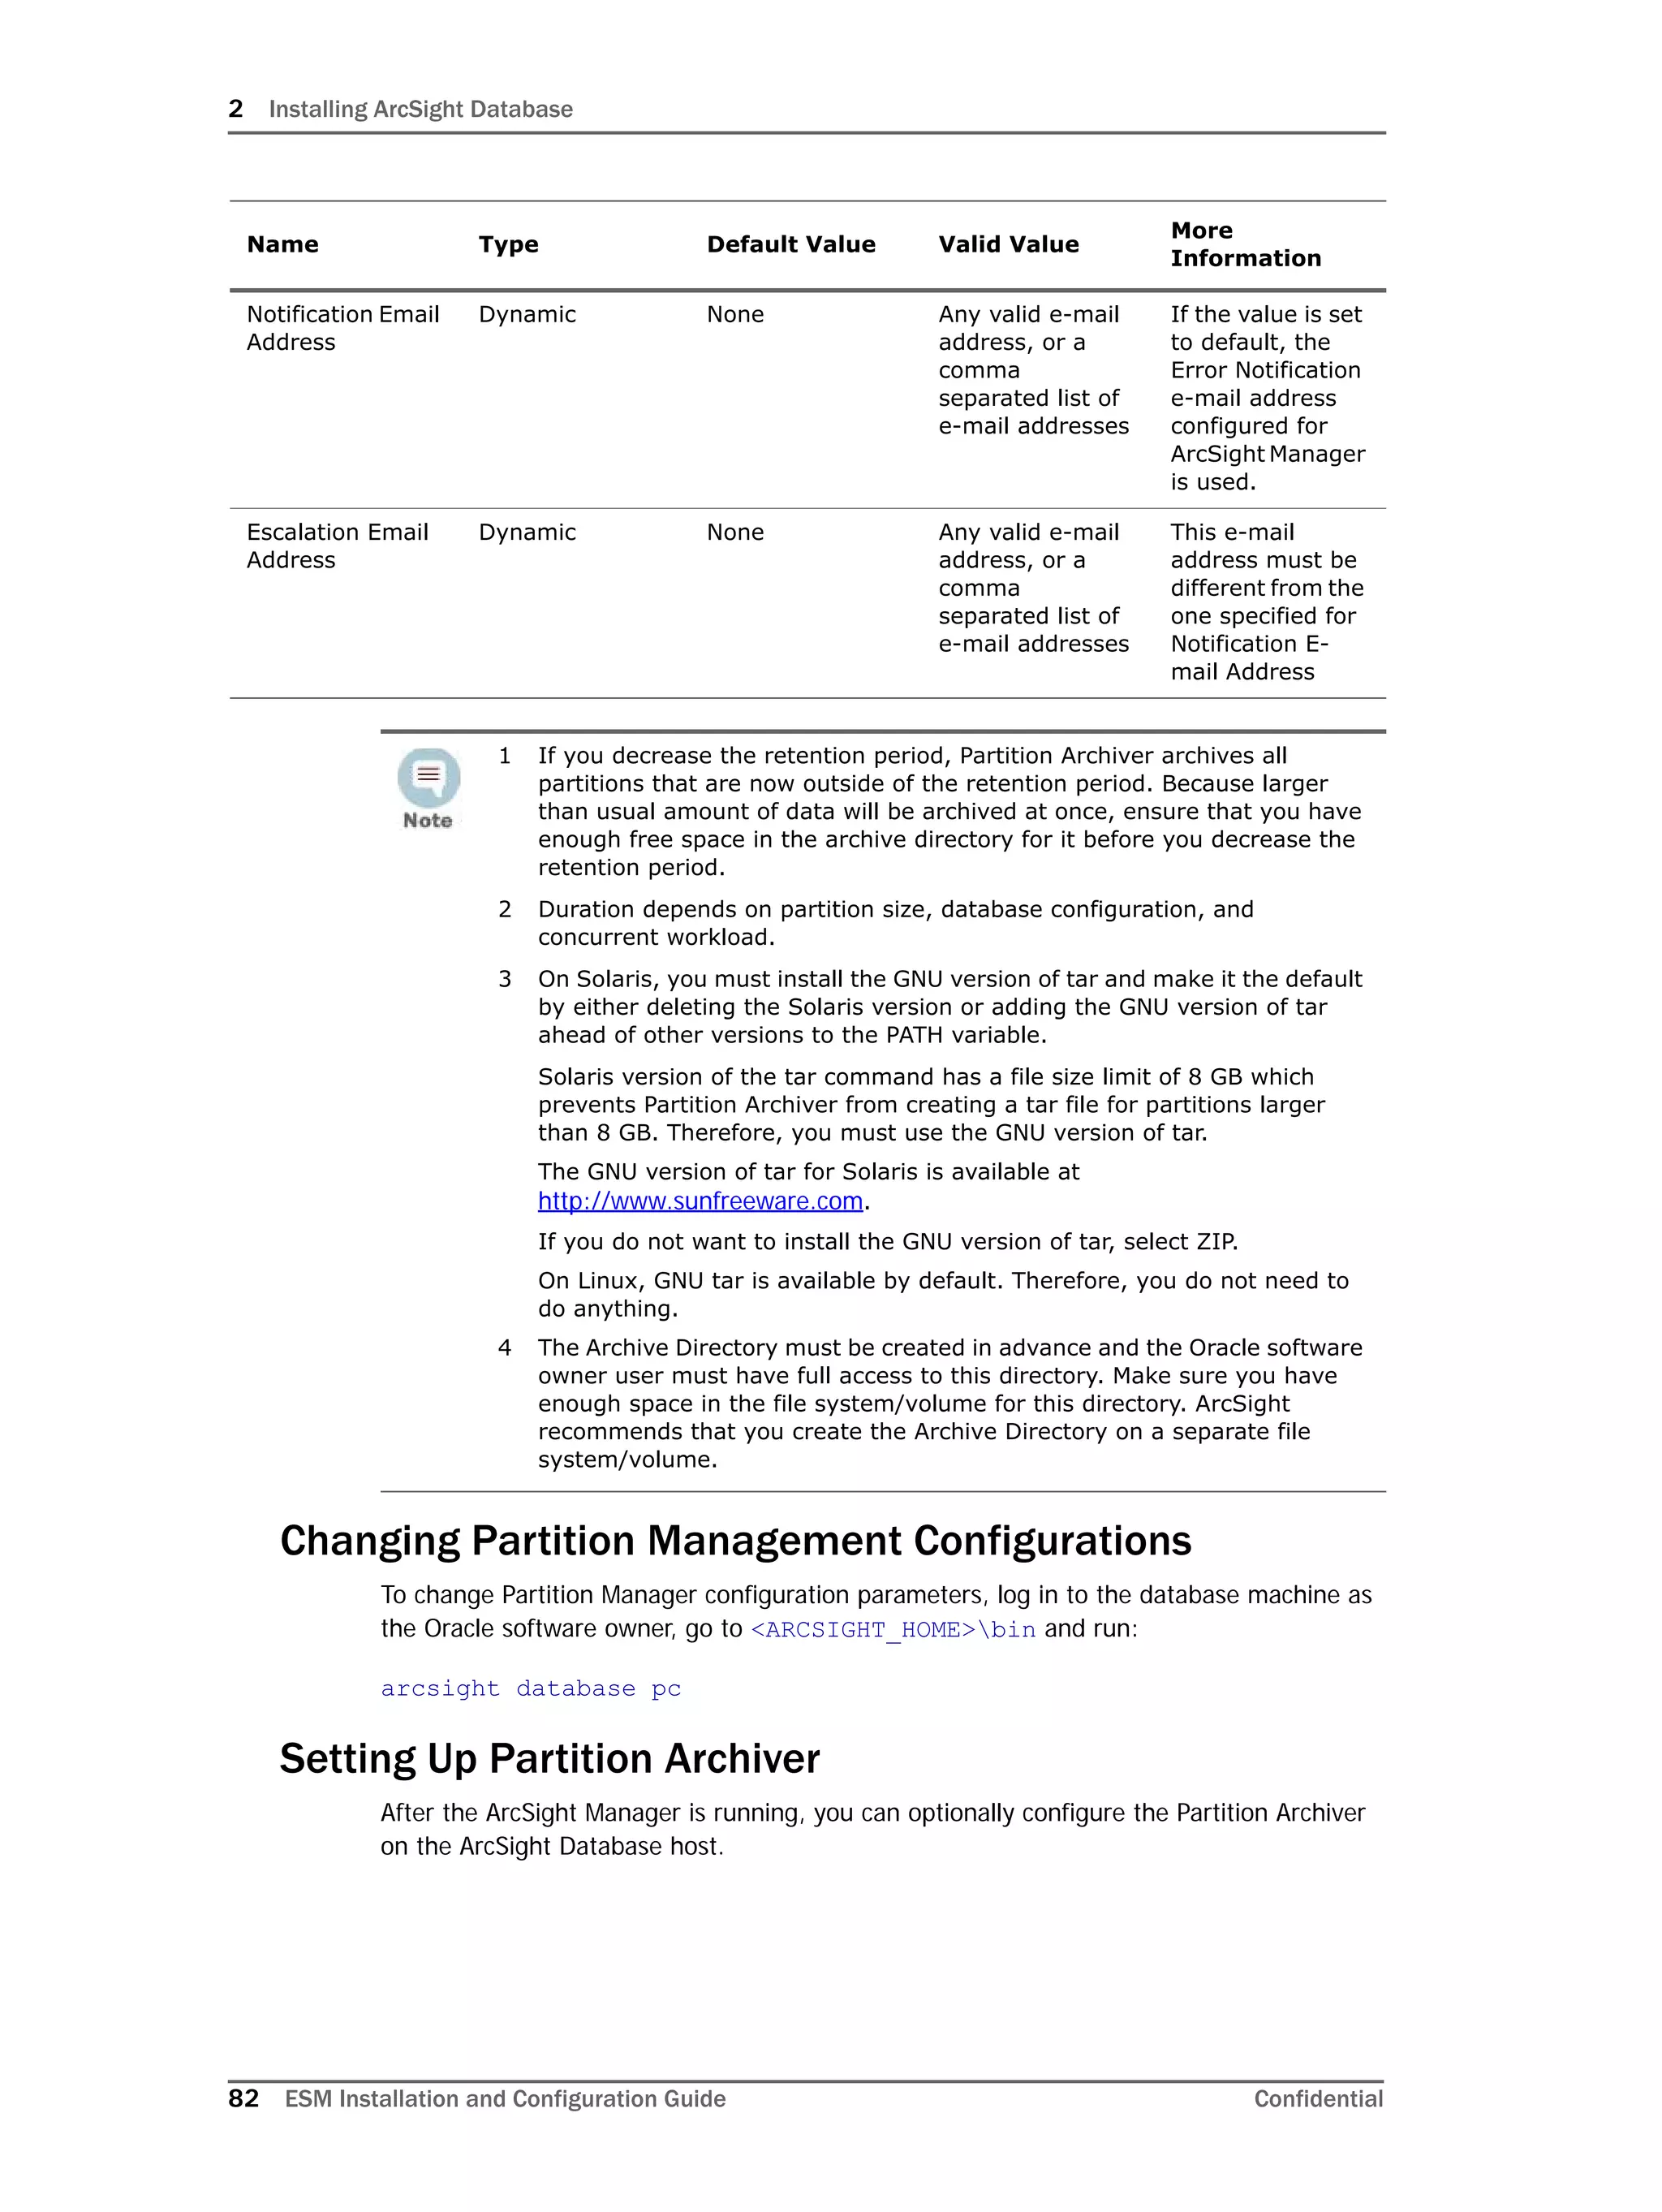
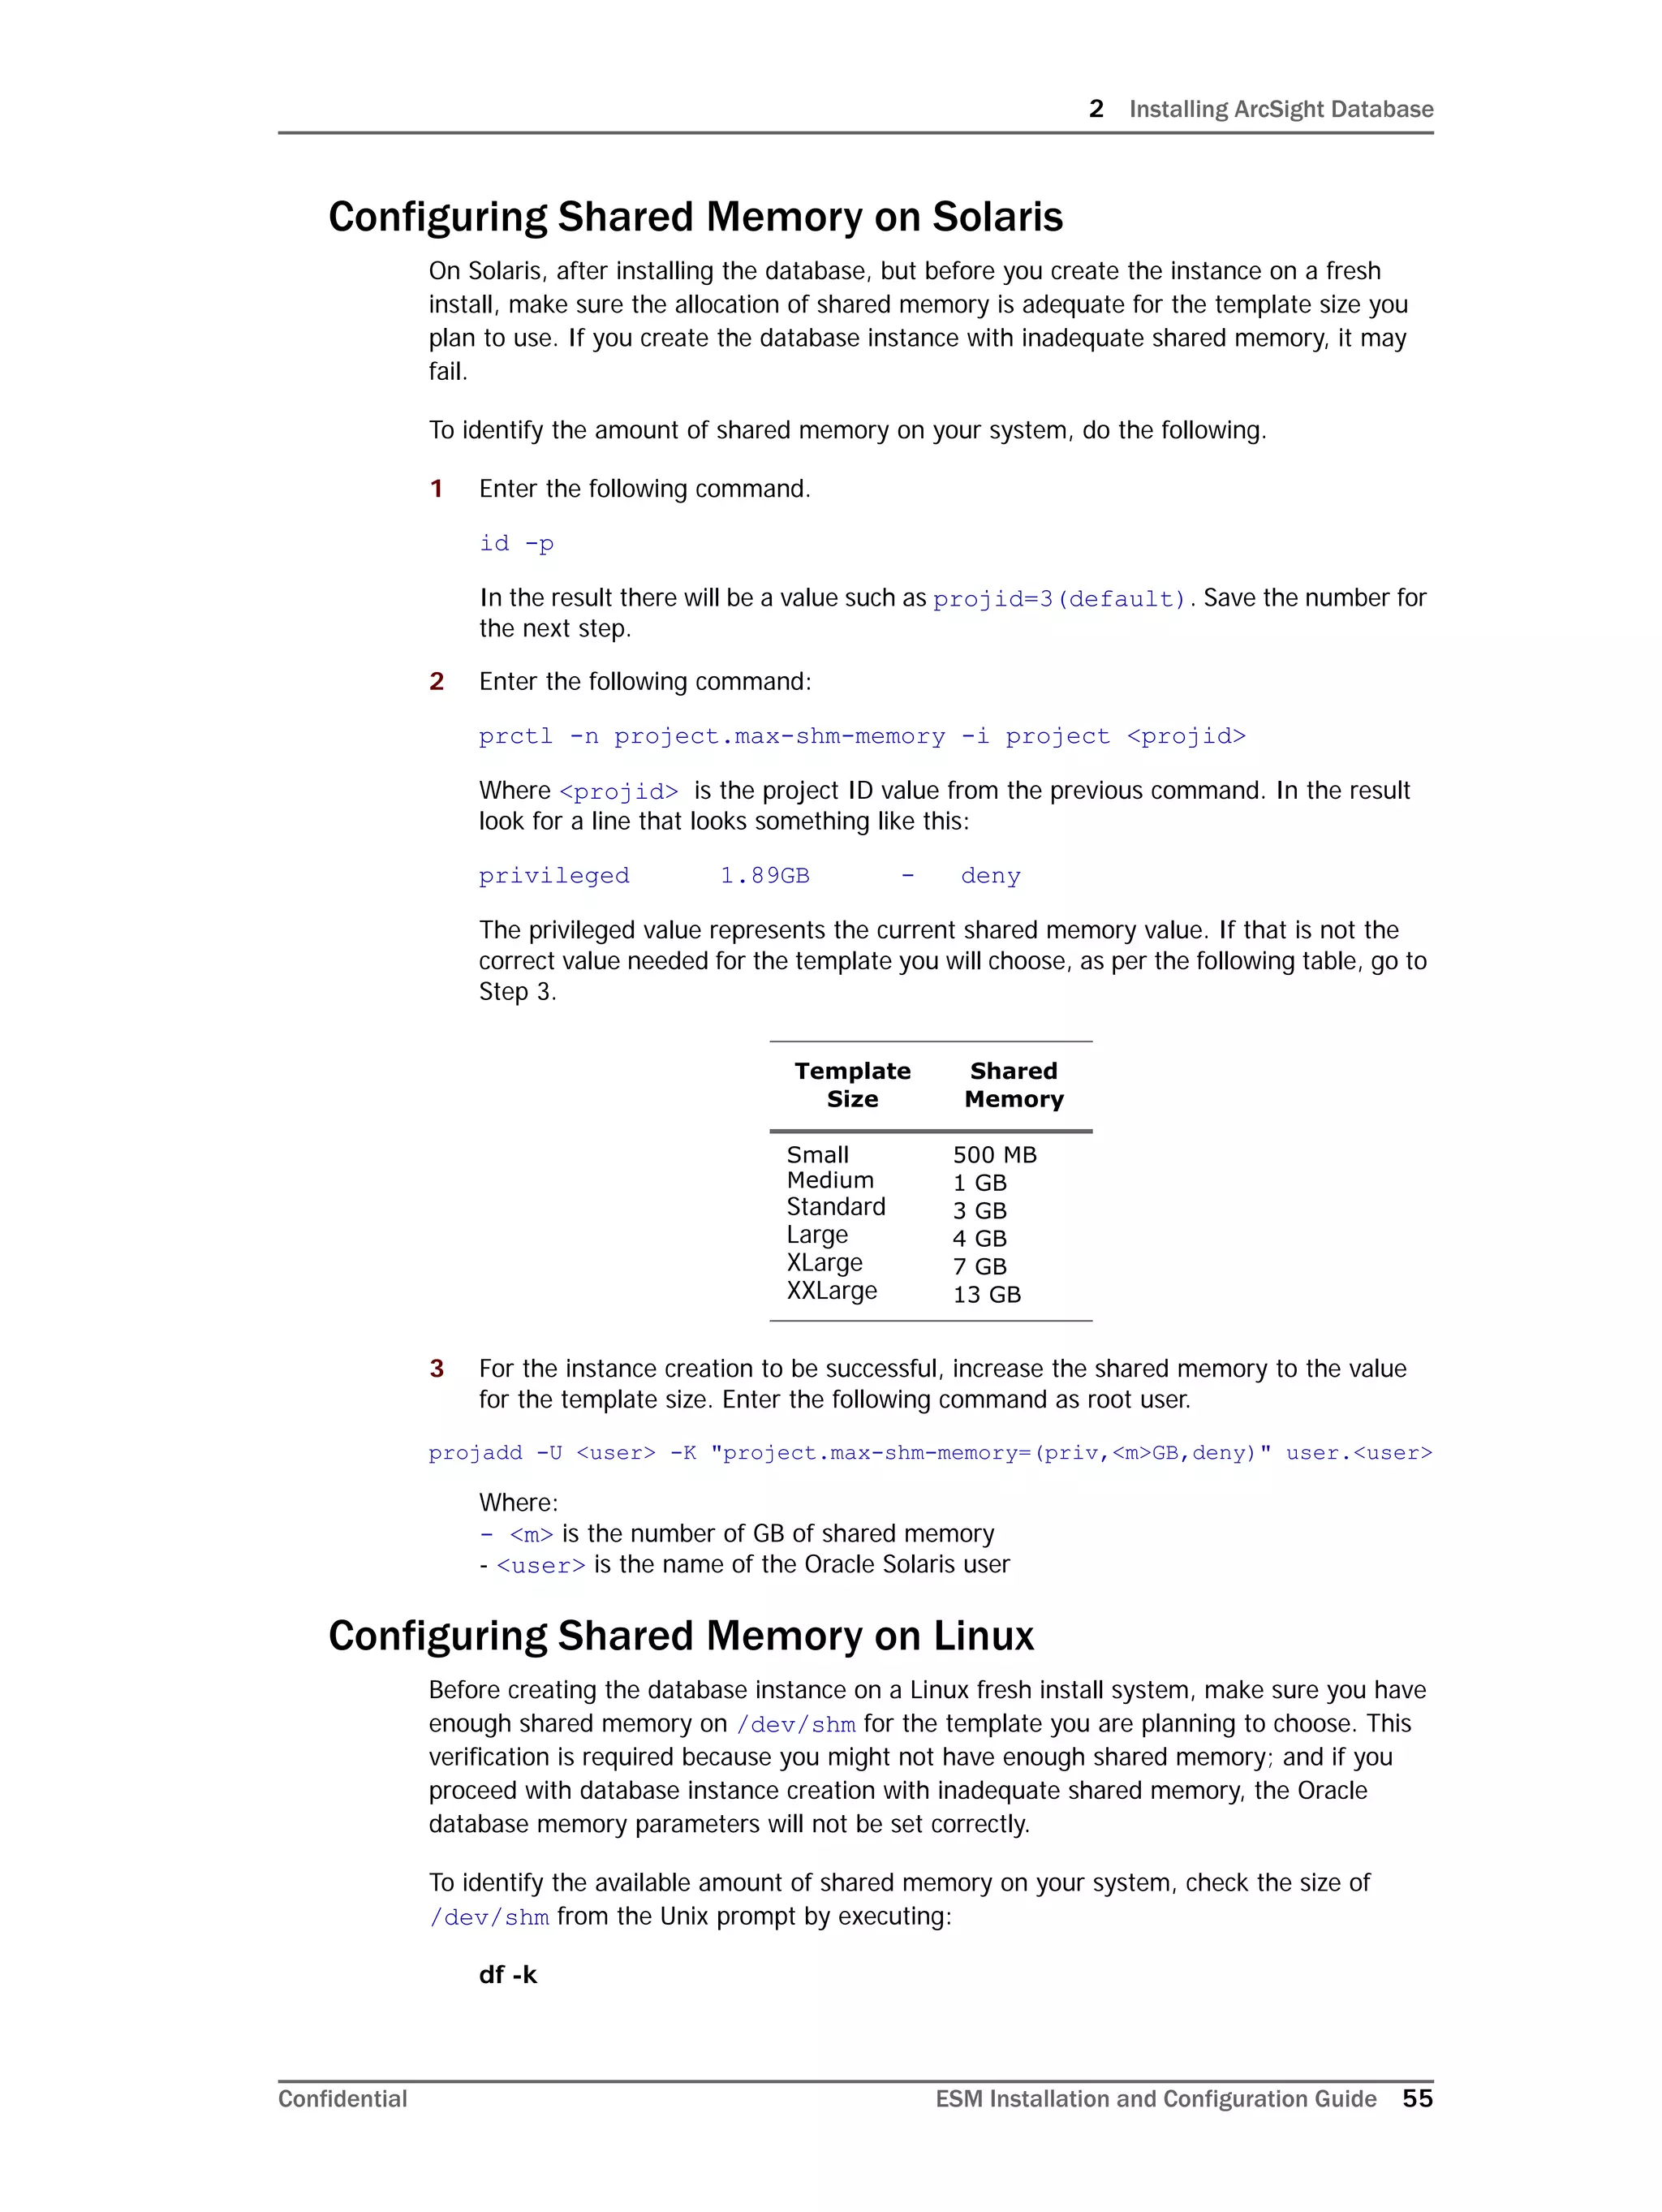
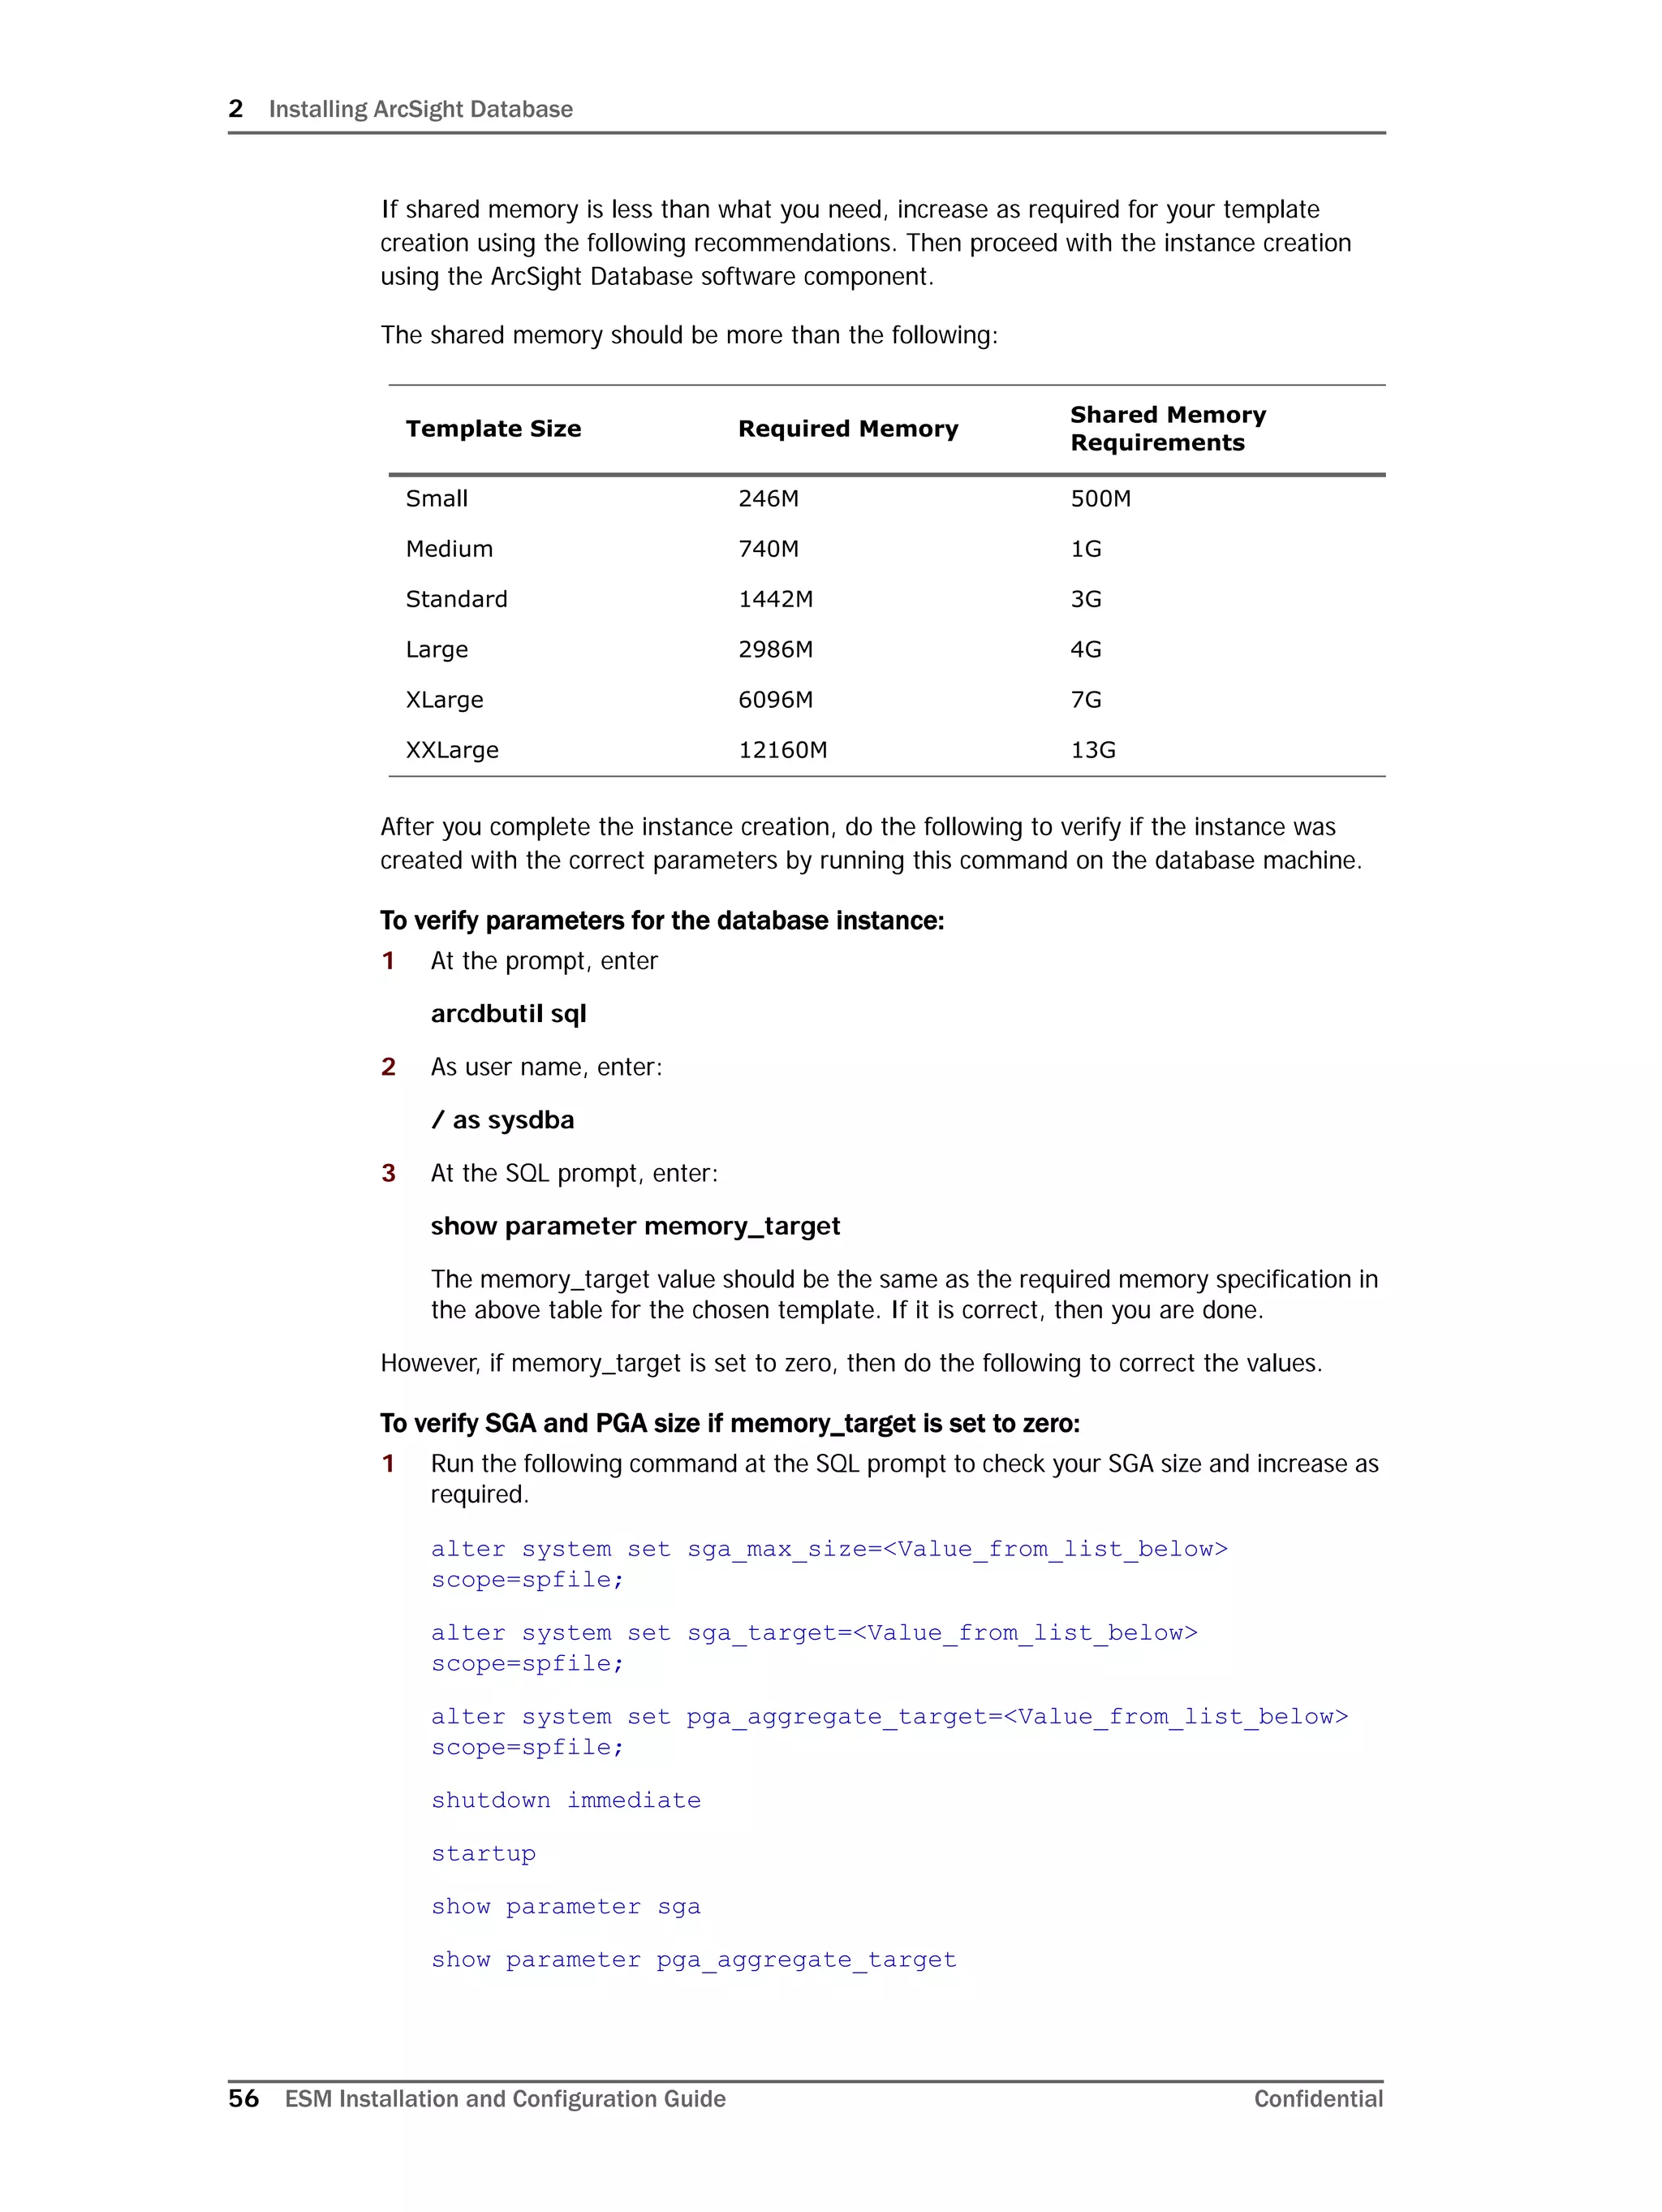
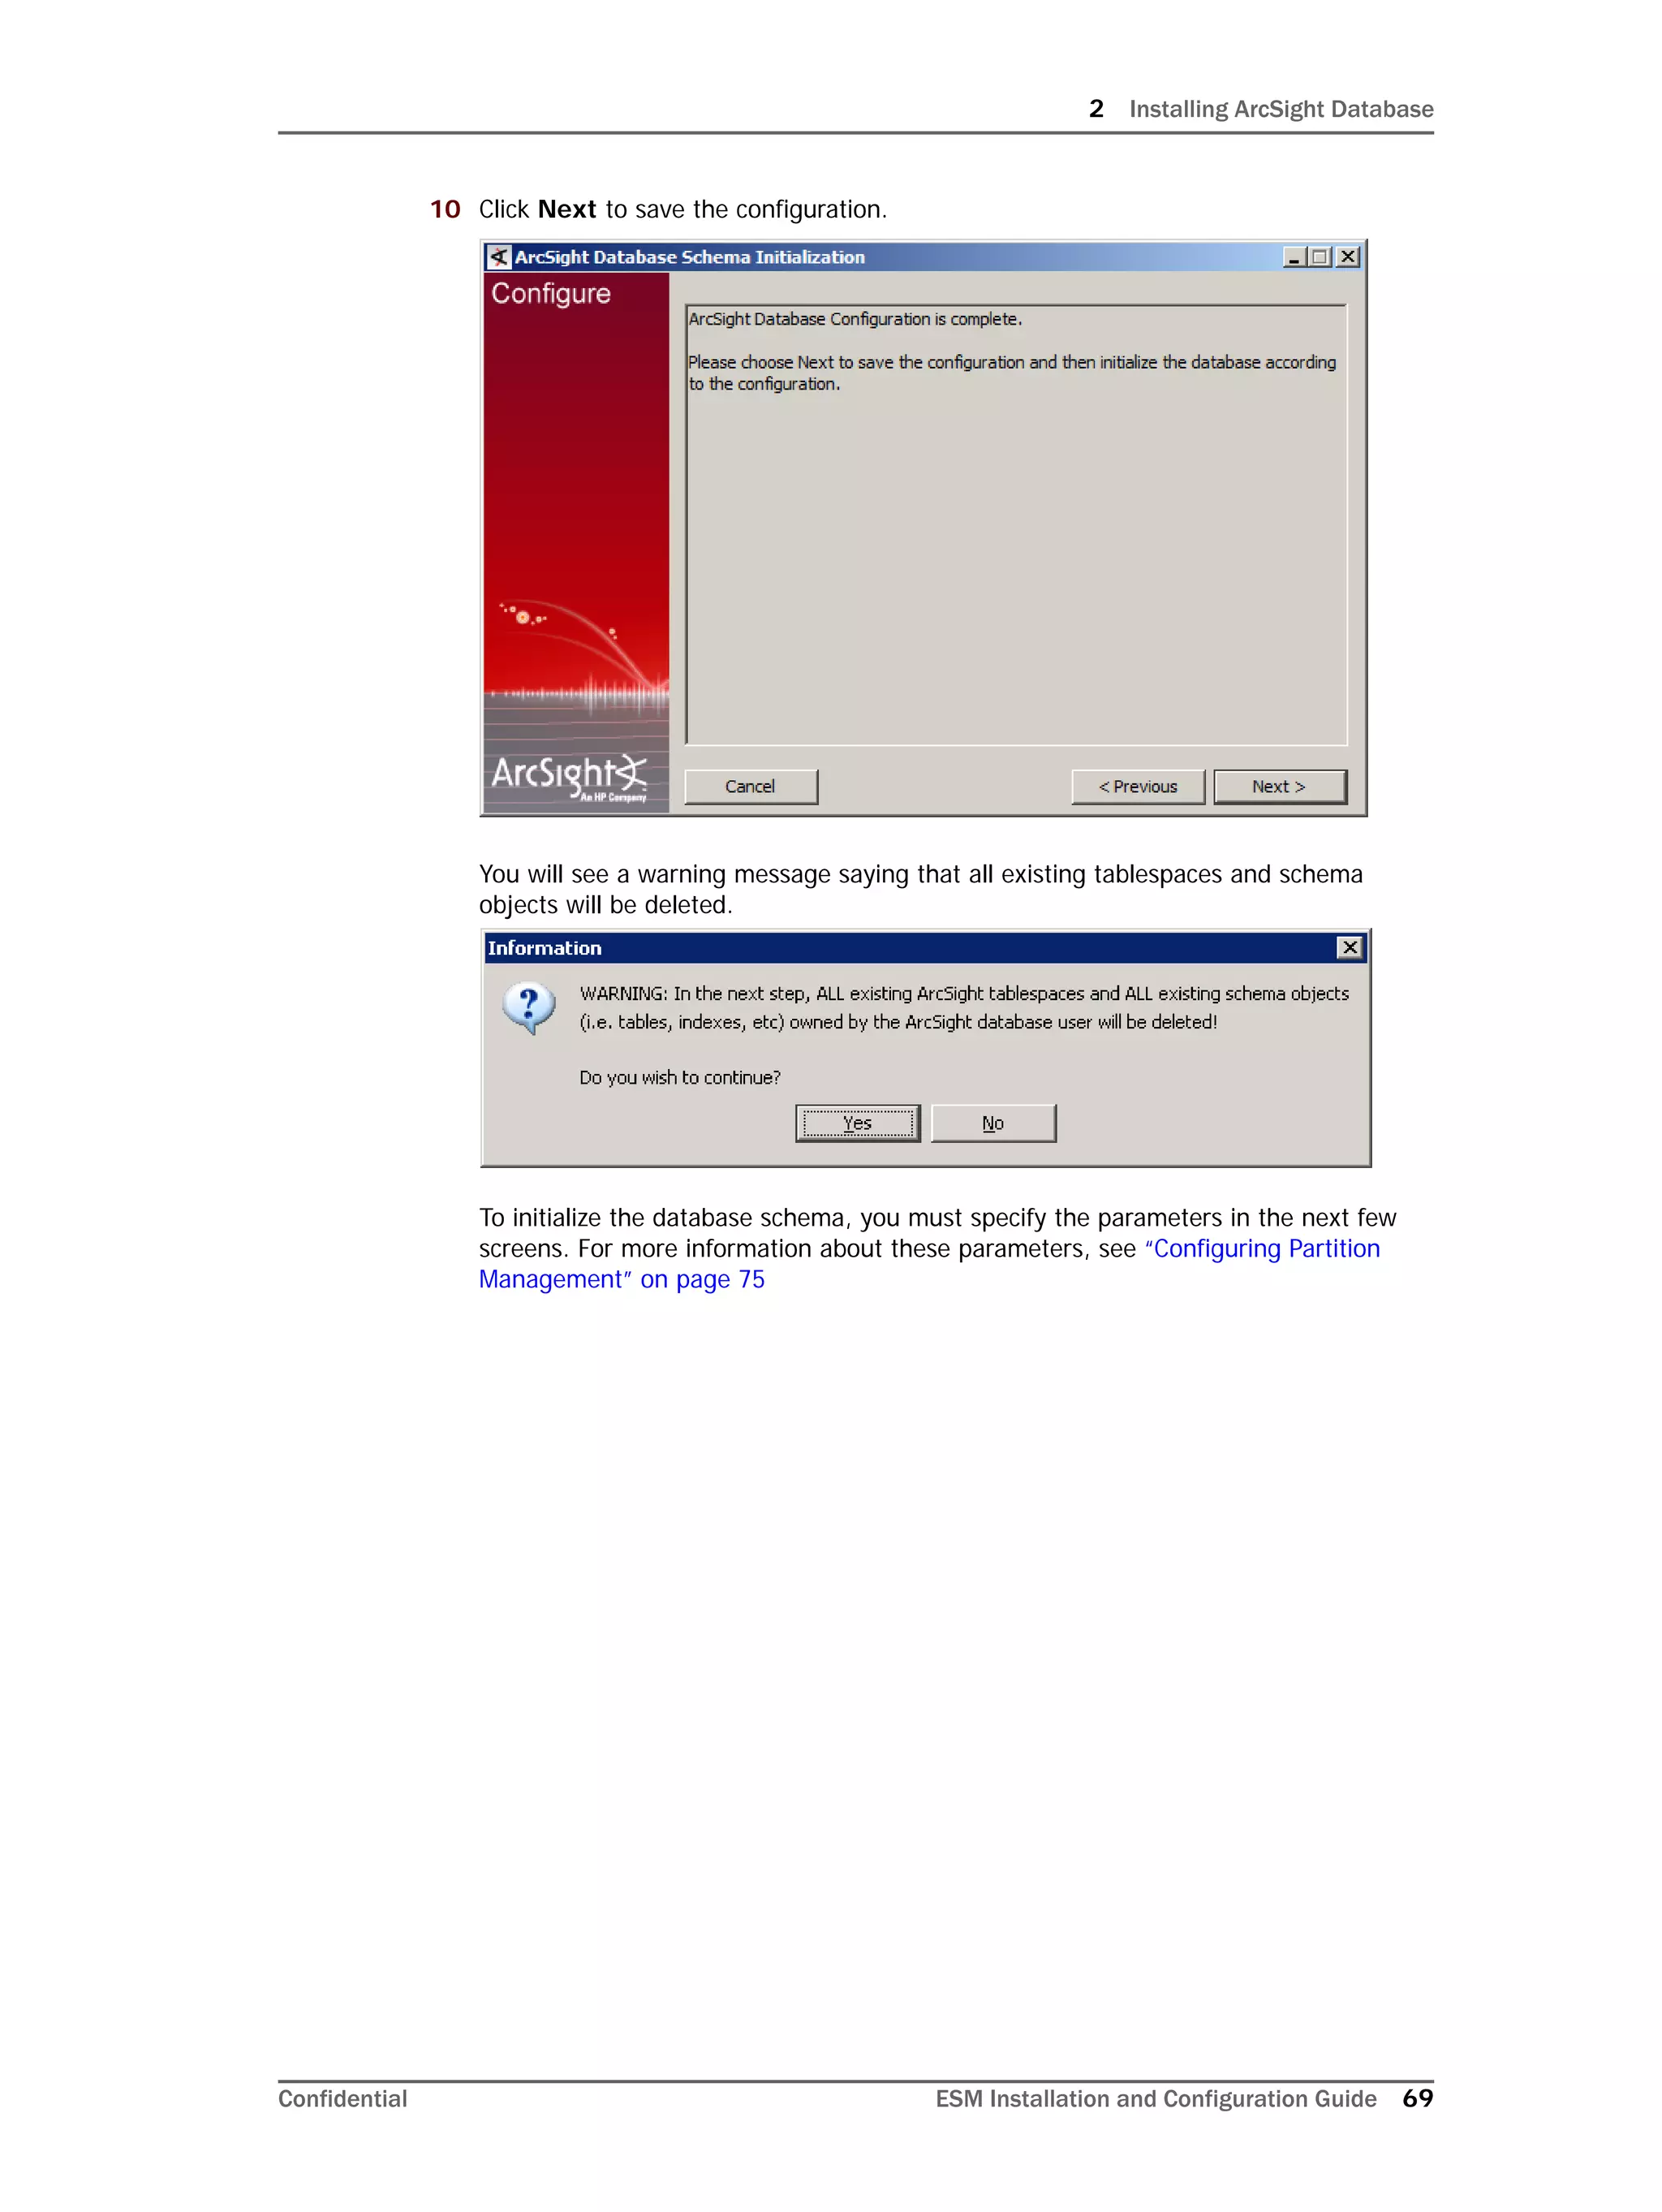
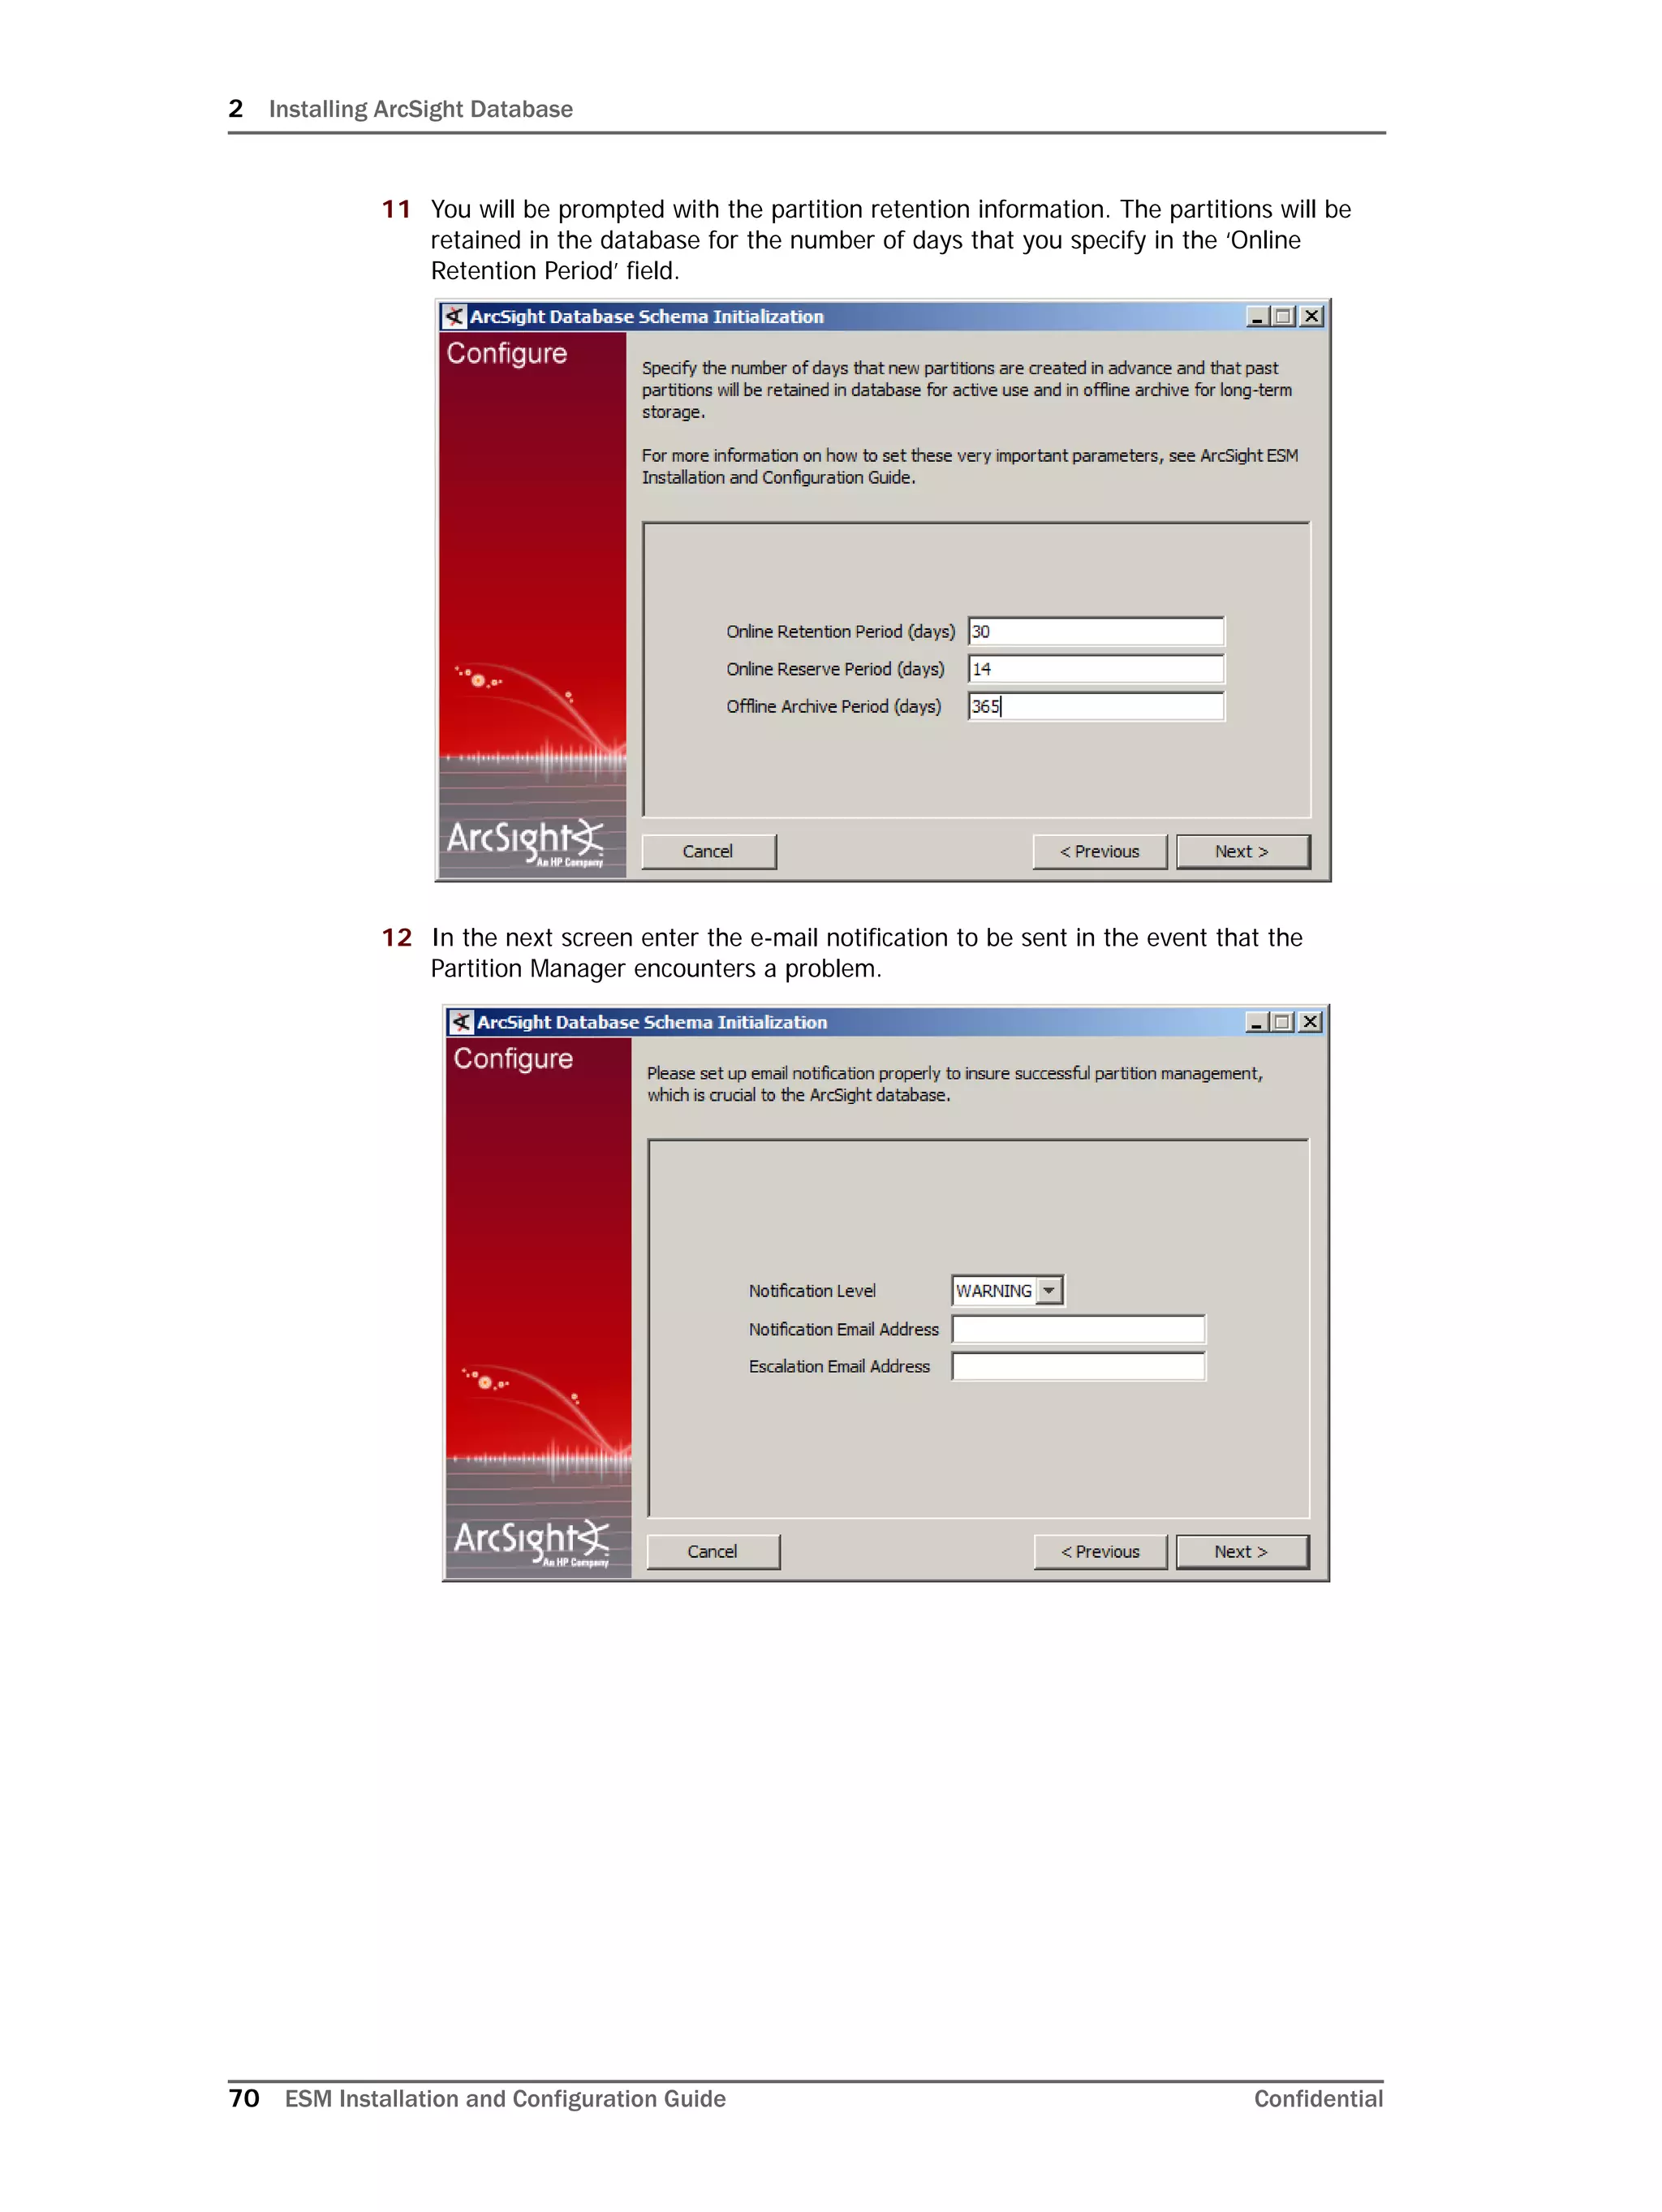
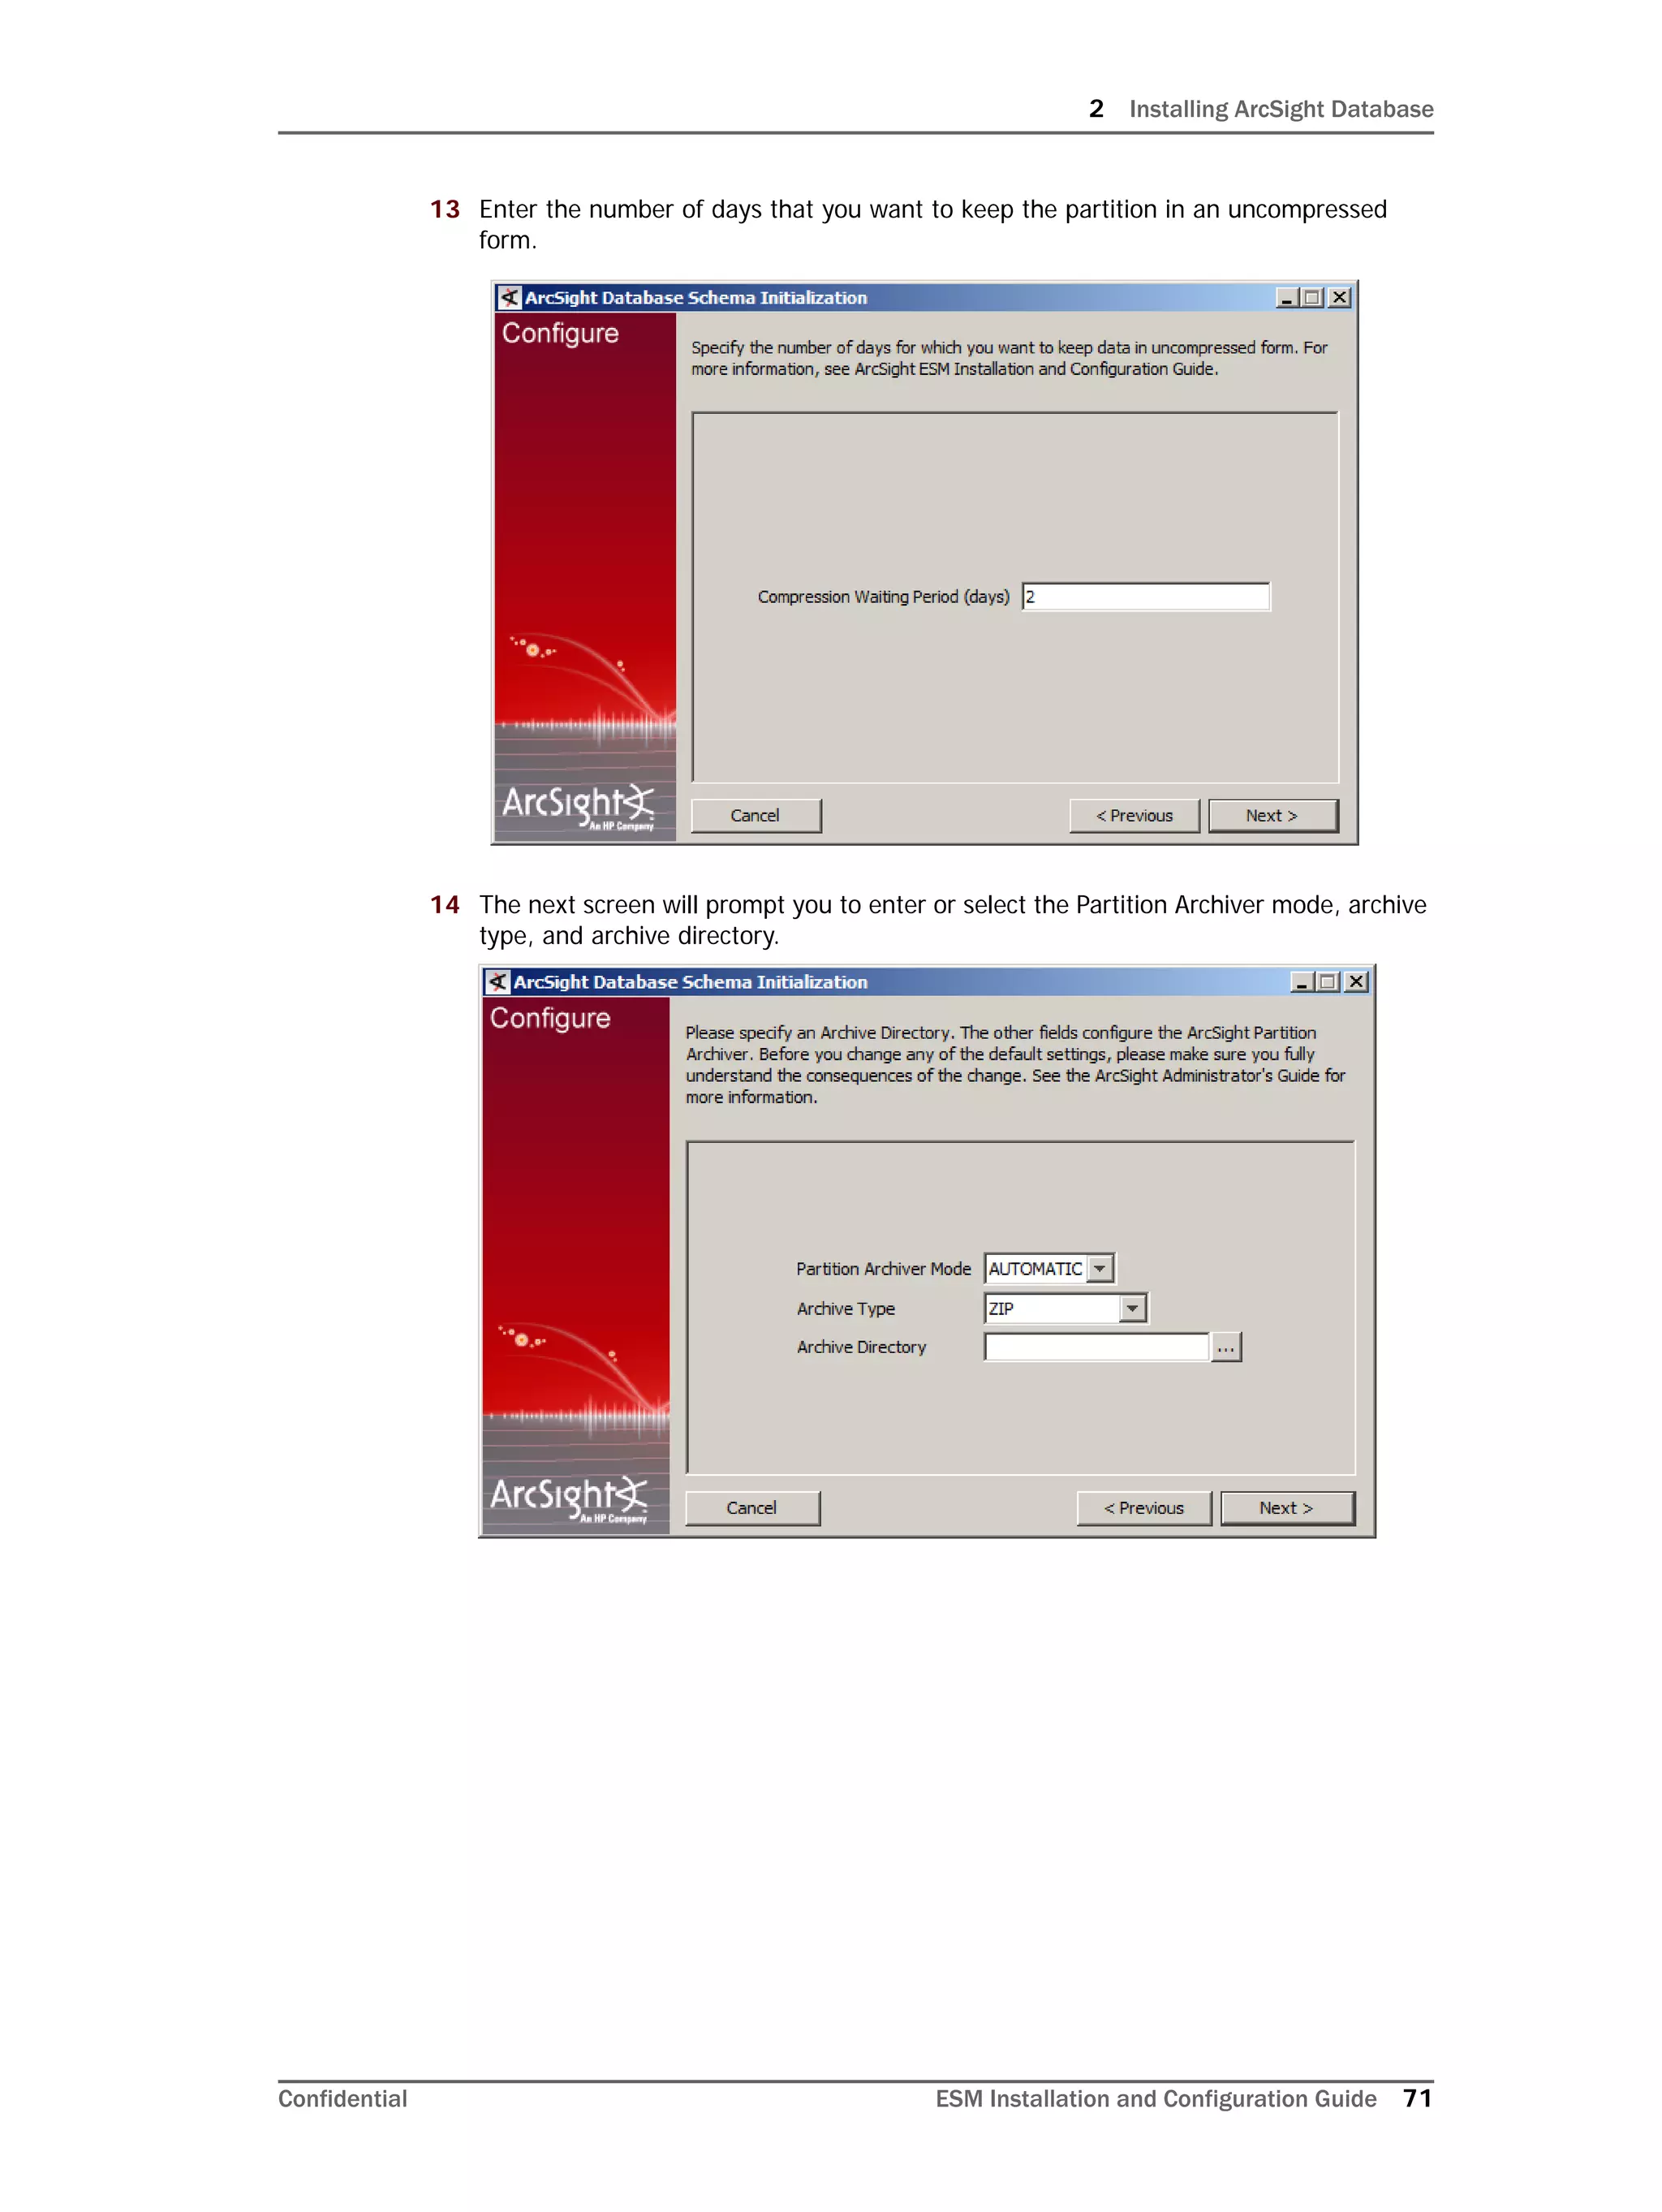
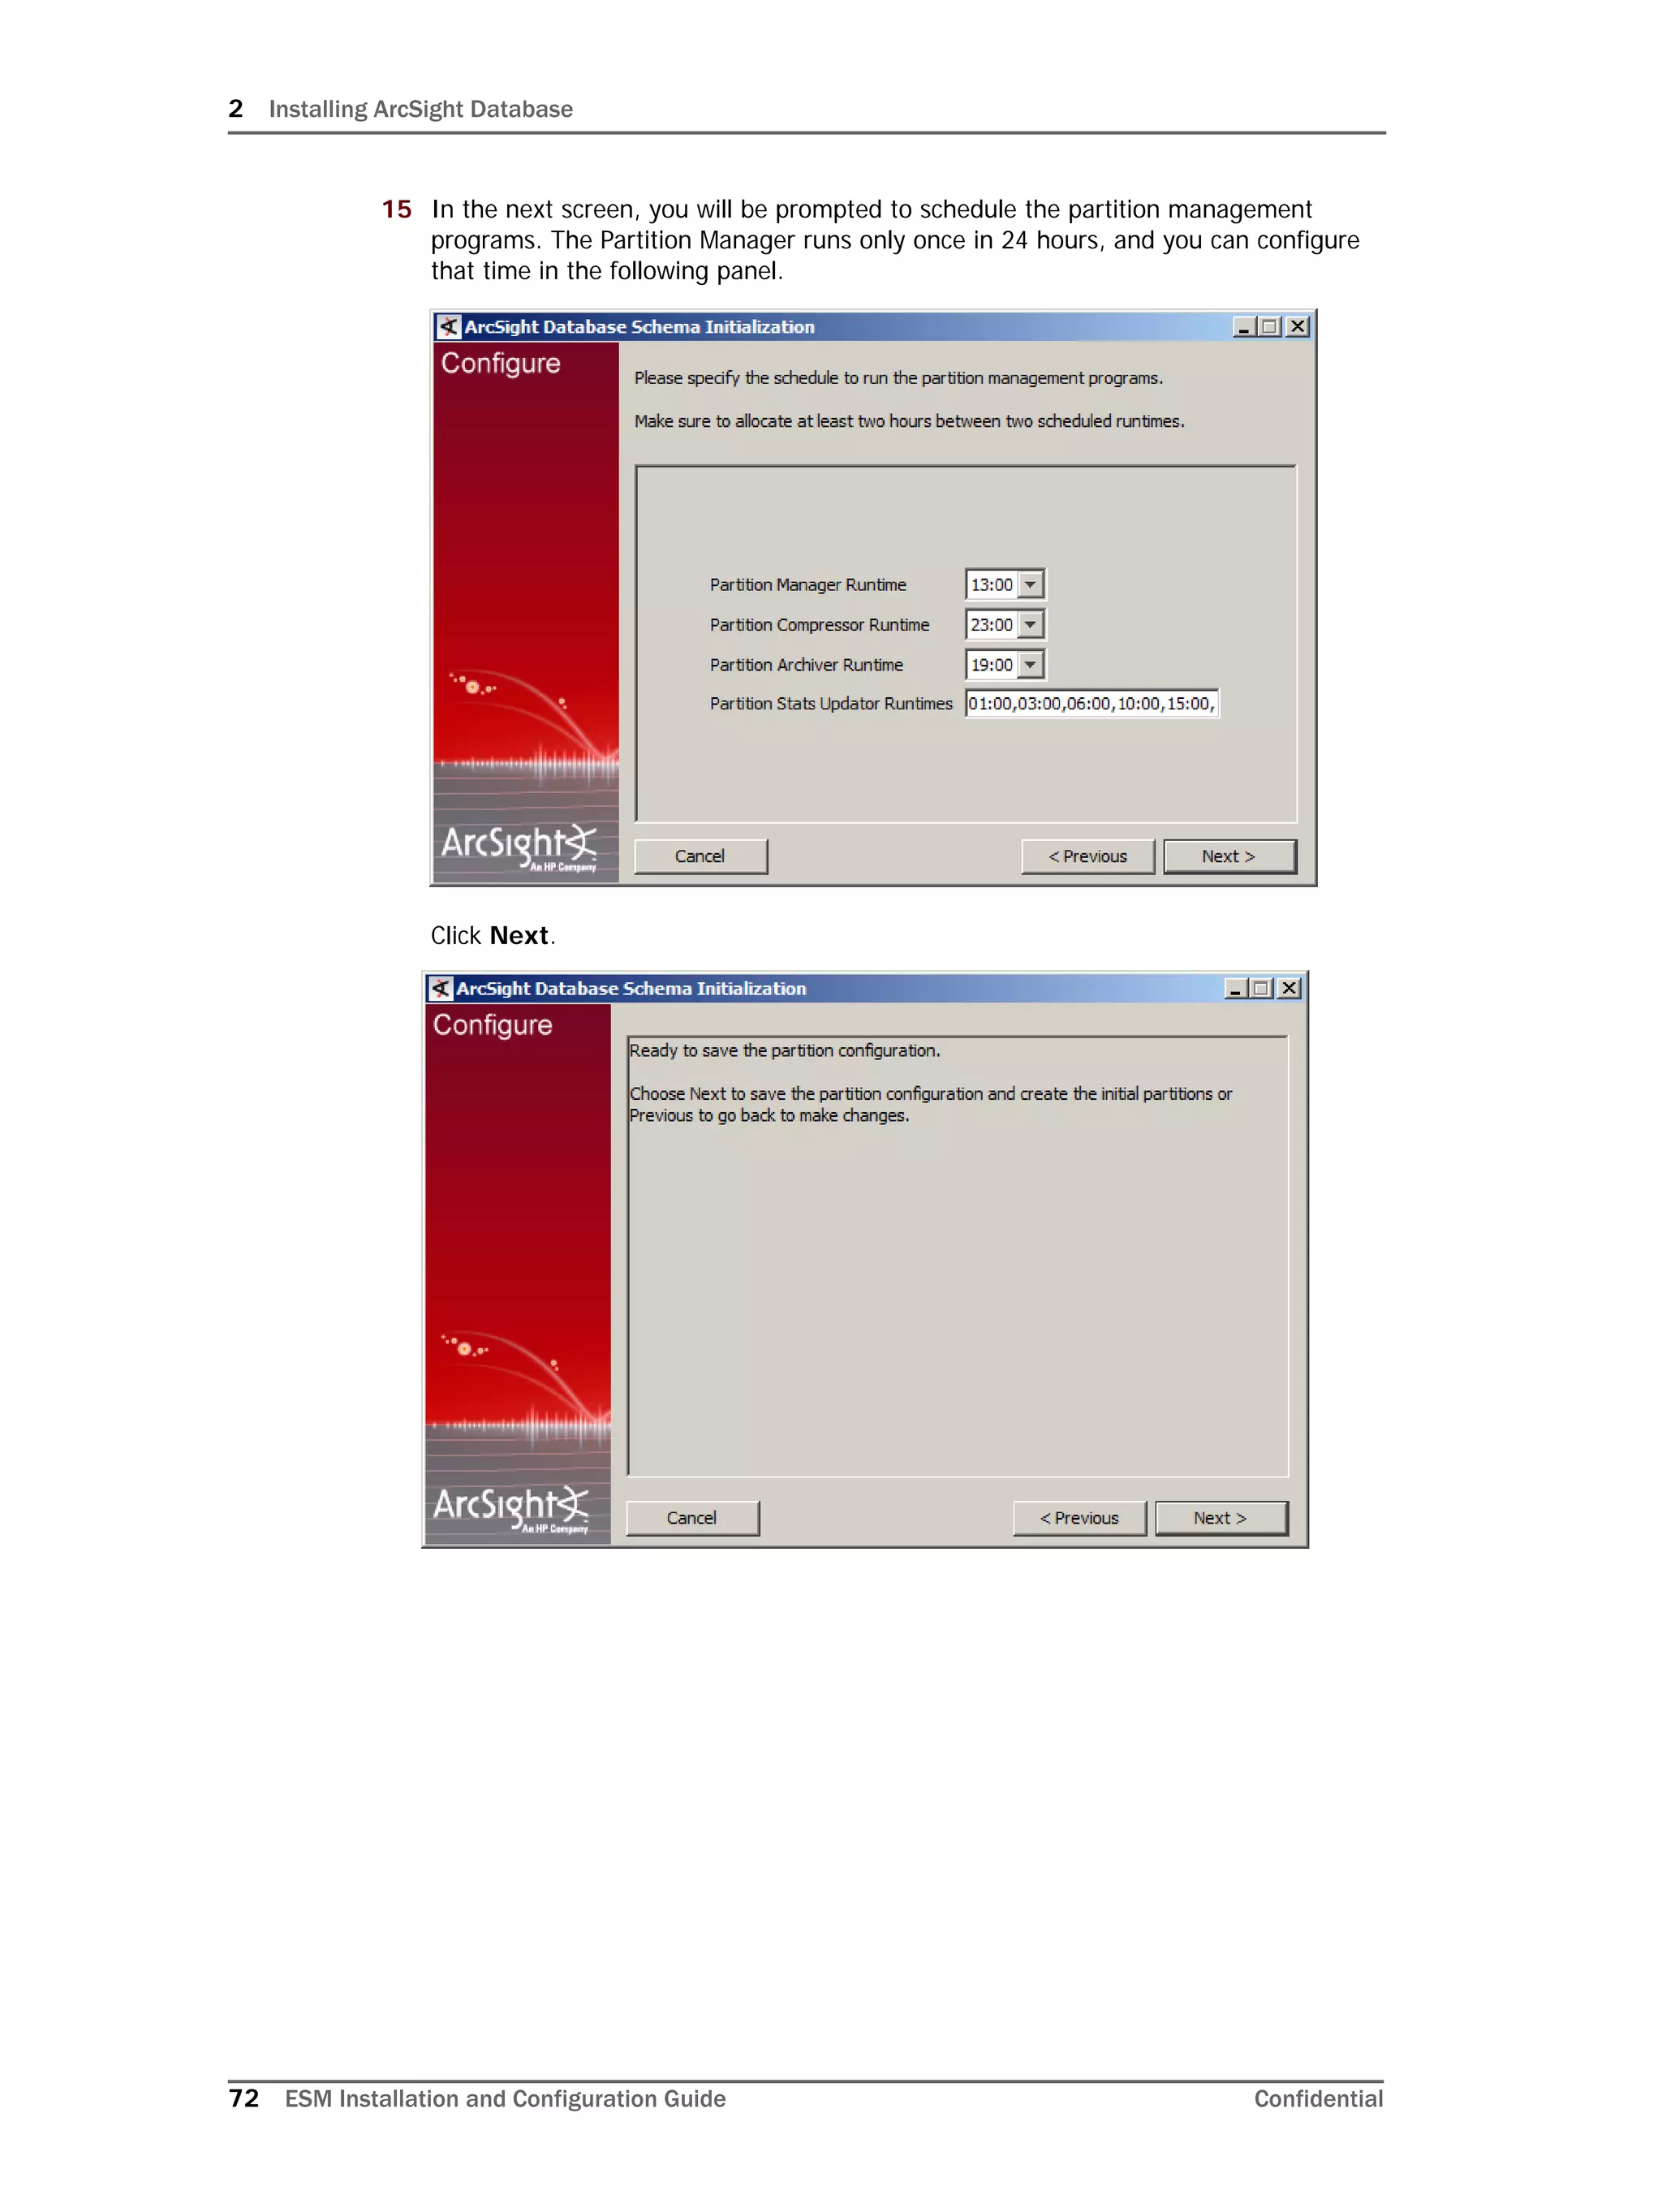
Configuring Partition Management
To improve overall system performance and availability, and to enhance the ease of data
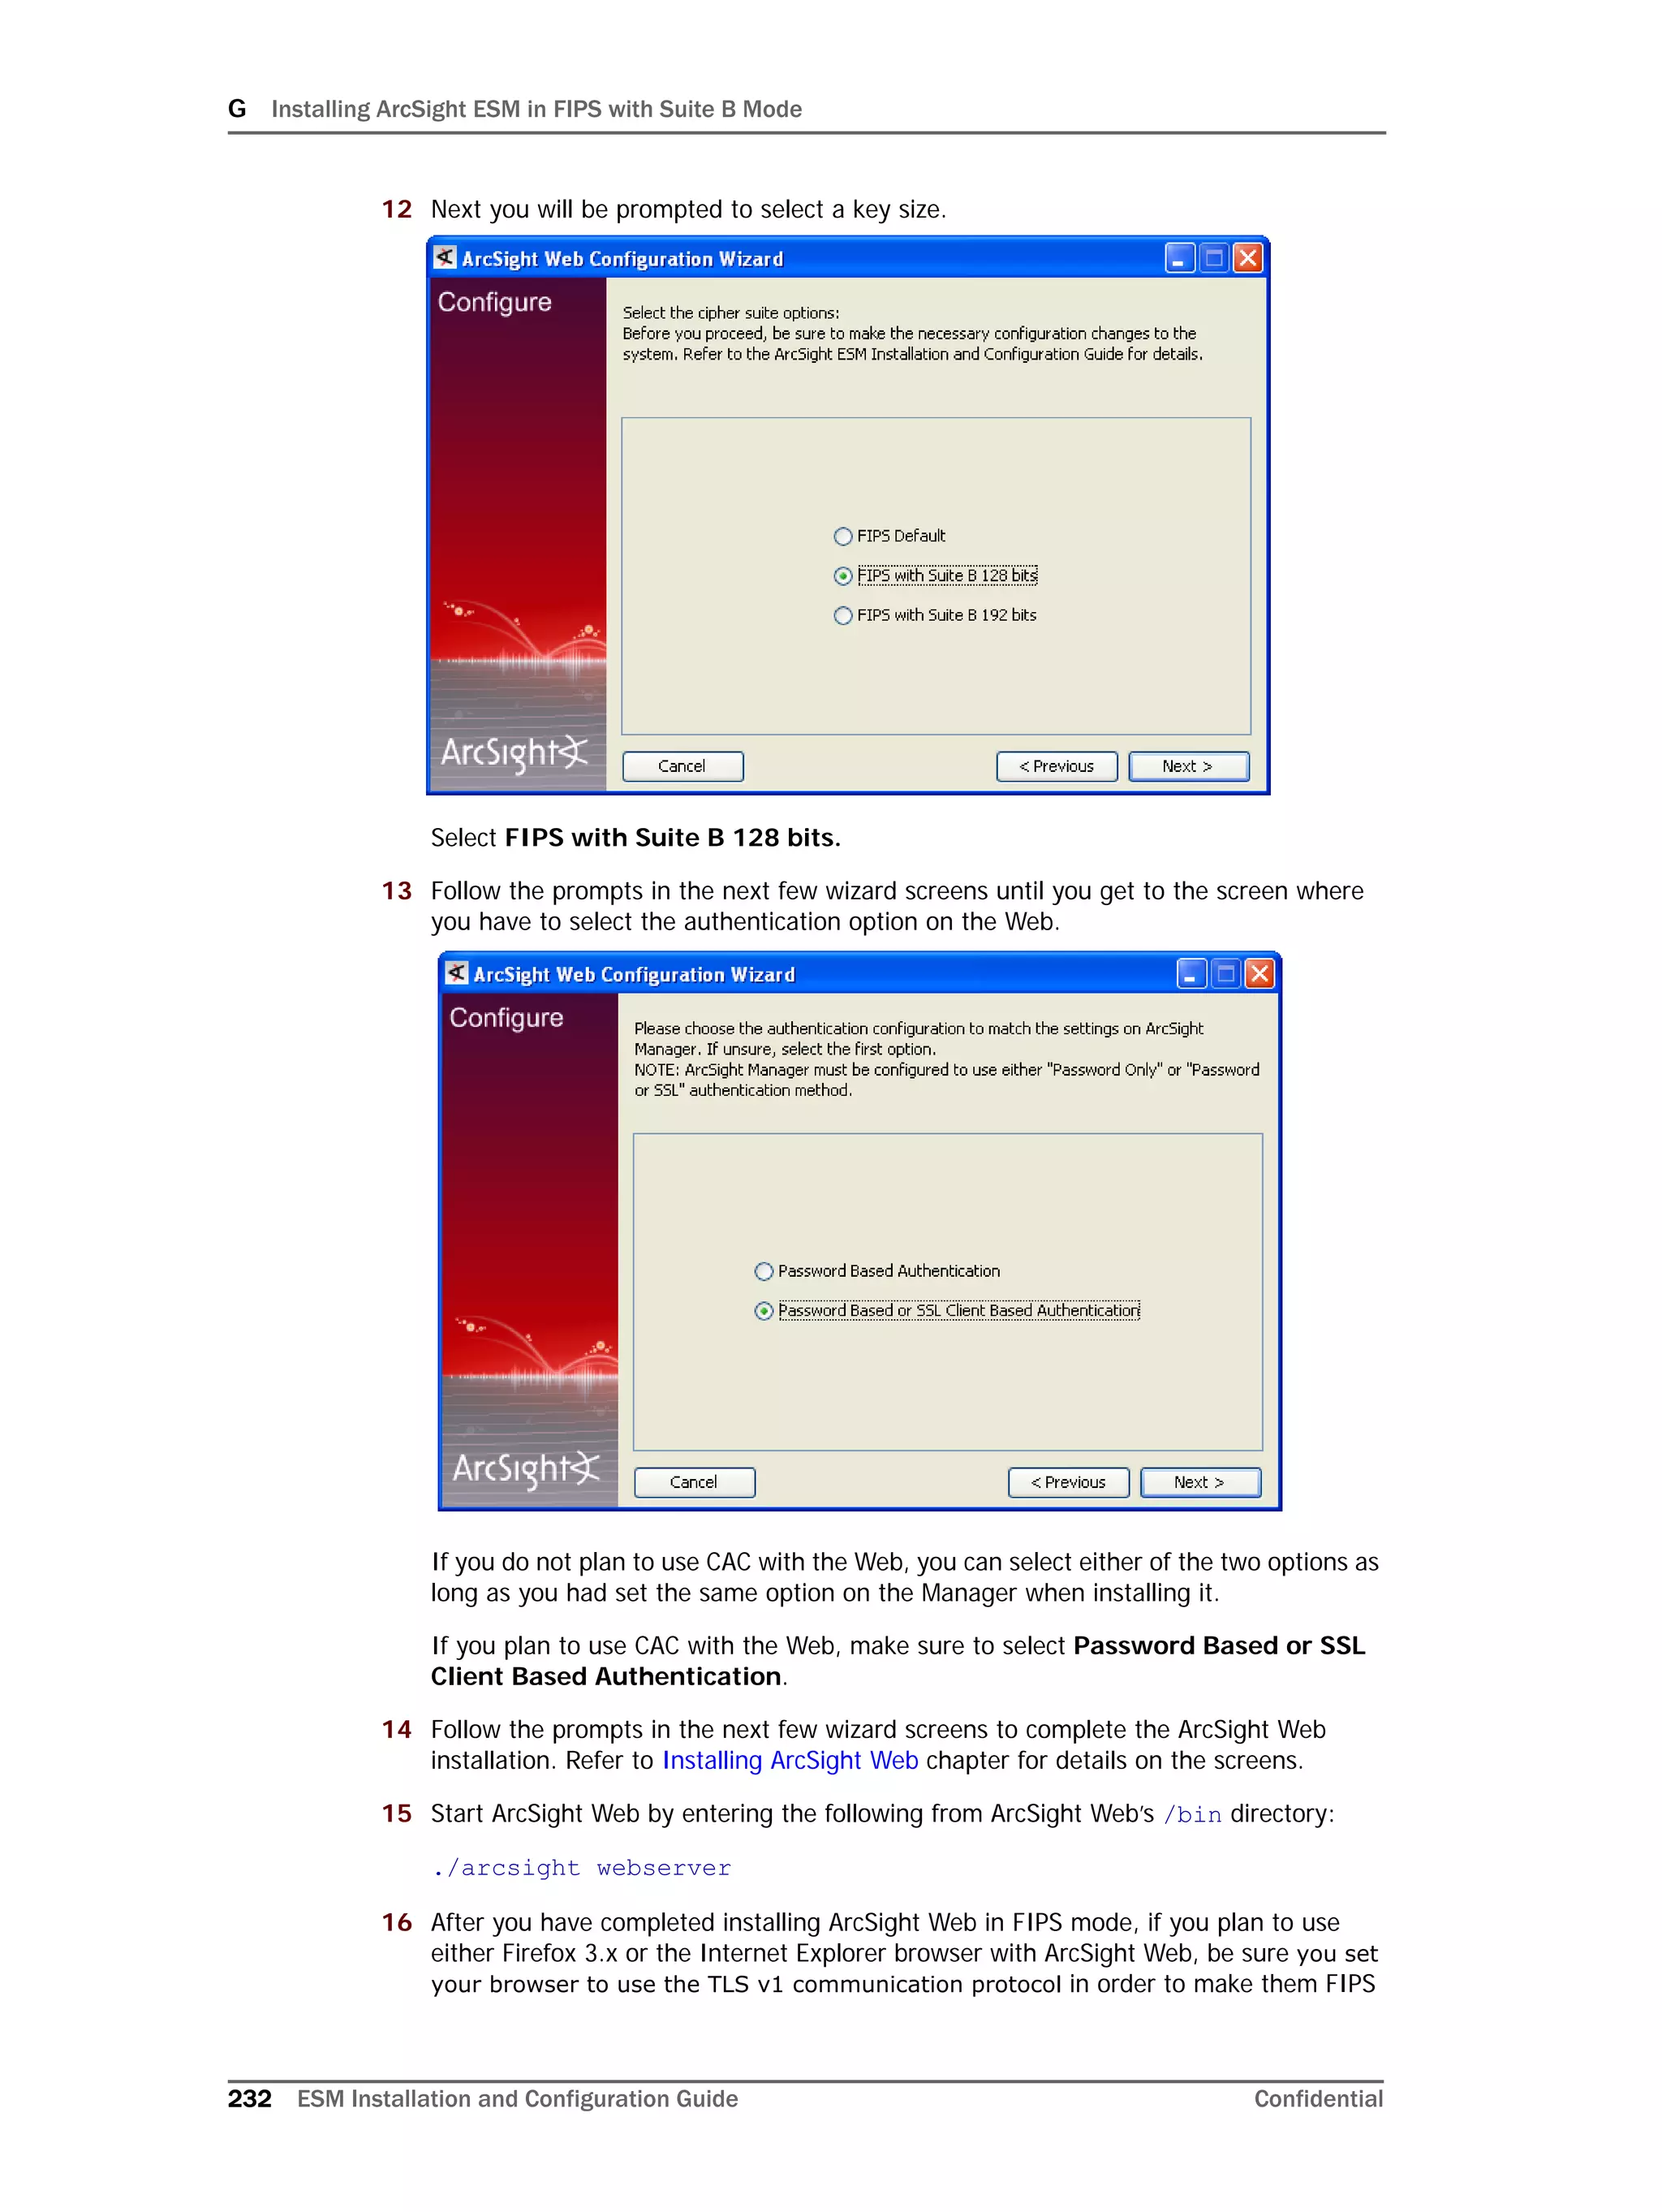
management, the ArcSight Database component utilizes several advanced features
available in underlying DBMS products (such as Oracle), including table and index
partitioning. Table and index partitioning allow large tables and their indexes to be split into
individually managed smaller pieces, while retaining a single application-level view of the
data.
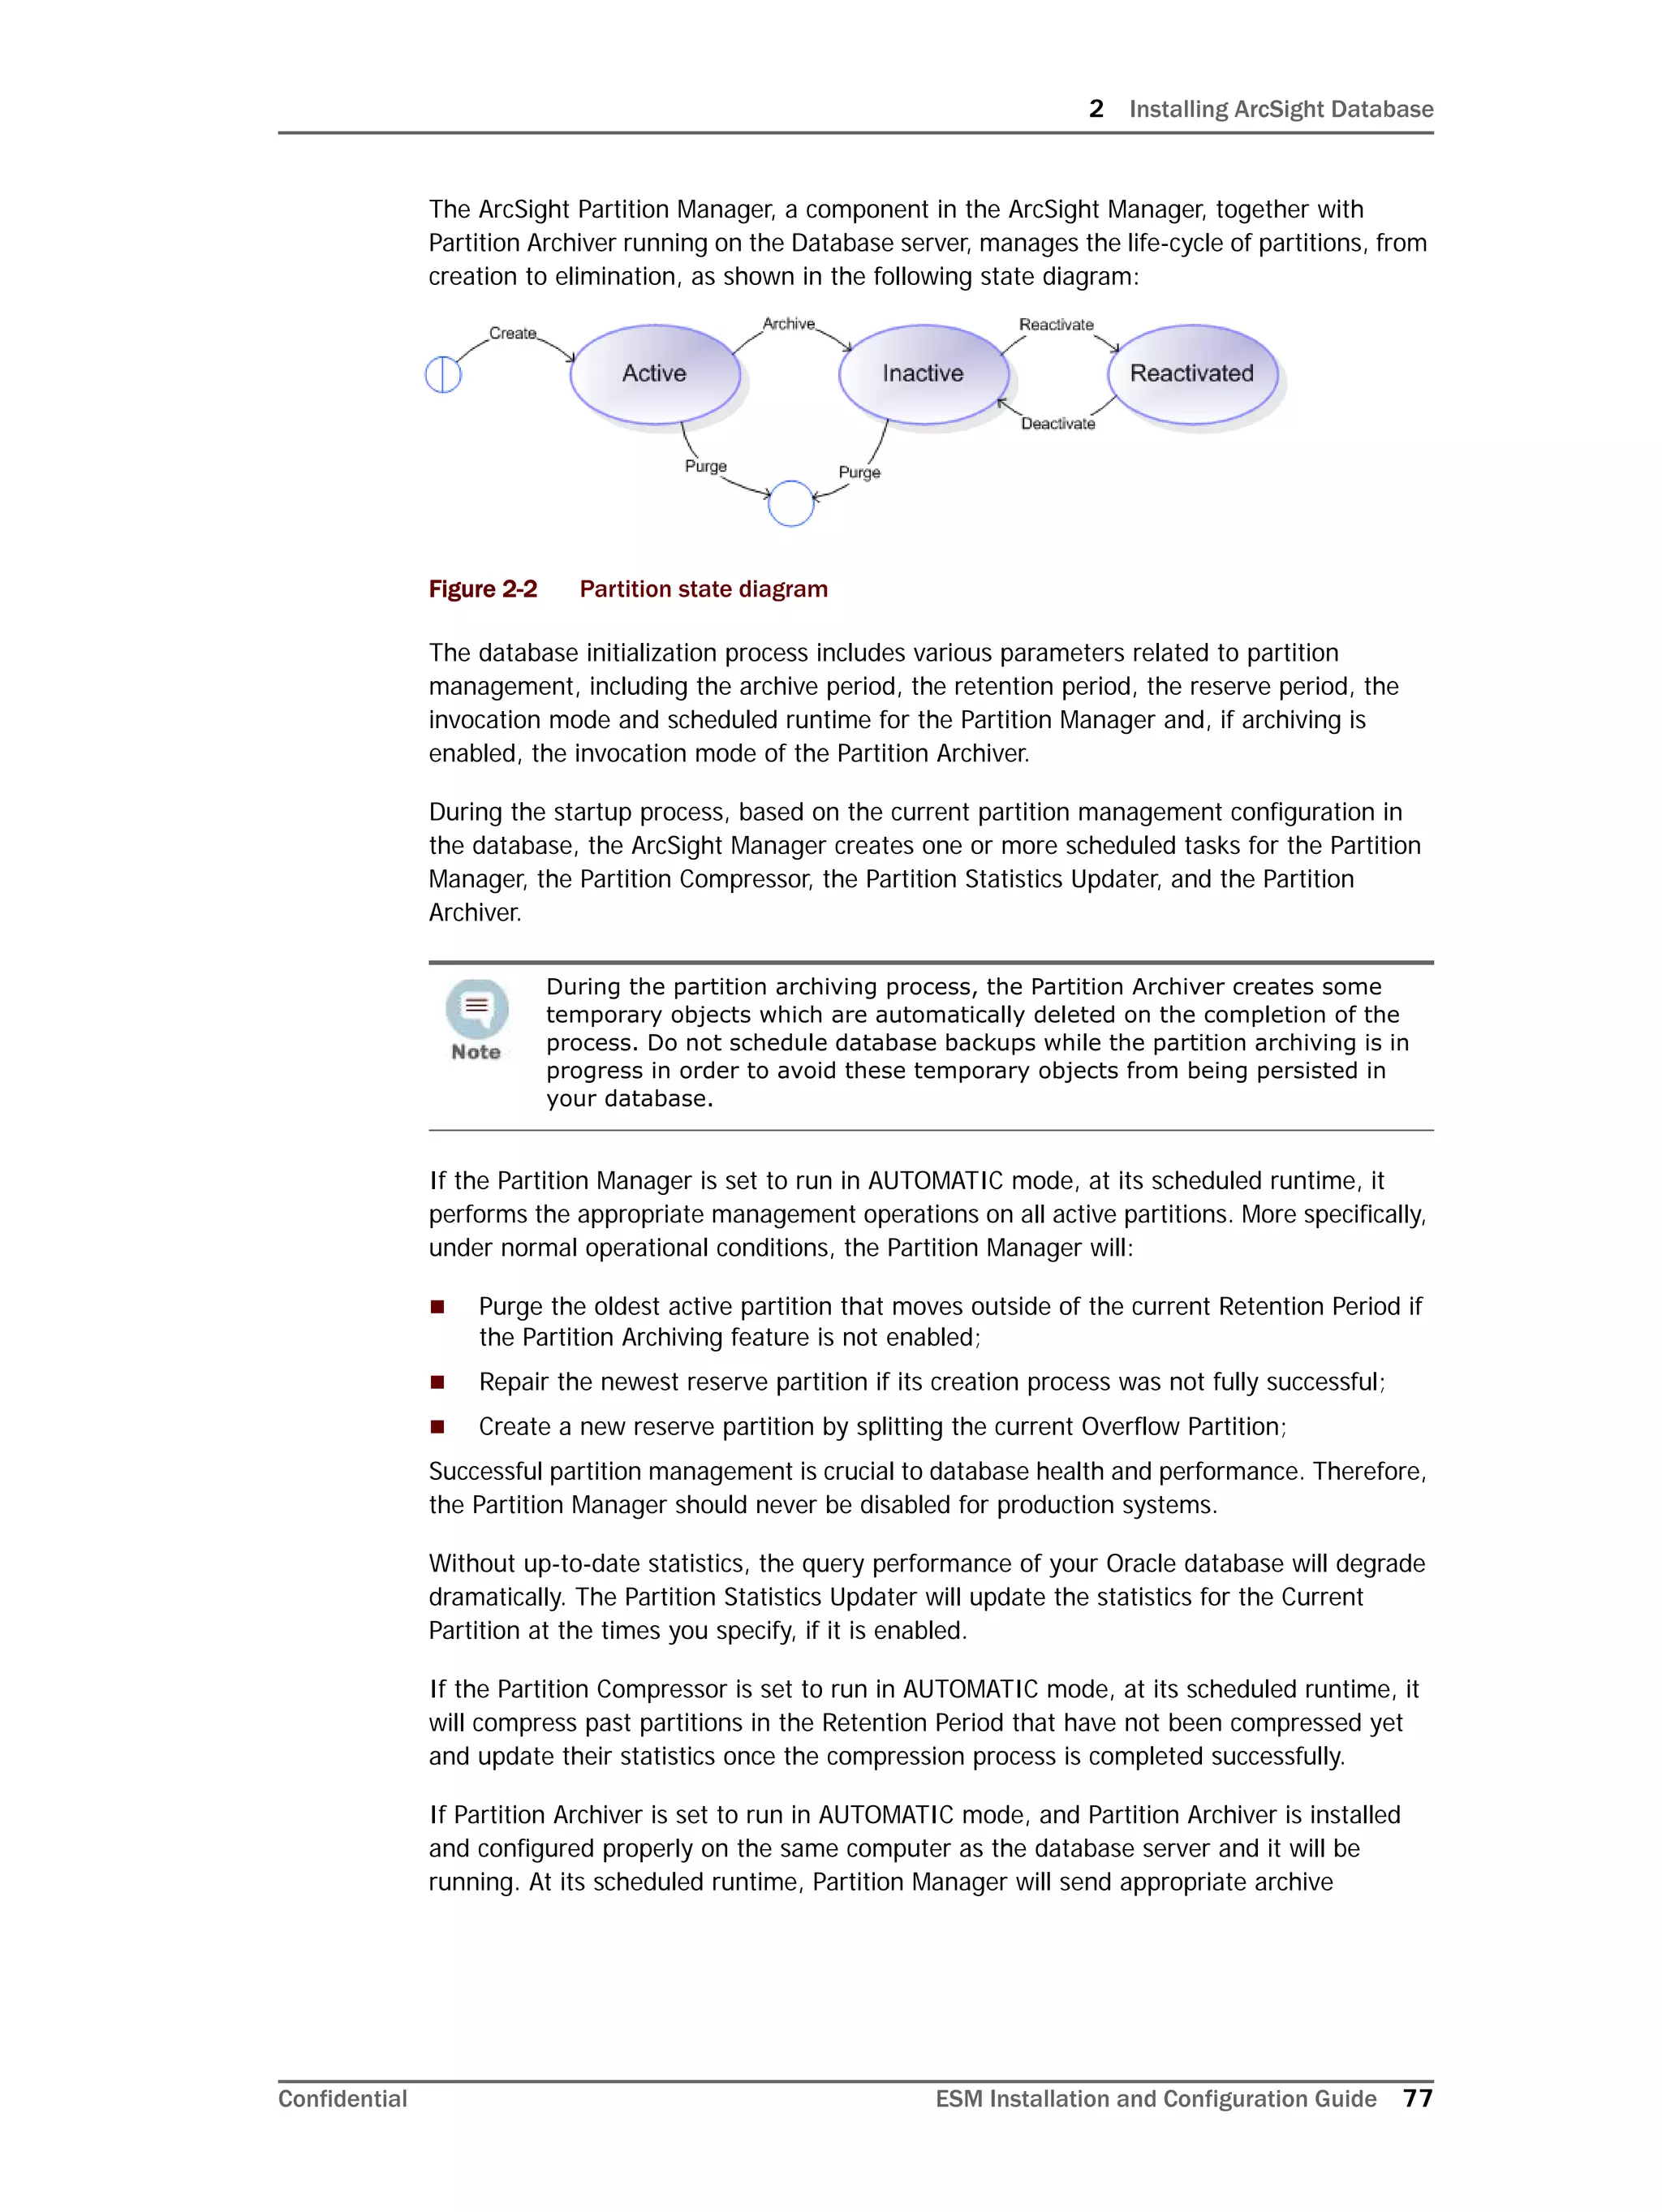
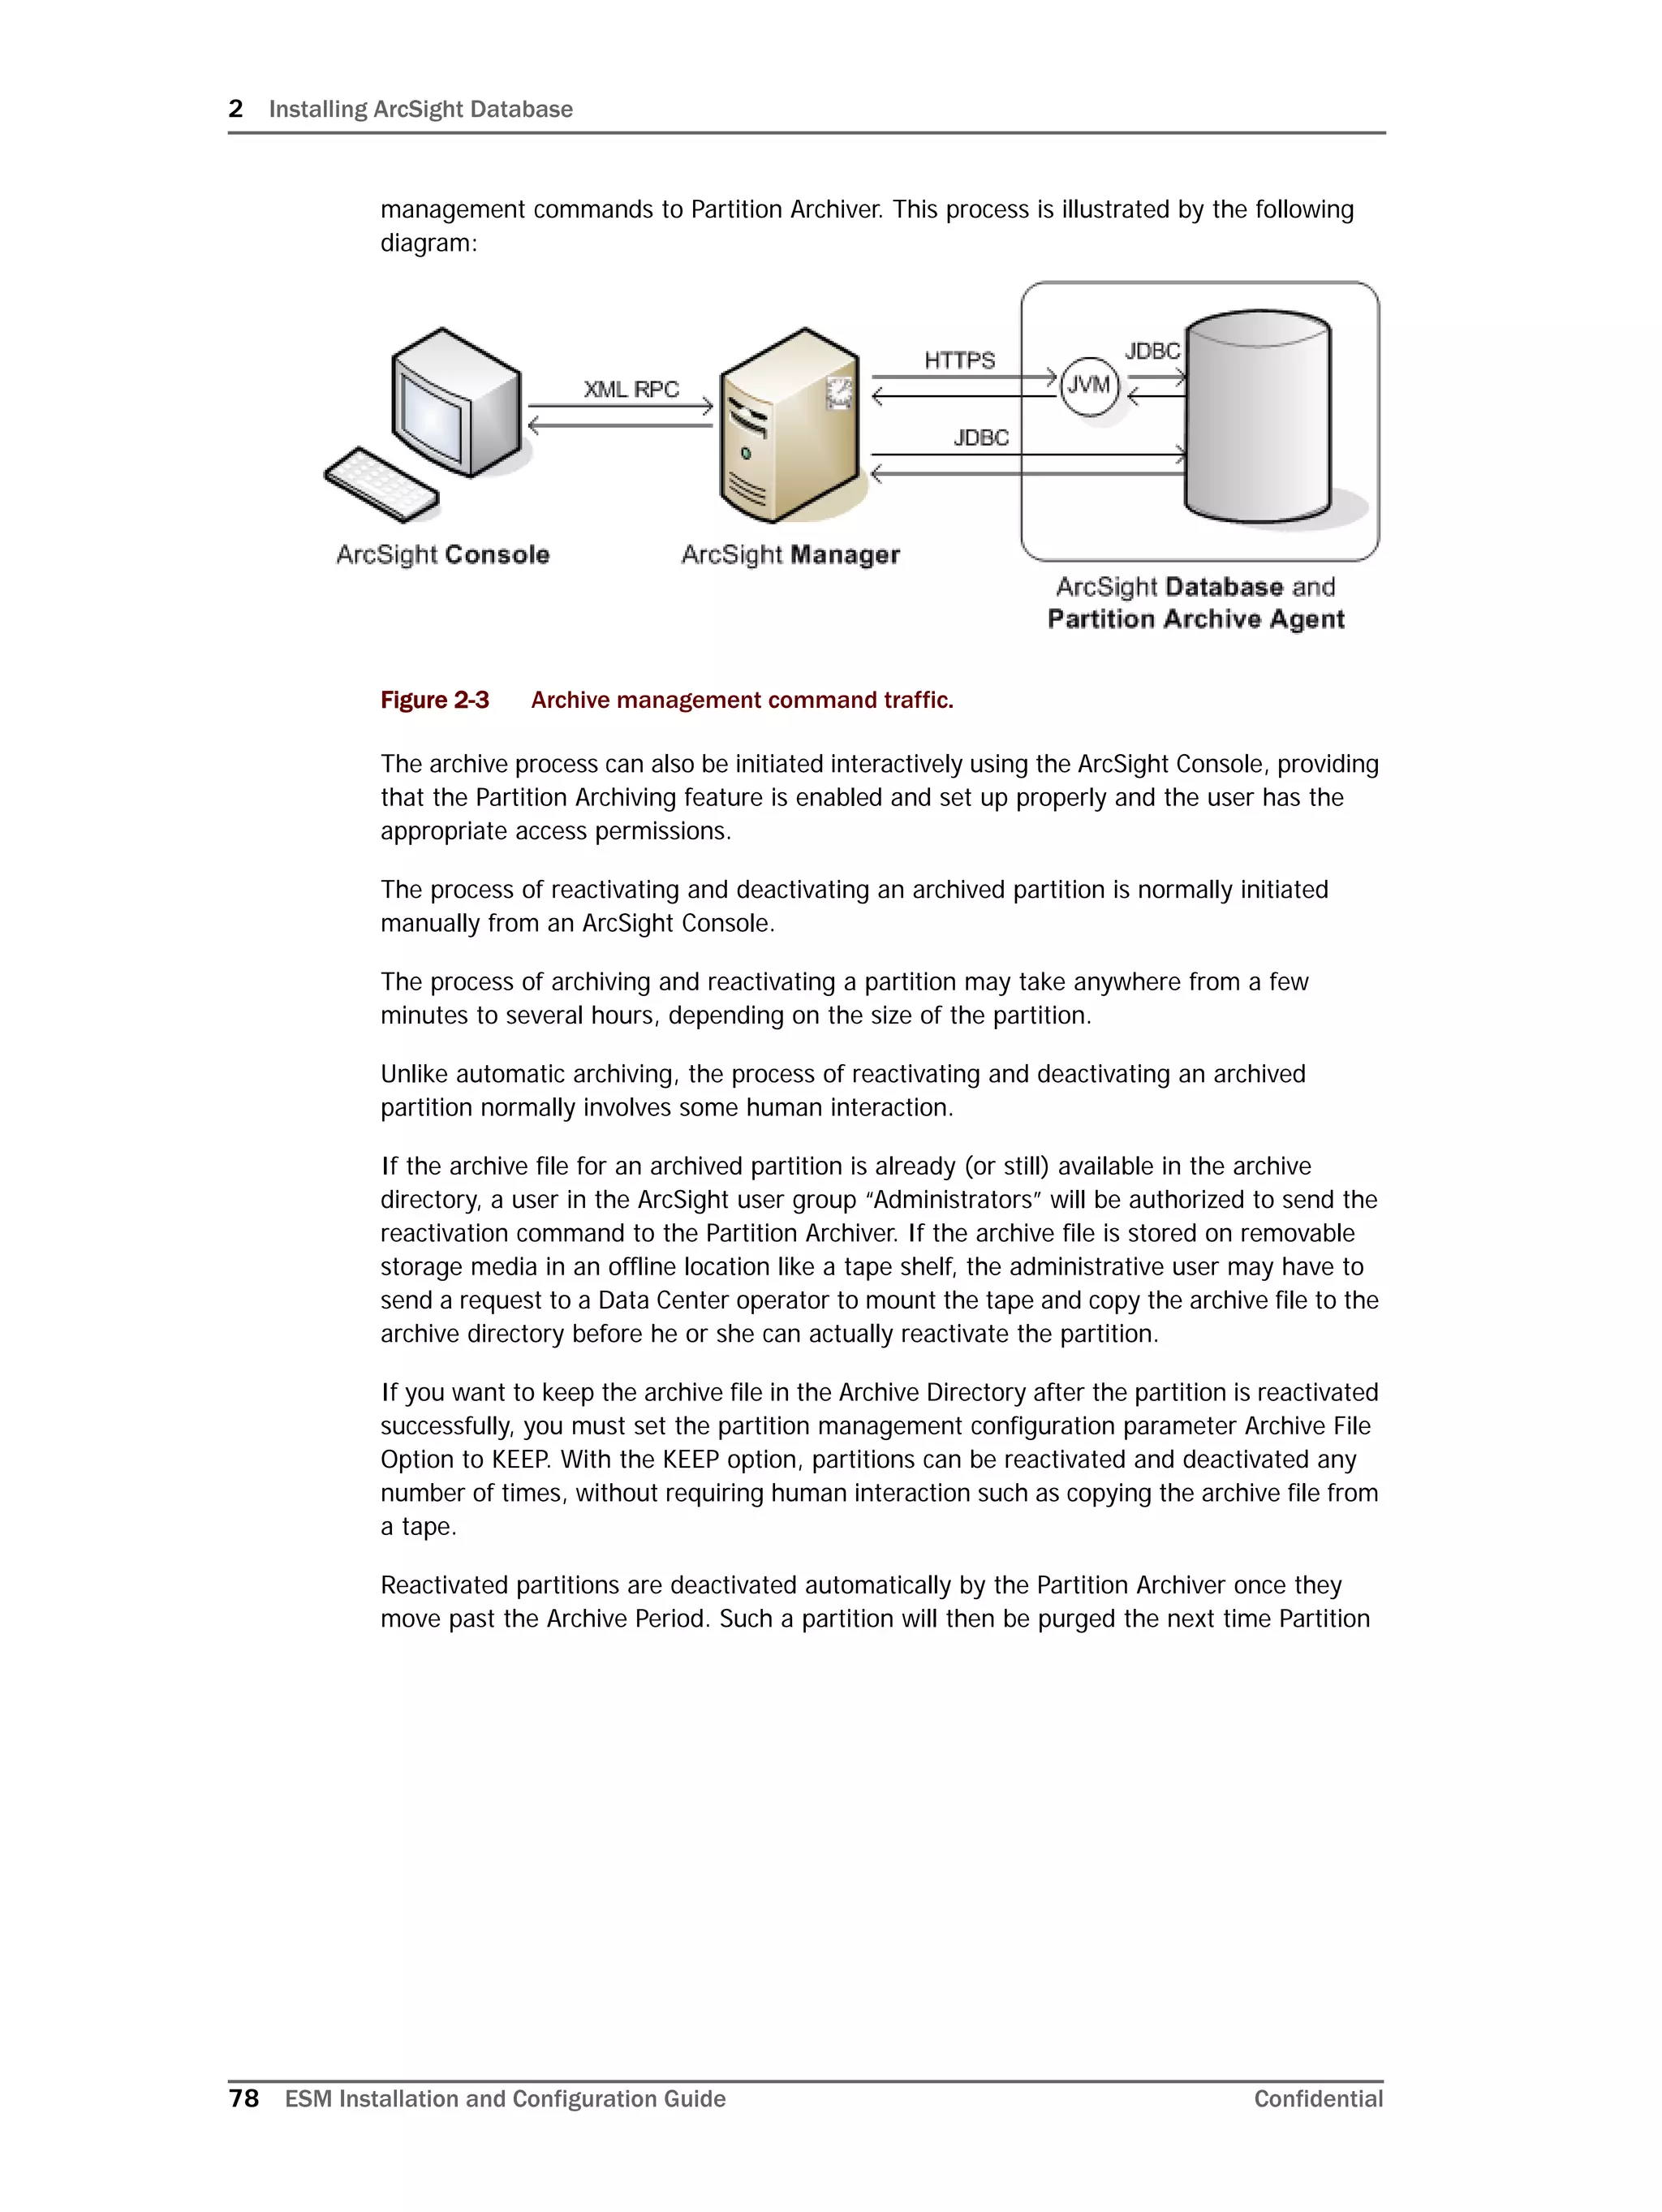
ArcSight offers advanced life-cycle management facilities for security-event data partitions
as an optional feature. This feature fully automates the database partition management
On Linux systems only: Oracle 11g installation on Linux requires that the
SELinux is disabled. So, after installing the database, during subsequent
restarts of your machine, you must run the following commands to disable the
SELinux and ensure that SELinux has been disabled.
To disable SELinux:
1 Run the following from a prompt:
getenforce
You should see "Enforcing" in the output for the command.
2 Run the following command:
setenforce 0
This will disable SELinux on your system.
To ensure that SELinux has been disabled:
3 Run the following again to ensure that SELinux has been disabled:
getenforce
If you see "Permissive" in the output, SELinux has been successfully
disabled.
Here is a sample output when you run the commands above:
[root@Arch-RHEL5 ~]# getenforce
Enforcing
[root@Arch-RHEL5 ~]# setenforce 0
[root@Arch-RHEL5 ~]# getenforce
Permissive
[root@Arch-RHEL5 ~]#
Not all ESM versions or ArcSight Express models support the Partition Archiver.](https://image.slidesharecdn.com/esminstallguide5-170529123343/75/Esm-install-guide_5-2-75-2048.jpg)